-
Posts
2,535 -
Joined
-
Last visited
Content Type
Profiles
Forums
Gallery
Events
Everything posted by Rustyj
-
Ok all the paint has been applied and gangway iron supports are being installed. I've also placed the cannon and rigged them. I'll finish the supports and make the walkway next. Then it's ladders and a few other bits and pieces.
- 332 replies
-
- Triton
- cross-section
-
(and 1 more)
Tagged with:
-
Hi Ben, You're making good progress. Seeing you're doing such a good job of it I think I'm gonna mail my frames to you so you can raise them too!
- 147 replies
-
Hi Augie. Very nice job on the anchors and buoys! Man you are getting close.....except for the case that is.
- 1,668 replies
-
- syren
- model shipways
-
(and 1 more)
Tagged with:
-
Wonderful Chris! Keep it going your almost there. Plus I'm greedy and love seeing your work on her.
- 290 replies
-
- confederacy
- frigate
-
(and 1 more)
Tagged with:
-
Thanks Paddy and Antony. Ben, I used a torch and regular solder. Grant. Plans and build match? Never had that happen for me! I also used a plank to check both the height and angle. I marked each bracket and each location as they were all unique. Here they are drying. Coat two of ?????? Not gonna be twenty though Ben.
- 332 replies
-
- Triton
- cross-section
-
(and 1 more)
Tagged with:
-
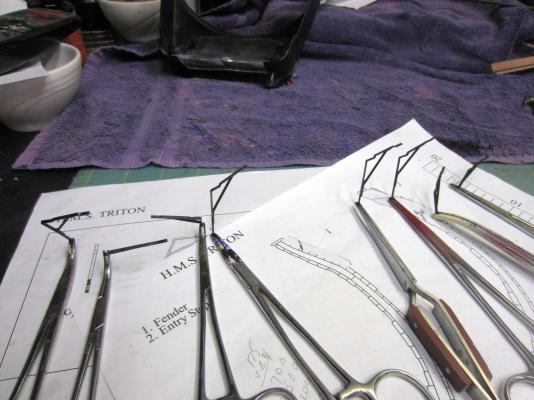
It’s time to make the gangway iron supports. Between the various heights of the gun deck spirketing and the gangway clamp each bracket will have to be to custom fit at their correct location. Here is the first bracket being test fit. All the pieces ready for soldering. And the first one soldered. Now I just have to clean it up and make seven more.
- 332 replies
-
- Triton
- cross-section
-
(and 1 more)
Tagged with:
-
Thanks Augie, Ben and Bob. Hey if you add the two together I came up with 20 coats!
- 332 replies
-
- Triton
- cross-section
-
(and 1 more)
Tagged with:
-
Hi Grant, Oh I've had so many oops moments and there wasn't always an extra piece made. Well I've assembled the carriages and painted the barrels. Sorry Ben but I stopped at ten coats of paint. Next it’s time to do some iron work and soldering!
- 332 replies
-
- Triton
- cross-section
-
(and 1 more)
Tagged with:
-

Syren Longboat
Rustyj replied to Tigerdvr's topic in Discussion for a Ship's Deck Furniture, Guns, boats and other Fittings
Hi Harley, That's what I did too. Sand and sand and sand with a little more sanding thrown in for good measure. Patience and time are what is needed. Best of luck. -
Thanks Grant. They were done individually as I did not have a block big enough. I set the table saw blade for each cut level and the cut 5 blanks progressing from lowest cut to highest. The extra one was for an oops moment.
- 332 replies
-
- Triton
- cross-section
-
(and 1 more)
Tagged with:
-
Thanks Paddy Hi Rob Yes the great crash of 2013 did touch us all. I learned I hadn’t saved as much of my work as I though I had and having a system melt down to boot would have been terrible. Well we all just start over where ever we can. Good luck with the Pinnace. It’s a wonderful kit.
- 332 replies
-
- Triton
- cross-section
-
(and 1 more)
Tagged with:
-
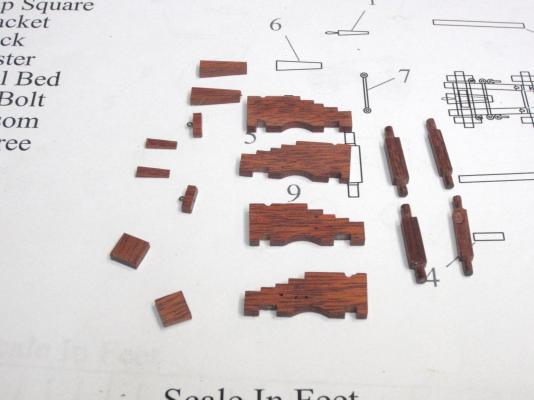
Thank you all for you kind words. The ruler was what was at hand but any flexible straight edge will do. Ok the nerves have settled a bit. I guess I can start working again. I've wandered back to the gun carriages. I cut them out of Bloodwood. Just because I had some and wanted a little color variation.
- 332 replies
-
- Triton
- cross-section
-
(and 1 more)
Tagged with:
-
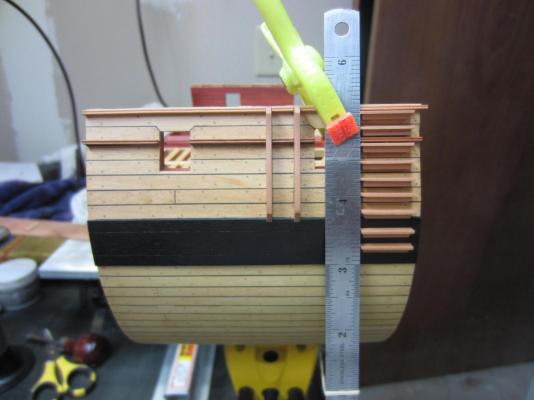
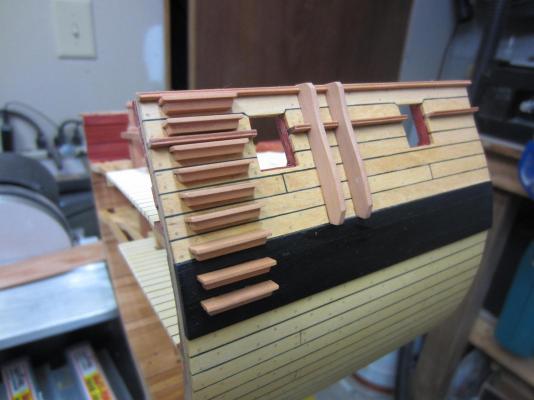
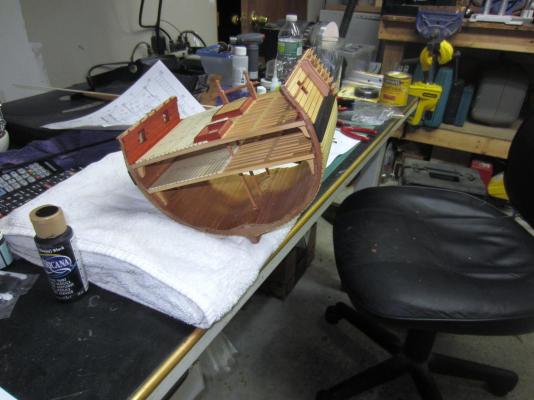
Well all of the steps have been made and attached to the hull. The back of each step had to be sanded to fit so the tread was level. I did them one at a time so I didn’t mix them up. To keep the steps in an even row I clipped a ruler to the hull and used it as a stop. Then while I was working on the Triton the Admiral called to me and wanted me topside. Being the good mate I jumped to, set the cross section down and went to see what was up. Upon returning to the shop I looked at my work bench, and mind you I have a mastiff that can put her head on my desk with all four feet on the ground and regularly does, and almost had heart failure…………... I tipped toed over, gently picked her up and placed her squarely back away from the edge. Needless to say I didn’t do anything more that night. I figured I had used up every bit of luck I had and only bad things could happen!
- 332 replies
-
- Triton
- cross-section
-
(and 1 more)
Tagged with:
-
Hi Rob all I can say is . Typing was never one of my strong points. I went back and hopefully made all the corrections.
- 332 replies
-
- Triton
- cross-section
-
(and 1 more)
Tagged with:
-
You're right Bob. With less available modeling time during the summer I've been giving the Triton the majority of that time.
- 332 replies
-
- Triton
- cross-section
-
(and 1 more)
Tagged with:
-
Well done Augie. Great work and I think the pictures should keep you know who happy too. Enjoy your fishin' and flyn'
- 1,668 replies
-
- syren
- model shipways
-
(and 1 more)
Tagged with:
-
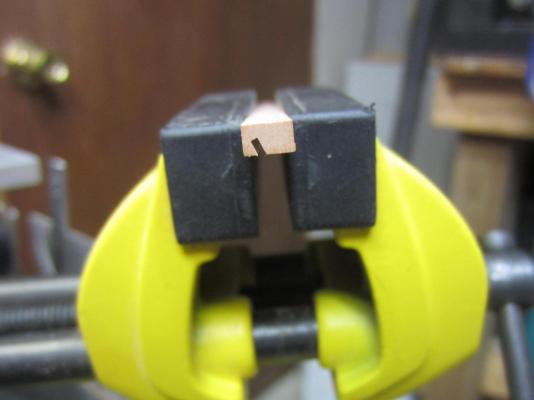
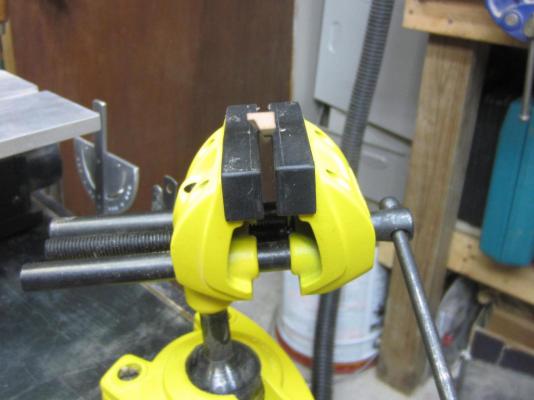
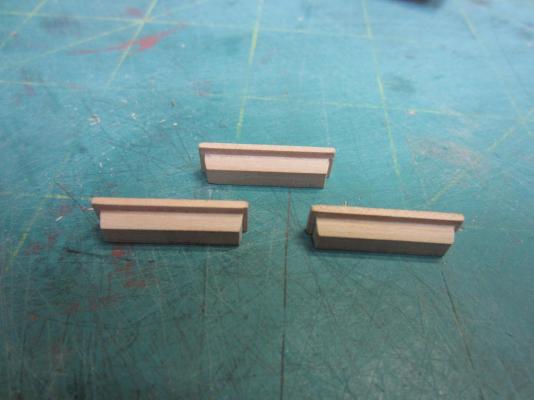
Thanks Paddy, Grant. Ben, There was so much I learned doing the Confederacy and I still look back at the practicum every once in a while. Here I’ve started making the entry step. I first cut the angle for the bottom portion and then made a second cut forming the tread lip. They were then cut to length and the sides trimmed to match using a xacto knife and files. Now I just have to finish making them, 18 total are needed.
- 332 replies
-
- Triton
- cross-section
-
(and 1 more)
Tagged with:
About us
Modelshipworld - Advancing Ship Modeling through Research
SSL Secured
Your security is important for us so this Website is SSL-Secured
NRG Mailing Address
Nautical Research Guild
237 South Lincoln Street
Westmont IL, 60559-1917
Model Ship World ® and the MSW logo are Registered Trademarks, and belong to the Nautical Research Guild (United States Patent and Trademark Office: No. 6,929,264 & No. 6,929,274, registered Dec. 20, 2022)
Helpful Links
About the NRG
If you enjoy building ship models that are historically accurate as well as beautiful, then The Nautical Research Guild (NRG) is just right for you.
The Guild is a non-profit educational organization whose mission is to “Advance Ship Modeling Through Research”. We provide support to our members in their efforts to raise the quality of their model ships.
The Nautical Research Guild has published our world-renowned quarterly magazine, The Nautical Research Journal, since 1955. The pages of the Journal are full of articles by accomplished ship modelers who show you how they create those exquisite details on their models, and by maritime historians who show you the correct details to build. The Journal is available in both print and digital editions. Go to the NRG web site (www.thenrg.org) to download a complimentary digital copy of the Journal. The NRG also publishes plan sets, books and compilations of back issues of the Journal and the former Ships in Scale and Model Ship Builder magazines.


