Rustyj
-
Posts
2,535 -
Joined
-
Last visited
Content Type
Profiles
Forums
Gallery
Events
Everything posted by Rustyj
-
 Hi Bob, I always enjoy your updates and that’s a very nice planking job. It is a shame you are going at it alone but then your log will be a great reference for all who will build her once the “issues” are corrected.
 -
Hey Augie great job on the planking. The run looks real nice. Lots of tree nailing coming your way buddy!
- 2,191 replies
-
- 1
-

-
- confederacy
- Model Shipways
- (and 1 more)
-
Thanks you to all who have stopped by for a look see and the likes too! Antony, Thanks. The plans showed it that way with the last plank at the center half width. I kind of liked the look so I went with it. Purely done for the look.
- 421 replies
-
- 2
-
-
- granado
- bomb ketch
- (and 2 more)
-
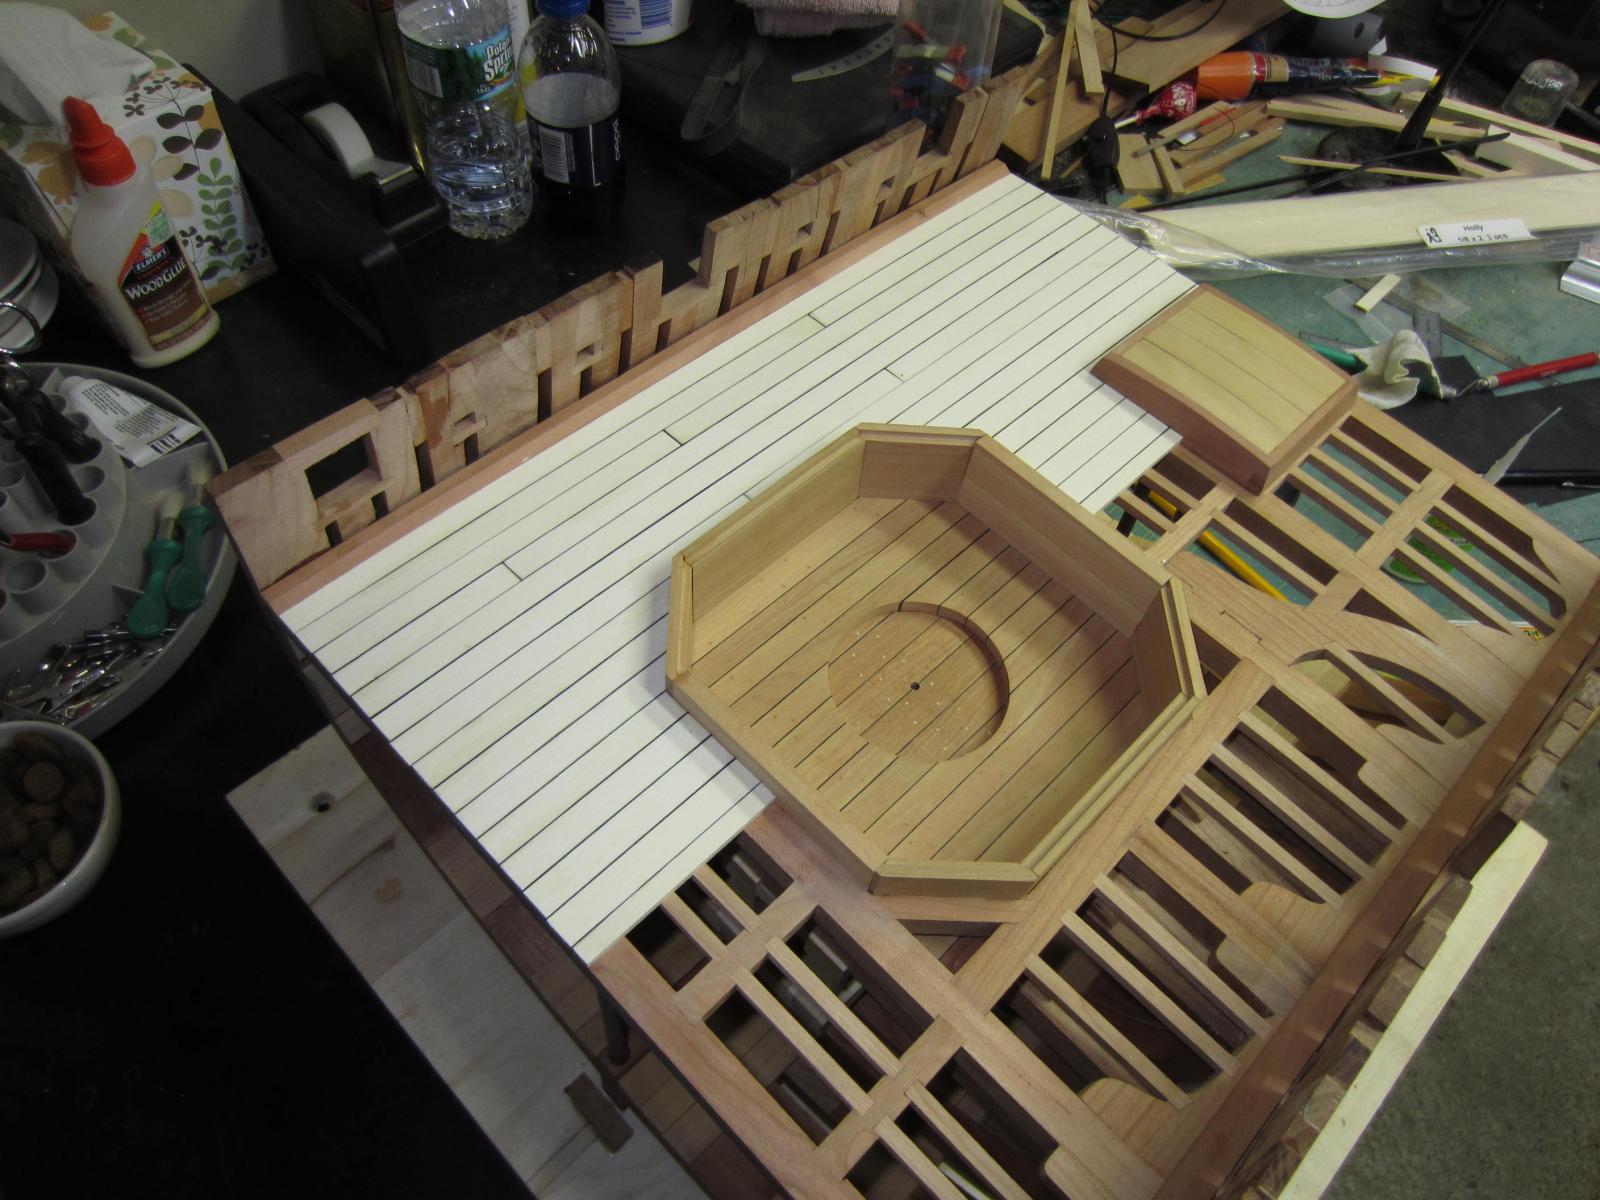
Thanks Augie, Yes the holly, like all the wood from Hobby Mill, is really nice and fun to work with. Thanks Chuck much appreciated. Hi Bob, Thanks and your Essex is coming along very nicely too! I have completed planking half of the gun deck. One plank had to be notched to fit around the hatch. It doesn’t adhere to planking procedures and it is a little too thin but close enough. There won’t be any rot issues anyways. At least I hope not! The hatch has not beeen glued in place yet as I have to sand and scrape the deck, treenail and seal it.


- 421 replies
-
- 15
-
-
- granado
- bomb ketch
- (and 2 more)
-
Hi Ryland, I see that you’re slow and steady pace is picking up some speed! Don’t worry about how long you are taking just keep up the excellent work.
-
Thanks Greg. Not much, maybe 1/64”. I always over bend them hoping to compensate for the spring back. Thanks grant. It’s always fun for me to mix in different woods. I’ve milled all the holly needed for the decking and have started laying them. Again I am using black paper to simulate the caulking. Hopefully later tonight I well get to the area around the hatch completed.

- 421 replies
-
- 15
-
-
- granado
- bomb ketch
- (and 2 more)
-
Hi Elmer, Thank you and welcome aboard. Thank you Dave. Hi Floyd, Thank you but I’ve seen your work and you are being too modest. Hi Bob, Thanks and not to worry. I’m planking just one side so we will be able to see some of the framing. Thank you Michael. I've started planking and will have some pictures tomorrow.
-
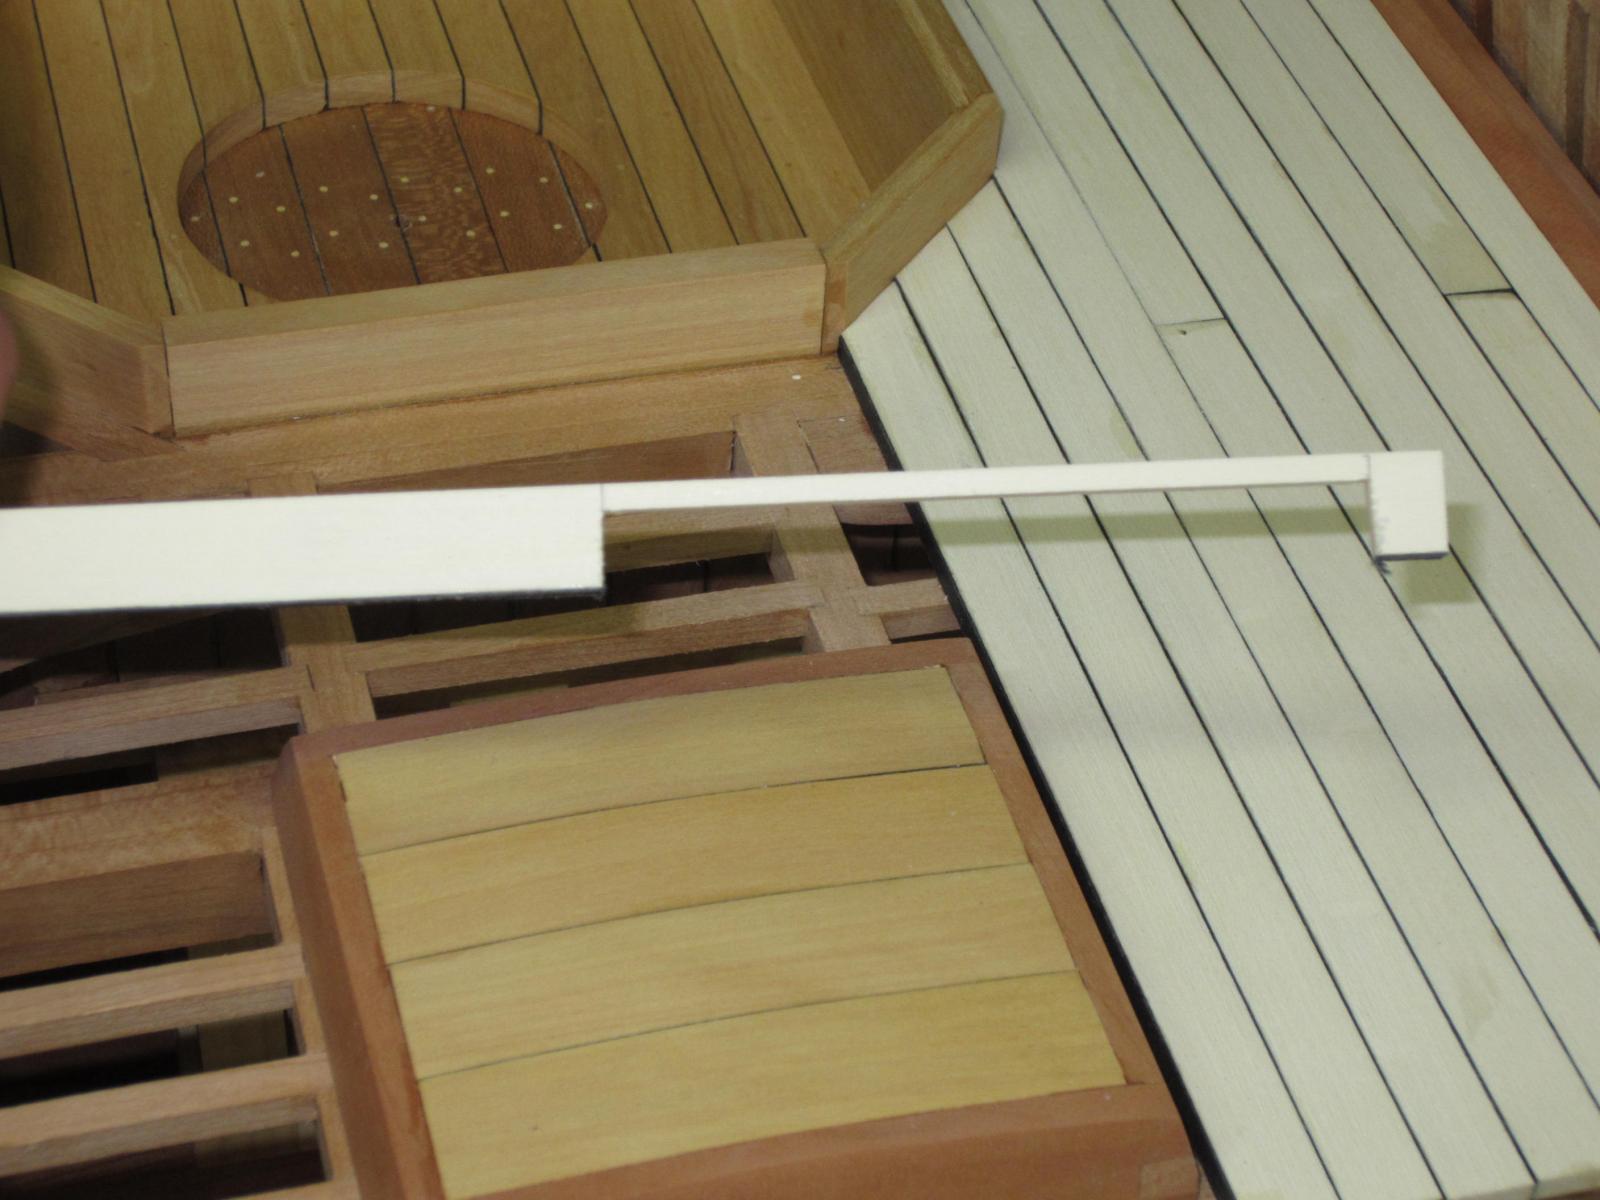
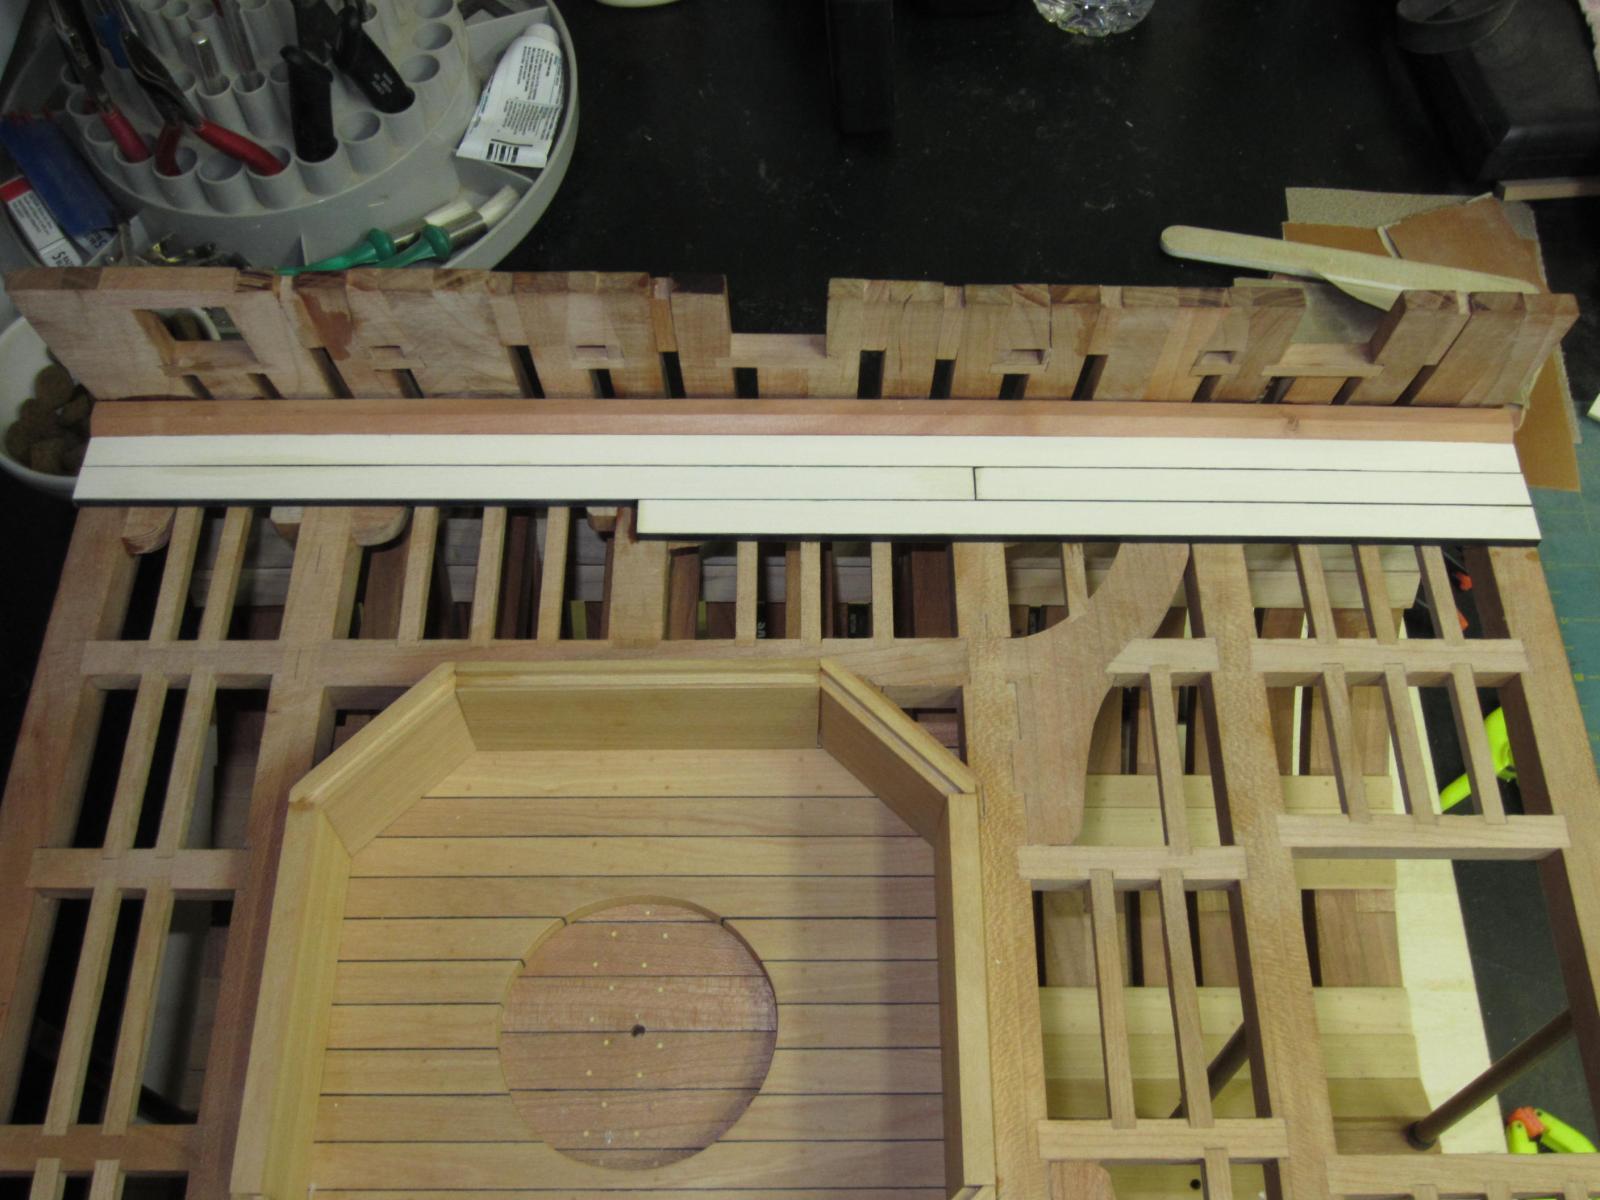
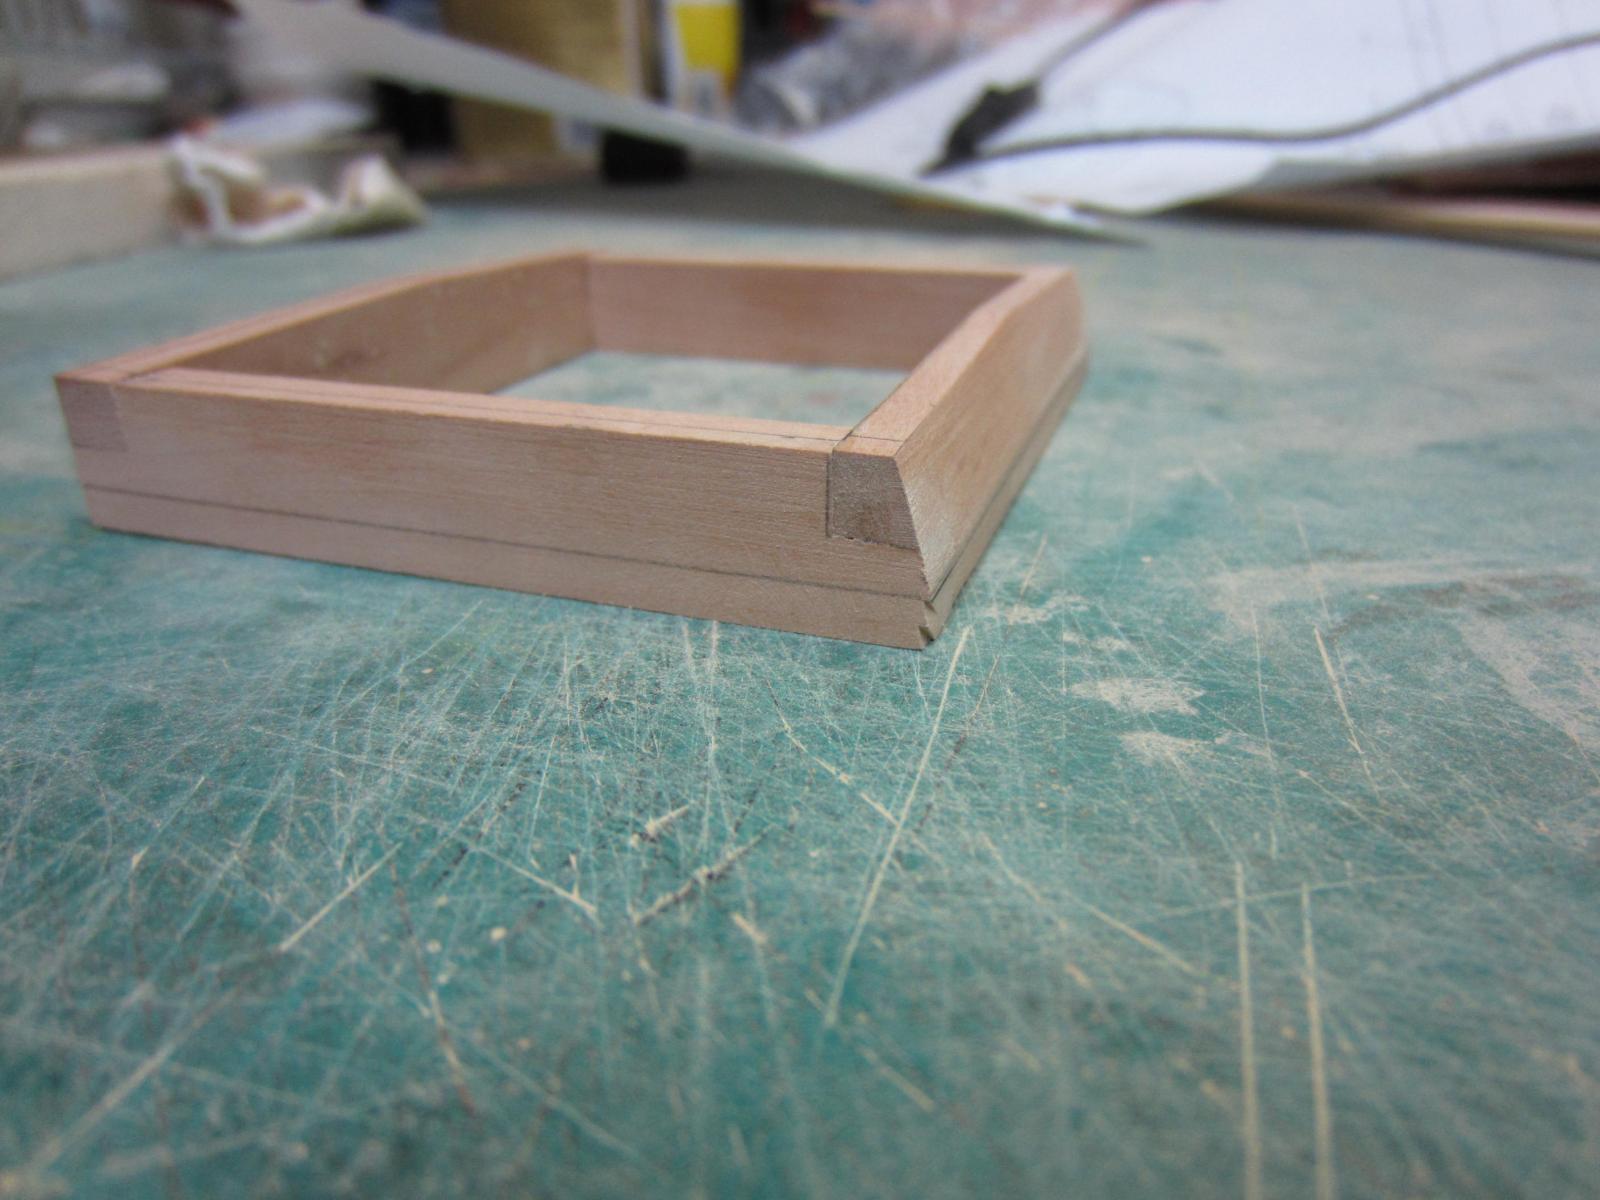
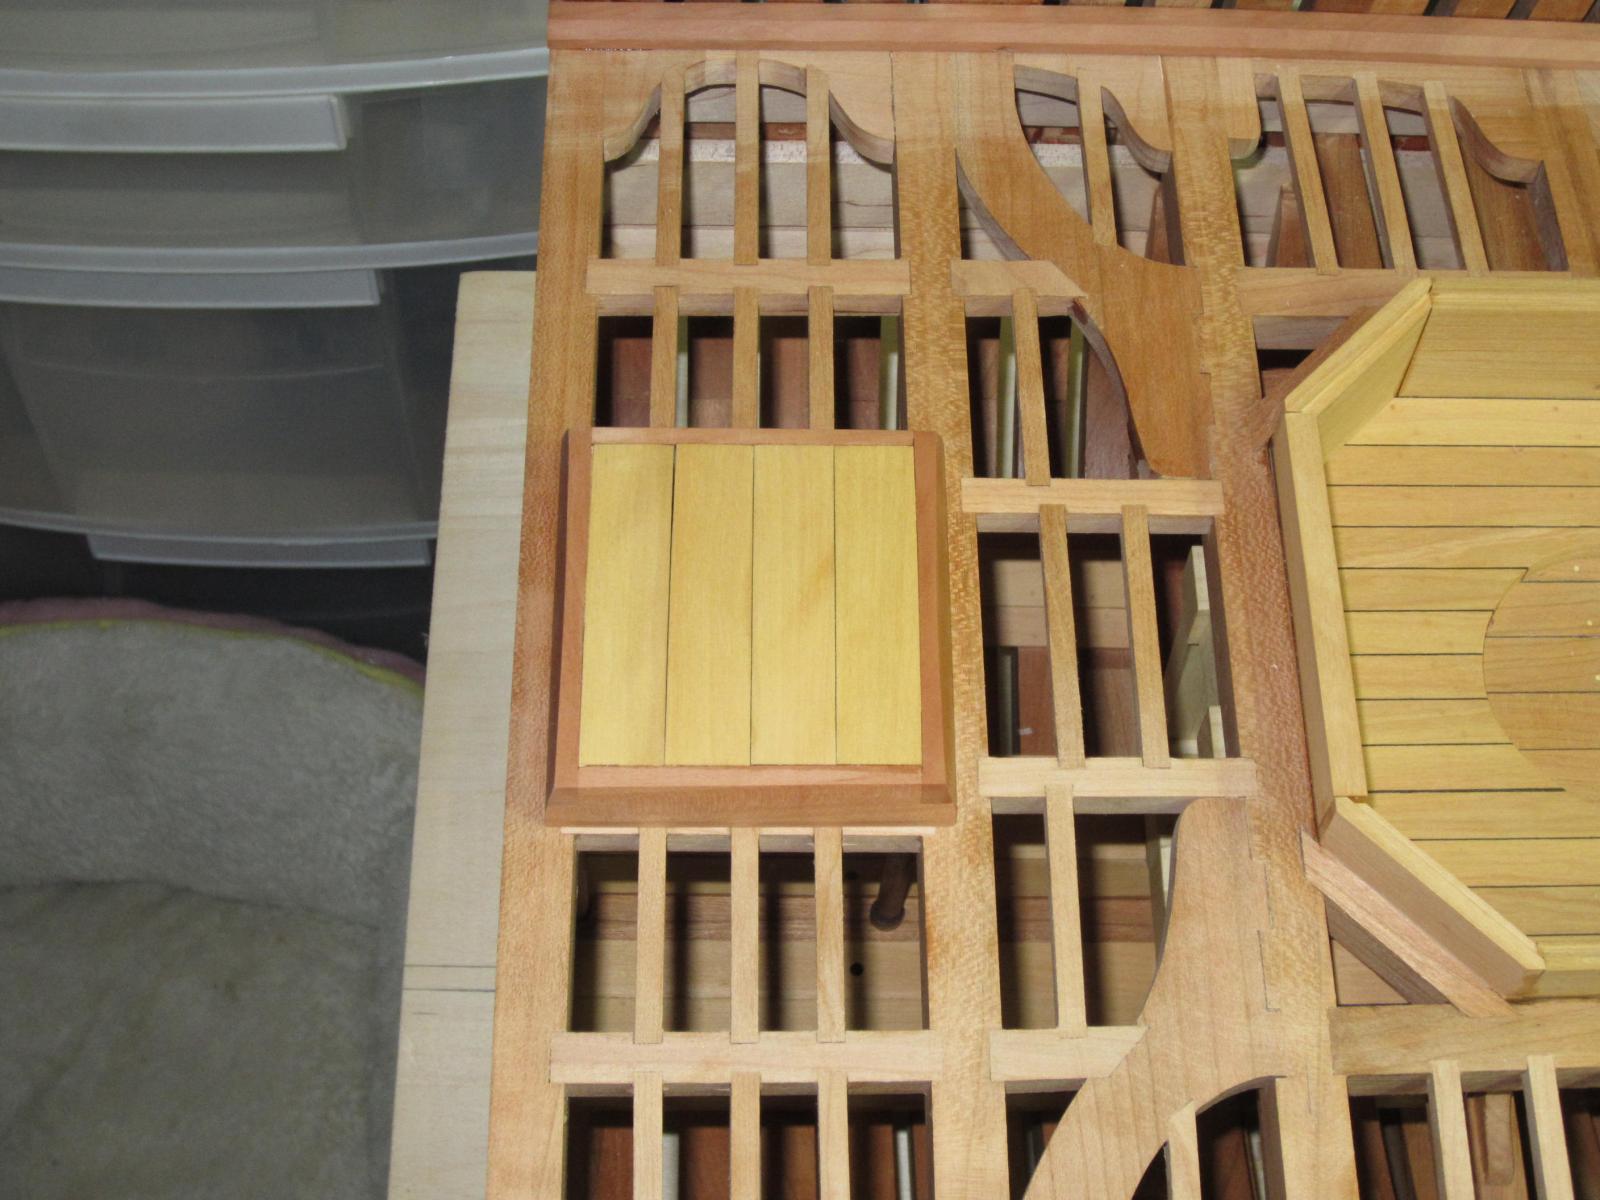
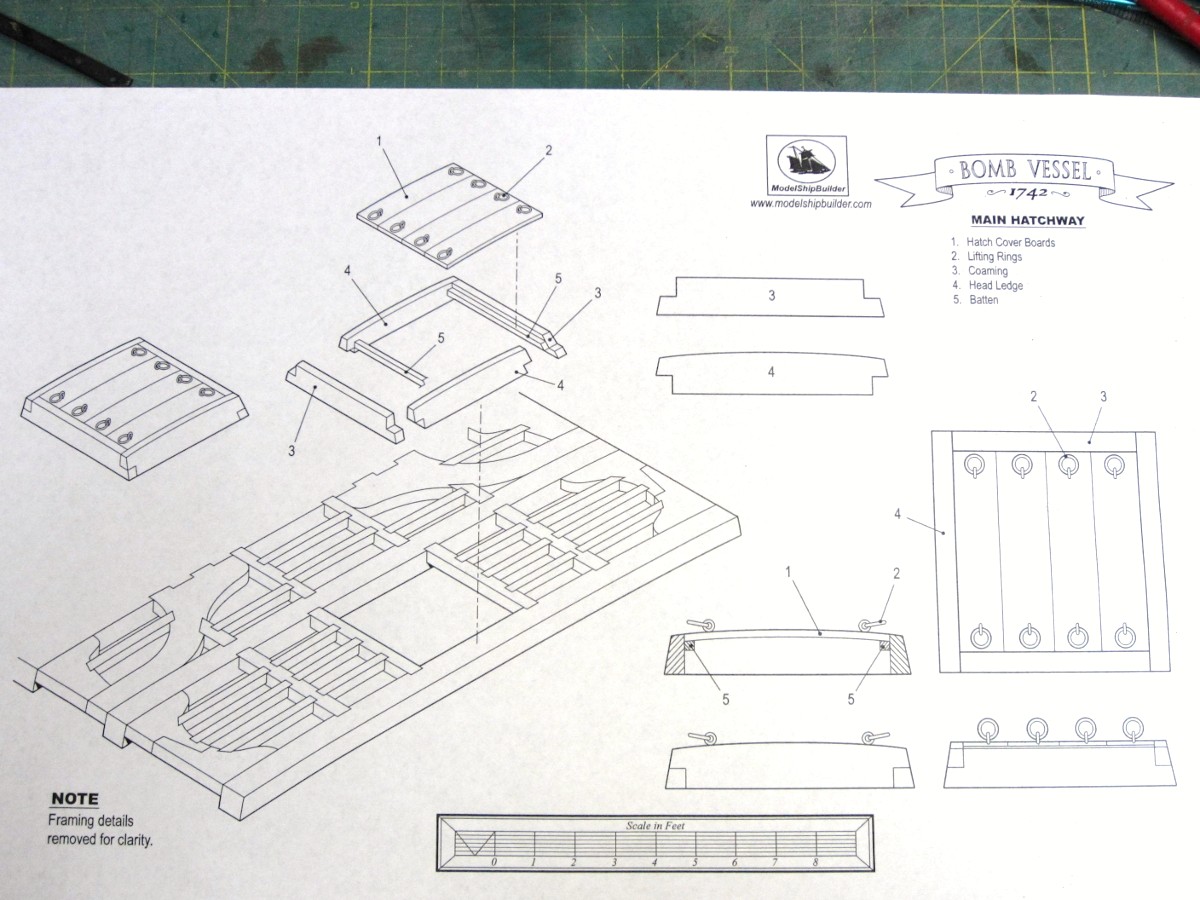
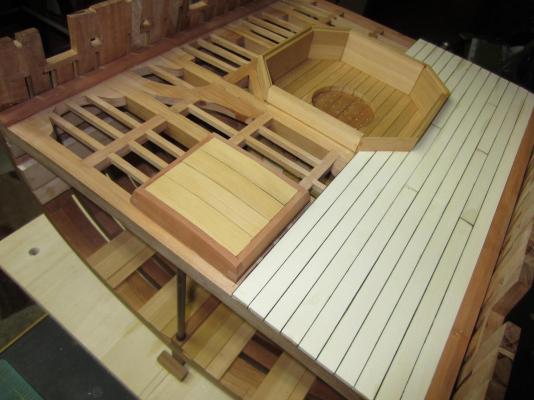
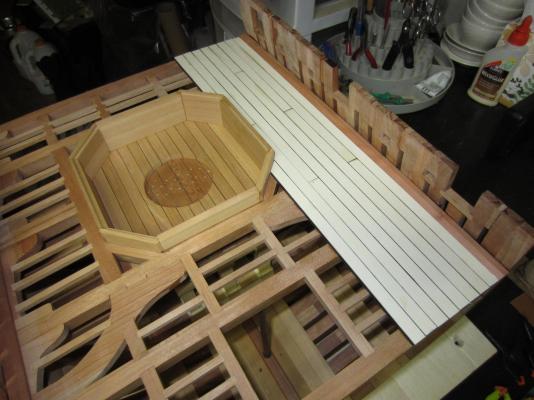
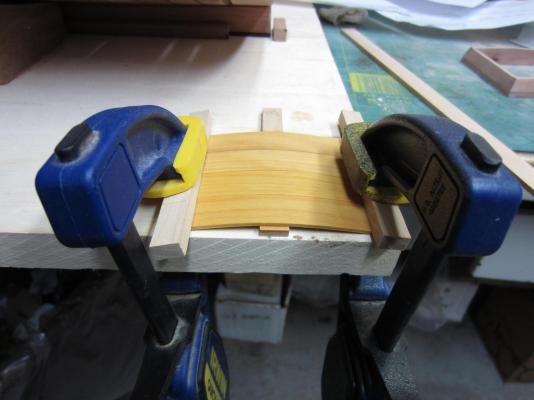
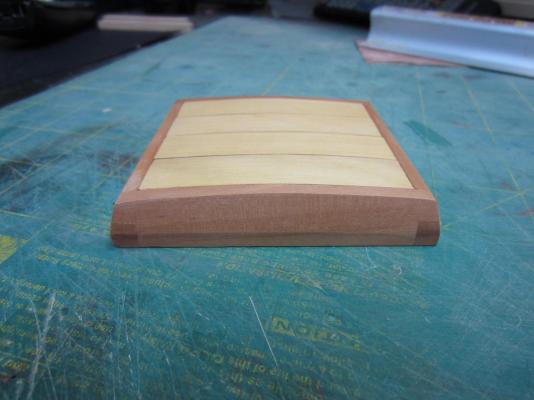
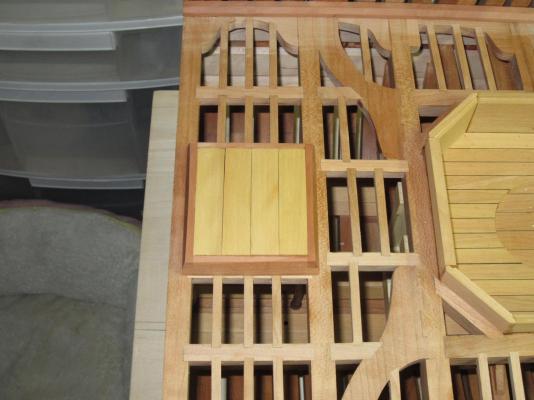
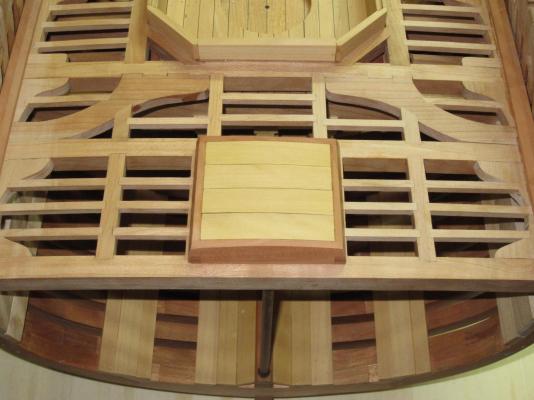
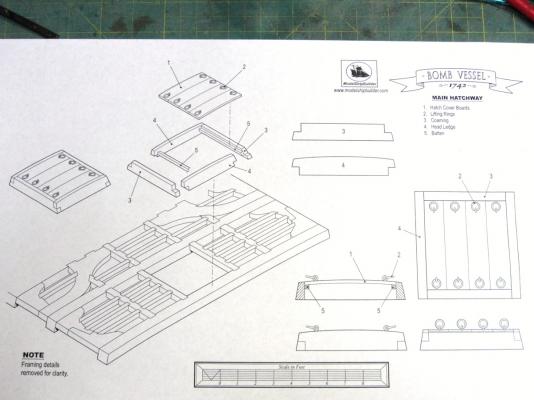
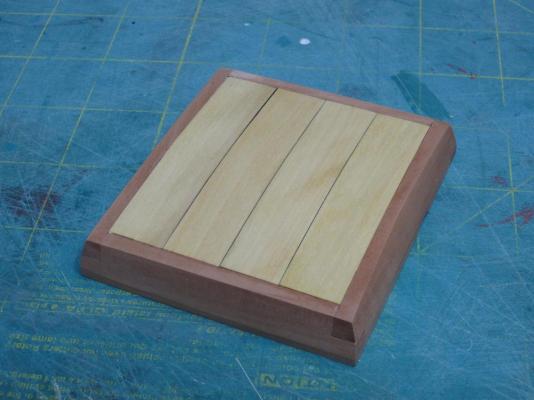
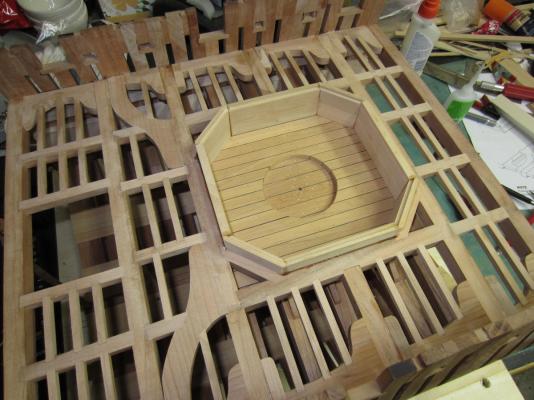
Thanks Antony. Yes wandering through the mind can be quite something at times. I’ve now started on the main hatch cover. The first thing I did was cut the hatch cover boards, boxwood, to length, soak them and then bend them over a scrap piece of wood to get the correct curve. I let them dry like that for 24 hours. The coaming and head ledge, swiss pear, were then cut out and assembled. The boards installed and the hatch set temporarily in place. I marked its location for installation later. I also still need to install the lifting rings. I didn’t want to permanently attach it until I had the decking done. It’s easier for me to sand and finish the decking if it’s removable. Also in the last two pictures you can see the waterways have been placed and they too are made from swiss pear. Thanks for stopping by!
- 421 replies
-
- 11
-
-

-
- granado
- bomb ketch
- (and 2 more)
-
Thanks Ben and Grant. Hi Mike, It is fun and a bit scary. The plans are great but there are no instructions so it’s just flip through the pages of plans and hope my interpretation is correct.
- 421 replies
-
- 1
-
-
- granado
- bomb ketch
- (and 2 more)
-
Thanks Joe, It is my intention to go but I have to keep life in line. Last year she interfered big time.
-
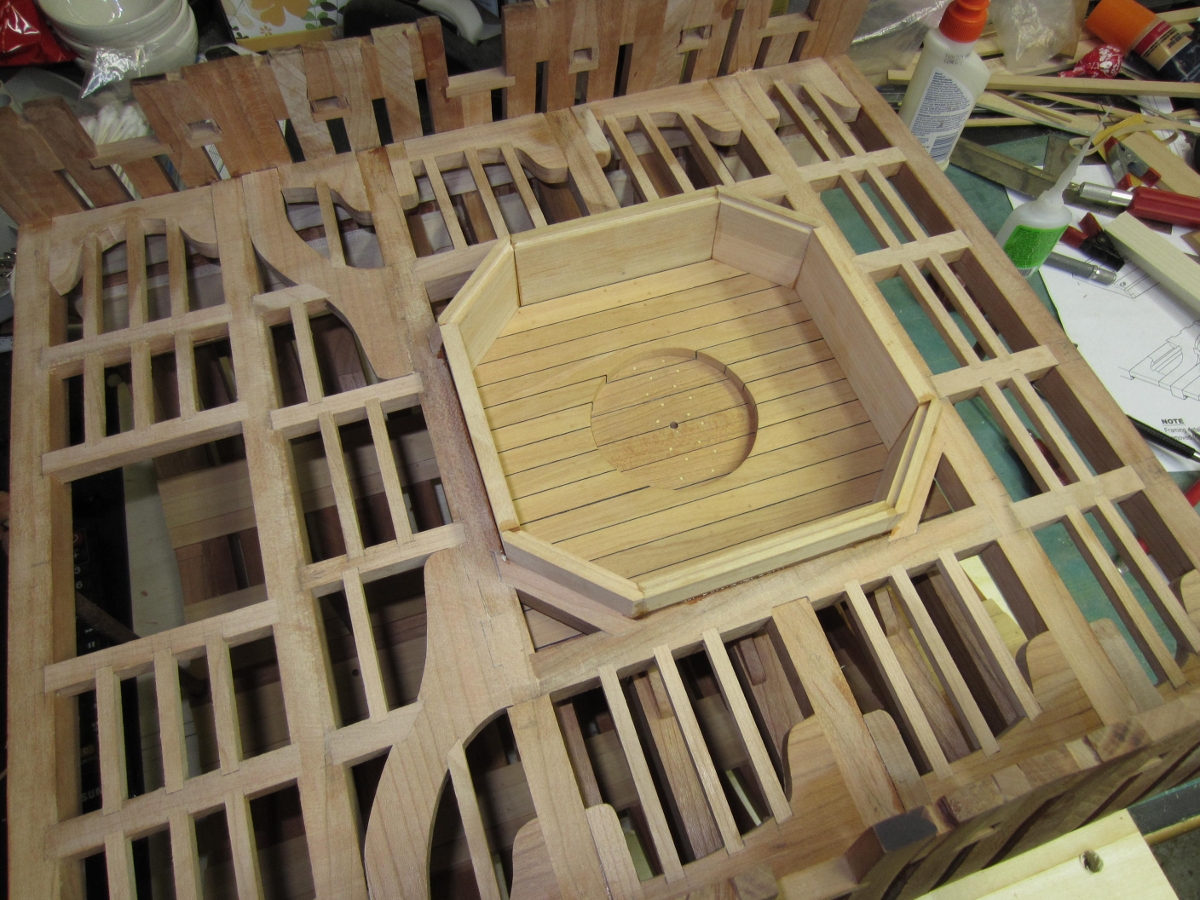
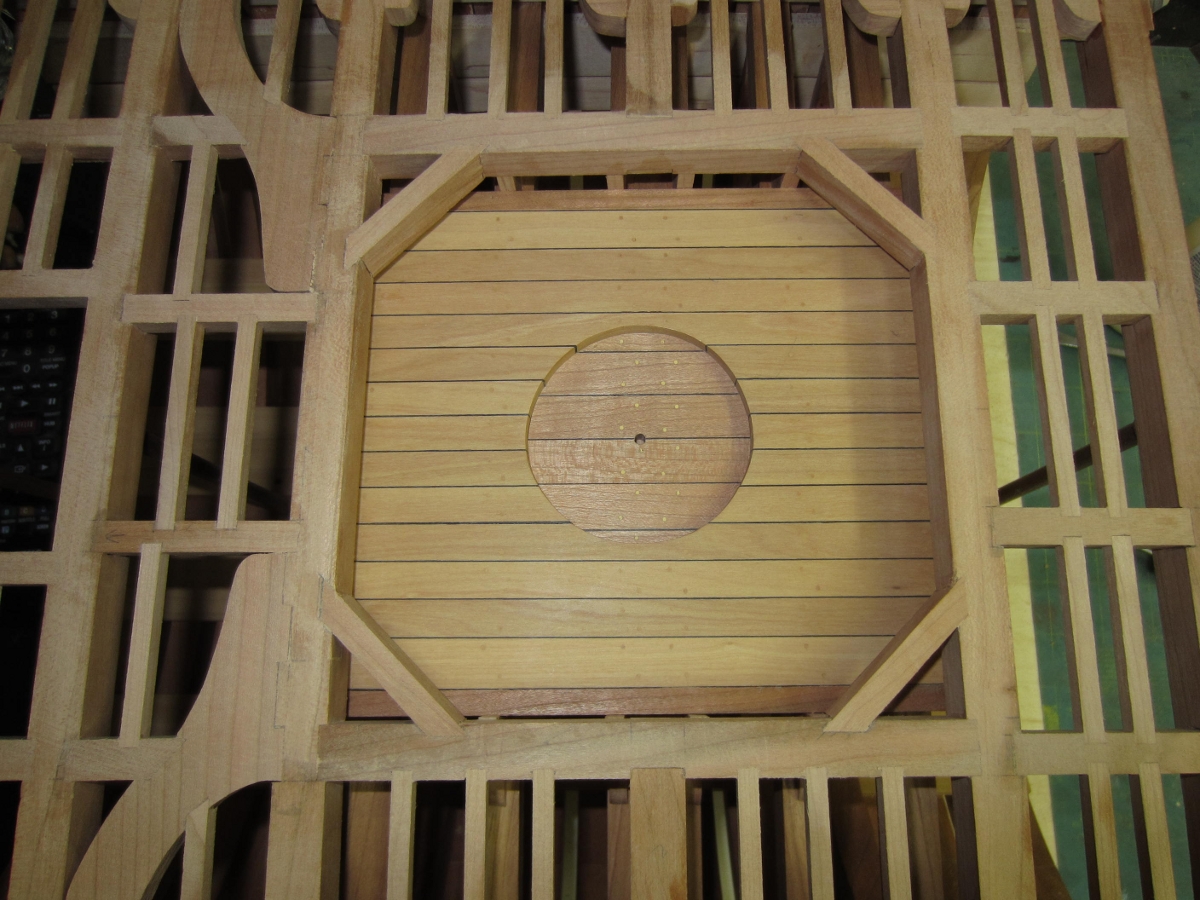
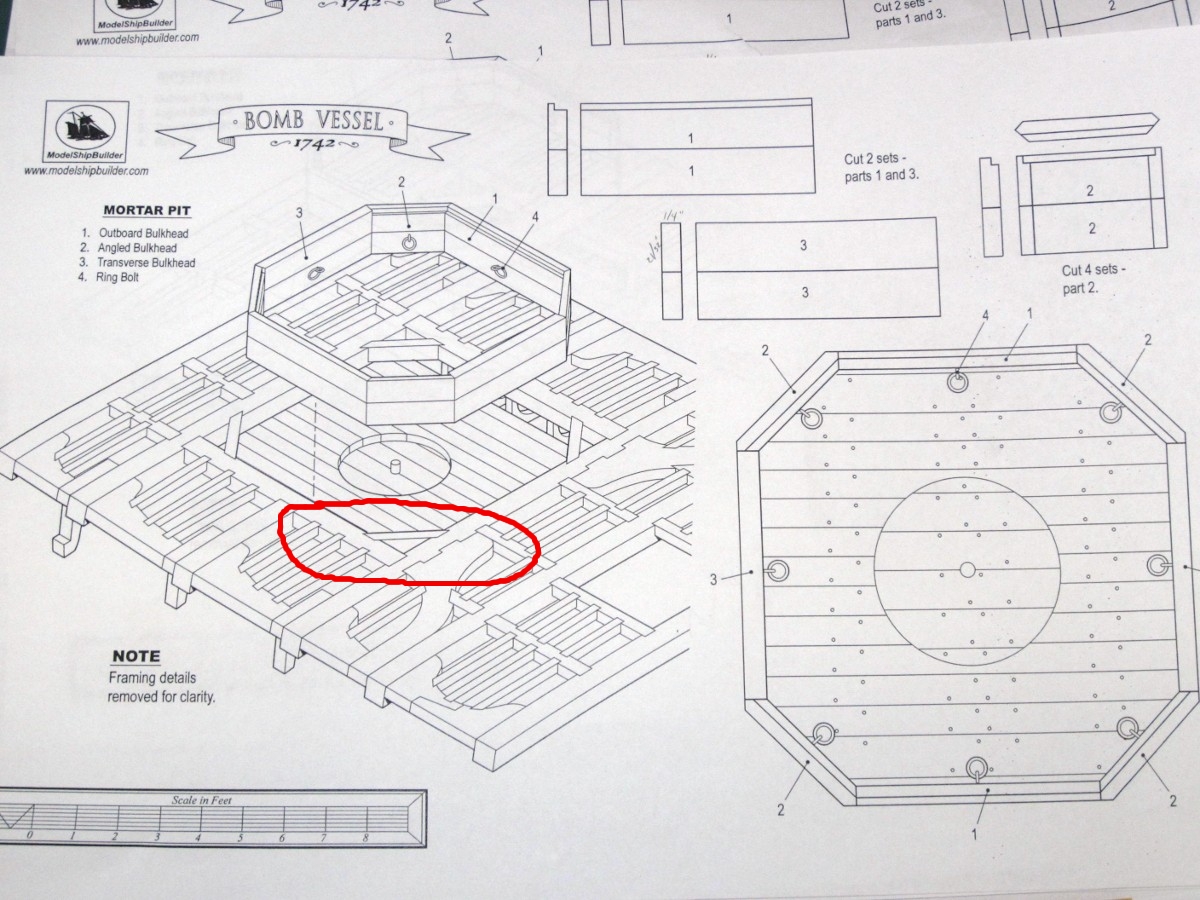
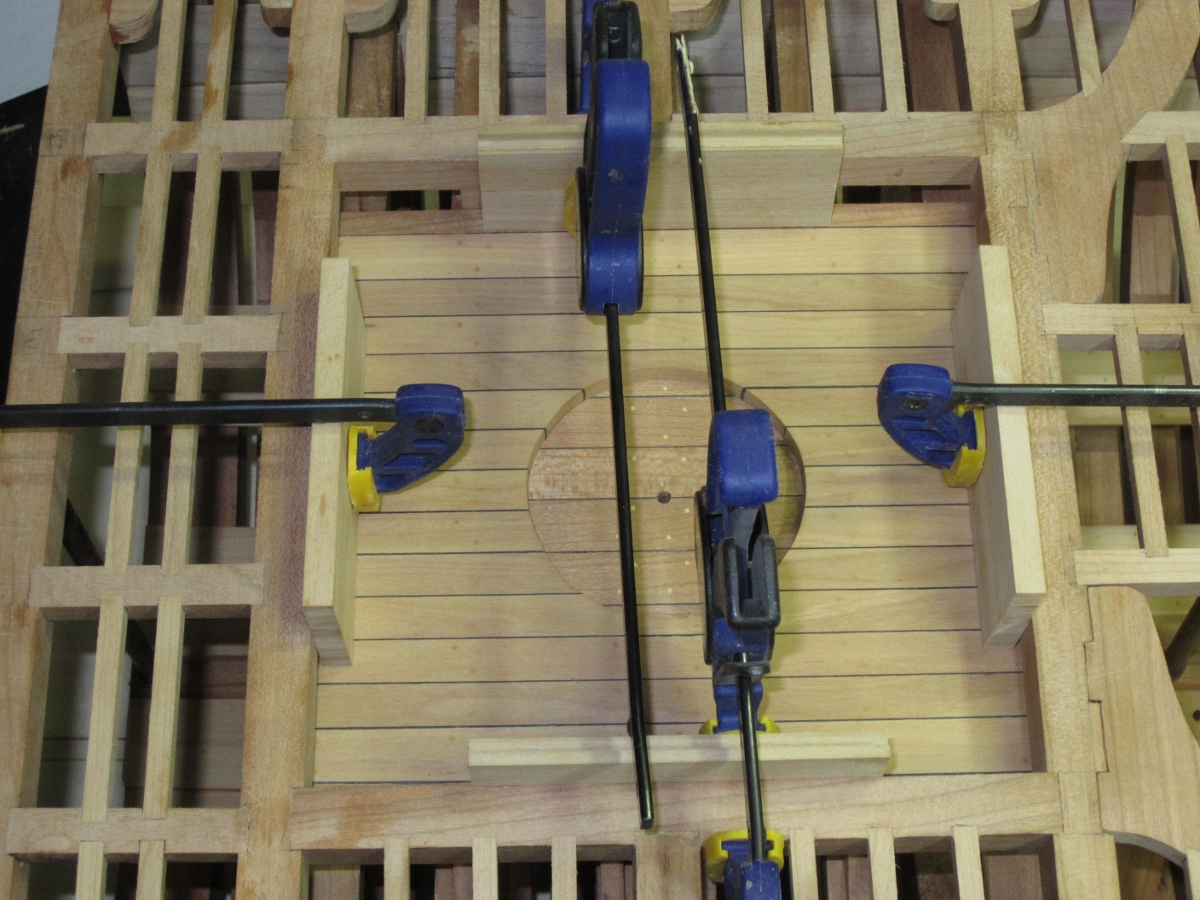
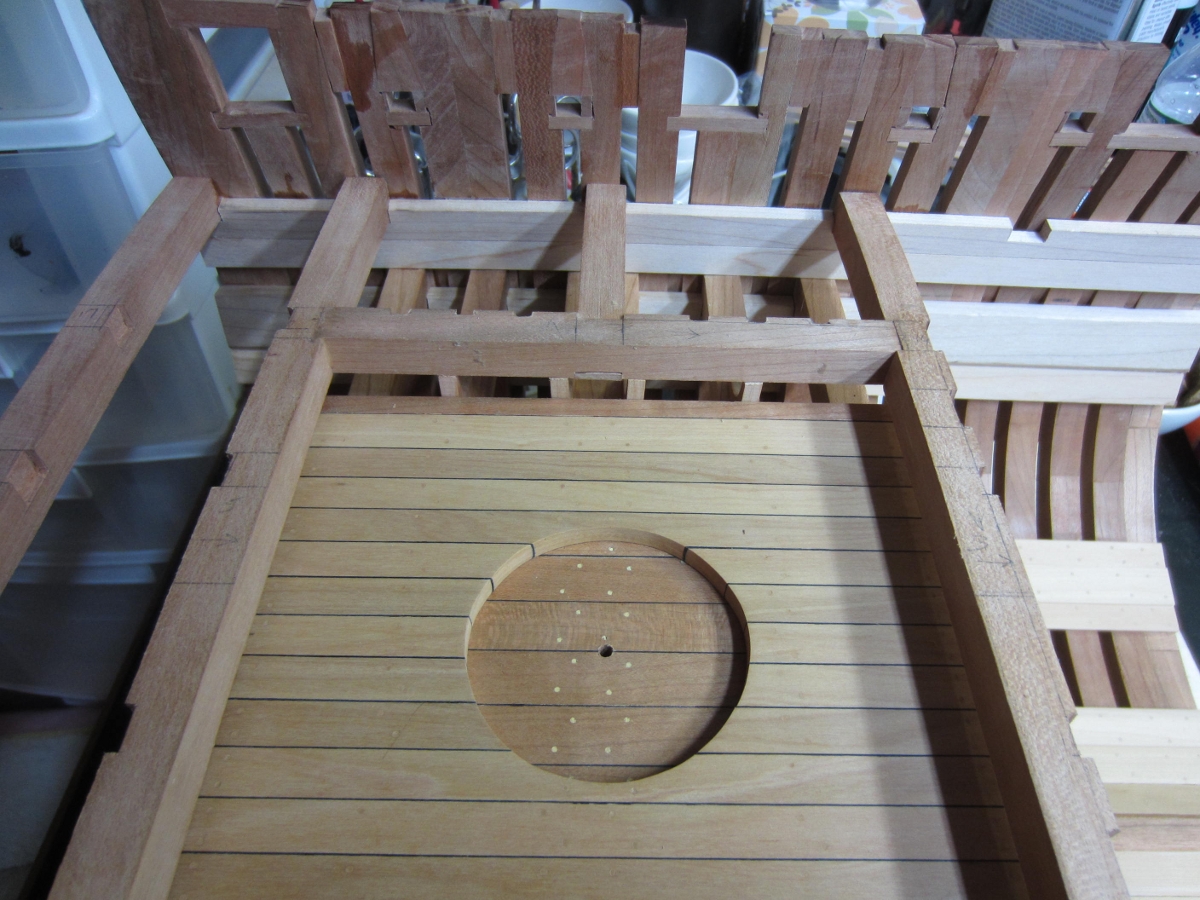
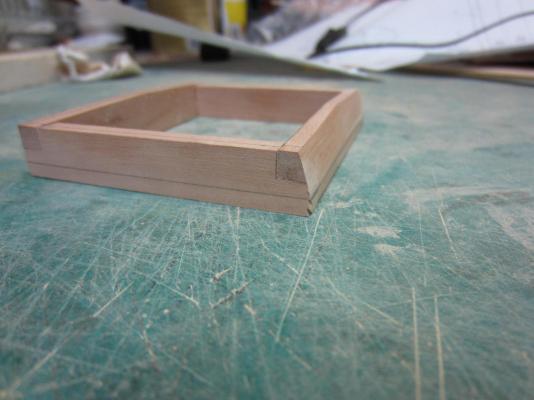
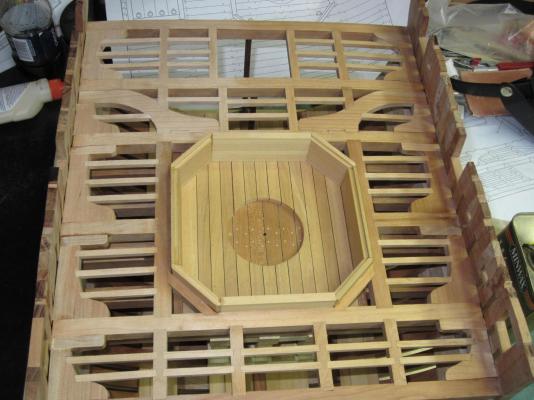
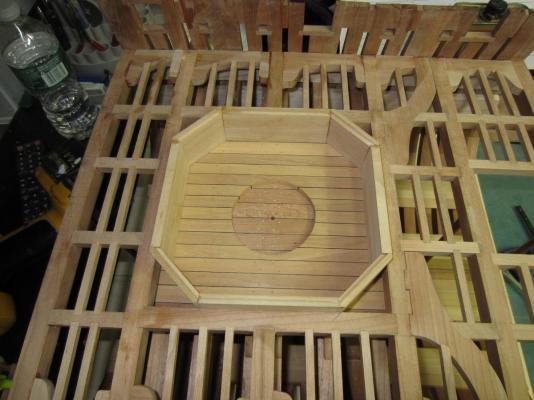
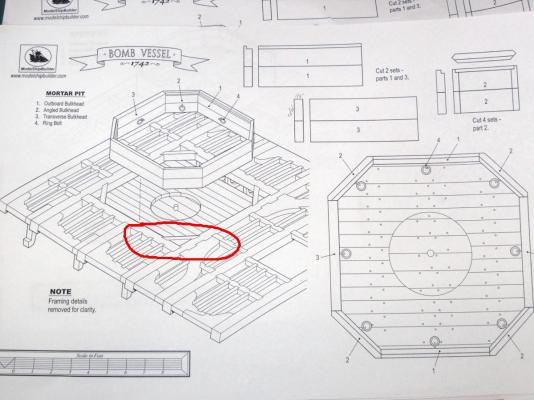
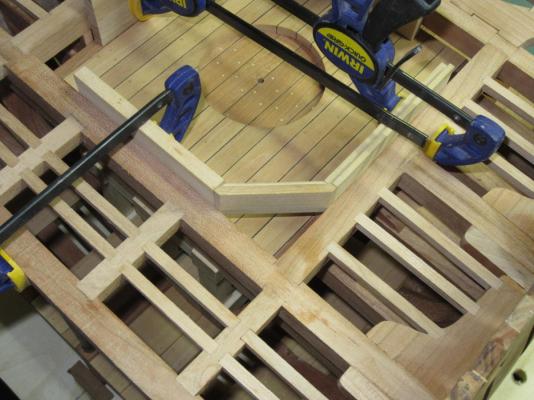
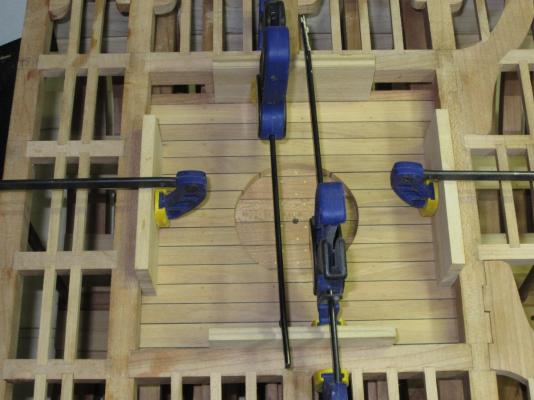
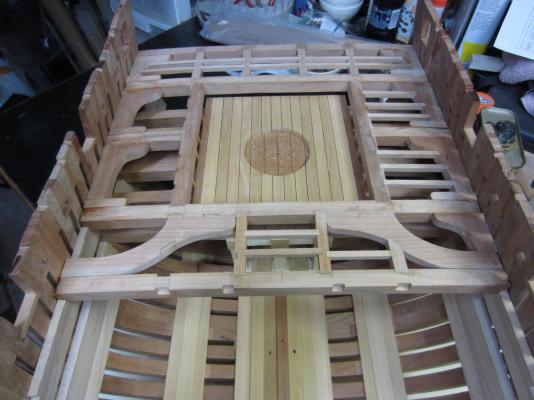
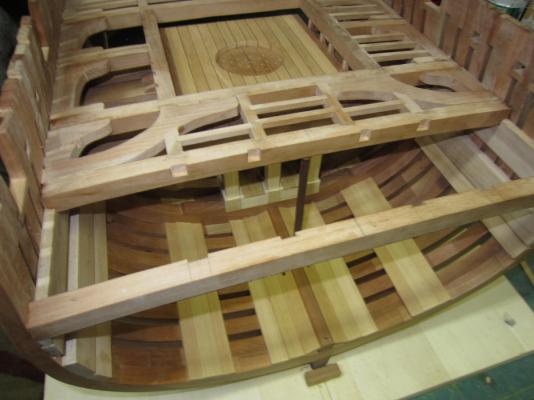
Thanks Anthony! Here is the promised update. Success! I was able to keep the side pieces in place and then attach the corner pieces, the correct term is angled bulkhead, but I like corner better. The biggest problem after getting the length right was using enough glue to hold the sides together but not gluing the sides to the beams. Once the glue had set marked the placement of the angled carlings I carefully removed the assembly. I the placed the angled carlings sanded it down and then permanently glued the pit assembly in place. The deck was sanded smooth and I applied wipe on poly to the side (starboard) that will not be planked.


- 421 replies
-
- 14
-
-
- granado
- bomb ketch
- (and 2 more)
-
Thank you all for stopping by. Hi Grant, I had a good night in the shop and it’s looking good so far. Hopefully tomorrow I’ll have more pictures. Jan, Welcome aboard. I understand what you are saying. With so many builds it’s hard to catch them all. I constantly find new ones too! Hi Ben, That’s similar to a saying we had while building my brother in laws house. We’d put something up and he’d ask “how’s it look? And invariably someone would shout out “Looks good from here” or “Can’t see it from my house”. Drove him nuts the entire time. If it wasn’t for the free labor he’d have booted us on day one!
-
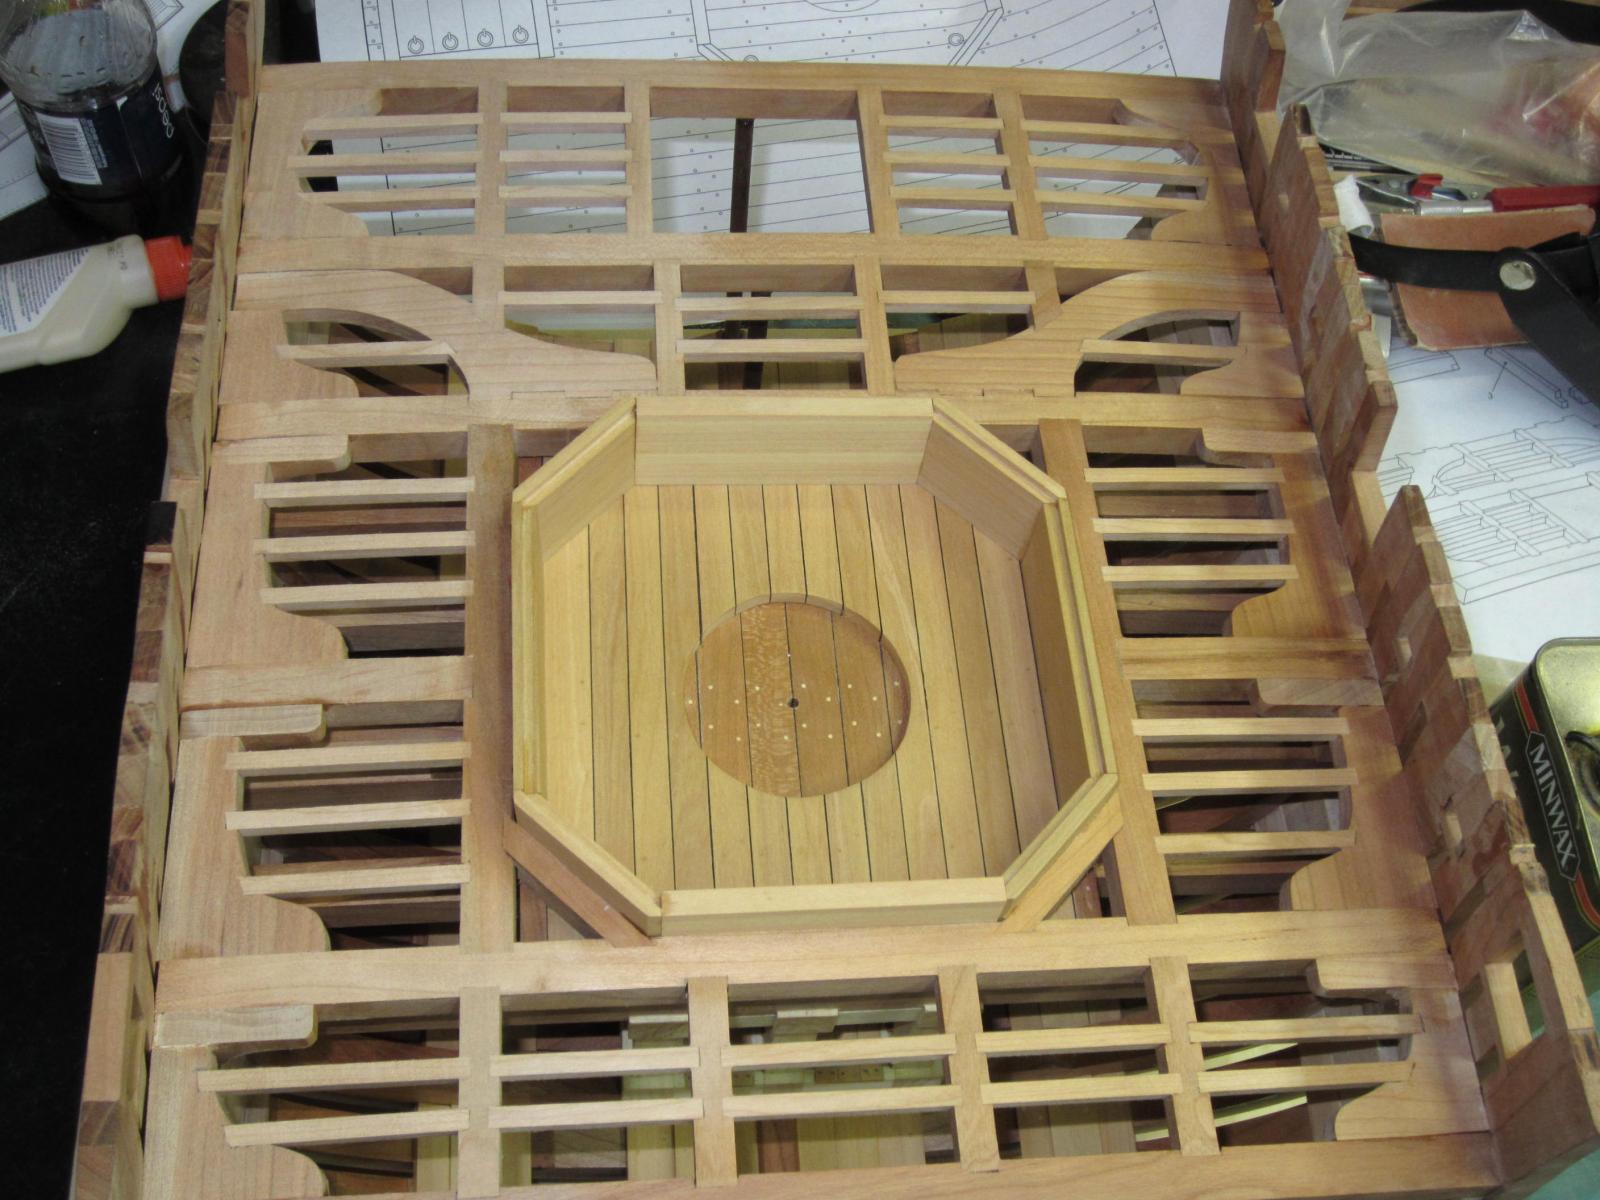
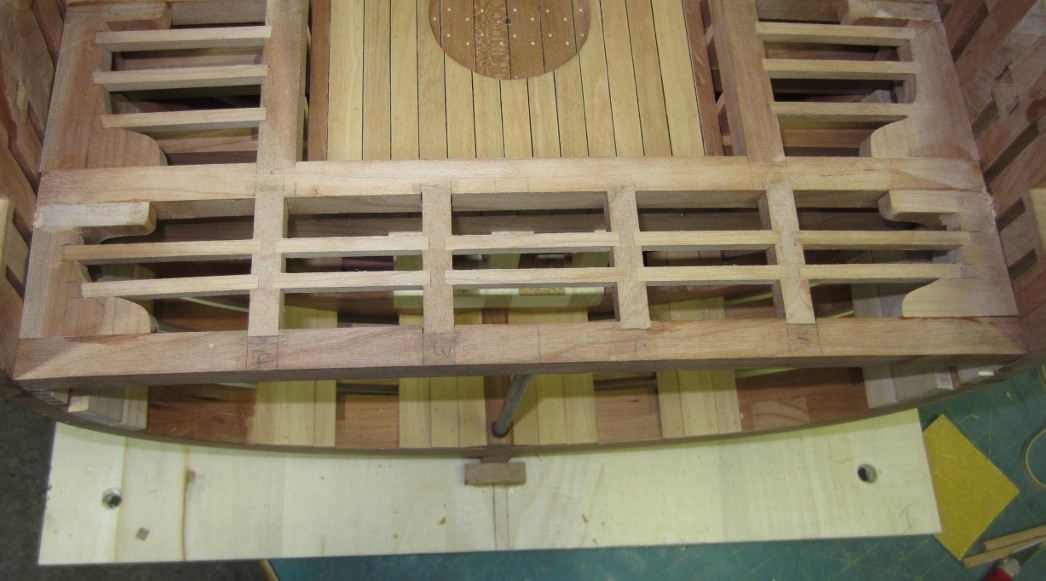
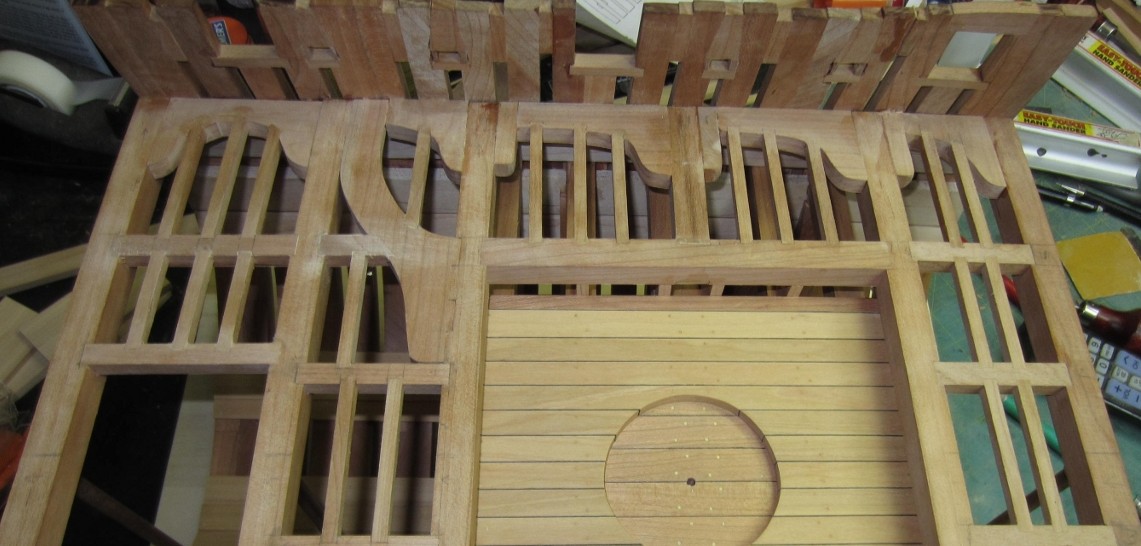
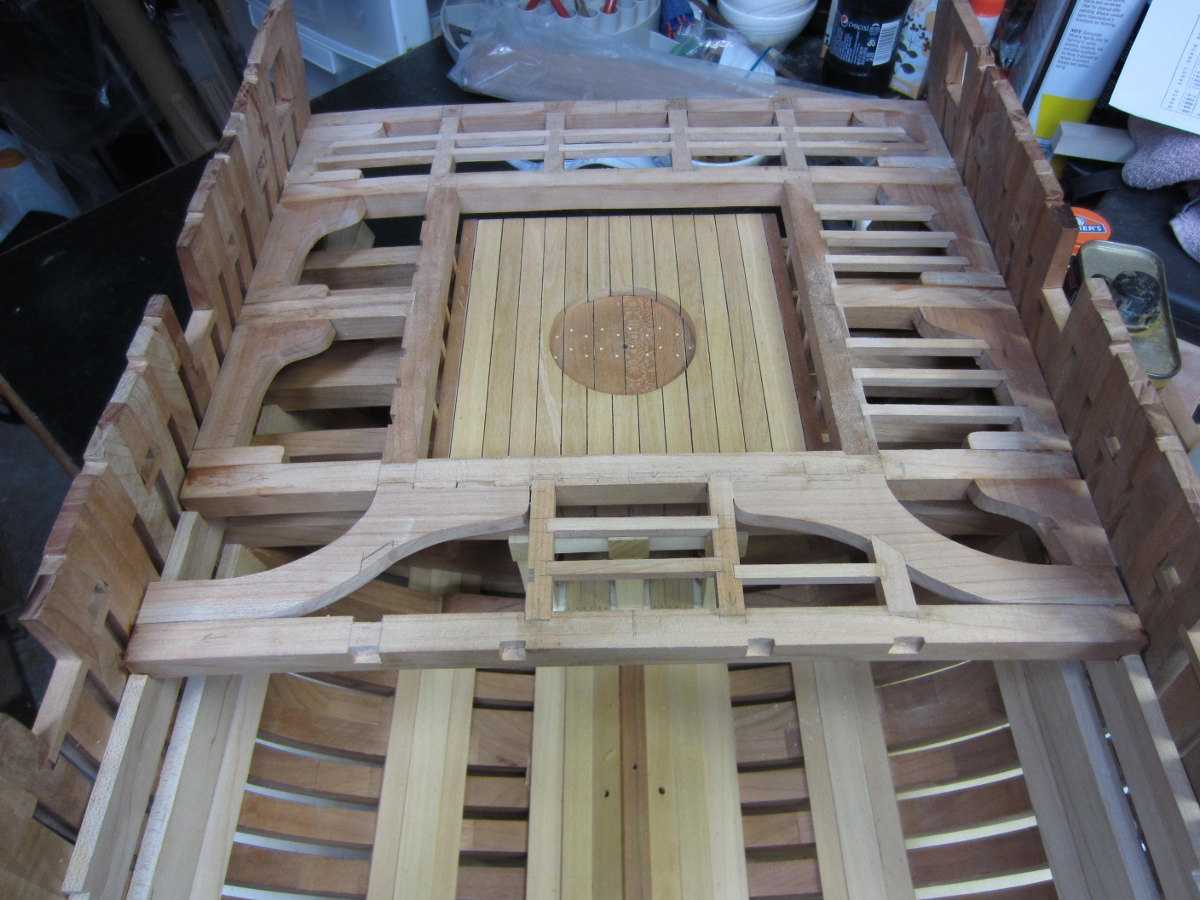
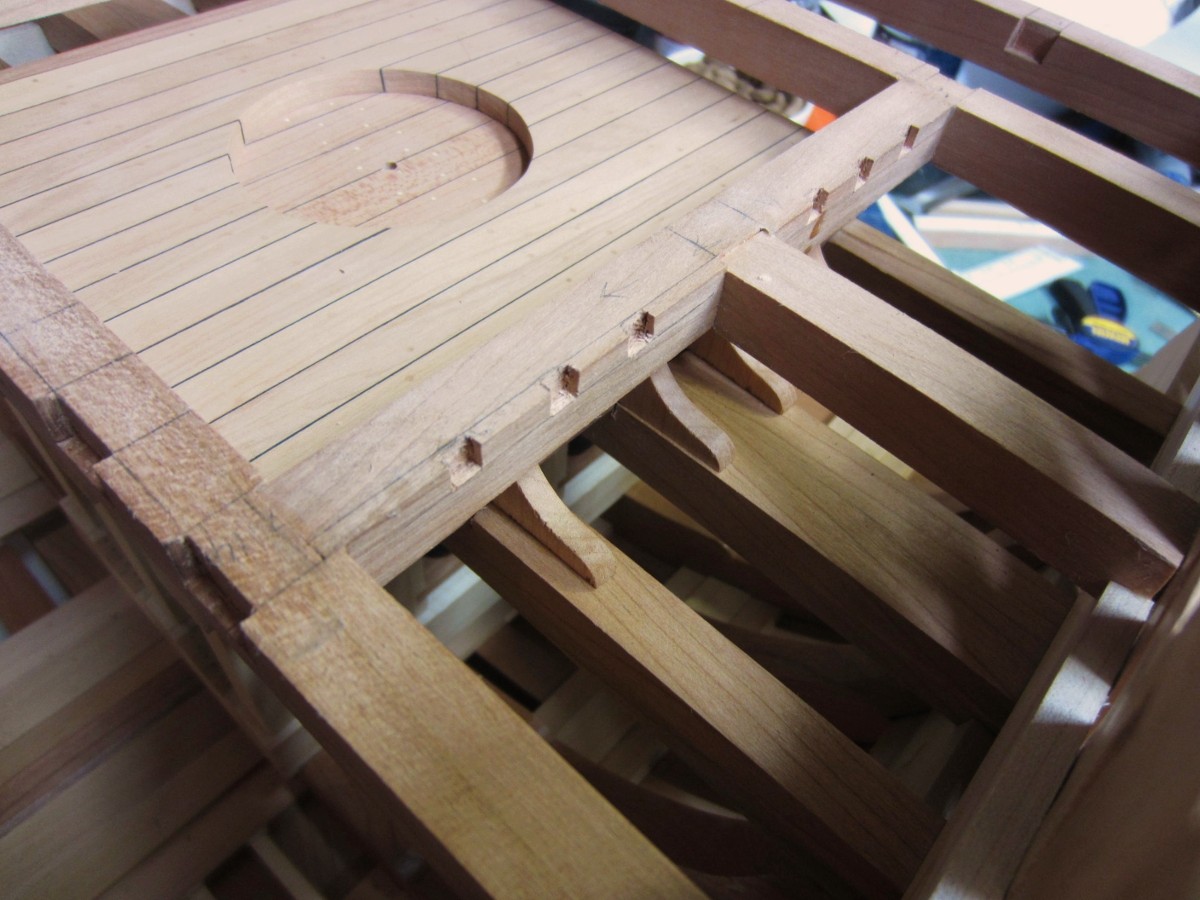
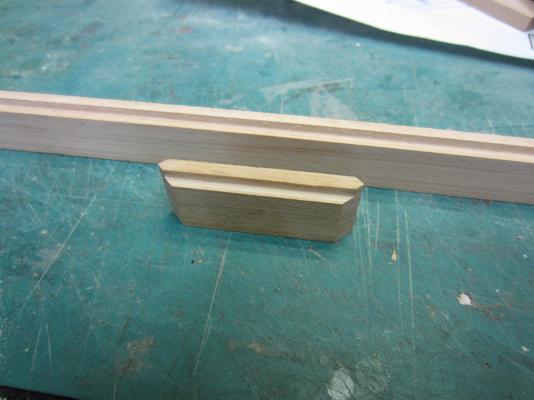
Thank you all for stopping in and the likes. Thanks Bob, you never know what kind of oops or such that could pop up and ruin the day. I have competed the framing of the gun deck. Pretty straight forward and at this size it turned out to be a lot easier to do. Next in the mortar pit the walls need to be built. There are angles involved and I didn’t trust myself to build it off the model and keep the correct dimensions. Also there are four cross braces between the beams that need to be put in. So to help me keep it square and position the cross bracing correctly I clamped the side walls in place and then started fitting the angles. This way once completed I can mark the cross bracing, remove the walls, install the bracing and then return the wall to it's correct location. Here is just the top piece of the wall confirming the angle and length are correct. Time will tell if this will work or not.

- 421 replies
-
- 14
-
-
- granado
- bomb ketch
- (and 2 more)
-
Thank you Michiel. I've been making good progress on the deck framing. It sure helps having cut the parts ahead of time! It still will need a good sanding to fair it all up but so far so good!
- 421 replies
-
- 16
-
-
- granado
- bomb ketch
- (and 2 more)
-
Hi Augie, Yes practice does make one better doesn’t it! Sorry you had to do the “do over” but it came out so very nice. Well done.
- 2,191 replies
-
- 1
-
-
- confederacy
- Model Shipways
- (and 1 more)
-
Thank you all for all the likes, visits and comments. They are very much appreciated. Thanks Ben, I’ve been asked a couple of times if working at the larger scale is a good thing or bad. Well when it comes to ledges, carlings and knees it seems to be easier. Although there is a lot more wood that needs to be removed I find my errors are smaller and less frequent at this larger scale. Time will tell if this still holds true. Hi Jim, Thank you and it’s good to hear from you. Thanks Jack, from what I’ve seen so far on they are very solid and I don’t know about the Erebus and Terror but it makes sense to me. Hi Kevin, thanks and I’m sure you can handle this cross section once you are ready. All you need is a LOT of patience and a willingness to throw away parts that didn’t work and do them over. Plus it’s a good excuse for more tools! Thanks Grant. That one fit right off the scroll saw. Not all of them were that close. A little adjustment here and there and in they go. Thank you very much Christian. Your work has always inspired me. Hi Augie. Thank you. Yours and everyone else’s support and interest makes my day! Well I’m off work until next Monday. Thanksgiving day is shot but the rest of the time has a whole lot of shop time scheduled in. By Sunday night the Admiral may have forgotten who that troll is in the basement. Happy Thanksgiving to all here stateside and best wishes to the rest of you. Be safe!
- 421 replies
-
- 3
-
-
- granado
- bomb ketch
- (and 2 more)
-
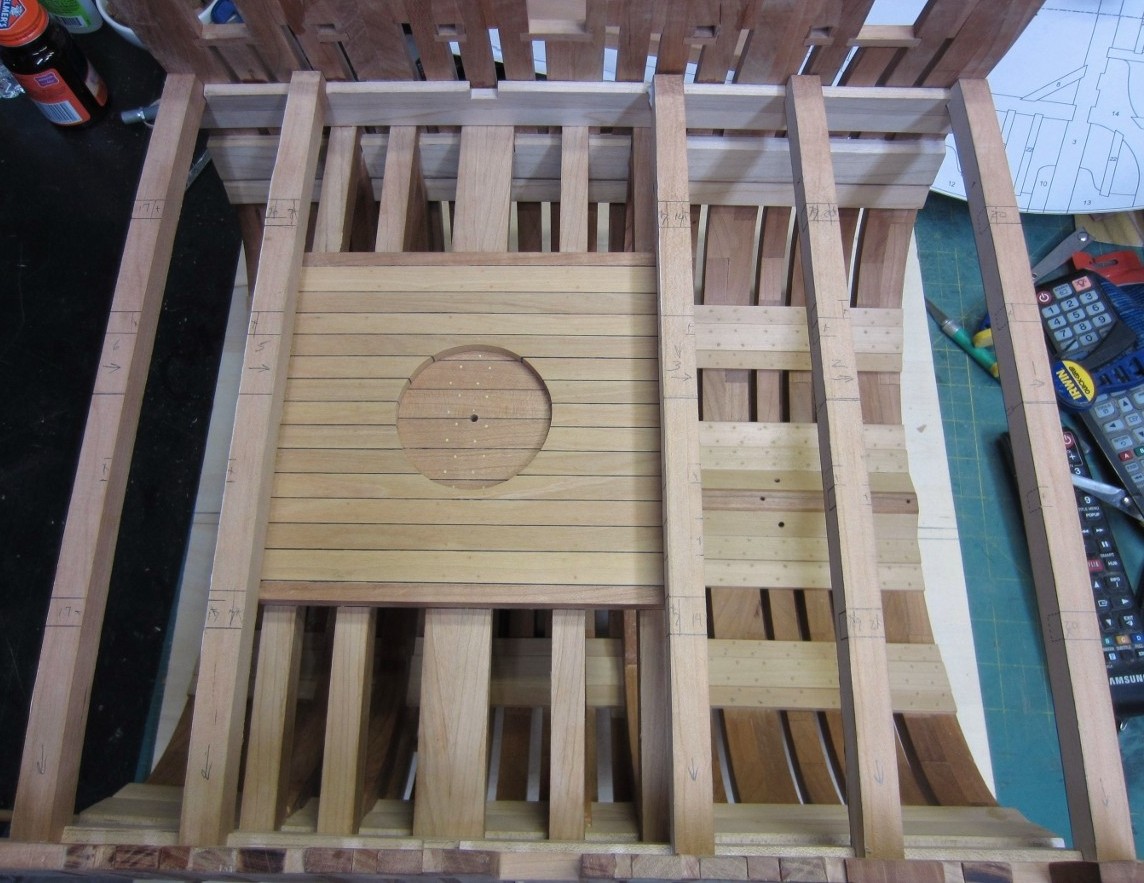
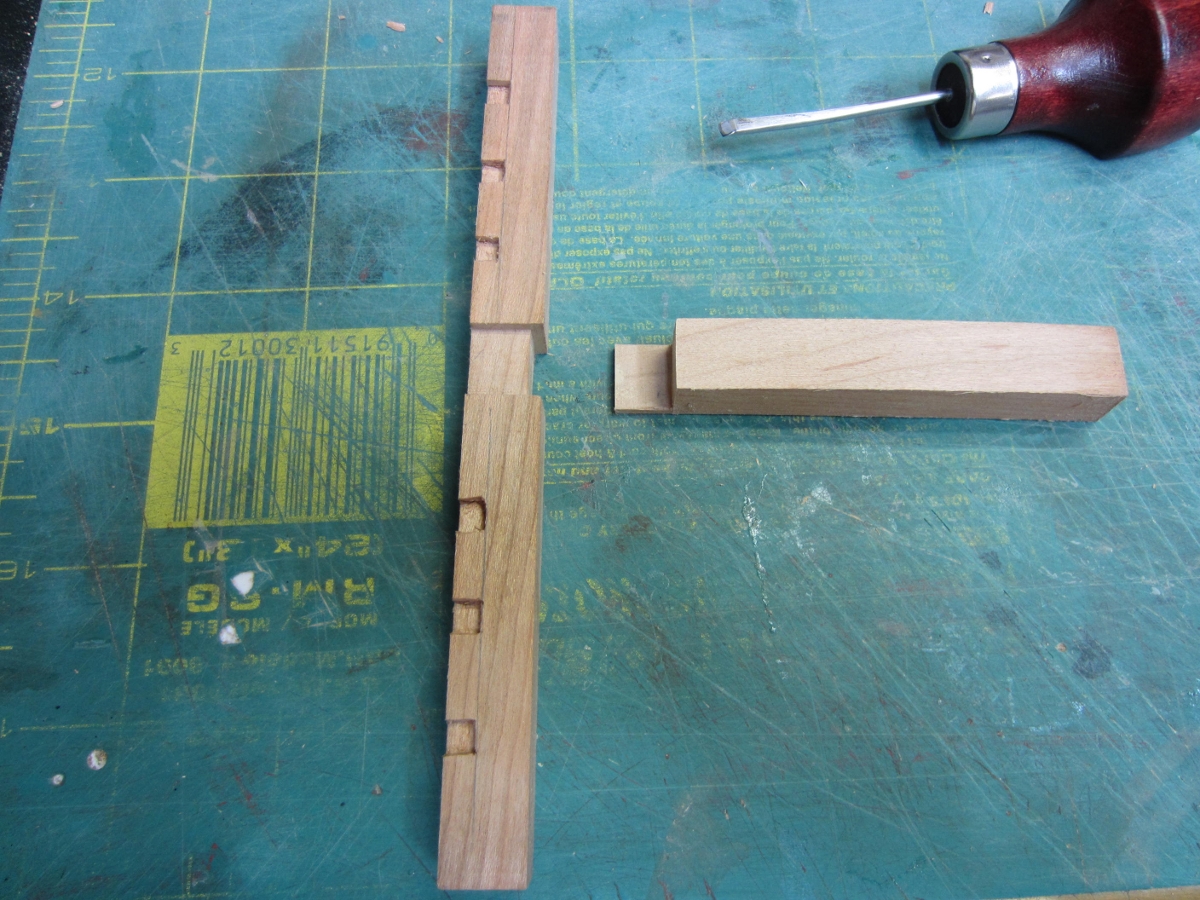
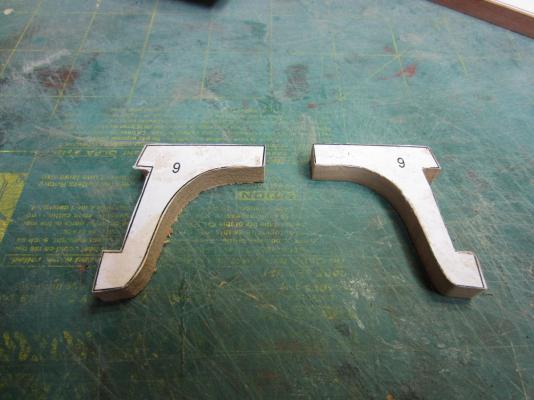
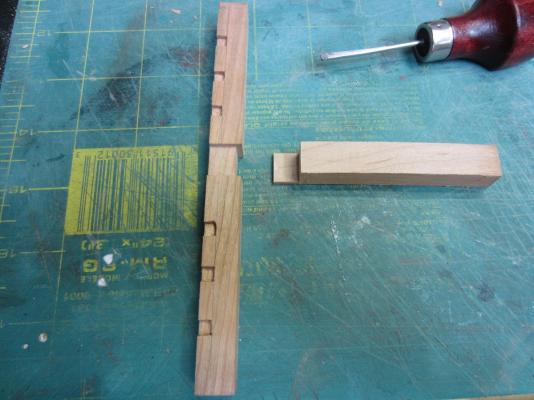
Thank you Antony. Your continued support is very appreciated. As I work my way around installing the ledges and carlings there are also assorted knees, hanging knees and double knees. All of the deck framing pieces are being cut from Cherry. Here you see one set of double knees rough cut out. Here is a hanging knee rough cut and then set in place to test the fit prior to the finish sanding. Everything seems to be going well, so far, now hopefully I just didn't jinx myself!

- 421 replies
-
- 17
-
-
- granado
- bomb ketch
- (and 2 more)
-
Hi Greg, Oh that is soooooo nice. I can appreciate your not wanting to cover those timbers. That is some fine workmanship.
-
Very nice Antony. I admire your abiltity to build the deck off the model. Great workmanship.
-
Thanks Ben but I can tell you cutting them into cherry is much easier than boxwood. I don't envy you all of the ones you're going to have to do. Hi Pete I wouldn't want to deprive you of all that fun. Thanks Grant.
- 421 replies
-
- 1
-
-
- granado
- bomb ketch
- (and 2 more)
-
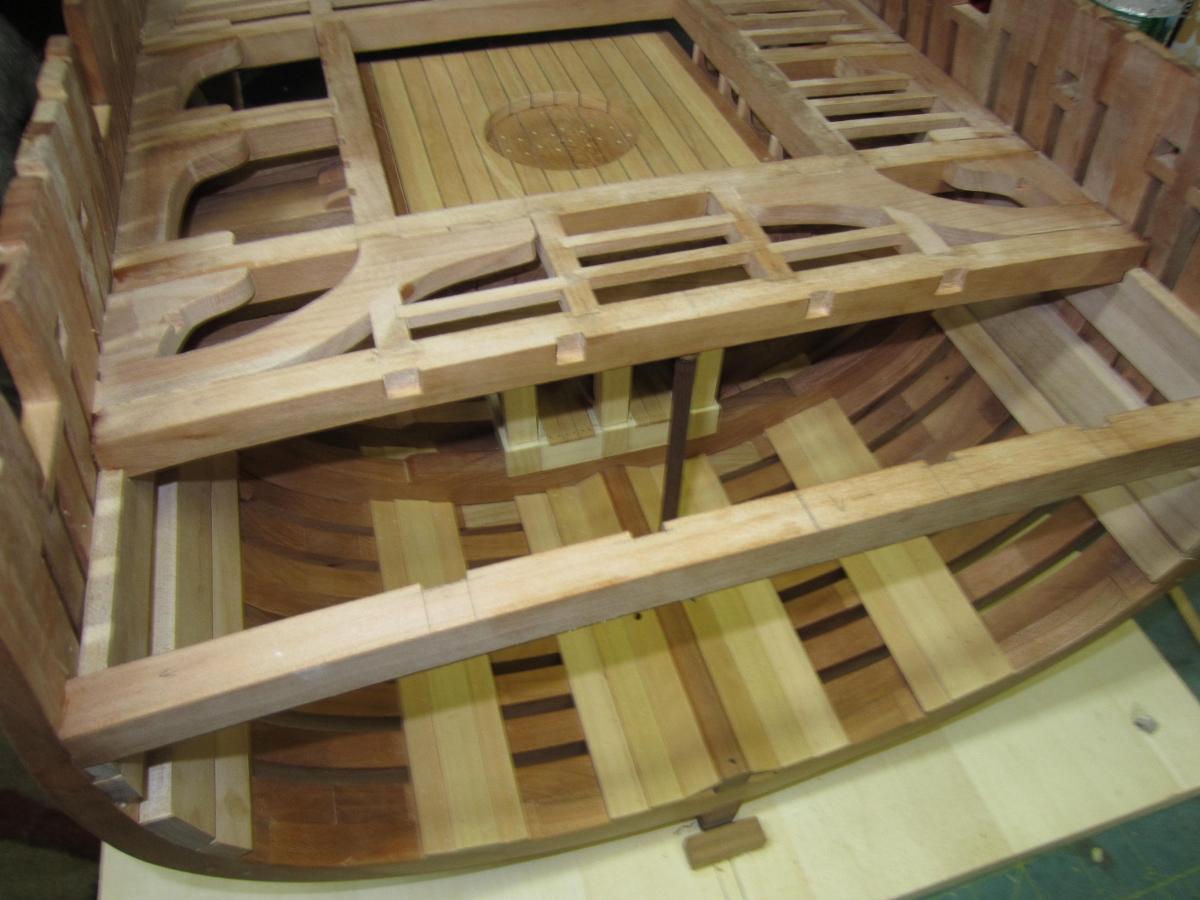
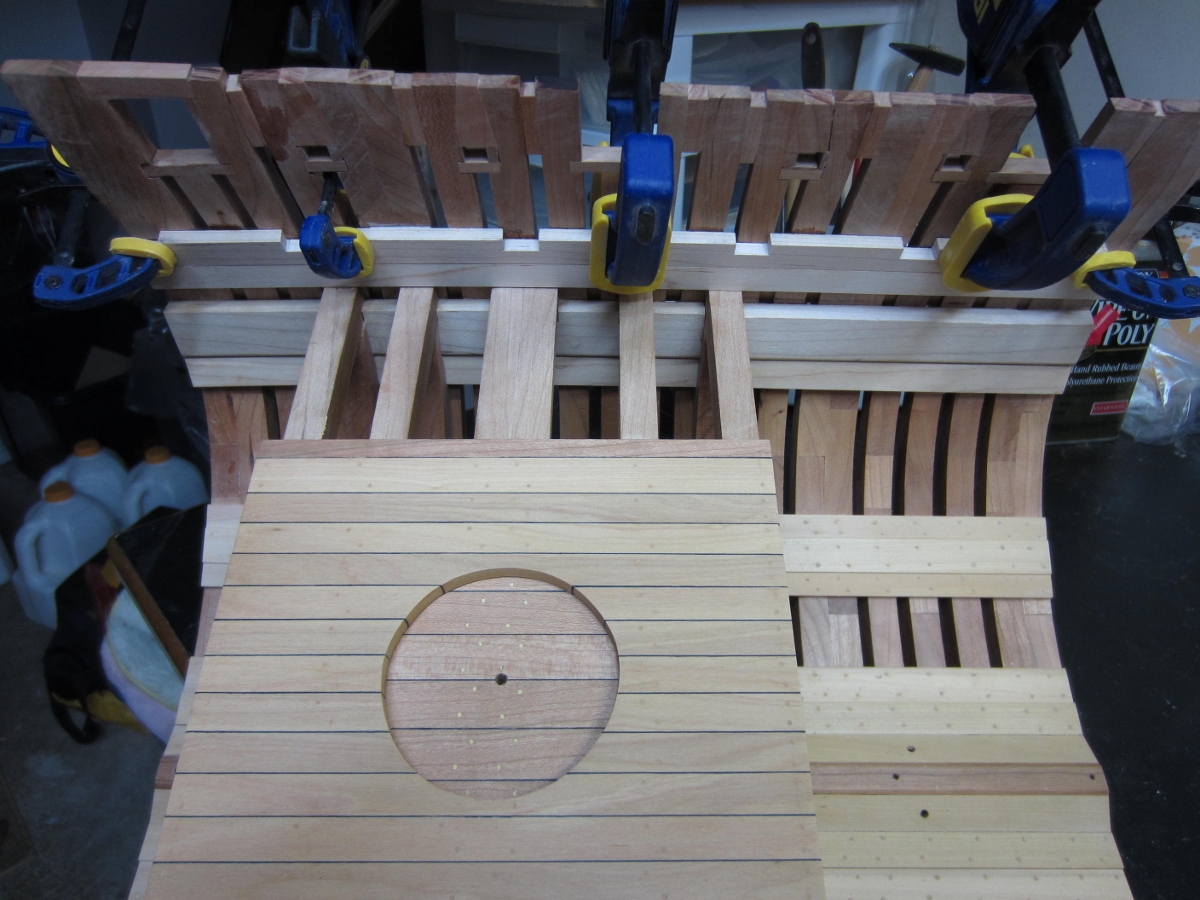
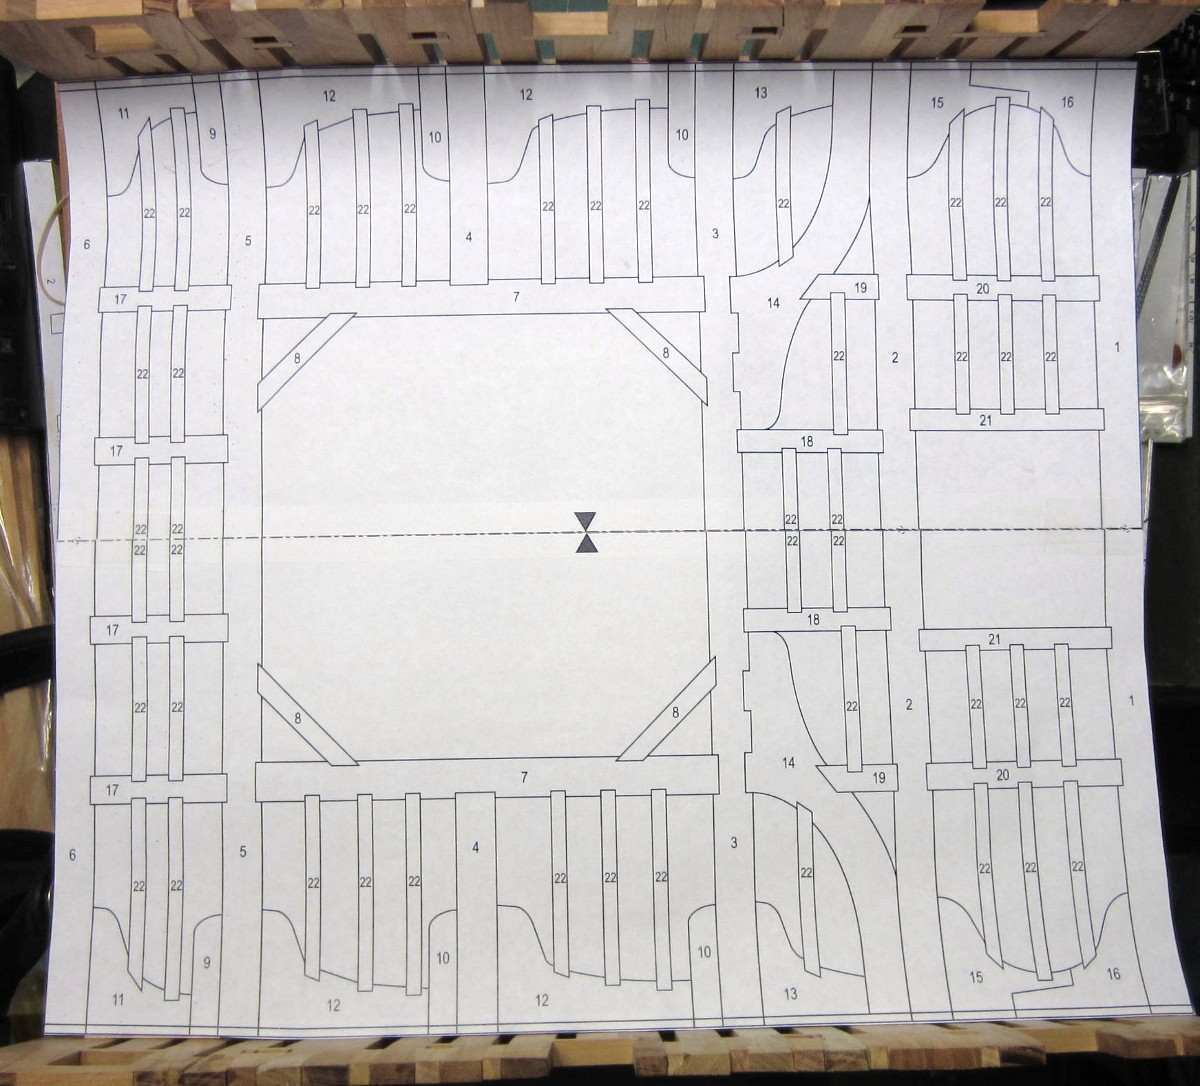
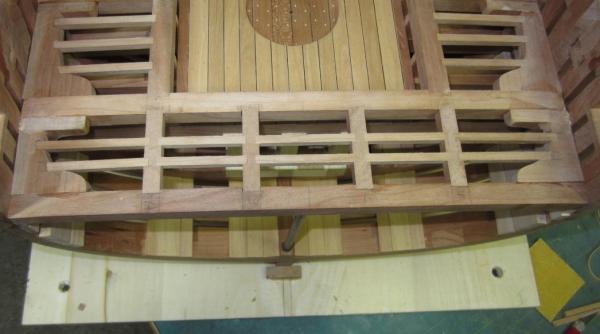
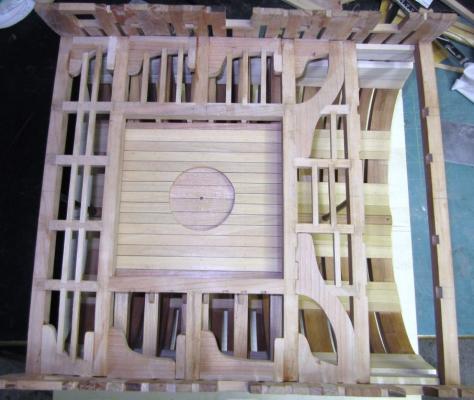
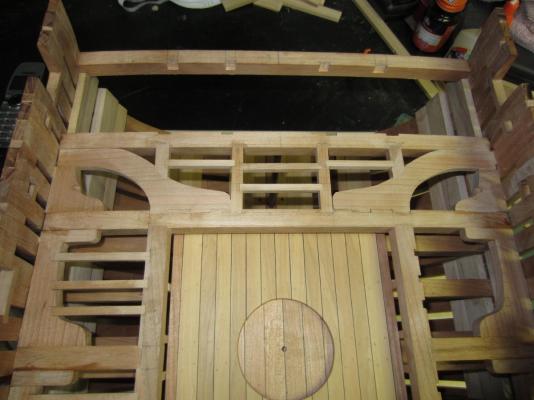
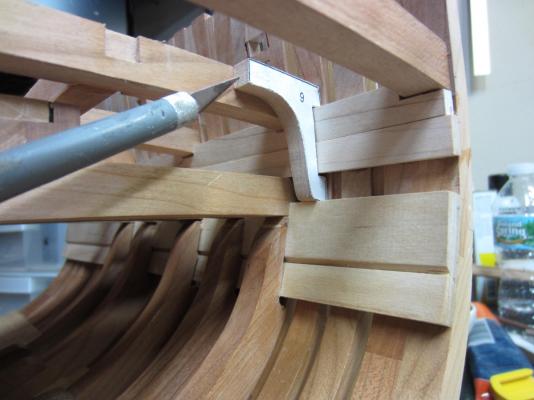
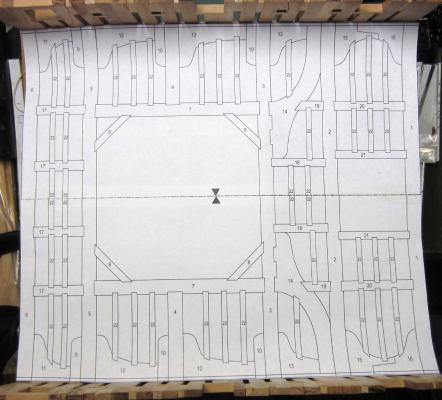
I’ve installed the gun deck clamps now and have started on the beams. Here you see the plans of what the gun deck will hopefully look like once completed. Here you see the beams set temporarily in place and marked out for the placement of various carlings, beams and half beams. Here is a beam the goes between two deck beam, # 3 & 5 as well as the half beam. And here it is set in place. I will just work my way from one end to the other filling in the carlings, ledges and knees as I go.


- 421 replies
-
- 14
-
-
- granado
- bomb ketch
- (and 2 more)
-
Stunning! Well done Remco.
-
Hi Glenn, Well done on the planking and painting. If you hadn't told me the paint scheme was different I wouldn't have known. Everything looks really nice and I enjoy your descriptions. Thanks.
- 101 replies
-
- 1
-
-
- victory models
- amati
- (and 2 more)
-
Hi Andy. That's a duh moment for me. I didn't give recoil a thought. Thanks.
- 421 replies
-
- 1
-
-
- granado
- bomb ketch
- (and 2 more)
-
Hi jzwei, Welcome to the Triton group and Happy Birthday too!