

Montaigne
-
Posts
139 -
Joined
-
Last visited
Content Type
Profiles
Forums
Gallery
Events
Everything posted by Montaigne
-
 Love this build. Such a beautiful and somewhat unique looking fishing vessel, and a very fine built model.
 -
Looking very fine indeed!
-
I just discovered and read through this entire build, and never before have I used the wow-emoji as many times and been so impressed with a build. Wow. Just wow all over. Beautiful. Gorgeous. Simply amazing and very inspiring. Thanks for sharing it all, Matiz, there’s so much for me to study and learn just by looking at the pictures in this build.
-
Looking very nice indeed, well done. Beautiful lines also on that ship.
- 50 replies
-
- 2
-

-
- Perry
- BlueJacket Shipcrafters
- (and 1 more)
-
I hadn’t realized how tiny this build actually is, only yesterday reading about the Mini Mamoli series for the first time. Very impressive work indeed, hats off!
-
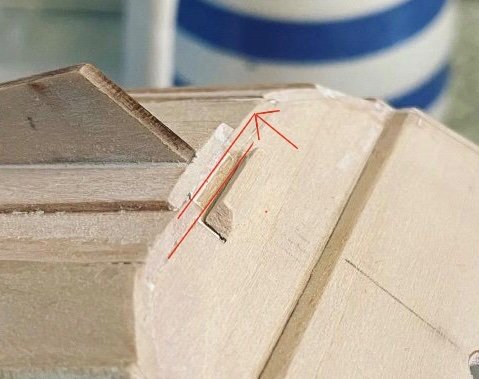
It looks to me like it should go up a notch, aligned with the the lower edge of the top plank. Now it’s aligned with the lower edges of the second pair of planks.

-
No one will ever know but you. And of course MSW’s 43,000 members, but they are all sworn to secrecy punishable by up to five rounds of keelhauling, so no worries.
-
It’s indeed delicious. I didn’t know it was torched. Learn something new every day.
-
I’d challenge anyone to say that ten times in a row without slipping lol Progress looking good!
- 105 replies
-
- 2
-

-
- Frigate
- Confederacy
- (and 1 more)
-
Books to learn Fusion 360
Montaigne replied to allanyed's topic in CAD and 3D Modelling/Drafting Plans with Software
I second video tutorials. While it doesn’t have to be one or the other; both books and videos can be used and complement each other, there is in this case a significant advantage to watching something being done while it’s explained, compared to having it described and explained in text. 3D software techniques quickly becomes convoluted and many methods may seem arbitrary, making understanding by reading a bit more challenging than understanding by watching. The complex logic of 3D software methods often end up as later aha-moments, making it benefit from approaches such as: “just do it, you will understand why later”. With video tutorials, preferably covering tutorial projects, you can watch them without practicing the methods described, then as a second step watch them again while using the software, applying the methods. This is a pedagogical and relaxed way of learning. You will partially remember what you learned from the first watch and have an easier time applying it. The main downside with video tutorials is that they’re harder to search through for certain bits of information, compared to books. Then there are big differences in tutorial quality, especially when browsing for them on Youtube. I don’t have any recommendations for Fusion 360 as it’s not one of the 3D softwares that I’ve used, but the recommendations above sounds like good suggestions. -
3D Printing Cannons in Resin
Montaigne replied to thibaultron's topic in 3D-Printing and Laser-Cutting.
Excellent tutorials, a very commendable effort. I have a background in CNC milling, back when these technologies were nowhere near affordable for home use. The advances in later years with 3D printing are quite fascinating. -
Sorry to hear you've been through rough times, Tim. Hope you'll be able to find some comfort in new build projects. I agree with your thoughts about attention to historical accuracy; I got a bit discouraged myself planning my upcoming build of the Bounty launch, as there are so many details about it that can be questioned and endlessly researched. But I don't work as a model builder at a maritime museum, I just want to build well made boats and ships that somewhat resemble their historical counterparts.
-
A second one going already! Wishing you fair seas on the Norwegian one, all the way from Scandinavia. Previous build logs are indeed a goldmine; I have spent countless hours studying logs.
-
What a fine build this turned out to be, cushions and all; very fitting to the inspiration. The seat with the ornate curved arms would perhaps have been a bit out of character with the rest of the spartan design of the boat, but the cushions are a match. Well done!
- 39 replies
-
- 4
-
-
- Lowell Grand Banks Dory
- Model Shipways
- (and 1 more)
-
Dust masks and respirators.
Montaigne replied to Bill Hudson's topic in Modeling tools and Workshop Equipment
Always. FFP2 mask when sanding and spraying acrylics, and respirator mask when doing anything that involves chemicals. After a couple of hours of sanding the mask is completely covered in dust that didn’t fill my lungs, so it’s a no-brainer. -
A sea chest sounds like a good idea. A friend of mine always hides notes inside his model ships with info about the ship and him and some funny stuff, and I’ve decided I must do so too. Models like these can last for hundreds of years, and then one day someone accidentally drops it, it breaks apart and a note falls out. It has to be included!
-
That’s my middle name. I know, it’s kind of long, but I’ve earned it. Impressive little build, that binnacle. Too bad about the scroll with name and build date. Hopefully you can find another solution for that, since it’s a fun idea!
-
Ahoy, looking forward to following your build. Gjøa is one of my favorite ships, and I have one that my father built; the small Model Shipways version with a solid hull.
-
It’s really coming to life now with all the details. Fascinating too that the figurehead shares likeness and symbolism with Vasa.
-
Plastic or Wood models? Your Favorite?
Montaigne replied to Bill97's topic in Modeling tools and Workshop Equipment
I’d like to add that you’re going to need stronger clamps than one normal use with plastic models, and lots of them in various sizes. In short you don’t need a large amount of tools besides the ones mentioned by previous posters to get started. It’s a good idea to start small in the tool department, as you will discover along the way what tools would be of use and then add then, rather than buying lots of tools that you might end up never using. These are most of my tools used for modeling in wood, if it gets you an idea. As you see there’s not a lot, and there are many similar tools of which I mostly just use one or two. Adding to this I also have a small flexible vice, some small chisels and a lot more clamps. Obsviously glues and paints too, and finally a cutting mat. Oh, and I almost forgot another commonly used tool: a piercing saw. In the picture only its blades are visible.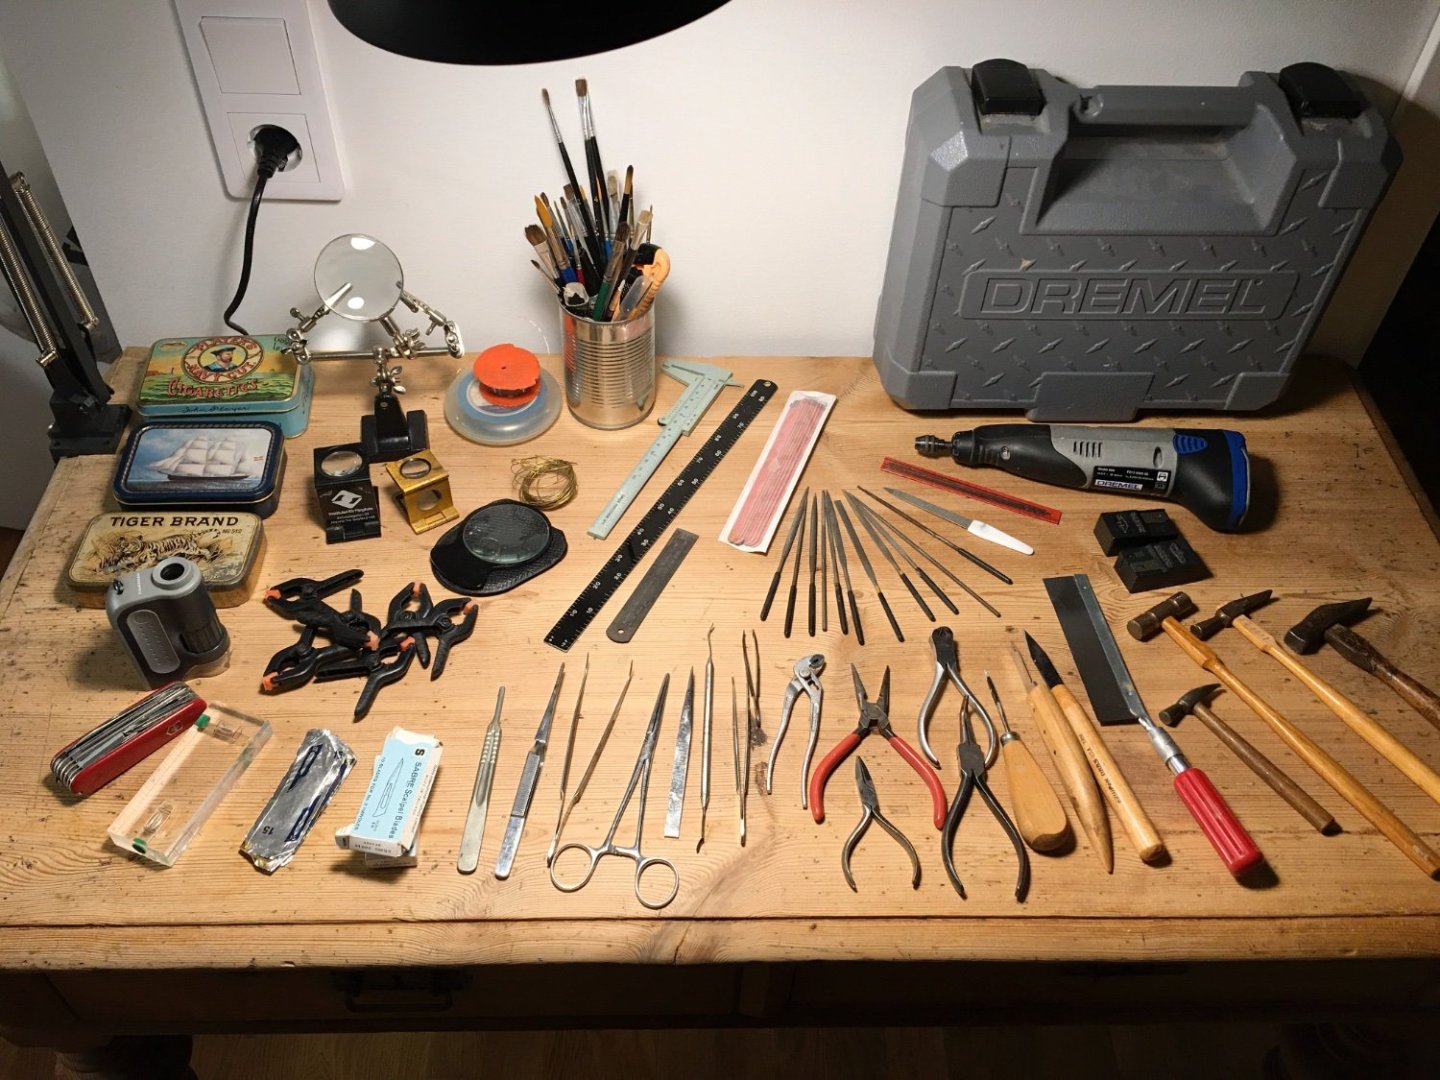
-
I can jump in on that. There are essentially four approaches to creating detailed decorations and ornaments in 3D/CAD software: One being regular polygon modeling, where you start with simple shapes, add and extrude edges and faces and move vertices around until you have accomplished the shapes, all of it done using a background image sketch or photo for tracing and reference. This method is classic polygon modeling. Its advantages are that you can easily create just about anything, and doing so is easy to learn. The disadvantages are that it can be very time consuming, and relies on later being modified with high resolution meshes for smoothing all the otherwise jagged corners and edges. These in turn have the disadvantage that precise measurements can be difficult to obtain. A variation of this kind of modeling in some CAD programs is called SubD modeling, which is very easy to work with (and in these cases can be converted to NURBS surfaces, however with similar problems regarding precise measurements). Another method is to create ornaments with NURBS surface modeling, where you create surfaces by precisely drawing their basic outlines and shapes, and/or combining basic shapes such as squares, spheres etc with these. Among its many advantages are a very lightweight geometry that is extremely precise “as is”. It’s highly suitable for 3D printing and industrial design where the demands for tolerances are the highest. The downside with using NURBS surface modeling for creating detailed ornaments is that you will often end up scratching your head regarding how to create and combine certain complex shapes. While creating certain surfaces can be a breeze - many that would take a very long time with conventional polygonal modeling - other surfaces may take a long time to figure out how to achieve. Waldemar’s Sankt Georg model in this topic is a NURBS surface model (although I don’t know if there are some minor polygonal details added), and is such nothing short of a masterpiece in NURBS surface modeling, especially considering certain challenging geometry. Another method is 3D sculpting. With this approach you start out with a high resolution simple mesh that you sculpt with a digital pen tablet as if you were working with virtual clay. This is a very hands on organic approach, that can produce amazingly intricate detail. It’s downside when it comes to ornaments is that it can be a challenge to create shapes that are perfectly streamlined, and also: precise measurements can be a challenge to achieve. A fourth approach is to draw patterns in 2D in software like Photoshop with height and depth indicated by light and dark areas, which you then in 3D software overlay with a high resolution mesh, essentially draping it to create a mesh with ornaments. It then interprets the dark/light areas as 3D shapes. This method is useful for certain shapes that are clearly defined and don’t have cavities underneath shapes, since it will literally be draped as with a table cloth. It’s limited in many ways, but can be useful for creating shapes and ornaments with less height variation and for the method suitable geometry. It’s also often used as a stamp, where you can easily imprint ornaments, complex geometry and patterns on surfaces. If for example I wanted to imprint an ornated text or insignia on a surface, I might choose this method rather than modeling all the shapes to create the stamp. One advantage with this method is also that it captures the dirt and grit of an image, so it’s useful for capturing worn and weathed effects. All of these methods can also be combined in most 3D/CAD software, so one is not limited to one or the other; in fact 3D design is often a matter of initially finding the right tool for the job at hand, rather than trying to build everything with just a hammer.
-
Good observation, wefalck, thanks. I was wondering about the same when I was reading up on Crown glass the other day, after seeing lots of windows like the one above in the series The Borgias.
-
Ahoy, welcome and greetings from a fellow Titanic obsessed!

