HOLIDAY DONATION DRIVE - SUPPORT MSW - DO YOUR PART TO KEEP THIS GREAT FORUM GOING!
×


turangi
-
Posts
276 -
Joined
-
Last visited
Content Type
Profiles
Forums
Gallery
Events
Everything posted by turangi
-

Posting Problems
turangi replied to turangi's topic in Using the MSW forum - **NO MODELING CONTENT IN THIS SUB-FORUM**
Thanks! An update: I posted the text and photos in separate posts and it worked. -
Pictures, for some reason they wouldn't load into the previous post.


-
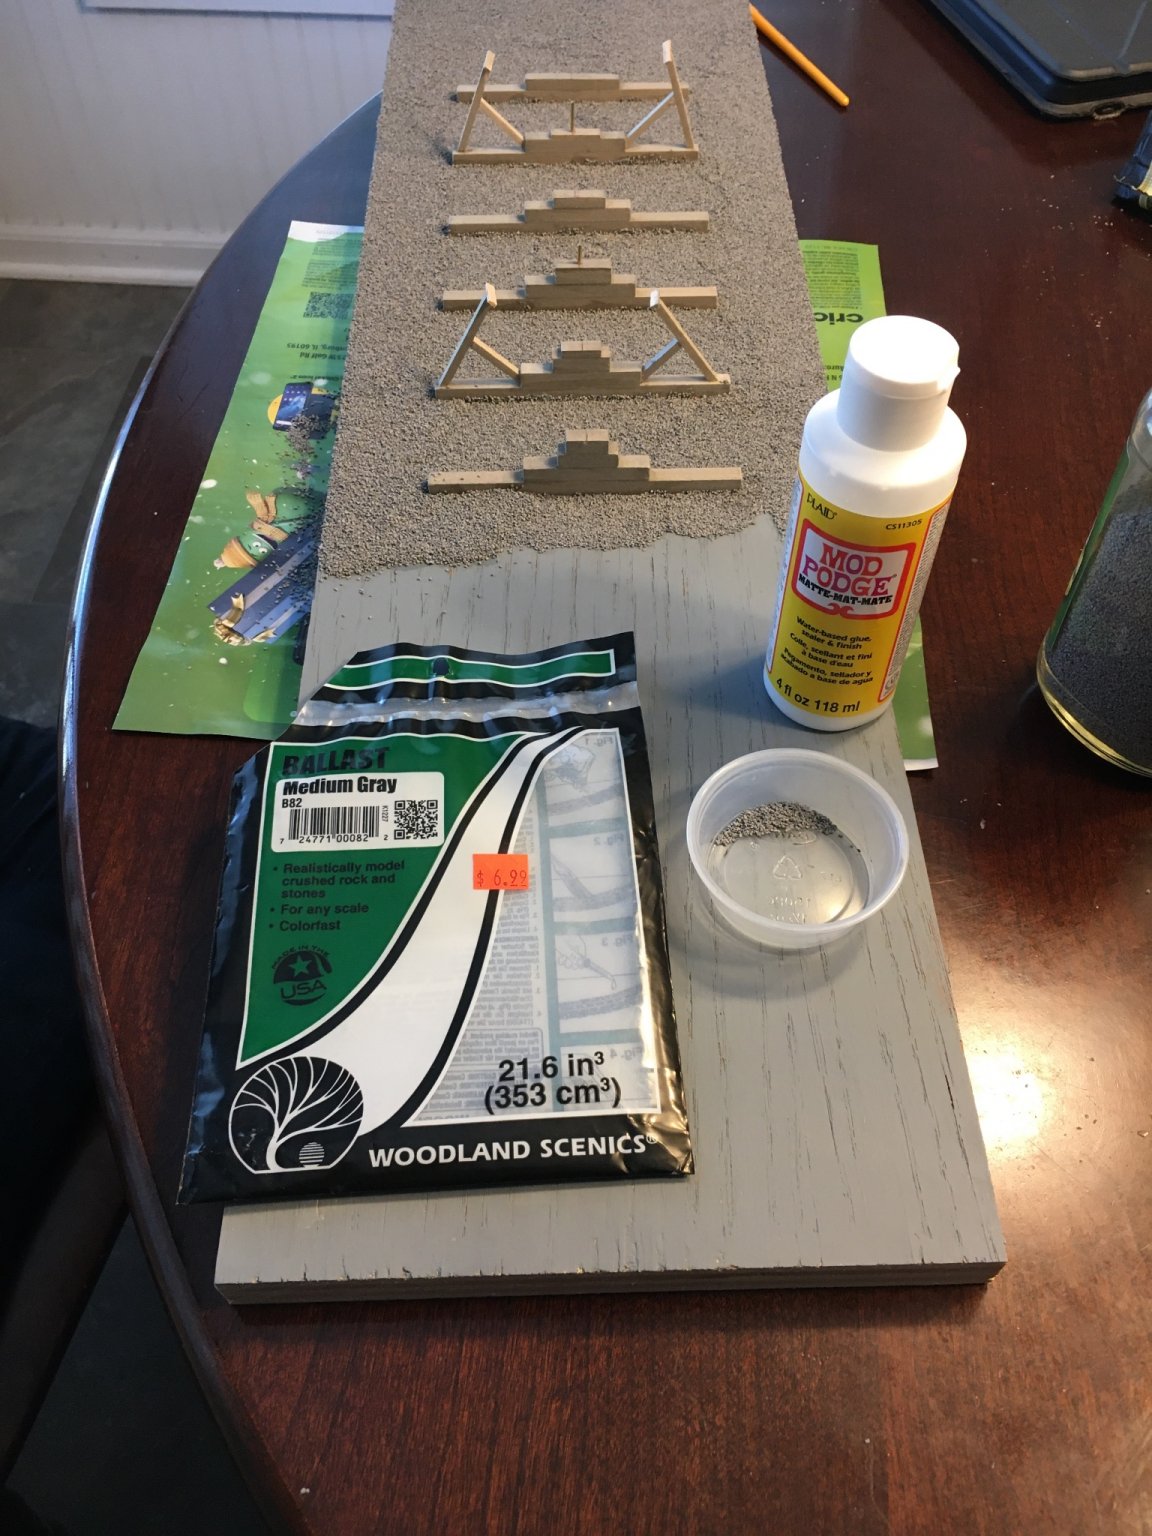
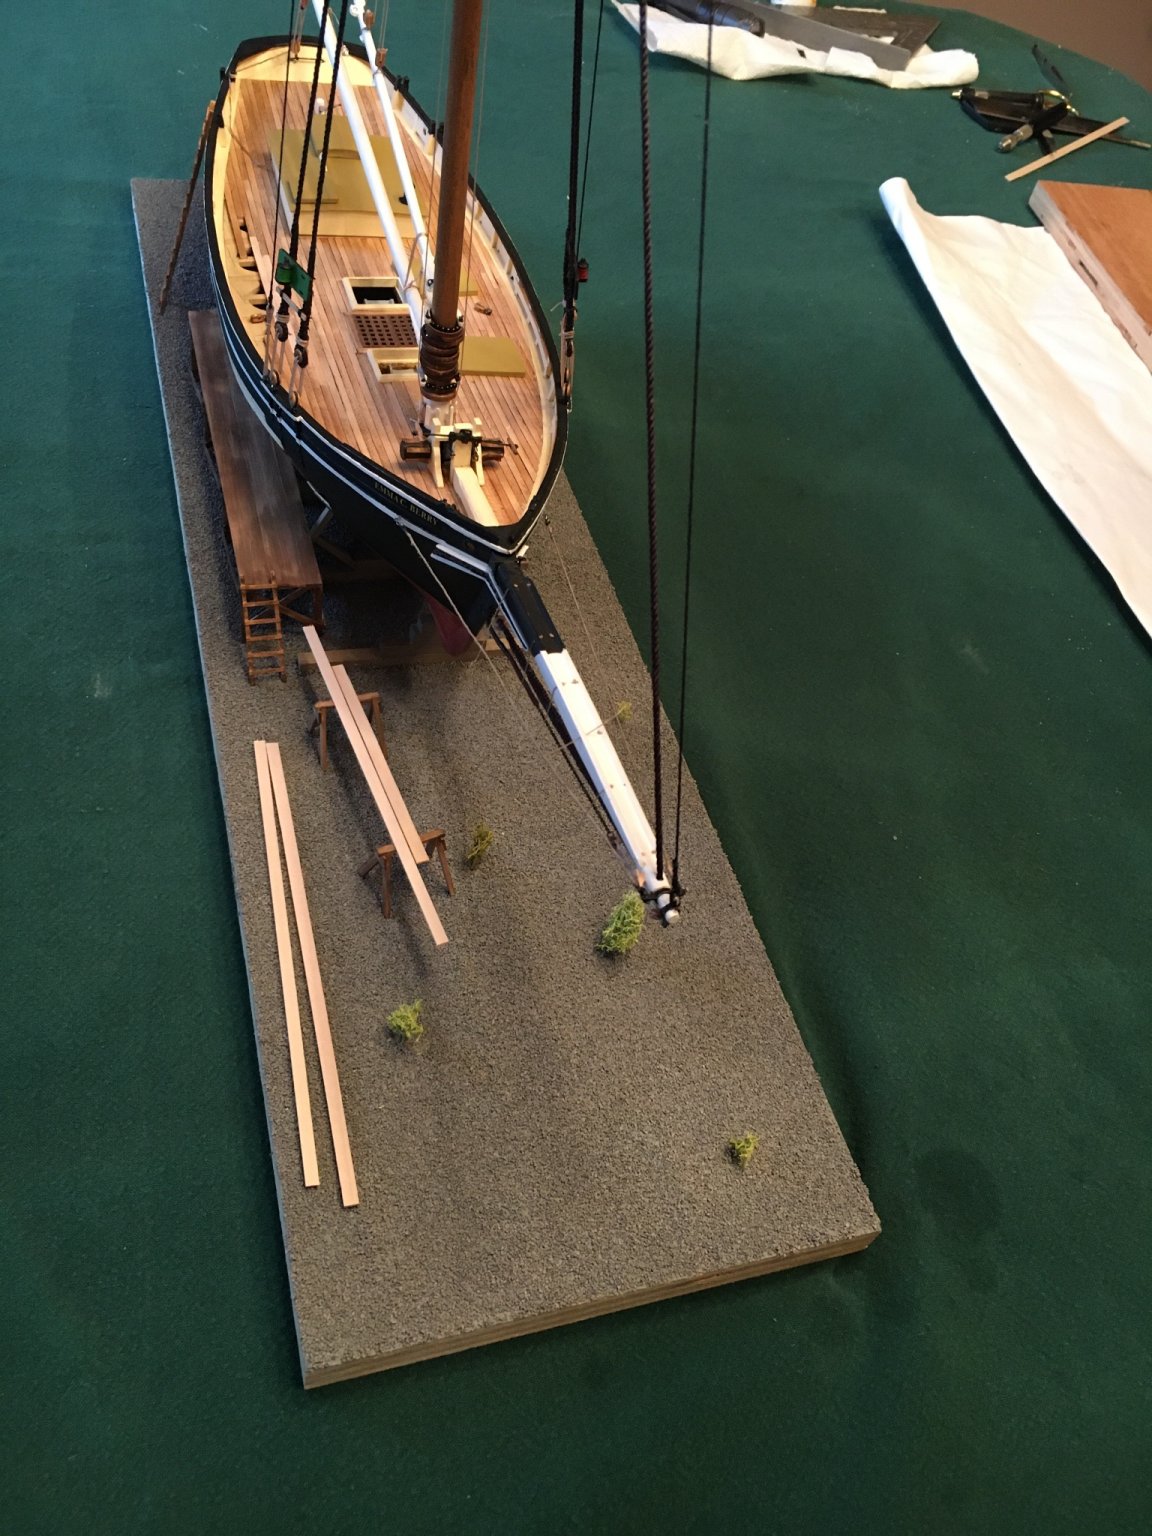
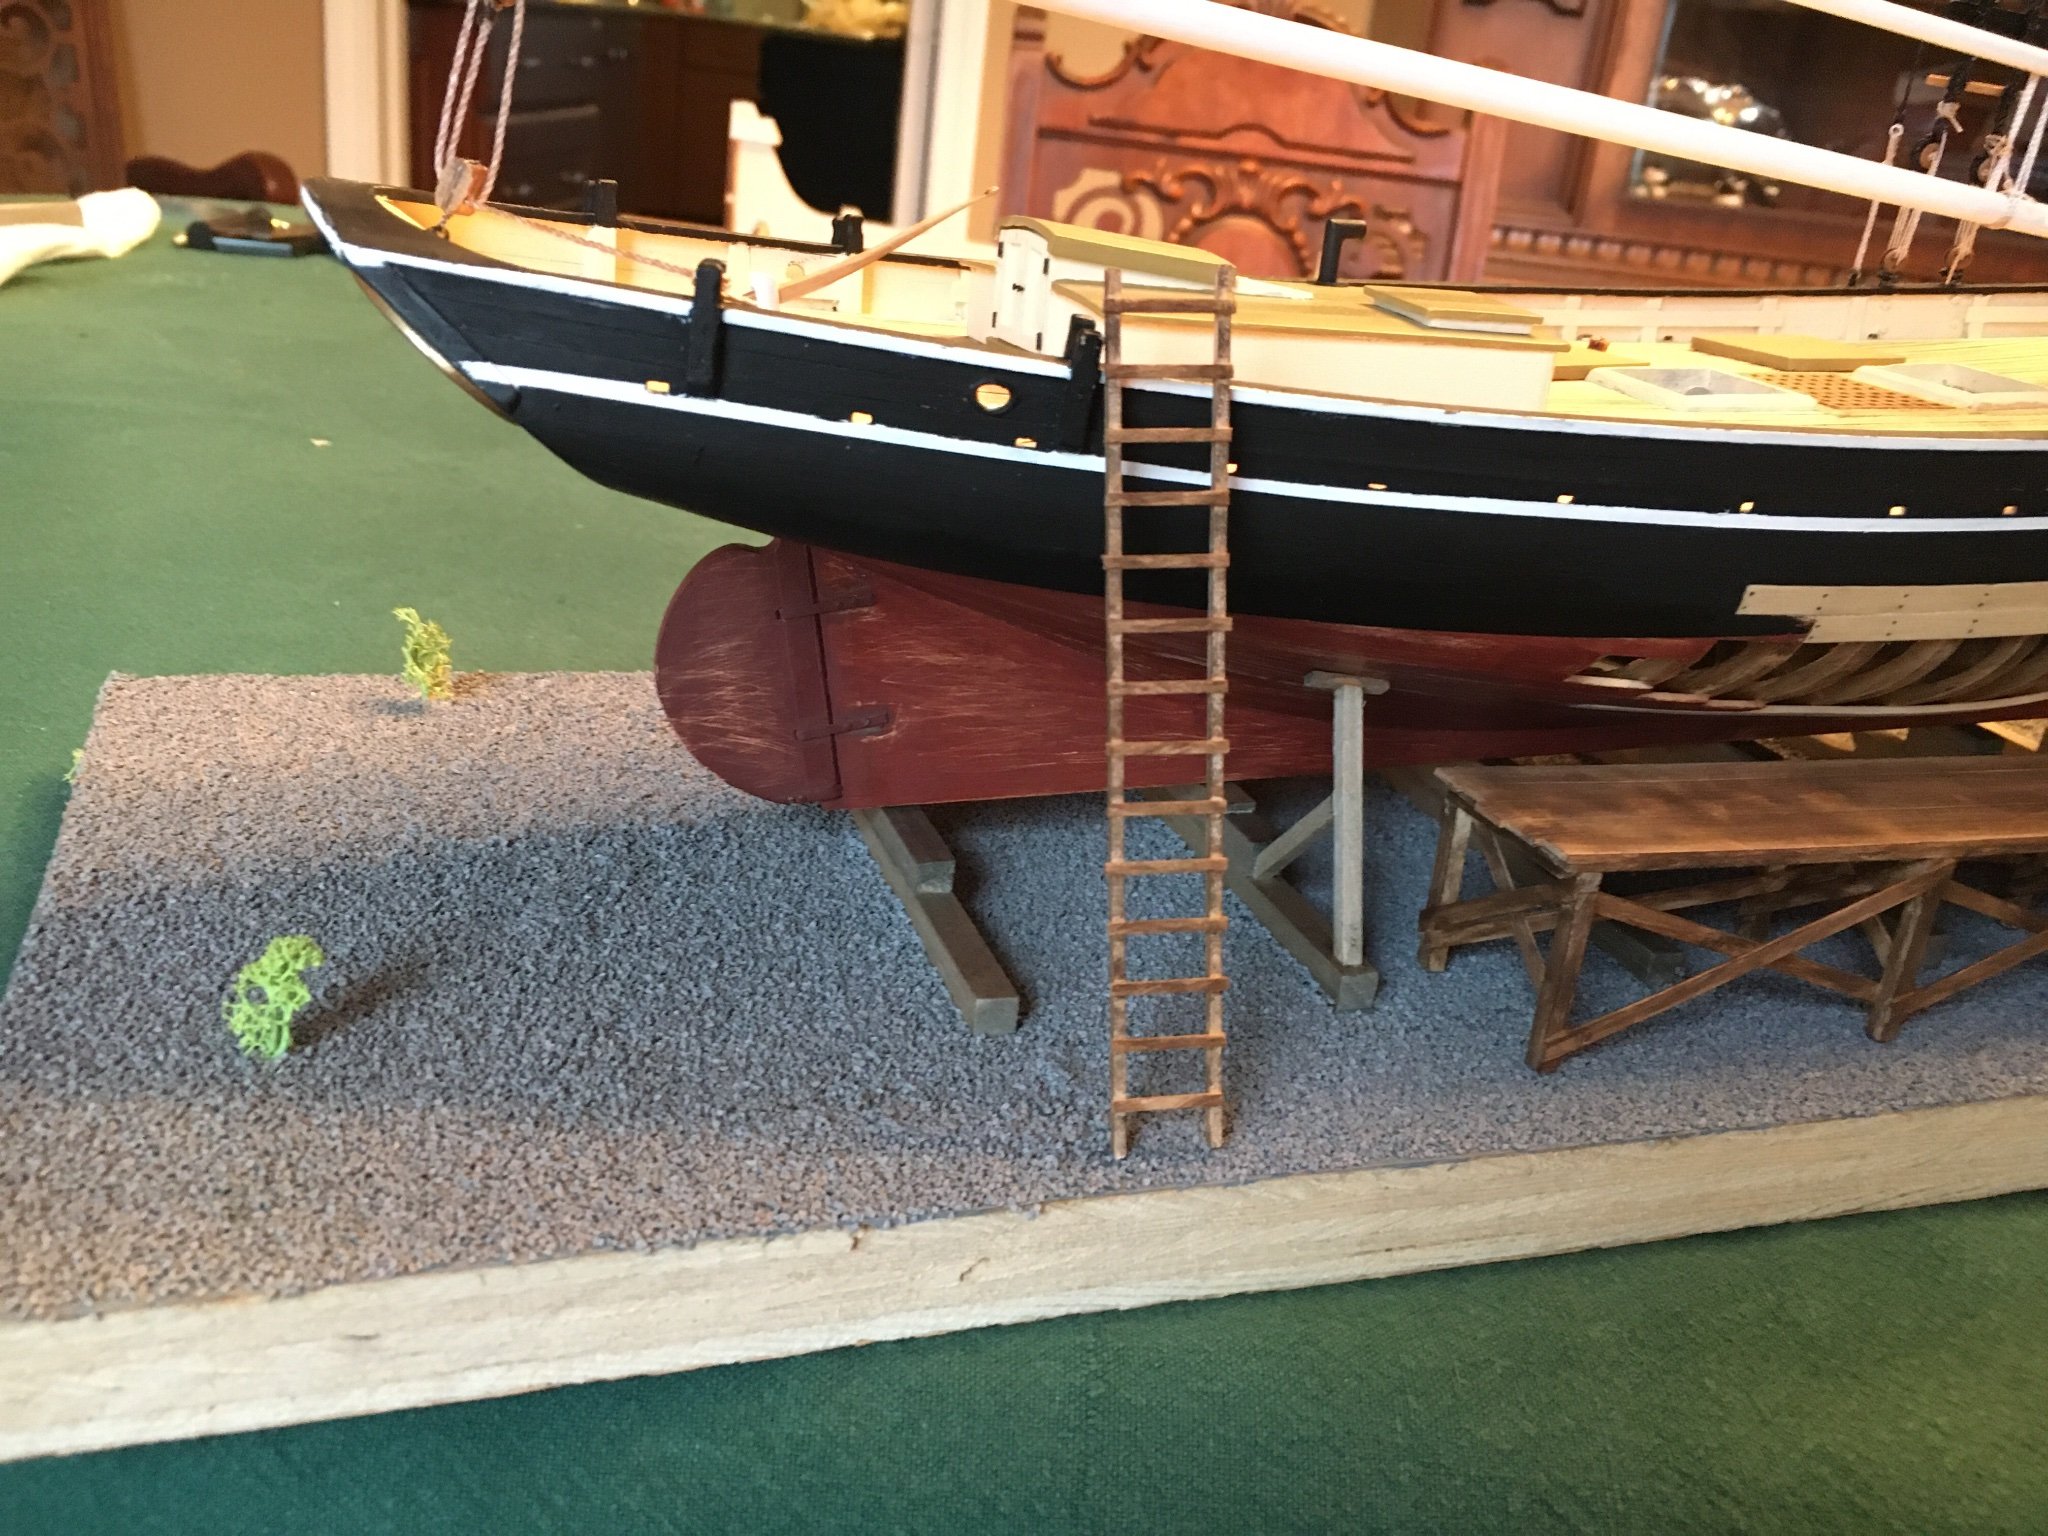
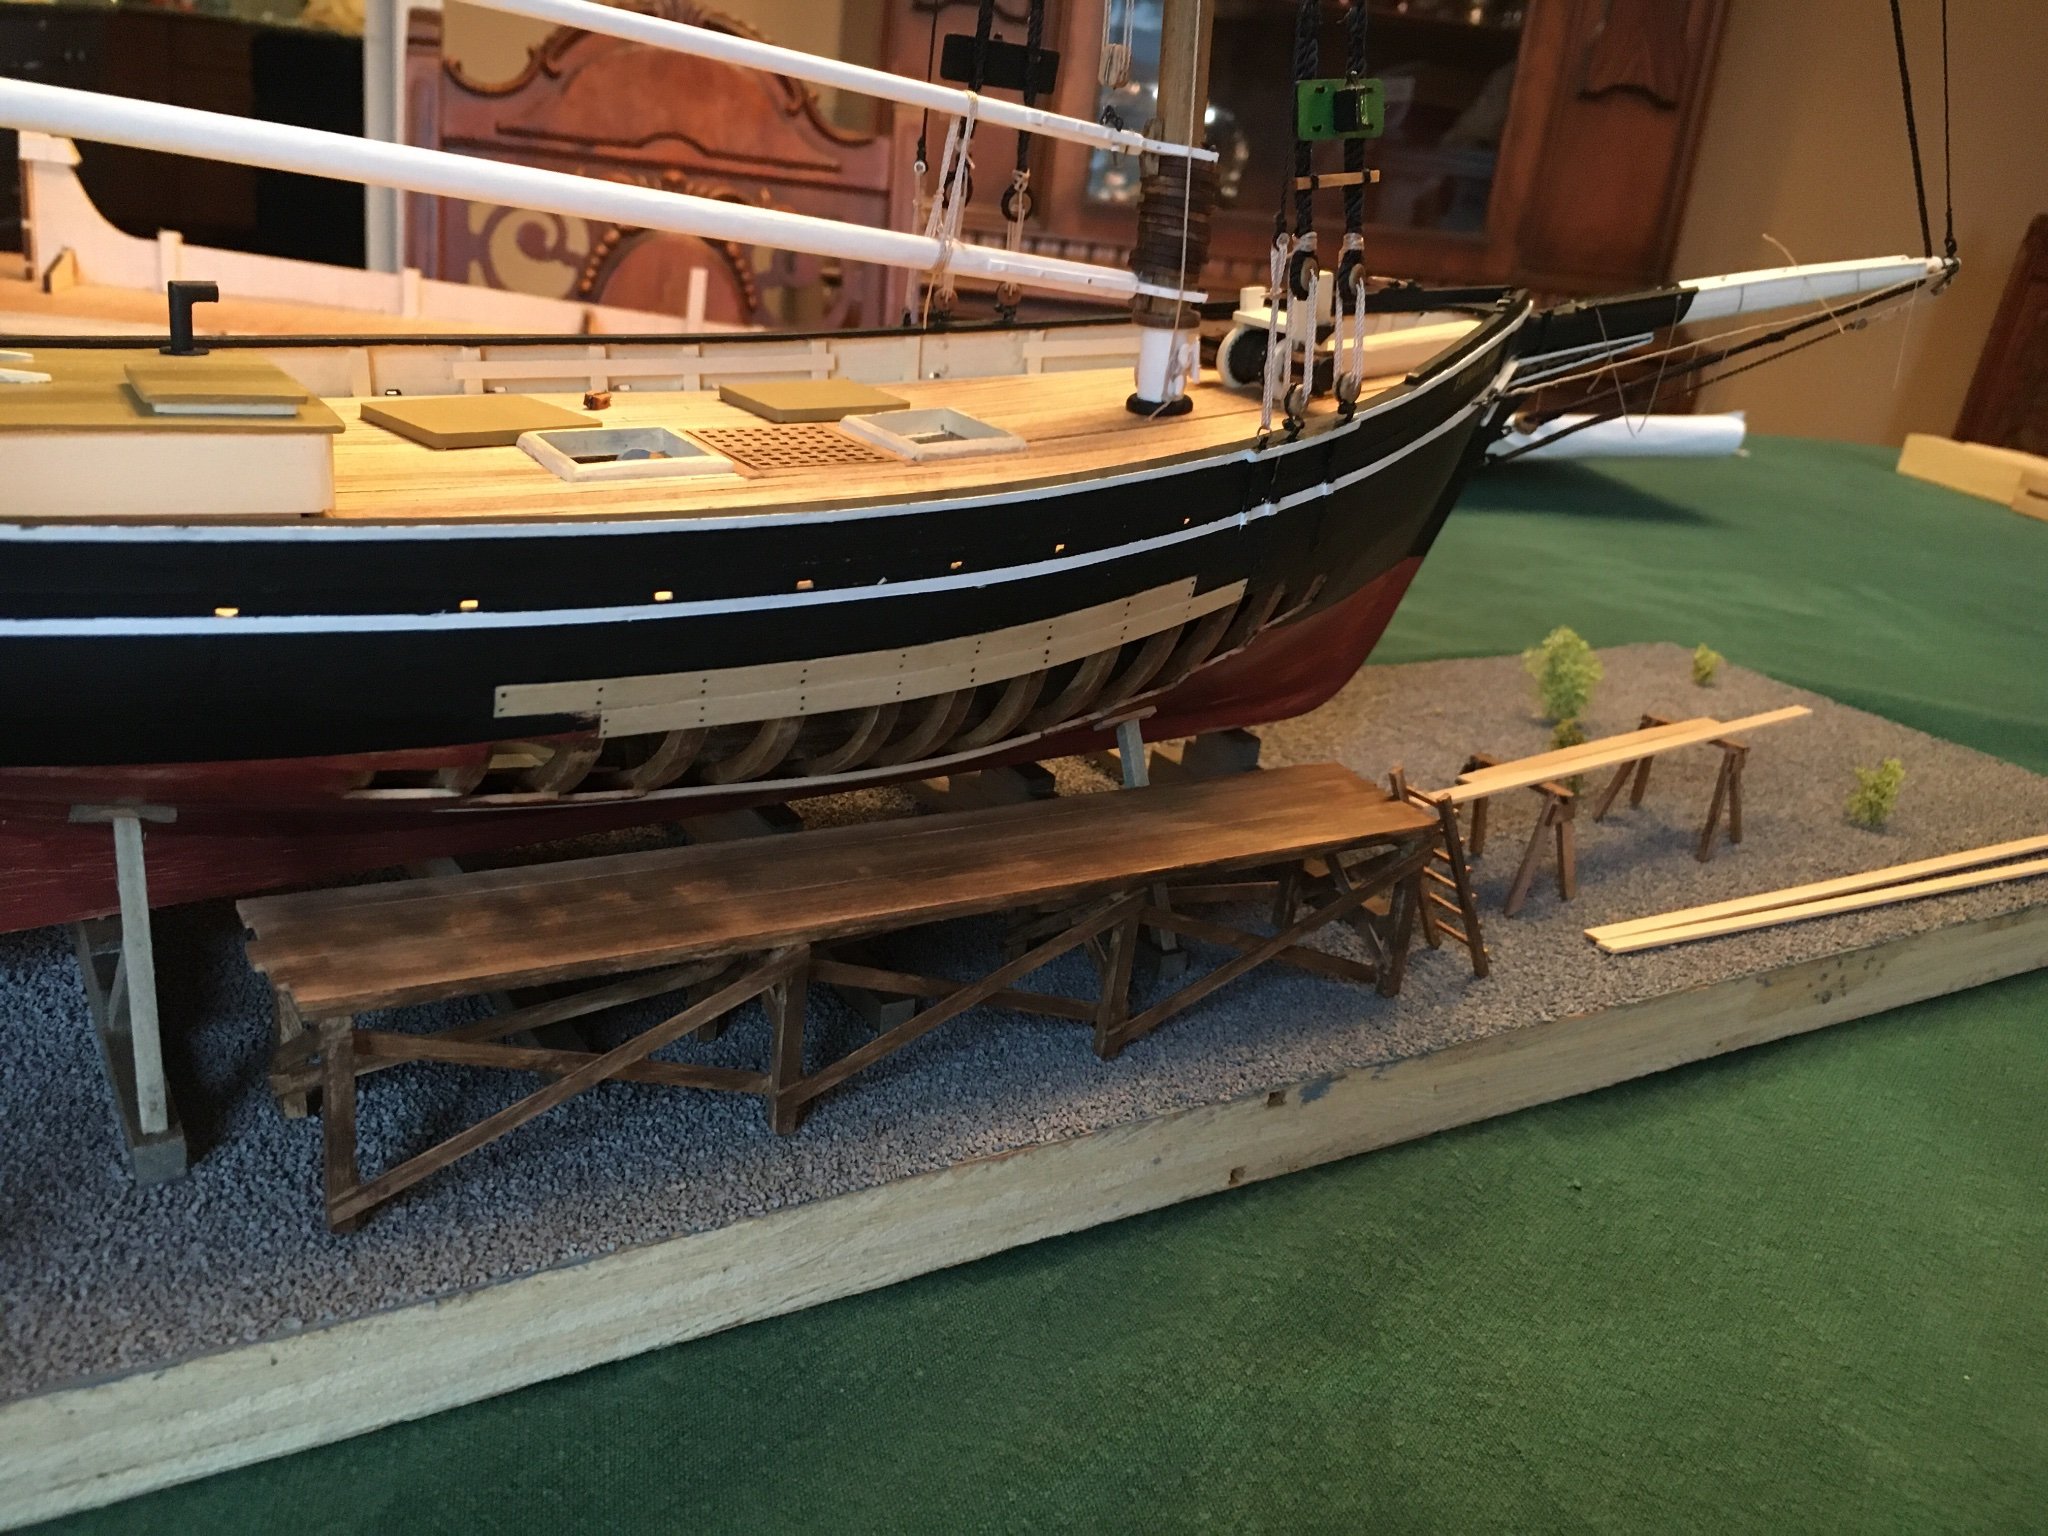
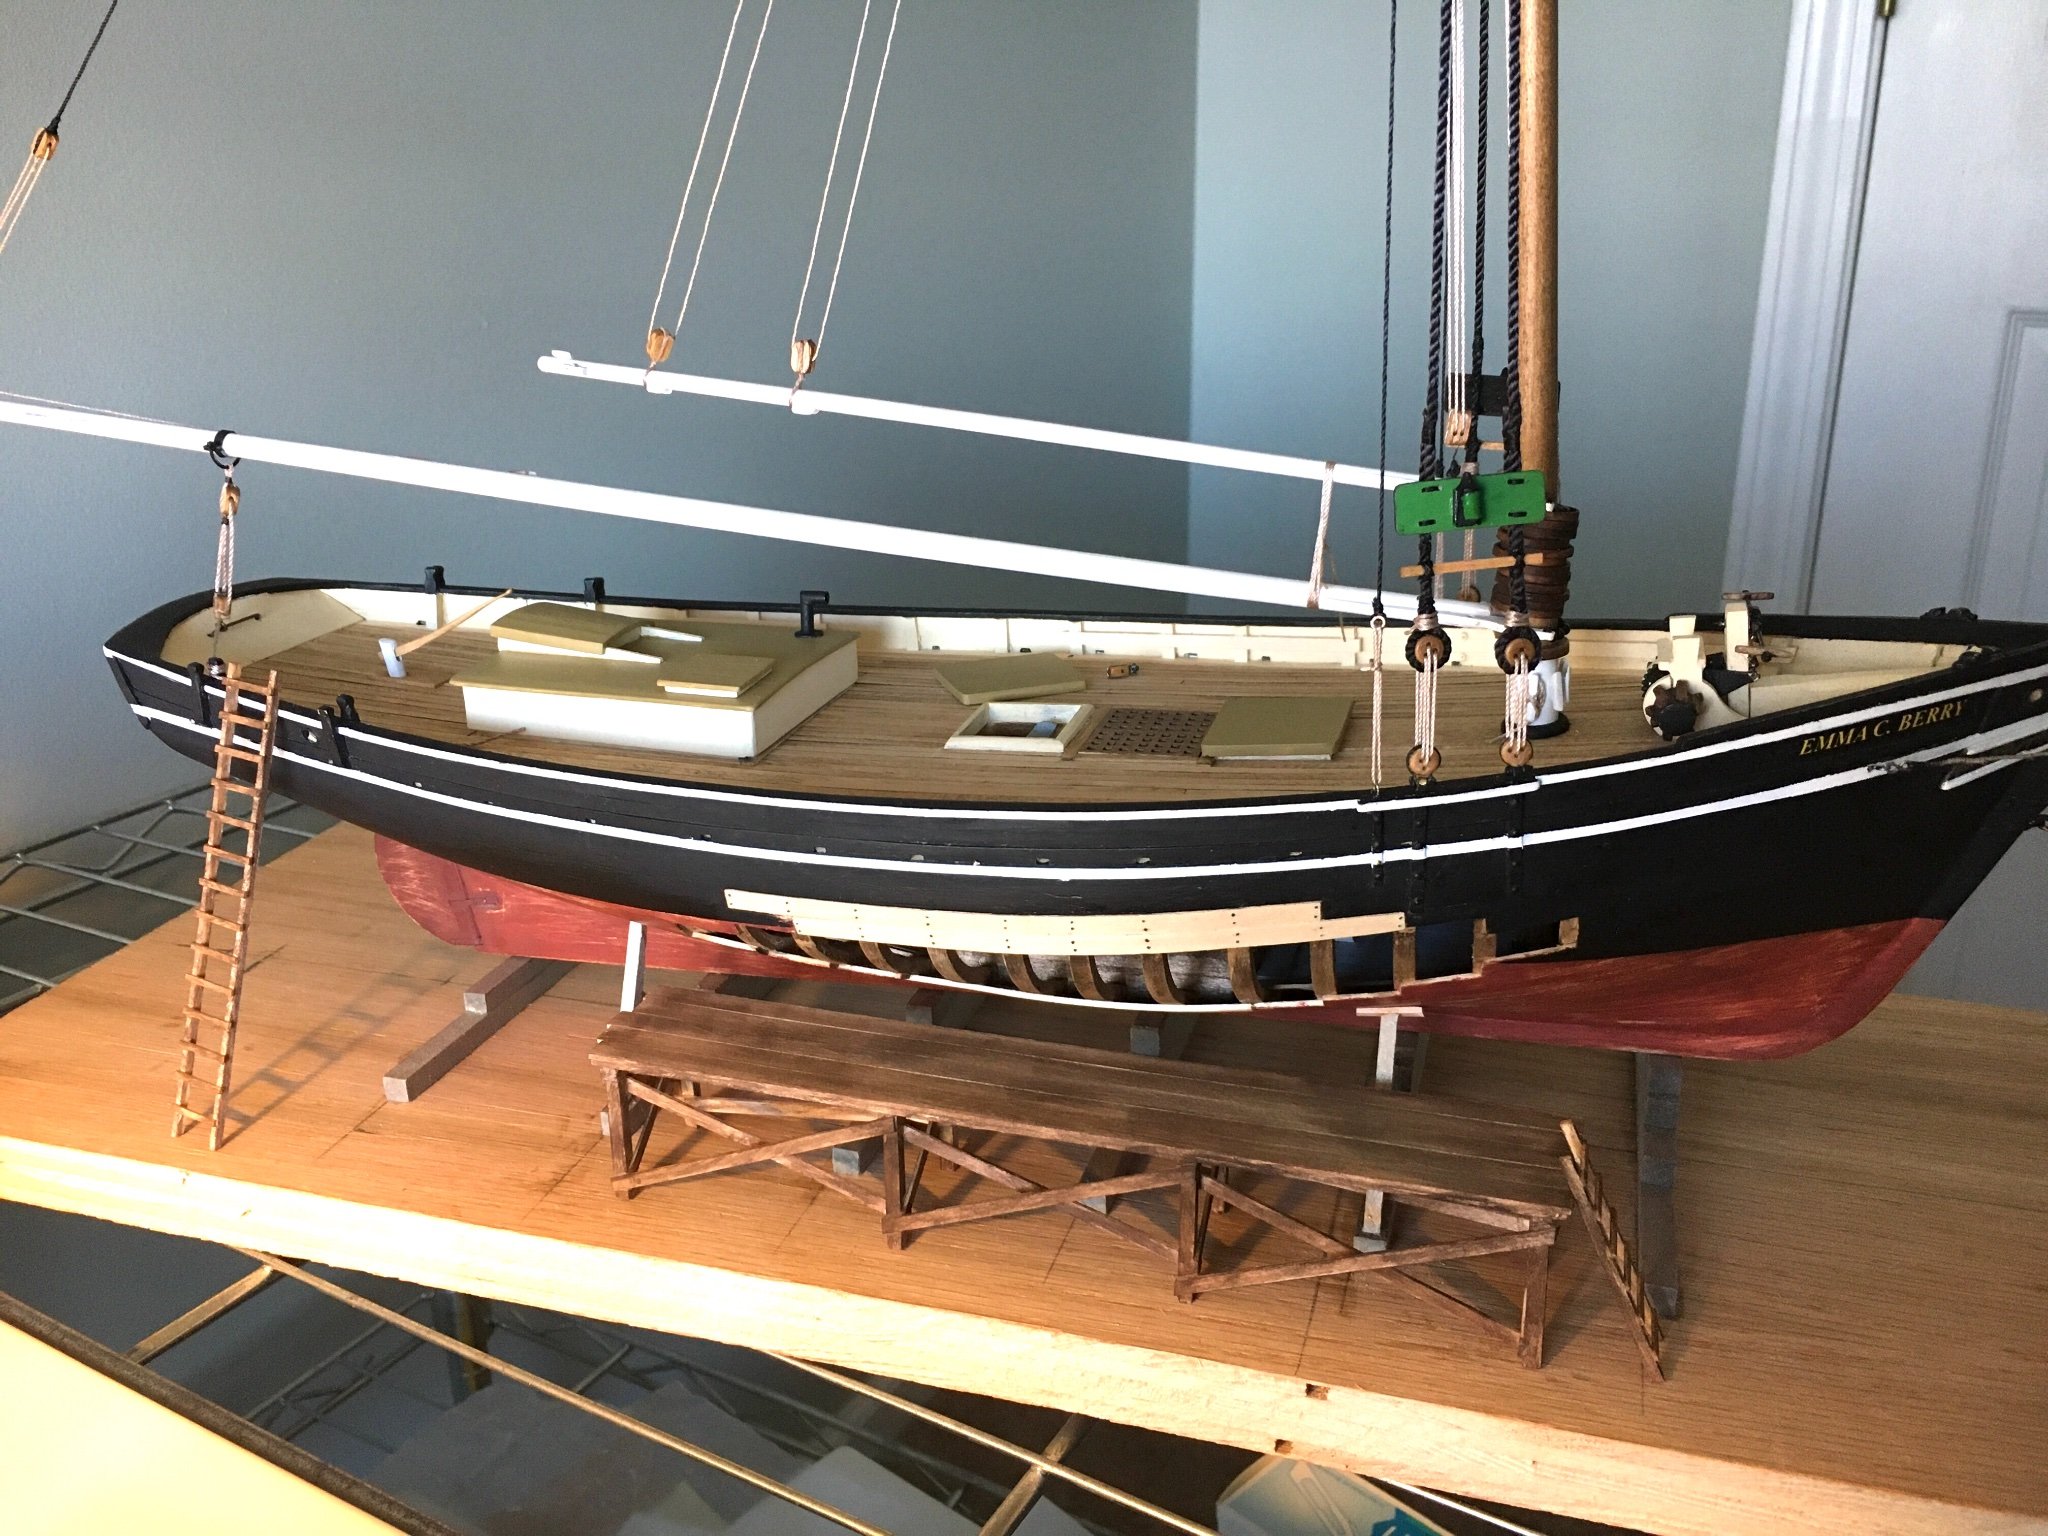
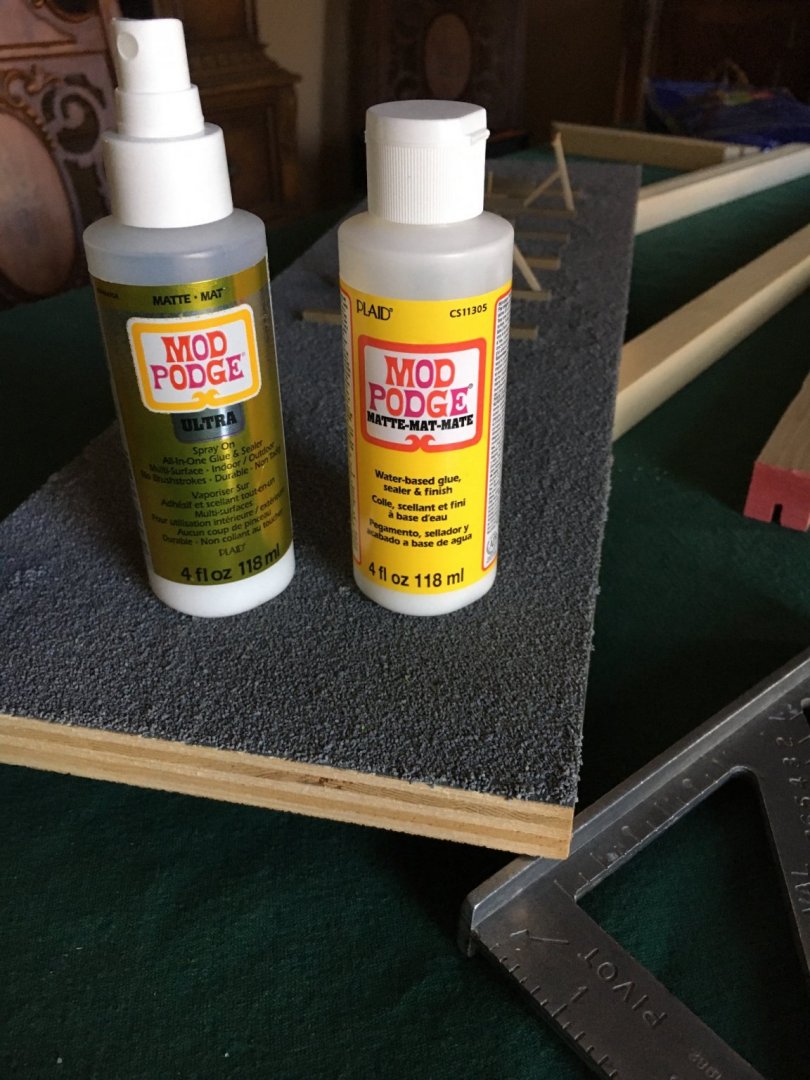
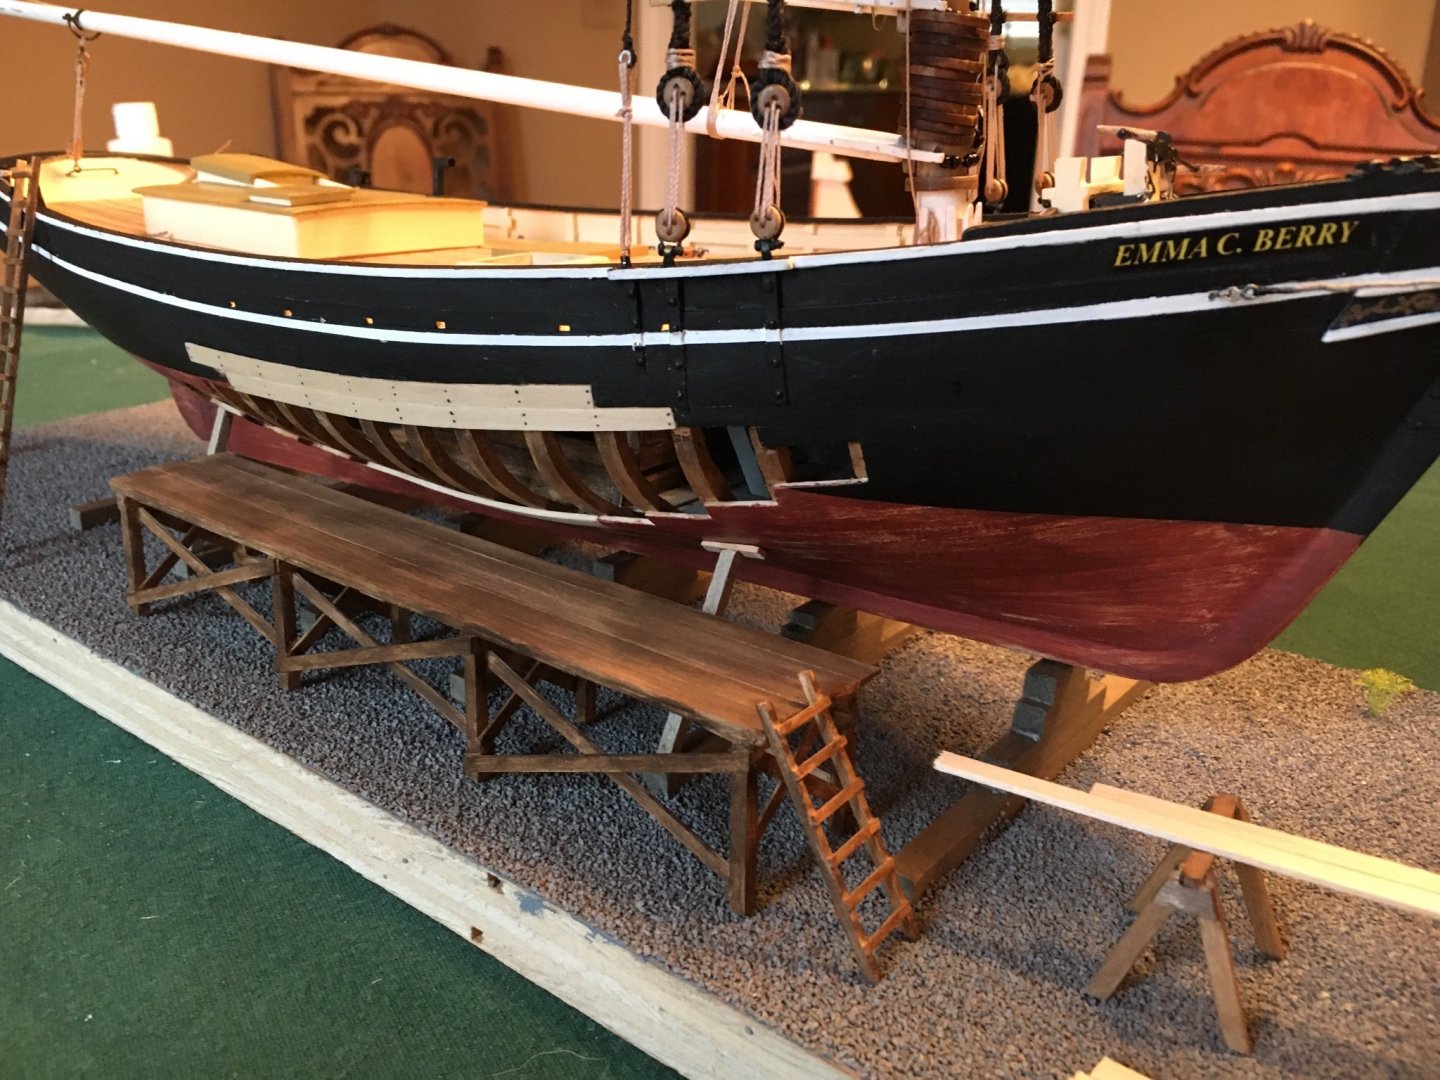
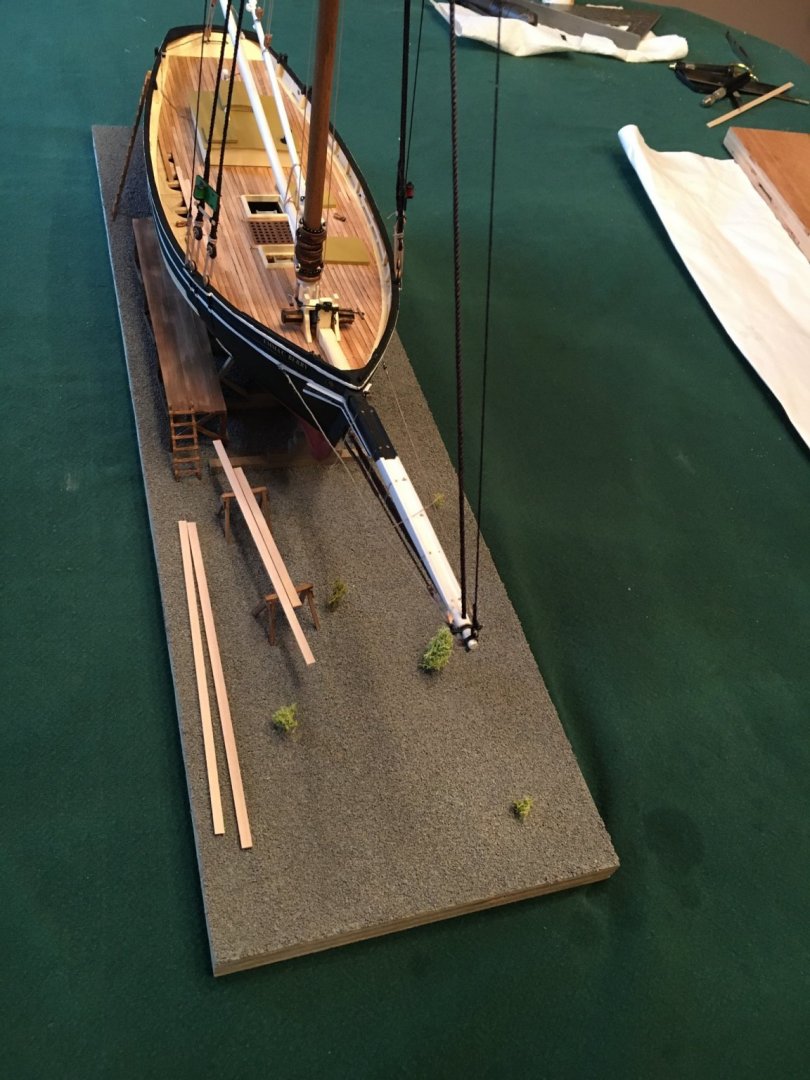
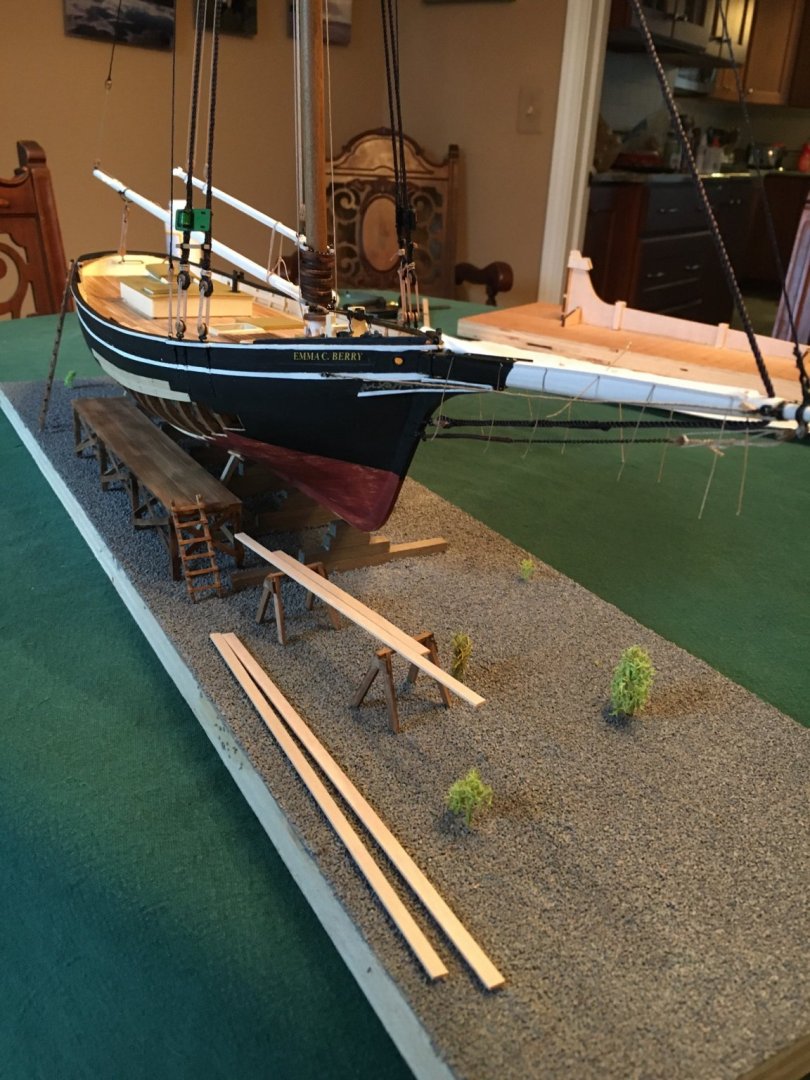
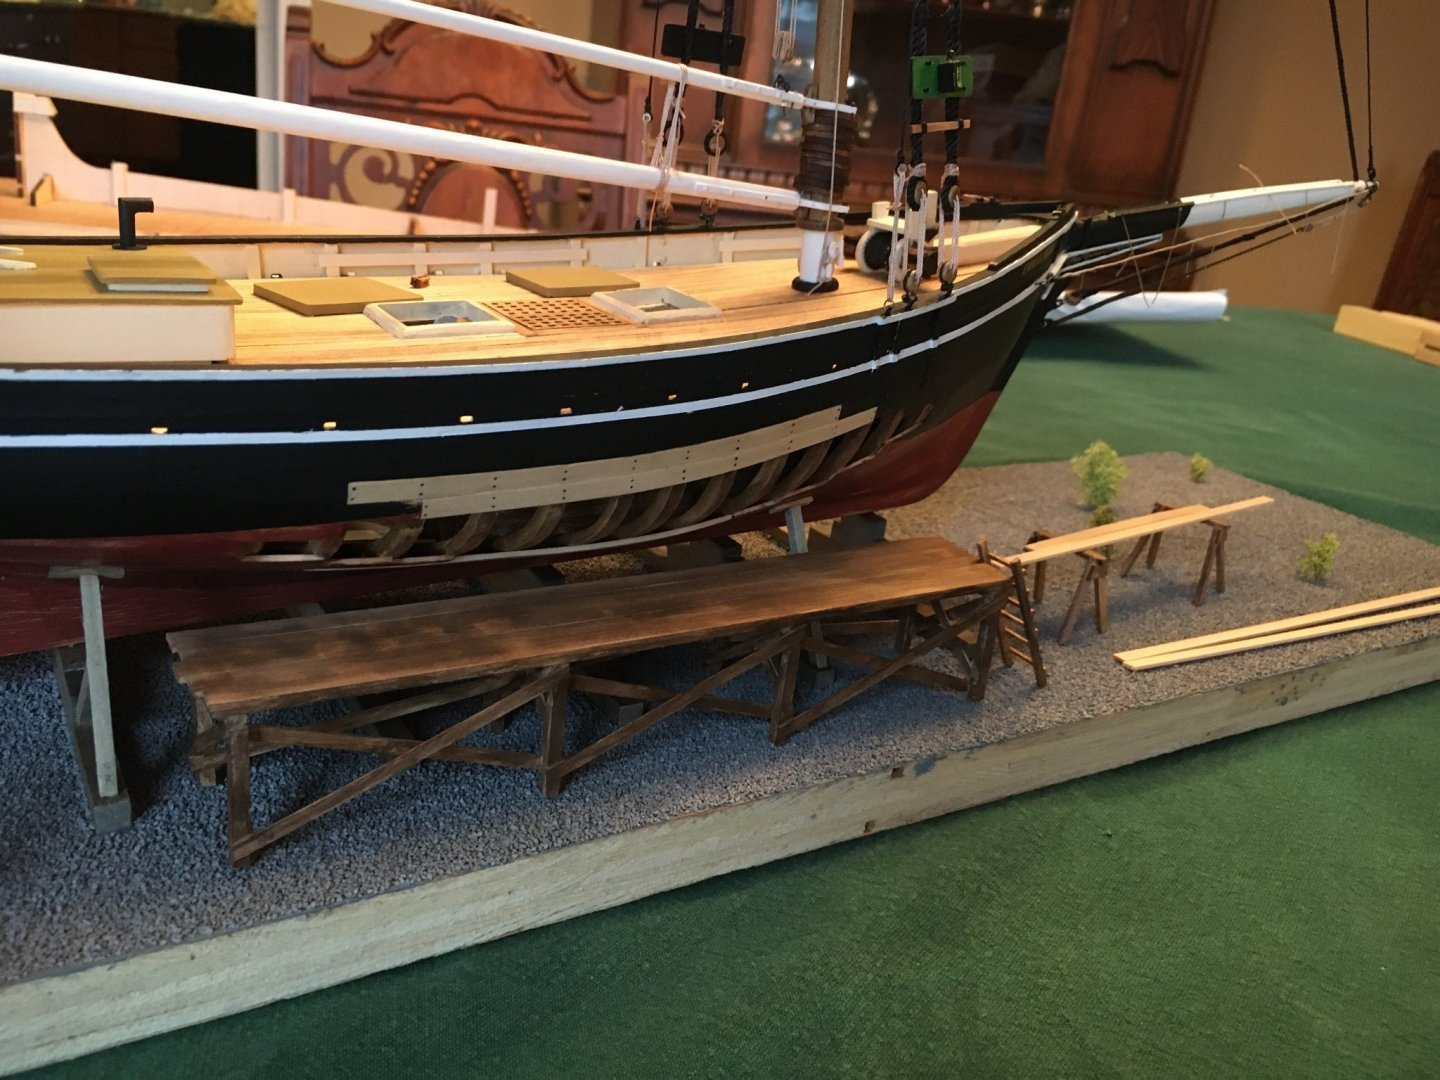
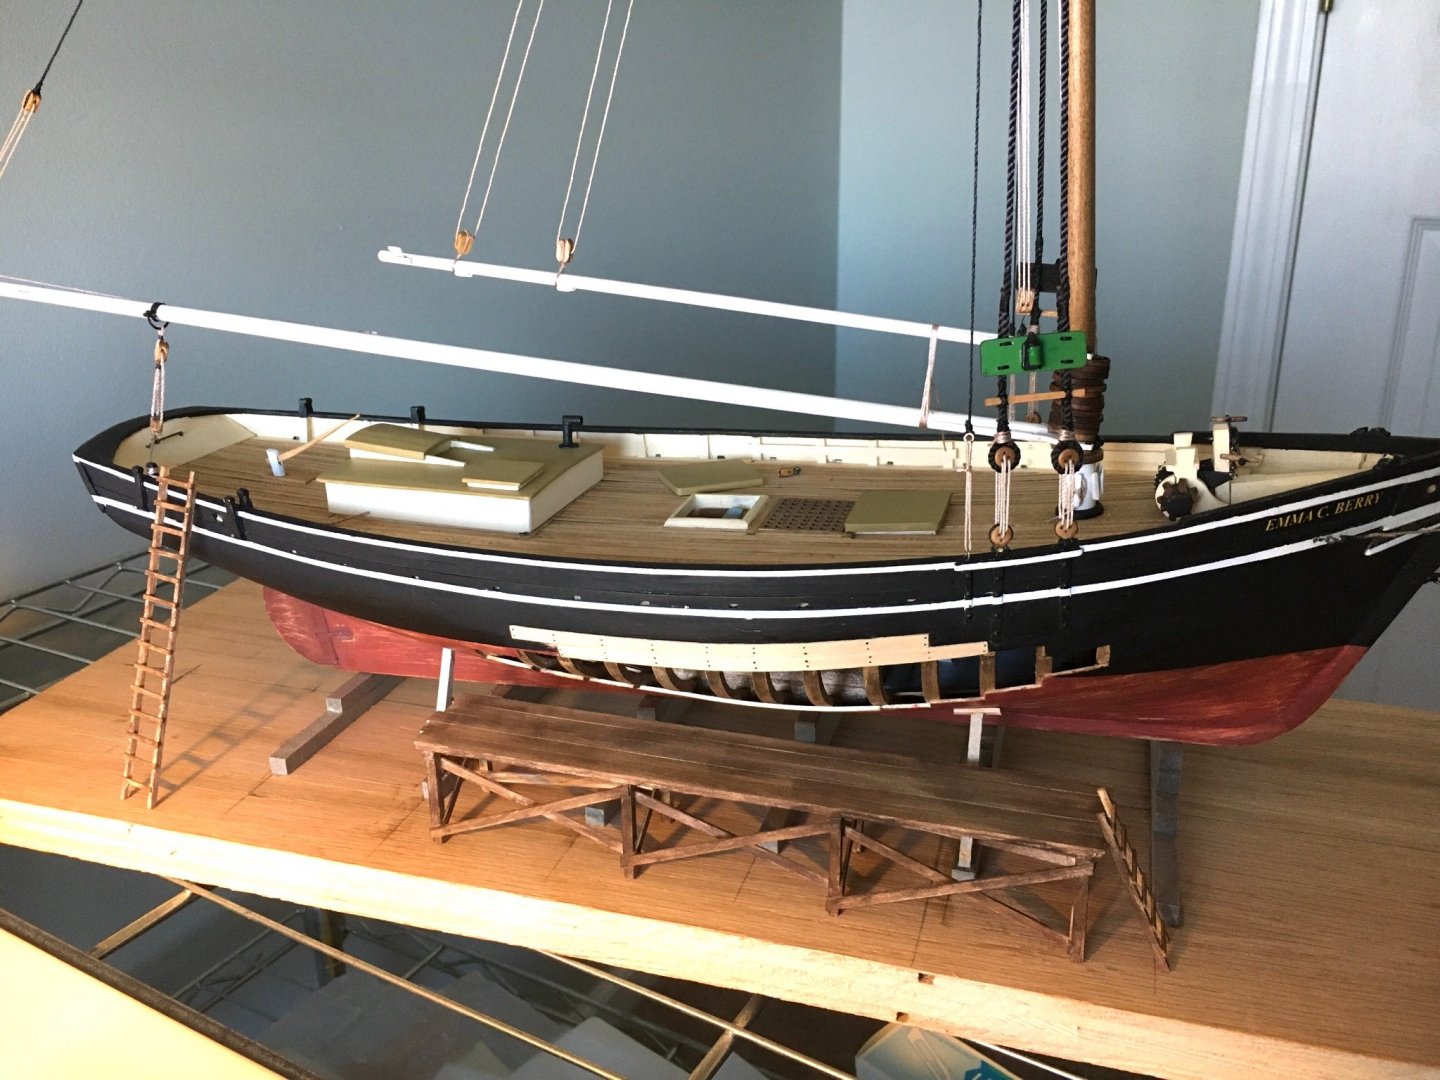
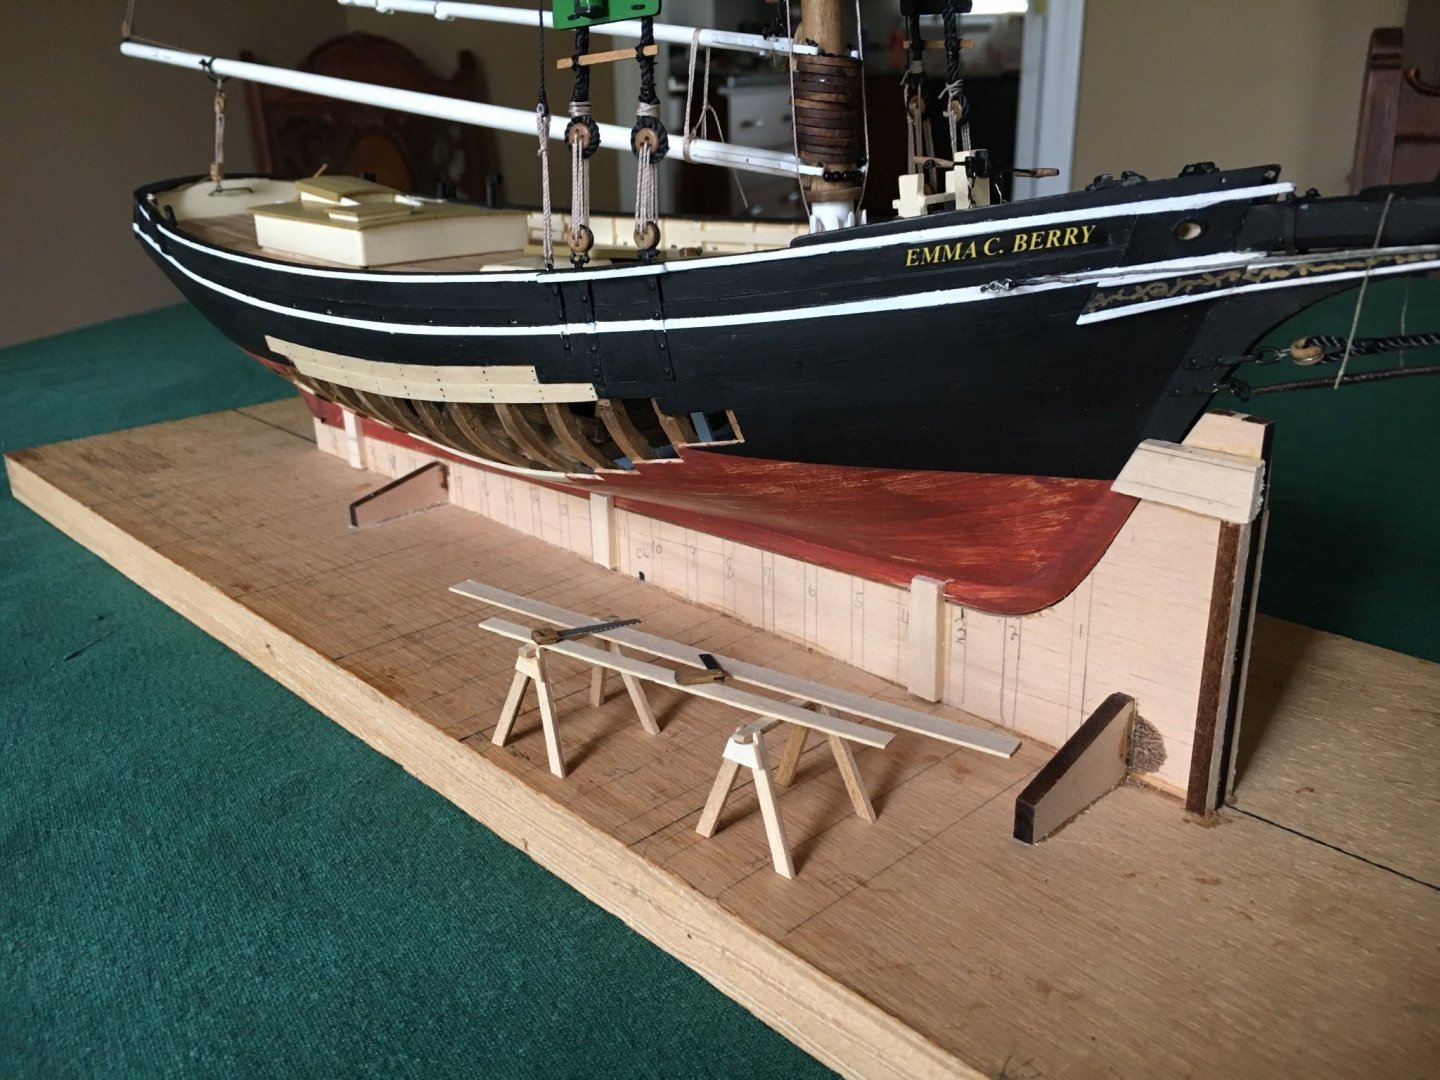
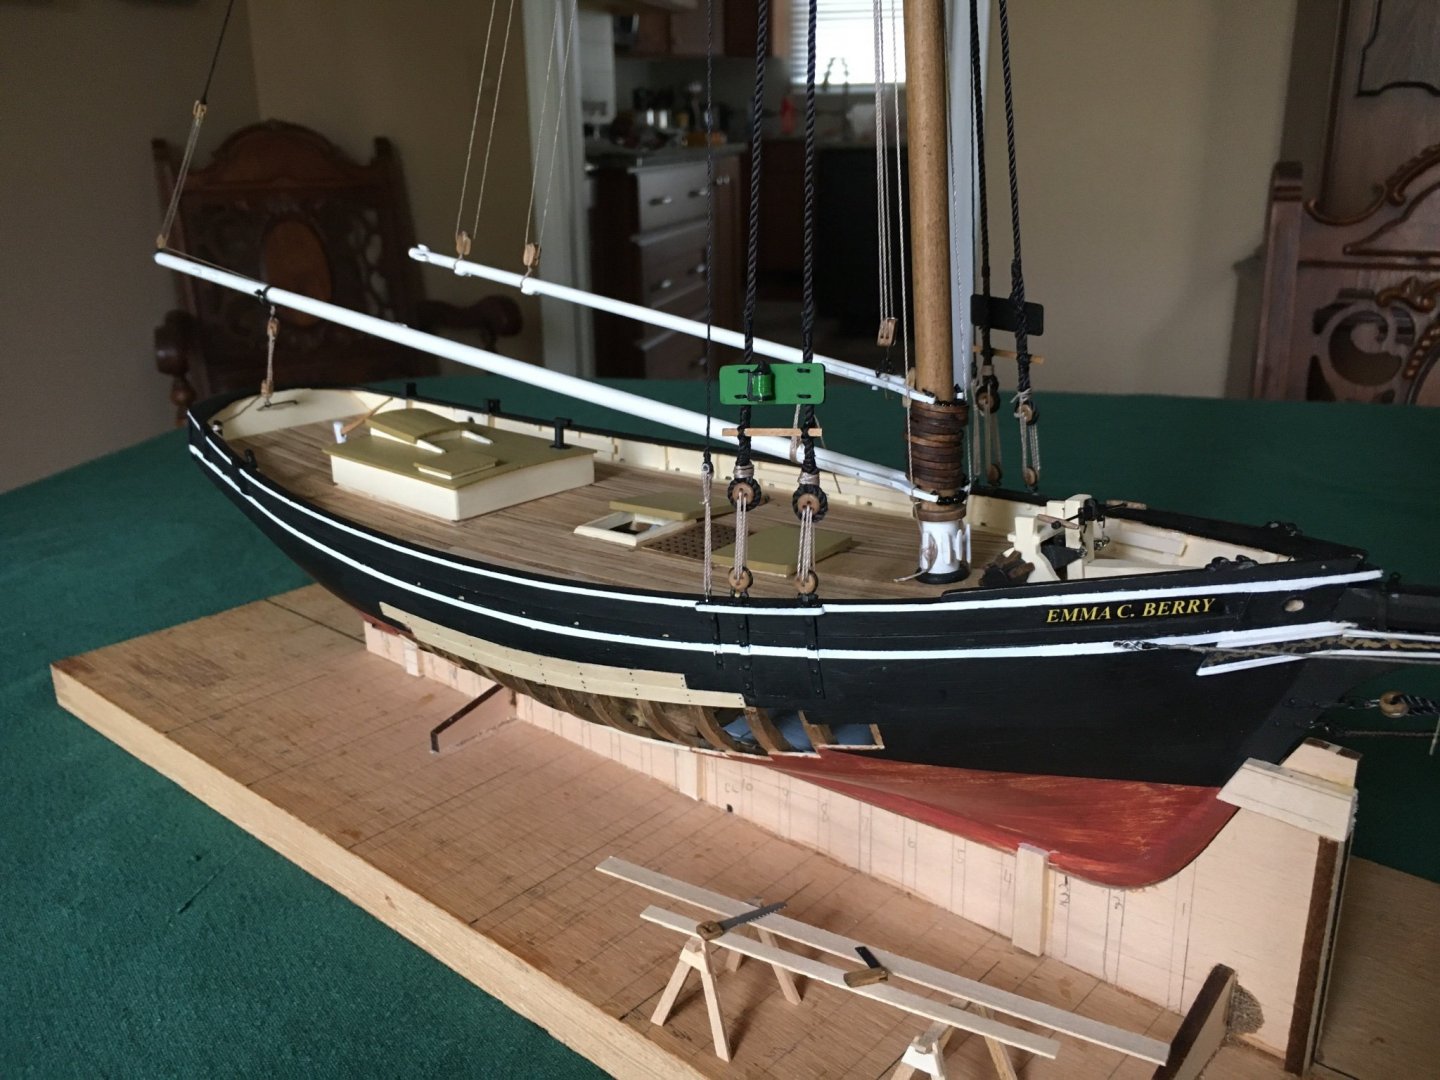
Another update. I was essentially done with hull construction to turned my attention to building a permanent base. I cut a piece of plywood, built the ways as stacked timbers I chemically aged to to look weathered, added two brass pins that insert into the hull and made some hull supports. I am very pleased as it seems very stable and strong. Next I wanted to lay down a simulated gravel base and used model railroad ballast material. I made a small test area and found a few problems. I initially used a product called "Tacky Glue" spread on the wood base and found that any open area in the gravel showed as raw wood, the glue is so thick it was almost impossible to spread and it dried very glossy. So I painted the base grey, found a product called "Mod Podge" that is available in either glossy or matte when dry and very easy to spread. I spread an area, applied the gravel, let it sit a while and then tipped the board to dump any excess. If a bare spot was found I applied a bit more adhesive with a small brush and sprinkled a bit more gravel. Worked like a champ! Mod Podge also offers a spray bottle of the adhesive in matte or gloss so I applied a couple of coats to lock the gravel in place. I then drilled a few holes to insert simulated foliage made from Moss, very satisfied. Now the bad news. I intended to build a case to closely fit around the base and while taking the included pictures noticed the boom extends beyond the base! Didn't see the forest for the trees☹️. So some base extension work is in my future.
-
I have attempted to post a couple of times and receive this message. Any help appreciated! Access Denied - Sucuri Website Firewall If you are the site owner (or you manage this site), please whitelist your IP or if you think this block is an error please open a support ticket and make sure to include the block details (displayed in the box below), so we can assist you in troubleshooting the issue. Block details: Your IP: 73.211.250.84 URL: modelshipworld.com/topic/25110-emma-c-berry-by-turangi-model-shipways-132/page/4/?failedReply=1 Your Browser: Mozilla/5.0 (Windows NT 10.0; Win64; x64) AppleWebKit/537.36 (KHTML, like Gecko) Chrome/96.0.4664.45 Safari/537.36 Block ID: SQLi17 Block reason: SQL injection was detected and blocked. Time: 2021-12-01 20:49:09 Server ID: 20006
-
Looking great! A small suggestion, you may want to put a small bend in the middle of the horse to keep the boom centered when you tension the rigging. I didn't and wish I had.
- 161 replies
-
- 1
-

-
- Model Shipways
- Emma C Berry
- (and 1 more)
-
A wee bit more progress. I made a work stage and some ladders. I used an acrylic wash and dry brush to age them , a first for me and am satisfied. My small dilemma is the timbers and supports for the hull were aged to resemble weathered grey wood. I am temped to dry brush them brown also. Any and all recommendations welcome. I need to decide before I start applying gravel to the base.
-
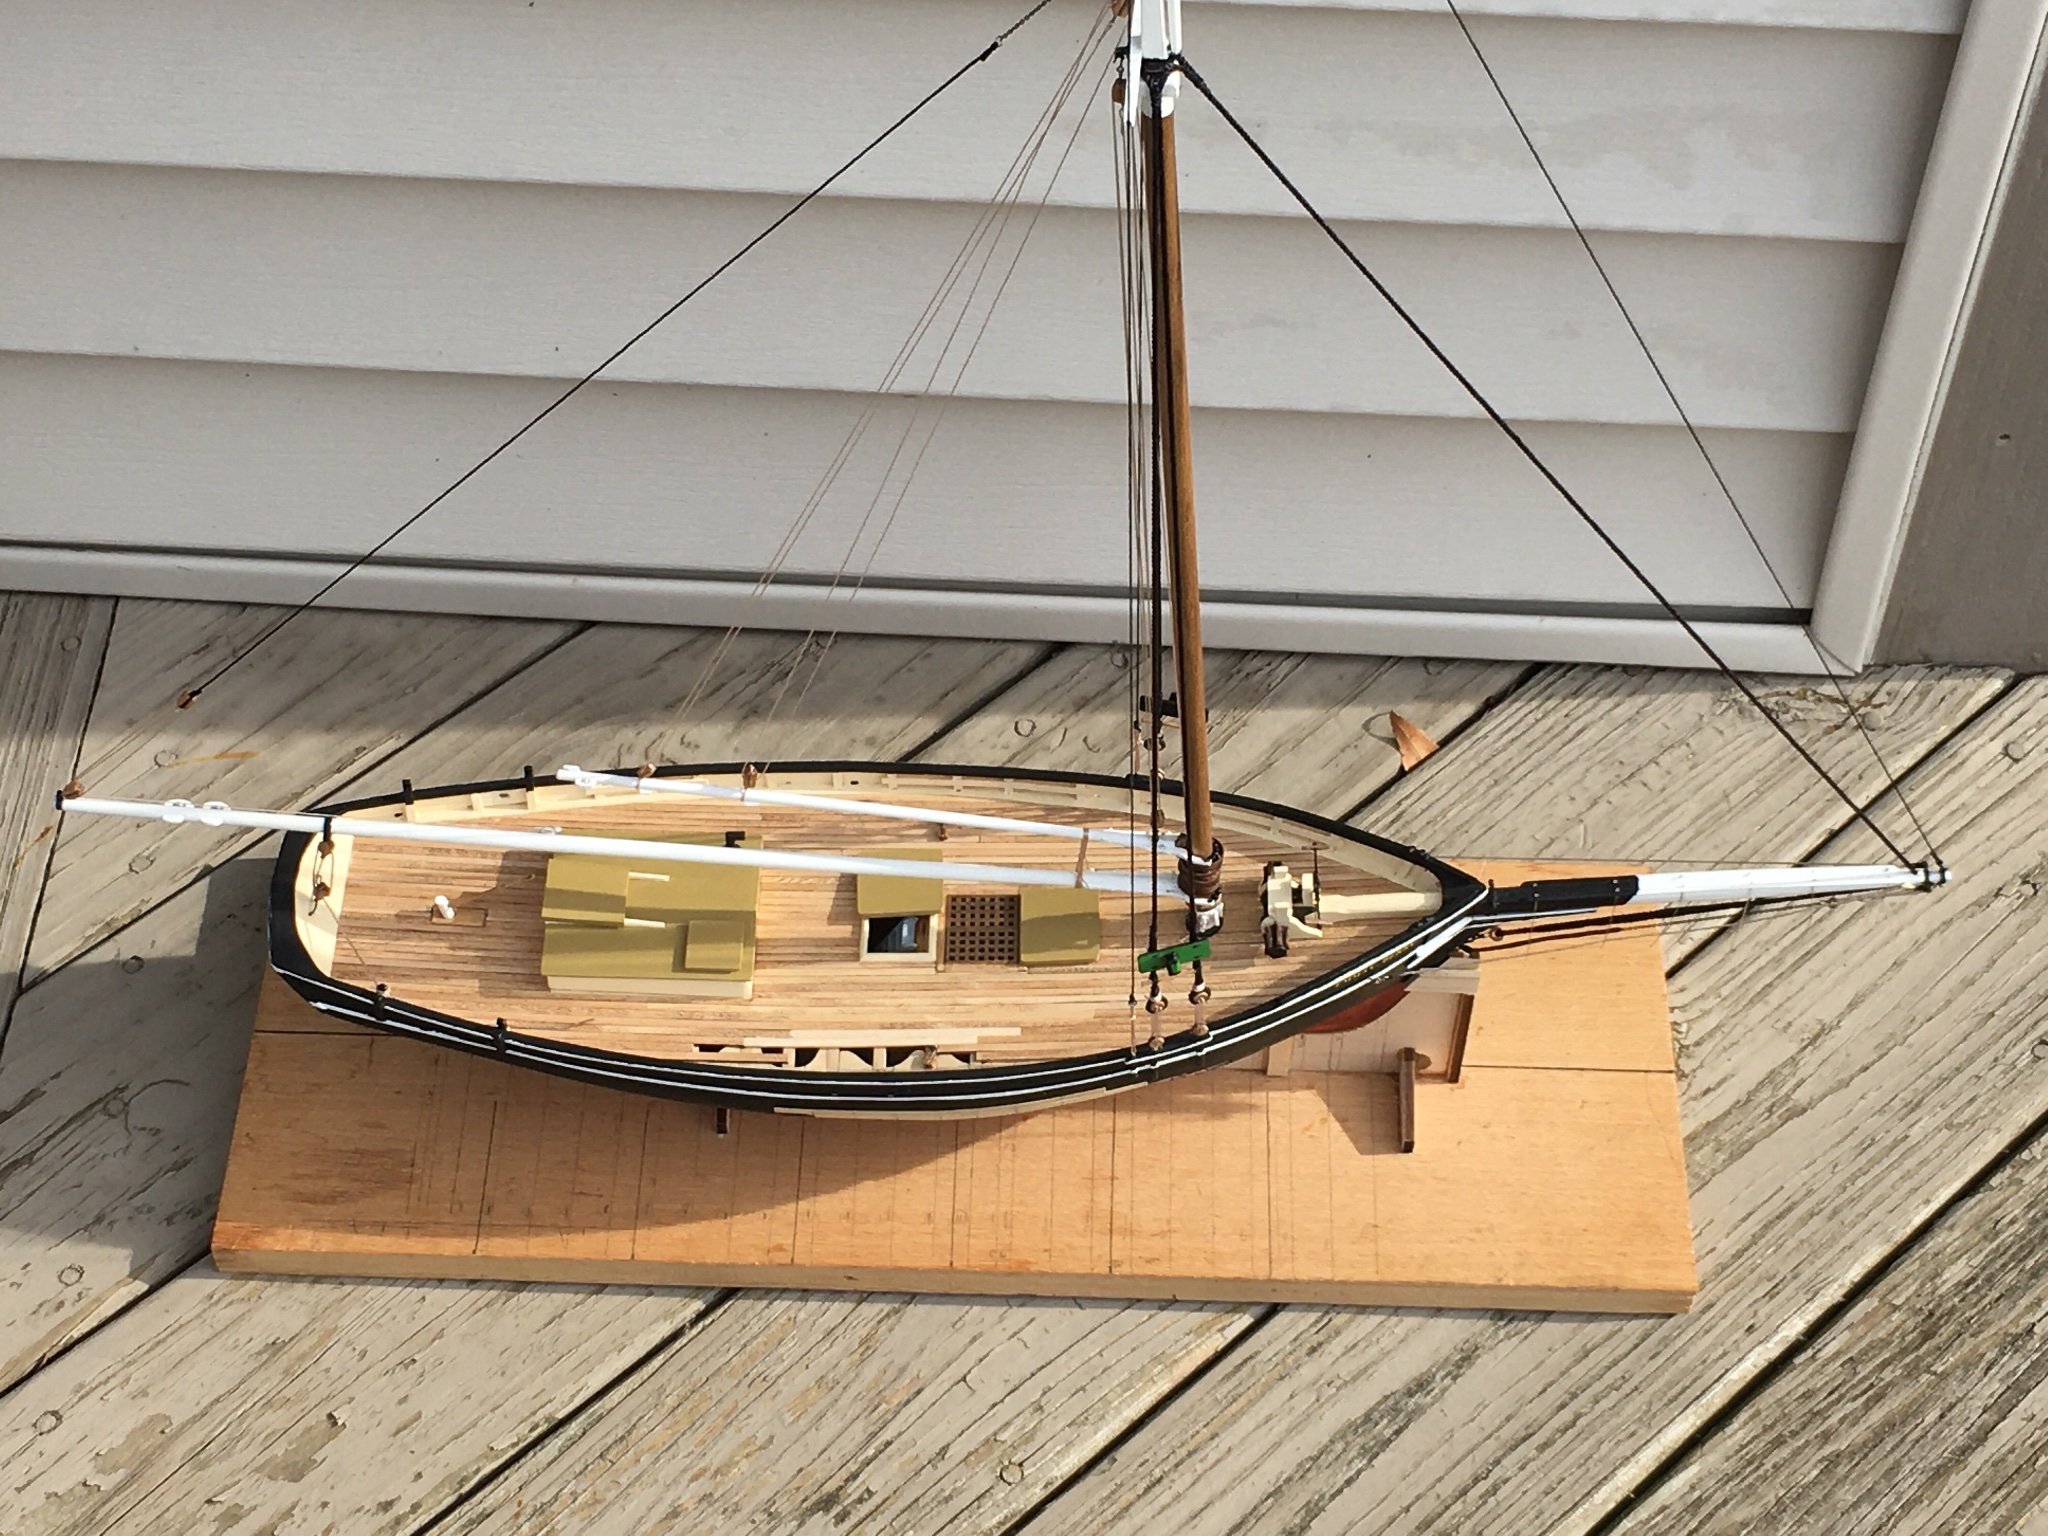
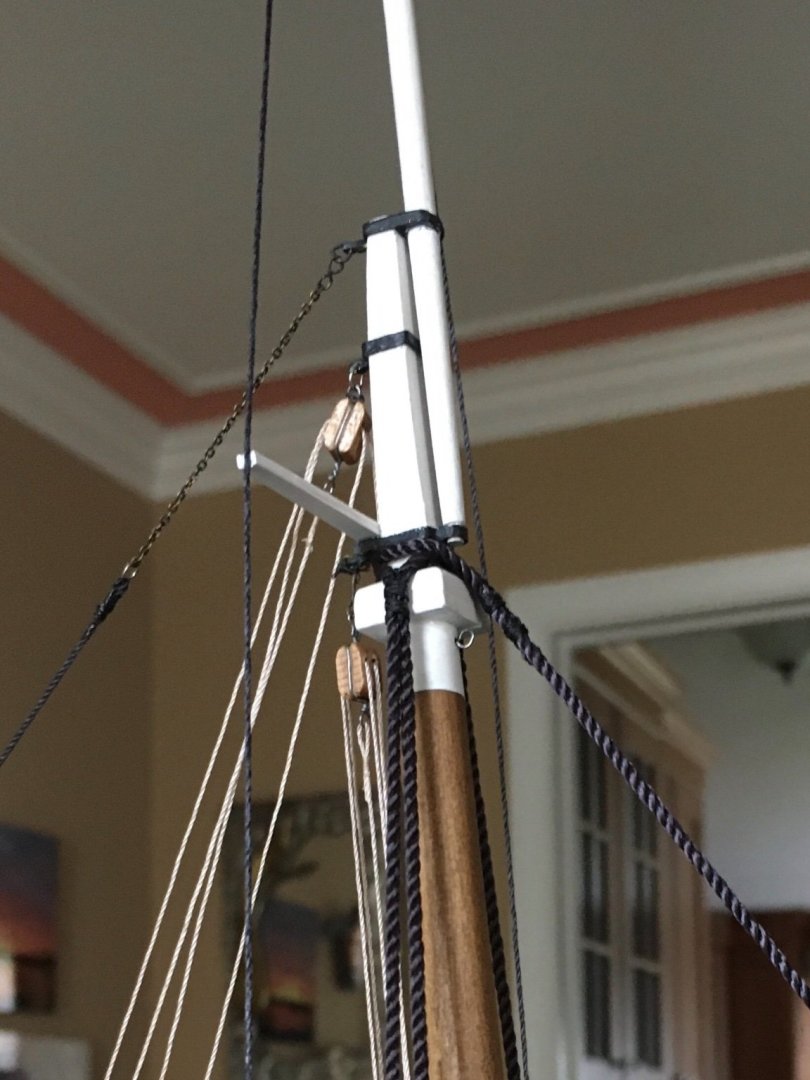
Time for an update. I am considering the rigging finished with a few adjustments needed. As ahb26 mentioned in his above post termination of the rigging was a head-scratcher so I just did what looked acceptable to me and am satisfied. A few points: the original building jig with some minor modifications held the model fine while rigging, no special vice needed. The diameter and color of the lines didn’t always match the directions or plans so I winged it, standing rigging black and running Manila color. As to diameter, I choose what pleased me to my less than knowledgeable mind. As I have loss of feeling in some fingers and sometimes can’t feel the lines tweezers, hemostats, and homemade rigging tools were my friends as was salty language befitting a sailor. My next endeavor is working on a proper base, at my breakneck speed I anticipate being finished by Christmas…..2022. I find the journey often as exciting as the destination. As always any comments, or more importantly, suggestions and advice would be greatly appreciated.


-
There are some tough decisions and I found the same problem as you with regard to the amount of line provided. Although there is a minimal amount of rigging on the model sans sails it may still look a bit like a Road & Track cutaway of a Birdcage Maserati.
-
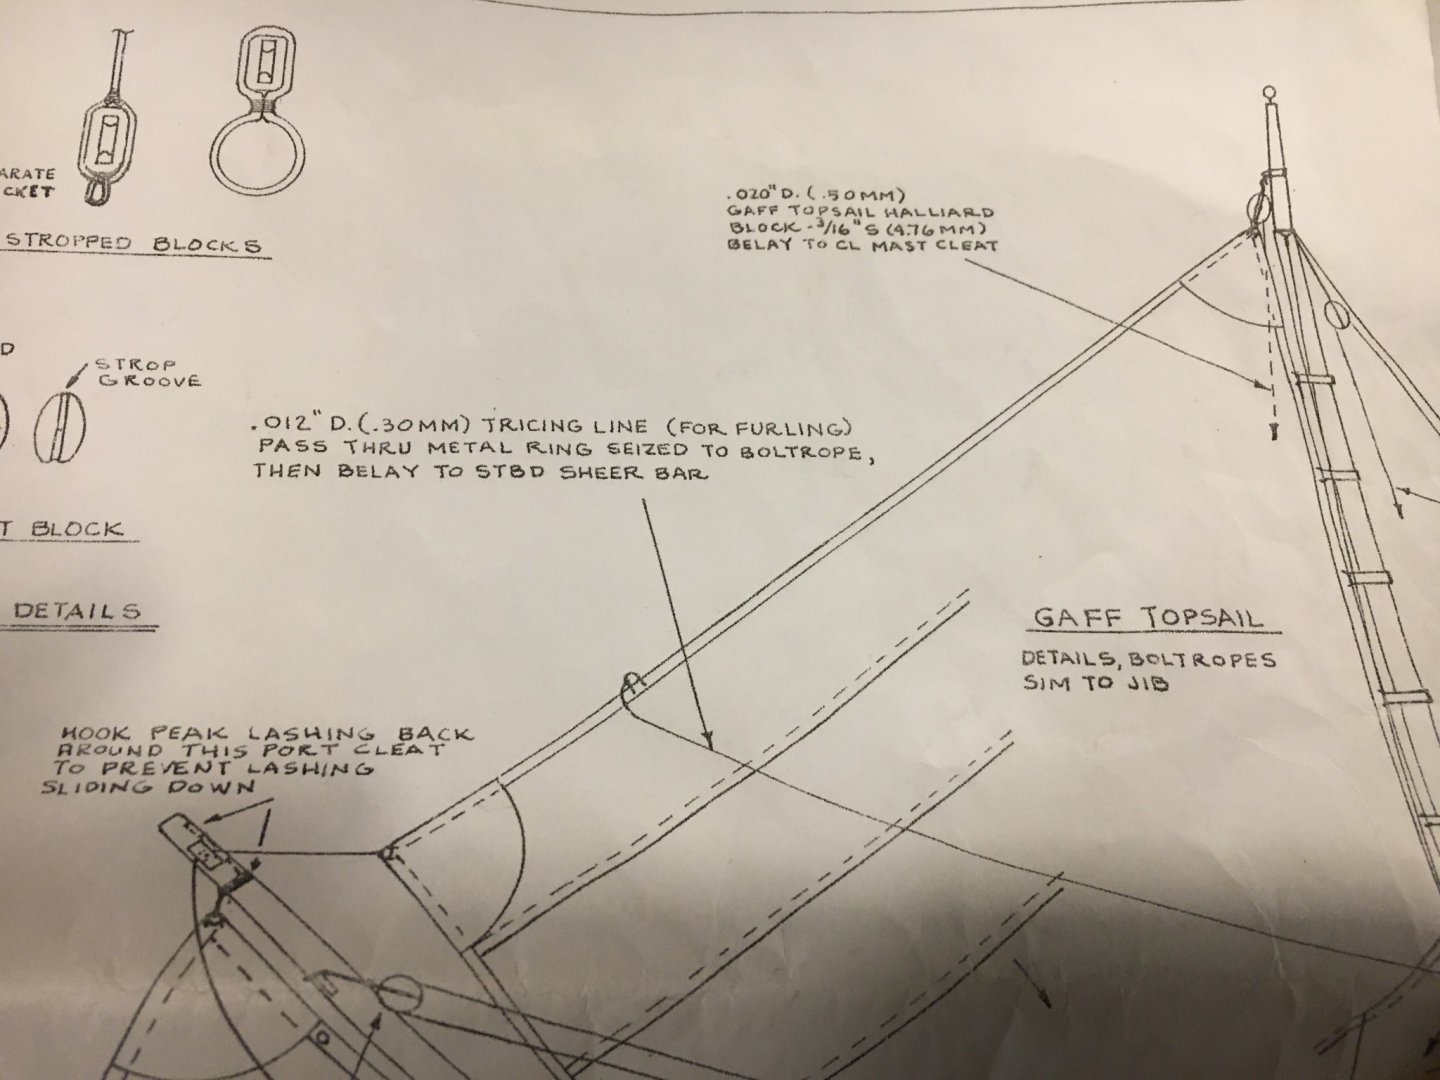
Looking very nice, rigging is a challenge! I have been working on rigging my model and have found that all blocks and fittings are not needed if you are not making sails for the vessel. as an example, the Gaff topsail halyard may look a bit strange without a sail attached. Several models built without sails on this site do not have the fitting and block on the upper mast as it would a bit strange without a sail. I suppose you could attach the fitting and not rig it in anticipation of of sails being fitted during the rebuild of the vessel if that is what you are representing. There are other blocks, lines etc. that also might look out of place with no sails.
-
DONATE NOW TO SUPPORT MSW
turangi replied to kurtvd19's topic in NAUTICAL RESEARCH GUILD - News & Information
Kurt, I just made a long overdue second donation. This site is outstanding and as a relative neophyte I have received priceless advice and encouragement here from many modelers including those I consider masters of the craft! They have also saved me from buying useless tools, mediocre kits and books that would be of no use. Those savings alone more than equal my donation. As a moderator on a different non-model site I am thoroughly impressed with the operation here, pleasant, polite and helpful members always willing to assist any other member with a problem or query. Although membership here is no cost I fully realize that the operation of this site is an expensive proposition and needs the support of it's members. I encourage all members to think about the value they have received here from membership and send a contribution to keep this wonderful resource running and active! We would all rue the day it disappeared from lack of member support so contribute anything you feel appropriate in order to keep enjoying this site and the company of fellow members here. -
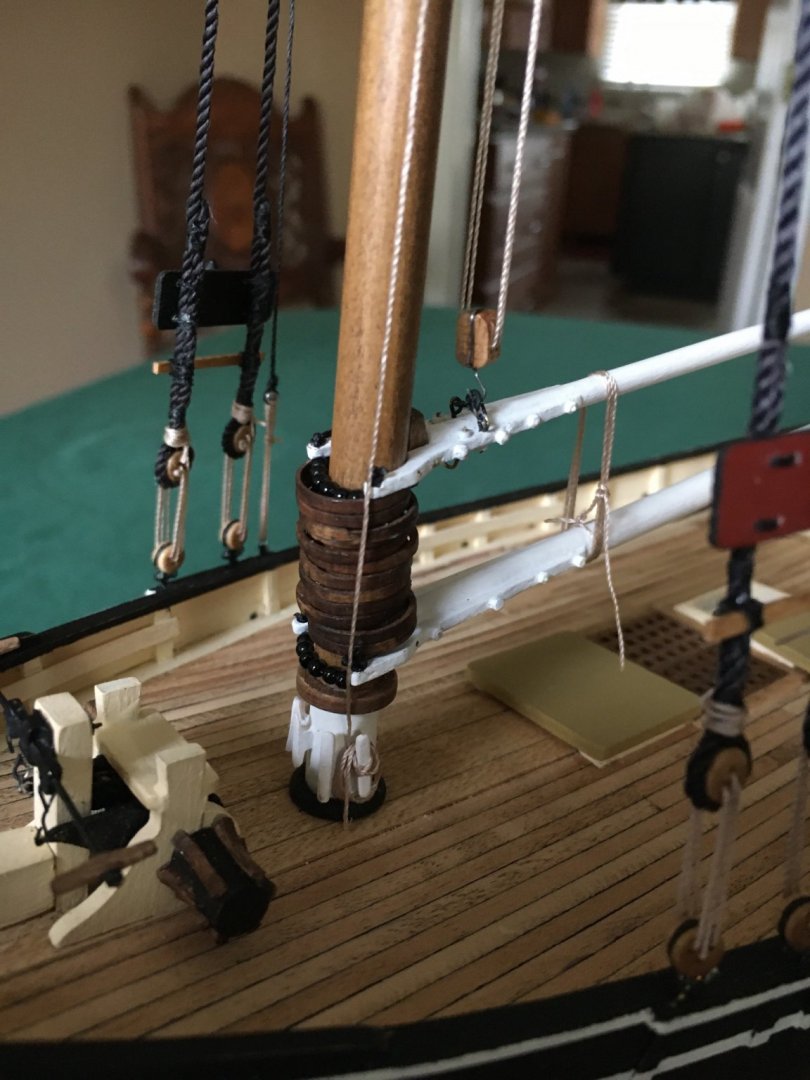
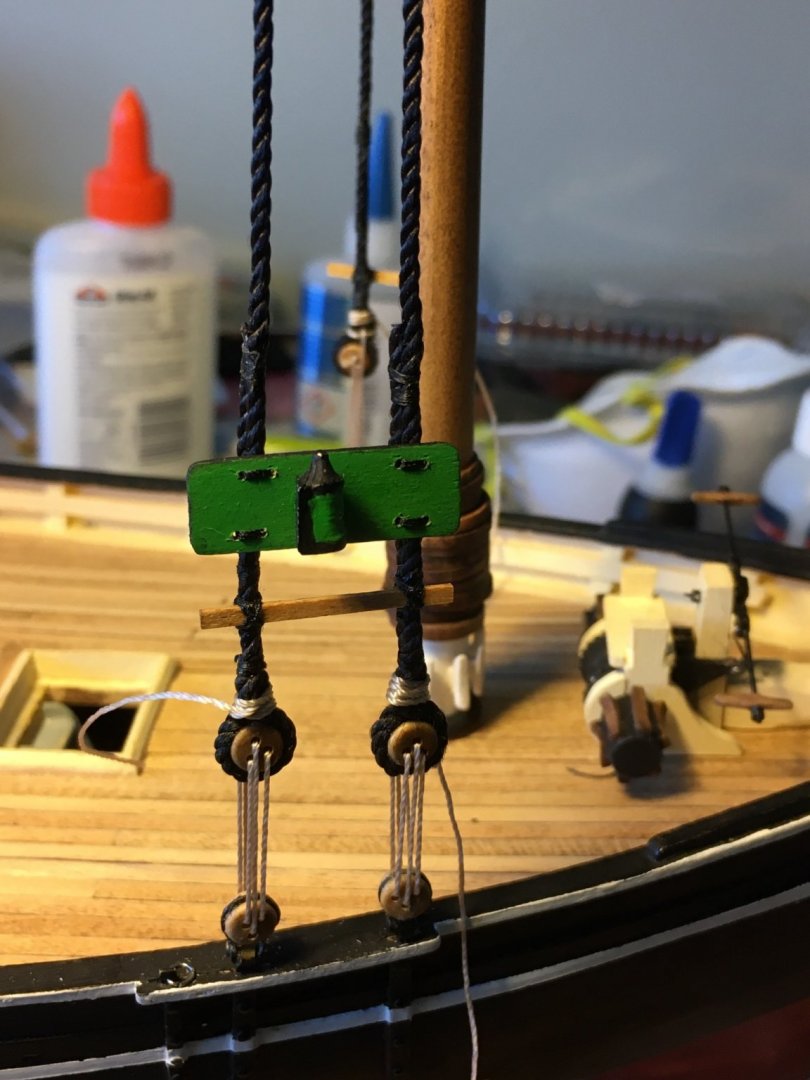
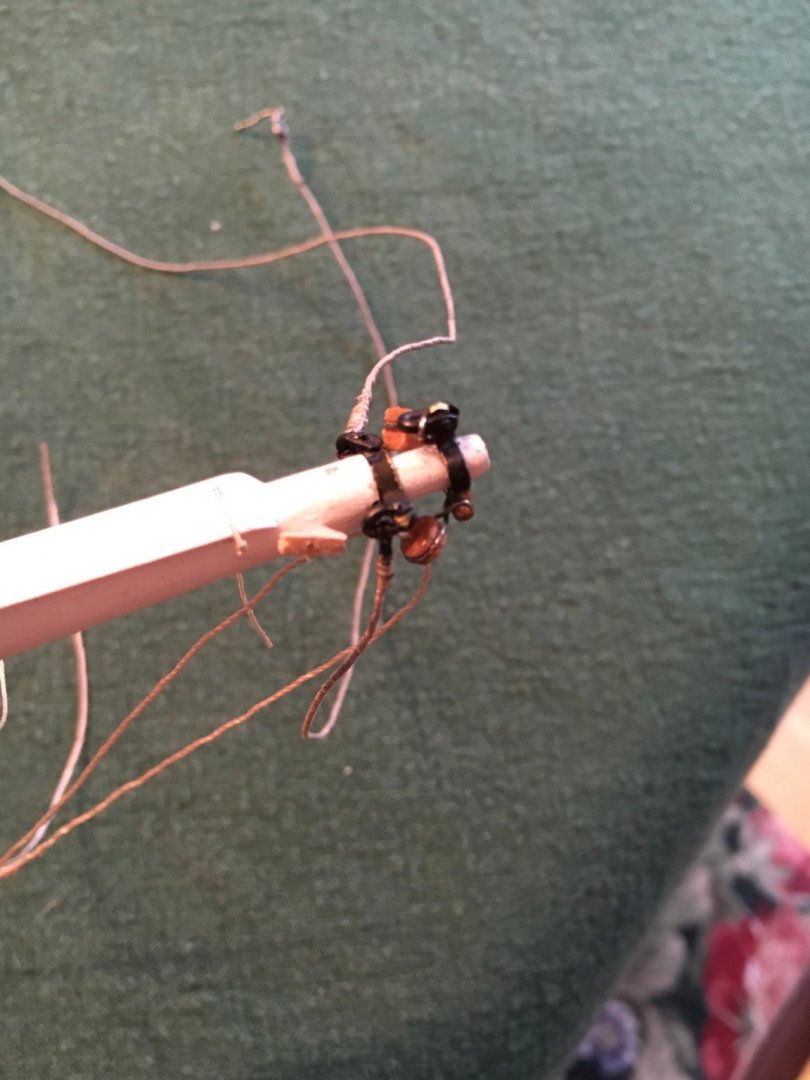
A bit of progress and a couple of questions. I started the rigging by reeving the dead eyes that secure the shrouds, I used a Manila colored line as I thought if they ever needed adjustment on an actual boat due to stretching or mast flexing if they were tarred it would make that task more difficult. I have seen it done with simulated black tarred line or natural colored line on various models and was not sure which would be correct? I do admit I rather like the contrast of the Manila with the black shroud. I have temporarily secured the lanyards to the shrouds and may need to revise them some for a neater appearance before securing them with PVA. My question is this: on an actual boat do you cut off the excess lanyard flush at the secured point or leave some excess for undoing the secured area and giving some extra purchase to readjust them? I also mounted the starboard running light and mount but this was fairly straightforward.
-
Thanks all, it was an enjoyable little project.
-
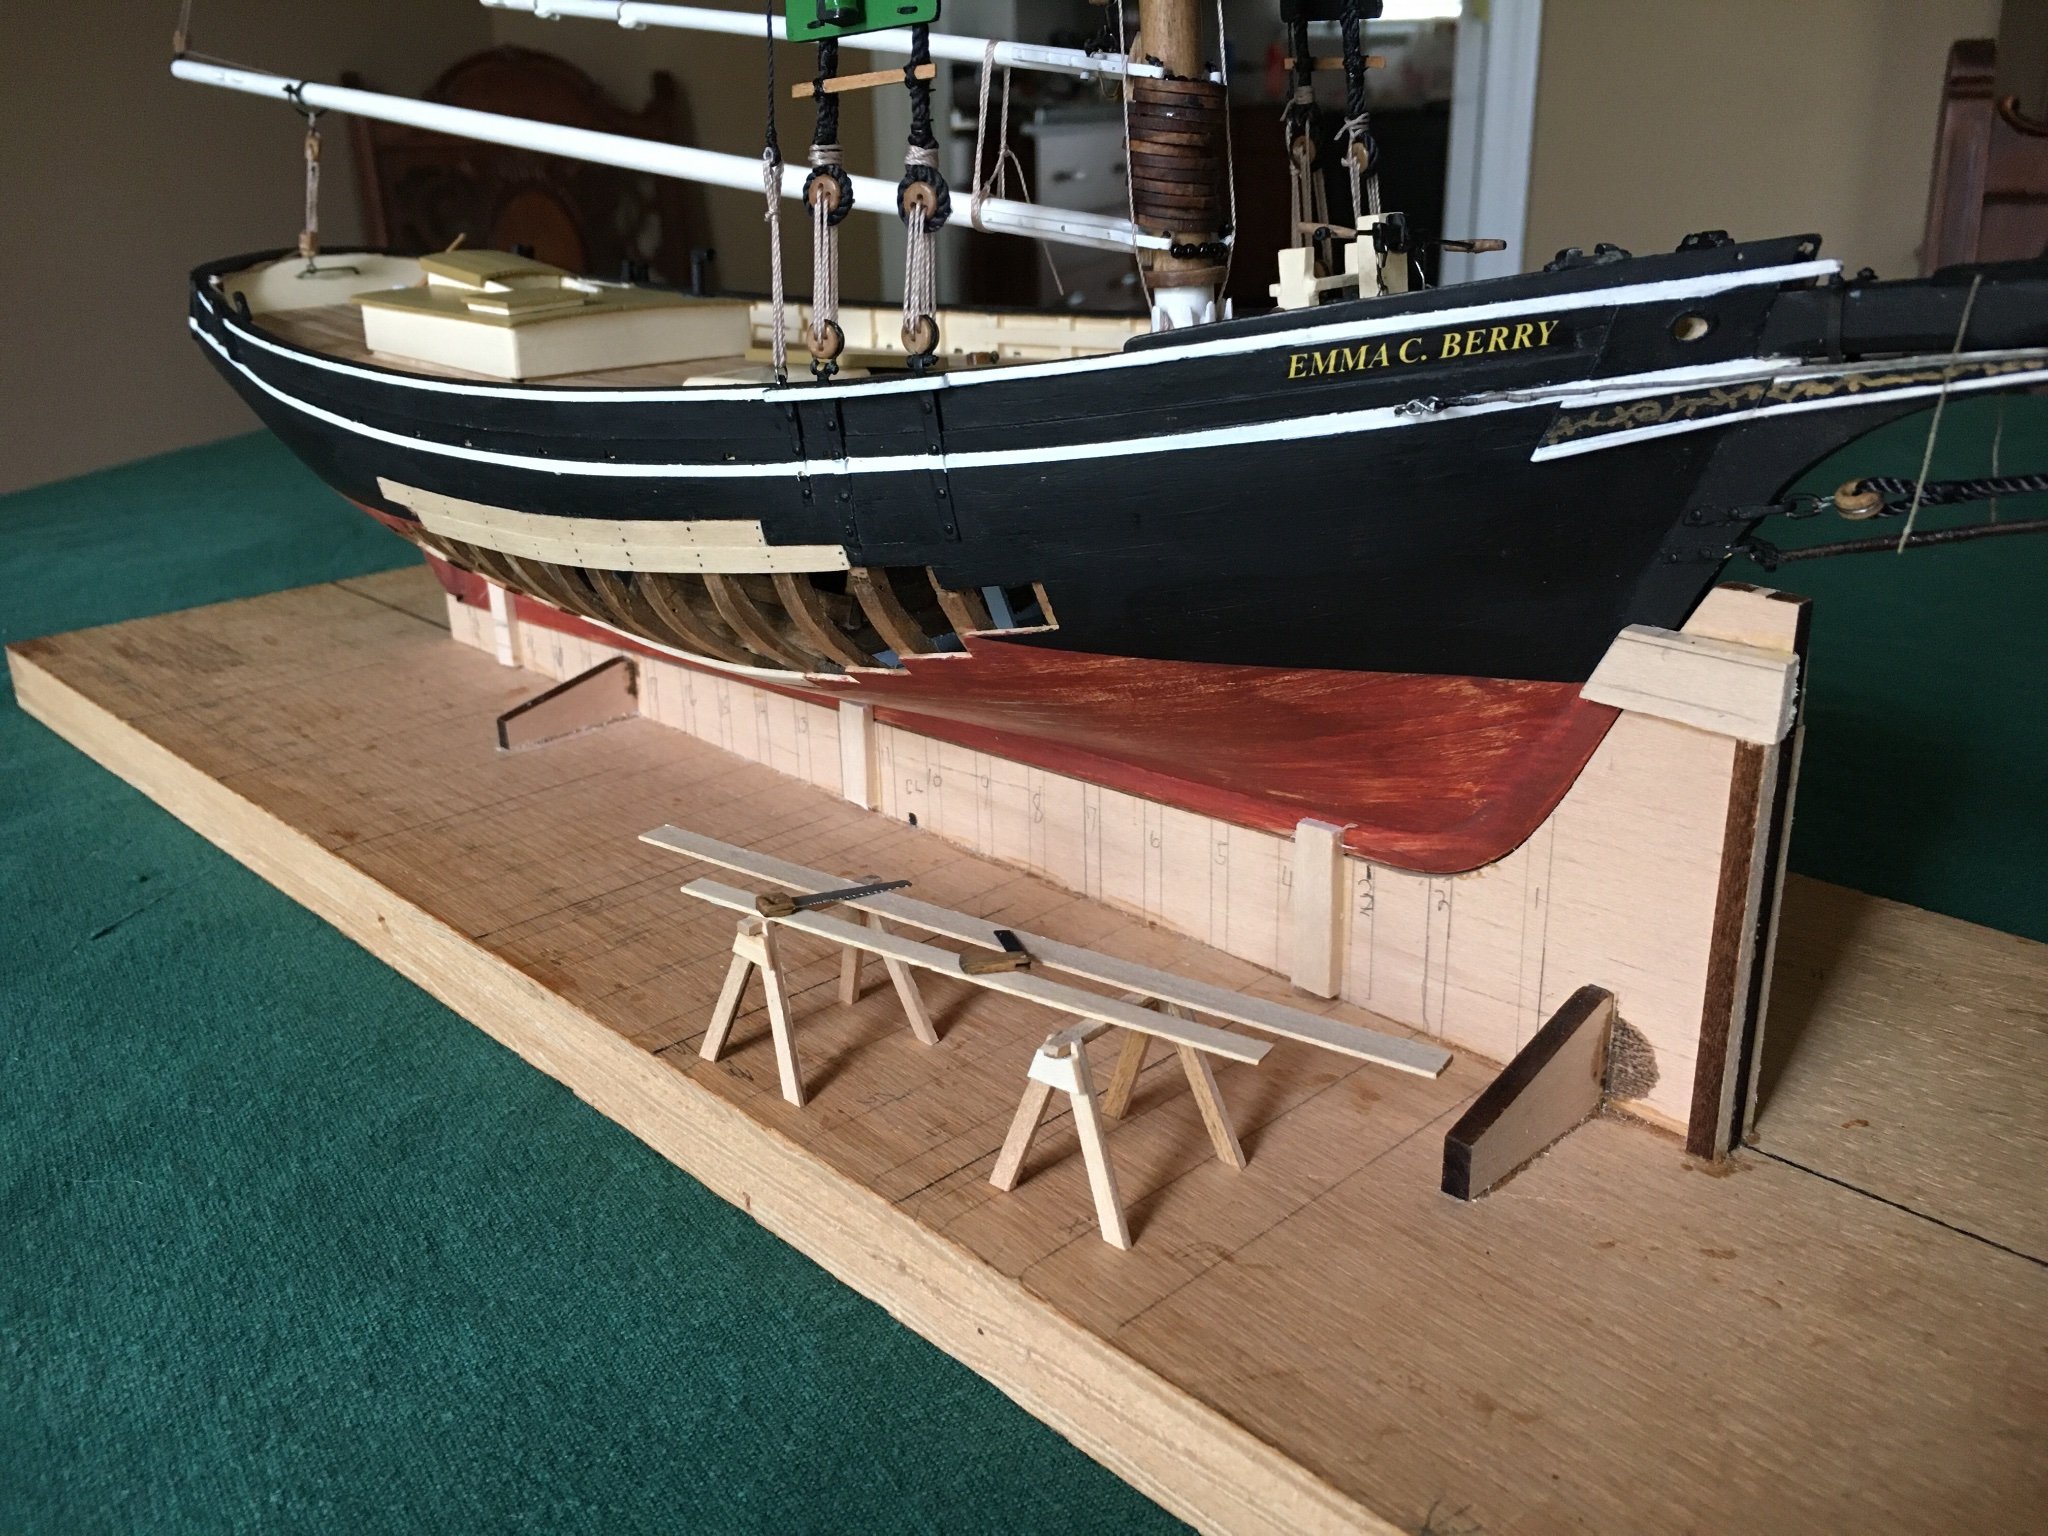
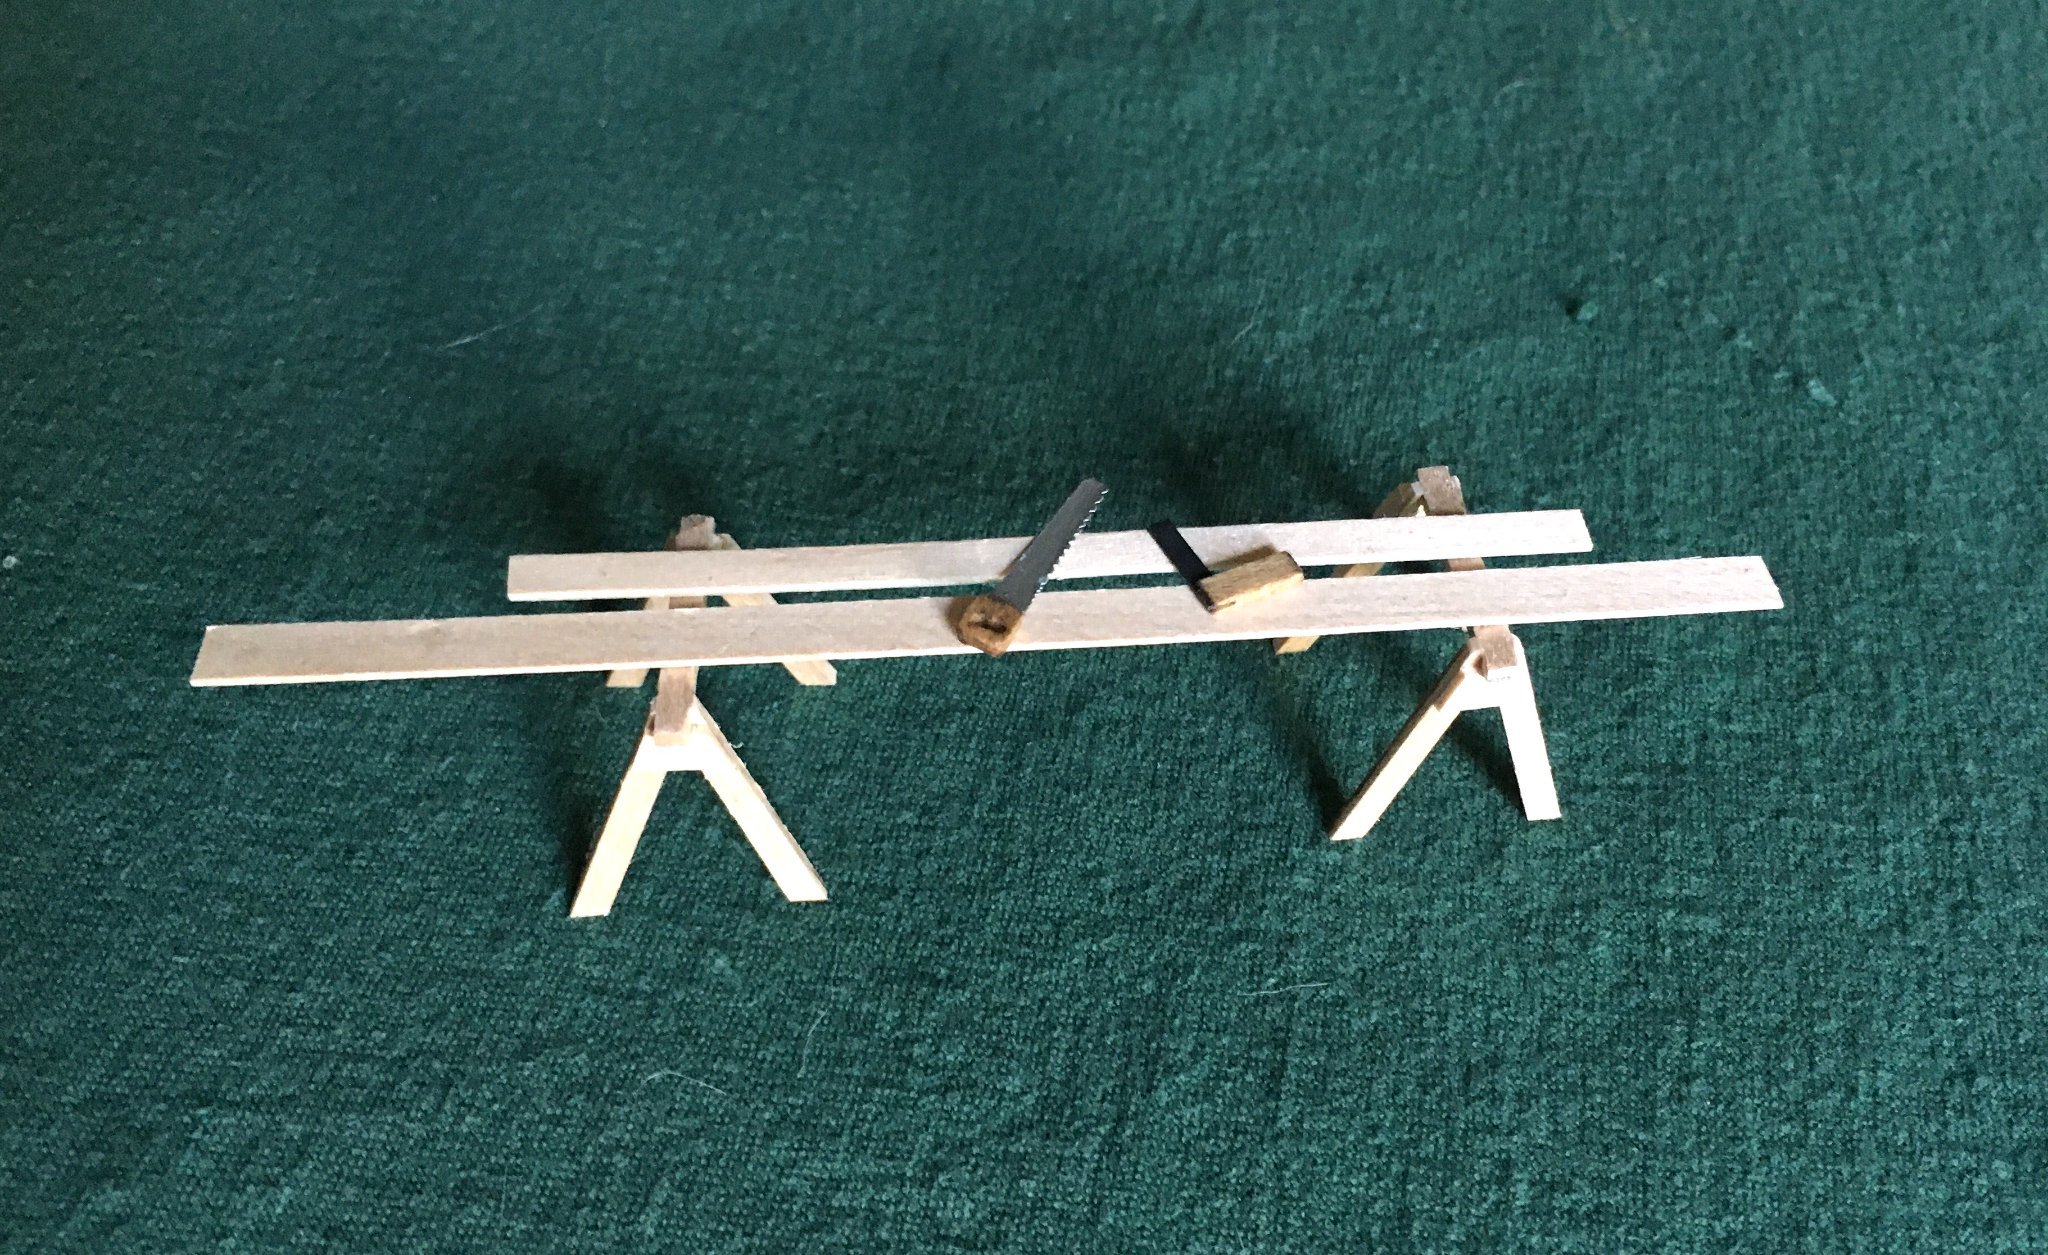
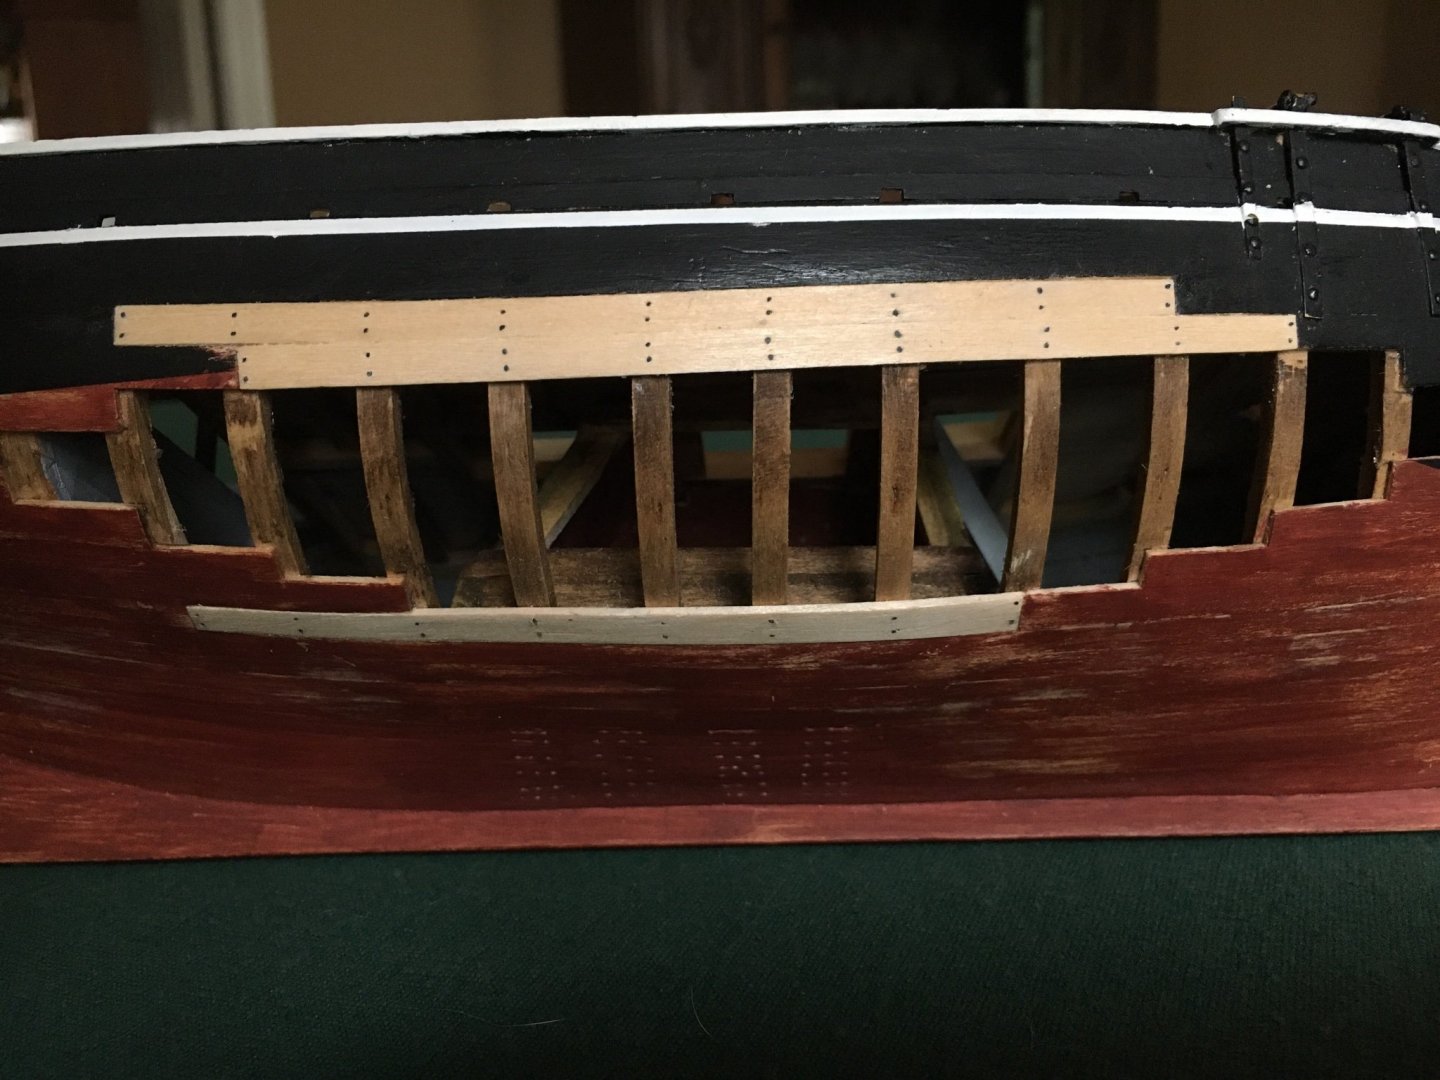
A small update. I did some touch up painting on the hull and while waiting on that to dry made some small accessories. Any repair yard would need some saw horses, a saw and a square to work on the new planking. I cobbled them together from some scrap wood and used a bit of sheet brass to fashion the blades for the saw and square.

-
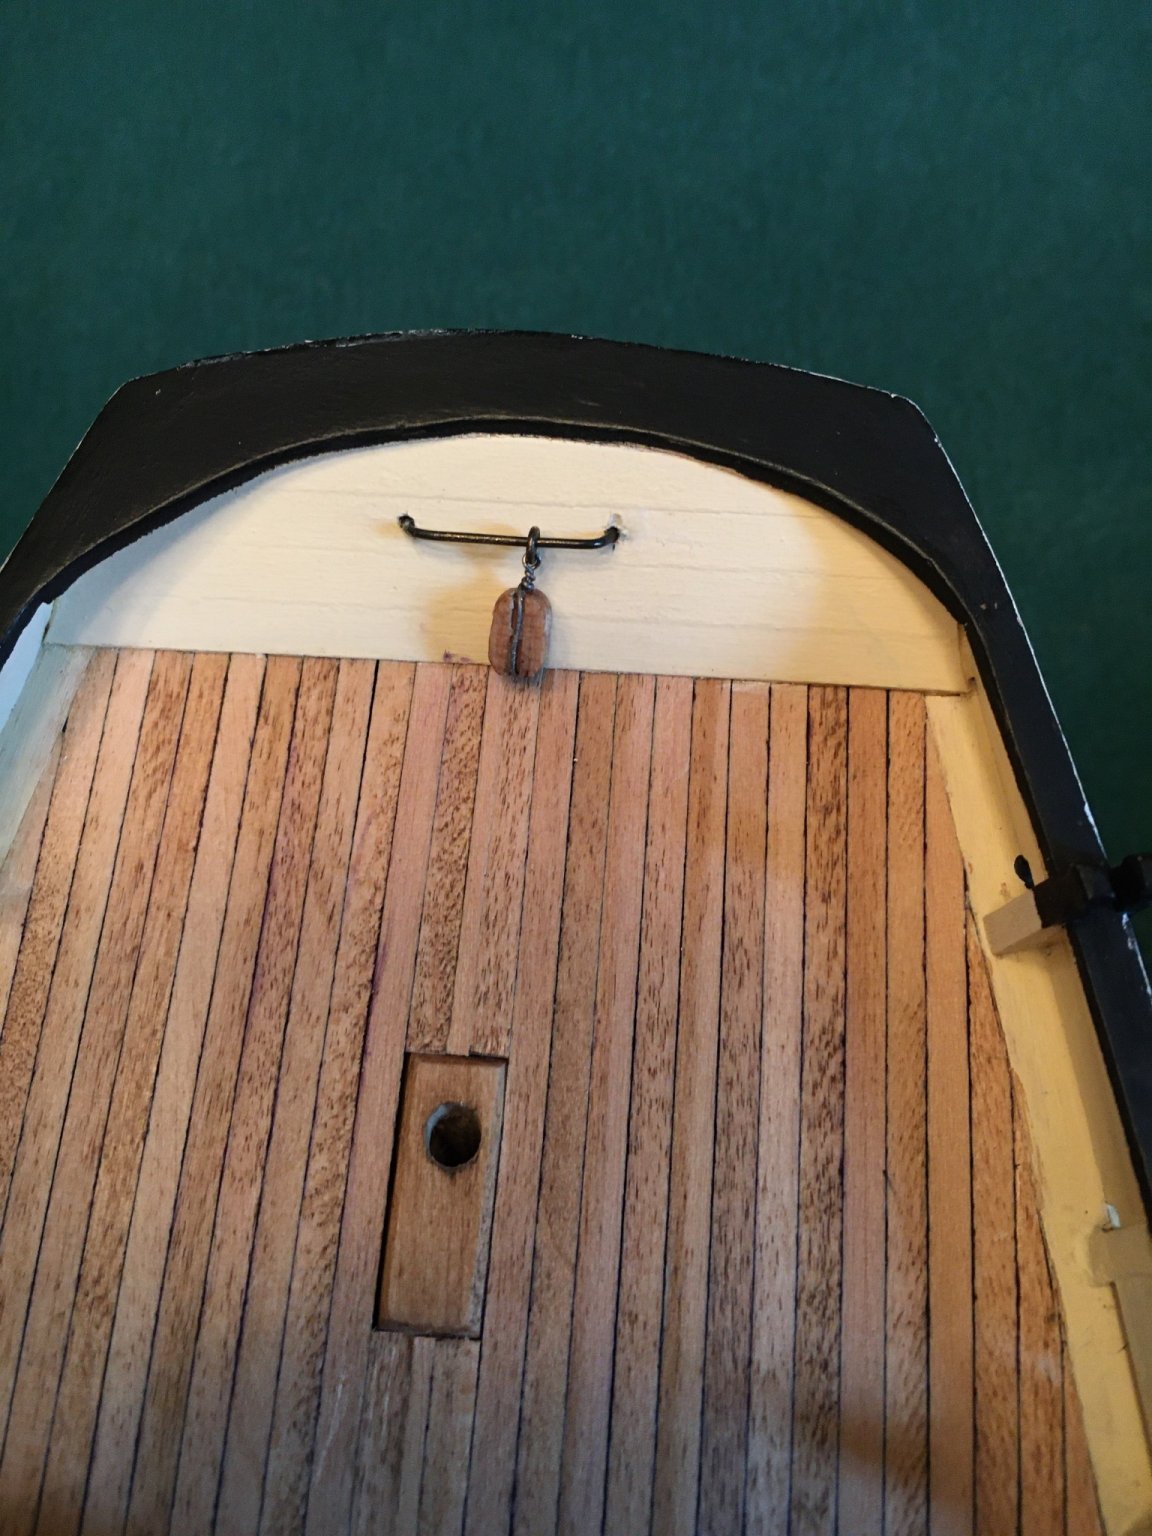
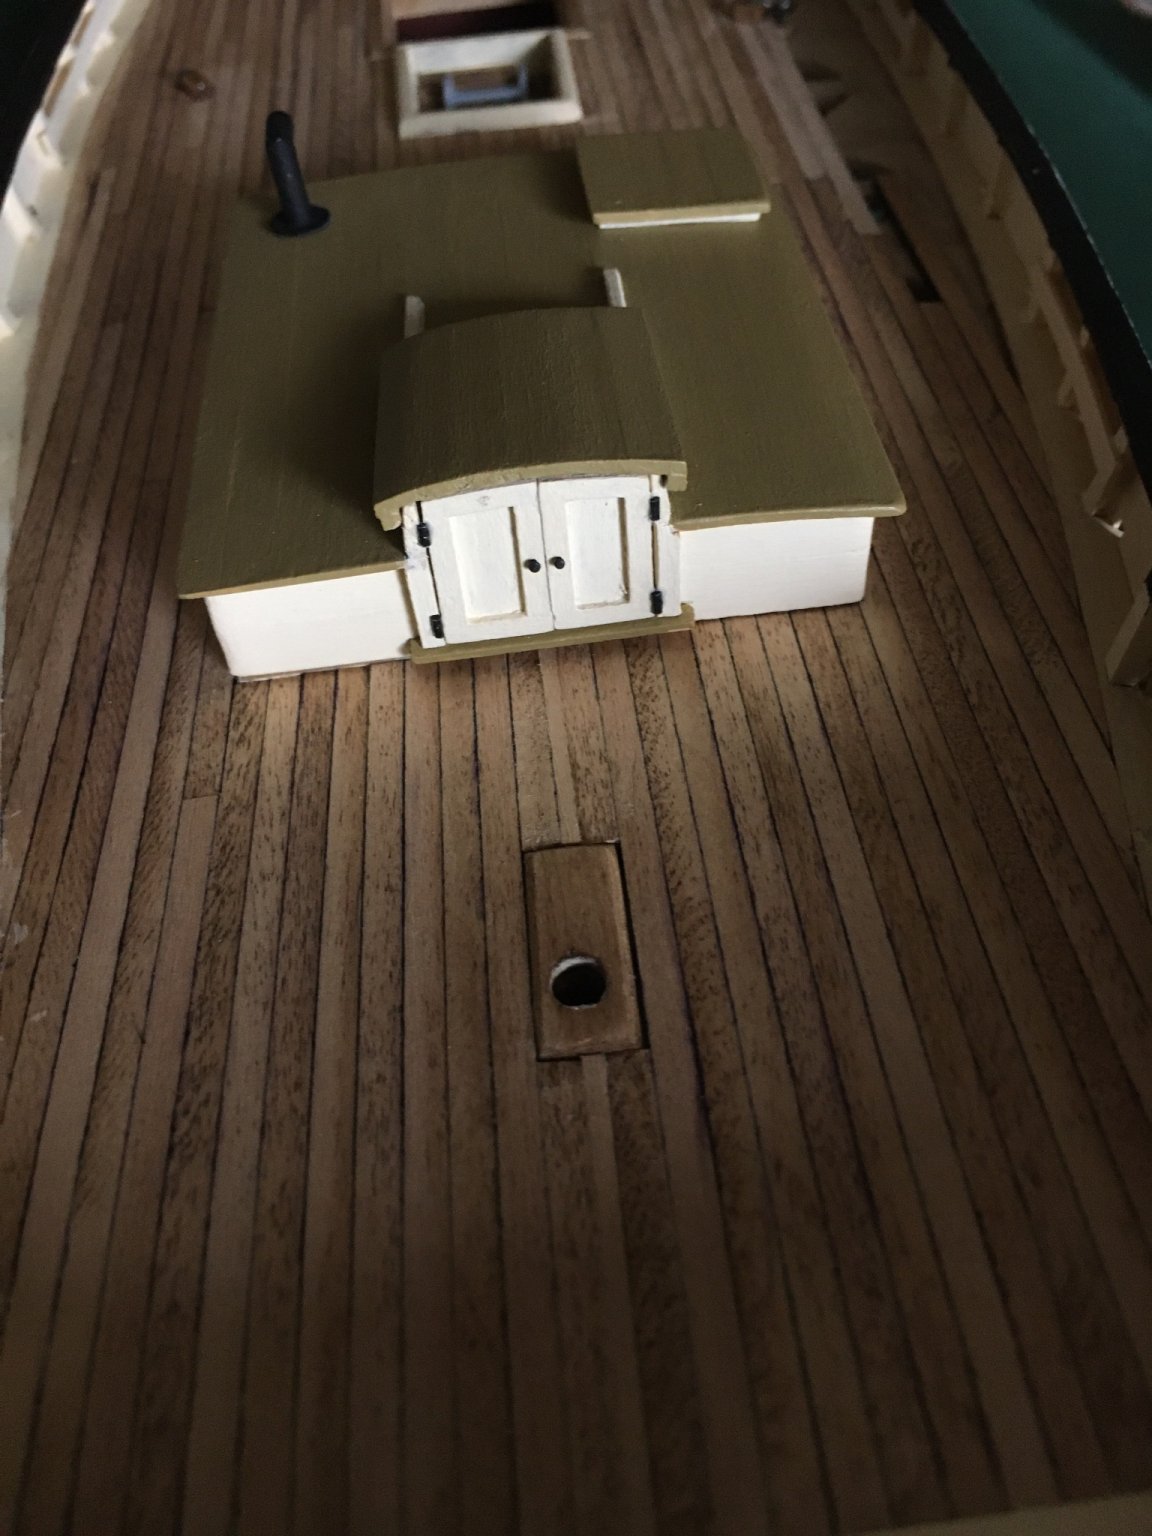
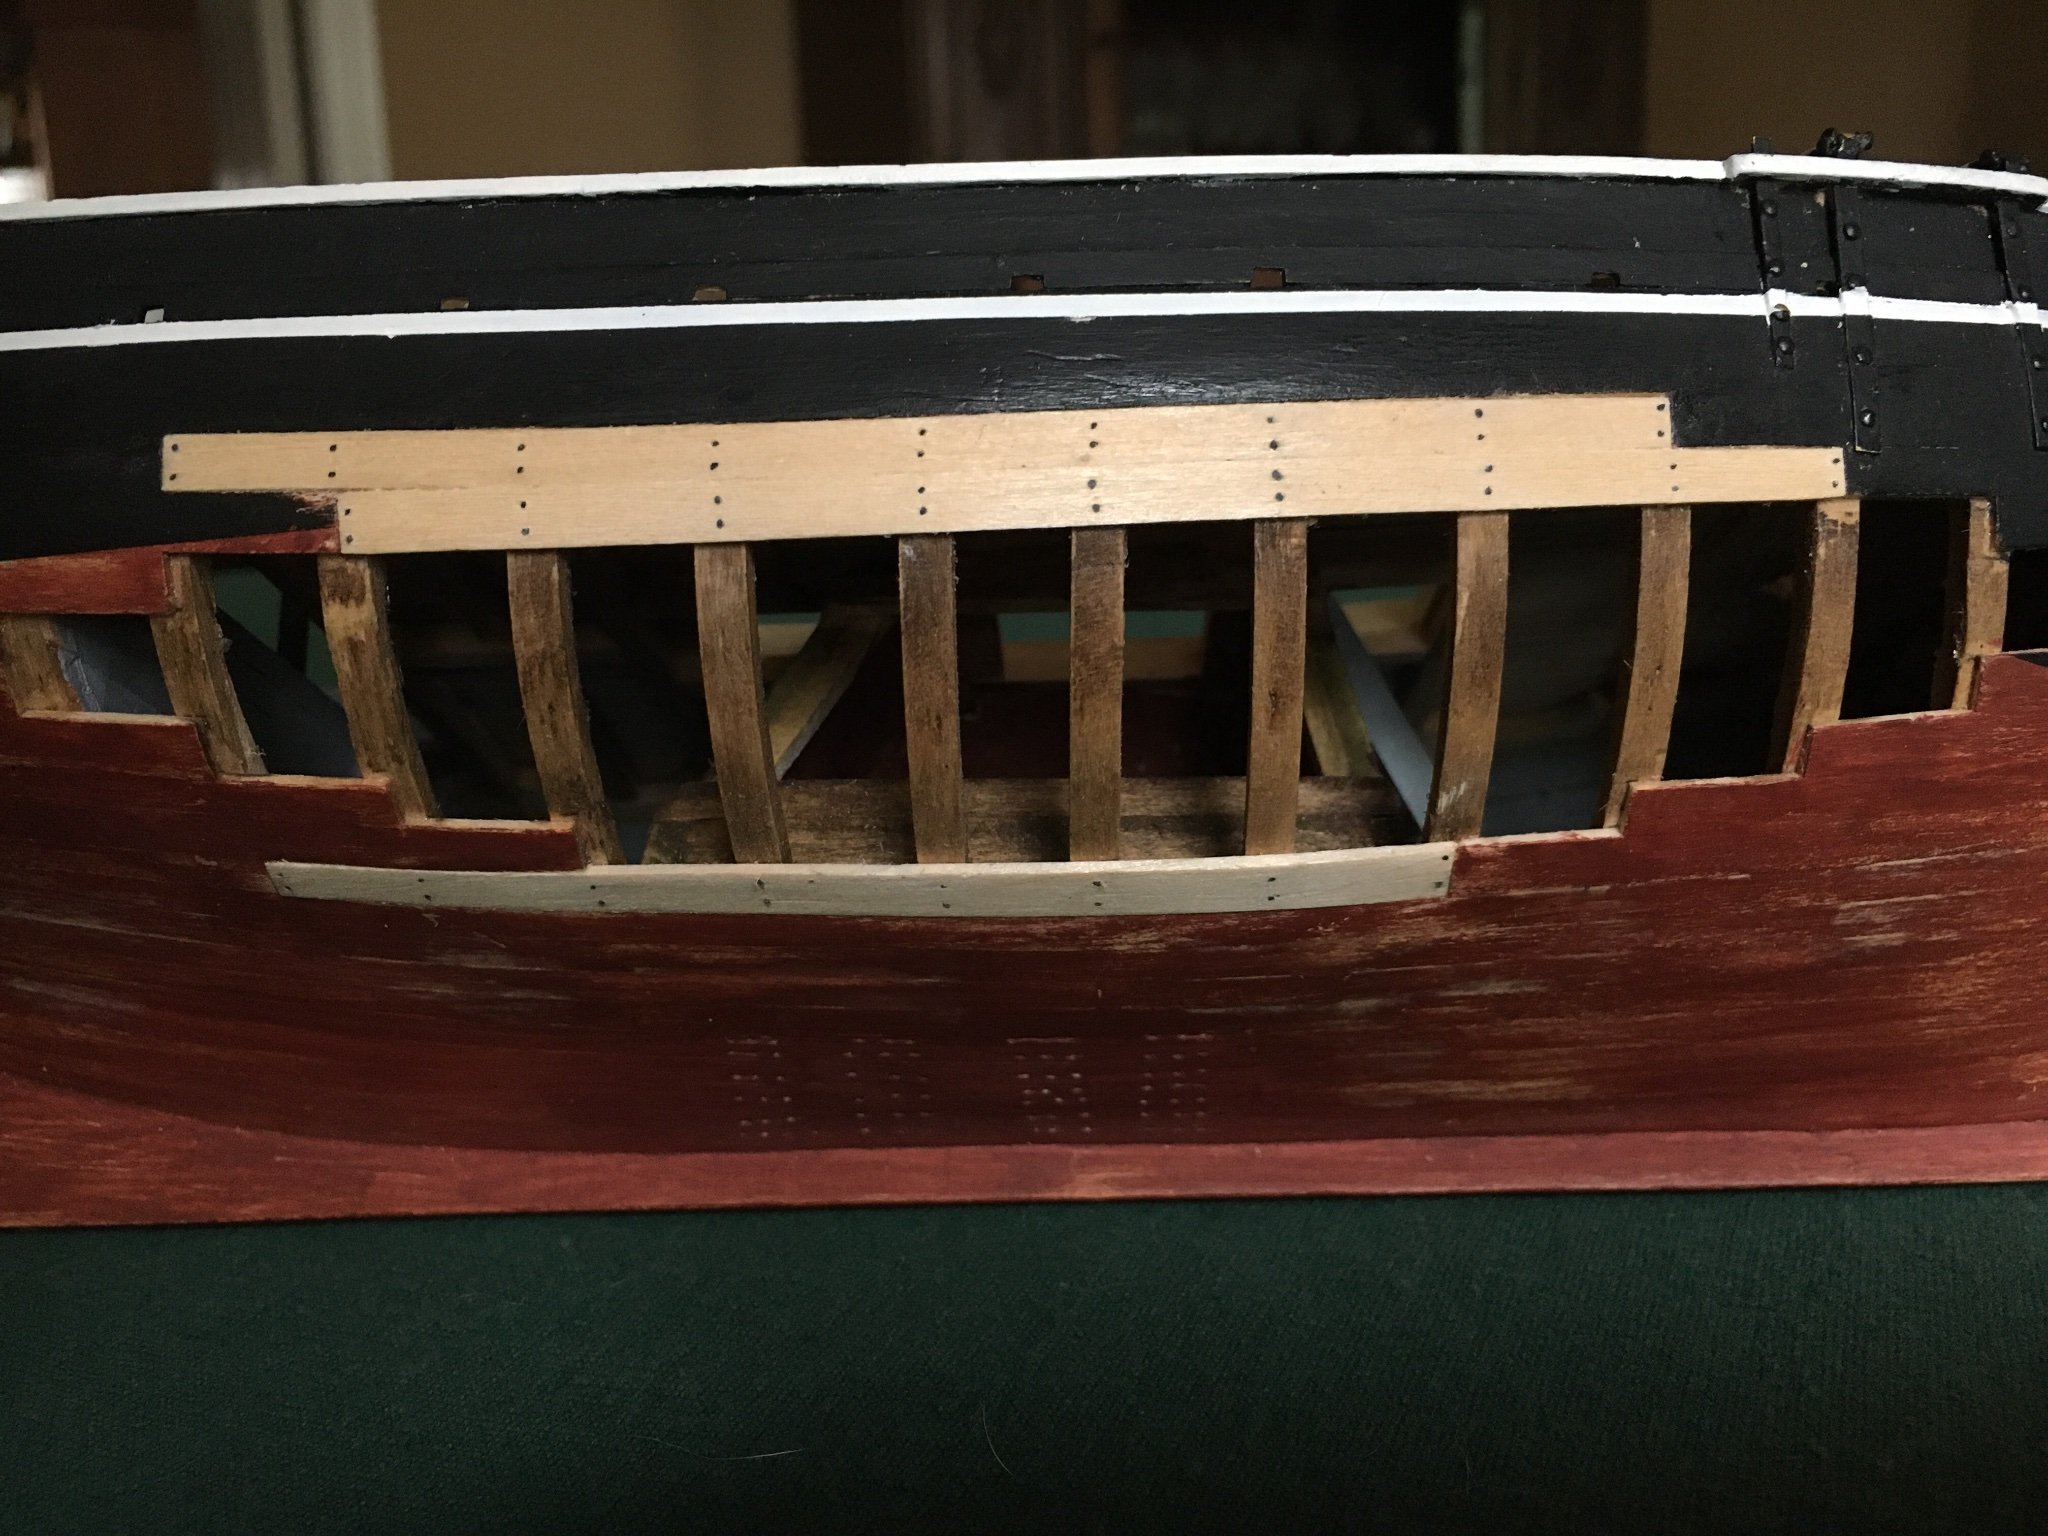
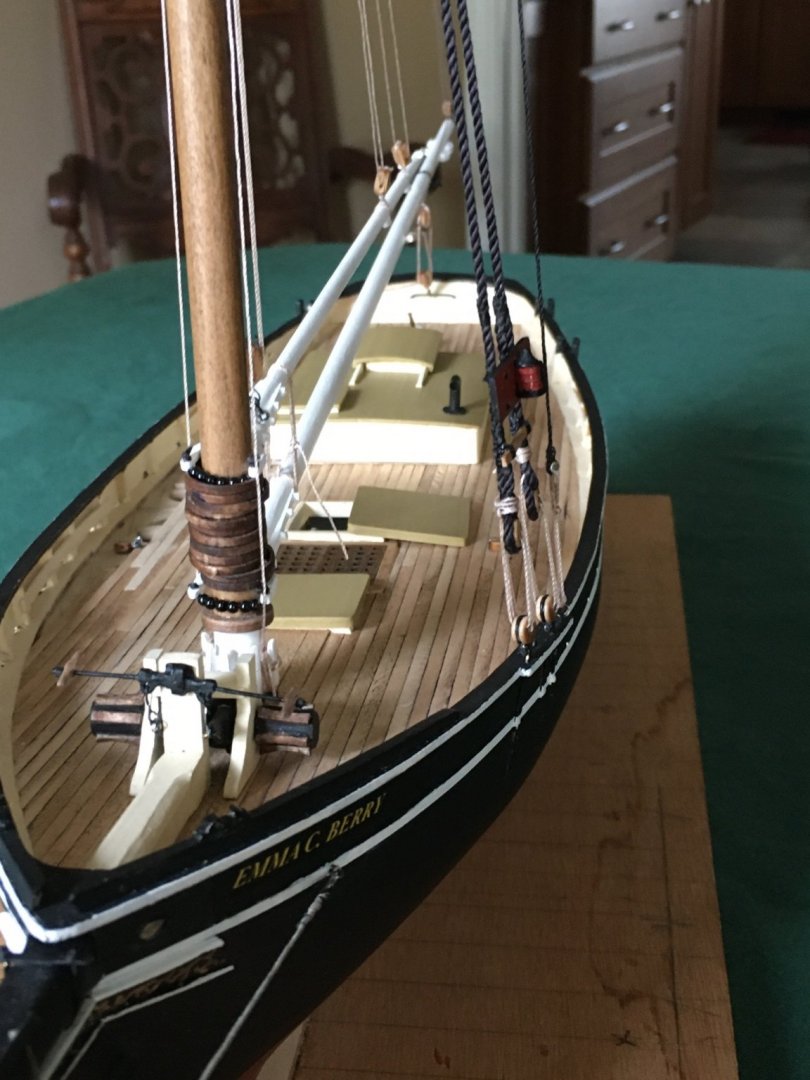
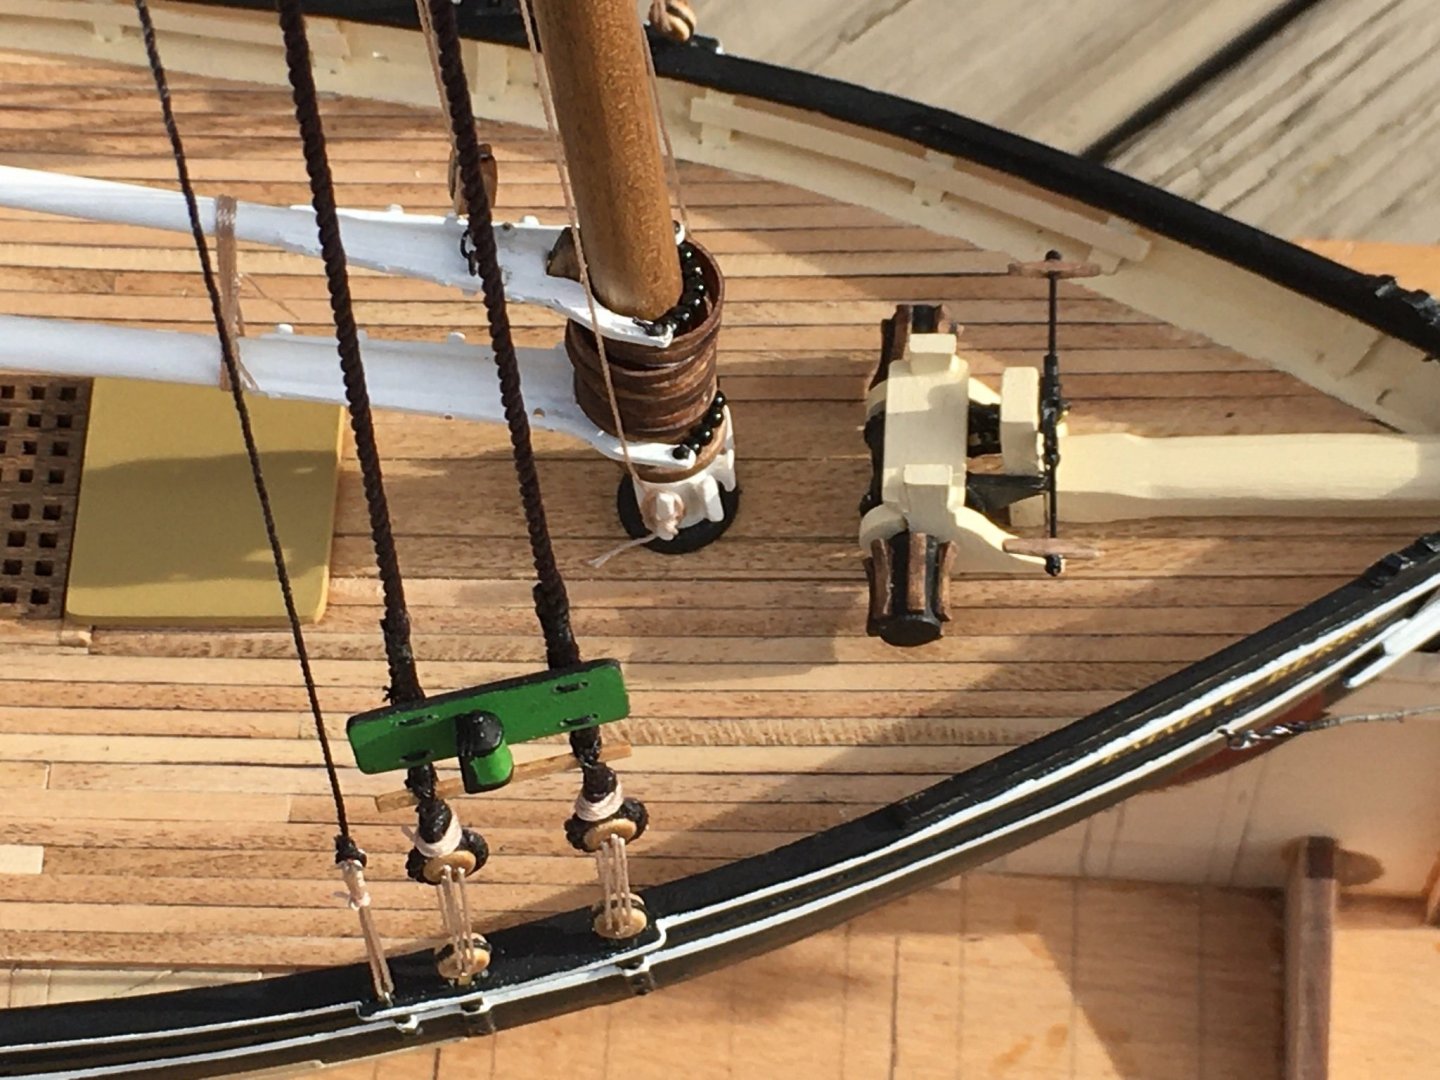
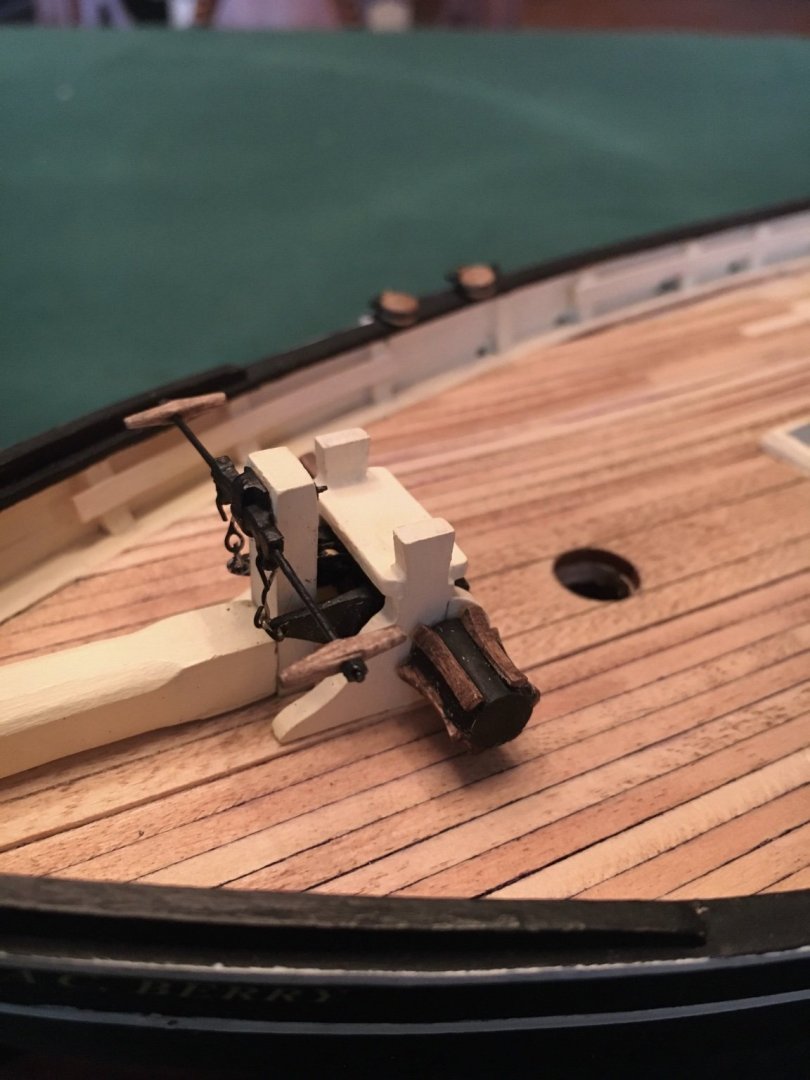
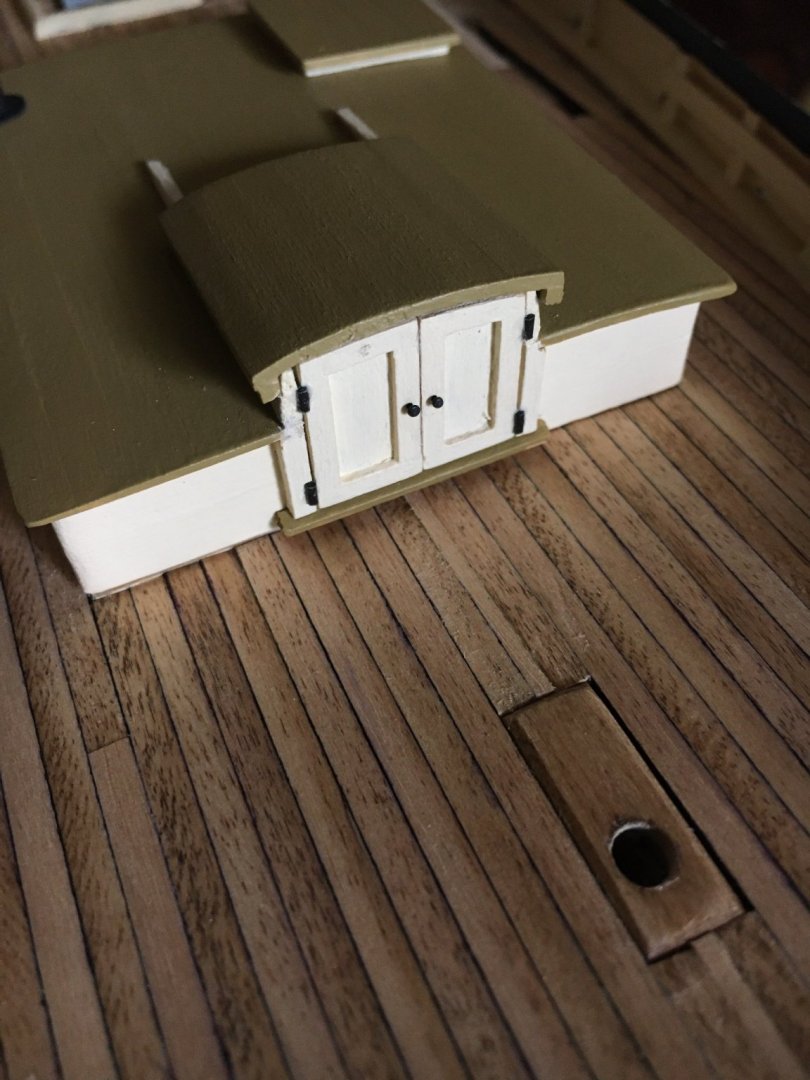
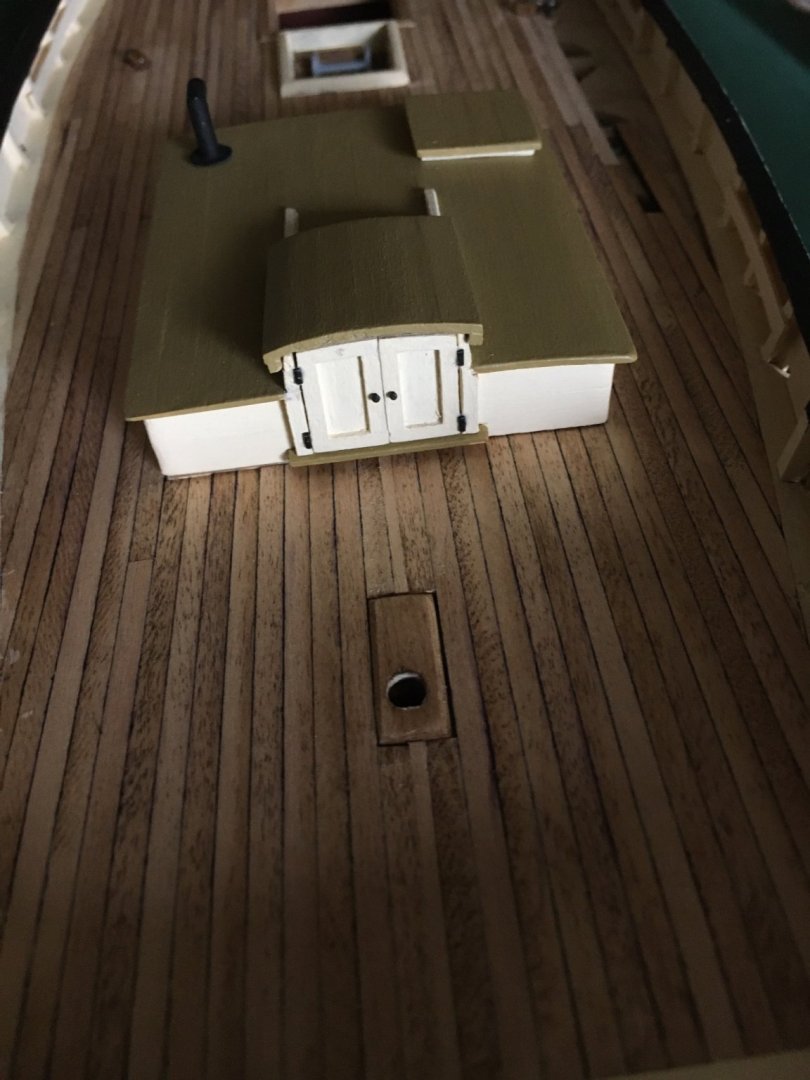
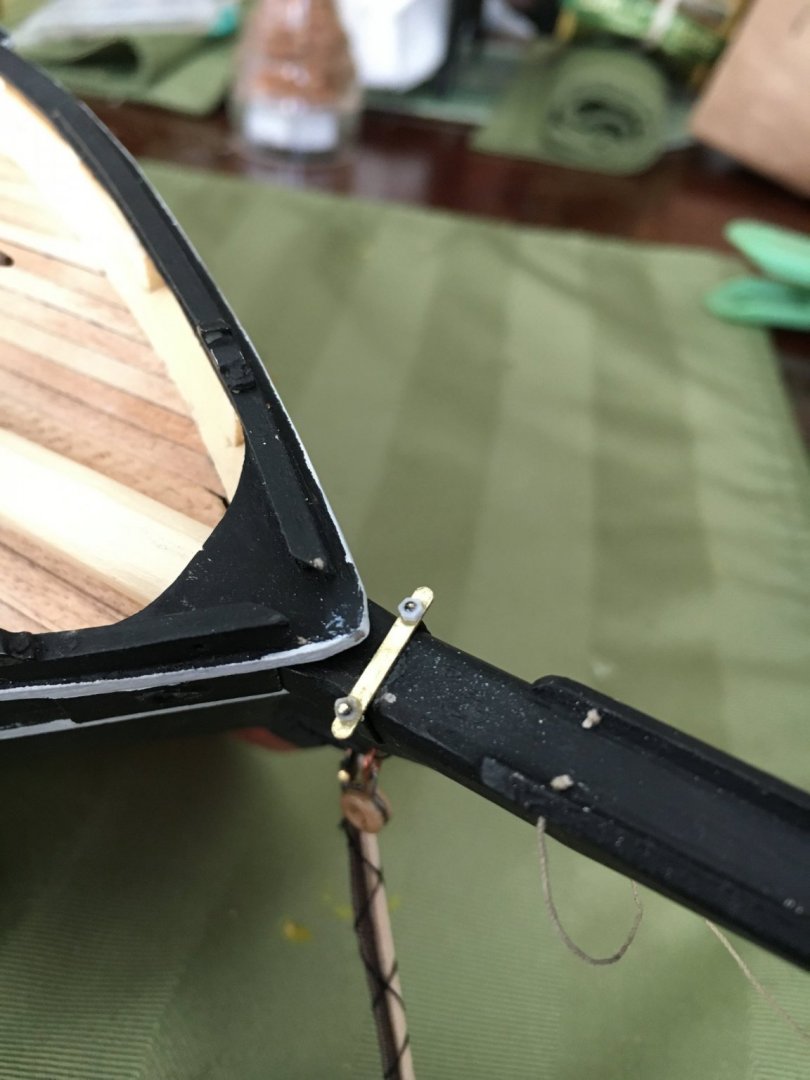
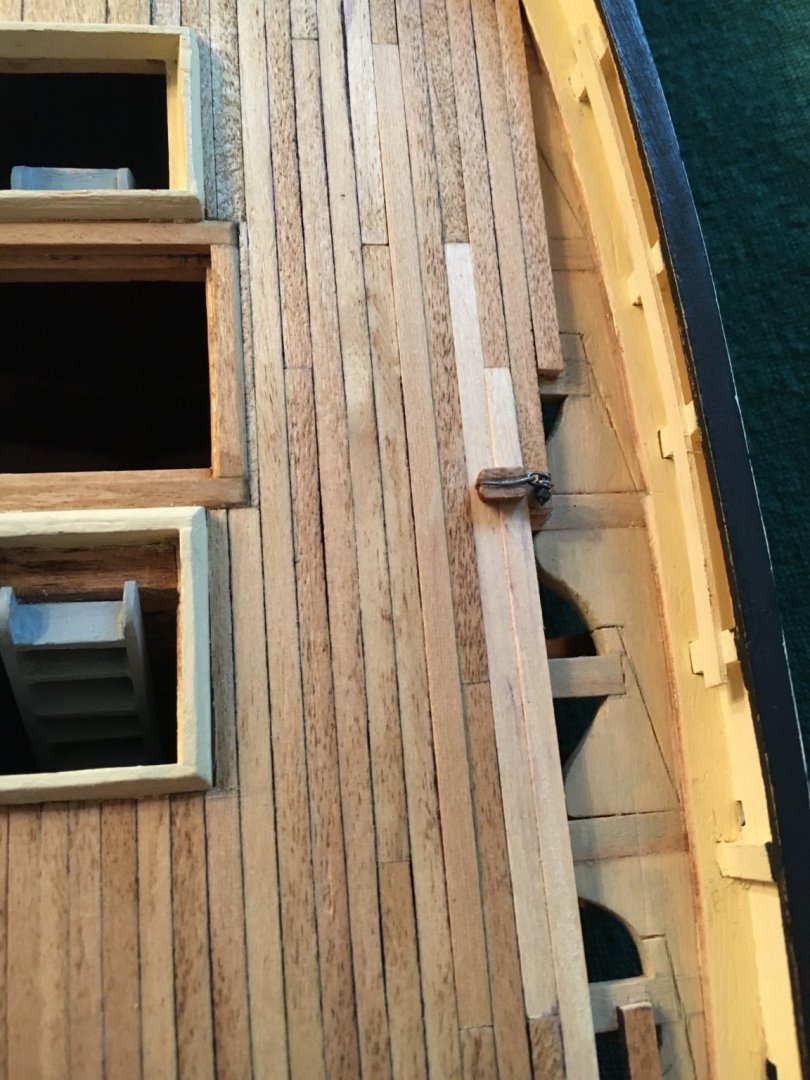
Did a bit more work, I am trying to finish up all the bits that can be done before starting major rigging. More likely I am procrastinating starting that task as I think it will be a challenge. I tend to do this but once I start I thoroughly enjoy it. I finished mounting the winch, mounted the horse at the stern, finished the cabin doors and installed fake fasteners in the simulated new planks in the open area of the hull. I thank Sea Hoss for his post about using brush bristles, worked a treat and my thinning hair shan't miss them!

-
Is this still available?
-
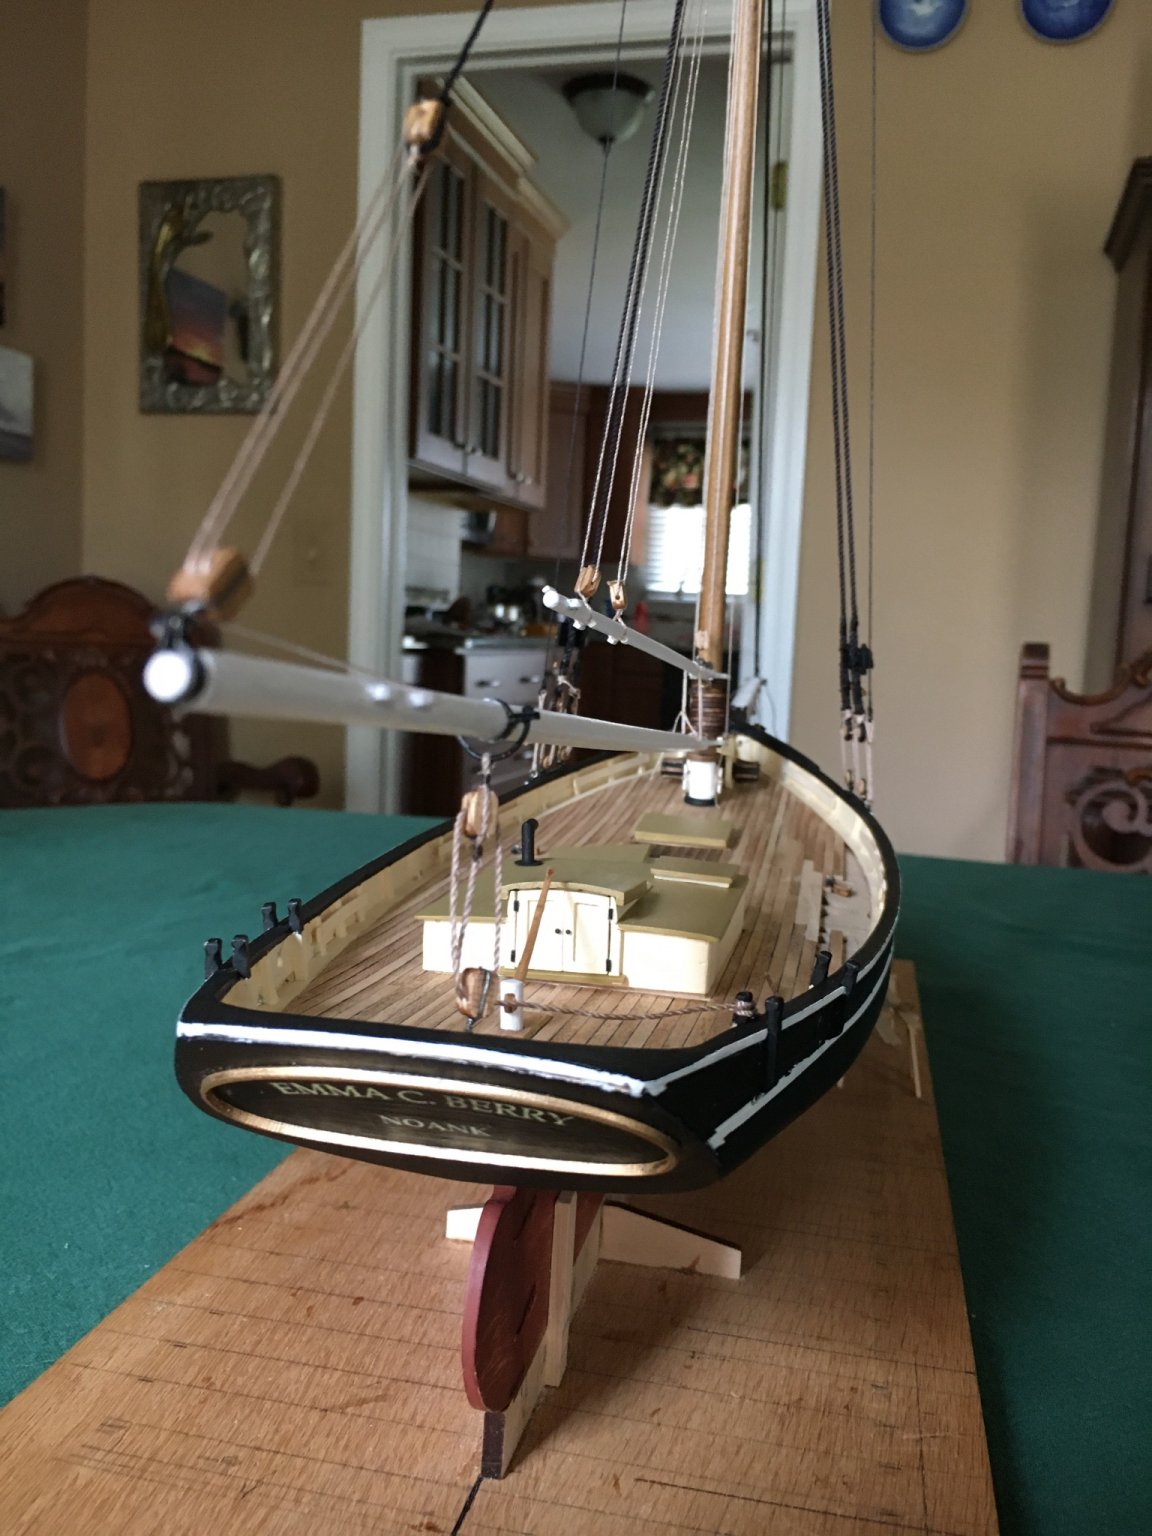
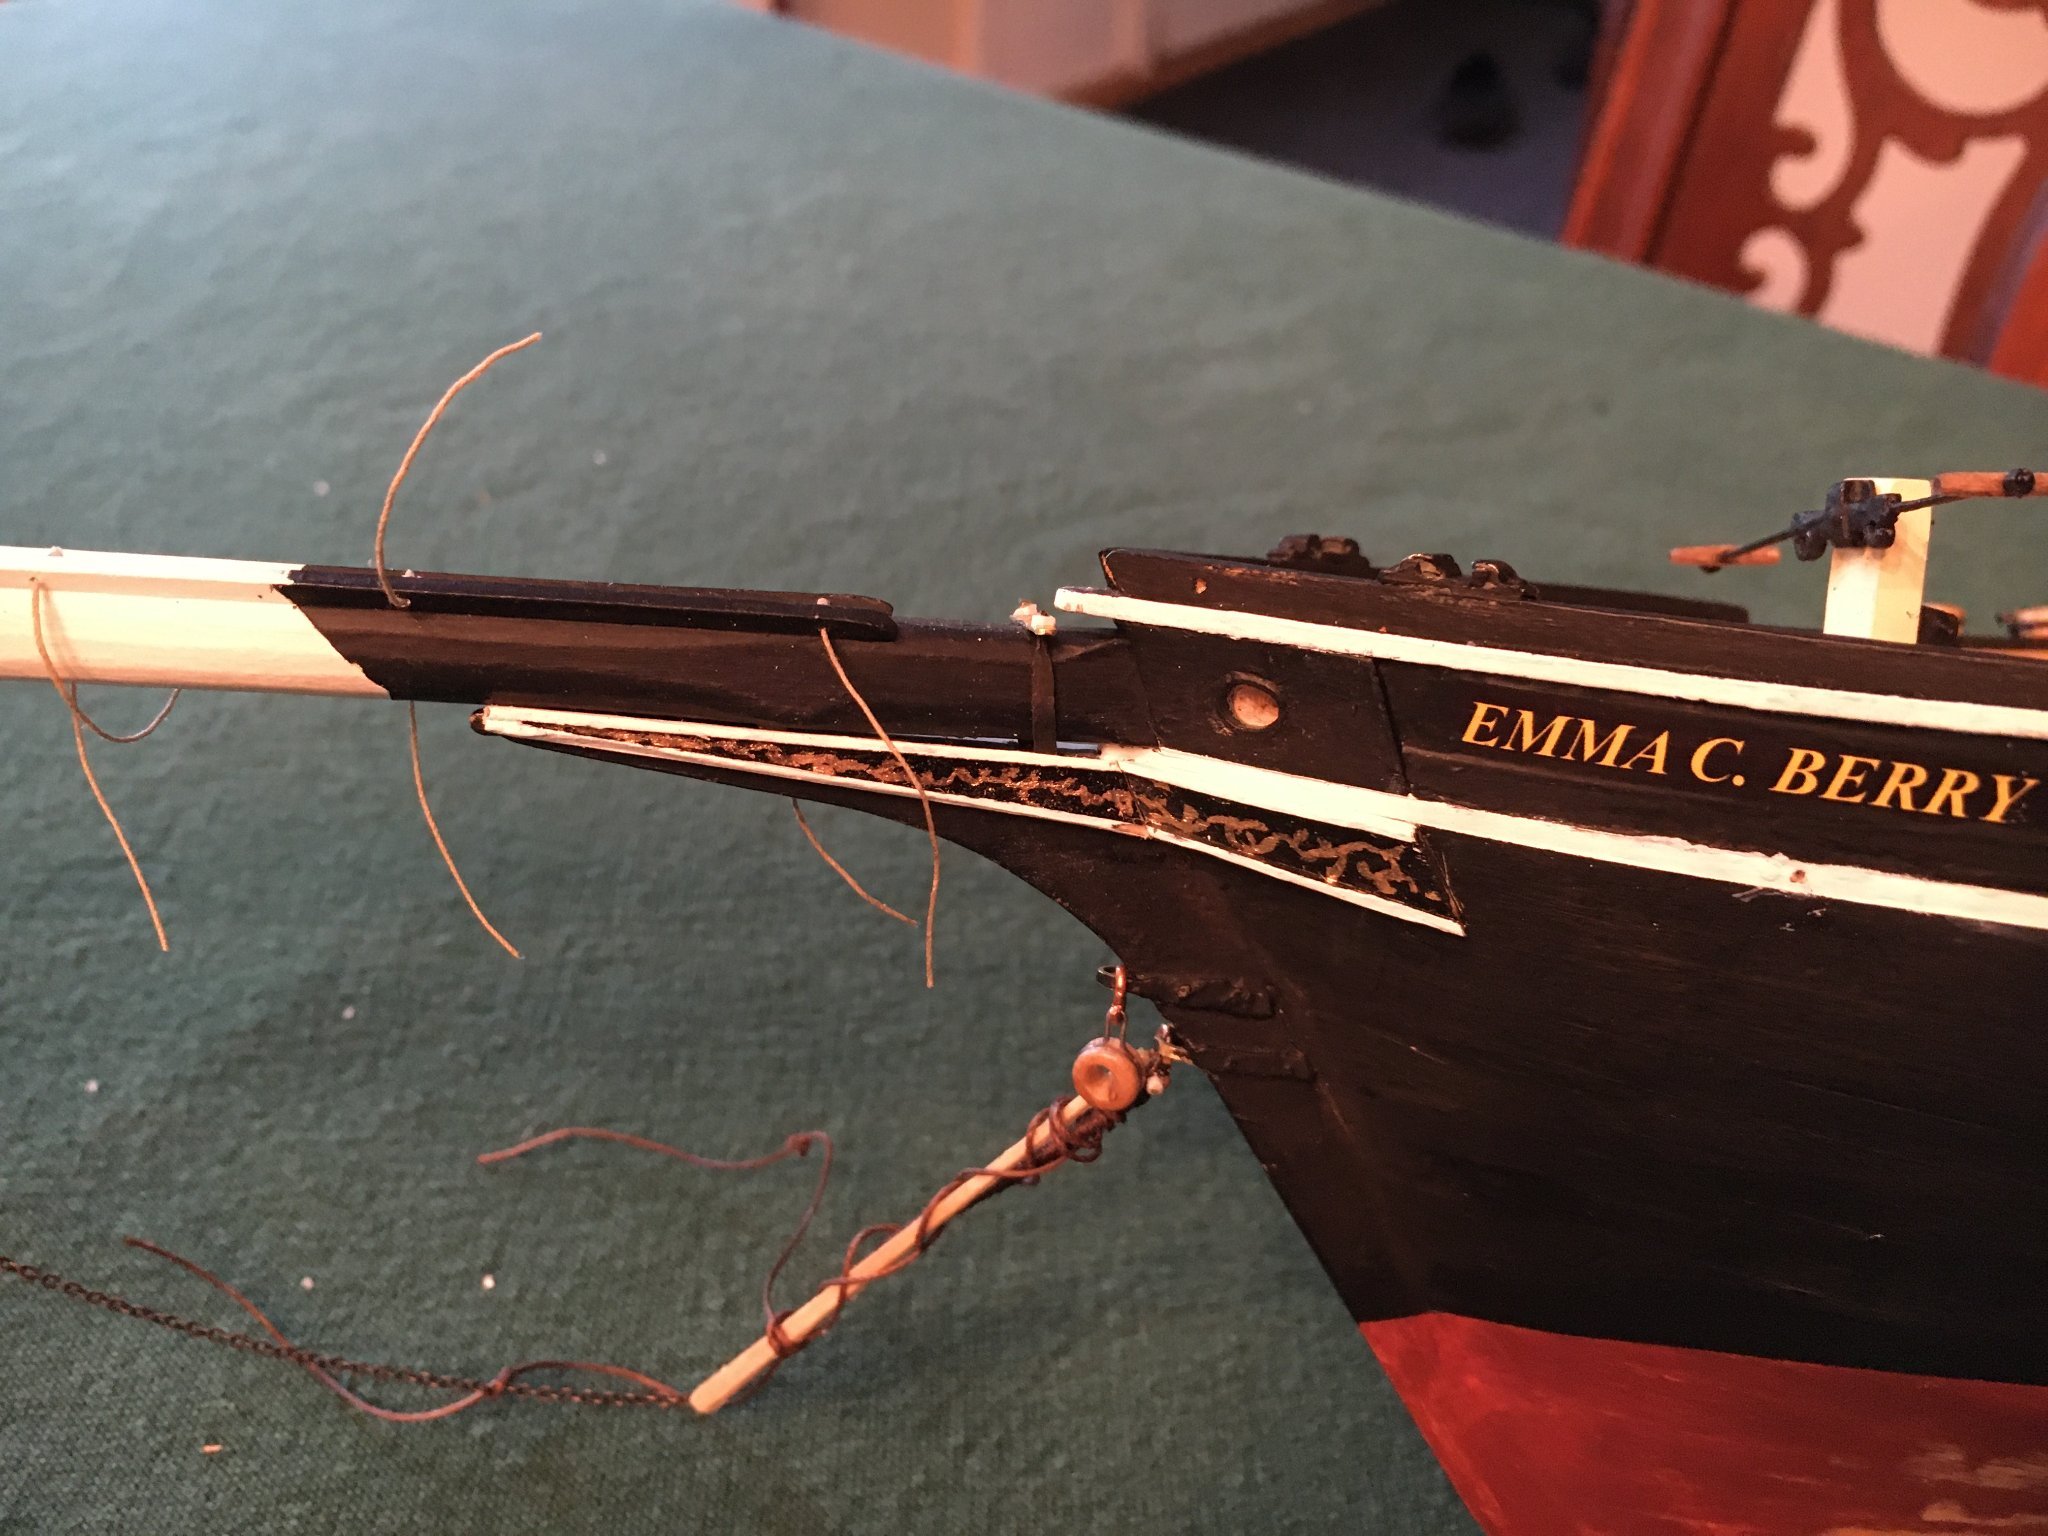
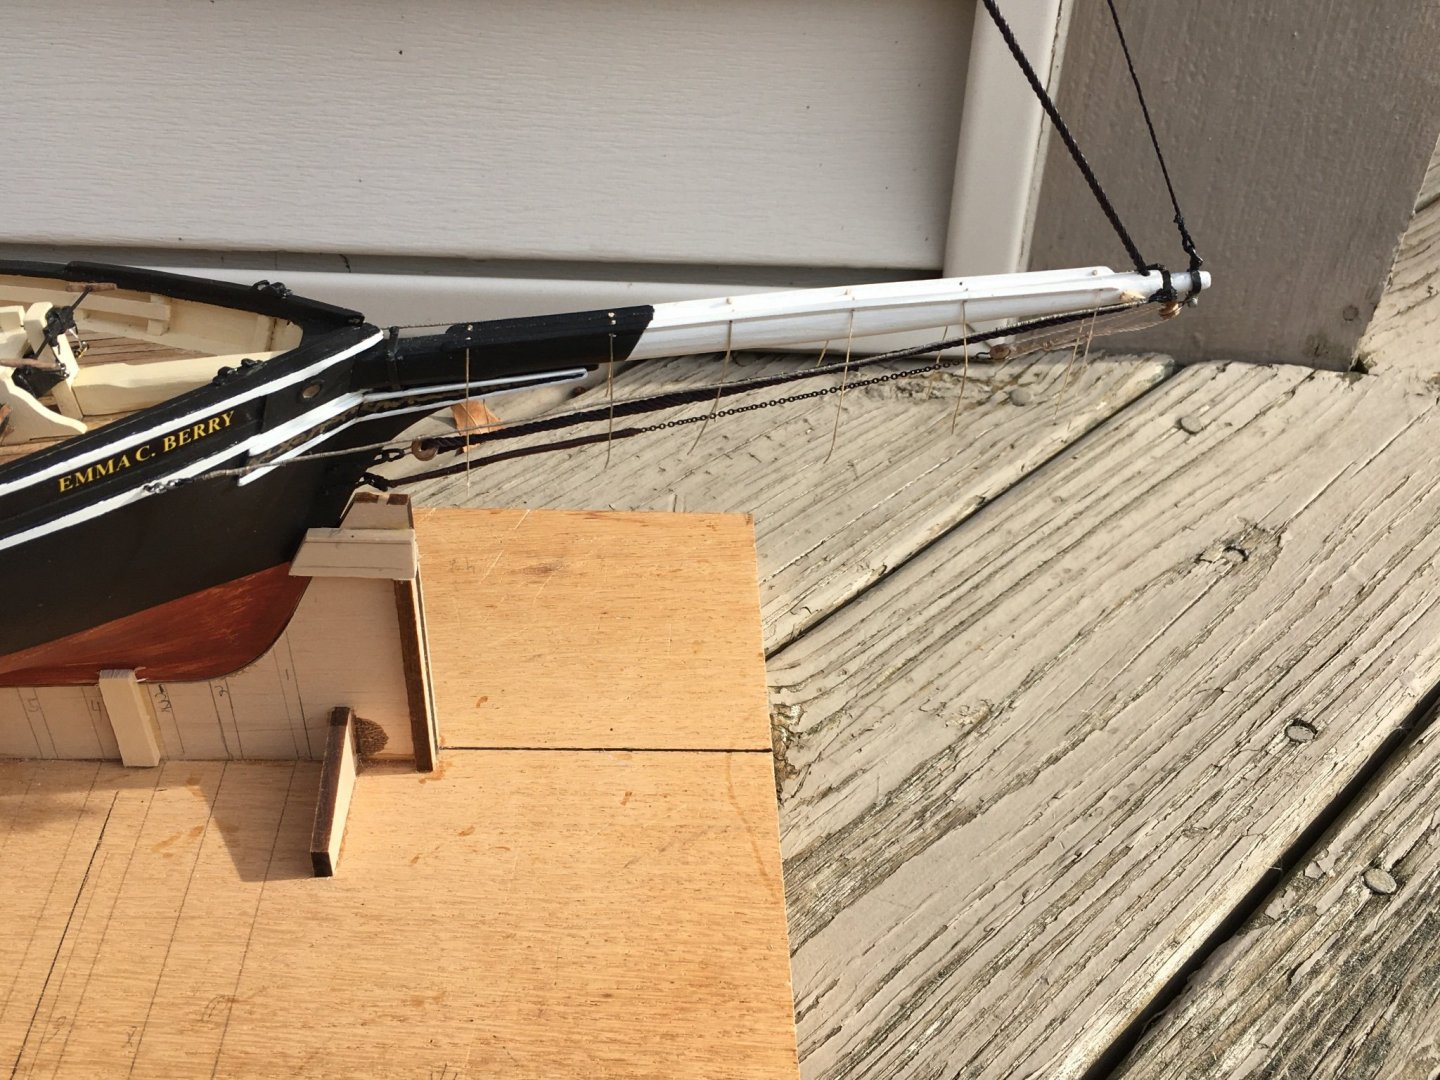
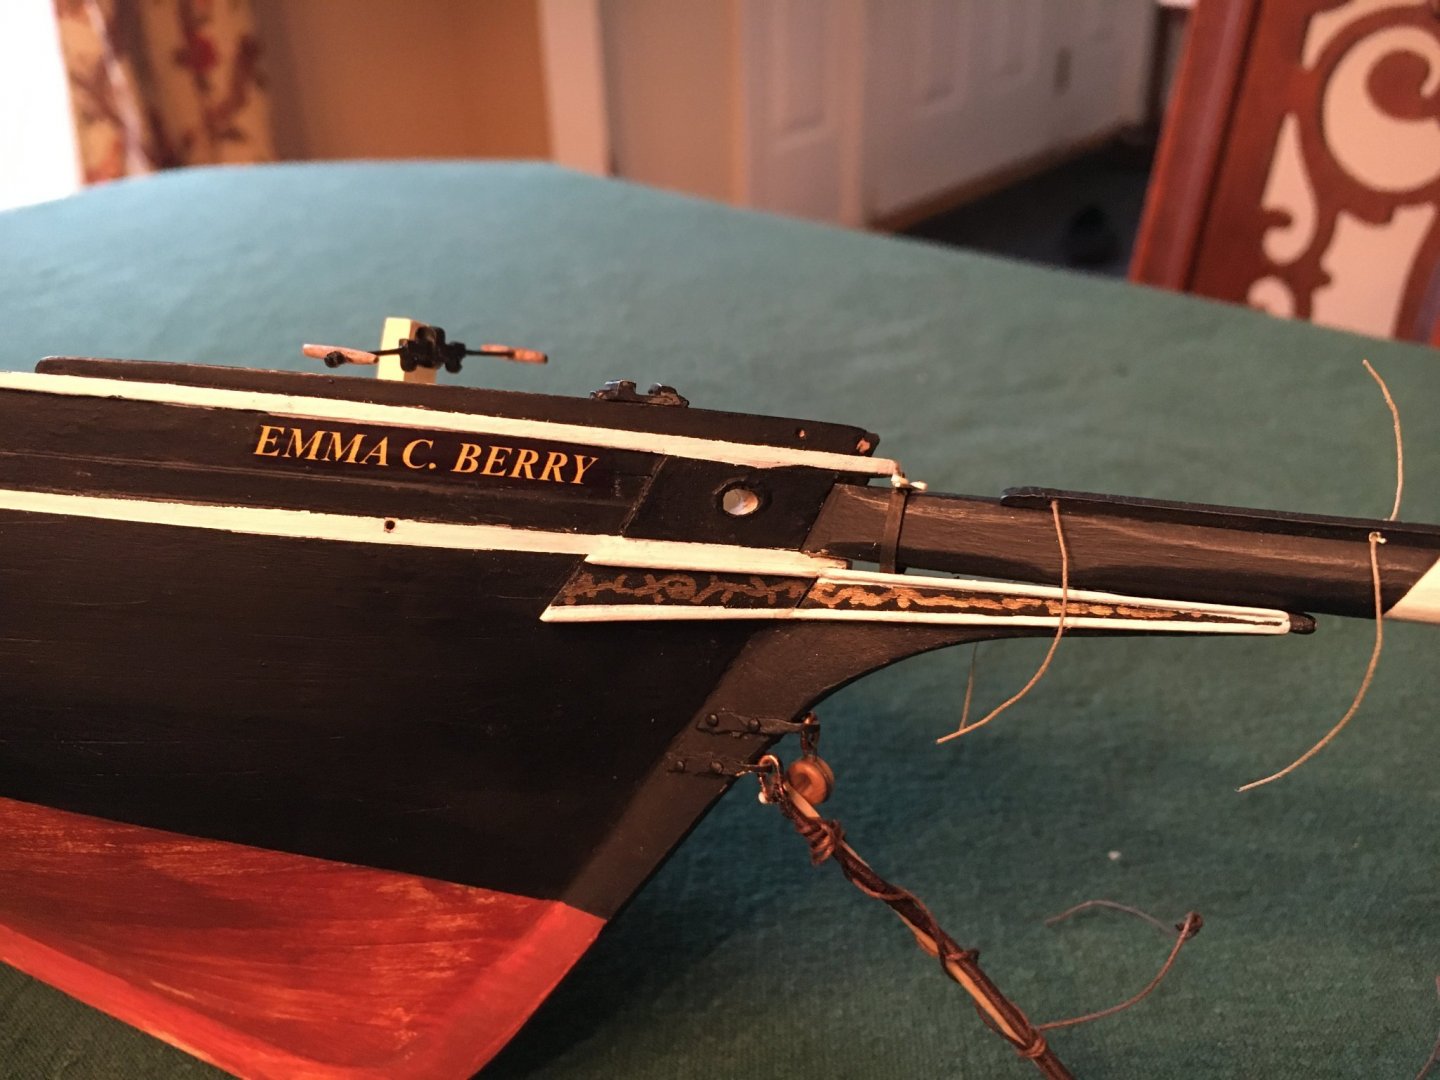
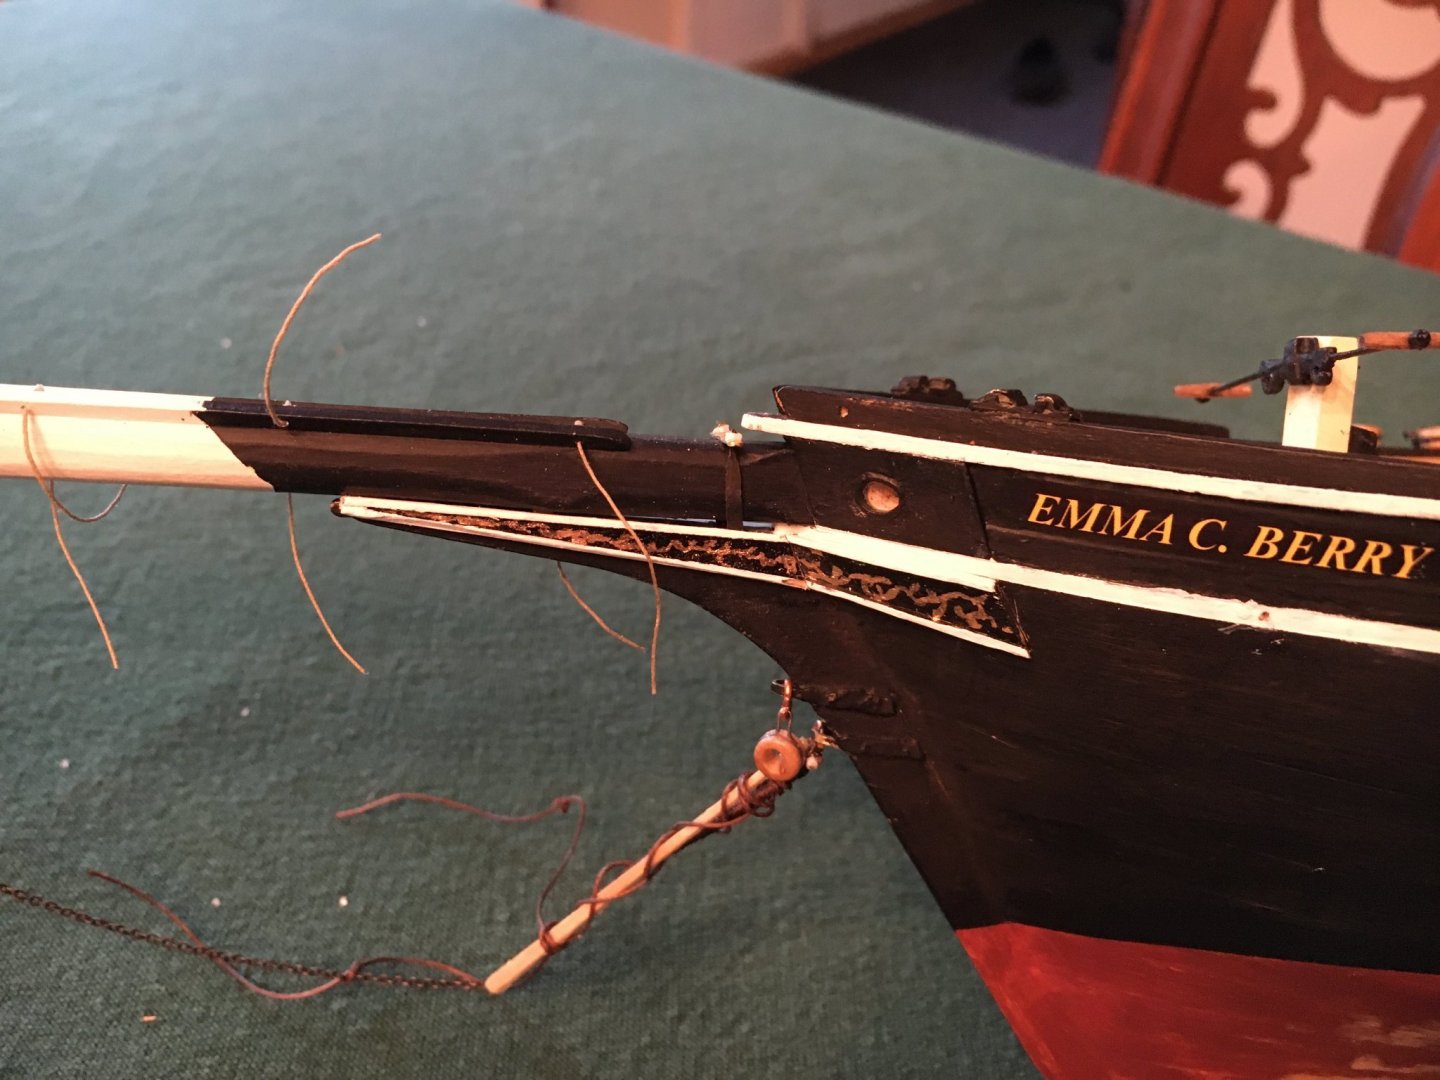
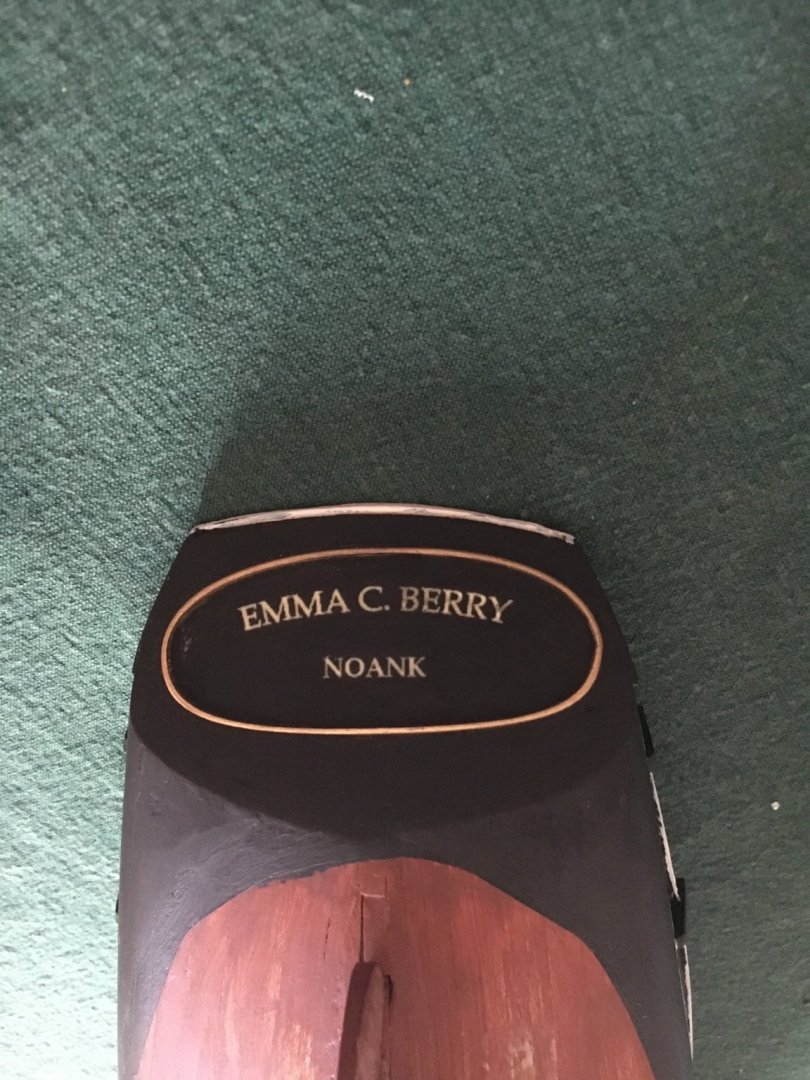
Certainly well past time for an update! I have been busy during the nice weather contemplating projects that needed done around the house. I managed to do a lot of of contemplation and possibly succeeded in accomplishing about 10% of them Perhaps a blessing or curse being retired and having no Admiral to motivate me. In addition, one of my joys in life was travel and I had not been away since March 7, 2020 when I escaped from Auckland via Sydney, San Francisco and Chicago, I was sure I was a dead man but did survive. So I recently threw caution to the winds and went over to Hawaii for a couple weeks before I went mad. My late wife and I went there often and I needed some salt water on my skin. I hope I am not violating any rules but want to post this song that always brings me joy reminding me of my wife after I travel to Hawaii. I always get a bit contemplative but comforted after a trip there after my wife had passed. Enough digressing, I spent a fair amount of time rigging as much as possible before I install the mast, boom etc. as it seemed easier than doing it after installing the bits, really no photos were taken, perhaps after installation. I installed the bowsprit and completed the gammons, a couple of photos. I simulated bolts with plastic rod I tried to make six sided. I installed the trim board after hand painting it. I actually did them in two parts, not sure that was the best option and perhaps bending them to fit would have been better? I next turned my attention to the boat name at the bow and and stern. I knew hand painting was not an option and I was not happy with the printed sheet provided with the kit. I bought some decal sheets for use in my inkjet printer and am fairly happy with the result. The bow was easy but stern not so much. I had neither the program or more probably the paucity of expertise to create the curved lettering for the stern so I pinched a photo from another member here (thank you Ahb26!) and used that to make the decal. It turned out that making and applying the decals was a fairly complicated process and rather than elaborate on the procedure if there is any interest I will expand on the details. Finally, I sealed the deck with a matte finish and any other raw wood also.

-
Your model looks wonderful, great job! I am still working on mine and you inspire me to complete it. Hoss, I have to ask, is that duplex we see out the window across the street finished yet also?
-
John, your model turned out wonderful! Great work.
-
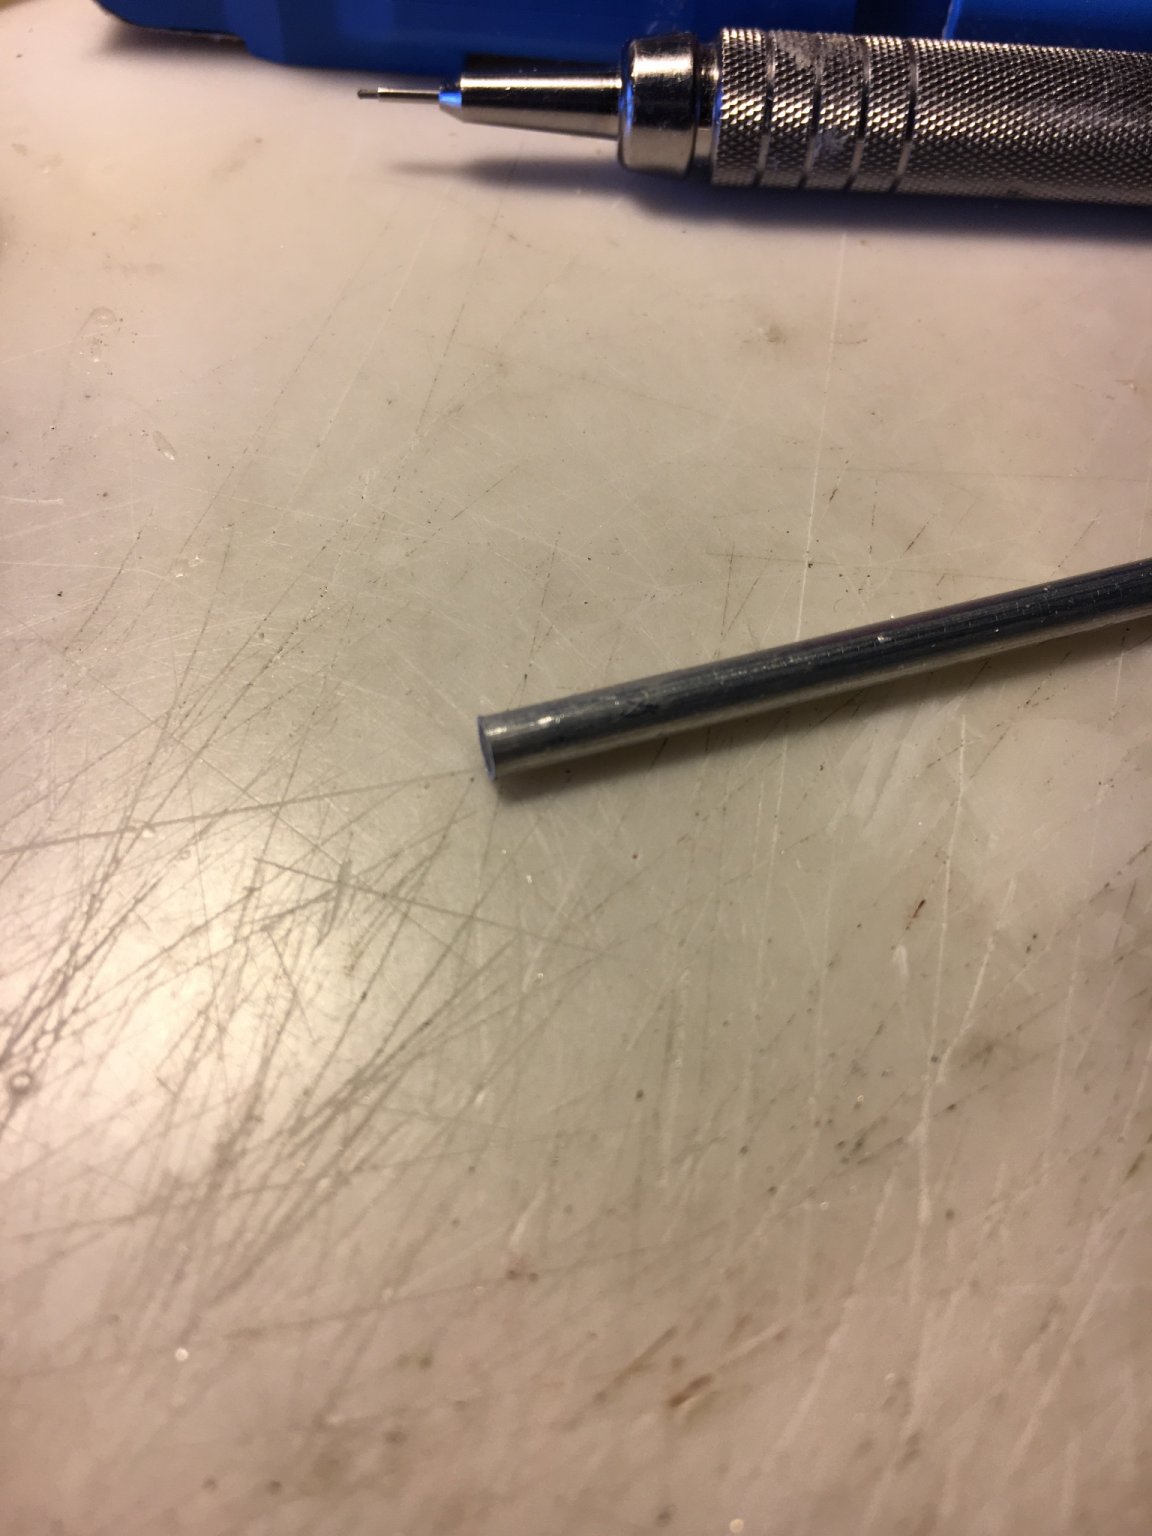
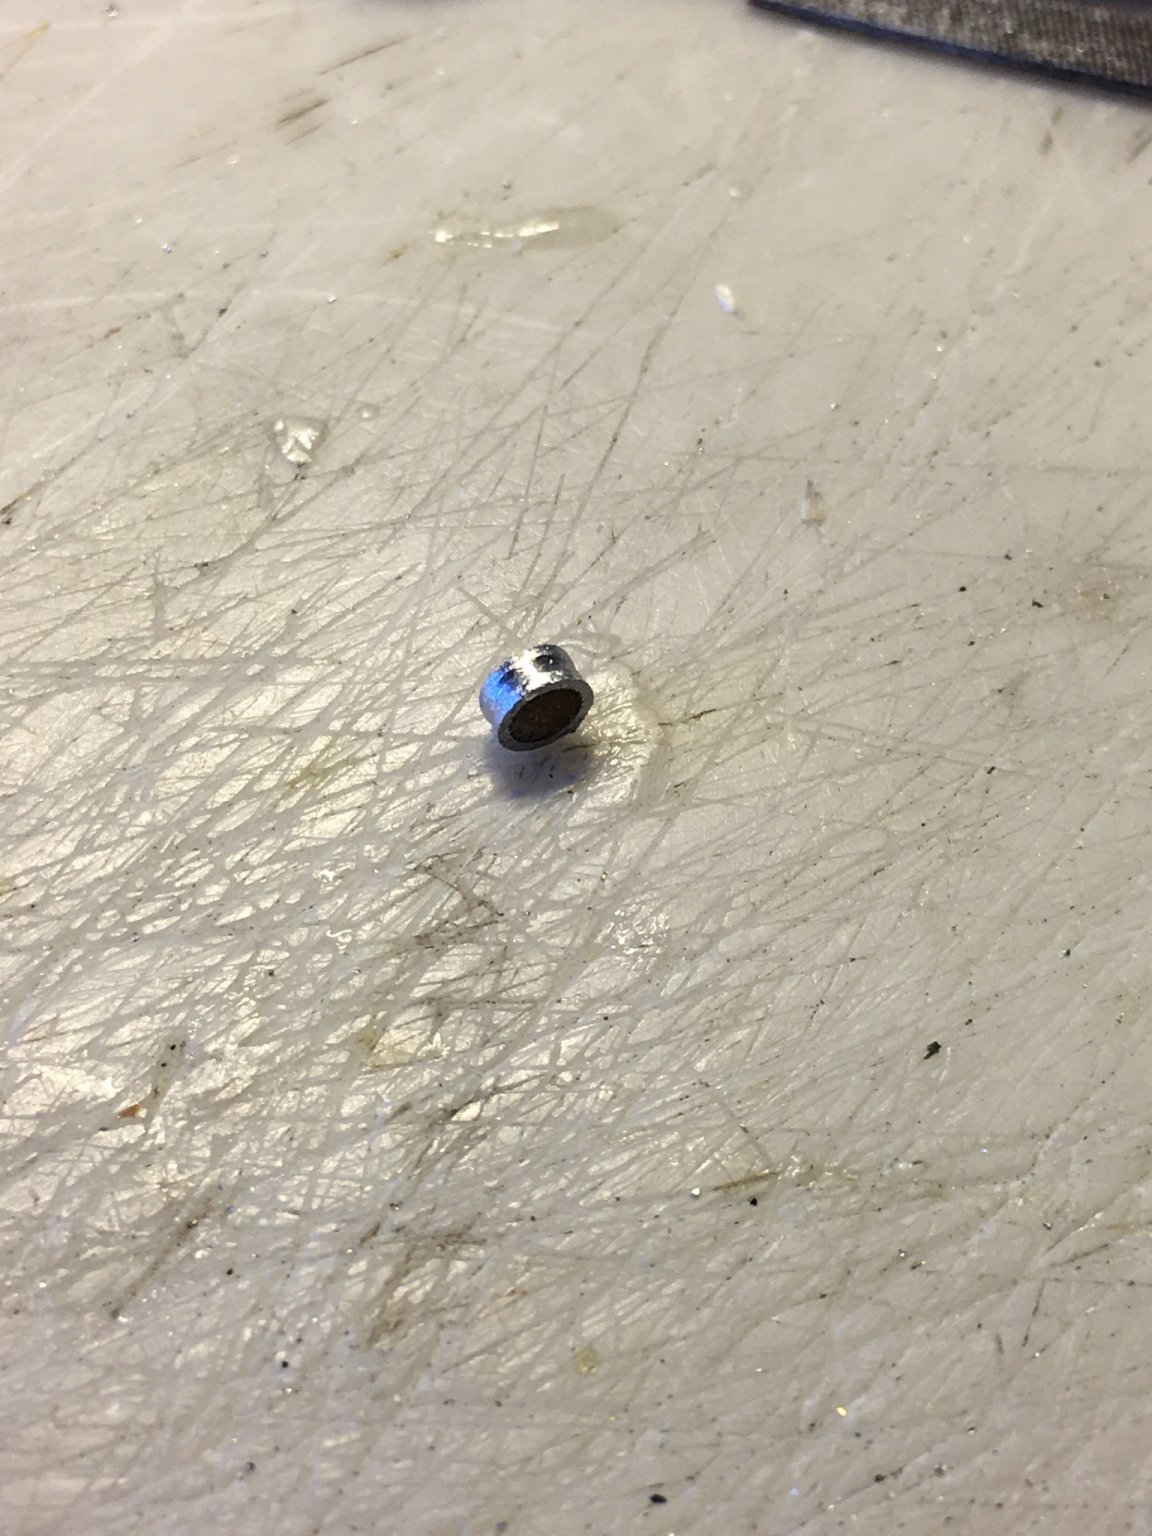
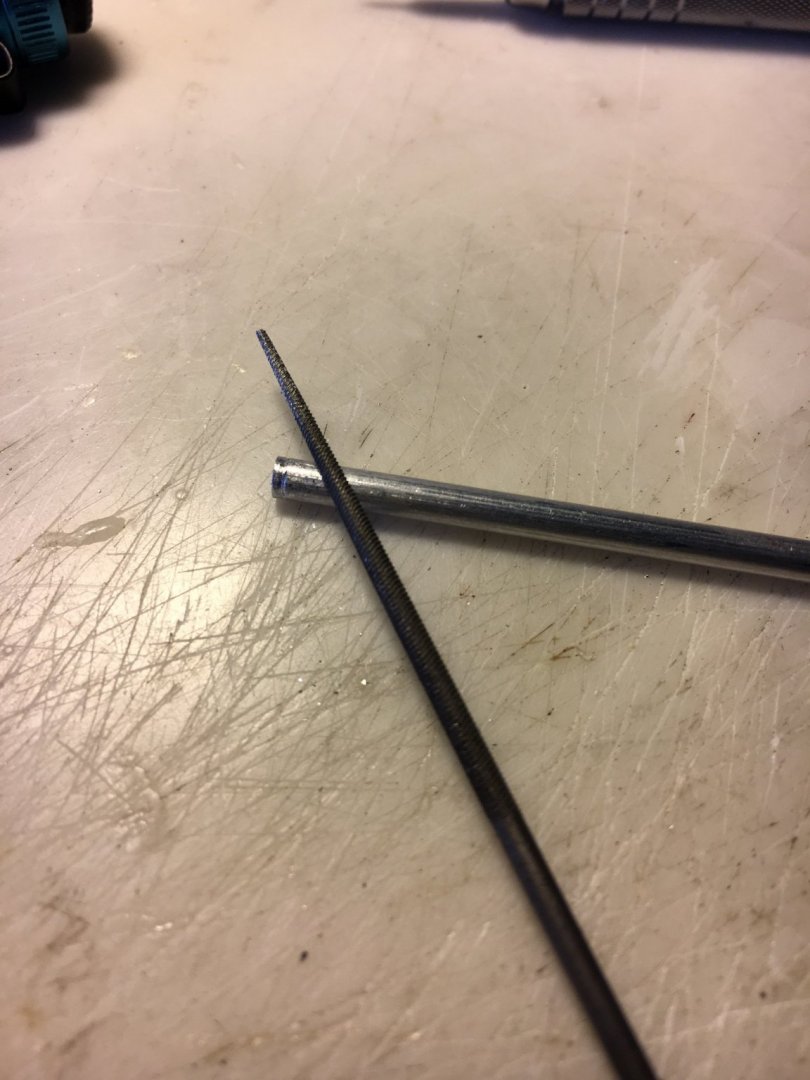
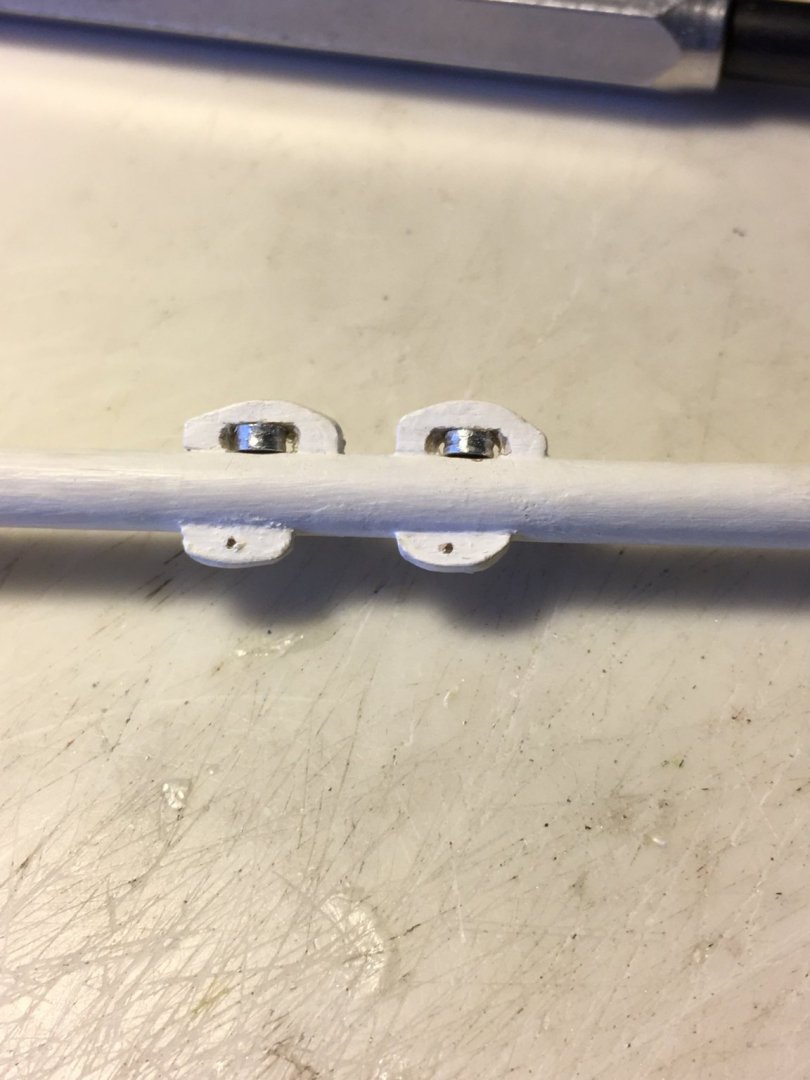
Another brief update. In my previous post I had a photo of the cheek blocks on the mainsail boom. The directions suggested a couple of holes could be drilled in them as a simulation. It didn’t look right so I made some proper blocks. I had some Aluminum tubing left over from another model so I glued a bit of Bamboo skewer in the center to allow it to be pinned in place. I used a wee file to make a groove around the outside, cut it in a miter box with a razor saw and pinned it in place. I am much happier with the result!


-
I use both and now prefer scalpels. I also occasionally use single edge razor blades as they are thinner with a less severe bevel and make square edged cuts easier in some materials.
-
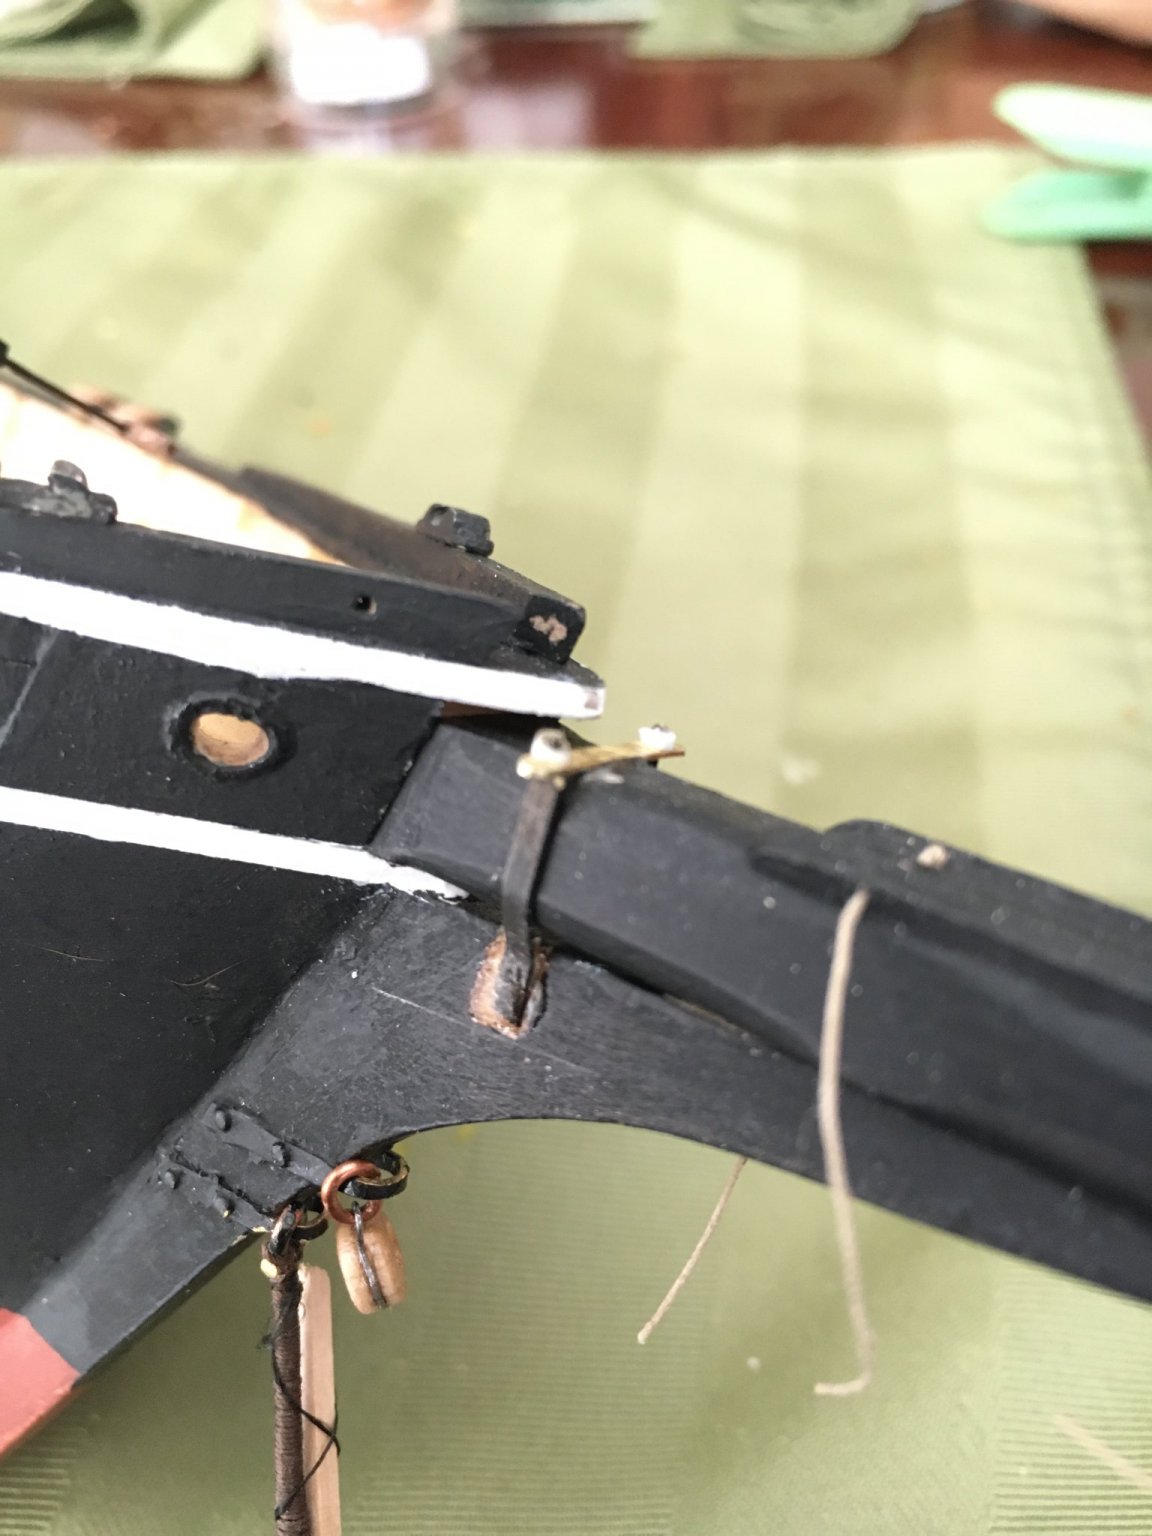
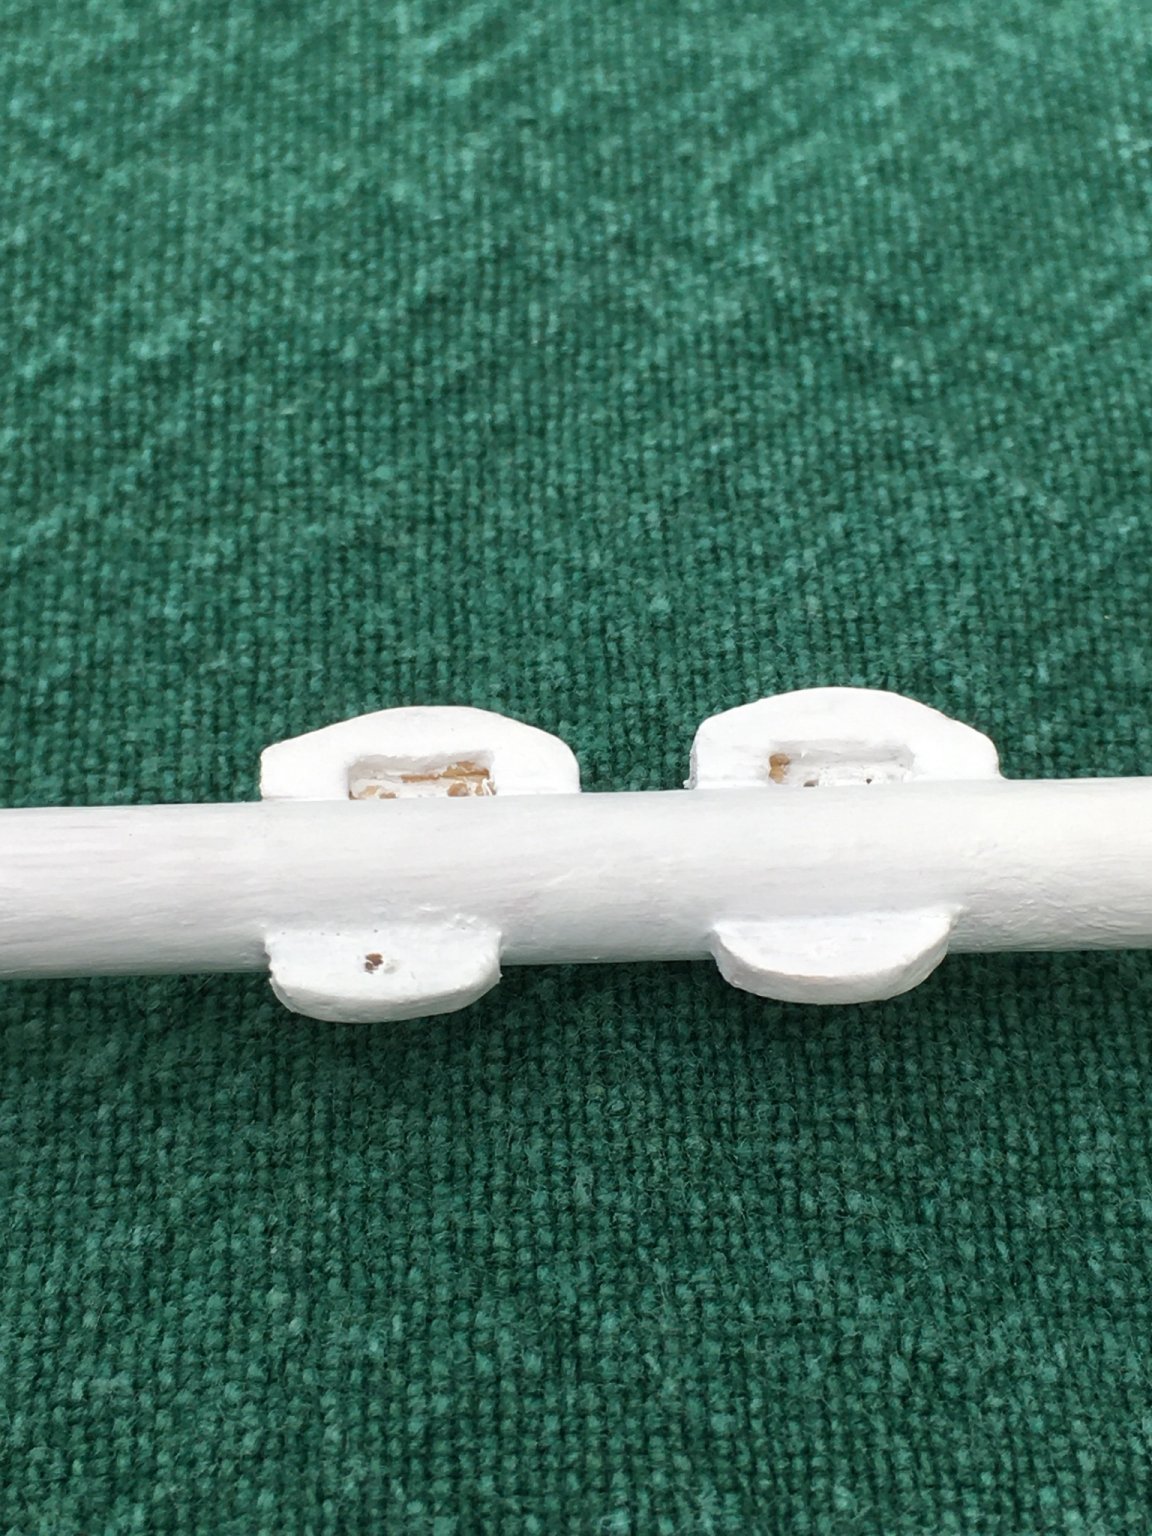
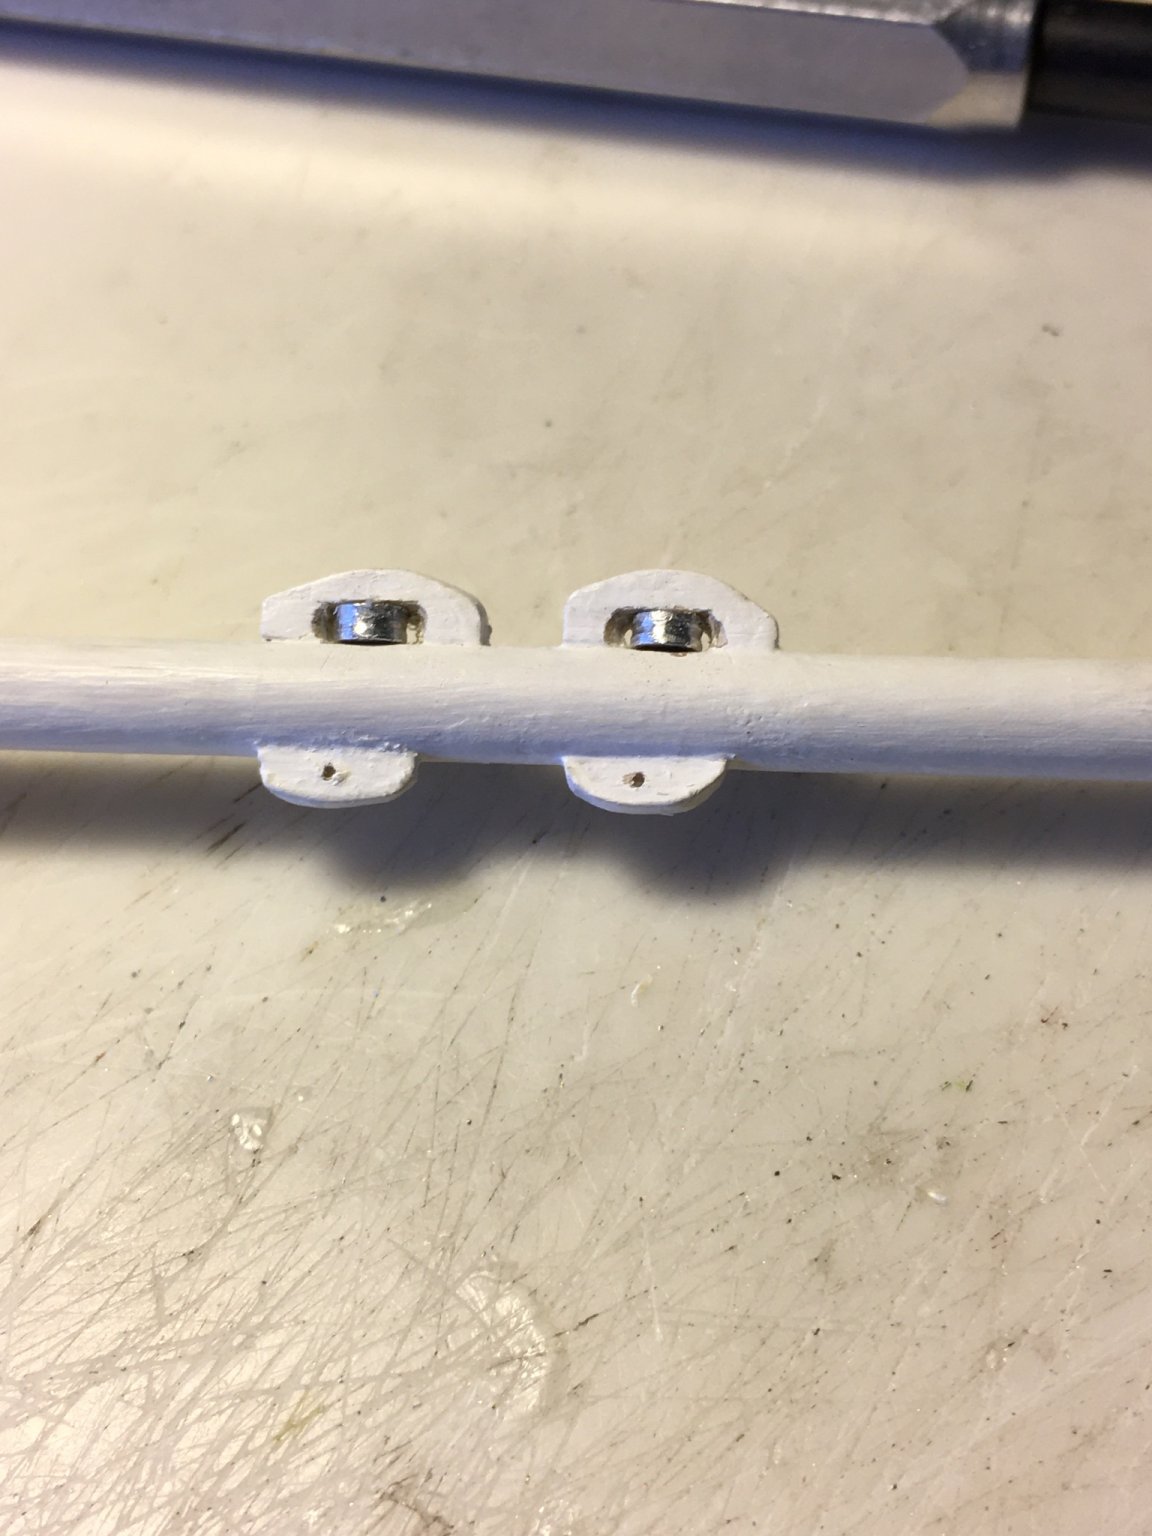
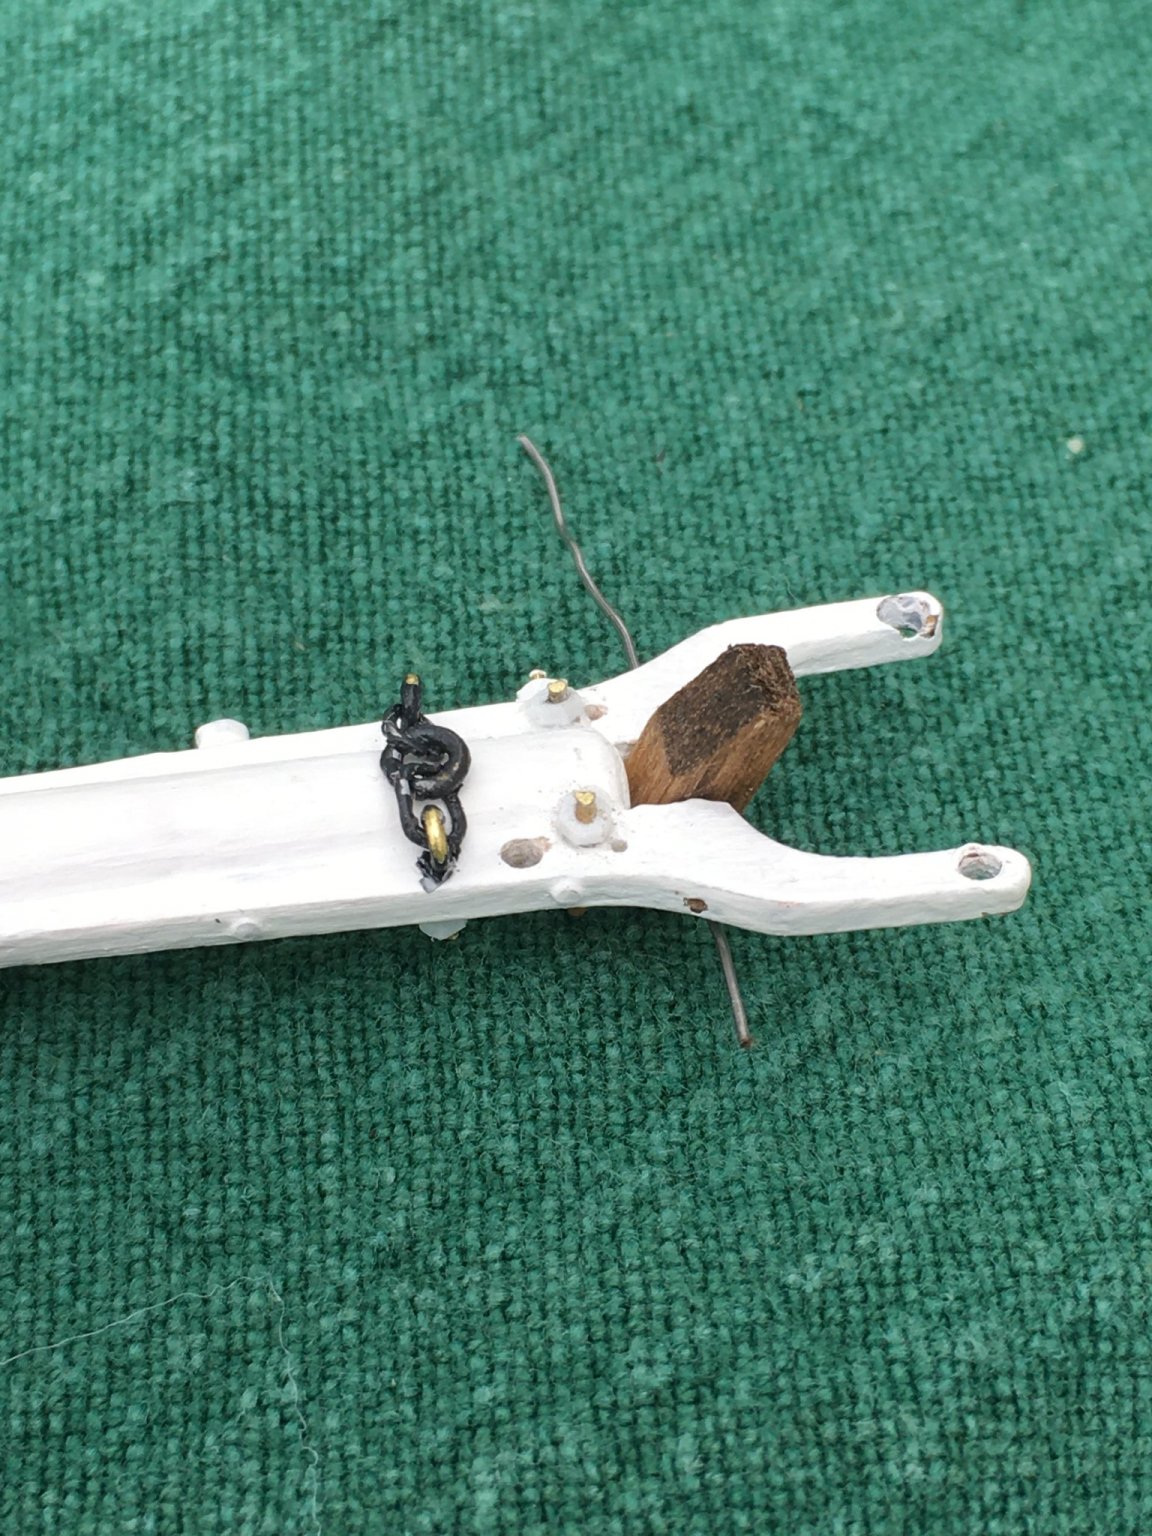
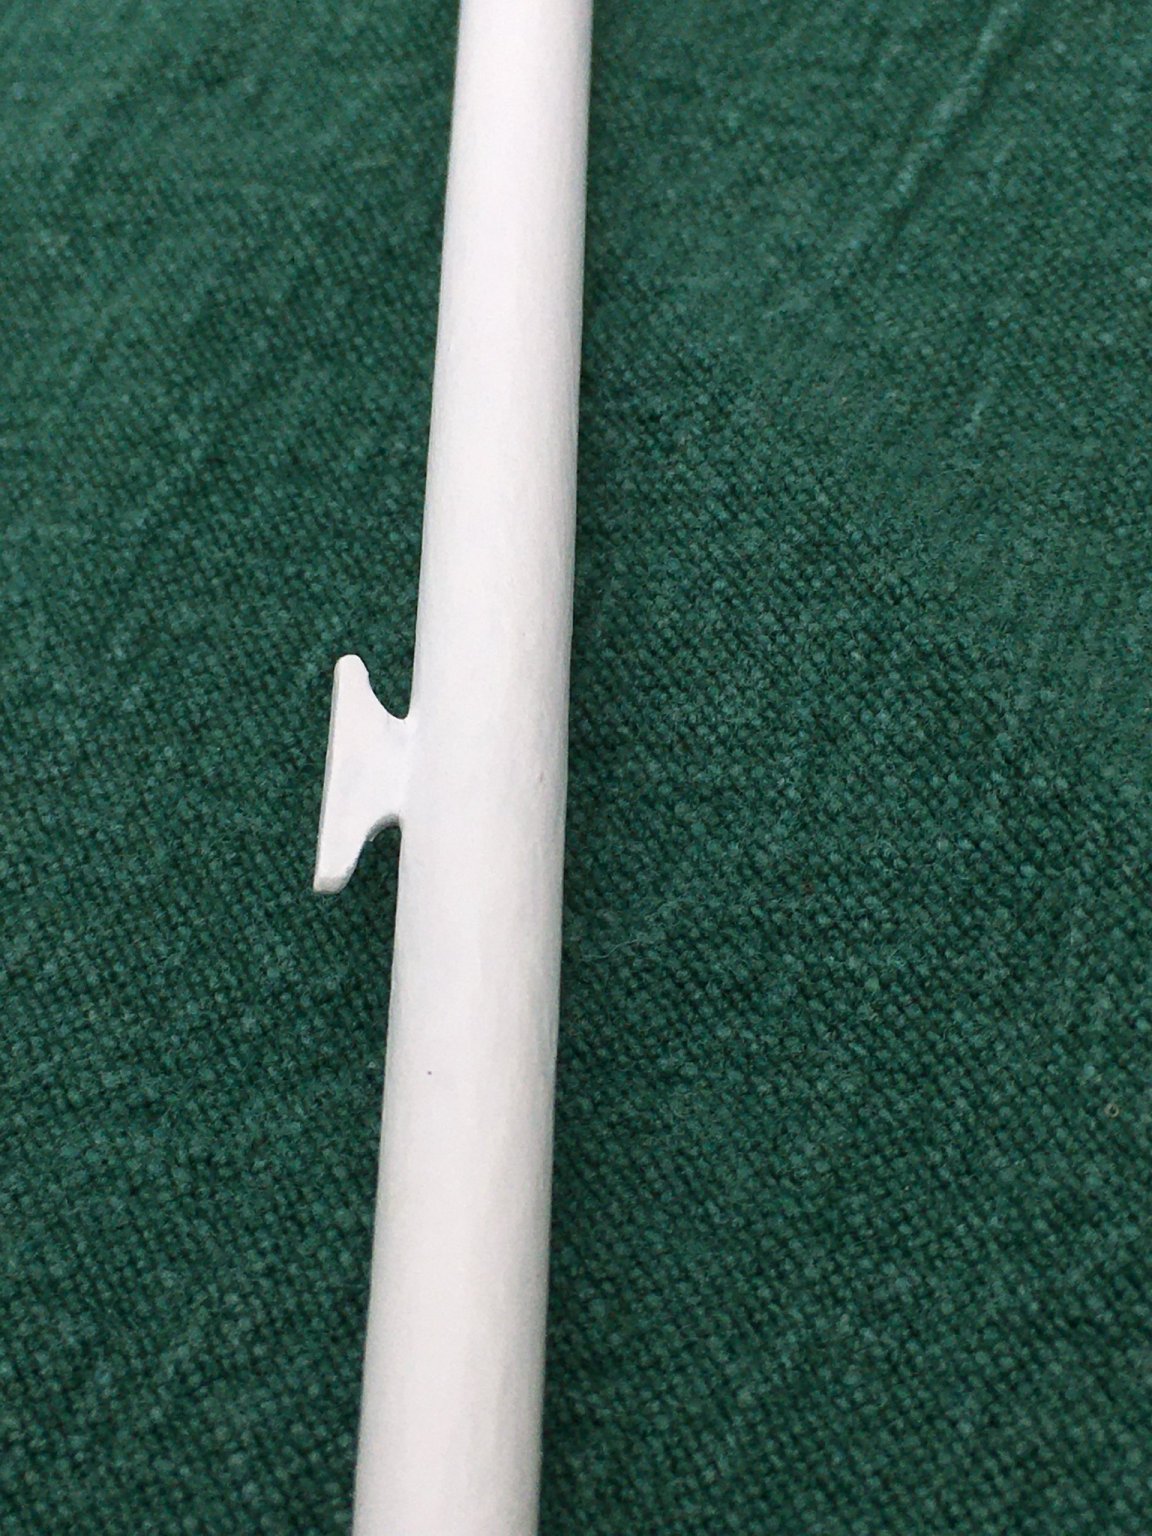
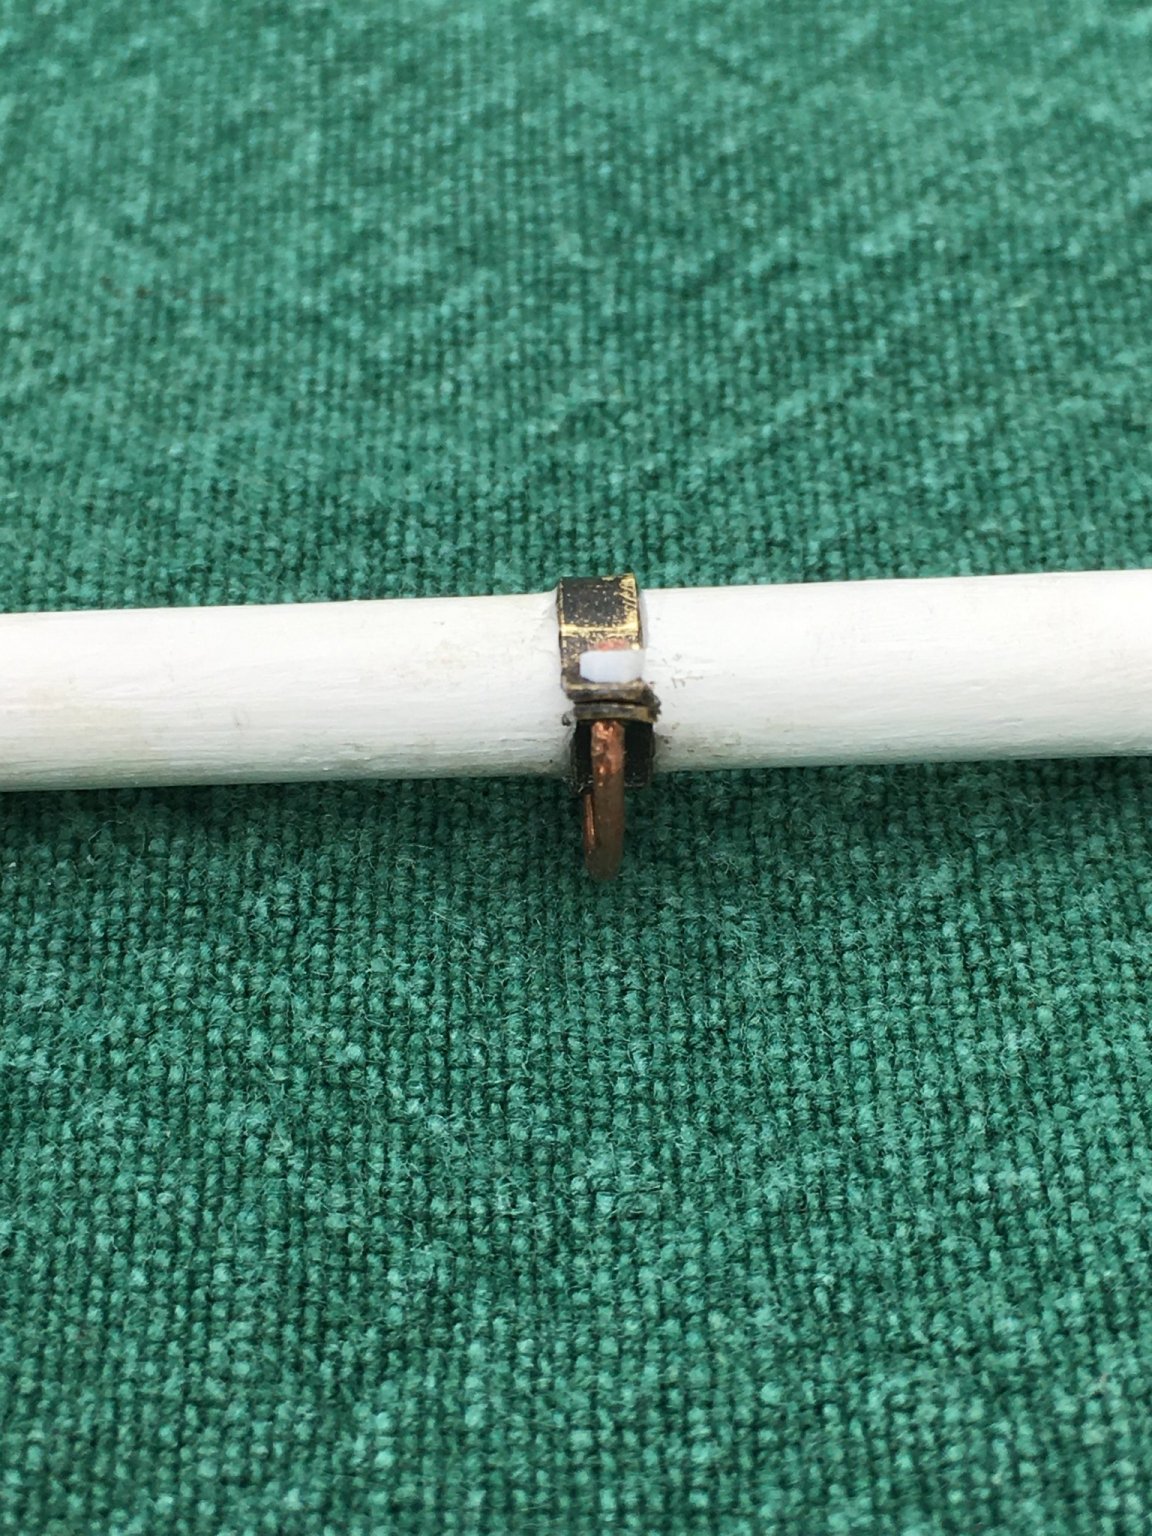
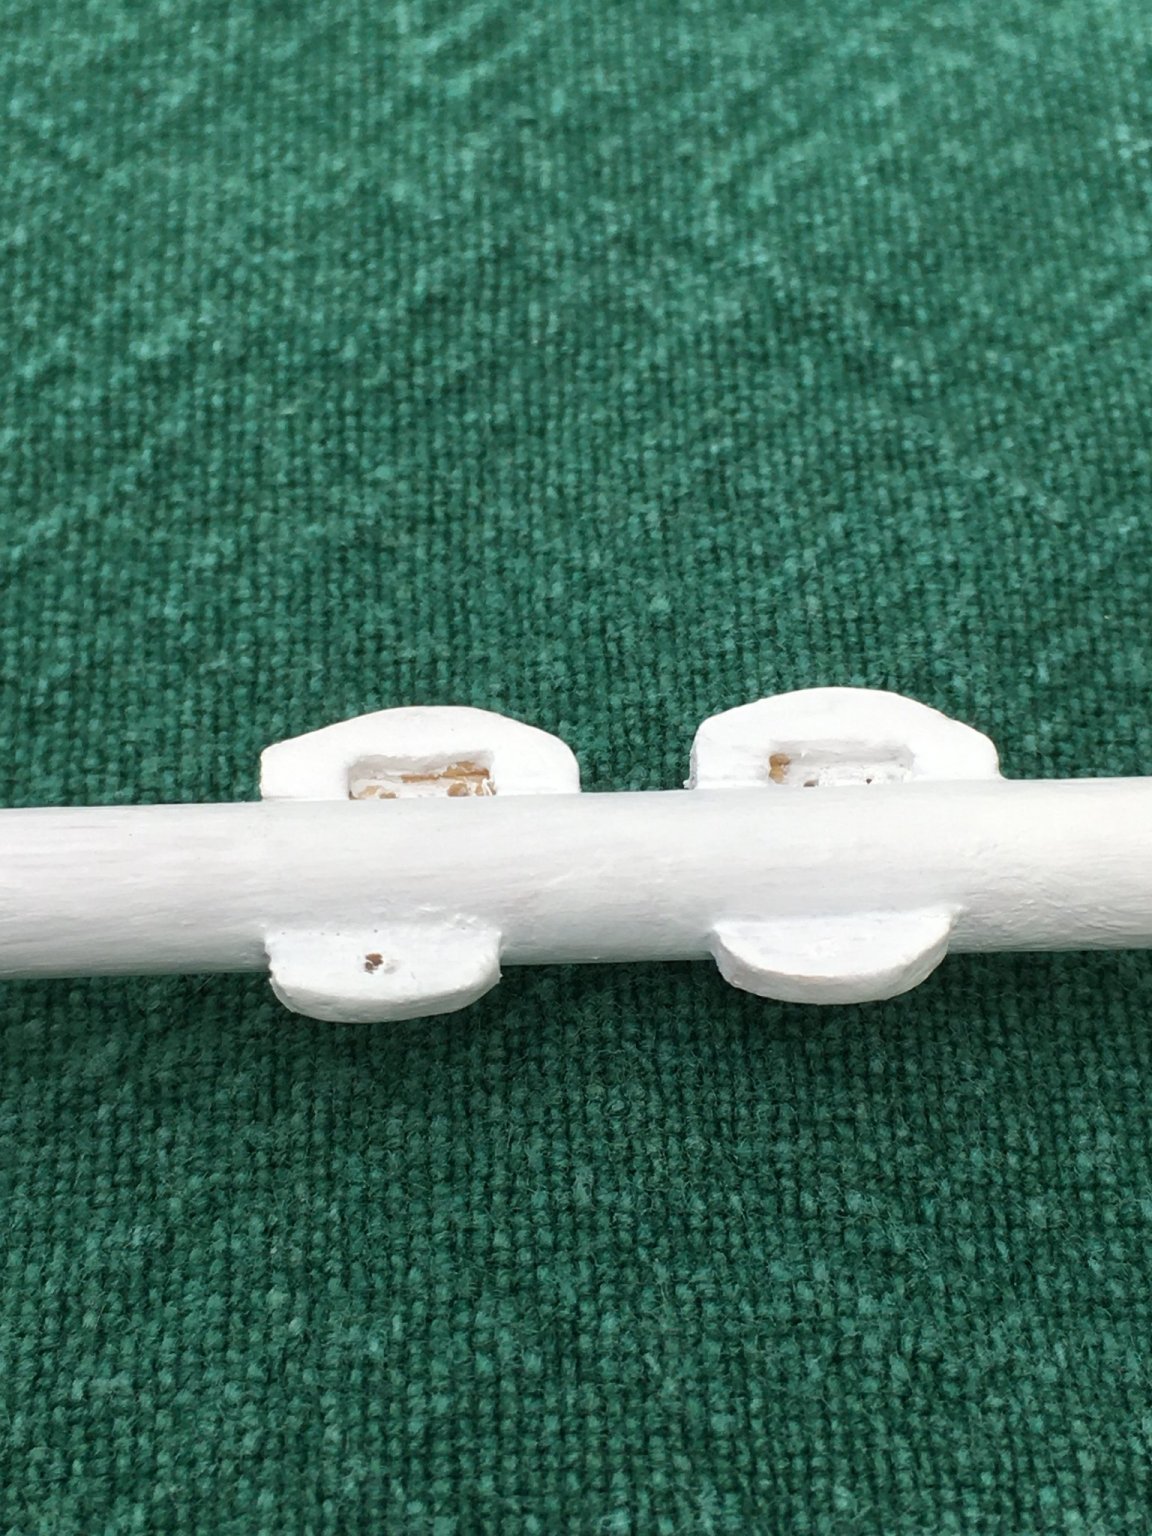
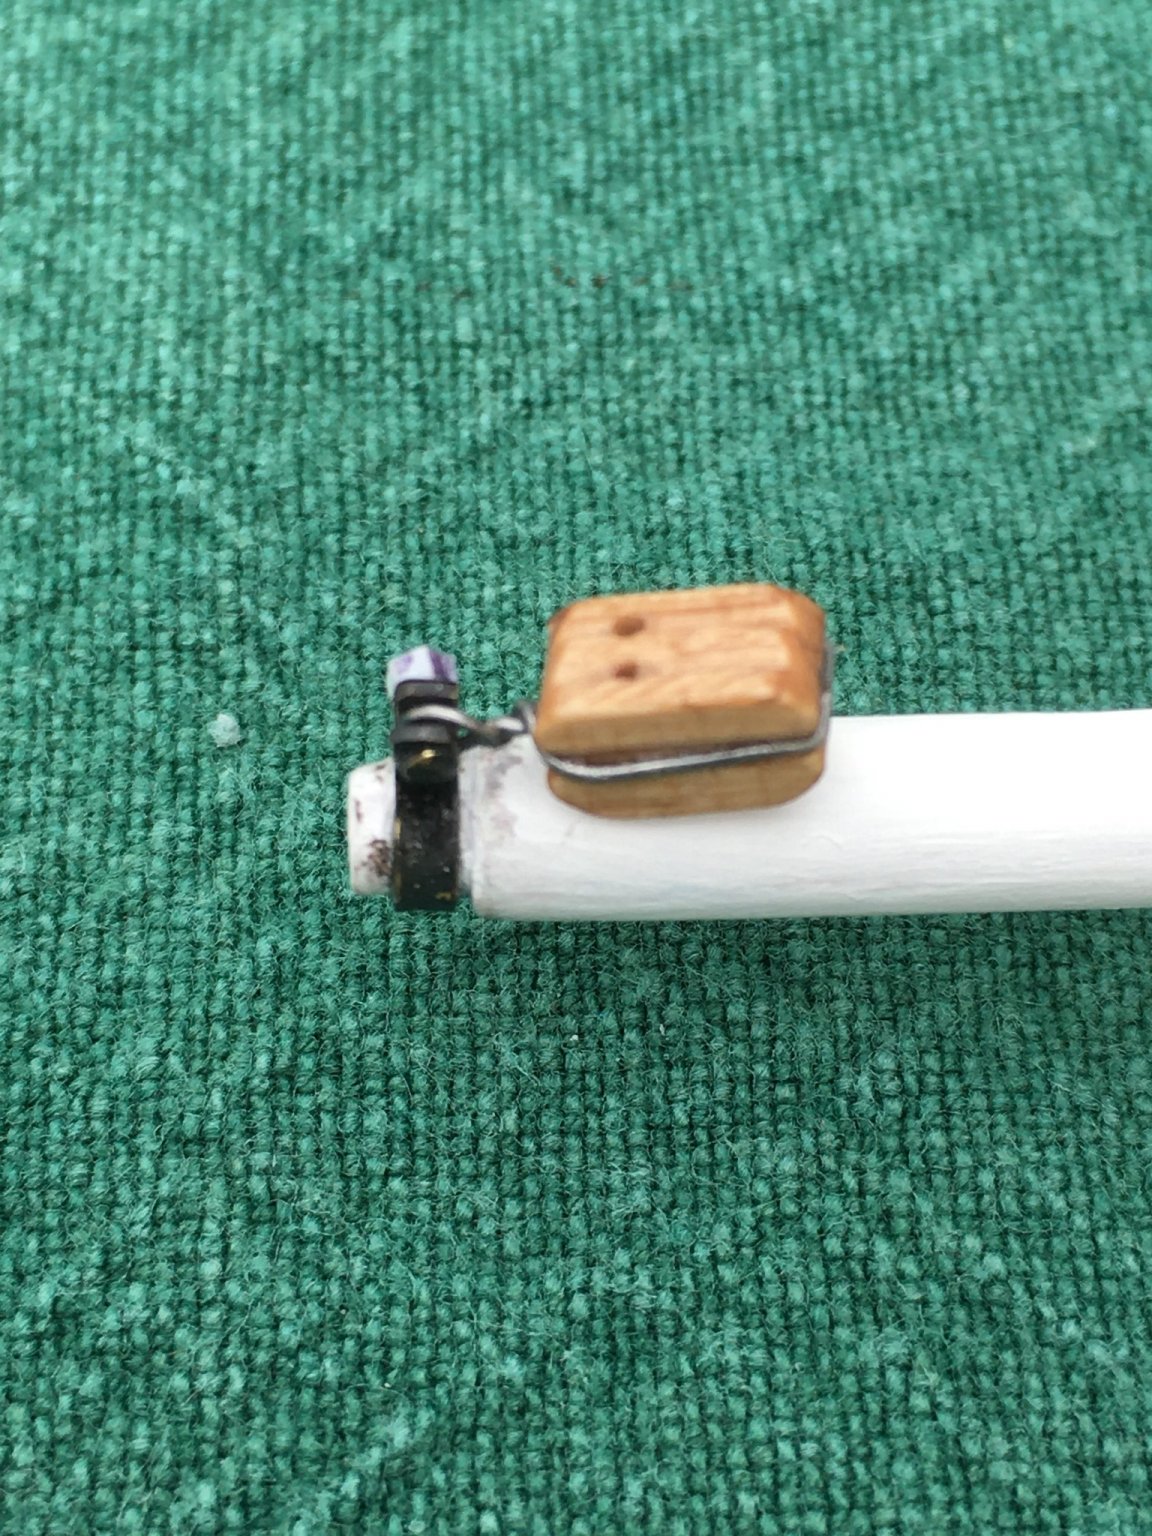
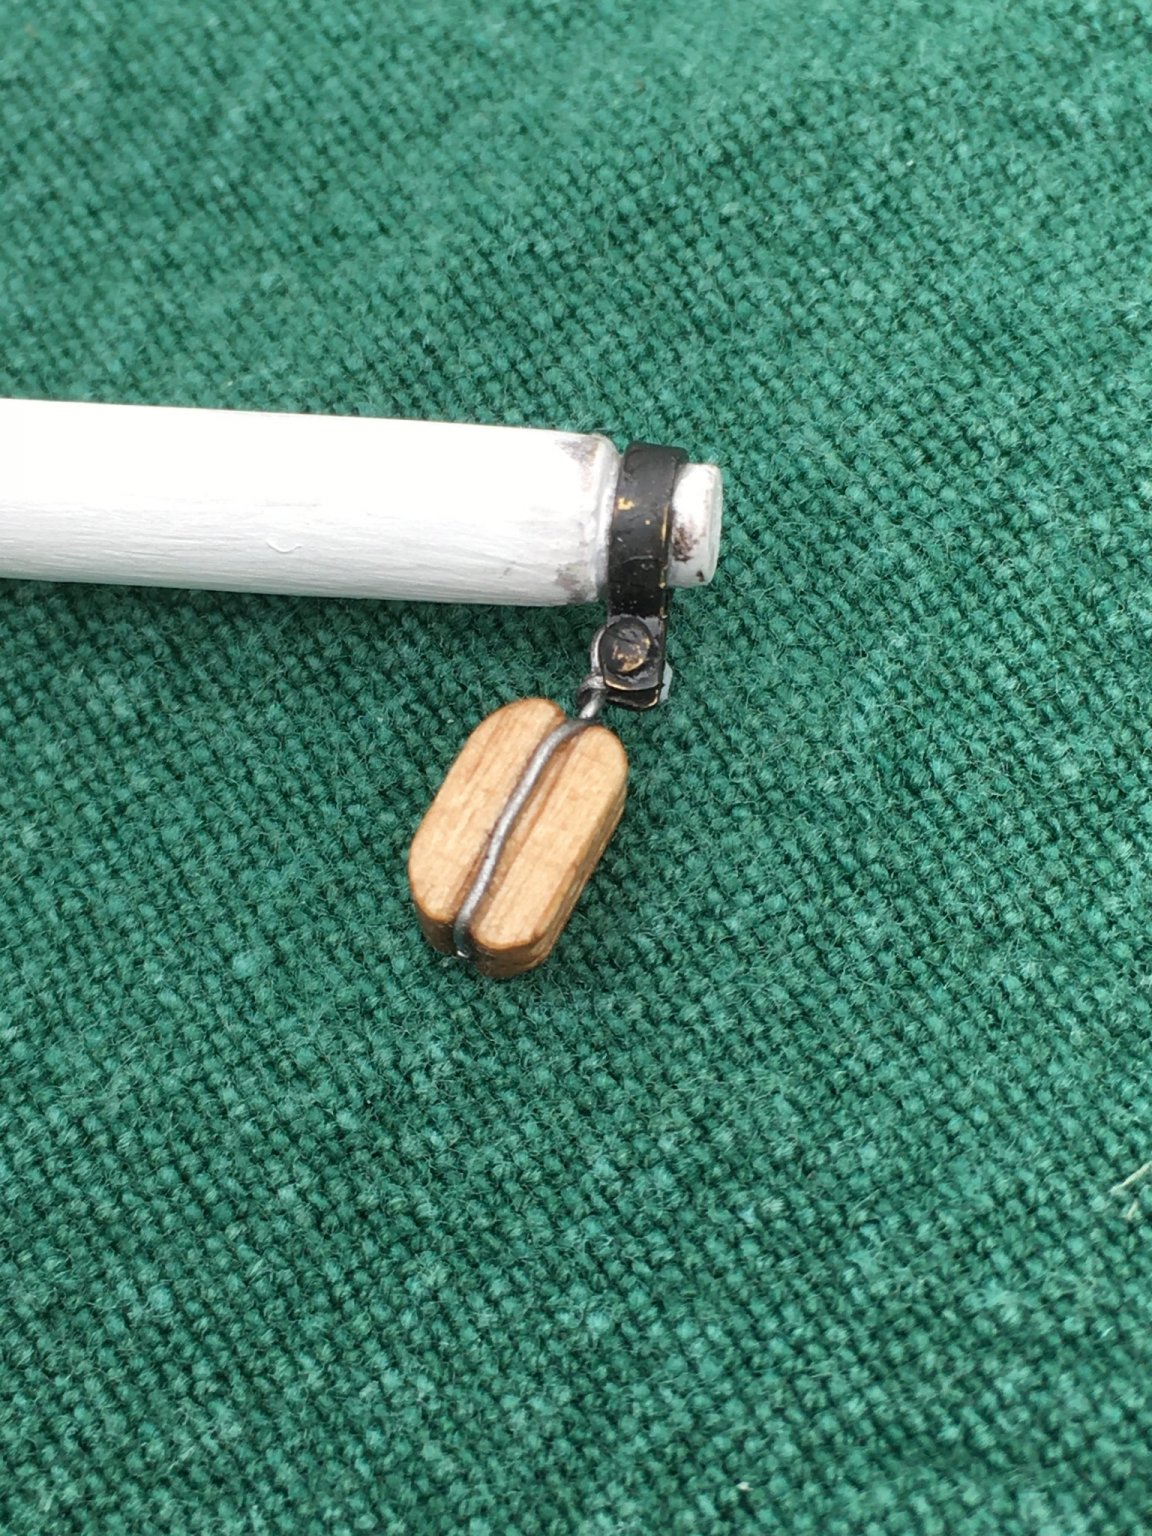
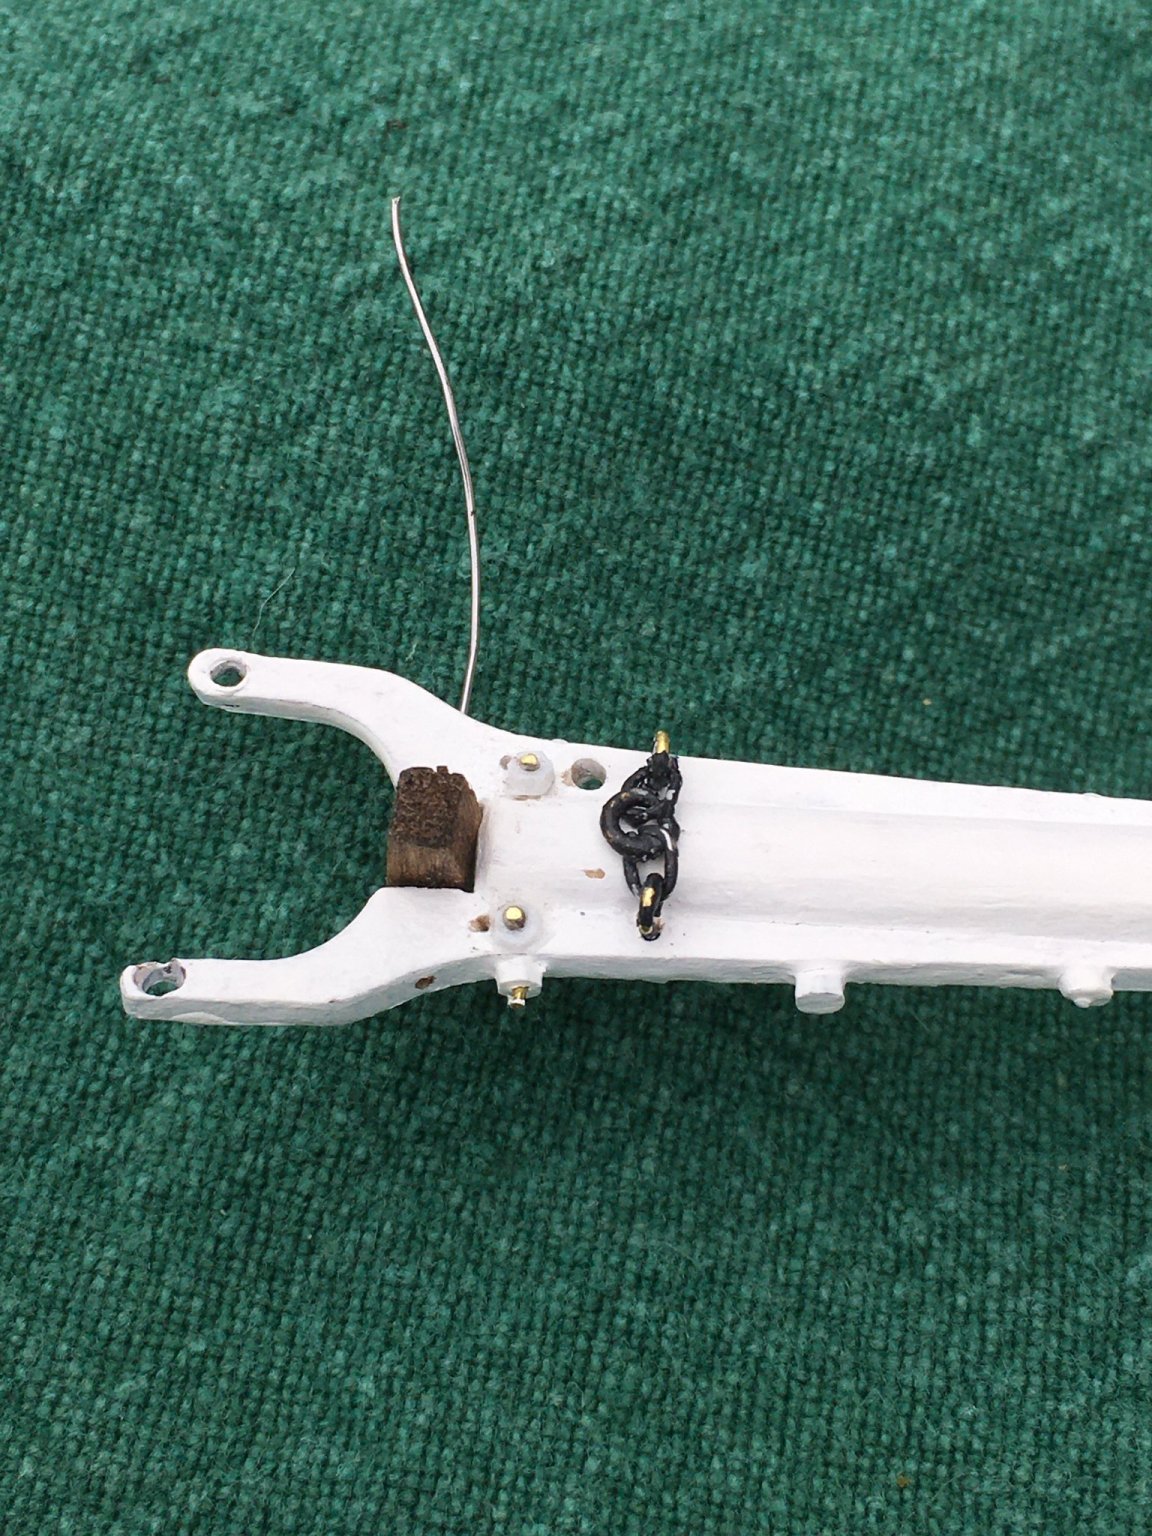
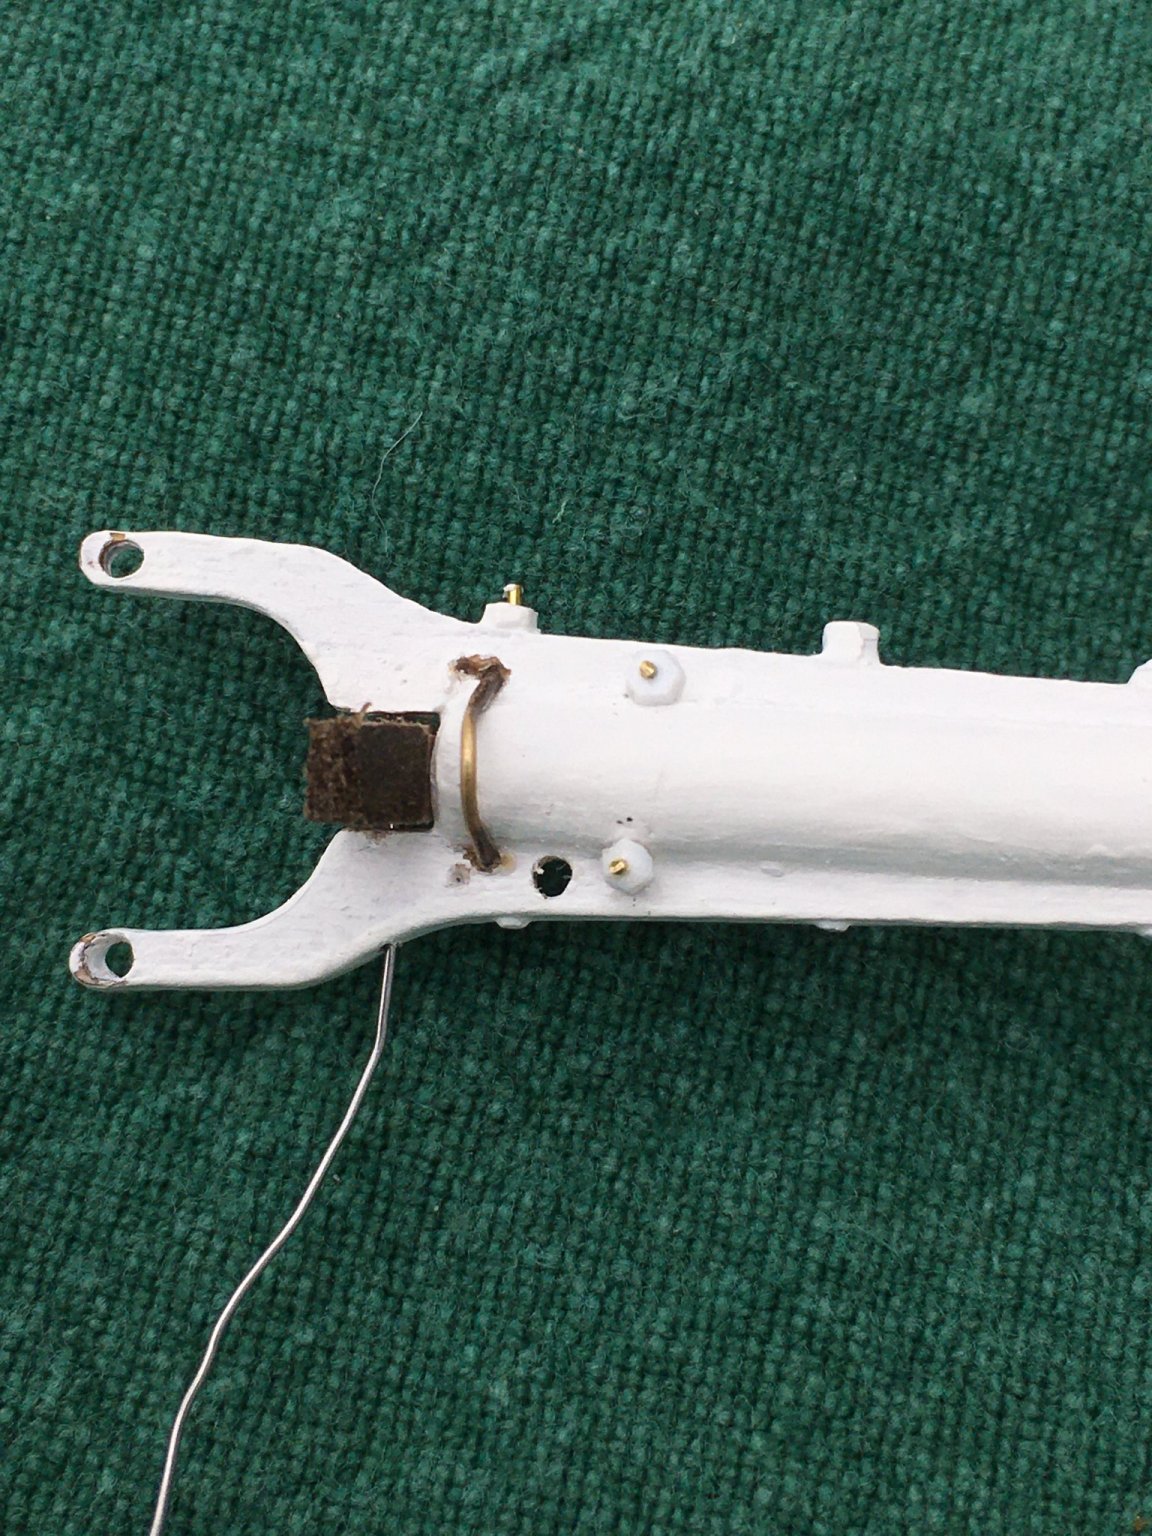
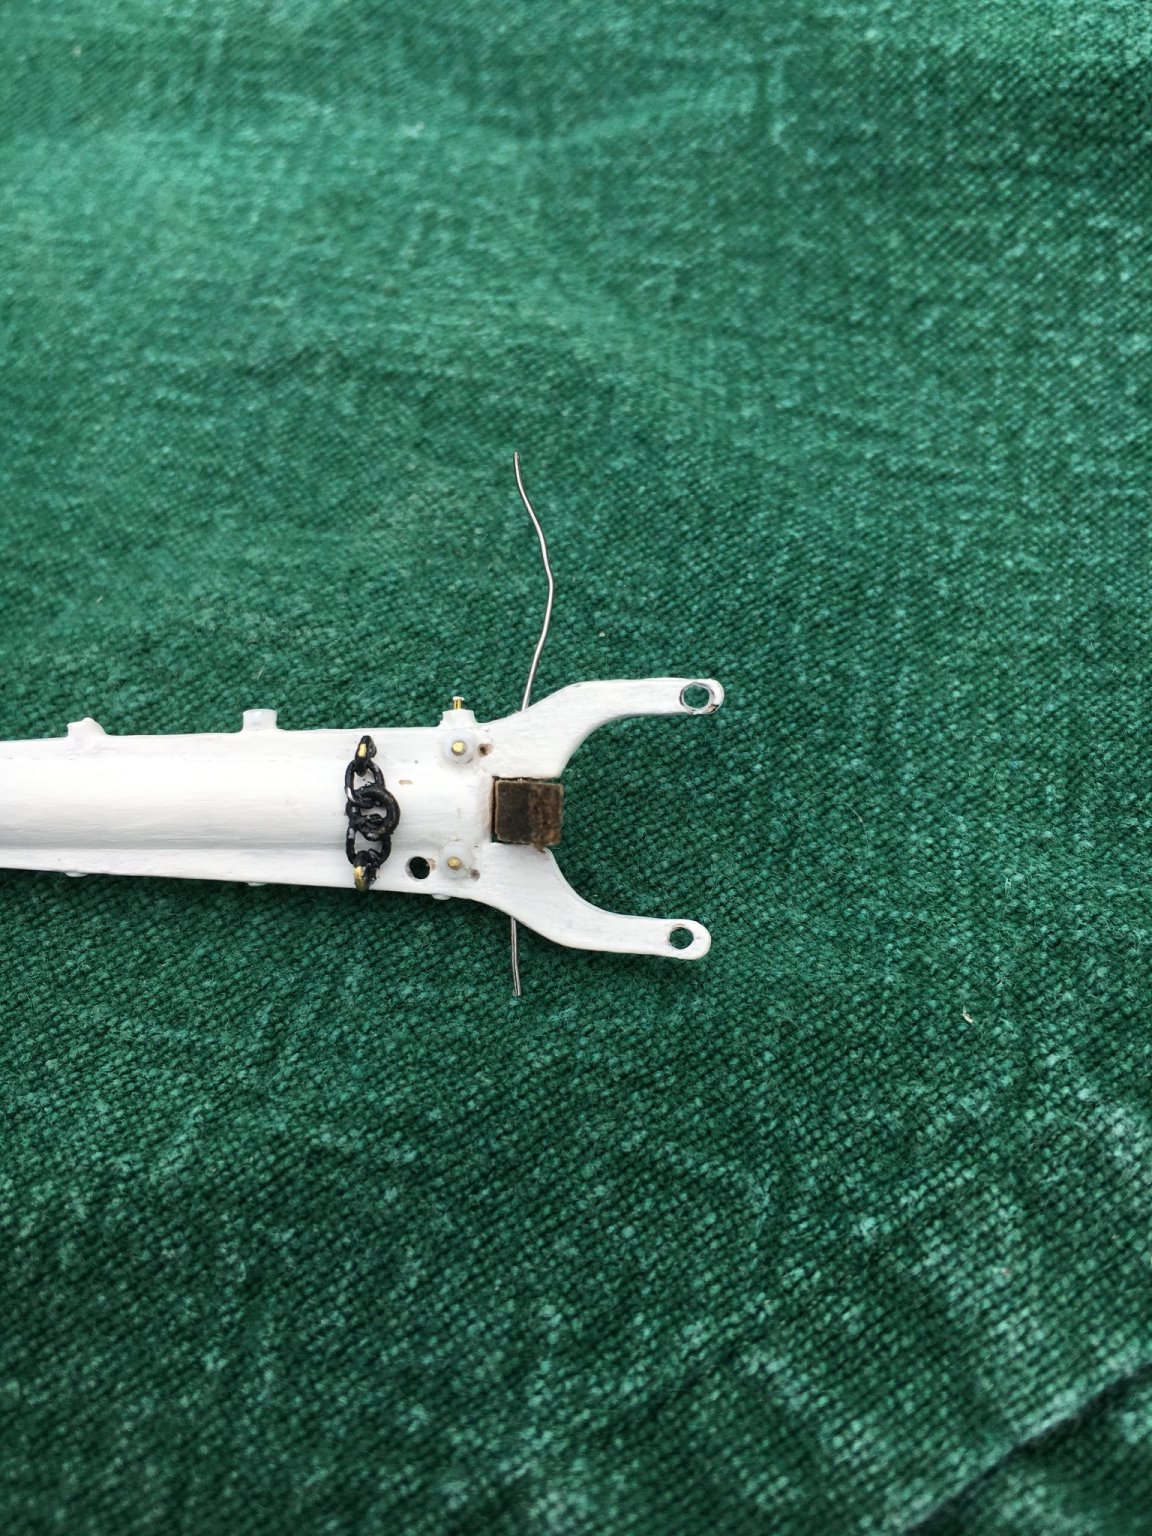
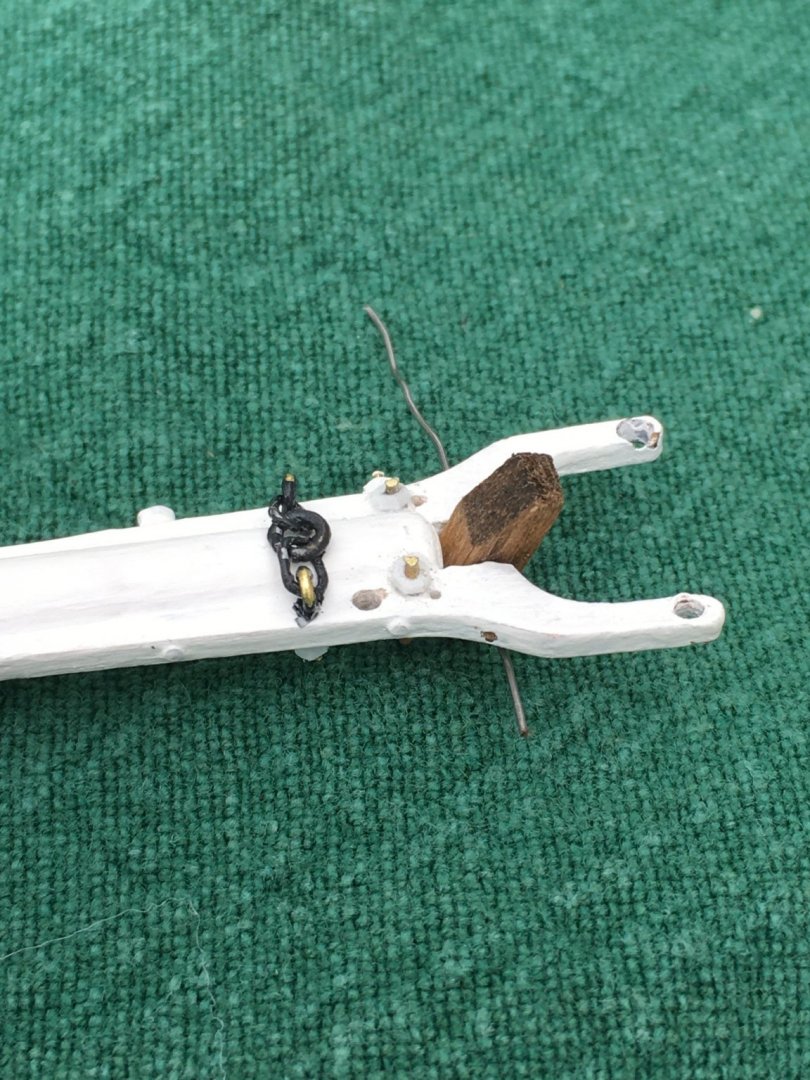
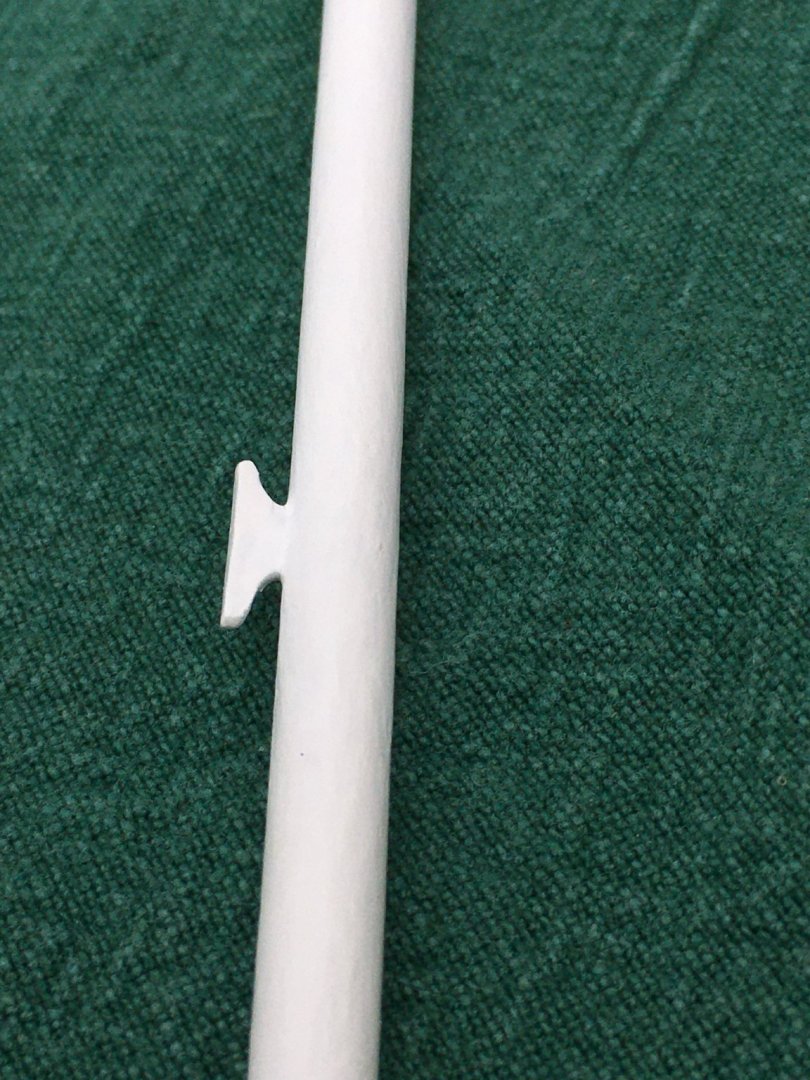
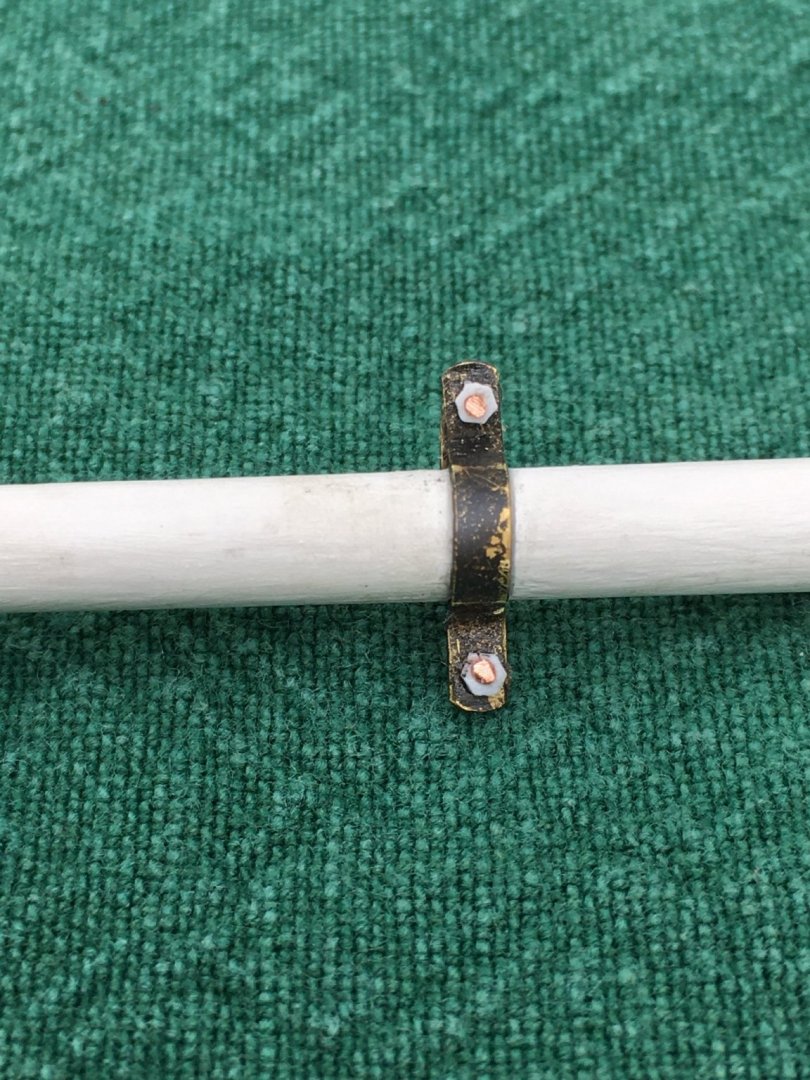
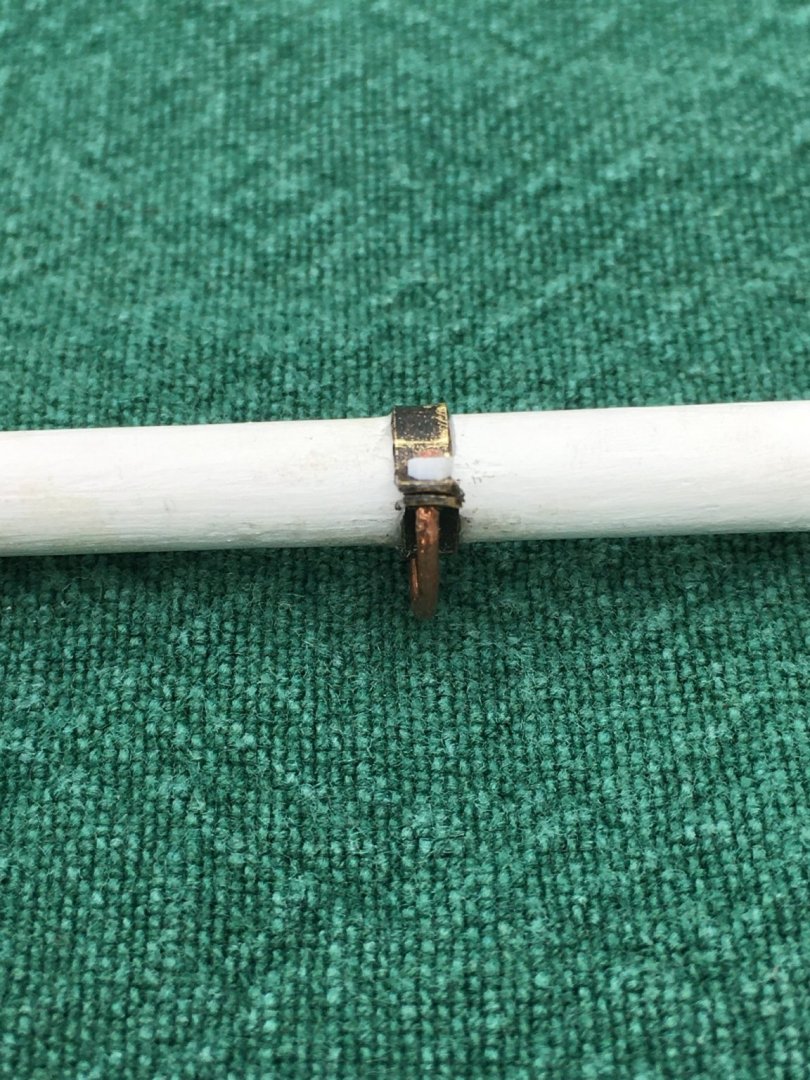
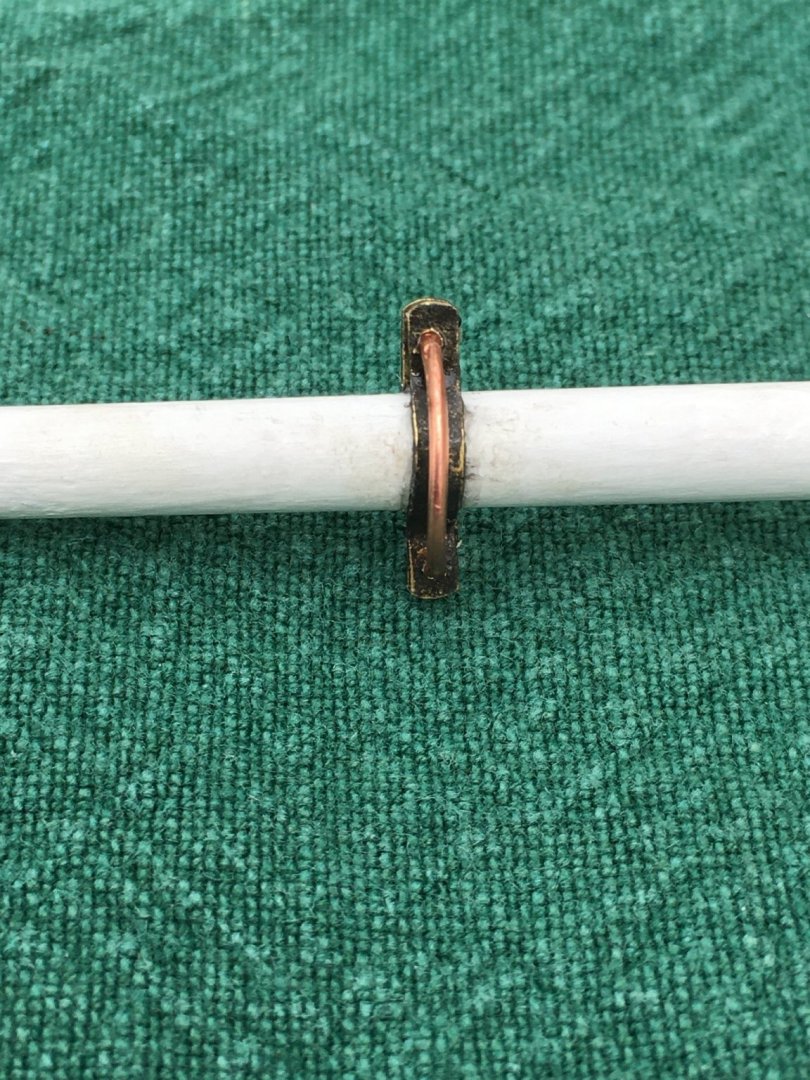
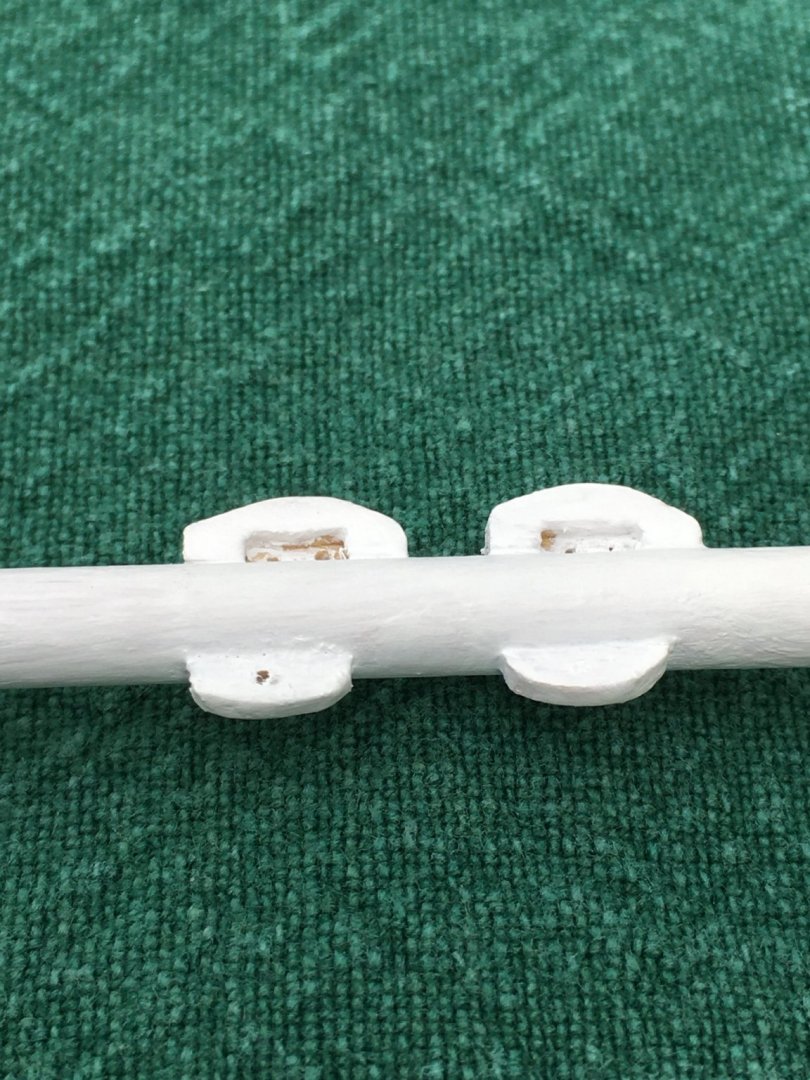
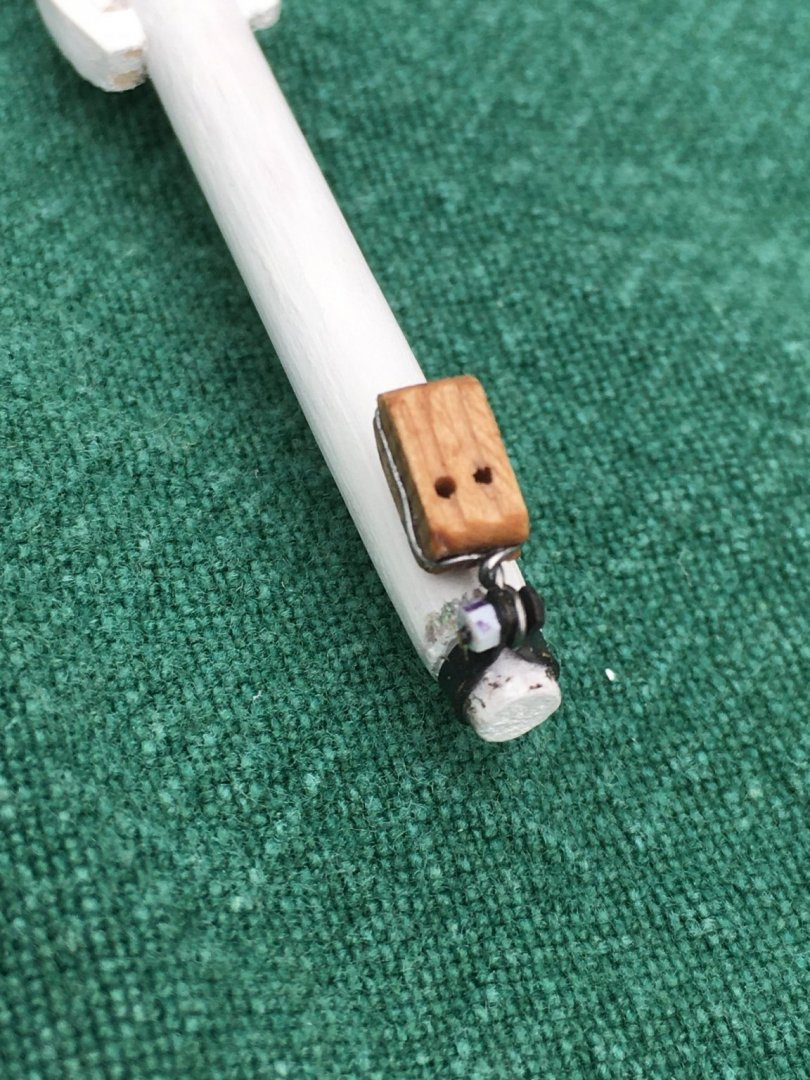
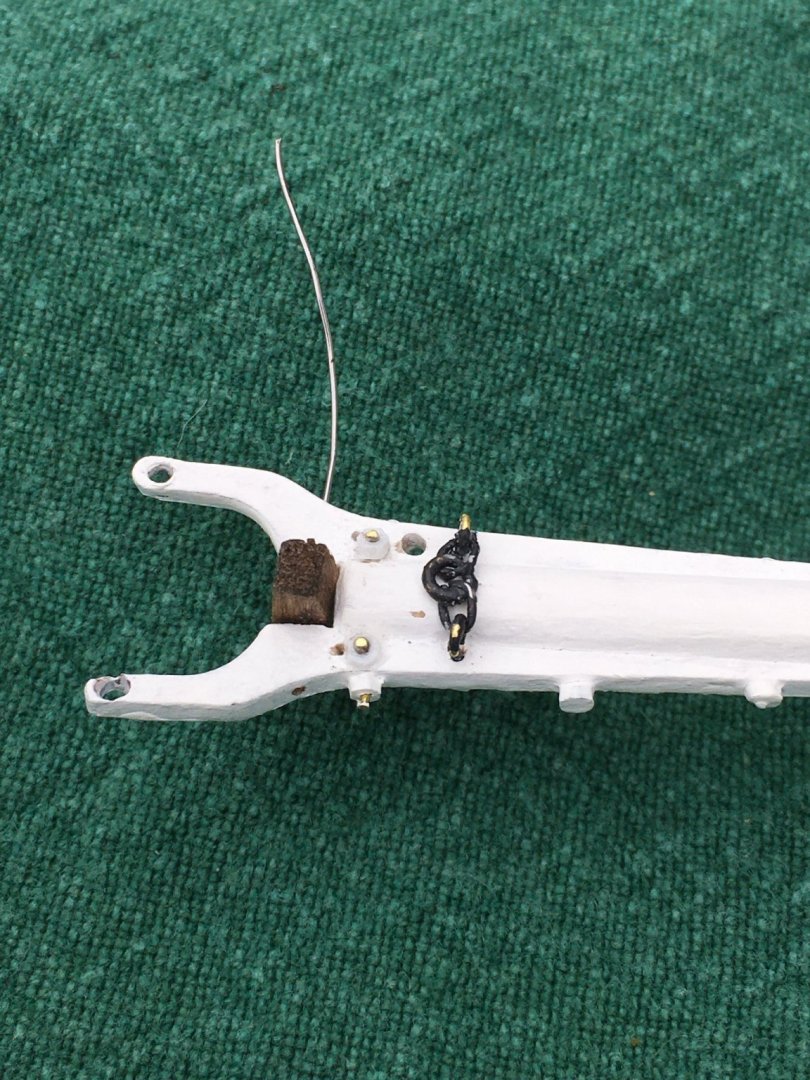
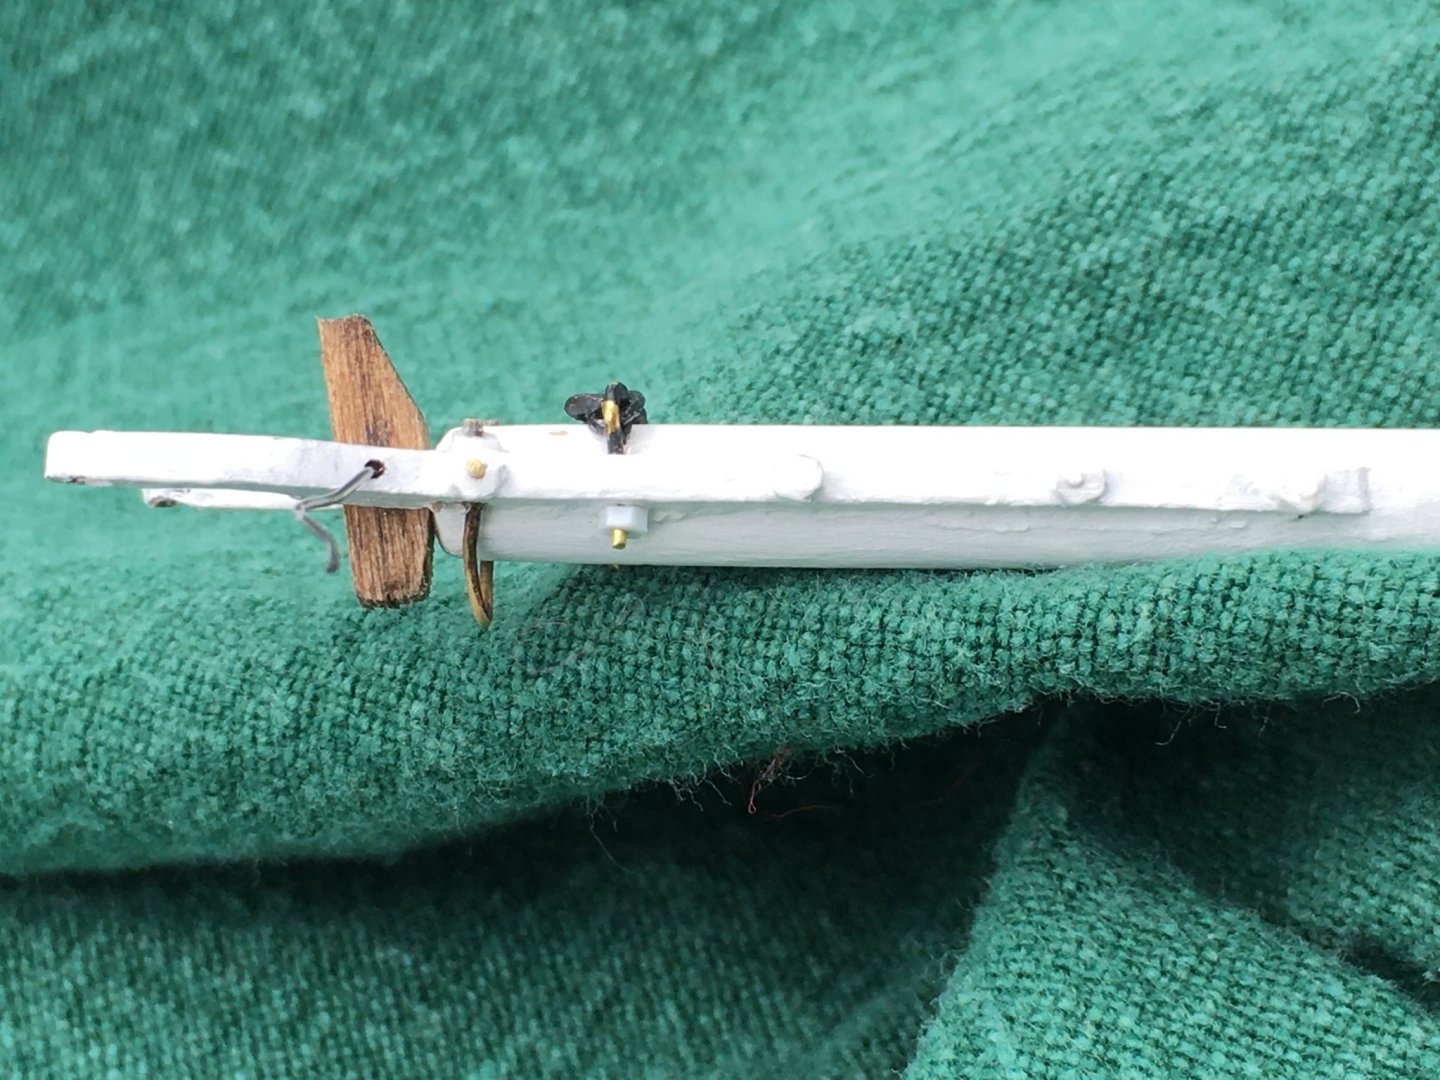
Warning! Do not use the pictures below as a guide for installing the parts shown at the main boom jaws! I misread the plans and the parts belong on the jaws of the upper boom! I only leave them up as perhaps they will help another builder to check the plans twice and build only once. I have fixed the problem and the bottom photo shows what the main boom jaw area should look like. Time for a long overdue update. With the decent weather I have been trying to catchup with outdoor chores. The weather turned rather too warm and humid for my taste so I did some work on the boom for the mainsail. There is a rather surprising amount of fabrication and installation of parts to be done on what would seem to be a rather simple affair. I won't bore you with details but will post some photos, still a fair amount of touch-up etc. to be done. If you have any questions feel free to post them or contact me.


-
Macro photos with an iPhone
turangi replied to Tomculb's topic in Photographing your work. How to do this.
The other way is to press the home button three times rapidly and the magnifier will come up. -
Your model is looking great! When I built my ECB kit I started with the garboard strake on the starboard side but on the port side started the planking above the garboard according to the frame lines and worked my way down to it and found it much easier to shape and fit the garboard then as the upper planks are less complex in terms of twisting etc.. I twisted and shaped the garboard to approximate shape and incrementally trimmed it to a proper fit. Both sides turned out completely to my satisfaction. It was much easier to shape and trim the garboard to fit the existing space. Both sides were done according to plans.
-
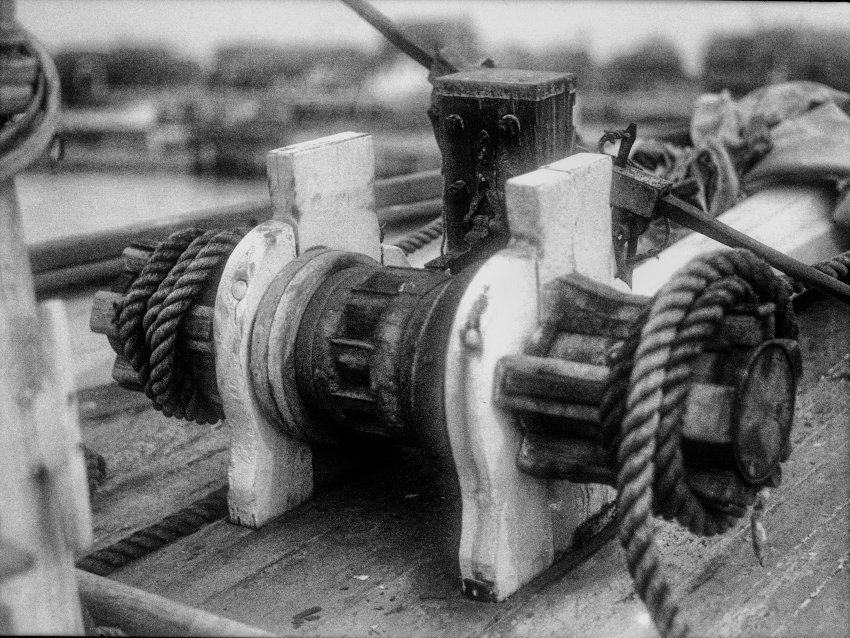
Great job on the windless! I used 5 minute epoxy to attach the whelps, gave me a bit more working time. As far as the handles I made mine based upon a photo of the ECB windless, may not be the original configuration but worked for me. Post #50 and 56. https://modelshipworld.com/topic/25110-emma-c-berry-by-turangi-model-shipways-132/page/2/?tab=comments#comment-815288
- 161 replies
-
- 2
-
-
- Model Shipways
- Emma C Berry
- (and 1 more)
-
Bill, I seem to learn more from my mistakes than successes!