NenadM
-
Posts
3,254 -
Joined
-
Last visited
Content Type
Profiles
Forums
Gallery
Events
Everything posted by NenadM
-

Cutty Sark by NenadM
NenadM replied to NenadM's topic in - Build logs for subjects built 1851 - 1900
Anybody can see here "Star of India" I do not One more night of playing until give up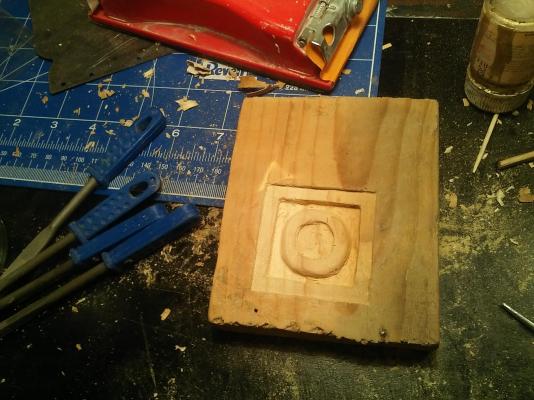
- 4,152 replies
-
- 10
-

-
- cutty sark
- tehnodidakta
- (and 1 more)
-
Cutty Sark by NenadM
NenadM replied to NenadM's topic in - Build logs for subjects built 1851 - 1900
Thank you for your notes, Harvey and Jud. Actually, I intend to temporary fix stand on temporary working panel min 70-80 cm long and min 20-30 cm wide , and after all done, to use mechanical screws embedded on way I show on picture to fix stand on final board - floor of future glass cage. I was thinking a lot about lever forces which appears manipulating with distant tops of spars yards and masts. Also I am considering solution to make stand wider a bit on down side. Already told story about war between elegance and stability During thinking process, I am playing with carving knifes I have got for some birthday from kids ( Shame on me, I opened it up only yesterday )- 4,152 replies
-
- 7
-
-
- cutty sark
- tehnodidakta
- (and 1 more)
-
Maybe a bit confusing in sheet #3 ?
-
Cutty Sark by NenadM
NenadM replied to NenadM's topic in - Build logs for subjects built 1851 - 1900
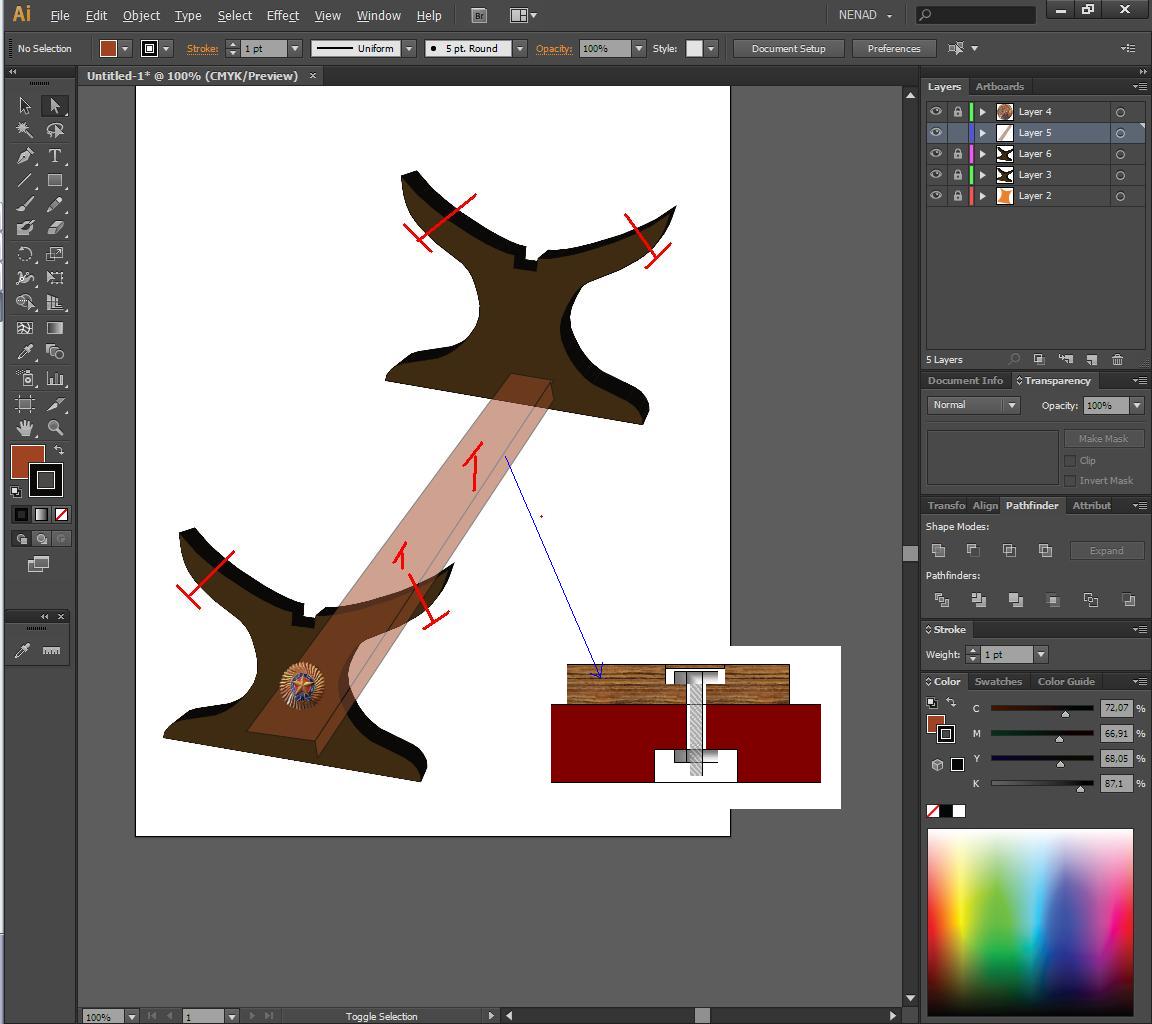
Going to meet final solution for standing, I made some test - drawings First, I found my old CS plans, and copied curvature from adequate ribs, draw something by them, scanned it, import on Adobe Ilustrator as background, and start drawing over them on new layer Here is how far I got - just preliminary drawing Red marks are for future screws, toward hull - screws for wood, down - I plan to take mechanical screws Main idea is to fix standing in upper part to hull permanent, and to fix standing in lower part temporary for some massive panel board, thinking how to get it easy to replace that board with final board when Her Glass Cage will be done. Yes, invisible masked screw covered by veneer, with unscrew from down side. I think it will be nice to put "Star of India" on outside panels of standing Maybe there will be some additional carvings and relief around "Star". Maybe. Maybe I`ll just paint standing black as hull, and add some "golden" ornaments, similar to ornaments on bow and stern have to think about a while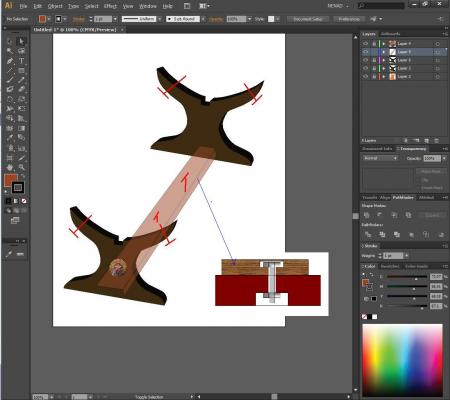
- 4,152 replies
-
- 9
-
-
- cutty sark
- tehnodidakta
- (and 1 more)
-
Oh, boy, this is just - fantastic !!!!
-
OMG !!! Just marvelous !!!! What an eye and brain !!! Very well done !!!!
- 962 replies
-
- 7
-
-
- sovereign of the seas
- ship of the line
- (and 1 more)
-
Cutty Sark by NenadM
NenadM replied to NenadM's topic in - Build logs for subjects built 1851 - 1900
Hello Cap, thanks for your quick response Ah, diorama issue ... it can be solution, theoretically, but my concept is quite different - I want bow and stern with rudder to be seen, with all sails wide spread I have to admit that your idea is very likely, and that might have diabolical look ... imagine boiled sea with foam on waves an in air, leaning sailboat running somewhere at full speed, traces after him in waves, unfortunately during strong winds are not all sails open , wild waves breaking on hull spraying on deck, some torn sails and unattached ropes flapping wild in the wind, and with adequate lighting under glass cage ... and model more than 3 ft long and almost 2 ft high ..... Whoa !!! But ... I have zero experience with dioramas Maybe in next life or with next model Thanks again- 4,152 replies
-
- 5
-
-
- cutty sark
- tehnodidakta
- (and 1 more)
-
Cutty Sark by NenadM
NenadM replied to NenadM's topic in - Build logs for subjects built 1851 - 1900
Thank you Mark for fast answer. I am close to that solution, but I feel I need some extra time to shake and jumble my poor head a bit more. Who know what else can drop out ? Wellcome Greg, and thank you for your nice words ! It is nice to see another person who likes your mumble-jumble attempts and playing Hello Patrick. I have read somewhere about stands it is important not to lean keel to stand, but to lean hull, even better if you can use something soft as layer between- 4,152 replies
-
- 4
-
-
- cutty sark
- tehnodidakta
- (and 1 more)
-
Good!
-
Cutty Sark by NenadM
NenadM replied to NenadM's topic in - Build logs for subjects built 1851 - 1900
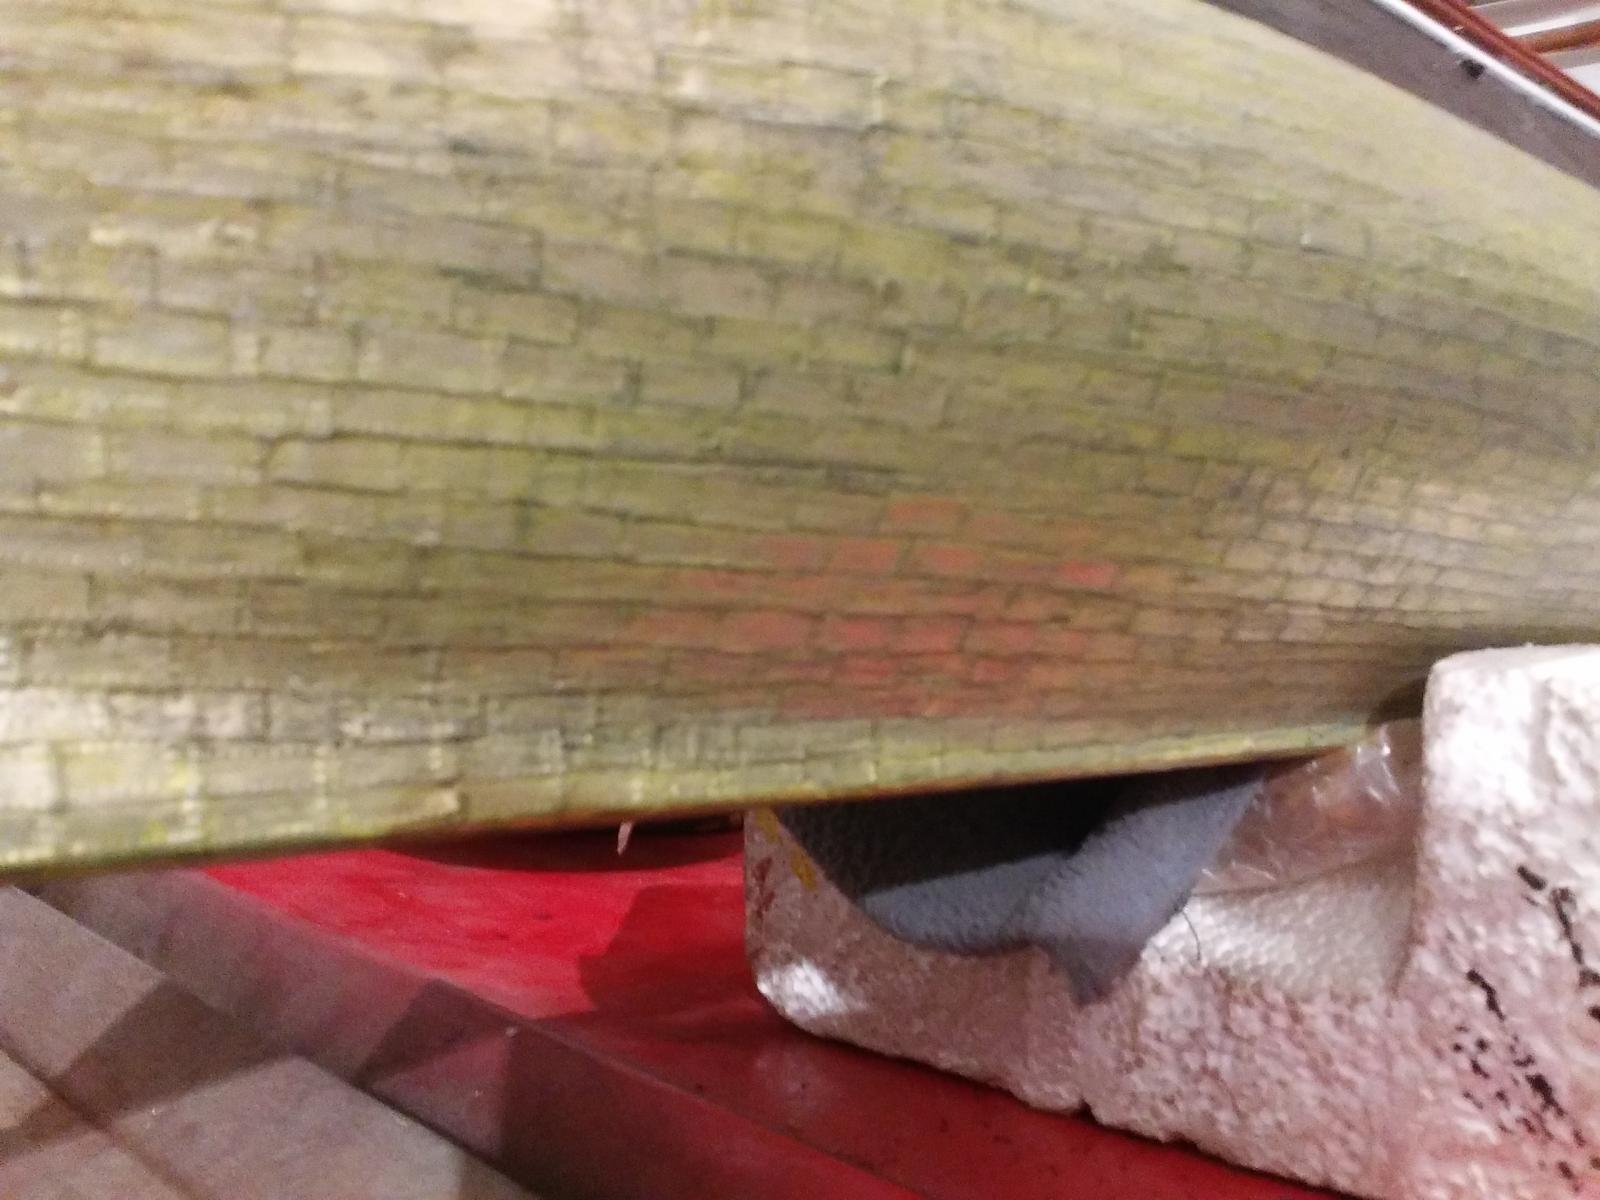
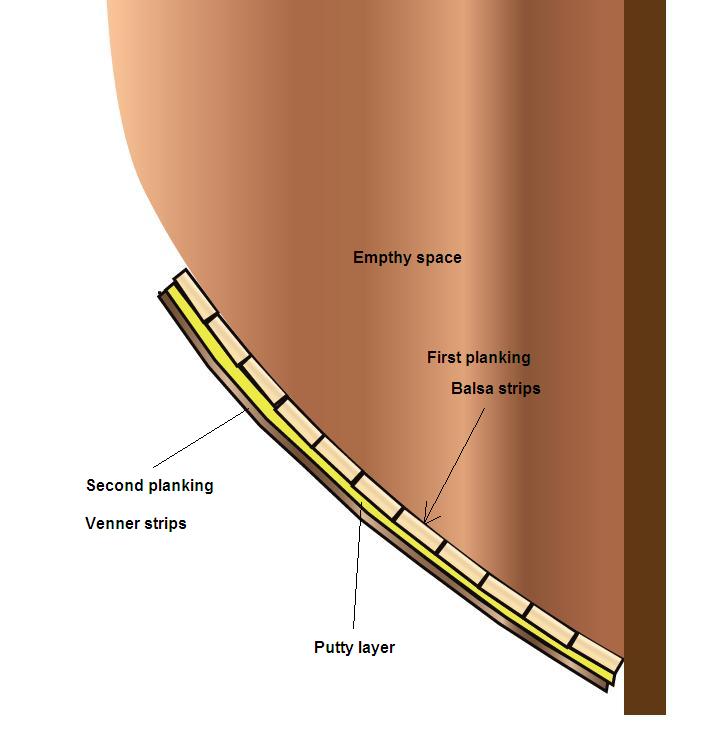
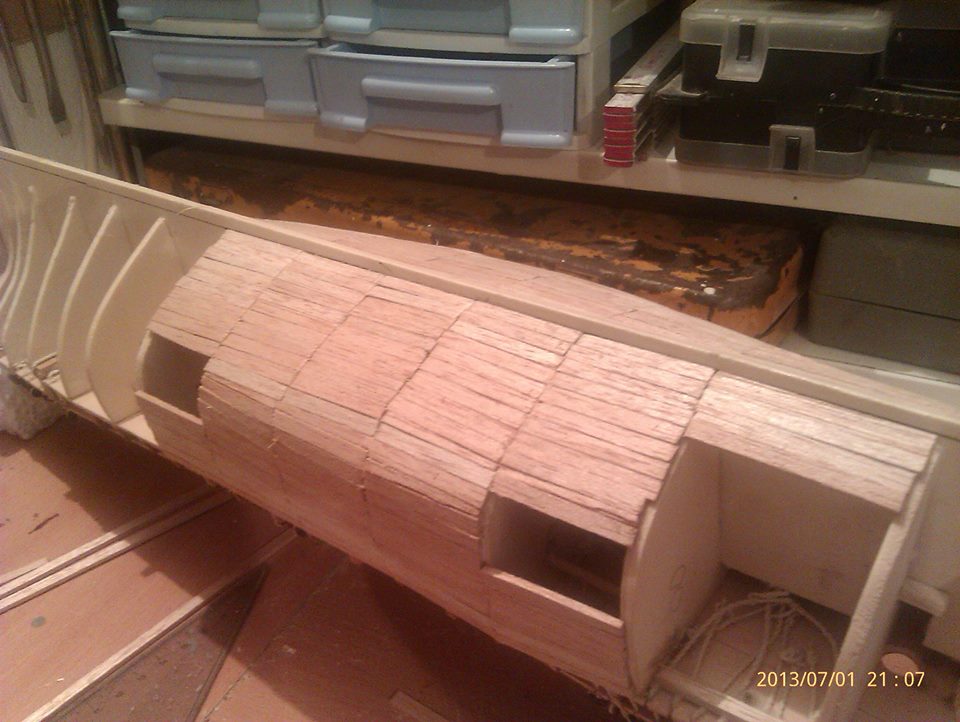
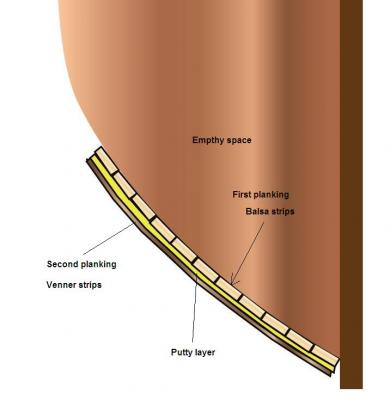
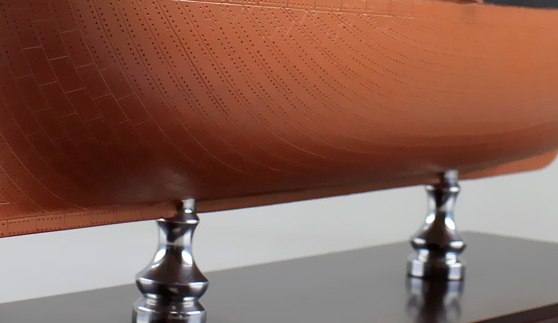
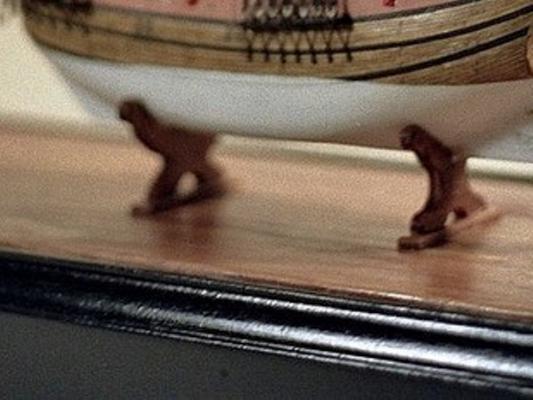
Now, my stubborn personality comes to the point when really need some help/advice. I hope you could understand my Monkey-English trying to explain what torture me As usual, older mistakes appears and bump in front of me I learned one thing - it is not accidental that hull planking has it`s rules - at first - USE SOLID WOOD in long strips !!!!! Me, genius, used soft wood - balsa, with short strips which meet on the rib And now, when time for Her standing comes, I am in a swamp - again. This is kind of standing I`d like Most elegant, hide nothing. But, that kind of standing demands hard sturdy and solid base on hull/keel, which is not my case I was "smart", and even I noticed that, during sanding after planking, even I noticed that I have thinned keel to 3mm (instead 4) and on some way, drown it under planks, I did - nothing. On later/same point of building, I was forced to reconstruct stern post and bow, and that was a right time to reconstruct keel also - to make something as a false keel, this time from solid hard wood. But, I did not. Consequence - now I had only 3 mm thick keel, drown under soft planks about 1-2 mm, so I am not sure if I apply this kind of standing, that keel will not crack. (keel is made from inexpensive plywood with dubious quality) It all still looks fine, covered with my "coopering" As it is not enough, I made second mistake - when reconstructing stern post and bow, I added a pair of millimeters here and there, so, there is no way to find exactly where are ribs now !!!! Third mistake is - using very soft wood as balsa for first planking layer, so, after 1 kg of putty, now I have nice hull lines, covered with nice second planking layer an coopering, but with THIS crosssection With another weakness on ribs where strips meet each other ( If I used long strips ...) That opens main question Obviously, I have to go on road with classical standing, something like this, with more or less artistic jostles The best solution could be - if I can find ribs, in any way, and align stand with ribs, following curvature of stand by the ribs. But, without test holes, I do not think it can be done on any way. To admit, I am not in the mood to drill test holes. What to do with them after ? Ok, if this is not possible, considering glue stand to hull is out of question, one possible solution is - use screws to fix it to hull over dome soft layer between. But - If I do that, I know that manipulating with model ( on a long way run I still have to go) will transfer forces directly to screws. And, as you could see in my log, I am not quite patient and careful type of man. And at that point - arise "balsa question" - could "sandwich" of balsa, putty and veneer with empty space under, hold safe screws (even 8 of them), without possibility to damage and break balsa strips, planking and coopering ? Maybe, to drill "test holes" or holes for screws and to fill somehow empty space under with something hard? And - with what ? Long ago mixing alabaster and carpenter glue I have got sonethibg strong and hard... Any idea ? I`d be very very very thankful !!!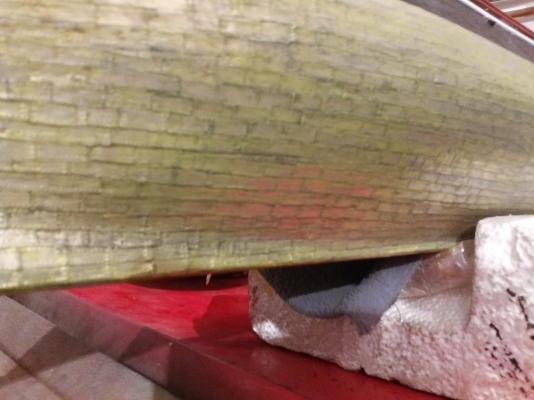

- 4,152 replies
-
- 9
-
-
- cutty sark
- tehnodidakta
- (and 1 more)
-
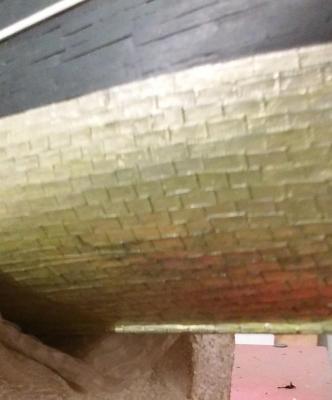
Famous "green green grass of..." color. Go on !
-
Cutty Sark by NenadM
NenadM replied to NenadM's topic in - Build logs for subjects built 1851 - 1900
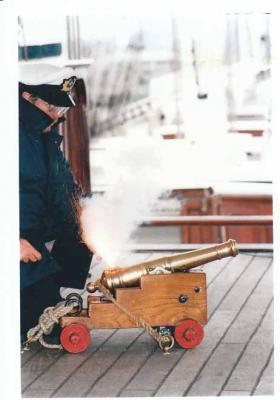
Baby cannon ... When growns up, will be a serious war cannon, looking for a job on Victory Oh yes, first to spend some time in West Point or something simillar. Signal gun has no war use, and art of war must be learned first- 4,152 replies
-
- 6
-
-
- cutty sark
- tehnodidakta
- (and 1 more)
-
Cutty Sark by NenadM
NenadM replied to NenadM's topic in - Build logs for subjects built 1851 - 1900
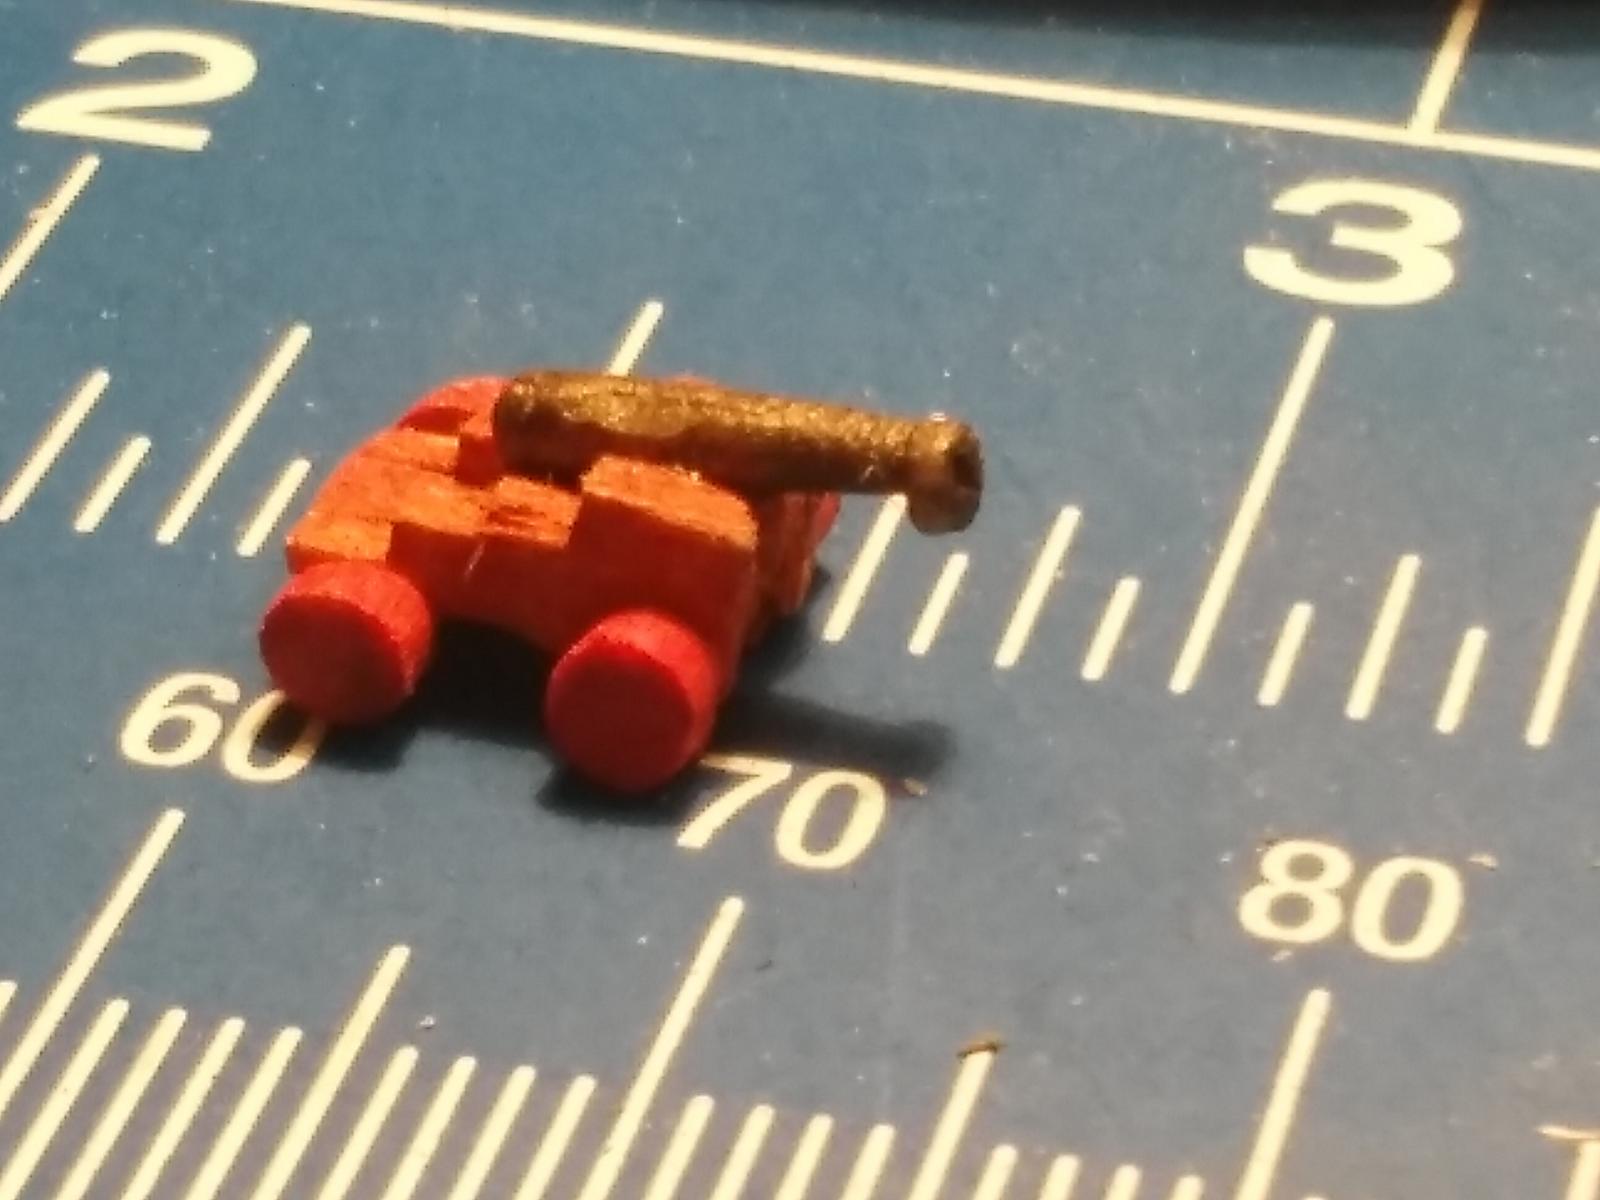
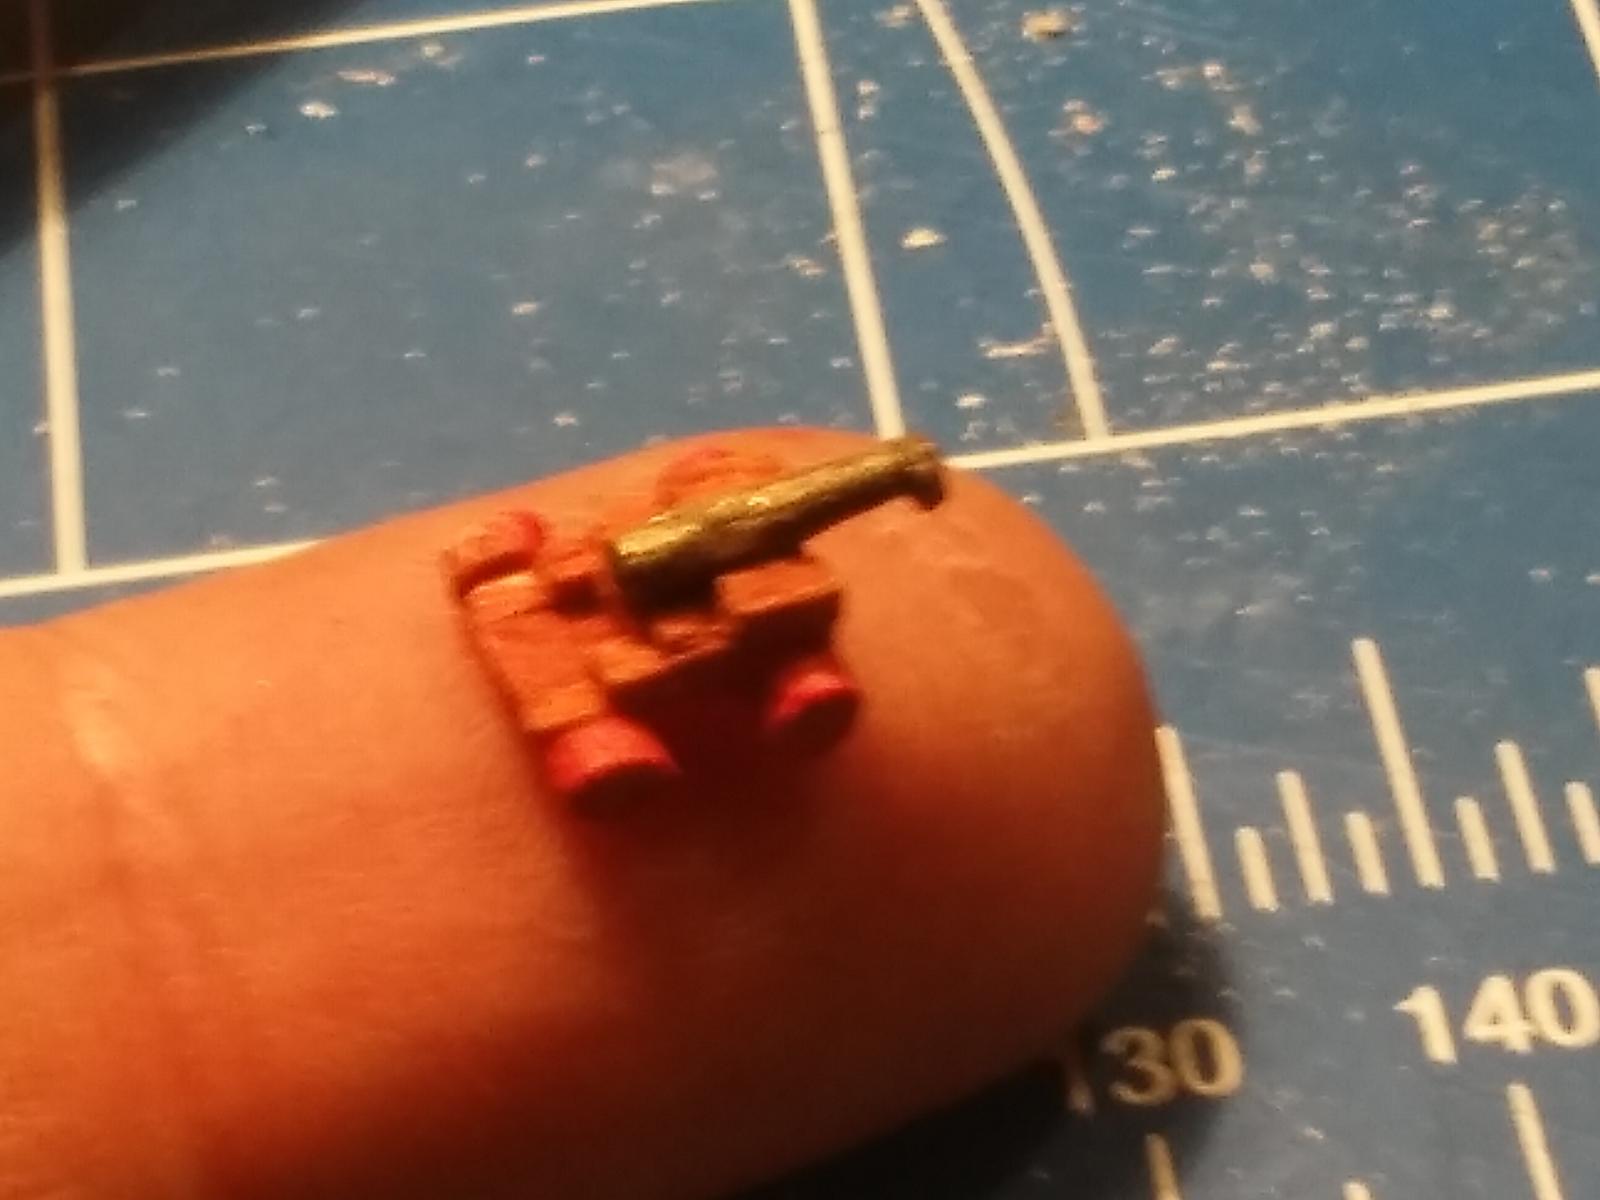
Signal gun, ver #2 Ver #1 just dissapeared from table at half of road @#@## Gun is made from toothpick in Dremell, basement is made from 1mm veneer, wheels from old rounded molding, cutted to 1,5 mm, glued with ca, and thined in width to scale after glue dry For now, I think I'll just jump over bolt issue on gun basement. To be in scale, their outer dia has to be less than 1mm, and I think that is no point even to try. The thinnest solid wire I have is 0,5mm, and there is no way to pack ring and hole under 1mm. Bolts on decking at the roof on aft-deck house will be quite enough, with some ropes Really small beast

- 4,152 replies
-
- 11
-
-
- cutty sark
- tehnodidakta
- (and 1 more)
-
Cutty Sark by NenadM
NenadM replied to NenadM's topic in - Build logs for subjects built 1851 - 1900
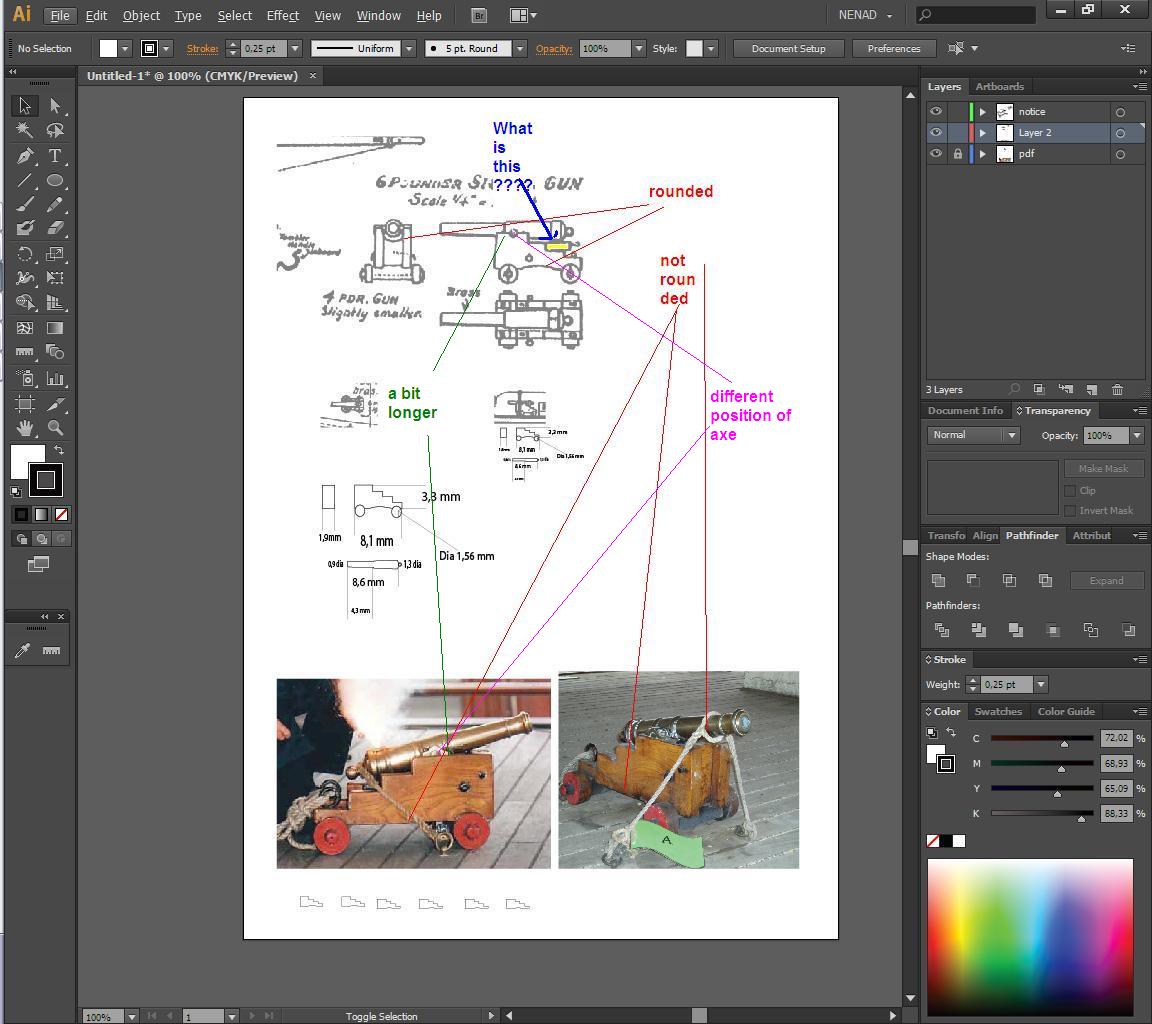
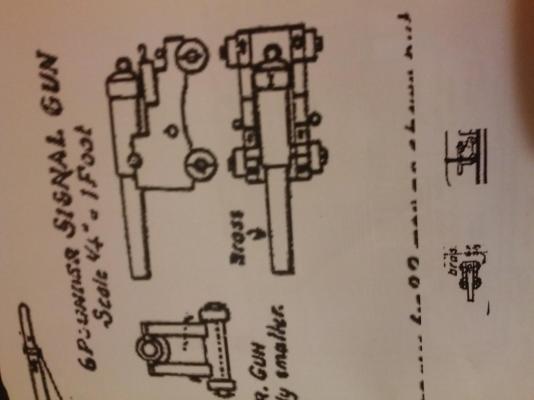
If she will be sweet looking lady, she will fall in love and leave me with some vagabond who will take her to the sea ..... Thanks for your nice words Denis Eh, Michael, it is said " if man know where he will fall down, he would sit". How can you know long time ago that you will have friend who will be interested in details you could make a photo ? Thanks anyway Some preparing for signal gun done in AI, and I am a bit frozen by dimensions, also challenged at the same time Here is working sheet Just for notice, if somebody will make Her in 1:50 or larger scale, there are some differences between C-plans and present stage, considering photos I marked with red lines And there is a unknown part, presented on C-plans ( I marked it yellow) , not presented on photos. Do anybody know what is this ? To repeat my question from upper post - how to rigg signal gun ?
- 4,152 replies
-
- 6
-
-
- cutty sark
- tehnodidakta
- (and 1 more)
-
Drug ambalage Not my idea. I found this on FB Good to share

- 396 replies
-
- 4
-
-
- Idea
- Bright Idea
- (and 1 more)
-
Cutty Sark by NenadM
NenadM replied to NenadM's topic in - Build logs for subjects built 1851 - 1900
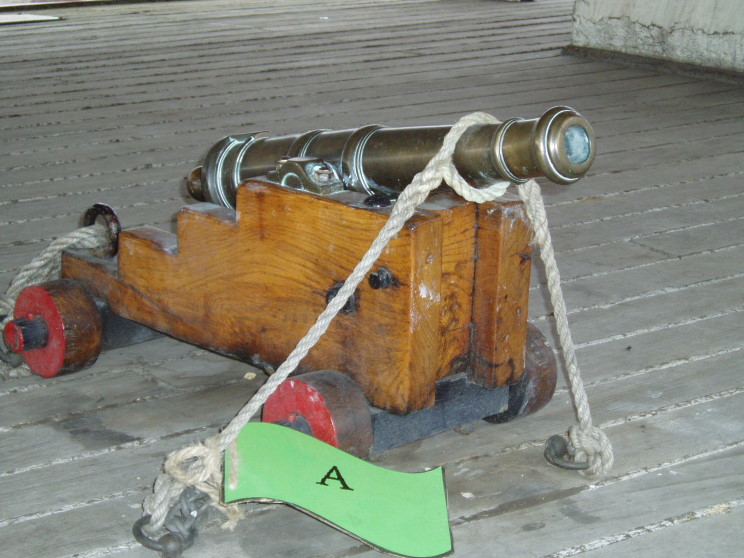
Thank you for photos, Michael. Do you have a picture of signal gun, maybe? I found only two On C-plans there are some differences ... Gun is longer toward basement, downside of basement is curved, not all rigging bolts are on place now... BTW ... I read many post discussing about gun rigging. But there is a big difference between fighting guns and signal guns. Do anybody has idea how and where signal gun was rigged and placed during sailing?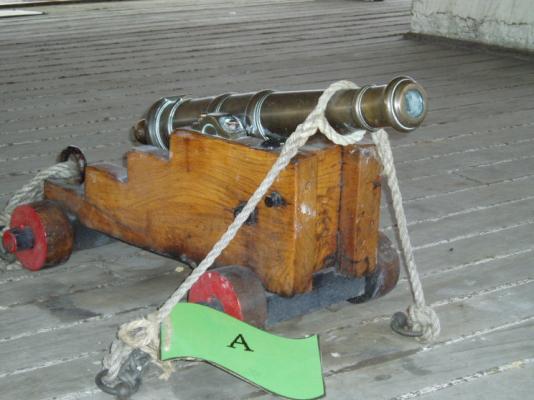
- 4,152 replies
-
- 9
-
-
- cutty sark
- tehnodidakta
- (and 1 more)
-
Cutty Sark by NenadM
NenadM replied to NenadM's topic in - Build logs for subjects built 1851 - 1900
Thank you Mark. Your words turn me on , but temporary attack from office turned me down until end of working week I hope- 4,152 replies
-
- 5
-
-
- cutty sark
- tehnodidakta
- (and 1 more)
-
Maybe ... cellophane of a cigarette pack ??? Transparent, but not at all, shiny but not too much, it may be tightened, it may be tinted with transparent acrylic, you can sand it to get blur effect, you can play worming it, you can bend it to get "crystal" effect, ...