NenadM
-
Posts
3,254 -
Joined
-
Last visited
Content Type
Profiles
Forums
Gallery
Events
Everything posted by NenadM
-

Cutty Sark by NenadM
NenadM replied to NenadM's topic in - Build logs for subjects built 1851 - 1900
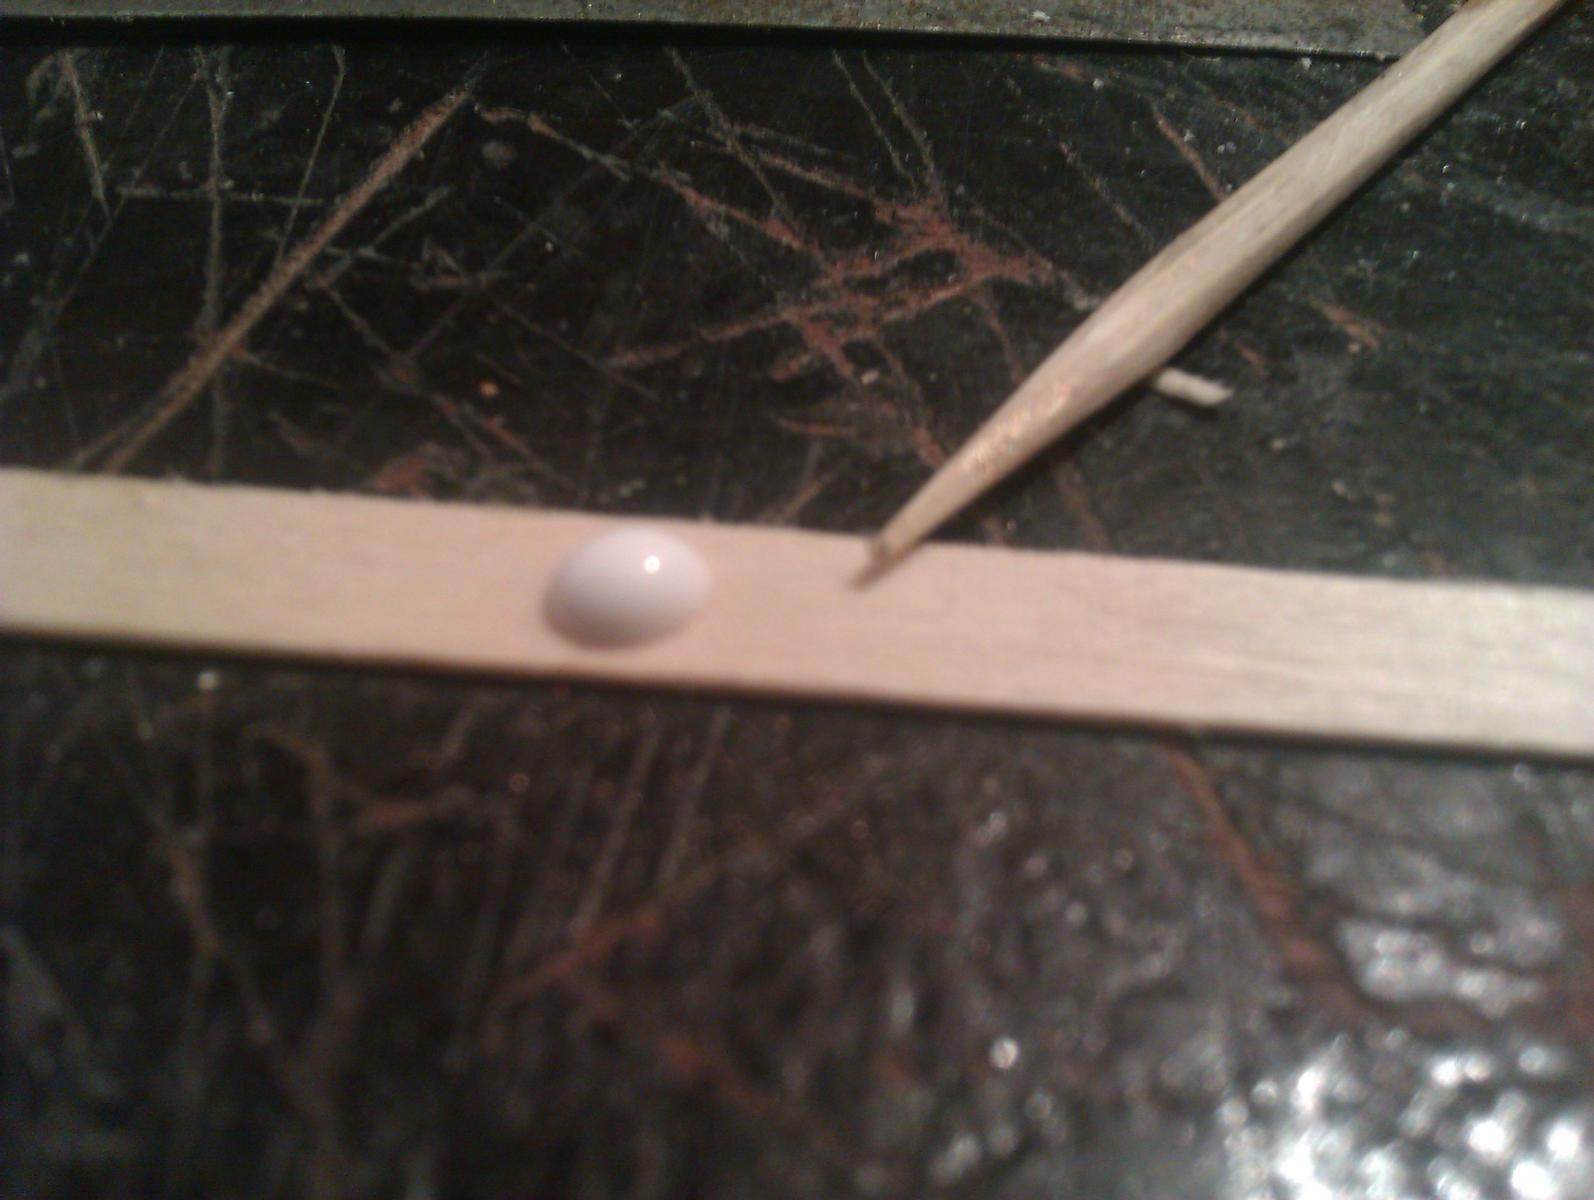
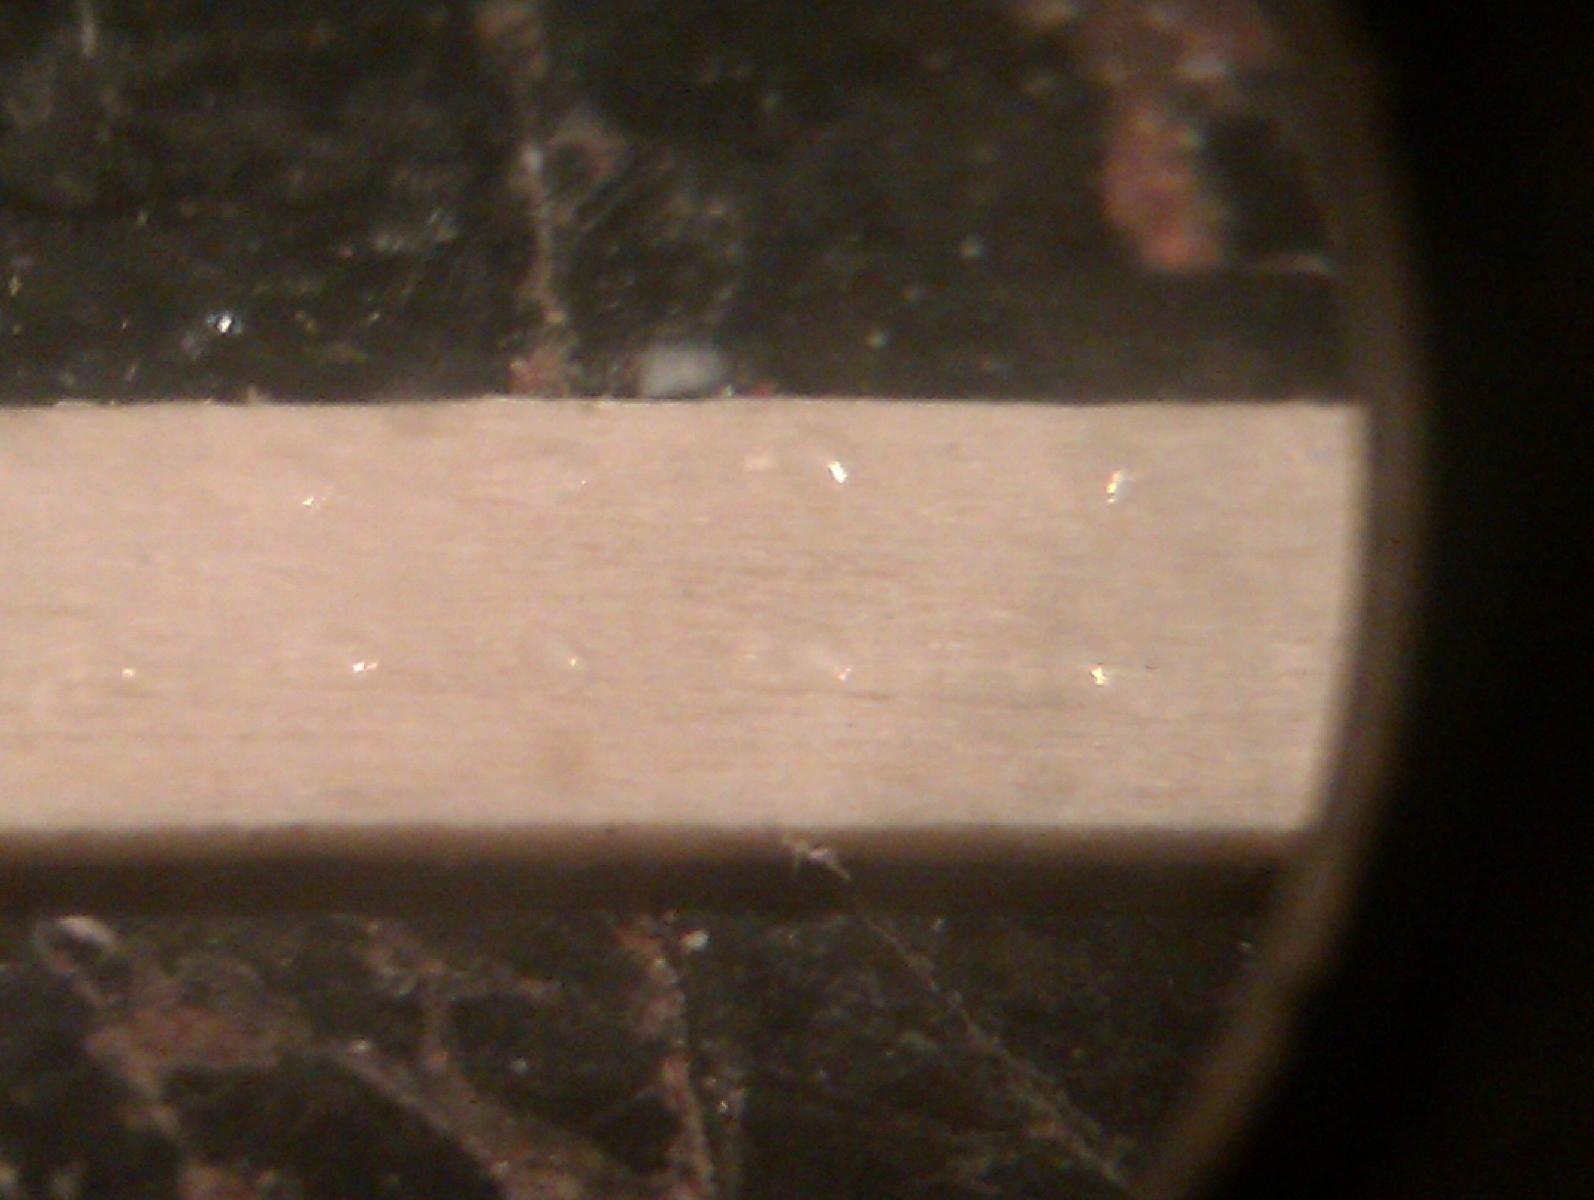
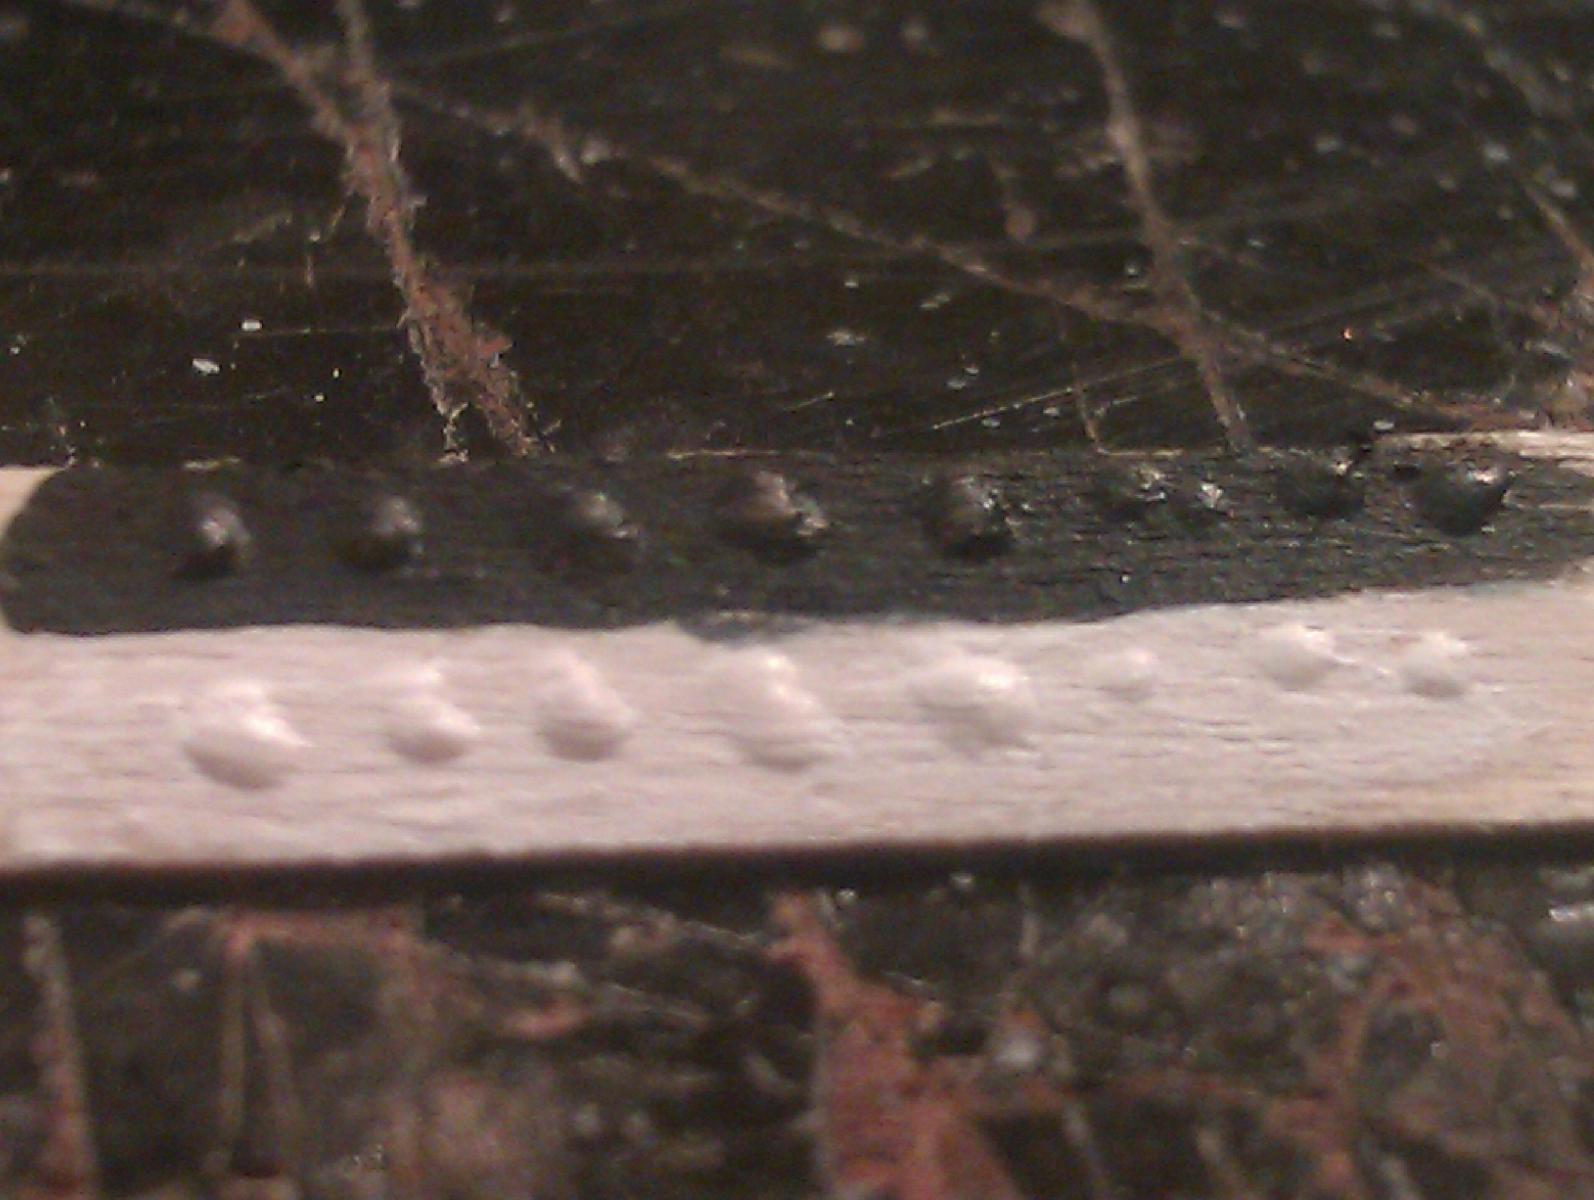
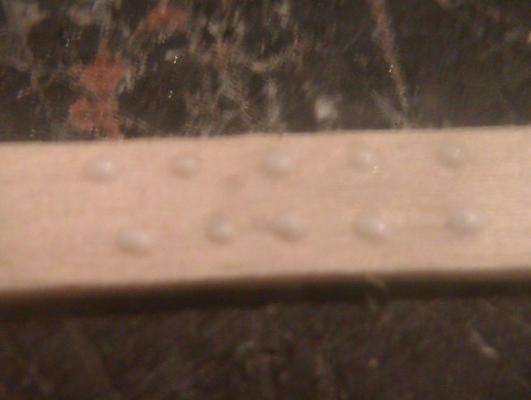
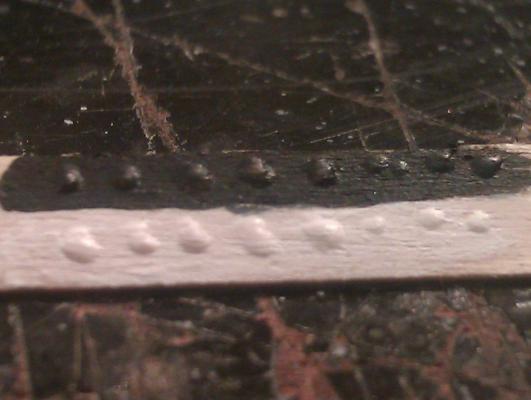
Hi Tass, thanks for kind words Here is "fake riveting school" All you need is drop of classic wood glue and thinned toothpick Testing on 0,5x4mm veneer Take a thinny drop of glue on the same top of toothpick, and just "write" your rivets When dry, make another pass at same points And that is all. After paintong you have your rivets Instead wood glue, you can use acrylic paint or putty. Just play a little and make experiments until you got desired look

- 4,152 replies
-
- 11
-

-
- cutty sark
- tehnodidakta
- (and 1 more)
-
Extra good work. And look very well. I like it, and I'll try to reproduce it
- 525 replies
-
- 4
-
-
- cutty sark
- mantua
- (and 2 more)
-
Cutty Sark by NenadM
NenadM replied to NenadM's topic in - Build logs for subjects built 1851 - 1900
Uh uh uh !!!! Marvelous work in details, lead me to the further devil's road- 4,152 replies
-
- 4
-
-
- cutty sark
- tehnodidakta
- (and 1 more)
-
Ahh what toys .... Be very carefull, even you have to make 1cm only, and use always protective glasses and glowes Keep always in mind that rotary tools has their own will, even small Dremell. I learned it in a harder way. Making beds for kids long ago, my circular saw suddenly decided to send for a walk piece of wood throught double glass window in february and -15℃. Repairing my terrace and cutting stone, I forgot to wait this beast to stop turning before I laid it down. Next scene was watching it running after my dog ... No damage, but I learned my lesson, and three basic laws: always work with full attention and full concentration; always use all possible protective equipment; never think - I know that, so nothing will be wrong Nobody wants to be hurt, but sh*** happens
- 525 replies
-
- 4
-
-
- cutty sark
- mantua
- (and 2 more)
-
Cutty Sark by NenadM
NenadM replied to NenadM's topic in - Build logs for subjects built 1851 - 1900
Thanks dear friends for good words and wishes. If I find there something interesting except full nirvana, I'll post about Still two days to play in shipyard- 4,152 replies
-
- 4
-
-
- cutty sark
- tehnodidakta
- (and 1 more)
-
Cutty Sark by NenadM
NenadM replied to NenadM's topic in - Build logs for subjects built 1851 - 1900
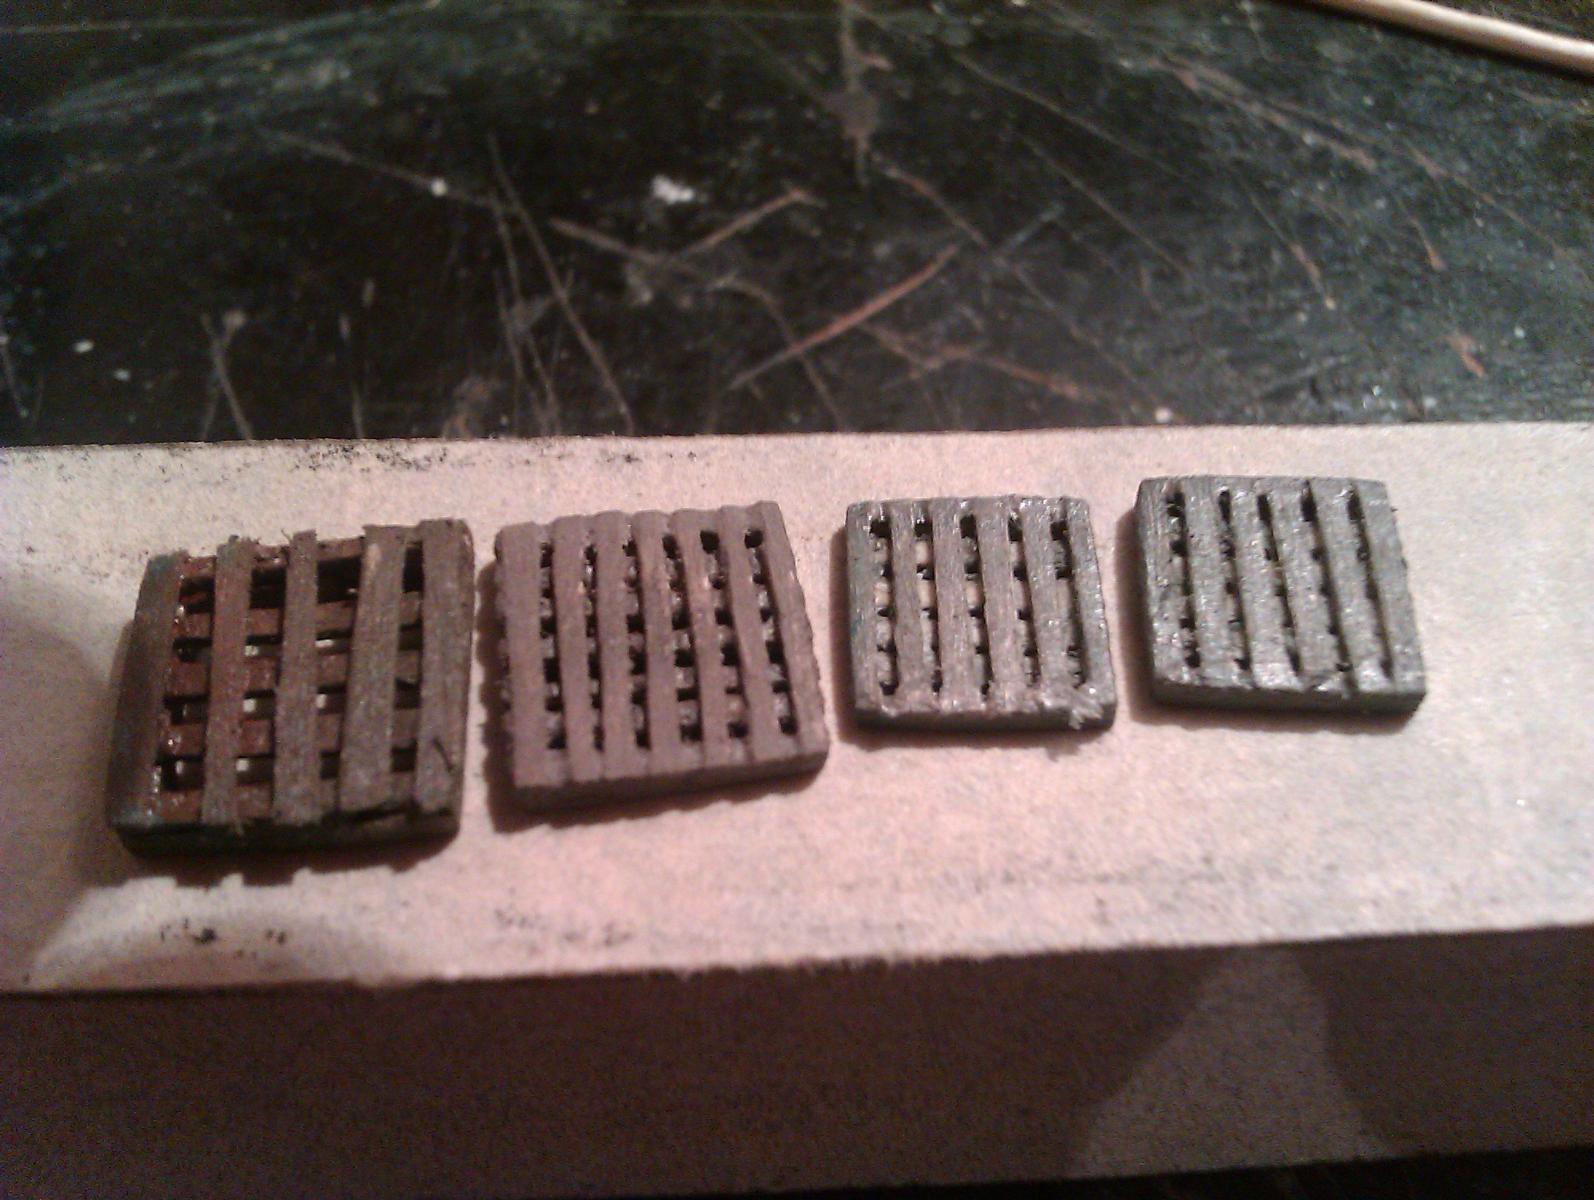
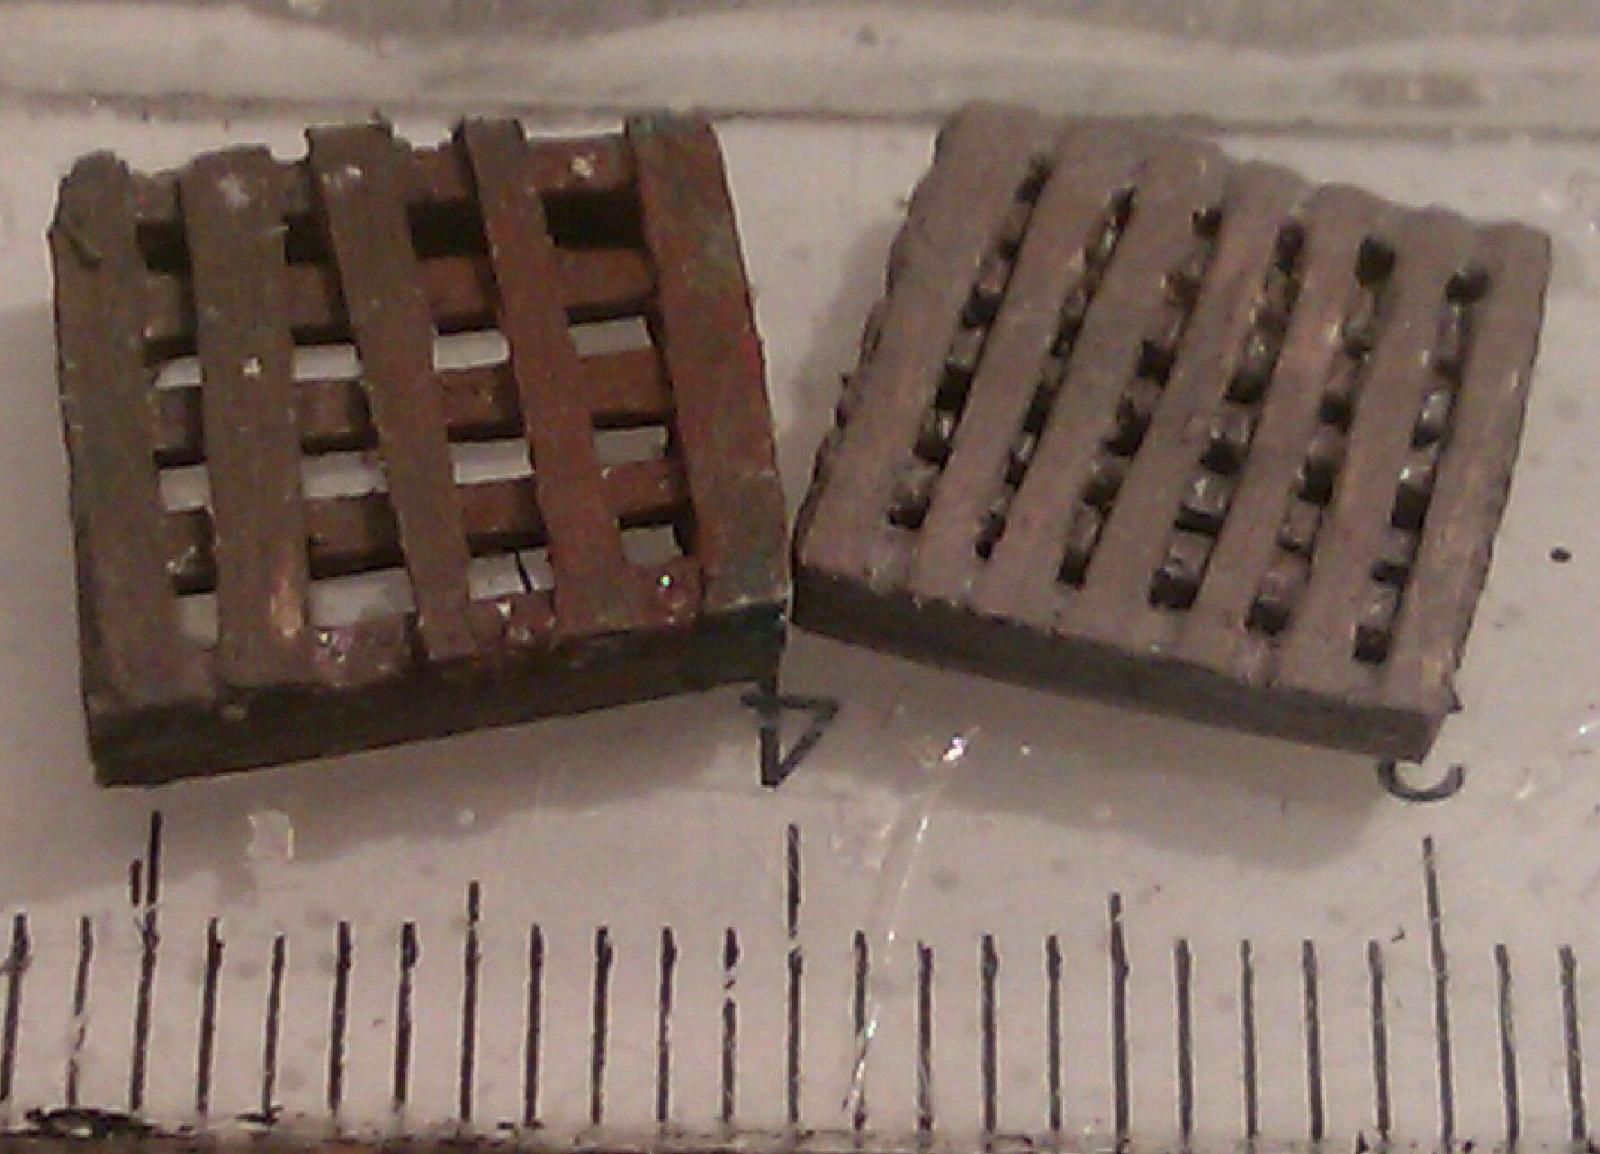
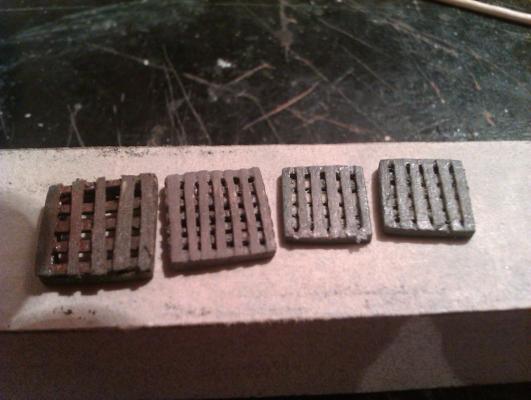
Definite version. A bit smaller and more thin Two old at left Temporary on place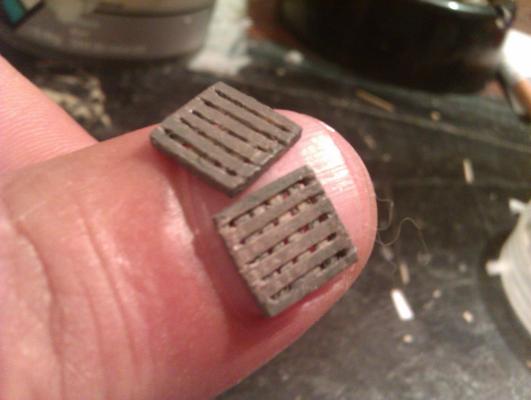
- 4,152 replies
-
- 9
-
-
- cutty sark
- tehnodidakta
- (and 1 more)
-
Cutty Sark by NenadM
NenadM replied to NenadM's topic in - Build logs for subjects built 1851 - 1900
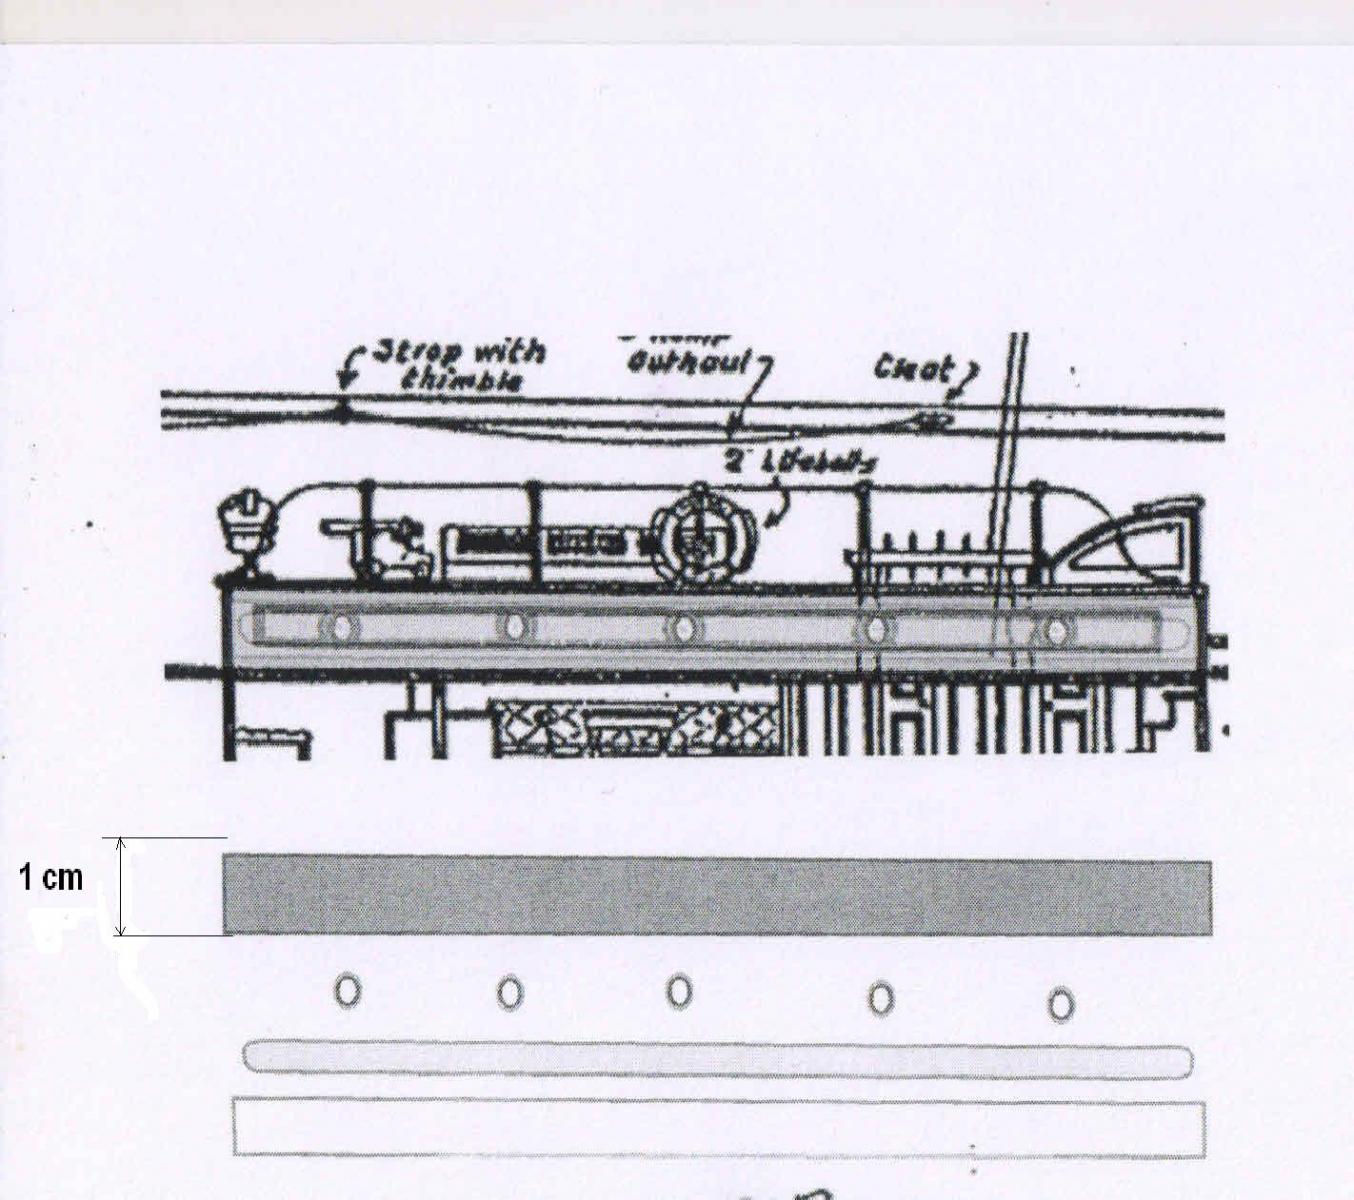
Marc, as you carefull look at the photo with Queen, and englare space over Her head, you can notice shadow of round rail which lead to conclusion that entrance is promoted just to the rail. q And now,look at the next picture, particulary position of rail toward buckets I am not shure that unbroken line of buckets shown on C-plans is not separatwd by entrance Also you can notice intersection shape change of that rail ???? Hmm ... something to think/rethink about during my one week vacation next week ... with one more "hmm" question how to reproduce same color on deckhouse's roof planking as I made mixing colors for decks ... what I was thinking - again My plane is to make short Shumadia Tour and to visit three mountines in Serbia and my three friends who have three cabins deep in the woods of Rajac, Zlatibor and Rudnik mountine, in 200km circle from Belgrade. Kids don't want to go with me (booring thei said), so I will let them enjoy in 39℃ in shade, and I will enjoy in traveling, wood walking and chating with friends with/without beer/bear or wine I hope to find my tools well when I come back So, today is last day in office, and,I hope during weekend to make some progress on fore deck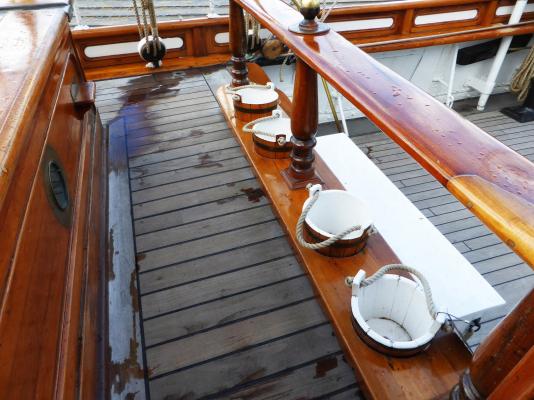

- 4,152 replies
-
- 11
-
-
- cutty sark
- tehnodidakta
- (and 1 more)
-
I had no idea how complex is this mofel. Great work Mark, no matter you are quietly burning on a light fire. Fire always produce something
-
Cutty Sark by NenadM
NenadM replied to NenadM's topic in - Build logs for subjects built 1851 - 1900
On the left - first attempt, on the right - new attempt Better, Marc?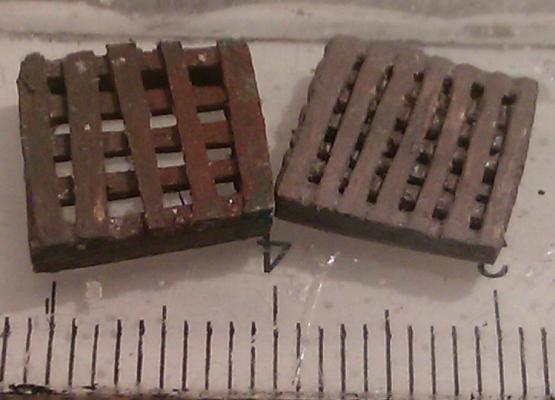
- 4,152 replies
-
- 9
-
-
- cutty sark
- tehnodidakta
- (and 1 more)
-
Cutty Sark by NenadM
NenadM replied to NenadM's topic in - Build logs for subjects built 1851 - 1900
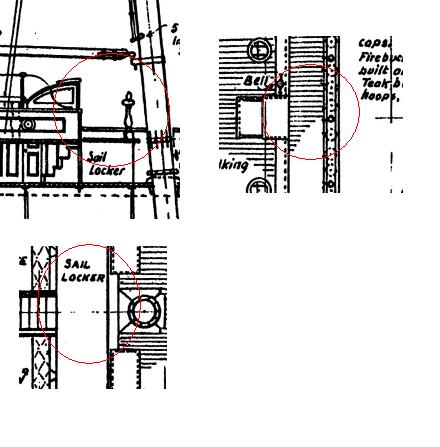
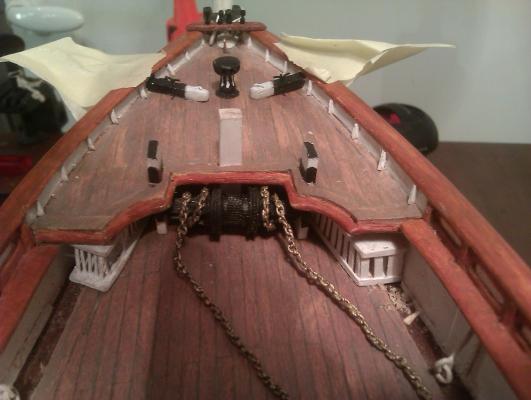
Yes, palette. There is a palette on some photos, an that will be nice detail in implementation of my over detailing strategy to cover mess and mistakes I made I hope too, Marc And one interesting point above aft-deck house - on C-plans - only one entrance on the fore side. Today , two entrances. Has anybody clear picture of fore entrance to aft-deck house ? Are buckets all along edge, or they are reduced with entrance ? On internet I found only segmented photos, and can not clear this point Here is situation on C-plans And in present stage Also, entrance seems to be promoted a while to front from the line of fore wall of aft deck house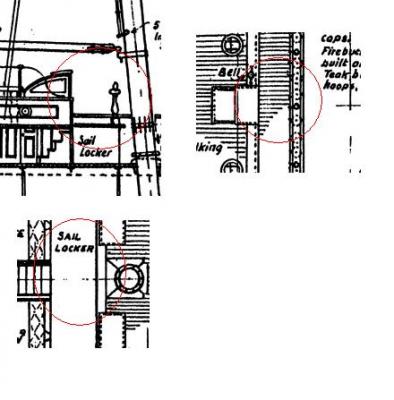

- 4,152 replies
-
- 6
-
-
- cutty sark
- tehnodidakta
- (and 1 more)
-
Cutty Sark by NenadM
NenadM replied to NenadM's topic in - Build logs for subjects built 1851 - 1900
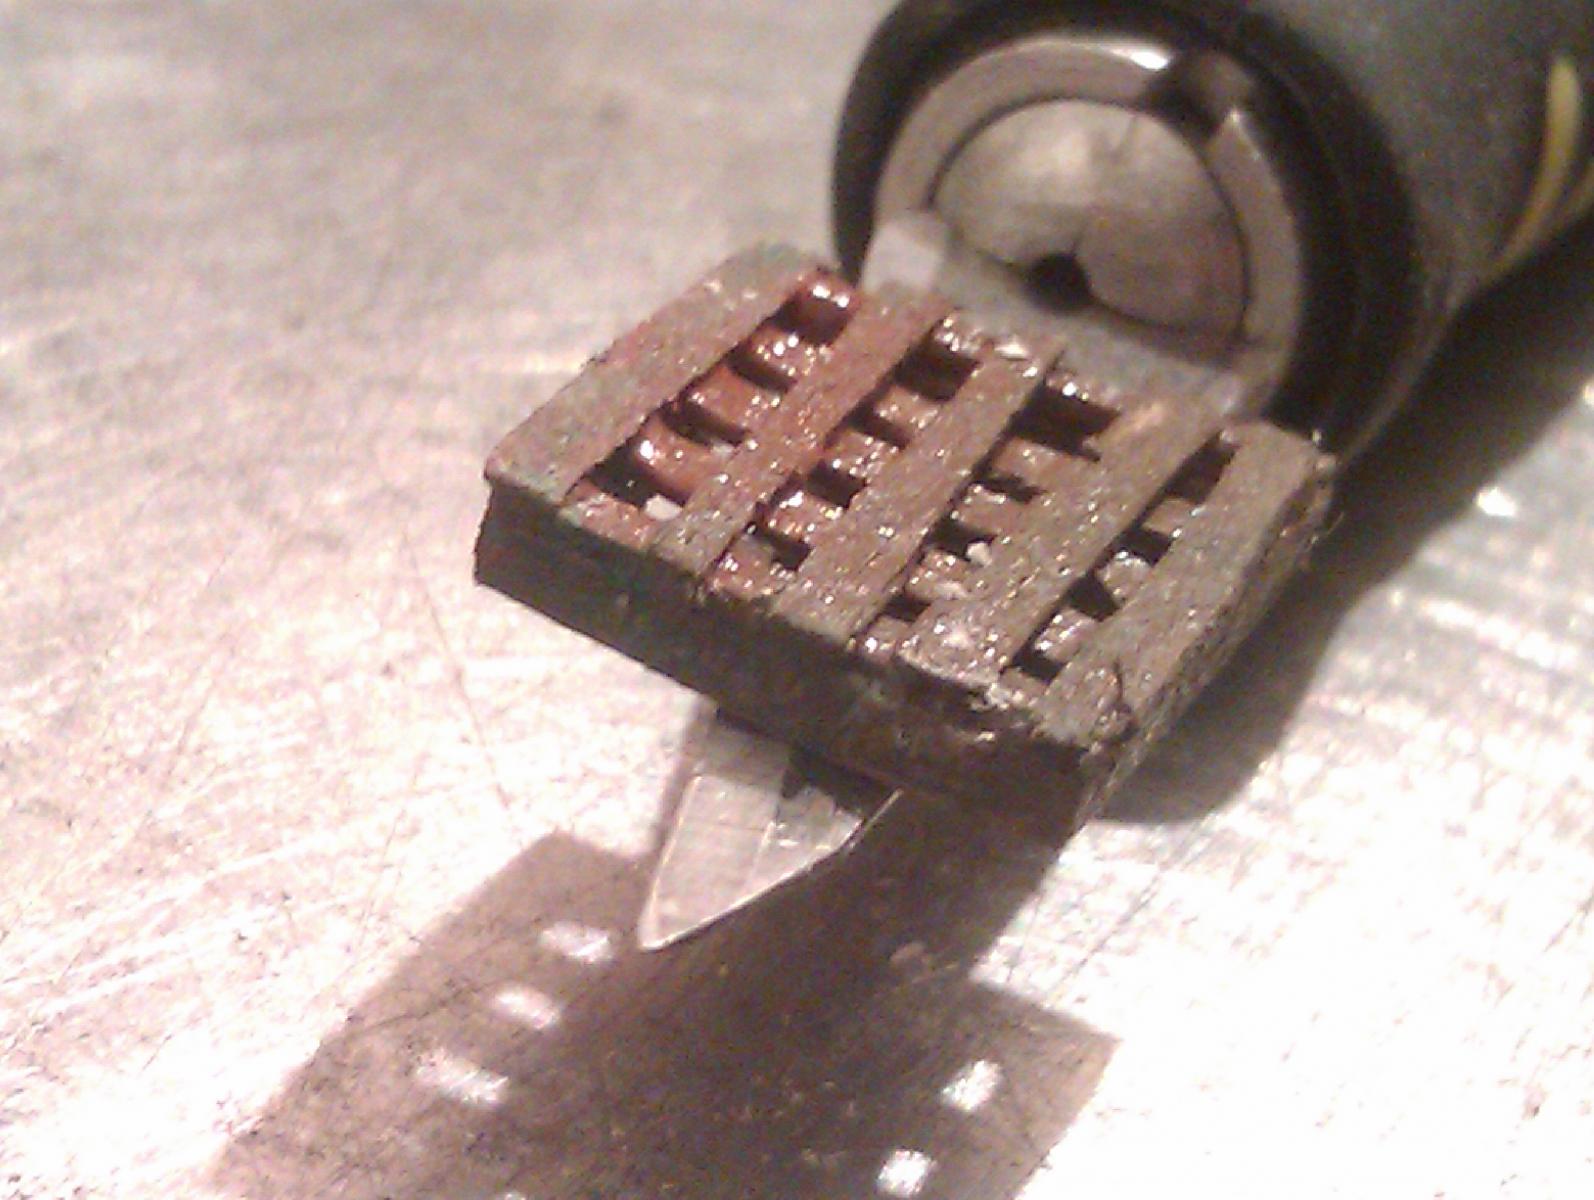
Gratings, attempt No 1 Too thick and large Can you do it better , Nenad? @$#$## talking with myself again
- 4,152 replies
-
- 7
-
-
- cutty sark
- tehnodidakta
- (and 1 more)
-
Cutty Sark by NenadM
NenadM replied to NenadM's topic in - Build logs for subjects built 1851 - 1900
Thanks Izzy for your kind offer, but I have more simple and comfortable solution. Hothead, my son is architect engineer and he is more than a familiar, and very very very very good with all kind of raster,vector 3D software of any kind, and, being my son, he MUST have ALL of them on his laptop. During his summer vacation he is home, and few days ago he occupied my late Admiral`s work desk in office, so when I am on my PC, he is mainly sitting opposite to me. I also have very solid computer education and knowledge - considering kind of my job , so there mainly are not problems In picture on my last post you can see what is my basic need, which means very basic and low level usage of this monster programs ( mainly draw simple cicrcle or poligon and transform it and move it`s points where I want) . Mainly, this job can be done even with MSWord, but clumsy, and AI or CDraw as vector programs has nice opportunity to work with layers, also keep scale of inserted raster crop from *.pdf C-plans I have Thanks anyway- 4,152 replies
-
- 2
-
-
- cutty sark
- tehnodidakta
- (and 1 more)
-
Hello Izzy Visit Rfolsom's log for some answers And think about preparing to immediately removing excess of glue from any placed plate, if yoy want clean and neat work Good luck with army of plates
-
Cutty Sark by NenadM
NenadM replied to NenadM's topic in - Build logs for subjects built 1851 - 1900
Little pause ( without bear ) but with wine ( red domestic from Adriatic sea !!!) Preparing for aft deck house, playing and learning Adobe Ilustrator This will be a chalenge !!!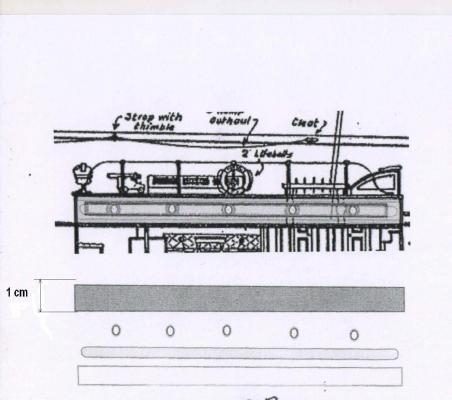
- 4,152 replies
-
- 5
-
-
- cutty sark
- tehnodidakta
- (and 1 more)
-
Cutty Sark by NenadM
NenadM replied to NenadM's topic in - Build logs for subjects built 1851 - 1900
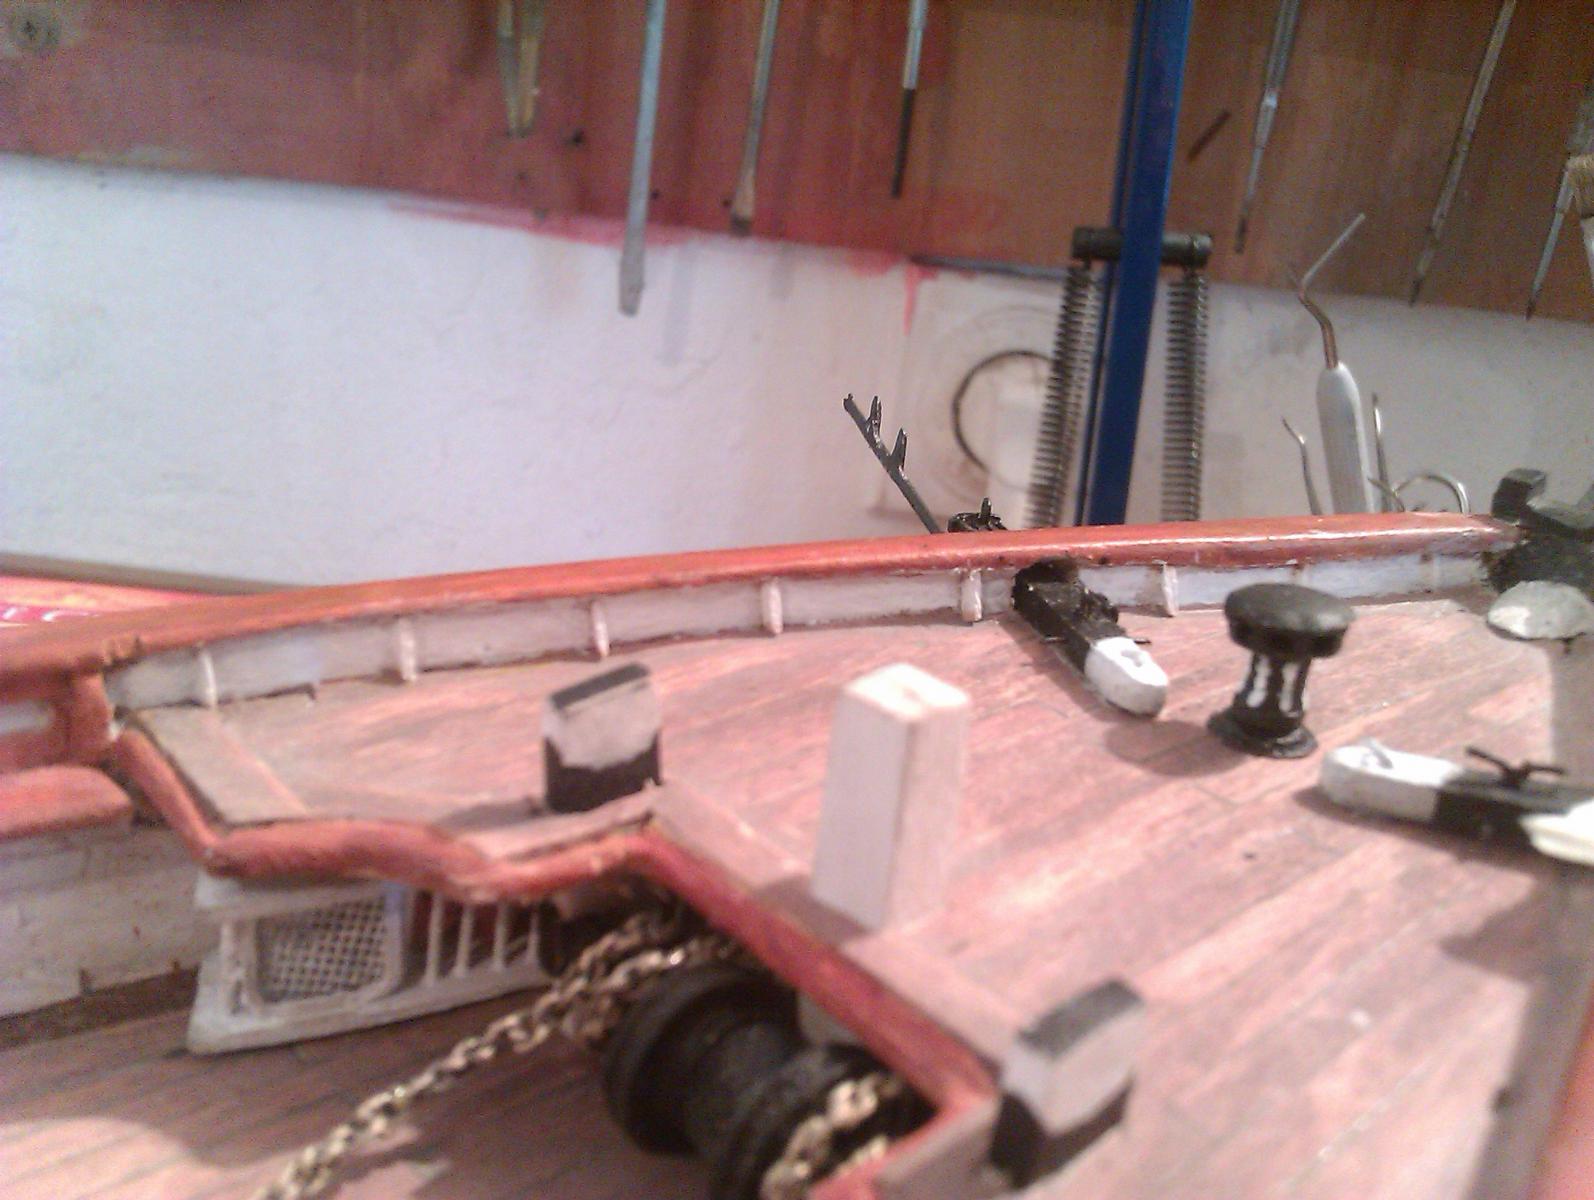
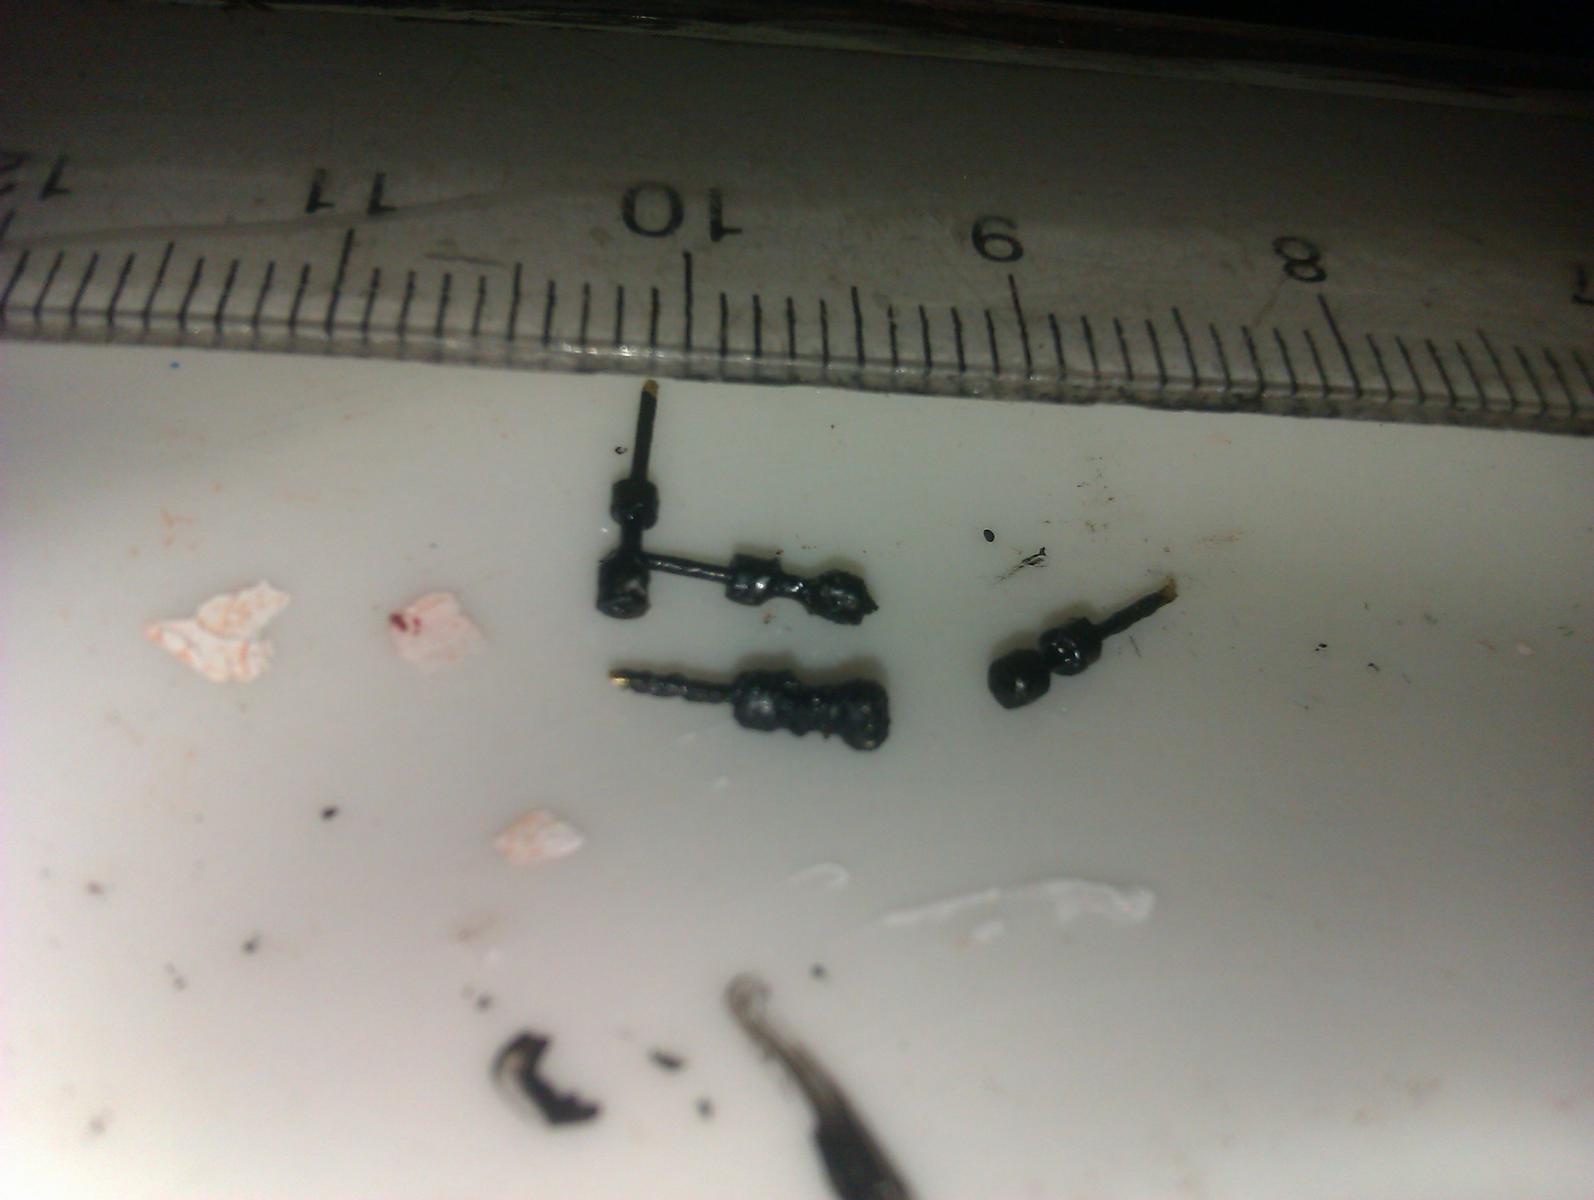
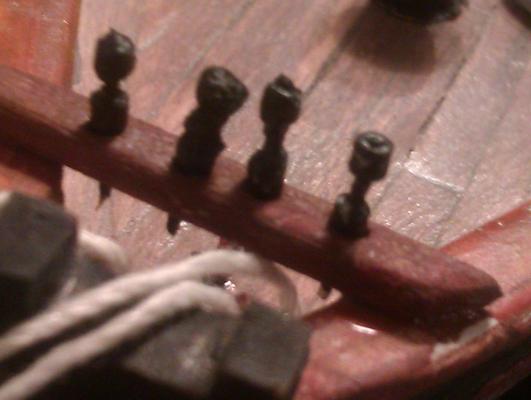
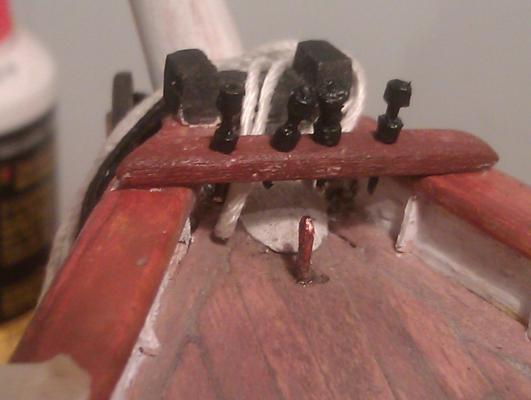
Little pillars/ribs under foredeck rail, on both sides. Hell's work, but it worth any second. Wholr look of foredeck rises up And then, front pinrail, and ... pins Pinrail was not problem, but pins were, particulary considering they has to be equial to pins on main deck ( 1000 of them). So I must think about massproduction of pins In mean time, fortunaty, I remembered that there are cleats under pinrail, and that will be imposible to put them when pinrail gets in its place. So, three cleats/eye ... fixed and glued at the root of bowsprit. Not a big deal, them were prepared earlier during bowsprit works Pin first attack was by 1mm brass wire, but this wire is so thick, and whole structure doesn't look well - crowded and too much massive Then I tried with 0,5mm brass wire, and isolation from Cu telephon wire 0,5mm (my favorite, before I discover brass wire 0,5 mm) After painting And on place I Hmmm, maybe it can be better And new feel and look of foredeck Conclusion : pinrail has to be little thinner, and pins have to be little longer That's all for today, at 39℃ in shade I earned my cold beer ... bear ... beer ... whatever
- 4,152 replies
-
- 11
-
-
- cutty sark
- tehnodidakta
- (and 1 more)
-
Cutty Sark by NenadM
NenadM replied to NenadM's topic in - Build logs for subjects built 1851 - 1900
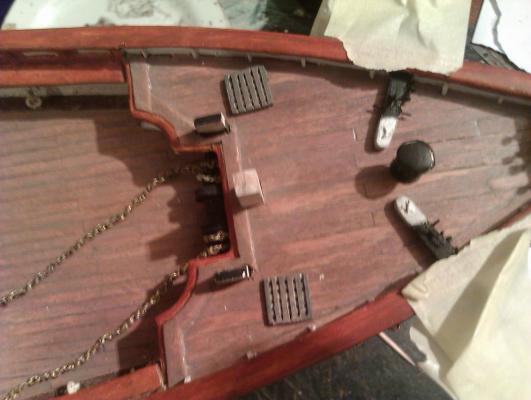
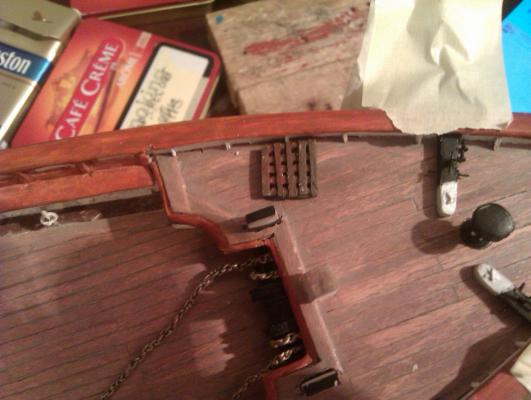
Rectangles ... As I could see on photos, those are movable palletes. On some pictures they are presented, on some not. You can also see something simillar on some pictures layed beneath bulwark, with anchor chain on them Just think it will be nice detail 2 x 3 "cleats" are not presented on Her in Greenwich, but you can find them in old photos, and in Conservation plans. I suppose them are removed to avoid visitors from faltering In my scale, cleats, eye rings and eye bolts has cca 1mm dia, and looks equial. I know thet are different, but as I am not able to make them different, just didn't even try to remember where is cleat or where is eye-something placed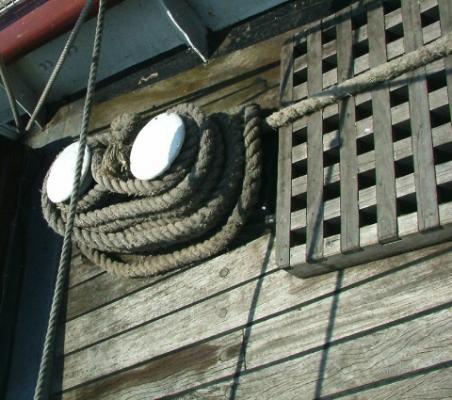
- 4,152 replies
-
- 9
-
-
- cutty sark
- tehnodidakta
- (and 1 more)
-
Cutty Sark by NenadM
NenadM replied to NenadM's topic in - Build logs for subjects built 1851 - 1900
Another hot day with 39C in shade Not working, but doing some research for forgetful Nenad - marking elements on fore deck still have to be done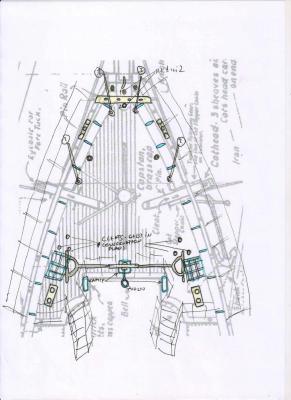
- 4,152 replies
-
- 5
-
-
- cutty sark
- tehnodidakta
- (and 1 more)
-
Nice to see you back !
-
Cutty Sark by NenadM
NenadM replied to NenadM's topic in - Build logs for subjects built 1851 - 1900
Thank you Denis. Encouragin words from real master- 4,152 replies
-
- 2
-
-
- cutty sark
- tehnodidakta
- (and 1 more)
-
Cutty Sark by NenadM
NenadM replied to NenadM's topic in - Build logs for subjects built 1851 - 1900
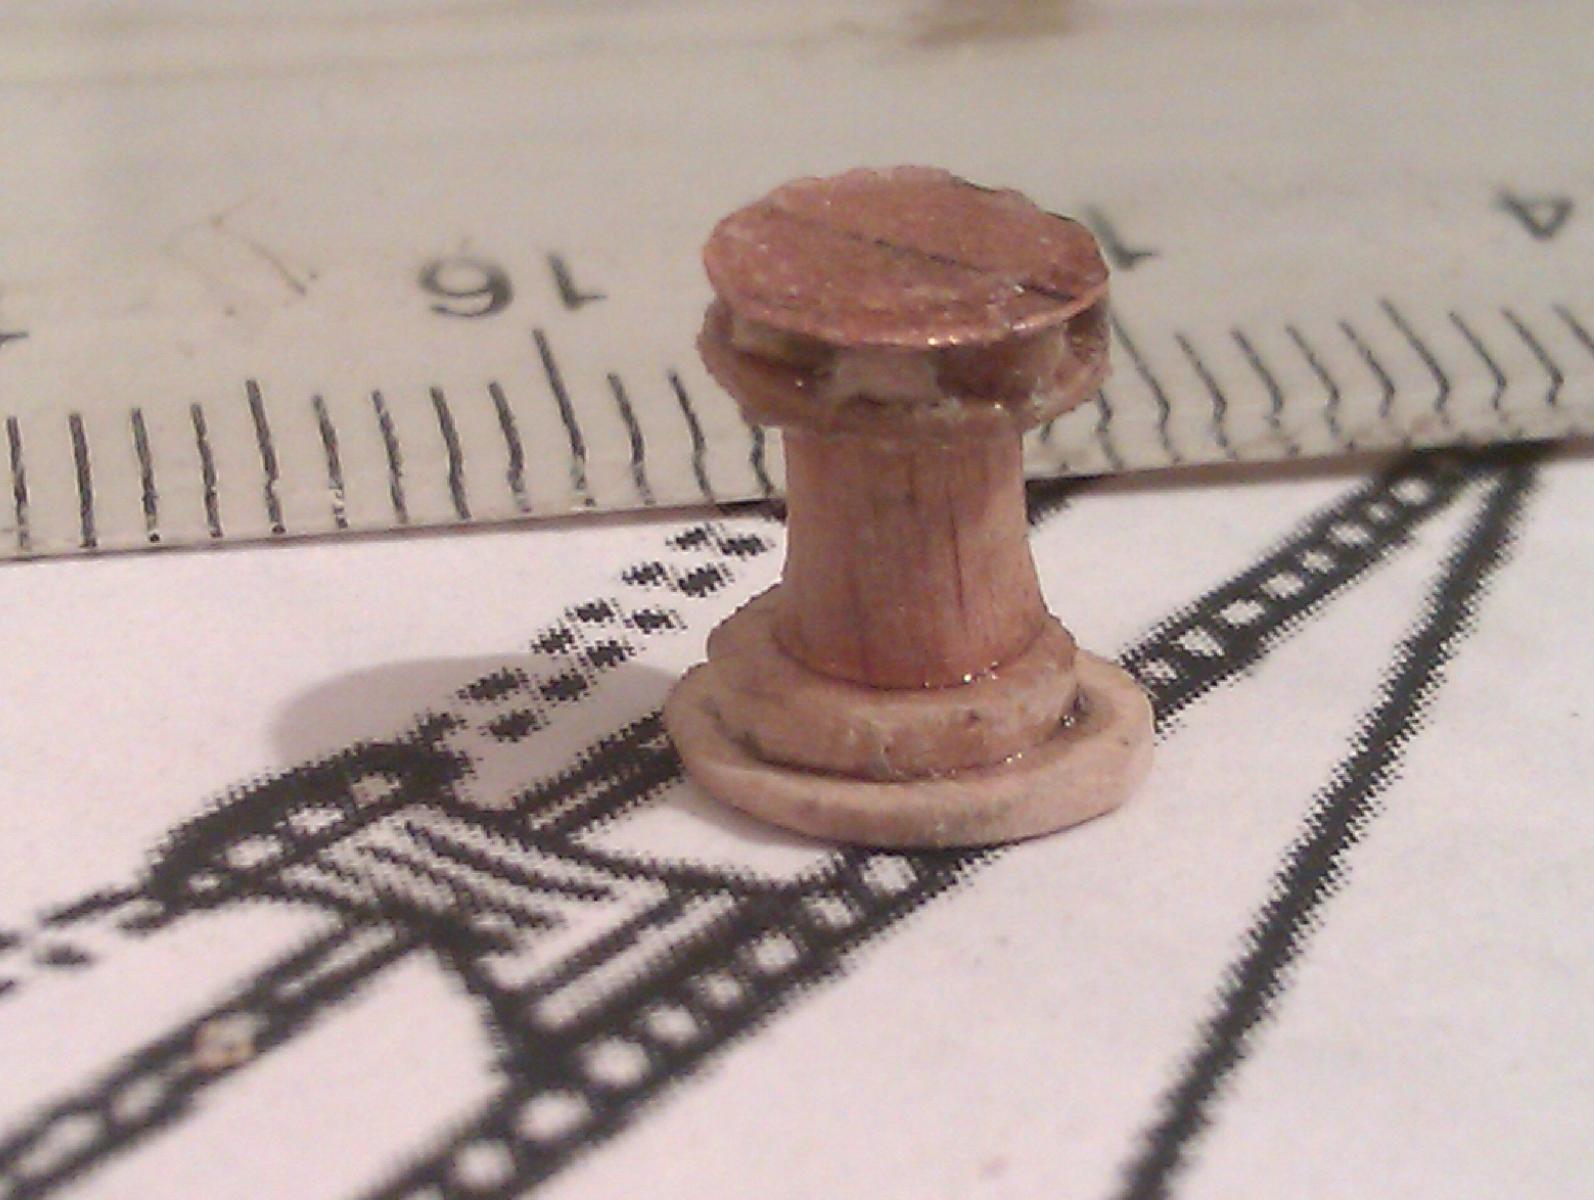
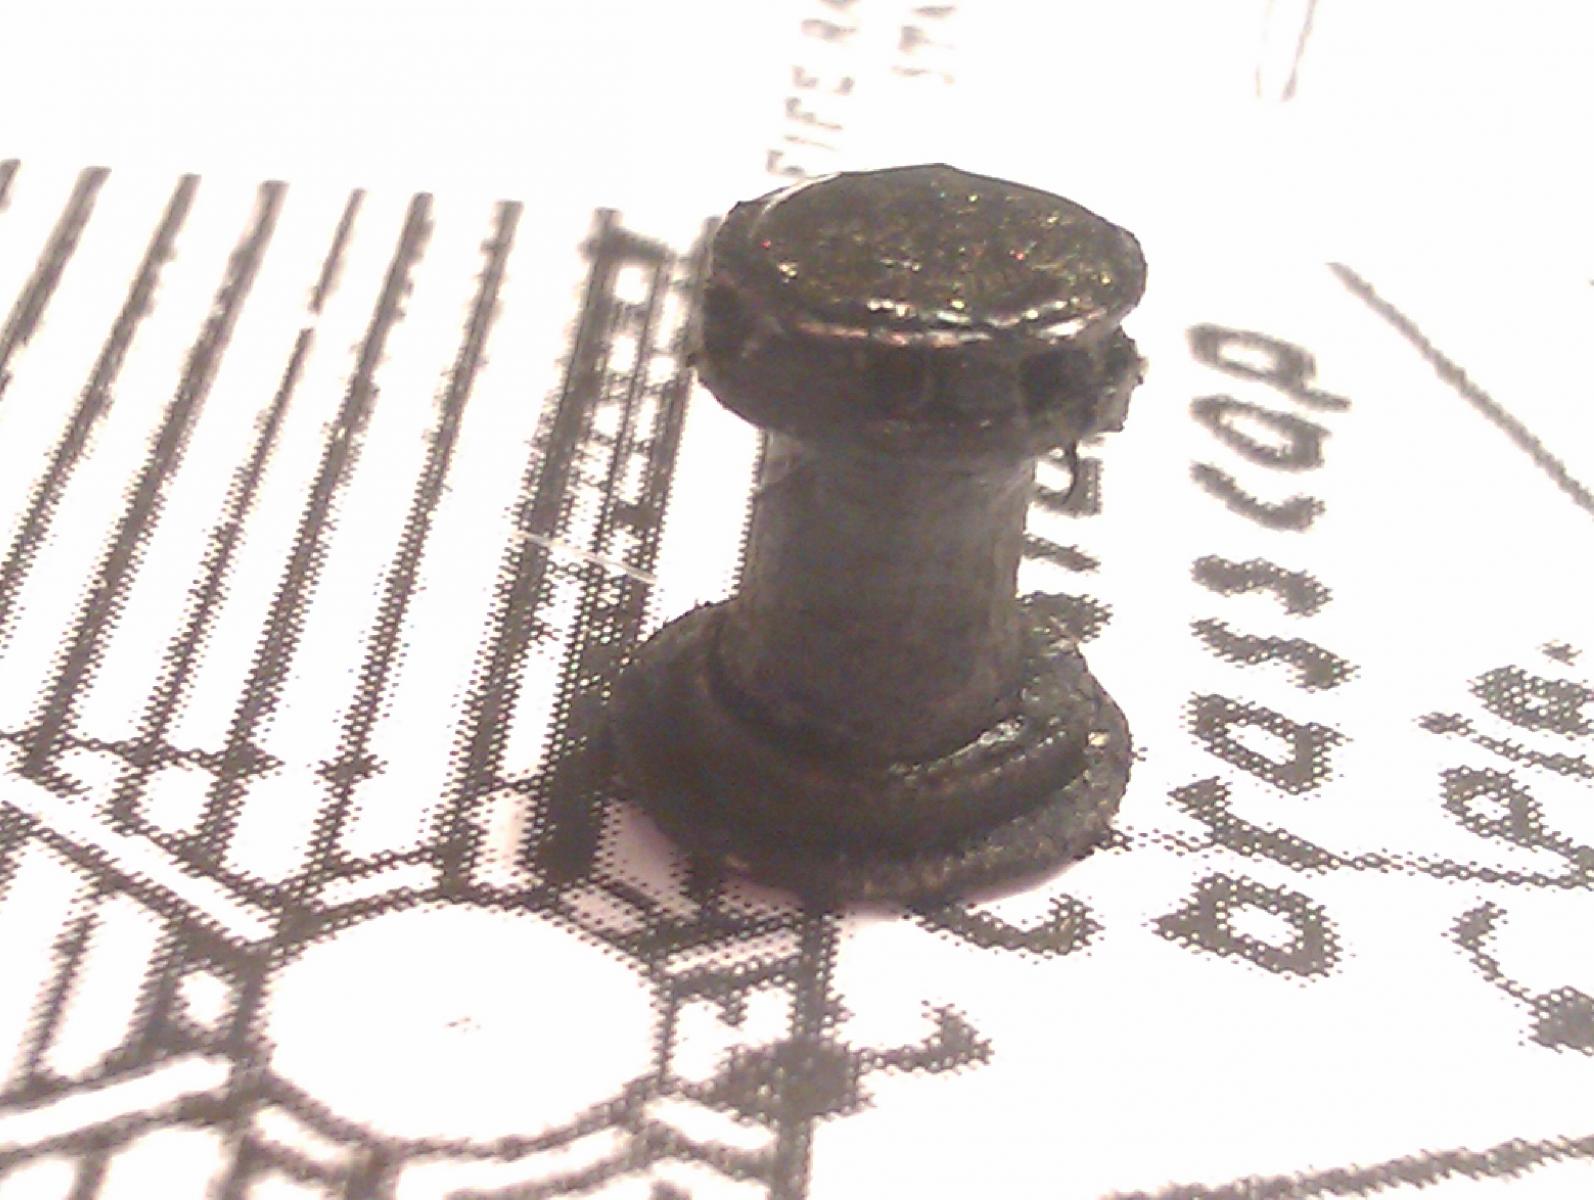
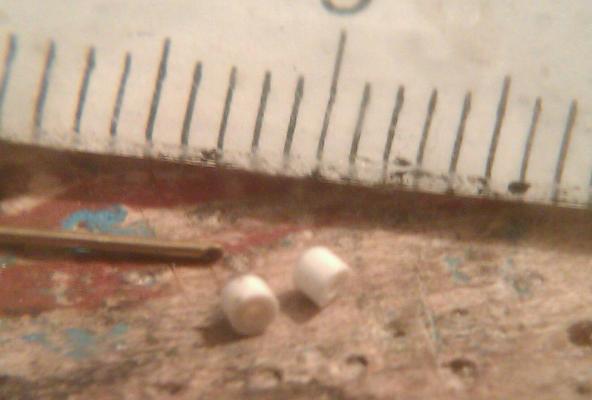
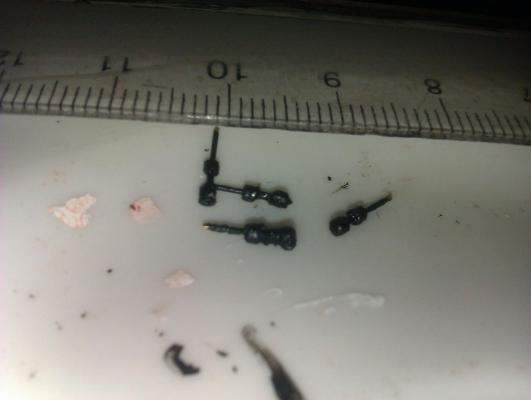
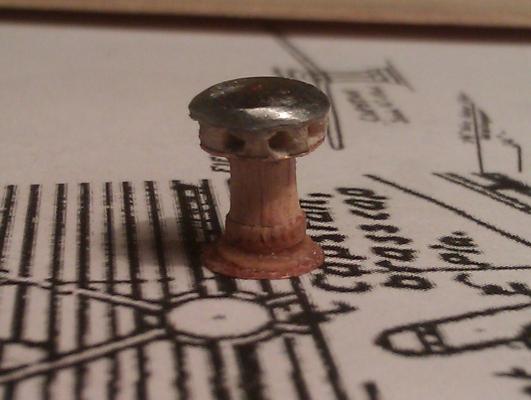
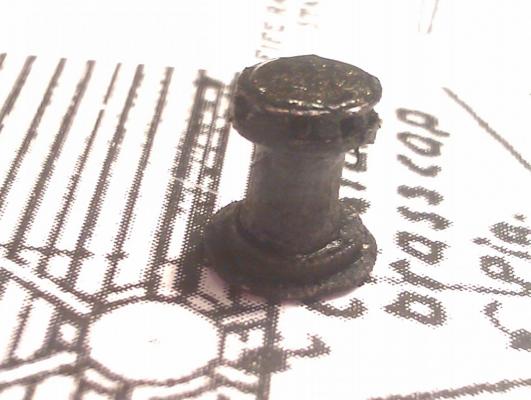
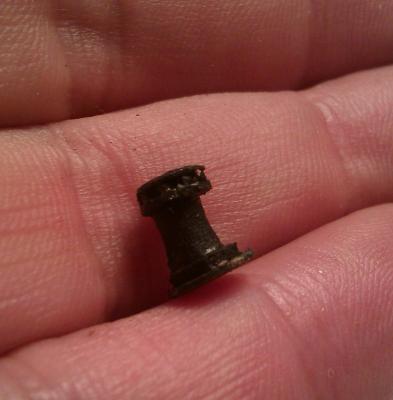
Hi Denis Almost close ... Thumb tack, reduced diameter with shaped edge, a lot of Dremell's work under magnifier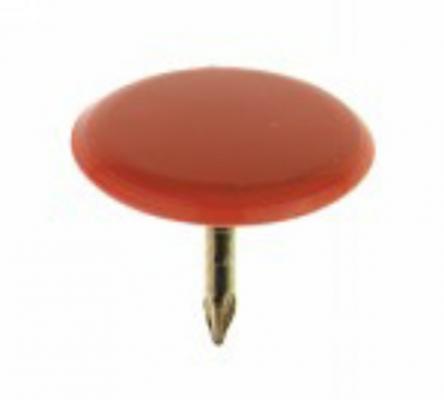
- 4,152 replies
-
- 6
-
-
- cutty sark
- tehnodidakta
- (and 1 more)
-
Cutty Sark by NenadM
NenadM replied to NenadM's topic in - Build logs for subjects built 1851 - 1900
Thanks George. I ask myself often - where was my brain, patience and dedication in early stage of building ?- 4,152 replies
-
- 3
-
-
- cutty sark
- tehnodidakta
- (and 1 more)
-
Cutty Sark by NenadM
NenadM replied to NenadM's topic in - Build logs for subjects built 1851 - 1900
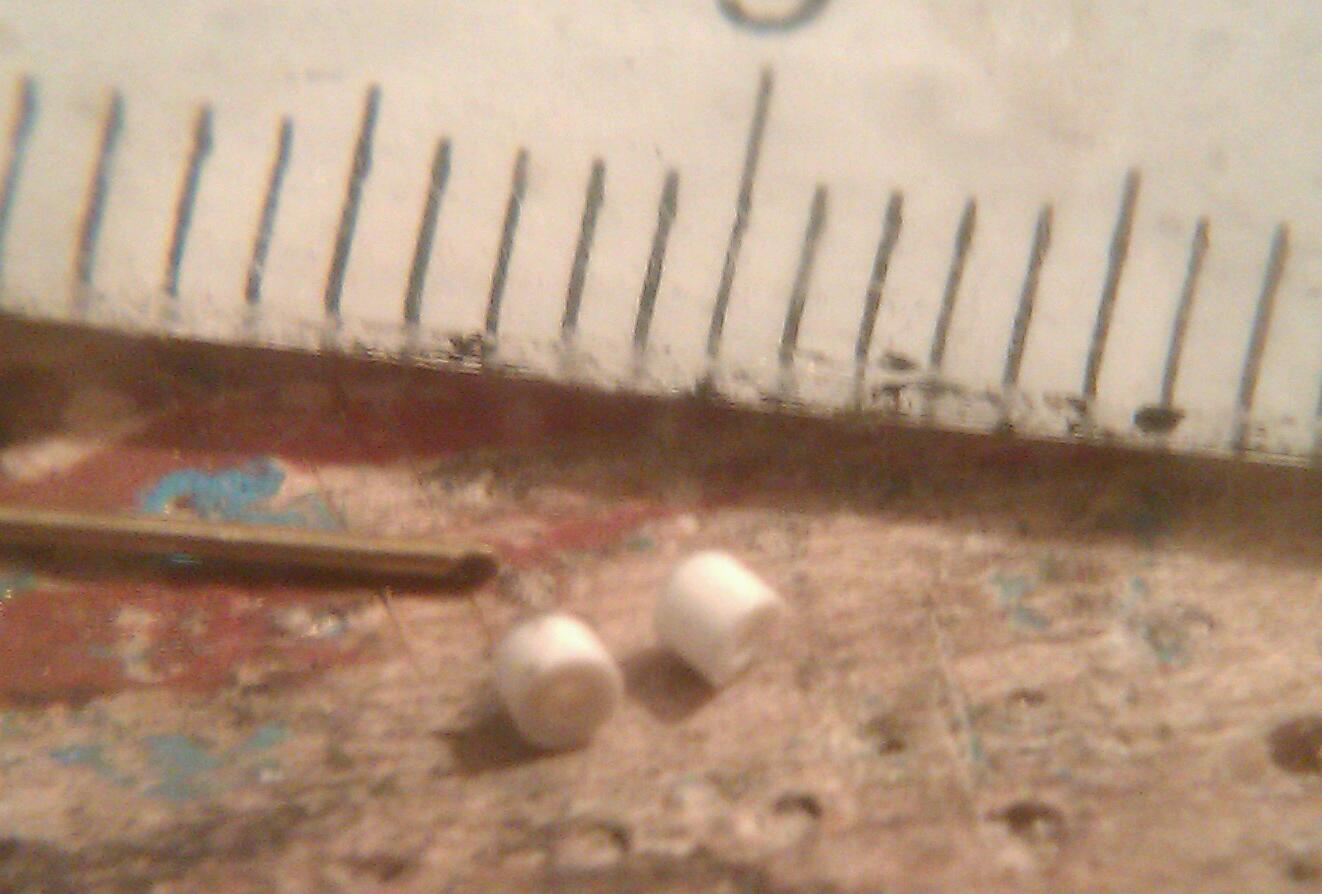
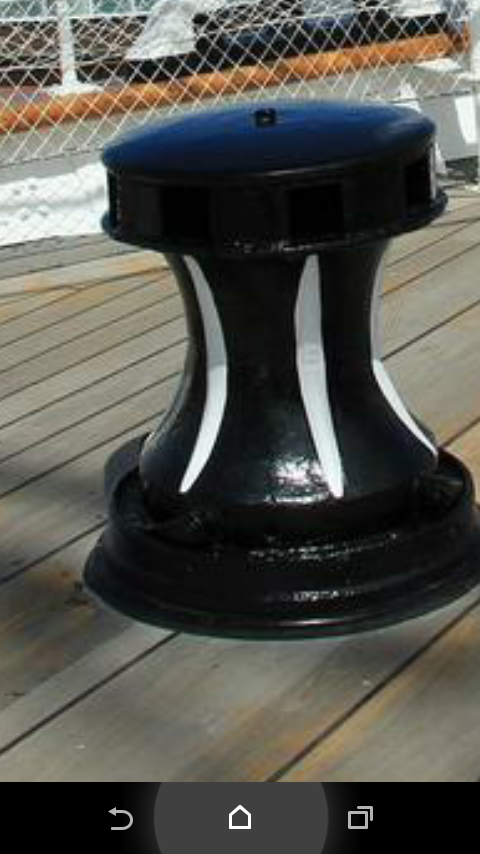
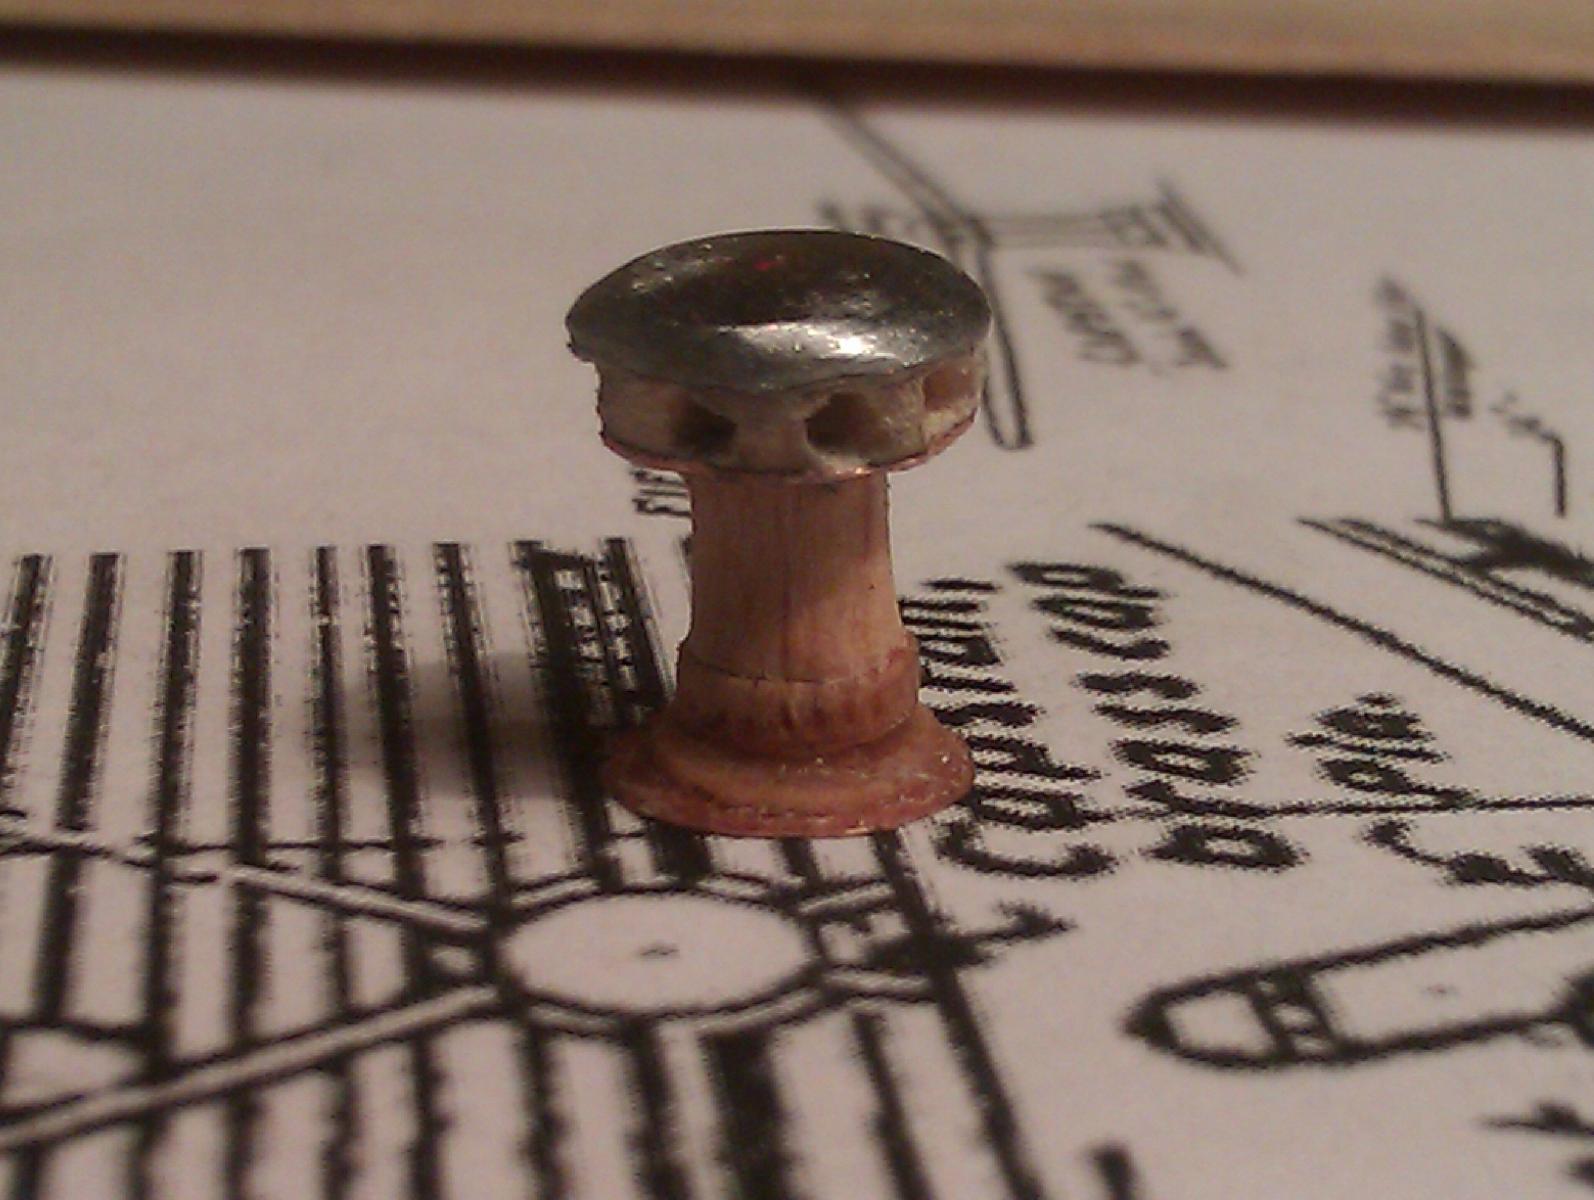
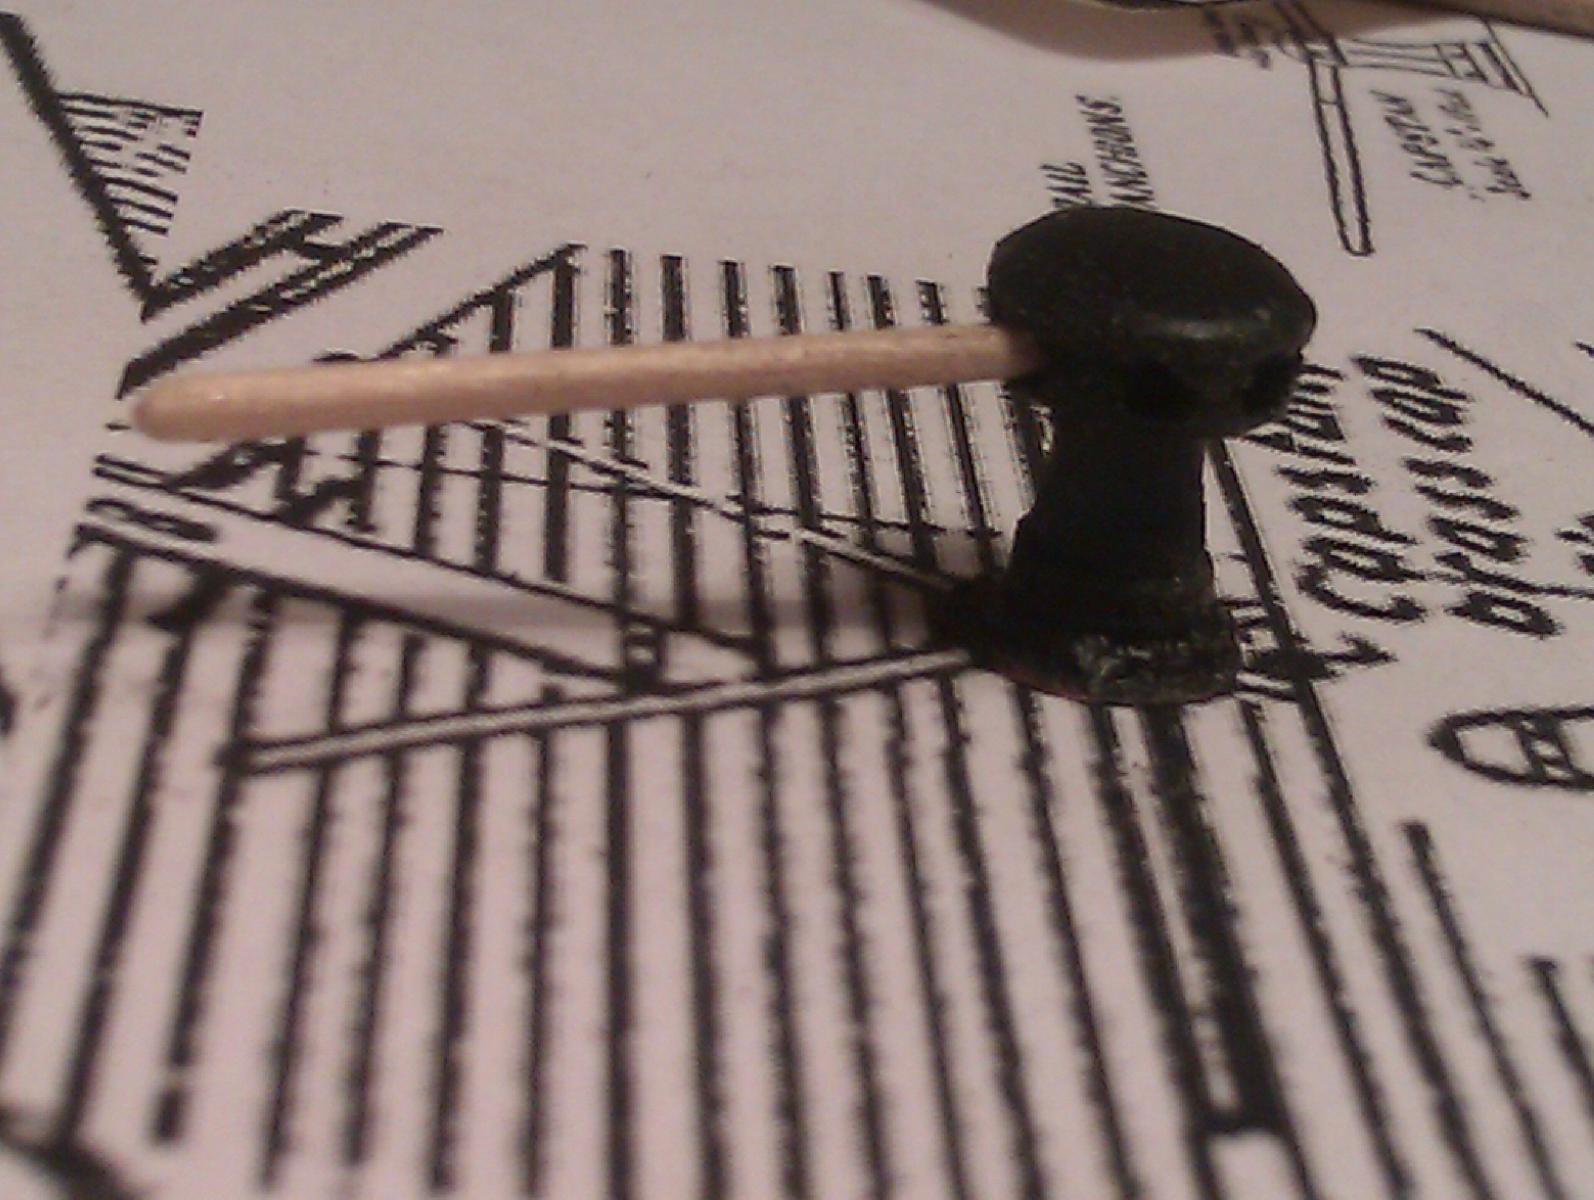
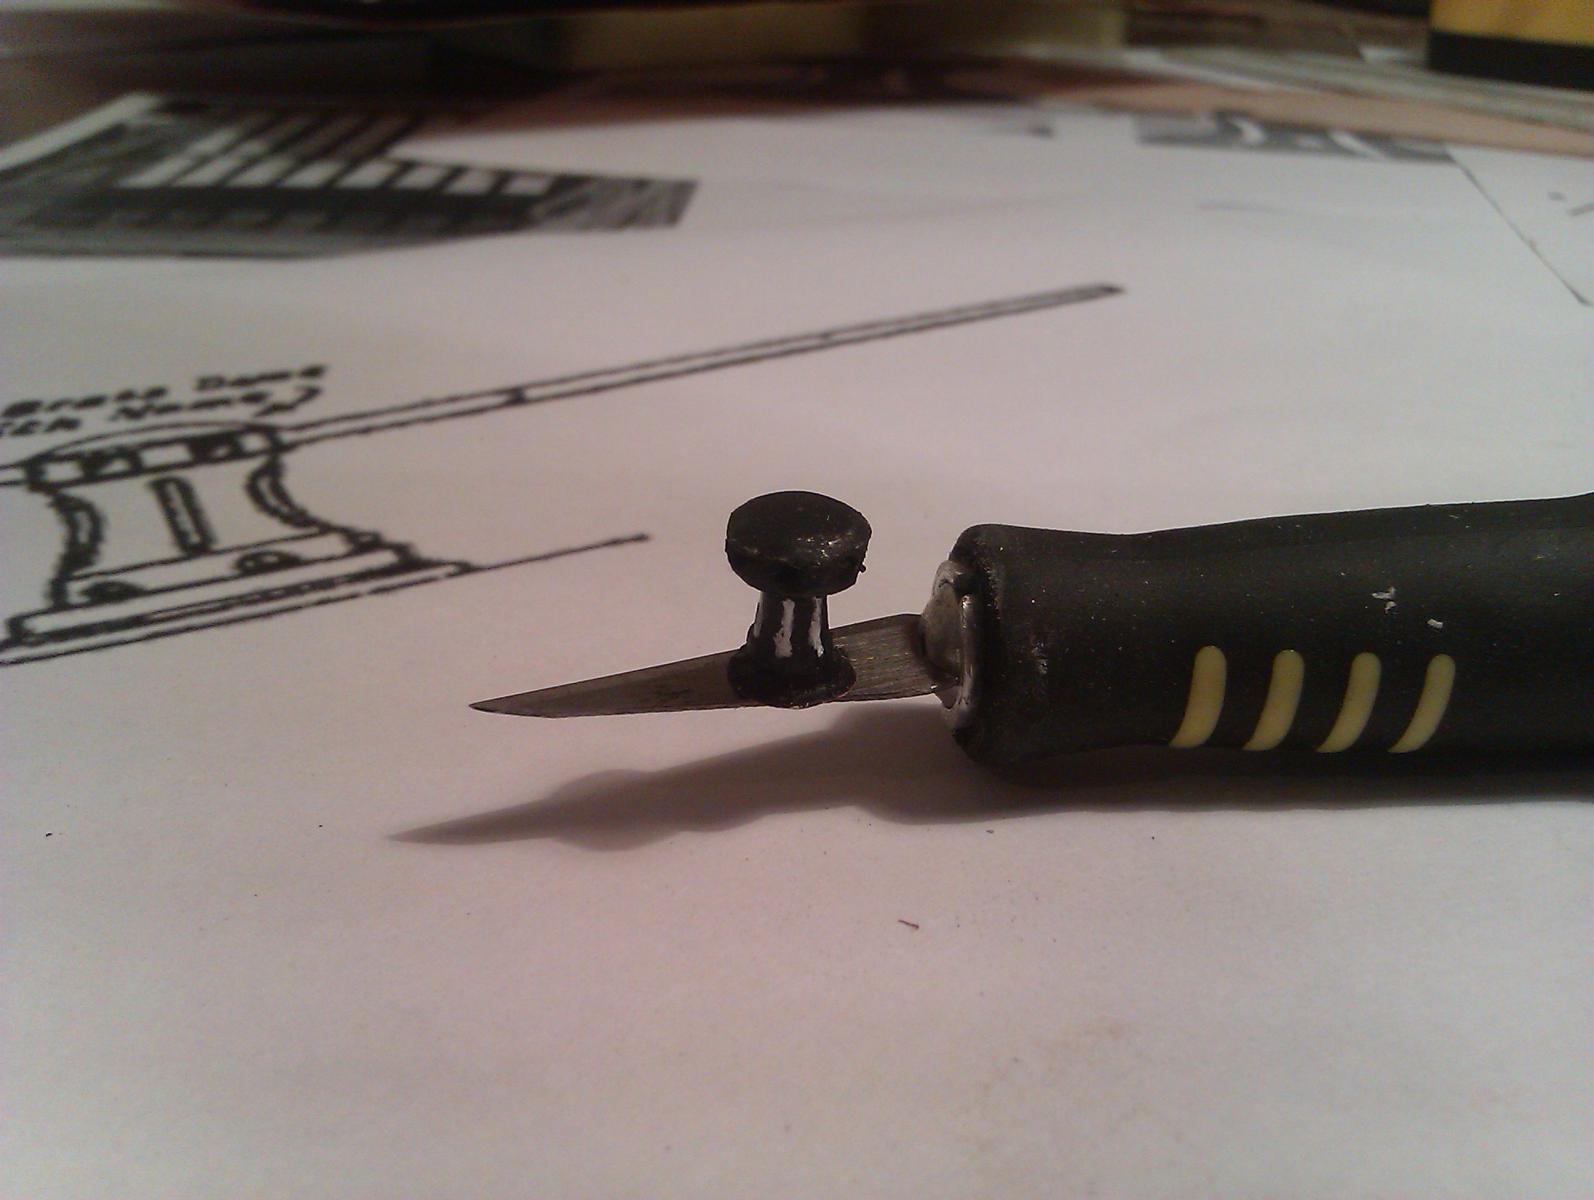
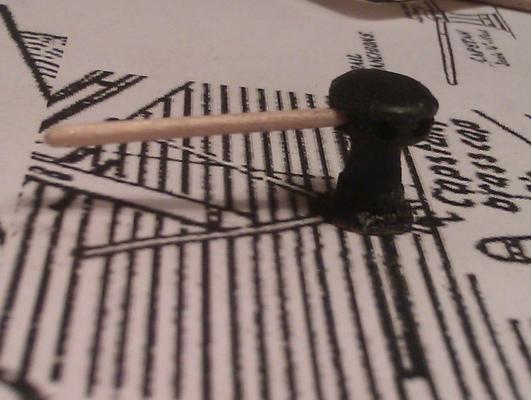
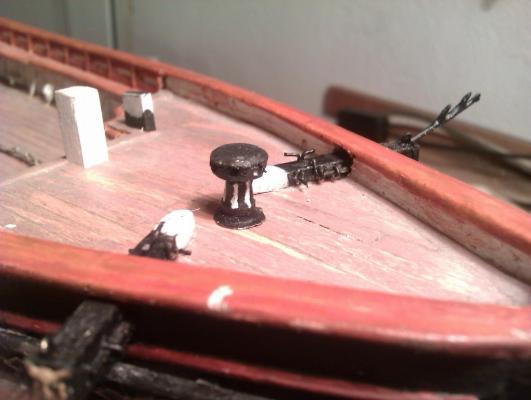
Another very hot day, 38℃ in shadow, all day sitting inside under climatisation Finaly, capstan - done, and in place Targeted look Step by step. I decided to oversize capstan a bit (for 1mm) just to bold it as a nice detail on fore deck Testing bar made of thinned toothpick Too fragile - les than 1mm in diameter To show how small it is I put capstan on blade And afrer carefull applying white ornaments, glued on place, I hope forever And trick question for Cap. Steve and other bashers ... what I use for capstan's cap ?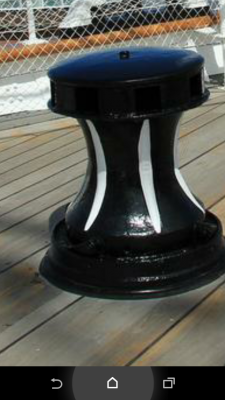

- 4,152 replies
-
- 13
-
-
- cutty sark
- tehnodidakta
- (and 1 more)
-
Cutty Sark by NenadM
NenadM replied to NenadM's topic in - Build logs for subjects built 1851 - 1900
Thanks George, I agree, some ideas are impossible, or without any sense exept challenge and joy- 4,152 replies
-
- 3
-
-
- cutty sark
- tehnodidakta
- (and 1 more)
-
Cutty Sark by NenadM
NenadM replied to NenadM's topic in - Build logs for subjects built 1851 - 1900
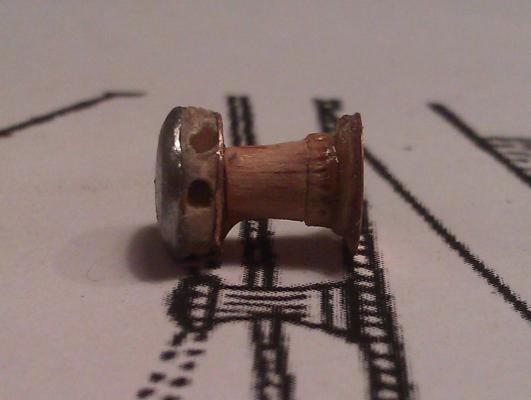
Capstan - attempt No1 I can make it better Layers of veneer for down base and bottom of top construction, covered with Cu foil 0,1mm Black paint So little for bars And temporary on place Think scale is OK And answer about bars comes ... when I put capstan on place, it is obvious that there will be no bars on capstan. In my scale their diameter is less 1mm, and don't think it is possible. I can make them from wire, but this is not good idea, them are from wood And for tomorrow, I'll made both layers of top structure from Cu foil, because I can better bold holes for bars

- 4,152 replies
-
- 4
-
-
- cutty sark
- tehnodidakta
- (and 1 more)