yvesvidal
-
Posts
3,633 -
Joined
-
Last visited
Content Type
Profiles
Forums
Gallery
Events
Everything posted by yvesvidal
-
 I love the HASEGAWA artworks of that period. What a great view.... Yves
 -
This looks magical. The way you build these planes is incredible, Chris. I guess, the great stuff about paper planes, is that you do not have to paint them (talking is a guy who is struggling with 50 years old decals, ruining the nice paint job...). I envy you at times. Yves
-
Bugatti Type 35B by CDW - FINISHED - Italeri - 1:12 Scale
yvesvidal replied to CDW's topic in Non-ship/categorised builds
Is that a real piece of wood, that you placed at the bottom of the cockpit? Yves -
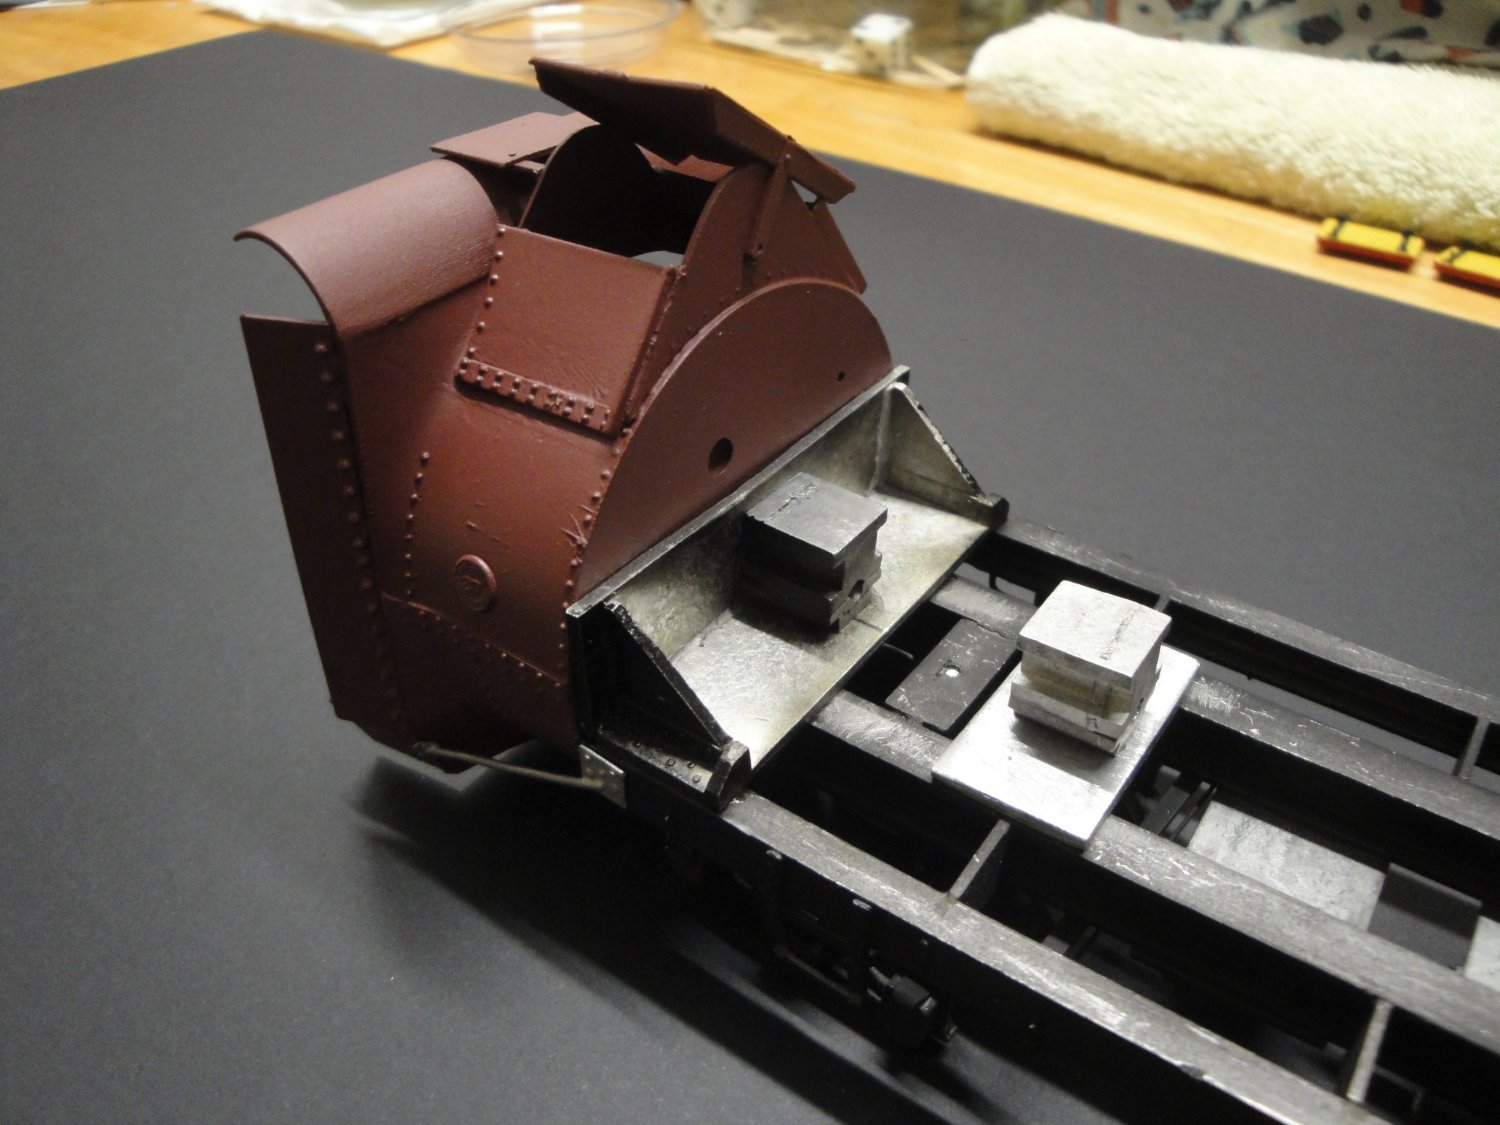
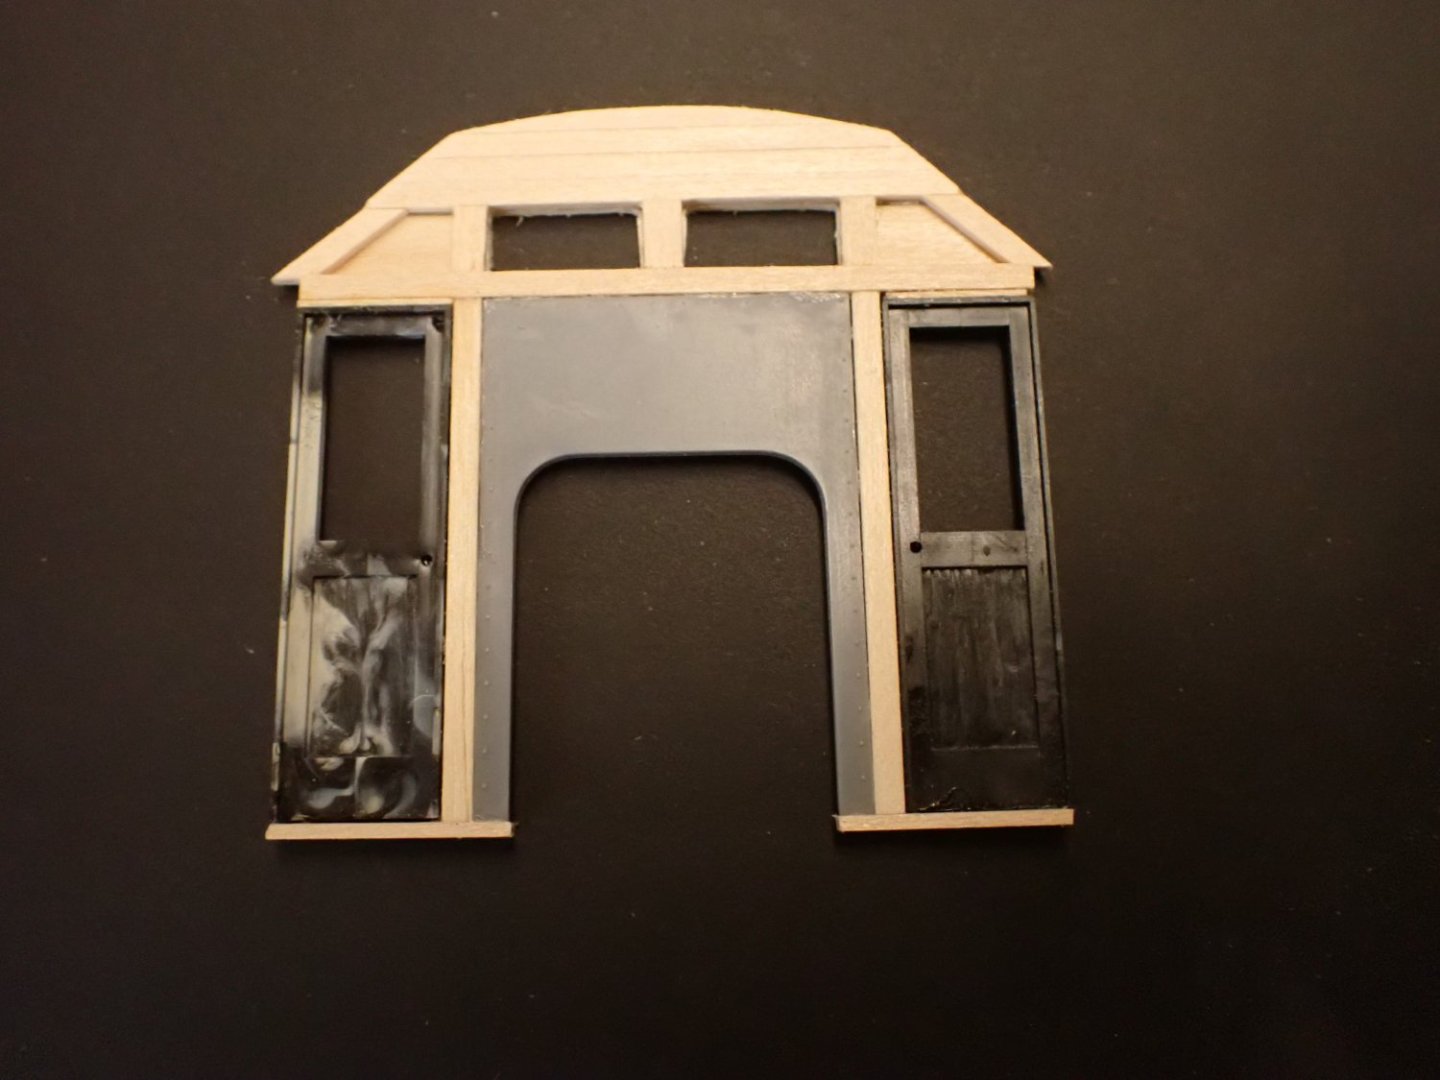
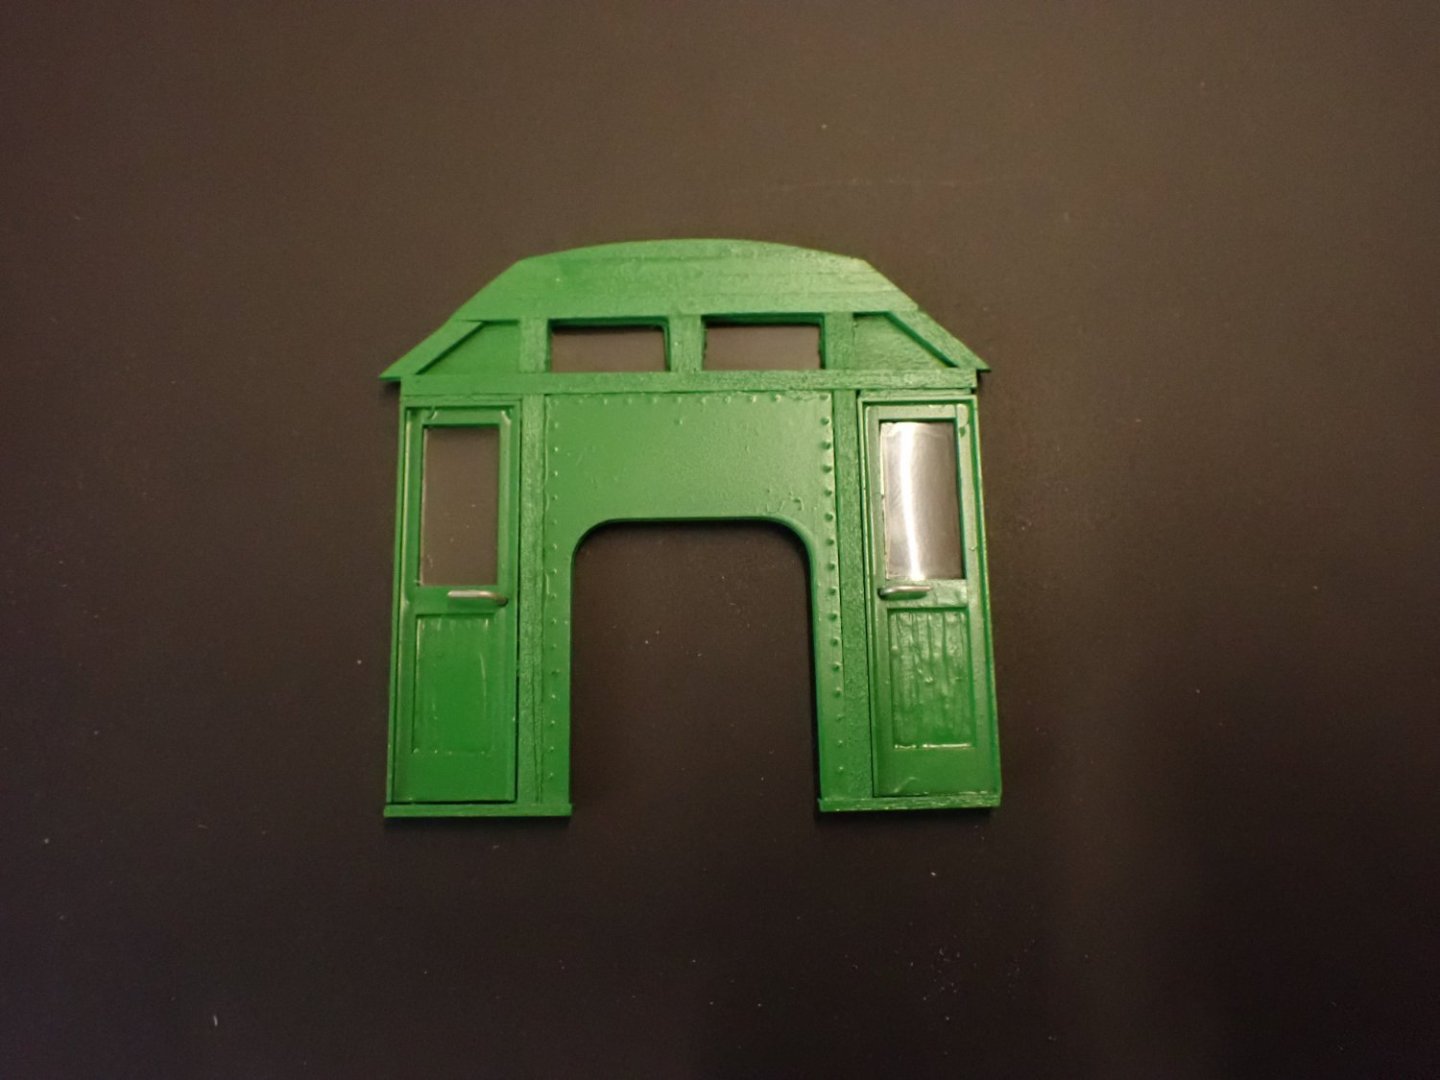
Rear bulkhead is pretty much done. There are still some details but I will install them, once it has been glued to the boiler: John Deere Green airbrushed.... Yves
- 102 replies
-
- 15
-

-
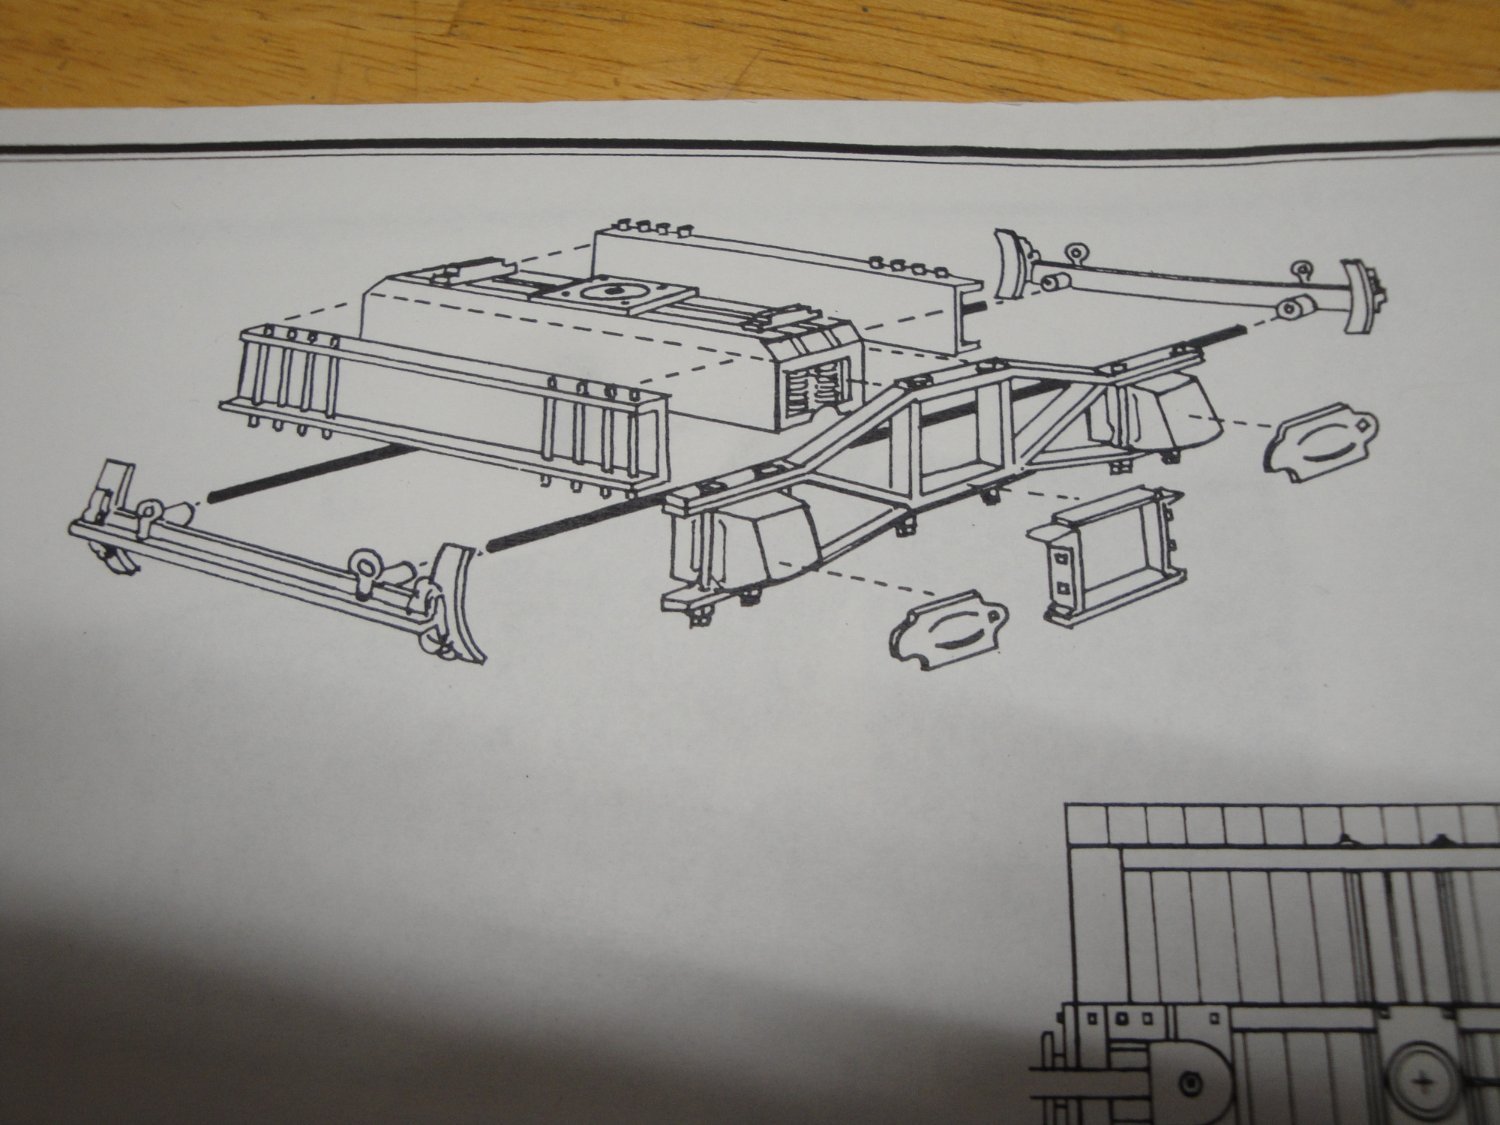
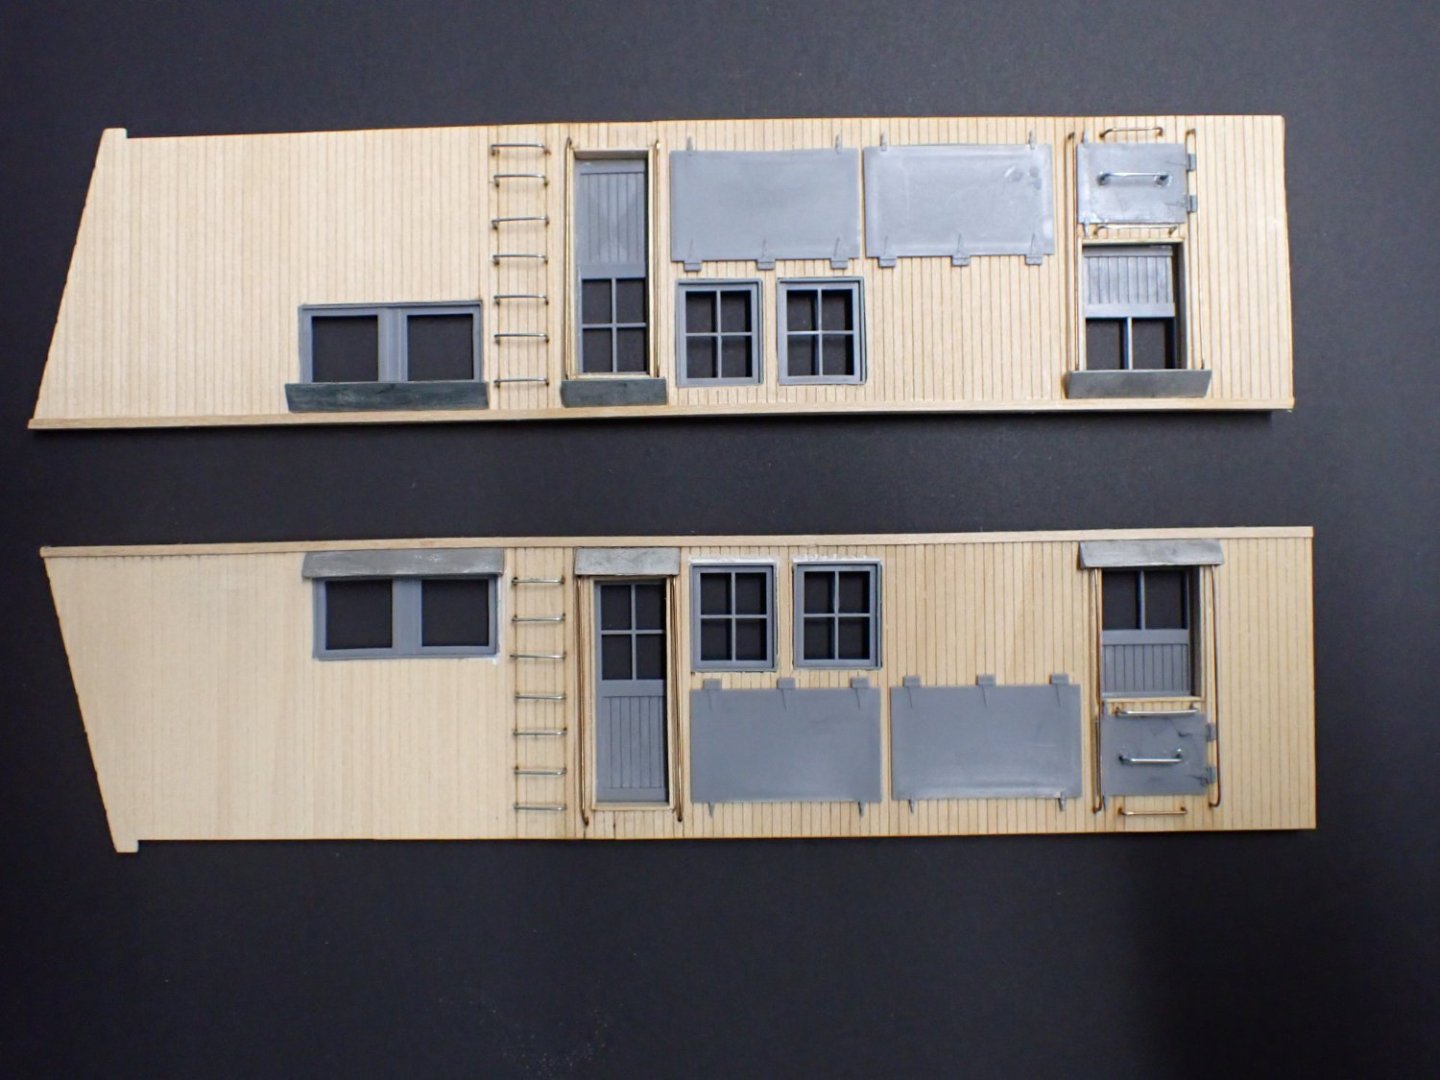
Craig, yes you are absolutely right: very difficult model, involving all kinds of disciplines that I do not master very well (soldering, wood gluing, plastic gluing, metal gluing.....) and most importantly the lack of assembly instructions. It is all text and you have to decipher and find the parts you need among a large amount of small wood pieces and cast white metal parts. For instance, the pieces of wood are indicated in inches and feet !!! You have to divide by 48 or use a special O gauge ruler to find out what they are talking about. Basically, it is like building the real stuff.... Definitely a very advanced kit. At last, assembly of the two sides is now completed. These will have to be painted and decaled before being glued to the main frame. I am now working on the rear bulkhead. Yves
- 102 replies
-
- 13
-
-

-
Bugatti Type 35B by CDW - FINISHED - Italeri - 1:12 Scale
yvesvidal replied to CDW's topic in Non-ship/categorised builds
Craig, that is so interesting. I had never realized that the panels were attached together, using these pins and wire technique. Detailing that aspect, would make your model quite unique. Yves -
Fantastic work on the train. The trestle bridge is absolutely stunning with the brass bolts. Yves
-
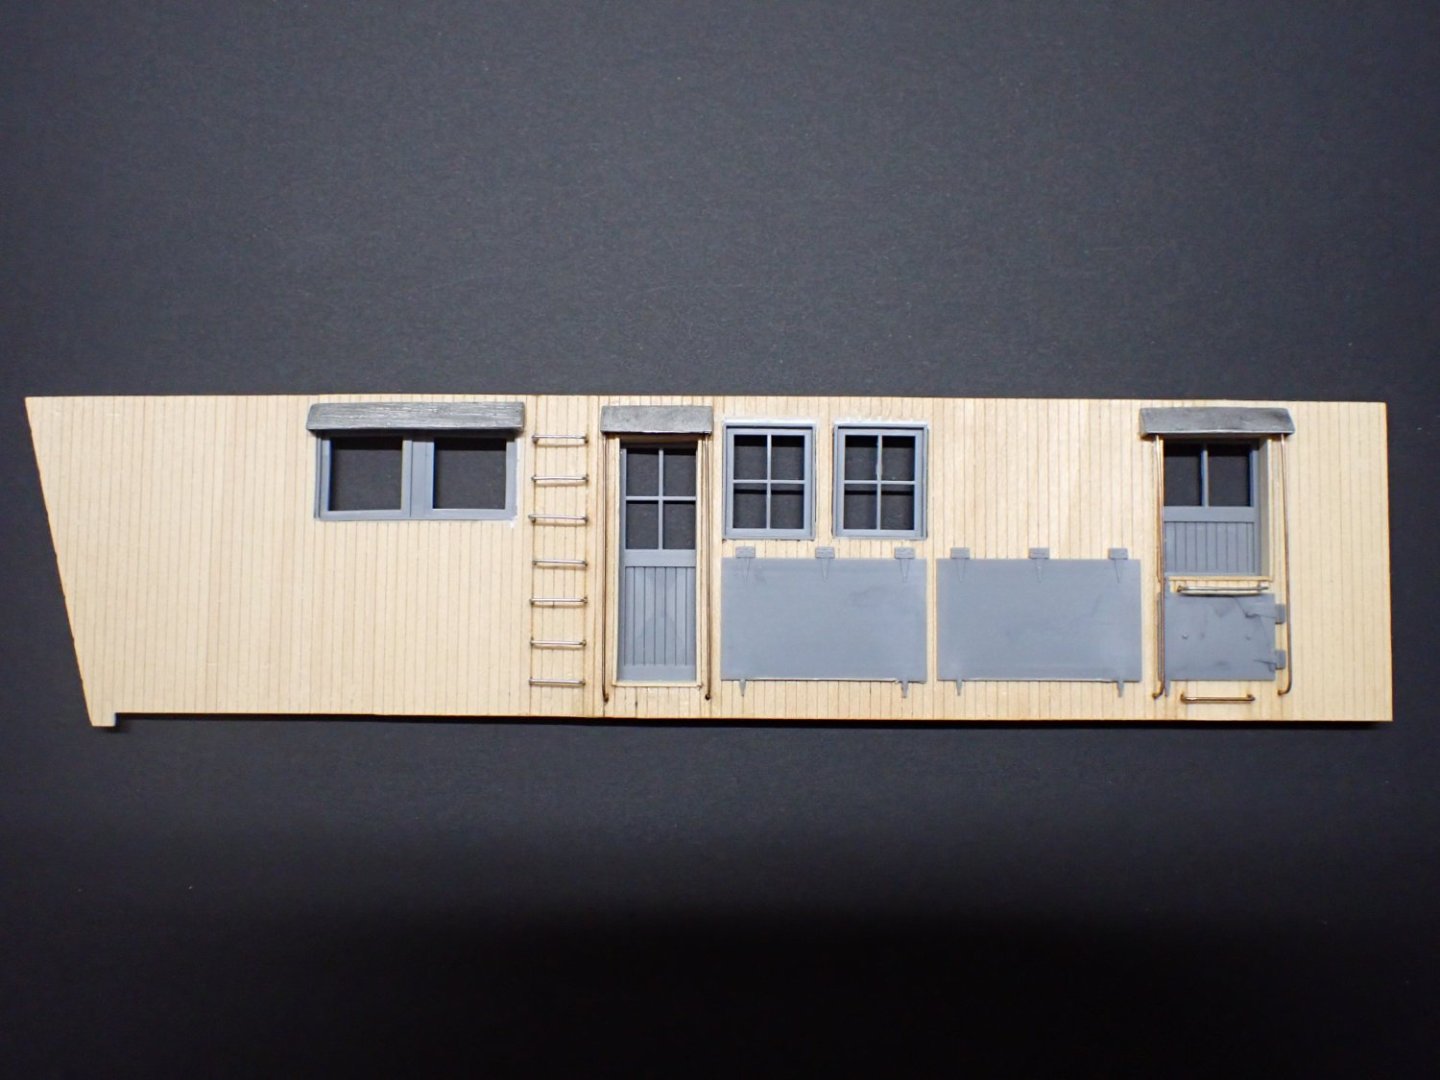
I finished installing the grab-irons and handles, on this side and started the cuts on the other half: Yves
- 102 replies
-
- 11
-
-
-
You made a wonderful model of this old Billing kits. Congratulations. Yves
-
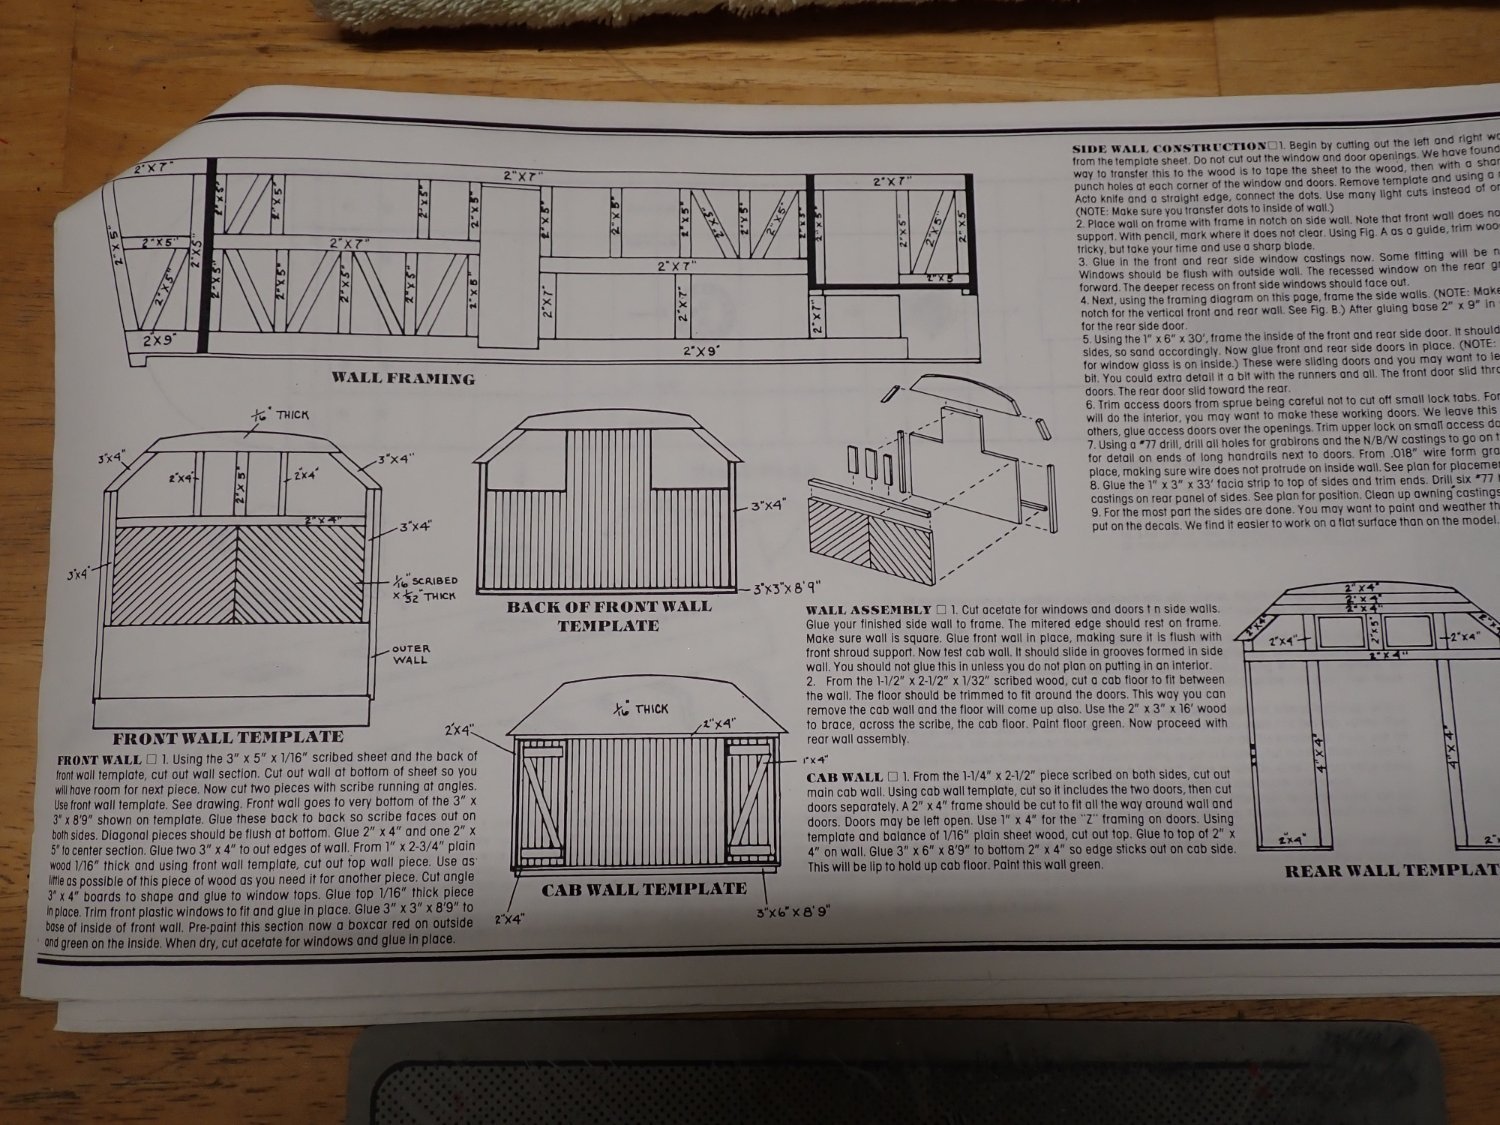
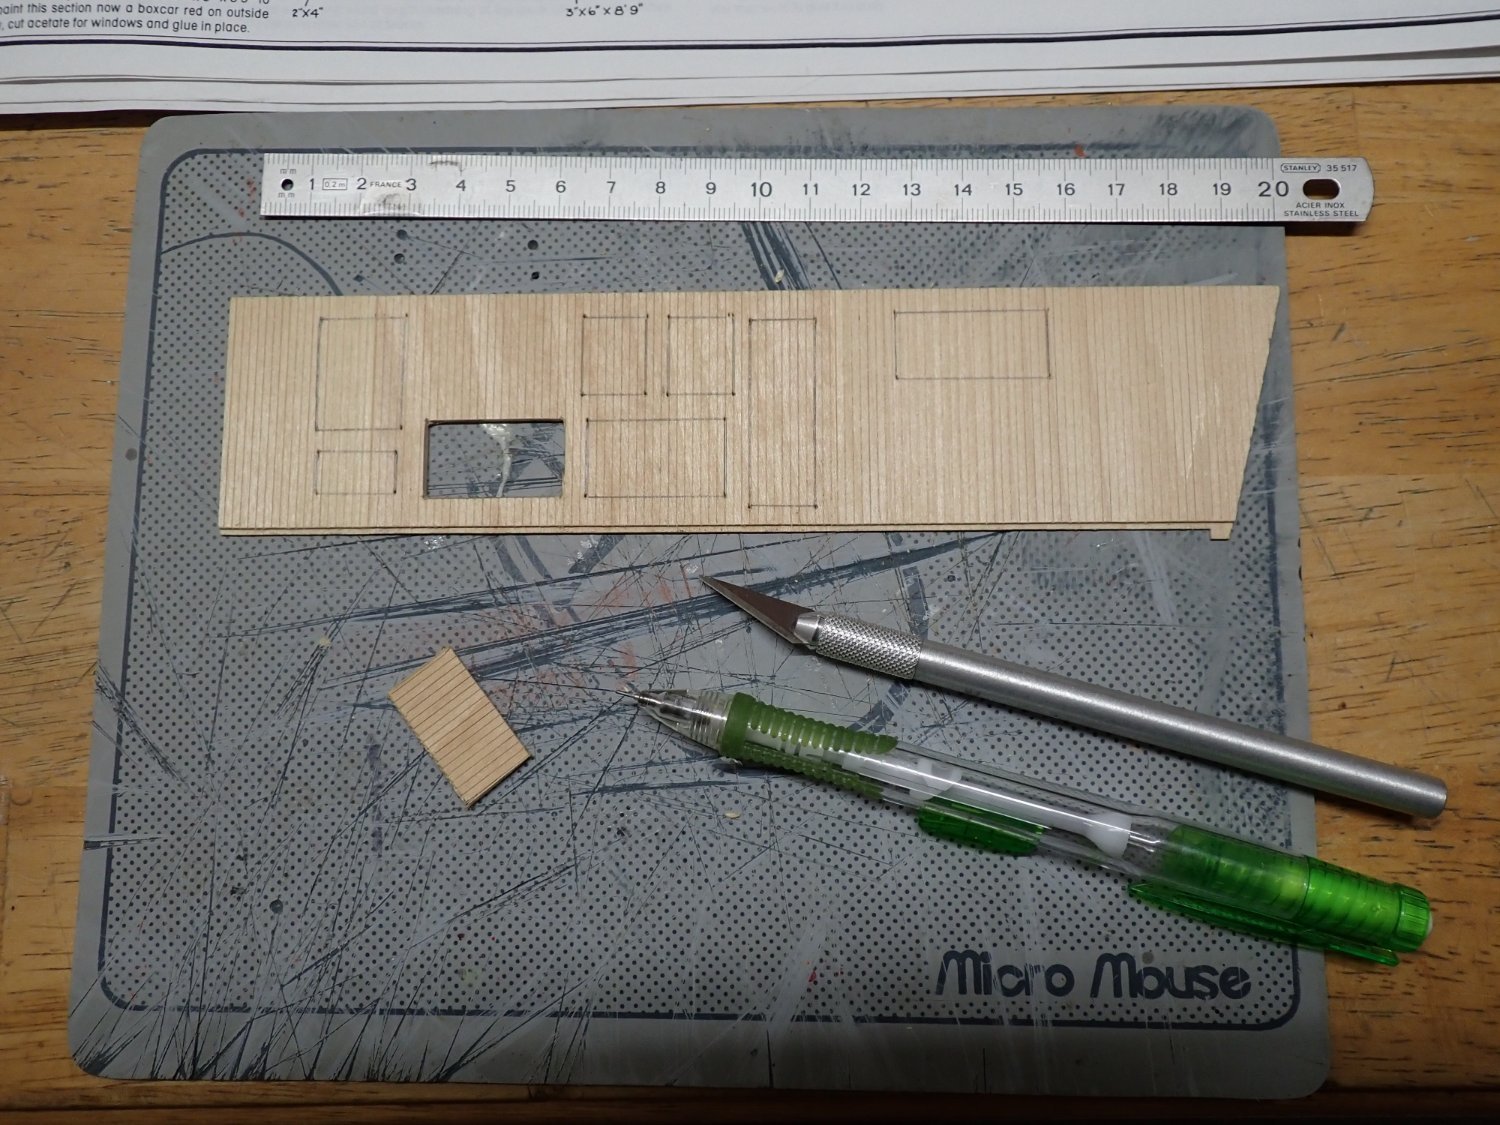
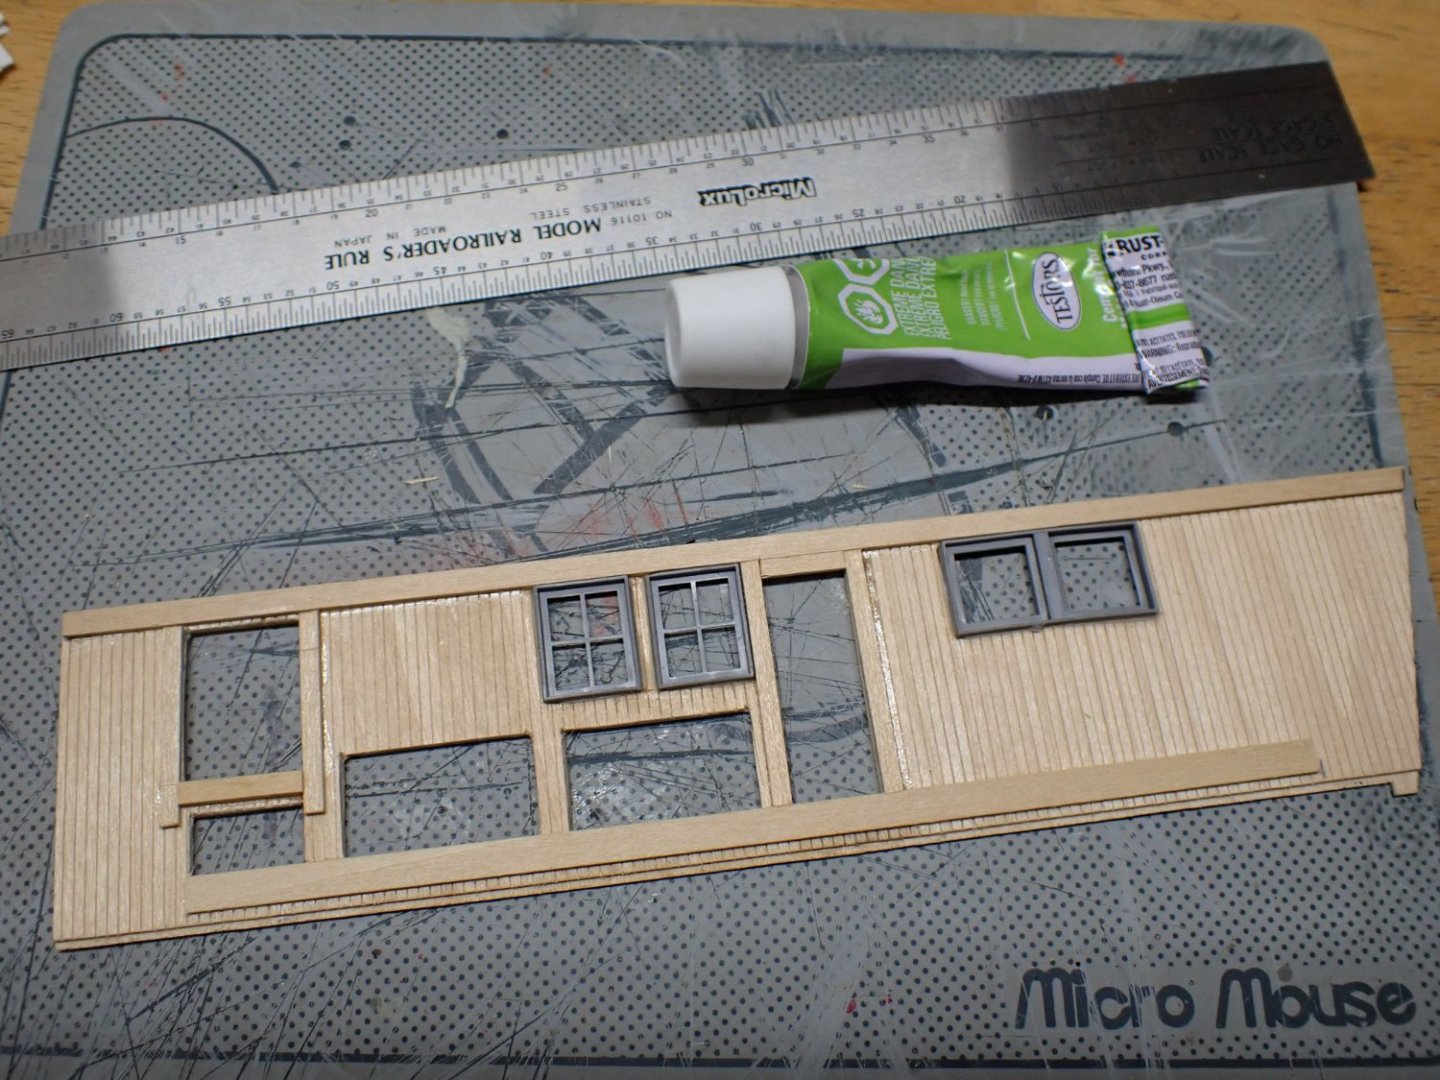
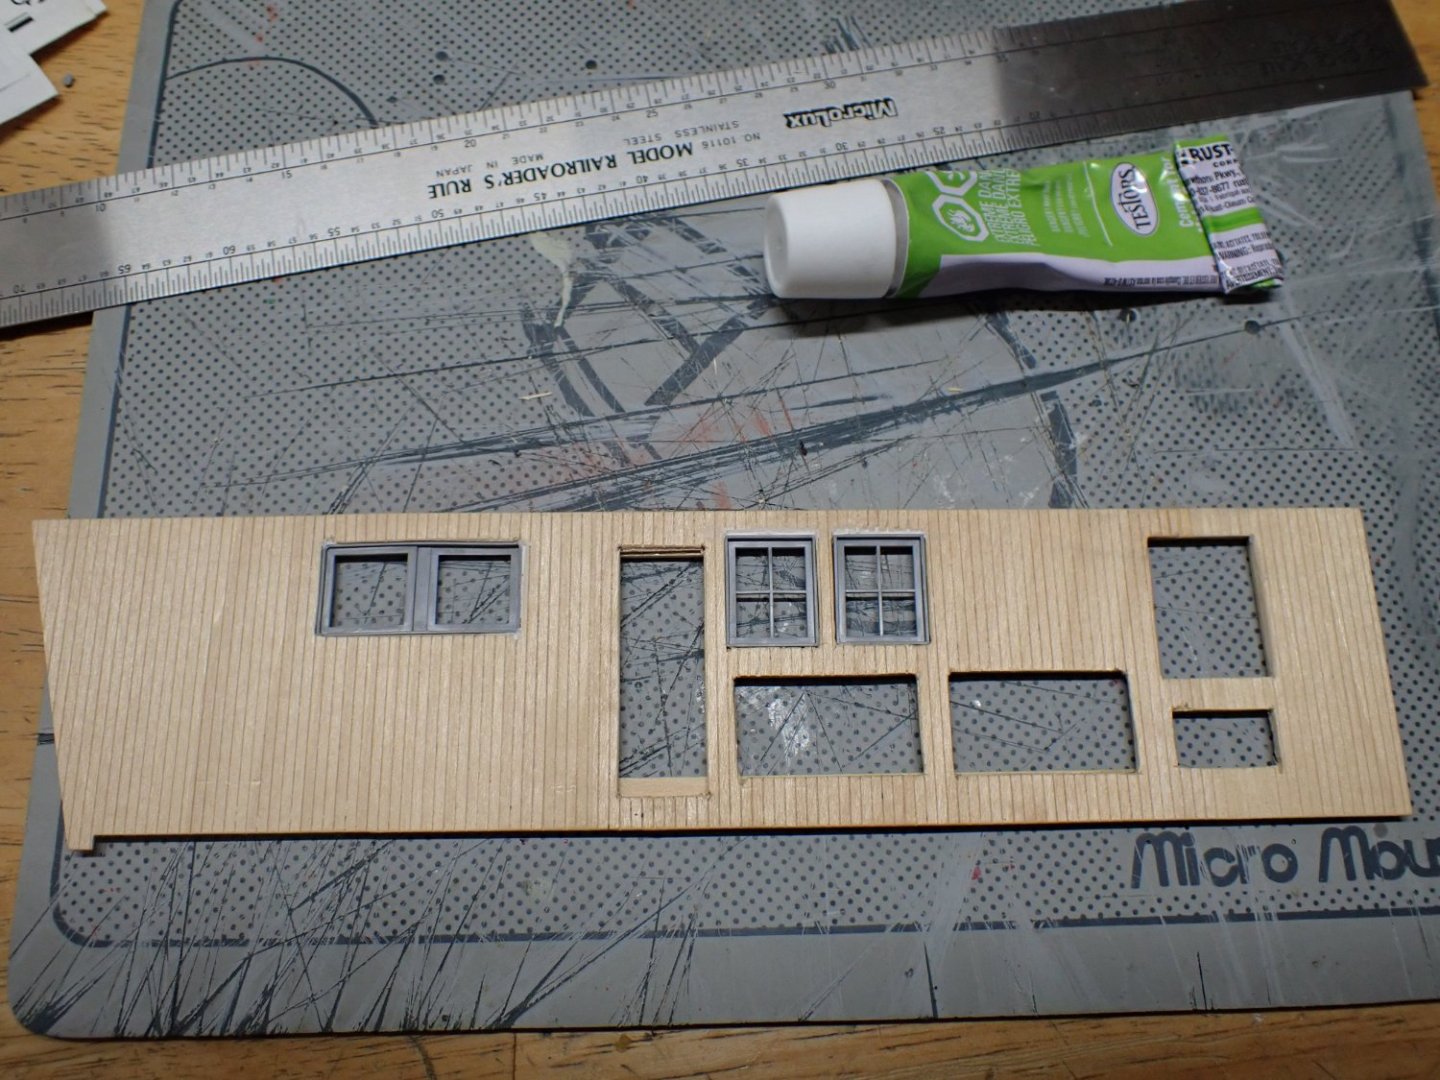
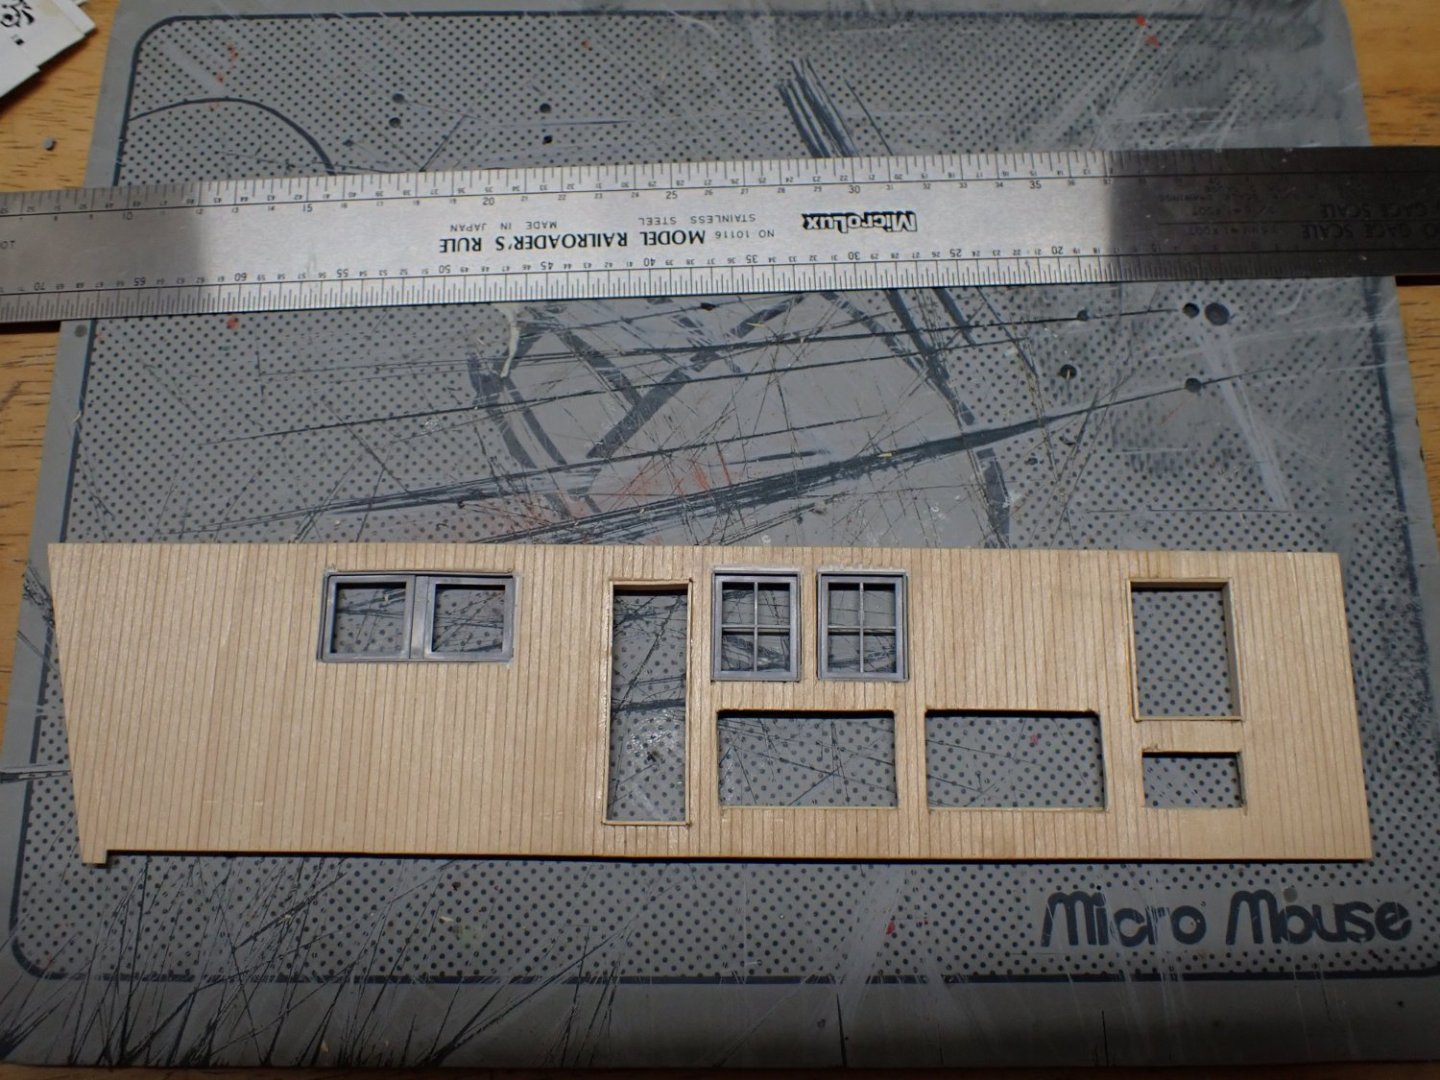
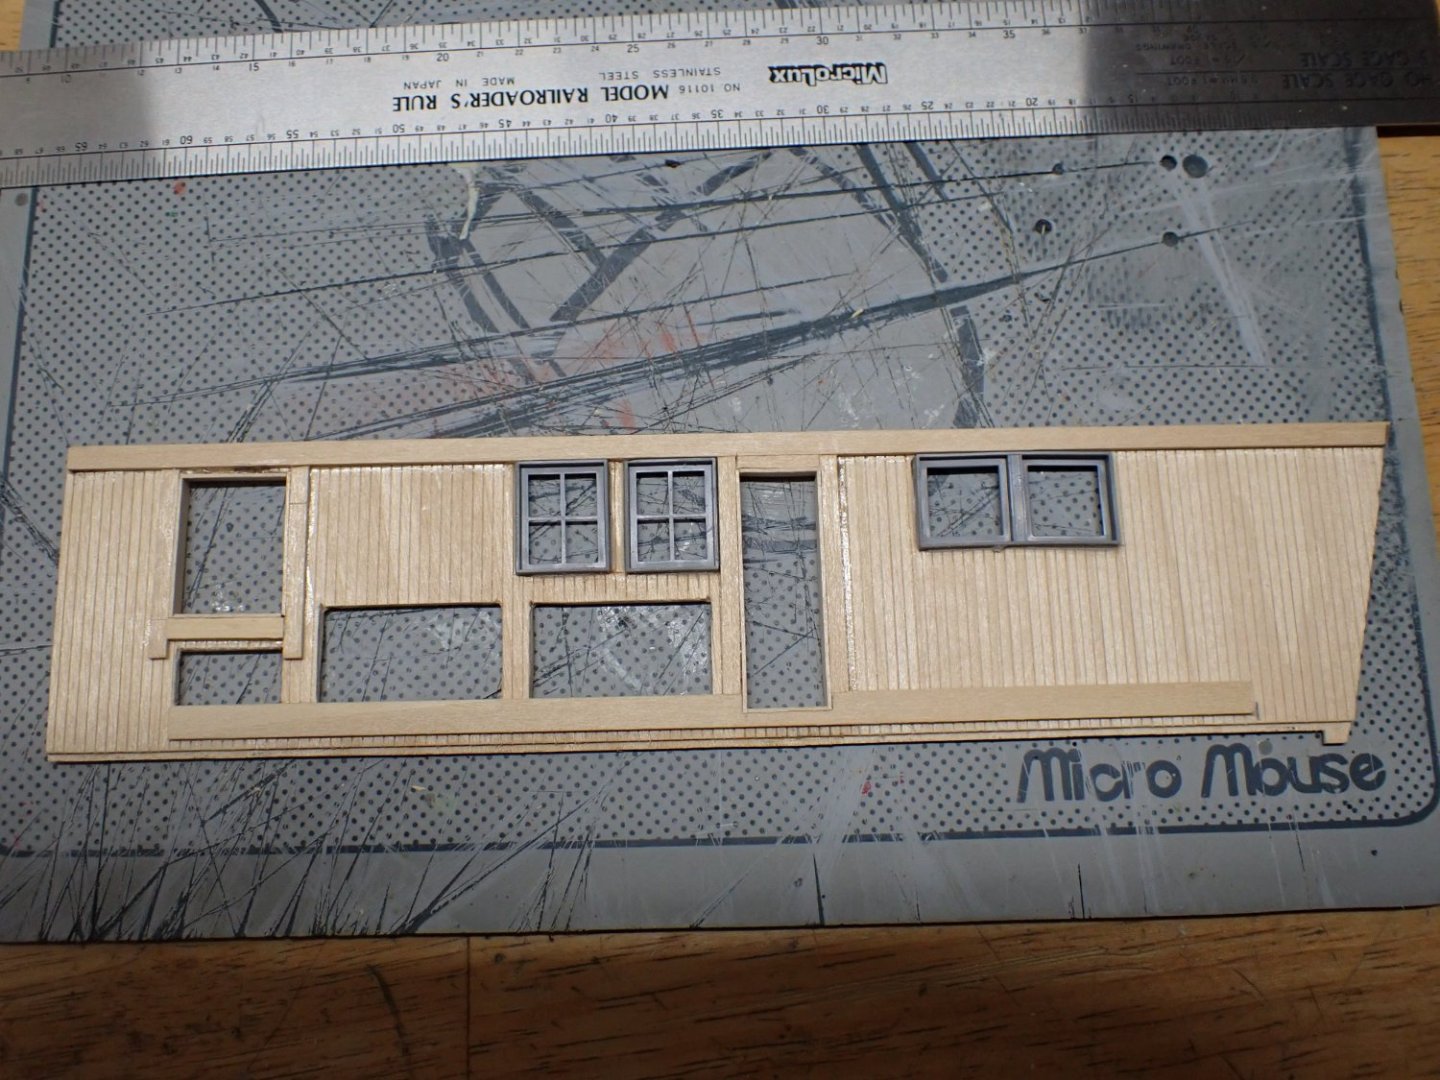
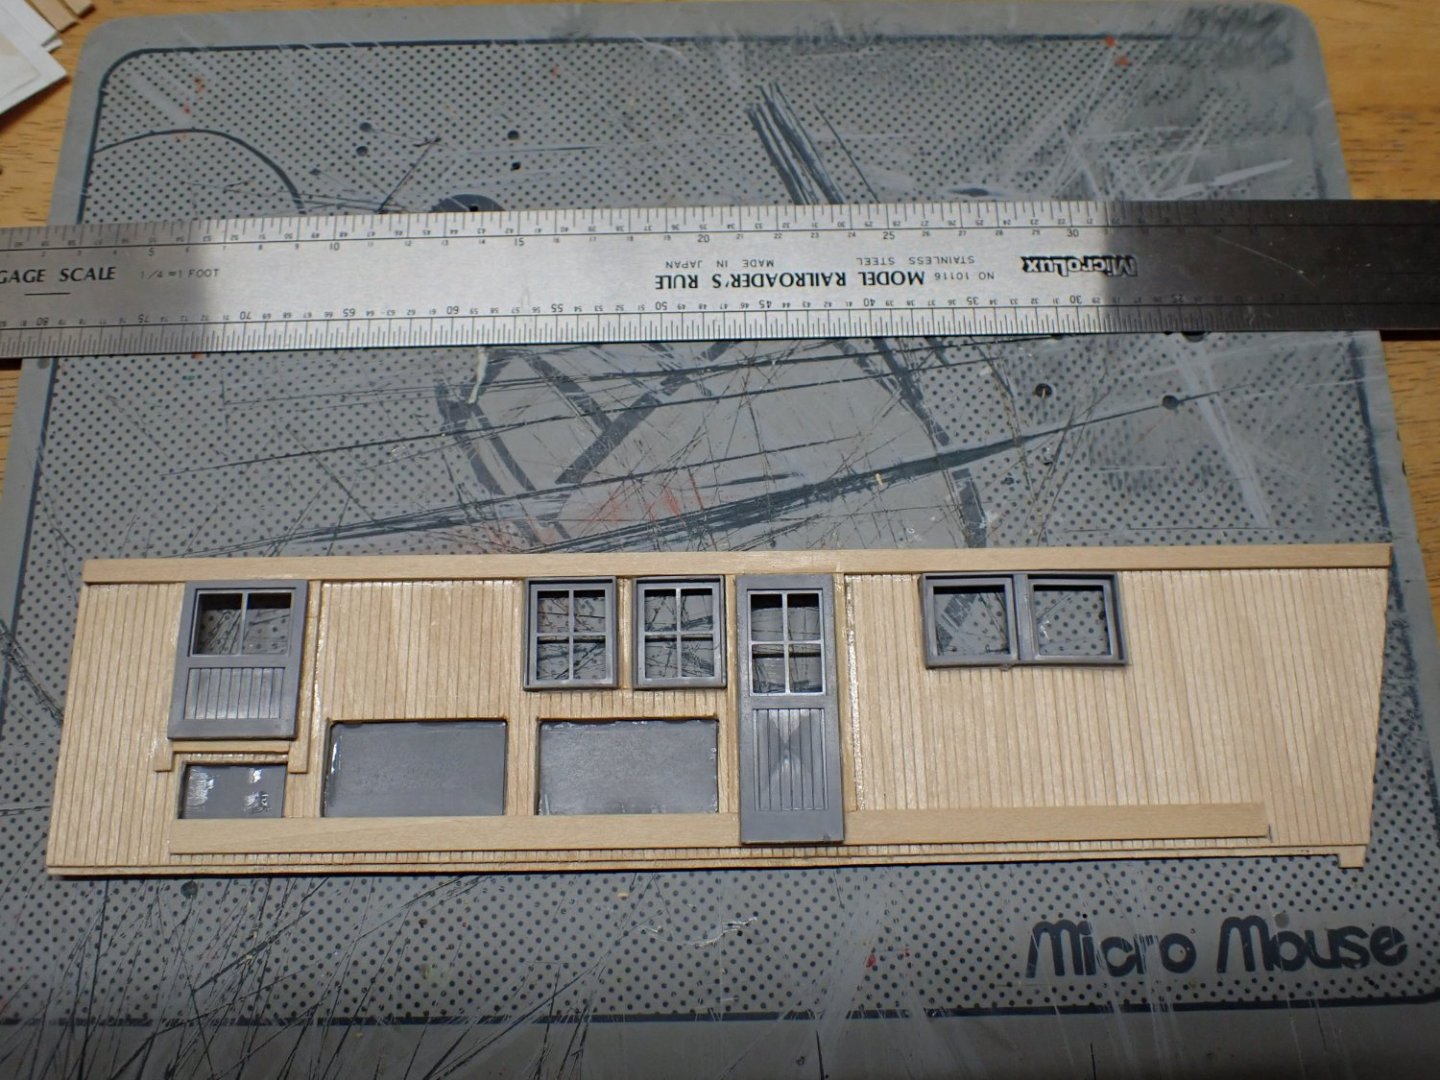
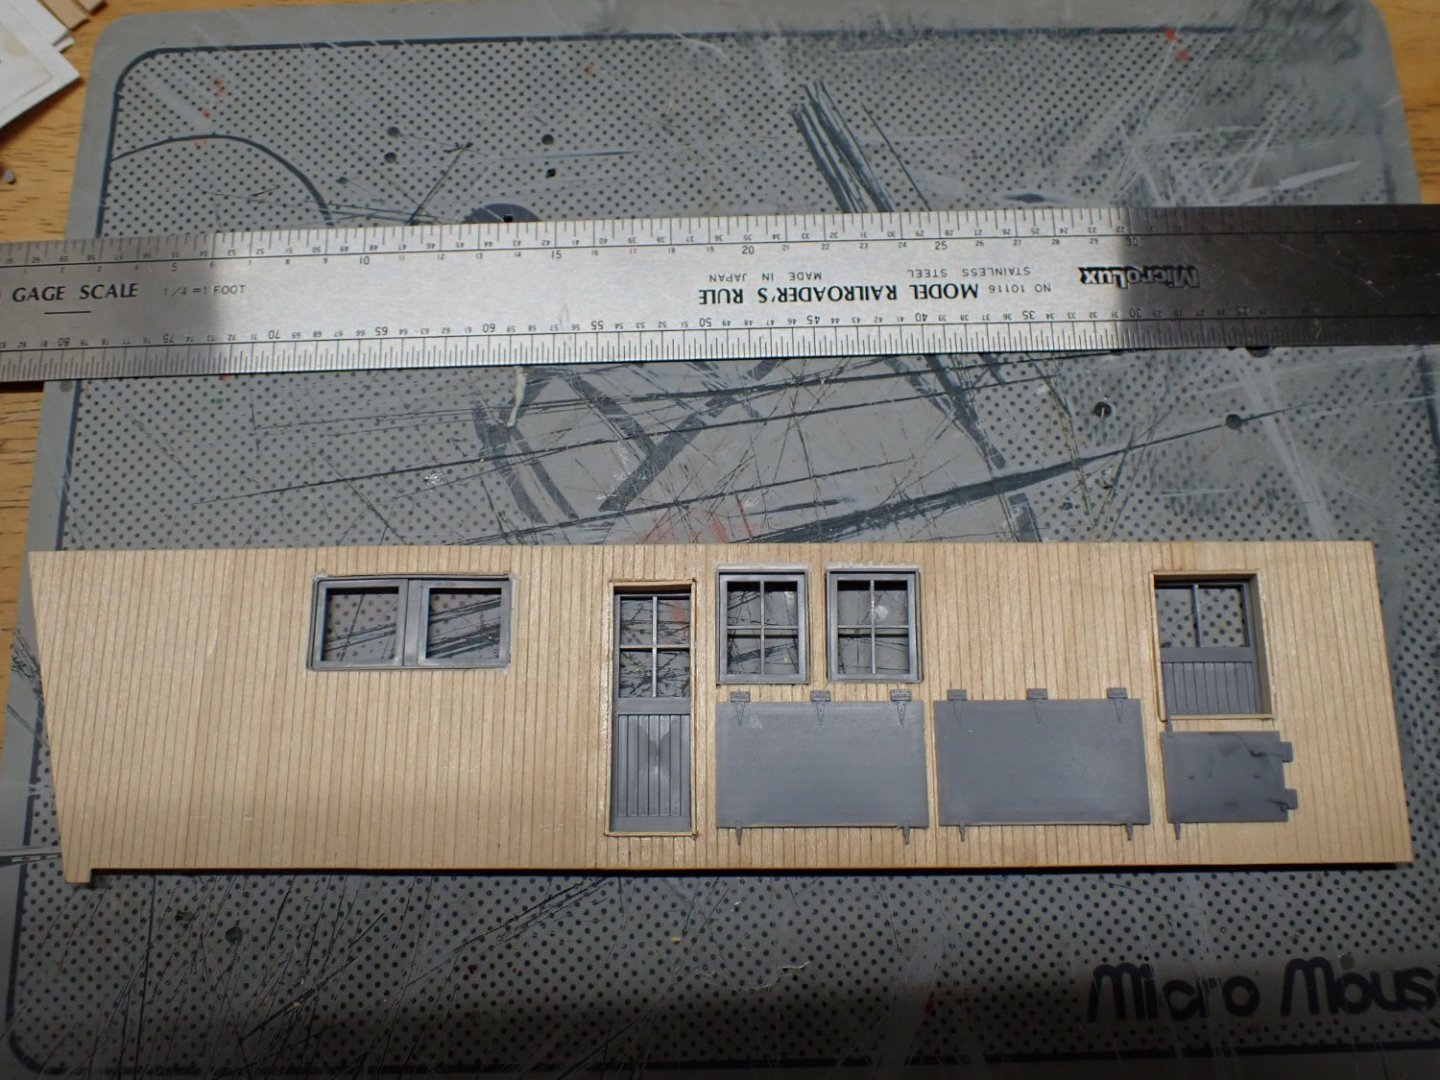
I have decided to start working on the cabin of the snowplow. It is a very delicate work, similar to some of these wooden kits of railroad structures and buildings made by advanced kit makers. The wood available in the kit, is calculated with precision and there is absolutely no room for errors. Overall, this snowplow by Durango Press is one of the most difficult kit I have ever done. As you will see, my building of the cabin side is simplified, especially when it comes to the framing. The purpose of the kit maker was to show the interior and offer later on an additional kit depicting the internal mechanism of the snowplow. That is the reason why the internal framing was so carefully designed in the kit. The additional kit was never created and there is not enough wood to implement the framing as suggested on the assembly instructions. After using a paper template, each opening is carefully cut. This is a tedious task and I wish laser cutting had been used for that purpose. Longitudinal framing is done to stiffen the sides, and around he doors. Plastic windows are installed. Framing around the doors is finished. I have less than 2 mm of wood left after doing that..... Doors and access covers are glued in place. One side is finished. Now, I have to repeat the same on the other side, front, rear and an intermediate wall. Yves


- 102 replies
-
- 13
-
-
Very nice work. I like the smaller Heller model and the comparisons you are making. Yves
- 17 replies
-
- 1
-

-
- Marie-Jeanne
- Artesania Latina
- (and 1 more)
-
It is always nice to see these old Billing kits come back to the front window. I am sure you will do this model, justice. Yves
- 3 replies
-
- 1
-
-
- BUR2
- Rainbow Cutter
- (and 1 more)
-
You are most definitely adding a significant layer of complexity to this kit. However, the efforts will be worth it, when you can sail this beautiful yawl on the lake. Yves
-
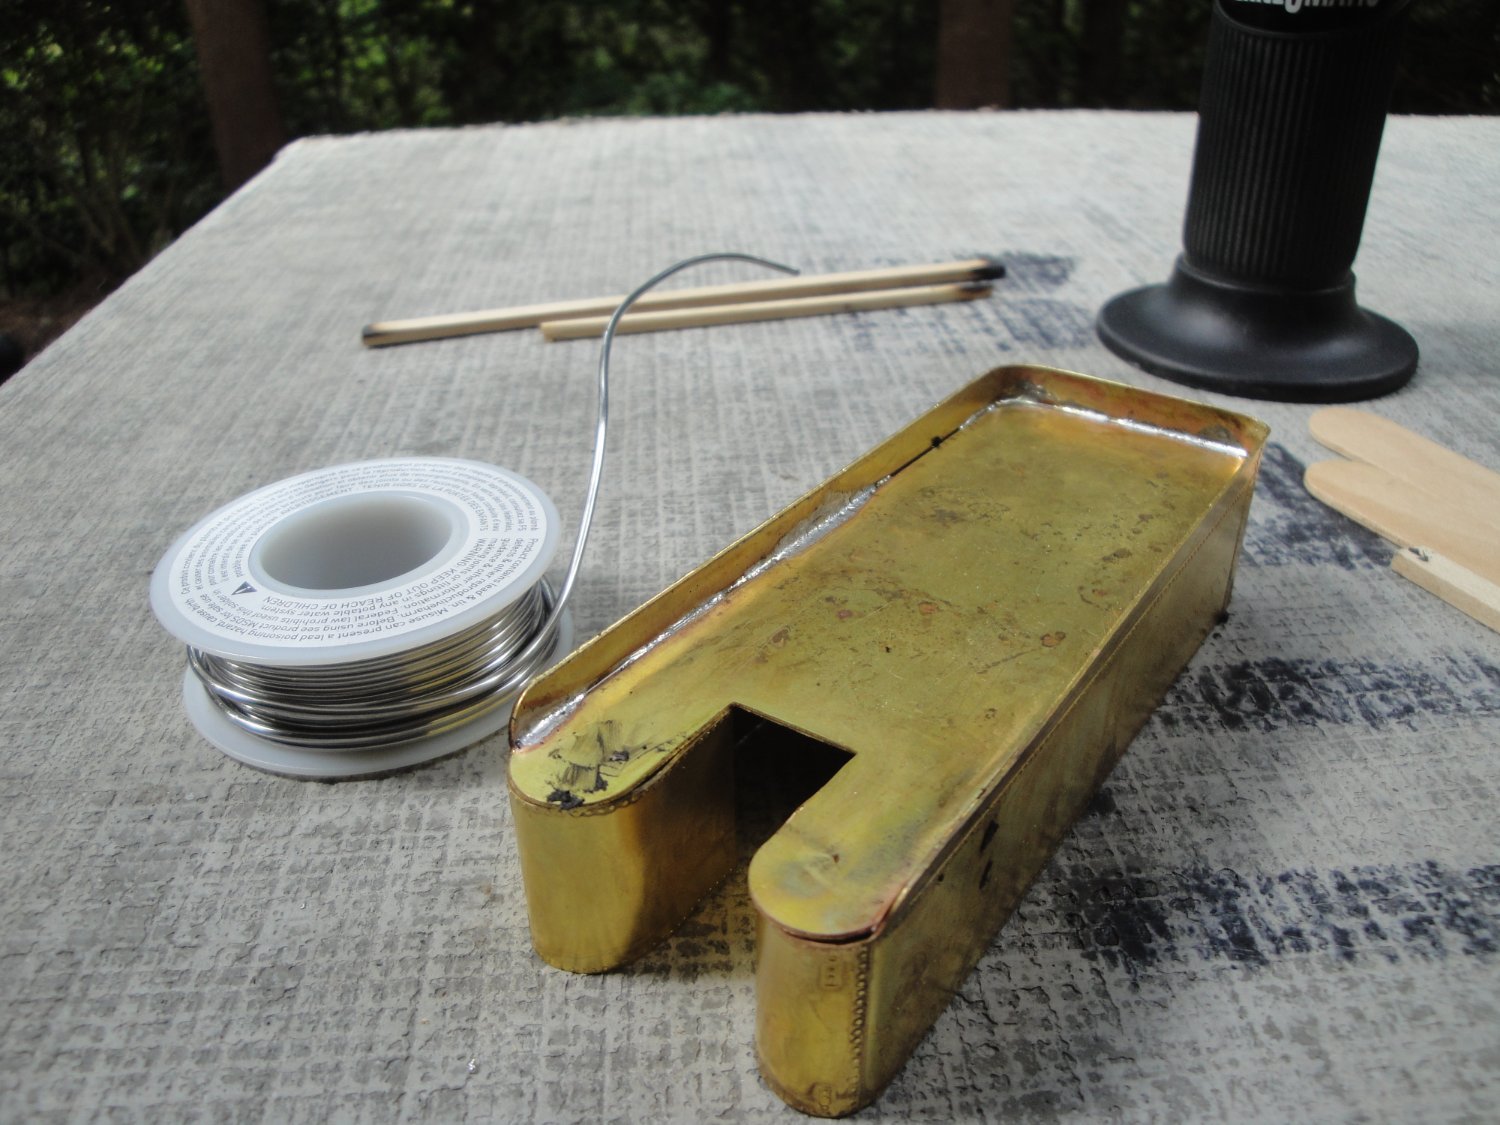
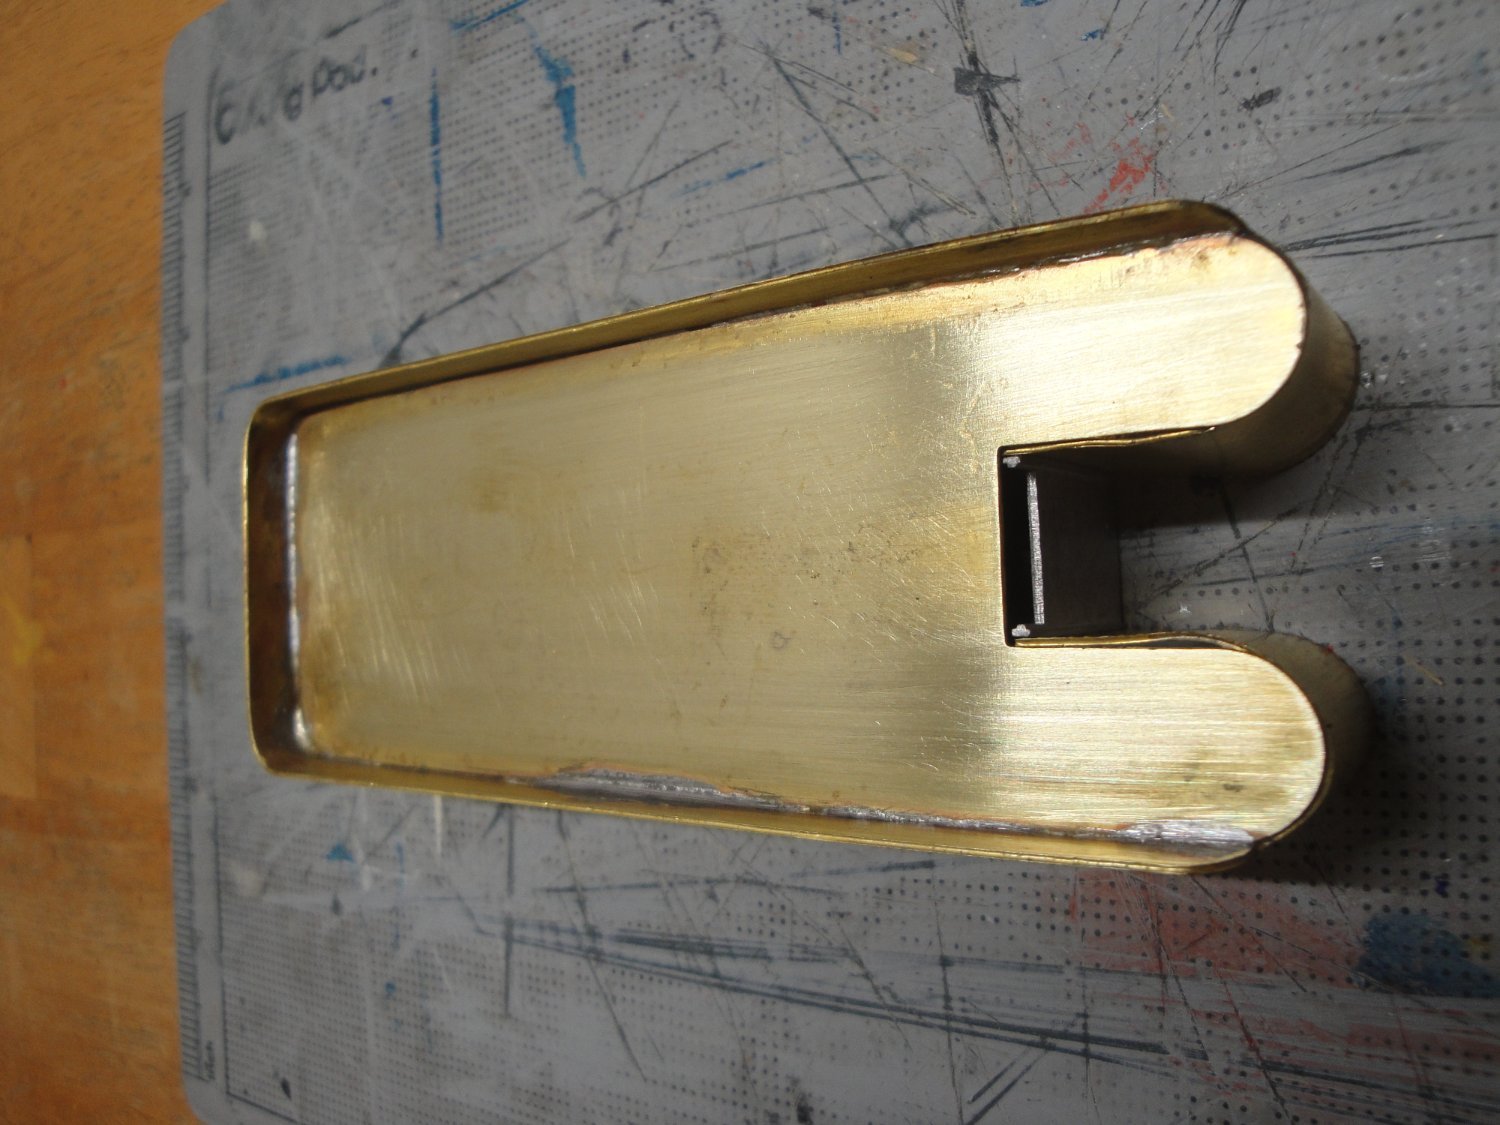
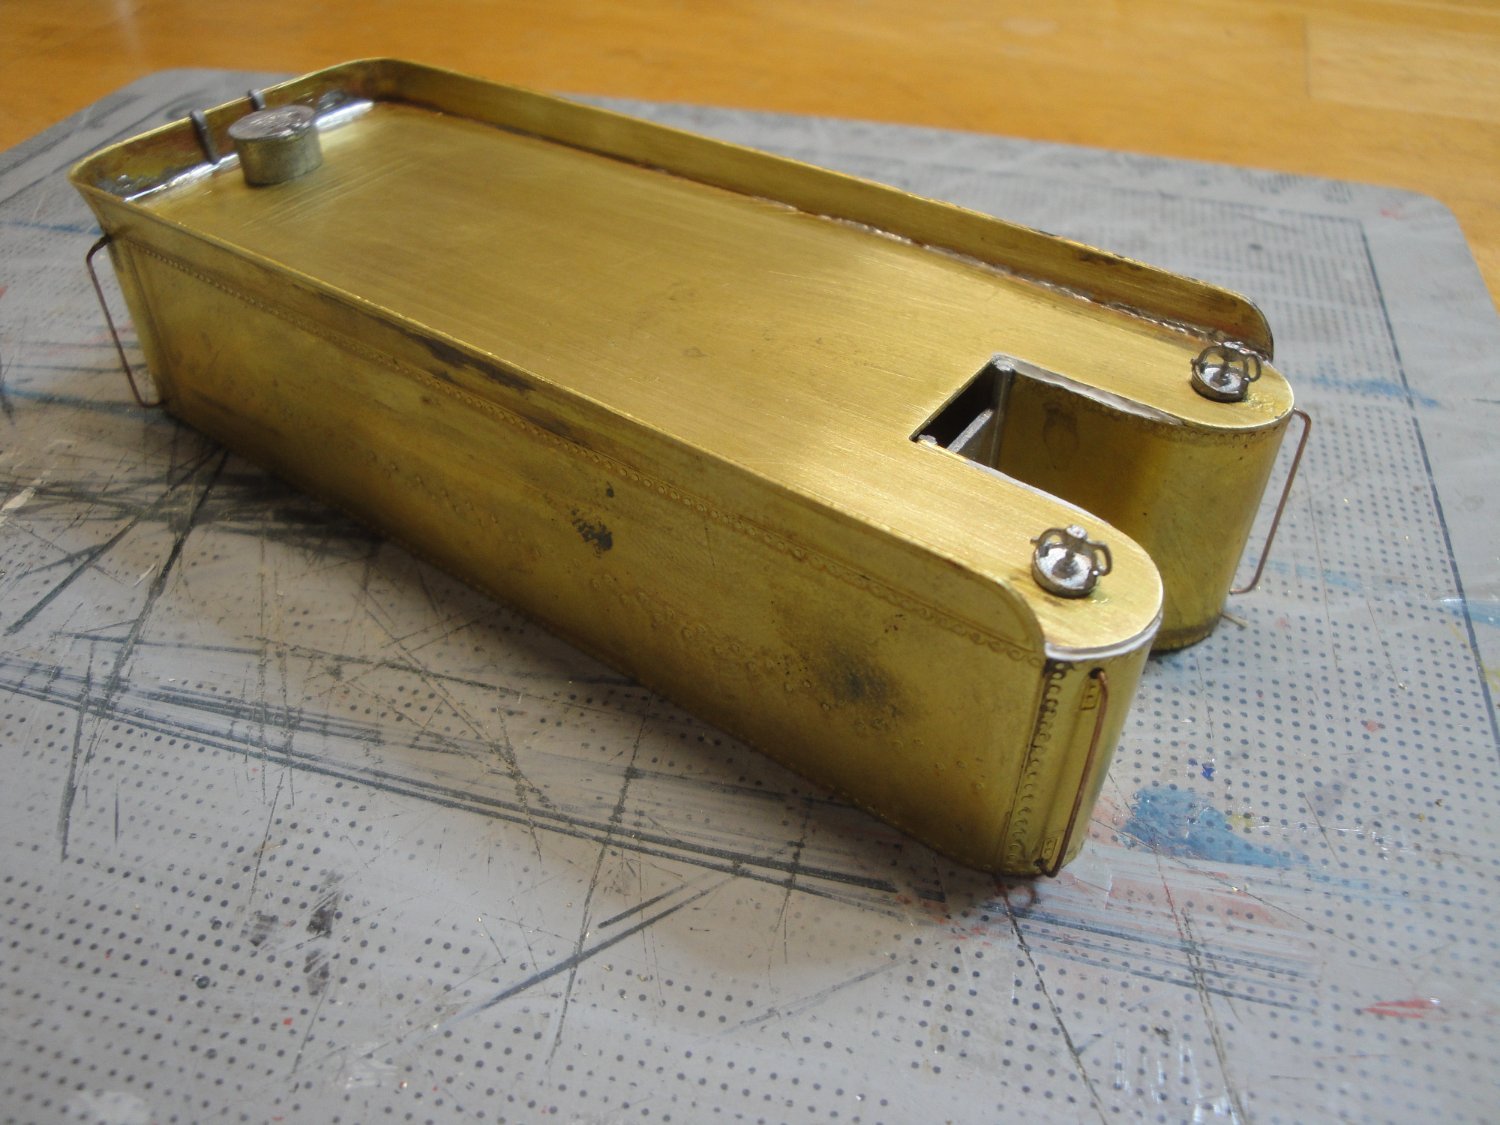
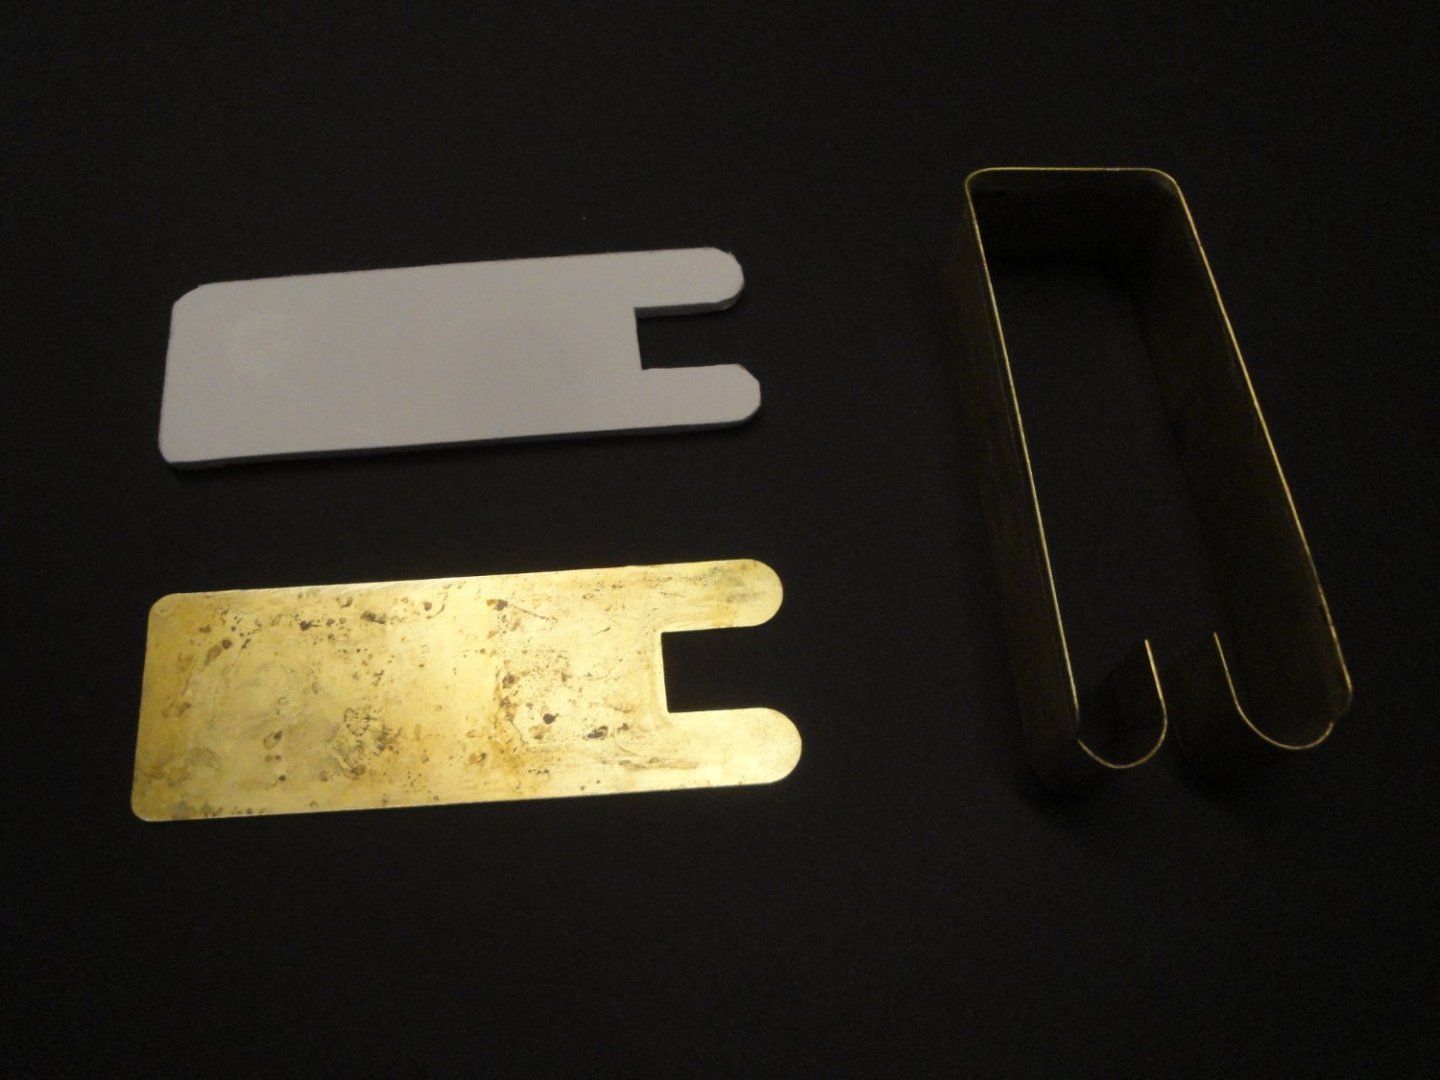
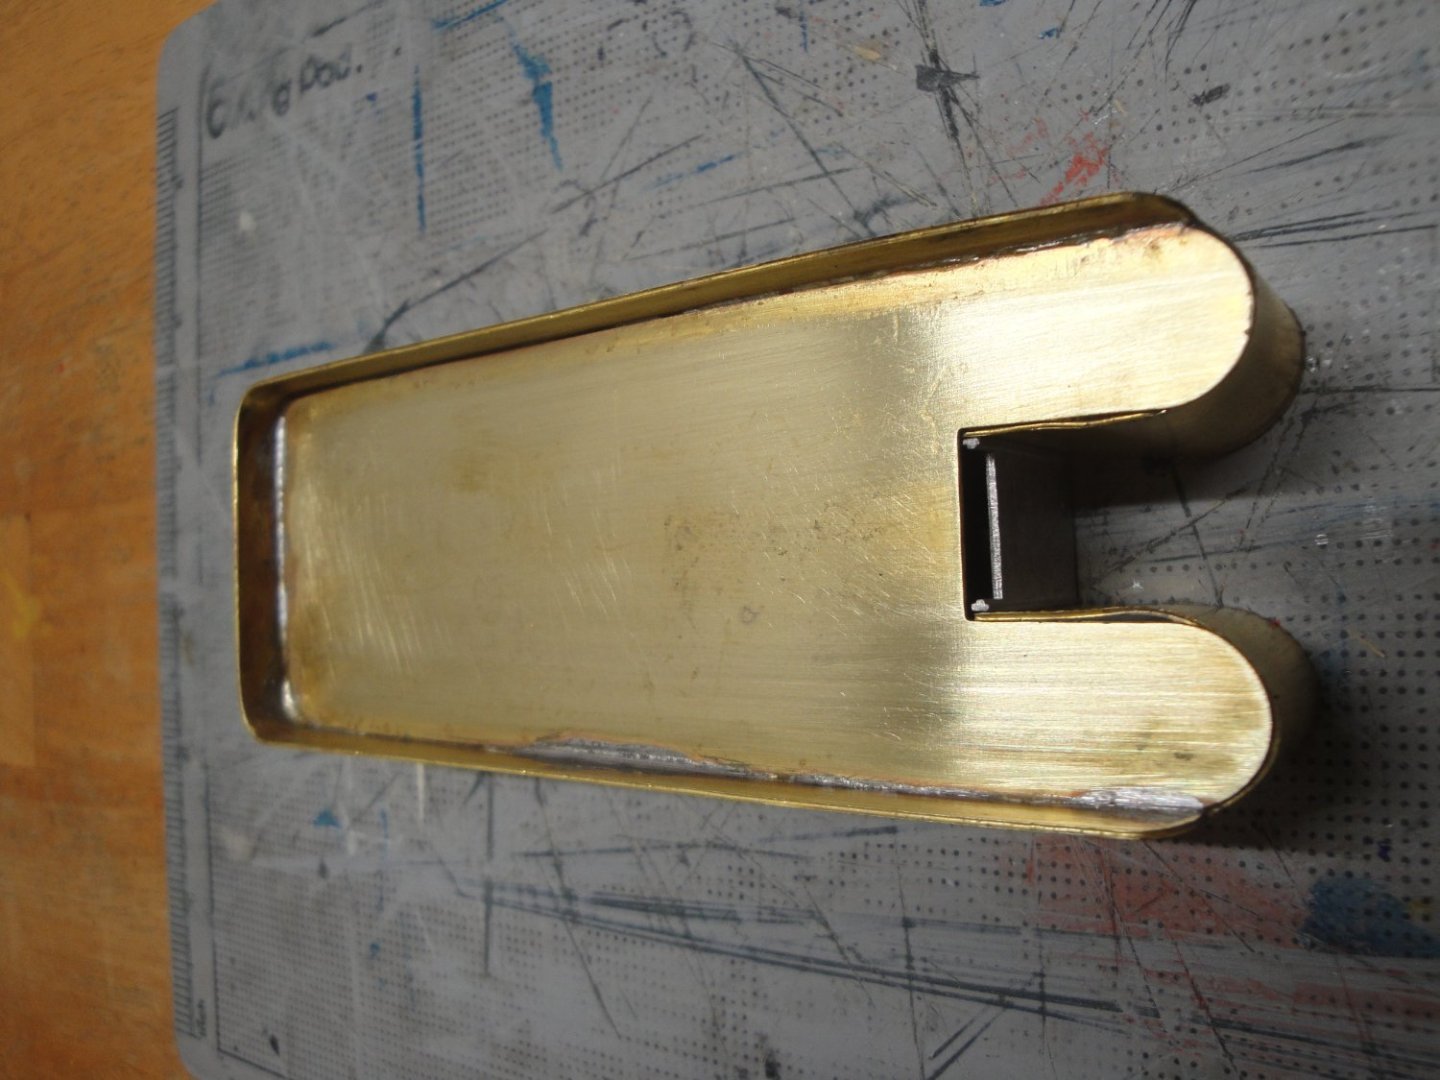
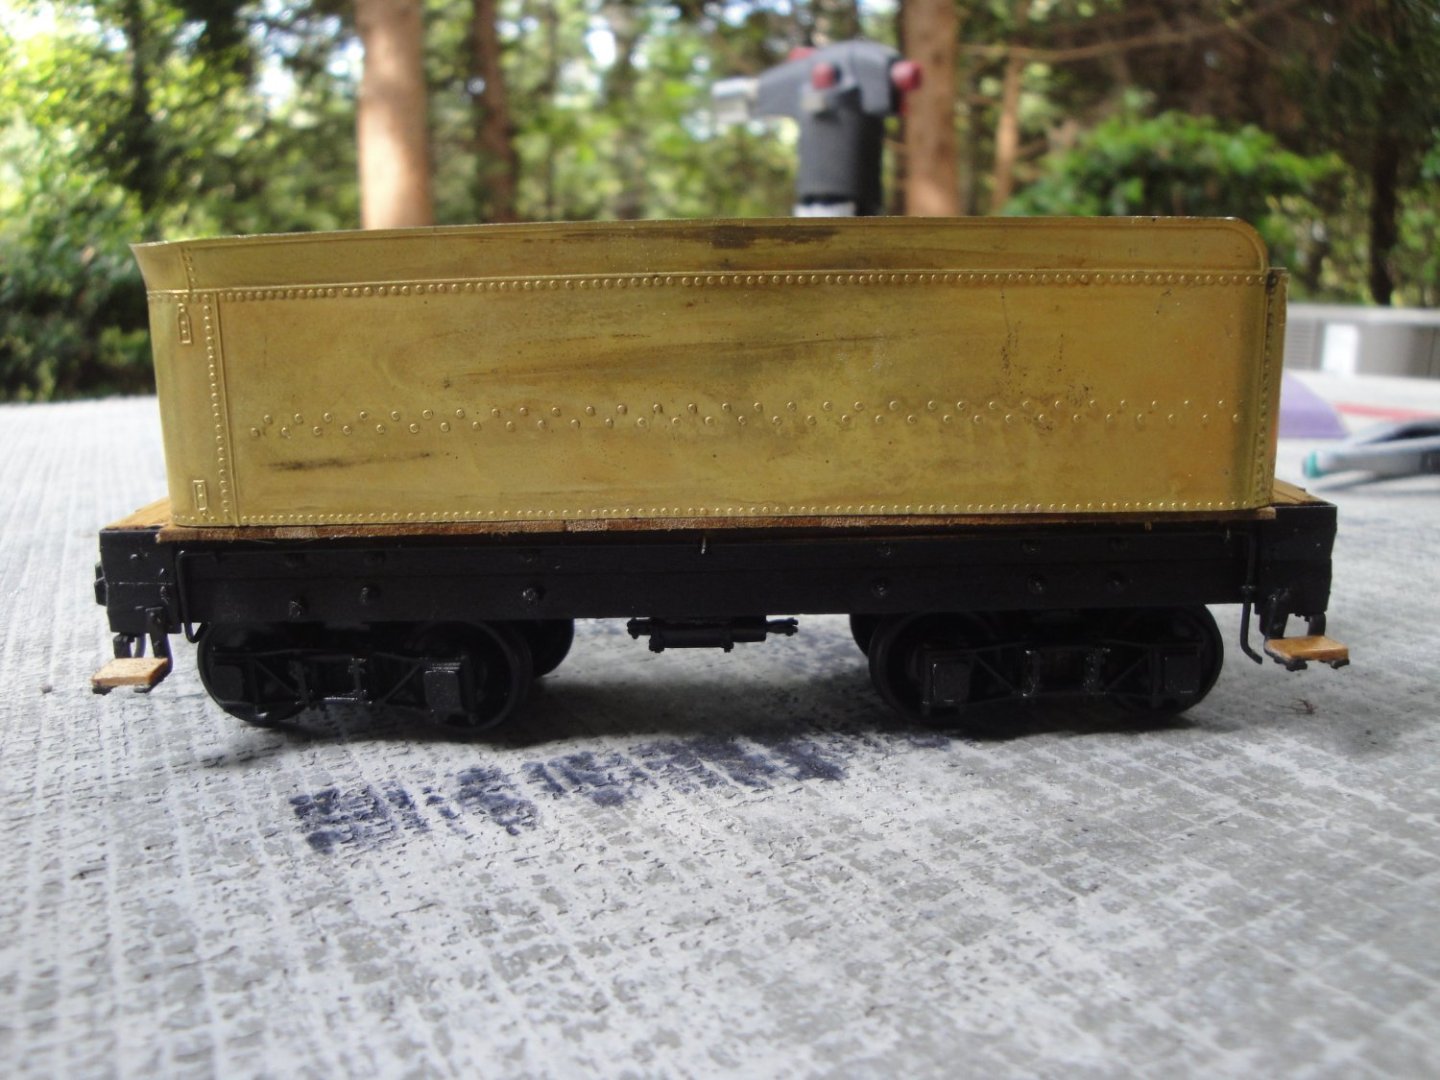
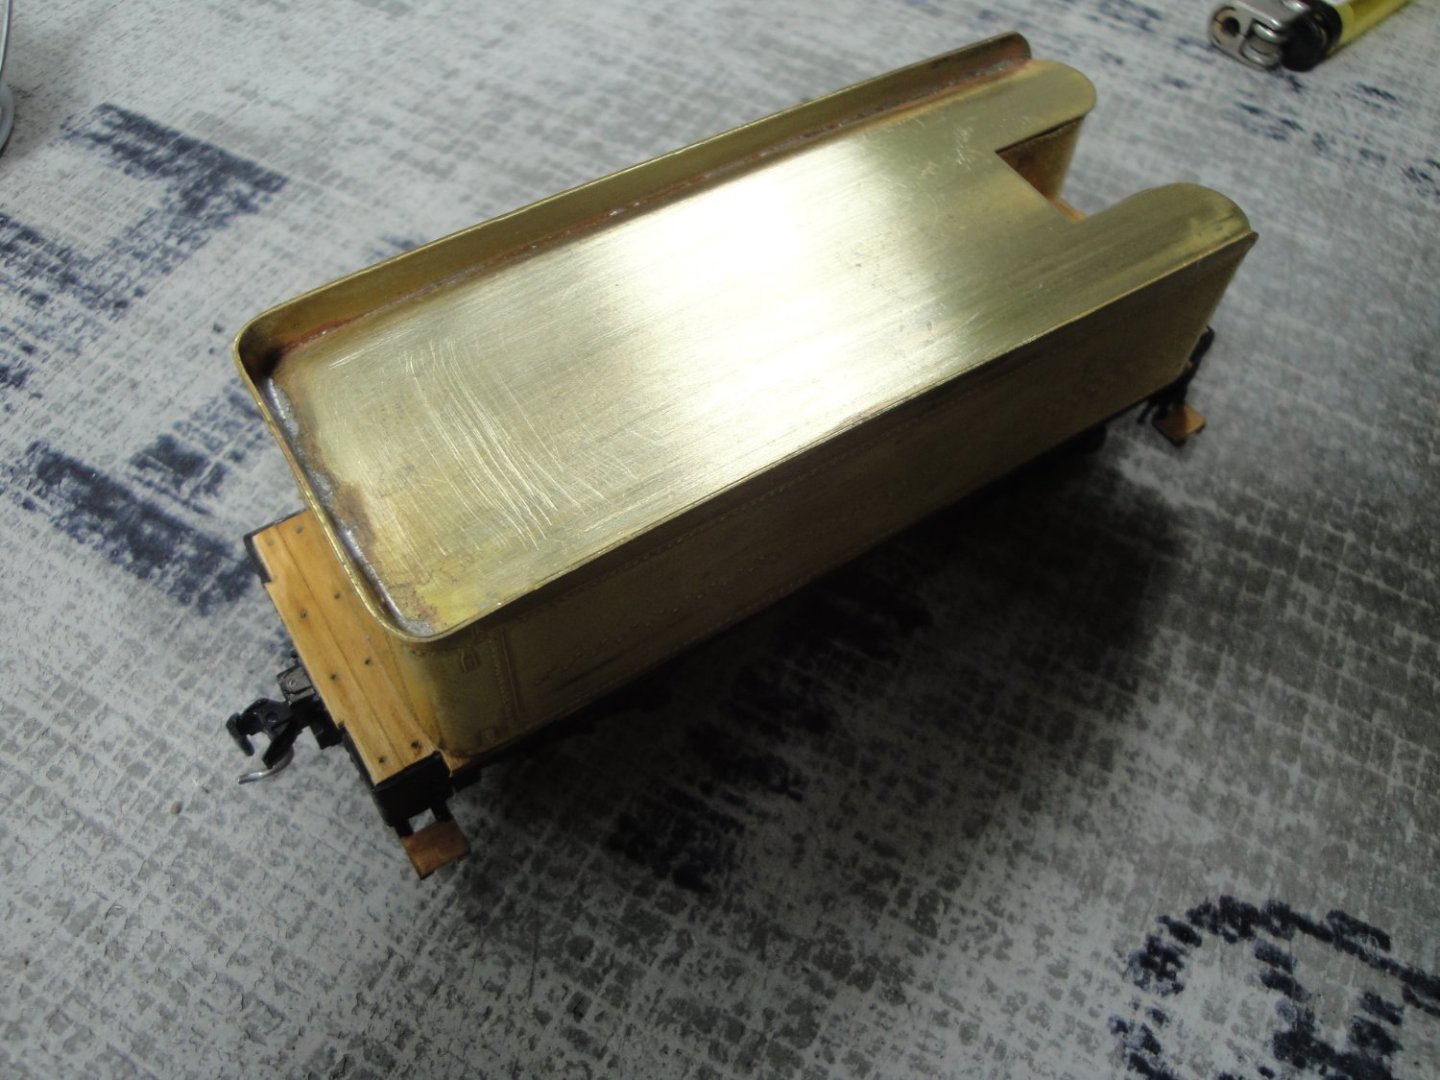
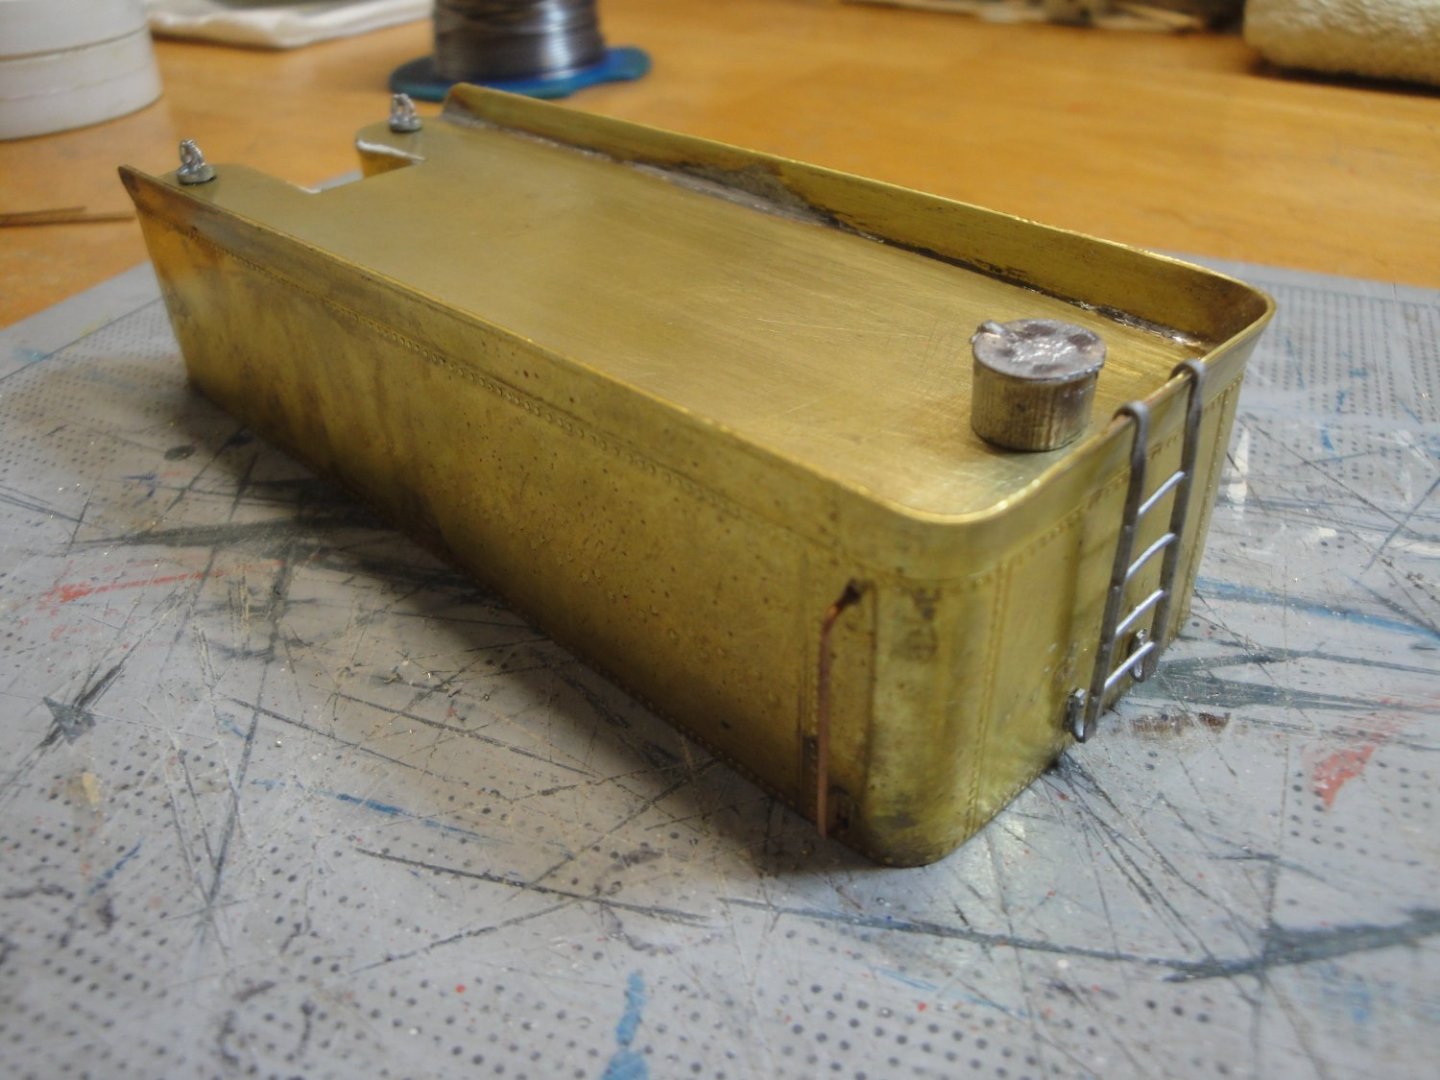
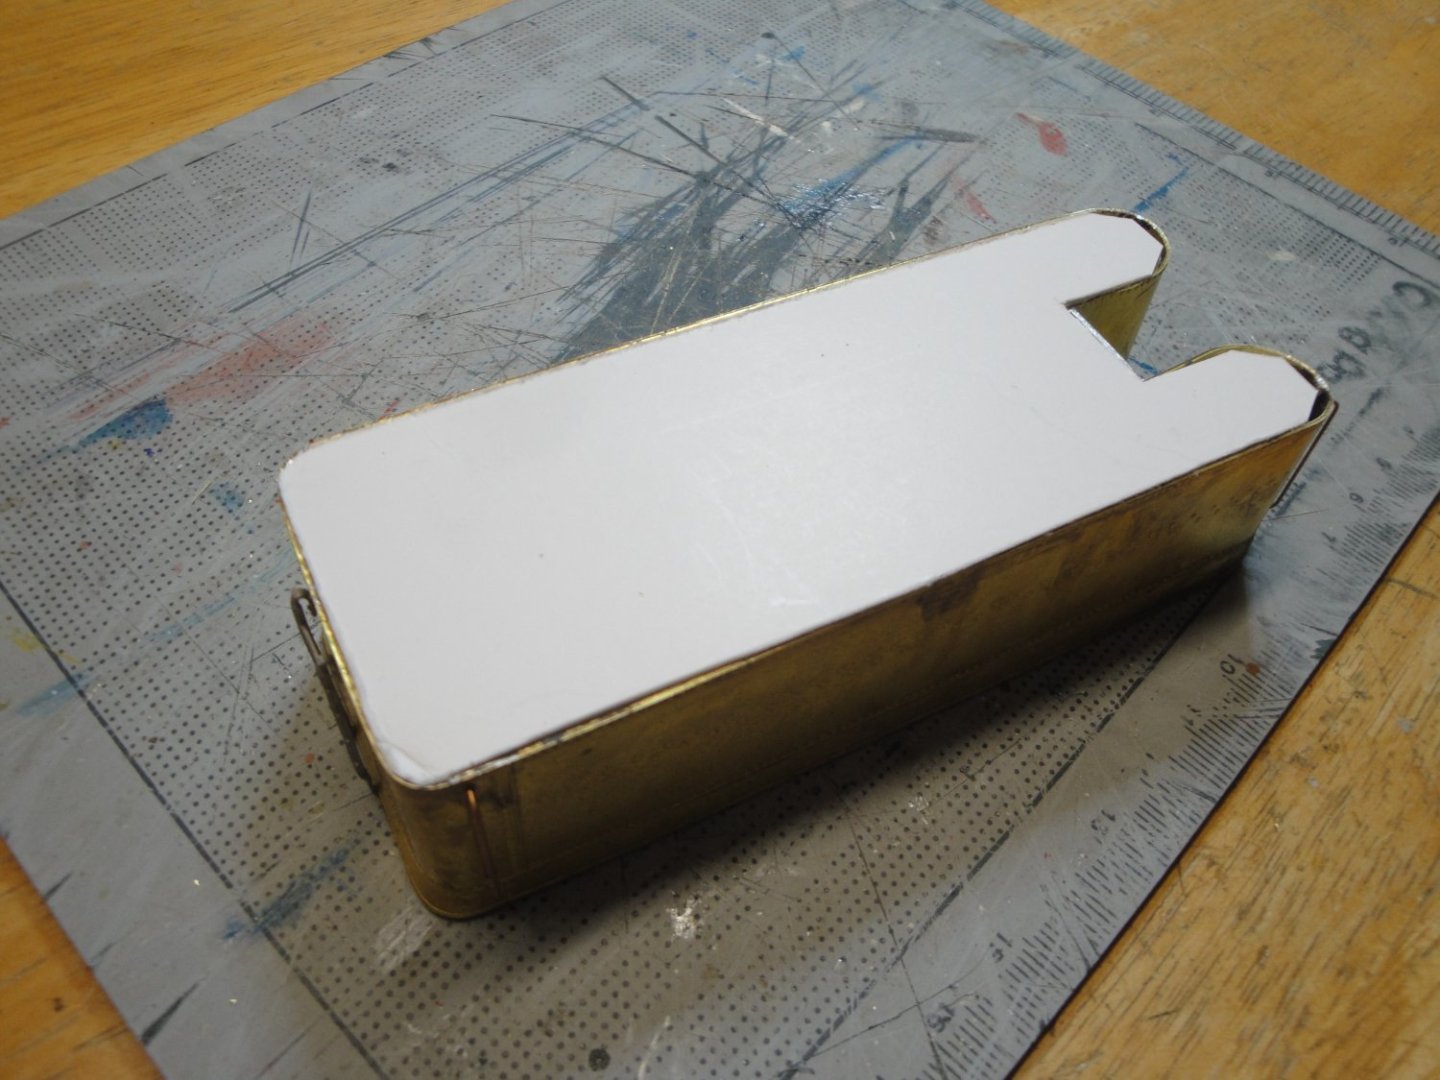
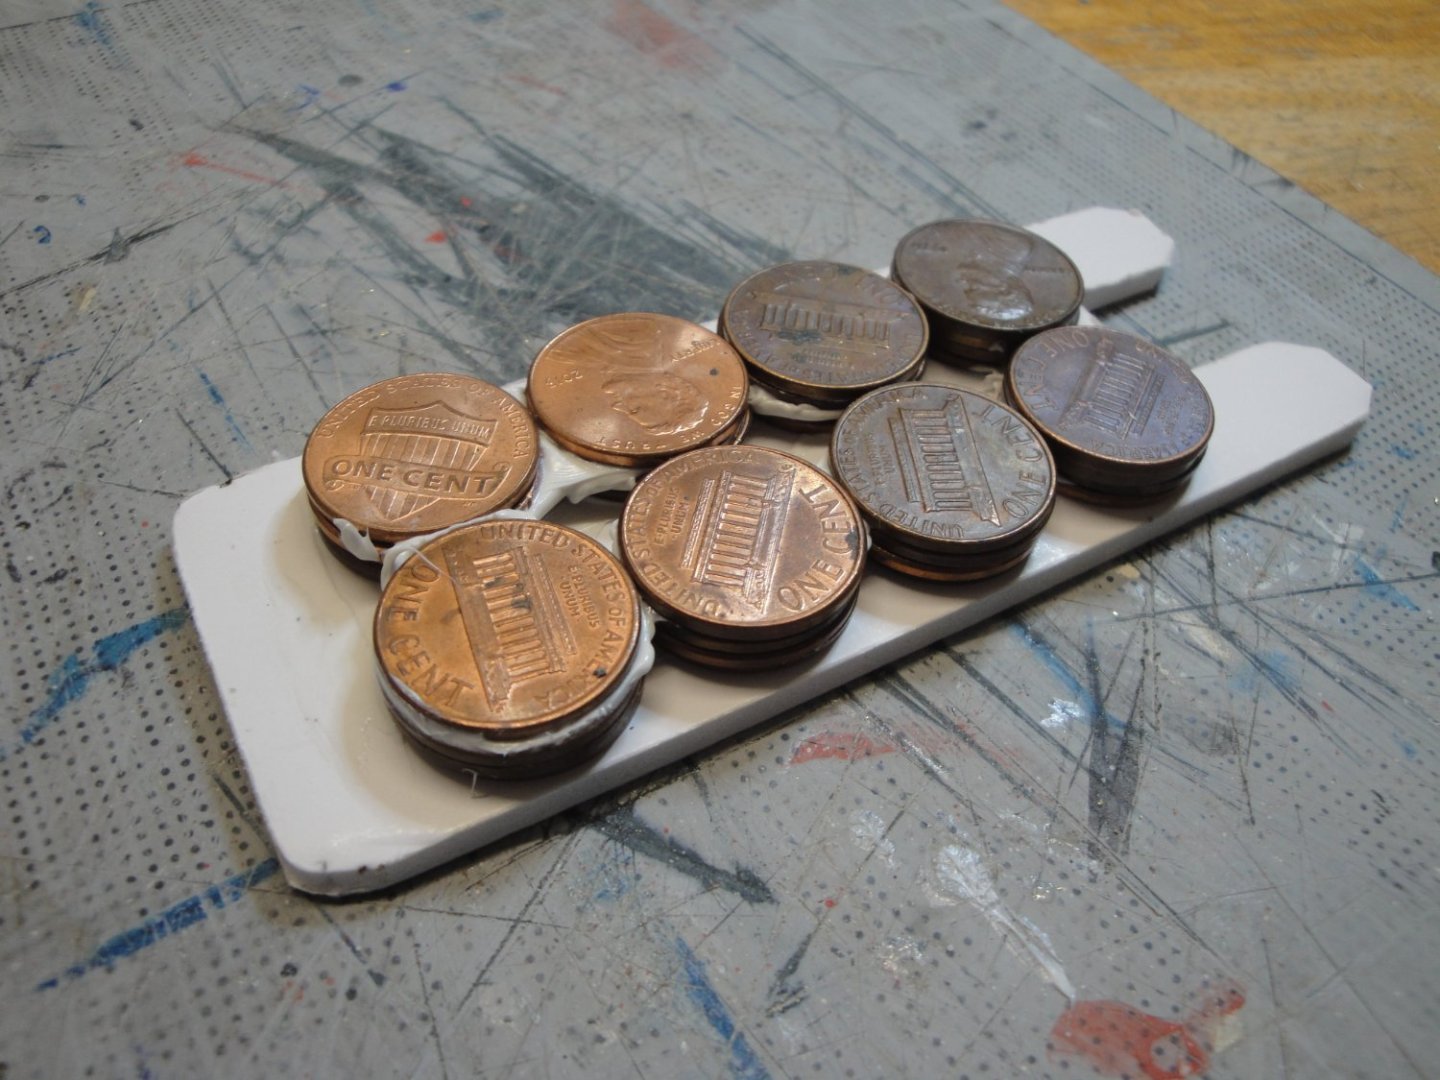
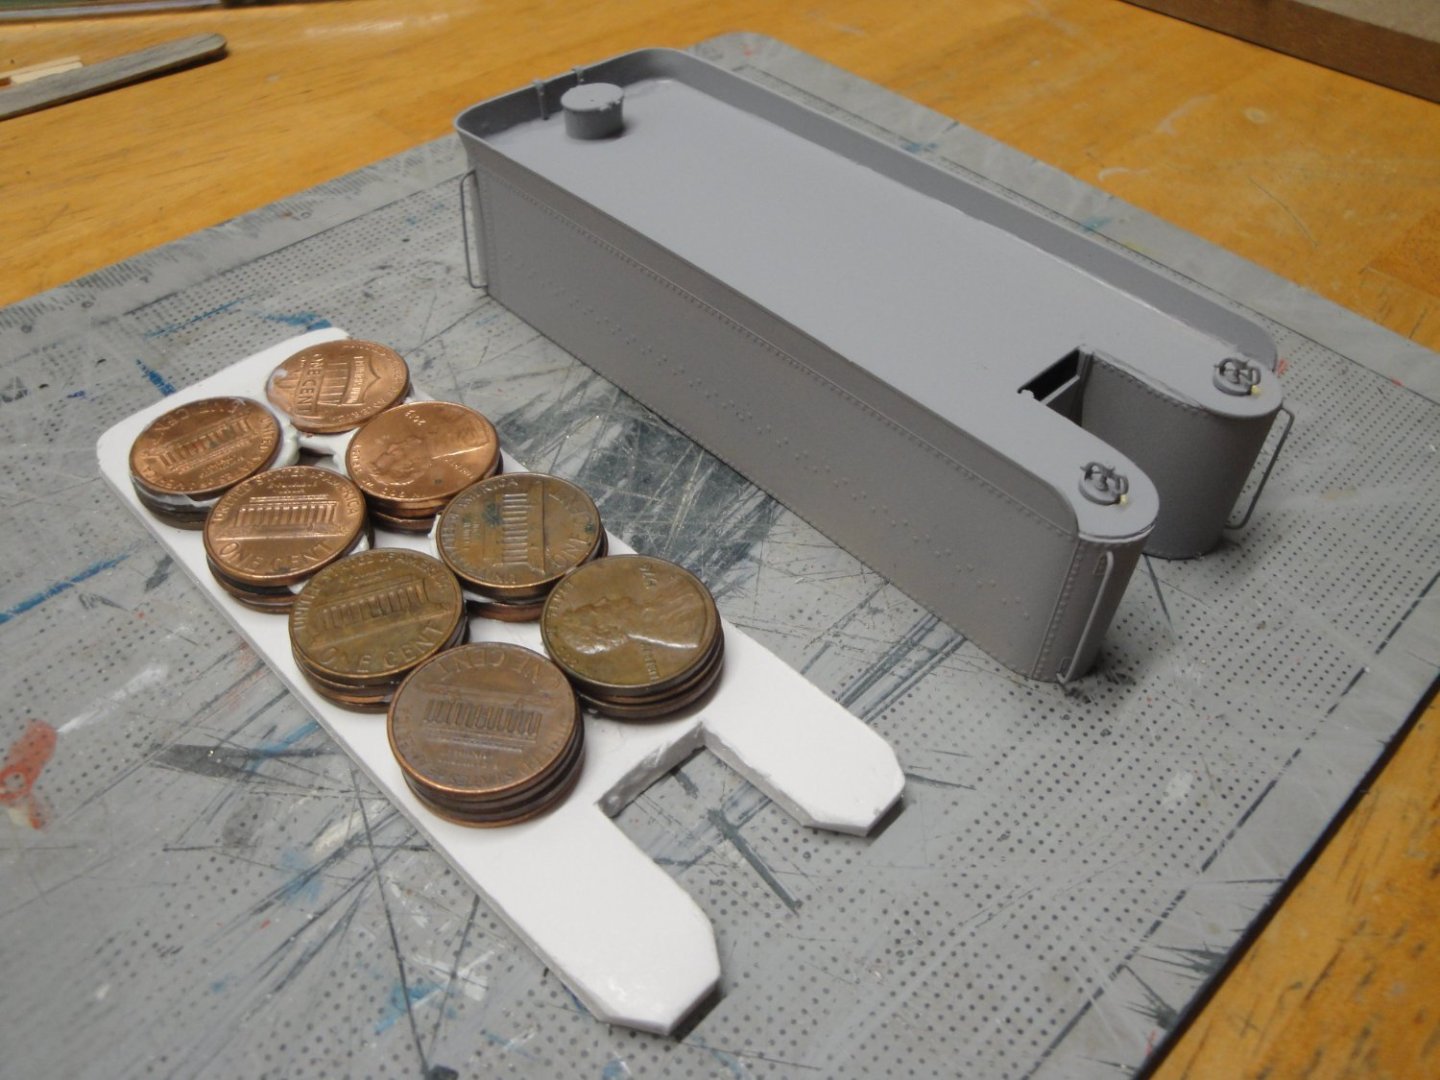
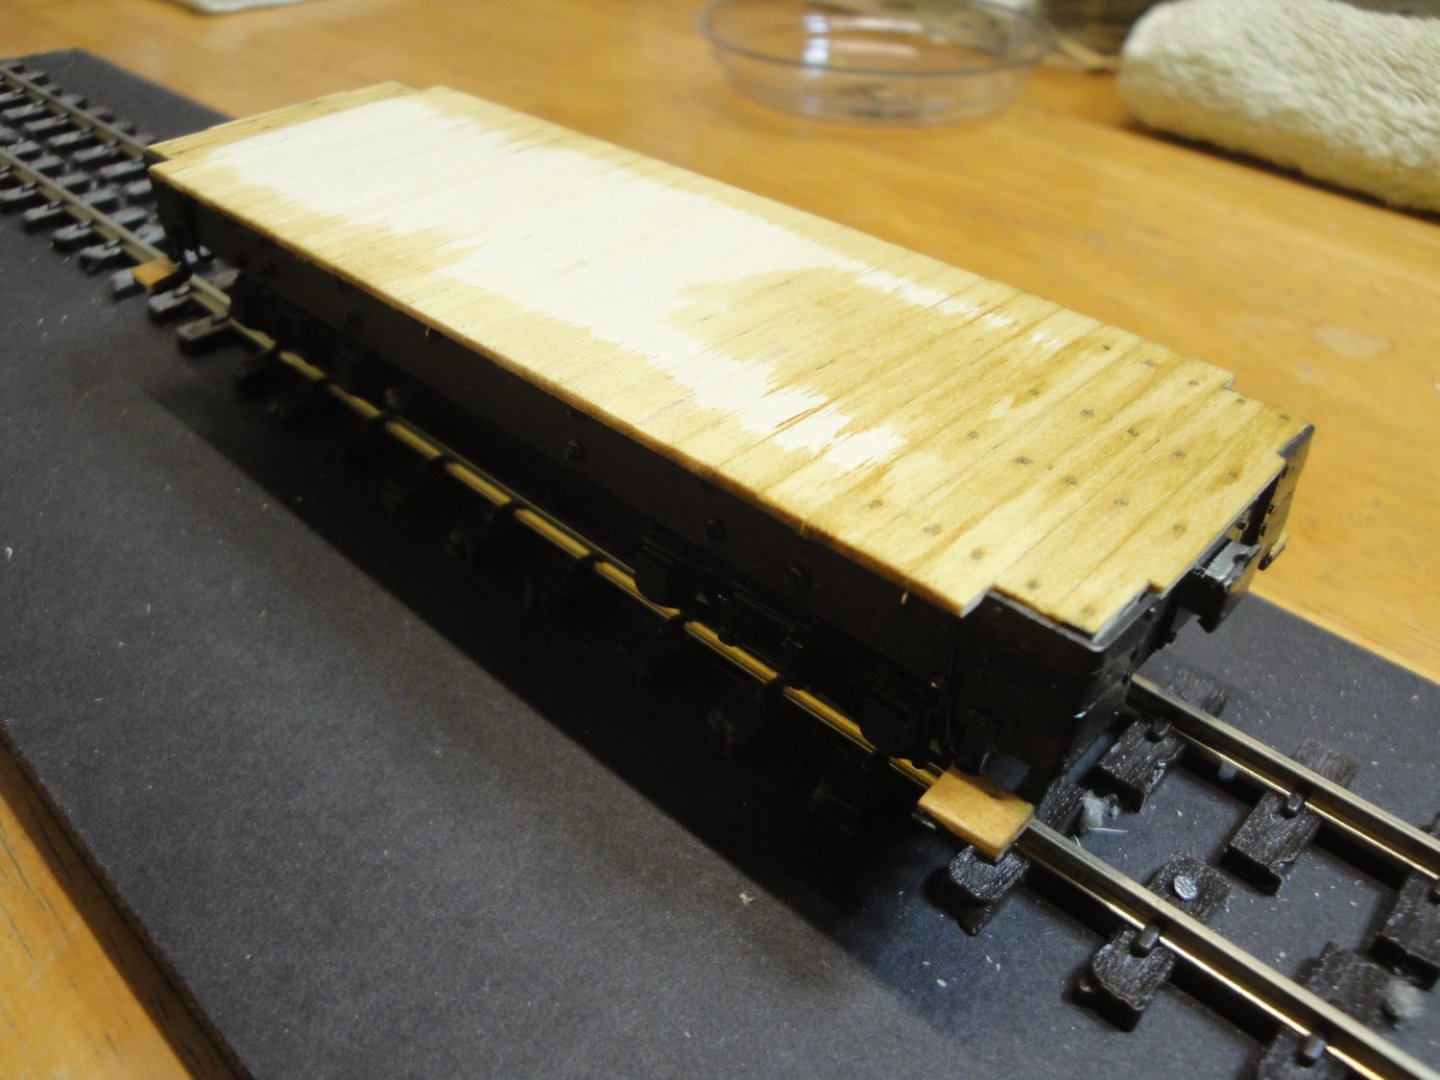
A few progress on the tender piece. My kit came with a folded brass shell, whereas the latest kit from WISEMAN are offering a resin molded tender. The first thing I did was to cut a similar shape to the top of the tender, in order to provide a stiffer tender and a way to glue it on the chassis previously planked. In fact gluing brass sheet directly to the wood planks is not the best way to do it, and I strongly recommend making that extra part: The top of the tender is soldered to the brass enclosure, to the best of my abilities (not great in this case) using a mini torch. This is required due to the large parts being heated. I am an expert when it comes to soldering electronic parts, but this is more of a challenge for me. I am not going to show you the underside of the tender....I intend to keep my reputation of modeler, intact.... Installation of the tank on top of the tender chassis: After this difficult task, hand rails and small details are added to the main tank: And finally, a coat of primer is done to harmonize the whole assembly. Next is the underneath piece: That piece is made of foam board and will be used to glue some weight, in order to stabilize the tender. I always use coins in my train models, to increase their value.... Coins will not age like lead and are easier to procure. Here we have 32 cents of extra value and these coins are increasing (almost doubling) the weight of the tender. Let's not forget that the tender sits in between the engine and the heavy snowplow. It needs to remain on the track, when the engine is pushing. Overall view: That is all for today.... Yves


- 102 replies
-
- 17
-
-

-
Lotus 72D by gsdpic - FINISHED - Tamiya - 1/12 - PLASTIC
yvesvidal replied to gsdpic's topic in Non-ship/categorised builds
Fantastic work. It looks so real. Yves -
Bugatti Type 35B by CDW - FINISHED - Italeri - 1:12 Scale
yvesvidal replied to CDW's topic in Non-ship/categorised builds
Thank you for sharing the references and pictures of the paints you are using. This will help future builders. Yves -
A very brief update: things are still progressing, albeit slower than expected, due to the Snowplow I am building in parallel. Seven additional gunport lids have been placed: Seven more to go towards the bow of the ship and that tedious and repetitive task will be over. I have a question for the experts: regarding the color of the three lamps attached to the stern, on a period ship. Were these lamps made of metal, wood or a mixture of both? What was the usual way of painting them on a large ship of the 18th Century and on the Bellona in particular? Yves

- 507 replies
-
- 13
-
-
-
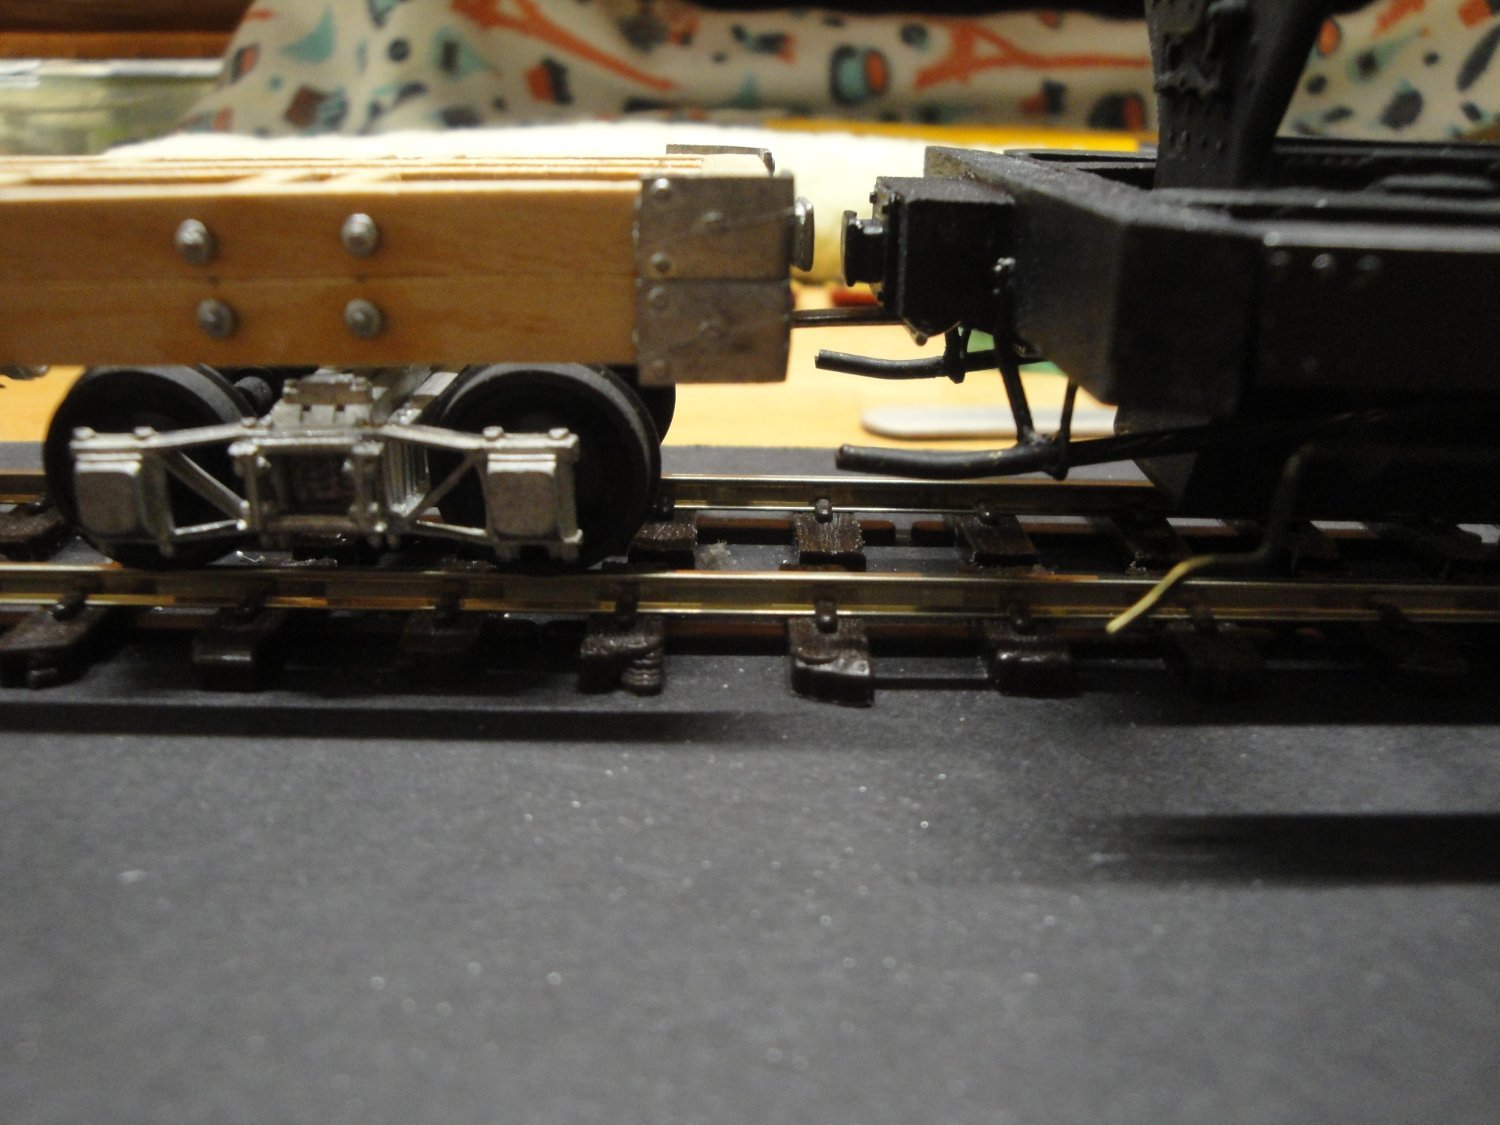
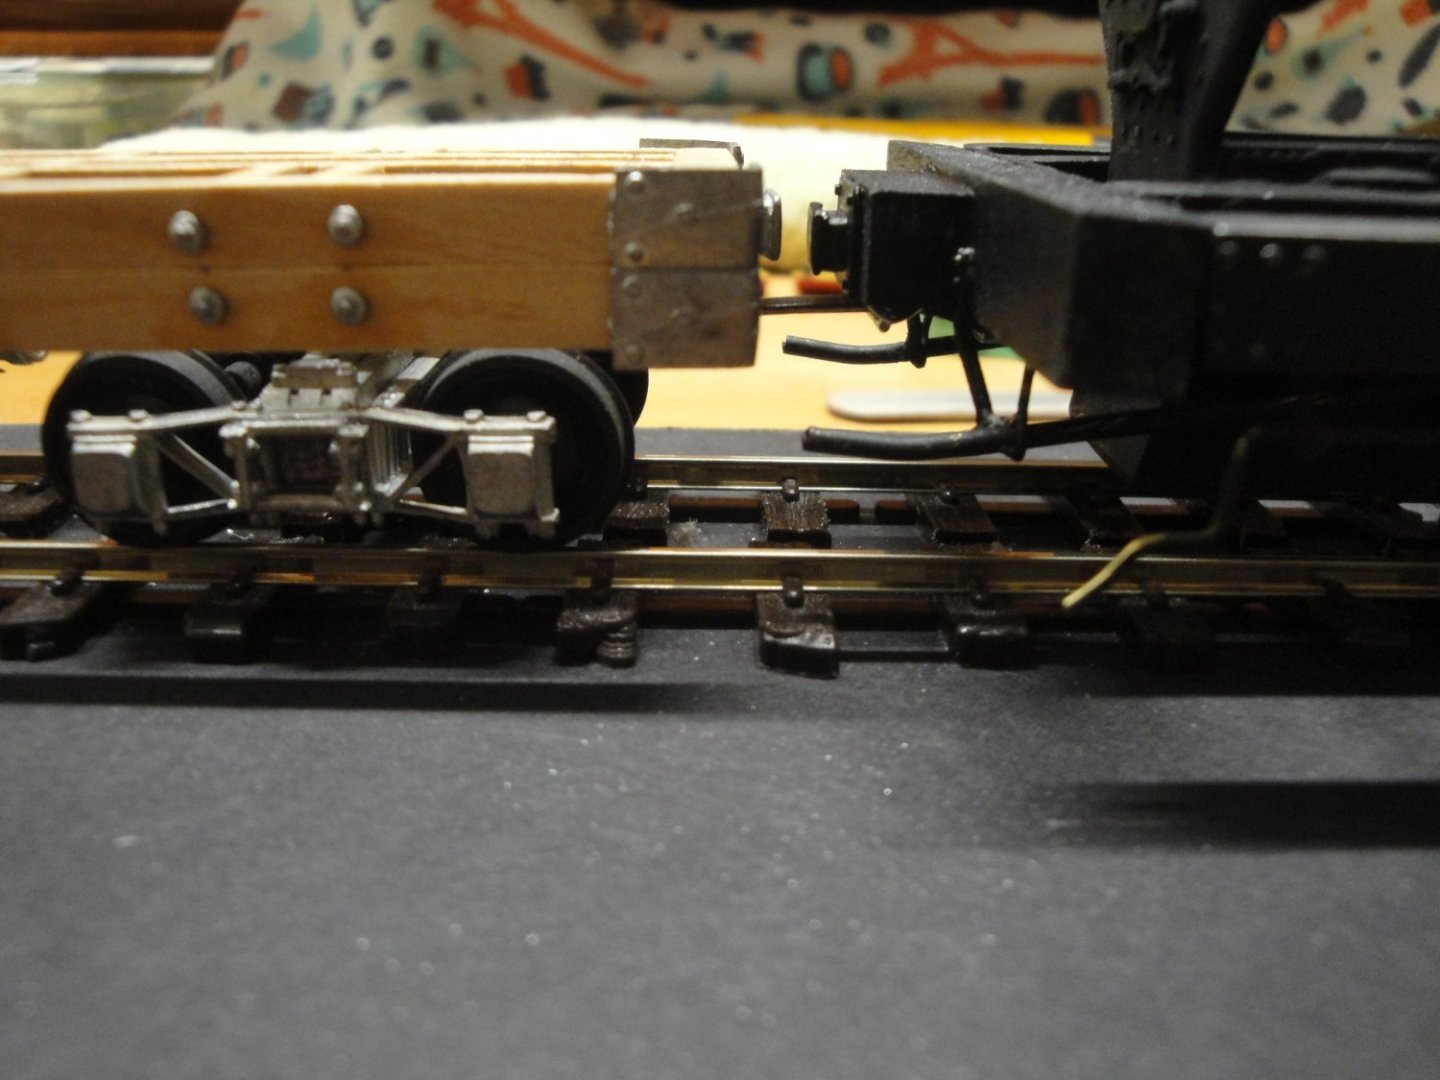
No spring on the trucks. Yves
-
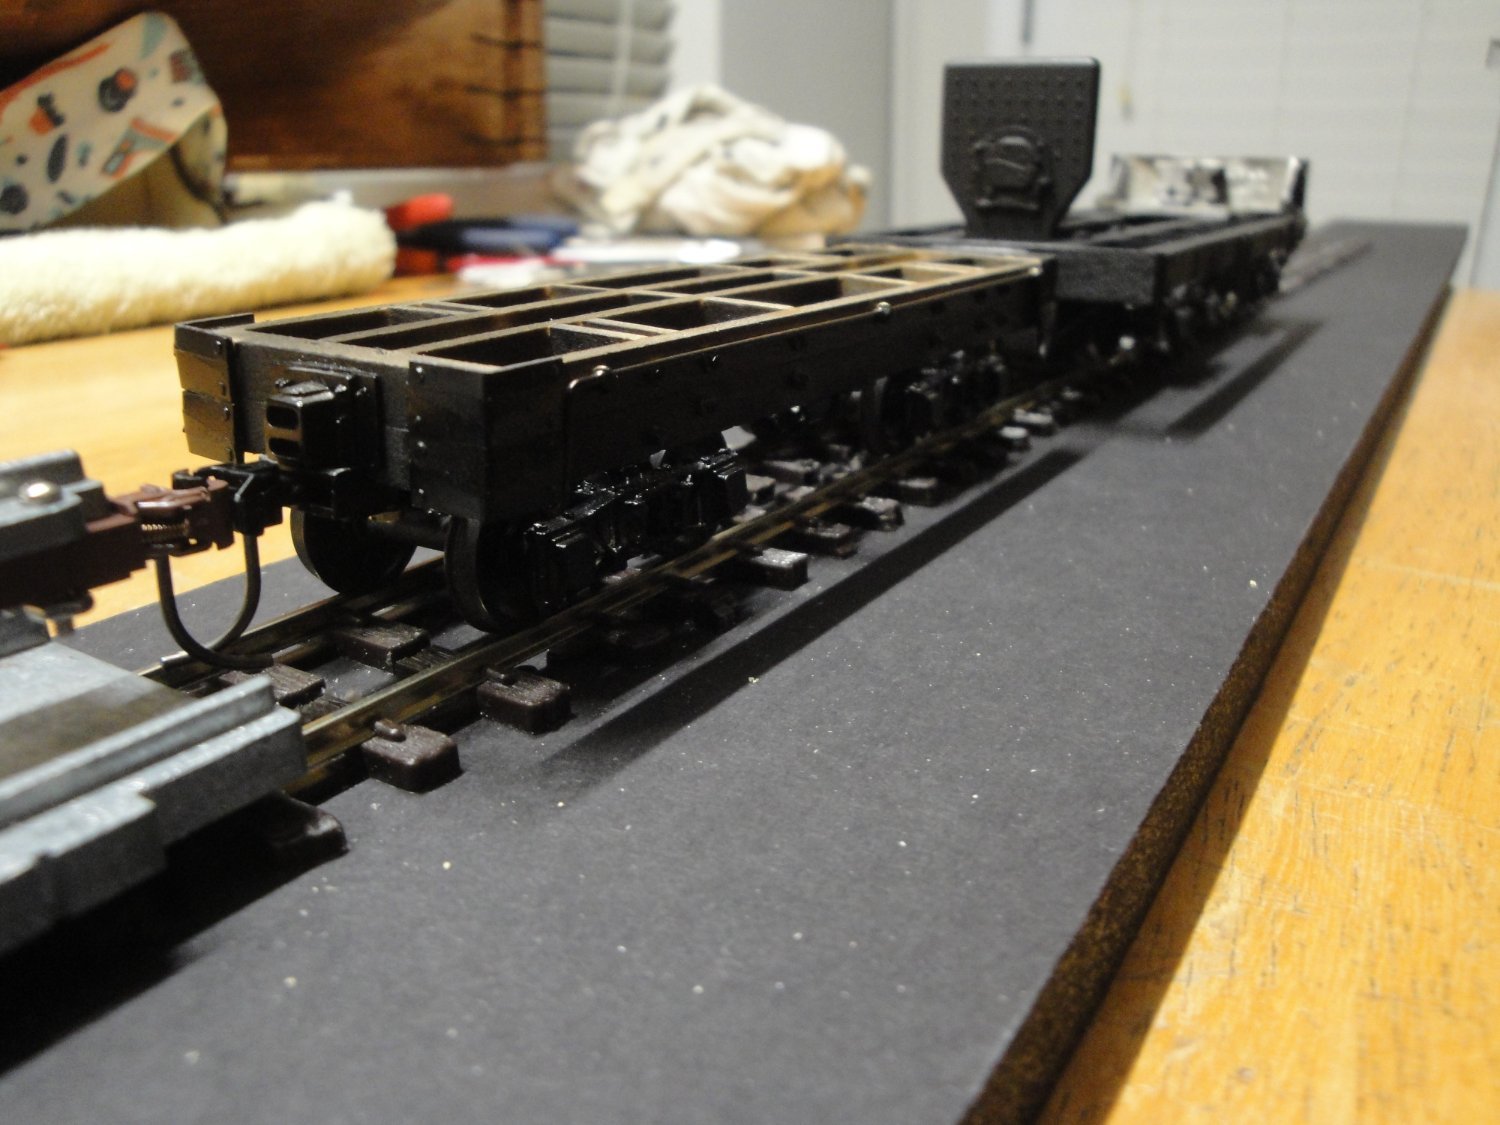
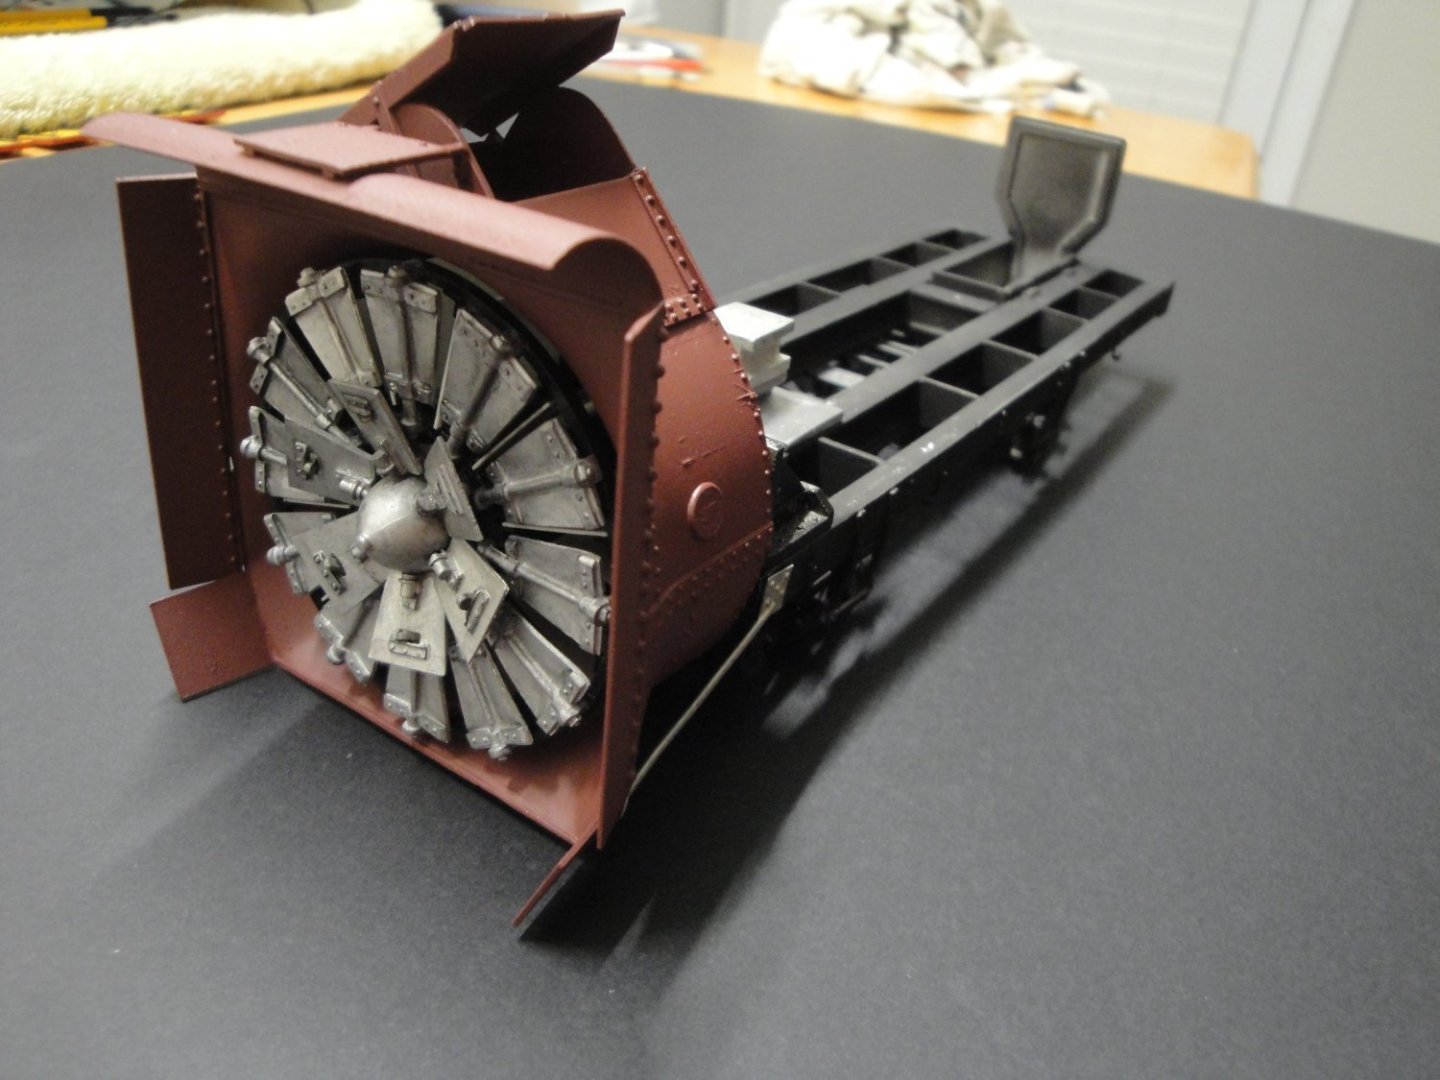
The shroud is finally installed on the snowplow chassis. Height is carefully estimated to 1 mm above the top of the rails: Yves

- 102 replies
-
- 13
-
-
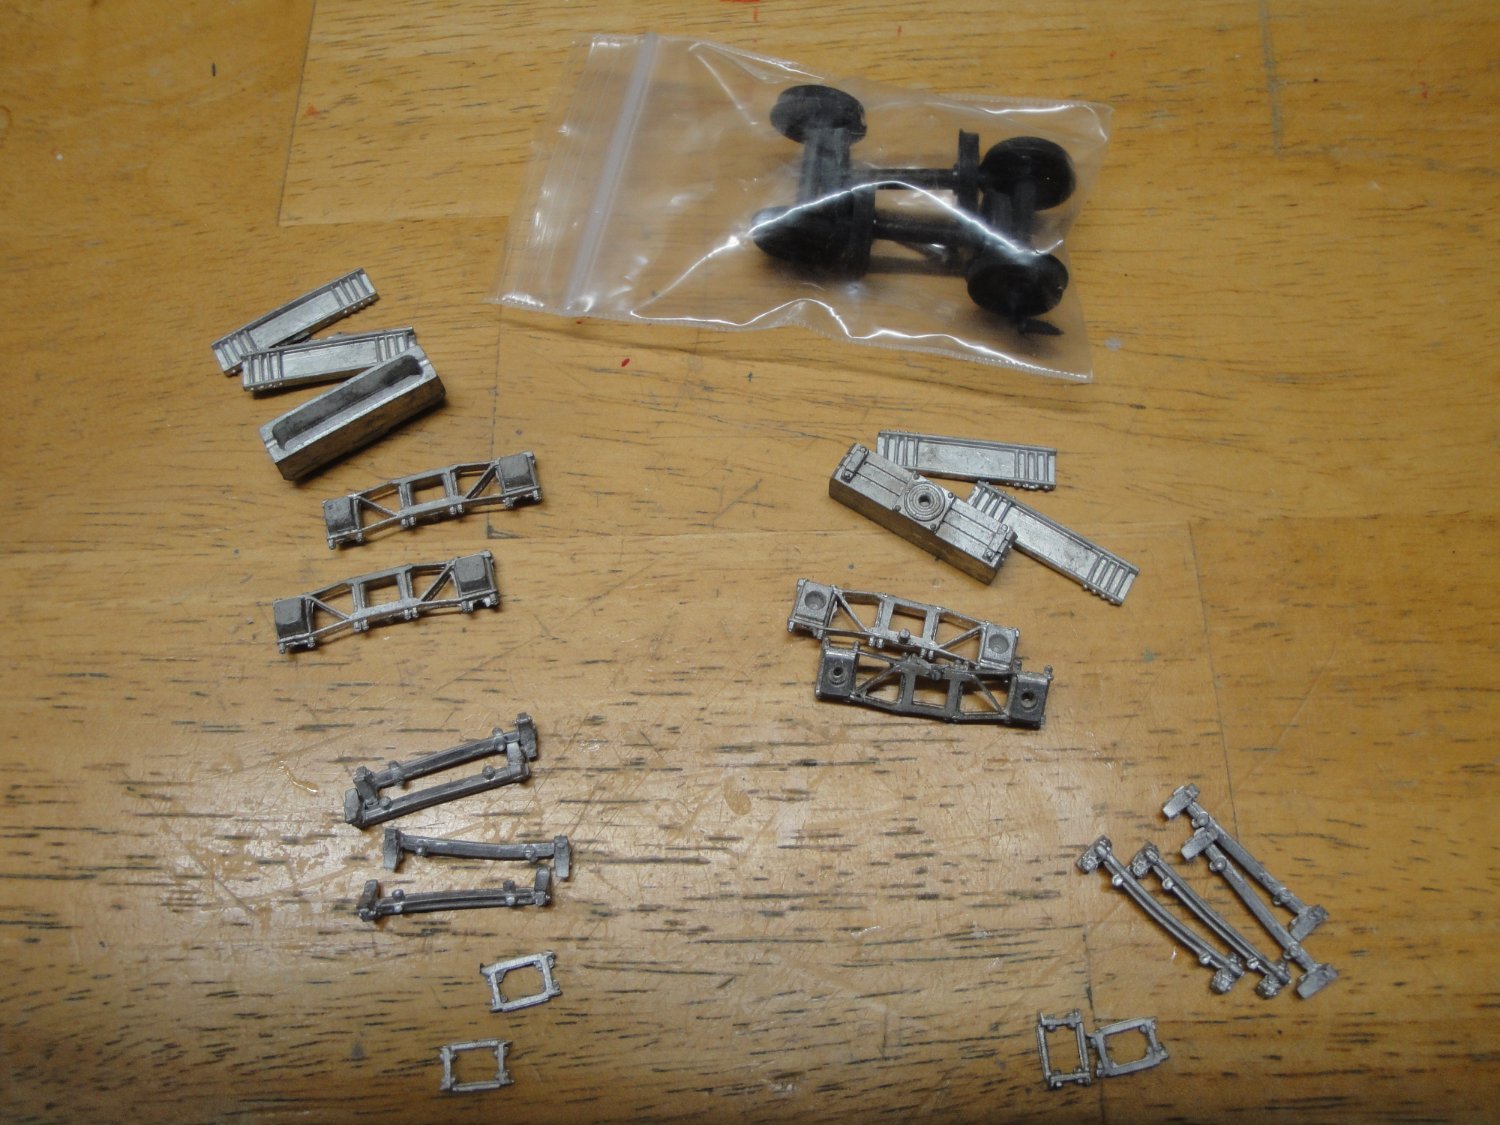
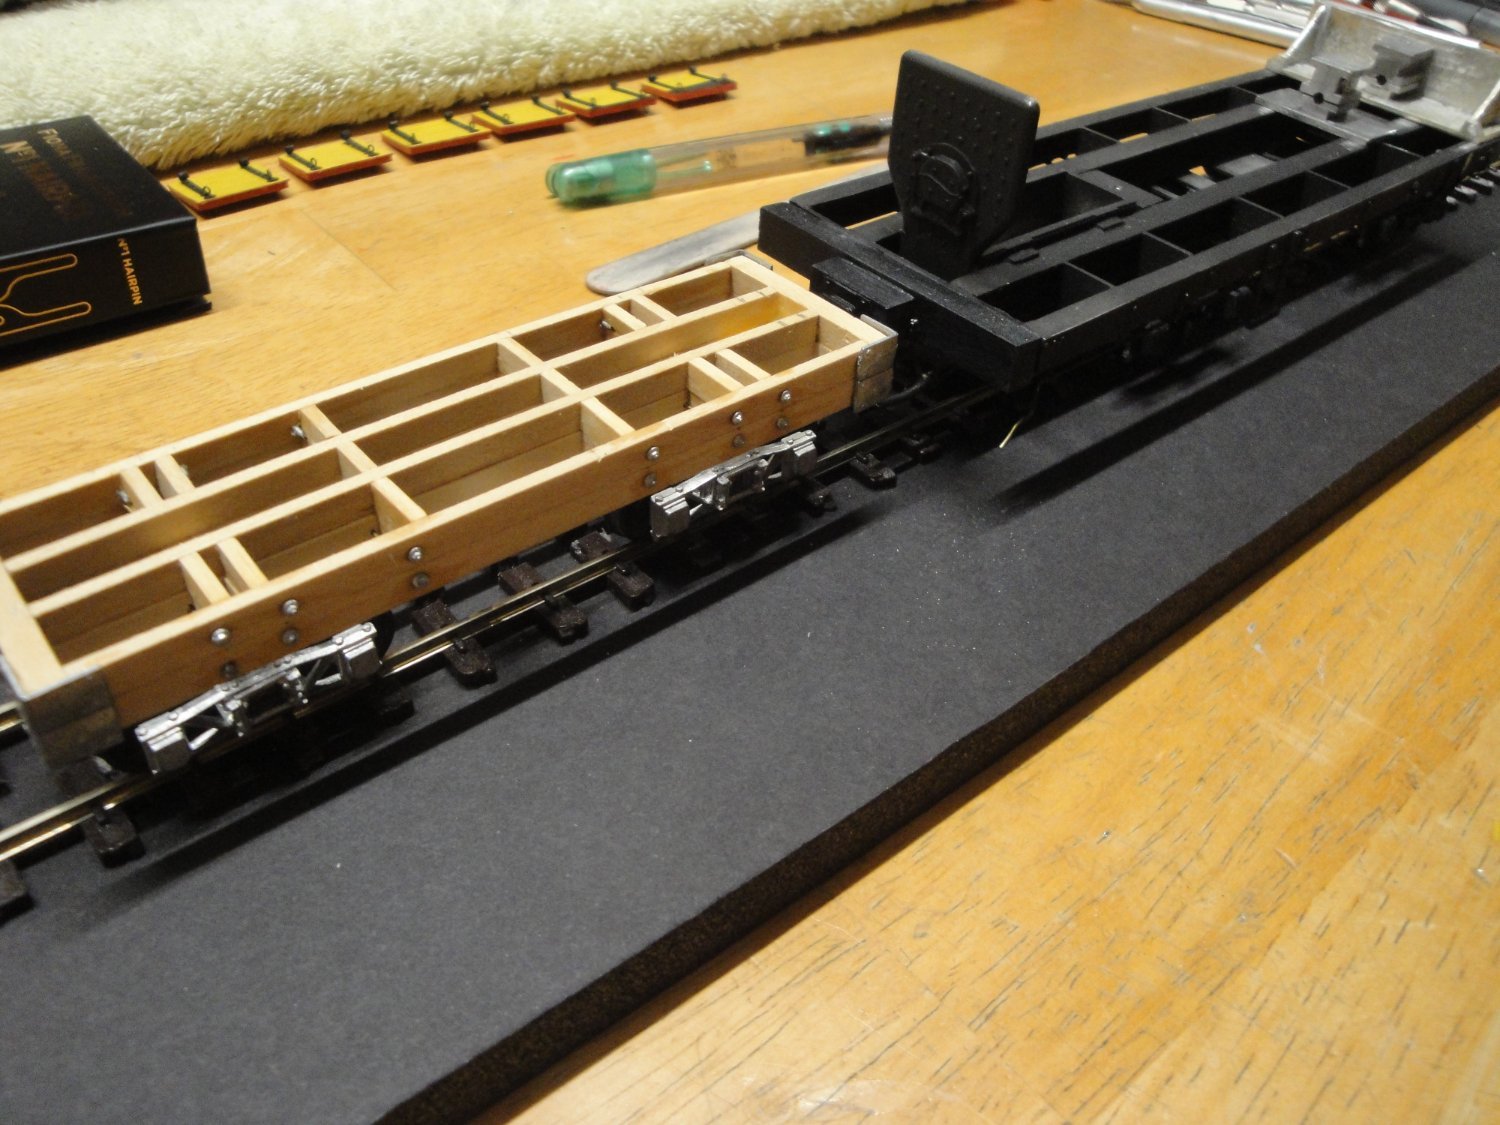
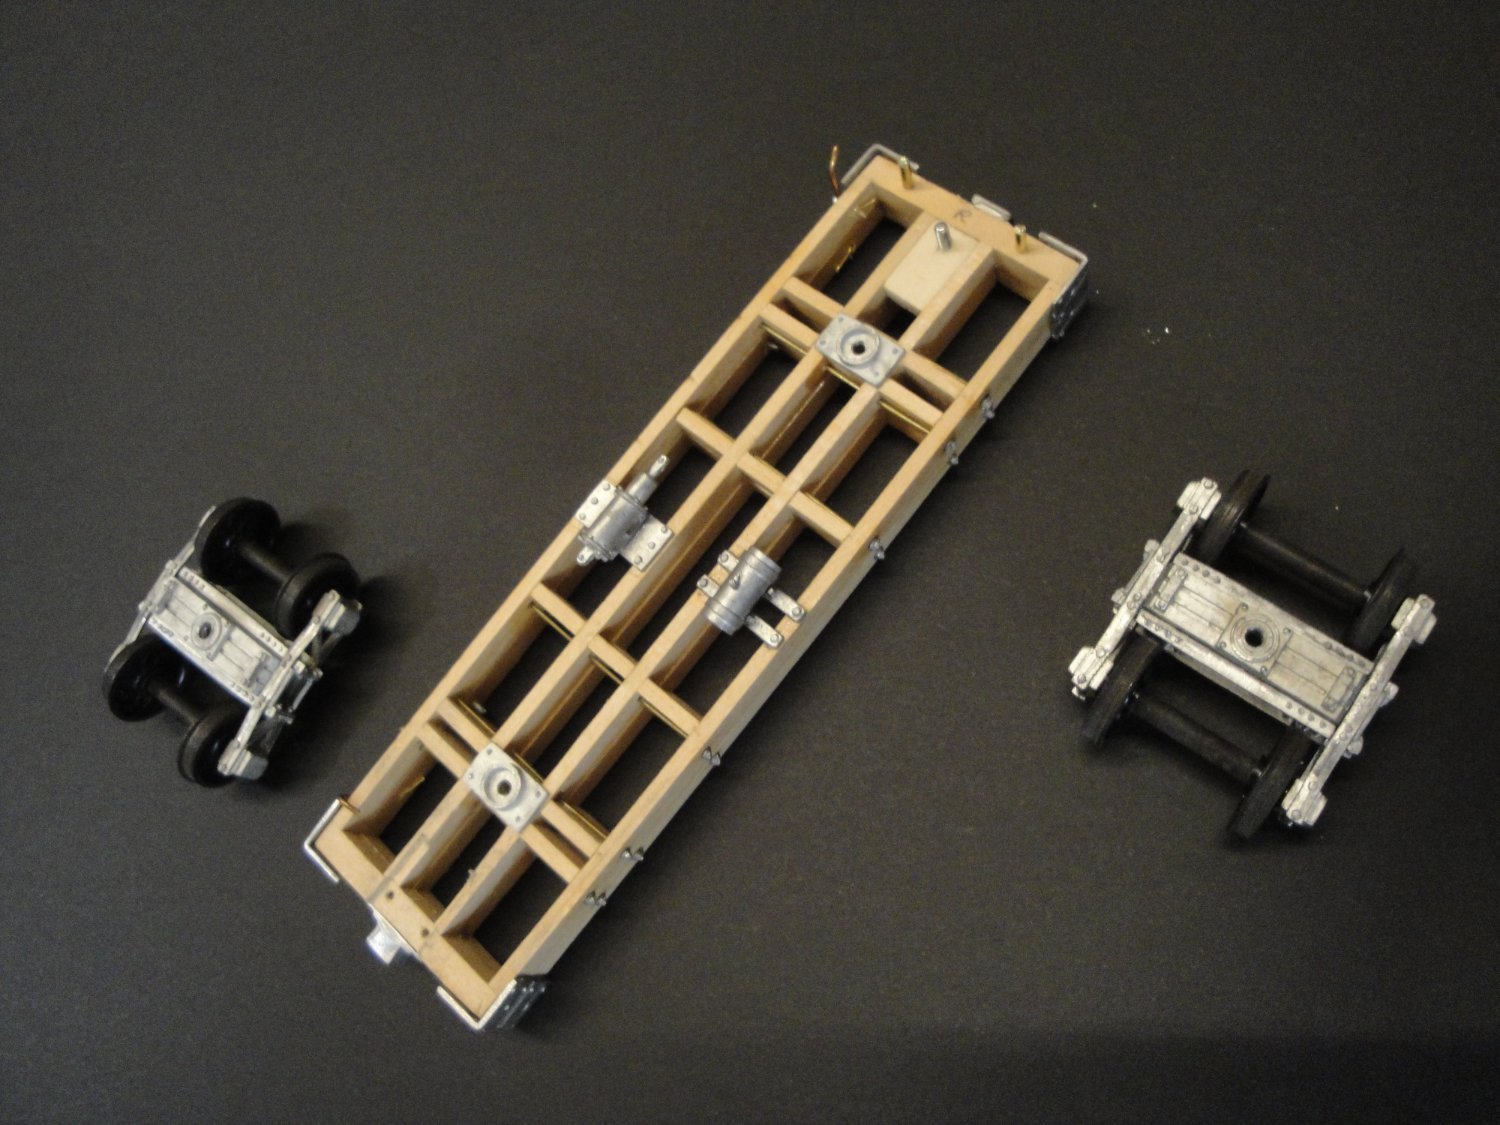
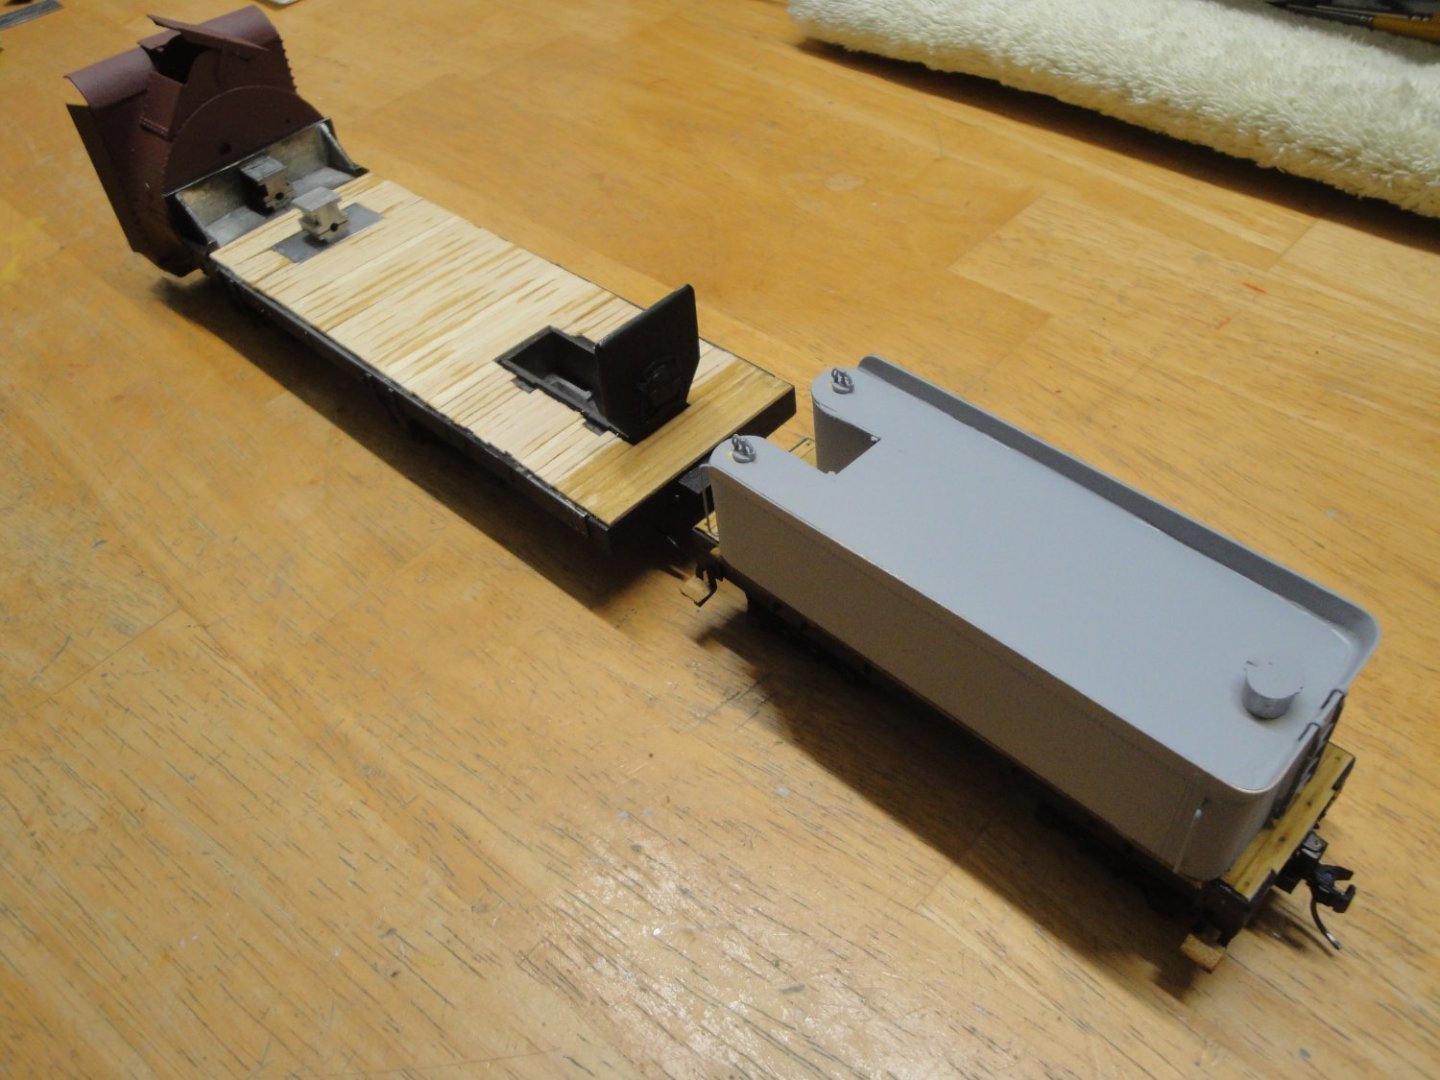
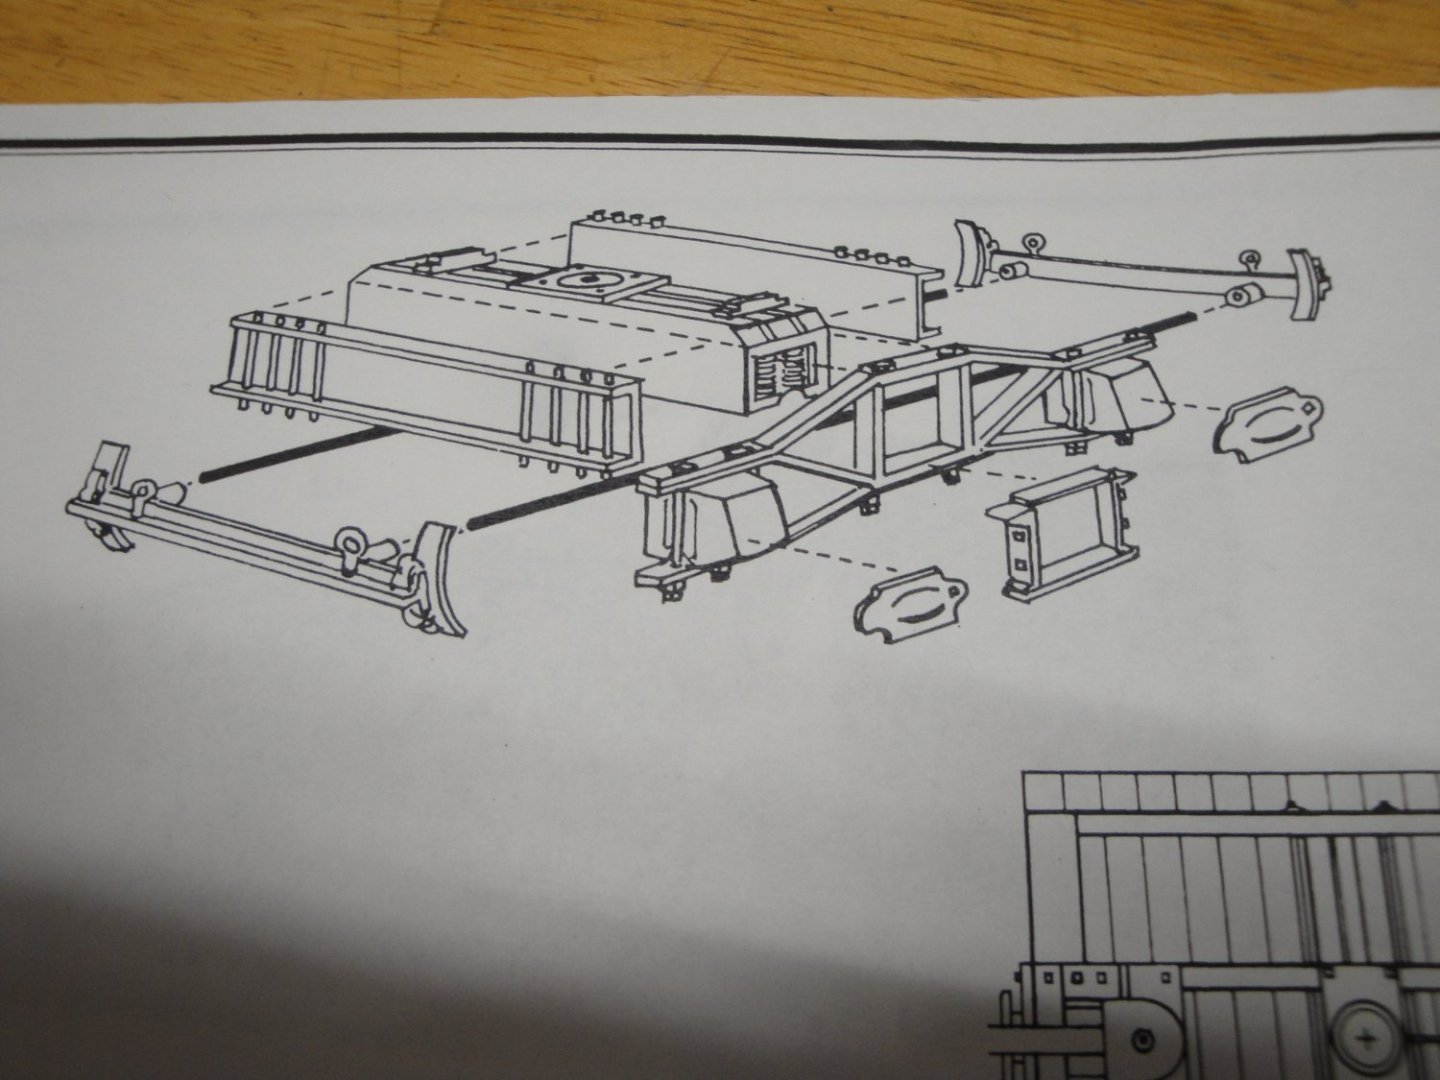
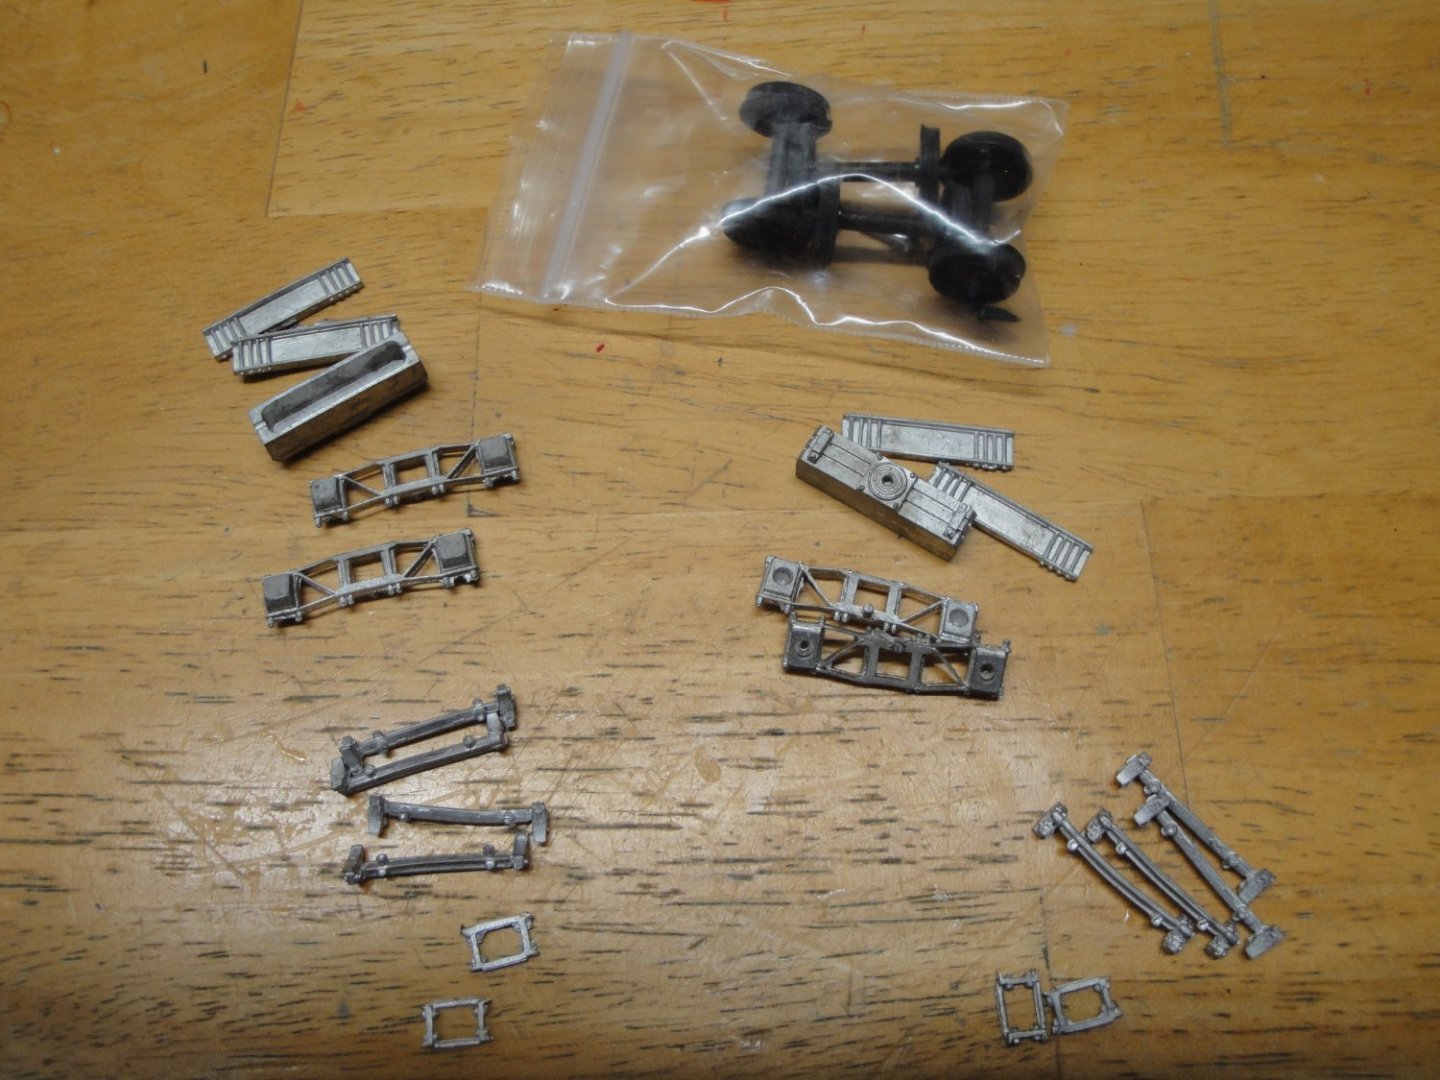
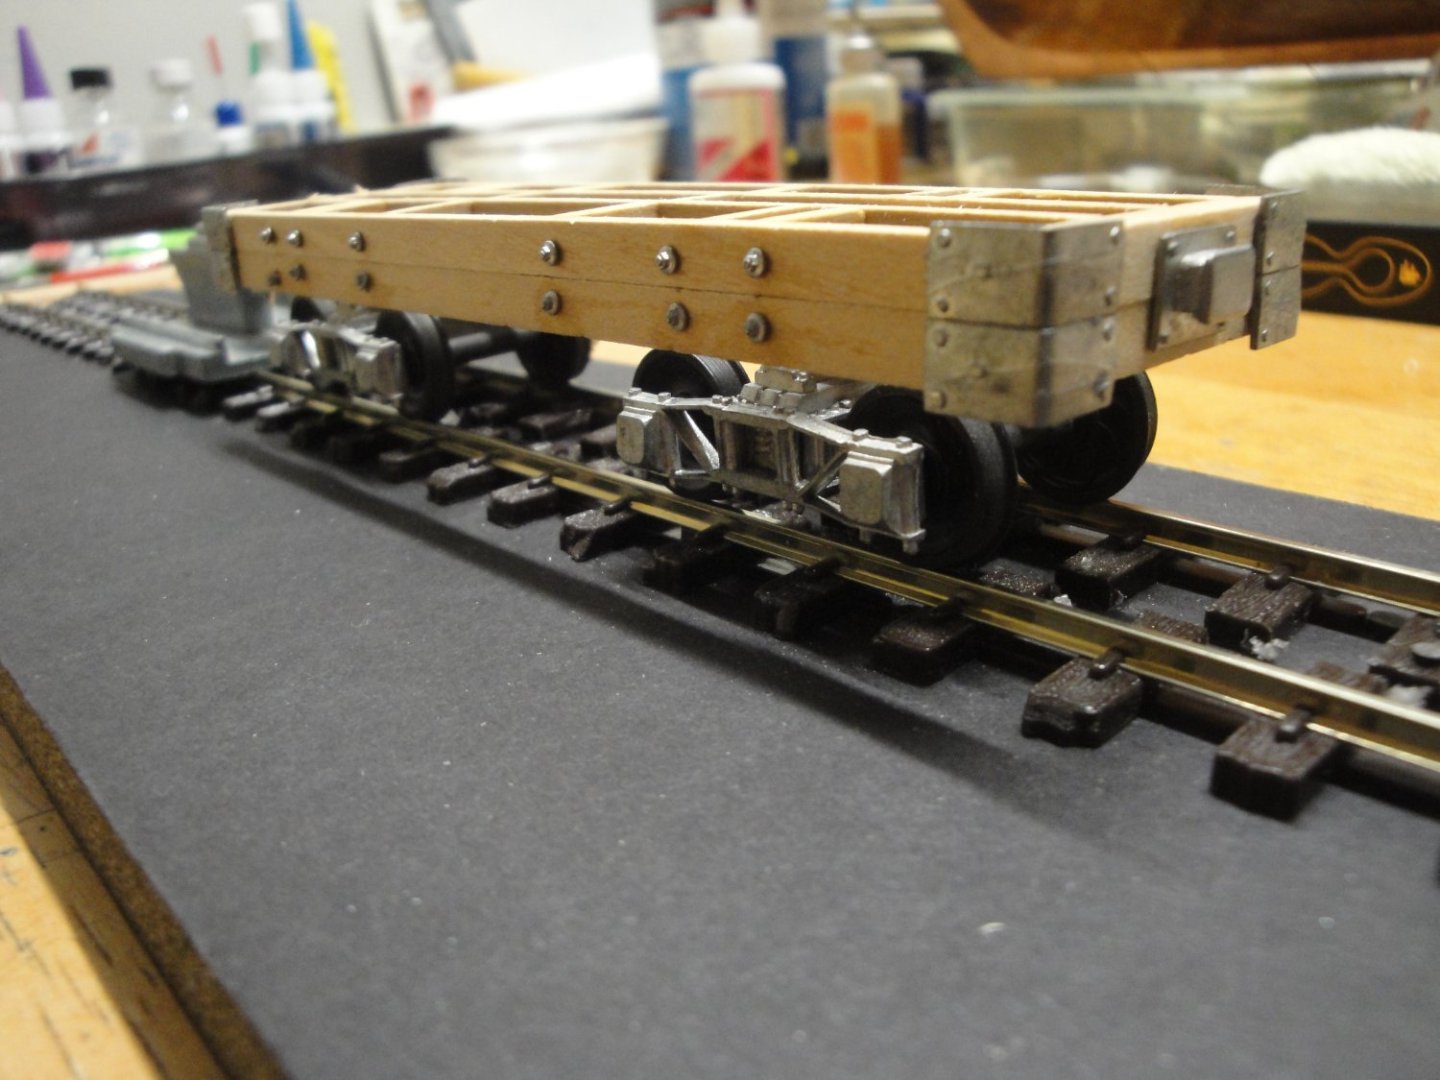
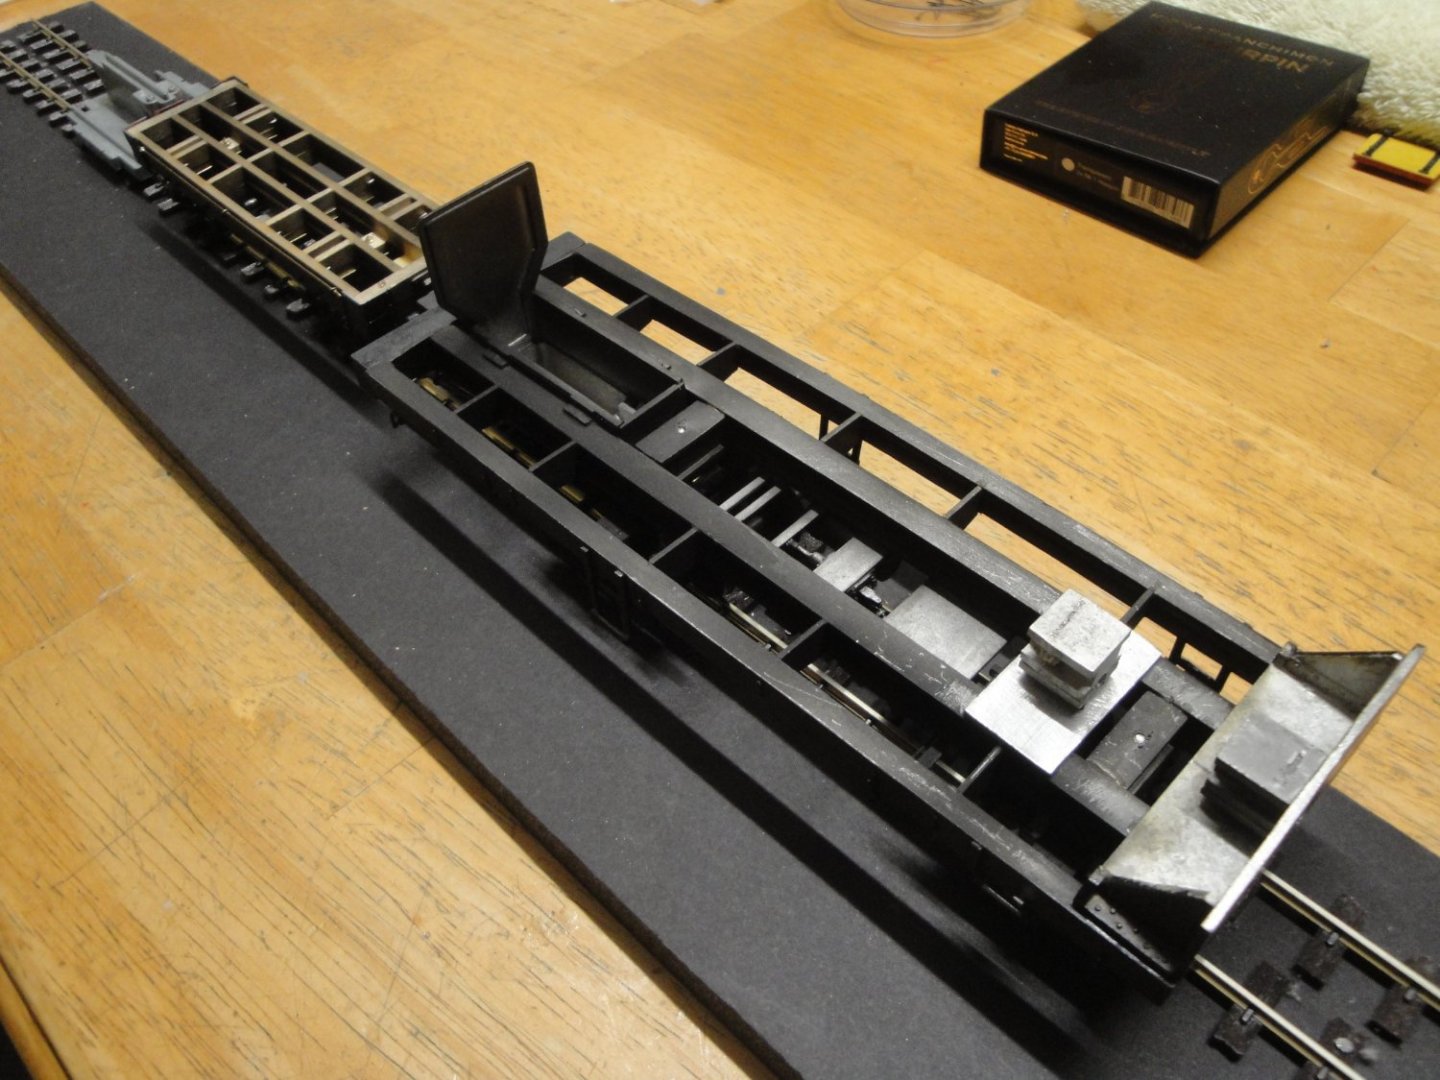
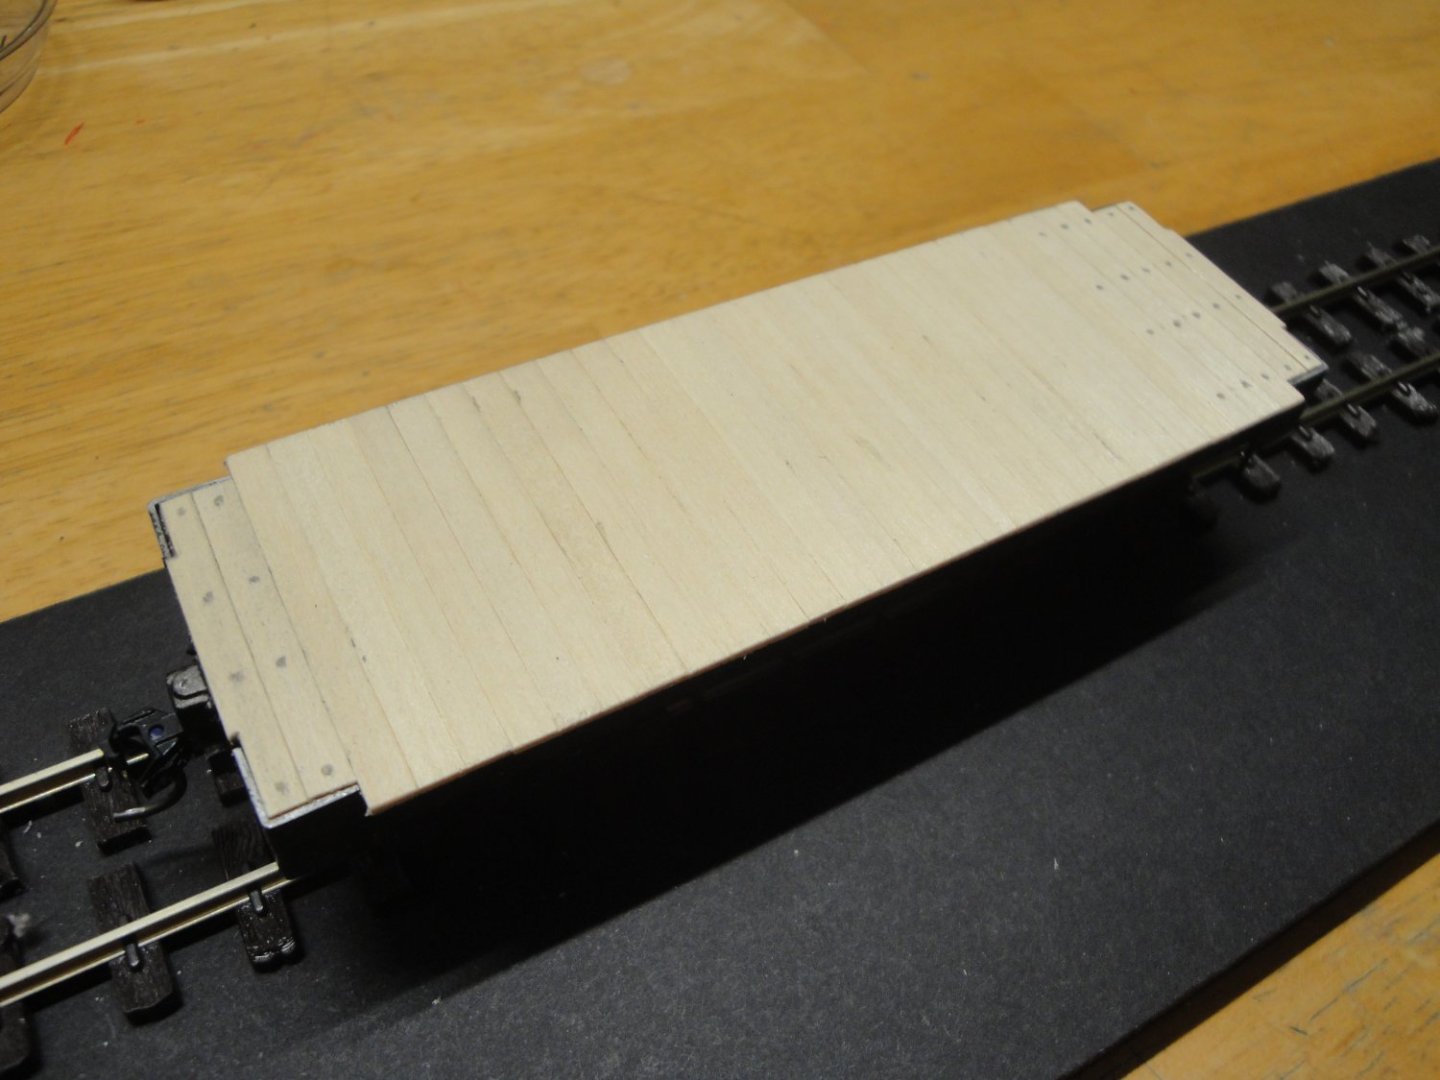
Assembly of the snowplow tender continues. I cannot really make more progress on the snowplow section until I have worked out all the heights and connections issues, between the two units. First thing first: the trucks. Always start with the trucks, as they are your foundations: Then, mount the trucks under the wooden chassis and check the heights with the snowplow and the KADEE On3 gauge: Install an On3 coupler in the rear: Height verification with the Snowplow section: It is lining up quite well. This kit is well thought out.... Installation of some underside details. It will be spartan as I do not like to build the braking system. It is not visible anyway. This is where we are at the moment: Planking of the tender takes place: the kit is very tight fisted, and the amount of planks is just right....no room for a mistake: Some ink to stain the wood and we can move back to some snowplow chassis details. Yves


-
I agree with you. I also have the kit and if I ever get to it (one day), I would definitely paint it with the early colors. Yves
- 155 replies
-
- 3
-
-
- Mikasa
- Merit International
- (and 1 more)
-
Are you going for the "grey plastic/shiny brass" version or will you paint it later on? Yves
- 155 replies
-
- 4
-
-
- Mikasa
- Merit International
- (and 1 more)
-
Bugatti Type 35B by CDW - FINISHED - Italeri - 1:12 Scale
yvesvidal replied to CDW's topic in Non-ship/categorised builds
Craig, I think you are perfectly right, as depicted in this beautiful painting of Graham Turner: Yves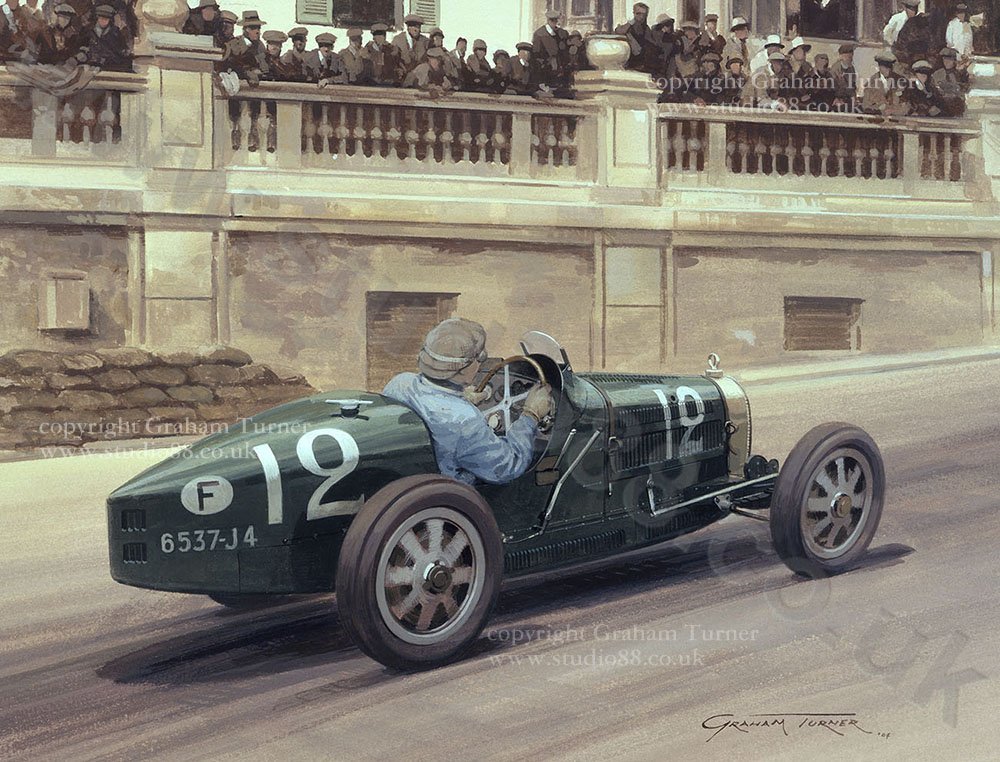
- 155 replies
-
- 10
-
-
Bugatti Type 35B by CDW - FINISHED - Italeri - 1:12 Scale
yvesvidal replied to CDW's topic in Non-ship/categorised builds
What a great choice..... The winner of the first Monaco Grand Prix, sitting in front of the Casino. Yves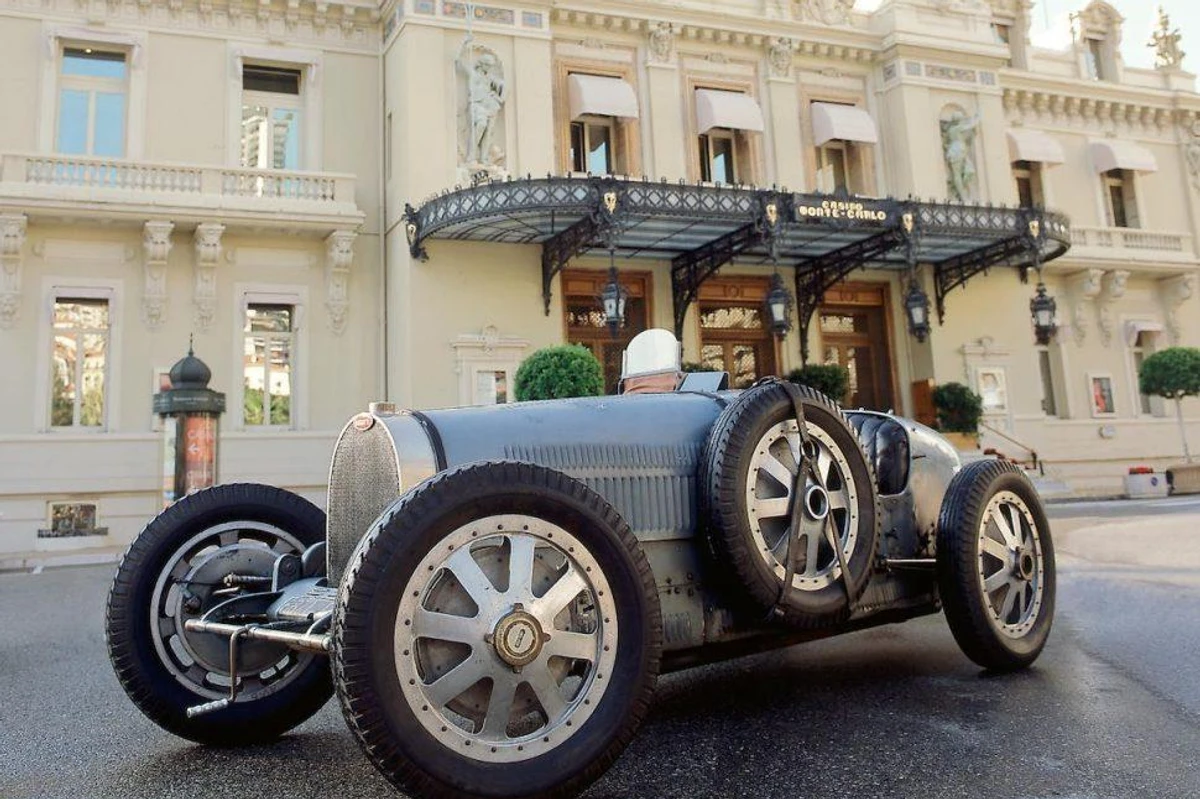
- 155 replies
-
- 10
-