HOLIDAY DONATION DRIVE - SUPPORT MSW - DO YOUR PART TO KEEP THIS GREAT FORUM GOING! (Only 51 donations so far out of 49,000 members - C'mon guys!)
×

Jim Lad
-
Posts
9,503 -
Joined
-
Last visited
Content Type
Profiles
Forums
Gallery
Events
Everything posted by Jim Lad
-
 Looks very nice in the case, Russ. John
 -
Russ - if it had happened in the normal course of events, I probably wouldn't have mentioned it, but the fact that cut it just as I was thinking that I needed to be careful ......... Pat - Not sure yet Pat; one of the curators has been making comments like, "Oh, that's nice. We don't have a pearler in the collection yet." John
- 745 replies
-
- 4
-

-
- francis pritt
- mission ship
- (and 1 more)
-
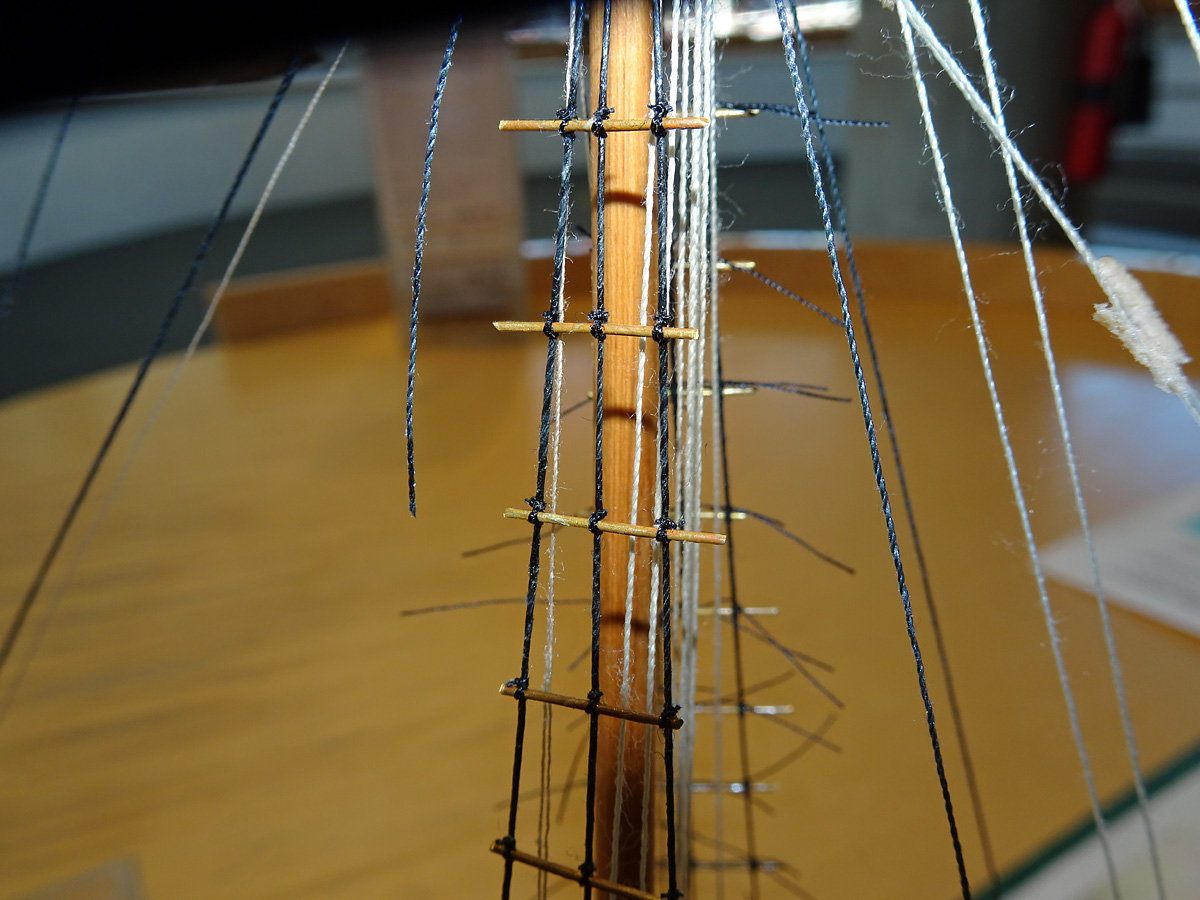
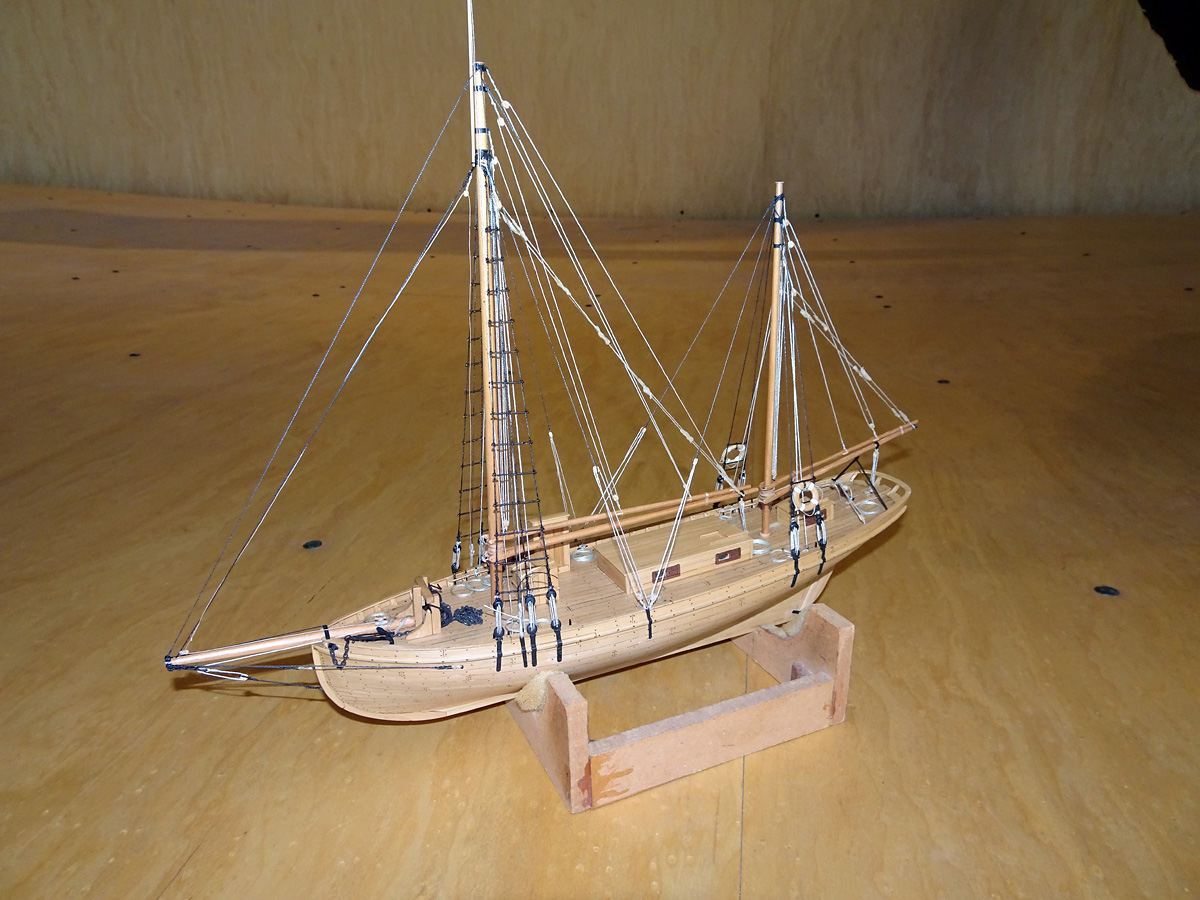
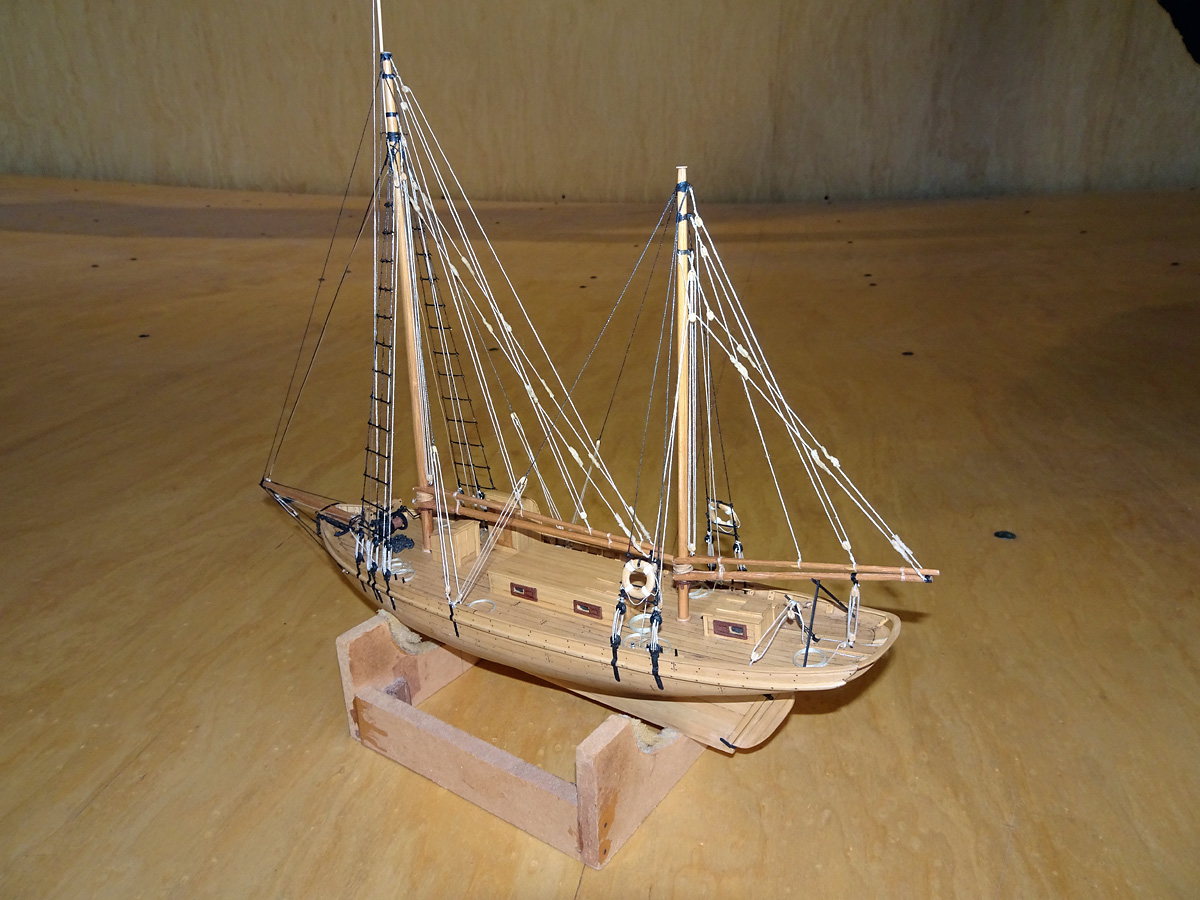
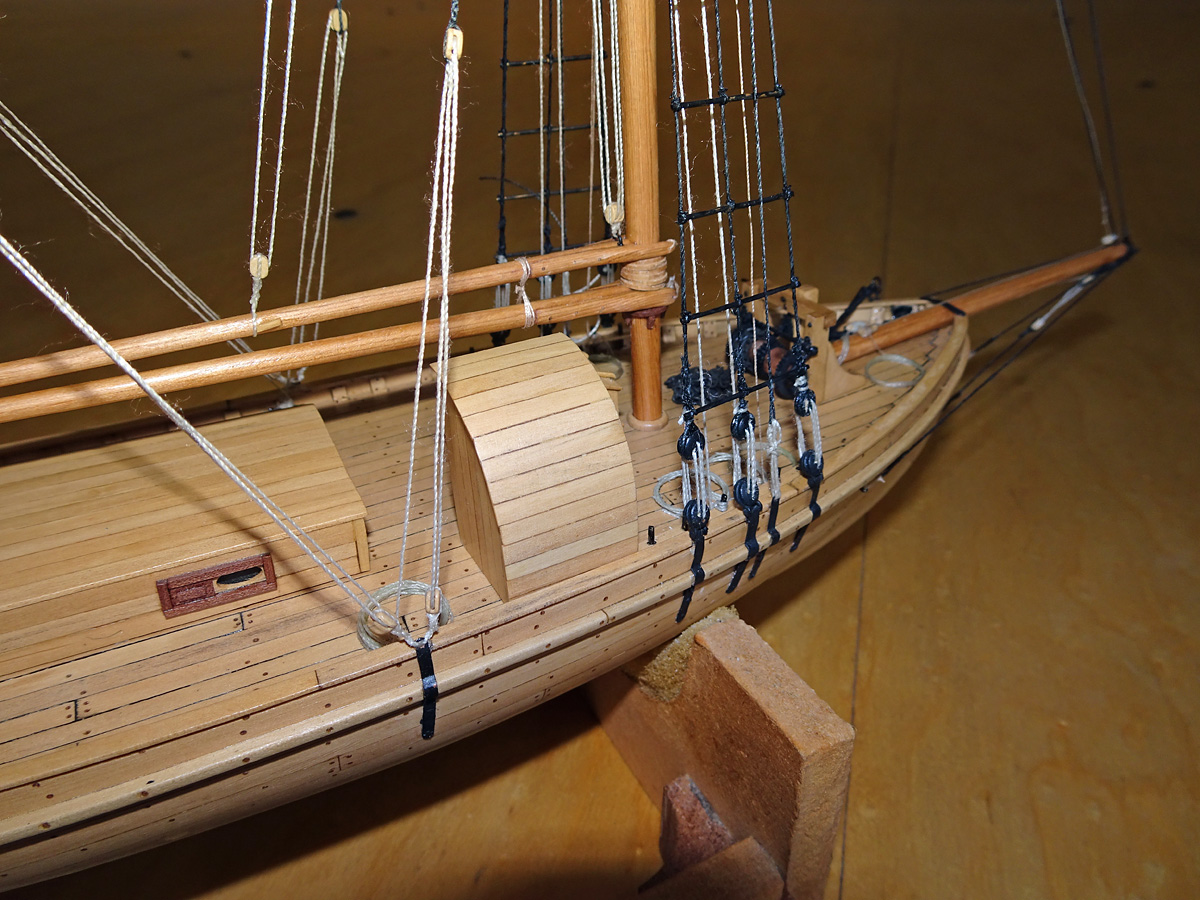
Nearly there! Had a good day for work at the museum last Monday (been away since then so unable to post) and have now come close to having the 'Pritt' completed. Just have to do the sidelights, which I had hoped to have complete for next Monday, but things aren't looking good at the moment. My first job last week was to trim off the fag ends from the ratline lashings. As I started trimming I thought to myself, "Better be careful here, or you'll cut the topmast shroud". Next snip and I cut the topmast shroud! It was an interesting exercise to extract the cut shroud from the masthead and splice a new one in place again, but it was soon done. Here's a photo of the dreaded cut shroud plus some photos of the model as it looks at the moment. John


- 745 replies
-
- 18
-
-
- francis pritt
- mission ship
- (and 1 more)
-
Hello, and a warm welcome to the forum from 'Down Under'. John
-
SS Mariefred by captainbob - 1:96
Jim Lad replied to captainbob's topic in - Build logs for subjects built 1901 - Present Day
Good to see that you're starting on one of those beautiful Swedish stermers, Bob. John -
Excellent work (again), Nils! John
- 2,625 replies
-
- 4
-
-
- kaiser wilhelm der grosse
- passenger steamer
- (and 1 more)
-
I have a head band magnifer, but don't use it now. I use a simple pair of magnifying reading glasses. The advantage of the glasses over the magnifier is that you don't have that 'beak' sticking out in front of you to bash into model detail while you're rigging. John
-
Hello Blaine, and a warm welcome to the forum from 'Down Under'. John
-
Hello, and a warm welcome to the forum from 'Down Under'. John
-
It's good to hear from you again, Helmut. It seems that you've had some really major health problems in the past and it's great to hear that you've been able to 'get back on your feet' again. John
-
I was away on holiday when you posted your original request. It may be of interest to you that sailing barges, or scow schooners, were a big part of the New Zealand coastal trade in the days of sail. There are a couple of preserved craft over there and quite a bit of documentation. John
-
Popeye, now we know how big the dolly winch is compared to a penny - but how big is the penny? John
- 453 replies
-
- 8
-
-
- thermopylae
- sergal
- (and 1 more)
-
Hello Bjønar, and a warm welcome to the forum from 'Down Under'. John
-
Introducing myself and already seeking advice
Jim Lad replied to kdm's topic in New member Introductions
Hello Keith, and a warm welcome to the forum from 'Down Under'. John -
A great action shot, Mark! The 'Maluka' looks like she's really charging down the harbour! John
-
Hello Dan, and a warm welcome to the forum from 'Down Under'. John
-
The model looks superb, Nils. It was quite usual for large ventilators to be turned by a gear mechanism. John
- 2,625 replies
-
- 7
-
-
- kaiser wilhelm der grosse
- passenger steamer
- (and 1 more)
-
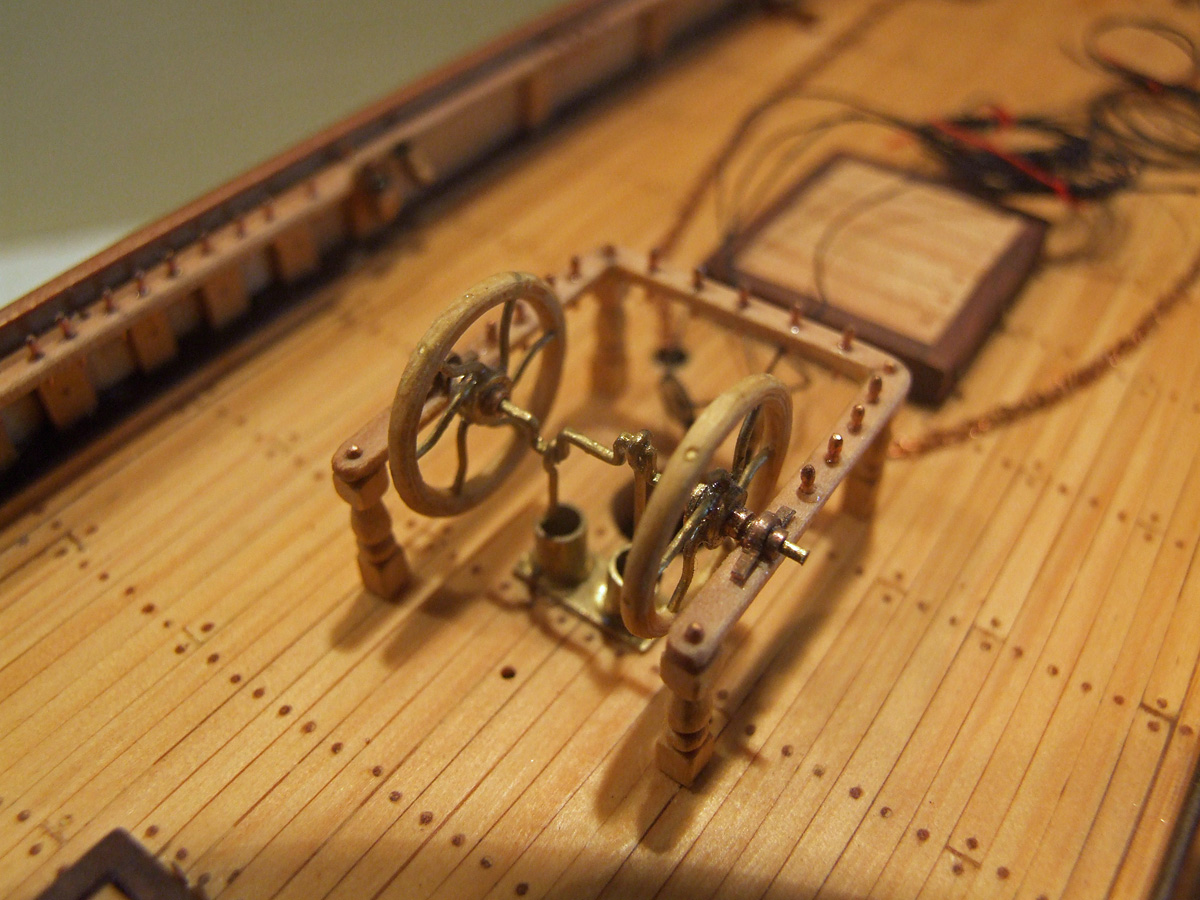
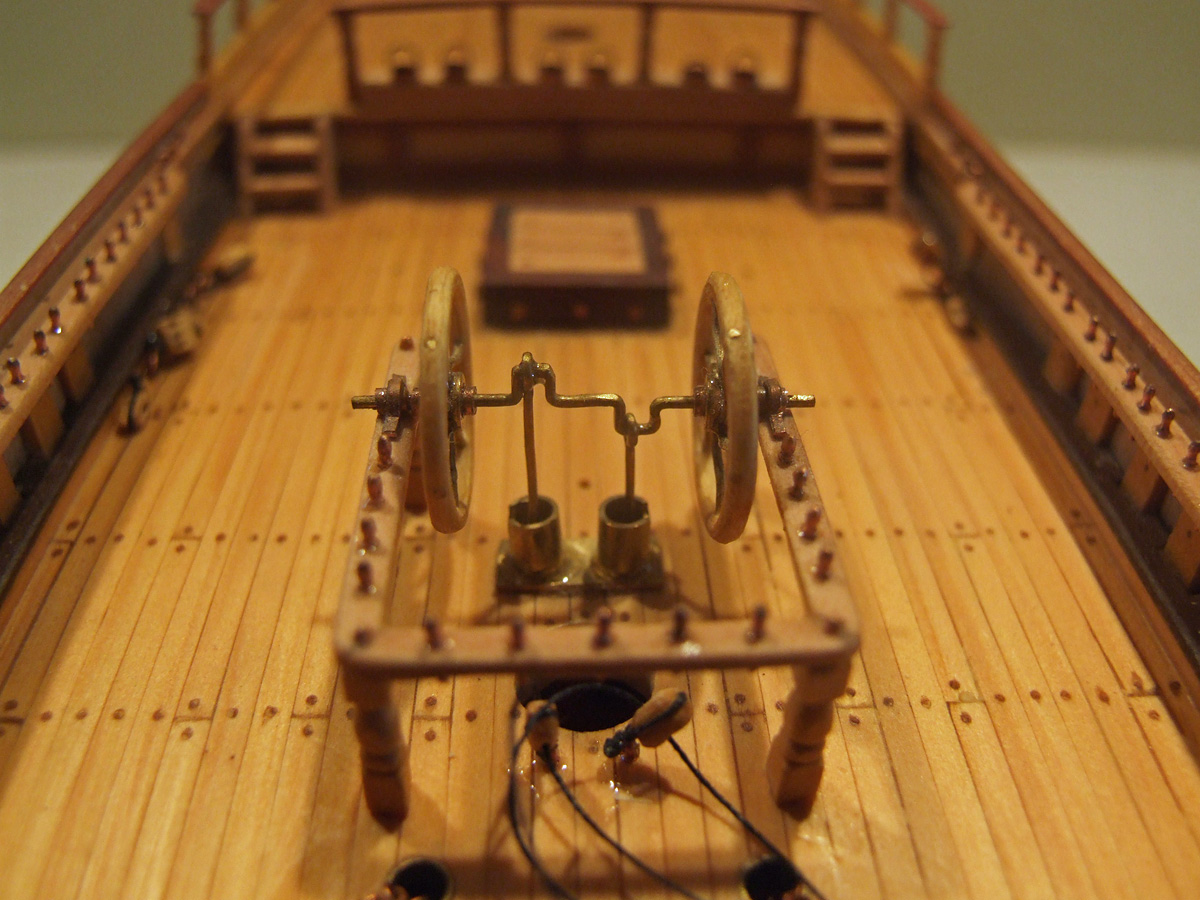
Popeye, Just for reference, these are the pumps on my model of the 'Nautilus' for reference. I would think that your pumps are the same type. John


- 453 replies
-
- 15
-
-
- thermopylae
- sergal
- (and 1 more)
-
next thing, Popeye, you'll have to put her in the water and try trawling for tiddlers! John
-
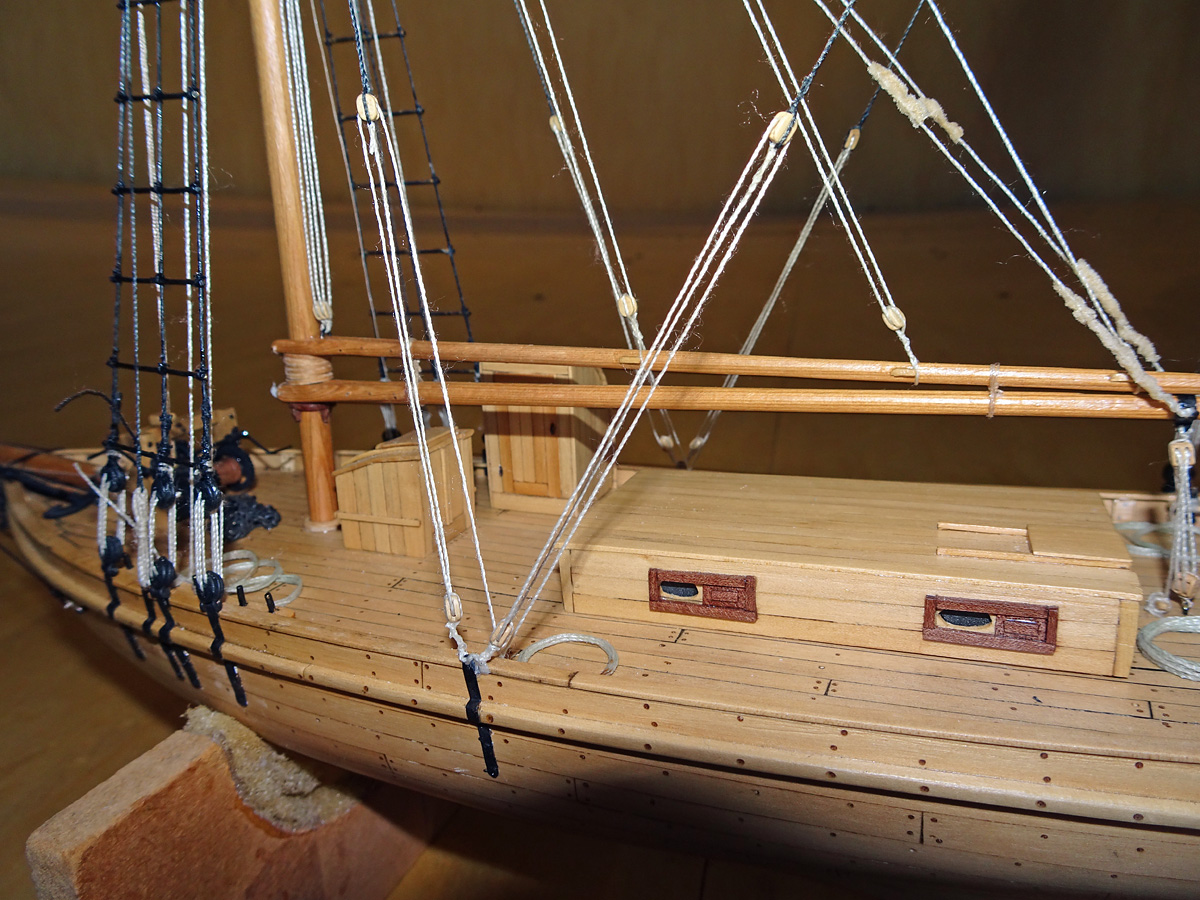
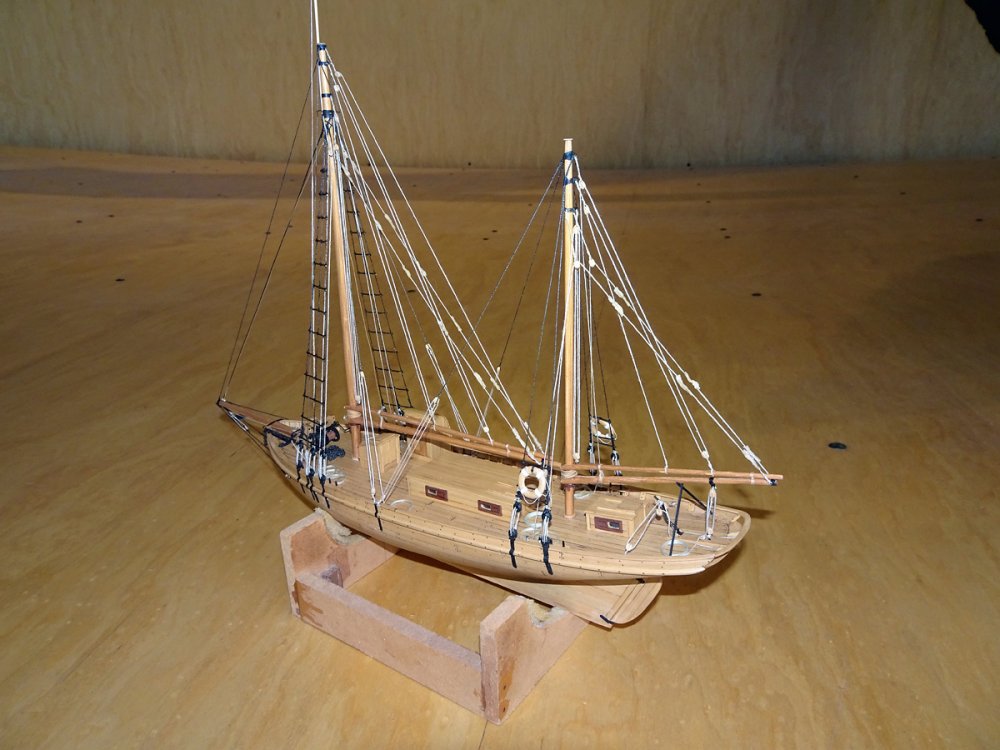
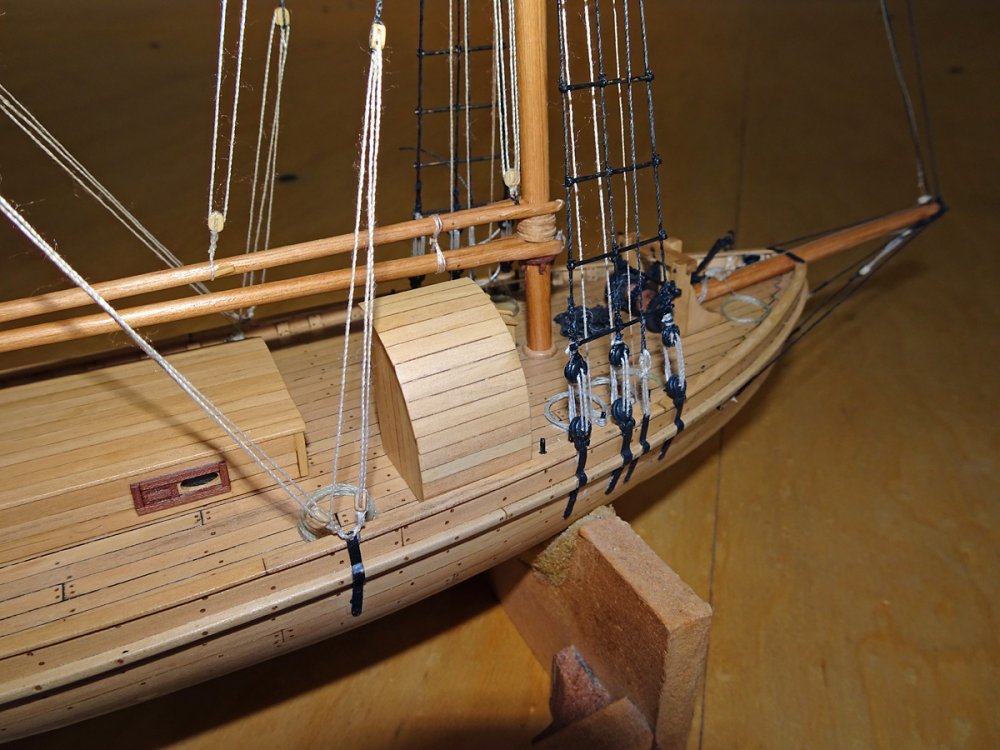
Lovely lines on this one, Russ. I love work boats! John
- 420 replies
-
- 3
-
-
- captain roy
- lugger
- (and 2 more)
-
More first class work on those companionways! John
- 346 replies
-
- 3
-
-
- terror
- polar exploration
- (and 2 more)