Jim Lad
-
Posts
9,594 -
Joined
-
Last visited
Content Type
Profiles
Forums
Gallery
Events
Everything posted by Jim Lad
-
 You're making good progress in spite of your problems, Meredith. I think I'd stay away from the el cheapo Chinese stuff unless you can give it a person good inspection before buying. John
 -
Thanks, Mark - I'm pretty pleased with the progress so far, but it's going to get pretty crowded under the for end of the cross trees once the lower square yard is rigged! John
-
Lovely work as usual, Ilhan! John
-
Just catching up, Mobbsie. Crikey! You don't hang about do you mate? I expect that by now you've got the other side finished. John
- 1,279 replies
-
- 1
-

-
- agamemnon
- caldercraft
- (and 1 more)
-
Andy, That's one of my favourite Far Side cartoons (yep, we've even heard of Gary Larson down here in Oz!) John
- 1,668 replies
-
- 1
-
-
- syren
- model shipways
- (and 1 more)
-
You're really rocketting ahead with this one, Popeye! You'll be onto the rigging before you know it! John
-
Nick, You only need to wax your thread if it looks a bit 'furry', however if you put a touch of glue on the tip of the line you'll find that the hardened end is much easier to thread through deadeyes and blocks. John
-
Looking good, Mario. I like the look of the deck as it is. I would think that a waterway or trim piece might make it look a bit fancy for that type of boat. By the way, if you don't get flight pay, do you get danger money for the cliffs and snakes? John
-
That jetty looks very realistic, Wefalck! John
-
cleats
Jim Lad replied to ross's topic in Discussion for a Ship's Deck Furniture, Guns, boats and other Fittings
Ross, A couple of cleats on the Endeavour replica - they may be helpful. John
-
Rigging sizes in relation to scale of model
Jim Lad replied to HKC's topic in Masting, rigging and sails
Nick, Danny and I both worked on the sheet originally for MSW version 1 (BGC - before great crash). John -
Bob, Swear; walk away for a while; have a cool beer and then back into it! The Dark Side demands its sacrifices at times - especially whan you're doing all the design work yourself - but the final model is always worth all the pain!! John
-
Thank you one and all. We're really looking forward to our time up north - it's hard work being retired! John
-
Tom, We do actually know a little of what the Supply looked like. Have a look at this painting by George Raper, a Midshipman on the Sirius. It's on the Natural History Museum site. http://www.nhm.ac.uk/nature-online/art-nature-imaging/collections/first-fleet/art-collection/historical.dsml?sa=4&lastDisp=gall&beginIndex=13&enlarged=trueimage John
-
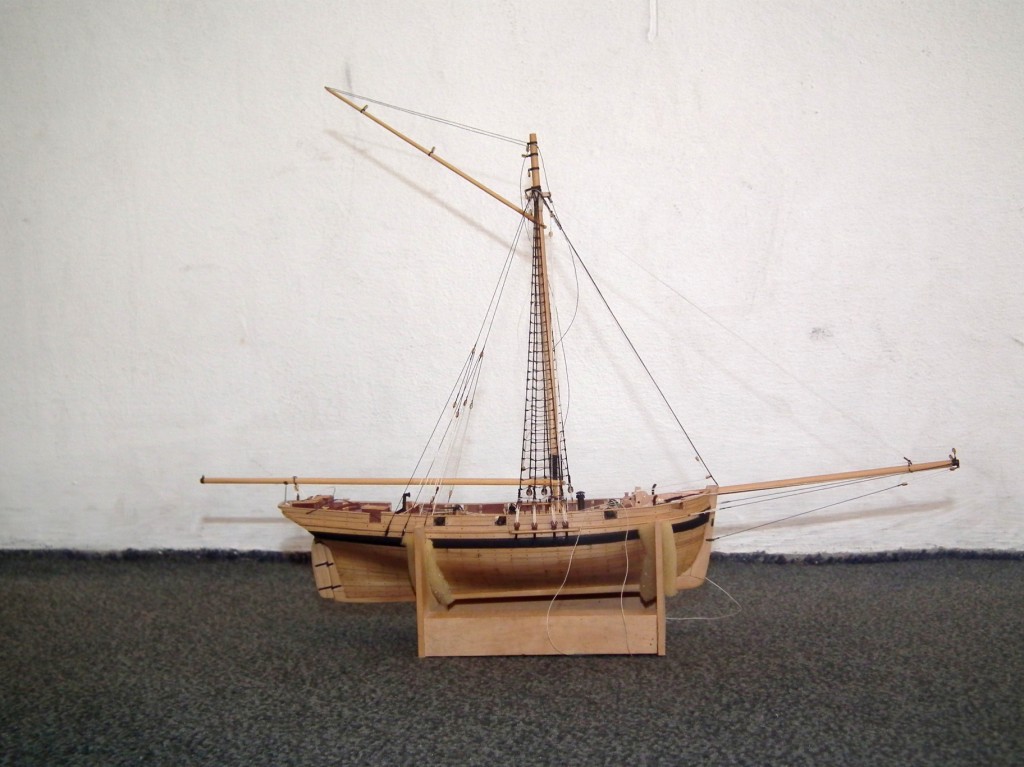
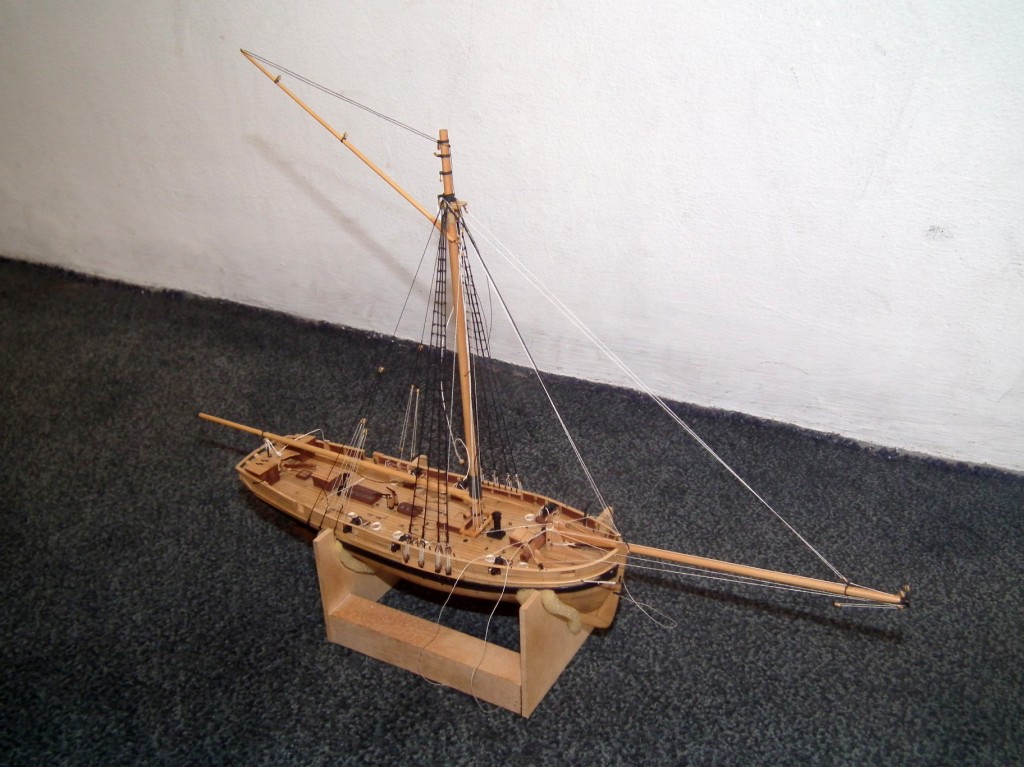
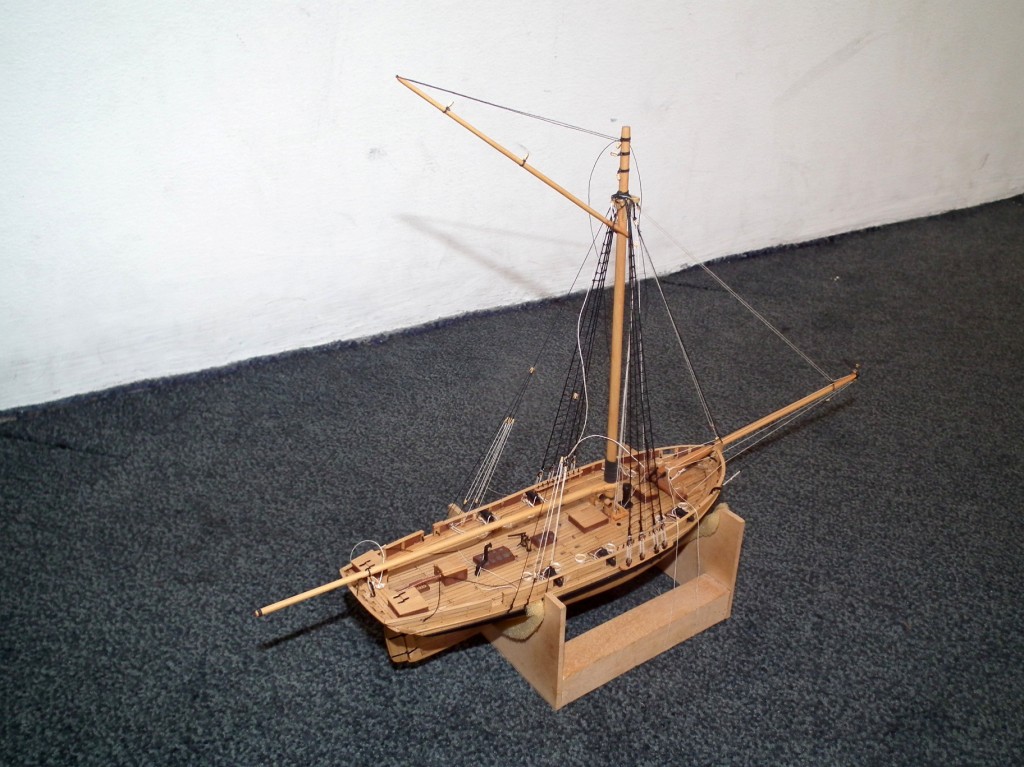
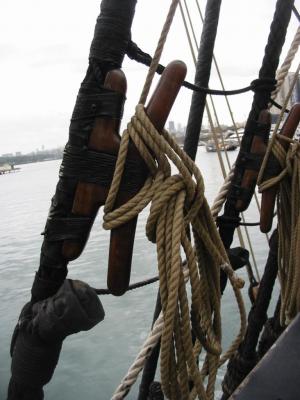
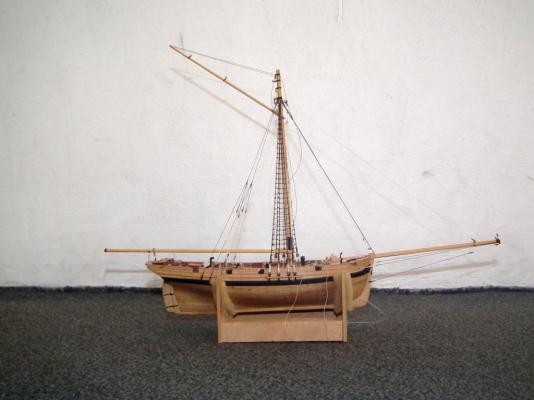
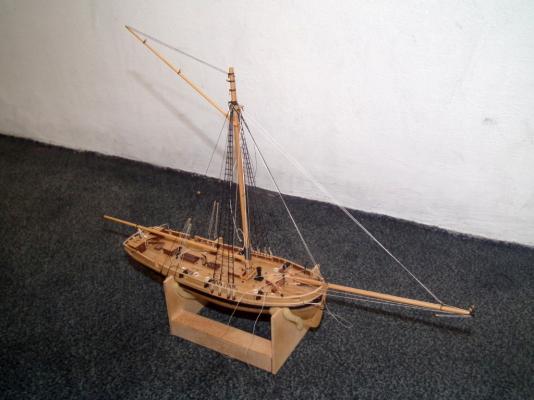
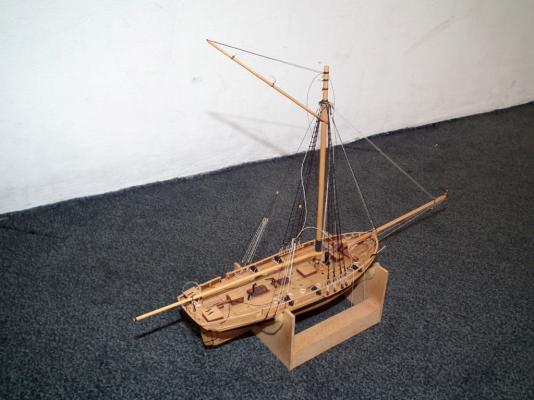
The spiders have been busy on the Stag again. The headsail rigging is now in place and the boom is set up, but not fully rigged as yet. The gaff has also been fitted but is still awaiting its rigging. She's really starting to look like a cutter now. The line running from the peak of the gaff to the masthead is a temporary expedient to hold the gaff in position until the peak halliards have been rigged. This will be the last update for a while as we're off to Queensland next week to visit family. John
-
HMS Forth Shipwreck: 19th Century British Ship Found Off Yucatan
Jim Lad replied to Kevin's topic in Nautical/Naval History
Very interesting, Kevin. John -
Thanks for all those photos, Mario. It looks like they built the outside of the hull and then just used whatever timber they could lay their hands on to strengthen the inside. Very different to our northern European tradition of boat building! John
-
Nicely done, Mario. You appear to have quite a few partial frames there. I assume that's the same configuration as the original boat? John
-
Now that's turned out very well, Grant! John
-
Scale planking
Jim Lad replied to S.Coleman's topic in Building, Framing, Planking and plating a ships hull and deck
Scott, You only need to double plank if you're planking over a POB hull. If it's framed then the scale planks have plenty of support. John -
Phew! That was a difficult planking job done well, Mario! Johnb
-
Very neat work, Juergen! John
-
Mario, Tha looks a lot of bending and twisting on those planks. Are you steaming them first? That usually tames them down. John
-
ancre Le Fleuron 1729 by rekon54 - 1:24
Jim Lad replied to rekon54's topic in - Build logs for subjects built 1501 - 1750
Just keep those beautiful pictures coming, please! John