flyer
-
Posts
1,016 -
Joined
-
Last visited
Content Type
Profiles
Forums
Gallery
Events
Everything posted by flyer
-
 Hi B.E. The planking looks good, especially in pictures 1295 - 1298, which show the most important viewpoints. However, if I'm interpreting your assistants facial expression correctly he's only appraisal criterion is: edible? yes/no Good luck in convincing him to do the treenailing.😉 Cheers Peter
- 574 replies
-
- 4
-

-
- cheerful
- Syren Ship Model Company
- (and 1 more)
-
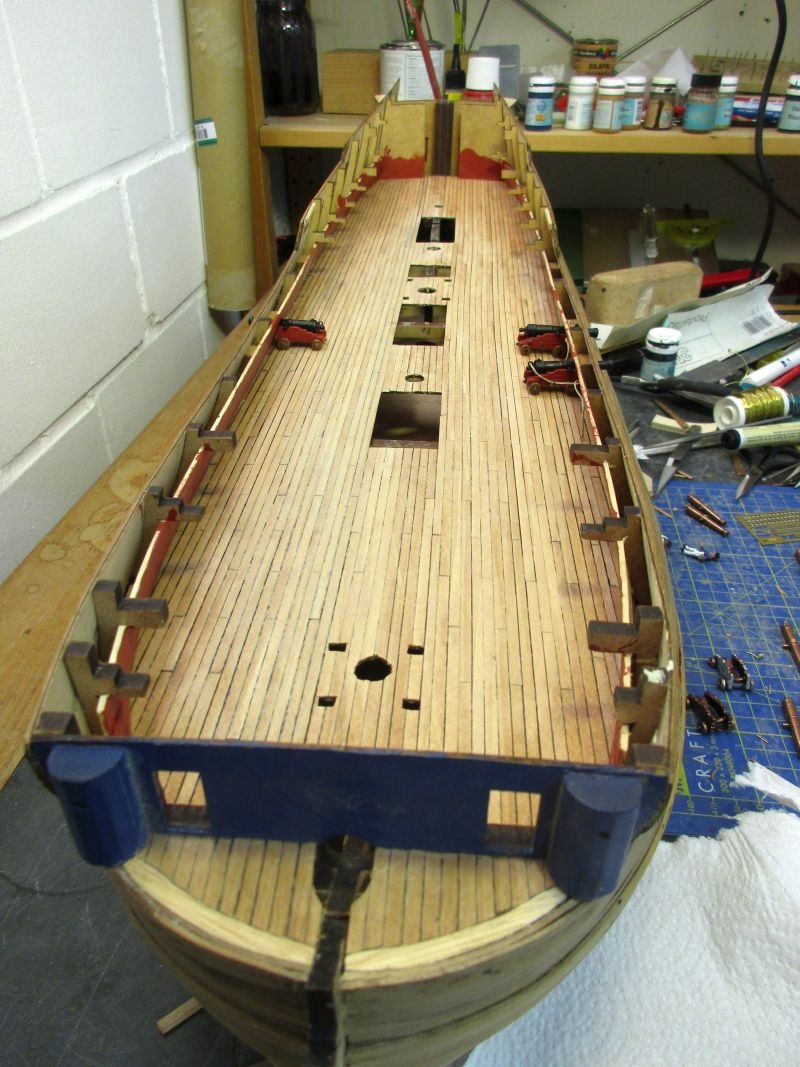
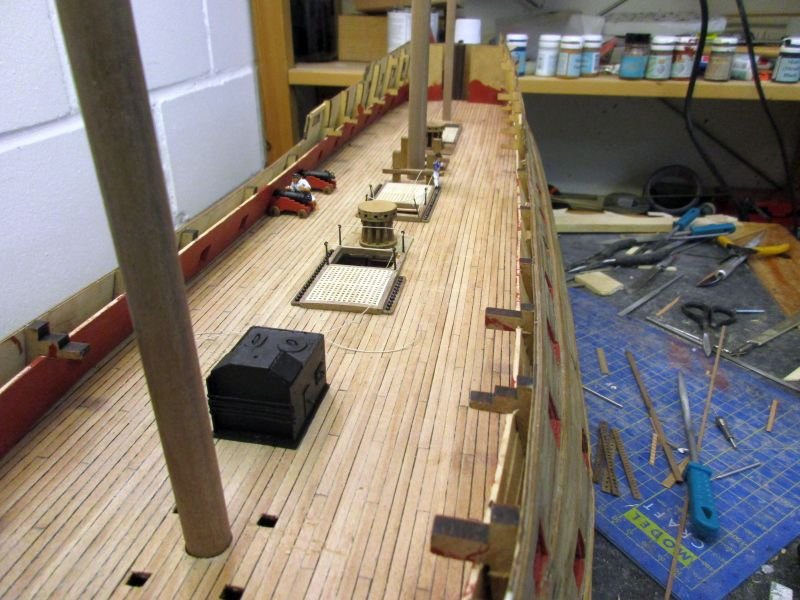
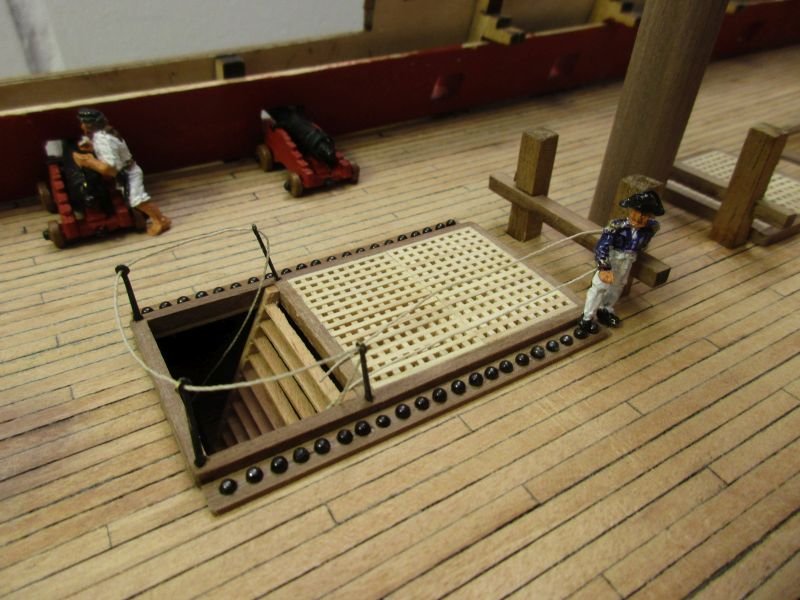
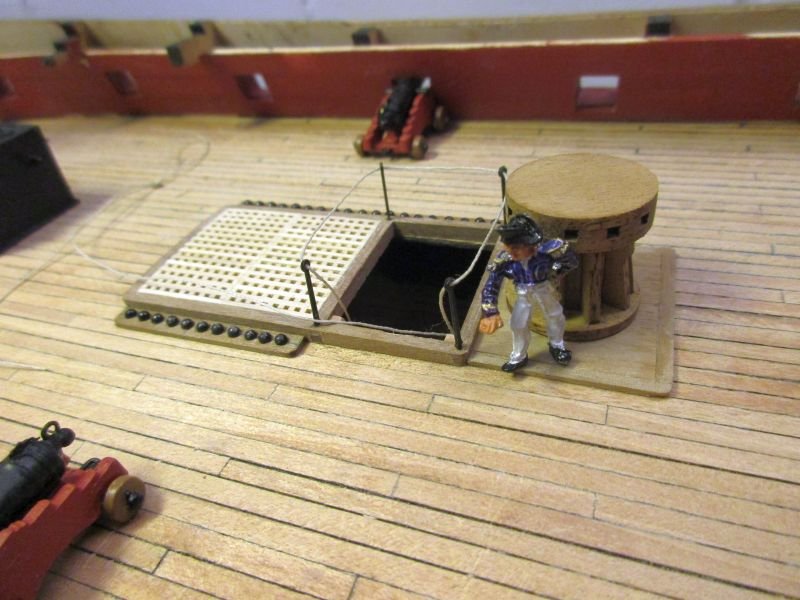
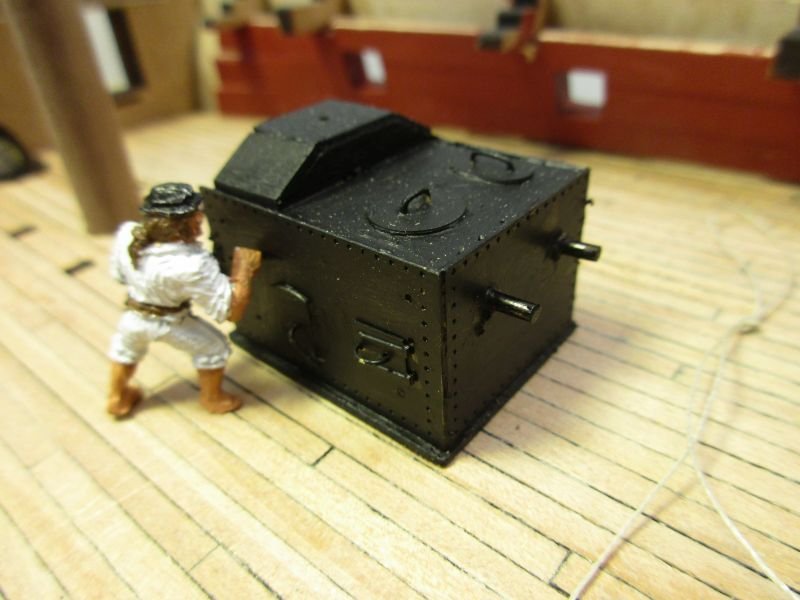
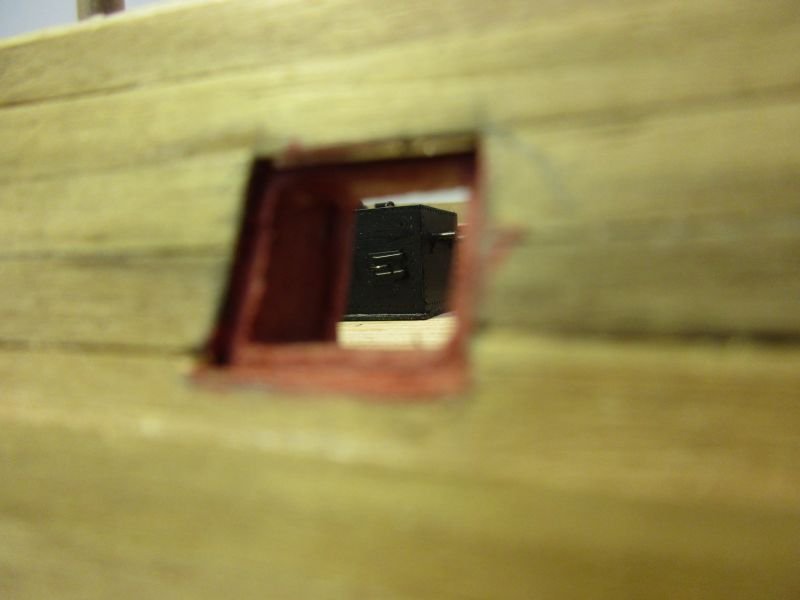
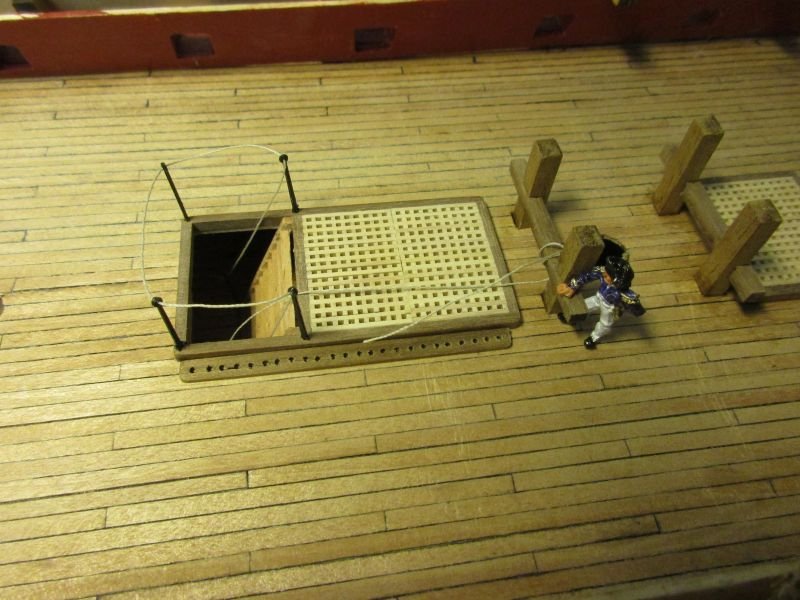
The equipment on the centre line of the upper deck is finished. The capstans are mounted on a 1mm pedestal framed with 2mm walnut. Finally I also managed to make shot garlands the way I wanted and filled them with 2mm balls. The part in front of the forward hatchway is left off to prevent the sailors stumbling over the shots. The stanchions are leftovers from Pegasus and stand smaller than those from the kit but would fit below the capstan bars. The oven will be placed directly on deck as any base below would be invisible after closing the deck. The masts, stanchions and the oven are only provisionally put there and will be removed for the next step - detailing, painting and coppering the outer hull. with only 2 guns in place the deck looks spacious the captain wonders a bit about the carpenters many tries for the shot garlands main hatchway forward hatchway and capstan polishing the oven ...and what will later be visible of it - but only after removing a gun

- 366 replies
-
- 7
-
-
- bellerophon
- victory models
- (and 2 more)
-
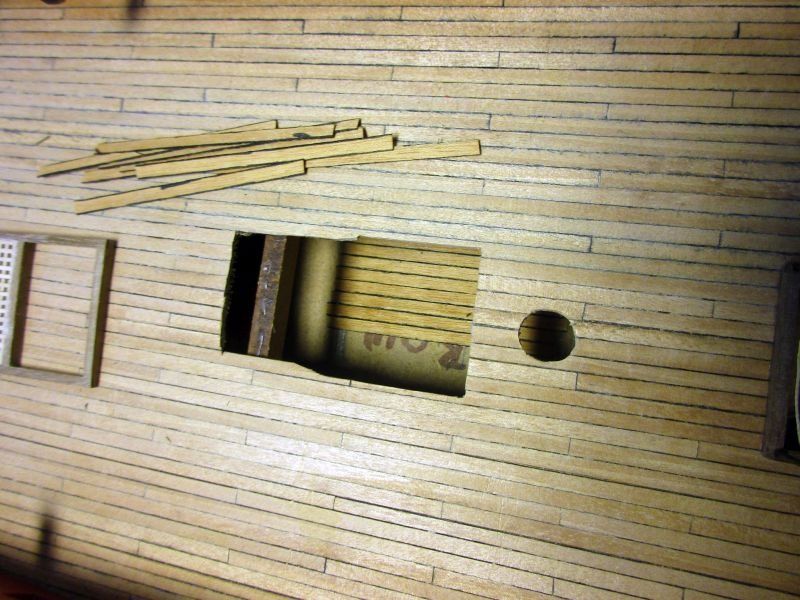
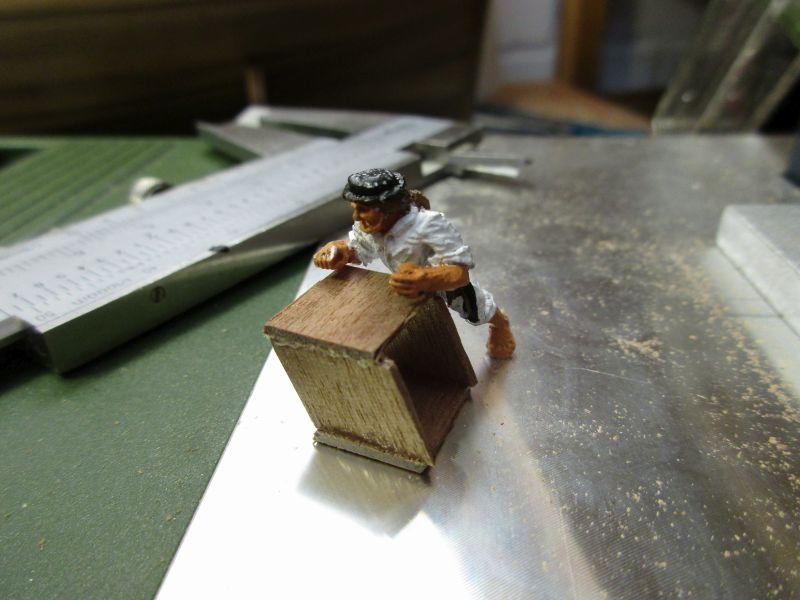
Presently I'm working on the 'furniture' of the upper deck. The oven is finished and set aside. It is a very nice detail - a pity it won't be visible on the finished model. The hatches and ladder ways are nearly done. However first I had to plank parts of the gun deck through the hatches. This would better have been done before installing the upper deck but it worked somehow. An unsolved problem are the shot garlands. Those furrows shown on the plans don't seem practical as the balls will roll and perhaps jump it when they're not full e.g. during an action in a lively sea. I try to fabricate boards with holes for the individual shots as seen on other models. This isn't easy. After splitting the first three attempts lengthwise I noticed that those cannon balls seem rather big. I found them to be 2,5 mm which is too big. For an scale 1/72 18pounder they should be less than 2mm. Fortunately I found some old 2 mm balls - a 30 years old leftover from the Vasa - which will be a better fit. So the next few tries will be with smaller holes. I wonder also about the wooden rail around the forward hatchway, shown on the plan. It stands in the way of the forward capstan and differs from all the other rails. If I have enough parts it will replace it by stanchions and rope, similar to the others. planking the gun deck - the hard way the captain examines one of the attempted shot garlands and is not happy (stanchions and rope are provisionally fixed and will be removed for gun rigging)
- 366 replies
-
- 9
-
-
- bellerophon
- victory models
- (and 2 more)
-
Hi B.E. Your Cheerful comes along very nicely. There is much to say for building smaller ships as you can concentrate on every aspect and detail while when building a 74 you have to take some shortcuts or take an eternity to finish. However, I'm a bit confused about the run of the planks. As I understand you are following Chuck's planking pattern which is based on an original plan. From some angles the run of your planks looks fine (pictures 332,336) while others give the impression of a distorted run (306,331). Most planking tutorials emphasize that you should avoid bending planks sideways - something you definitely have to do. I got the impression that the small tape you used as battens did allow more lateral bending than a wood strip and therefore created a pattern with laterally bent planks. On the other hand the frontal view onto Cheerful's bow looks fine while on my models, where I usually start tapering with or just below the wales, I can keep a natural run on the planks but get a rather crowded bow planking and need quite a few drop planks. I don't mean to criticize your work, I just wonder if you are happy with the way the planks are running - especially the one above the garboard? Do you think this is how it was done on the prototype and wood will eventually give up its tendency to warp? Cheers Peter
- 574 replies
-
- 2
-
-
- cheerful
- Syren Ship Model Company
- (and 1 more)
-
Hi Jacek It is a lovely lady but she moves some quite some water - even in scale 1/72. I still have no idea where to place the finished model but as we have room in the house after some of the children left home the admiralty tolerates it. To soften up your admiral (and even to improve your skills in the same time) you could first build a smaller vessel, such as Caldercraft's Pickle or the Lady Nelson from Victory Models. Those smaller builds look quite elegant especially if you manage to hoist sails. They don't take up much space and elegance should be appreciated by a Lady Admiral... Cheers Peter
- 366 replies
-
- 1
-
-
- bellerophon
- victory models
- (and 2 more)
-
The gun carriages have now all been reworked. Those which will not be visible below the forecastle and quarter deck only got a reworking of their front part which will be visible through the gun ports. Also those barrels will not get the full details but will be used as cast. To paint them I finally found that a first coat with a simple big black marker works well as base for a thin second coat of Caldercraft's metal black paint. The markers paint seems to be aggressive enough to remove all traces of fat and is thin enough not to smear any details. Unfortunately it's to shiny to leave as finish. Just for fun I provisionally put the guns on one side in place to have a look at the lady's teeth. reworking of the 'hidden' gun carriages and barrels The lady's teeth are quite impressive
- 366 replies
-
- 3
-
-
- bellerophon
- victory models
- (and 2 more)
-
Hi Martin Don't give up the ship... just because the captain is - entre nous - a cheating, lying, stupid bully. There are still a lot of decent crewmembers aboard. Would love to share that beer (or a bottle of merlot) anyway.🍻 Cheers Peter
- 366 replies
-
- 1
-
-
- bellerophon
- victory models
- (and 2 more)
-
Hi Rob Your Granado is turning out very nice and you certainly made a brilliant recovery from your problems with the wood for the second planking. You even make me rethink my decision never to show treenails on my models. Although they usually show a bit more prominent than the scale would request they do add a feel of reality to a model. Cheers Peter
-
Hi Martin Oh, it's a lady. Perhaps she looks a bit wrinkled but definitely handsome. We did a daytrip on a big catamaran to some outlying islands but as they had a tight schedule and unfavourable wind they motored all the way. One of my daughters will visit Vancouver island later that year which seems to be just north of your vacation place but in a different country - although she loves the US she will stay away as long as Nr. 45 occupies 1600 Pennsylvania Ave. Nevertheless both places seem to offer great nature and in the case of your place even a rainforest. You will however have to steer clear of the cougars and bears which - I believe - are a bit less friendly than the big tortoise. Take care Peter
- 366 replies
-
- 1
-
-
- bellerophon
- victory models
- (and 2 more)
-
Hallo Nils Congratulations on another masterpiece! I'm glad those 'heathens' are just raiding your garden and I don't have to fear an encounter when travelling in the Mediterranean. Peter
- 692 replies
-
- 7
-
-
- eagle of algier
- chebec
- (and 2 more)
-
kit review 1/72 HMS Vanguard 1787 - Victory Models/Amati
flyer replied to James H's topic in REVIEWS: Model kits
Oh and the black cartridge paper is extremely useful if you want to make iron hoops or bands. Just cut a small stripe and you could use it in the raw or with an additional coat of metal black. So far it was used to make the iron bands which hold the yaws of a gaff to the boom or mast bandings or a spectacle plate... Wherever iron bands or plates are required you can make them with cartridge paper. Peter- 18 replies
-
- 3
-
-
- victory models
- elephant
- (and 3 more)
-
kit review 1/72 HMS Vanguard 1787 - Victory Models/Amati
flyer replied to James H's topic in REVIEWS: Model kits
What you say is all true. Being about a year into the build of Belllerophon I would like to share some additional impressions. The big black mark on this kit are those cast carriages for guns and carronades. Very detailed made they fit no known prototype and I can only wonder that so much resources went into so obviously wrong and pretty useless parts. I still hope for a correction by Amati as it was done for the Fly/Pegasus kit although it would be too late for my build anyhow. I didn't particularly like the dummy guns for the lower gun deck and I think with some slight alterations to the kit it would be possible to rise the false deck onto the level of the gun deck, provide some simplified carriages and have full guns on that deck. Another problem is that the stern decorations for Bellerophon are still white metal. Nevertheless I will try to use them and I thrust Amati so far that I hope to find an acceptable solution with them although I will have to bend them even more as I increased the bulge of the stern. Generally you should look at the plans somewhat critically as there are several questionable details. Not only details of the stern could be reworked. Another question is also why the upper gun deck and the deck part in front of the beakhead bulkhead are not on the same level. I left that open and built as instructed by the kit but I think this detail is wrong. I'm sure there will be more questions as the build goes on. However I would like to confirm that this is a great kit offering the possibility to build wonderful models and I never regretted to have bought it - but please change the gun carriages. Have fun! Peter- 18 replies
-
- 6
-
-
- victory models
- elephant
- (and 3 more)
-
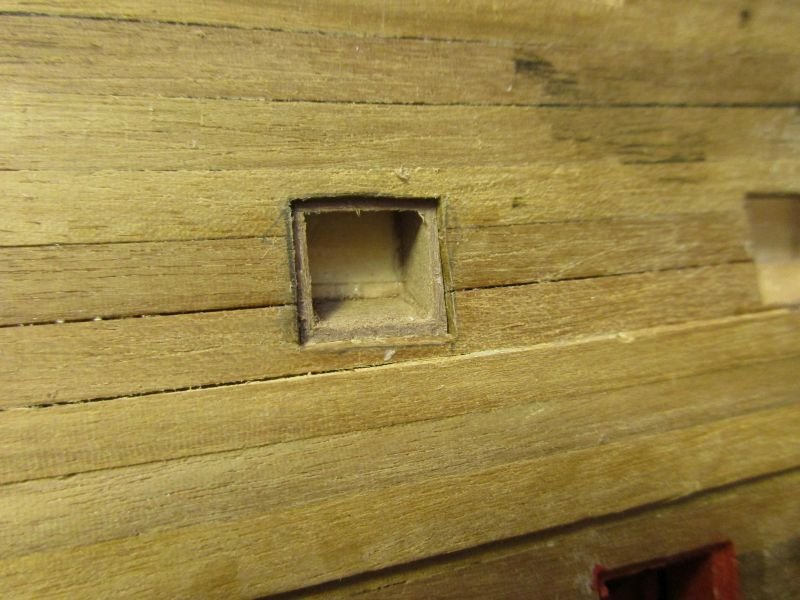
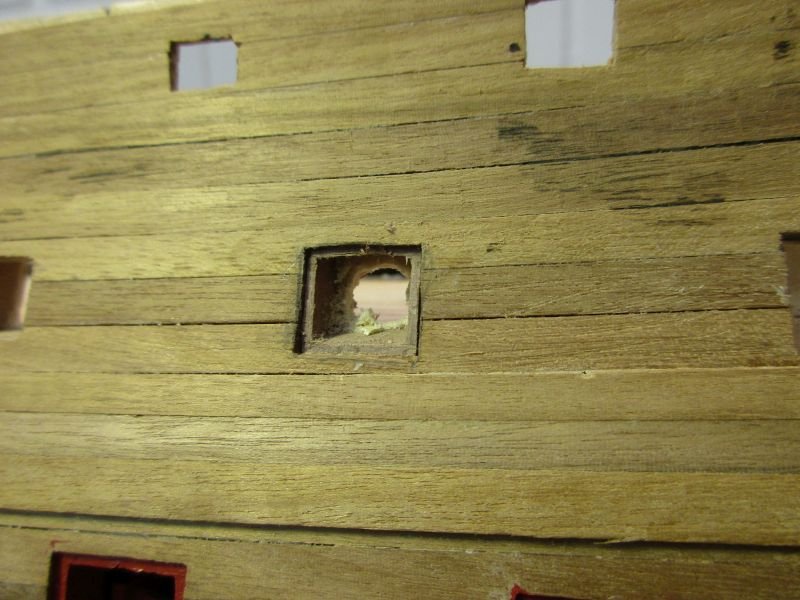
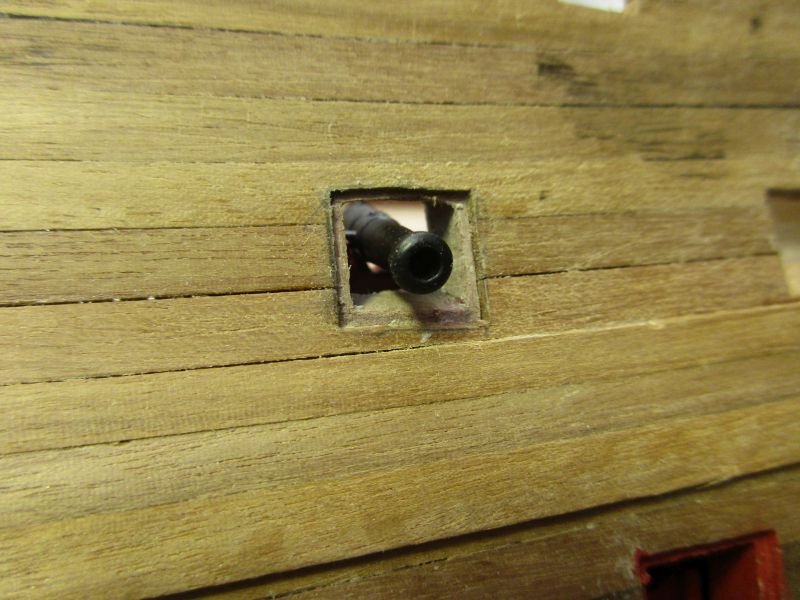
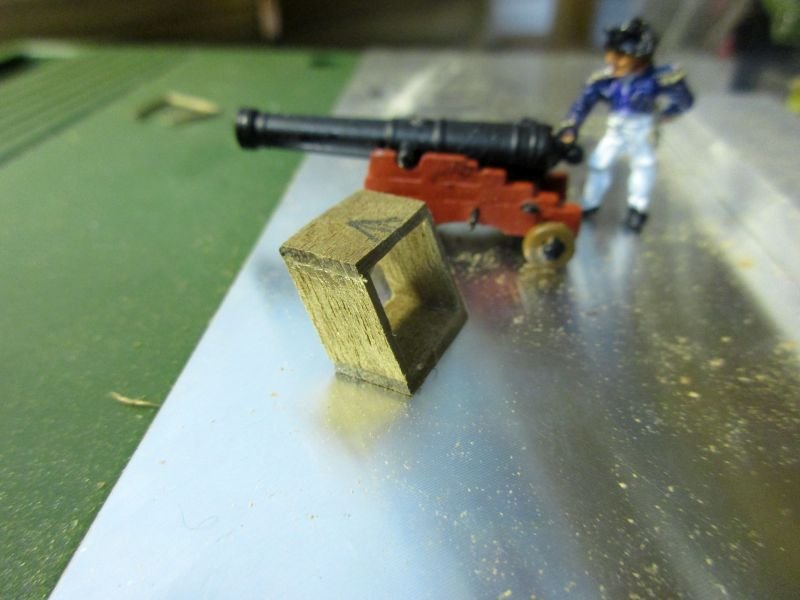
It was quiet in the wharf lately because I was away on holidays - despite some dear friends asking why retirees would need holydays. We visited the Seychelles where we not only met wonderful people, largely intact nature and interesting weather but also the Aldabran giant tortoises which I believe to be close cousins to Stephen Maturins world famous Testudo Aubreii. Interesting tropical sailing weather with a waterspout left of that rain shower... not Testudo aubreii but Aldabrachelys gigantea Back home the framing of the upper gun ports with lids was started. The beginning was a bit hard - or as somebody else said in his log: I liked the work so much that I did the first frame three times. Finally the routine was established as follows: - measure the angle of the tumblehome to the deck -cut a rough frame with that angle, glue (and wait long enough for the glue to set - otherwise you may happily do the same work again. -cut the outer opening in the hull to the exact size of the particular frame -cut the frame to a thickness that it sits on the inner bulwark and finishes 1 mm within the outer hull -glue the frame into the opening and onto the inner bulwark -open the inner bulwark through the frame -check with a gun and hope for the best This way the planks of the inner bulwark cover the frame as it should be - not that it will be noticeable on the finished model but anyhow. The pictures show that the frames still need some cleaning before painting. In this context a remark to the Amati plans concerning gun ports with and without lids. On the plans they are drawn in the same size, a fact which lead to a mistake on my Pegasus. You should consider, that when building the hull with its frames all the gun port frames have the same size. Those without lids are then covered with the planking up to the opening while the planks around those with lids stop short of the opening to leave some room for the lids to overlap the opening. But the CLEAR OPENING of all gun ports for the same calibre guns should have the same size. raw gun port frame... ...and trimmed to fit frame glued in opening of the inner bulwark test with a gun


- 366 replies
-
- 8
-
-
- bellerophon
- victory models
- (and 2 more)
-
1:64 Copper plating
flyer replied to Peter Y.'s topic in Building, Framing, Planking and plating a ships hull and deck
Hi Peter While building my Pickle one of the alterations I made to the kit was changing the copper plates. I used those from Amati which are designed to put on overlapping as it should be according to different sources. Those from Caldercraft have - in my opinion - much too prominent nail heads giving the hull an rather badly shaved appearance. I think the nail heads had to be rather flat to reduce water resistance. Your Pickle looks fine. Have fun! Peter- 14 replies
-
- 7
-
-
- pickle
- caldercraft
- (and 1 more)
-
Hi Martin Prego cento! Hi Rob That Bridge is between 3 and 4 centuries old. Some daring people (e.g. Martin W) jump from it into the water some 15 meters below. Not only is the water of this mountain torrent ice cold, you also have to find a spot of water deep enough between the rocks... And you are absolutely right about the focus on the overall effect. However, sometimes I find it difficult to judge beforehand which details will blend in with the background and which will stand out like a sore tooth when tinkered inaccurately. The cannons will be rigged with breech rope and tackles - at least those visible from above. Cheers Peter
- 366 replies
-
- 2
-
-
- bellerophon
- victory models
- (and 2 more)
-
Hi B.E. Did you see such carriages anywhere else - not on British ships? It is a pity that Amati has such finely detailed and well cast carriages but nobody seems to know where they found the prototype for them... And - Thank you. Hi Martin Thank you. BTW I just came back from hiking in the Vercasca Valley and I guess you know that bridge. The Merlot is still fine... Cheers Peter

- 366 replies
-
- 5
-
-
- bellerophon
- victory models
- (and 2 more)
-
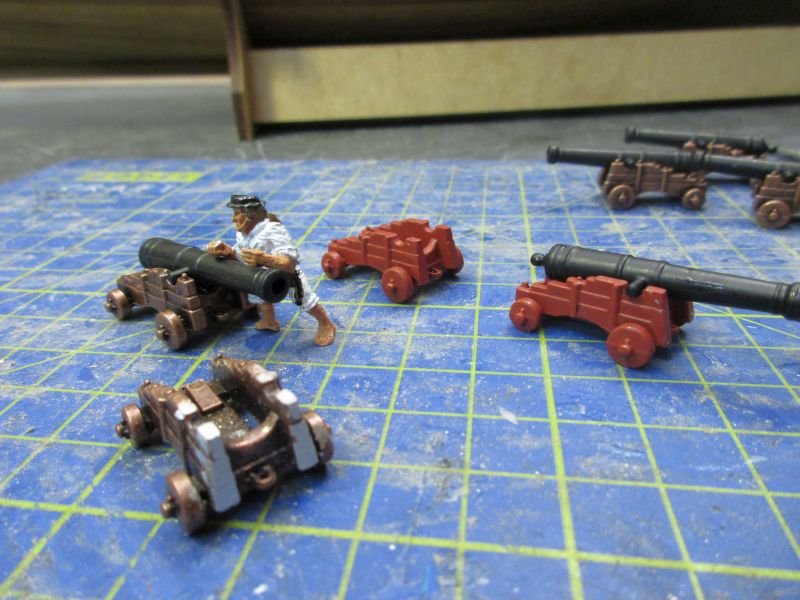
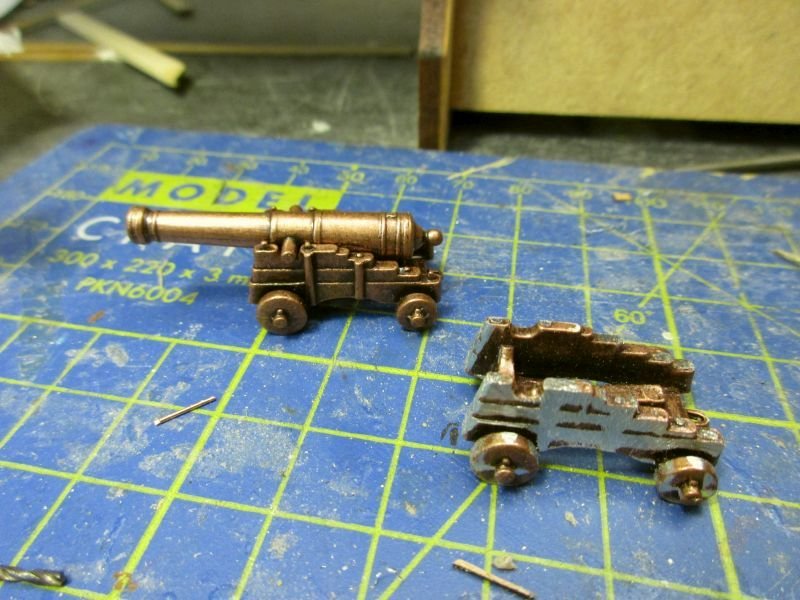
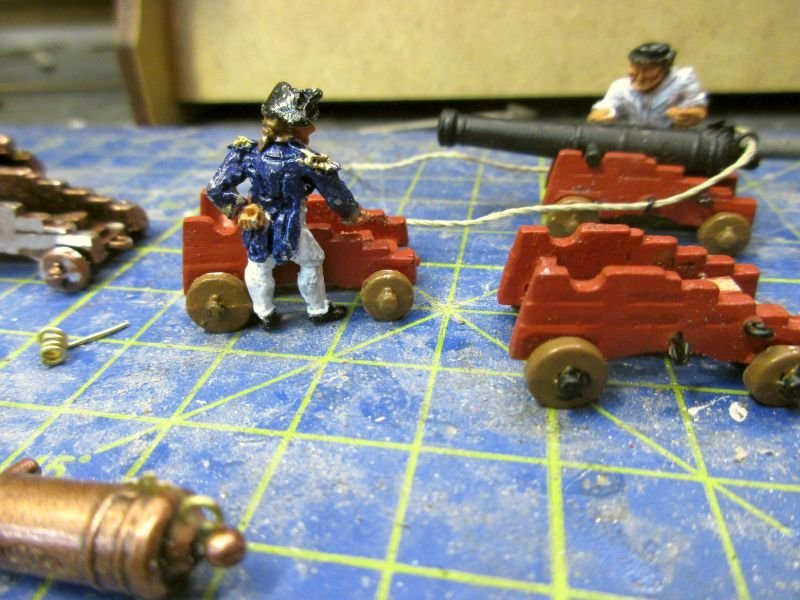
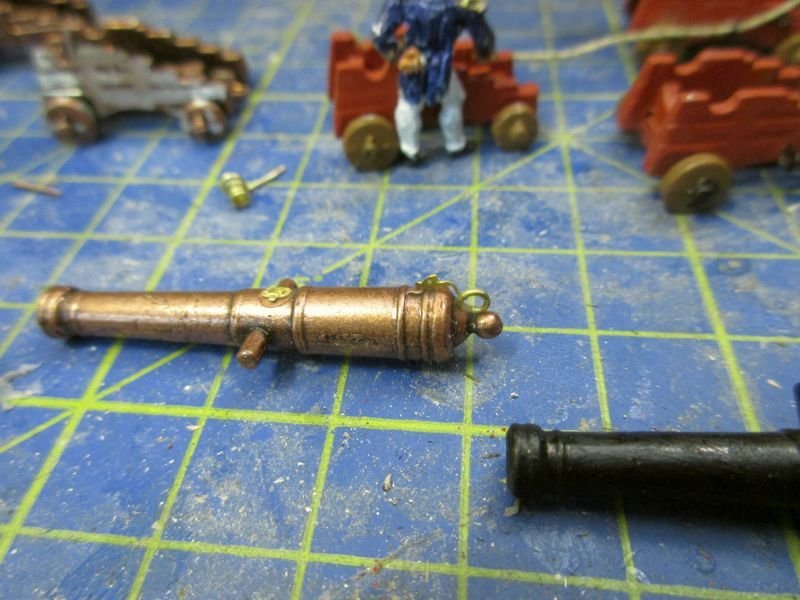
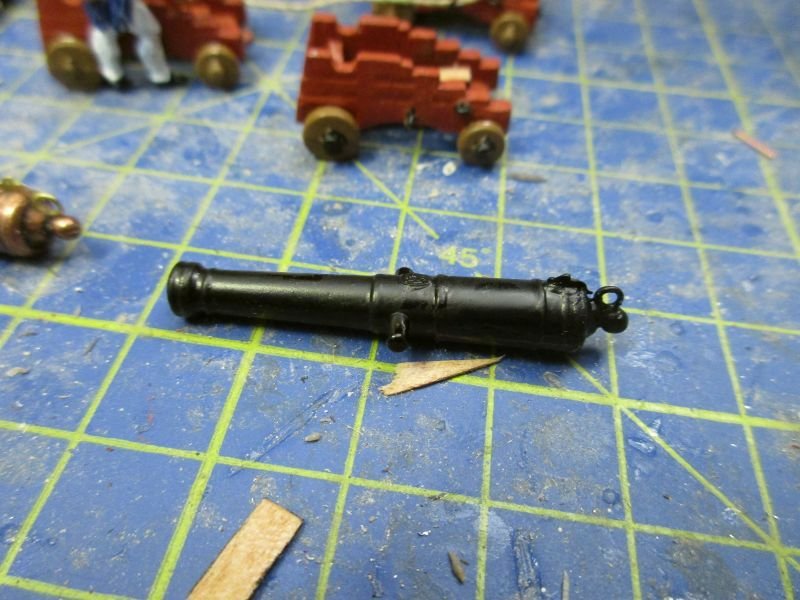
upper deck The plywood deck was installed and then planked in place. Only those parts which will remain visible got deck planks cut to length and laid in a appropriate pattern. As the outer edges will hardly be visible as well I didn't install margin planks or waterways. The deck planking continues below the previously installed inner bulwark planking. Then I started to cut the gun ports, first those without lids where the frames were already installed. finished deck with some guns provisionally in place the captain checks preparation of the gun installation upper deck guns To get some change I also started to rework the gun carriages and to finish the guns. The carriages were filed as flat as possible on the outsides, the front grommet removed and the protruding bolts on top filed flat. Then four holes were drilled for eyebolts, two for the tackles and two for the breech rope. A little paint was added and I think the result is an improvement over those wonderfully detailed but very strangely casted kit carriages. The barrels got the stamp and lock details provided by the kit. An additional ring for the breech rope, formed of brass wire, was glued above the cascabel for the breech robe. A coat of black metal paint finishes the barrel. gun out of the kit and reworked carriage paint and eyebolts added - the captain approves the work barrel with glued on additions finished barrel


- 366 replies
-
- 9
-
-
- bellerophon
- victory models
- (and 2 more)
-
Pandora by marsalv - FINISHED - 1:52
flyer replied to marsalv's topic in - Build logs for subjects built 1751 - 1800
As a big fan of sail ship models with sails I want to congratulate you on that absolutely beautiful sail. Only about ten more to go. Keep up the good work. Cheers Peter -
Hi All, many thanks for the likes and comments. Michael, the credit for the dummies' idea goes to you and your Vasa. The credit for the deck lines goes to the kit and the gun port stripes. Jason, yes, I did consider it but buying dozens of better carriages over stresses my budget and building them myself over stresses my endurance. I tried to rework one a bit to make it smoother and tried light ochre and red paint. The red covers the superfluous details better and will be used. It really is a pity that the kit has these strange carriages. Hi Martin Yes, ladies without teeth do look rather old fashioned... Thank you, Mike. Yes I love that kit and really look forward to how the finished model will look - in five years or so. Cheers Peter
- 366 replies
-
- 3
-
-
- bellerophon
- victory models
- (and 2 more)
-
The first of the decks, the gun deck, is now fully equipped with frames and dummy carriages. I decided to do a test run and arm one side with all the dummy guns. (I'm presently reading The Martian again and Mark Watney repeatedly stresses the need for test runs as 'No plan survives the first contact with the enemy' (perhaps quoting General Tacticus or a similar authority) and so a test run was done.) I only broke off three dummy carriages and therefore it was a successful test because it showed the need for more glue to fix them to the port frame before I close the space with the upper deck. One deck finished, two more to go but this was by far the most simple one... she is showing some teeth... the dummies - although rather simplified - improve the overall impression
- 366 replies
-
- 11
-
-
- bellerophon
- victory models
- (and 2 more)
-
Don't give up the ship! You could try to take off those offending stripes of the second planking. Soaking them in water would help to loosen them a bit and then you could get a scalpel between first and second planking and lever the stripes off. Then scratch the first planking clean and try again. Sometimes when trying to get a smooth finish for the planks I get better results by scratching them clean with a very sharp knife (scalpel) held vertical and moved like a plane (the tool, not the aircraft). You could also try to order some better quality wood from outside of Australia. E.g. https://www.cornwallmodelboats.co.uk delivers worldwide - perhaps even to former colonies. At least you shouldn't be treated worse than me as we belong both to the same group of customers: 'Rest of the World'. Cheers Peter
- 421 replies
-
- 2
-
-
- caldercraft
- granado
- (and 1 more)
-
Hi Martin Retirement is now just a faint echo in my past. Having now more time for building means that I make my mistakes more frequently - and the workbench still is as organized as it was before. But still - being a retired gentleman is cool too. Judging by your pictures you have some excess length on your rails. Couldn't you fix the timbers, then adjust the rails on the timbers and then cut the rails to the correct length and finally file the upper ends of the rails to the correct form? Cheers Peter
- 467 replies
-
- 1
-
-
- fly
- victory models
- (and 1 more)
-
Looking at those pictures of the second planking I can understand your slight frustration - especially after your fantastic Vanguard. But allow me a perhaps stupid question: Are you sure that your wood stripes for the second planking are truly boxwood? Judging by the pictures it looks more like lime to me, which would be rather coarse-grained for a second planking. I had much fun with my Granado kit myself and would like you to have too. Please feel free to ask for more information or pictures. Unfortunately I made no build log - only a gallery file. Cheers Peter
- 421 replies
-
- 2
-
-
- caldercraft
- granado
- (and 1 more)
-
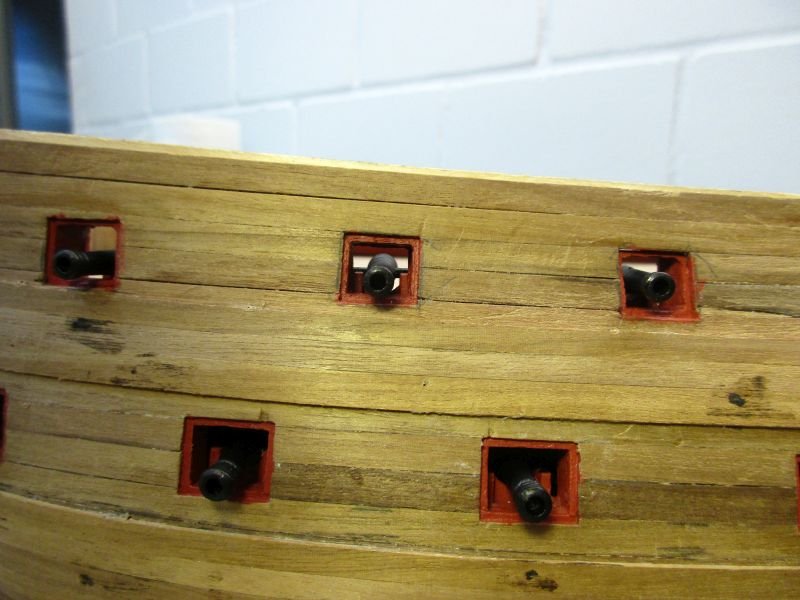
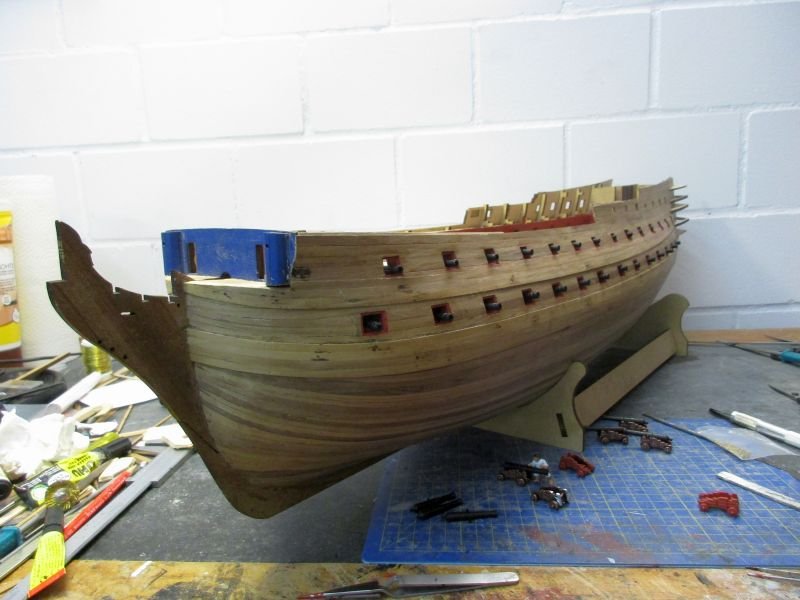
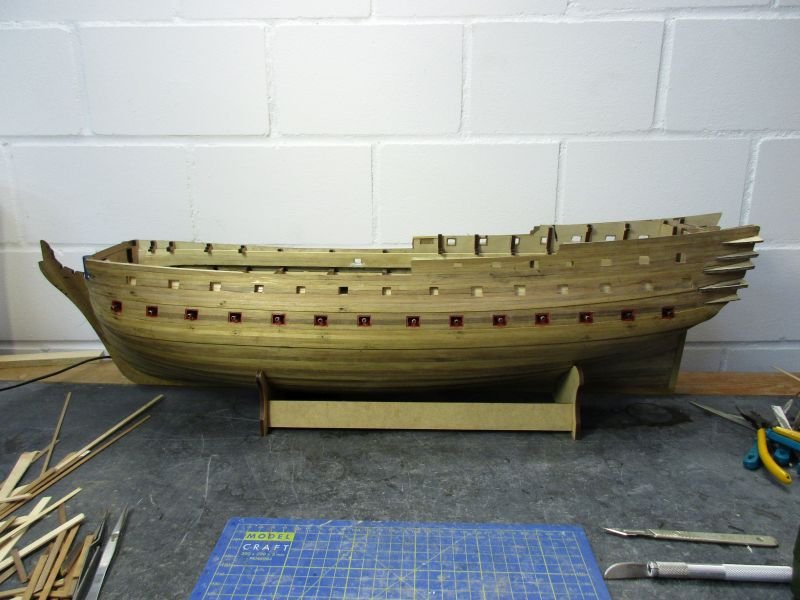
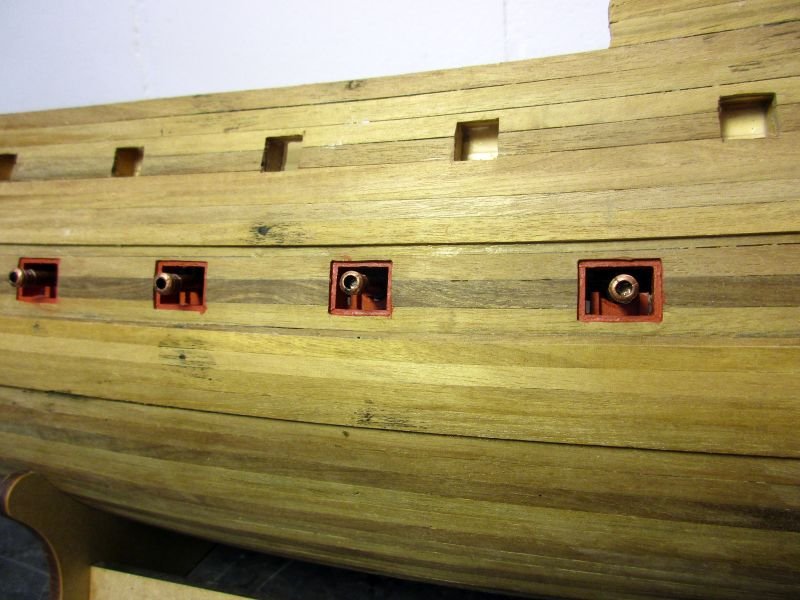
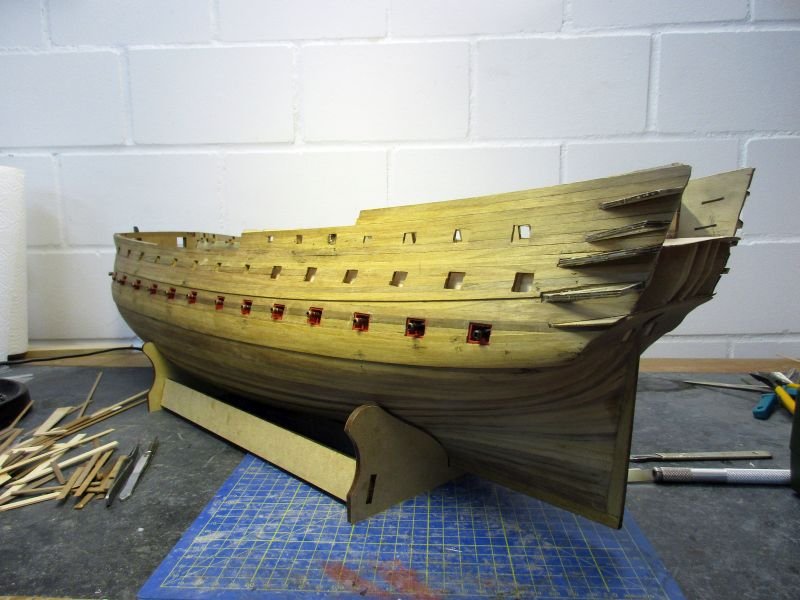
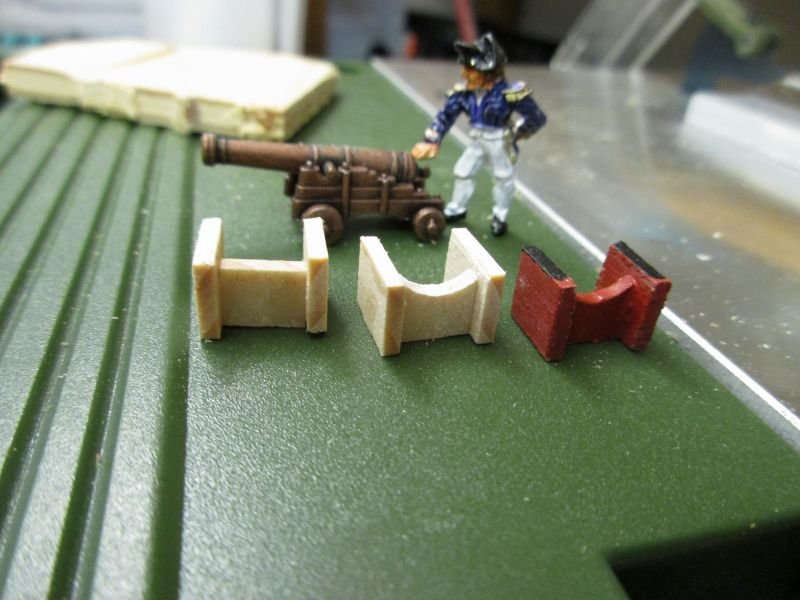
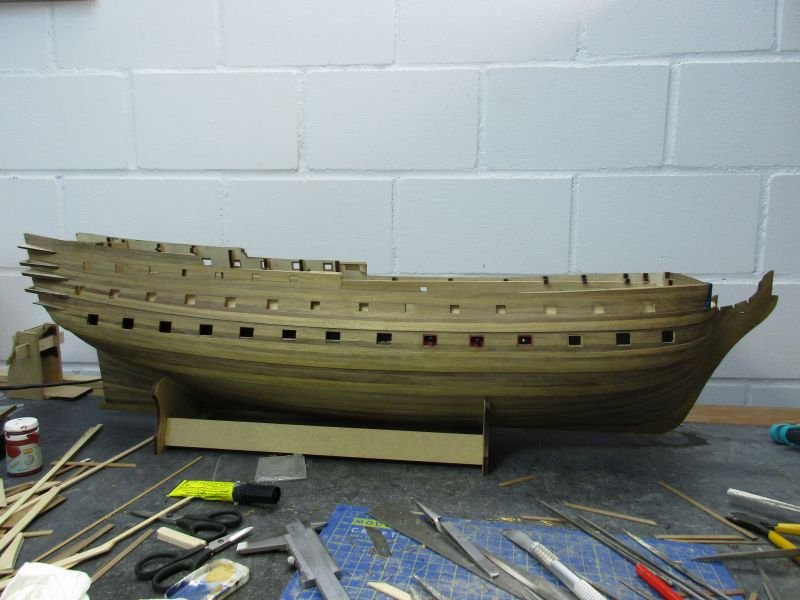
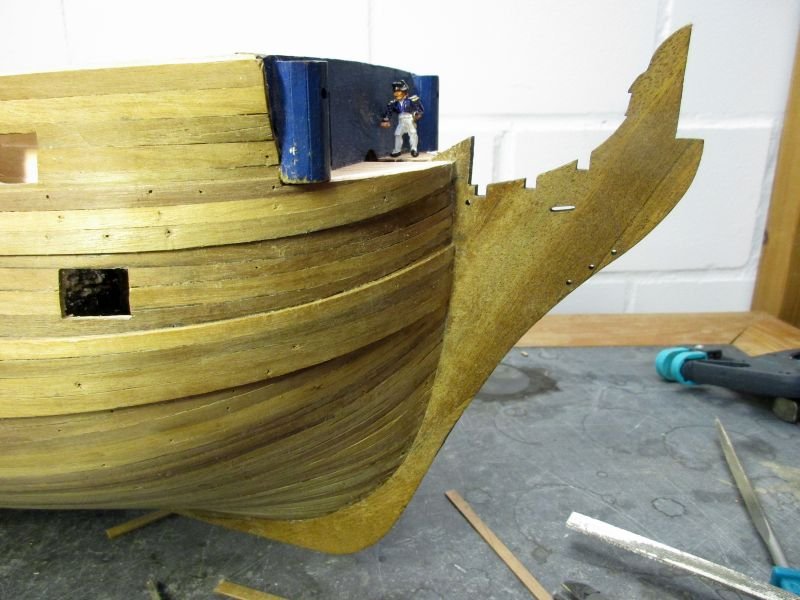
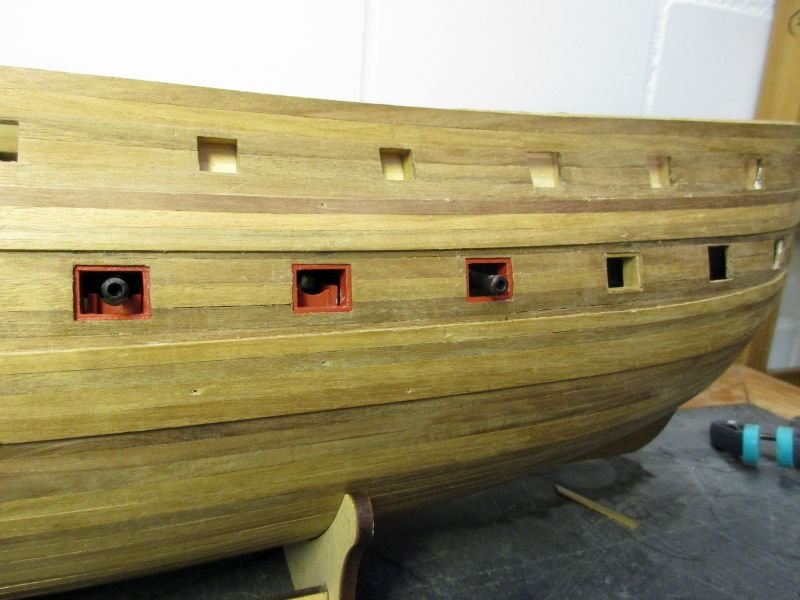
The second planking is now completed and the hull 'sanded'. I used mainly a sharp knife to plane the plank seams and sanding paper only at the stem and stern. Planning gives a smoother surface. The main and upper wales are in place as well. While marking the correct main wale positions I stumbled over the first big mistake I made. There are two different instructions where to start the second planking. In the 'hull assembly instructions' the start is at the upper edge of the gun port pattern - which I followed. In the 'building instructions' however was the correct way to start at the position of the main wale - which I didn't. According to some of Captain Aubrey's remarks there are two ways to do something: the right way and the navy way. At least I did it somehow the navy way... I hope that the fact that the wales aren't running fully in parallel with the planking will be overlooked once the hull is painted. I intend to put on the painting scheme 'after 1800' with the 'Nelson checker' where the painting runs across the plank edges and thus irritate the eye sufficiently to overlook my mistake. for the photo session I tried to get the workbench into some order... the misalignment of planking and wales is hardly visible here... ..but more obvious here. The visiting captain however seems more interested in the bowsprit position. gun deck Installing the gun port frames and the dummy carriages for the dummy guns has begun. For the parts I make full use of my new proxxon saw. Presently the fourth gun port frame is installed and I have only a few dozen more to go. So far I was several times quite happy to still have access to the deck from the inside and I think leaving off the upper deck till later was a good idea. The frames are completed and trimmed a bit to follow the inclination of the hull at their actual position. After adjusting the hull opening they are glued in. Then the dummy carriage is carefully inserted and glued from the inside to the lower sill of the frame. The glued connections are then generously painted with more glue from the inside - I hope this holds. The frames will be painted red. For the carriages I tried several colours: red, dark ochre and a light ochre as it is used on Victory. I think the traditional red (which I personally don't like much) is the best solution to keep the makeshift dummy carriages visually in the background. I will later on also help to mask details on the kit's a bit strange cast carriages. gunport finished, with -carriage and gun - carriage and no gun - gun and no carriage - just the unpainted frame making of dummy carriages.

- 366 replies
-
- 8
-
-
- bellerophon
- victory models
- (and 2 more)
-
Congratulations, Michael on reaching the end of a wonderful journey. Thank you for taking us along. And yes, I'm as well eagerly looking forward to your next masterpiece. Peter