HOLIDAY DONATION DRIVE - SUPPORT MSW - DO YOUR PART TO KEEP THIS GREAT FORUM GOING! (Only 20 donations so far - C'mon guys!)
×


captainbob
-
Posts
3,498 -
Joined
-
Last visited
Content Type
Profiles
Forums
Gallery
Events
Everything posted by captainbob
-
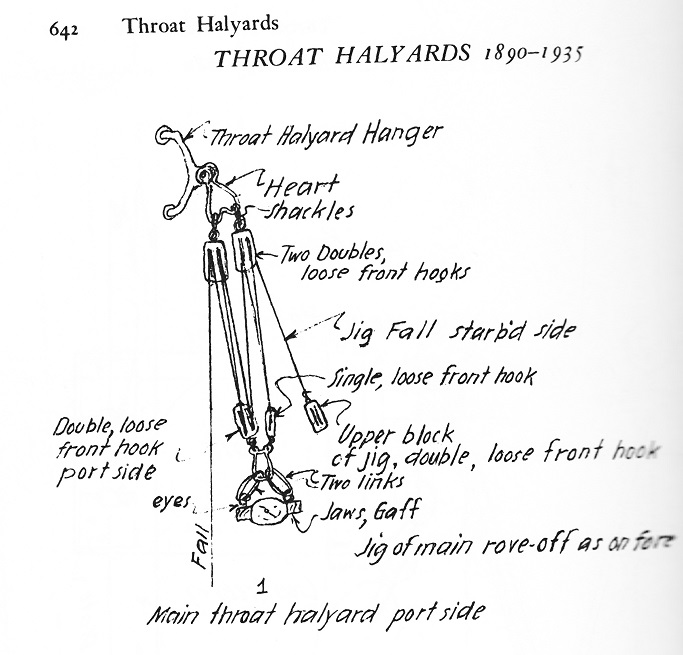
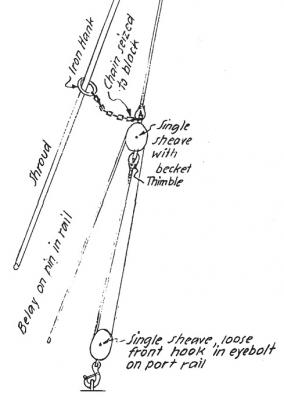
Tom, Thanks for your concern that I get this right. What you say is true for some boats and I was going to rig the Lettie that way until I read Chapelle’s book. He tells how boat rigging changed with size and year. The attached drawings may explain what I am doing and why the question. With the blocks shown there are six lines and the port side fall has a block attached as a becket. This becomes part of the Jig shown in the other sketch. The drawings were taken from two different parts of the book. I will take the main throat halyard to the starboard side and the jig halyard to the port. The fore sail being smaller and not as heavy will not need the jig and it will be gigged the way you describe. Bob

-
Jud and Nils, thanks for joining in. Tom, when sailing smaller boats I would hang coils on cleats in the same way you described but that seem like an awfully big coil to hang. Thanks for the answer. SpyGlass, as it turns out the halyard was, as you say, “double tailed”. But the other end went to a set of blocks and was called the halyard jig. The halyard was used to lift the sail and the halyard jig was used to tighten by lifting that last little bit. Bob
-
I’m getting closer to figuring out where all the blocks, fittings and belaying pin need to be so the schooner can be rigged. Most models I see use the same five or six rounds of line to make up the hanks of rope for each belaying pin but that is not correct. Last night as I was studying the main throat and peak halyards, the engineer in me took over and I suddenly realized just how much rope is required. If the distance between the lowered gaff and the raised gaff is 30 feet and you have, as Chapelle shows, two double blocks at the crosstree and a double and single block on the gaff jaws, that’s a total of six lines going up and down. At 30 feet each that’s 180 feet of rope. When the sail is raised and the halyard is belayed the remaining line is made into a hank. If the hank is 2 1/2 feet top to bottom or 5 feet around that is 36 turns of rope. That is too much line for one pin but I have never seen on any of the pin diagrams that more than one pin was used. So what did they do with all the excess rope? Bob
-
Harriet McGregor by Boccherini
captainbob replied to Boccherini's topic in - Build logs for subjects built 1851 - 1900
Beautiful. Bob -
Looking good Dee Dee. Really starting to take shape. Bob
-
Thanks Nils but I don’t think the brass comes close to yours. It's all in the camera. Thanks Pete I was starting to work on wood hoops when I remembered the admiral said black and gold so the hoops are now slices of brass tubing and the pins may be brass also. Bob
-
Nice start. Bob
-
I'll wait to see what color you choose. But it looks like you're going to have to build a boat shed / show room to store this cutter and Maria. Bob
-
Good choice. Bob
-
"... fell out of the rack right in front of me...." That sounds like the line I use. Bob
-
I couldn't have said it better myself. "a pure joy". Bob
-
Thanks Russ that makes sense. I haven’t seen the turnbuckle yet but I’ll keep looking. Bob
-
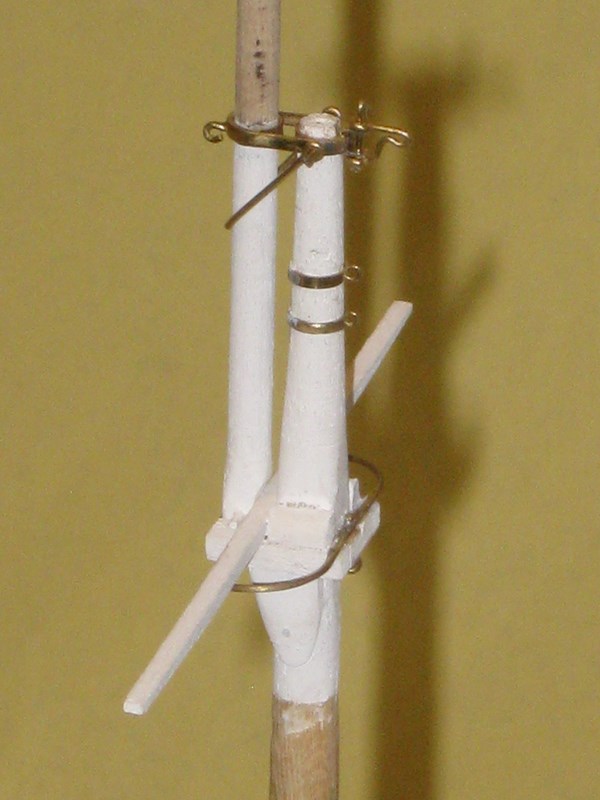
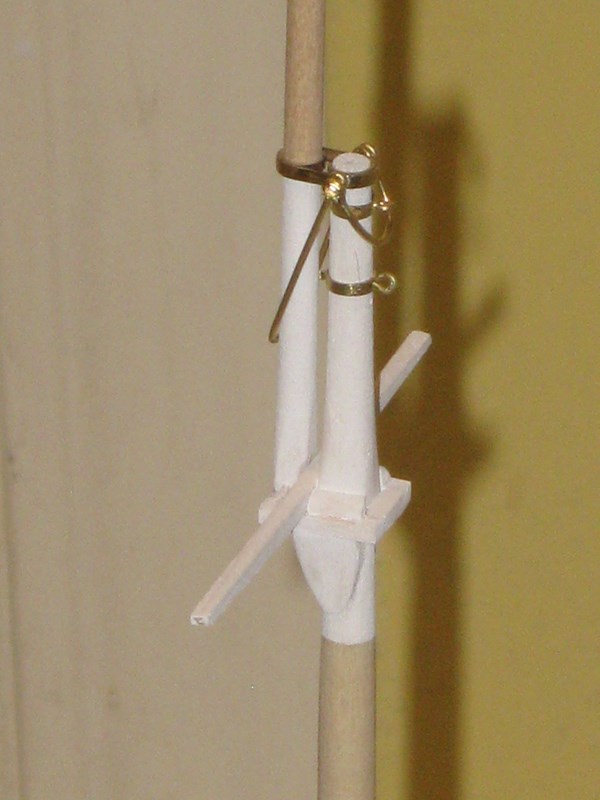
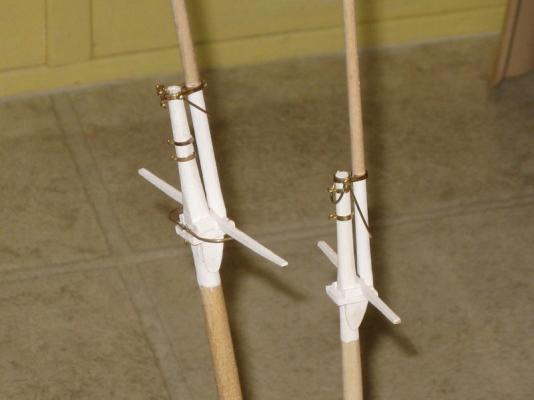
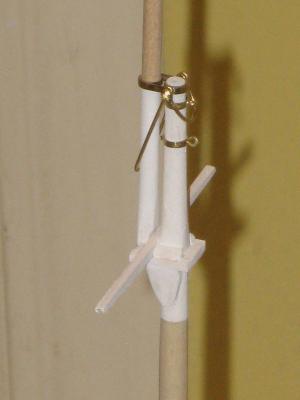
Thanks Russ, Michael and Carl. Please forgive my ranting Chapelle's book really is good. John, they are not straps they are a long "U" shaped rods. It goes down one side, around the mast and up the other side, and they pivot from a pin going through the mast top. The long one on the fore mast supports the jumbo jib stay (the innermost of the three jibs). The short "U" on the back of the foremast has a line going to the long "U" on the main mast. That line is called the spring line. That's as much as I know. Bob
-
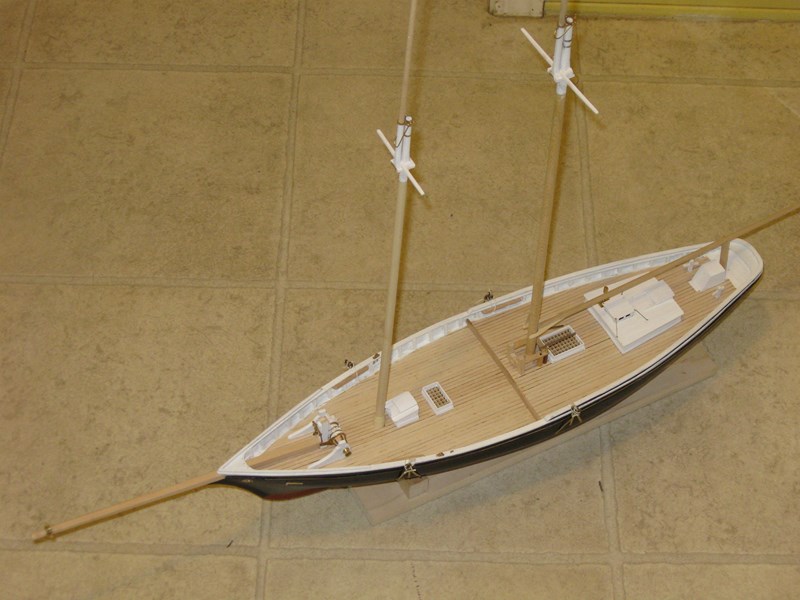
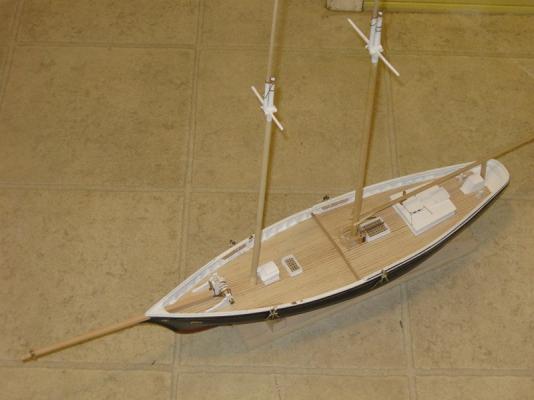
Well it’s been a month since I entered any pictures and on the one hand I’m sorry to have so little to show, on the other hand, when the HAER got the Lettie for documentaion the masts had been stripped and removed, so there are no rigging diagrams for her. So I have had the fun of trying to decipher the information in Chappelle’s book, “The American Fishing Schooner”. It’s a lot of, which one of the many ways to rig the bow sprit do I use? Big boat or small, this year or that and then is it like this boat or that. There is no index for the second half of the book, it is supposedly in alphabetical order. So you look at the drawing of the fife rail and there is information about the mast that is not shown anywhere else. So after going through it time and time again I made my own table of contents. Anyway enough of that. Before I could do the masts and spars I had to figure out how many blocks of what size and where mounted and do I use just the haulyard or do I use the haulyard jig also. I have come up with a diagram in my head that I will use, hopefully it will not have to change too many times. So here is the start, the masts. I’m open to any comments, when it comes to rigging I‘m definitely not an expert. Bob Main mast Fore mast

- 420 replies
-
- 20
-

-
Thanks Rich, more to come. Bob
-
Love that first picture, up through the frames, of the below decks area. You always do such great work. Bob
-
Come on Pete. With all the small and mini RC equipment out there. Surely you can find some that will fit. Go for it. Bob
- 296 replies
-
- 2
-
-
- herreshoff
- buzzards bay
- (and 1 more)
-
She's really coming along. Nice work. Bob
-
Beautiful build with such detail. You challenge others ( me) to try and do as well just by showing it can be done. Bob
-
Where to find 28 gauge black wire?
captainbob replied to David Spindle's topic in Masting, rigging and sails
Try your local hardware store. If they don’t have it McMaster Carr has it. They call it: 1008 Carbon Steel—Black-Oxide Finish .014 dia. http://www.mcmaster.com/#metal-wire/=sltk0h -
Bob, that is quite a story. I thought I heard late last year that she had been moved to dry-dock. There are so many stories about her present state that it is hard to know the truth. I also thought it should have gone to Pearl Harbor where she would be at home. Arkansas probably got her due to some political favor. I still hope to build the City of Oakland someday but there are many others to build first. Thanks for the letter. Bob