captainbob
-
Posts
3,498 -
Joined
-
Last visited
Content Type
Profiles
Forums
Gallery
Events
Everything posted by captainbob
-
I agree It tough when life gets in the way of fun. Bob
-
Michael, your drum method is very well thought out. By pulling on both sides at the same time you only need half the number of turns. Don’t forget to put some sort of stop on the drum. When the sail is all the way “in” the drum needs to stop even if your finger does not release fast enough. And when the sail is all the way “out”, if the drum does not stop you end up with tangled line. I always had mine stop just before the boom hit the shrouds. A purchased sail winch has a mechanical stop built into the gearing inside the winch. Maybe you can do it with gearing also. Ah, yes. There are a lot of people on the forum I would like to live near. But better the forum than nothing. Bob
-
That's a nice photo to follow. It also shows good detail of the rigging. Lots of fun there. Bob
-
Beautiful, as always. Bob
-
Bedford, every time I build a boat I get ideas to make the next differently. Bob
-
Looking good. Bob
-
You should always wet any veneer before working with it. if not it tends to split and crumble. Bob
-
Thanks Nils, I can't either. Bob
-
Thanks for the lessons. Bob
-
When I was building R/C, except for the drive shaft, I always waited until the deck was on and then mounted running and control equipment through openings under removable deck houses, hatches and such. You will want to be able to remove that equipment through these openings for repair. Bob
-
Harriet McGregor by Boccherini
captainbob replied to Boccherini's topic in - Build logs for subjects built 1851 - 1900
Very nice wood work. Bob -
Thanks Popeye. But I got help from the forum. Keith, I only hope it doesn't become a target for pirates. Bob
-
Thanks John, that’s what she says also. Michael, the paint is acrylic covered with Pledge/Future. 60/40 solder and a low temp solder iron. Thanks for the info David, maybe next time. Bob
-
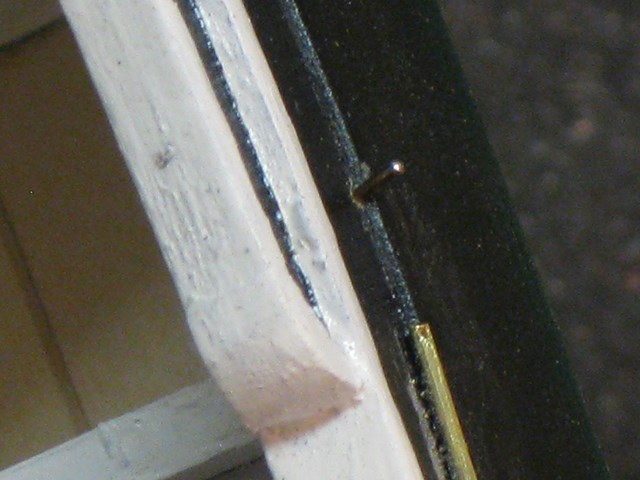
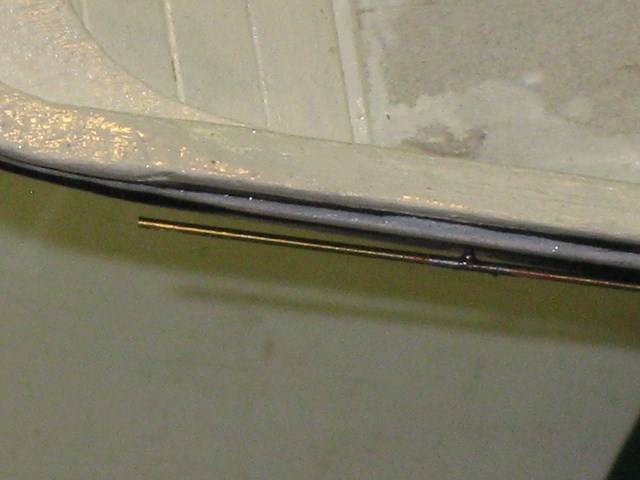
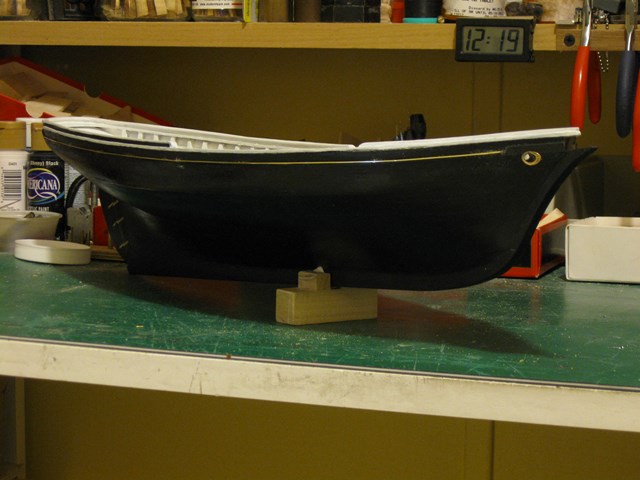
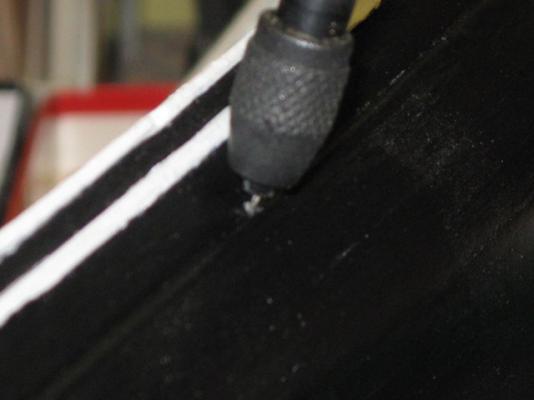
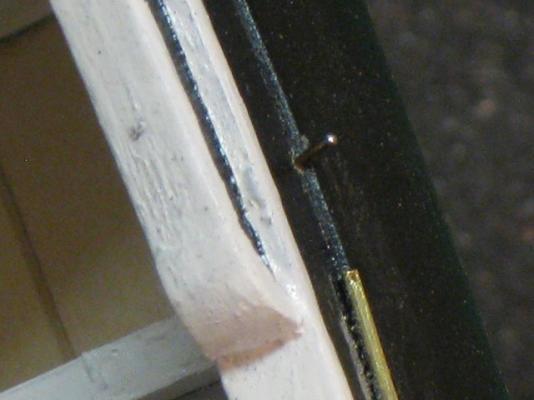
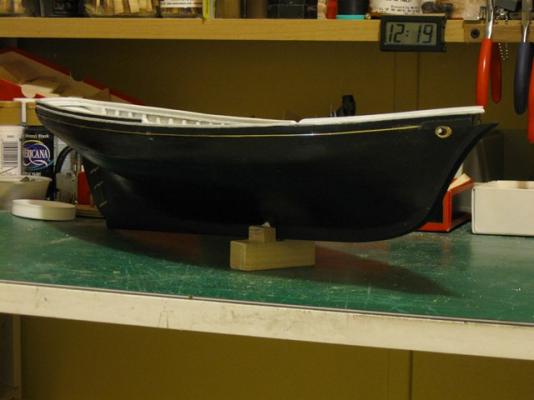
As I said before, “SHE wants GOLD”. Now I come to the cove that should be gold. I looked into gold leaf but not only is it expensive but I don’t need near that much. Yellow paint isn’t the same and I’ve never seen a gold paint that came close. Besides with my hands I could never paint a straight line. So here comes brass. All I have to do is fasten a strip of brass . . . but I read topics here saying how do you fasten brass to wood? There are probably many ways but here is how I did it. The stripe goes in the cove line or in my case where the thin bulwark strake and the wide strake meet. My plan was to solder .188” of the tip of several .024” brass plank nails to a .032” brass rod. This is still up in the bulwark area so fasteners had to be placed where the stations are. I drilled .020” holes into the stations. I measured the hole locations and soldered the nail tips at the same distances and found out that if you are off by even that little the brass rod doesn’t fit properly. On to plan B. I placed the nail tips in the holes leaving about .06” exposed. Then I soldered on the brass rod and pushed it tight against the wood. I then filed a flat on the exposed part of the brass to catch the light. Thanks for the help Nils. Bob Drilling for the nail tips. A nail tip pressed in, waiting for solder. Rod soldered to nail tip

- 420 replies
-
- 10
-

-
Yes, the sheet takes a lot of rope and multiplies every time it passes through the blocks. I can almost imagine myself walking that deck and getting ready to sail. Bob
-
Now you have the idea, the board goes all the way down. The centerboard boats sailed/worked in shallow water and the centerboard needed to be free to be pushed up into the centerboard trunk in case of grounding. Most were weighted though I have seen designs of some that were not. If the board is locked down in any way then grounding could damage it. Bob
- 86 replies
-
- 2
-
-
- muscongus bay lobster smack
- Midwest Products
- (and 1 more)
-
Just remembered. Now I have to go back and take the paint off the pintles and gudgeons. Bob
-
Thanks Allan. That’s why I’m with MSW. To learn how to do this kind of thing. Nils, that’s what my admiral is expecting too. She already has a place for Lettie and says she wants to see lots of gold. So I won’t be painting the brass. Bob
-
Sounds like some good changes. Bob
-
Well done. Nice sails. I'm like S.os, I want to sail her. Bob
-
WOW. If I had just waited one minute before posting I would hav seen the bow even better. Well done. Bob