


captainbob
-
Posts
3,498 -
Joined
-
Last visited
Reputation Activity
-
 captainbob reacted to usedtosail in HMS Bounty Launch by usedtosail - FINISHED - Model Shipways - 1:16
Other stuff I am working on. I transferred the shape and details of the fore sail from the plans to a sheet of paper, which I traced onto the supplied sail material. I applied Fray Check along the outside lines, then carefully cut the sail out. I want to add a bolt rope along the outside edges. I am still experimenting with gluing or sewing the bolt rope to the edge. I am leaning toward sewing if I can get it to look good. Gluing was not working out too well on some scrape material.
I ran some line for the mast shrouds through bees wax, ran them over a light bulb and through my fingers to get the wax into the line. I then hung them with weights to straighten out:
I served some line for the first time in my home made serving machine, to use to strop the two blocks for the spar halyards. I coated the serving in varnish to hold it together. I am hoping they will stay together when I strop the blocks. I sanded the two blocks to get them to look more realistic, too.
Finally, I finished finishing the masts. The dowel was not taking the stain well, so I ended up painting them with a very diluted mixture of burnt sienna and raw umber acrylic paint. I am really happy how they came out. I masked off the "natural" part of the masts and used a brush to get a good edge at the white tops.
I am not sure which of these projects I will do next, maybe all at once still.
-
 captainbob got a reaction from augie in Maine three-masted schooner by Bedford - 1:54 - RADIO
Yes, with all that sail she'll need lots of ballast. What a lot of builders do, in order to keep the ship "scale" for display, is to add a removable, heavy, external keel while in the water. This can be clamped on or fastened to threaded inserts in the bottom of the keel. One advantage of the added keel is that it can be altered until the ship’s balance is right.
Bob
-
captainbob reacted to michael mott in Bristol Pilot Cutter by michael mott - 1/8 scale - POF
Cabin structure part 13
Well it felt like the 13th today, I was basically not happy with the construction of the hatch. I should have given up on it at this stage.
However I persevered sanded and looked at it on the slide logs, and then began a new one. I spent a good part of the time working on getting some accurate cuts on the table saw and in retrospect I need to make some adjustments to the large fence which is slightly out of alignment because I was having some binding problems using the fine adjusting fence, so worked of tuning it but still was not really happy with the cutting.
the next picture shows the new frame for the hatch, I should have gone this route in the first place.
Next the new planks with fir splines ready to be beveled and then glued.
The new frame will be more sturdy and a bit longer
I will attach a keeper plate on the bottom side of the hatch side rails instead of the half round tubes.
I will use the KISS method
Michael
-
 captainbob got a reaction from popeye the sailor in Holiday Harbor by popeye the sailor - 1:20 scale - multi build
Planking and deck and then - - - Oh boy, I can hardley wait.
Bob
-
captainbob reacted to Jim Lad in Maine three-masted schooner by Bedford - 1:54 - RADIO
Follow the advice of the notice on the 'Vampire's' bridge, Steve - "Look astern before you turn".
John
-
captainbob reacted to Modeler12 in A video about making metal hooks and . . . . .
I have made a short video about making various parts out of metal wire. Some of the topics I included seem to be of interest right now, but I also included some hints, how to blacken metals and a few others.
I show what I typically do and don't want to give the impression that it is the best or only way, of course. In fact, I welcome suggestions and your input about how to . . . .
After all, that is what this forum is all about.
-
captainbob reacted to mobbsie in Fly tying vice for rigging?
Good Morning Sam / Q. A.
I have taken a few pics of my fly tyers showing how I use them, for the purpose of these pics I have not used the correct main thread and the seizing thread is just ordinary cotton.
They are a "G" clamps which fits onto the edge of the workspace so the distance can be what ever you like, I'm showing close work.
The starting knot is a Clove Hitch and the end knots are 2 x Half Hitches.
The first picture is a 5mm Deadeye set up in the screw jaws with the trailing line thread clamped in the quick release.
The Bobbin is just hanging holding the line taught
The finished item, bearing in mind this is only a demo piece
Next is a Long Block, this was completed a while ago but still by the same method but with a brass rod to form the eye.
Here is an eyebolt that has been put in the screw jaws a tread attached to that then a 3mm double block tied in.
So there we have it guys, hope that's not too long winded and that it shows what can be done.
If you have any other questions that I am able to help with ask away.
mobbsie
-
captainbob reacted to woodrat in USF Essex by woodrat - FINISHED - Scale 1:64 - Fully Framed - from Portia Takakjian plans
Having lost my build log in the catastrophic crash of 2012, I will try to resurrect an abbreviated version. I used Portia Takakjians plans and referred to both the AOTS book and the POF publication. There were significant differences in the deck framing between the two books. This was my first ship-model and I learnt a lot along the way, especially from MSW members later on. The build took 10 years and was done in american cherry for the structural elements. Hope you like it.
Dick
a representative midship frame the bow framing completestern module
hull framing complete
-
captainbob reacted to michael mott in Bristol Pilot Cutter by michael mott - 1/8 scale - POF
Cabin Structure part 11
Most of the caulking is now completed and scraped. The first picture shows the dark carpenters glue filling the seams befor scraping. A few spots needed to be topped up with more caulking.
The second shows the scraping of the planks and caulking.
Test fitting the slide logs, these are both different heights because of the slope of the larger area I used a couple of sticks to ensure they remained parallel and level to each other
The rear section glued and ready to be scraped, the slide logs are located to measure the forward end panel of the companionway, this will be mahogany. The aft end will also get mahogany side slots for the drop in boards up to the hatch. after the pine section of the curved plank stop is removed.
Michael
-
captainbob reacted to ndeconte in Orca by ndeconte - FINISHED - 35" movie replica
So it's been a while since I posted, life has been busy for us here and it always seems that there's some new issue round the corner that needs to be attended to. I've had limited time recently to put into the boat, but I'm determined to get it done for Christmas!
I've added the lettering and the round cover plate to the back of the boat:
Here's a photo of the original lettering that was auctioned off from the boat, I used this to go by for the lettering.
Also added the re-enforcing plates, threaded rods and nuts to the locations on the hull. The rivet/bolt heads that are on the plates themselves are actually drops of 2 part epoxy, only way I thought of replicating them in this scale since nothing I found was small enough.
And I cut a master barrel out of a block of Ren-shape on the lathe, still have some re-working here and there and final sanding to do. Will be adding the 2 covers to the top then I'll make a mold off it and cast them in back urethane. Once this is done, I'll paint the appropriate yellow color and distress to match the origninals.
-
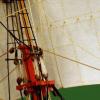
.thumb.jpeg.fc5d633a7b34428fcf19419a73d56d55.jpeg) captainbob got a reaction from EricWilliamMarshall in Spray by captainbob - FINISHED - 1:48 - SMALL - the first boat to be sailed single handed around the world
captainbob got a reaction from EricWilliamMarshall in Spray by captainbob - FINISHED - 1:48 - SMALL - the first boat to be sailed single handed around the world
Hi all,
Years ago I read "Sailing Alone Around the World" by Joshua Slocum, and in January 2012 I decided that I would build his boat, the "SPRAY", in 1/48 scale POF with bent framing. The way Slocum built it. I started asking questions on this forum, and I want to thank all those who answerd with help. The information on this forum is invaluable.
Then the research began. In the first chapter of his book, Slocum said he was given an old "fishing smack". So I looked for fishing smacks of 1800. About when his was built. Someone suggested the "Emma C Berry" for framing, so I hunted for information on that boat. I also gathered as many plan drawings of the "Spray" as I could find. About five.
Now it was time to check and redraw the plans. The first thing I discovered was that ALL the plans had errors. Things like, the shear and section views would agree and the shear and the plan views would agree, but the width of the plan was no where near the same as the width of the sections. Of the drawings I had, the drawing from the appendix in the book was the closest. So I traced that into an old copy of AutoCad and worked out the errors.
Checking the fishing smacks plans had shown a frame spacing of from 15" to 22" I chose 18" for framing the Spray. I drew a section at each frame. I offset a line .031" inside to subtract the 1.5" planking Slocum used. The frames will be 3" X 5" so again I offset another line .062 inside the planking for the frames. This gave me the section lines for the plug I will carve to shape the frames.
I am going to plank only half the deck and deck houses so I can show the insides, taken from the sketches in Slocum's book. (See below)
Bob
-
 captainbob got a reaction from WackoWolf in X-Y Attachment for Dremel
Nice looking drill press. Can you give us a picture of the other side, so we can see the workings?
Bob
-
 captainbob got a reaction from pete48 in Muscongus Bay Lobster Smack by pete48 - FINISHED - Midwest Products - SMALL
Simply beautiful. I'd sail that boat any day.
Bob
-
 captainbob got a reaction from molasses in ESMERALDA by molasses - 1/640 - BOTTLE - Chilean Navy Training Ship
This is a Photo Shop trick isn't it? You took the "top" picture and blanked out the masts and added the exacto blade. You can't fool me. Fine work.
Bob
-
captainbob got a reaction from pete48 in SS Vinal Haven by TBlack - FINISHED
Tom,
The ring are looking good. Anxious to see a photo of the whole boat with the latest additions.
Bob
-
captainbob got a reaction from pete48 in Muscongus Bay Lobster Smack by pete48 - FINISHED - Midwest Products - SMALL
Nice detail work. Nice looking fleet.
Bob
-
captainbob reacted to popeye the sailor in Holiday Harbor by popeye the sailor - 1:20 scale - multi build
sorry for not posting it..........I was going to add it to the AmericA build. I don't have any pictures of it, so I didn't bother. it's alright now..........a little repair work and she's good as new. thanks for your concerns gentlemen, but the damage was very minor
-
 captainbob got a reaction from Moab in Spray by captainbob - FINISHED - 1:48 - SMALL - the first boat to be sailed single handed around the world
Hi all,
Years ago I read "Sailing Alone Around the World" by Joshua Slocum, and in January 2012 I decided that I would build his boat, the "SPRAY", in 1/48 scale POF with bent framing. The way Slocum built it. I started asking questions on this forum, and I want to thank all those who answerd with help. The information on this forum is invaluable.
Then the research began. In the first chapter of his book, Slocum said he was given an old "fishing smack". So I looked for fishing smacks of 1800. About when his was built. Someone suggested the "Emma C Berry" for framing, so I hunted for information on that boat. I also gathered as many plan drawings of the "Spray" as I could find. About five.
Now it was time to check and redraw the plans. The first thing I discovered was that ALL the plans had errors. Things like, the shear and section views would agree and the shear and the plan views would agree, but the width of the plan was no where near the same as the width of the sections. Of the drawings I had, the drawing from the appendix in the book was the closest. So I traced that into an old copy of AutoCad and worked out the errors.
Checking the fishing smacks plans had shown a frame spacing of from 15" to 22" I chose 18" for framing the Spray. I drew a section at each frame. I offset a line .031" inside to subtract the 1.5" planking Slocum used. The frames will be 3" X 5" so again I offset another line .062 inside the planking for the frames. This gave me the section lines for the plug I will carve to shape the frames.
I am going to plank only half the deck and deck houses so I can show the insides, taken from the sketches in Slocum's book. (See below)
Bob
-
captainbob got a reaction from pete48 in Muscongus Bay Sloop by pete48 - FINISHED - SMALL
Looks like a good project to get into the dark side. Since you are familiar with the boat already, I'm sure you will do a great job.
Bob
-
 captainbob got a reaction from Q A's Revenge in Tool storage
I get confused with six drawers. With 15 drawers I'd never be able to build any boats for looking for tools.
Bob
-
captainbob reacted to WackoWolf in Cutting stripwood for deck planking
Bob,
That is an excellent way of making the strips, you don't waste any wood like if you did it a a table saw, and I don't see any problems with using other woods. You might have to cut more that one time but it should still work. just take your time when cutting harder woods. Taking time seems to be a down fall for a lot of us.Also a lot of us don't have that much time. So many sip and so little time is the problem. Thank you for the tip.
-
 captainbob got a reaction from GrandpaPhil in Spray by captainbob - FINISHED - 1:48 - SMALL - the first boat to be sailed single handed around the world
Hi all,
Years ago I read "Sailing Alone Around the World" by Joshua Slocum, and in January 2012 I decided that I would build his boat, the "SPRAY", in 1/48 scale POF with bent framing. The way Slocum built it. I started asking questions on this forum, and I want to thank all those who answerd with help. The information on this forum is invaluable.
Then the research began. In the first chapter of his book, Slocum said he was given an old "fishing smack". So I looked for fishing smacks of 1800. About when his was built. Someone suggested the "Emma C Berry" for framing, so I hunted for information on that boat. I also gathered as many plan drawings of the "Spray" as I could find. About five.
Now it was time to check and redraw the plans. The first thing I discovered was that ALL the plans had errors. Things like, the shear and section views would agree and the shear and the plan views would agree, but the width of the plan was no where near the same as the width of the sections. Of the drawings I had, the drawing from the appendix in the book was the closest. So I traced that into an old copy of AutoCad and worked out the errors.
Checking the fishing smacks plans had shown a frame spacing of from 15" to 22" I chose 18" for framing the Spray. I drew a section at each frame. I offset a line .031" inside to subtract the 1.5" planking Slocum used. The frames will be 3" X 5" so again I offset another line .062 inside the planking for the frames. This gave me the section lines for the plug I will carve to shape the frames.
I am going to plank only half the deck and deck houses so I can show the insides, taken from the sketches in Slocum's book. (See below)
Bob
-
captainbob got a reaction from popeye the sailor in Drafsight v's Autocad LY2002
Michael,
I used AutoCad at work but could not take it home when I retired. I found and downloaded Draftsight (Made by the people who make SolidWorks) and have been very happy with it.
I got rid of Norton and use Microsoft Security. Which is a free down load.
Bob
-
 captainbob got a reaction from rtropp in What woods do you prefer to use
Steel wool & vinegar is a very old staining technique, sometimes called "ebonizing." It works with the tannins in hardwoods. There is not enough tannin in any softwood to do a respectable job, but you can add tannin to the wood with tea. What I originally saw was vinegar with steel rusting in it applied to walnut without any tea. It immediately turned black with brown overtones.
What you need to do is make up some rusty vinegar, the rustier the better, a jar of tea and some scrap woods of different types. Experiment with and without tea and see what happens. If you look on the web for weathering wood, ebonizing wood, ageing wood, you will see many different techniques, any one of which may or may not give you the color you want. The only way is to experiment to find your own results. the only thing lost is a little scrap wood and less time than this thread has taken.
Bob
-
 captainbob got a reaction from AntonyUK in What woods do you prefer to use
Steel wool & vinegar is a very old staining technique, sometimes called "ebonizing." It works with the tannins in hardwoods. There is not enough tannin in any softwood to do a respectable job, but you can add tannin to the wood with tea. What I originally saw was vinegar with steel rusting in it applied to walnut without any tea. It immediately turned black with brown overtones.
What you need to do is make up some rusty vinegar, the rustier the better, a jar of tea and some scrap woods of different types. Experiment with and without tea and see what happens. If you look on the web for weathering wood, ebonizing wood, ageing wood, you will see many different techniques, any one of which may or may not give you the color you want. The only way is to experiment to find your own results. the only thing lost is a little scrap wood and less time than this thread has taken.
Bob