HOLIDAY DONATION DRIVE - SUPPORT MSW - DO YOUR PART TO KEEP THIS GREAT FORUM GOING! (83 donations so far out of 49,000 members - C'mon guys!)
×


egkb
-
Posts
1,632 -
Joined
-
Last visited
Content Type
Profiles
Forums
Gallery
Events
Everything posted by egkb
-
 Peachy looking Jim.. just the Boom & Gaffs to go eh ! You'll be onto a new kit soon (have you anything in mind? or just finish Snake!) All The best Eamonn
 -
Wonderful Stuff Danny, a pleasure to follow along ! All The Best Eamonn
-
All righty then.. the Starboard side deadeyes & chains are fixed in place, no photos yet as all you will see are some lolly-pop sticks clamped to hold them in place whilst glue sets.. and I don't think anyone wants to see that.. except maybe all you ahem ahem 'Clamp' enthusiasts I know who you are... shame in you !! All the Best Folks Eamonn
-
Rob she looks the absolute bizness mate.. really like the black on the masts & bowsprit ! All The Very Best Eamonn
- 76 replies
-
- 1
-

-
- caldercraft
- finished
- (and 1 more)
-
Euro price.. a special offer give away € 145 to the door .. normally around this price Sterling undelivered!!.. couldn't say no as you may guess. Ebay .. unwanted gift I think.. E
-
Right Back At You Jonny (PM wise) Holty it is a cracking good bit of kit.. ok I accept that a drill will produce good results too but for sheer convenience .. having 2 centers really makes a difference ..!! Thanks for dropping by guys Eamonn
-
Hey Holty.. It was the small Proxxon one, it was on special offer and I couldn't resist. All The Best Eamonn
- 1,039 replies
-
- 1
-
-
- ballahoo
- caldercraft
- (and 2 more)
-
Small Update Time Again.. All Deadeye Strops are complete and have their Deadeyes in place, the strops aren't anything special to look at but I still feel that they are way better than the kit supplied versions.. next up is painting the strops black than adding them to the channels. All the best Folks, and Happy Thanksgiving to my friends across the pond. Eamonn
- 1,039 replies
-
- 2
-
-
- ballahoo
- caldercraft
- (and 2 more)
-
We had similar issues and causes Jonny.. I too sailed professionally and had to pack it all in for the same reason, but mine was untreatable (at least at the time) I was 21 and retired Eamonn
- 215 replies
-
- 1
-
-
- convulsion
- caldercraft
- (and 1 more)
-
Not sure if this helps guys but it is my understanding that the Fore Most Shrouds are served over their full or almost full length to protect them from chafe as a result of rubbing by the Square Sail on that particular mast.. so probably not on the Mizzen Mast as (I think!!) there is usually no sail set there (I'm referring to the lower shrouds of course) Hope this may be of some help. Eamonn
- 1,144 replies
-
- 3
-
-
- snake
- caldercraft
- (and 1 more)
-
My soldering iron is of the Butane variety.. I wasn't able to pick up the necessities for Brazing around town or even near-by so I went online and was dazzled by the different recommendations (got totally lost in fact) until I found the Solder-it and at a great price.. no kiddin I was totally lost re Flux & Silver Soldering etc just when I'd find what I was looking for I'd discover they don't post abroad.. or were in industrial size quantities.. I actually gave up on it (I'm usually very tenacious ) and Solder-It was a 'God Send' ! Eamonn
- 1,039 replies
-
- 1
-
-
- ballahoo
- caldercraft
- (and 2 more)
-
Thanks Jim.. I'm using Solder-It solder paste http://www.ebay.com/itm/Solder-It-SP-7-Silver-Bearing-Solder-Paste-Syringe-7-1-Grams-Flux-Blended-In-/291082936652 I bought it on eBay and it came with a Copper version free.. well easy to use for an idiot like me ! it can be used with an iron or any flame !! it is amazingly strong too, using the above method on a long loop of the same wire, I was testing it.. I wasn't able to pull it apart with my hands!! (there was a good 0.5 cm of overlap though) Eamonn
- 1,039 replies
-
- 1
-
-
- ballahoo
- caldercraft
- (and 2 more)
-
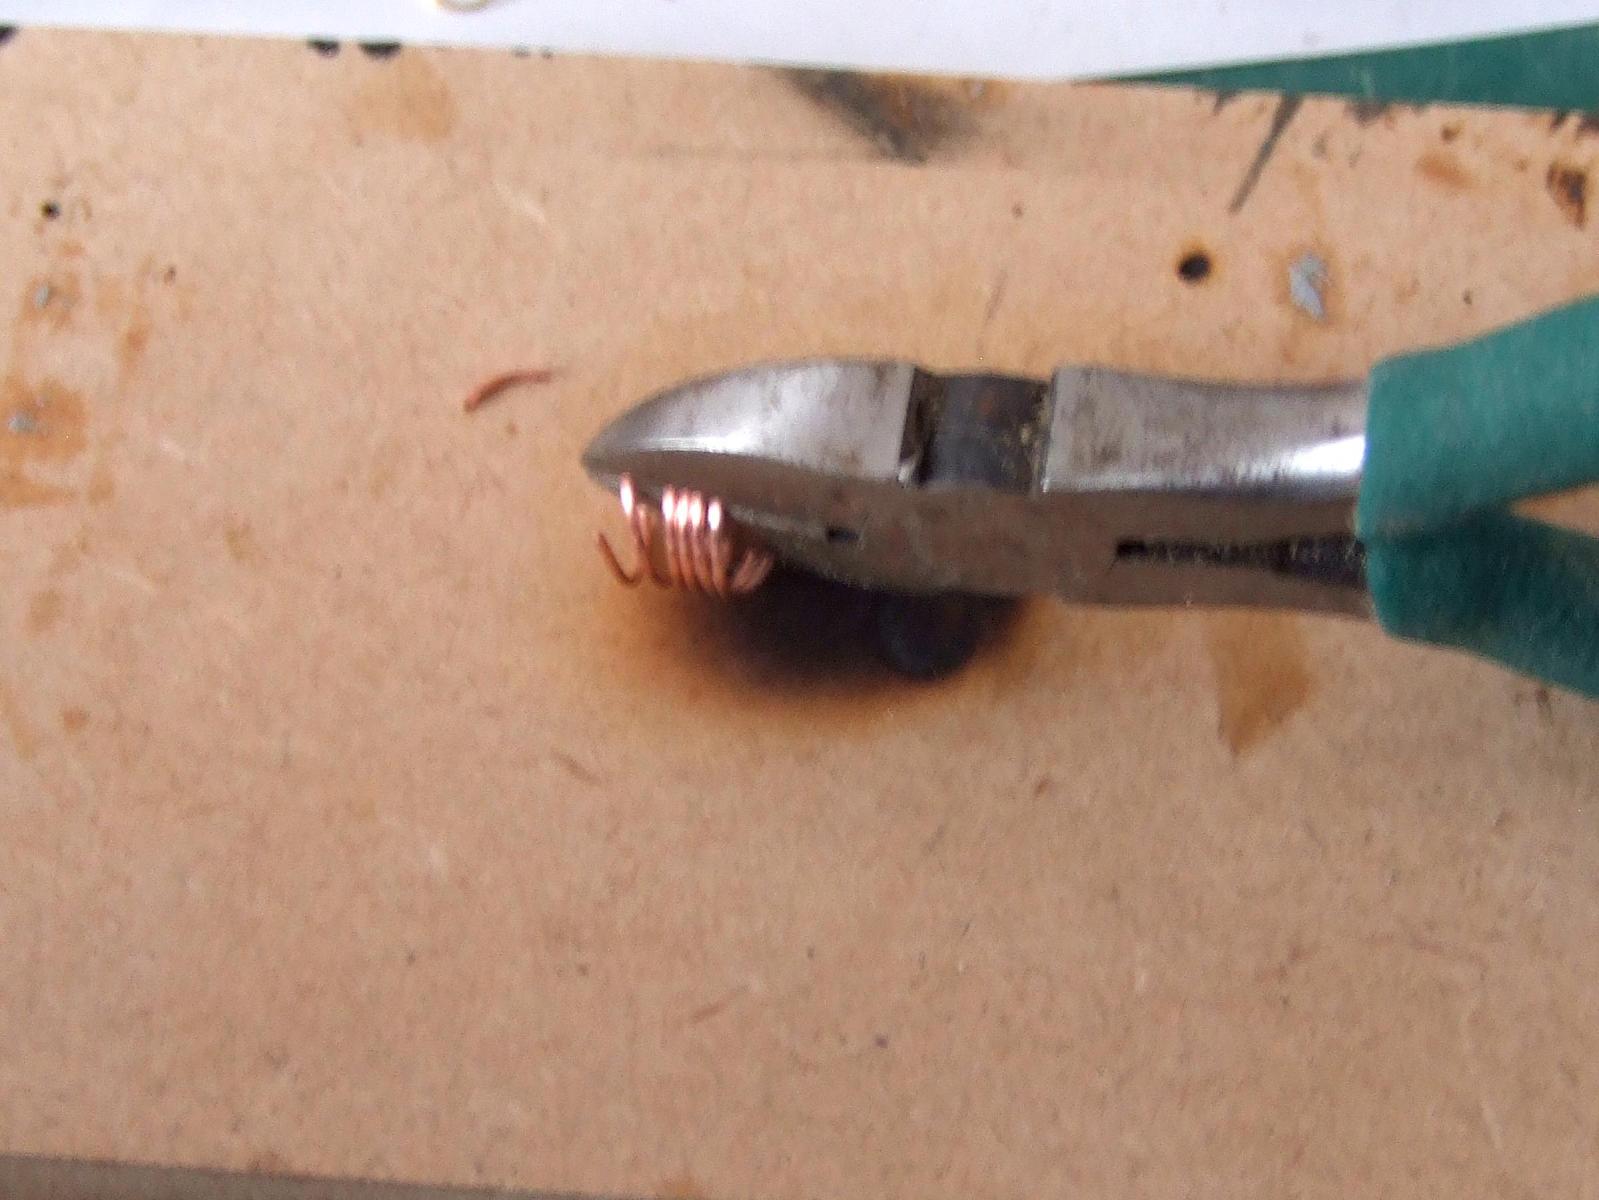
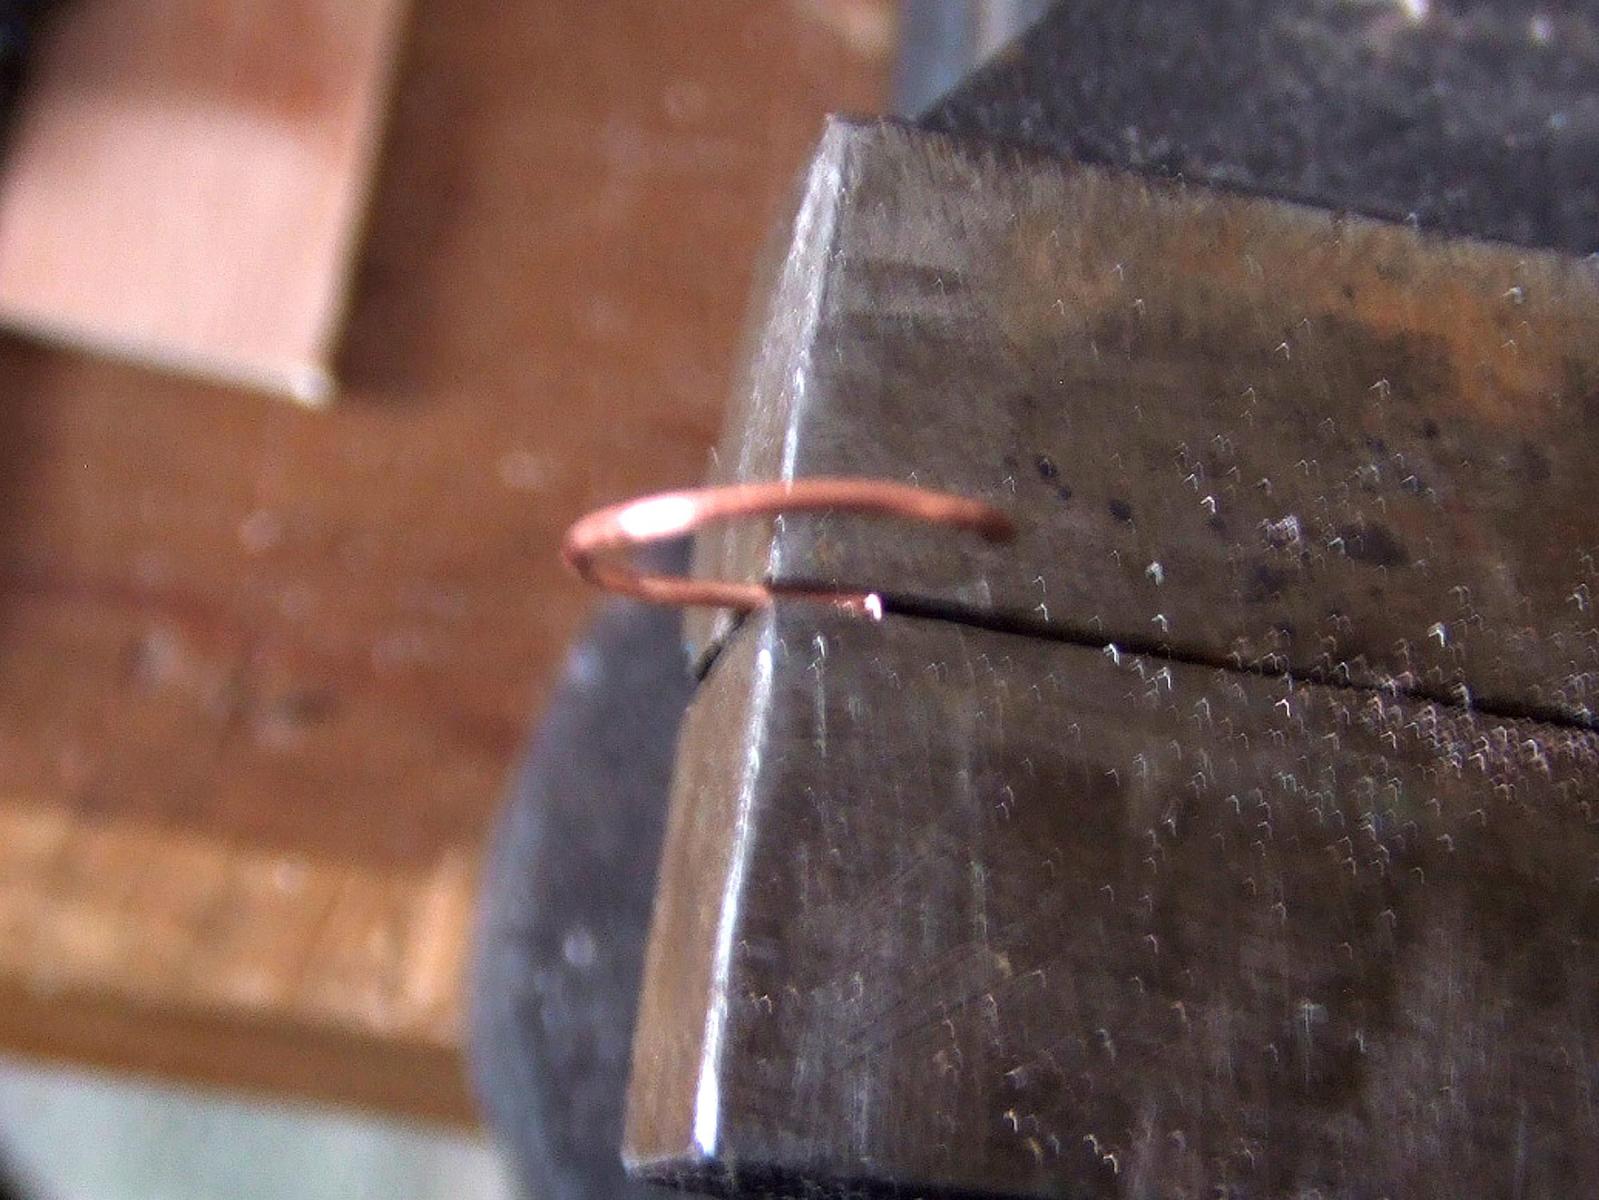
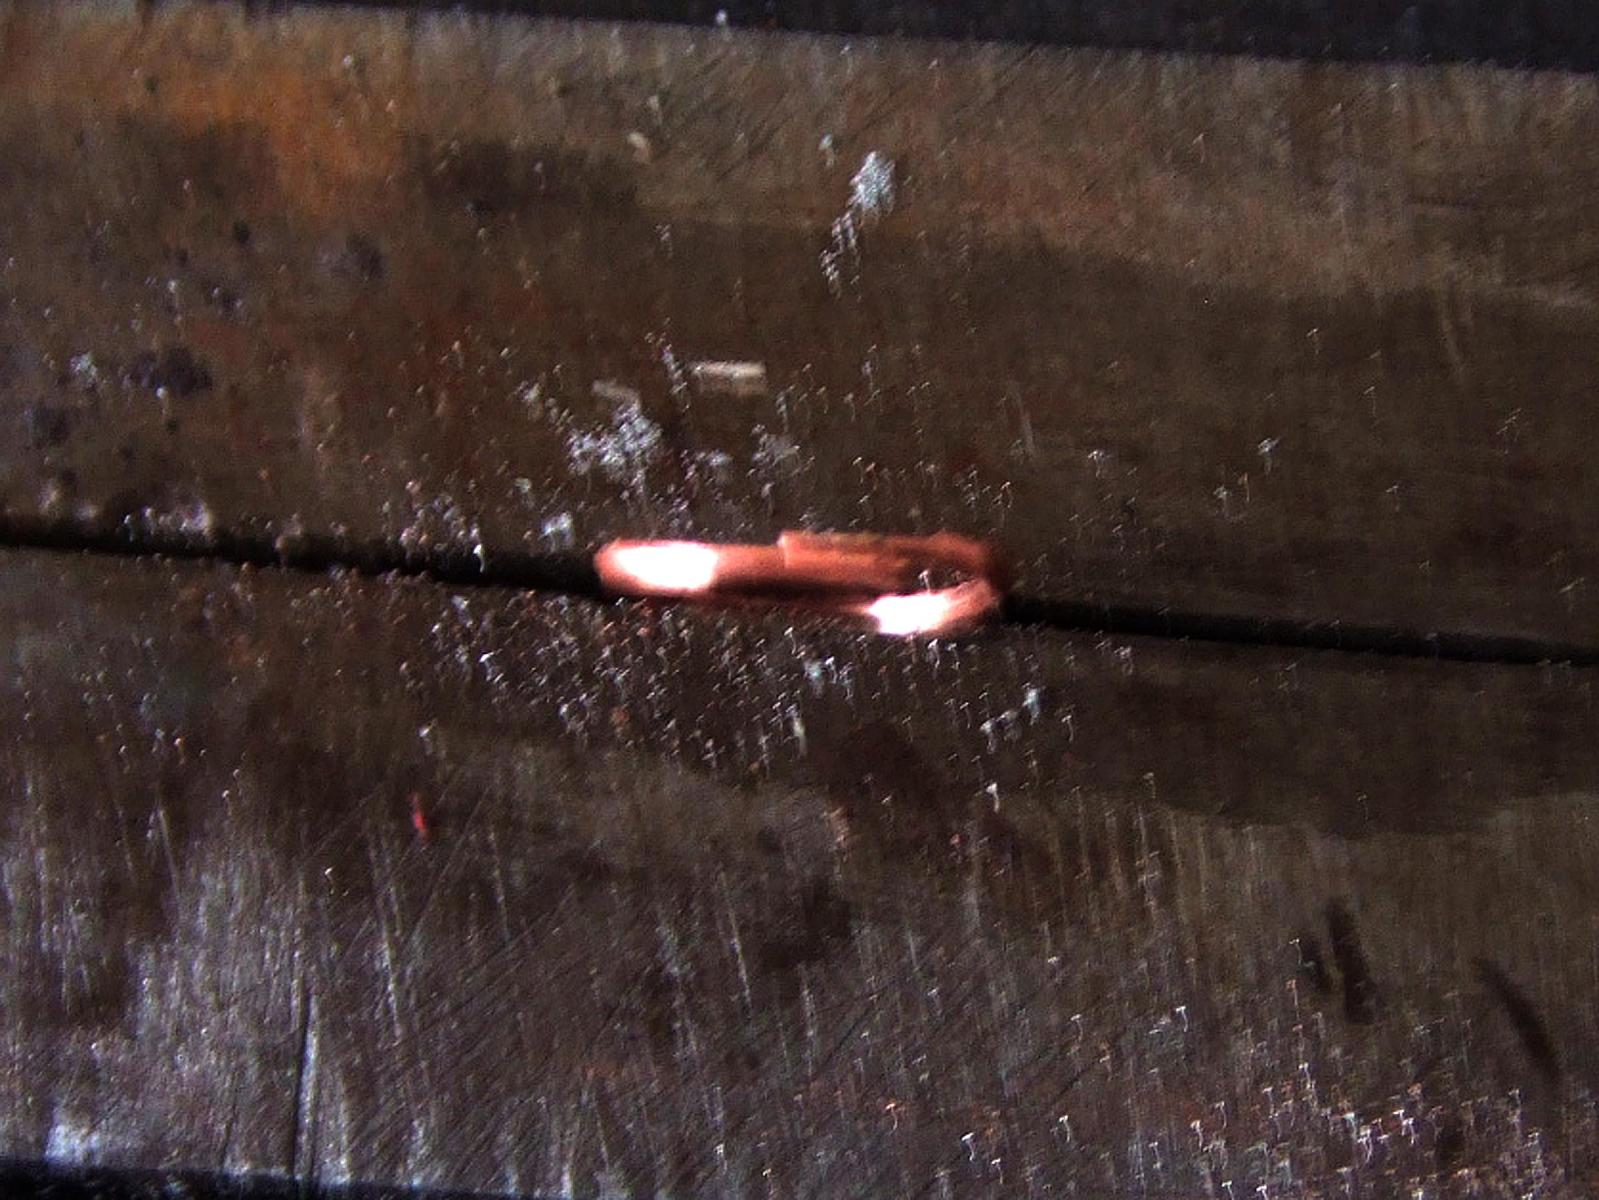
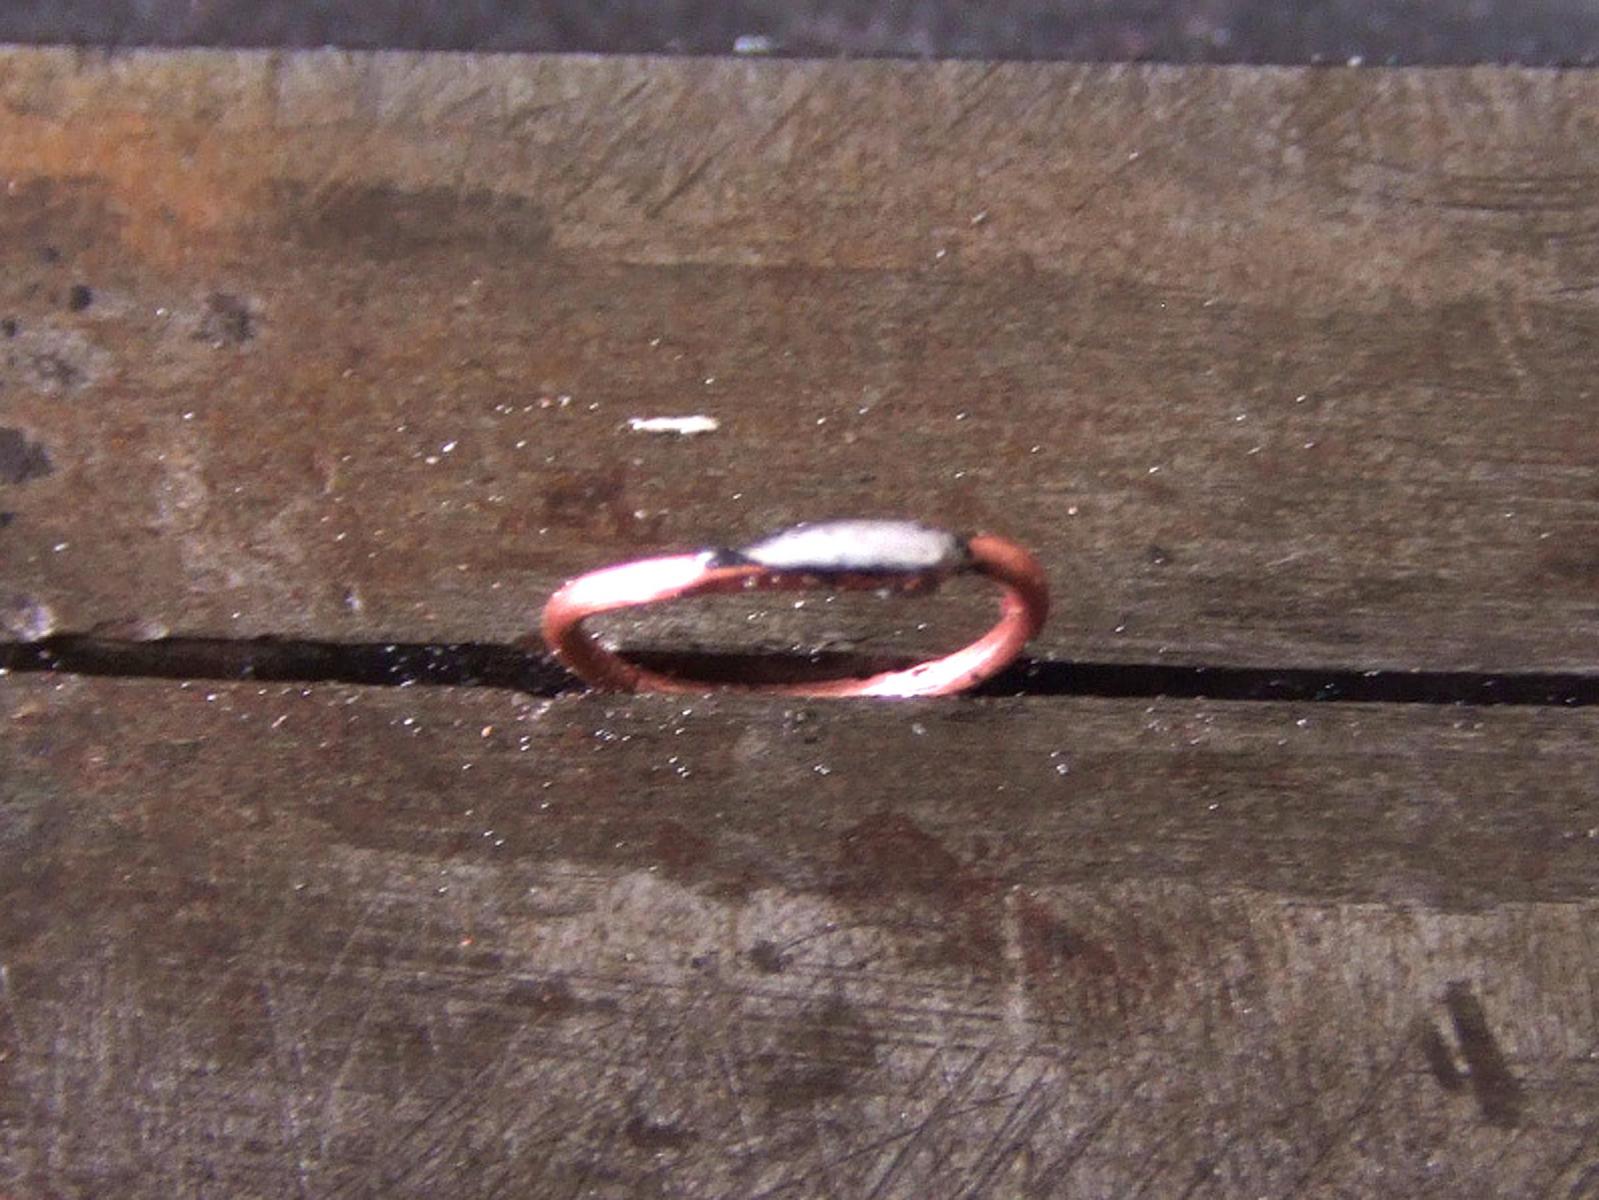
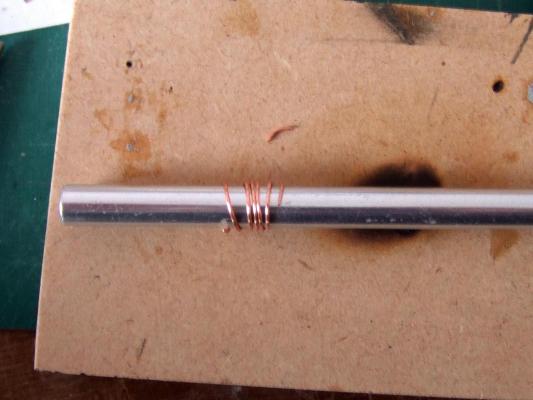
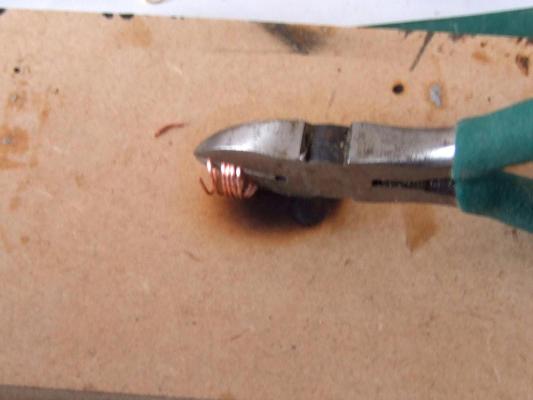
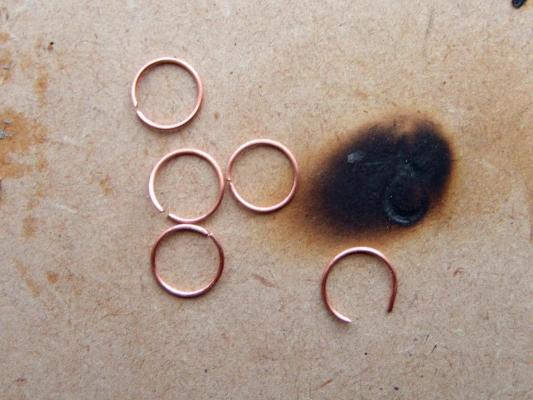
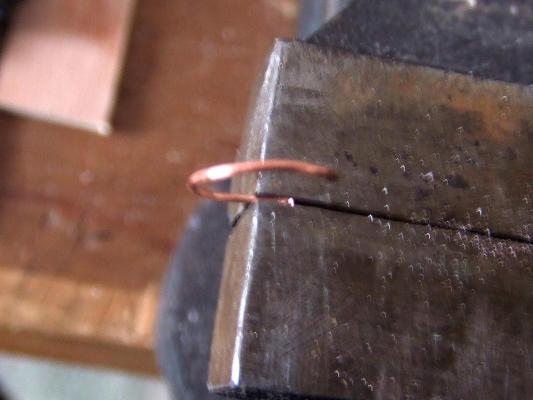
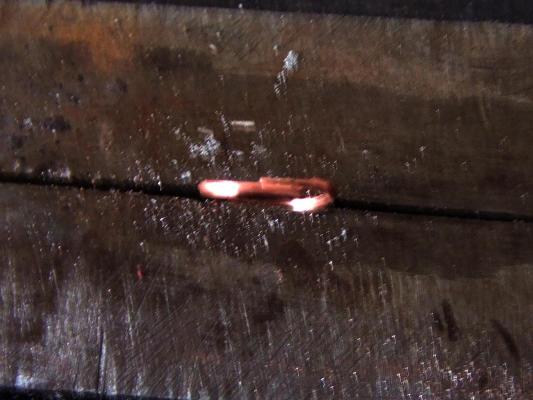
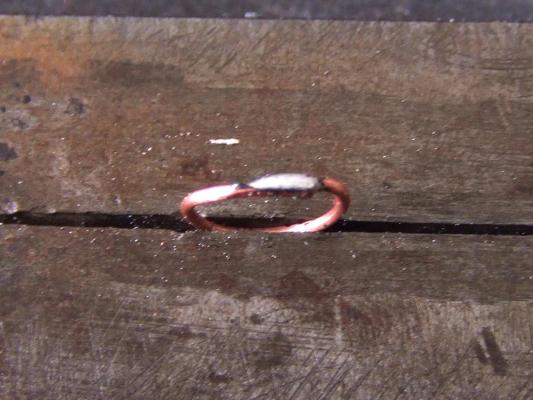
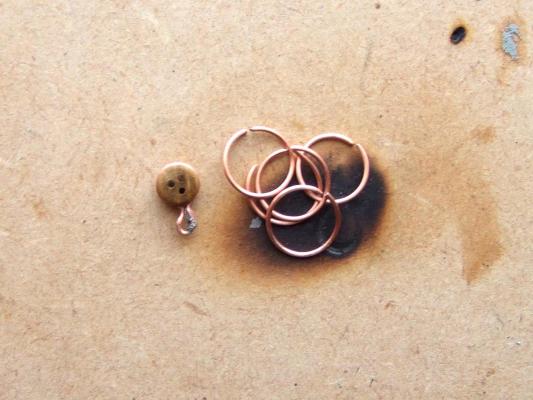
Hi again Folks.. Have hit on a method for doing the Deadeye Strops.. the Method owes much to Jim Smits description for making Strops over on his own Ballahoo Build (I'm not as talented as Jim so I had to adapt it somewhat! in fact I'm kinda rubbish at this sort of stuff ) Anyhoo here goes.. There are photos at the bottom somewhere ! Oh and any changes in the font or font size isn't highlighting or indicating anything other than some sort of issue within my Google Chrome & MSW interface.. 1. wrap suitable wire (regular electrical wire in my case, comprising of 0.5mm strands of copper, and there are loads of it in even a few inches of the stuff) around a dowel, 9mm approx will do.. but don't be too worried over this as they are easily trimmed to length once circular. I ran the length of wire through some emery paper a few times to clean it up first. 2. remove the coil you created by wrapping from the dowel and cut across the coil with snips.. this will produce a bumper load of individual rings. 3. flatten approx 2 or 3mm of each end of the ring (I squashed them in a mini vice, but pliers will work as will smacking them with a hammer! ) 4. squeeze the now slightly flattened ends together so as to form an overlap 2 to 3mm or so will do (we now have nice flat ends touching each other which will give loads of surface area for the soldering bit later) 5. put this ring into a suitable holder so as to have the join upwards, just to make the soldering work easier to reach.. again I put them into the jaws of the mini vice. 6. heat up the iron, and away you go. 7. pop the dead eye into place, close up the strop around it, I find putting a sowing needle or similar into the opposite end helps keep this part open slightly.. you will produce a bowling pin kind of shape.. incidentally I use a round nose pliers to do the squeezing. I suggest keeping the join near the bottom, that way if it fails at some stage your rigging won't become slack, as may happen if the join is towards the top where the deadeye is... gluing the strops in place in the channels should stop any issues. See Photo for outcome.. it needs fine tuning (less blobby looking solder for a start) but it works! and if it doesn't quiet fit (too big for example) than simply trim a small amount off the Ring (stage 2 above) and try again. All the Very Best Folks Eamonn

- 1,039 replies
-
- 7
-
-
- ballahoo
- caldercraft
- (and 2 more)
-
Discreet lack of the old photos there Jonny and you had gotten me all excited to be looking at them too Eamonn Happened me a few weeks ago too (I had just forgotten to post them up, only remembered 20 mins later) E
- 215 replies
-
- 1
-
-
- convulsion
- caldercraft
- (and 1 more)
-
Nicely done Jim ! Eamonn
-
Amazing Work Right There Mate. Loving the 2 thicker planks going down off center ! Eamonn
-
Thanks Jim.. that's exactly where I'll be heading ! E
-
Deadeye Strops are proving awkward.. the kit supplied Photo Etched ones are the devil to fit correctly, they seem designed for either thinner Channels and/or wider slots in said Channels.. so I've moved onto making my own, spent an hour today rummaging about for suitable wire, and then attempting to actually solder the beasts into loops.. not with great success it has to be said decided I'd have more luck actually setting up a Smithy Forge and making the darn things from raw Iron Ore a hammer and an anvil !! Anyhoo after much puzzlement I found some articles in the Tips Techniques & Research section on MSW and I know what I've been doing wrong (the list of errors seems to begin with me actually getting out of bed in the morning and goes on from there) So hopefully tomorrow (weather permitting.. i.e. nice & bright) will see me with some usable Deadeye Strops !! I did however get some of the eye-bolts in place, so not a total disaster Oh and my soldering technique has improved what with all the repeats .. which was nice All the Best Folks Eamonn
- 1,039 replies
-
- 2
-
-
- ballahoo
- caldercraft
- (and 2 more)
-
Now That really gives a scale for our various Builds.. Good Stuff ! Jeeez Ballahoo is TINY !! Maybe she is just really far away.. even though she is in front !! must be an optical illusion (that's my story and I'm sticking to it, cos I know for deffo that Ballahoo is HUGE ) In Denial.. Eamonn
-
Looks The Business Mate.. the size difference is amazing between the two. Eamonn Sorry for not dropping a word in sooner, though I've been in the following quietly in the background
-
Thanks for that Kester, yea the jury is our re the photo etched ones.. that said as they will barely be noticed I haven't totally dismissed the kit ones, especially as I'll be attempting to solder the 'side opening' ... me with a soldering torch.. yup there goes the work bench.. Tony the Pin Rail before the mast is where you put your pint whilst warming your hands on Kesters heated horse.. All The Best Eamonn
-
Ahh the old Heated Horse.. I remember it well, we used gather around it to have a chin wag.. good times ! Fore Stay next for you I presume ? Quick Question.. What did you make your Deadeye Strops out of.. were they Kit Supplied Photo Etched affairs of did you knock them up out of wire or somesuch ? I'm at that stage myself on Ballier All The Best Eamonn