-
Posts
788 -
Joined
-
Last visited
Content Type
Profiles
Forums
Gallery
Events
Everything posted by keelhauled
-
Peter, Catching up on the build. She is looking fantastic! All of the details are really taking that model to a high level. Love the deck. best marc
- 207 replies
-
- billing boats
- cutty sark
-
(and 1 more)
Tagged with:
-
After letting the shrouds and lanyards sit overnight, I adjusted the tension where needed and let it sit again for a few days. Then I checked the tension and alignment of the mizzen against the other mast again. this time I got a better photo. The caps are lined up, the tops are lined up and the royals and sky are lined up. I'm sure that they never were on the actual ship. But I tried to keep the rigging ship shaped For reference, the only square sails set thus far are on the fore mast. thanks for looking!!
- 525 replies
-
- cutty sark
- mantua
-
(and 2 more)
Tagged with:
-
With the mizzen stepped. I checked the alignment of the mizzen mast against the other mast and a pumb bob. You probably can't see the plumb bob and string well - it has a white string. I can see if fine in person. Also, I know the photo isn't lined up with the center line. sorry. i took it with my phone instead of my camera. Looks like I need to go back to using my camera. With the mast lined up, I started the mizzen shrouds. I'm using forceps to keep tension on the dead eye lanyards.
- 525 replies
-
- cutty sark
- mantua
-
(and 2 more)
Tagged with:
-
On to bending the driver. I wanted to have the driver attached before stepping the mizzen. I made more hanks using the jig described earlier in the log. why I didn't make all of the hanks at the same time, I'll never know! I built the channel for the hanks to slide on as well as attached the hanks to the driver. I used photos of the cutty to make sure of the detail. I have an observation. I shot around 200 photos and still don't have the shots that I need. With the driver rigged, I stepped the mizzen mast. I used toothpicks for the wedges. Thanks for looking!! marc
- 525 replies
-
- cutty sark
- mantua
-
(and 2 more)
Tagged with:
-
Work proceeds on getting the mizzen ready to step. Before stepping the Mizzen, I wanted to make sure that the driver was attached and rig. Here is preparing the booms. There are still a couple of fittings and cleat to add. I finished rigging the ratlines and checked and double checked the blocks to make sure that I haven't missed any. A view of the progress on the sails and test fitting the mizzen.
- 525 replies
-
- cutty sark
- mantua
-
(and 2 more)
Tagged with:
-
Hi Marco! thank you for your comments! I'm learning as I go. I was originally going to build the large Revell model. By the time I was ready, I couldn't find it and was told that they stopped producing it. I was intimidated with the wood, but it's been fine. i spend a great amount of time trying to research the ship. Wish I was closer to the actual ship. If I can help in anyway, please let me know. Also, do you have a build log I can follow? best marc
- 525 replies
-
- cutty sark
- mantua
-
(and 2 more)
Tagged with:
-
Boat time again! I had previously attached the boats to the chalks and checked it's location and fit of the supports with the pinrails. I continued with adding the lines and chains, fastening the boats to the eyebolts. As you can see, I did the work off the ship using some plastic containers to allow me easy access to all of the eyebolts. The next step will be adding the studding sail yards, spars, and accommodation davit. If I can fit all of that stuff on the beams.
- 525 replies
-
- cutty sark
- mantua
-
(and 2 more)
Tagged with:
-

HMS VICTORY 1765 by albert - 1/48
keelhauled replied to albert's topic in - Build logs for subjects built 1751 - 1800
Beautiful work. Beautiful work space. I look forward to following your progress! best marc -
They are available in several different sizes. I have sizes ranging from 3 inches to about 9 inches long. really nice. the scissors have saved me a few times. Like all tools, they range in quality and costs. You get what you pay for. More important with the scissors in my experience. cheap ones weren't too good- cutting edges had some irregularity when the two surfaces met. the expensive ones were razor sharp and perfect alignment.
-
Wow Harry! What a great build! Your cases are also works of art! You should do a tutorial on building cases. very jealous of your skills. best, marc
- 70 replies
-
- pen duick
- artesania latina
-
(and 1 more)
Tagged with:
-
Love this model! Very interested to see the sternpost and rudder assembly in place and articulated. cheers marc
- 118 replies
-
- sanson
- artesania latina
-
(and 1 more)
Tagged with:
-

Cutty Sark by NenadM
keelhauled replied to NenadM's topic in - Build logs for subjects built 1851 - 1900
Sorry to hear about the water!! Very nice work on the ship!! I'm always inspired seeing your creativity! best wishes marc- 4,152 replies
-
- cutty sark
- tehnodidakta
-
(and 1 more)
Tagged with:
-
hello everyone, thanks for your support Harry! I've been learning to use the lathe. I've been accomplishing turning threads at the correct pitch and turning rods to the correct diameter within a 1/10000 of an inch. I have a way to go to before tackling anything of substance. working on skills. I'd like to make some parts for my tiny wood working lathe (like a following rest) and make some jigs for modeling. Eventually I want to turn the ships bells, stanchions for the rails, sheaves and maybe cannon and belaying pins. Sorry, I haven't posted. Unfortunately, I've been working long hours as a result of COVID-19 and when I've had time off, I wasn't overly productive and didn't feel like being in front of a computer screen. I don't think I checked email more than once a month. Anyway, I have worked on the Model some when I can get myself motivated - seem to be in a funk and extremely tired. Then I moved my home work environment from my house in Virginia to my house in Florida for the month. On to rigging - I continued work on rigging the mainmast. I continued with rigging the ratlines, using templates created for both sides. The template is designed to be up against the shrouds to align the ratlines. The view of the template isn't aligned with the ratlines in the photo (its leaning against the mast, so the ratlines don't line up with the correct template lines. You might notice that there are two groups of lines red and black. I screwed up which was evident when I checked the port and starboard alignment and height above the deadeyes. The red lines are the corrections to the spacing. port side some views of the foremast and the pin rails. You can see the serving of the main stay. a view of the fore top from aft. can see the Next is some work on the ship's boats thanks Marc
- 525 replies
-
- cutty sark
- mantua
-
(and 2 more)
Tagged with:
-

Cutty Sark by NenadM
keelhauled replied to NenadM's topic in - Build logs for subjects built 1851 - 1900
Great progress, Nenad! she is looking wonderful! So much to be proud of. Take your time with the rigging. Always check the placement of your hands and your lines. No long sleeves. You'll be fine! Are you going to rig her with sails? best Marc- 4,152 replies
-
- cutty sark
- tehnodidakta
-
(and 1 more)
Tagged with:
-
Hi Harry, Tim, and Grant! thank you for your kind comments. Grant, your comment hits close to home. The first time that I oiled everything and fired up the lathe to make sure everything was working, I was dismayed to see the gleaming surfaces become covered with oil.😲 I finished the table in January. So back to the ship!!! I've been doing some rigging during this month. Thank you for your patience! Marc
- 525 replies
-
- cutty sark
- mantua
-
(and 2 more)
Tagged with:
-
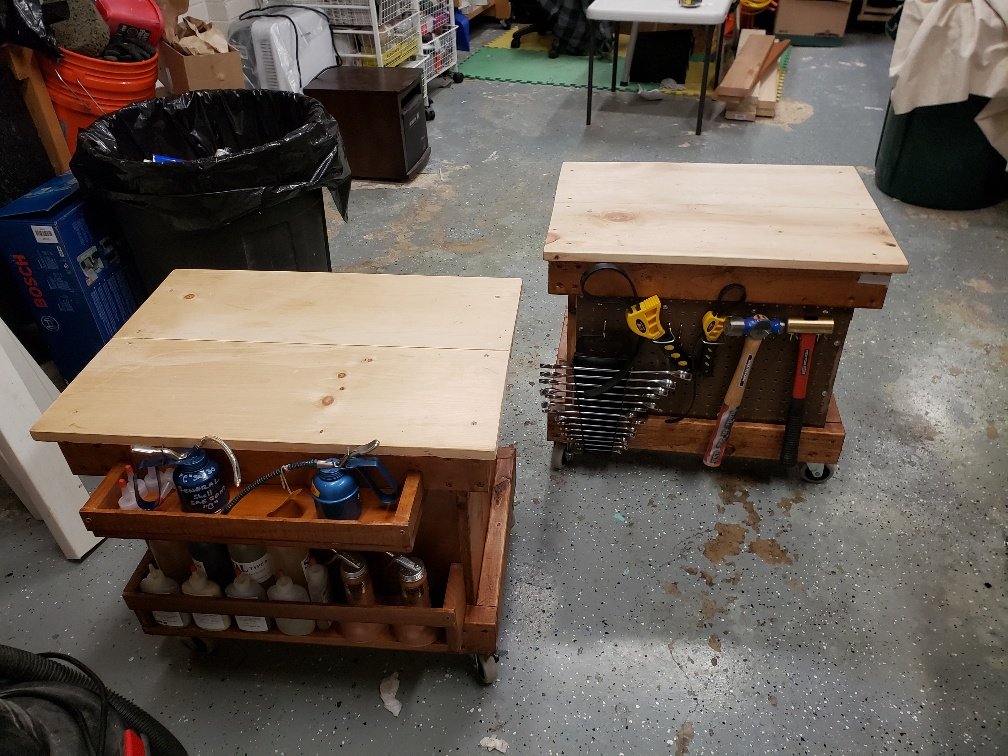
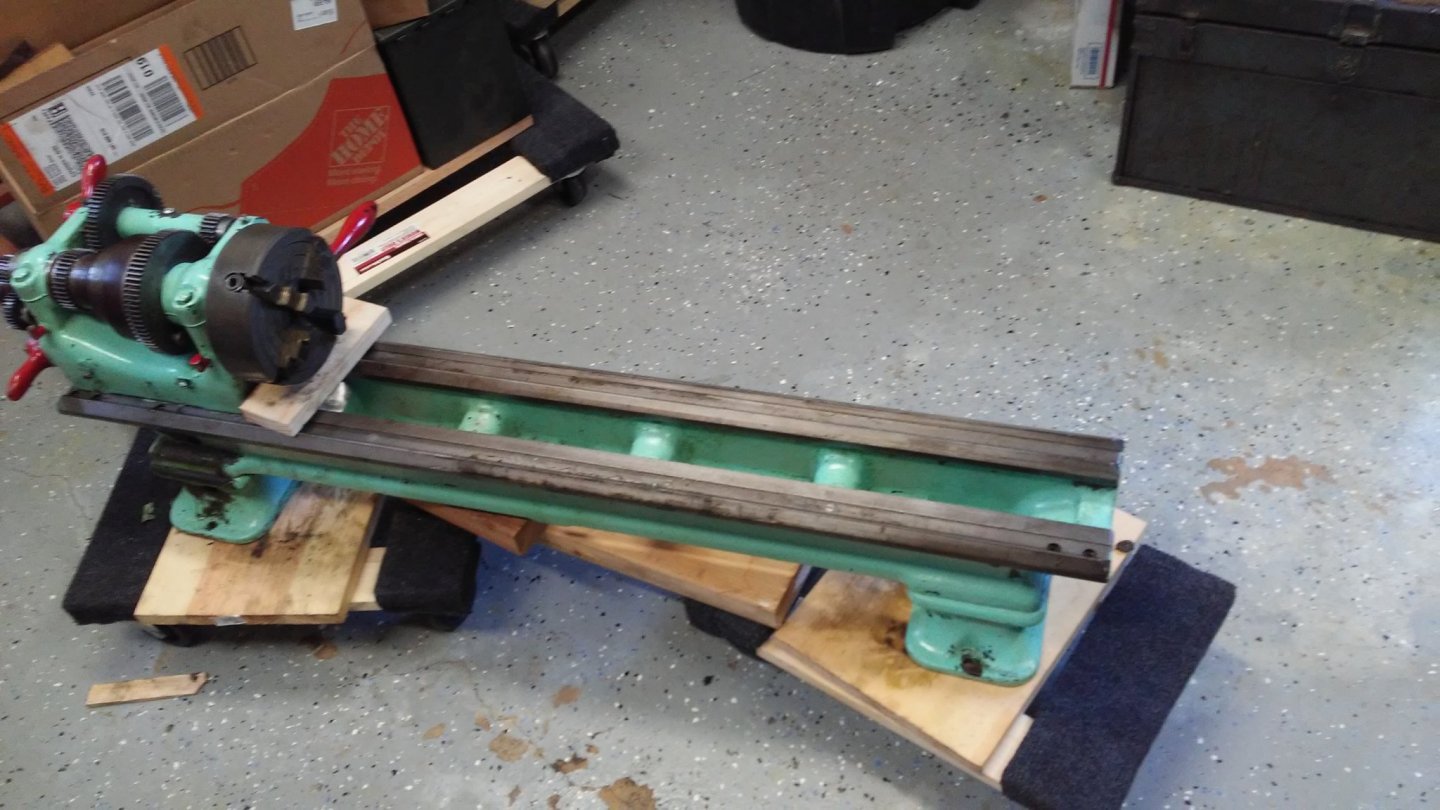
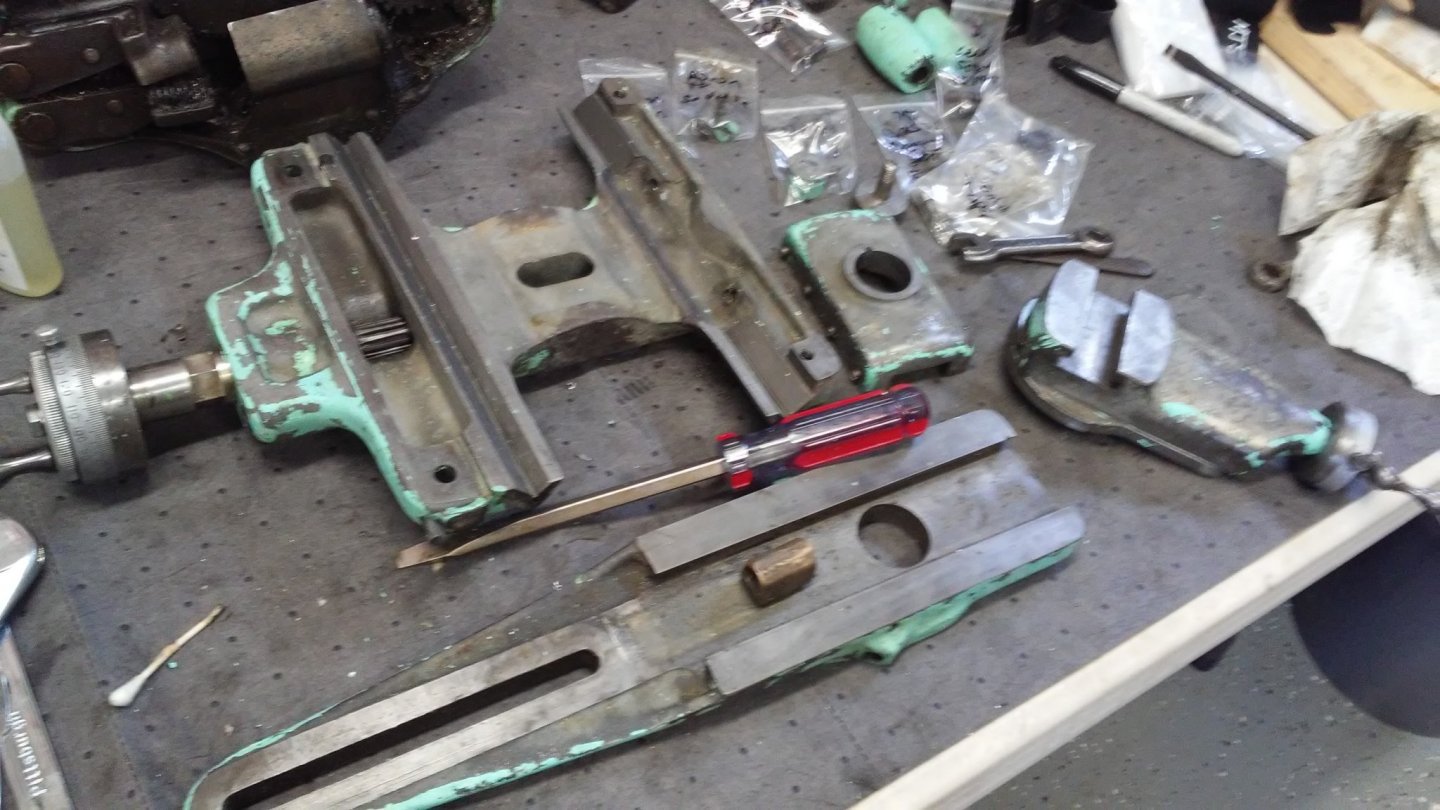
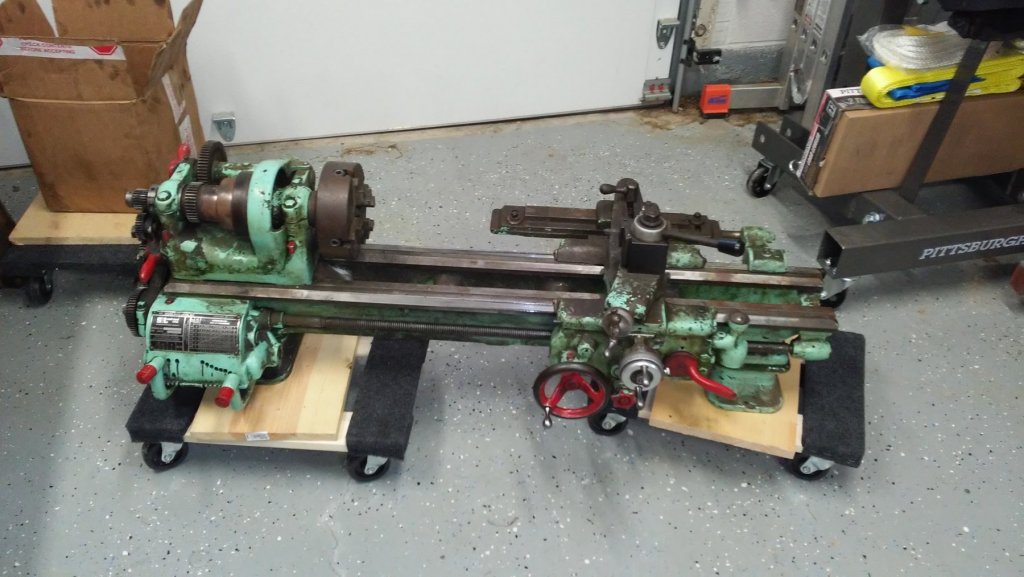
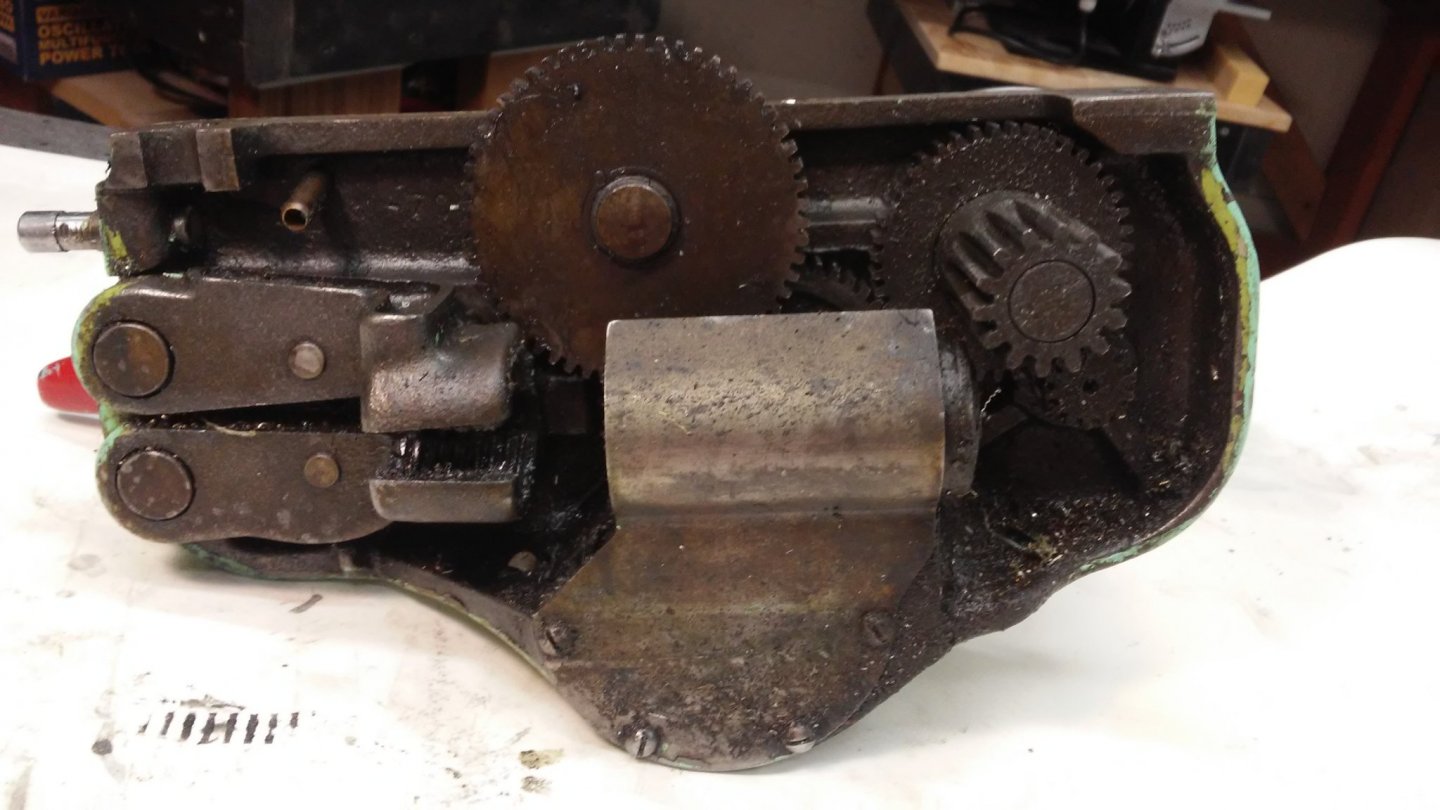
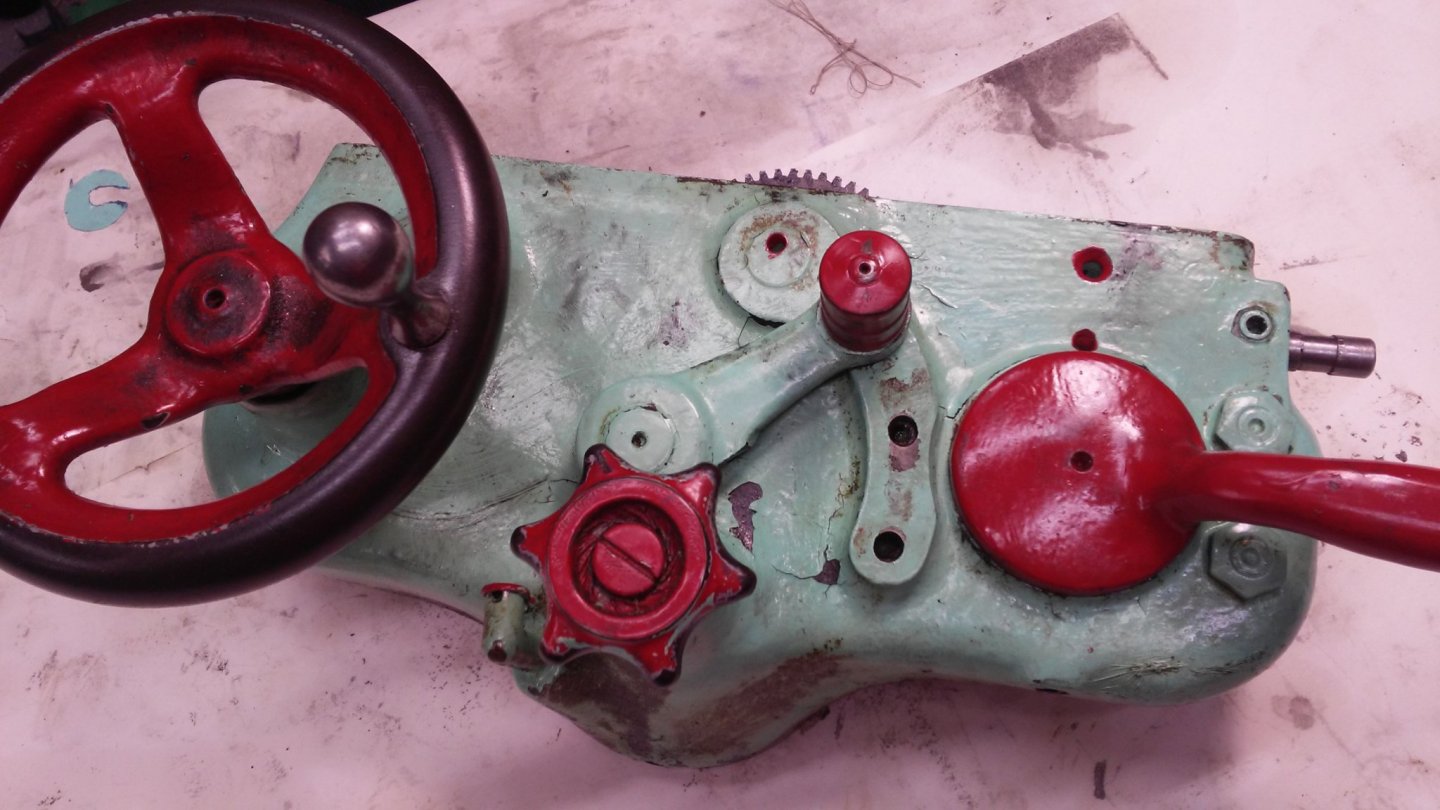
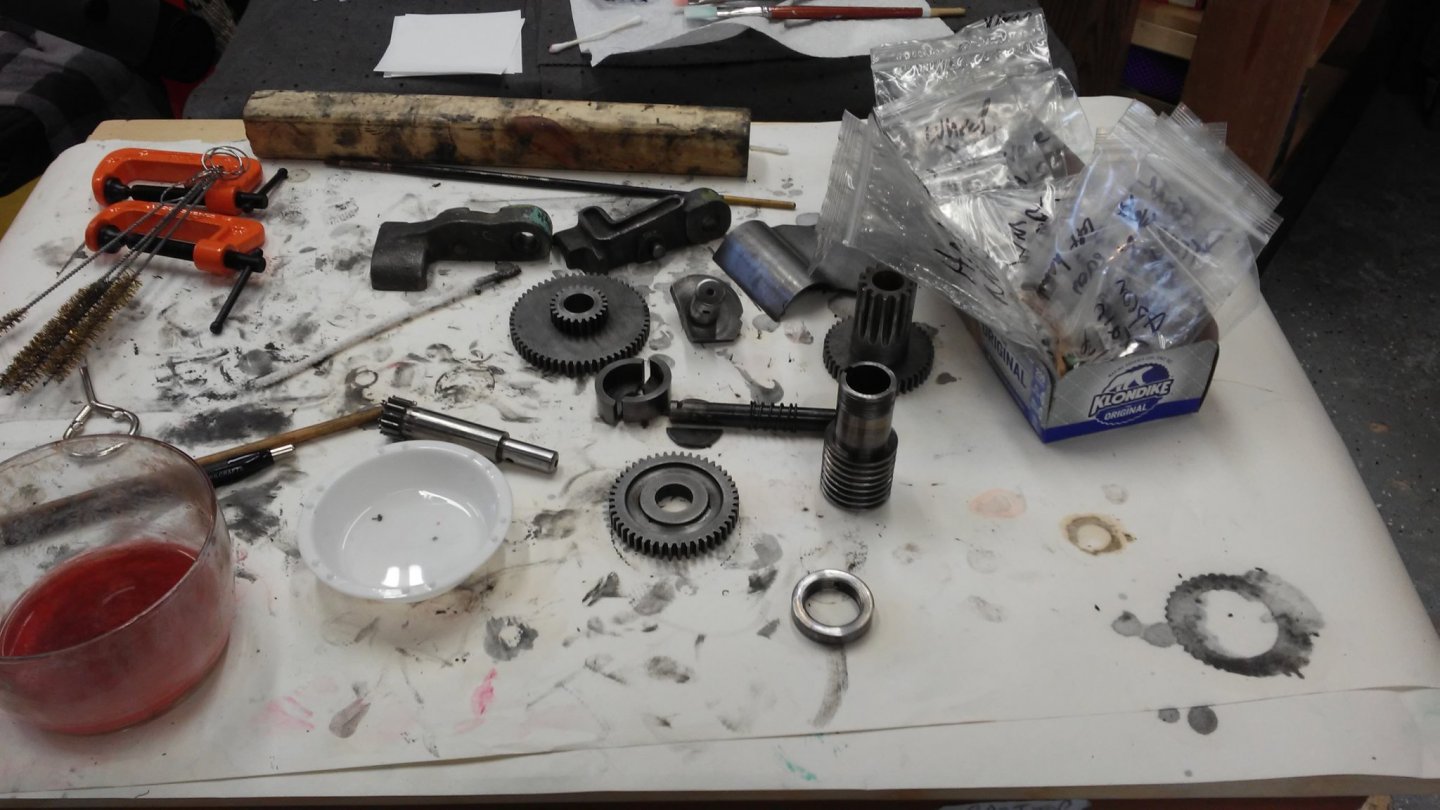
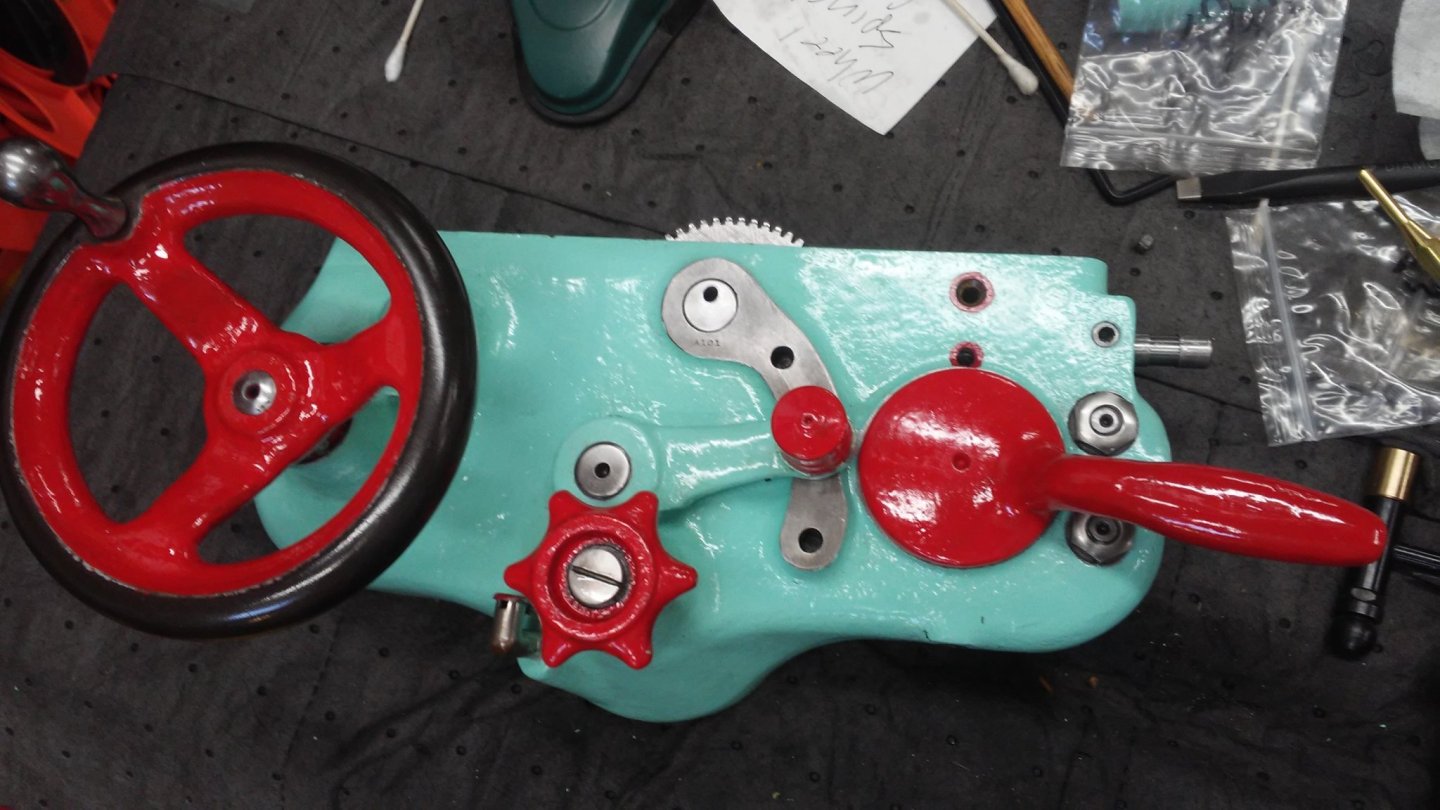
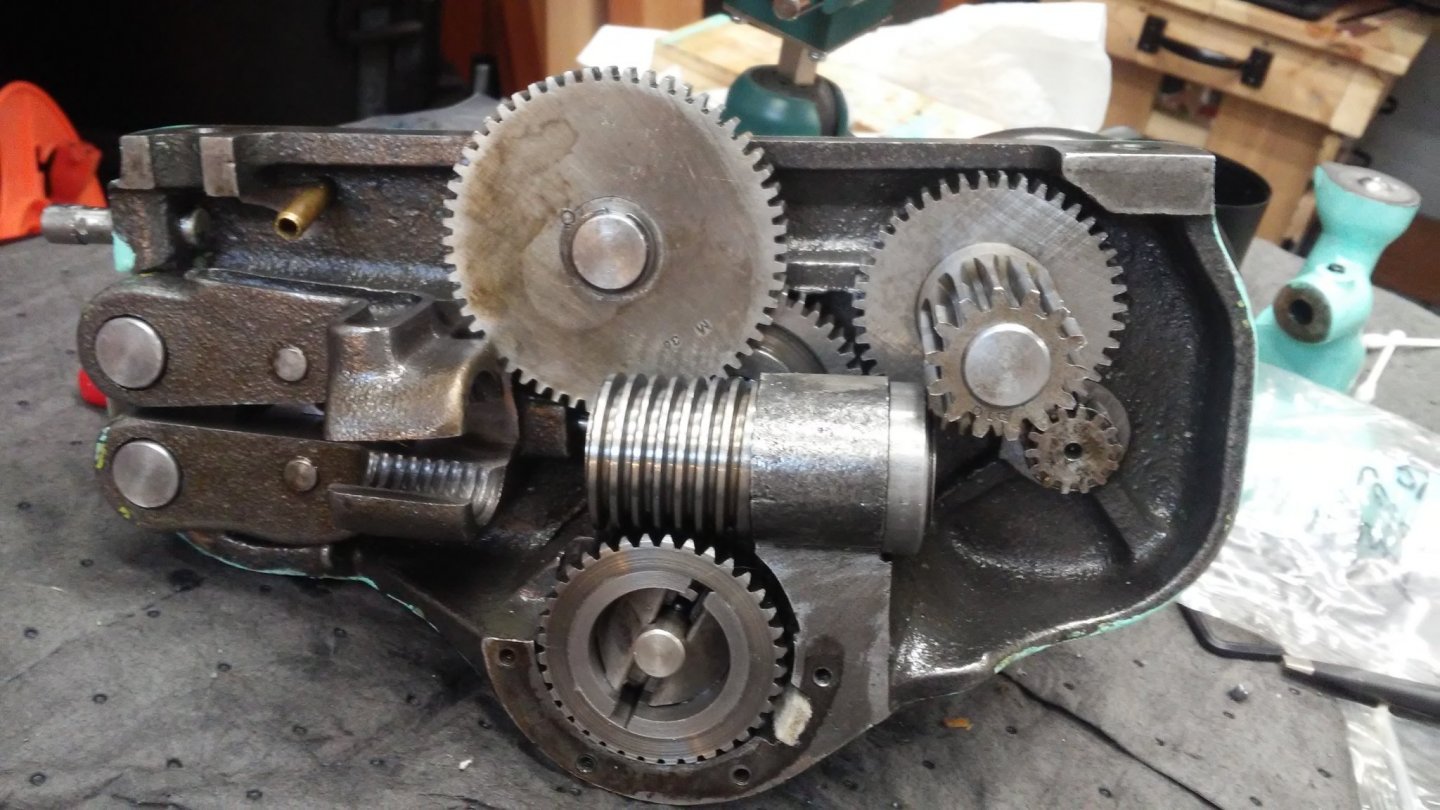
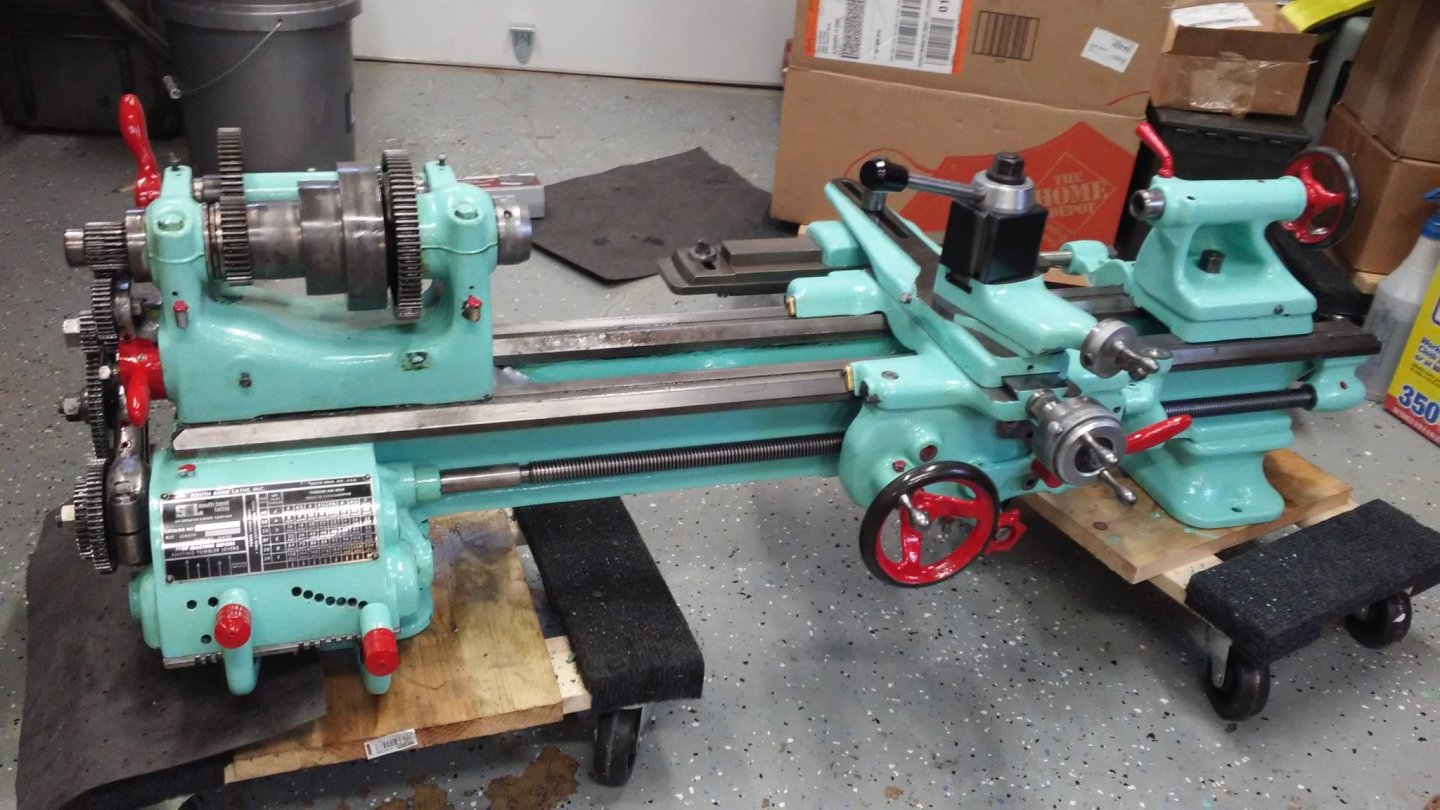
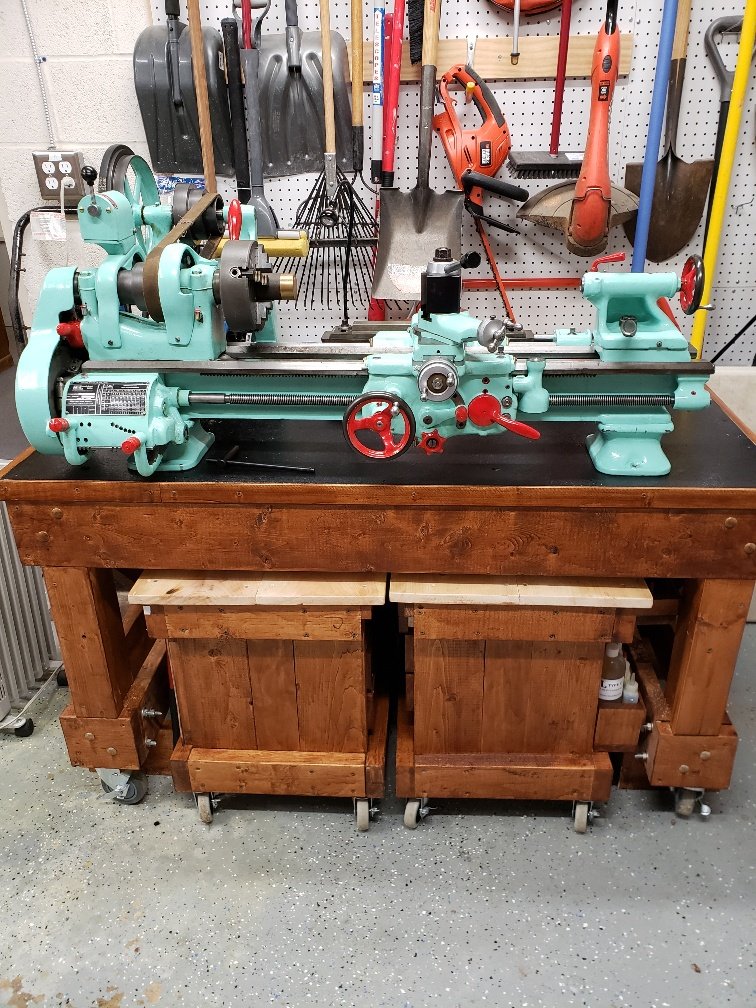
Hi everyone, here is the reason that I haven't been working on the ship since June. Here is the lathe when I started. I was just going to clean it up some and put it on a bench. Here is what it looked like five months later I started by just doing some cleaning. Then, before I knew it, I had disassembled the lathe down to the bed!!! It become one of those projects where the more you get into it, the deeper you get. I took just about everything completely apart, stripped it to the bear metal. Here is the apron. several coats of flaked paint. Levers and gears aren't smooth and hard to use. The back of the apron. surface rust, caked oil and dirt filling the gear teeth. blocked oil paths. Apron disassembled and taken to the bare metal I was hoping that it all went back. Notice the collection of labeled zip lock bags. I photographed each component in-place before removing it, then removed the component and placed it into its own labeled bag. After complete cleaning, painting, new felts, new oilers, and reassembly. the wheel and all of the levers and gears operate very smoothly Here the lathe is on the table that I built for it. I wanted to have the table on castors so that I could move it around, but I wanted the stability of it resting on legs. I couldn't find a solution online that didn't have complaints. I actually built the table so that it could rest on cribbing (boards) that lift the table off of its castors. I use a hydraulic car jack that lifts one side of the table high enough for me to slide cribbing consisting of 2"X 8" boards formed like a "U" that supports the table. It only take about 4 pumps on the jack to lift it to the correct height. It takes less than a minute to do both sides. In this photo the table is actually siting on this cribbing, not the castors. I made two carts that slide under the table. I'm able to store most of the tools and accessories in these carts. The slot at the top of the cart on the left holds four chucks and the collet draw bars. On the back of the carts, I store all of the oils needed (5 different types) and various tools that don't fit well in the drawers. I'm very happy with the results! One change with the tops of the carts - i placed a soft oil resistant mat on the tops. Now I need to learn how to use the lathe!!!😲
- 525 replies
-
- cutty sark
- mantua
-
(and 2 more)
Tagged with:
-
Hi Harry! Merry Christmas and new years! (belated) to answer your question about the Cutty, she is sitting there unhappy for lack of attention. All of my time from July until Christmas was taken up with that lathe from my post in June. What began as work to just clean up the lathe and get rid of the chipping paint turned into a complete tear down to the bed frame. All disassembled, striped, cleaned, repainted, and reassembled. I'll post some photos soon. Now that the rebuild is finished and a table built to hold the over 450lbs (don't know the kilos) of iron, I will start back on the Cutty sometime this month. best, marc
- 525 replies
-
- cutty sark
- mantua
-
(and 2 more)
Tagged with:
-
Grant, Harry, Michael, Peter, thank you for the kind words about the lathe and the model! I really appreciate the words of encouragement!! I'm currently working on the ratlines for the lower main mast. the rest of the main mast ratlines are in place. I'll send photos soon. best Marc
- 525 replies
-
- cutty sark
- mantua
-
(and 2 more)
Tagged with:
-
Hi Joushua, The plans are still available. They just moved the page: https://shop.rmg.co.uk/collections/maritime-gift. I went to the sight and I just copied this link. They currently have the prints in stock. They are pretty large 3/32" scale if I remember correctly. Just for info you can always check the cutty sark gift shop, if the link doesn't work anymore. The plans are great! Also they are copyrighted. Best Marc
- 525 replies
-
- cutty sark
- mantua
-
(and 2 more)
Tagged with:
-
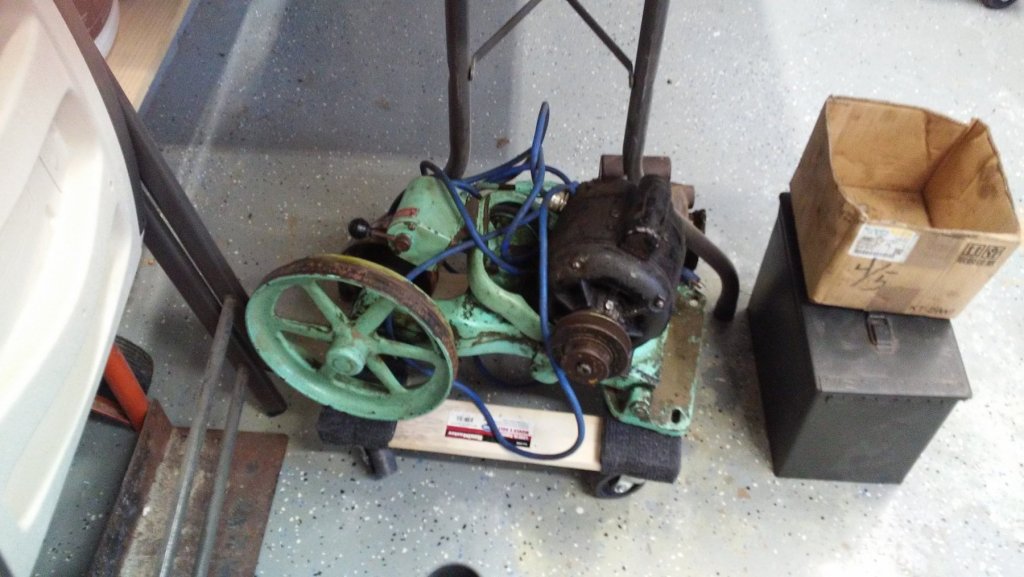
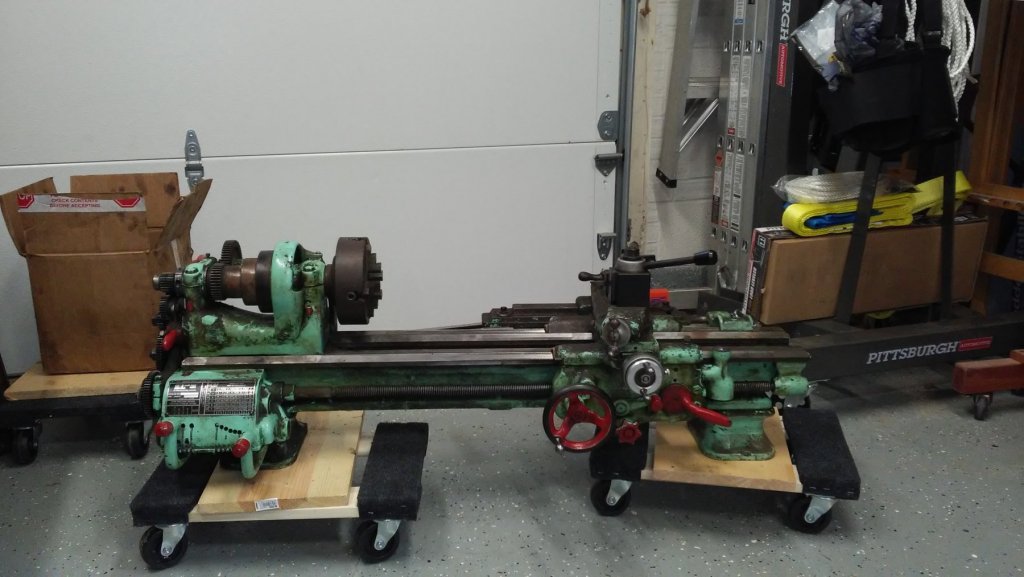
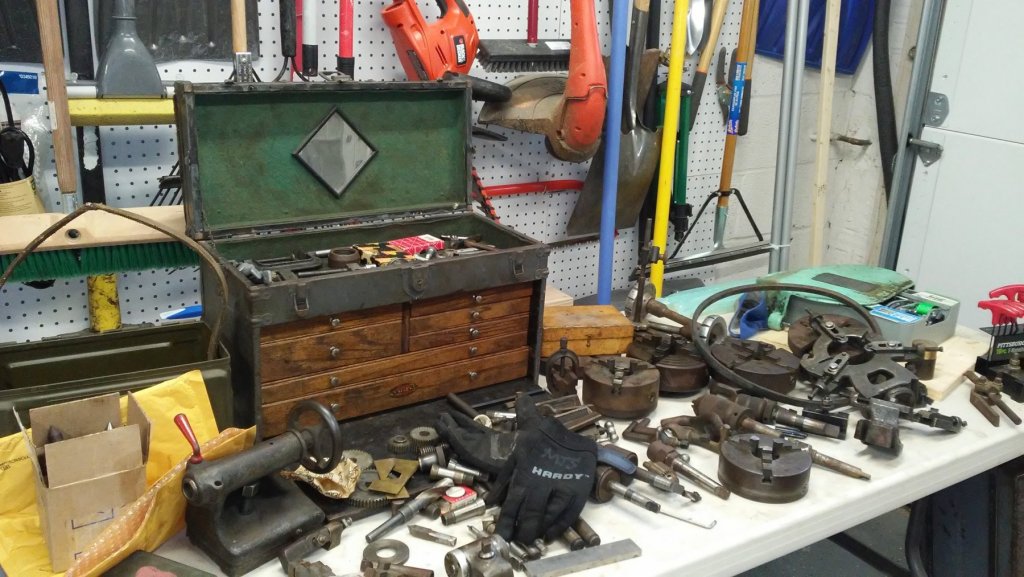
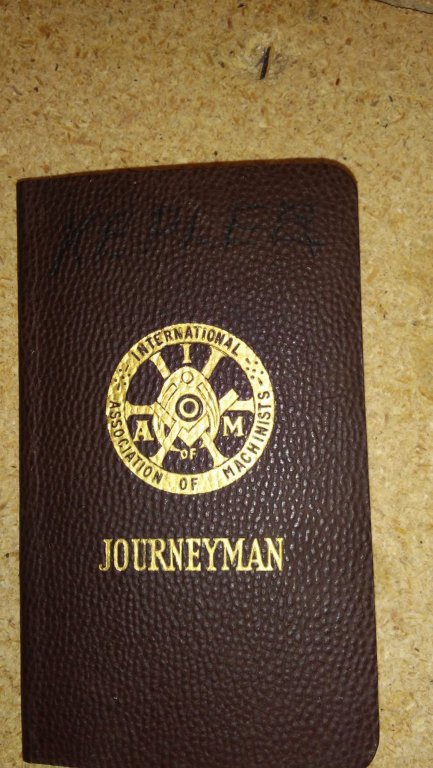
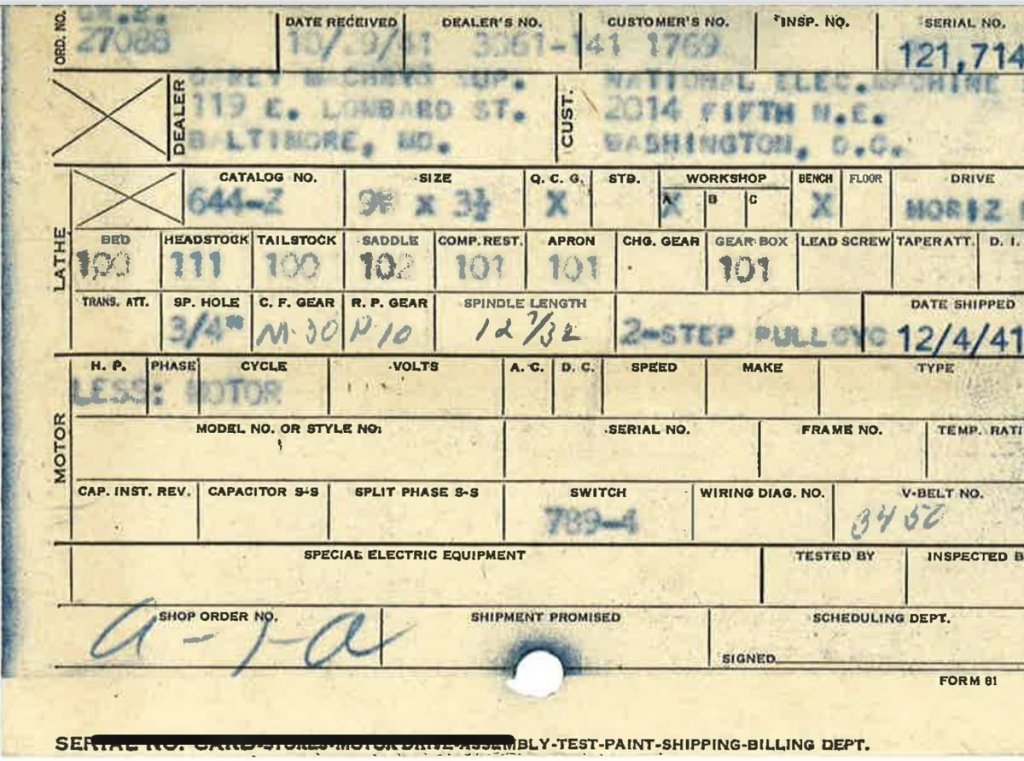
Hi all, Well, I'm the proud owner of a 1941 South bend model A lathe! It has some wear, but so would anyone born in 1941! I'm the forth owner. The third owner bought it three years ago, but never set it up and ran it. The the machine never ventured past the suburbs of DC. Even have the original shipping info. It needs some cleaning and surface rust removed on the tooling, but the gears and the gear box are clean- no chips in the gears of the box. Everything works as it should and was well lubricated. Just VERY dirty and in need of a good cleaning, new oil and probably new felts in the wipers. Lots and lots of tooling included as well as several options were ordered with lathe. Even came with the 2nd owner's machinist tool box. The tool box was also full of tools, micrometers, gauges, etc. There were three boxes full of tooling and a box full of cutting bits. His Union record book and certificate were still in one of the drawers So, although the lathe was extremely heavy (between 300-400 pounds), two people were able to move it. I was lucky a good friend was available as was his truck. Saved me from trying to figure out how to get it in and out of my wife's SUV. For me, it was VERY heavy. I used my legs and saved my back. The tools and tool box are heavy enough to bend my table. In fact, the chucks actually deformed the surface. Oh well, who cares.. I've got a lathe!!! Now I just need to learn to run it. Now I need to turn my focus back to the ship! I need to focus on the rigging!!! Ignore the lathe... focus on rigging... ignore the lathe ...ignore the lathe... Did I mention that I got a lathe!!!
- 525 replies
-
- cutty sark
- mantua
-
(and 2 more)
Tagged with:
-
Hi Michael, You are too kind! This is my first wooden ship build. Although at this rate (speed) it might be my last. I was hoping to do three other builds, but I'm already 50. Not sure how much time is left.😉 Thanks for the input Harry! On a side note, for the past three years I've wanted a little bench metal lathe. I finally found one on craigslist that was the model I was looking for. I'm going this weekend to take a look. I'm trying not to get my hopes up, but it might be too late. Hopefully it won't be a let down. By the way, 400 pounds seems a little heavy for a bench top lathe - at least to me. Luckily I have a 2 ton shop lift once I get home, but how am I going to get it into the SUV? The current owner said two people can lift the largest part and have done so in the past. He also said that he would help me put it into the SUV, which is extremely nice of him and raises my faith in his assessment that two people can lift it. Still...... I need to get some friends with trucks!😁 back to rattling down the main shrouds! Marc
- 525 replies
-
- cutty sark
- mantua
-
(and 2 more)
Tagged with:
-
Thanks Harry, Good points and advice. I'm checking the deck fixtures -Deckhouses/Skids/Davits/Pumps/Hatches//Boats as I rig to make sure that they can still be put into place. I'm most concerned with the davits and boats aft the main mast. So far the big issue was not checking access before glueing the sheets for the main stays sails into place. As I said earlier, the sheets blocked easy access to the front of the lower main mast and would have been a big issue for rigging the pin rails. Luckily I was able to release the sheets from the sail - Hopefully I can get them re-attached ok when the time comes. I appreciate the info on rigging the braces. best, Marc
- 525 replies
-
- cutty sark
- mantua
-
(and 2 more)
Tagged with:
-
If your lines were rigged during summer and are now sagging during winter be careful with tightening them. You might find that they shrink again in summer and could warp your masts. I paint oil portraits on canvas (both linen canvas and cotton canvas) They sag during winter but will become drum tight during summer (this is in a heated and air conditioned home that is kept at the same temp year round). Some canvas stretchers (the frame that the canvas is tacked to) have wooden wedges to adjust the tightness during painting to compensate and then is loosened once the painting is finished. Once I re-stretched the canvas during winter because of the sagging. When summer came the cavas became so tight that it bent and warped the frame so severely that it twisted the frame and cracked the oak 1"X 3" parts, that I had to remove the canvas and stretch it on a new stretcher(frame). I pre-stretch and wax my cotton standing rigging lines. I don't know if it makes a huge difference, but I haven't noticed much sagging of the lines on the model and it is in the same house as those paintings. Best Marc
-
Harry, can't thank you enough! You saved me possibly hours of work and the cursing that comes with mistakes!!
- 525 replies
-
- cutty sark
- mantua
-
(and 2 more)
Tagged with:
About us
Modelshipworld - Advancing Ship Modeling through Research
SSL Secured
Your security is important for us so this Website is SSL-Secured
NRG Mailing Address
Nautical Research Guild
237 South Lincoln Street
Westmont IL, 60559-1917
Model Ship World ® and the MSW logo are Registered Trademarks, and belong to the Nautical Research Guild (United States Patent and Trademark Office: No. 6,929,264 & No. 6,929,274, registered Dec. 20, 2022)
Helpful Links
About the NRG
If you enjoy building ship models that are historically accurate as well as beautiful, then The Nautical Research Guild (NRG) is just right for you.
The Guild is a non-profit educational organization whose mission is to “Advance Ship Modeling Through Research”. We provide support to our members in their efforts to raise the quality of their model ships.
The Nautical Research Guild has published our world-renowned quarterly magazine, The Nautical Research Journal, since 1955. The pages of the Journal are full of articles by accomplished ship modelers who show you how they create those exquisite details on their models, and by maritime historians who show you the correct details to build. The Journal is available in both print and digital editions. Go to the NRG web site (www.thenrg.org) to download a complimentary digital copy of the Journal. The NRG also publishes plan sets, books and compilations of back issues of the Journal and the former Ships in Scale and Model Ship Builder magazines.


.thumb.jpg.c33d8352ed1c7e53983f69ab4135a741.jpg)
.thumb.jpg.5dcbe9d95c32c41afae5b99e37951d35.jpg)
.jpg.b4dc5ba630197652ab0e61b5a4feb1f0.jpg)
