


popeye the sailor
-
Posts
15,981 -
Joined
-
Last visited
Content Type
Profiles
Forums
Gallery
Events
Posts posted by popeye the sailor
-
-
that is the way of modeling Gary........no one is immune. I've been drowning in the same fate.......probably the reason I've come to combining modeling and computer time
 beautiful work on wood simulation and paint......gonna look great when you get the cockpit assembled!
- mtaylor, Old Collingwood, Canute and 1 other
-
 4
4
-
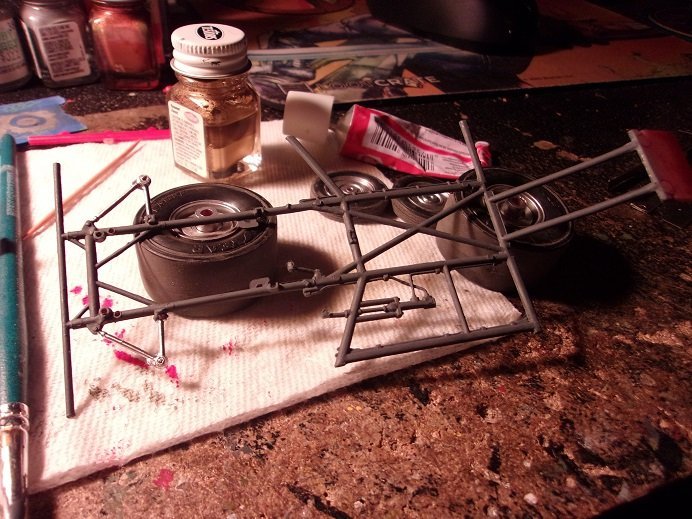
the exhaust needs to be added before the interior box is placed on the frame......the pipes locate above the torsion bar frame. very tight quarters to do it after. the box is on the frame now.
- Egilman, Ryland Craze, Jack12477 and 6 others
-
9
-
hello all.......and hello to you Mike....glad you could join in
") we have a calendar of Iconic cars......this month is the 1957 Buick Roadmaster.....tempted to see if there is a kit out there for it
we have a calendar of Iconic cars......this month is the 1957 Buick Roadmaster.....tempted to see if there is a kit out there for it  I did make some progress on this project.......I did spend quite a bit of time on the Pro Mod version, correcting a couple of mistakes the prior owner made. but I got them where I can be happy, so on with that project too {I would have been sad if I couldn't}.
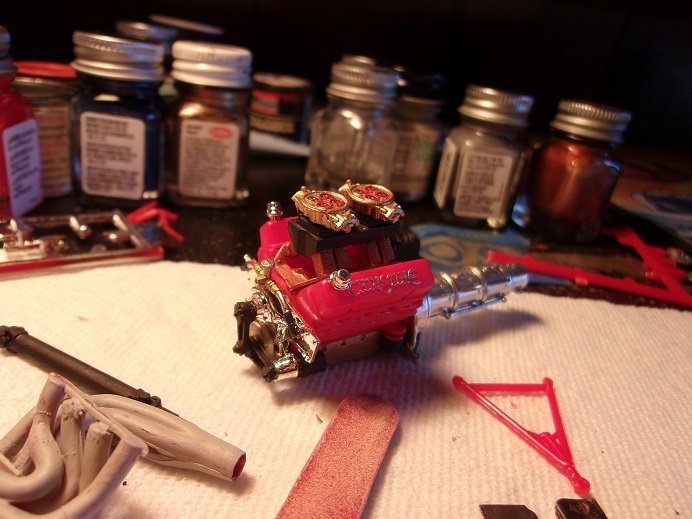
the engine is pretty much done......the frame was painted and the engine was put in place.
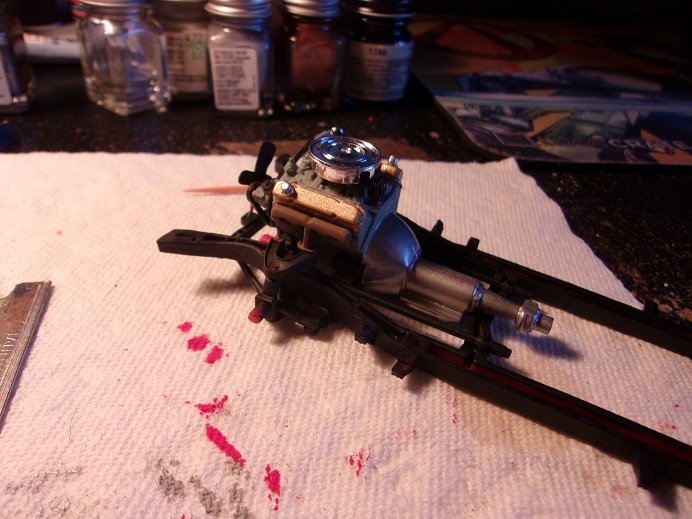
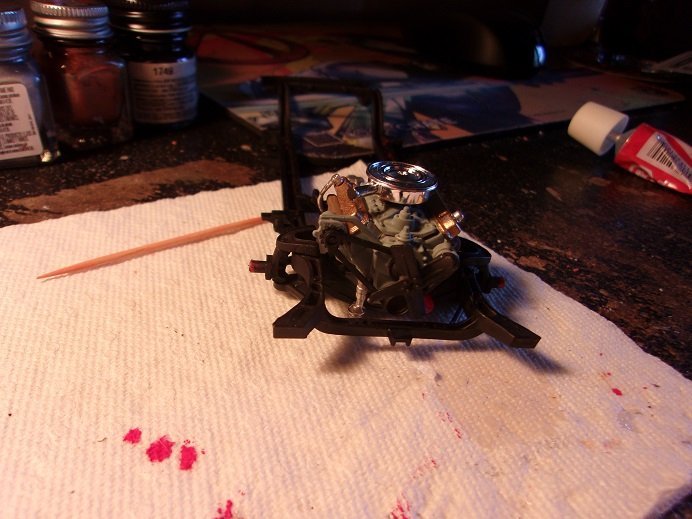
don't know why........I decided to leave the air cleaner chromed.
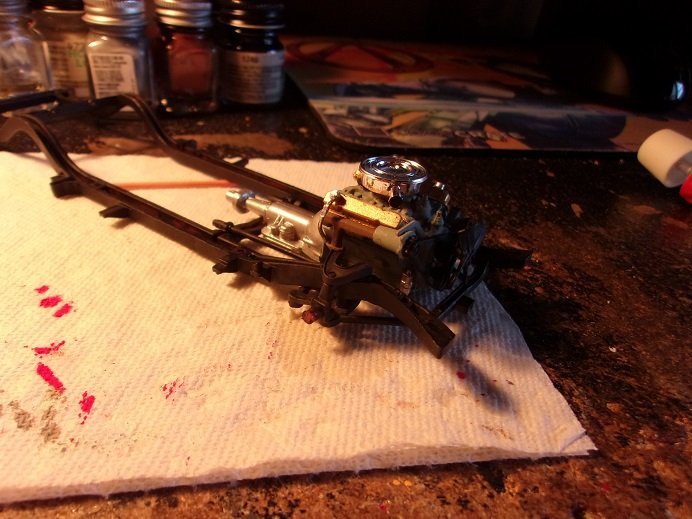
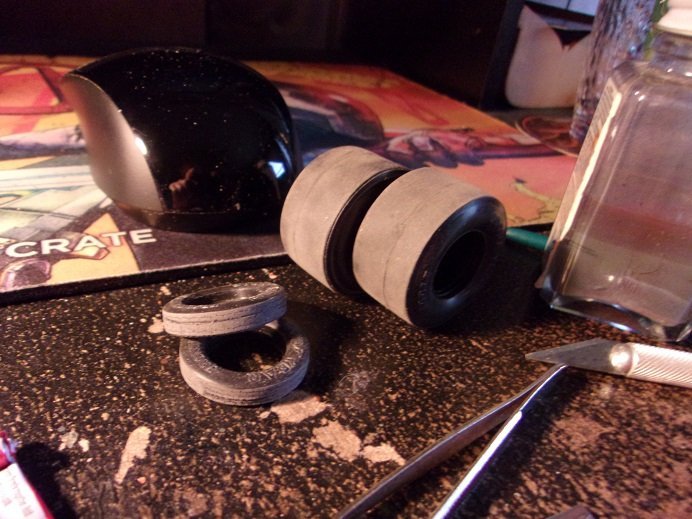
other parts were painted.....like the exhaust and the rear suspension.....the tires were assembled as well.
the front tires were added...
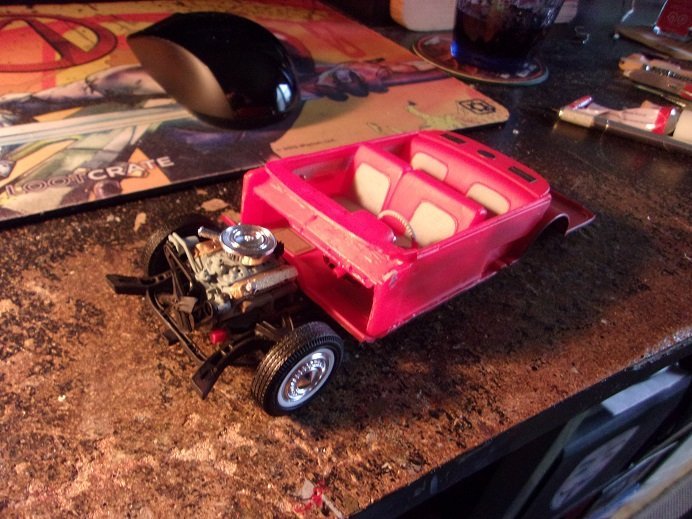
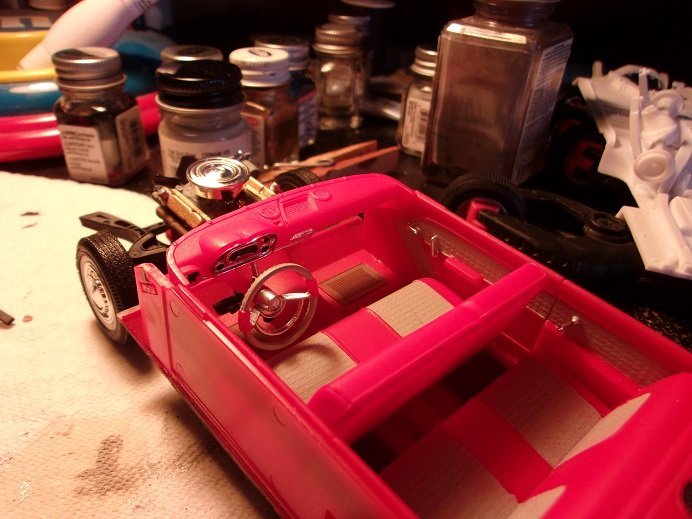
you can see in the background just how warped the sprue with the tailpipes is.....I hope it doesn't reflect in the parts. the interior was next to be assembled. the majority of the interior was painted flat red. in most of the picture I saw of the finished model, there is this white /red trim deal going on. I'm fairly certain that the interior was this way in the movie {the actual car}. the Chevy Bel Air kits I have have decals that reflect a two tone interior, but I didn't think they would fit good, or come out to my liking, so I painted them in. I used a very light gray......it looks white, but a color tint that would fend off most of the ghosting, since white is such a hard paint to work with.
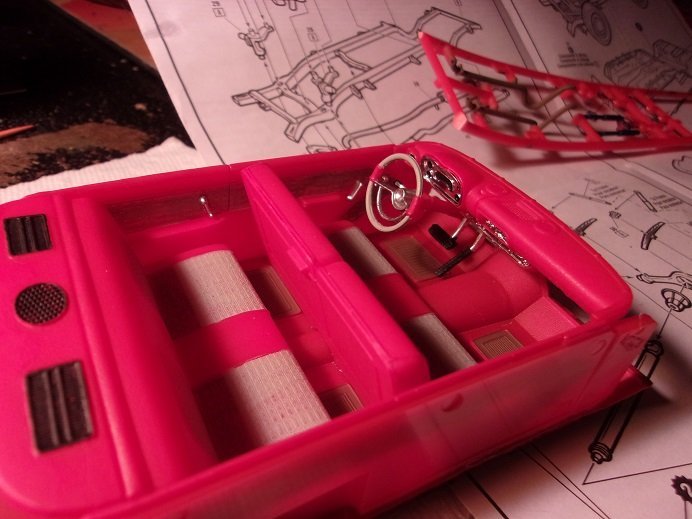
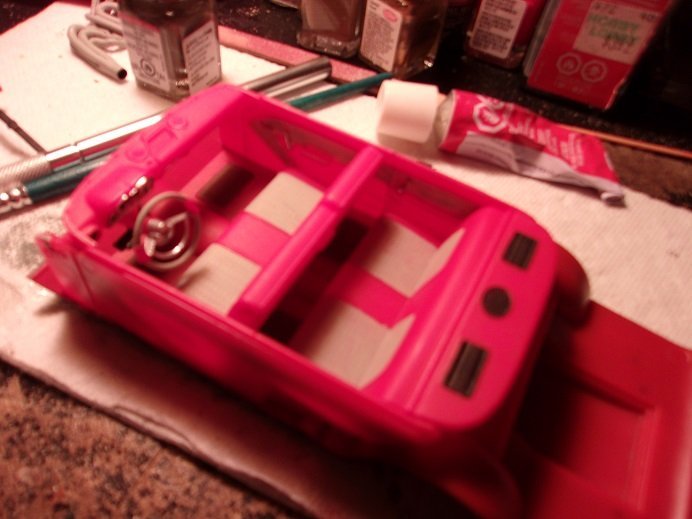
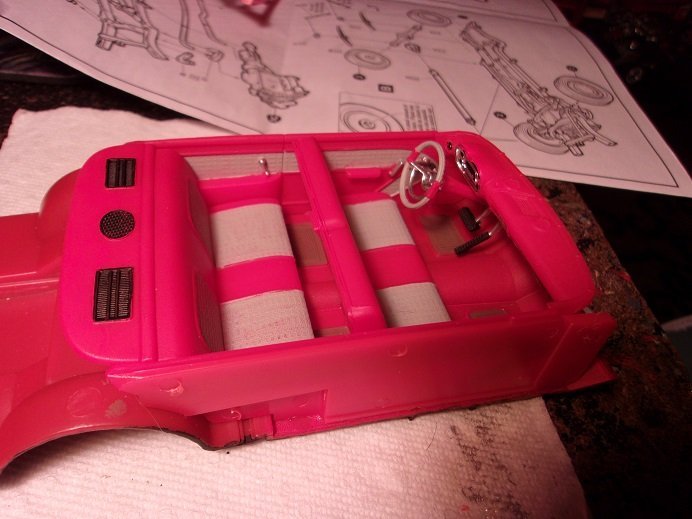
note to self....touch up that rear seat

- lmagna, Old Collingwood, Canute and 4 others
-
7
-
I should post my experience with the 4 cylinder. I need to take it apart because mainly of the same problem you had with the crank shaft. it hits and rubs inside, impeding the electric motor that makes it work. it wasn't too bad timing it up, but the way they have the wires is terrible....doesn't truly represent plug wires like yours does. when I get around to doctoring it up......perhaps.
looks really neat!
")
-
very nice progress ........the windows look great
- Canute, Edwardkenway, mtaylor and 2 others
-
5
-
-
-
darn it.......I just remembered......I still have the Jerry cans on the table here?!?!?! so it's not totally complete
 I tried that mud stuff I got.......to me it's totally crap! all it does is make the tracks look shiny. I'll just stick to my paints. anyway......I thought these would be the finish pictures.......I guess not
the shiny stuff on the bogies is the junk I used.........might as well say I went through a puddle

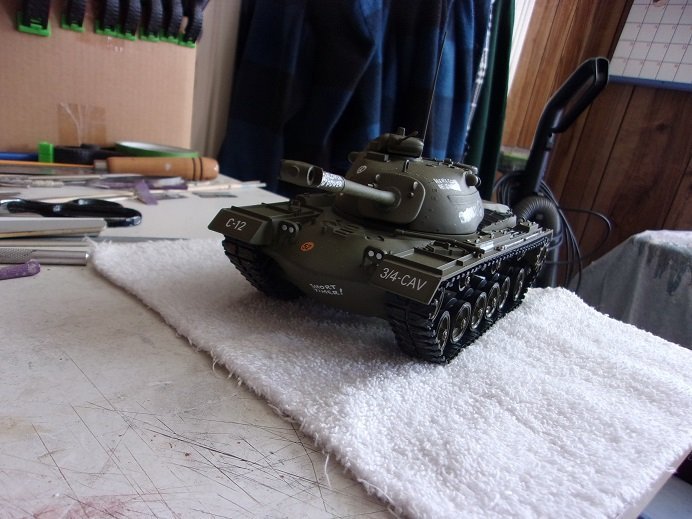
but the decals are on and the painting is done.......

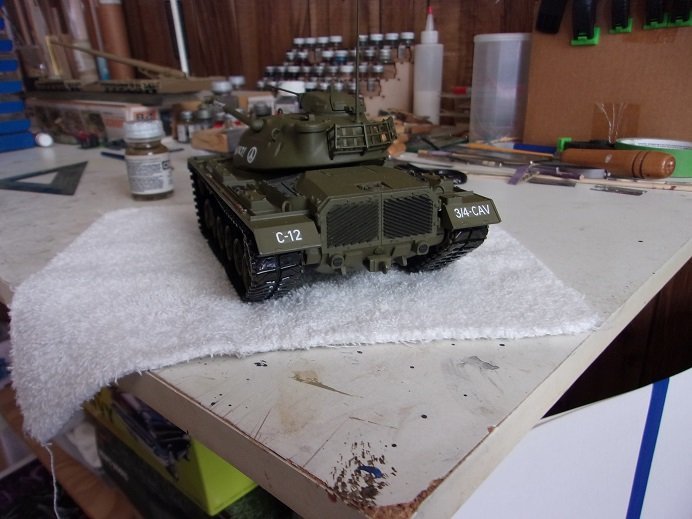
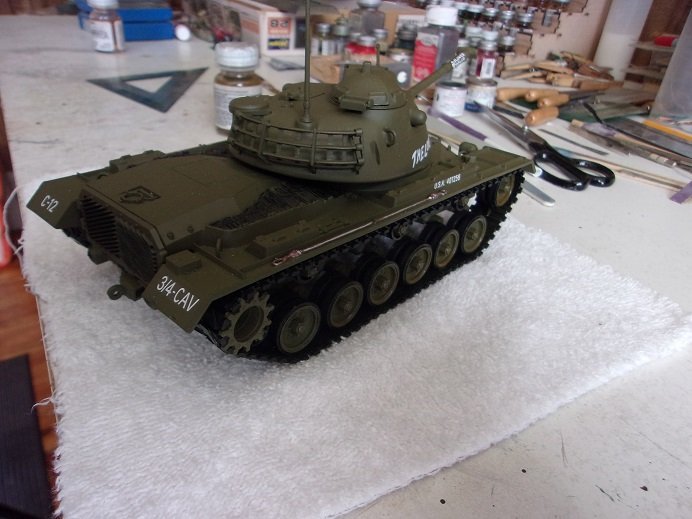
maybe I can think of something to put in the rack......
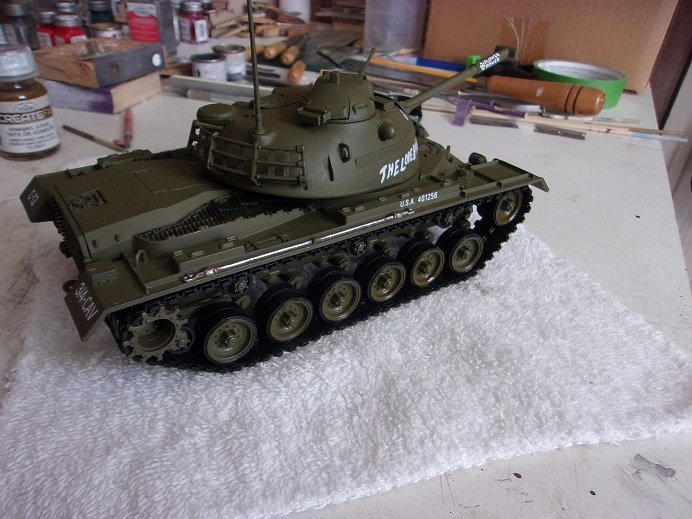
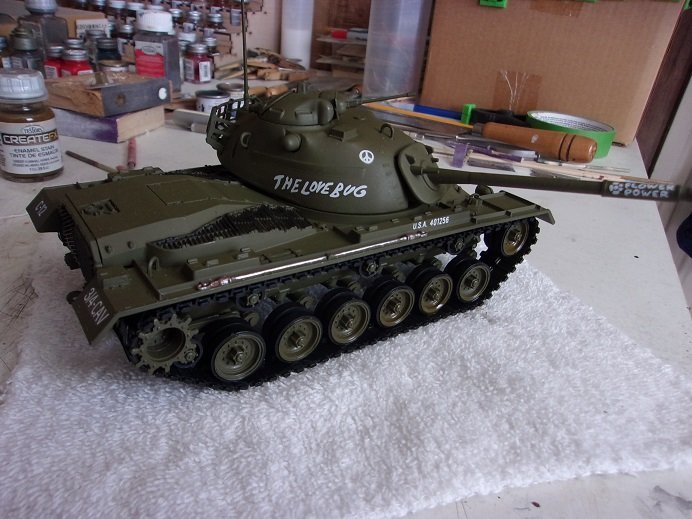
so there will be a few more pictures when I do what I need to do
- lmagna, king derelict, Ras Ambrioso and 6 others
-
9
-
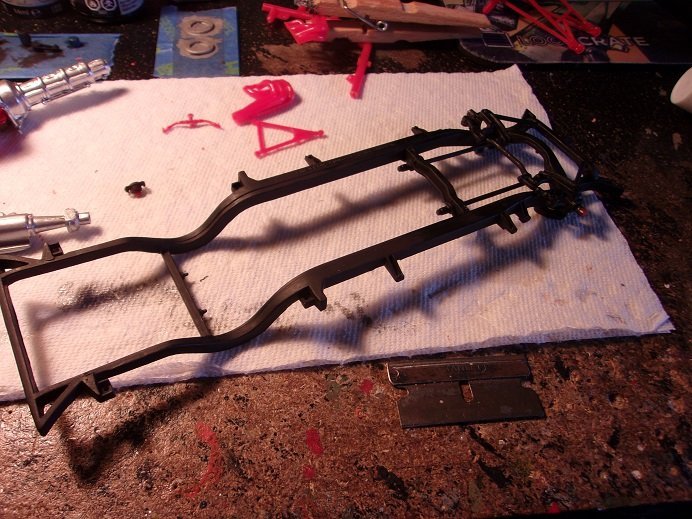
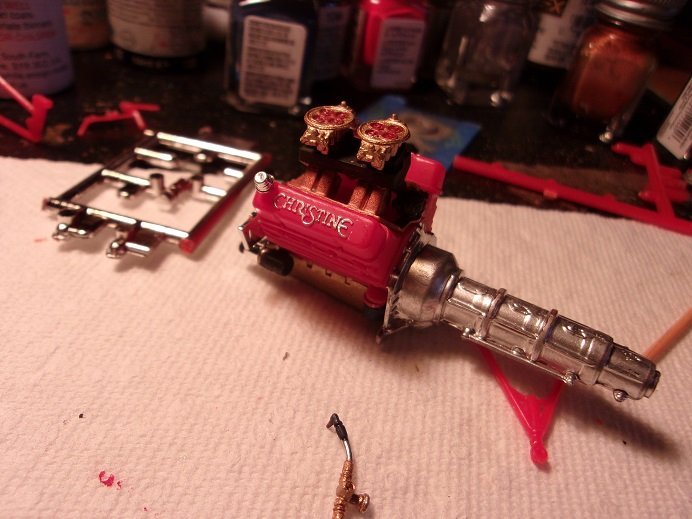
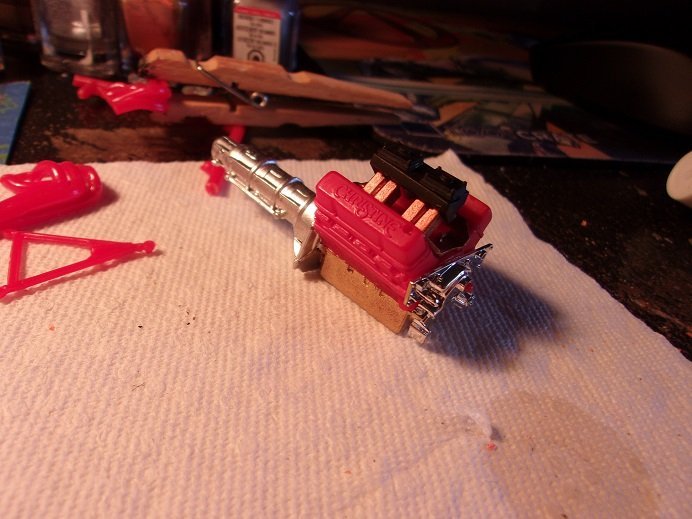
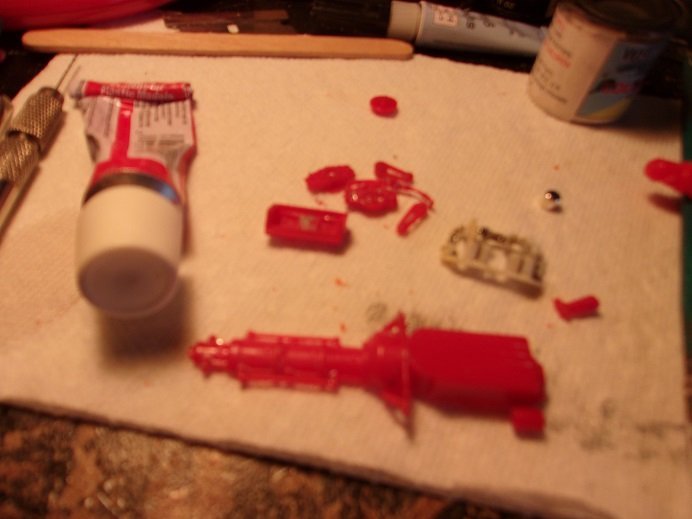
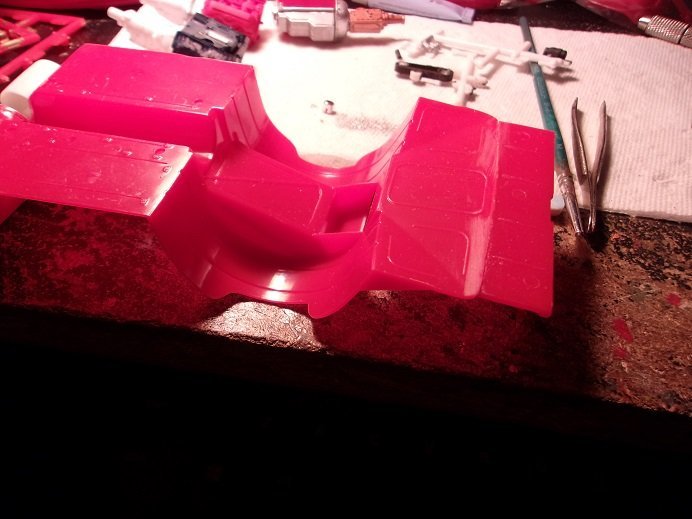
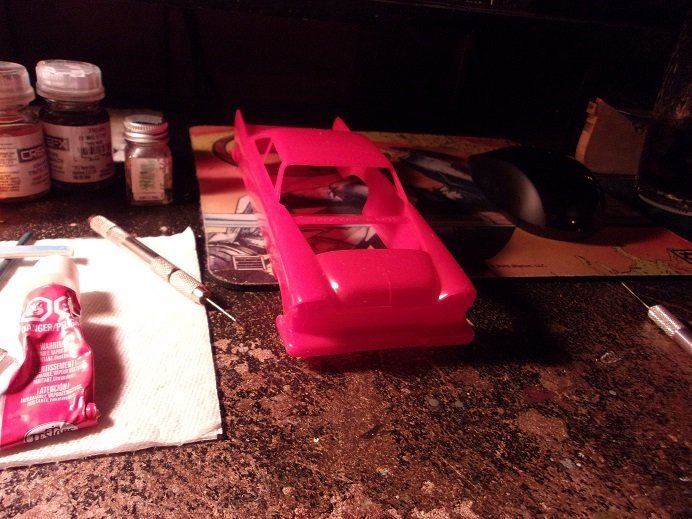
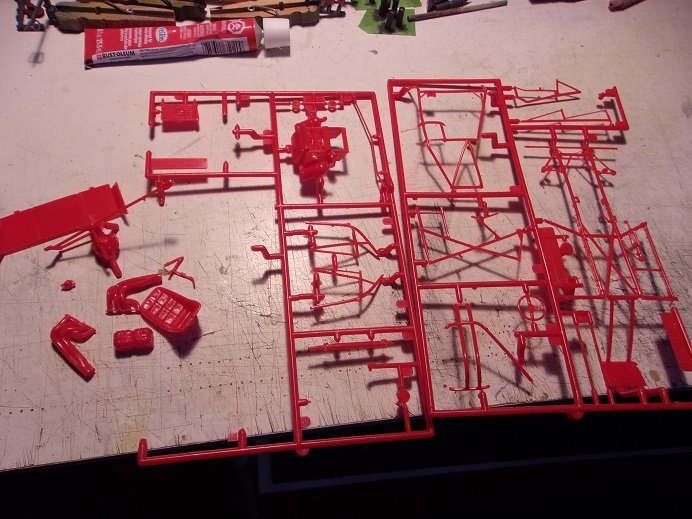
been working on Christine as well.......mostly paint to start off with. even though {and this pertains to the Earle machine too}, I'll be painting, even though the bodies are already red. with the sanding and cleaning of the parts, it can look hideous with all the marks.......painting will cover all of the nasty stuff over. so it's a combo of gloss and flat. the majority of the front suspension is already assembled on the frame. with that done, the frame was painted in flat black
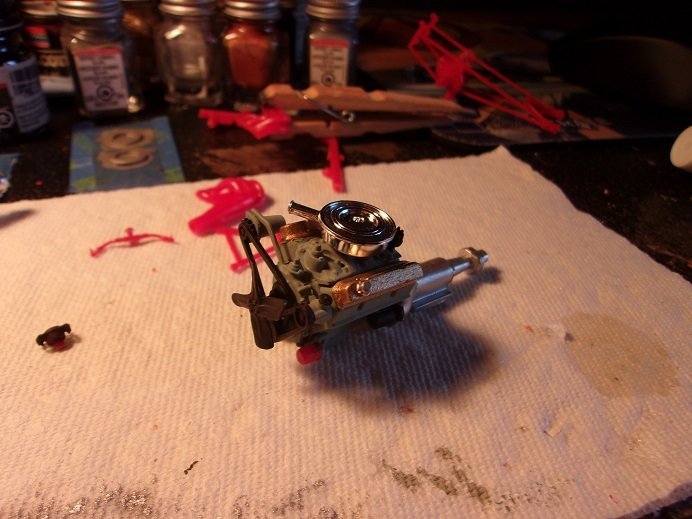
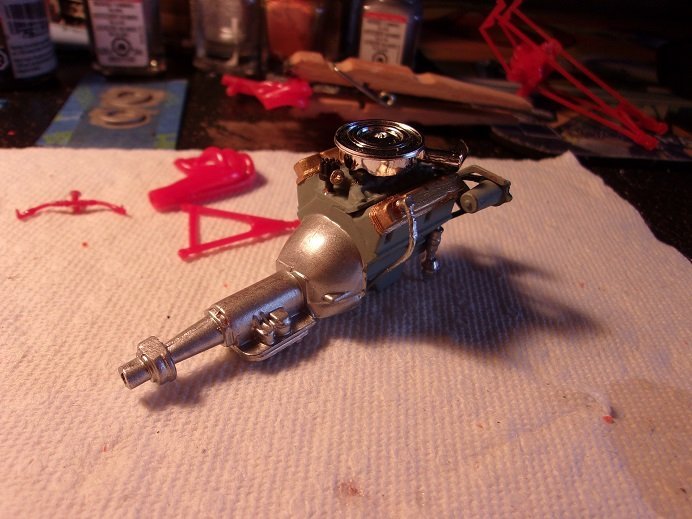
I was working on the engine before I got the other kit. at this point, it was time to assemble what I had painted. there isn't a lot of plated part for this model, so I didn't have to decide if anything was to be dechromed {a first for me}.
I'm currently working on this one.......got some ideas from pictures on the net
- Jack12477, GrandpaPhil, Egilman and 6 others
-
9
-
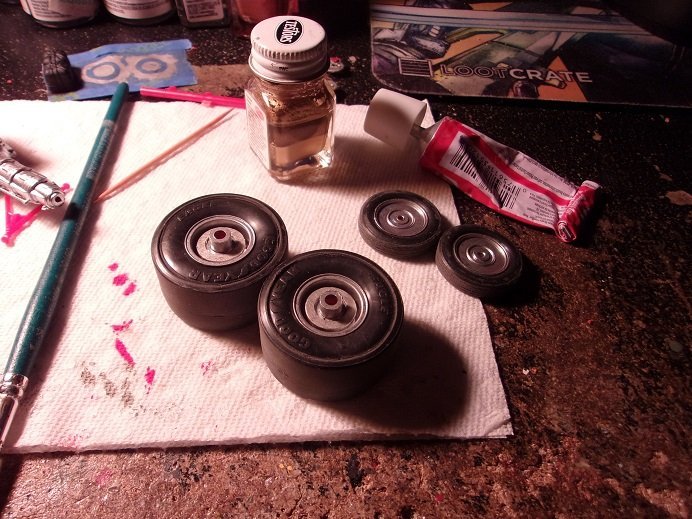
the tires are all done........I did them as the first order of business
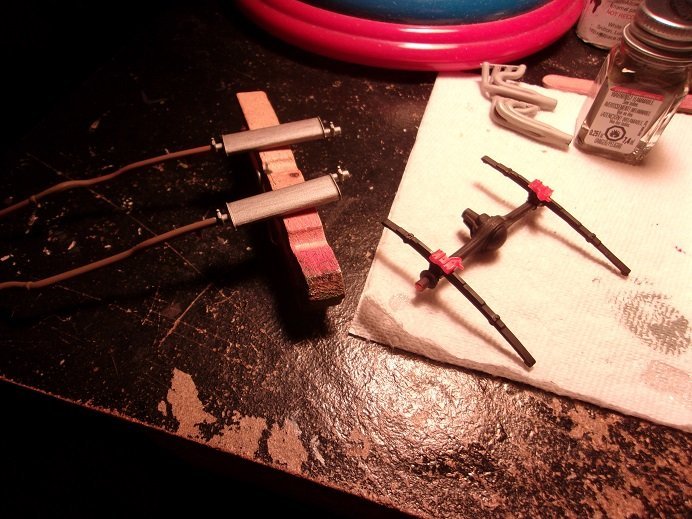
got more done on the engine....... got the carbs on and highlighted the throats. added the pulleys......I have another set as a fall back, in case these didn't fair so well in the jar.

the plumbing that will go on the engine front is also painted
thought I'd highlight the valve covers too
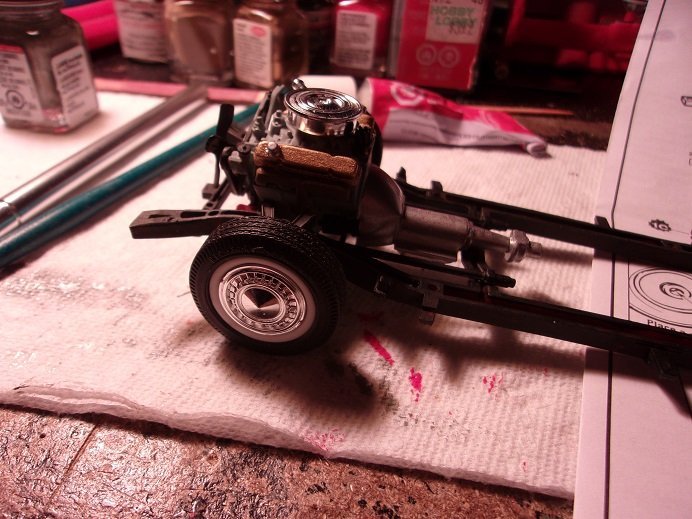
the tires were assembled trapping the axle buttons inside......if I was successful and didn't get cement on them, they will roll.
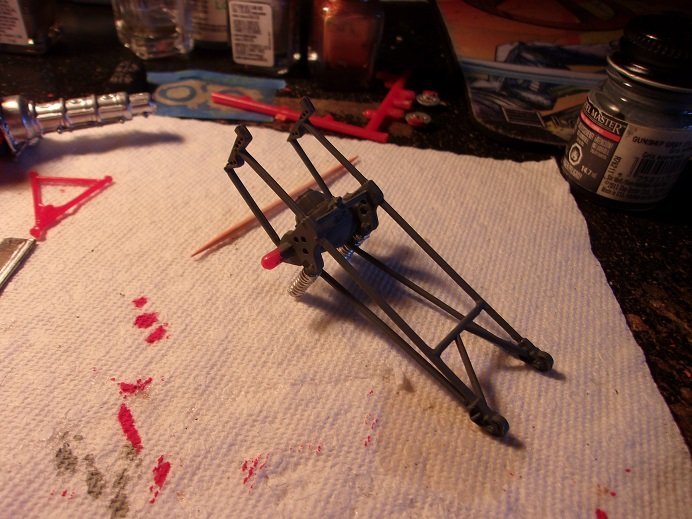
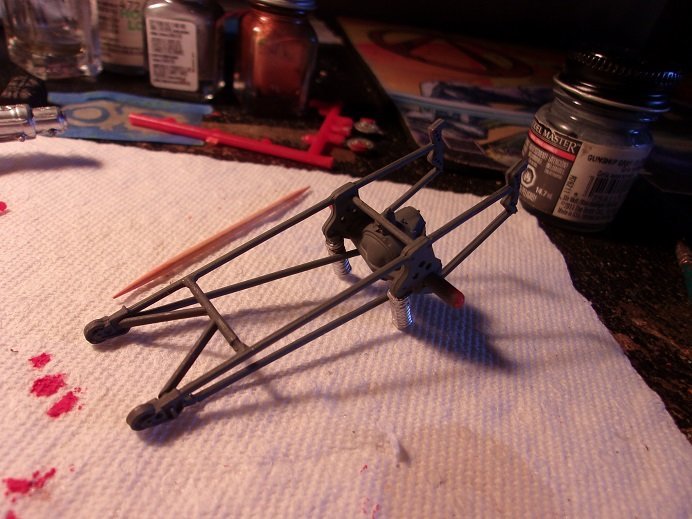
the underside of the chassis deck was painted in a darker gray, the same color as the roll cage will be.
the chassis frame will be done in the gray as well.....the front suspension will be in silver { my aluminum has gone ka-put}
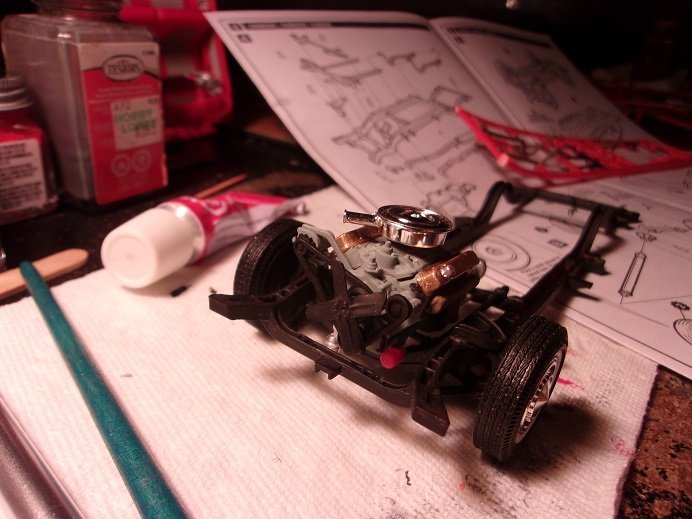
I'm going to highlight a few thing on it before it is assembled. the plumbing is on the engine now..
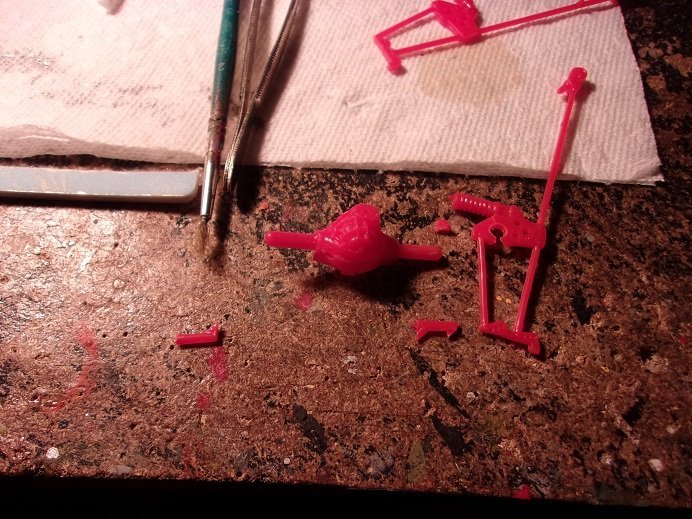
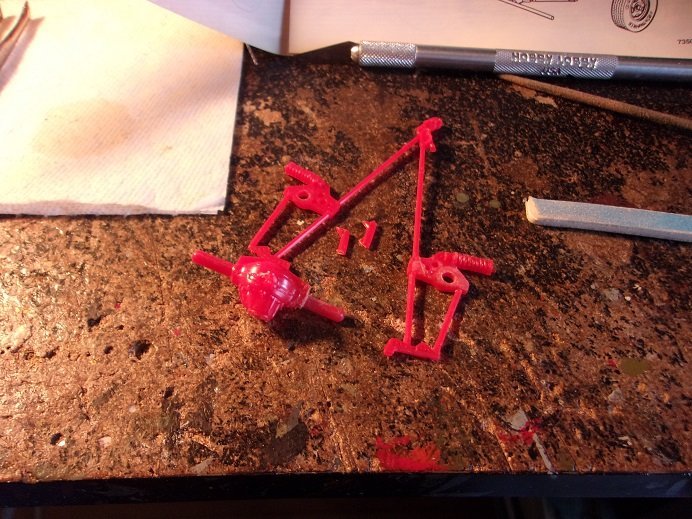
one of the headers wasn't assembled straight, so I had to take it apart and straighten it out. the differential assembly is in the process of being painted.......all that id left is to paint the wheels on the wheelie bars.
- Jack12477, Landlubber Mike, CDW and 6 others
-
9
-
I got more done on this project. I had reinstalled the cross bar pieces back onto the differential, but I couldn't get it to go straight across. later I cut it back out again and fitted a thin piece of round stock form the spare parts box {just happened to be red plastic too}.
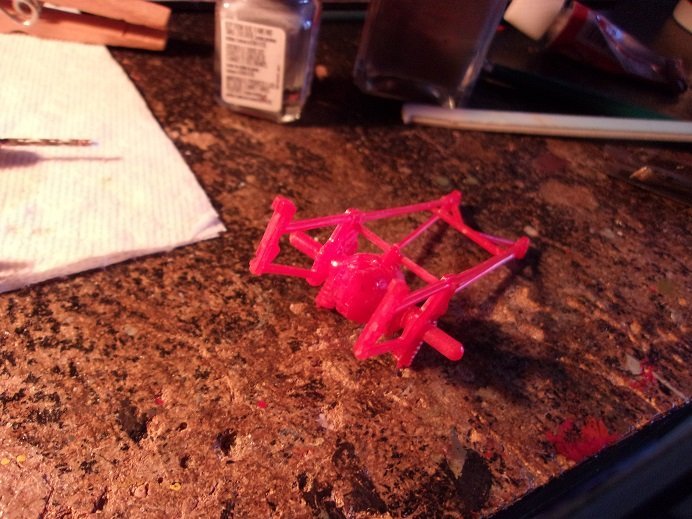
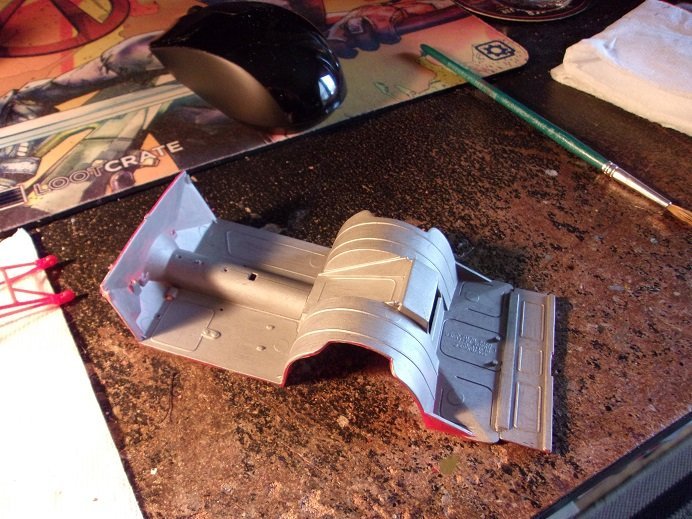
it will be set aside to totally dry. the top deck was to be painted silver, but I opted to go with flat steel.
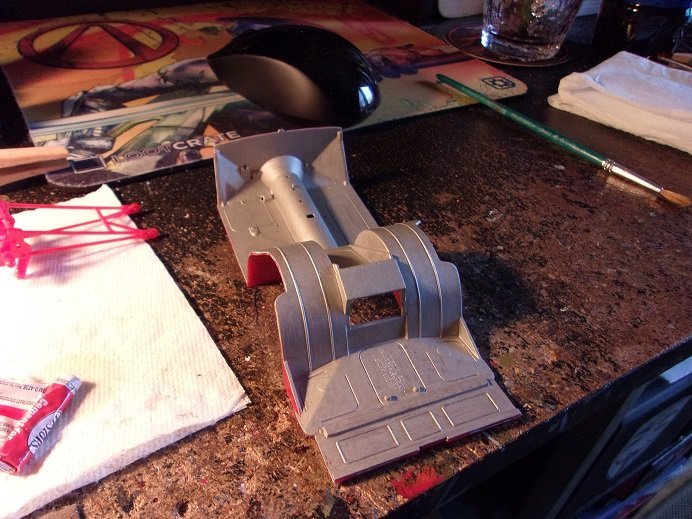
once the underside is painted, it will lose that reddish hue. it's one of the shortcomings with red plastic........tend to want to bleed through. other colored plastics have this same issue as well.
it's obvious.....another problem with the red plastic is how it photographs...comes out look'in like neon...I took another picture of the differential assembly under direct light.

I had been working on the AMT engine......and as soon as I got all the parts out of the dechroming jar, I could start on the Earle engine. here is how far I got by the 16th...
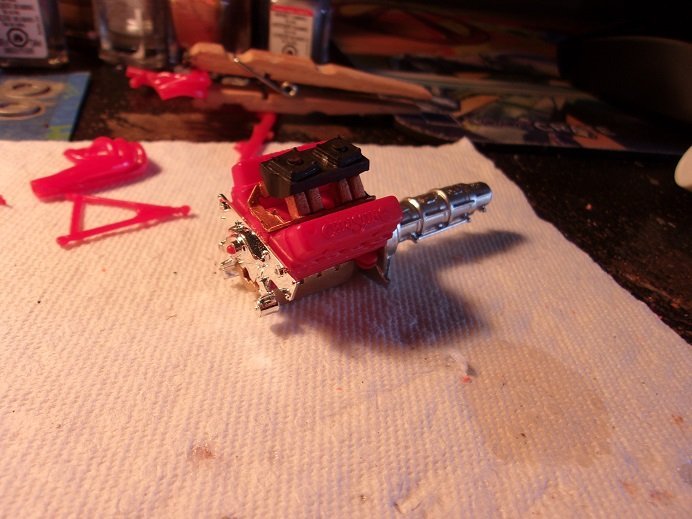
again, with the silver.......the engine was to be painted silver, but I stayed with a flat red. I broke it up with other colors ...............
- CDW, mtaylor, Old Collingwood and 4 others
-
7
-
these are interesting kits too.........I have the Smithsonian Motor Works 4 cylinder. has a motor that shows the engine in action........I have to take it apart though because it binds in certain places {mold lines and such}. when I first ran it, Gibbs went nutz!
- Canute, Old Collingwood, Egilman and 1 other
-
4
-
really nice progress OC.........fun part is putt'in the bling on
- mtaylor, Edwardkenway, Canute and 2 others
-
5
-
-
nicely done........took me a bit to figure out that you were simply missing a blade
- mtaylor, Egilman, Old Collingwood and 1 other
-
4
-
sweet! very well done!
I like the larger models too!
- Jack12477, Old Collingwood, Canute and 1 other
-
4
-
the molds for this kit likely covered several other kit subjects......some will even go as far as to include parts to make other variants too. you came out with a superb mustang E.G..........the paint looks great! it's a very smooth finish. it is still a little on the reflective side though......look at it a week or so down the road......it will tone down. the paint needs time to fully cure. I'm sure the main recipient of the process will much easier without all the rivets
- Edwardkenway, FriedClams, Canute and 4 others
-
6
-
 1
1
-
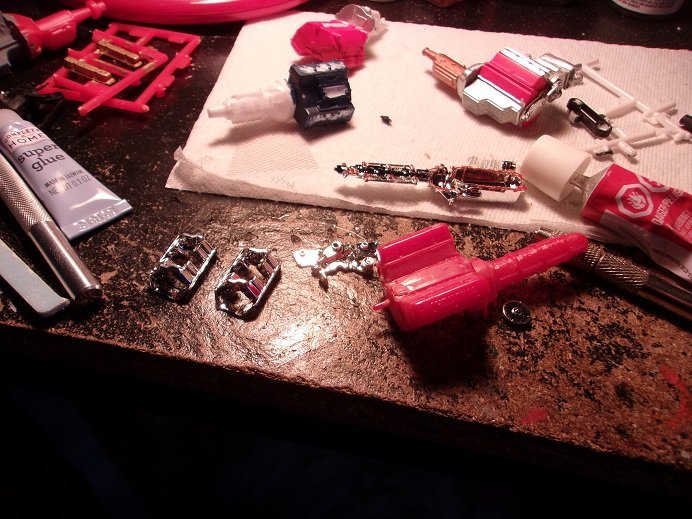
got the parts out of the bottle this morning.......things went pretty well. the high rise manifold though is a newer part......not all of the chrome came off
....and on the difficult differential front.......I think it's a winner too
now...the assembly and paint......
-
moving on.......... things took a downward turn here. I looked at it earlier and failed to notice it
 part of the differential has been assembled......but I didn't notice that the bracket / wheelie bar is backwards. there is a heavy presence of glue too, which means that it is really welded on there. I would say that the person saw this too.......likely the reason it was put back in the box and shelved. as most know, it is better to separate parts earlier than later....in this case.......years later. trying to source parts will be time consuming and costly, something I don't like to do.........so the best thing to do, is try to separate the parts. I have a set of thin razor saws.....I figure if I can cut around the shaft, seeing no evidence of glue around where the axle shaft protrudes, I might be able to break it free without much damage.
the plastic is a hard plastic......the deed is done, but not without damage. the untouched axle part broke off and the crossbar above it broke off. the wheelie bar part broke too, but I have all the pieces...all clean breaks.
I already glued back on the broken axle shaft...that is what's drying at the moment. I'm going to let it dry all night. the wheelie bar parts was also successfully glued back together.......same deal......gonna let it dry all night, and I'll clean the both of them up tomorrow. I'll add the crossbar when I assemble it. I turned to do some clean up to the chassis deck and remove the odd date stamp.
I toyed around with a few other things before calling it an evening.
it sounds horrible.......I know.......I've fixed worst than this. once painted, you'll never even see the repair
he....hee........that's me Popeye calender AK-k-k---k-k-k-k-k-k

-
-
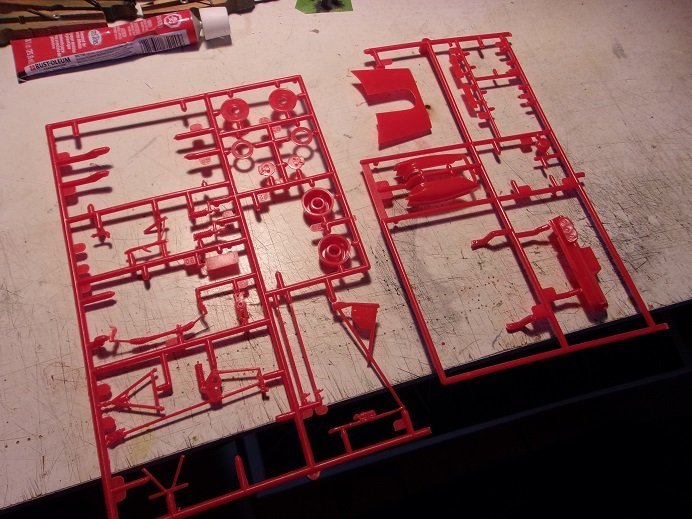
so...as I read through the instructions, anything that requires paint goes into the bottle.
more will be added, I'm sure of it
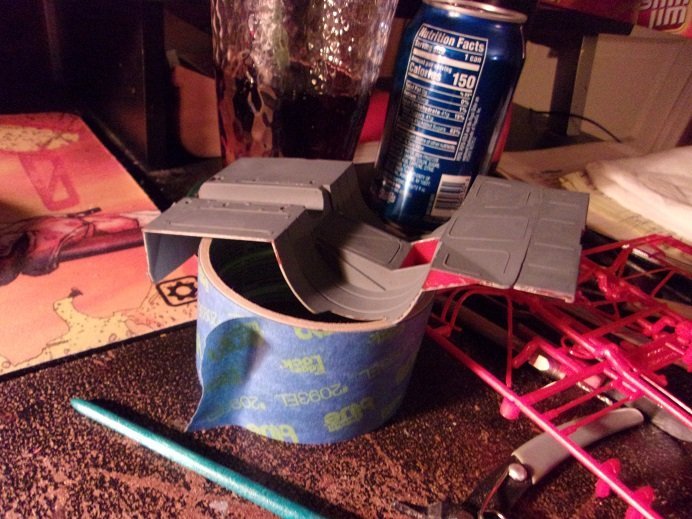
I did some clean up to the front of the body.......it's passable. I'm still thinking that the grille decal will cover the thin gap that spans across the hood line. after removing the tab that spanned across the opening of the engine well, I assembled the hoof scoop and cemented in on the hood. the hood looked out of flush with the opening so at this time I taped it in place. as the hood and scoop assembly dries, it might keep the shape.
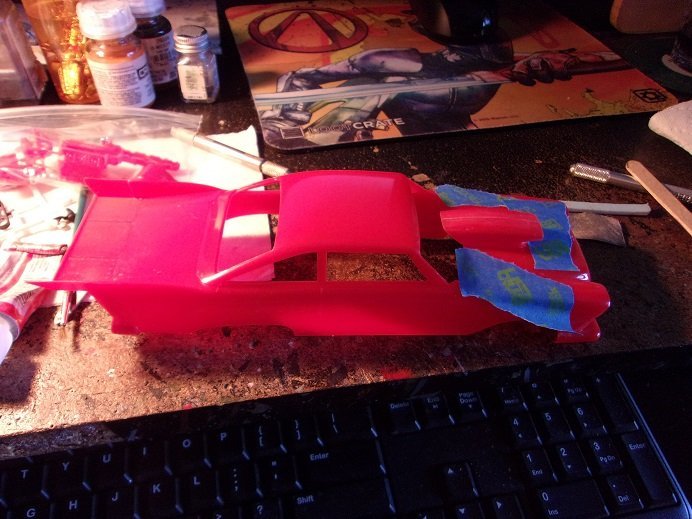
I also added the rear spoiler deck.......that went on pretty good. I cleaned up the rear corners before I added it. dog walk time......I'll be back.
- mtaylor, Old Collingwood, Egilman and 5 others
-
8
-
this has to be a model.......I love how it looks
the induction sticking out of the hood.......the headers.......considering what's in the kit, the person didn't have to do any drastic modifications.
- Edwardkenway, Landlubber Mike, mtaylor and 4 others
-
5
-
 2
2
-
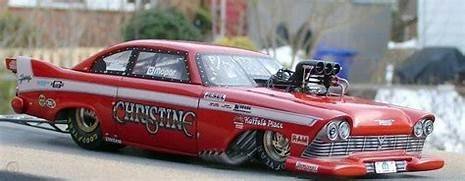
I'm sure that by now you've all read the story of how I came by this model. it's really something to imagine something as wild as this, and find out that there is an actual subject out there. I have to say though.......even though it took a short time to locate a kit, one gets a sense that the kit is a bit on the rare side. even Alan agreed with me......chances are, that this probably is one of their low production kits.....either that, or it sold like hotcakes!. as mentioned, it has the same set up like the 'Jukebox Ford' I built a while ago, so it might be safe to say that these two kits are part of a series {likely quite large too}. the Revell stock car series shared the same similarity......the chassis were all the same, right down to the engines.
there was some assembly done in the kit......nothing too dramatic.......a few hiccups, but I can fix them. the molds for this model were tooled in 1991, as it states in two places on the model. one would be visible, so I removed it, keeping the other one for posterity. examining the contents, I saw that everything is here.
the engine, which I have already taken apart......was my first focus. nothing is painted and the oil pan / tranny half is not the way I would have it. I was happy to see that the person wasn't in the habit of scraping his plated parts. the intake {on the right} didn't come off so good, and a small piece broke off. fearing that it could be seen, I quickly remembered that I had {the one on the left} an exact manifold in my spare part box. with quite a few kits of this time period, model manufacturers did a lot of parts plating, to make the finished model look more appealing. advancements in the paint department offers so much more, that it's not that big of a need anymore. the decals look pretty good too.......better than I thought they would. I don't see any micro cracking......usually, they tend to shrink, exposing them. there are a couple of creases........they might be a problem, but don't affect the important decals.
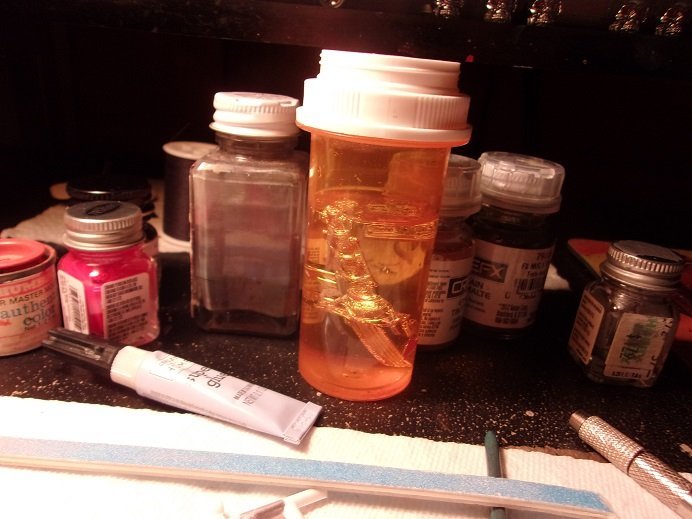
I found that the front and rear were assembled to the body. the parts weren't cleaned up as I do......and there are some tiny gaps, but I can either fix them or let the decals hide them. the additional decking was also added to the rear edge of the chassis deck....clean it up and it will be Ok. I'm creating a pile of the plated parts I want to de chrome....the bottle is ready.
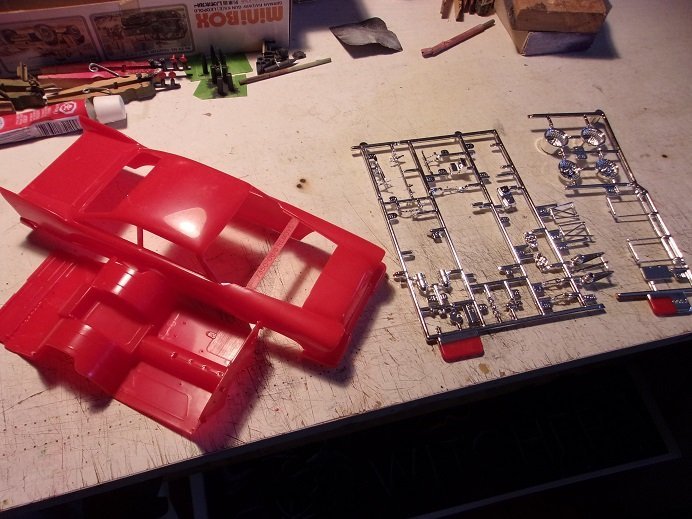
not a whole lot of flash to deal with.......I'm impressed. nothing is broken either.
the rest of the parts are just as good........little flash and nothing is broken. part of the differential is assembled....loose stuff.....both headers...looks like I'm in business.
the tires are kinda shaggy though......there are flash bands around the slicks and front tires that needs to be cleaned up. I sandpaper the tread to rough them up anyway, so no harm....I've seen it before
the glass looks really good......no scratches...........so yea, I'm in business
I'll hang around a bit more and do a few thing. if I don't, the admiral will wonder why I was so adamant in getting this kit {I don't do catch and release} I'll clean things up a bit, the tires.......and get parts ready for the bottle. I'll be back.
-
I suppose if this was the actual car...sure. according to specs I've seen, it could do the 1/4 mile in 16 seconds. pro modified cars aren't built like that though......the bodies are just a shell, over a 'single weight' {all cars must be built to this spec} chassis. they also bounced between full and mid size over the years they were built. I recall an old Plymouth wagon we had back in the day...it had a flat head six in it......we used it use it to inflate tires. my dad bought this adaptor that could be screwed into the #1 cylinder which had an air line fitting......he got it from J.C.Whitney. here's something stupid for you: I was told to blow up the tires on the tractor one day. getting the adaptor and stuff.........and out to the car, I drove it over to the tractor. it wasn't that far, I found out, because when I installed the adaptor and tried to restart the engine, it wouldn't start. in order for this to work, the engine had to be warmed up.......in modern car talk, all cars start in closed loop........when warmed it up sufficiently, it enters what they call open loop. closed loop ratio being more fuel, less air, and open loop is less fuel, more air. it's basic talk for the metering the fuel / air ratio. modern cars have a computerized fuel management system, where as, older cars with carbs {later carbs had computer sensors} had a choke /vacuum system.
anywho.........after doing this a couple of times, and getting frustrated that things weren't going my way, I devised an idea. I would start the car, and remove the plug with the car running. I did say stupid.......right?!?!! don't worry folks, the car has a built in deterrent system
grabbing the spark plug wire send me flying backwards.........that was about 40,000kv going through my arm! ultimately, I warmed up the car, before I was able to blow up the tractor tire dad was curious what took me so long.......so I told him. after he stopped laughing.......he gave me my next task.
when I worked at Granite State Tire, one of the techs was having trouble opening a car hood. every time he tried to open the hood, he'd either get a jolt to the gut, or his fingers whenever he touched the hood. upon shutting the car off, he was able to open the hood, where he found that one of the plug wires was touching the underside of the hood!. this also solved why the car was stalling every time it rained
Mercury Cougars......and I even owned a Comet......that were susceptible for cracked distributor caps. not only was it a rain issue, but it would also cause excessive piling on the point contacts.
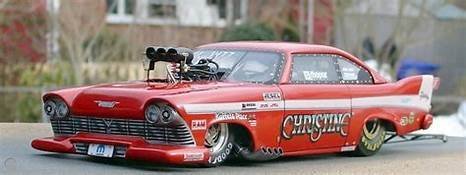
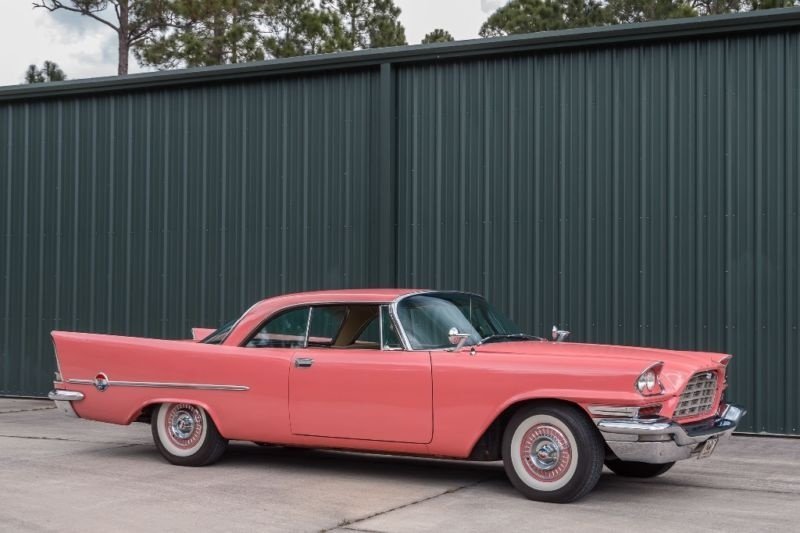
the pull was too great Mark.......it's a beast.......so narly that one can't imagine this not being on some sort of track. there are other cars that I've seen that would fit the bill.......how about a 1958 Chrysler 300......
wher there is a model....there is a way
- Jack12477, Landlubber Mike, Canute and 5 others
-
8
Stage Coach 1848 - Artesania Latina - 1/10 - by Kevin - July 2021 - finished March 2022
in Non-ship/categorised builds
Posted
superbly done Kevin.........very sharp") the leather work is awesome!
the leather work is awesome!