


popeye the sailor
-
Posts
15,981 -
Joined
-
Last visited
Content Type
Profiles
Forums
Gallery
Events
Posts posted by popeye the sailor
-
-
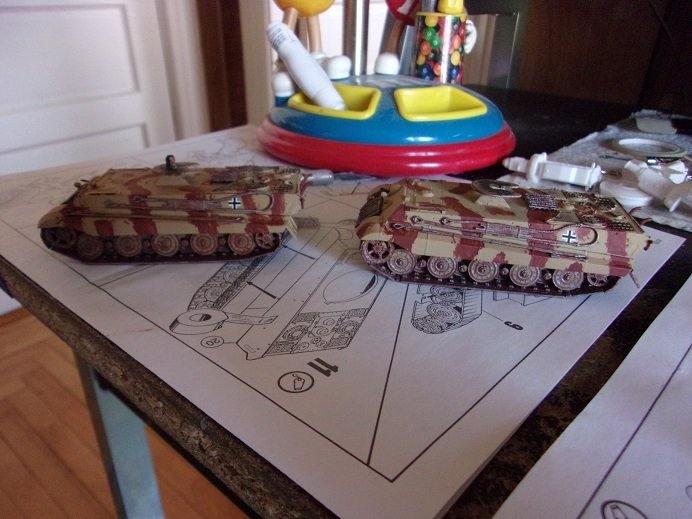
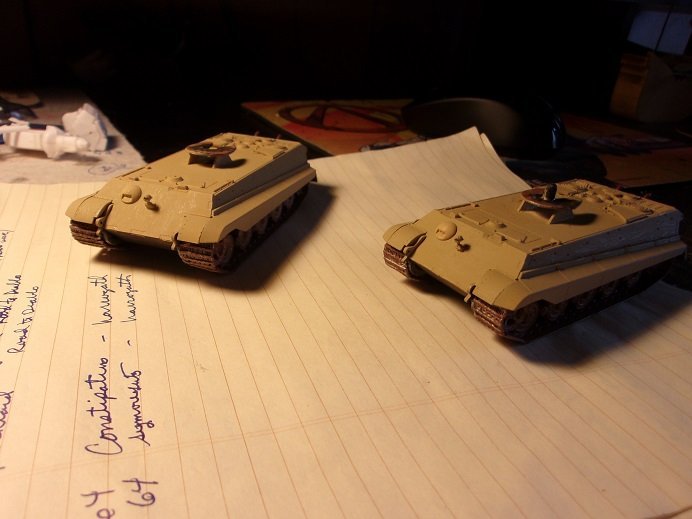
decaling for these tanks is located mainly on the turrets. where it is though that the chassis used likely came off the assembly line, rather than the field, I simply gave then the German insignia. they were positioned in places where I could use the rest of the detail parts, like sections of repair track, the cables, and such.
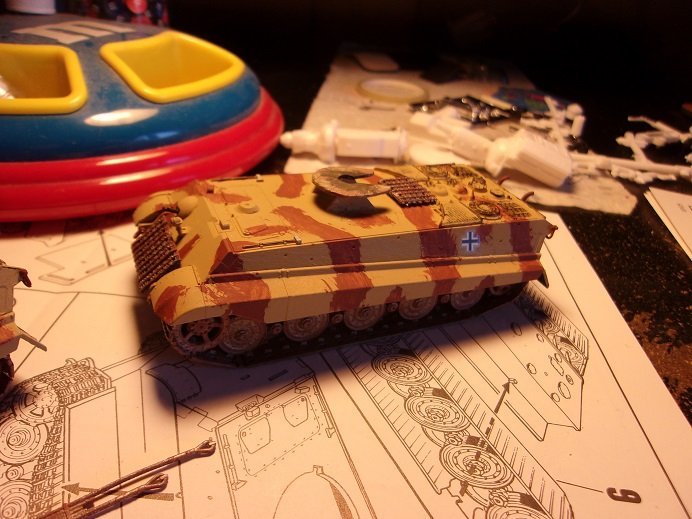
I would imagine that if there were antennas, they would would be tied down, in the form of a 'whip'........I haven't added them yet.
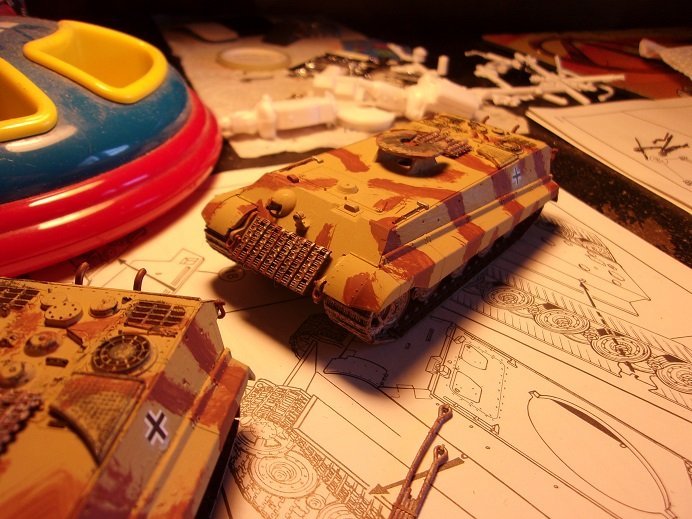
the cables were painted in flat steel and dry brushed with the rust color.
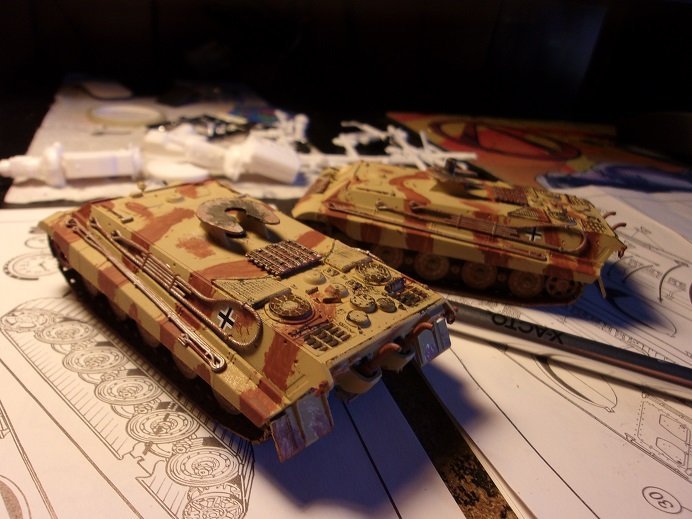
this morning, I took another picture of the two........in a different light. the shackles were also added.......just a couple more parts to go
")
-
the first chassis is done.......I used Ca to speed up the process, and it was a better glue to keep the sections in place, so I could continue with the assembly, without so many discouraging words.
after touch ups, the outer fenders were added to the chassis.
the other chassis got the tracks added and the production line came to the conclusion of the track fiasco. the exhaust parts and detail was added to the rear, now that I can move forward finally
rear fenders as well....
I did some dry brushing to the tops of the couplers
front parts were added.......and then I gave them their camo stripes
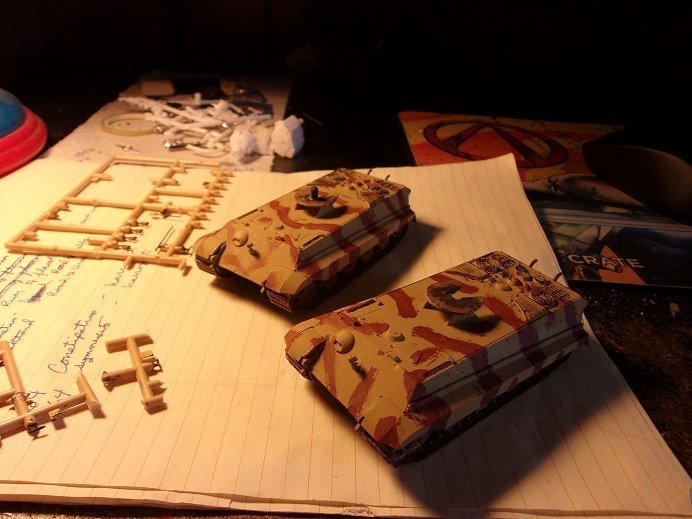
they are coming down to the smaller added bits of detail. keen to note that I said a half truth earlier.......there are tools that are molded detail. added detail is a shovel and a crank, used for something or 'other. that's next in the process.
- Baker, Edwardkenway, Canute and 8 others
-
 11
11
-
hello everyone!.......remember me?!?!? I'm that guy with the 'fly away' mind
 it's been a busy place 'round here at the wharf...from snow storms that may as well be called slush events, to changes in life and work { I wish the work part would fade......but that another story
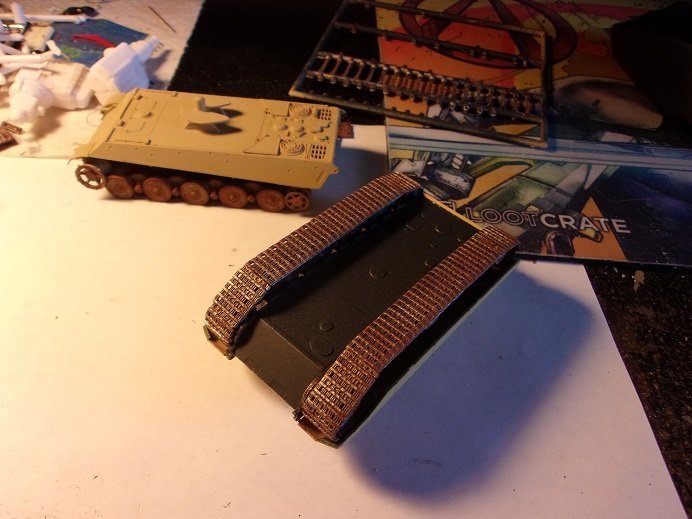
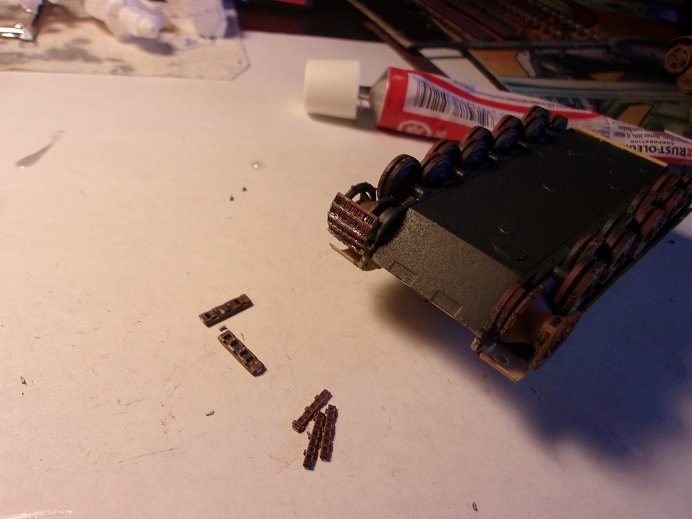
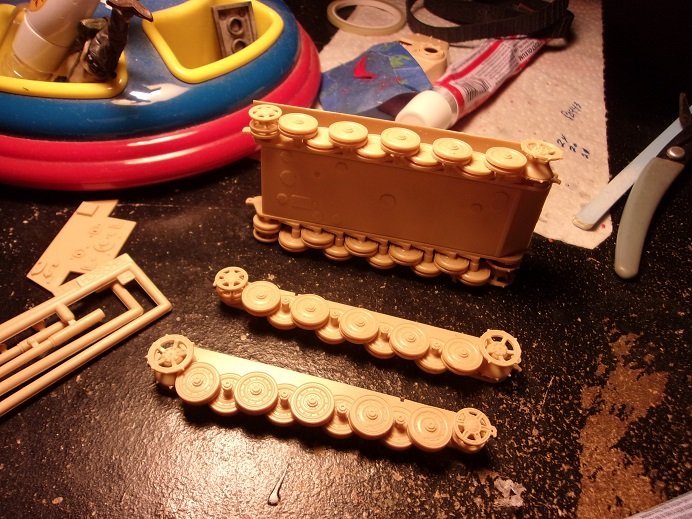
 ") } . I have had moments where I could devote some time on this project though.......the concept is too cool now that I see it in the flesh. to pick up where I left off takes us back to the end of January, when it was time to put on the tracks.......a step that would have been better, had I done it when the side panels were off the main chassis. I would have had more room to piece together the track links. as can be seen, there are the flat sections to the tracks, and they are to be joined by the smaller parts of the track where ever the need to turn to meet the flat sections.
} . I have had moments where I could devote some time on this project though.......the concept is too cool now that I see it in the flesh. to pick up where I left off takes us back to the end of January, when it was time to put on the tracks.......a step that would have been better, had I done it when the side panels were off the main chassis. I would have had more room to piece together the track links. as can be seen, there are the flat sections to the tracks, and they are to be joined by the smaller parts of the track where ever the need to turn to meet the flat sections.
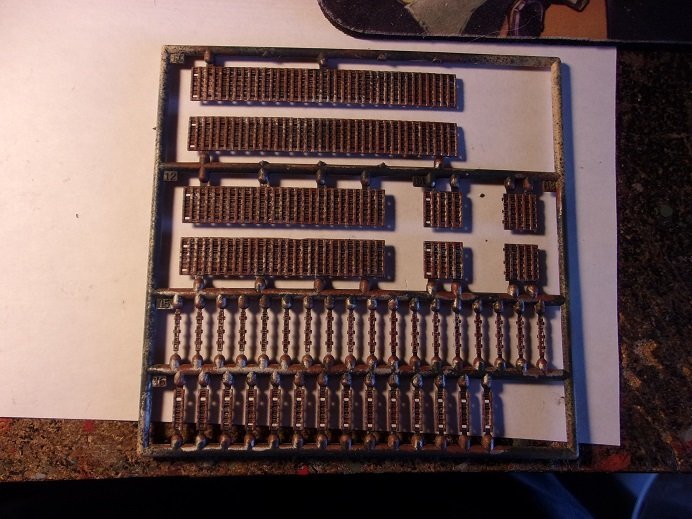
they were first base coated in the Dunkel gray.......then dry brushed in flat steel, and later to be dry brushed with the rust color {nothing more than flat red primer}. it was kinda frustrating to assemble the tracks.......but it went well and I got the job done
once the chassis were painted in the sand yellow, the gears and bogies were also dry brushed in prep for the task.
I did leave some of the gray shadowing beneath the fenders...the outer part of the fenders will be added once the tracks are in place.
...and let the fun commence!
-
she looks great Mike! you've come quite a long way with her
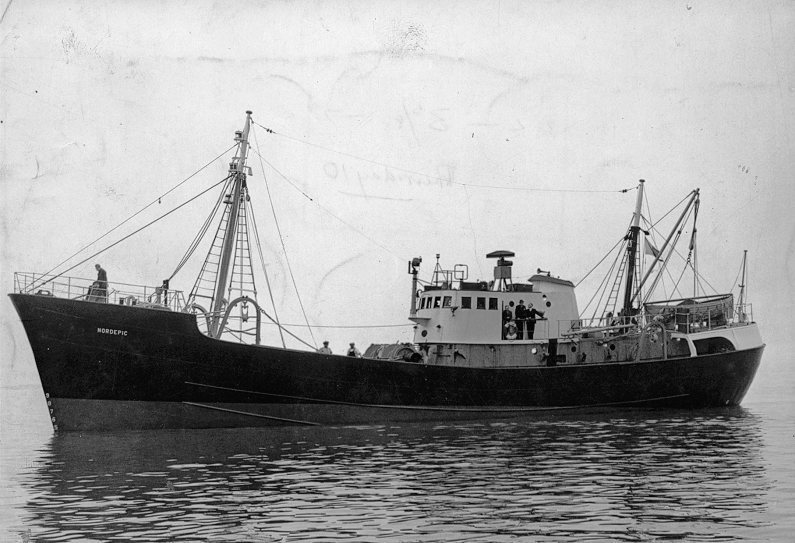
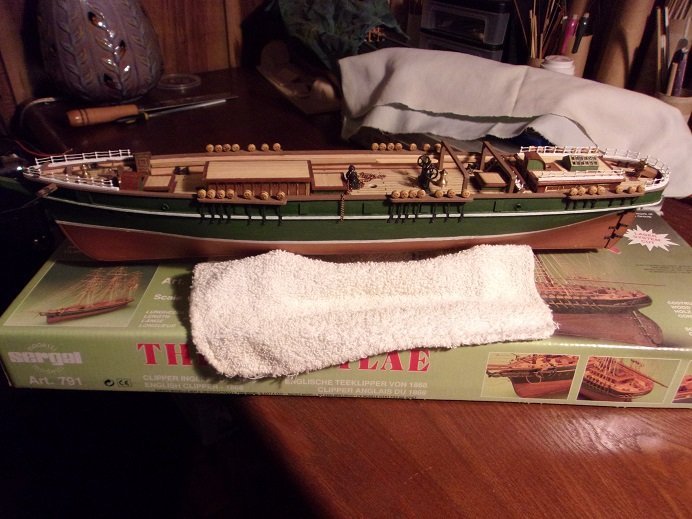
so true........these old kits are not laser cut, which makes life a bit more challenging. the fitting kit does have the upgrades, but there were a few things that I wasn't crazy about. in the original fitting kit, the anchor winch and the net winch were made of metal ....in the new fitting kit, the main bodies are laser cut wood parts. the boat crane is plastic, but it wasn't part of the original kit. I cut the parts out and assembled it.......later getting the idea to motorize it. the kit I got to build the Progress is an older kit.....the parts panels and the planking is mahogany. I used basswood and Obechi, and save the mahogany planking for future use {a sailing ship perhaps}. I also fancied the idea to elongate the hull and build this vessel:
the stern came out really nice.......I had a heck of a time with mine. the outer panel broke and I had to repair it. superb job all the way around......very nice choice of paint!
- mtaylor and Keith Black
-
2
-
catching up on your Cutty Peter....gotta say she looks fantastic!
great job on the masting, and I as well use the plastic blocks if I have them......they look fine and work just as good very nice progress indeed!
- Keith Black and petervisser
-
2
-
-
-
must have been cool to own your very own tank..........drive around........scare the neighbors
 I've always run into kits that parts that I would thing should be separate, are molded into the associated part { like oil filters to oil pan etc...}. I have one at the moment with this problem.......if that wasn't bad, the starter is molded on too
  .....and this particular kit is 1:16 scale! very sad state of affairs indeed.......wa....wa....waaaaaaaa
I'm currently doing this sort of mod with a pair of Tiger II's.........look'in forward in seeing what you do to this one
- Old Collingwood, mtaylor, Egilman and 3 others
-
6
-
superb job Chris........the spit looks almost real! I always do a little sanding to my tires......it's like weathering
- lmagna, FriedClams, Edwardkenway and 6 others
-
9
-
-
-
very sharp chassis and engine
the numbering looks cool too!
- Canute, Jack12477, king derelict and 2 others
-
5
-
hello Kathy.......now I really feel embarrassed
 4 years.........
 .....that's the same as a term for the presidency! has it been that long??? to be hones, she's been under drape all this time.....doing my best not to let the dust settle on her. I do have a reason for getting her back on the table......but I did as well in the case of the Half Moon.......and I missed the boat on that one too
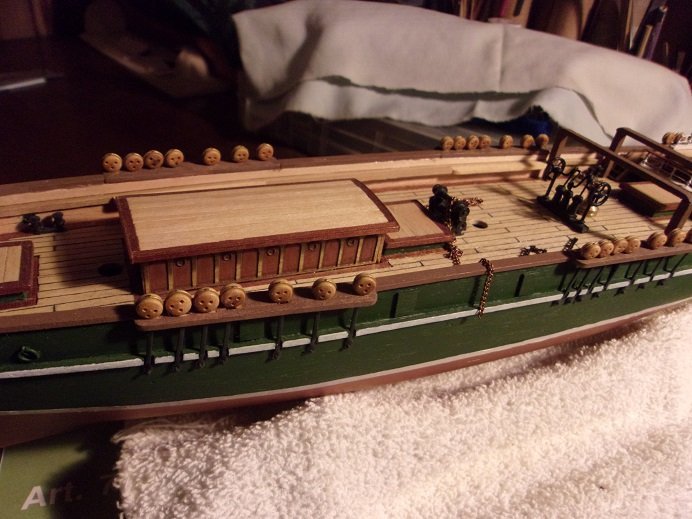
I was in the process of trying to find the life boats for her, since the kit has a shortcoming on this area. the aft supports are dry fitted in this photo, I believe....another pair are to be positioned on the roof of the forward cabin. it been trial and error.......so I think I will settle for what I've got and go with them.......I'll just fudge them a little to suit. I also wanted to add a few other bits of detail.......and with that, I think I will lower the scope a little, so the project will be a bit more achievable.
the idea of building a second model to accompany this one did come to some sort of fruition........I built a hull {using that one bow bulkhead I showed back in the early part of the project}, but instead of continuing it as the Cutty Sark, I thought to do something very different. I decided to build a clipper battle ship. there are some aspects that I still need to iron out....like propulsion {I plan on 2 to 4 screw}, and masting, but it is doable. I have pictures of what I have done on her......I am so 'itching' to digress.......but I shouldn't. here is just one picture of the hull.....
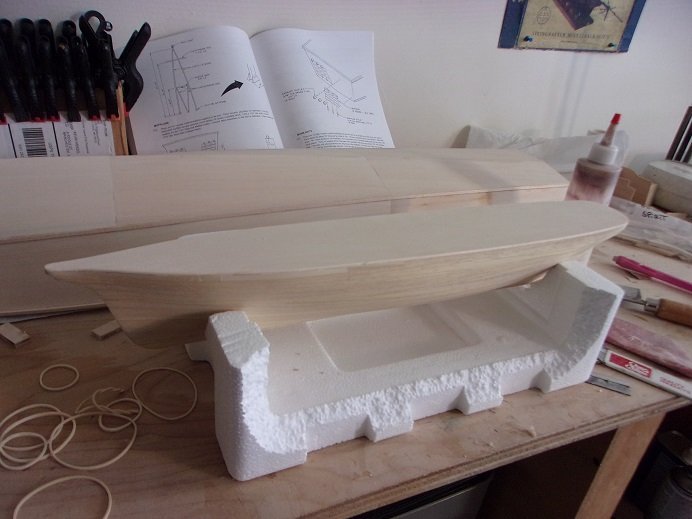
I guess the idea came about, when I was working on the Arizona {which I still need to finish as well}...or I might have been tinkering with the guns on the New Jersey {which I am so itching to start}. the idea ran though my head.......could I make these from wood? ....and that's what kicked it off.....
I have some PE to play with for her.......it's been about a year since I last pulled her out. I'm always play'in with something.....make no mistake. one day I may get up the gusto to create a log.....I just don't want to scare folks, thinking that I've gone off the deep end
I have......>evil grin<. so keep an eye on this log.........I will be back


-
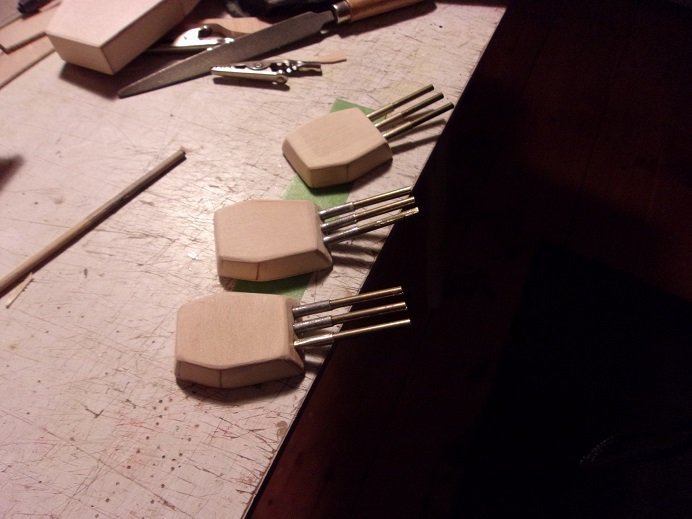
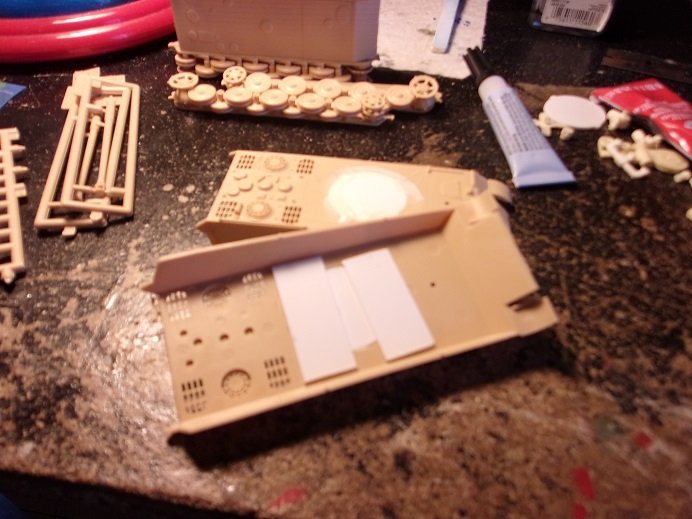
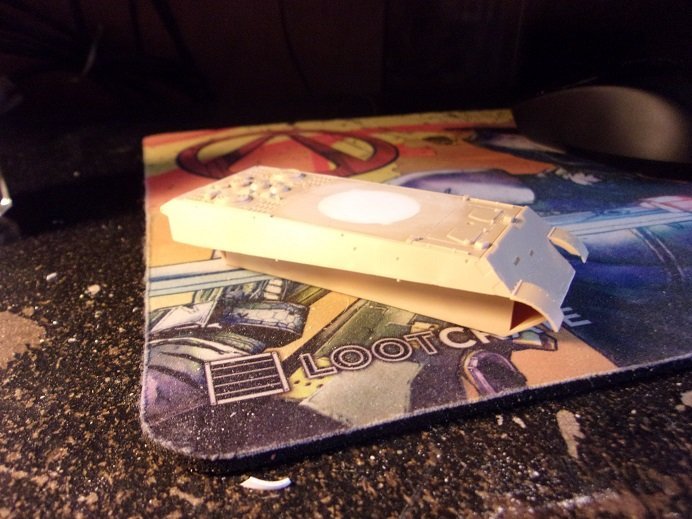
so........at this point, the burning question is....how were they to be coupled. Hasegawa isn't very detailed in this respect......there is some detail on the forward rail car, but for the trailing rail car, they only show a circle with a pin in the center. the height of the gondola was another concern......sitting on the rail car, the gondola is around 5/8ths of an inch off the ground. not only that, but it appears to be a tad lower in the rear, than the front. the adaption to the tank chassis might lift the gondola higher off the ground, but it might be necessary, since it will now be able to navigate over uneven terrain. in thinking of the pivot points and how it would have to turn, I thought to go with a simple 5th wheel design. cutting them from the thinner plastic, they were cut to shape and sanded.
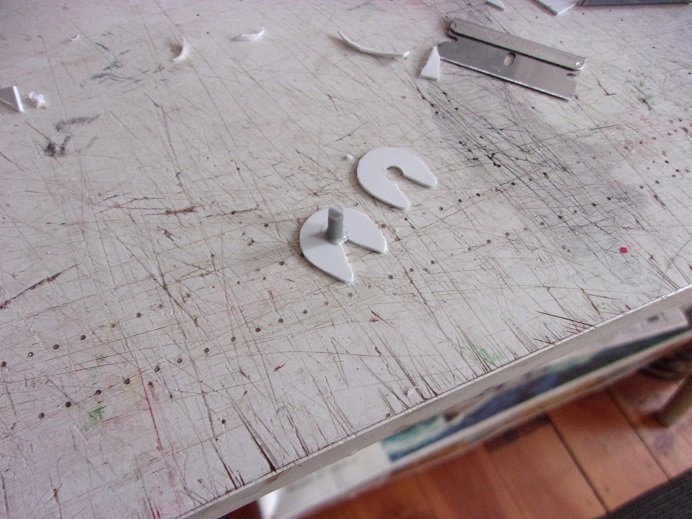
keeping with the Hasegawa kit design, the rear 5th wheel needs to have the pin added. to get a better idea of how much height will be needed, I had to set up the chassis the same as well {but without the pin for the rear}.
the gondola need to be high enough off the chassis to clear the detail on the decks, as well as the exhaust pipes {I haven't dry fitted them yet to see how much that will be}. the chassis are shorter than the rail cars......the cars being about 5 inches long.
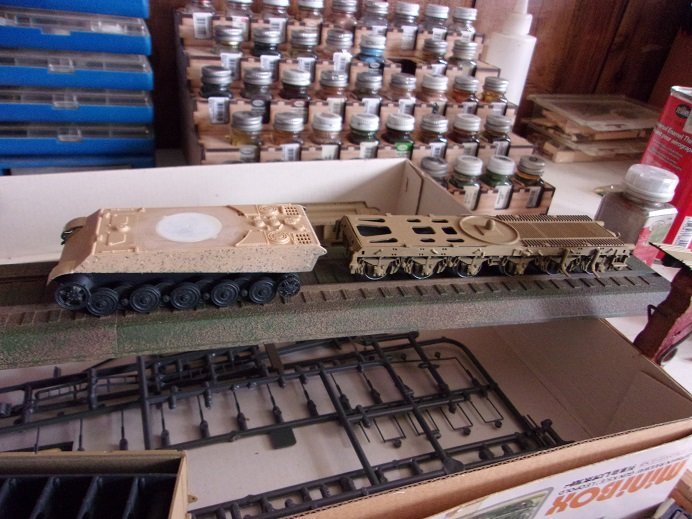
.......but it can be seen that the gondola will also be higher off the ground, than on the rail cars. the height might be unavoidable, since I'm not going to modify the gondola. I {at this point} am either tempted to buy a second kit, or scratch build the gondola, for this new variant. we'll see
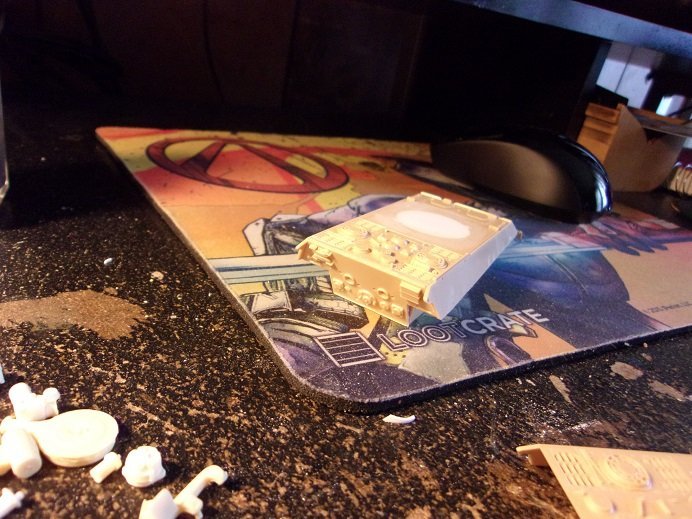
the 5th wheels sit on a bracket fitted with a pivot pin. in thinking of my dealings with tractor trailers, trailers need to be a certain height off the ground, so that the tractor can slide under them, hooking up to the king pin located under the nose of the trailer. the rear suspension of the tractor is fitted with air bags that will lift the trailer off the ground enough for the driver to be able to crank up the landing leg {tubes}. the landing legs are the support for the front of the trailer......the legs are telescopic....the lower portion of the legs retract into the housing of the upper section and allow enough clearance from the ground for transport. ...just the principle of how these two parts work together to play it safe, I gave them a height of around 1/4 inch.
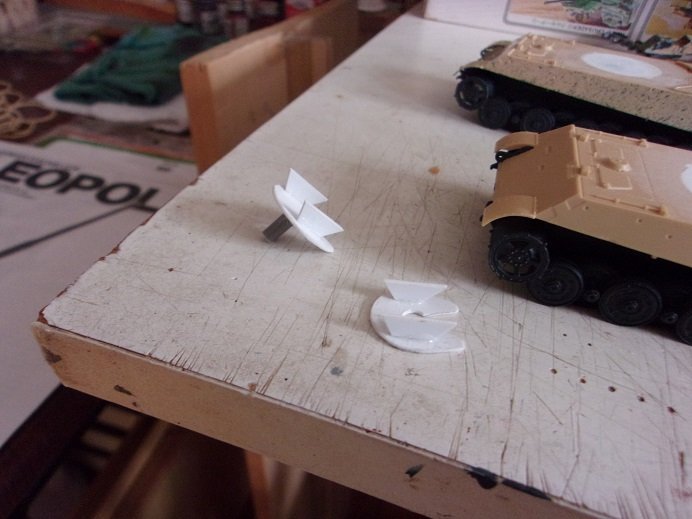
fitted in place....they now look like this.......
more on this soon, when I get the tracks on and paint.
- lmagna, Old Collingwood, mtaylor and 8 others
-
11
-
well thanks Bug.......and thanks to all who have joined in
I like models that have some 'expanse' to them...I think they give the modeler more freedom to build them the way they like. they make you think.......what would they have looked like, if they pulled it off? I would say that the Germans thought about this after losing Leopold and Richard in Italy. they were sent there to lay siege to the town of Anzio, later nicknamed "Anzio Annie" and "Anzio Express". I think that being limited to rail hampered them........they did do some damage, but were not as effective as they were hoped to have been.
if these two were mechanized, they could have been positioned better in more strategic locations, thus making a larger impact. it might have also changed the use of the K5, more versatile, like the mortars that were built as all terrain pieces. I haven't had the time to devote to Leopold.....save for a bit of time here and there. I'm officially on vacation......won't see the shop now till the 29th...and I wish it was longer
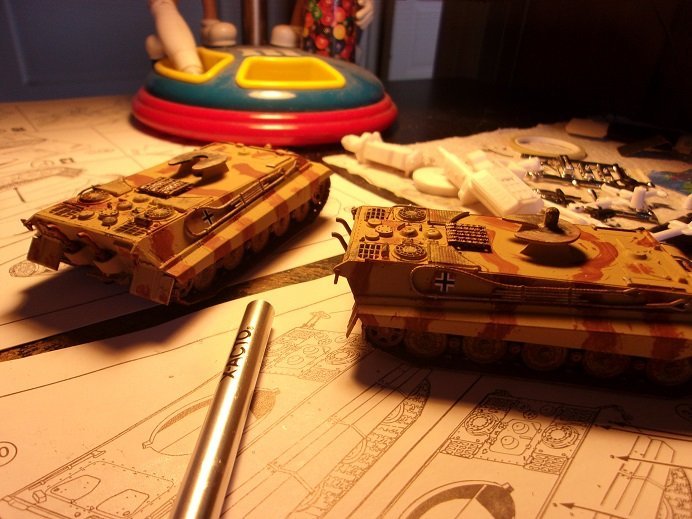
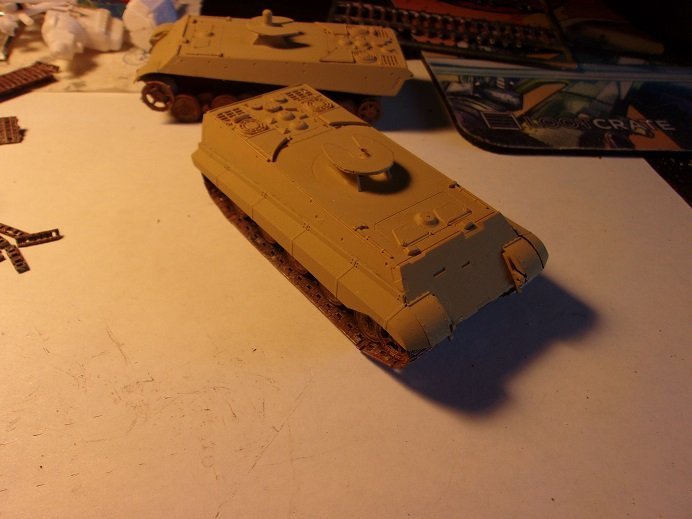
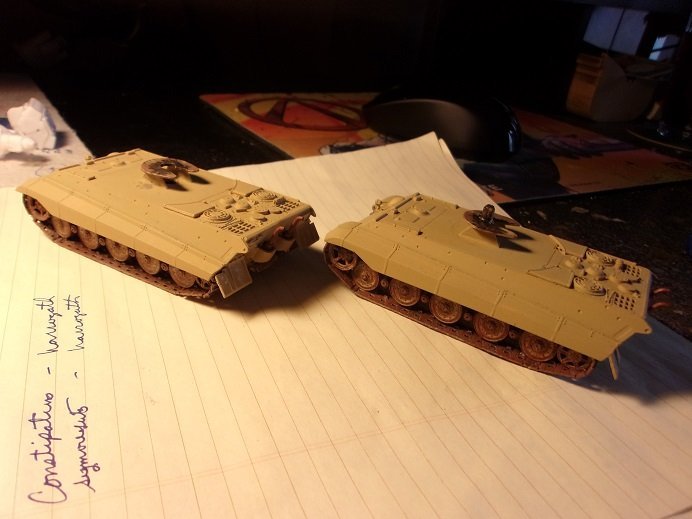
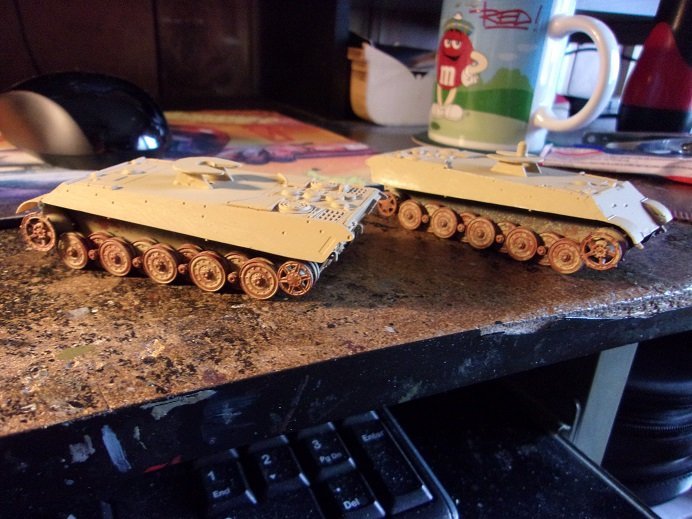
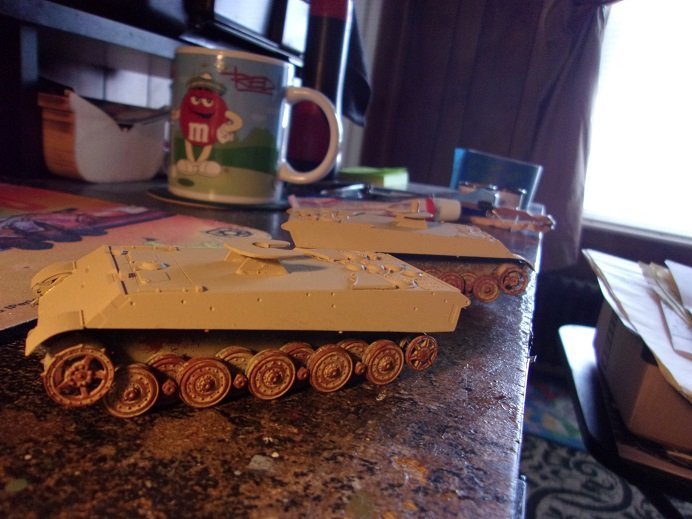
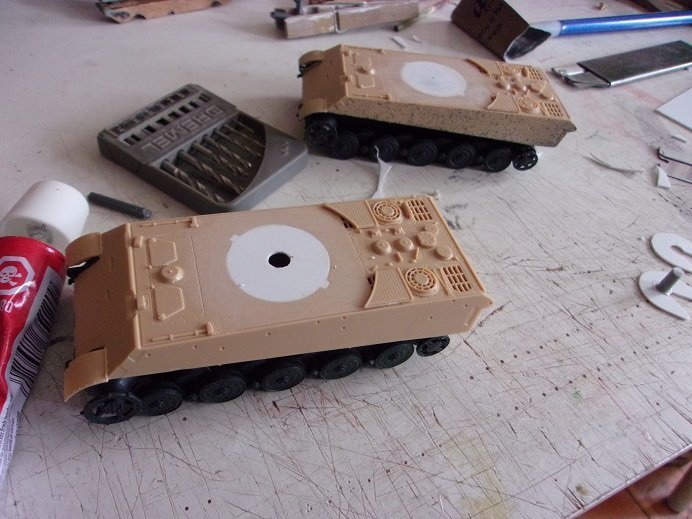
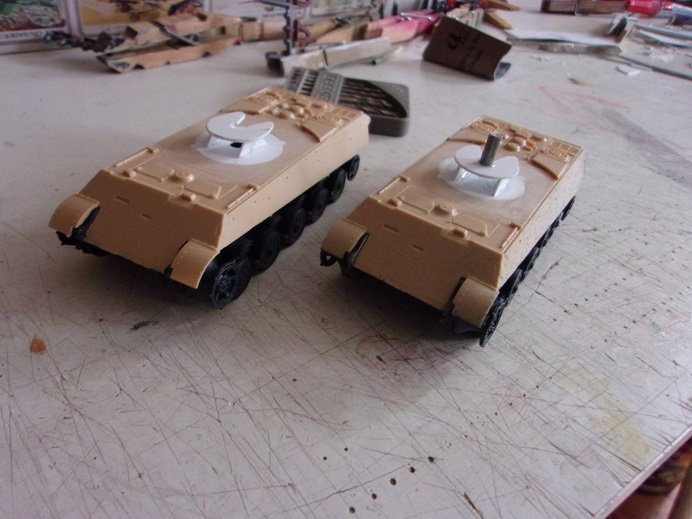
I took a different approach to the pair of Tiger II tanks.......wondering if adding the tracks would be easier. one, I added the track sides to the body, the other I didn't. ultimately, I ended up assembling the chassis the same, due to how I wanted to paint them. the bottoms of the chassis were painted in the Dunkelbrau gray, and then will be 'shadowed' with the sand yellow, just like the gondola was done. to fill in the holes for the turrets, I changed over to the thinner plastic to make the plugs. the plastic used is the same thickness as the thickness of the model, so this made for a better choice.
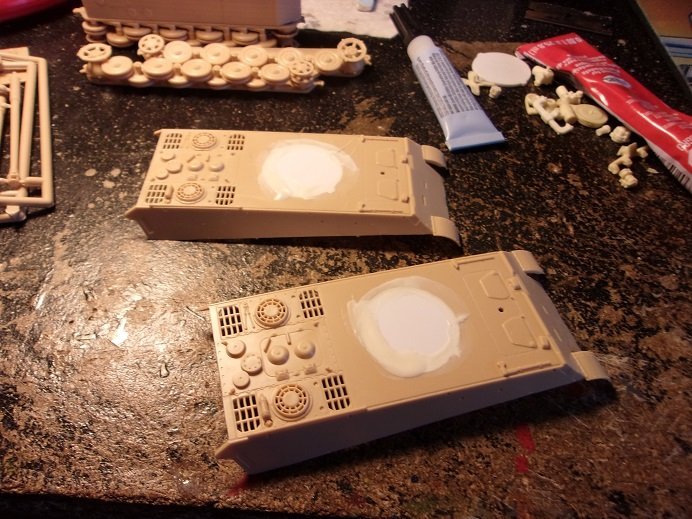
I used filler to get rid of any gaps around the plugs......trimming off the excess with a razor and sanding the decks smooth. I also reinforced the plugs in case I needed to do any 'manhandling' along the way.
what I ended up with, was a rather smooth looking deck.
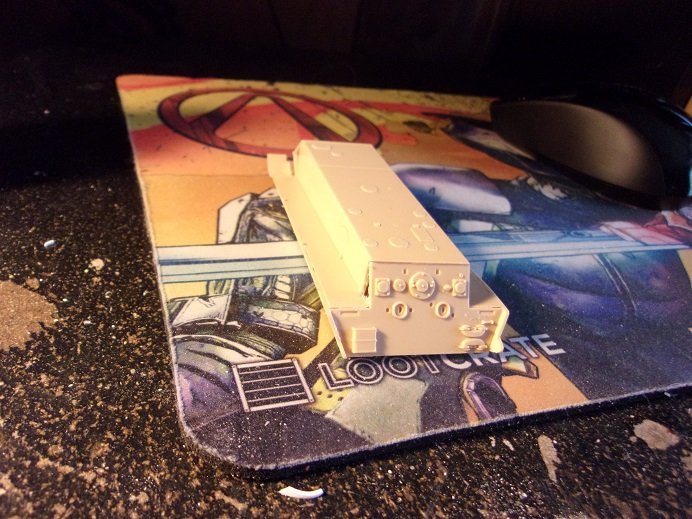
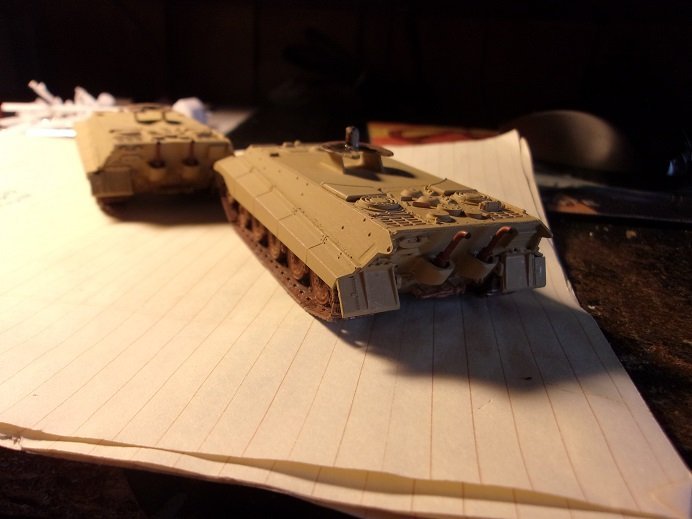
this is the one that I didn't add the tread sides to.......a plate that has all the pins for the wheels and bogies. once both were assembled, I started with the paint. I did the tracks with the gray as well, later to be dry brushed with flat steel and rusty color. there is still one bit of detail to be hashed out, but that will be another session.. it needs to be done though for the second round of paint.
- Edwardkenway, mtaylor, Baker and 5 others
-
8
-
more has been done on this project.........mainly with the mechanization though. I just got told we have to run.......but I will be back
-
awesome piece Grant...well deserved for such high praise!
a case would definitely be in order. it's a real work of art! perhaps another piece would compliment it even more...........a Hook 'n ladder maybe?
- BobG, thibaultron, gjdale and 5 others
-
8
-
-
very nicely done Patrick! the weathering looks great!
-
pretty cool model........extremely well done
if one was to try one of these models.......thanks for the tip
- Jack12477, Canute, Old Collingwood and 4 others
-
7
-
-
impressive work Michael
- Egilman, Canute, Old Collingwood and 1 other
-
4
-
-
I think you've built an outstanding model Dan.....the camo looks great just the way it is! very nice job on the engine as well.......it's very seldom you see a display pairing like this. then again, there aren't too many kits that have the engine, unless they are large scale kits. Soviet or Japanese planes are not commonly modeled....I've not done any. first class model my friend

Leopold German railway gun by Popeye the Sailor - 1:72
in Non-ship/categorised builds
Posted
of course........I also found a little time for Leopold. the aft deck of the gondola has been added to the model, along with the 'tilt' loading platform just behind the breech. then I did something stupid........I used a brush to touch it up in spite of my shaking the bottle of paint, it still dried a different hue than what the airbrush laid down....I will have to go back over it. the top decks were finally cemented into the rail cars........
I did some here too.......given getting over spray where I don't want it, I may just try and blend it somehow. the main pivots for the gun still needs to be added...the parts are in the back ground..
so where we are at with Leopold...is here. outside of the shading.......I'm ready to move on. here it is again on the rail cars.
I'll get that shading in check") as can be seen though, there isn't much of a need for clearance......the tolerance between the gondola and the rail cars is minimal....not much gets in the way. if this was to have gone through with mechanization, I did find that the tolerance would need to be more, due to what is on the chassis tops and the exhaust....etc. I am glad I gave it as much as I did..........get a load of this
as can be seen though, there isn't much of a need for clearance......the tolerance between the gondola and the rail cars is minimal....not much gets in the way. if this was to have gone through with mechanization, I did find that the tolerance would need to be more, due to what is on the chassis tops and the exhaust....etc. I am glad I gave it as much as I did..........get a load of this 