


popeye the sailor
-
Posts
16,007 -
Joined
-
Last visited
Content Type
Profiles
Forums
Gallery
Events
Everything posted by popeye the sailor
-
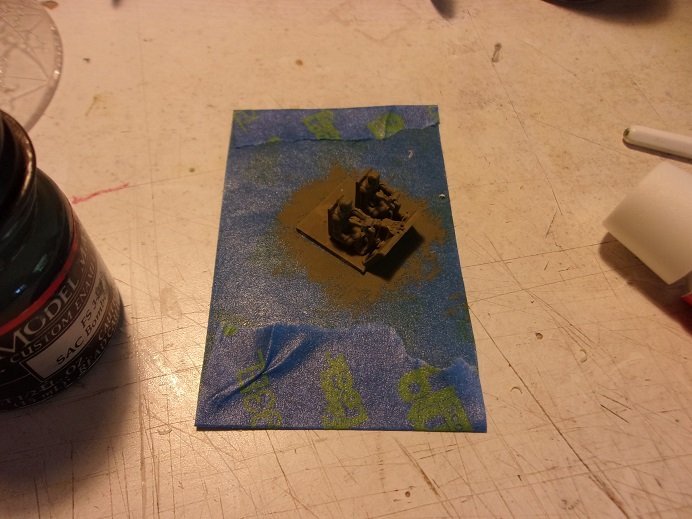
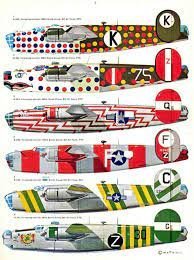
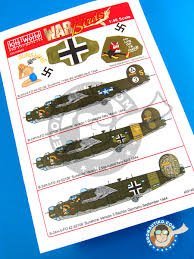
 ....as I said to Lou yesterday.........it's just one of my habits I wish I could break my love for older kits will be the demise of me yet! I wracked my brain trying to find decals for this model.........the biggest hurdle is the scale. the major problem in domesticating an older kit is just that.......early model kits produced, were in such odd scales, that it makes it nearly impossible to bash them in this way. even in the after market dept., mods {unless scratch built} are hard to do. I have some pictures from the 17th on the progress of this model.......painting for the most part. after painting the underbelly gray, I got the feeling that I had made a mistake.........most of the captured planes had their under bellies painted yellow. I did find out however, that a few of them retained the gray........so that put me at ease for the time being. I rode a little high on the fuselage, but I think it won't matter too much. the top and bottom of one wing was done........the wheel well is done in chromate green. I still need to do the engine paint, as well as the deicing trim and touch ups. the pilots were molded to the seats......I would have cut them out, if not the fact that I want to show the plane in flight. painted in chromate green too. the stabilizer and rudders were done in the Army green and gray. the malformation of one of the rudders doesn't show too badly, now that it's disguised in paint I also painted the buckets for the turrets......I need to do the glass frames and guns......later to assemble them. our discussion over the phone yesterday actually uncovered another aspect of the B 24, that I had not seen previously........there was such a thing as an assembly plane. this was the lead plane that the others would assemble behind and follow to the mission location. the paint {camo} on these bombers is very reminiscent to planes of WWI there were a few that were even more striking ! here is an idea of what one would look under another banner............... we kinda joked about scale...........I'm sure I'm not alone, but I believe that from one manufacturer to another, there are subtle differences in their production of scale. it may be slight......but it is noticeable.........and once the molds are tooled, there is no going back. just for a laugh, we looked up anyone who made a model in 1:32 scale. think of it.......the model would be HUGE! well......we found one...........Hobby Boss! I found these decals for them.......these are masks to paint the markings on {something I've never done before}. Captured B-24 Liberators Luftwaffe Insignia Paint Mask Set 1/32 un....%#&# believable! but wait!...........there's more!
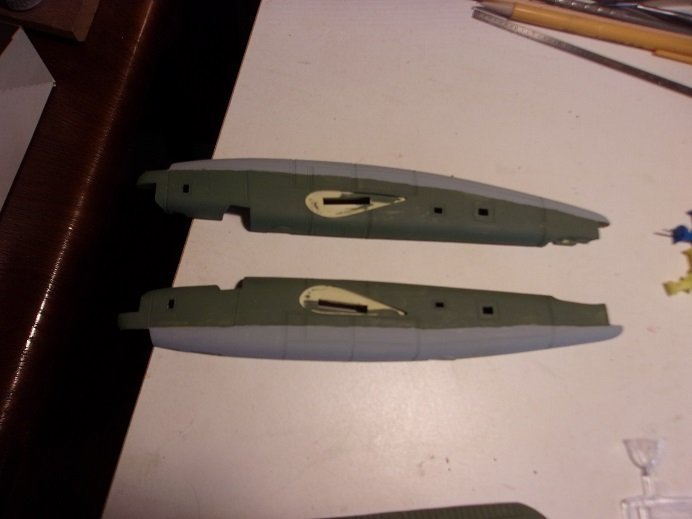

- 70 replies
-
- 12
-

-
checking in to see where your at on her Tom..........she's looking great! the sails look very nice....very good progress all around
- 135 replies
-
- 1
-
-
- billing boats
- half moon
- (and 1 more)
-
..........so you've met Murphy?!?! he's well know here on the site......he's always look'in best way to tick 'em off, is to see it through 'an get 'er done! look'in real good so far.........nice bit of detail HEY MURPHY!!!!!!................NO FEAR!>>>>>>>🐯 GRRRRRRRRR!
- 55 replies
-
- 1
-
-
- hydroplane
- Slo-mo-shun IV
- (and 1 more)
-
super nice progress.........the color choice for the deck sheer really gives her that rustic look the engine looks sweet......is there to be a raised dome cover over it? window work is sometimes a pain........the windshield can be done with a full panel to cover all three, but sure......you can get away with just filling in the 'vent' windows, leaving the others open. there are many ways.......slotted frame and slide them in before putting the roof on or create inner and outer edging to sandwich them in. I used it in a few instances, but Testor's makes a canopy glue for plastic models. it dries clear.......won't help you in that situation, but there is a chance it can be saved with water. coming along very nice!
- 51 replies
-
- 1
-

-
- laughing whale
- maine lobster boat
- (and 1 more)
-
if that were me.........I'da likely broke it off to a great start! looks good!
- 225 replies
-
- 5
-
-
- I Love Kit
- Hood
- (and 2 more)
-
thanks Gary sadly no motivation to do too much yesterday......they were painting the outside of the building yesterday, and if I were the customer { I wouldn't pay for it!}. I need to get out there and put the border around the admiral's lily garden....the bulkhead is finally installed. the guys doing it did an awesome job on it........poured the foundation and everything. now I just need to do a little landscaping and put the timber borders back. I will attempt to do something later on.
-
paint looks very good John 👍 you did a superb job of blending the chine joints. glad to see your taking to the airbrush so quickly
- 51 replies
-
- 1
-
-
- laughing whale
- maine lobster boat
- (and 1 more)
-
really nice work........you've captured the looks after hard battle you've got some good detail there
-
the Tender is coming along splendidly Craig!..........great paint and very detailed for such a small model
- 127 replies
-
- 4
-
-
- Akitsushima
- Pit Road
- (and 2 more)
-
sitting in as well........this might be the future for the model kit
- 225 replies
-
- 4
-
-
- I Love Kit
- Hood
- (and 2 more)
-
it is as I thought.......there are no other decal sets for captured German planes......the Wulfe hound was likely the only notable plane. I found that what I have in the pile, are for 1:48.......too large for the model of course, the only German insignias I have are a couple short........they're from that Stuka model. being told that the times not good to order any is also a set back. so I may have to do an about face on the captured aspect and go with the original American subject. I won't add the Buffalo Bill thing ........I should have enough numbers to come up with an unnamed plane that is at least legit. this also changed the paint.......show ya in a bit
-
yea Ken......injection molding relies on the correct pressure to push the material into the molds...I think it was a bit off I wonder how many kits were produced before they noticed the problem?! when I worked at Disogrin industries, it was one of the things we looked for during our inspection of the parts we made.......flow lines and 'dirt' was other factors. flow lines meant that the material was cooling too fast in the molds.......and 'dirt' meant that the production was moving too slow, or the temp was too high........either case meant that the material was in the liquid state too long and starting to 'over cook'......turning the material brown or {in extreme cases} black. the production stopped at this time and the machine was purged of all the burnt material until it ran clear again. this usually resulted in the operator being written up for slacking off injection molding is a very fast paced job........one had to be on his toes all the time. I usually had 'hot runners' , which meant that these parts were produced at a much faster rate....you couldn't even stop to go pee! that was one of the things I liked about the older kits........although they usually relied on a simple slot method. this is something different....we'll see how this holds up WHOOPS..........right into confession for that guy! sound as funny as the Holy Hand Grenade skit I do recall though building the 'Pacific Raiders' kit, but don't recall the steps I went through building it. the wing roots are a tad too large to fit into the root wells in the fuselage....I'm having to file the edge down a bit {1/16 or so} around the root so they will fit in the wells. the elongated tabs of the wing roots overlap one another inside the fuselage.........but no way to clamp them at all to insure the proper dihedral. I've done one of the wings.........but dummy me painted the undersides without doing the other one first nostalgia.........gotta love it as with the Wulfe Hound, I think it will be hard to find decals for a model of this subject....least I haven't seen any others so far. Blonde Bomber II, a B 24D-1-CO 41-23659, the first B 24 captured, was inspected by the Germans and sent to Rechlin, but there is no info as to its use by the KG 200. Sunshine, as the second plane on record, a B 24H-5-FO 42-52106, was used a had the call numbers A3+FK. on most of the B 24's, the Germans weren't concerned with removing the bulk of their markings, aside from the American insignia. they must have learned from their use of the B 17's, that it was harder for them to infiltrate an in flight squadron, the more they looked like German aircraft {as if the insignias didn't give them away}. I guess as long as it wasn't offensive to the Germans.......like the Wulfe Hound, with a wolf eating a German plane} two other planes, a B 24 G-10-NT 42-78247......given the code CL+XZ, and B 24G-5-NT 42-78106, had the code numbers NF+NL. this plane was destroyed in a raid.......the other plane's fate is not known. by the end of 1943, several B 24's had been captured.......as many as 5 were in service. I haven't done much checking for decals.......I do have the decals for an HE 111 that became botched, damaged and then thrown out. I think the decals are still useable.......I may go with them.
-
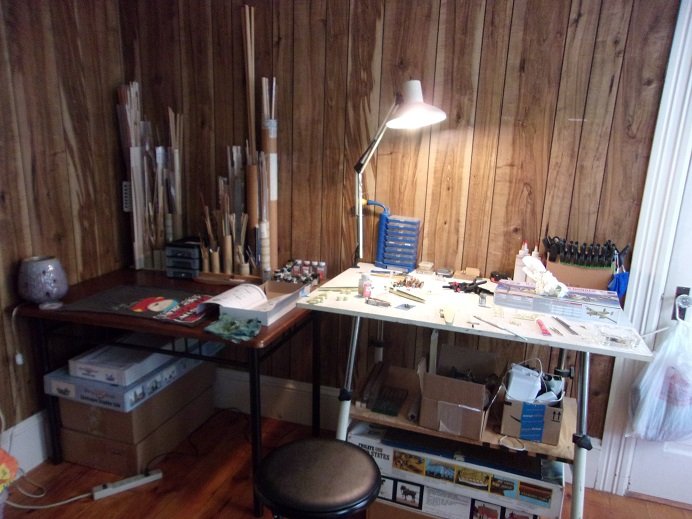
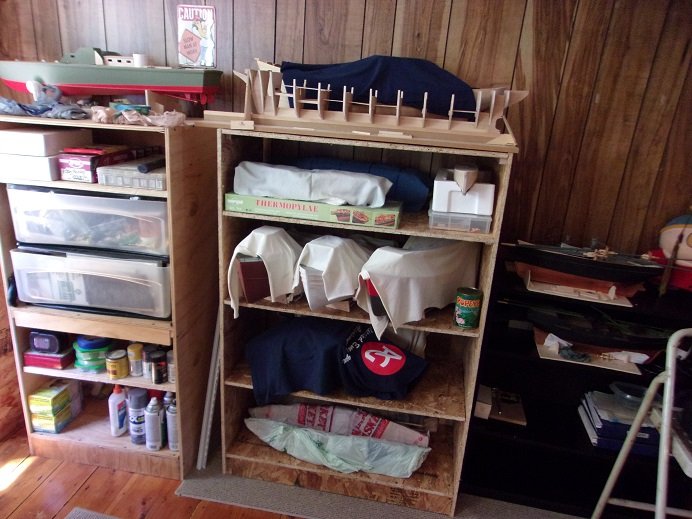
yea...I've got a few. the Half Moon was a partial kit that I got from a friend of mine. I decided to scratch build the missing parts.......I've yet to get back to her of late. I'm at the masting stage. I still have a good amount of that mahogany planking, which I got from the second Nordkap kit, and I also have some pine planking from the Steingraber kit. it's so old, the resins from the wood has come to the surface and pre-sealed it! it has some really nice grain to it........I'd hate to paint over it definitely agree....you can get some really good stuff from older kits soon to get back to the PT boat.......I've got a crane light waiting for me at Home Depot.........I may move the project over to table black once I get the light installed on it {just gotta figure out how to attach it}. the new table is in the spare room...it fits the wall. the light is set up to cover both tables, so the other crane light can stay with the scroll saw, and I should be able to direct it to the spray booth. still a bit more to do......but it's functional. I brought in the black bookshelf from the computer room.......I'm not making another shelving unit, although I might set something up on the wall. the supply cabinet is loaded........the 'berth' is loaded........there are 13 active projects in it: the three hull frames for the Bluenose project {counts as 3} the Boulogne Etaples the unnamed fishing boat the caroler's boat the Christmas Tree boat the Thermopylae the 'what if' battle cruiser the Progress the Tumb'lin Dice river boat the Half Moon and the hull frame for the Danmark {which may be called by another name} 3 others are in the black book case..........there are a few others still in the computer room closet. I go where my ideas take me.......I am never bored while I try my best to stay within the circle, I seem to spiral outward. Bermuda may have it's triangle, but I have my circle
-
airbrush is great..........it's a step up from the rattle cans you have more control with the spray and can do the lighter coats. I use an airbrush that doesn't cost a lot ..Testor's EZ airbrush. your progress looks really good
- 51 replies
-
- 2
-
-
-
- laughing whale
- maine lobster boat
- (and 1 more)
-
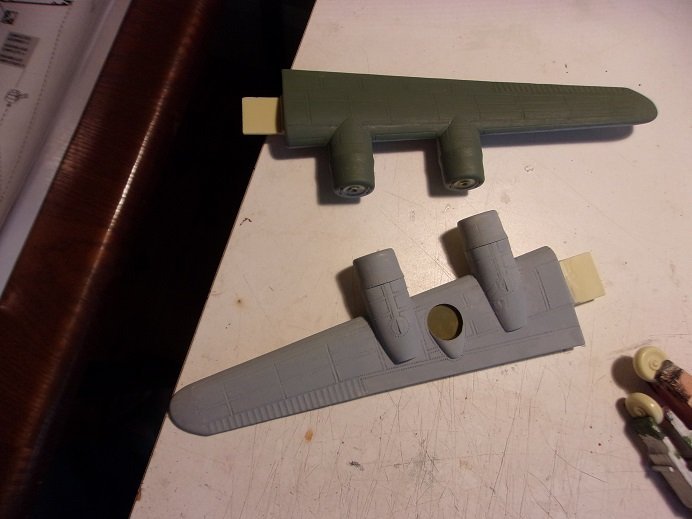
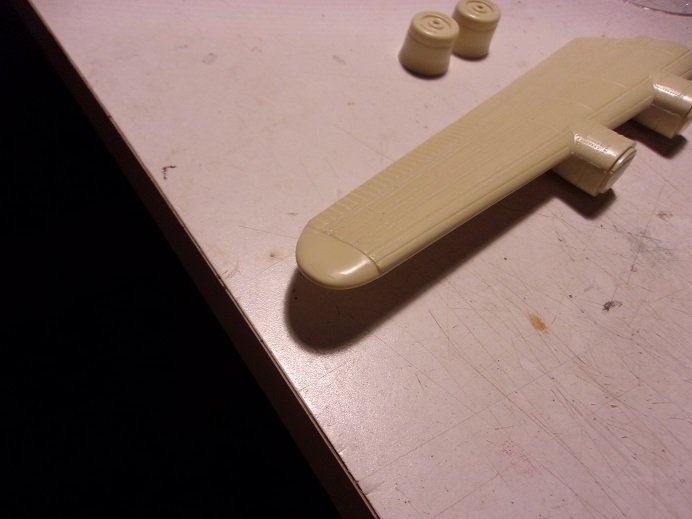
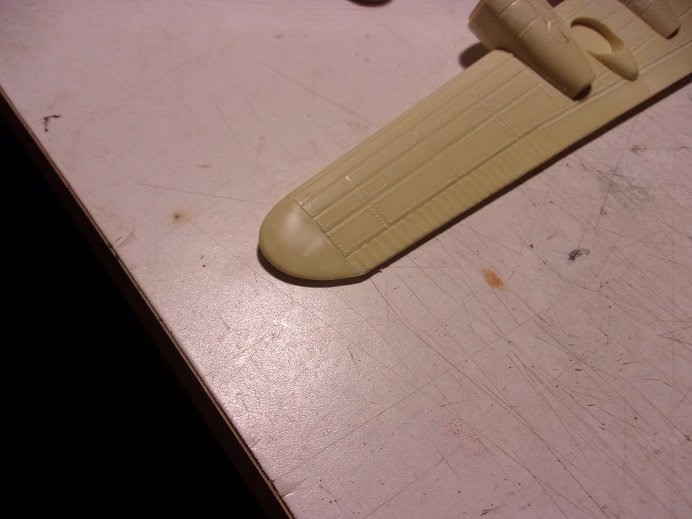
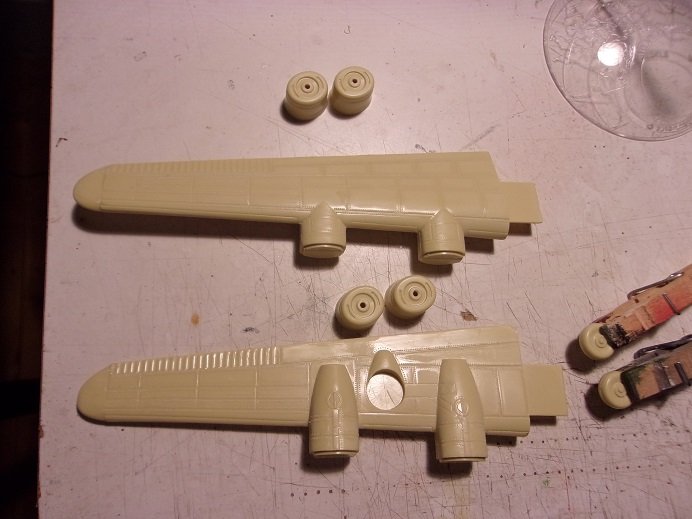
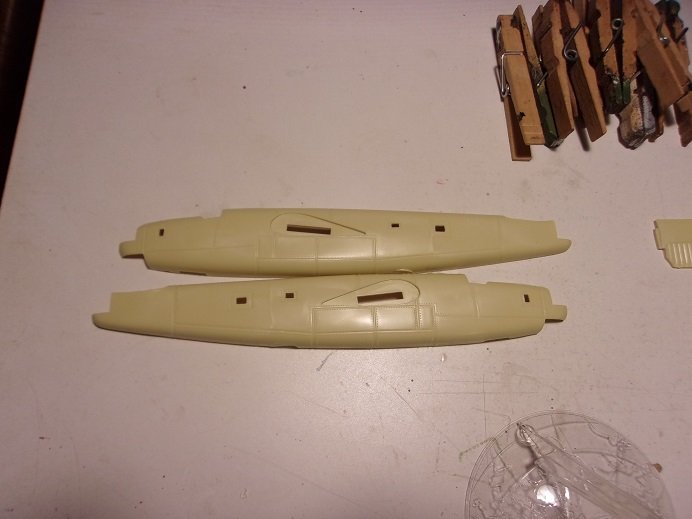
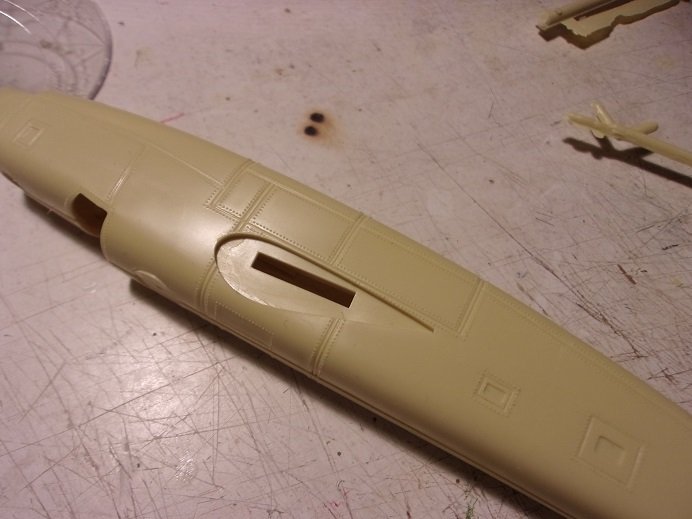
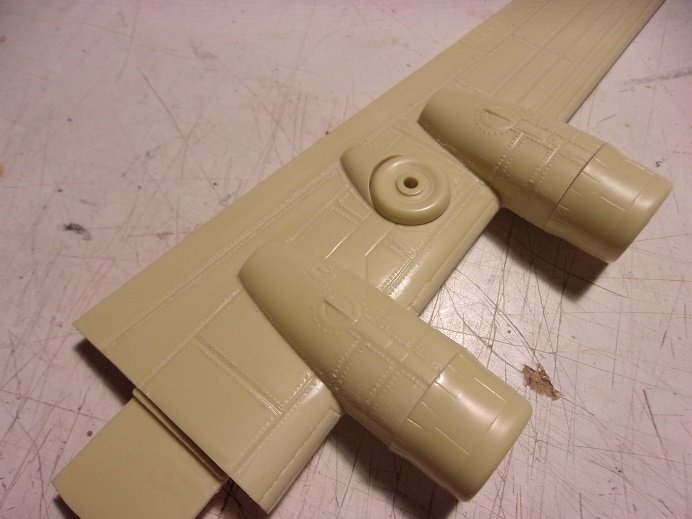
the wings were fitted with their wing tips.......can't mix them up due to the way the tabs are situated on the wings. more injection tabs were cut off and then they were cemented in place. looking at the leading and trailing edges, they don't conform to the contour of the tips, so they need to be trimmed once they are dry enough. I did the trailing edge of the starboard wing......it's the worst end. the leading edge just might get away with a bit of sanding. both wings are ready for paint.......I'll probably check them over one more time to be sure I got everything....... I have another bit of bash up my sleeve.........fuselage windows I cut them out! I have been all over these halves.......trimming and sanding every edge! as I mentioned about the odd plastic thickness.....I did a small goof on one of the halves near the nose gear, that I will need to fill. the nose gear can be eliminated......doors are supplied to cover the opening. the windows I opened at the nose and mis ship, I will try to use the window maker to fill them. the gunner's windows I can leave open.....just call it a perk hopefully more tomorrow!

- 70 replies
-
- 15
-
-
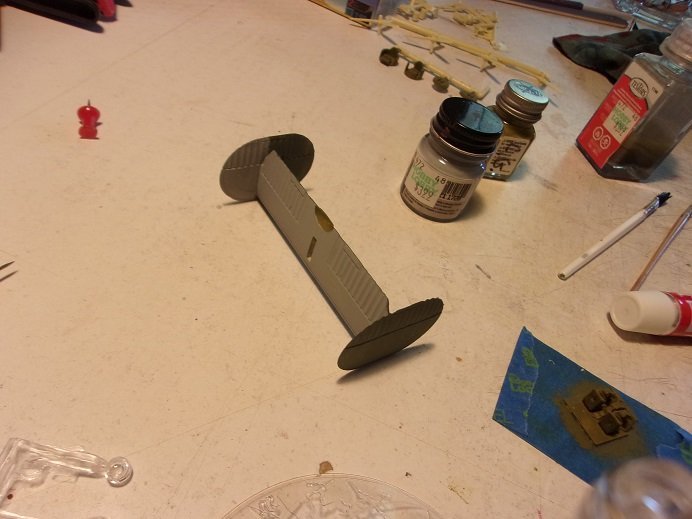
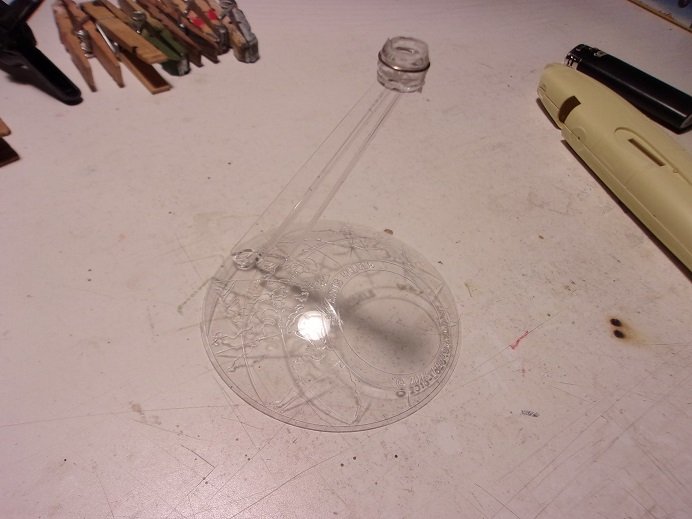
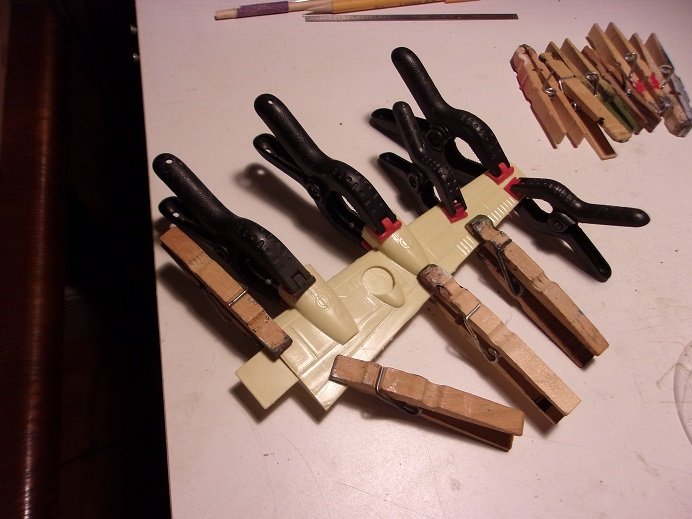
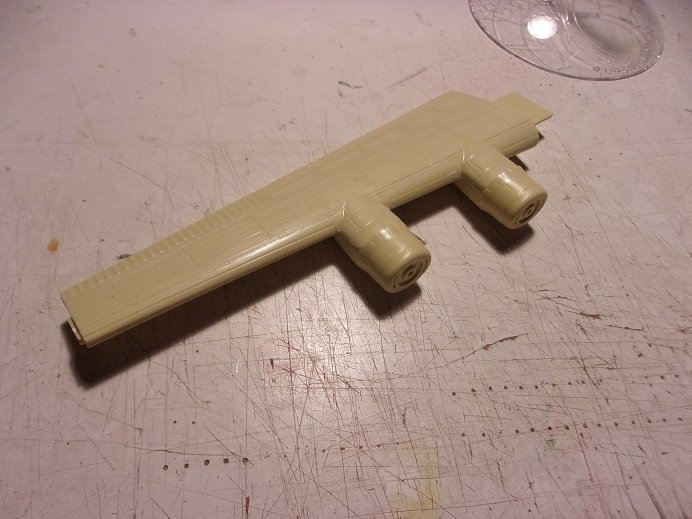
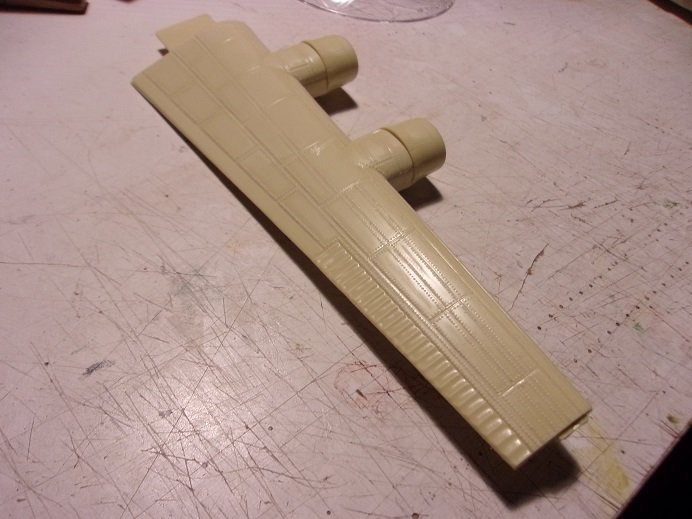
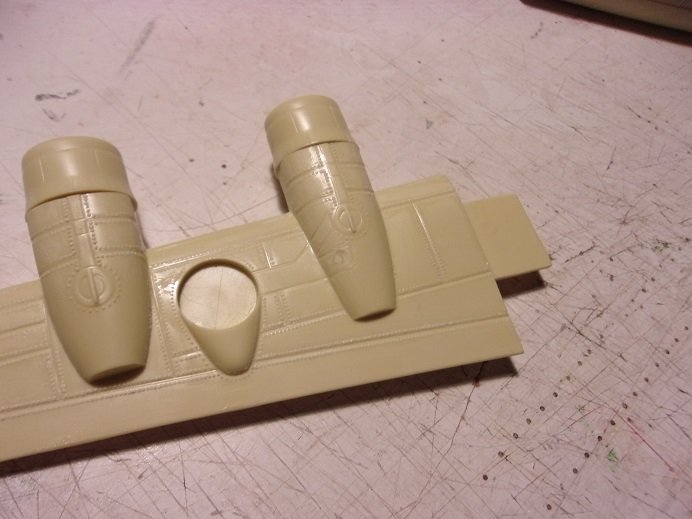
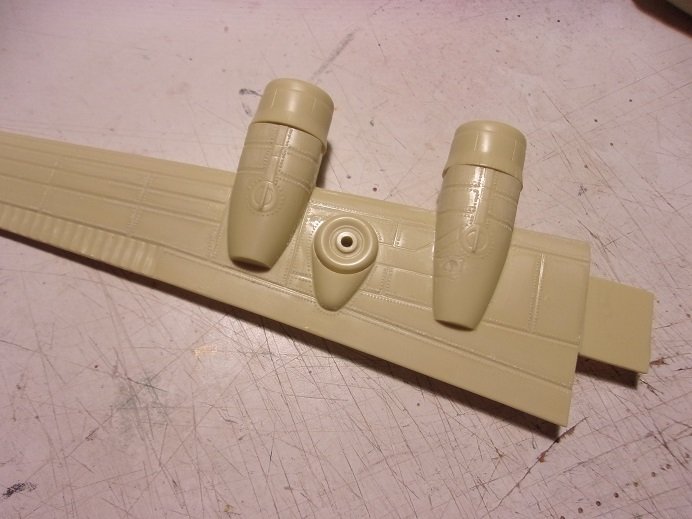
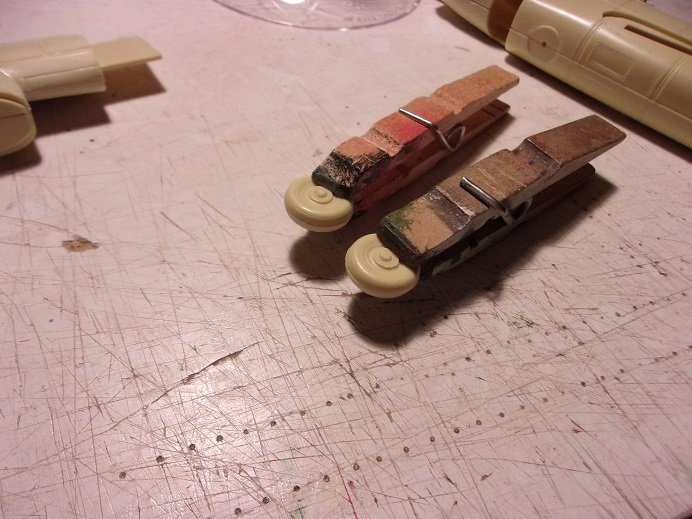
well.......that didn't take long, to size them down for posting miss me? since the wings are so bad, I started with trimming down the rivet detail. I left just a little to the imagination there was a lot of flash and the edges were a disaster. the admiral wandered by and asked why I was play'in with the plastic 'thing'........basically, I told her how the kit looked interesting. it did {to be honest}.......but I never expected the poor quality. old kit.........well......so much for the tooling they said they did she ran a finger over the rivets, and even she said it felt gross! while I was doing that, I also took the injection pin marks off the stabilizer and rudders.......two on each rudder and four on the stabilizer... you can get a better look at the deformity of one of the rudders.......can't do anything about it......oh well! the stand is assembled. it's got the slip ring around the neck of the cup........there is a ball that will fit into the underside of the fuselage. it will snap into the cup......we'll see how well it works. with this plastic being so soft, I dare not do too much trimming. the thickness of the plastic isn't consistent either......the fuselage halves shows this like a sore thumb......the top is like 1 mm.......the belly is about .5 mm! yepper.........strange stuff ! to insure that I can arrive at a seamless assembly {or reasonably close}, I will assemble them now and paint later......not my usual habit, but as I mentioned, I'll cross that bridge they are clamped in many places........no gaps! you can get a sense of the sanding I did to remove the rivets. later on.....the clamps were removed and the leading and trailing edges were sanded. the cowls were fitted on the nacelles to insure they fit flush. just a hint of the rivets is all that is left......I rescribed in a couple of the panel lines. unlike the wings, the fuselage bears only minor rivet detail, so I left it as it is. to model the plane with the gears up, the holes for the wing gears had to be filled. the tab that is to fit here was removed from the landing gears and use to fill the holes. one came out pretty good.......the other still shows it a little. the gear doors are molded closed.......I couldn't come up with a good picture of them, but it really doesn't matter. I'm on the right track with what IO want to do. all I really need to do, is simply cement the wheel in the well. there is no covering over the wheel......just the gear. I'm going the cut off the pin that the tire goes onto, insert it in the hole. then sand the backside of the wheel to cut down on the thickness, so the wheel appears to be deeper in the well than what you see here. that's done......... there's more!

- 70 replies
-
- 10
-
-
not sure about the present, but I have seen some older kits out there sweet look'in bike!
-
then you have a much better kit than this one I think my B 25 is a 1:48 scale model........your gonna have a big girl on your hands. look forward to seeing you bring her out of the closet. I did some work on her today......sporadic though since I had to mow the lawns and begin the filling of the new recycling barrel that we just received. I hope to get all the cardboard boxes off the porch by next week. I was harboring some in the garage from the rearrangement......got all that plus some rearranging in the garage done { much needed...getting cramped}. oh.........I also had to make a special trip to buy a new mower blade there is a stump at the end of the patio { if I were to give the slab of concrete a name}....and I tried not to, but I hit it. it's the landlord's mower...he had just got it back from the repair shop, so I never gave a mind to inspect the blade. of course, this was a few years ago........ it was bent al right.........only because it was so worn out....and dull as &#%* to boot! it only cost 20 bucks.......and I also bought the installation tool to torque it. the admiral's eyes went right up there when I picked it up........."you and tools......"they're my bread and butter", I told her. after mowing the lawn....with much noticeable improvement, I might add, I sat down and downloaded the manual and the service manual for it....bet the landlord doesn't even have them anyway......I have pictures. with a little love, she's starting to show some promise I do have to assemble and paint her a bit differently than I'm used to, but I'll cross that bridge when I get to that point. I should have the pictures up soon.......I did a little extra on the bash appeal
-
I bookmarked those two site you mentioned......one never knows when a Hood will end up on their table it's great when you can find info like that. it dispells a lot of guess work. as for the gray.....it's new to me too, although I do agree that flats are dominantly used........I would never use a gloss on a war ship
-
look'in good! this is just the upper hull......are you gonna add the bottom?
- 127 replies
-
- 5
-
-
- Akitsushima
- Pit Road
- (and 2 more)
-
there's quite a history on this aircraft.........many variants......A....all the way to M! over 18,000 were built.......there are only two that are flyable today. nicknames for them included the flying boxcar, but most notably, the flying coffin.......since the only escape route was through the hatch in the tail section. scalemates shows an interesting timeline on this kit. I'm finally caught up in this forum.....my word.....you folks have been busy!
-
gotta also consider that there wasn't too much of the 'fast food' junk either.........home cooked meals from scratch and all that jee........think of all the chemicals and additives we eat every day?!?!?
-
hey there OC.......just caught up to your antics! very nice work! the drummer fella came out great really top notch work!
