Supplies of the Ship Modeler's Handbook are running out. Get your copy NOW before they are gone! Click on photo to order.
×


popeye the sailor
-
Posts
15,993 -
Joined
-
Last visited
Content Type
Profiles
Forums
Gallery
Events
Everything posted by popeye the sailor
-
 I used a piece of the sail material I got with the Gothenborg. they don't give you enough to do them IMO........it looks and feels like canvas, especially if you give it a lacquer coat.
 -
thanks all and those who hit the like button........Mark filled in the gaps the three frames are not in the works just yet. the original hull sat in the closet for a while, before I started to examine it further. I'll tell you the story when I finally can bring them out. for now though......it's the mad dash to get some of these builds finished. I think it's neat that they take up the whole table........I was setting them out, and the admiral was asking what I was doing more on them soon........... thanks again.
-
just caught up to your video finish Frank....don't know how I could have missed it awesome job Frank....the weathering does her some decent justice~! congratz on the completion of your Alert you'll like the Marina II..........a cool tug to sink your weathering techniques into
-
awesome copper work.........
-
glad I'm not the only one saw your lindworm....awesome looking ship!
-
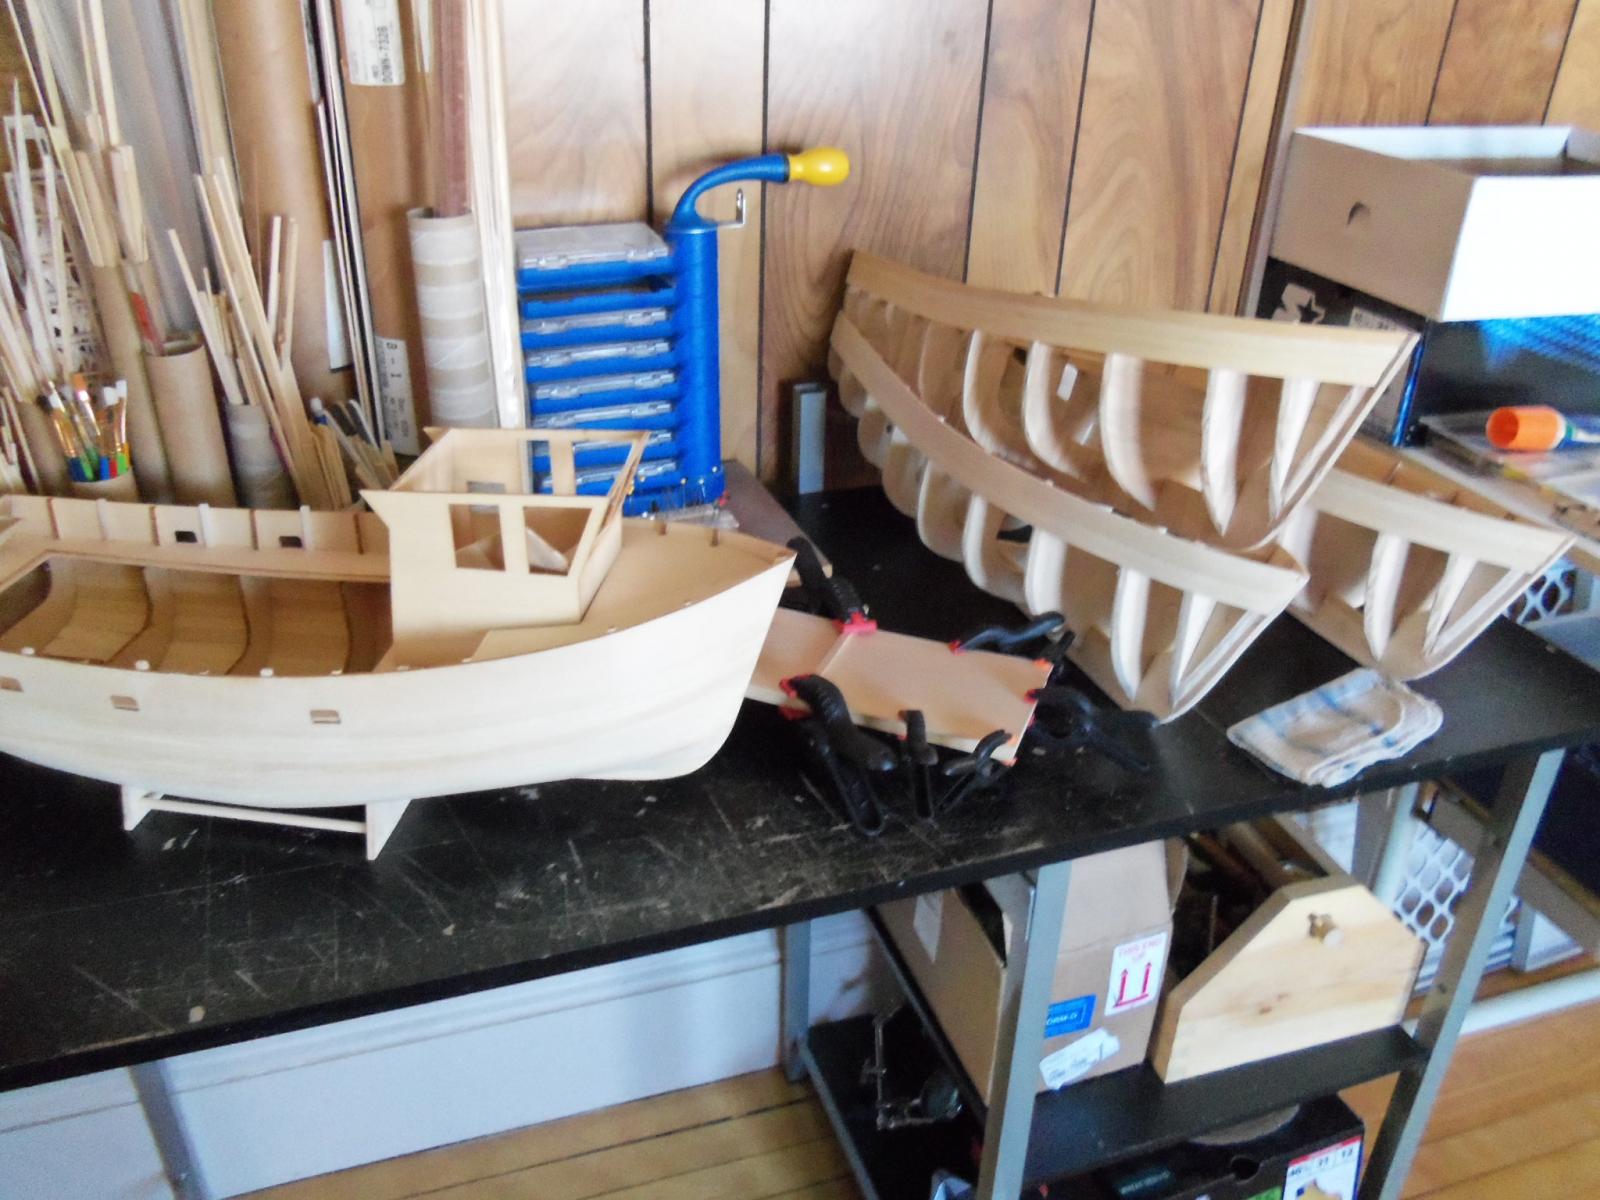
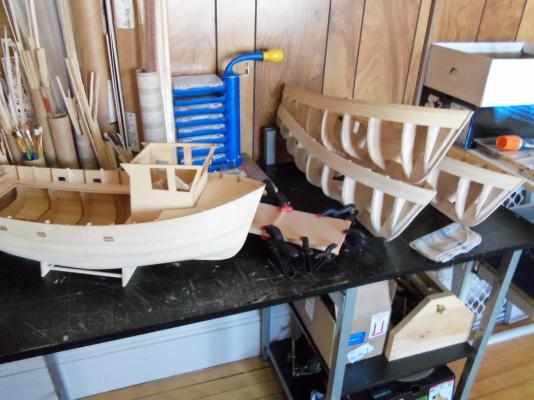
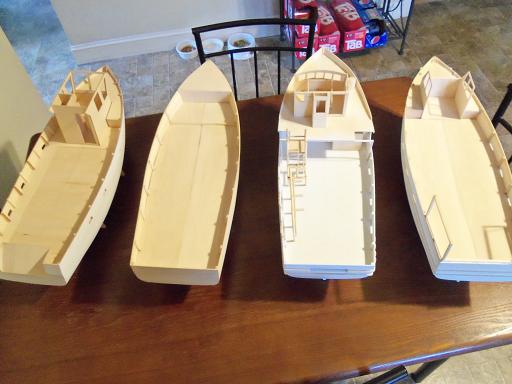
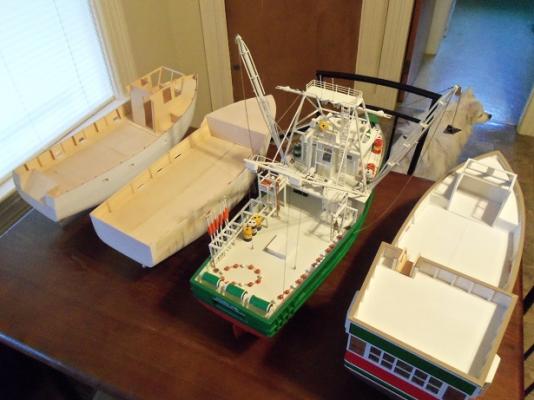
I have been meaning to do a progress report on the four boats of experiment #2. this came on the heels of experiment #1, which was a big success. the admiral won big on that one........she got her M&M Fun Ship, and I got my trawler {which is still in the works}. it still has a way to go, but is the closest of all my projects toward being finished ....and to think........the whole concept of experiment #2 was an expansion of the initial thoughts I had, when I was building the hull frame of the Boulogne Etaples. this particular hull design is common for many versions of short range fishing vessels, not much fuel capacity, but big on payload. long range vessels are much larger and longer, having the fuel capacity to reach fishing areas further out, and able to stay out for longer periods of time. I could have based all three on fishing vessels, but I came up with an even bigger picture....Christmas. the concepts were simple, but it didn't take long for the subject to blossom the way it has. it's all I can do to keep the scope narrow......new ideas are coming up all the time. it began 5-13-2013.......and by 12-13-2013, I had these........ by 11-6-2014........the four hulls looked like this......... {left to right} The Boulogne Etaples...the mother ship The Tree Boat...............this one needs a name......still need to finish planking the hull The Andrea Gail............was to be the Skater's boat "the Silver Blade", but logic took over and I nixed it. it fell victim to my initial thoughts. The Jungle Belle...........this one is the Caroler's boat...I find this one very hard to keep the 'fishing boat aura' about it 3-25-2016 quite a bit of time has passed, since I showed them all together. I was hoping I had more to show.......but it wouldn't matter when I take the pictures.......the progress of the moment is just that.......progress. so, here they are as of 'today' they're in the same order....... The boulogne Etaples..................no progress.......just in the sub assembly dept. The Tree Boat..............................it still doesn't have a name......but the hull is planked, and a fore deck has been added The Andrea Gail..........................done and off the table The jingle Belle............................a lot of work has been done, in regards to paint and upper deck now....I shouldn't show these........while I call them 'experiment #3', they actually are no more than an expansion of a popular Billing's kit. Billing Boats sells all three, but they are at different scales....these will all be at 1:65. I tend to think of them now, as an 'expos'e of sails'......all three, even though the hulls are similar, sport a different configuration of sails, which should prove to be quite interesting. at the moment, they are in the closet, waiting for the day when I clear up some of my back log. there is a story.......but it can wait till they begin their real journey. I shouldn't show them, because of the history........there's no time like the present, I suppose. this went on from 12/14 to 12/15. enjoy

-
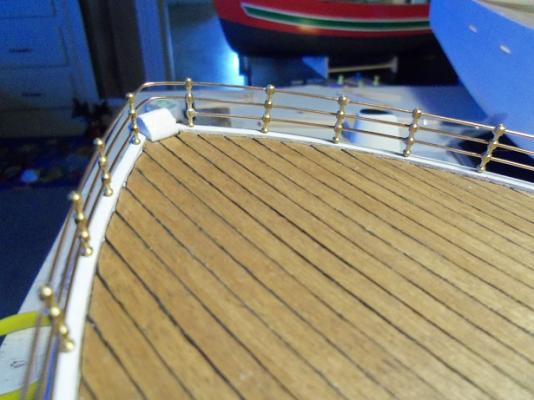
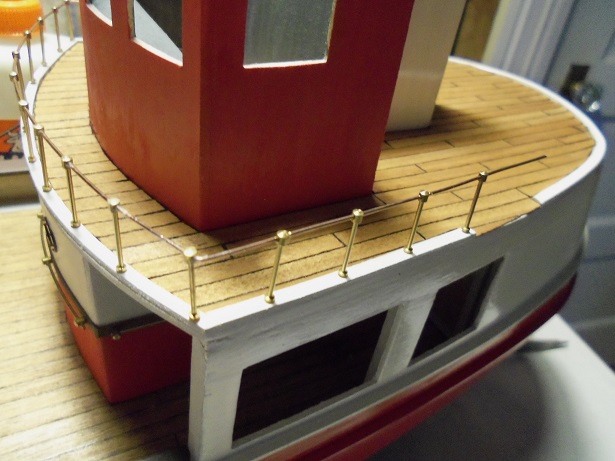
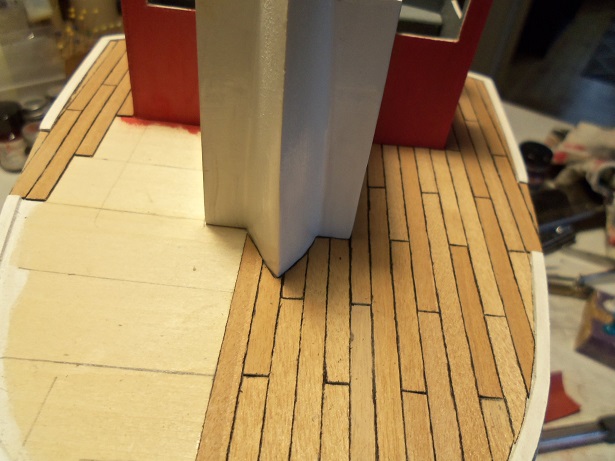
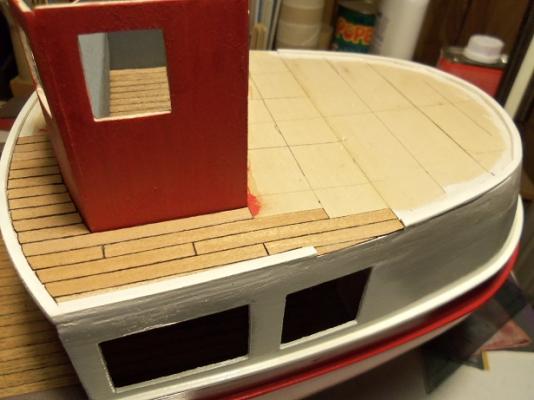
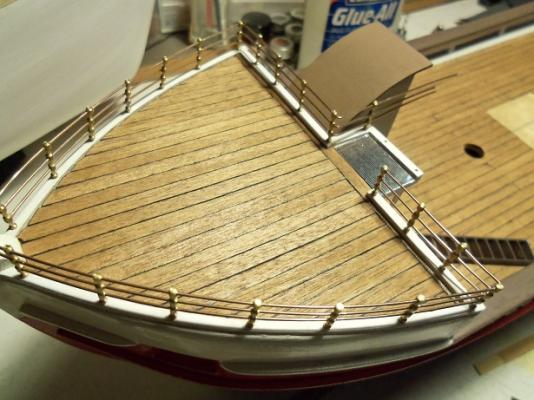
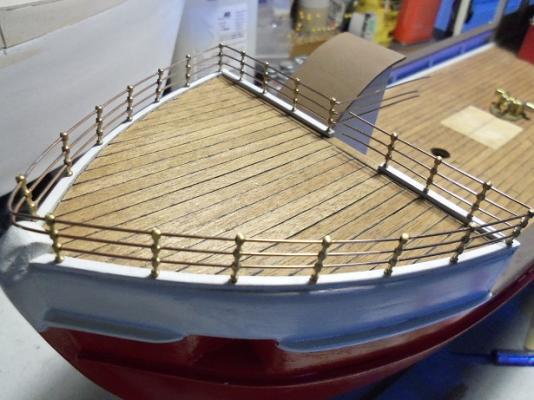
as mentioned, the aft deck was given a couple coats of semi gloss lacquer. I added a butt stagger at the lower left {in the picture}.....and it evened out the pattern a bit more. it's still wet in these pictures. continuing with the aft deck, I ordered two packages of 15 mm, one hole stanchions. I should have ordered more of the three hole, but I have a different treatment in mind for this section of railing. ........then the port side....... .......then the starboard side..... ....until the entire section was complete. by now, the aft deck has dried enough.......most of the sheen is gone. I could have used a flat lacquer here, but it comes out looking too 'dead-pan'........ it's a good look, but I had used the semi gloss on the other decks, so I didn't want to change anything. lucky I can remember every thing I used, as far as paint goes next will be to trim the railing ends, and finish doing what I'm doing here. I have more parts that can be added to the ship.


- 747 replies
-
- 10
-

-
thanks all for the kind words.......and to all who hit the like button I have since sanded it and put on a couple of coats of semi gloss lacquer.....passes muster in my book I have been looking......I had some clear cello that CA would not cloud......that would be perfect for this build. so far I haven't found it, but I'll keep looking. for now though, I have another update for you kind folks to see thanks Nenad and Bob......just to let you know I didn't miss seeing your posts.........thanks for the good word! of course John.........but some come as a surprise......and some come from the wedgie I get from flying by the seat of my pants! :D
-
Cutty Sark by NenadM
popeye the sailor replied to NenadM's topic in - Build logs for subjects built 1851 - 1900
now your talking....that's my music taste.....but I tended to follow Sabbath more I play bass........wish I has started that earlier in life too- 4,152 replies
-
- 6
-
-
- cutty sark
- tehnodidakta
- (and 1 more)
-
wonderful that the rudder is finally where it should be super job my friend! as a side note......your running out of reasons why she should be upside down a suitable stand would be the ticket by now.....unless your going for the pedestals.
-
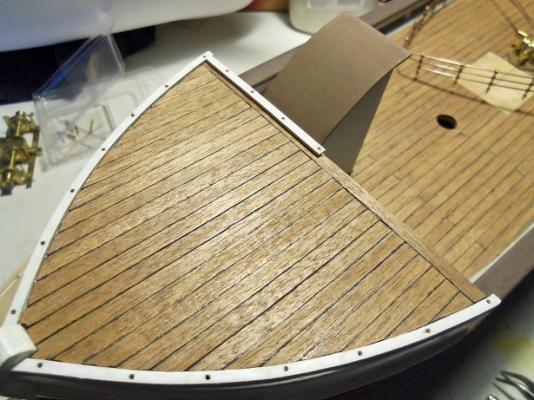
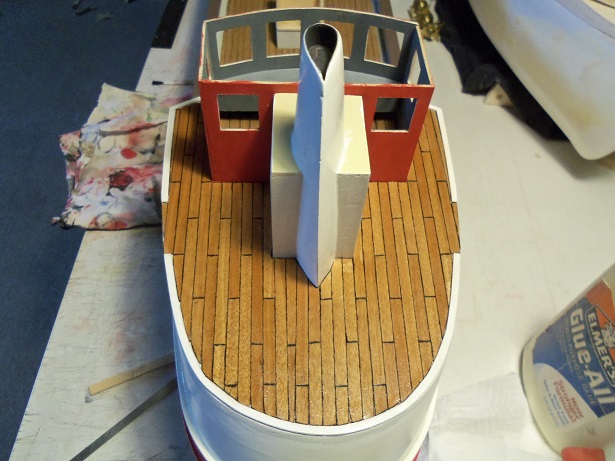
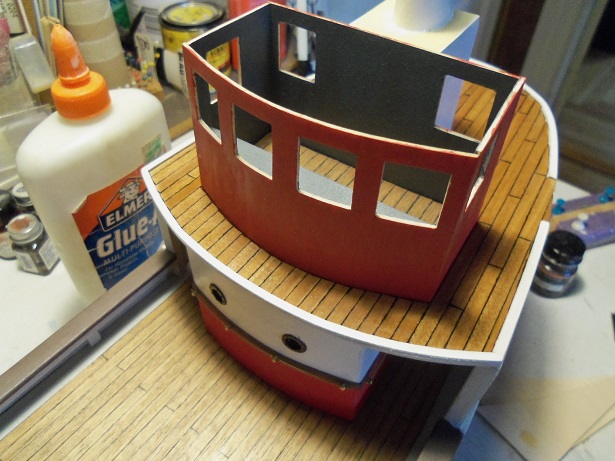
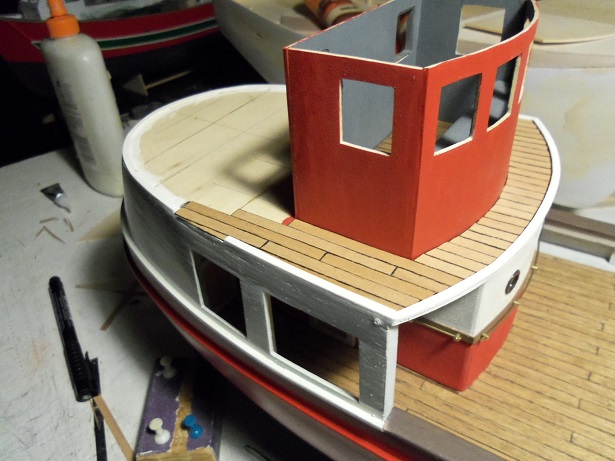
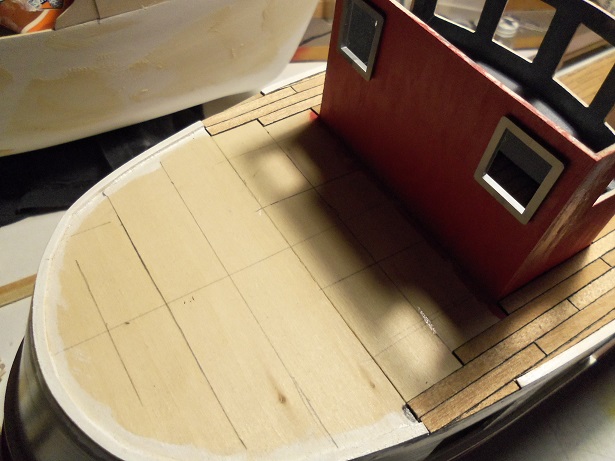
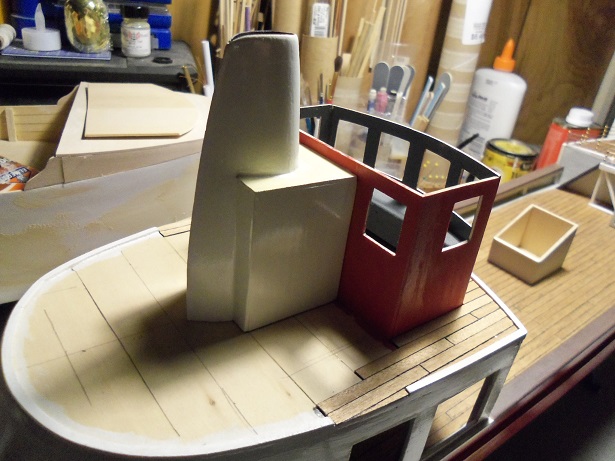
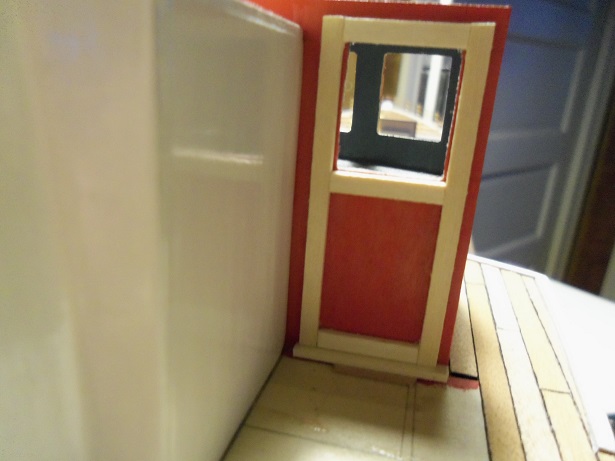
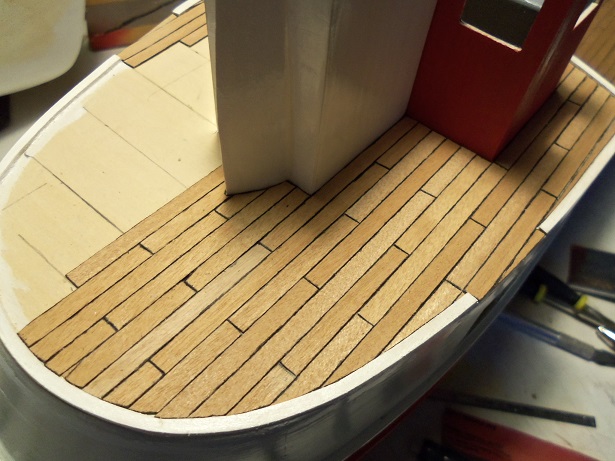
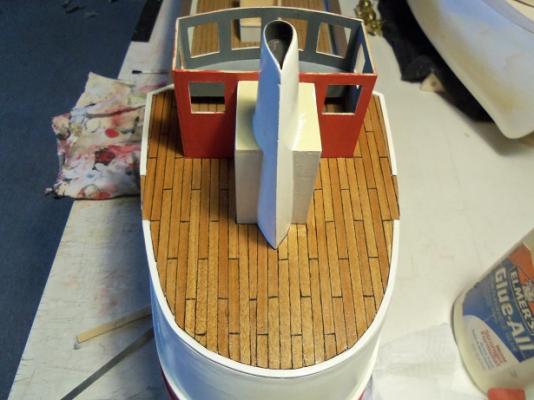
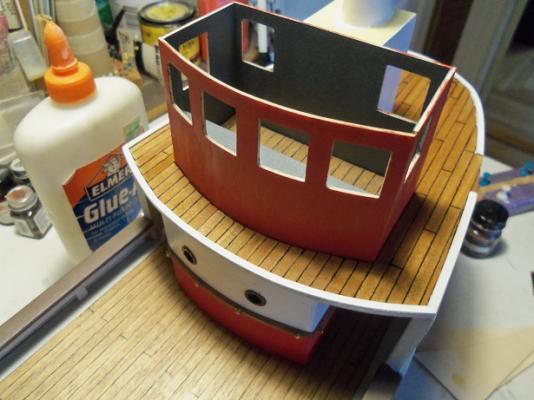
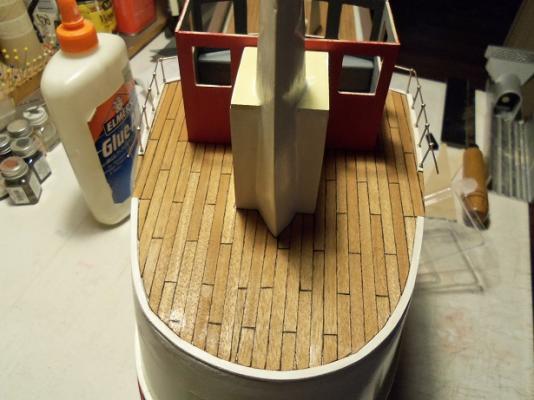
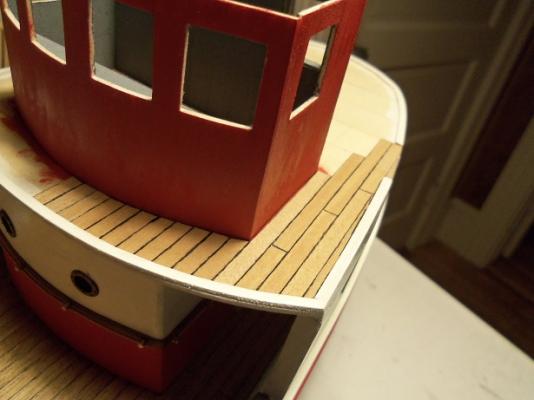
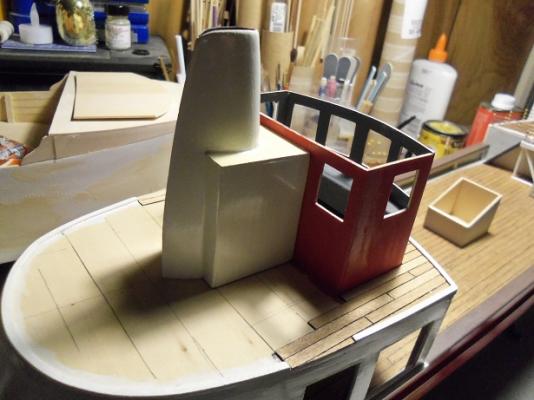
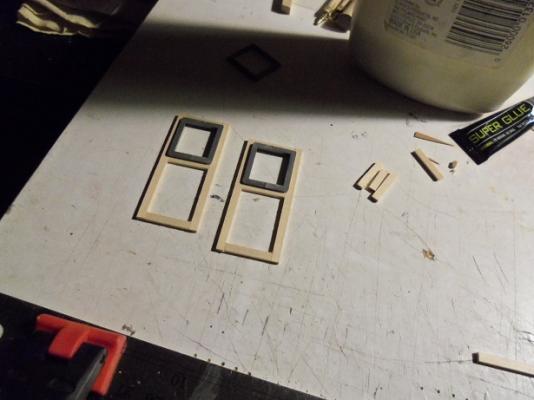
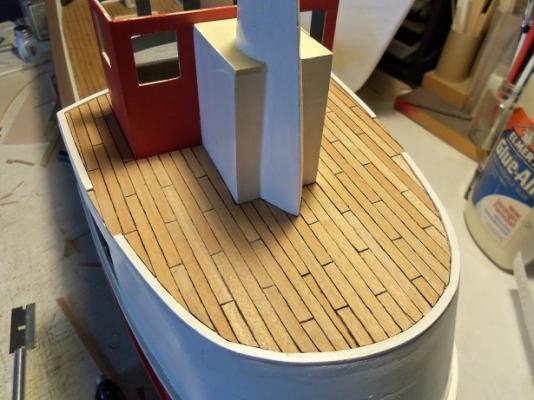
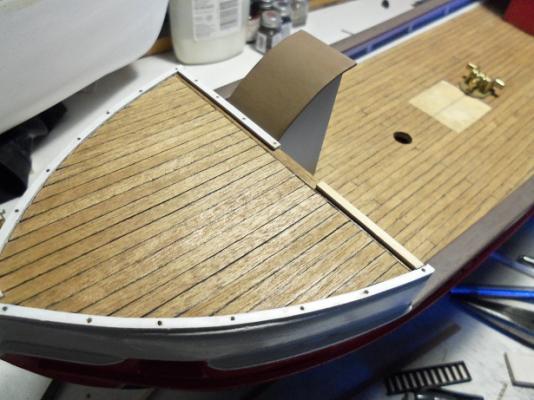
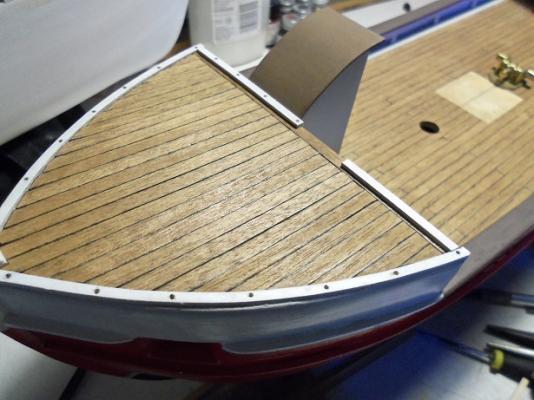
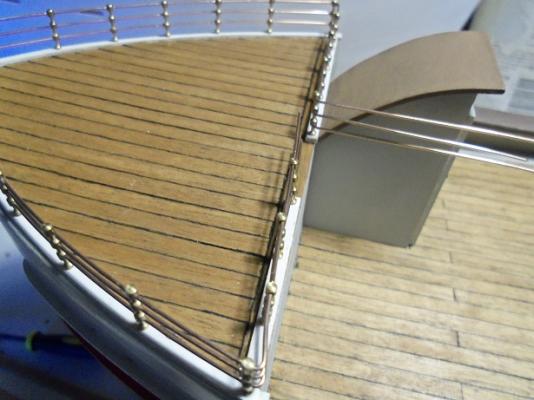
I was itching to plank the aft deck.........so I went to it a lot of trimming went into laying the front part of the deck. I was lucky that the helm room was just the right size, that the planking laid square to the edge.........the next plank row laid along side, without having to fit it. in order to mimic the main deck planking {two plank butt stagger}, I had drawn lines that would represent where bulkheads would be.......and then drew lines bisecting these areas in half. I need to make two doors for the helm...but I also gave some thought on the cabin and funnel. I wanted to do a few things with the cabin/funnel, but I decided not to go crazy with it. anything I need to do, I can do with it in place on the deck. the planking continued around the starboard side, until I get past the center line. I then thought about the doors and how they will be fixed to the helm room wall. better check this out. I began to assemble the doors for the helm room. the top opening for the door will have to house the window frame. the other doors, I laid plank backing behind them to fill in the main body of the doors. the exposed areas on the outside were lacquered. with the top opening having the window, I'll have to make sure that these two openings match up. the door was shimmed with a piece of planking and a threshold, to see how well I did. Once the door is sanded and painted.....I don't think I'm going to add a backing to them.......I kinda like them the way they are. by this time I had gone past the center line.......I could see that the planking is off a bit. the aft deck is not as symmetrical as I thought it was.......I'll move over to the port side and continue there. I'll just make adjustments along t he way. I'm not going to pull anything up.......the domino effect has gone on for too long....backtracking would be a pain. so, from the port side, I finished the planking........it's a little off, but it doesn't look too bad. I'll sand it a little and give it a coat or two of semi gloss lacquer.........should make it look even better. I also noticed that I missed a couple of butt staggers. I'll try and add them in......the planking is still fresh


- 747 replies
-
- 11
-
-
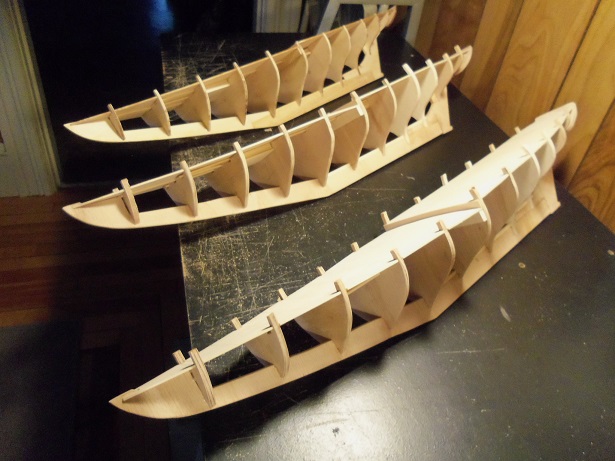
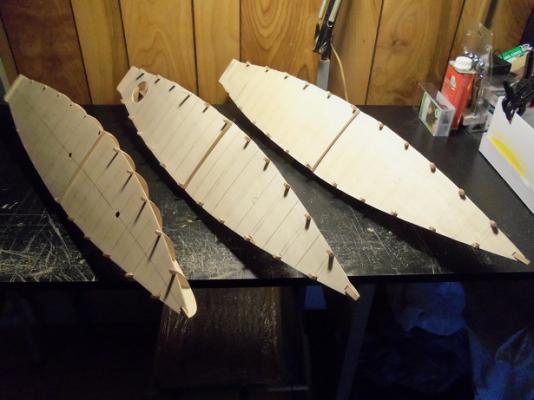
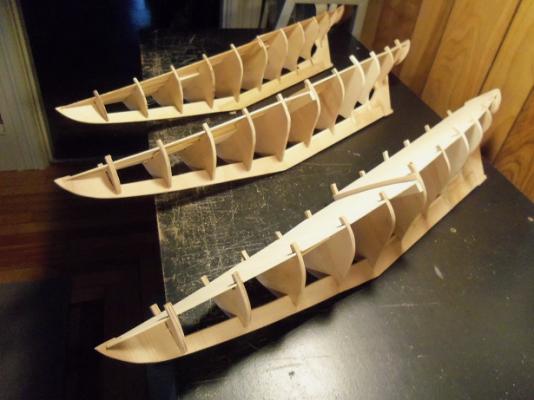
most kits will produce a hull frame like this. I have hardly any experience in making frame using Cad or similar programs, so this is the best method for me. thanks for the good word
-
cool dragon!
-
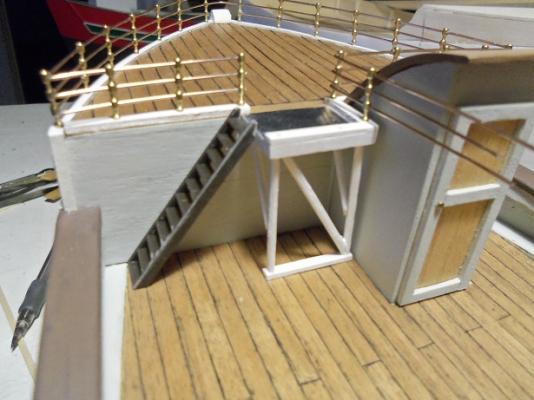
thanks Pat.......and all who hit the like button. I put the stairs like that to save on deck space........and it will make that bulkhead wall look busy appreciate the good word!
-
super shine........really makes the grain pop! I really like the design.........are you going to have sails as well?
-
sweet job on the winches Nils........they really do look quite functional.......super detail. sorry to hear about your disc problem......I can sympathize my admiral has been disabled for quite a few years due to a fall. {back and shoulder}. lately, I've been getting pains in my lower neck and left shoulder....I told the admiral about it........she says I'm a pain in the neck anyway hope you get better!
- 2,625 replies
-
- 5
-
-
- kaiser wilhelm der grosse
- passenger steamer
- (and 1 more)
-
Cutty Sark by NenadM
popeye the sailor replied to NenadM's topic in - Build logs for subjects built 1851 - 1900
your making some great progress Nenad.........glad to see your world is returning to some sort of normalcy cute new friend too........- 4,152 replies
-
- 5
-
-
- cutty sark
- tehnodidakta
- (and 1 more)
-
look in the sofa..........it always finds it's way between the cushions :D Majellan is really coming along! the furnishings look great....quite a bit of detail there a really super job so far!
-
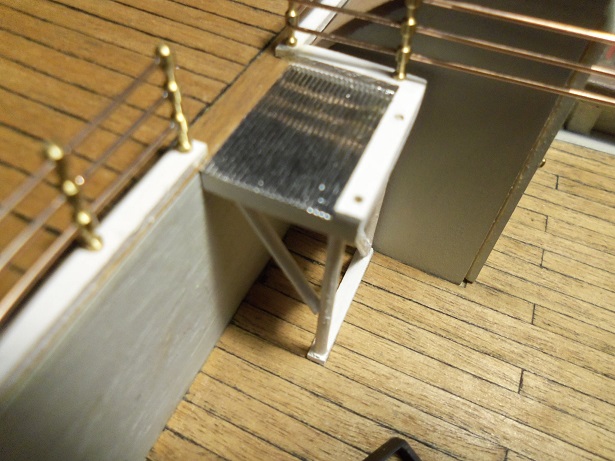
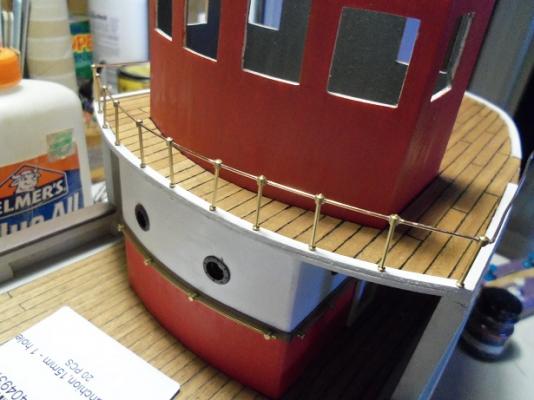
thanks Keith and Patrick......and all who hit the like button. it's working out well that I've been able to keep the railings as a 1 piece 'part'. I did go a little bit further, before I left to go to the airport........I forgot to snap a shot. there will be more to it, but here is the basis of my idea. I have some model railroad siding for structures. it's got rows of tiny ripples, like aluminum siding......I thought it would look good as a non slip surface........like grating or something like that. I plan to do the treads on the stairs with it, but make the pattern go across the tread. should I paint it to more of a deck color, or something? I will add something to the outside edge of the stairs.......some type of railing.
- 747 replies
-
- 14
-
-
interesting concept for hull construction I noticed that you didn't rib out the bow or stern. amazing that you were able to retain the shape, by simplt using the center spine so cool! gives it that 'Capt. Nemo' flare.
-
hello John........always good to see you thanks for the good word. in the last picture, you can see how I adjusted the port corner of the railings. it passes in my book thanks again
-
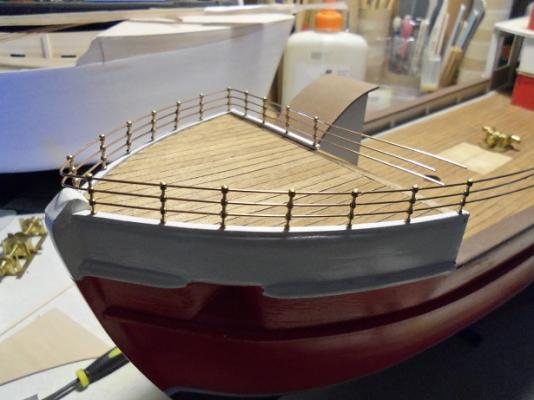
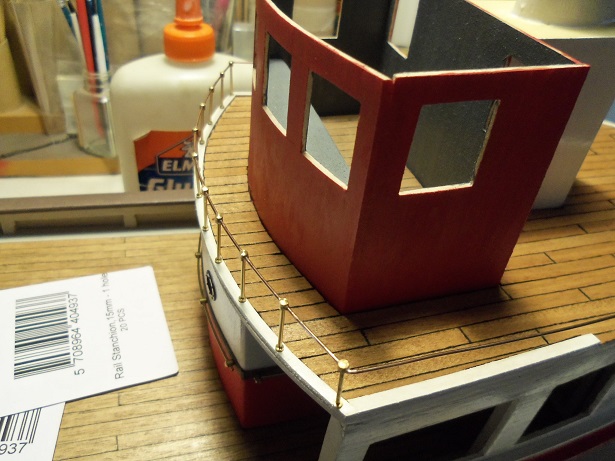
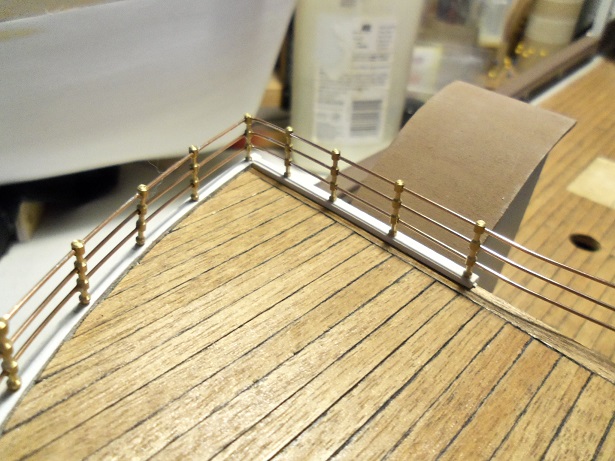
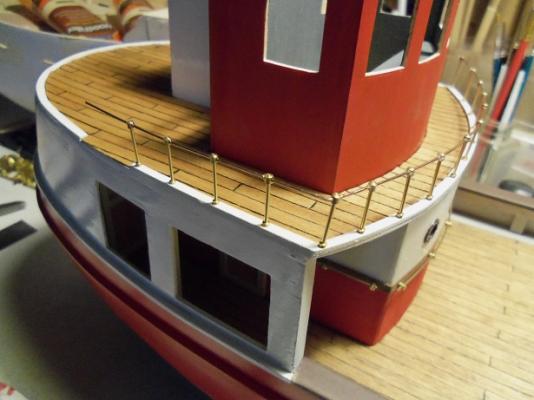
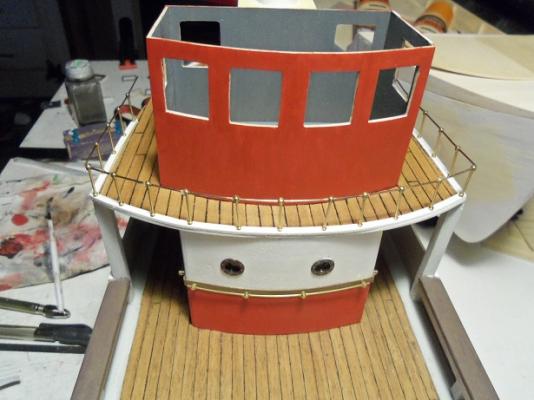
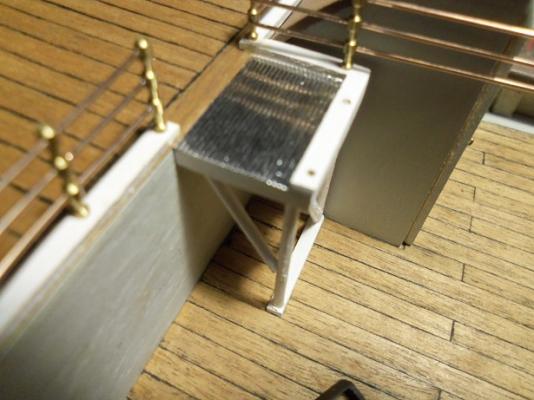
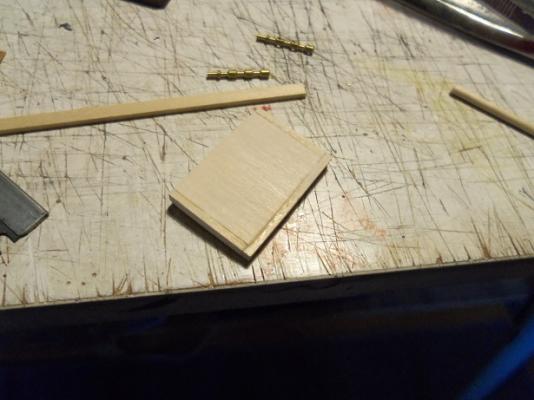
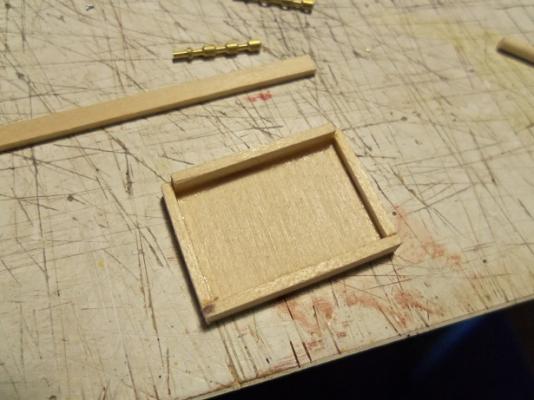
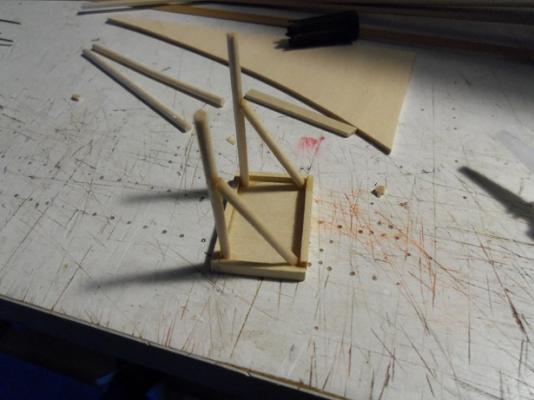
so now it's a toss up........do I want to plank the aft deck......or continue what I'm doing here? I have a neat idea going....so I'll just continue. I had finished assembling the top landing for the stairway. the underside of the landing was boxed in, so I can add some supports to it. now that I had the size of the landing figured out, I could add the other side of the fore deck border, on the deck. it's just fitted in place for now. I had bought that package of small diameter dowels......they will make the perfect supports for the landing. I even added in some bracing. after I added in the front support brace and the borders for the railings, it was sanded and dry fit. clean it up a bit more and it will get paint. the border on the fore deck was painted and cemented in place. holes were drilled.......the railings on the starboard side were bent to follow the companion way. these will continue on and around the landing. the post side will terminate at the end of the run. I sorta goofed a little on the port side.......I did manage to straighten it out a little, but the turn of the railing is not perfect. I think to fix it further might cause a bigger problem.......so I'll leave it the way it is for now {or until it bugs me enough to fix it}. the landing is painted and put back in place to check where to drill the rest of the holes for the railings. I'd have gone further, but >sigh< it was time to go to work. more tomorrow


- 747 replies
-
- 11
-
-
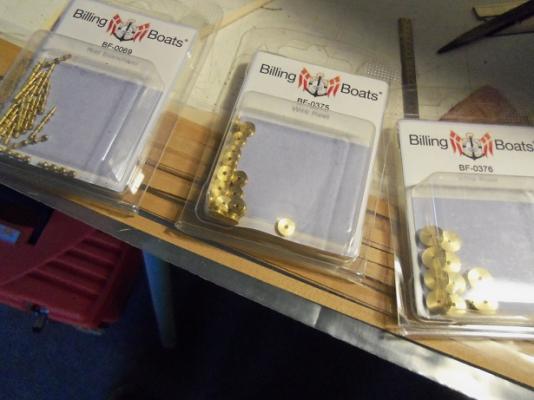
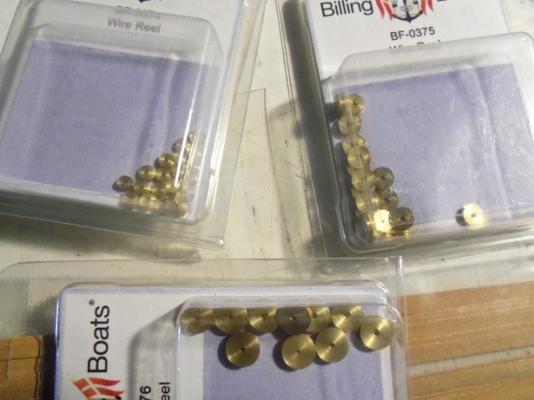
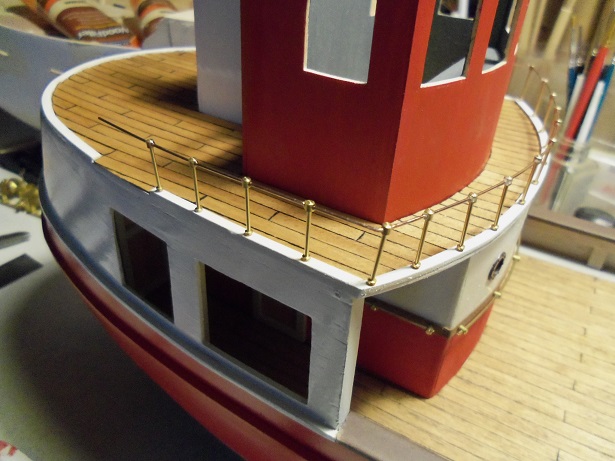
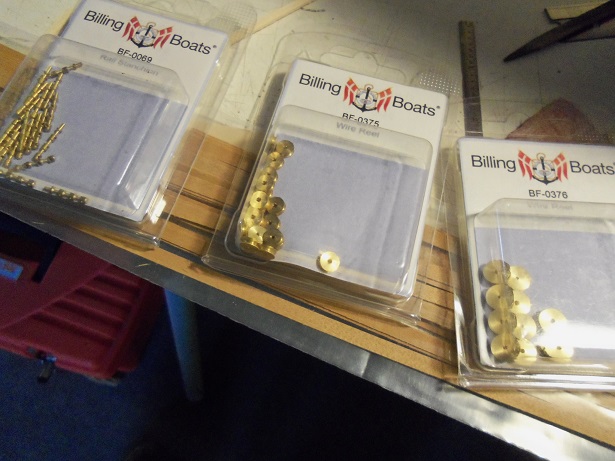
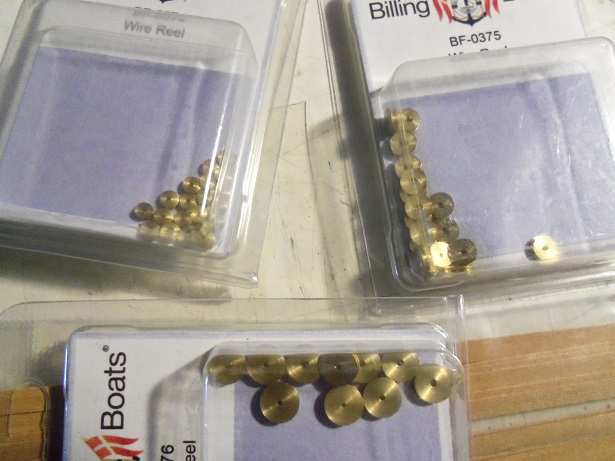
I made some more progress with the trawler.........I would have done more, but I got a call to cover the night shift at the airport. I had to stop.........mid thought here is what I've done so far............. I had gone a bit further with the railings, than what I had left off with. I had put the railing back in place, and then trimmed out the bottom rung at the bow tip. it sat much better once I did that. without taking a picture, I removed the railings again and laid the border along the bulkhead behind the companionway. with the railings back in place, you can see how I trimmed the bottom rung. and the new border is populated with the railings. I did get my order from Billing USA.......I got it on Saturday. I got some more 15 mm, three hole stanchions, two different sizes of pulley reels, and the aft deck planking so, now I have three different sizes of pulley reels.......4 mm, 6 mm, and 8 mm