popeye the sailor
-
Posts
16,007 -
Joined
-
Last visited
Content Type
Profiles
Forums
Gallery
Events
Everything posted by popeye the sailor
-
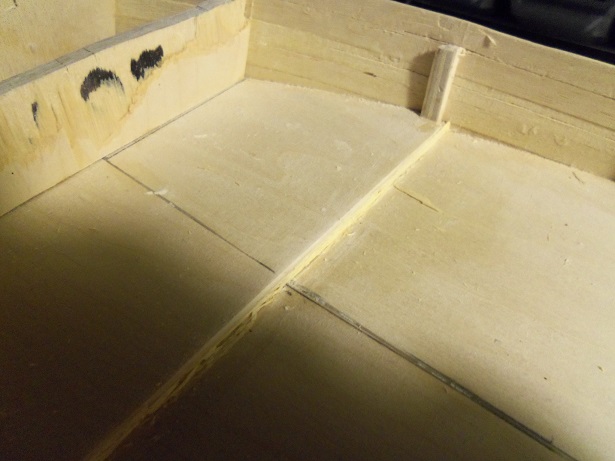
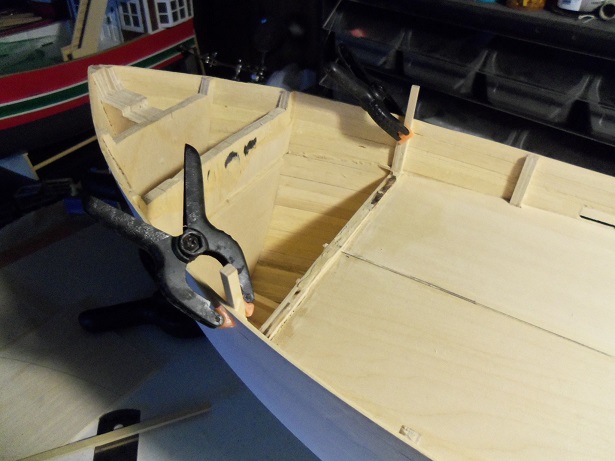
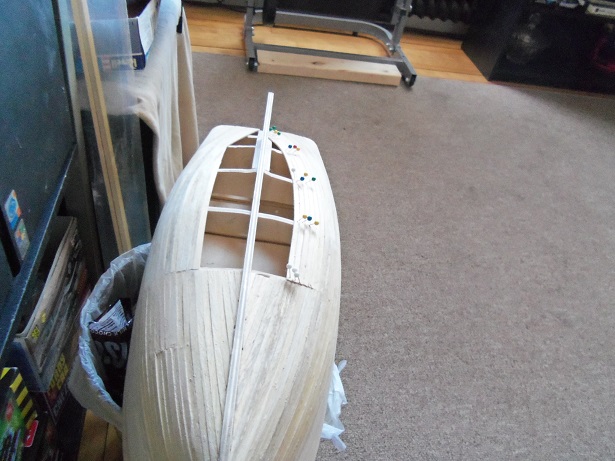
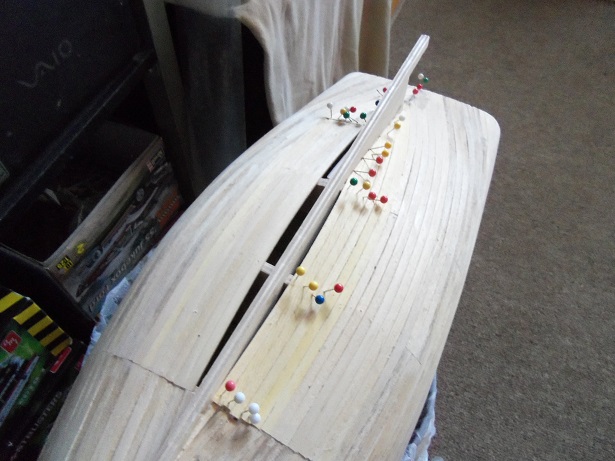
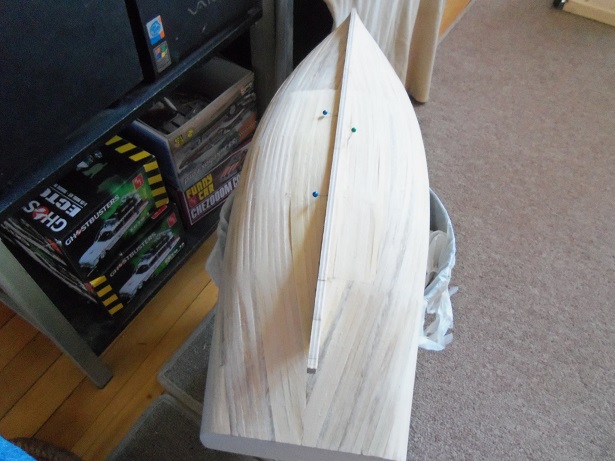
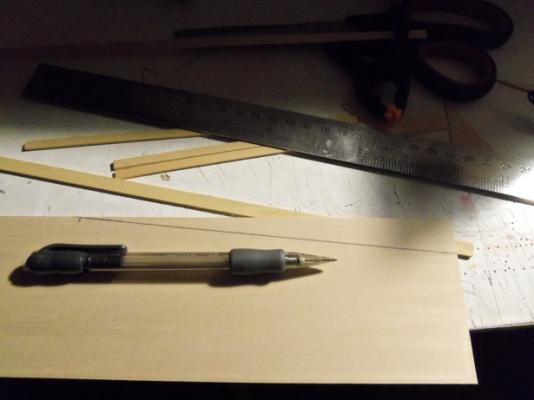
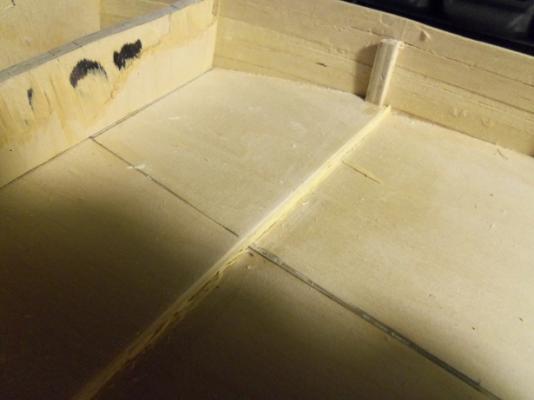
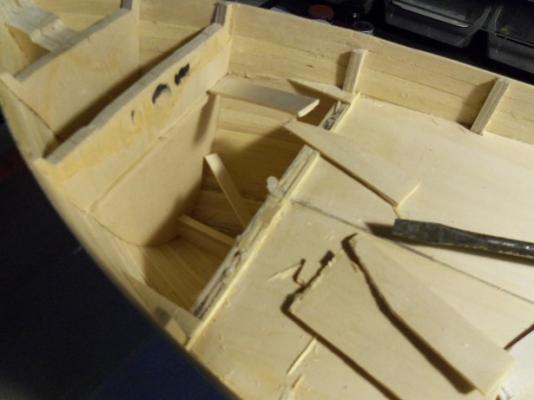
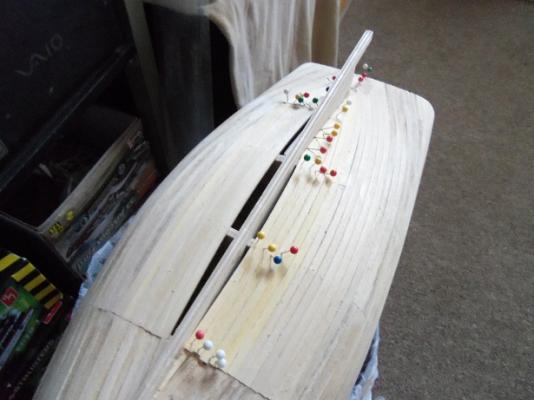
 when the extension posts were dry, they were shimmed and a deck beam was laid across the span. this is the beginning of the new bulkhead wall frame. the wall part was cut out of 1/16 flat stock and fitted in place. the deck platform was also cut out on the scroll saw. here is a dry fit of what will be the basis....a fore deck. the filling in of the gaps is next. my earlier idea was to plank the sides in and trim them afterwards. but, I though of all the extra work involved, and shot it down. I had some pieces of 1/32 flat stock lying around.......I couldn't think of a better way to use it up, than as backing tabs for whatever I decided to fill it in with. the bulkhead box can also be seen here. I chose the 1/32 for it's flexibility..........using the grain in my favor, it can be bent to the curve of the bow, without causing any stress to the hull walls. the trick here is not to have the hull walls widen out of control........the shape is important. if there is to be any flaring........the fenders will do it. errrrrr........if I decide to install them mind you......... I decided to simply cut the fillers out of 1/16 flat stock. the grain will run lengthwise.....I hope it's not too stiff. the other side needs to be fitted with the 1/32 scrap wood. when the piece is cut out, I will mimic another piece to match it. more to come
-
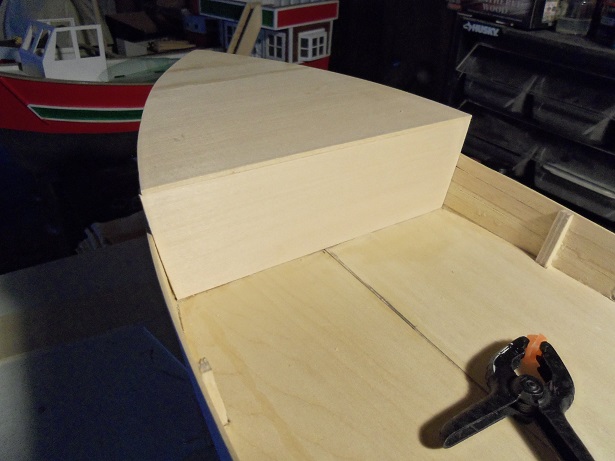
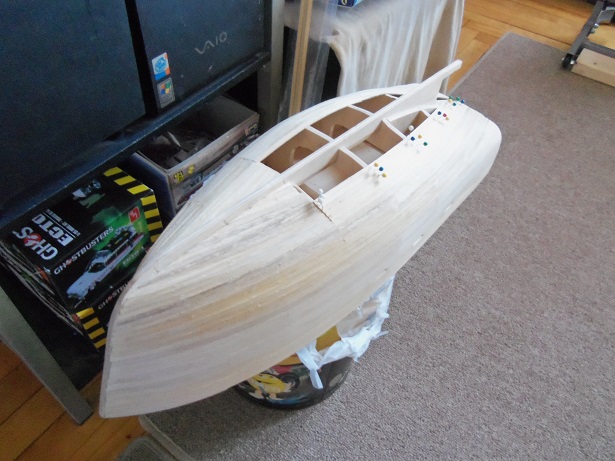
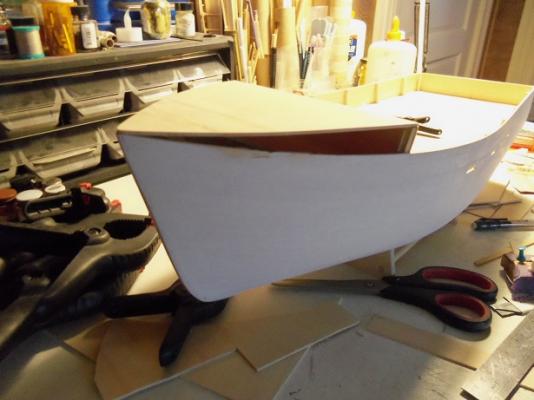
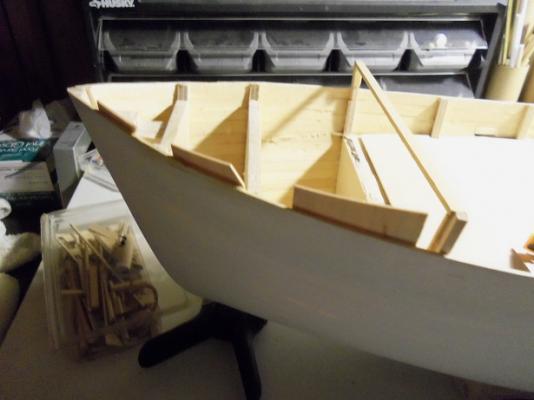
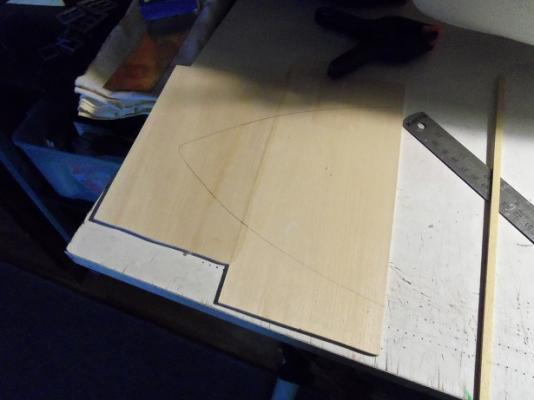
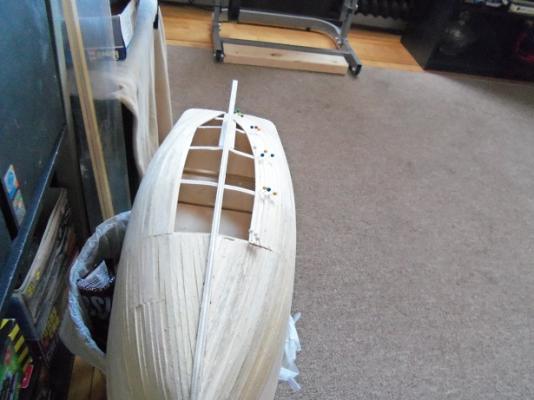
OK...........got the tools together...... first order of business....rip off the bow cover. that met with slight damage.....tore a small piece out of the port side........but it was fitted back in place. it's not a big concern.......I have to fix the area anyway. the cavity where I was going to put in a full width helm room, also need to be taken out. the bulwark post were cut down, so extensions can be installed. the toe board was removed......this also means that the short section of flooring will also have to go. the added strip along the deck will also be removed, to make way for the new bulkhead wall. the leveling of the new deck will be around 55 mms. the extensions that are above the existing bulwarks, is 30 mms. before these were cemented in place, the bow profile had to be traced out. I cemented two pieces of 1/8 flat together to do this. now that I have the profile........the extensions were cemented in place

-
thanks to you all.......I appreciate your fine comments thanks as well for the likes. I'm bouncing around builds for the moment......unloading some of the ideas I've come up with.....seeing what sticks. I have more to show you hi Keith......there are ways to create hull frames. I'm not that good with CAD, so I use this method........so far it's been kinda neat. all I do is save the parts panels from the kits I build, trace out the hull parts, and them modify them to what I need. of course, it's better to stay within certain guidelines.....type of boat and hull construction.........it make it easier interesting idea Kevin.......since this boat and the Jingle Belle have a dual commercial purpose to them. first things first though.......... to the demo!.....................................................................
-
Cutty Sark by NenadM
popeye the sailor replied to NenadM's topic in - Build logs for subjects built 1851 - 1900
I wish you well Nenad.- 4,152 replies
-
- 5
-

-
- cutty sark
- tehnodidakta
- (and 1 more)
-
looking very nice Greg
-
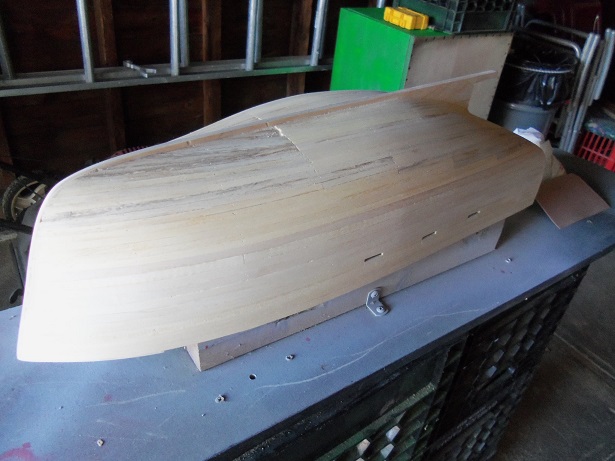
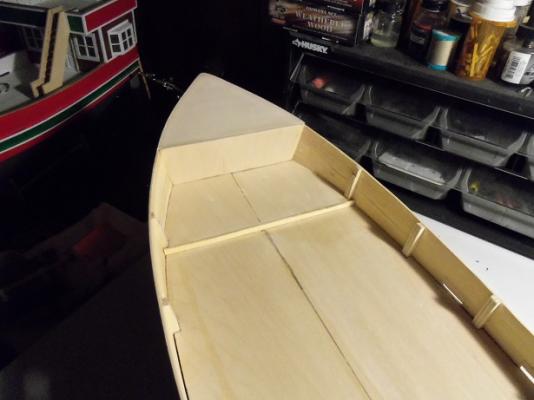
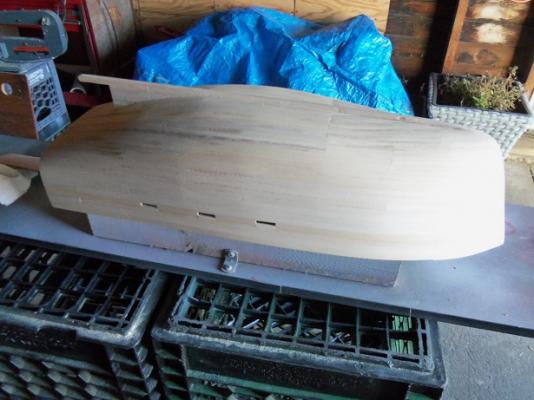
after the completion of the sanding, came what I had of the filler. it covered the first wave, but there was to be a second wave. I got another two tubes. I did the second wave of sanding, and reapplied again to imperfection that were missed. when dry.......by the time I got around to supper {brought the grill out of mothballs}, I sanded as I cooked. felt like old times. when done.......and supper too........I gave it a quick primer. still more to go. you can see where I had covered over the bow.......I was going to put the pilot house at the bow. I don't want to do that now........I think a self standing structure might be just the ticket. I haven't built anything yet for this, but for the idea I have, it will mean tearing out the bow cover I put on. more to follow.............

-
I did manage to do a little more the other day. I didn't have the right size dowel for the booms, so a trip to Wal-Mart {surprisingly enough} was made to get some. I saw one day that they did carry a selection of dowel......even packages of them in their arts and crafts department. the boom brackets I had made were cemented in place on the mast. the swivel brackets were cemented in slots, cut into the end of the booms and bound with narrow brass strip. now that I'm finished planking the Tree Boat's hull, perhaps I will have more time to do more

- 747 replies
-
- 10
-
-
thanks for the kind comments and the likes. I'm going to go with an aft pilot house for this one........I covered the front section of the bow over, but I think it could be something better. the demo has begun........I should have something a bit later stay tuned
-
well, if you know your close to the color, you'll know whether it needs to be lightened or darkened. you'll do just fine! wicked sharp hull
- 434 replies
-
- 2
-
-
- pelikaan
- beamtrawler
- (and 2 more)
-
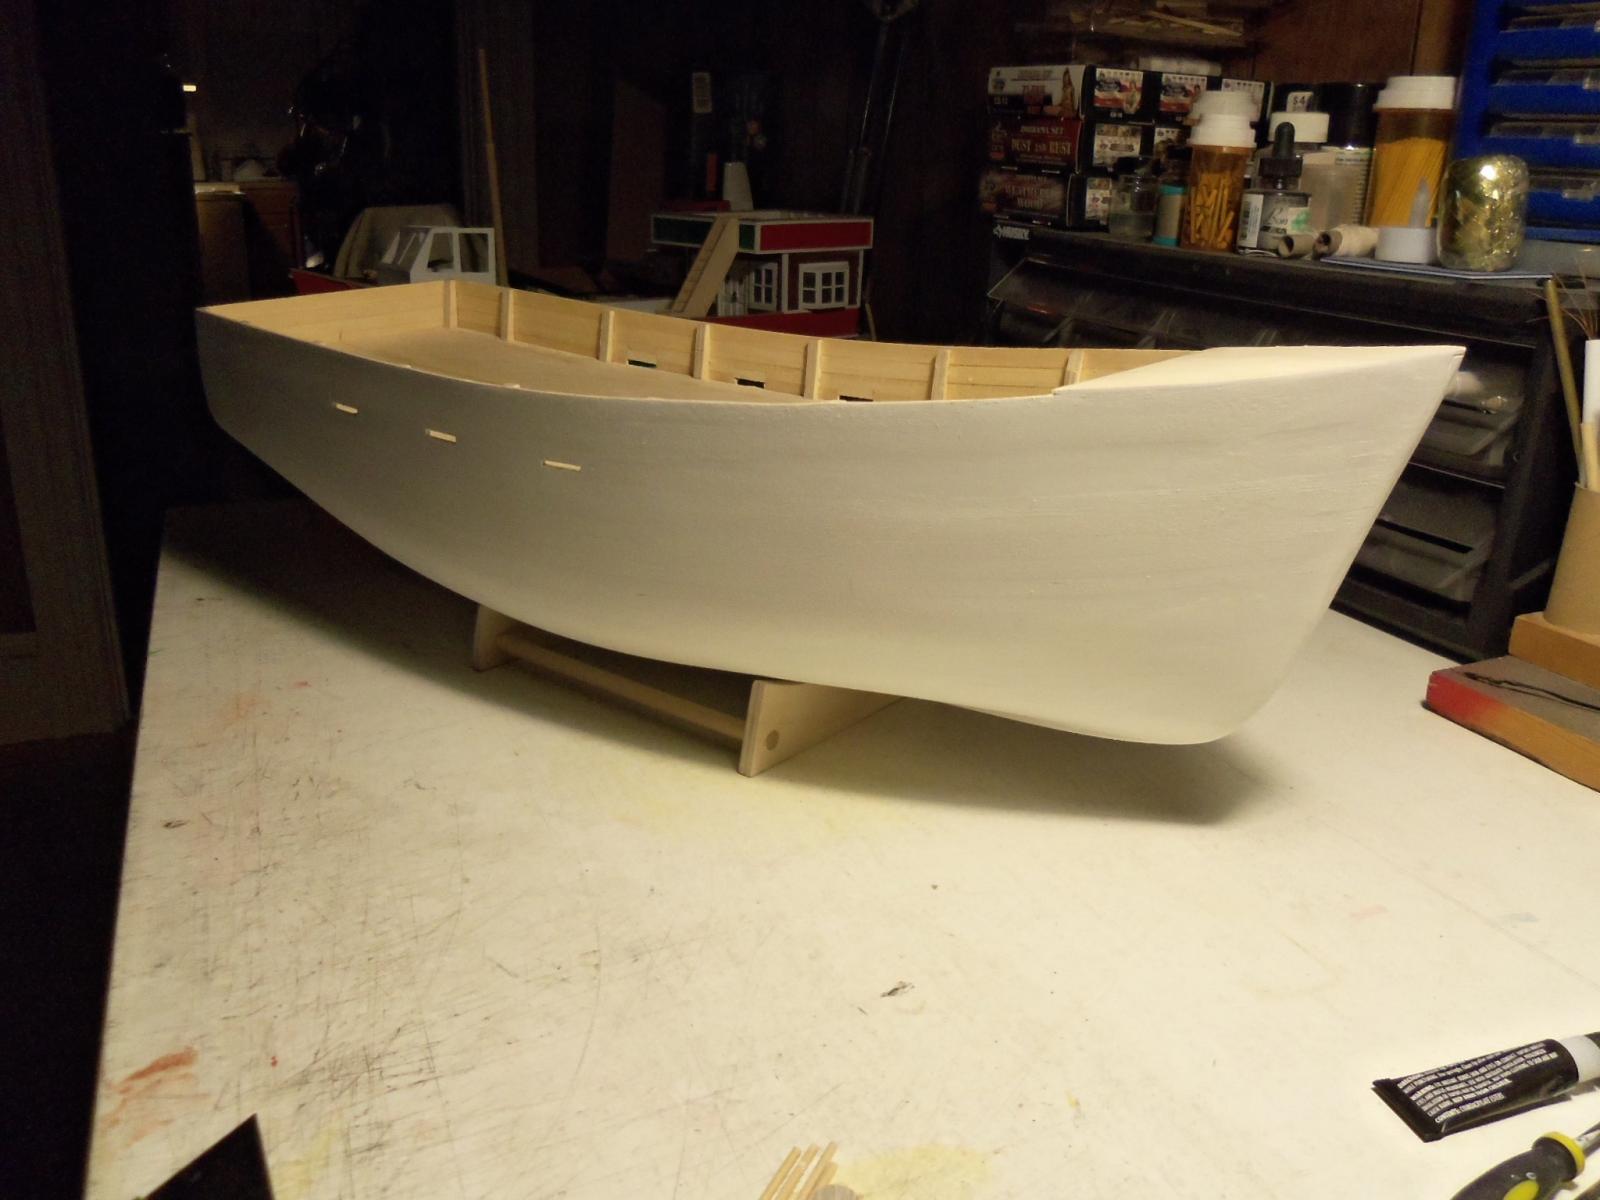
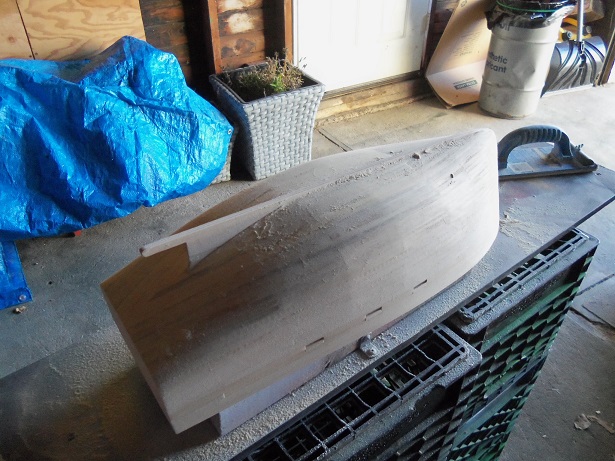
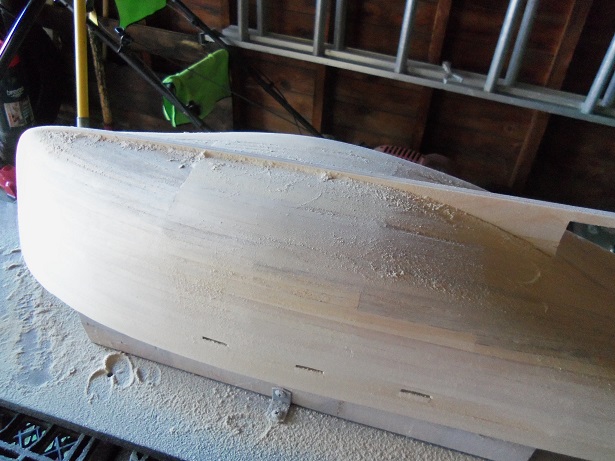
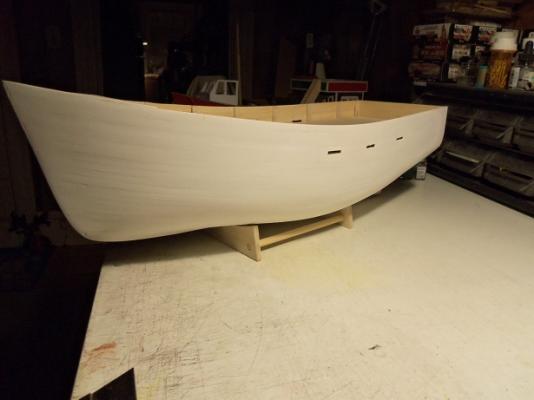
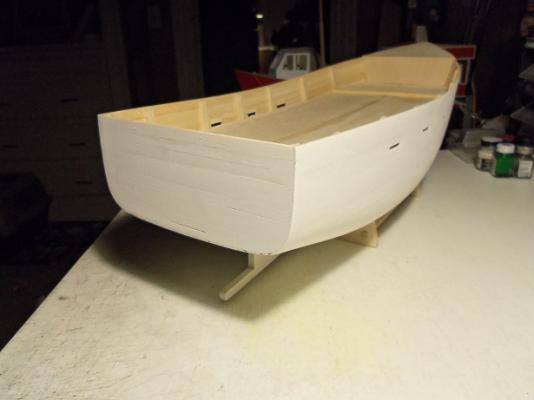
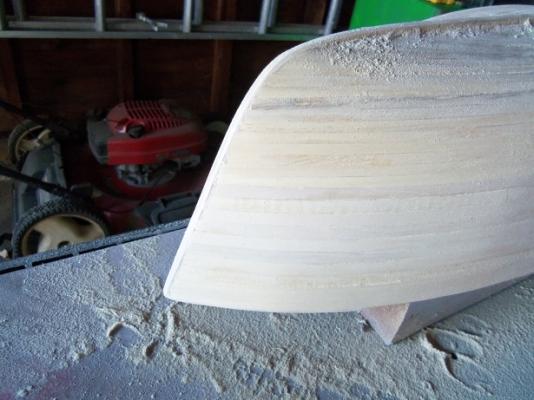
I focused most of my attention to the Tree Boat hull today. I'm using narrower planking, so it's taking a bit longer than planned. I had done more to her, from the last pictures I showed.........I got her planked up to this point. the port side is my trouble side........I think my bow trouble was that side as well. planking continued first thing this morning. I got to the point of closing her up. fitting the last bits of planking.....the job was done. we are finally warming up around here.......I was able to take stock in the garage and set up a sanding table. I did some sanding as I went along.......now the real sanding can take place. I can let the sawdust fly! the first thing I did though, was clean up the keel. the height was also knocked down.......something I probably should have done with the other two {a bit too late now}. the bow was refined, giving it a good edge there is a low spot just after the bow section........I'm thinking a bad cut for that particular bulkhead. this frame was the one made with the 1/4 plywood........not only was it hard to fare and sand, but it was the one that I expected mistakes to occur. I will have to build both side up with filler........ I use a drywall sander to do the major sanding. the one bad aspect to this tool, is that it has a soft rubber cushion between the sandpaper and the tool. wood is not uniform.......it has hard spots and soft spots. sanding in long strokes along the hull {with this sander}, allows the hard spots to rise above the soft spots, creating valleys in the hull.........it comes out all wavy. you might see a little here.........it's really noticeable around the scuppers, where I repaired them. the best thing to do at this time, would be to sand it a bit more.....concentrating on the high spots, getting a coat of primer on the hull, and then go over it with a solid sanding block {I have a couple}. then I can see where I need to do corrections. the filler work is coming up anyway, I can do some then. I'm already looking at what I did to the bow...and not liking it. I have something else in mind necromancy 101................>in progress<


-
nice job on the carvings........very intricate work
-
Cutty Sark by NenadM
popeye the sailor replied to NenadM's topic in - Build logs for subjects built 1851 - 1900
my condolences my friend- 4,152 replies
-
- 5
-
-
- cutty sark
- tehnodidakta
- (and 1 more)
-
thanks Piet........I'll take that as a 'pardon' for my crazy ways I do though, look forward to the day when I'm all caught up. I never knew how addictive the wood medium could be. I guess it's a good thing that I enjoy it as much as I do.......or I would have 'ran' from my own madness I really appreciate you saying so.........it's comments like this that make me proud to be a part of this site, among such wonderful folks, like yourself. thank you!
-
very nice take on the 'ole girl Steve I have mine on a shelf in the hallway......I still need ti finish her.
-
thanks Dave......there's still quite a bit to be done, but this one is one of my 'more finished' builds. I forgot that I need to order some planking for the upper deck.....that will be in the works, as soon as I get a chance. I have plenty to do while waiting for it thanks for looking in, and to all who hit the like button.
-
your getting there, slowly but surely........I wouldn't be worried about finishing, you still have more to go. she's looking better with everything you do. a super build indeed!
-
thanks Ron.........
-
something amiss in the book? I'm sure you'll find the true meaning...Iagree.....very interesting
-
Cutty Sark by NenadM
popeye the sailor replied to NenadM's topic in - Build logs for subjects built 1851 - 1900
great job Nenad!.........ship's wheel looks awesome- 4,152 replies
-
- 5
-
-
- cutty sark
- tehnodidakta
- (and 1 more)