popeye the sailor
-
Posts
16,007 -
Joined
-
Last visited
Content Type
Profiles
Forums
Gallery
Events
Everything posted by popeye the sailor
-

Cutty Sark by NenadM
popeye the sailor replied to NenadM's topic in - Build logs for subjects built 1851 - 1900
simply super glue them on......probably not a good idea to try and drill holes.- 4,152 replies
-
- 6
-

-
- cutty sark
- tehnodidakta
- (and 1 more)
-
hard to think that they would be hanging outside the bulwark......they'd be in the way of the mizzen shrouds. perhaps the hammock cranes were built off of the inside bulwark walls. the sketch shows the bulwarks thicker, but is pretty vague on what makes them look thick
-
Cutty Sark by NenadM
popeye the sailor replied to NenadM's topic in - Build logs for subjects built 1851 - 1900
nice job on the buckets Nenad.........unbelievably small my friend! shoulda put those ants to work insteada lugg'in stuff around all day in their jaws......you mighta started a trend ! good use of imagination there!- 4,152 replies
-
- 6
-
-
- cutty sark
- tehnodidakta
- (and 1 more)
-
awesome work on the masts.......lighting them will be a treat! gonna be some cool looking rigging as well
- 434 replies
-
- 6
-
-
- pelikaan
- beamtrawler
- (and 2 more)
-
thanks Mark.......I still have to touch them up a bit. cold doesn't play well with paint thanks for the good word
-
thanks Lawrence........I lucked out considering how long ago I planked the fore deck.......it could have meant a redo.
-
a 'patchwork orange' must be someone who is in a lot of trouble "son........have you seen where all my quilts, got off to?"
-
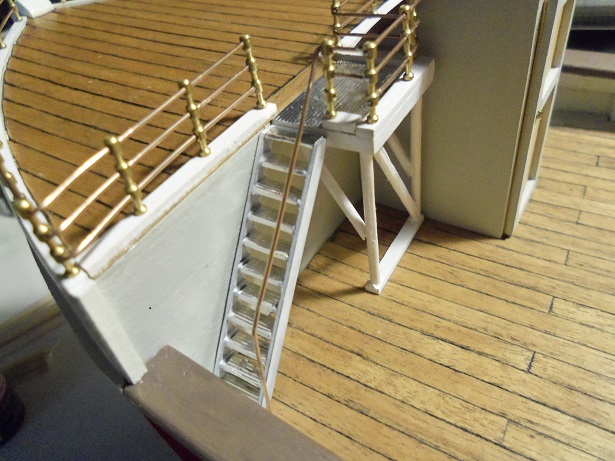
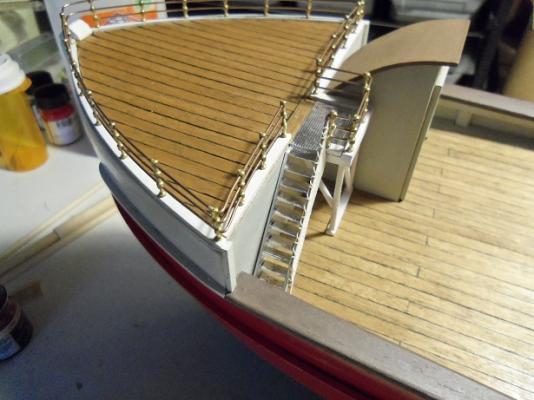
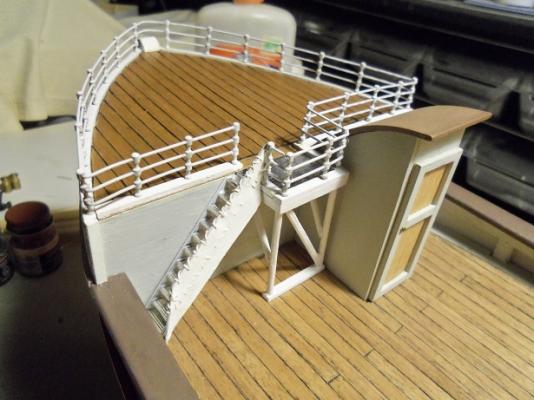
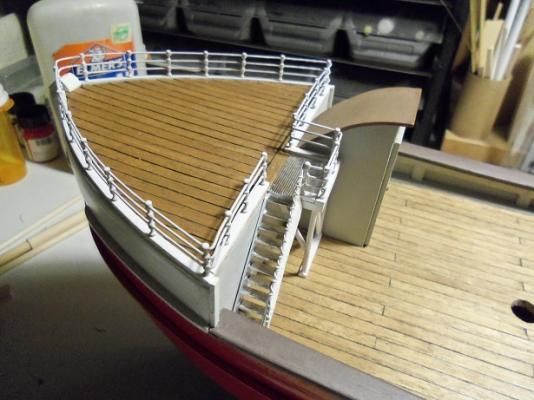
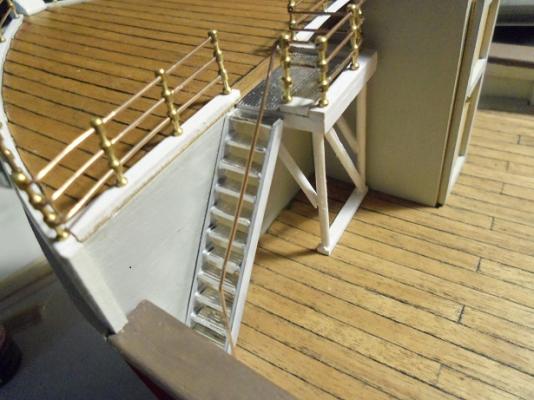
thanks John, Bob, and Patrick......and who hit the like button. I don't think I'm going to add any more rail cover........although it might look cool on the bow railings. Michael showed me some really neat approach to the stairs......but since these were solid treads and I wanted to use this ladder up, that was the best I could come up with at the moment. I seem to be doing a lot with stairs and ladder in recent weeks.........don't be surprised if you see something new in the near future. after all.........he did give me ideas thanks all for the kind words and the likes!
-
I use white glue, and I keep a damp cloth with me for whatever oozes out. I rinse it out periodically to keep the cloth fresh. after a good sanding afterwards, I've even opted for staining, rather than the second planking. I've only done one hull that I've second planked. there are many methods for planking. the plank will tell you how it wants to lay.......whether to taper, or not. don't be intimidated......think it through. after a while, it'll be fun.....you'll see I haven't even come up with the perfect hull yet
-
awesome job on the ship's wheel {s}. they look very nice on deck!
- 1,350 replies
-
- 3
-
-
- constitution
- model shipways
- (and 1 more)
-
I feel your pain Russ........I've got a few more years yet. and when I get there, they'll probably have raised the bar another couple of years the bottom paint look great........touch ups are part of the process. you'll be doing it until you throw up your hands and say 'I'm finished!' {I've done it on all my builds } it a good color scheme....red and white compliment each other. good to see your working on her again
-
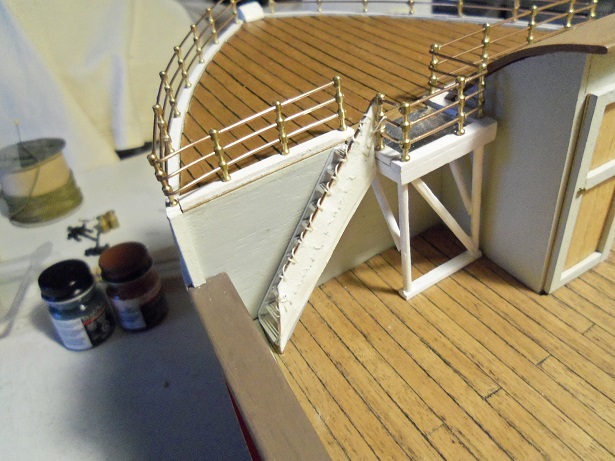
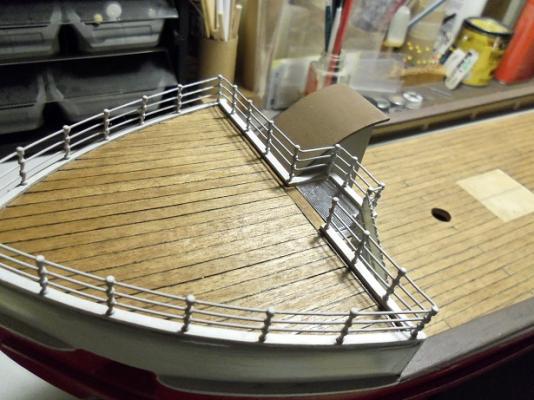
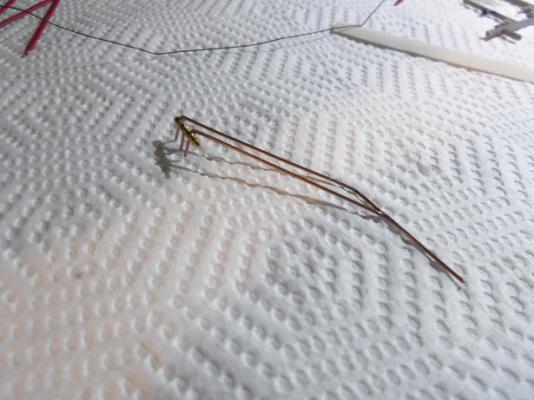
nutz! I didn't get any pictures of the railing cover being sewed on. I did get pictures of the railing in place though. I added to it.......the angle made it too short at the bottom.....you could see the ladder. adding a piece to it covered it well enough......I used CA to add the piece on. it hides the seam quite well, I think. then ......like the proverbial fool that I am.......I took both railings out on the porch to give them a coat of flat white. we were getting 2 - 4 inches of snow.......it was way too cold out there, and the paint behaved as paint does when it too cold. I was going to wipe down the railings, but I figured to just let it dry, and I'll do it in the cellar or wait for a warmer day. anyway, I was going to redo them before I show them to you all, but now that they are dry, they don't look too bad {except for a few bare spots}. so here are a couple pictures of them painted and in place. I hope to get more done tomorrow

- 747 replies
-
- 14
-
-
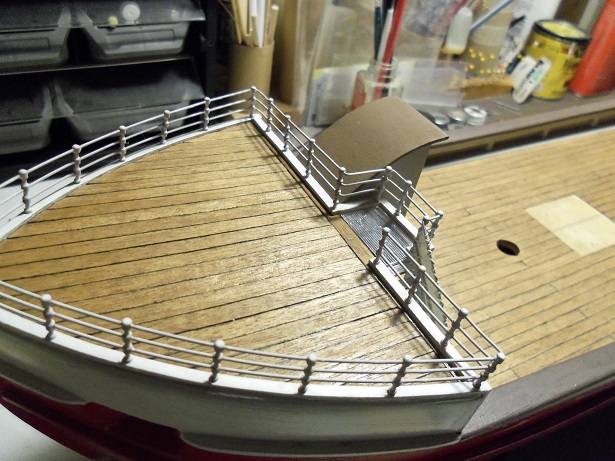
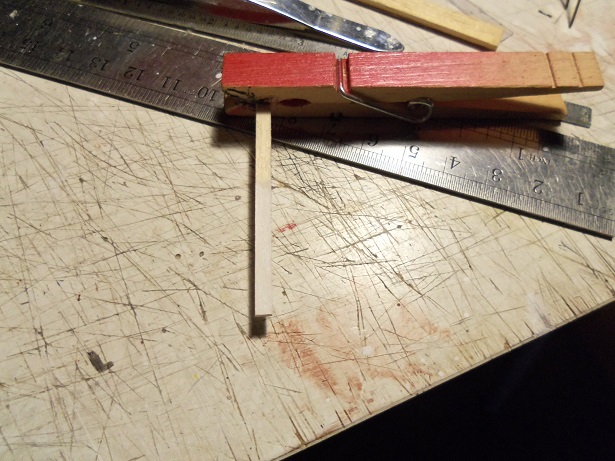
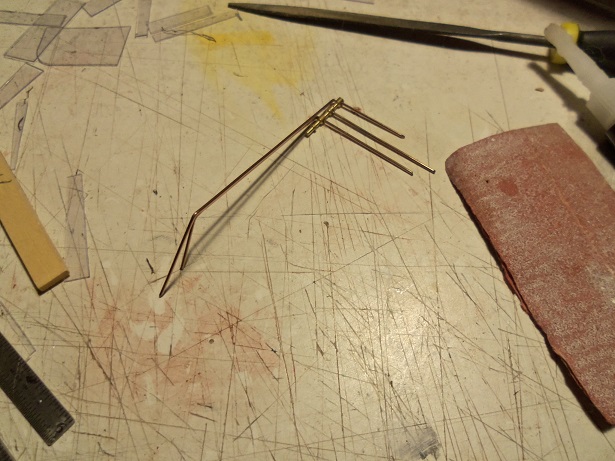
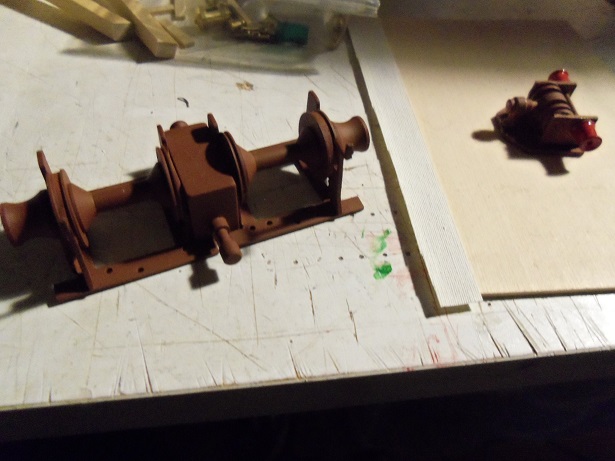
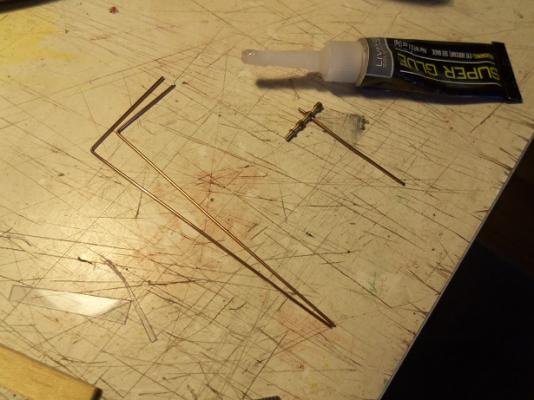
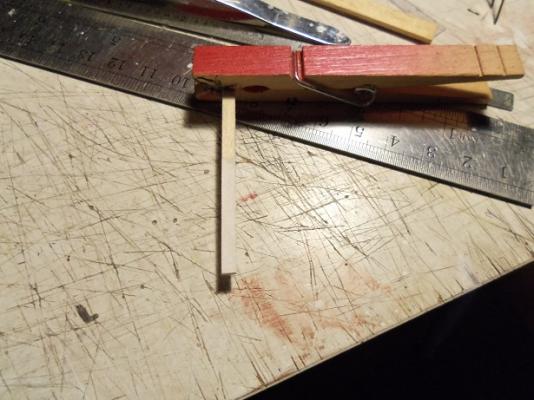
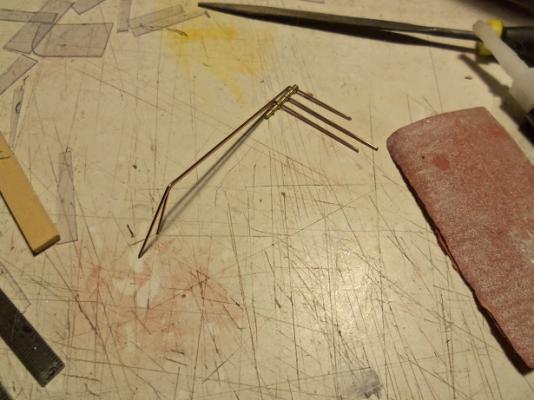
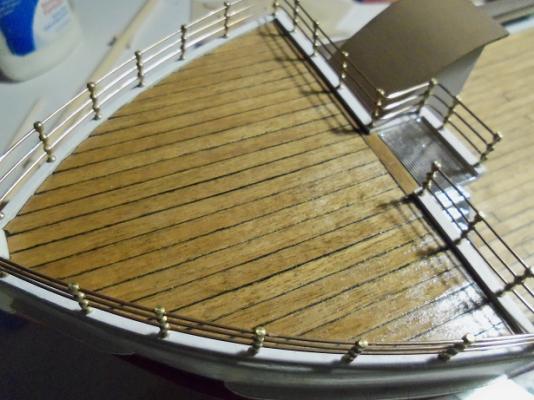
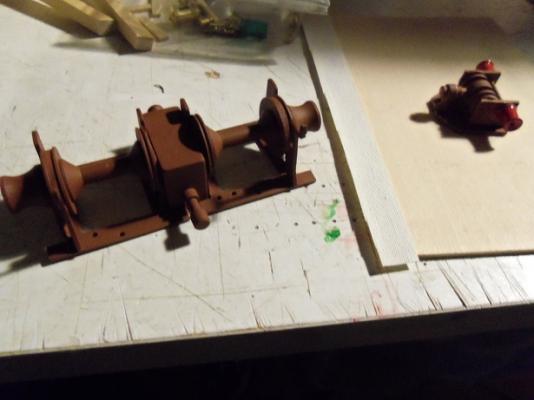
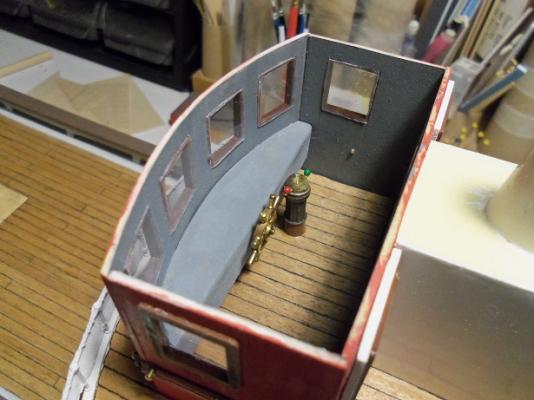
not really Bob........that is since it involved almost ruining a fore deck that's been finished for over a couple of years. I'll start from the beginning......... I had an idea on how to make the railing for the stairs.....it consisted of bent wire and a three hole stanchion. as I have done along the bow line and for the upper landing, I bordered it off for the stanchions to sit on. I needed a very small piece of wood {I forget the size} to fit the span between the ladder and the rest of the border. I painted some up with the flat white. now, I'm making that section of border......and shaping the railings, and trying to gauge where to drill the hole for the bottom stanchion {it's to be part of the railing itself}. in between all of this, I must have forgotten to tighten down the cap on the flat white.......I began to shake it. I noticed my fingers turning white...........but it was too late........a couple of paint drops landed on the fore deck! I wiped them up as fast as I could.....but they still left the remnants of their mark. so, I had to sand them with fine sandpaper to get rid of them.......now the blemishes are much larger. I gave it another coat of semi gloss lacquer......thus removing all trace of the paint fiasco. I saw another spot on the upper stair landing....some thinner took care of it well enough. then I cleaned up the table, because there were spots on it as well. once that dilemma was over, I looked over the winch to take my mind off of things for the moment. this winch worked well for the Nordkap.....I believe the same one was used for the Cux and the Mary Ann. the big drawback with it, is that it only has two spools.....I need more, so I'm going to have to add to it. how......you may ask? I can't tell you just yet. the binnacle is in place in the helm room. so with the piece of border in place on the upper landing...hole is drilled, and the hole is drilled down on the main deck, the railing was set in place and the rungs were cemented in the position they needed to be in. when the CA had set......it was moved to the desk for yet another process that was to be done with it. the short rungs will be cemented to the existing railings after everything is painted....the stair railings and the bow railings. I'll see if there are more pictures in the camera
-
I'm not liking that with a ten foot pole! holy crap my friend........that's really terrible if the stub is still in there and there's a hole, perhaps it can be repaired with a suitable dowel. you may not even have to remove the rigging to do it. I hope you have good luck with the repair.
-
winches look awesome Nils.........they make for good study
- 2,625 replies
-
- 4
-
-
- kaiser wilhelm der grosse
- passenger steamer
- (and 1 more)
-
your a very diversified guy Piet! take care of the world around you.........the ship will still be there......waiting
-
wow......now that's tiny! great job on the furnishings never even knew they made a micron ruler the pillars look better too.
-
thanks Piet.......made some small progress.........once I get it together........ I can also tell you all about the dummy move I made
-
that's good to hear Sjors.........see, it was a piece of cake for you
- 1,616 replies
-
- 5
-
-
- caldercraft
- agamemnon
- (and 1 more)
-
thanks Lawrence........it's neat to try a few things out on this one. more to come, I'm sure
-
I don't know about that Lawrence.......you've been turning out some beautiful ships as well. your a tough act to follow! thanks for the good word and thanks to all who hit the like button I'll continue with the Tree Boat for a spell.......but I'm kinda concerned. I was browsing through images for winches for the Syborn, and I saw a couple of trawl rigs that might look good on this hull. I want to give it a working subject, as well as it's holiday subject.......but I run the risk of leaning more towards the fishing end of the concept. I will have to try really hard to balance the two
-
gray........that's an aircraft color..........leave it to Revell! Well........now that you let 'er out of the box........let'er rip!
-
will do.........I may have already it'll feed my Frankenstein until you resume on this build I enjoy your work.