popeye the sailor
-
Posts
16,007 -
Joined
-
Last visited
Content Type
Profiles
Forums
Gallery
Events
Everything posted by popeye the sailor
-
 amazing Piet........the carvings look super! very well done indeed!
 -
Cutty Sark by NenadM
popeye the sailor replied to NenadM's topic in - Build logs for subjects built 1851 - 1900
looks great Nenad........how many more do you have to make?- 4,152 replies
-
- 4
-

-
- cutty sark
- tehnodidakta
- (and 1 more)
-
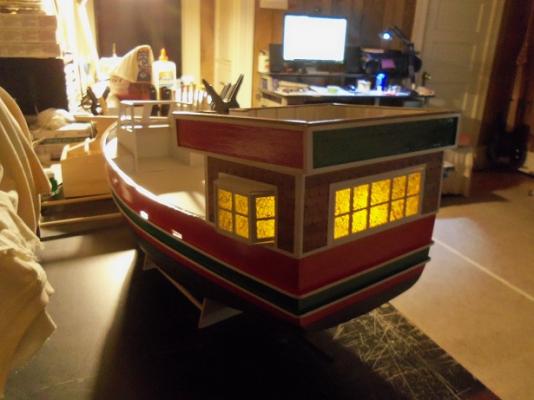
gee.....a huge thanks to you all......and to those who hit the like button. one more little thing to do...and I can move on to something else......like the pilot hou......errrrr....helm. I got another thing to do on the hull....mustering up the courage to do it..... planking still in the works on the Tree Boat. she got it from her mother George.......and she learned it quite well. she's pretty lenient about my tables......and that's a good thing thanks Greg........I do something similar with white glue too. after filling a small crack with white glue, I let it set just a little, and then I sand the snot out of it. does well in hiding joints and stuff. thanks John, Piet, and Wayne! still more to come note to self: put dish on upper deck thanks Gerty as Nenad would say Patrick.......it's the spice of life. I wonder how it would if I used a white light, as opposed to the yellow lights? perhaps I'll find out, since I thought it was doubtful that I would get any lighting on this boat. wonders never cease.
-
thanks George.........if you liked that update.......you'll love this one thank you >thanks Gerty!<
-
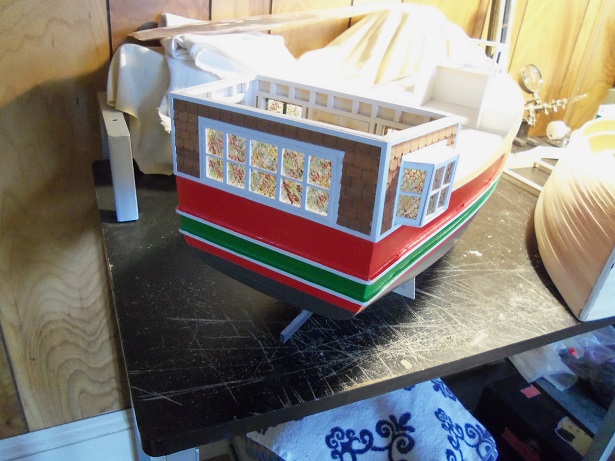
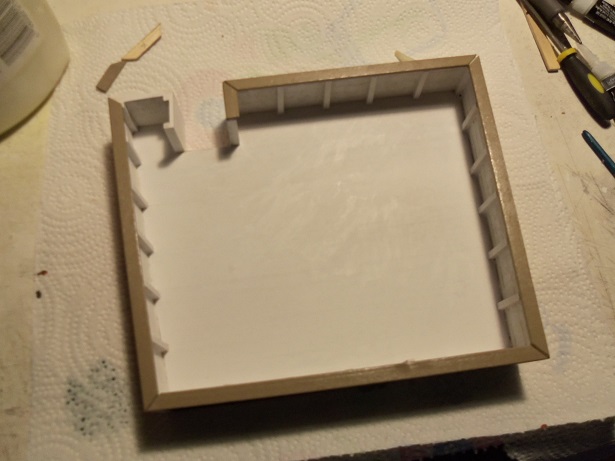
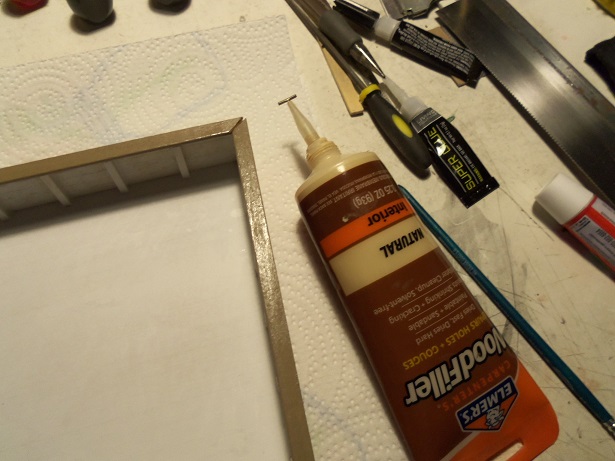
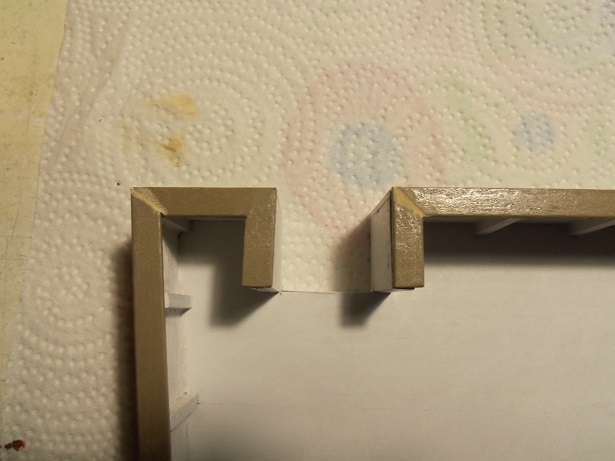
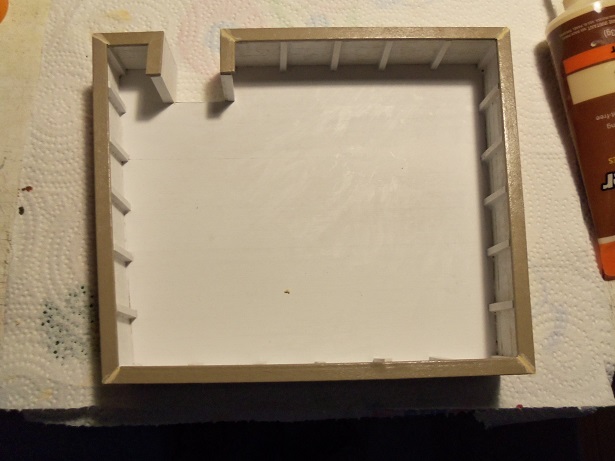
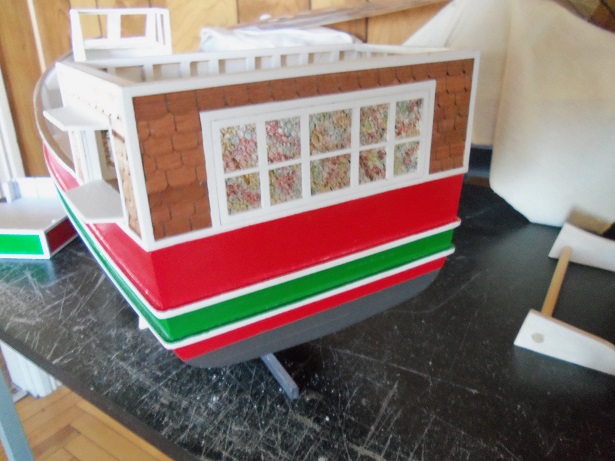
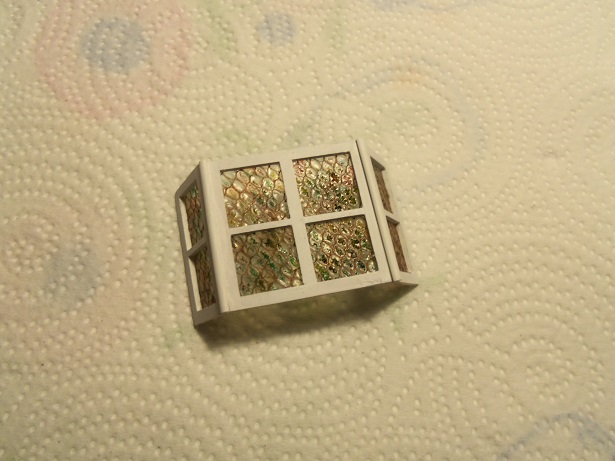
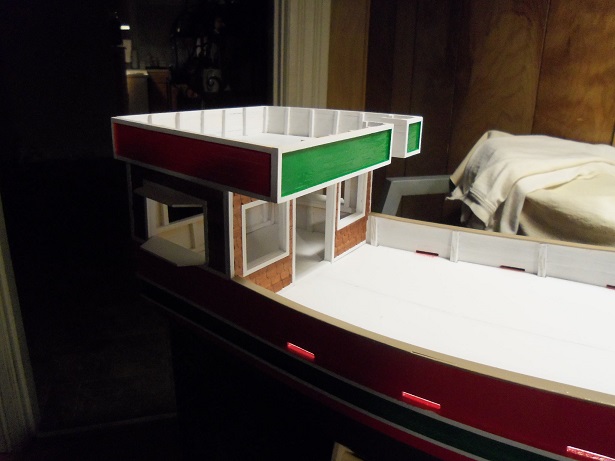
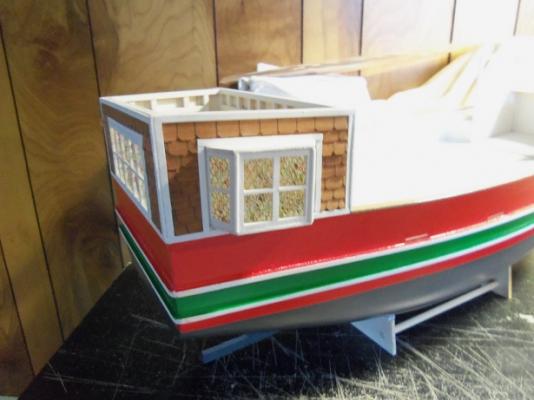
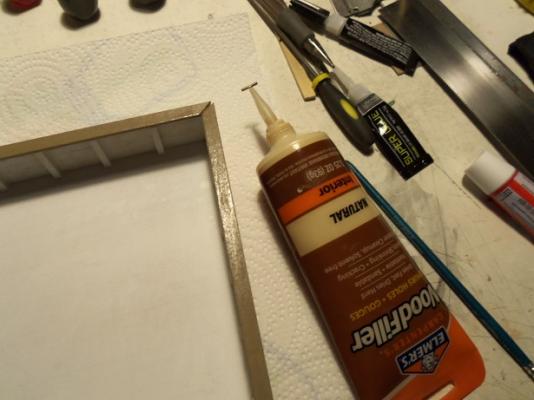
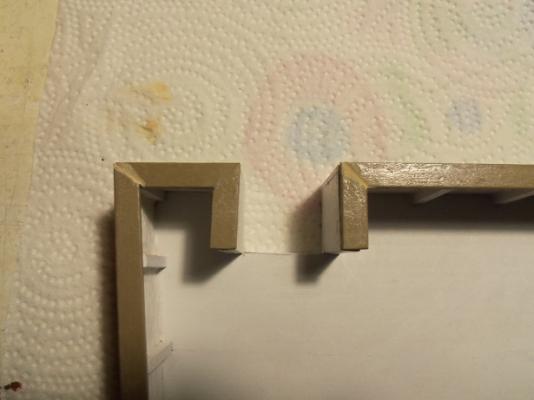
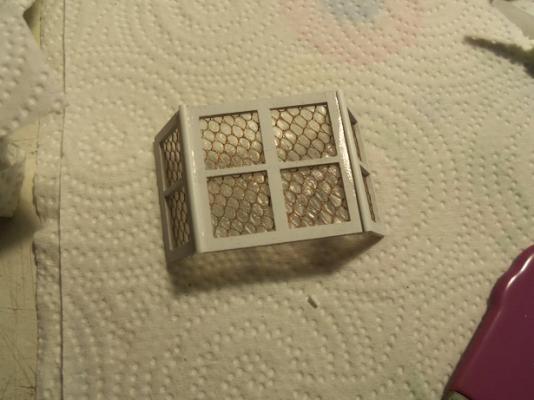
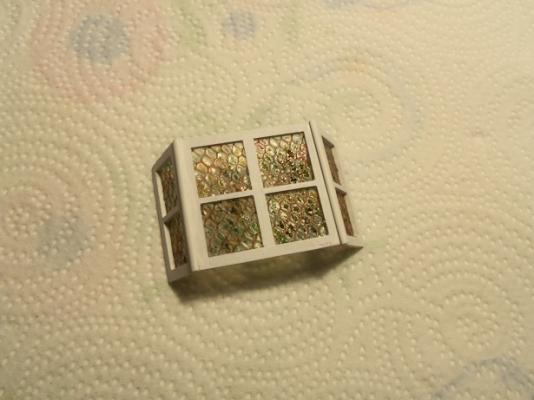
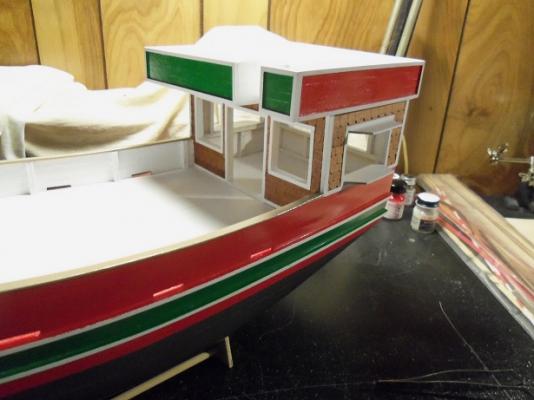
here is the last window....... in place.....finally! forgetting I took a picture of the front already......I took this one...........different lighting. time to get the cap rails on the upper deck. they are all cut at an angle, for a nice squared corner. the little section of port side rail needed to be trimmed to fit properly. to fill in the corner joints a Testor's glue nozzle was fitted into the tube of wood filler. the neck is cut down just enough for a tight fit...the filler is thinned down to a consistency that it will extrude. great for small cracks. the sections were trimmed and fitted.....cemented in place. the joints are filled. I made sure that the two small rails didn't go over the edge of the opening..........making way for the stairs when dry, they were touched up, blending them in. we went to the local Hobby Lobby today.......I got the right thinner, so I could paint one of the plastic builds I'm working on. the same trouble I had with the Jingle Belle....happened there too {I was also using Billing's paint......jury's still out on the cause.....it does rule out the primer though, 'cuz I didn't use any}. while we were there, I managed to pick up another pack of those lights. here it is with two of them in there. kinda bittersweet.......the stained glass look isn't there as much as I would have liked. oh well.......ya win some, ya lose some. >shrug< yea.......it's a bit cluttered. I got the Syborn draped to the left there, got the Half Moon on the main table.......got the two orders of parts that I haven't put away yet {some are for both of these builds}......got the Tree Boat laying there, and my desk is an absolute war zone! it's a wonder the admiral isn't giving me the hairy eye. the hardest part is keeping the paint bottles separated.......trying to keep the paints I'm using together with the builds. I persevere though......I refuse to let anyone threaten me with a good time


-
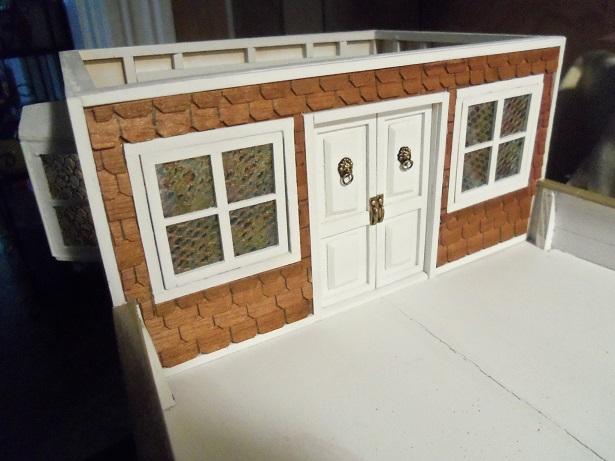
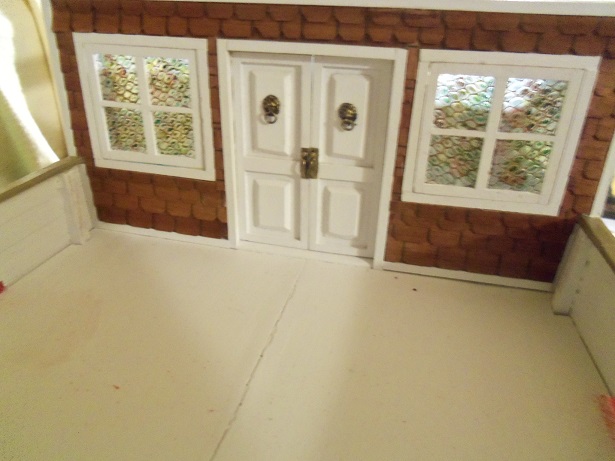
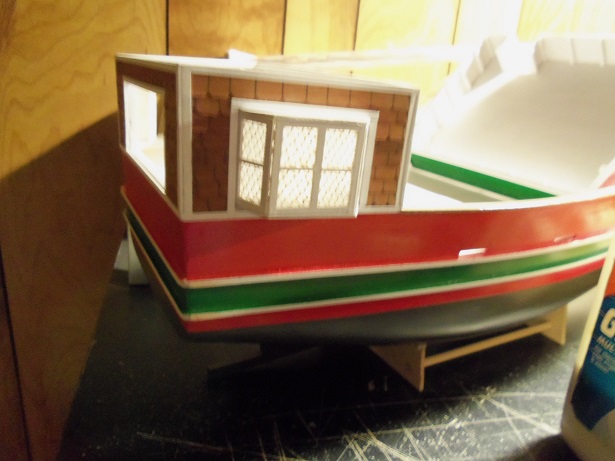
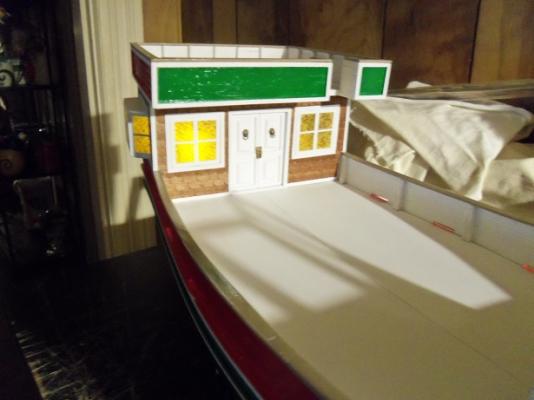
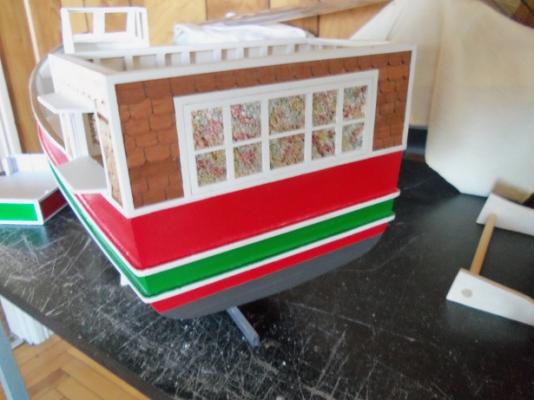
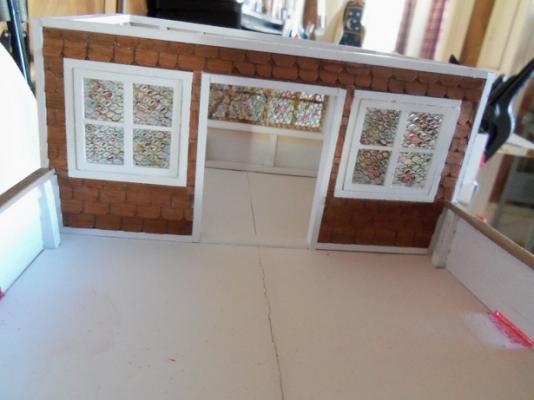
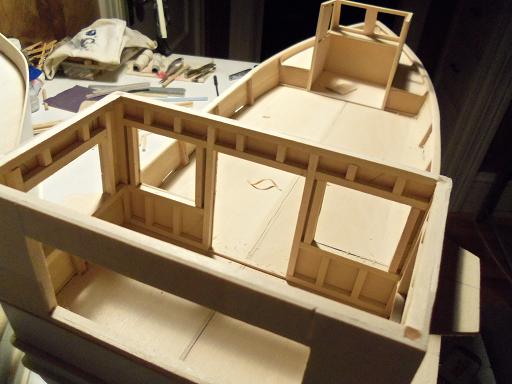
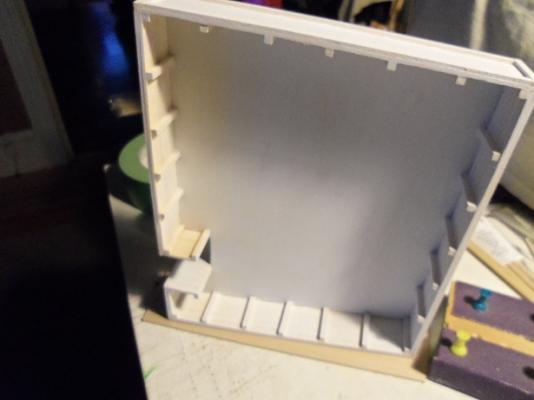
gee........now where the heck have I been the last couple of days........I dunno......it's all a blurrrrrrrr! I'm working on two plastic kits on my desk.....planking the Tree Boat, and the Jingle Belle. cramming this all together, because Thursday on to next Tuesday, it's gonna be a bit sketchy for model building........but I'll try and get something done Thursday and Friday. anyway........life goes on for the Jingle Belle. I figured it was just as good a time as any, to get the windows in place. the stern window is now cemented in place. ....and so are the two front windows........ ....and so is the port side badge window......{poor picture} ....and so are the two cabin doors. but.......still one set of windows eludes me......the starboard side. they are cemented together and waiting for the colorization. before that can happen though, the exterior needs to be finished off. hard to notice in this picture, but I saw a couple holes in the material. they were quickly patched up by dabbing and spreading some white glue over them. the joints were filed out and covered with the quarter round molding. they broke on me too.....not serious, but still they had to be fixed and left aside for a short time. once these dried, I could sand them and flush everything out. then they got some touch up paint. THEN.......the color now to wait till they dry somewhat.......and then they can be cemented in place.


-
amazing...........it's all I can say.........that is one SUPERB fore castle deck! :im Not Worthy: :im Not Worthy: :im Not Worthy:
- 2,625 replies
-
- 4
-
-
- kaiser wilhelm der grosse
- passenger steamer
- (and 1 more)
-
Cutty Sark by NenadM
popeye the sailor replied to NenadM's topic in - Build logs for subjects built 1851 - 1900
very nice progress Nenad.........love how you made the fife posts....very nice shape indeed! ...and freehand no less.....impressive! I second that on the bamboo....you couldn't have picked a sturdier wood for those posts- 4,152 replies
-
- 4
-
-
- cutty sark
- tehnodidakta
- (and 1 more)
-
what are they.......shallow spots? hope they don't impose on the outer hull surface. they look great though.......quite an operation you've done there. the I.D. on the hull though does tend to limit the hulls you can produce........unless you have a way to change them, when making a different hull of the same configuration. it's a great process though........something to think about. I was in Hobby Lobby yesterday.......and I looked at a kit for resin mold / part making. I never knew there was such a thing.
- 434 replies
-
- 3
-
-
- pelikaan
- beamtrawler
- (and 2 more)
-
fantastic! what the heck.....just touch 'em up.........the jet skis look fine port engine......{see, you were getting dizzy too } looks super......painted up, it will look just like it's brother. wonderful update my friend !
-
looks great Jens.......never really thought of using silver { aluminum} in painting hardware. it really makes it stand out.......very nice
- 188 replies
-
- 1
-
-
- cutty sark
- billing boats
- (and 1 more)
-
nice progress Sjors.........love the 'animal house' you've created it all looks great though.....and the more you add will make it all come together. keep spinn'in the web! {oh......and bug farm too }
- 1,616 replies
-
- 5
-
-
- caldercraft
- agamemnon
- (and 1 more)
-
very nicely done Jack.........gonna look totally dapper with a full set of sails well done on the rigging as well! brass rings as mast hoops......did they come in the kit? Billing usually supplies those plastic ones. super job!
- 203 replies
-
- 3
-
-
- artesania latina
- marie jeanne
- (and 1 more)
-
thanks all for the kind comments and the likes......work time slows the progress as well as the mind. now that I'm past the mayhem, I'm hoping to settle in, putting all this together. then I gotta see how to best clean up the main deck......the over spray is bugg'in me. no worries Nenad!
-
it's not too hard Patrick.......I'll find a good 'pause' area sooner or later. I put in another order for parts. had trouble with stanchions...out of stock. perhaps I can pick back up with one of the other builds. thanks for the good word thanks Greg.......welcome to the asylum
-
ohhhhh, I wish this post had sound you'd hear the biggest Popeye laugh, I kin muster! glad to see you still work'in on the bounty.........very nice!

-
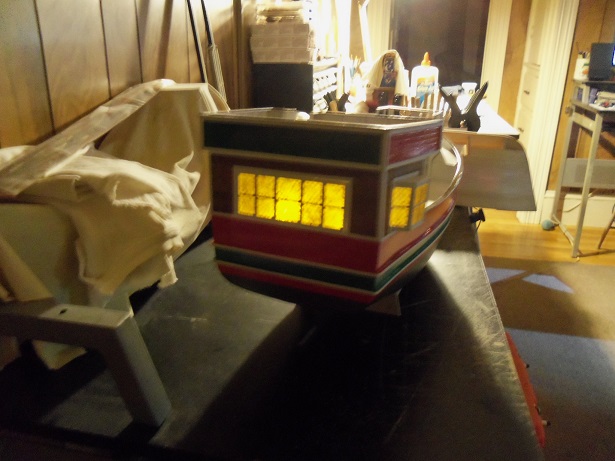
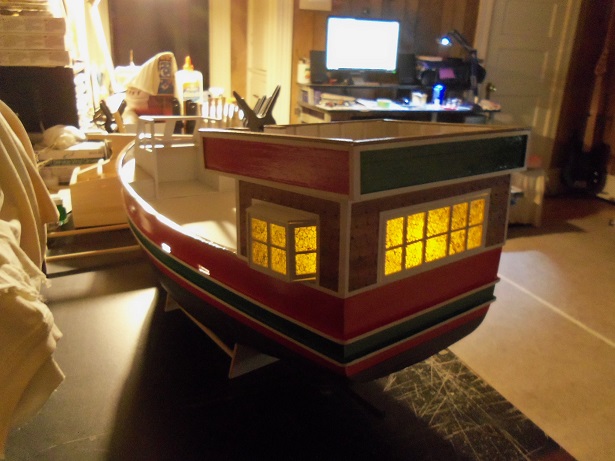
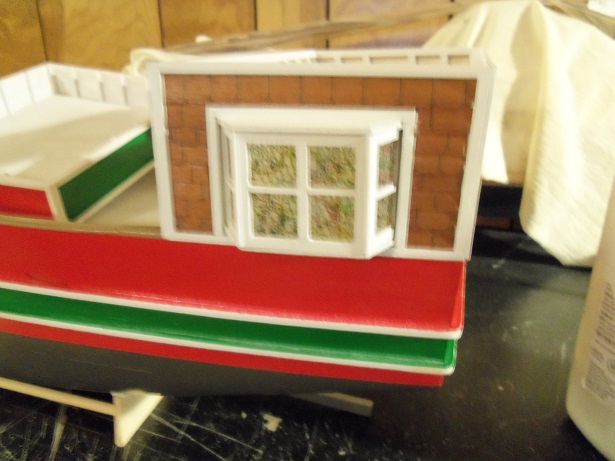
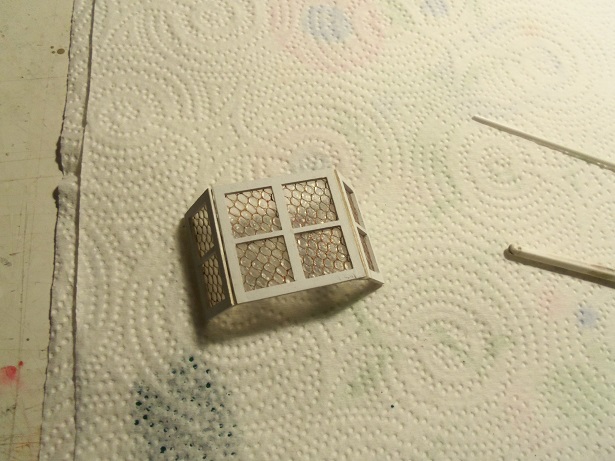
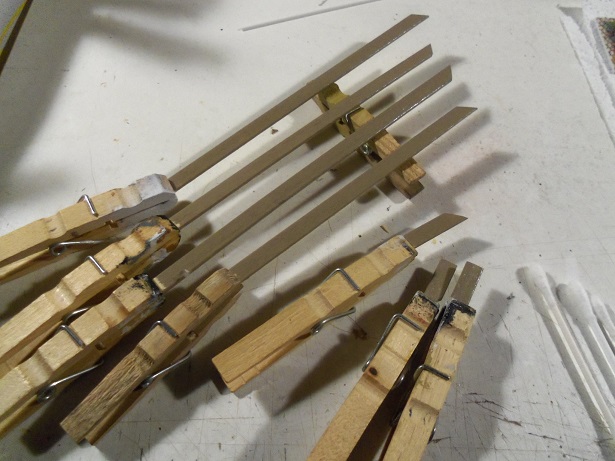
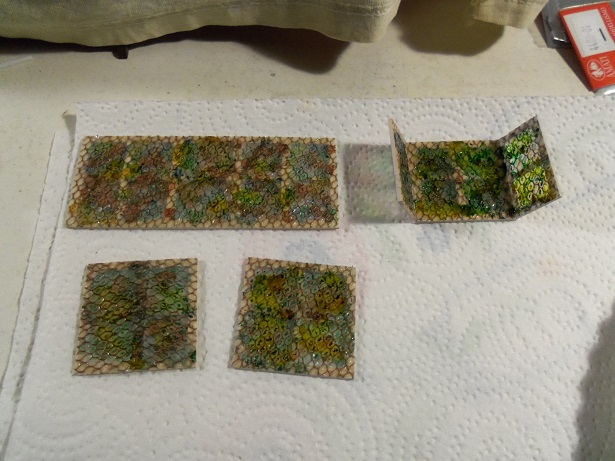
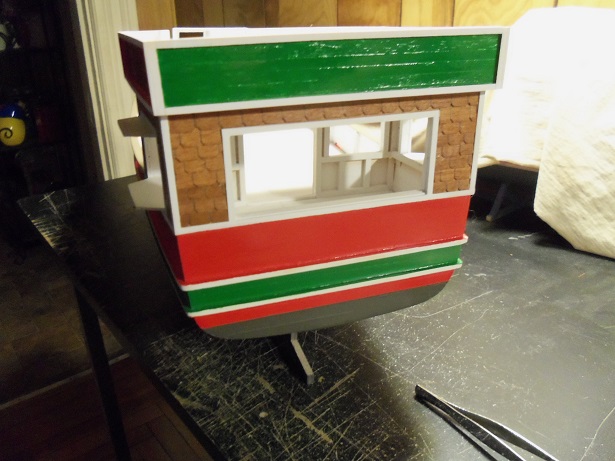
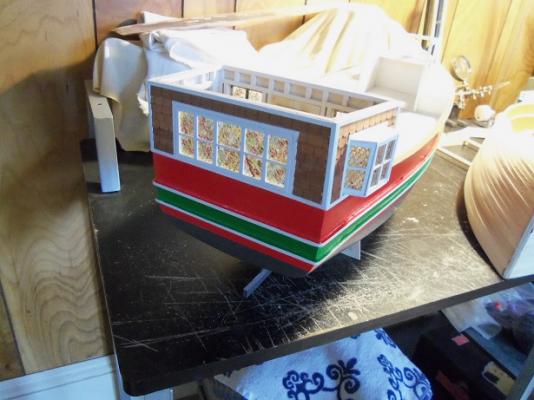
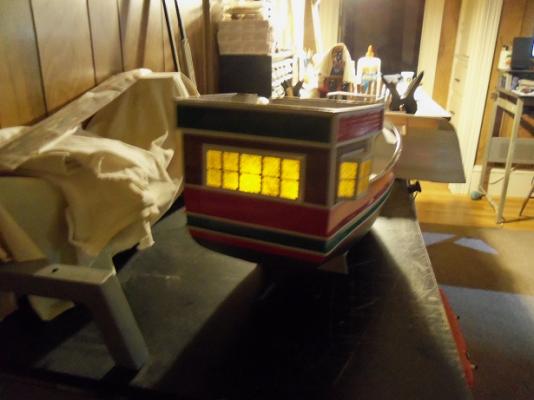
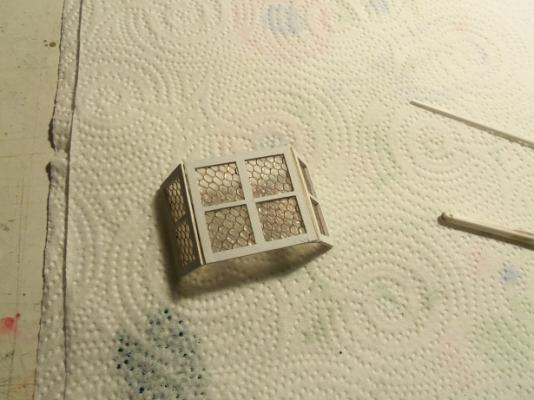
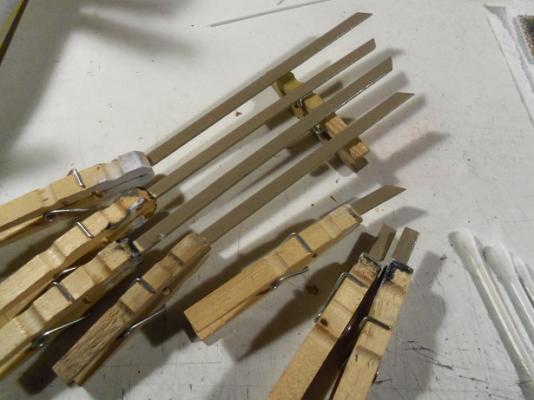
not a whole lot to report .....although, I think I found out what's bugg'in my airbrush. I'm using the wrong thinner. I mentioned that I pulled the Three Boat out from under the desk..... hard to remember when I was back this far. I'll work on her in the background as I do more to the Jingle belle. I put a coat of paint on the cap rails. .....and here they are.......the newly gussied up windows. I was going to use a brush on them.......but that would have taken forever. so I opted for something bigger......Q-tips! four puddles on a paper plate..........four Q-tips to apply them.........and this is what they look like. the starboard side window still needed to be assembled, so I did that too. when dry, I'll pop 'em out and finish them off........then I can gussie them up too.. this is going to be a slow planking job....


-
great! that's all I need......... Richard Simmons running around
-
flat bottom boats and barges........as for the last one Carl.....the only thing that comes to mind, is pillars the first one is interesting...... nice planking! thanks Carl oh......I guess I can't do that Bob.........I guess all that's left now is a fitness gym......
-
well that stinks! sorry to hear of your mishap.........fingers crossed and good hope, that you can get'er back ship shape! if it will make you feel any better......I took a complete ship w/sails and stuck it out on the porch........who would have thought that wind could send it flying!
-
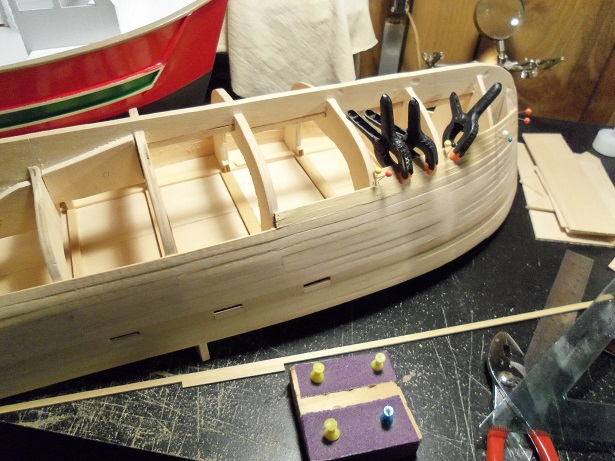
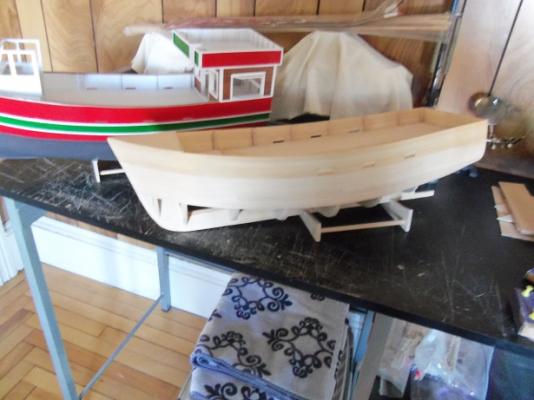
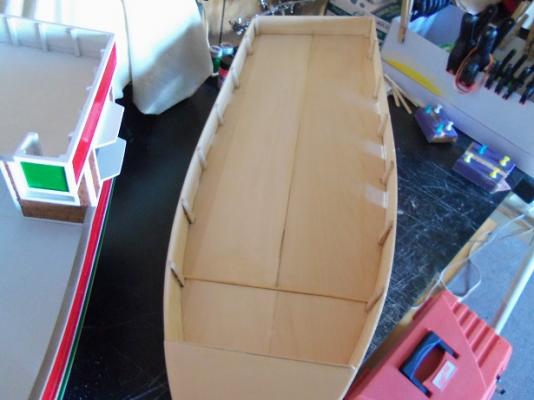
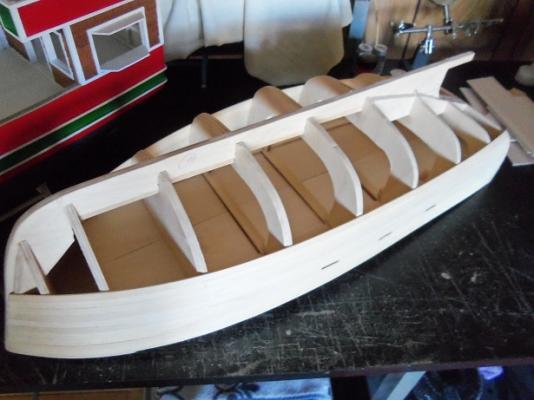
thanks Piet, Greg, and all who hit the like button. I sat back yesterday and surveyed how far I've gone with this boat. I checked with my Word Press Blog site....I was only at #36........I'm at #53 now, with a couple more to add. I had just started the experiment with the windows and created the doors. To look at her now.......kind of make me feel bad about the Tree boat......which kicked off my concept for the project in the first place. this boat was a by product of the subject......the main subject sits under the table on a shelf. I even had a thought to get the Boulogne Etaples up to snuff, and show a progress picture, as I did a while ago. so far, the only result from this project has been the Andrea Gail.....I can only guess which one will be next to reach the finish line. perhaps I can bring the Tree Boat up for a spell. I'm not sure Greg.....I was never the Mario / Megaman / sonic fan........hand me a roll player, me with a sword or a bow, and I'm in heaven. although looking at my e-mail address, it has a reference to Megaman's big boss enemies.....any of them having 'gutz' in their names the admiral and the boys played those games......thus the reason why they don't participate in the mediums. I was more reserved......there was a time for play.......and a time for play I just pulled the Tree boat out from under the table.........I really got a job on my hands.......the planking used was that polished basswood.....the edges are a bit rounded and everything. ....a lot of hull prep
-
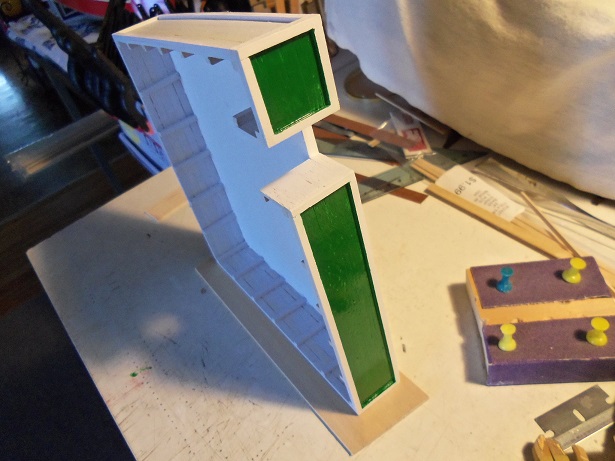
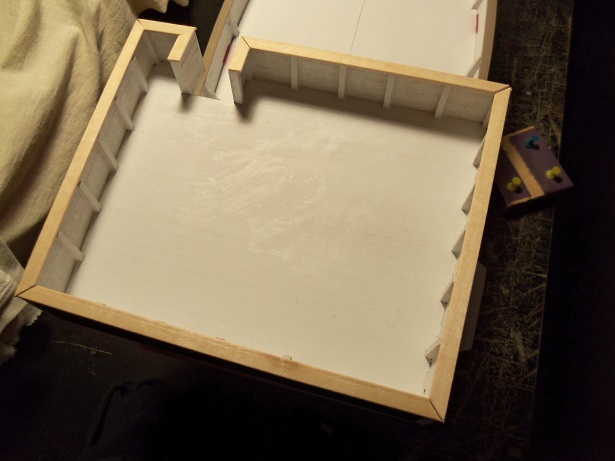
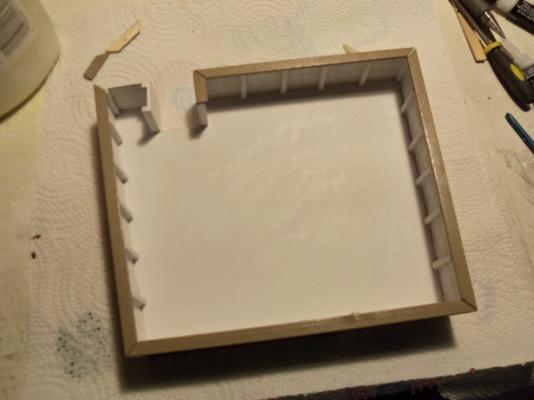
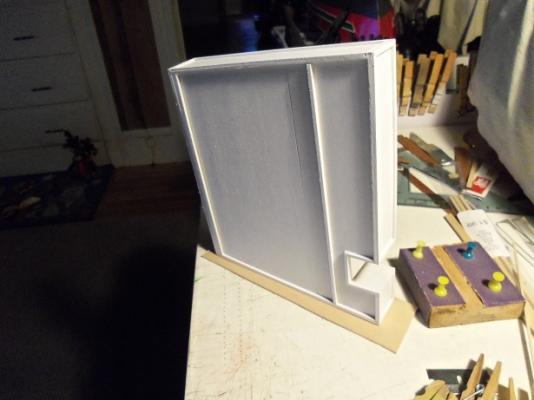
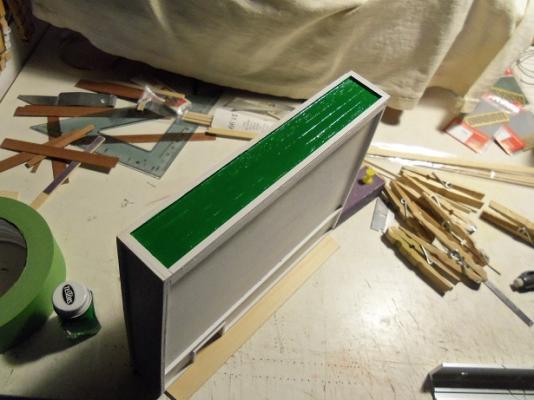
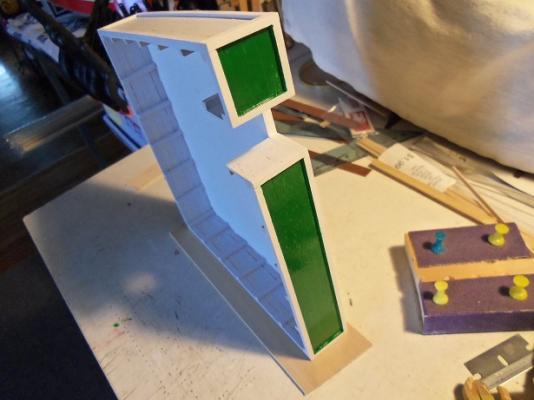
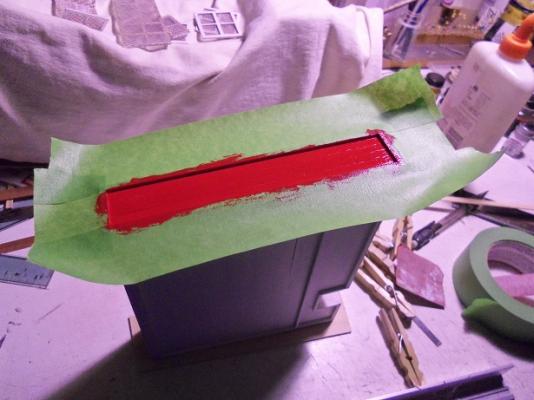
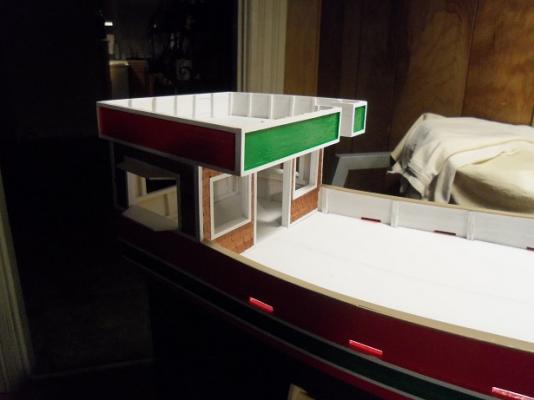
A bit of bittersweet coming up from the cellar..........I ran out of primer but I decanted some I made sure the outer surfaces got it first. ...but the inner surfaces.........not so much..... After waiting a while for the primer to cure a bit.......I began with the painting. I decided on a two tone effect. the stern bulwark was painted green. ....as with the front wall {s} {here's where it gets a little dicey.......the sides are to be painted red. darned if that primer ripple didn't come back to bother me. {camera having a 'pink' moment} what I did to cure it was to wait till it dried.....lightly sand it, and give it another coat. I did the same for the other side. this was good.......the inside bulwarks and parts of the deck was painted with the primer that I had decanted. so now it looks like this. I'm going to need to something creative here, but I cut all of the cap rail pieces. the bad part is I didn't have any planking that was wide enough. I have some half round strips......I'll border the cap with it, if I have to

-
aaaaaaye! what's that ya say?!?! ya given'em time ta vent?!?! .....nice look'in too, I might add
- 2,625 replies
-
- 4
-
-
- kaiser wilhelm der grosse
- passenger steamer
- (and 1 more)
-
coming up soon John