popeye the sailor
-
Posts
16,007 -
Joined
-
Last visited
Content Type
Profiles
Forums
Gallery
Events
Everything posted by popeye the sailor
-
 thanks all! you noticed them..........ladders.........just what I needed.......more ladders. could be in the future.......one never knows
- 956 replies
-
- 6
-

-
- andrea gail
- trawler
- (and 1 more)
-
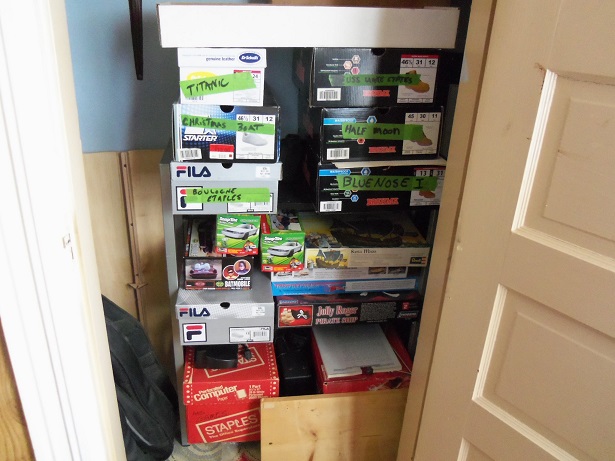
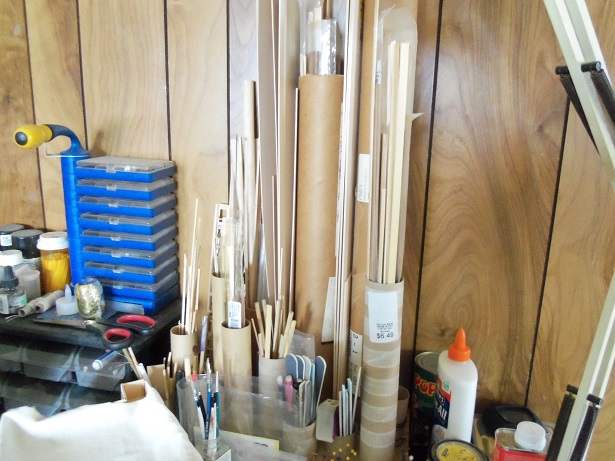
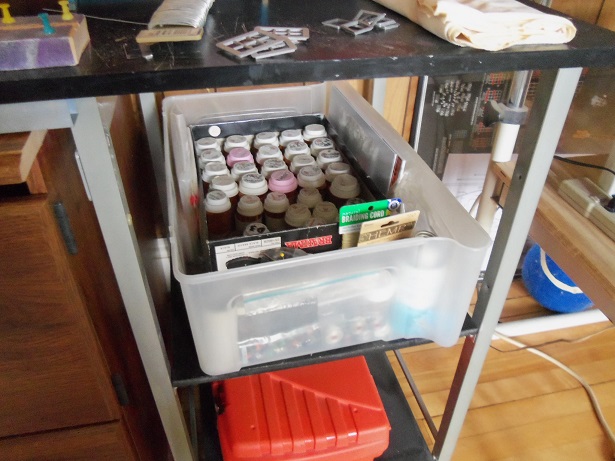
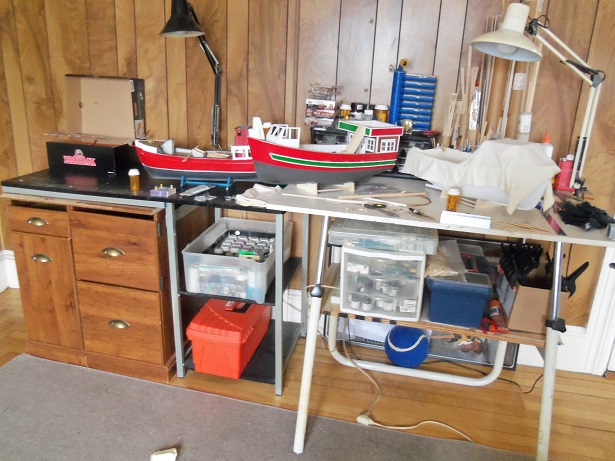
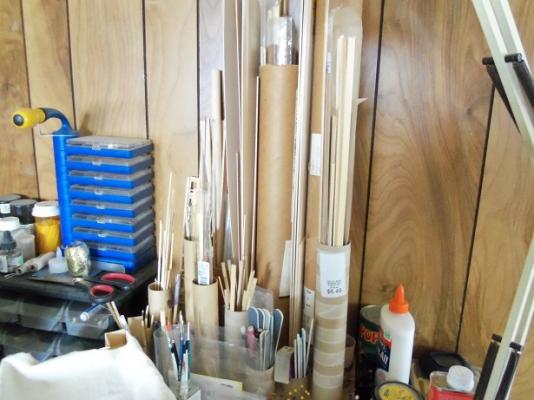
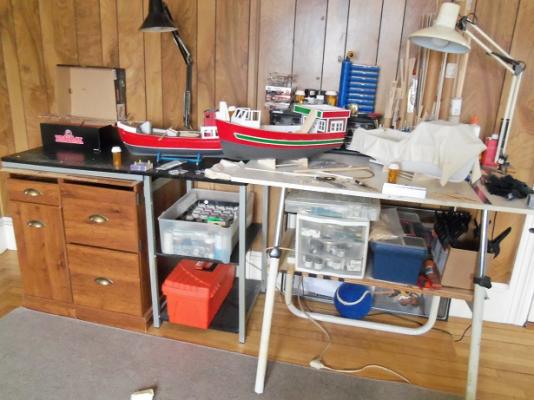
thanks to all of you fine folk....and those who hit the like button. I had looked......and the last entry on this build was 2014...heck, I probably have one longer than that. I shouldn't be surprised.....my tangent with the Andrea Gail.......the small jaunt with the Black Diamond {cute}, and the continuance with the Jingle Belle...time just flies by. I'll get an idea of what to do next and go for it........who knows what else thanks Patrick, Nenad, Piet, and Pat. I had to kick myself.......looking for the right wire. I bought some bailing wire, thinking that it would work.......it's too big! now what am I going to do with 5 pounds of wire. so far, I've been using it as a weight, but I think there is more I can use it for. quite a while ago, I had bought some floral wire....can't remember what I got it for. it ended up getting stuck in a box and forgotten. after making the discovery with the MIG wire, I recalled having it and dug it out. I found that it would work just as well! welcome to Brainphart, USA I get that a lot Mark....how do I do it. well, it's not as bad as you might think.......it's more an exercise for the memory banks. once I open a kit, the frame is built.......all the while, thinking of all the thing I could do with a hull like that {day dreaming on a huge scale}. if I'm going to save the parts panels for the hull parts, I put them away in a separate box {a big box}.....{I probably have the hull panels for several ships}. the rest of the panels are broken up and put in a boot box. I go through a pair of two of boots a year, so the boxes add up. they are labeled and put in the closet. the only kit not shown here is the Thermopylae....it's still in it's box and on a higher shelf. the strip wood is separated and put in plastic sleeves, and labeled according to size. most kits are made up with the same size woods, so this also prevents my running out of a particular size. what else I need, I get from HobbyTown or Hobby Lobby....or I'll order it from Billing USA {the site is still up and running}. the flat stock is more the trouble spot, so I get a few sheets here and there to keep the inventory fresh. the rack is made up of shipment tubes and paper towel tubes cemented into a board, different size hole made with a hole saw. the fittings and stuff are kept with the kit........there are occasions though where I will rob from them. I replen the part as soon as possible. what I do order and the extras I acquire are kept in a separate inventory box. I use my admiral's spent pill bottles for this, to keep them organized. toilet paper tubes are cut in half and cemented in rows inside a boot box to keep the m in order. I uncluttered the tables........good to get a fresh perspective on things. the cabinet on the left hand side under the smaller table is a new addition to the work station. the admiral got a new desk, so I took the two lower parts and put them together. it has two cubby holes and two drawers.....it will help me from having to use the hallway for added storage. it will keep stuff closer. well......that's my method........and my work station. there are still a few things I'd like to add to it........like power tool, but it's home and I like it well.......back to planking?........painting?..........cutting?..........cementing?...........and the dreaded......sanding? I never know what I'll get myself into.


-
thanks all for the good word and the likes. I'm glad that the the two treads that are slightly off don't show......just goes to show how slight they are off. the poor condition of the 1/16 square stock....I'm kinda surprised that it looks this good. after seeing how rough cut they were, it a surprise that I didn't chuck 'em......but they'll be good for structural stuff, so I kept them. hopefully I can use them up and be done with them......I bought some basswood strip stock for the external stuff I have a few things in the works at the moment........more scratch building thanks Patrick........the hull is about 22 inches long. the girth of these girls make them larger than what they appear. I think that when I get the hull finished, perhaps a bit further, I'll do a group picture........the three hulls and the mother ship, the Boulogne. I think it would be interesting to see the stages they are at the moment. the last time I did it was in 2014.........I think {I'll have to look} thanks Mark........when done...it will be more so........... thanks Piet........I can't think of a better way to catch up on these builds. the admiral was ribbing me the other day........I have kits in the closet that I haven't started {the idea of having a stash is new to her.......I've never had one before}. she got me the Sergal Thermopylae for Christmas 2015, and I still have the Guillow's Fokker Dr I from Christmas 2014 {I have a couple of plastic ship kits in there too}. the admiral doesn't know...I mentioned it, but she won't remember.......I have plans for the Thermopylae. think of it as 'Pandora's box' icky may
-
it's a nice fix......but I don't think you'd have to have worried about it that much. when that particular bulkhead was cemented in place, the broken piece could have simply been cemented in place at that time. it would turn out just as strong. it's good your taking the time to insure a good fit......it will serve you well on the long road ahead
-
she looks awesome Jack.........really like the way the emboss came out! congratz on a fantastic build!
- 203 replies
-
- 5
-
-
- artesania latina
- marie jeanne
- (and 1 more)
-
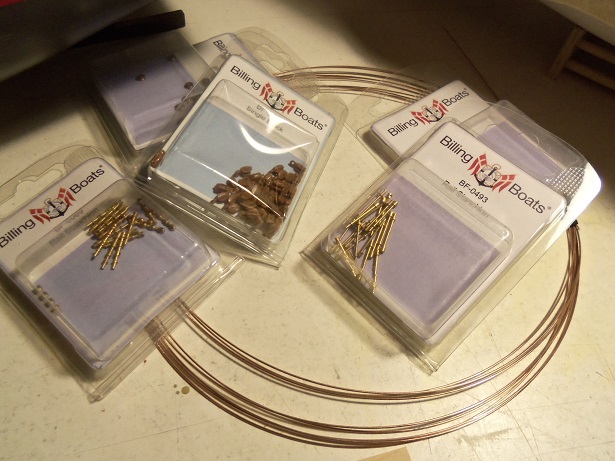
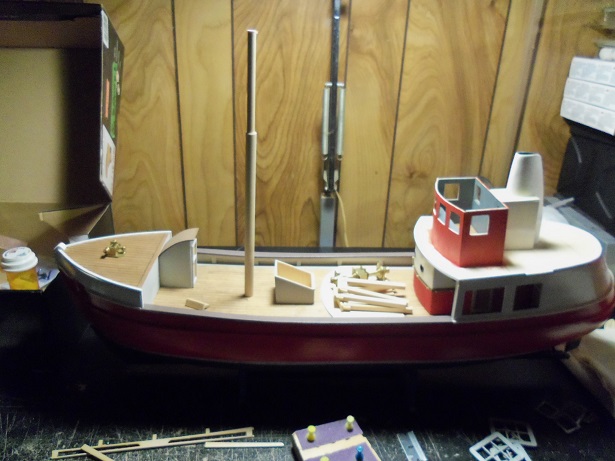
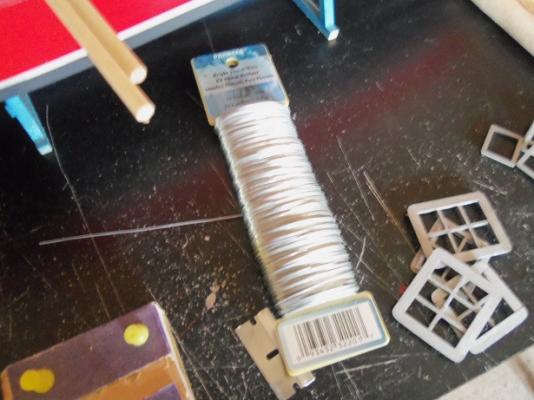
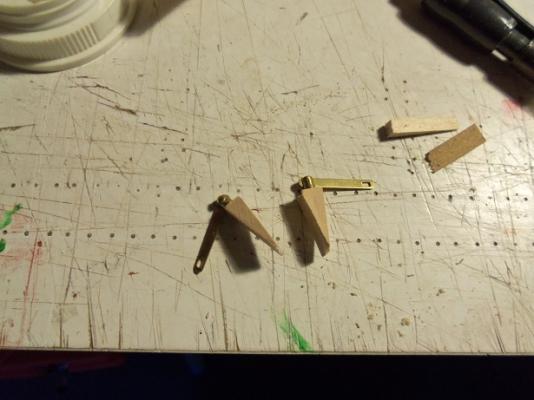
well, it's been a while since I did an update on this build.......a gross understatement I ordered some parts for this build......but one item still is needed......brass wire. I normally get it from HobbyTown, but they moved to a town further out, one that I don't frequent as often...drat them! some of the stuff I ordered from Billing USA, now a branch of Ages of Sails, was out of stock, so I had to make some substitutions to the order. not what I wanted.......but I guess it's better to have something than nothing at all the outlook in obtaining wire changed for me last Saturday. one of my jobs at work {Wally} was to weld a new bumper on a trailer, that I had inspected. we have a large MIG welder.......it's nice, but sometimes can be stubborn. anyway.......I was welding the new bumper on, when the tip on the welder's gun got too hot and melted, causing the wire feed to malfunction as well. the tip was removed......opened the welder and cut the wire that had backed up in there. I then pulled out all of the wire that was in the gun hose.....roughly four or five feet. normally, this would get thrown away....but I had a hunch it was the right diameter.......so, I rolled it up in a loose coil, bound it with electrical tape, and put it on my tool box. I smuggled it out to my car at lunch time and brought it home. when I got home, I tried it in one of the stanchions, and was happy to find that it fit! so now I have the wire, I can move on with this build. I have the plastic double blocks......I think they are 7 mm. I had ordered some single blocks for this build, but I think I goofed... I got the 5 mm. I still have time to place another order.... the companionway was cemented in place. while I was at it........the larger dowel was cut down a bit, and a smaller segment was added on. as a matter of fact, I just got back from our local Wal-Mart......they carry dowels in their arts and crafts section. I needed the dowels to make the booms....I will have two on this vessel bought a package of 3/16 {in my drill gauge, they come out as 13/64}. I made the boom brackets to cement on the mast.......pre drilled for the hardware there are still some touch ups to be done here and there. catch up time


- 747 replies
-
- 11
-
-
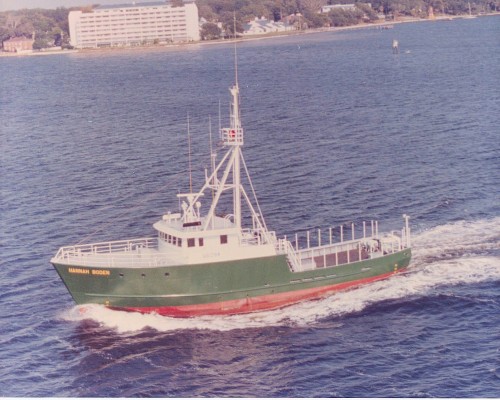
just a short note to let you all know that I finally got a copy of 'the Perfect Storm'. knowing that there are some errors in the movie itself.....I just let them go by my head......I still think it was a darn good movie. the opening sequence opened my eyes though......the Hanna Borden and the Andrea Gail looked almost exactly alike! now, if the Andrea Gail in the movie, was actually the 'Lady Grace'........then what ship did they use for the Hanna Borden? two articles that I read had conflicting information in regards to where they were built http://www.easternshipbuilding.com/our-portfolio/hannah-boden/ http://www.gloucestertimes.com/archives/lady-grace-also-gets-harbor-berth/article_a983191f-3d1e-5b5f-9013-98b2bcd4faa1.html Eastern shipyard is located in Panama City Fla. the second article states that the Andrea Gail and the Lady Grace were built in Ocean City Maryland. while this may not be too important, the pictures speak for themselves. the Hanna Borden: the Andrea Gail: I'm still thinking of rebuilding the Andrea Gail......the real one this time. in light of this, who knows.....the Hanna Borden may also be added to the pipe dream...... just depends on how much fun I want to have

- 956 replies
-
- 9
-
-
- andrea gail
- trawler
- (and 1 more)
-
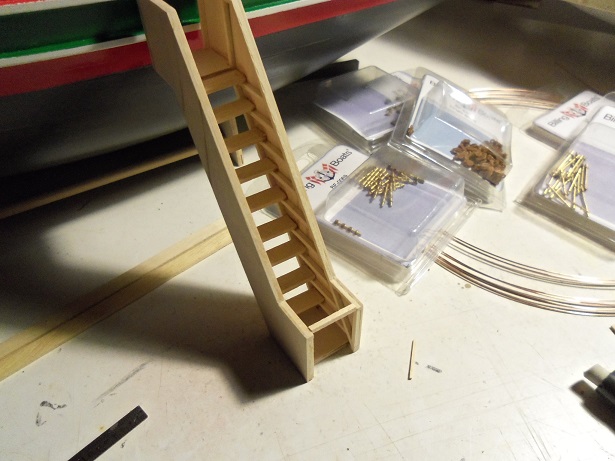
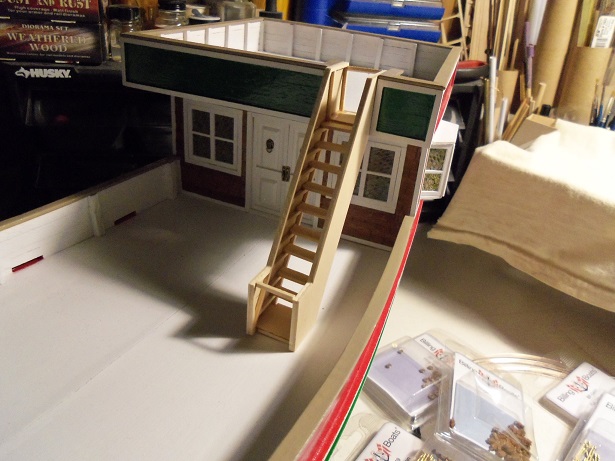
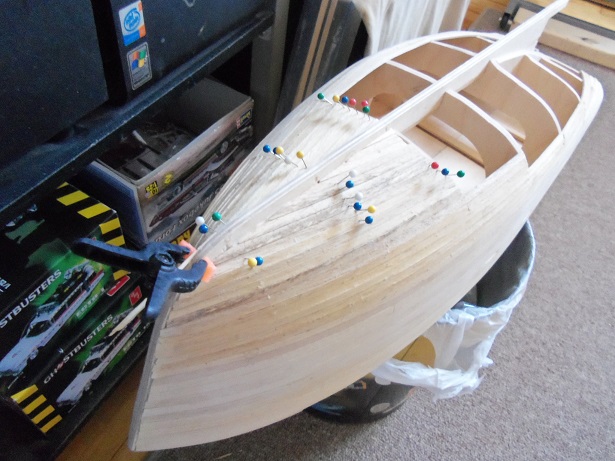
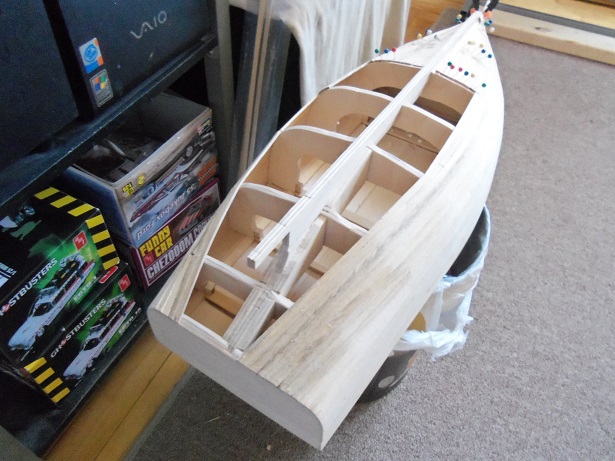
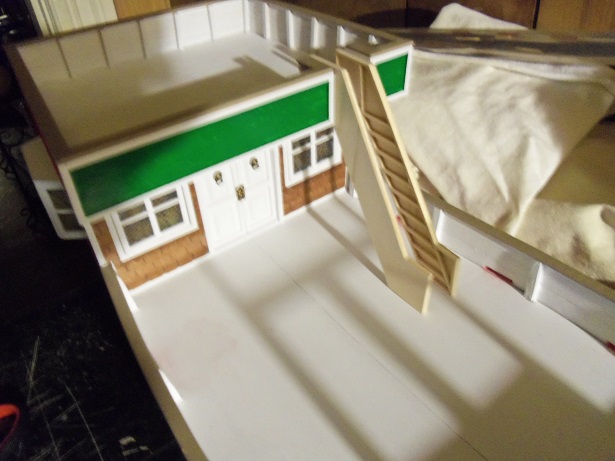
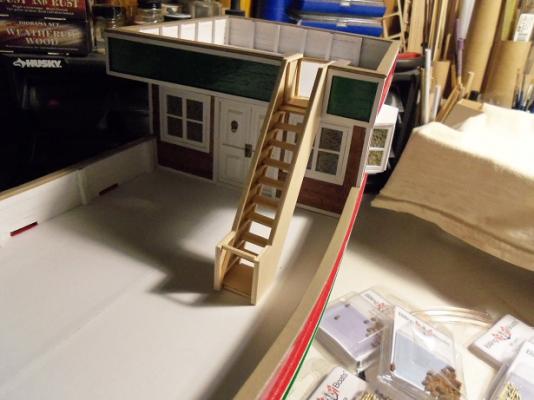
thanks Lawrence this was the easiest of my other two thoughts.....an escalator and an elevator thanks for the good word. I wish I had taken a few more pictures........but I was fumbling around at the table.......and I came up with this. I gave it an upper and lower landing. I really should have painted it before I assembled it, but as I mentioned, it went together very quickly. the two pieces of wood at the tops are just there to keep it square until it dries totally. I did this Tuesday evening. I did frame out the bottom of the upper and lower landings, seeing that the grain of the wood goes side to side {very easy to crush it....I already broke one of them earlier on}. I didn't bother to put the 'kicks' in....just the treads. a couple of the treads are slightly off.......to mess with it will mean making another one. so I won't bother. once completely done, it will never be noticed. the dry fit showed that I need to make a small adjustment to the opening, and I may need to add a threshold to the opening at the upper deck. I'm leaning toward making this a separate piece.......once the lights are put on and the deck is put back on, it will be made so it can be slid into place. now that it's fleshed out, I have a few ideas for it's enhancement. I also have an update on the Tree Boat. I've done a good portion of the planking. I had to redo one side of the bow though........I forgot that the keel needs to be sanded down a bit. I had it riding all the way up the keel, instead of tapering it at the bulkhead line. the keel is uneven and has a few chiggers in it. I'll set up the belt sander and work the keel so the bow end has a nicer curve to it, and keel line is evened out.. don't ask me what's up with the planking.......I dunno. it's Obechi, I can tell ya that much. I got it in a bundle of wood, in a kit I received, from a friend that could no longer continue his build. I got new wood for it, and hatched out a twisted idea for it, in waiting for it to arrive. but.......this is another story anyway........after fixing the bow, I can now plank the rest of the hull, without fear of any more trouble. I know it odd that it sits on my trash can like that..........I figure that if it gets too messed up, it doesn't have far to go bad joke...........right! gotcha~! nawwwwww......little chance of that.......I haven't tossed one yet


-
the shrouds look great.......Bounty is coming alone nicely.
-
hey there!!.....welcome back good to see your back at the table.........very nice to see Emma again
-
nicely done KP.....
-
looking good Nils...nice start on the winches and boats
- 2,625 replies
-
- 3
-
-
- kaiser wilhelm der grosse
- passenger steamer
- (and 1 more)
-
you put a lot of detail into the wheel house Bob.......she looking great! don't lose the pattern yet......you still have the aft structure to do I'd say you nailed it
- 348 replies
-
- 3
-
-
- pequot
- cable ship
- (and 1 more)
-
the deck layout is looking better and better John.......the windlass looks super, as well as the structures. very nice indeed!
- 745 replies
-
- 4
-
-
- francis pritt
- mission ship
- (and 1 more)
-
thanks everyone for the kind comments....and for those who hit the like button I may try and make a set Piet.......I like the canvas idea too. this style seem to be easier for the model though. I think everyone remembers the M&M boat I enjoyed that build.......it was fun thinking up all that stuff I'm still pondering over a few things and finish the ladder {stairs}......then I can see what will be next.
-
good to hear your getting back up to speed Walt. I hope the good health continues for you and your admiral.......hope to see an update soon
- 208 replies
-
- 2
-
-
- meridea
- repair ship
- (and 1 more)
-
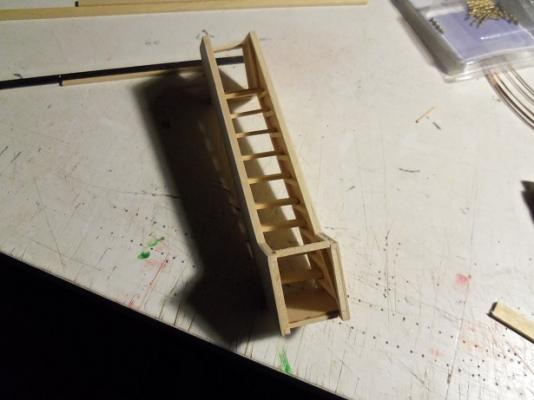
thanks Patrick and Jack. I had a few ideas about them........if I had enough brass rod, I could have simply made the frames, and made up some 'canvas' sides to cover them. the treads were what made me go with this. here, I could make the tread frames, and add the treads later. since this will be cemented to the upper deck, making it removable as well, the top will lock into the bulwarks {I could have negated planking them}. I could also leave it as a separate piece.......putting it in place after the upper deck is back in place. the bottom flat is done this way, merely to make it sit better, when in place. now to figure out how to best assemble it
-
Cutty Sark by NenadM
popeye the sailor replied to NenadM's topic in - Build logs for subjects built 1851 - 1900
I see it shows anchoring to the deck......and line tension doesn't need to create a musical note. you want to keep the tension around +0 as much as you can. you could use the smaller one.......the anchoring will make it stronger. but if you want to be sure.......there is a + or - that you can go, as far as scale goes. whatever you feel comfortable with, my friend- 4,152 replies
-
- 4
-
-
- cutty sark
- tehnodidakta
- (and 1 more)
-
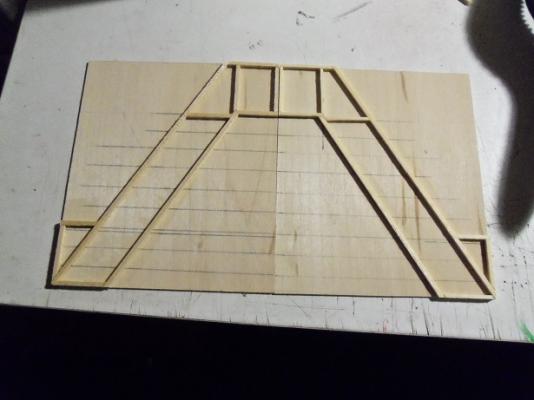
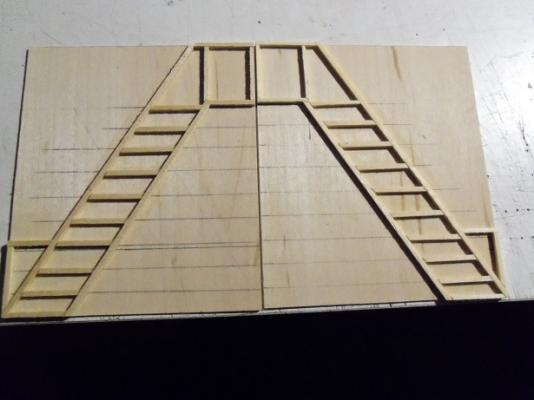
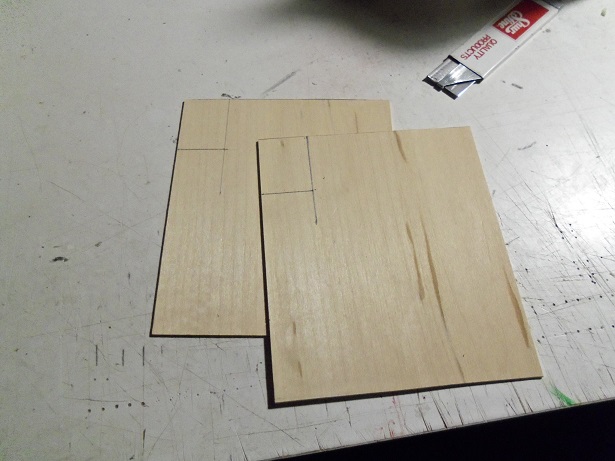
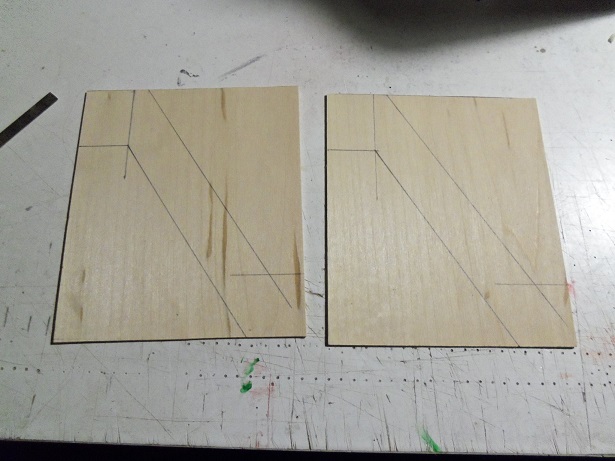
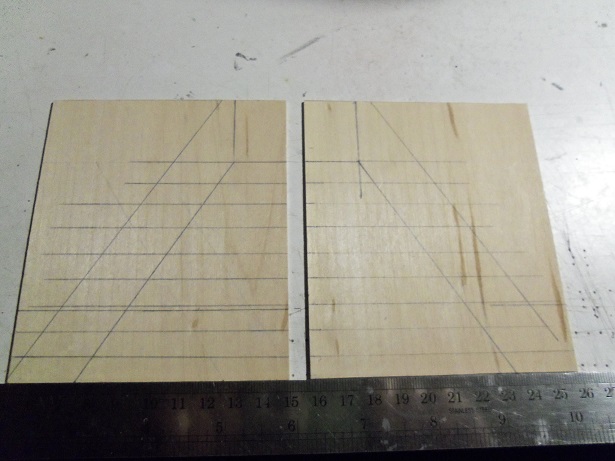
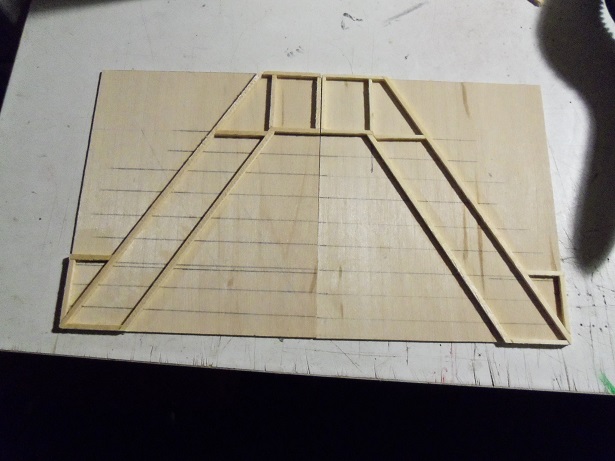
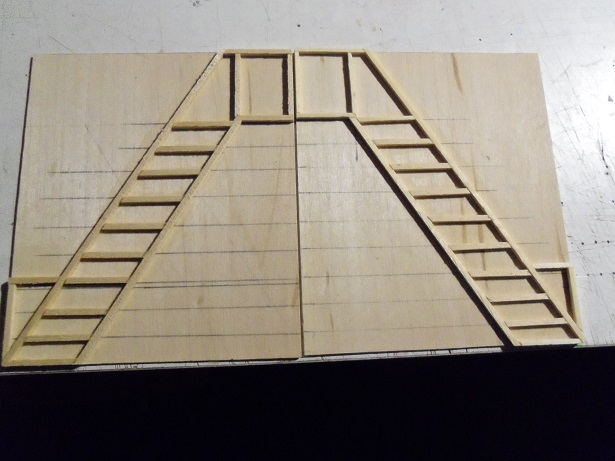
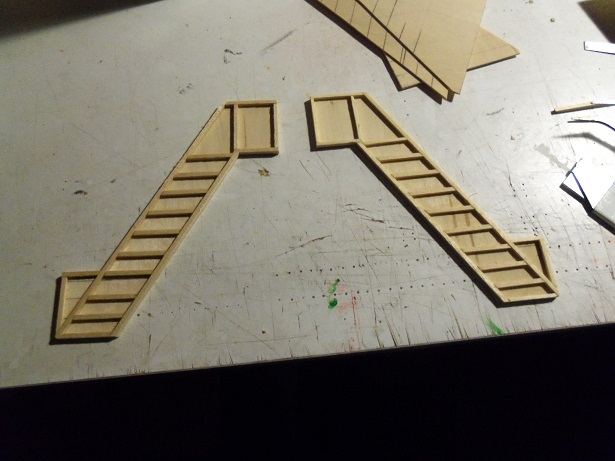
started working on the stairway to the upper deck. it begins as two pieces of 1/32 flat stock....the upper threshold is drawn out. and with the rest of the sides drawn out..... this is when I realized that making two starboard sides wasn't going to end well..........so I changed one of them to be the port side. the tread lines are drawn in for the frame work I'm using 1/16 strip stock to outline the drawings. this is the last of the crappy, that I got in one of my kits........you wouldn't believe how bad the wood was. rough cut, not exact to size.......I'll be picky what I use, but following the lines, I can make allowances here and there. going further, the tread frames were added .......and then the excess was cut off. I was going to use the scroll saw, but I ended doing it by hand with a razor {my trusty case cutter} once sanded and cleaned up a bit, a dry fit was done to see how they fit the upper deck and the main deck.