


popeye the sailor
-
Posts
16,007 -
Joined
-
Last visited
Content Type
Profiles
Forums
Gallery
Events
Everything posted by popeye the sailor
-
 thank you Mobbsie work is done.........now ....play time first I'll finish the other ladder.......and then those vents!
- 956 replies
-
- 3
-

-
- andrea gail
- trawler
- (and 1 more)
-
Cutty Sark by NenadM
popeye the sailor replied to NenadM's topic in - Build logs for subjects built 1851 - 1900
lots of folks I know, view the beginnings of their builds as a bit on the ugly side.....even me they are discheveled.....a skeletal frame.......ahhhhhhh! but what do they say........the beauty is in the design. I think you swan has energed- 4,152 replies
-
- 6
-
-
- cutty sark
- tehnodidakta
- (and 1 more)
-
I got the kit for Christmas........that's where it is at the moment. it's the Academy kit......the big one she hasn't said too much so far, but that's why I want to try and catch up.............for when she does thanks you good sir!......well.....off to work!
- 956 replies
-
- 2
-
-
- andrea gail
- trawler
- (and 1 more)
-
Cutty Sark by NenadM
popeye the sailor replied to NenadM's topic in - Build logs for subjects built 1851 - 1900
looks great Nenad!- 4,152 replies
-
- 1
-
-
- cutty sark
- tehnodidakta
- (and 1 more)
-
thanks Patrick........didn't they tell you that when they gave you the modeling gene..........never blink! I'm trying to move this build along.......I wasn't supposed to ADD to my build roster......I'm supposed to try and catch up! I already got told by the admiral.........she didn't get me that Titanic kit, just to see it stuffed in the closet. so far, this build hasn't left the table, since I started.......and I've had the itchings to pick up on one of the others, but I can't seem to put this one down thank you Nenad.......yea, I'm afraid the the Cutty would look a bit out of place with metal style railings.......wood will need to be done. of course, if you have a trawler, that you fancy.......then you can play with brass rod to your heart's content! feel free to glean any ideas I might offer....that's what this site is all about! thanks for the good word everyone, and those of you who hit the like button! one more day to go........then it's play time again!
- 956 replies
-
- 4
-
-
- andrea gail
- trawler
- (and 1 more)
-
what......you don't have a micro setting? gee....now I'll have to put on my imagination cap, in order to envision all those tiny fittings I'm kidding......such wonderful work at this scale! I did hand rails like that for the Lobsie twins.....I can just imagine how you made yours looking really good my friend!
-
this is a very well done scratch build......kudos on the research. I like the colors you chosen.......the camo looks very good. it's your build......strive for exact color if you wish, but from what I see........I think you have done very well! keep up the good work!
- 45 replies
-
- 3
-
-
- saratoga
- aircraft carrier
- (and 1 more)
-
thanks Augie perhaps I could do one for those planes of yours I though about that while I was making them Carl. when I first made the ladders, I just copied what I had done with the others. as for other detail, I'm sure there was something, but I am uncertain. Be sure to know that I'm taking notes, in watching Kees never mind the tongue.......I'd love to see those hands busy.....love to see you back at the table I understand though.
- 956 replies
-
- 4
-
-
- andrea gail
- trawler
- (and 1 more)
-
thanks George and John hard to respond to that George........as crazy as I am......if I was a rocket scientist, I would have blown myself up by now!
- 956 replies
-
- 1
-
-
- andrea gail
- trawler
- (and 1 more)
-
Cutty Sark by NenadM
popeye the sailor replied to NenadM's topic in - Build logs for subjects built 1851 - 1900
looks awesome Nenad.............see.........it all in the results, not the process itself- 4,152 replies
-
- 3
-
-
- cutty sark
- tehnodidakta
- (and 1 more)
-
thanks Mark./...I hope they meet OSHA specs thanks George......I should do a rhyming log............now THAT would be a feat!
- 956 replies
-
- 1
-
-
- andrea gail
- trawler
- (and 1 more)
-
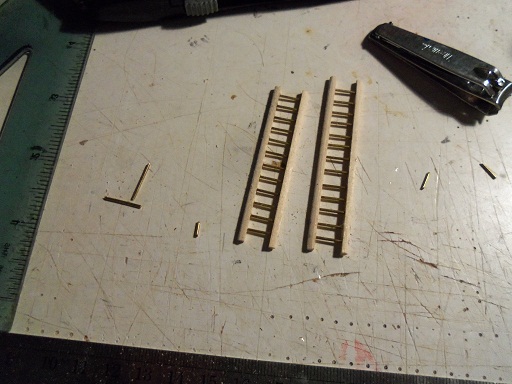
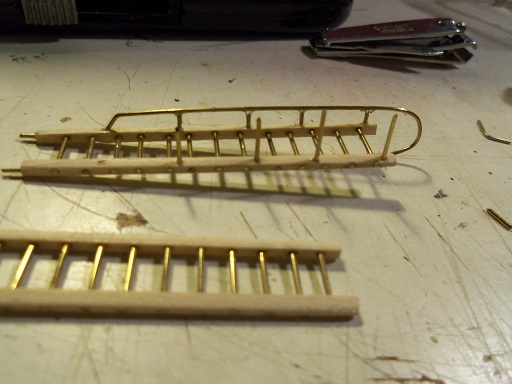
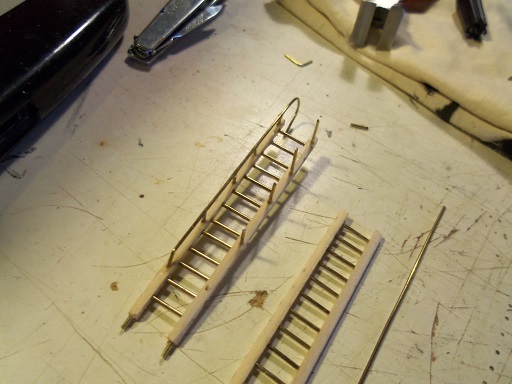
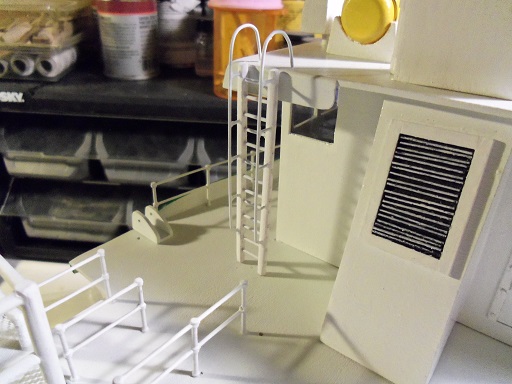
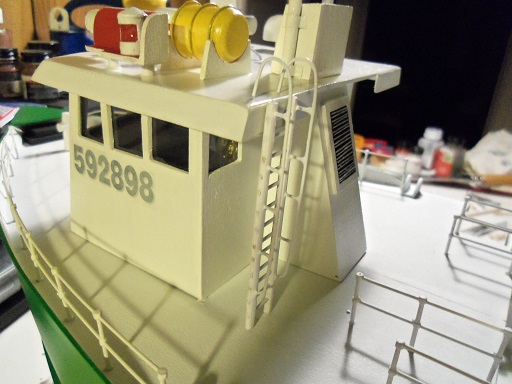
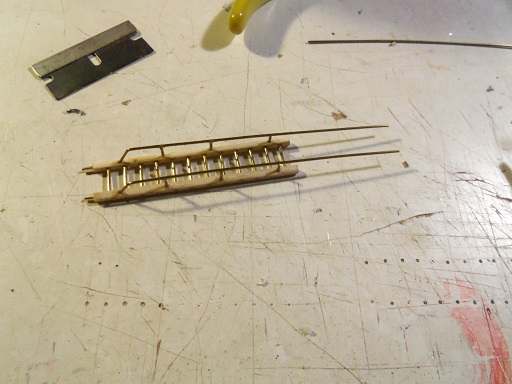
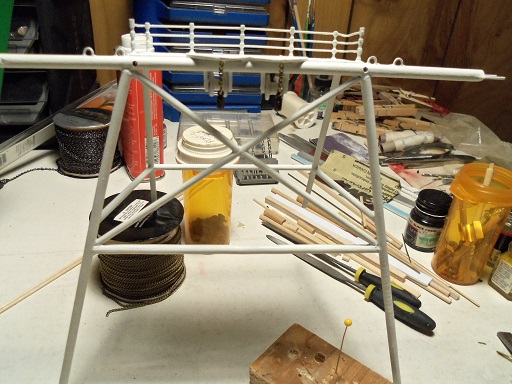
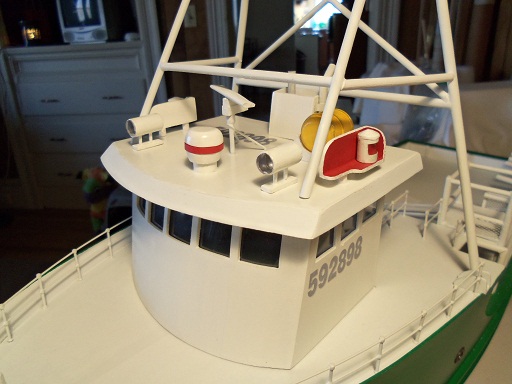
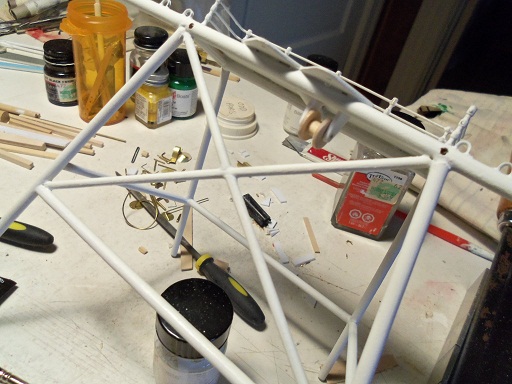
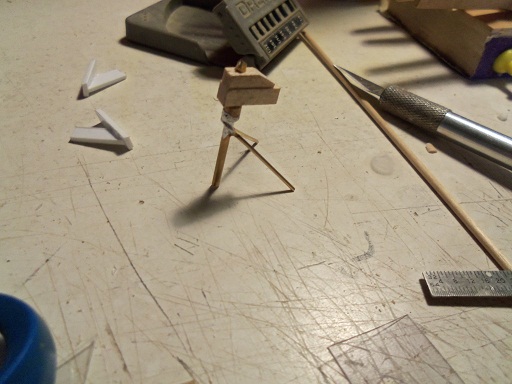
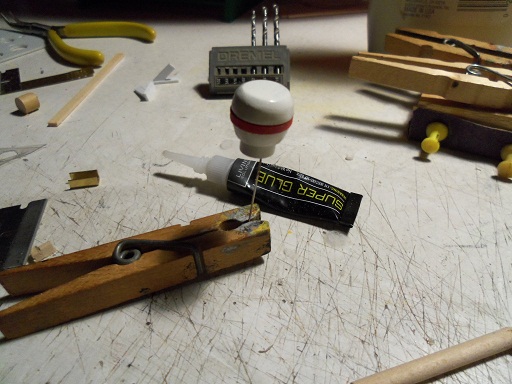
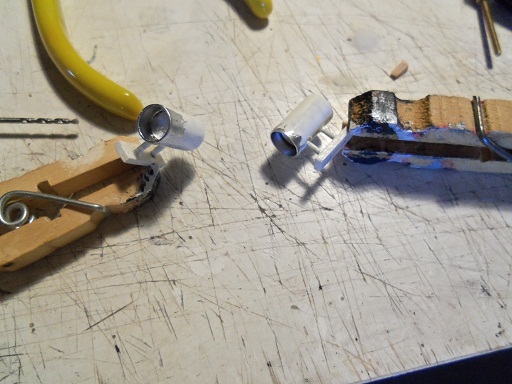
OK........so I made these ladders...... the shorter one is for the mani deck, abd the longer one will go from the fore deck to the roof. the way the plans show the ladder to the roof of the pilot house would look weird, if I were to put two curved pieces of brass rod in the top of the uprights.......you know.....drill a hole and insert them. I decided that I would bash them a little......sounds funny in relation to a scratch build........don't it. well.....it can be done.......I added grab rails. drilling all the holes......I set in some support bars for the rails.......and then the rails over the top of them. in hindsight, I probably should have made them entirely from brass rod and solder.......but this was more fun {I'll have to play with the other idea}. I had set them in place and drilled holes in the decks for the placement........in the bottoms of the ladders, small pieces of rod was cemented in, to serve as locators. I put the main deck ladder in place to see how this one would look.......it's not supposed to have grab rails. the other grab rail was cemented in place on the roof ladder. once both sides looked somewhat even, as far as the curve goes, it was set in place to make adjustments. when I was happy with it, it got a coat or two with primer. I looked at the roof ladder..........then I looked at the main deck ladder.......and then started to think how I would pull off doing the grab rails to the main deck ladder, especially when it reaches the fore deck. there are railings on both sides. I'll worry about that later on went the support bars! ....and the rails themselves! setting it in place..........yea....I might be on to something I also made up another bracket for that pulley.........it's a little crooked......I'll have to fix it, but it's on there. there are also guide blocks filling in those holes I drilled, in that piece off of the gangway. I would have gone further, but I was rung out...... so I climbed into me bunk..........sad to think the work week {end} is here. I'll finish this off and continue on Tuesday. thanks for looking in


- 956 replies
-
- 18
-
-
- andrea gail
- trawler
- (and 1 more)
-
thanks John.....I'm trying to speed things up a little not that it helps.......... hope you had fun......and thanks for the good word! thanks Carl........I HAVE to dig deeper......after seeing what Kees is doing man of talent....that one! thanks Augie and Mark........I was looking at the plans, and I'm not liking what they show for these ladders. the update will explain it all thanks for the good word thanks George and Patrick for looking in I've got an update, I like to begin if you think these ladders look flat and plain when you see what I did......you'll think I'm insane!
- 956 replies
-
- 6
-
-
- andrea gail
- trawler
- (and 1 more)
-
thanks Patrick........the ladders are Ok.....it's the way they have the grab rails that I'm looking at. the one that leads to the roof has them......the one that leads from the main deck to to the fore deck does not. I think they would look better with full length railings on both......but mulling over how to do the one from the main deck. thanks George......the pilot house is closed now....no way to get 'em in there I've never done much with figures......even in my aircraft builds. perhaps one day I will. my playtime is slowly coming to a close.........the weekend I work kinda dreading this weekend.......got myself into a rather sticky bind at work last Monday, and I will find out what kind of write up I'm going to get for it. what can I say.......things happen.
- 956 replies
-
- 4
-
-
- andrea gail
- trawler
- (and 1 more)
-
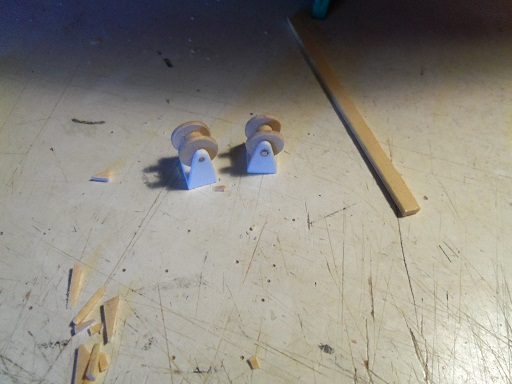
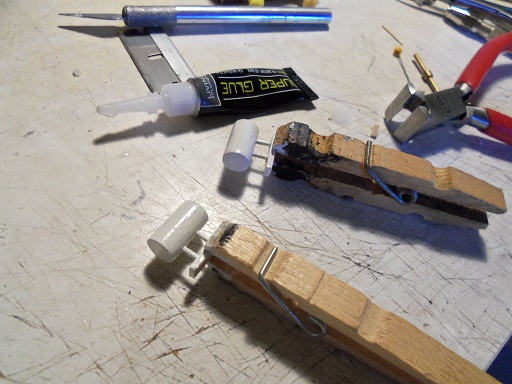
yesterday's update isn't very big......the roof asembly is almost finished though. I had assembled the radar and given it a coat of primer. I gave it the second coat. then the holes for it were drilled into the roof. when dry, it was cemented in place. next.....the last two ladders were assembled and sanded to shape. not sure I like how they look in the plans.......I may do something a little different with them I'm also going to do something with the part I had added to the gangway. there is to be only one pulley spool under the gangway, but I'm going to add both of them for what I want to do. I had cemented them in place, butI found that they aren't alike, so I am making another one......hoping I can get a pair that match. once I can get all this done........it will be time to set the first part of the trawl rig in place.


- 956 replies
-
- 11
-
-
- andrea gail
- trawler
- (and 1 more)
-
superb detail Kees!.........right down to the electrical conduits! I see you didn't post the picture you sent me...........is there to be a drum on the port side as well?
- 205 replies
-
- 1
-
-
- kw49 antje
- trawler
- (and 1 more)
-
thank you Bob and Frank.........the spot lights came out fine Frank........just a minor hiccup thank you Kees.......I hope you posted that picture you showed me in the PM........it looks so awesome!
- 956 replies
-
- 1
-
-
- andrea gail
- trawler
- (and 1 more)
-
thanks for the good word and the likes! I'm getting closer to the trawl rig placement.......I can't wait for that! Mark: that's why I was glad to see the black show thorugh somewhat on the cable.......a bit more texture. I have some tans........but I was also thinking about striating some copper on it.....might put a rusty look to it as well I don't want to get too heavy with the weathering though, i'm not an expert with it just yet. Marty: thanks for the tip......next time I'm at Hobby Lobby, I'll check it out. they have a very large glue selection. I've had that bottle of window maker for quite a long time now.......this is the first time it's ever failed me. Piet: I'm going to make the segment cuts a little wider.....but still at the same angle. the curve should be a more 'half circle' shape......these will come out looking like a candy cane..........a very weird idea is beginning to brew here {Holiday Harbor}.......best not to dwell on exestential thought
- 956 replies
-
- 5
-
-
- andrea gail
- trawler
- (and 1 more)
-
don't throw it away Kees.......here is how I decant paint from spray cans with hardly any mess at all https://wenzelswharftips.wordpress.com/2013/01/23/decanting-paint/ there is a good chance that there was a problem with the nozzle, and not the paint itself. then you can try the paint through an airbrush, to see if you have better control. good you were able to avert disaster....your doing such a superb job with this build! I just upgraded to windows 7....everything is so small! gotta go highlight the picture so I can drool over the detail!
- 205 replies
-
- 3
-
-
- kw49 antje
- trawler
- (and 1 more)
-
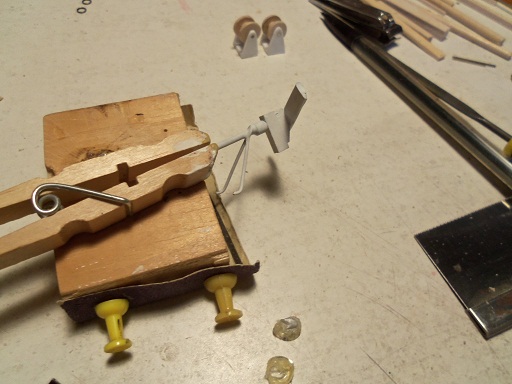
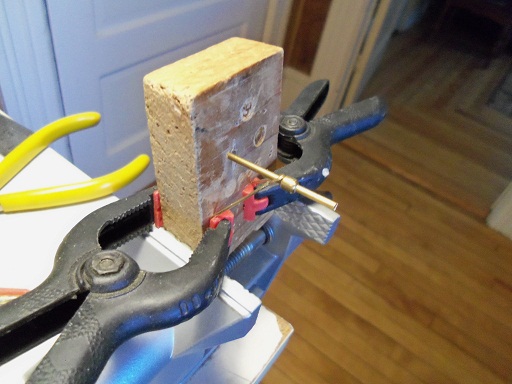
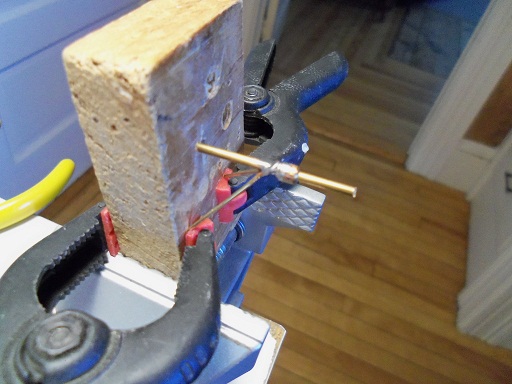
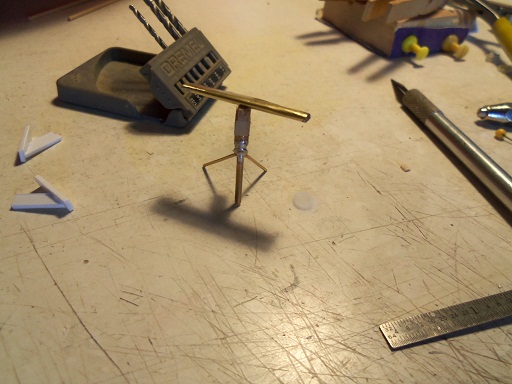
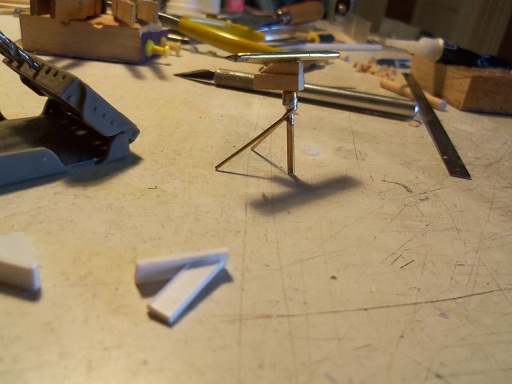
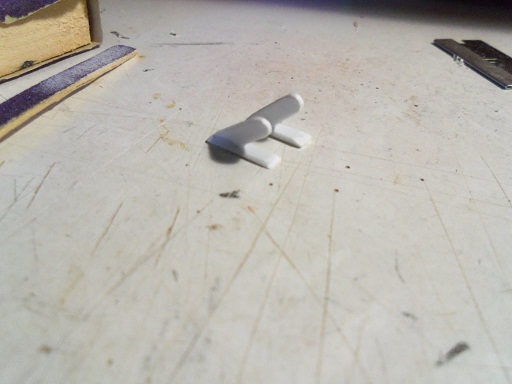
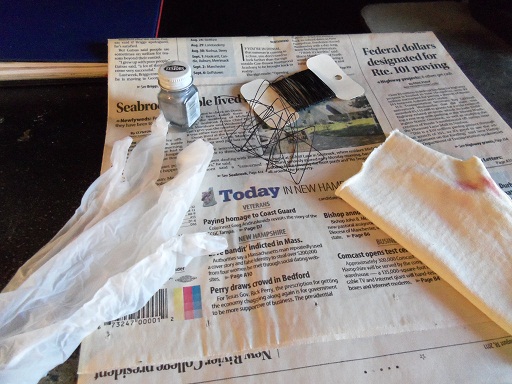
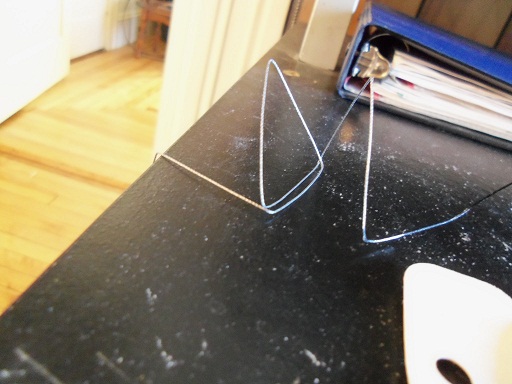
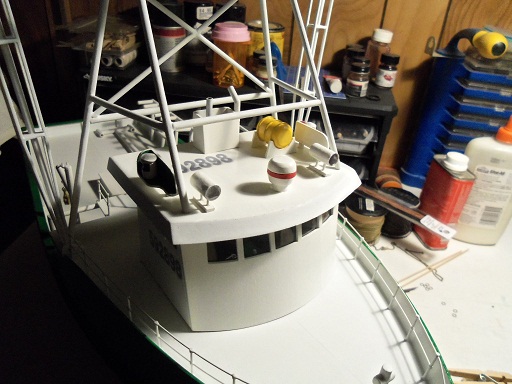
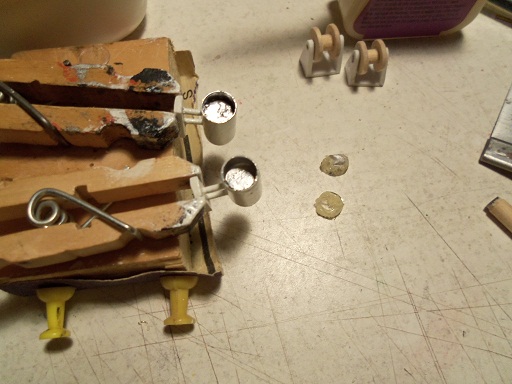
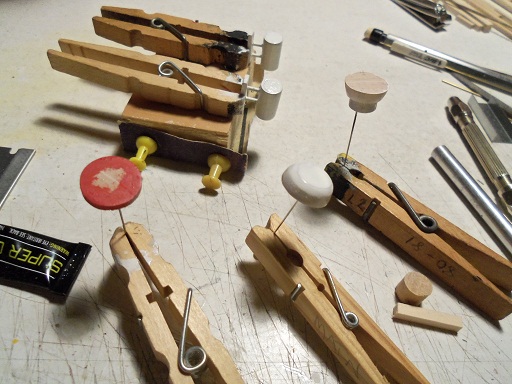
hi Frank.......the assessment of the lights is a bit premature.......but not to worry......I'll get 'em squared away yet! thanks for the good word anyway........here's the back up plan the cavities of the lights were touched up once again....readied for another go. since I can't use the window maker, I'll have to make the lenses from clear cello. 11/32 was the magic number to make them.......they were cut out, shaped, and cemented in place with the window maker. I had to get one to 'glare out' in order to show you. the last aspect I need to make for the roof, is the radar. you probably saw this piece of brass lying on the table from frame to frame.......a shaft with a collar fitted on it. it part of an old Billing's fitting. a pair of support rods needed to be soldered onto it. I set it up in the vice. ......and the rods were soldered on an upper control box was fitted onto the upper part of the shaft......made from wood. the radar head is a strip of brass flat stock that was bent around a dowel, shaping it. then it was solderd together, and a hole was drilled in the underside of it. it was then cemented on top of the assembly. the bracket you see in these last few pictures, still need to be shaped. I made a pair of them......they are to be the front support brackets for the stabilizer booms. all I need to do now, is drill the holes and paint them I was thinking about the support cables for the aft section of the trawl rig. I found the largest thread that would fit through the holes of those 'U' shaped shackles. it's black thread, and I'm going to wipe it down with silver paint. it came out well.......there is a hint of the black here and there. I will leave it like that. the lights are on the roof.......at last! .........and so is the GPS module the radar has gotten it's first coat of paint. I'll give it another, and then I can fit it into place. so far, I haven't had to drill any holes......for this assembly though, I will need to. so there you go........two days worth of playtime! the lights were an easy fix......the only real thing left, are those vents. they shouldn't be too hard to figure out more tomorrow!


- 956 replies
-
- 15
-
-
- andrea gail
- trawler
- (and 1 more)
-
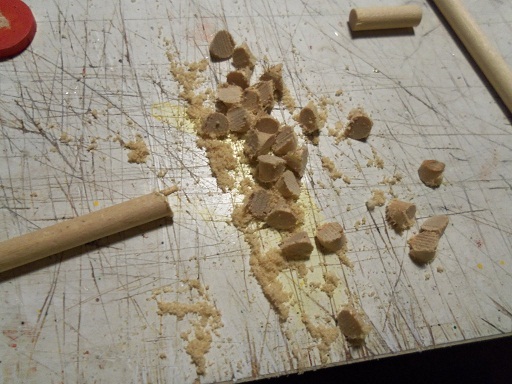
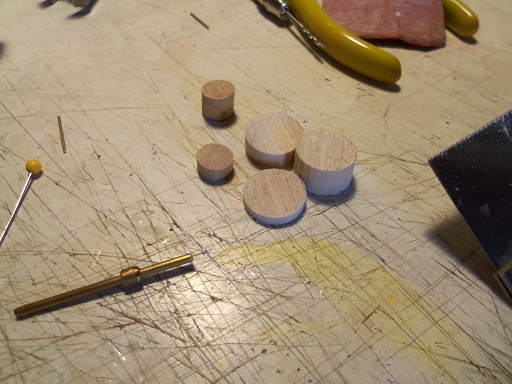
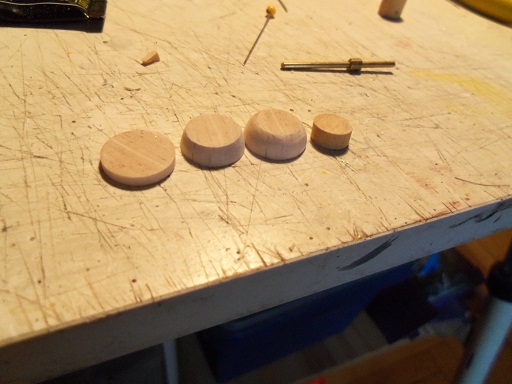
that was a lot quicker than with Vista........down and back up in no time! I also need to make vents for around the fore deck.......three of them. these are unlike the normal vents seen on larger ships......they look like nothing more than curved pipe. I had bought some hollow round styrene, but it's too large.....so, I'm going to do it from smaller size dowel. I cut a bunch of angled pieces......I put the puzzles together later during all this, I had filled the openings of the spot lights with window maker. enough time had passed......lets take a look.. ....... Oh........say it isn't so! the bubble broke in the middle! the other one?....... I'd say it gone from bad to worse...this is not good I guess the opening is too large a span for the maker to work! it's a good thing I have a backup plan........we'll get back to it later meanwhile.......back at the vents. I began to piece together the bit to form the curve.......I think I need to make them with just a little more length. I'll need to make some more.......I'm on the right track though, so that's a good thing. since the lights were a bust, I might as well get the window maker out of them, before it totally dries......at least I can salvage them. out of all this.....there was at least one small ray of light.......the orbcom GPS module

- 956 replies
-
- 16
-
-
- andrea gail
- trawler
- (and 1 more)
-
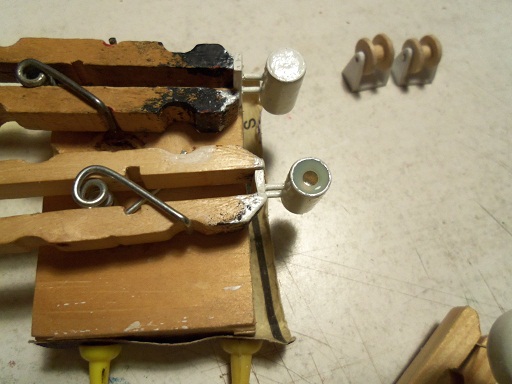
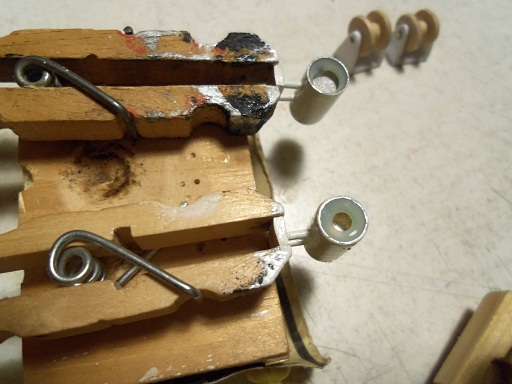
I would have had this update up sooner, but I got rid of Vista today. I upgraded to windows 7......so far it hasn't been too much of a problem getting use to it I did finally order.....and receive the update for the decal maker. once I install the whole thing, I can see how much of a change there is.......enabling the transparency function would be nice so now.....here I am with two updates. with the computer stuff going on, I tinkerd with the A.G.....more sub assemblies with this critter! yesterday, I began with the spot lights......painting the cavities with silver. I useda crappy brush though because I got some on the outside of the light body while the silver was drying......enough to sand off, I made the other pulley. once dry enough....the silver was sanded of and the bodies were repainted. more pieces of dowel was cut up......these still need to be shaped dowel is a tough wood to sand by hand.......cramped them like crazy doing it. here they are in their final shape. the base parts were assembled, as they are to be the same color........the restwere painted in respective colors I will be back in a bit.........more updates! I need to restart the computer

- 956 replies
-
- 12
-
-
- andrea gail
- trawler
- (and 1 more)
-
Cutty Sark by NenadM
popeye the sailor replied to NenadM's topic in - Build logs for subjects built 1851 - 1900
that will all touch up fine.........keep going!- 4,152 replies
-
- 2
-
-
- cutty sark
- tehnodidakta
- (and 1 more)