


popeye the sailor
-
Posts
16,007 -
Joined
-
Last visited
Content Type
Profiles
Forums
Gallery
Events
Everything posted by popeye the sailor
-
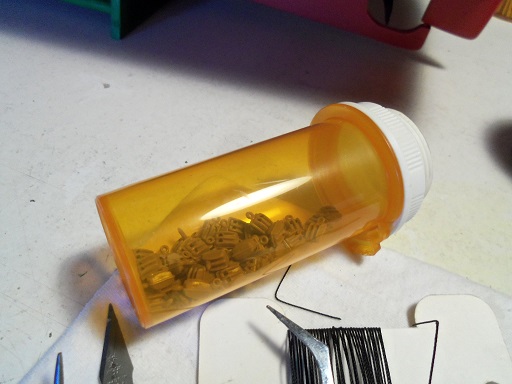
 yesterday was a slow day for me.......had to do some running around. it was frustrating, but it was worth it! I did manage to put the sway bar on the fore side of the boom. the chain on the aft side of the boom the counter weight chain was measured and cut for the starboard side. I will assemble the port side on the control panel. to keep it from dragging on the table, I slung it over the stanchion.......it will look better once I rig it with chain. I actually, am no different than other folks.....plastic blocks in kits .........well, in some kits, they really shouldn't be there. I have a good inventory of double blocks {I think these are 5 mm}......these are all I have left. I also have a decent inventory of wood blocks too, but I save those for the ships that would suit them better. believe it or not, I should order some of the plastic single blocks, since I have run out......I have one left. I have no idea where I got the dark brown ones, but the amount I had on hand, seemed to be the exact amount I needed for this build.....talk about karma while they may not be appealing to some, they do possess some interesting detail, and work well in the more modern F/V models. it's good that there is a use for them, so I will keep mining in my most natural resource.....the model kit
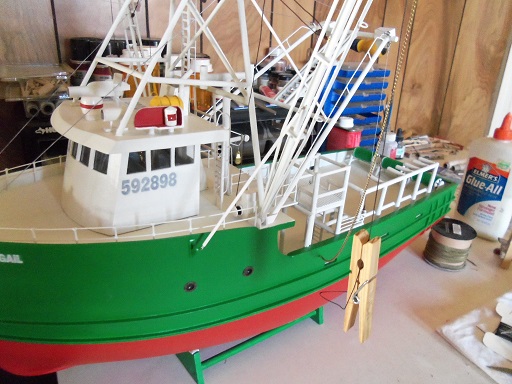
- 956 replies
-
- 13
-

-
- andrea gail
- trawler
- (and 1 more)
-
you are just 'too awesome' Carl thank you very much Gerty.........nice to see you looking in thank you Mark! the construction of these vessels present quite a challenge.......very fortunate for me, I had enough dowel to do it. there are at least four different sizes of dowel in this build. a good amount of it was done from memory, from what I read or studied from the two sets of Billing's plans. it's been a great exercise though....now, if I can just learn to come up with hulls, out of thin air, like other folks do
- 956 replies
-
- 6
-
-
- andrea gail
- trawler
- (and 1 more)
-
now.......aren't you glad I sent mine to you in a PM?!?!
-
she used to threaten me with the messy tables.........but she has come to the fact that it's the method of my madness
-
my tables are in the computer room.......the admiral has her desk in the corner.....and I pretty much have the rest of the room. she is disabled with back and shoulder problems, but she is not confined {I try like hell to keep her that way}. I would like to have a separate room, and keep the dust away from the electronics, but she won't have any of it.......says she won't see me as much. this is most likely true, with the way I model, but I like it as well. I have someone to talk to, and bounce my ideas off of. as for the dust.......it the really fine stuff......I do the major sanding out on the porch. yesterday, for fun, I wrote 'Popeye' on the monitor shelf on my desk........still waiting fro her to notice. yea....I know.....time for the total cleaning of my desk
-
I respect your comment Crackers...I can't guarantee.....but I will certainly keep it in mind. still can't wrap my head around it though.......a guy like me having a model in a museum. I'm not an expert or a shipwright. I do thank you for the humbling comment Wayne and George: thanks Wayne for the kind word those guys came to me like that! been very hard to put some meat on them bones. all I can do is keep them from thinking about existential thoughts.......{ Divinity series running gag} thanks Carl: of late.......we've spent more time taking Gibbs out to the field, than anything else the admiral has been lax....I have come to know the phrase "when you least expect it" .... contrast will come soon.....not sure what kind of detail I will add, but it will be colorful
- 956 replies
-
- 10
-
-
- andrea gail
- trawler
- (and 1 more)
-
I hear your plea Patrick.......I will try perhaps I had better pull the trigger on a case....... huh. I'm glad there isn't a punishment for cruelty to a model...I'd have three counts against me I'll see what I can do. {I'll even post a picture when I do } thanks Greg.......really appreciate it!
- 956 replies
-
- 2
-
-
- andrea gail
- trawler
- (and 1 more)
-
thanks again for your kind comments and likes. yepper! quite a lot done yesterday....but still more to go. thanks George......nope! jes' me..........and of course Chester and his small band of saw-bones {jes' thought I'd make you laugh} hey Matti.........nice of you to look in many reasons why I chose to do this one......the construction for one thing I've had this one on my mind though for quite a while.........feels good to finally have her on the table. I do have a few sailing ships on the roster......perhaps I'll see you there thanks for looking in my friend
- 956 replies
-
- 14
-
-
- andrea gail
- trawler
- (and 1 more)
-
congrats to you Jerry...........sadly, you and J left me in the dust at least I can take solace in the fact that when I pick back up on the Half Moon, I'll have plenty of completed logs to browse through. you did a super fine job on her.....very glad to have followed your log! Denis >Popeye<
-
I built my Cutty {the second one} before I got into wooden ships. if I knew then what I know now, I might not have used the plastic ones. I still have the United States.......perhaps I can find redemption. your doing alright......there should be four jib sails though...perhaps a spacing issue? well....no matter! you build her as you see her..well, blows me down! maybe that's how she beat the Cutty........snuck a jib on her when she wasn't looking
-
very nice texture...like it even better
-
Gibbs {our American Eskimo} is my lil' buddy {should have named him Gilligan} he hangs around me as well, even choosing to lay under my desk while I'm at the computer. I gotten to the point where I have to look before I move my feet! feel bad when I don't you've got amazing luck Danny
-
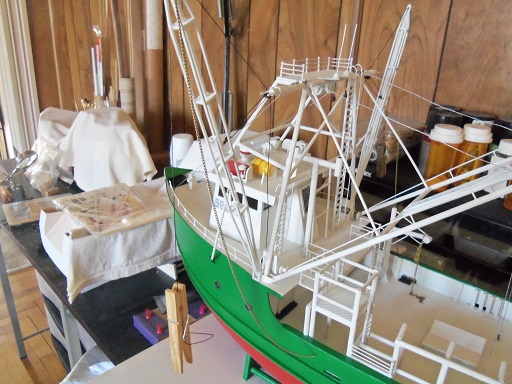
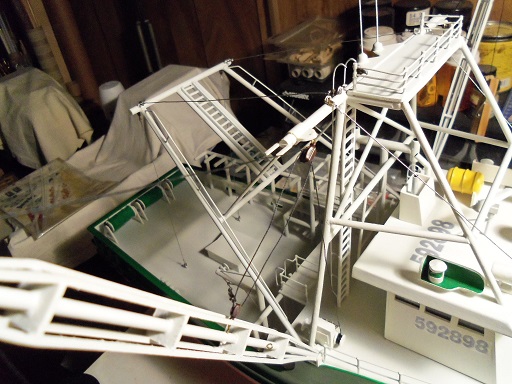
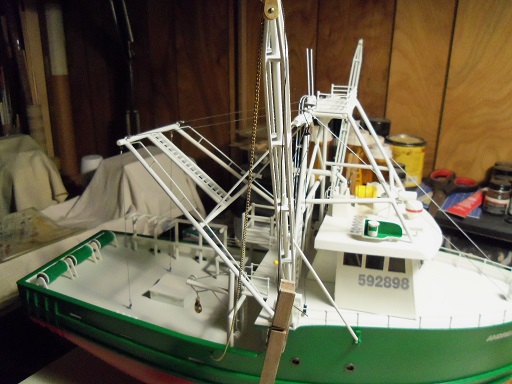
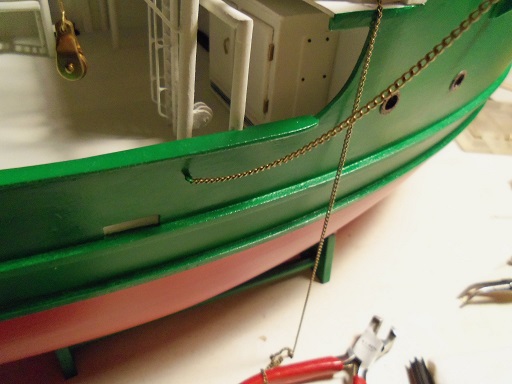
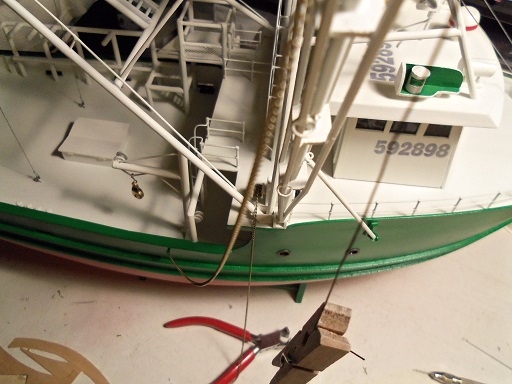
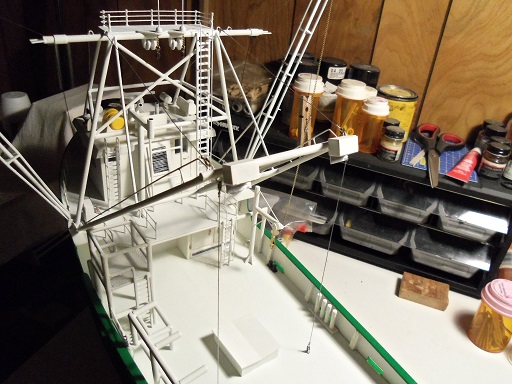
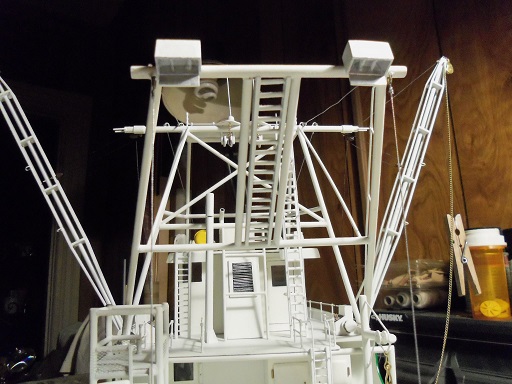
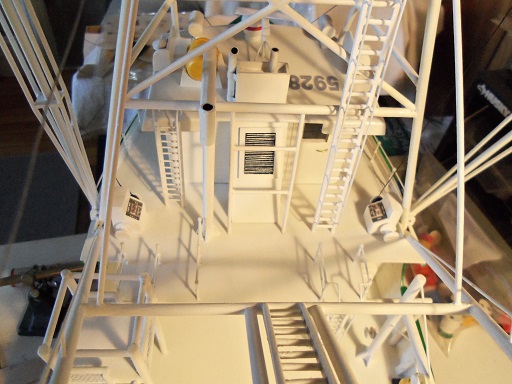
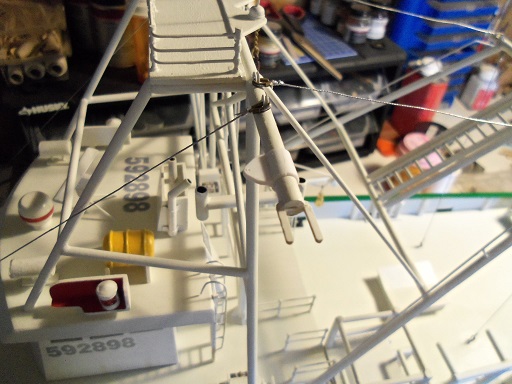
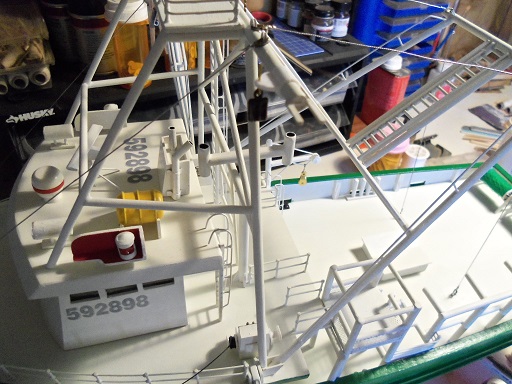
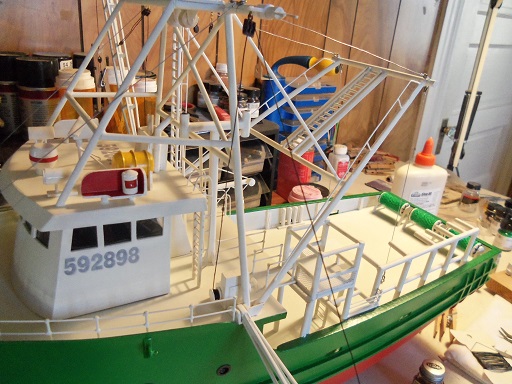
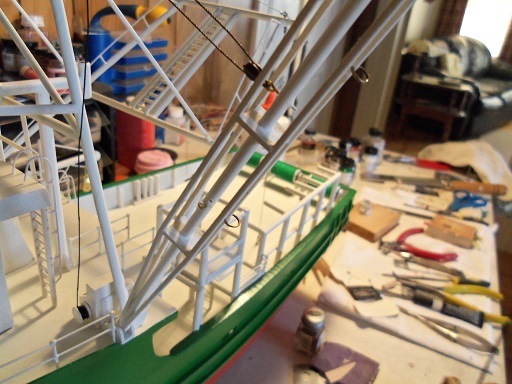
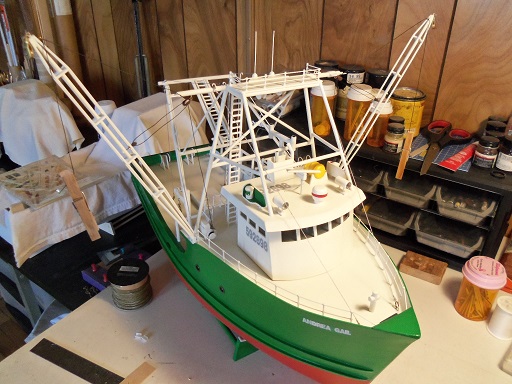
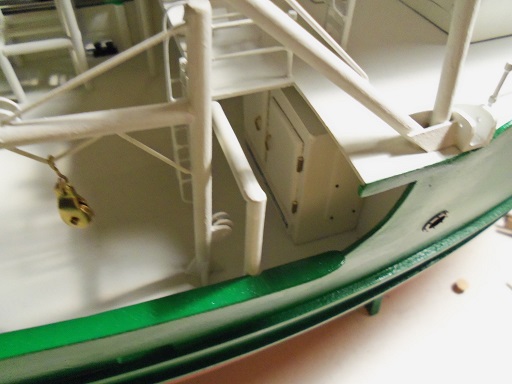
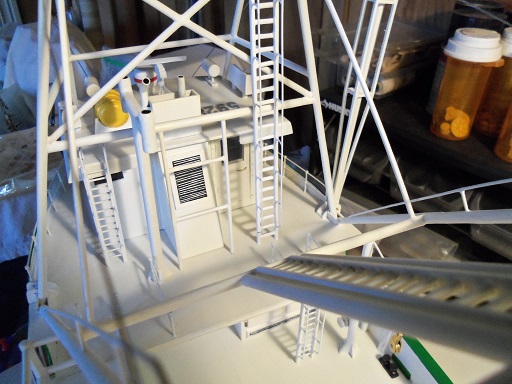
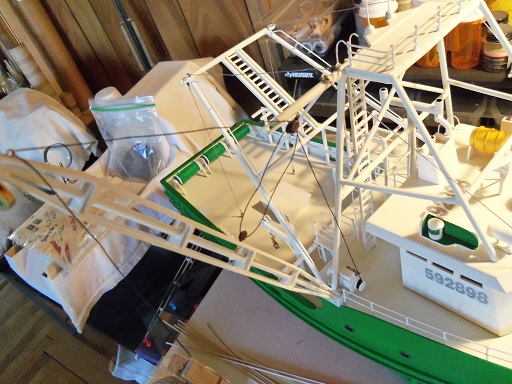
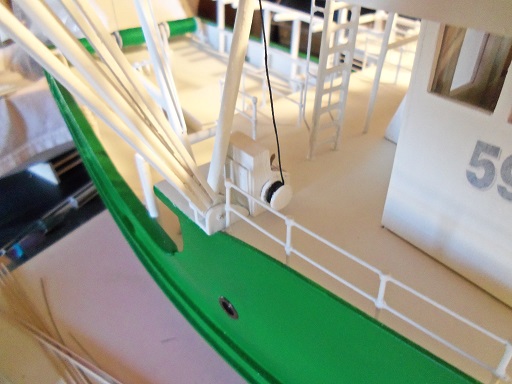
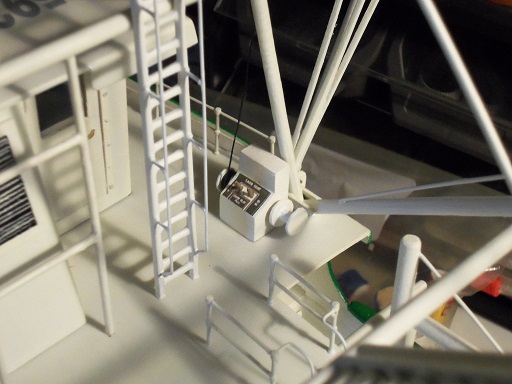
turning the model around, the rigging was redone, and went even beyond that! the bracket and eye bolt was installed. after given time to dry, the rigging was brought back into the picture. the sway bar bracket was added and painted. the sway bar was added in this picture........but the aft sway bar {chain} was added as well. notice how it hangs limp, as the boom is in the retracted stage. when fully deployed, this slack goes away and becomes a ridged counter for sway. this 'bar' is a good example of the radius that the boom has in it's travel.......at this point, the forward sway bar does most of the work. the hull fitting the boom fitting the counter weight chain 'eye' brackets were added. the path the chain will be routed can also be seen here. I used a long pin to stake the chain on the pulley, on the control panel, and cemented in place. the runout was set up the same as the boom rigging......from the deck side. the spotlights were ready to go, and they were cemented in place on the aft top bar. the last thing I did.....was a spur of the moment thing. that air horn, visibly seen after I had made it, was making me crazy. I don't want to let you down Piet.......I hope you can see this from where you are, but I refined it as promised. I still have a bit more painting to go on it......undecided to leave parts brass, or paint them copper. but, it will be trimmed and placed on the roof. even though it's not in the Billing's plans, it's a great idea.....too great an idea to pass up. thank you Piet for your suggestion

- 956 replies
-
- 15
-
-
- andrea gail
- trawler
- (and 1 more)
-
thanks everyone for the kind comments and the likes this bit of progress moved rather fast......once the brackets were made, they solved the problem, and the rest was sheer play time Patrick and George: I wish I did have a case ready for her...trouble is I haven't. I have three others that I have done, that are in boxes in my hallway closet. I don't want them getting dusty......a case has been on my mind for a while now. the admiral and I have been looking though.......we've seen a few tall glass cabinet style cases......should bite the bullet and buy one. checked into making one as well..........the cost of plexi-glass is astounding :o the 'birds' will be partially deployed {perhaps an inch or so from the yokes}, so the rigging will be more pronounce. the yokes are very fragile.......I should have perhaps made them from brass..........they've broken and I've had to fix them. I still haven't terminated the rigging though, so if I later decide not to do it, I can, the yokes fit in the boom frame, but it is a snug fit. I do like them off the mark though..........jury's still out on it we're not done yet.........still a bit more to go. I have another update......yesterday was one busy day
- 956 replies
-
- 7
-
-
- andrea gail
- trawler
- (and 1 more)
-
engine looks awesome Michael! a belated on your 20th.....glad to hear your admiral is doing well
-
Cutty Sark by NenadM
popeye the sailor replied to NenadM's topic in - Build logs for subjects built 1851 - 1900
i was referring to the two lockers that sit on each side of the main deck, before the fore deck...tall skinny lockers. Revell made no effort to include a pig pen or paint locker in their kit. I did do something with the windlass and anchor chain...the kit calls for using three pieces of chain.....I used two by drilling a couple holes under the fore deck, and two more holes covered by the chain gates. I'm sure you'll get to this step soon no mowing here yet {thank goodness}.........the snow has finally disappeared!- 4,152 replies
-
- 3
-
-
- cutty sark
- tehnodidakta
- (and 1 more)
-
nice deck planking.......really like how the bow is shaping up
- 745 replies
-
- 1
-
-
- francis pritt
- mission ship
- (and 1 more)
-
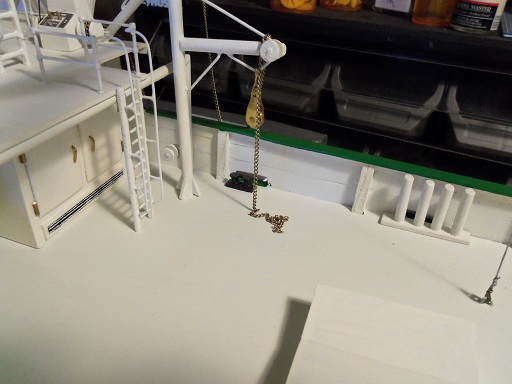
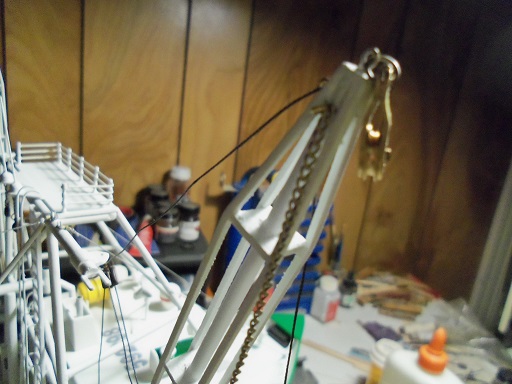
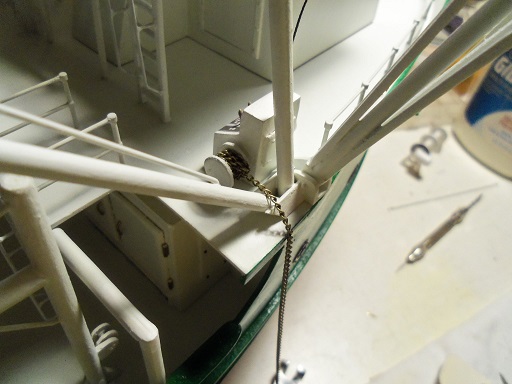
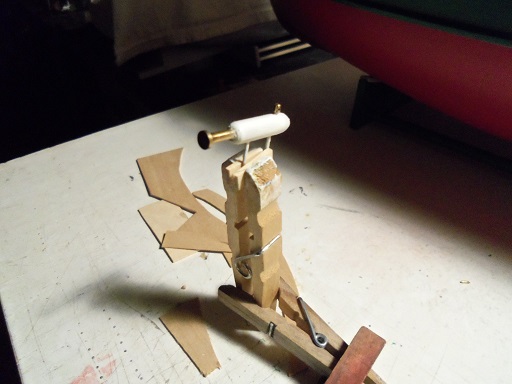
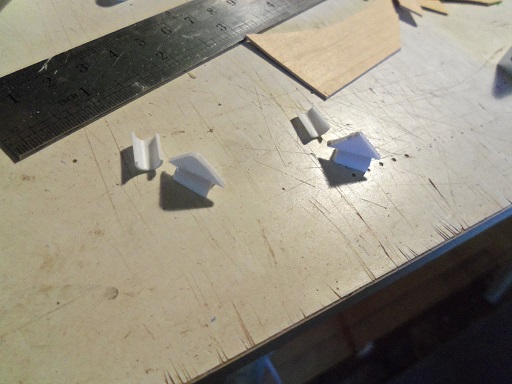
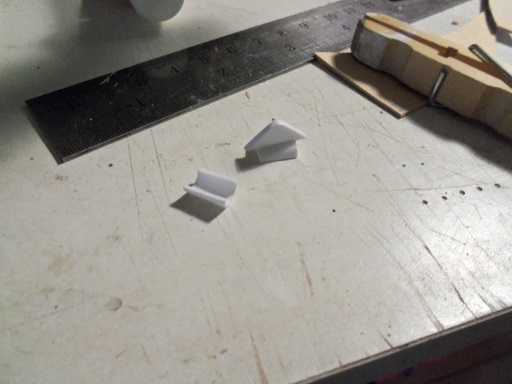
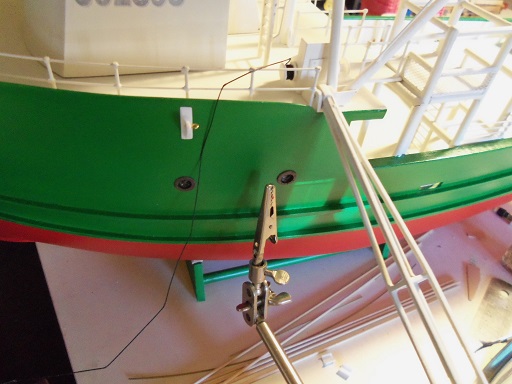
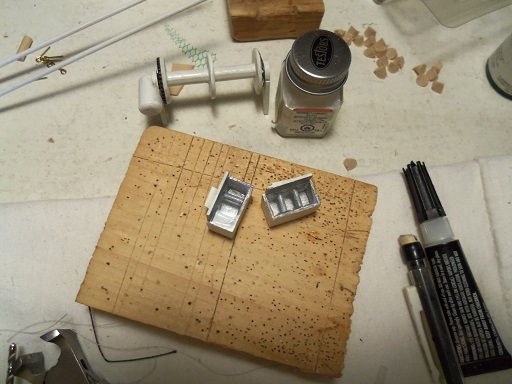
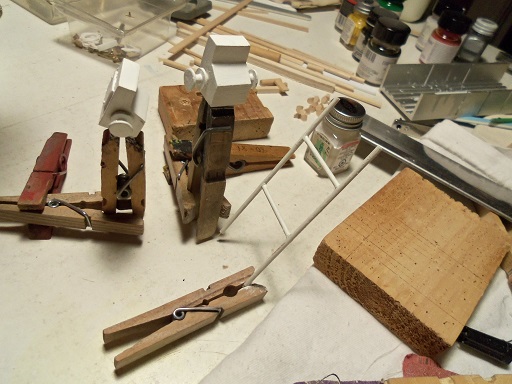
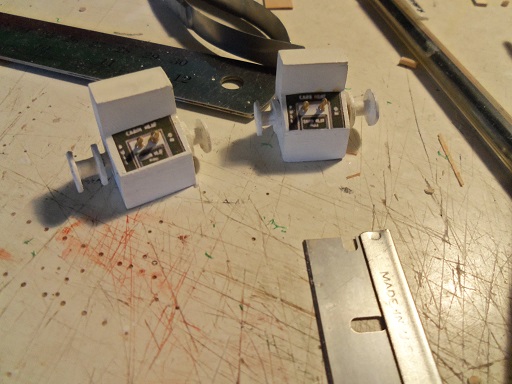
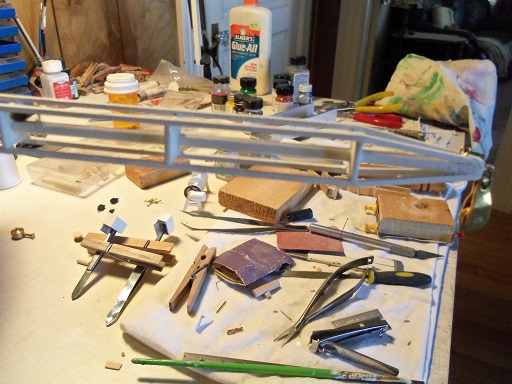
thanks John...... so anyway......now that I have my mind straight.......it needs to be forward......the counter weight reel is aft. basically, my original idea is good, just that the telemetry is a bit off. to avoid having the termination line hinder on the top bar, the double block needs to be in a more forward position. I was looking at the aft spotlights, doing some touch ups, when the thought came to me......a bracket. two more pieces of the styrene tubing were cut......actually four, but whose counting these were cleaned, sanded square, and cut in half. a couple triangular pieces of styrene was cut from the flat stock strip, I had cut earlier. glued to one half of the tubing.......these were roughed out. they need to be trimmed and rounded. while they were drying, the other control panel was threaded and made ready to cement into place on the deck. this time I made it a point to hang a clothes pin to the end and let it hang......in order to get the memory out of the thread. there was some serious kinking being on that flat card it comes on. then, in checking them and finding that they were dry enough, I took the first one and shaped it. a hole was drilled for the eye bolt. I started to work on this one. the other one is already on the bar by this time. the other half was cemented in place to complete the bracket. the spotlights will be done in the same manner......I had cut them with a razor blade, so there was no material loss, and no gap would be seen. given a light sanding, it isn't noticeable at all. the eye bolt and double block was fitted in place. I mentioned those other brackets for the stabilizer booms. I guess you could call them sway bars.....this bar will arrest the boom, to keep it in a equal arc as it is deployed, and prevent sway fore or aft. there is one for the aft side.....it is chain, but it isn't critical........I'll show this later. the forward sway bar does most of the work. the port side is cemented in place. since I plan to have them deployed, not connected to the yokes, I cut the bars to what I figured was reasonable. I would have had to do some figuring to come up with the correct radius........these will do eye bolts have been added to one end. I'll have to watch how much of this dowel I use........or I'll end up getting more for the buoys the spotlights were touched up......even added a touch of flat white to the florescent tubes......mixing it around to activate the silver, mixing it together. after a pair of eye bolts were added to the other end of the bars, they were painted flat white. when the control panel was dry, it was rigged through the double block.........clamping the clothes pin on again, because I added more to the length of the thread. the sway bar bracket was painted green at this time as well. it was time to add the clear cello to the spotlights, completing their assembly. I also thought about the counter weight rigging........this too needed some sort of bracketing to prevent the chain from sagging. taking two of those rings, shown earlier, they were spread out far enough, to clamp on the boom's outer framework at different places. two did the trick. an eye bolt was added as well for the sway bar attachment. so.......both booms are permanently attached to the model now. how they are deployed is the way she will look. now I need to turn her around and duplicate what I did on the port side. the addition of the double block bracket was a success, there is no more hindrance...the rigging is free.

- 956 replies
-
- 13
-
-
- andrea gail
- trawler
- (and 1 more)
-
thanks Mark, Carl, and Bob...........oh, yes....still more to go. forget what I said earlier about the positioning.......sometimes I don't know which side my pulley's at....hee...hee......... my second idea in rigging this is working out better than I thought. it looks even better too perhaps I can show you......give me a moment thanks again for the good word and the likes!
- 956 replies
-
- 3
-
-
- andrea gail
- trawler
- (and 1 more)
-
OMG........on such a tiny spectacle! the vane looks so cool!.........dresses the mast up in a big way
-
thanks Frank! kinda makes me look like I know something.......huh!!! thanks for the good word!
- 956 replies
-
- 1
-
-
- andrea gail
- trawler
- (and 1 more)
-
thanks for the kind comments and likes.......and a warm welcome Jack...glad to see new faces looking in. not totally positive as to how these are rigged, but the pictures do show lines governing these particular points on the booms. for all I know, these could have been separate lines, but this type of rigging assembly combines the two together. it does show functionality, and that, is of course what I was shooting for. I might have to amend what I said earlier though......I'll have to place the double block aft of the yoke. if I go forward, it may interfere with the counter weight, and this will be rigged with chain. since this seems to be a step in the right direction, the other aspect should be toyed with......the alignment of the booms. they tend to swing aft, most likely due to not taking the curve of the hull into perspective, in the positioning on the boom brackets. I'll get into this later when I make more progress. thanks again for the comments, likes and for looking in......I raise a glass.....or, even a boom...in your honor!
- 956 replies
-
- 4
-
-
- andrea gail
- trawler
- (and 1 more)
-
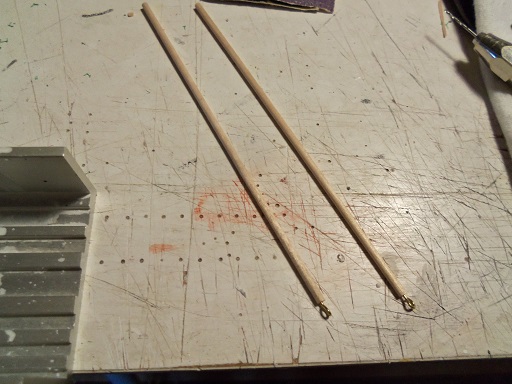
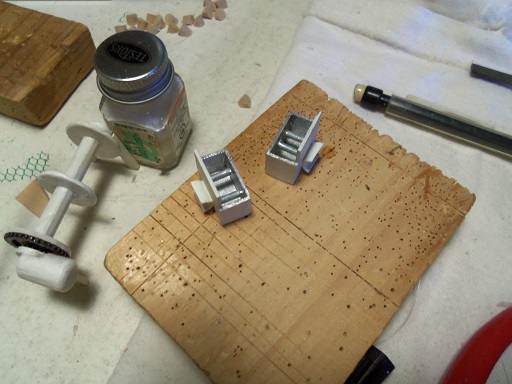
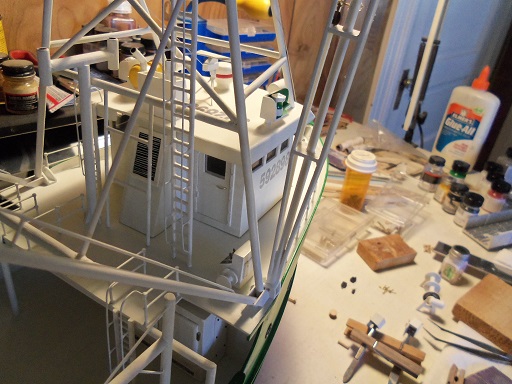
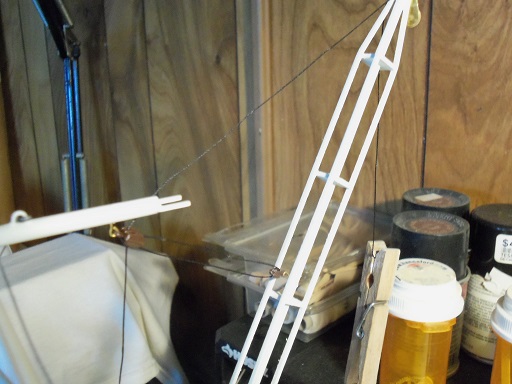
I'm officially on vacation off to a slow start though.......Tuesday was an errand day, ran a few of those and surveyed the yards......the plow guy did a number on the back yard. it's not my problem.....I should let the landlord handle it, but he'd do a crappy job....that I am sure of ! I can wait on it....there is still a small mound of snow and Ice that needs to go away I did manage to do a small bit on Andrea, but it was not enough to even mention. yesterday proved to be the better day, I did a lot more the frame work that needs to go under the first part of the trawl rig was where I had left off.....Tuesday was mostly fitting it in place. before I get to it though.......I recall a problem that was mentioned. I believe it was Mobbsie, that pointed out what looked like a small crack in the starboard side stanchion for the fore deck. I took care of it my friend......I didn't forget about it. thanks for pointing it out to me ...now for that piece of framework........ after fitting it, it was touched up with flat white. it was then cemented in place. seen in the picture.....is the starboard side stabilizer boom......pinned and cemented in place. the main objective here, is to figure how to rig them, so the lines don't hinder anywhere. this is tough, because the telemetry seems a bit off....and with no real plans to work with, the problem is compounded. going into the collection of older decals I made, I chose the ones that I will use for the control panel face. for the levers, I used some belaying pins, which Billing's supplies in their kits. dry fitting it in place.......the reel on the bow side will be deployment reel. the one on the aft side will be for the anchor weight {counter weight, would be a better name}. the pulley {block} assembly for this will need to be high up, but no higher than the top bar. I will use a double and a single block for this assembly. the single block will be located just below the contact point of the yoke, where it rests when not in use. an eye bolt will be located at the tip of the boom for a line to widen the weight distribution of the rigging. sorry for the background being so busy, here on the table. you may have to look close. the double block.......the dilemma.........where to position it. I can't put it on any of the side frames.......it would be too far aft, and it would want to pull it aftward. there are the guide bars that I need to add later {those other brackets I made}, and that will pull them forward, to align them with the yoke. I decided to put the double block just under the top bar, behind the yoke. it imitates a peak halyard, to sum it up in a nutshell. I like the way it looks, but the upper line going to the eye bolt, is hindered by the top bar and yoke. I will try something different with the port side, and if it works better, I can adjust the starboard side. I won't need to change where the control panel is.......this is the most logical spot for it. clearly, the problem is here. looking at it at this point, I may have to relocate the double block to the forward side of this anchor point. we shall see

- 956 replies
-
- 15
-
-
- andrea gail
- trawler
- (and 1 more)
-
Cutty Sark by NenadM
popeye the sailor replied to NenadM's topic in - Build logs for subjects built 1851 - 1900
nicely done Nenad! you could move the lockers a bit closer and hide them........but I would think the cages were removable, so they could be cleaned...especially the pig pen. I can just hear the sailor {tasked with the job} now......."I'm not gonna crouch down there to clean that!" as for those lockers, Revell called them sail lockers in their instructions. there are some 39 sails that fit the Cutty.......I'm in doubt that they would all fit in them. they could be a utility locker......or possibly even the heads. perhaps someone can clear this up...... have fun with the windlass.........let the spice flow!- 4,152 replies
-
- 4
-
-
- cutty sark
- tehnodidakta
- (and 1 more)
-
a friend of mine told me about this method.......I really haven't had the reason to try it yet. it works well. Bill Nye would be proud of you.......very well done!
- 205 replies
-
- 2
-
-
- kw49 antje
- trawler
- (and 1 more)
