


popeye the sailor
-
Posts
15,993 -
Joined
-
Last visited
Content Type
Profiles
Forums
Gallery
Events
Posts posted by popeye the sailor
-
-
-
she may surprise you Jerry......we have quite a few accomplished female builders here. wouldn't it be cool to add her name to the list!
you've done better than I have......my admiral will have nothing to do with the hobby.......she won't even do my sails for me. she tells me that there is room for only ONE crazy person in the house
 I'll look forward in seeing the start of her build.......has she got a user name yet?
 -
never be afraid to show progress......we do it all the time. it's amazing to see a step so disheveled........then to see it finally cleaned up with the fitted parts. part of the territory.......the grand scheme of things to come. I always look at it this way........"it may look like crap now...but just wait till you see it when I'm done!" you are a man of method Nenad......never be afraid to show it
what the heck!!!! you mean to tell me you didn't see any snow this year! if you were a real estate agent.....I think you would have me sold!
-
very nice updates Patrick.........the winches will look great when seen in application
that, I think id the big difference between kit and scratch.......kits yield a bare bones build with a little added detail, but the scratch builder sees so much more. if the detail can be seen with the naked eye, then it can be added.......and makes the build more more appealing. very nice work! -
-
looking super Kees......when all the sub assemblies are in place on the deck.....it's gonna look great!

-
decals do have their limits Nenad........what would look as though it's paint, they can be the answer. but, if it's raised detail and paint, then they are useless. color isn't really an issue.....unless they are metallic. ink jet printing draws the line there.......it is possible to get the color, but it lacks the shimmer. what you've done is emphasize both of these aspects........very nice indeed!
good to have the opening at the bottom of the gammoning.....you may need it. I believe those are called bob stays.......they will pass through the Martingale and terminate at the tip of the bow spirit boom. the Cutty has such beautiful bow rigging! nice work!
-
two comments Carl.........I can combine them
the admiral is very understanding about my hobby......for her to allow my mess to be in the computer room, is a testament to this. a lot of time I drive HER nuts.......she never knows what we're looking for, when we're out on one of my scavenger hunts thanks all for the kind comments and those who hit the like button......still quite a bit to go yet
I'll have to check on that Crackers.....I'm still working on the George Clooney angle for Frank! 
Patrick.....sadly no about the LED. could be done though........quite easily
-
-
I did get a little done on Friday.........added the supports to the base of the vent
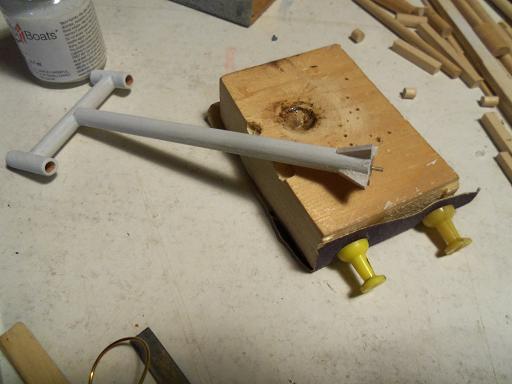
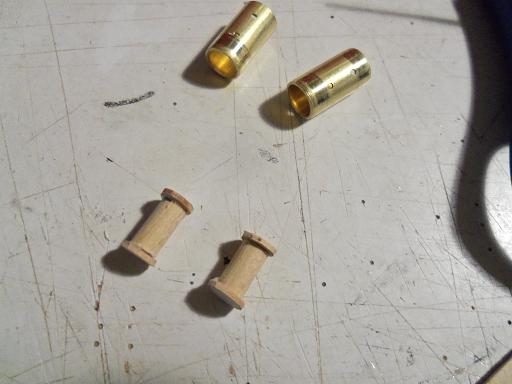
this is the makings of the pulley that will be added for the trawl rig. there is only one.....but I might make the other one too.

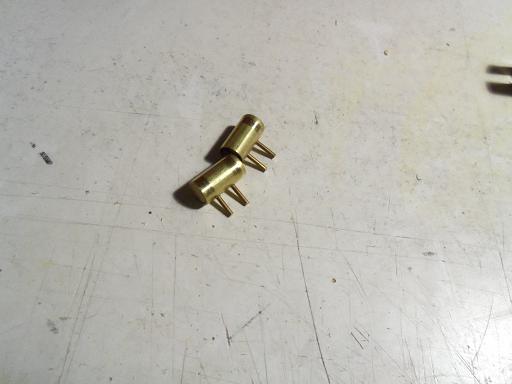
posts were cemented into the bottom of the lights
this is the finished pulley
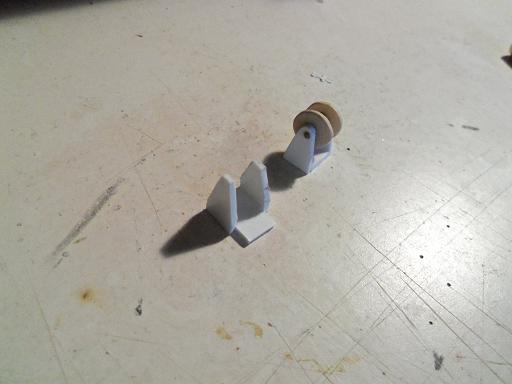
a base was added to the lights......may even aide in locating them
the pulleys were fastened to the ends of the birds. I took these pictures for a friend of mine at work
- Mirabell61, mikegerber, hexnut and 16 others
-
 19
19
-
-
-
thanks Carl......shucks man......I ain't special
I'm just the nut on the other end with too much imagination. keep on thinking free! I forgot to mention......I got the decal maker update yesterday. darn thing looks like an add-on! I'll have to install it and see
thanks to all who hit the like button I have a bit more progress to show.....but it will have to wait till tonight........the work week beckons 
-
thanks Michael......I saw that you commented before I posted the recent update. kind of you to say.....I appreciate it
thanks Augie! I'm still shaking my head......I'm just as amazed as you are
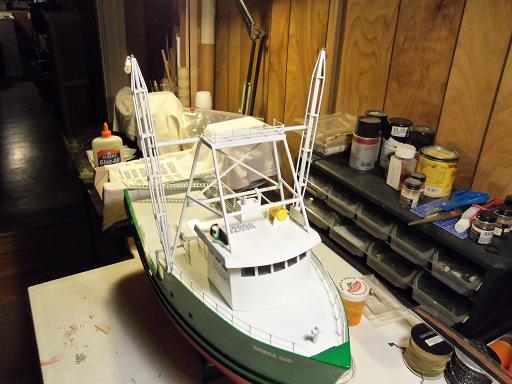
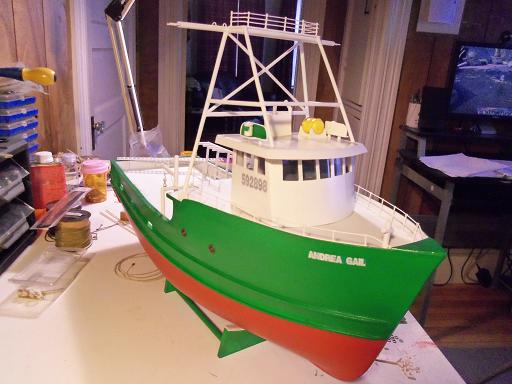
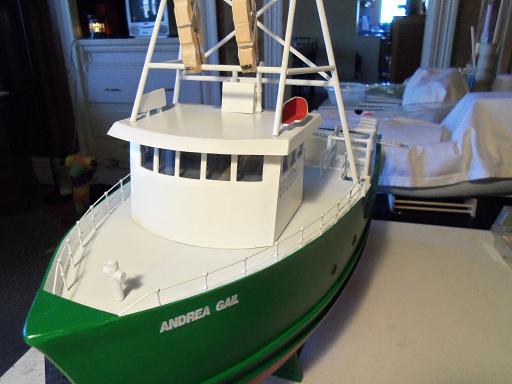
it was a thought when I assembled the Boulogne hull frame, and emphasized when I was done planking her....... you would never have thought that the hull I created the A.G. from, looked like this in the beginning 
while I'm here, I want to thank all who hit the like button. I see a couple new folks looking in......I welcome you......and appreciate your looking in
enjoy!- cog, IgorSky, Mirabell61 and 8 others
-
11
-
I've been following Stewart's log.......man....I am so green with envy. I've done quite a few Billing's kits......I've learned how to read between the lines
I like Billing's......I just use the instructions for reference. both the Warrior and the Titanic are two fine additions to the Billing's line up.......the price tag scares me though. I'd love to get a copy of the plan.........I'm doing a scratch build right now and using an instruction sheet {s} to do it.......working out pretty good I like the way your doing the planking......pretty neat way! I agree......looks like quite a span between ribs
-
windlass looks super.......never seen one with so much detail to it
I wouldn't feel bad about the planking.......you have the chance to paint first very nice progress......your having fun! -
holy cow! she's looking awesome Patrick
how far does the mast root go down? still can't get over the shine.....what paint is that? I have some of the Billing's paint {I usually use Model Master}, and the black gives equally a good shine. I did Keaton's Batmobile a while ago.......and I ended up having to dull the shine not to worry.......just saying that there are some things in this world that don't deserve a shine as what you've done.....it's really nice did you use an airbrush? -
-
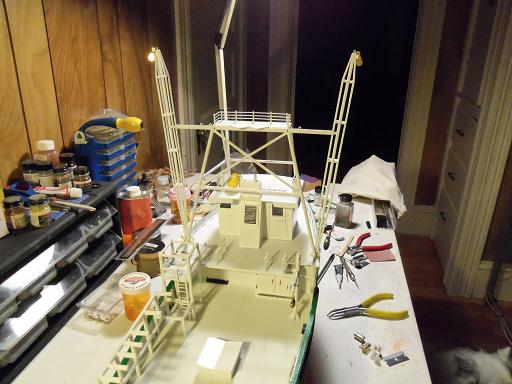
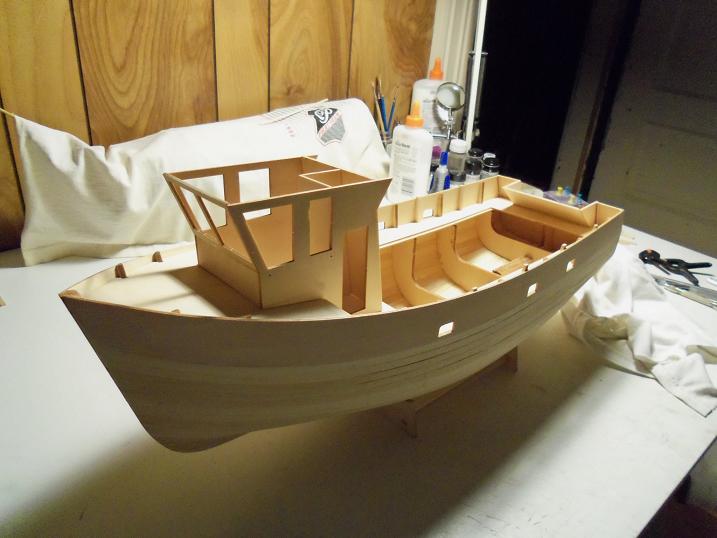
the roof work has begun.......this is quite an assembly. there are several parts to the assembly....I have already placed the funnel addition. the light boxes are next to be cemented in place.
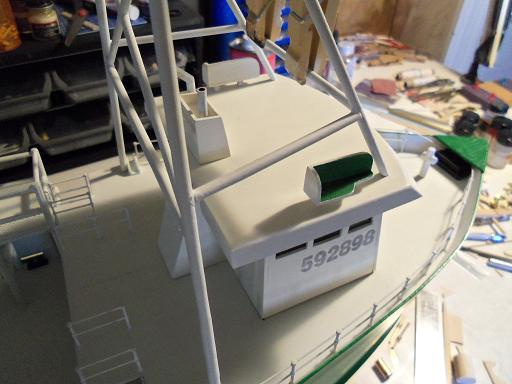
the raft locker was next.......once it was in place, I could see the space to add in the number decal.
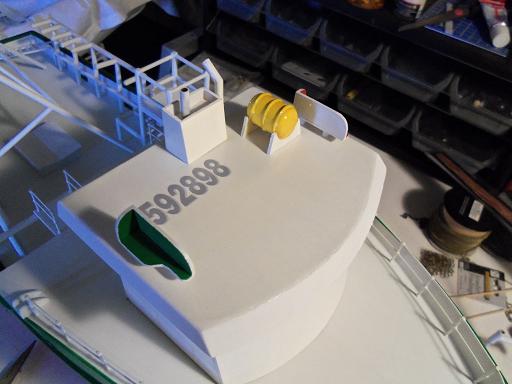
now that the boxes are firmly in place, the lights were set in place.
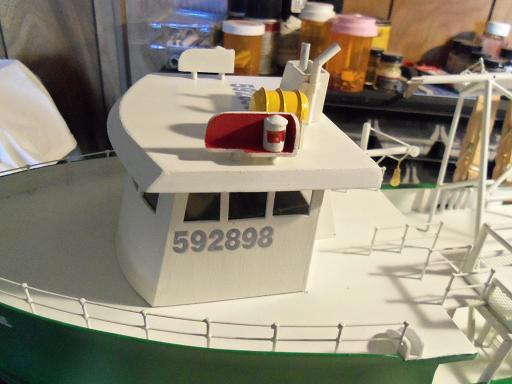

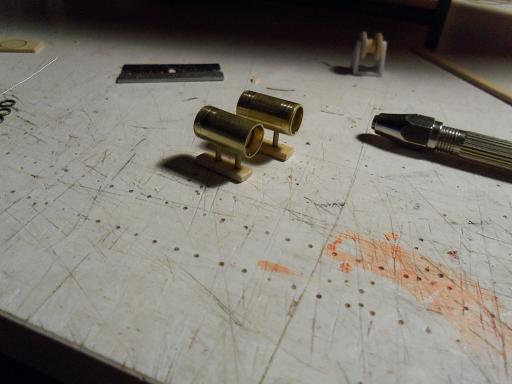
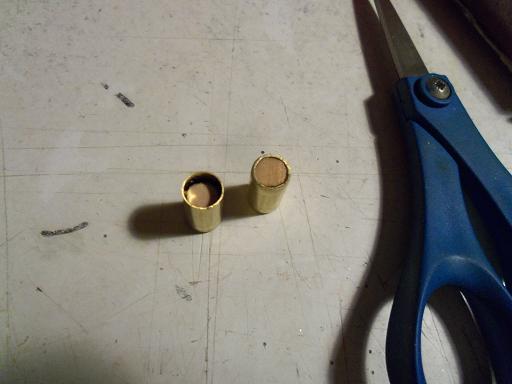
there are three more aspects that need to be added to the assembly. the next parts to be made are the spot lights.........there are two of these and will locate facing the front of the roof. I have one light kit that Billing's includes in their kits.......but it doesn't help having only one of them, and as I promised Piet, I was going to try and scratch build the parts I need for this build, as much as I can. I had purchased a larger brass tube for this, and cut a pair to the desired length. two holes were drilled in what will be the bottom of the lights for the attachment posts {I may make them larger}. to close up the back end, I had cut some more of those circles. this led to how I was going to set the scene for the lense end.
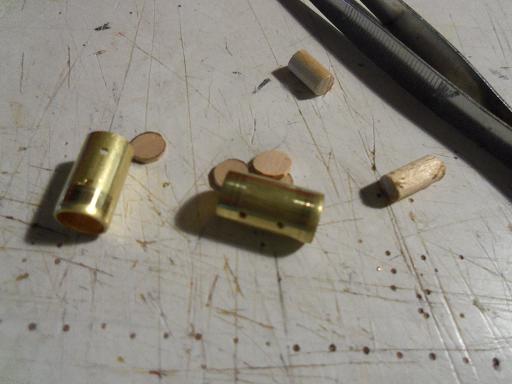
you see the two short pieces of dowel.....they are to be the spacers for the 'back plate' and the 'light plate'. the circles were cemented onto the ends of the dowels, to create a sort of 'packing'.
the end that is even the most will be the end that will be the back of the light body. I coated it with CA to get rid of the wood grain. the other end will look recessed into the light......this will give the impression of the 'light bulb' I will wait till I have the pictures to show, to tell you more.
I would have gotten this done last night, but I promised Gibbs that we would have TV time. I put him off the night before......couldn't see to do it again
you really need to see how all this goes down.....he has such an adamant disposition. he'll sit by me computer and give me 'lip service'......grunts and groans, with the most determined eyes. I ask him "whadya wanna do?", and he bee-lines it for the living room, pausing at the doorway to see if I am following him. if not, he repeats until he gets his way. when in there and I turn on the TV, he'll either lay on the floor with one of his chewies, or he'll get on the couch with me.......or he'll end up there eventually, and sooner or later, he'll end up laying against me. of course....I can't help but rub his head, or stroke his fur. it melts me when he looks up with eyes of bliss........you know that he is where he wants to be......and his human counterpart has bent to his will, once again.may seem strange that I mention this.......not much bearing on the model itself......but it sheds more light into the modeler himself....or herself. I think the identity of the modeler is just as important, and the mindset that goes along with this hobby.
- avsjerome2003, cog, Omega1234 and 11 others
-
14
-
again....thank you so much for the fine comments and likes! I may be a tad over scale with the lights and boxes though.....but for my first time making the lights......they are in scale with each other. I'll use them anyway....really pleased how they came out
I may warn you......what looks like I'm on another 'parts addition rampage'.........I'm actually doing the roof assembly kees: I did the same thing, when I decided to try my hand at making the boxes. most kits I find, have less than desirable ones. your so detail oriented though......I think your putting me on
I really like your work my friend........I'm studying it quite closely your work with styrene is fantastic......I'm beginning to think that integrating plastic and wood, may not be such a 'big bad wolf' after all Patrick: I love taking pictures of my builds.......I hardly ever did it in the past....and I regretted it. at the end of each build, I count the pictures......pretty staggering when you see the final number. looking at other builds....I see pictures that catch the imagination....and I sit there, studying the detail.....caught in the blink of the eye. yours is no different
I thank you for following along...glad your enjoying the build. perhaps the next update will produce a new 'diamond in the rough'.- qwerty2008, Omega1234, Piet and 3 others
-
6
-
awesome name plates Nenad! you are doing a splendid job on the trail boards and stuff......looks better than decals!
- GLakie, CaptainSteve and NenadM
-
3
-
thank you Nils and george! it won't be whipped cream and nuts, but I'll try to keep that sweet tooth of yours in check
I'm done getting caught up..........now off to the table!
- GLakie, Omega1234 and Mirabell61
-
3
-
the Scharnhorst isn't finished yet?????.........is it? hope to see more of your superb workmanship soon
glad to hear you'll be back soon! -


HALF MOON By Jerry - FINISHED - Corel Scale - 1:50
in - Kit build logs for subjects built from 1501 - 1750
Posted
can't read it either........although I have done a few Heller kit, and I had to translate them too! it must be a daunting task though to distribute kit in the language folks are accustomed to.......glad to hear your able to get an English set of instructions.
my admiral helps out wherever she can........she love to go on my scavenger hunts with me, and is very good in the common sense dept, helping me rationalize some of my ideas. she never balks at what I do.......she loves the boats and like to see how they look as I build them. she likes the wood over plastic....but for whatever reason, the last two kits she's picked out for me, have been plastic.
I'll look forward in seeing 'Olive' on the site