
HOLIDAY DONATION DRIVE - SUPPORT MSW - DO YOUR PART TO KEEP THIS GREAT FORUM GOING! (Only 20 donations so far - C'mon guys!)
×


popeye the sailor
-
Posts
16,007 -
Joined
-
Last visited
Content Type
Profiles
Forums
Gallery
Events
Everything posted by popeye the sailor
-
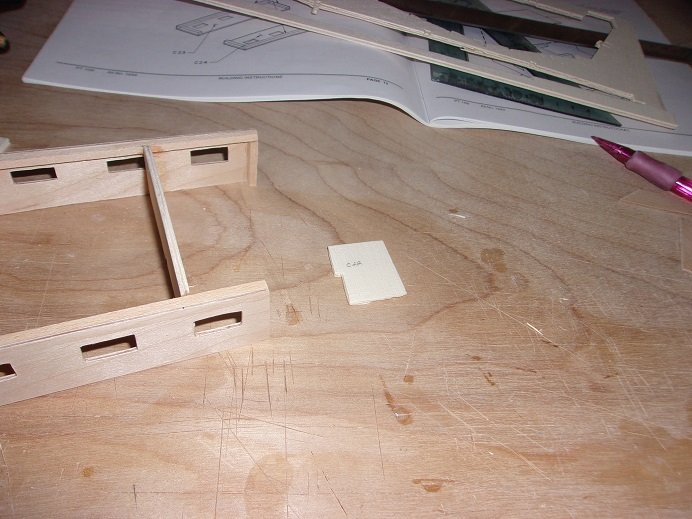
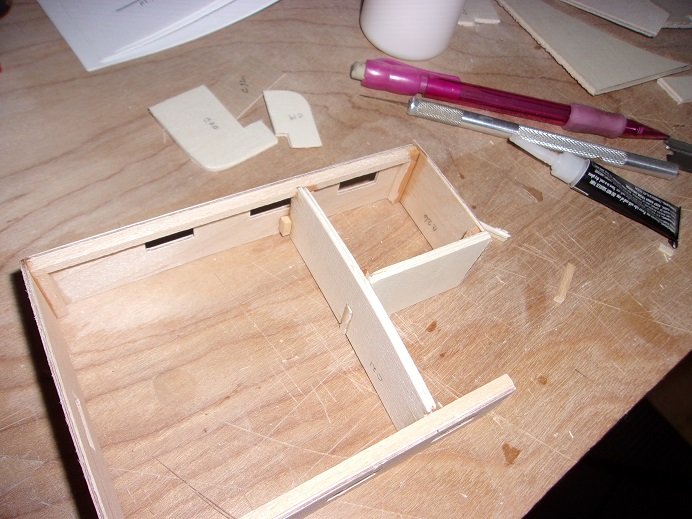
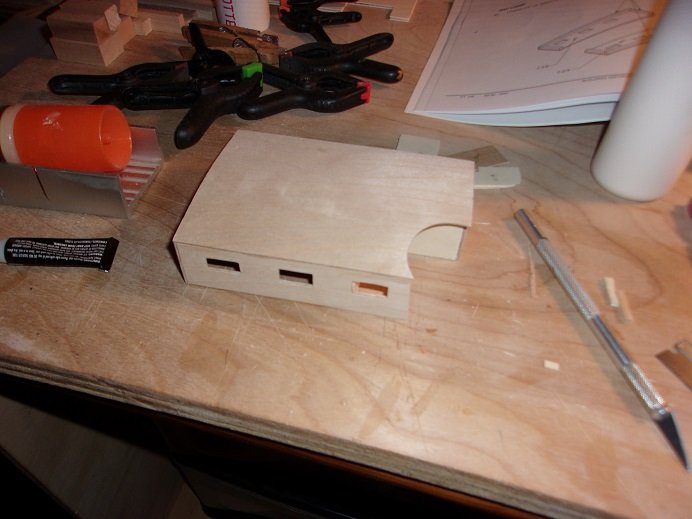
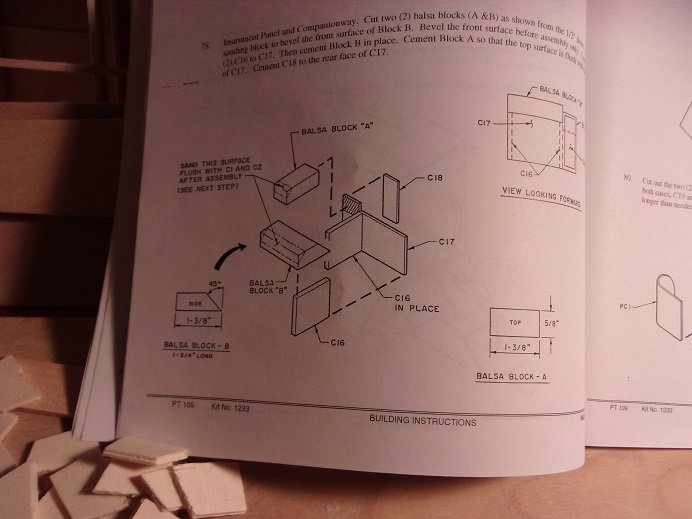
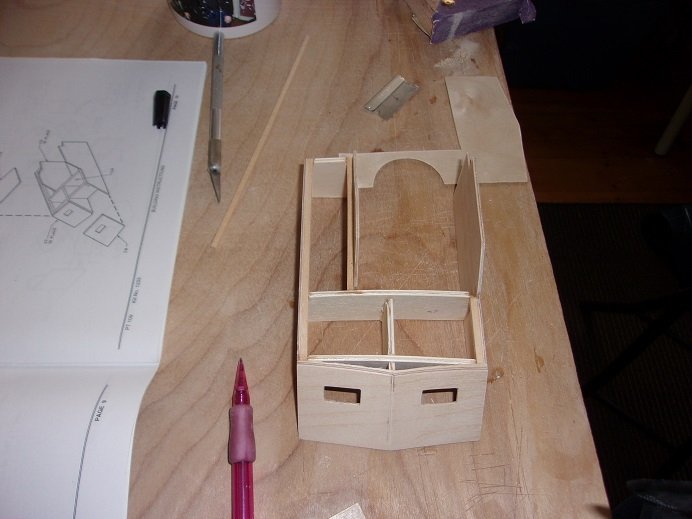
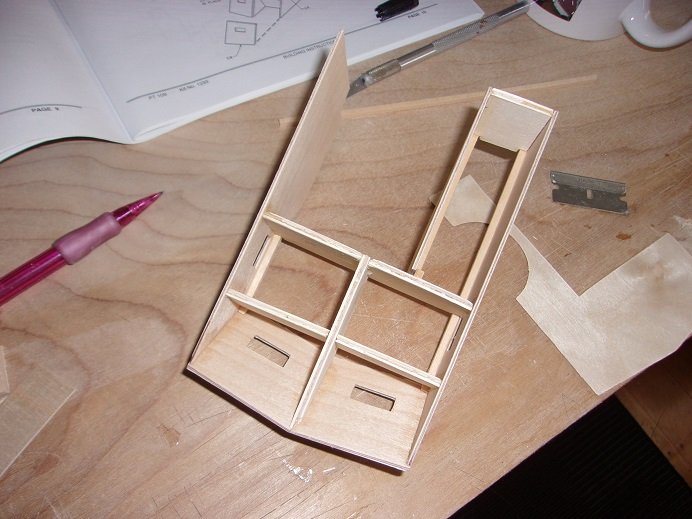
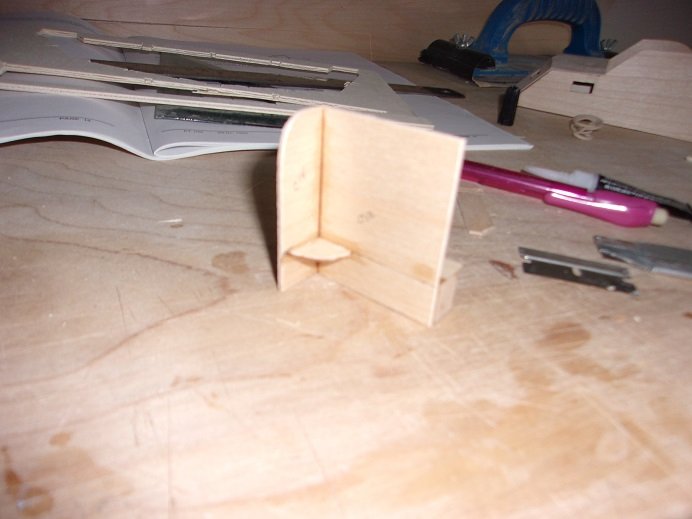
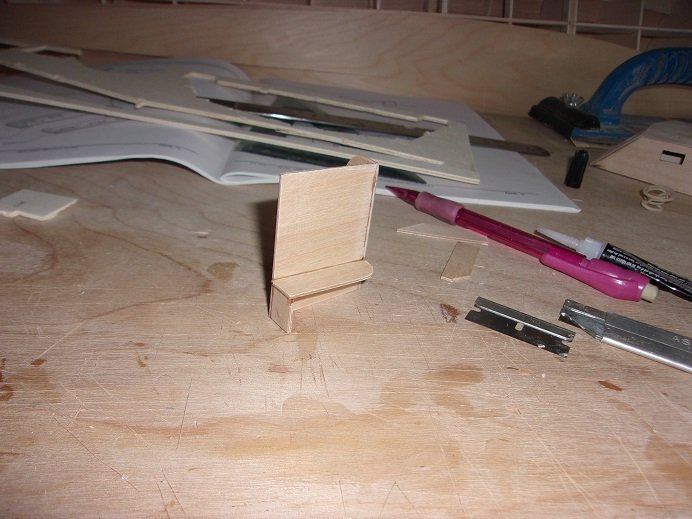
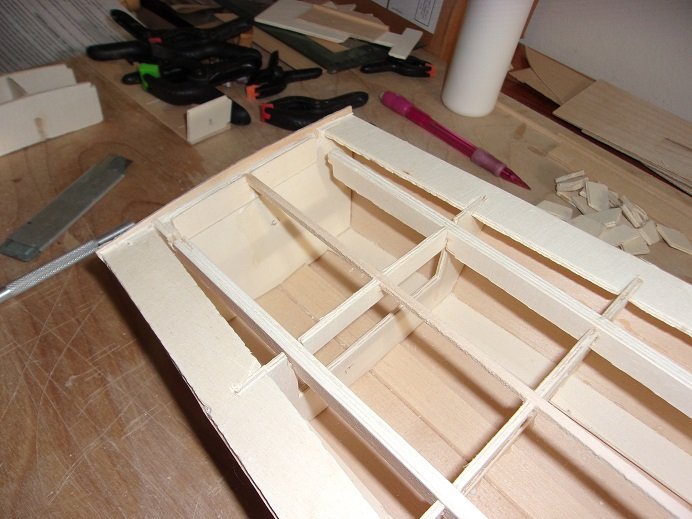
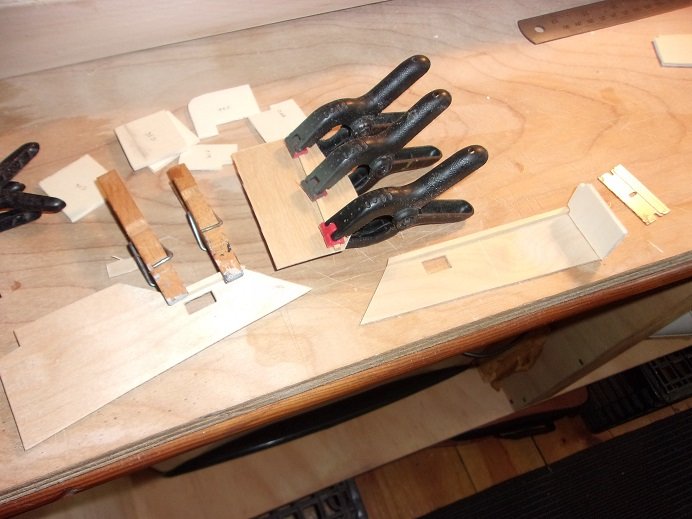
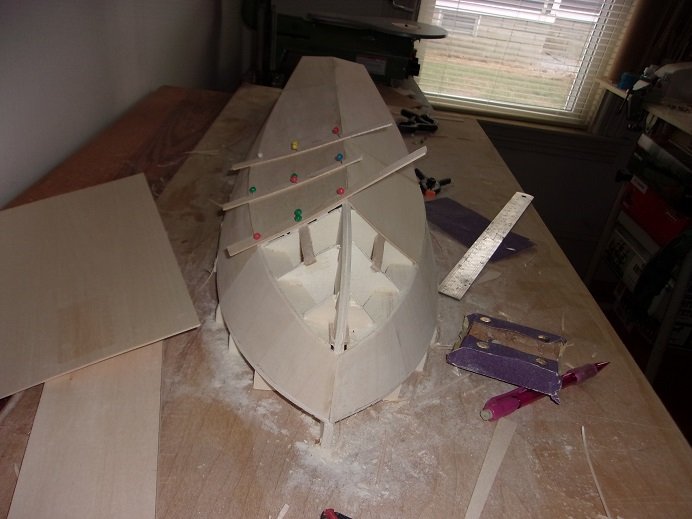
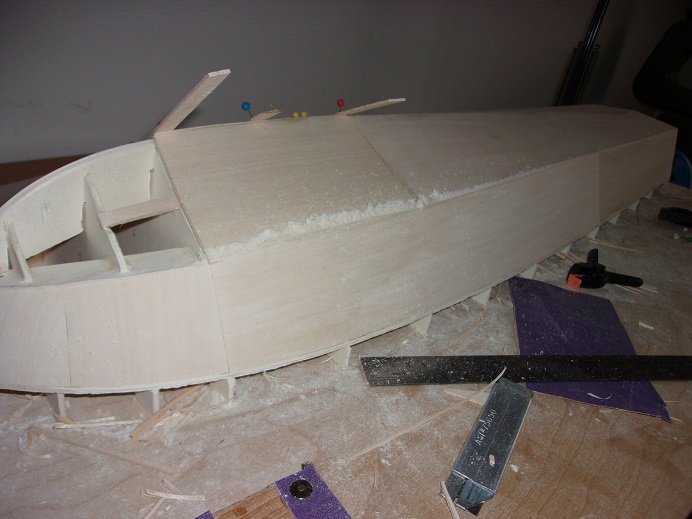
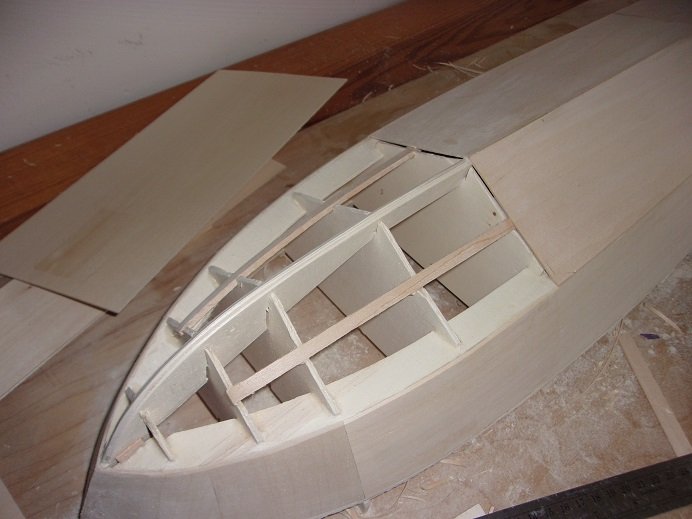
 the cabin aft of the helm..........here I made a mistake. on the starboard side, I cemented the 1/8 frame strip on the wrong side of the panel. since time has passed since gluing it on, the thought of removing it may result in damage to the part. I came up with an alternate solution for the assembly. to avoid interfering with a window, the cabin bulkhead was cemented further in....the long end of that wall was supposed to be towards the stern. the part that boxes in the turret, is this short piece....... so I made a longer piece, cut and trimmed to fit into the cabin bulkhead..... the outer wall was added to the starboard half, leaving the port side open. pieces of 1/8 strip was added the the inner corners to add strength. all the outer corners and roof surfaces were sanded. the rood lays on leaving the cut out for the turret open to accept it. cemented in place, the roof was supported with rafters.......and yep, more sanding they supply a plastic instrument panel. which is supported with an odd cut wall panel. this panel doesn't seem to fit very well...here are the plans: with what I see, these parts would eat up most of the space, leaving very little for that port side wall panel {C16 & C17}.........and again with the block of wood. I did this a bit differently. first, the dash top was added to the assembly.
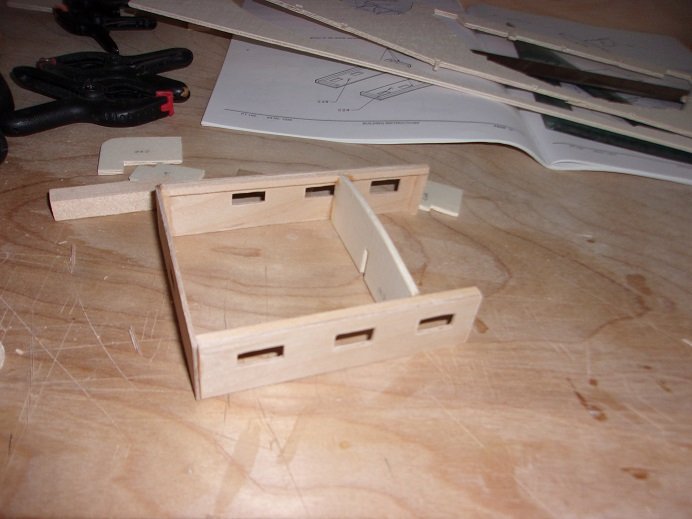
-
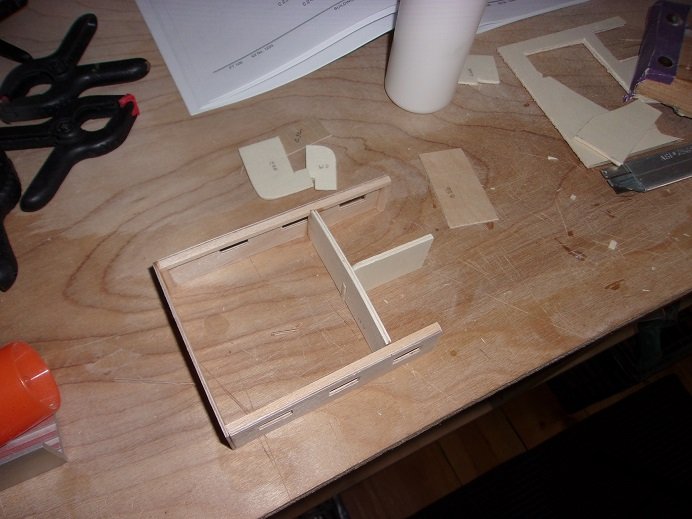
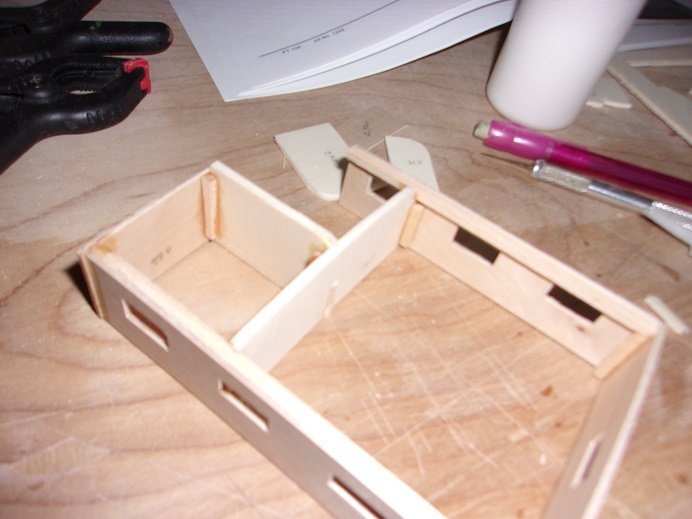
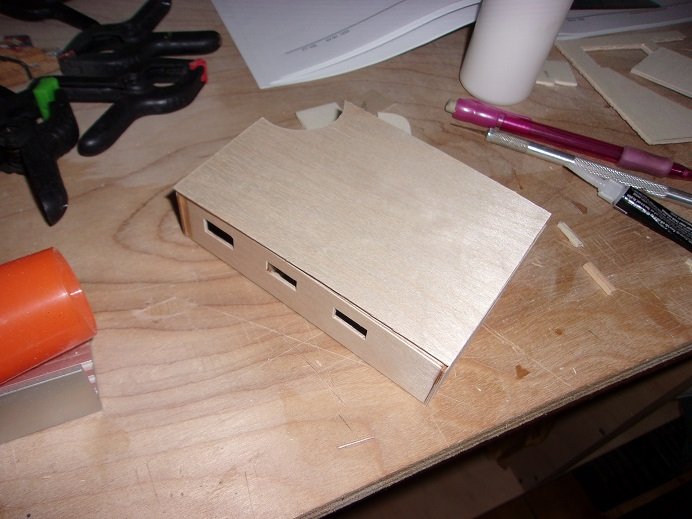
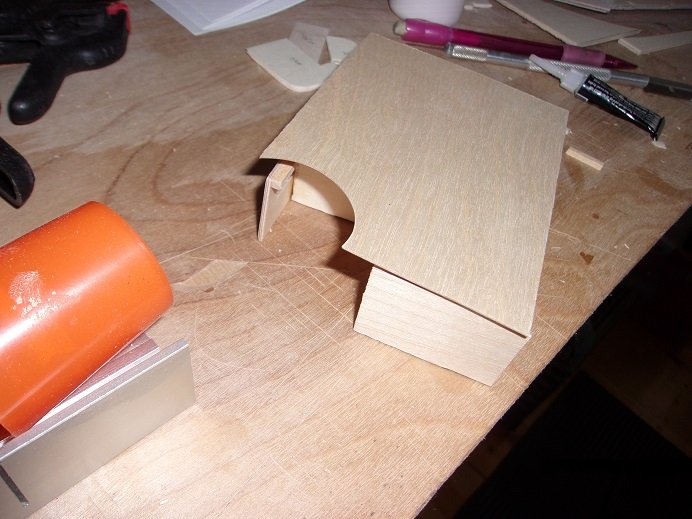
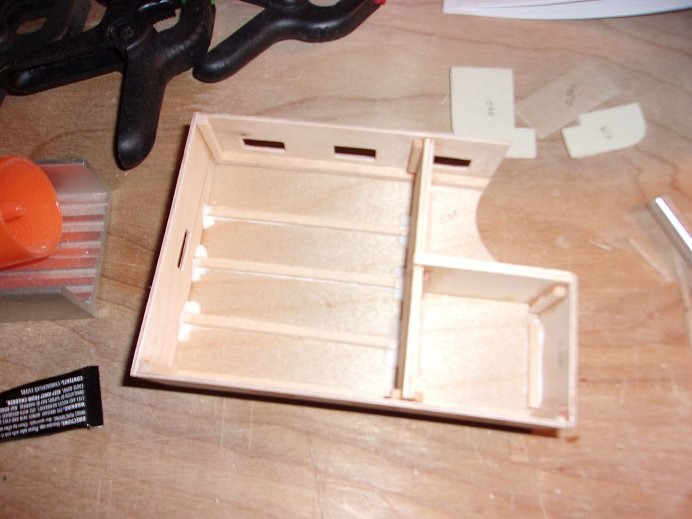
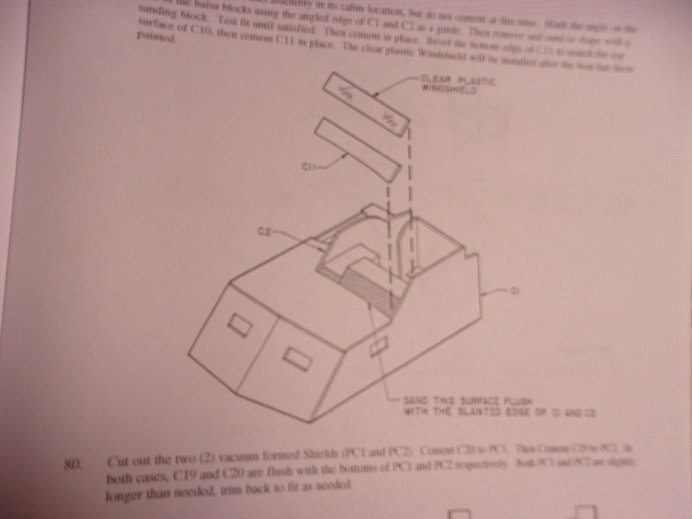
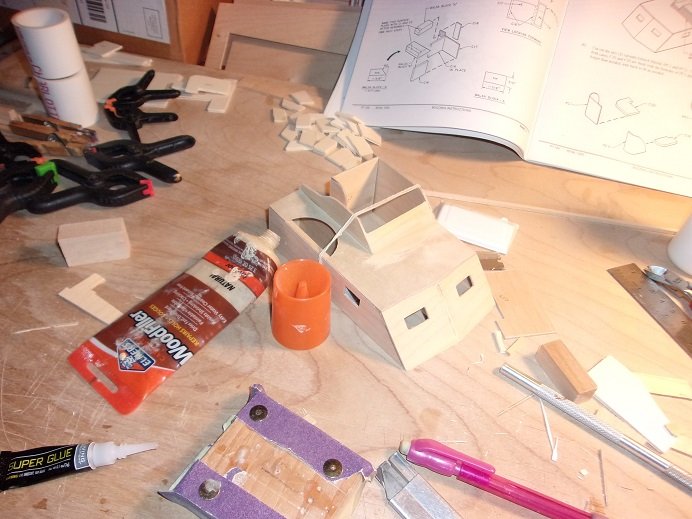
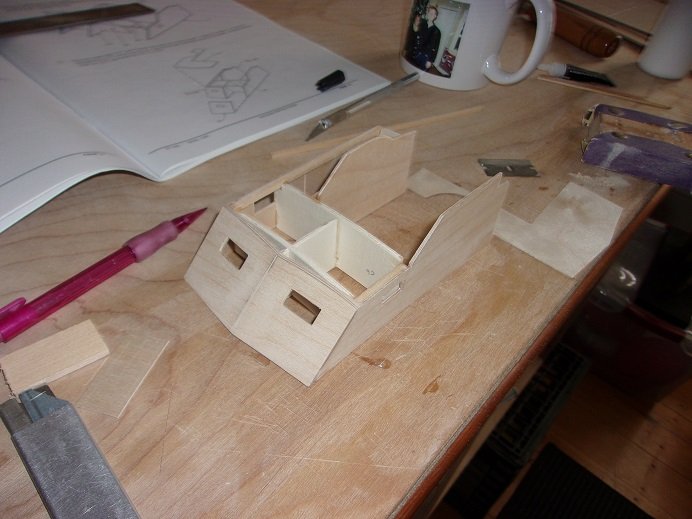
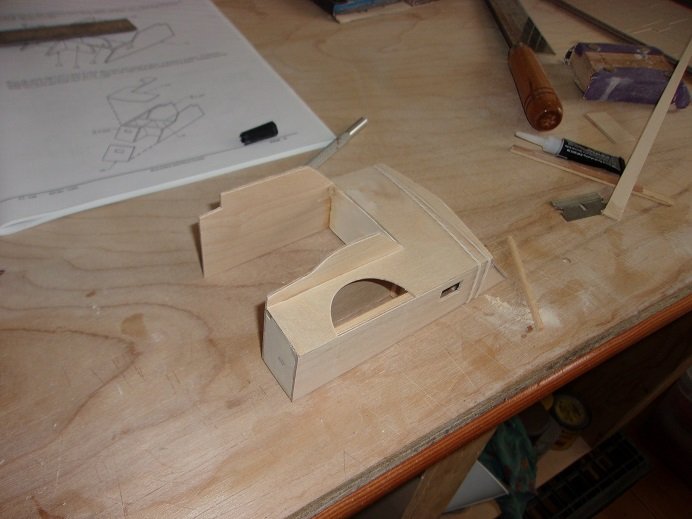
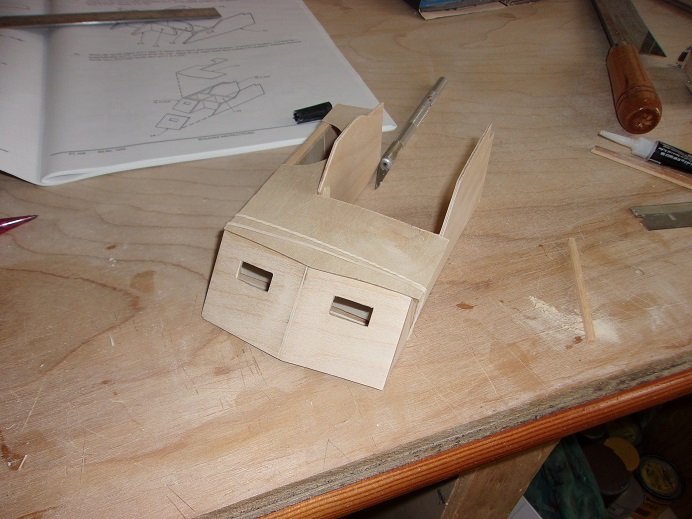
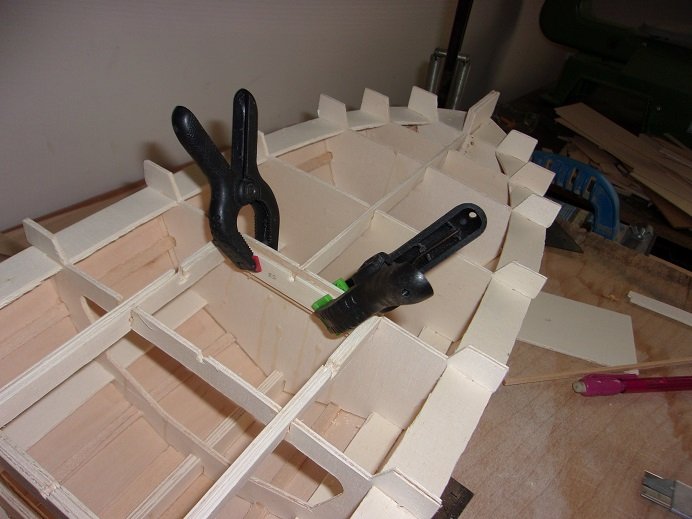
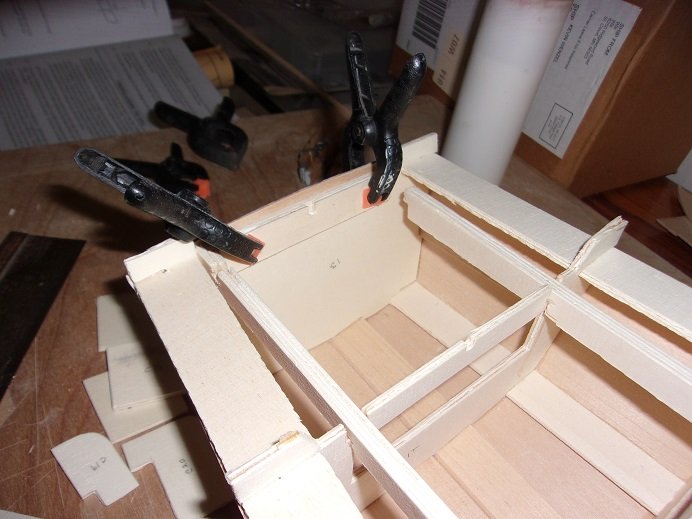
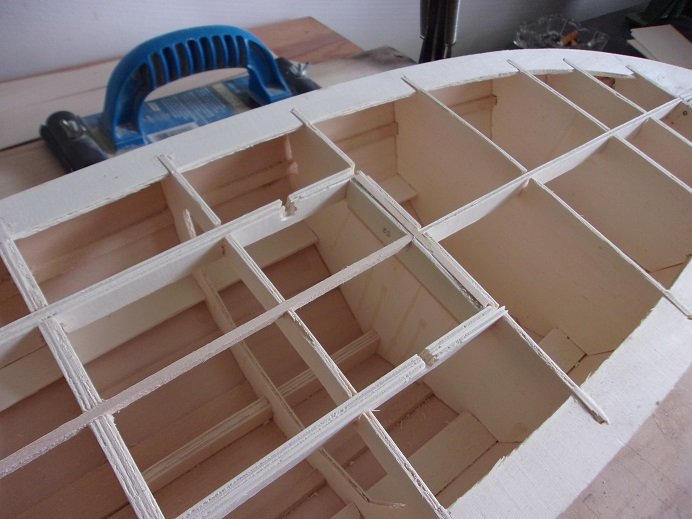
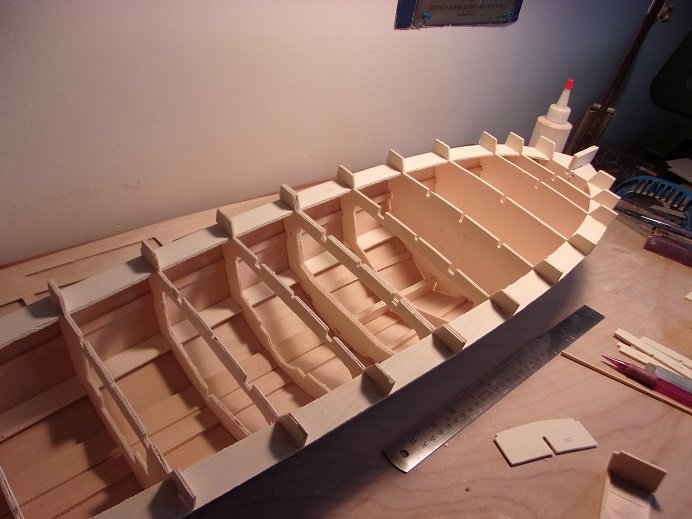
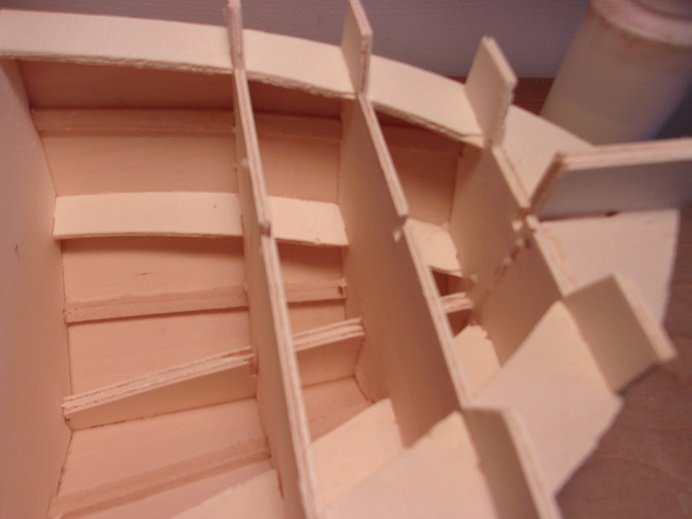
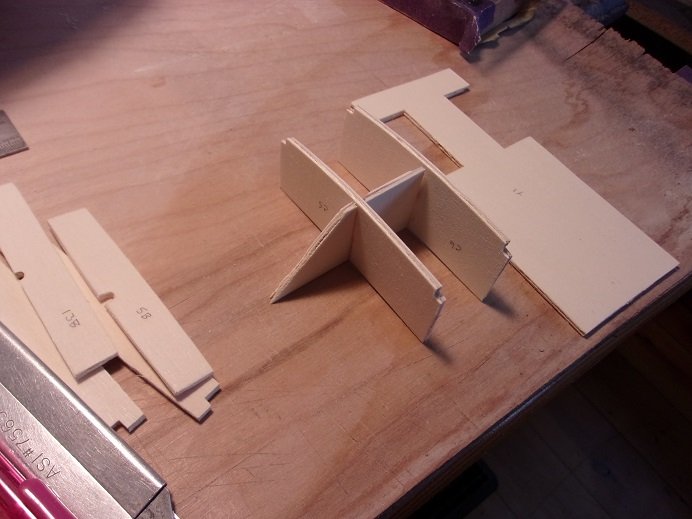
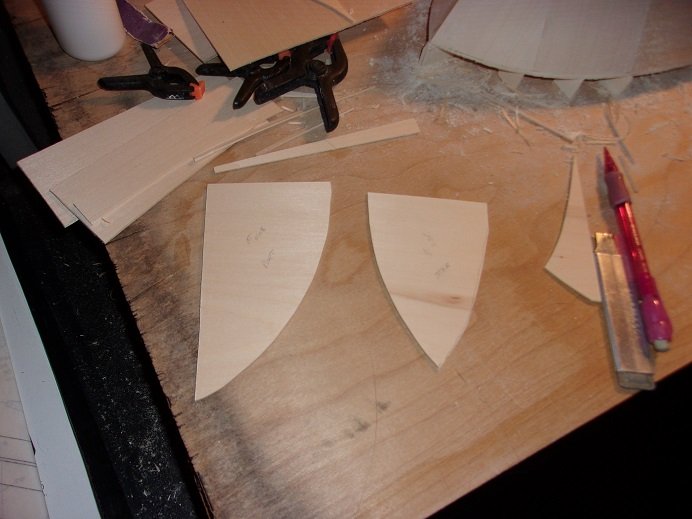
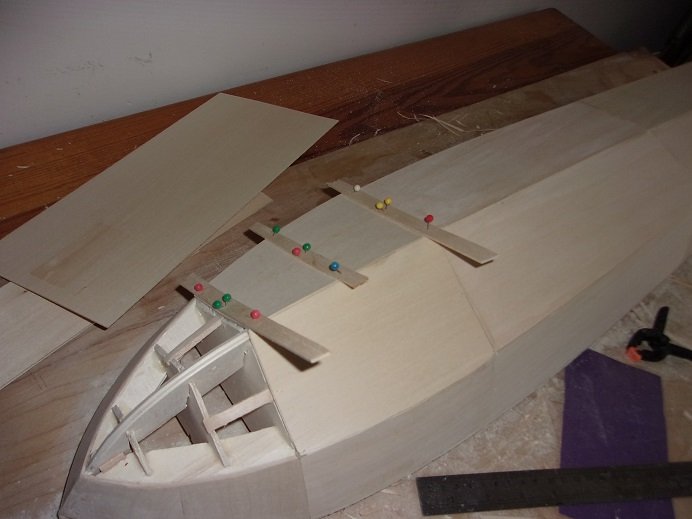
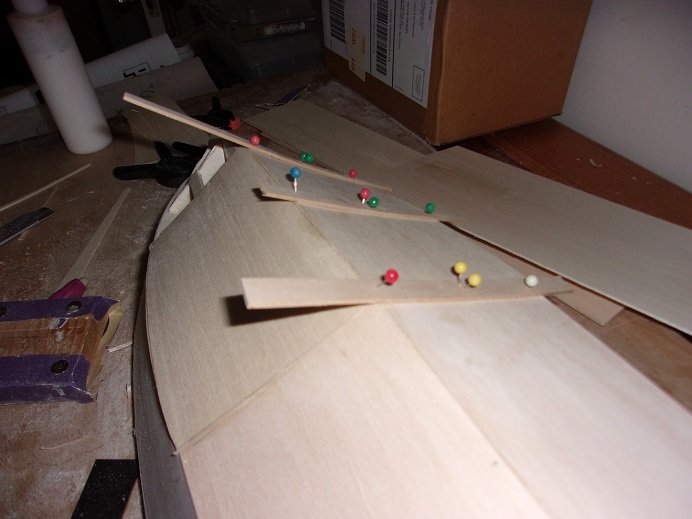
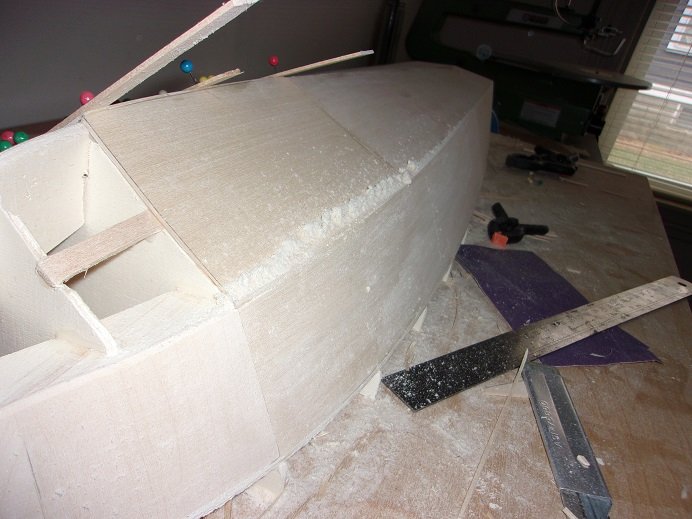
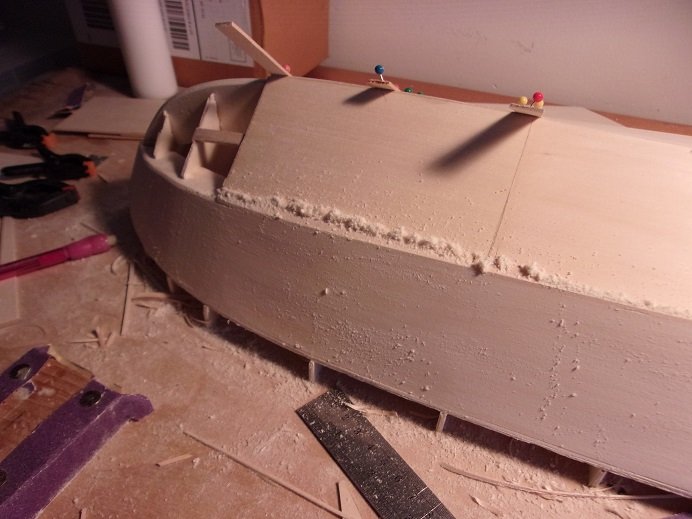
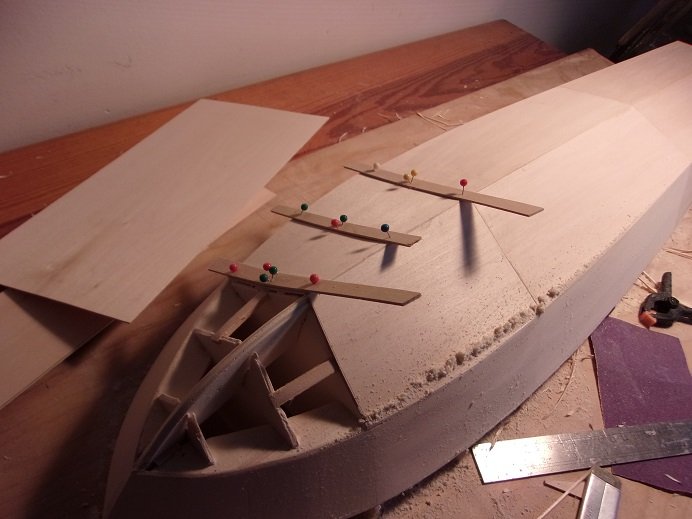
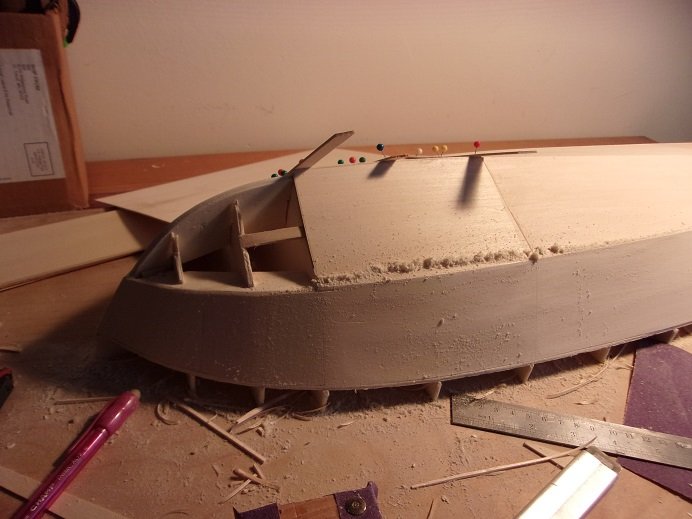
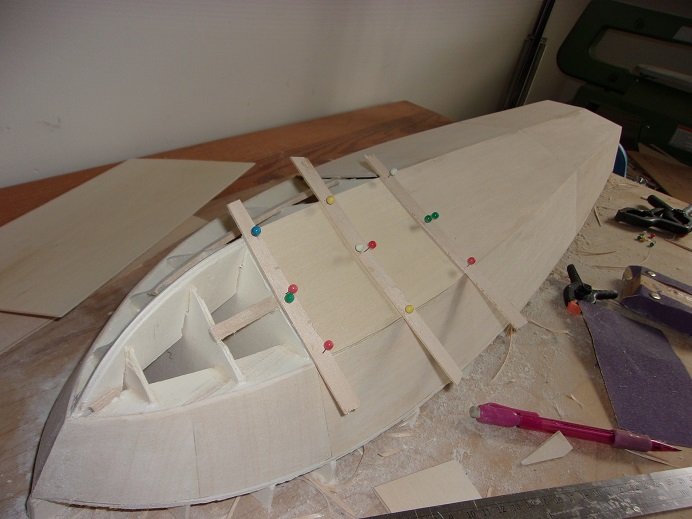
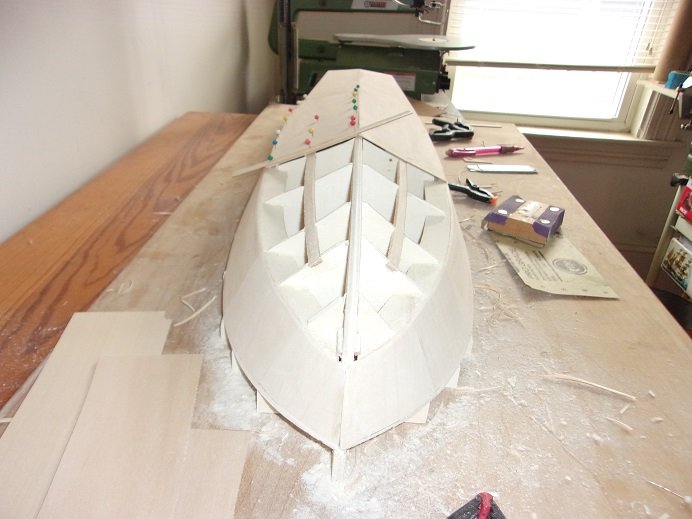
this was a huge session.......the main part of the helm structures was good. it was when I got to the point of assembling the instrument panel, where it got confusing. the sides and front wall panels was cemented to the frame. the inner wall on the starboard side was also added. I added a few more frame pieces to add strength........edges were sanded flush. then the roof was added. the area for the turret needs to be cut out. I was thinking to cut into the turret tube instead, but I think it might be more work than its worth. I'm getting ahead on myself here, me thinks. the edges of the roof were also sanded flush and to the appropriate angles. there is a wall that juts from the port side wall....I began flashing it out. on the backside, a block is to be utilized under this seat....a form of locker I suppose. this is all shaped to the camber of the deck. rather than do that, I'll simply box it in....plenty of cast off wood to go around { I have an unbelievable amount inside the box}.

- 221 replies
-
- 10
-

-
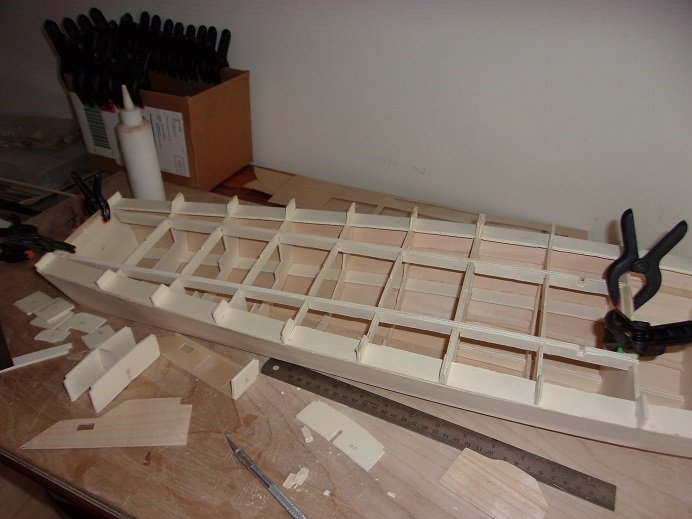
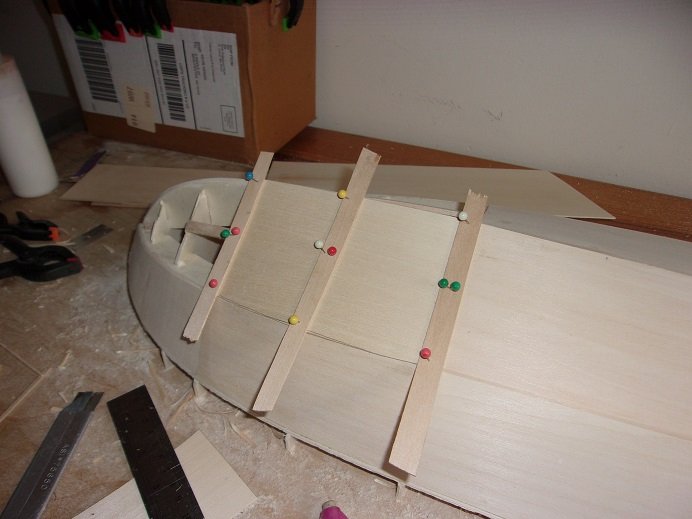
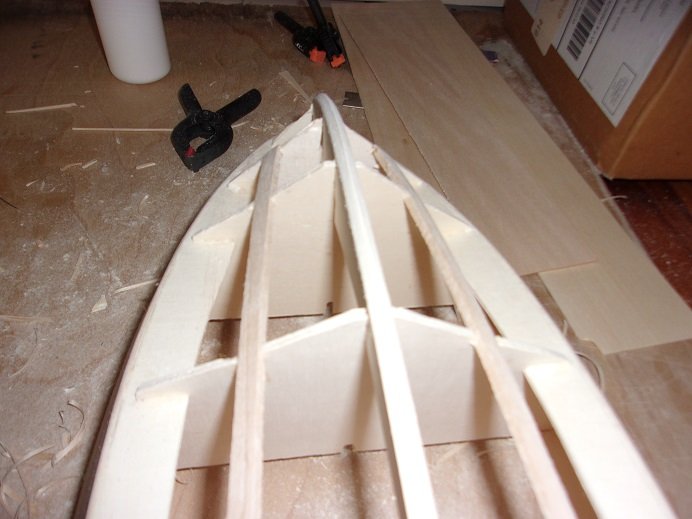
what size did you buy for it Phil.......nice to hear from someone who has built this model. were your props in the same direction or did you you do one left and one right? that may be the case CW, but I would think a three blade prop would give more thrust......this would like move like a tug boat in the water I continued with the helm structure.........but I did come up with an idea to deliver cement to the loose seams. I would need to devise a long tube, with a bend on the end......what to use was still being decided. the two long stringers were cleaned up. the directions here were really confusing, as it directs you to cut the ends off.......I did one of them still unsure, considering the slots in the bulkheads. I tried to fit the other one, and the true nature of the direction was revealed. I had messed up! thankfully, it's not the end of the world and easy to remedy. I cemented the two stringers in there. there is a center stringer that runs from #5 to the stern.......two slotted stops are cemented at each end of the run. these were trimmed and fitted in place. I will box each end of the stringer I had cut in when I'm done. I'll have to sand the top flat {fore and aft} so the sheer will lay on it flat. when dry, the center stringer was cemented in place. as seen in previous pictures, a single stringer was cemented in the center from #5 to the bow stem. I also cut off all the tabs from the bulkheads.... more sanding to be done......very noisy due to the tabs that didn't see any glue {I may go over them with cement}. the port stringer in the front butted up and was repaired easily......for the stern though, I will need to add some wood.
- 221 replies
-
- 10
-
-
they referred to it as plywood.......some did not specify. yes....mahogany was used, but out in the field, they used what they could get. one last before I go outside to brave the storm.........it's N.H. what can I say........ I did some more sanding, but it was futile......the panel was pulsing in and out and would do nothing more, than to become too thin, causing a redo. I decided to remove it from the board. the hull is 33 inches long.....the admiral saw it........the look on her face I need to frame the deck, but it can wait. I need to figure out how to get some glue under the chine stringer at the bow. not much room to work with..... as I pondered this feat, I tinkered with the structures.......first, the helm area. the part next to it, is the motor carriage........deciding whether or not to install it. the sides of the helm structure getting frame work cemented to them. I'll be back....wish me luck awww heck.......it'll be FUN!!!!!!

-
ohhhhhh.......I gotta get outside and shovel snow the admiral is going out to clear a small area for Gibbs { I already took him out this morning}. we've gotten quite a bit so far........definitely the boon on this one! no estimate on the amount yet, but we're getting about 2 inches an hour.......started before 11:00 last night, and has been raging since should end by the evening. ...but here it goes........ no pictures of the port side.........I know.......too much repetition here. all said and done, this is what I have to clean up. there is a small crack on the port side.....that was coated with glue and later sanded over. after sanding, you see what looks like a crack along the chine line........yes, that will haunt me.


-
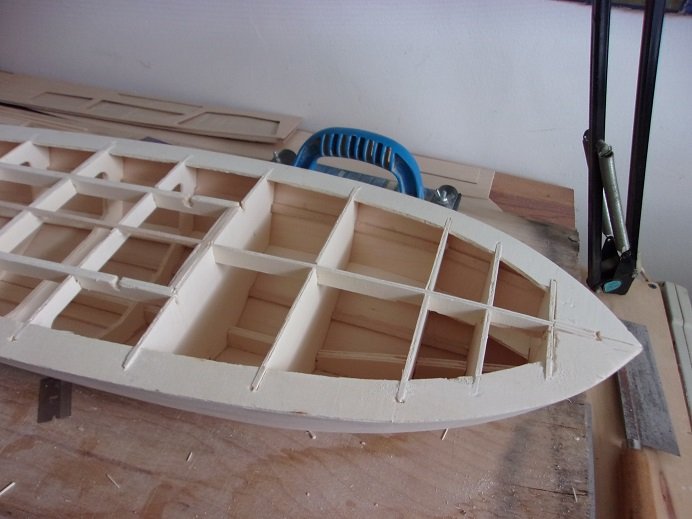
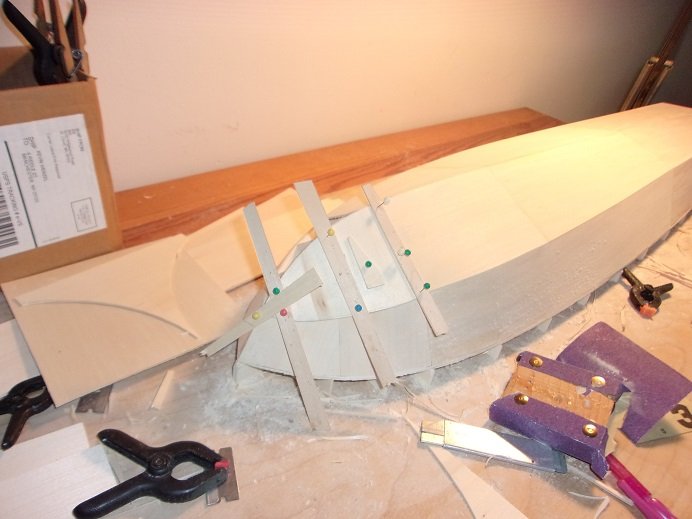
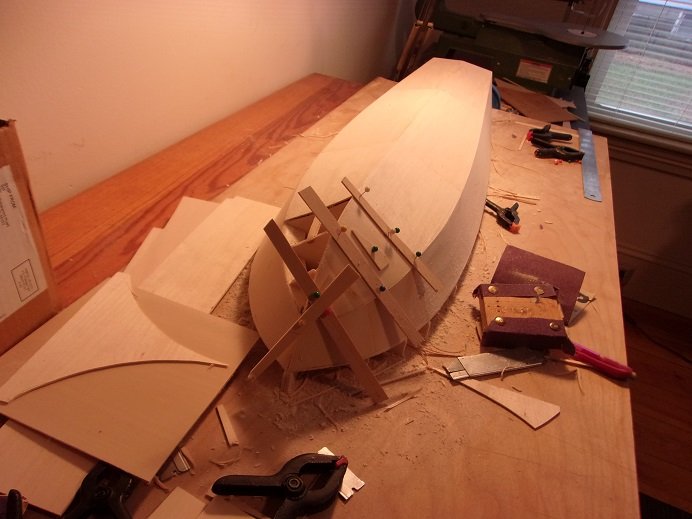
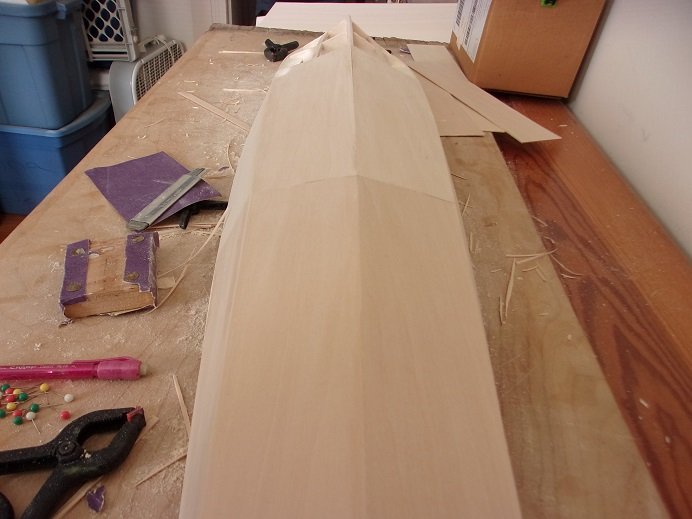
....now to finish the hull sheeting. you can see how jagged the bulkheads are.........die cutting was not kind. doing the last sections will allow me to take advantage of the center stringer and the bow tip.......no lapstraking here Egilman

-
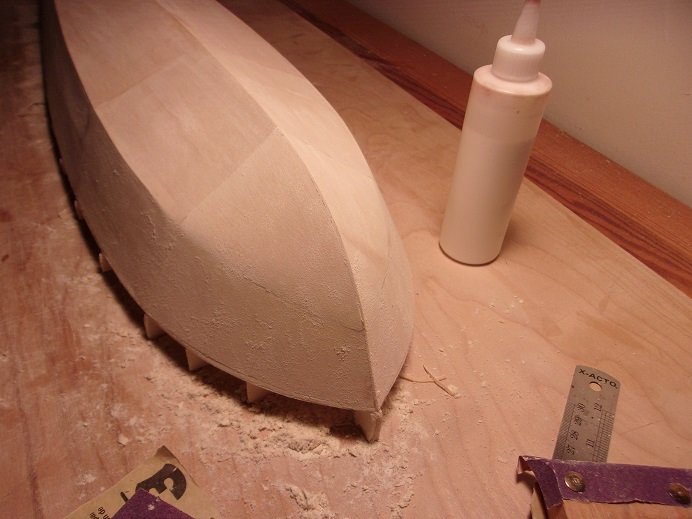
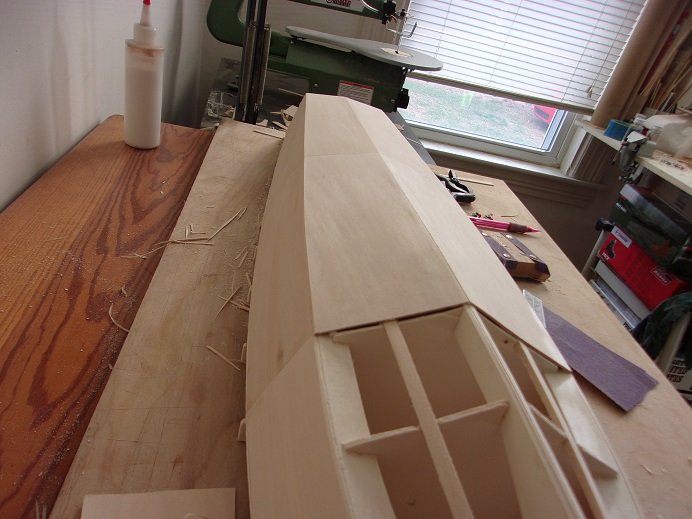
with the starboard sheet dry, the keel was prepped and the port side was laid down. any tiny gaps were filled with glue and sanded over to mix in sawdust. oh joy............more sanding
-
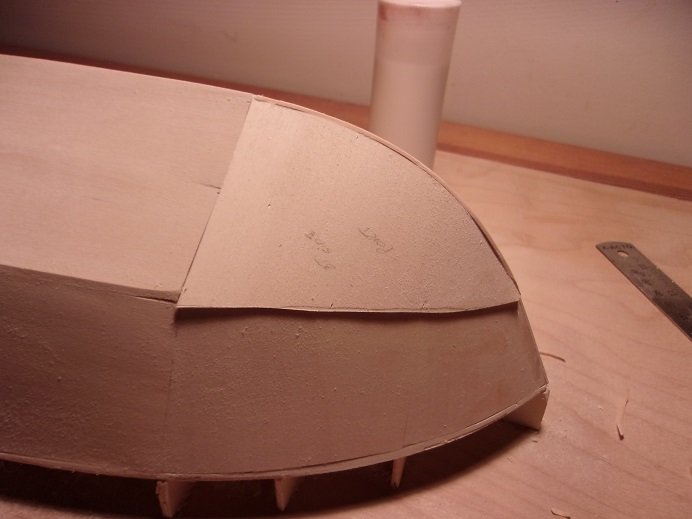
the next sections only cover two more bulkheads, keeping the joints on the bulkhead { I paid more attention to that}. the curvature here is a bit more pronounce. after cutting the starboard side {I turned the board around}, another was cut for the port side. I didn't leave as much excess either. I using the strips of cast off material, to suck the sheeting onto the stringer, to keep the curvature. I'll let this dry.
-
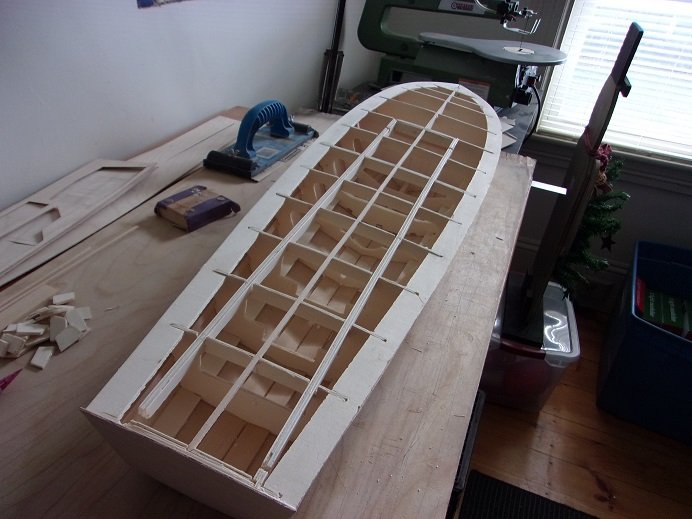
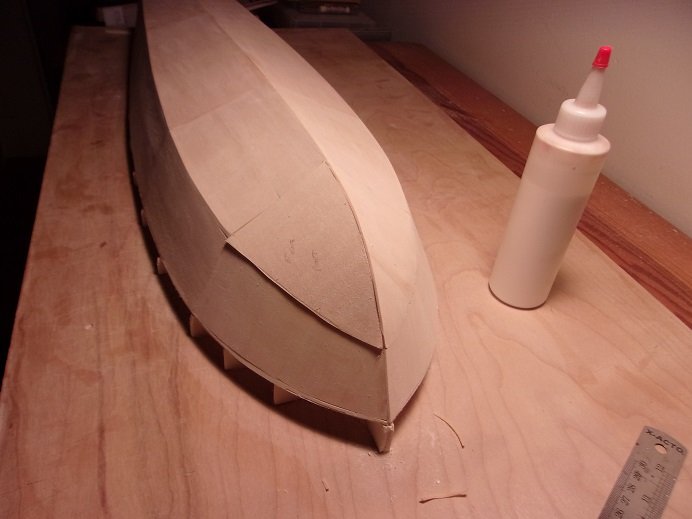
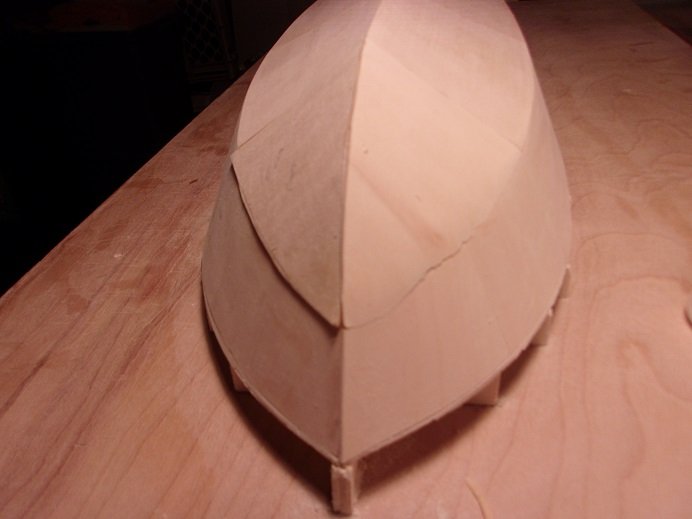
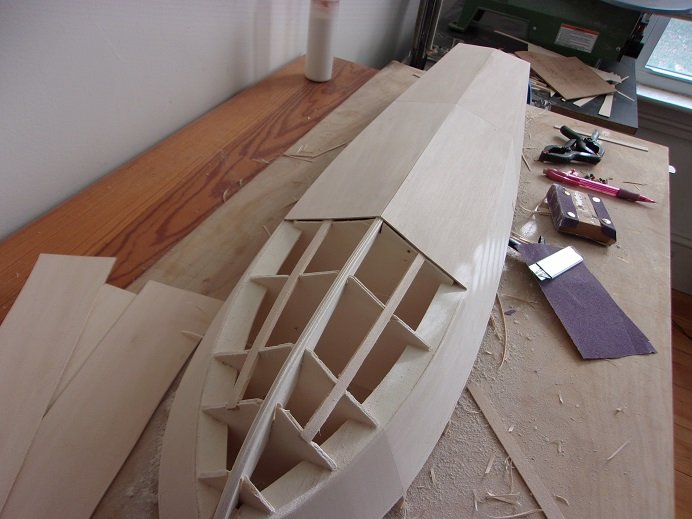
in the beginning, I was only going to pick at it.........but the more I worked on the hull, the more I got into it { I guess the immersion in sawdust got the best of me}. this session, the apex was sanded along the keel.......here's a fairly good picture..... from here, basically was only sanding.......between the keel and the chine stringer. the angles have to allow the sheeting to lay flat, with the most contact, much like faring. edges and lines more refined........the shape and feel is good. as much as I'd like to cover these two planes with whole sheeting, I feared that they would not behave well. so, I broke it up in smaller sections. the section joints are flush........I can hardly feel them. it continues........
-
well.........thank you all for joining in. our chat was very productive Lou......I had done a previous look, but was unaware of the other types of PT boats out there. I delve a bit deeper to get more ideas. for now though, I'm interested in assembling the basics......my usual direction deviated from there. there is more......the rest of the hull........I assembled the Elco structures {with more to do}........and began to assemble the armament [ not completely happy with the supplied stuff. what I was going to get into after assembling the hull. was that I began to look into the rudder and prop.......but to my confusion, there were no parts for these aspects. looking at the box cleared it up........you have to order this stuff separate. I ordered the running hardware kit.......that was a bit of a let down.........it only supplies a single prop assembly........with a two blade prop to boot! so before I get too far into closing up the deck, I will have to do some searching for more correct parts. the PT boat had three screws and rudders.....I probably can get away with two. .......might cause some to shrug, but won't look too ridiculous thanks for the picture lou........yea, that's kind of a herringbone design in planking. I would have thought that the hull be sheeted with plywood panels, but perhaps that method of planking adds more strength to the hull. knowing that the PT boat was heavily modified in the field to suit the needs, is a good thing........I will have card blanc in how I fit her out { I will be at the mercy of the budget director, as to how far}. armament changed and varied greatly Egilman.......the early boats had the torpedoes, and some did fit the roll offs later on. I did notice that some utilized light rocket launchers, depth charges and racks, as well as mortars. I read where one ship was fitted with machine guns from a P 38! I've always spoke of field modification........these guys were the Jacks of all trades where the log is at this time, is mid Nov.........there are ten sessions to go.......it continues
-
the V 247 looks like pure evil 😈
-
I just found the coolest site for the Osprey...........the future of Osprey these are the new versions of the Osprey under development.. Bell V-280 - Future Long Range Assault Aircraft with the V 280 Valor, there is a picture where you can do a 360 degree view of the aircraft....so cool!
-
thanks Lou......I haven't heard from the gut yet, so this will come in handy I did some look'in, but was hitting a dry hole......just articles and reviews. as you heard.......I'll have to sweet talk the admiral......I'll keep you posted
-
nice progress Kevin.......I think you should keep the spire the way it is. it adds to the detail......a history angle is always good too
-
very nice progress OC........they really look great! the diorama is going to look super.
-
I could tape them........but I'd be wary of the tape pulling the decal off. I'm gonna see what I can scare up for images........I think that in between the thin white stripes, it might be red as well...... they should be wrapped all the way around, so they can be seen from under as well as over. the 'duck' factor......hate to get cuffed by one of those blades I made more progress.......I'll show ya later
-
my thought exactly .........and there is a wide variety of kits out there too! I did see a 1:28 scale.........that would be nice! thanks gents.........should be finished soon
-
attacking roofs is hard........always an uphill battle beautiful work my friend......no matter which way the Euro is positioned { I think he glued it there }
-
nice........big fan of drag racing I've seen the Ivo machine kit.......love to get another large scale kit though.
-
really nice! although the other one should be on it's tracks rather than on it's side {I know....it's drying} catching up is fun with these little gems. your spare parts bin makes me think back to all the parts I had for cars, when I was a kid at home.........I kept them in boxes under my bed. Mom used to get mad because she couldn't clean
-
nice look'in engine.........also good to see some Japanese planes
-
yepper! thanks for sharing your grand dad's work.........truly beautiful!
-
look'in good Chris! here's something funny........I used to work with a fellow named Chris Coyle { I believe he spelt his last name like this}. we drove forklift together......good co worker
-
that's my curse too........breaking off tail wheels. wish they'd smarten up and mold them as separate parts antennas and small bits, I don't usually do until last.......I tend to handle the model too much too. I wonder if one of those stands that I've seen used, would help in that regard? good to see your progress.......great stuff
-
I wish I could make some progress with this project........but at the moment, I'm stalled. I still can't find the part I seem to have lost, I have pretty much visited every place I might have gone...this kit has only been in two places in the house! some light did shine into the tunnel, when Lou sent me a link to not only get the part, but add major detail to the engines and other areas of the plane.........cripes, I could even buy another kit and do a Dolittle plane, as I've been wanting to! I made the order.......but it was later canceled due to the virus this morning I contacted the seller, to see that if I ordered it again, can I still get it. I ordered a DVD set that came from China.........it is due to arrive today {I can't wait}.........so I can't see why this gent can't mail it {he hails from Korea}. I'll keep you updated as to what comes of it

