


popeye the sailor
-
Posts
16,007 -
Joined
-
Last visited
Content Type
Profiles
Forums
Gallery
Events
Everything posted by popeye the sailor
-
 you have the tail spot on........why wouldn't it align? coming together very nice.........very detailed
 -
I was gonna say..........yea, the under belly should be a gray! what you did there looks perfect jeeze.......there's no need to weather. any real camo effects would be on the overhead plane, and not on the underbelly. you have a nice balance of soot and discoloration looks great so far!
-
it's all in the learning curve.......I see your really getting into this project looking good!
-
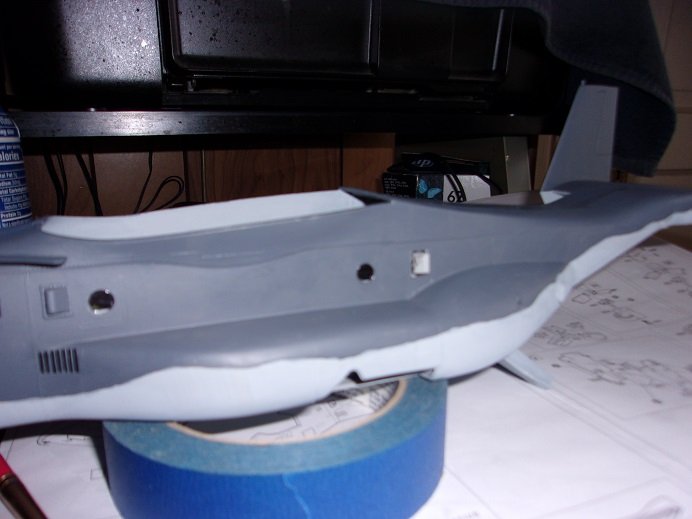
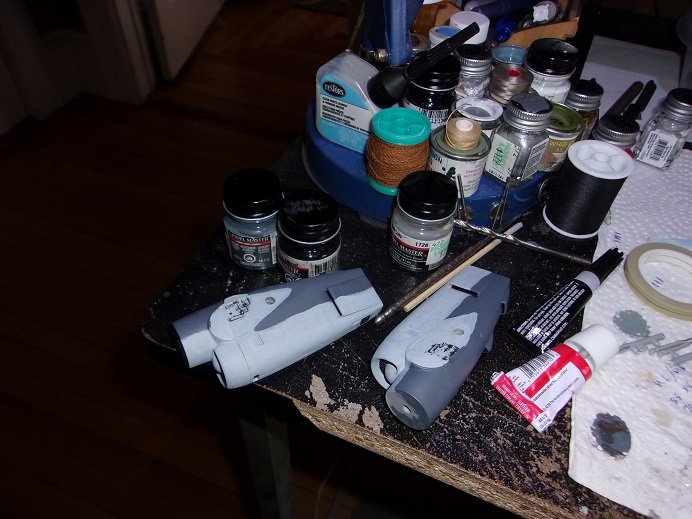
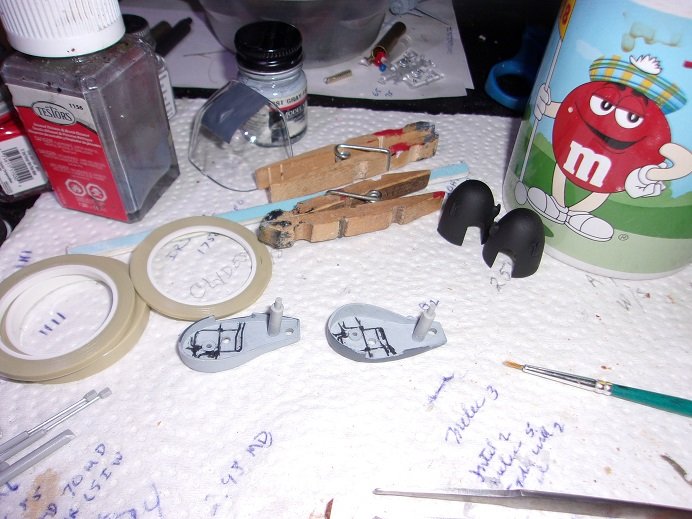
just a small update......I am making progress the underside has been painted.....I did manage to repair and trim the last vent for the port side. I added it to the model today........ I'll get that painted up........I've also been doing the paint for the rotors......kind of a two step process. no pictures yet...... I've done more on the narcelles as far as detail work...... .....touch ups on the wing.......and the pods that the narcelles are connected to....... the spinners are pictured here.......they already have been painted. more to be done....
-
thanks Egilman the Fokker D VII went into service just before they pulled the Dr 1's......the wing failures were getting to be too much. true....it wouldn't be too hard to come up with a pilot to model a pair for.......the decaling is another story I do hope I find them under the tree......I mentioned that they are a pair, since they are produced by the same company.....I forget who.....but they look very nice. actually, I could go with a squadron motif, like Rabin's ravens or Berthoud's boys.....both had ties to Jasta 18. I'll keep my fingers crossed on the big day. not to worry OC........you might not see it till Christmas....but I have something in the fire
-
1:8 1965 Shelby Cobra 427 S/C - Agora Models
popeye the sailor replied to James H's topic in Non-ship/categorised builds
no glue...........amazing how this is coming together! very nice! -
Enzo Ferrari by CDW - FINISHED - Tamiya 1:24 Scale
popeye the sailor replied to CDW's topic in Non-ship/categorised builds
looks sooooooo sweet! -
hey...hey....spinach man bang'in on the door busy....busy.....now I see where you went so much to cover here.......read the log through....man!...so sad to hear of your little friend we lost our first American Eskimo to that ...thing. Happy was almost 12....I still think about him. yea.......you need to do another Ice boat........it's in your blood! great pictures! glad to see your gett'in 'round better.....the hull looks super. and here you are show'in the spent parts panels.........driv'in me crazy. intact like that, I'd 've had two hulls......it's been my style lately. so........OK........you're do'in alright........don't need an enima or anything........gotta lay off the peanuts....polyps.....dontcha know .......{I know I sound crazy.....'cuz I am} {I don't get out much these days }..... gotta get me a plane like that!
-
awesome job on the figure J.......really came out great!
-
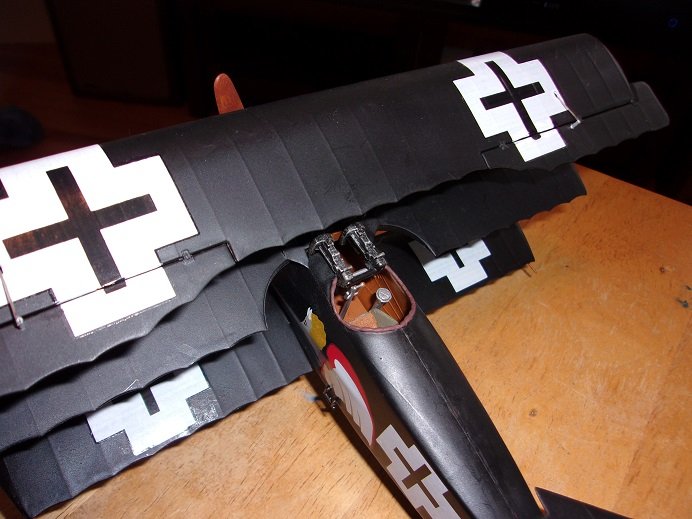
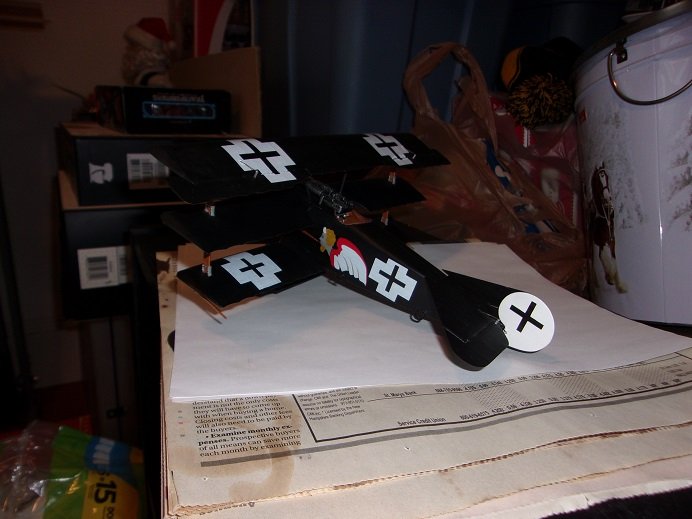
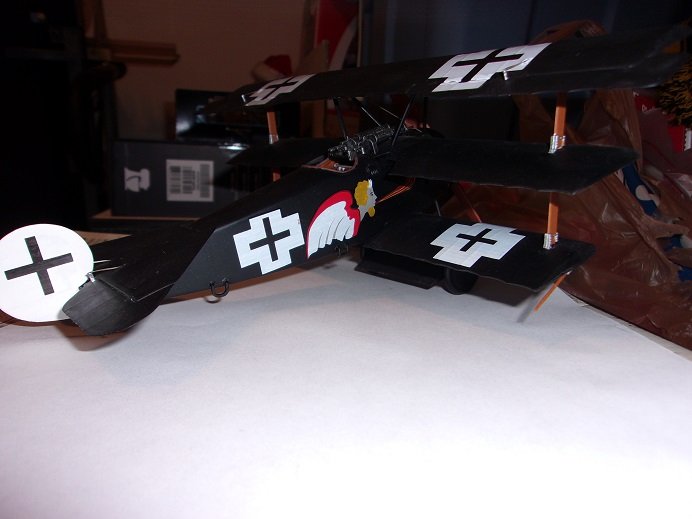
thanks all........if the decals would have been correct, I very well could have modeled the Baron's plane I was pleased to see that the decals from the Roden model worked out for it. I was thumbing through the log, when I came to the picture of Jacob's plane that I posted.......I don't see to much of a difference. I guess I did what I set out to do.....very happy with the outcome. if Santa is good to me......or if I meet Santa's approval as a 'good boy', my list has a pair on it.........a Dr 1 and a D VII. I'm hoping I can find a pilot that flew both.......if not, I'll put my own spin on a camo. I have some of the Billing's primer, but it did not fare well with the paint I was using.......for some reason or another. it may also have been that it's as old as the rest of the Billing's paint that I have left. I'm finding more dried up bottles.........soon it will all be gone. other than the fact that it smells terrible, it really isn't a bad paint. it dries to a hard finish.....the gloss is nice, and it covers reasonably well. I agree........lighter colors do better with a primer coat under them......especially if the plastic is a color other than white. this model was a red plastic...the black covered well, but the white had a dickens of a time losing the red tint of the plastic. thanks again to all who looked in..........glad you enjoyed watching
-
thanks Ed and OC.........that's the beauty of this era.......the art white paint tests me the most......so prone to ghosting.
-
definitely makes for a great activity! superb job putting it all together!
-
love to see this in an armor diorama........some very fine work going on here
-
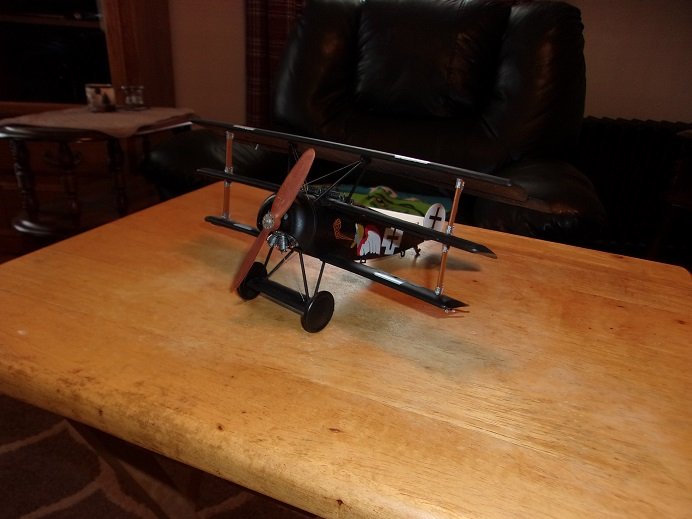
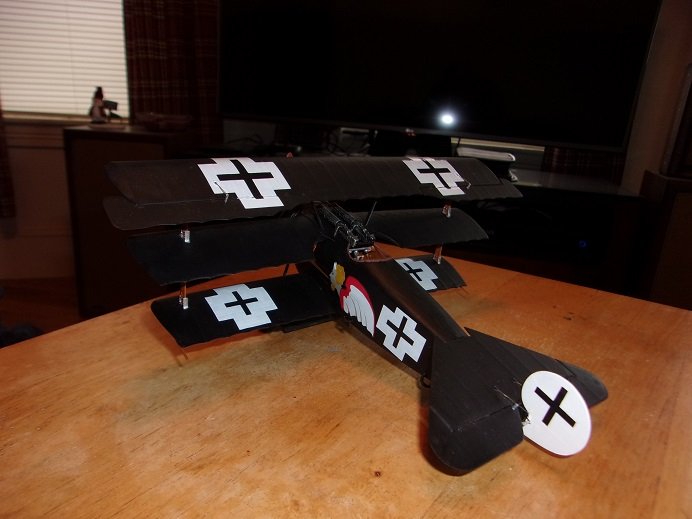
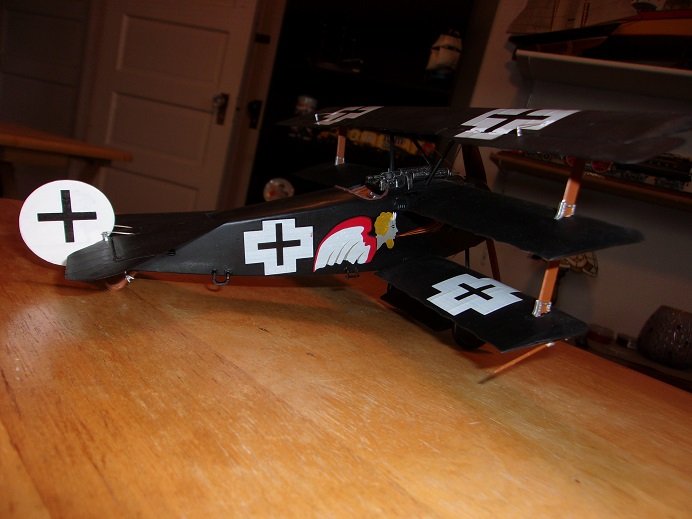
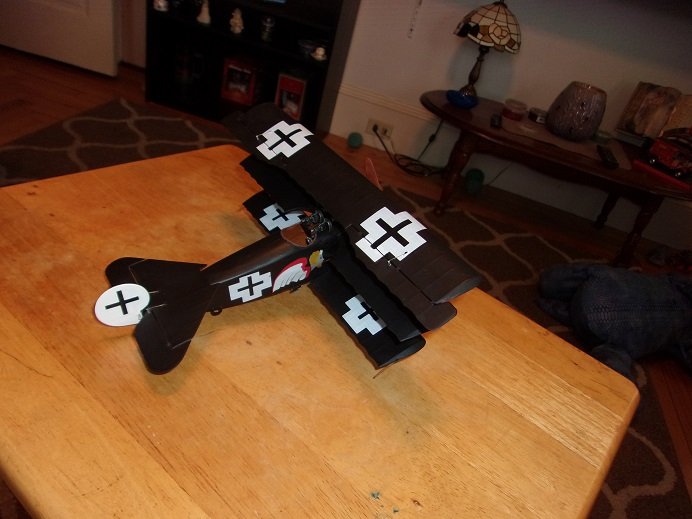
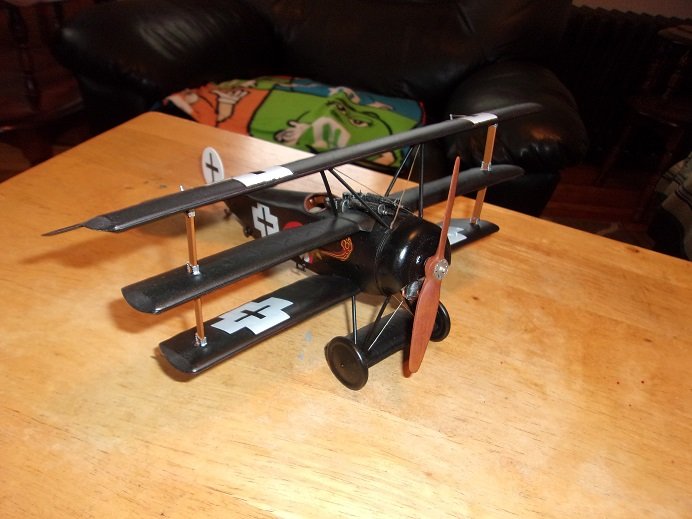
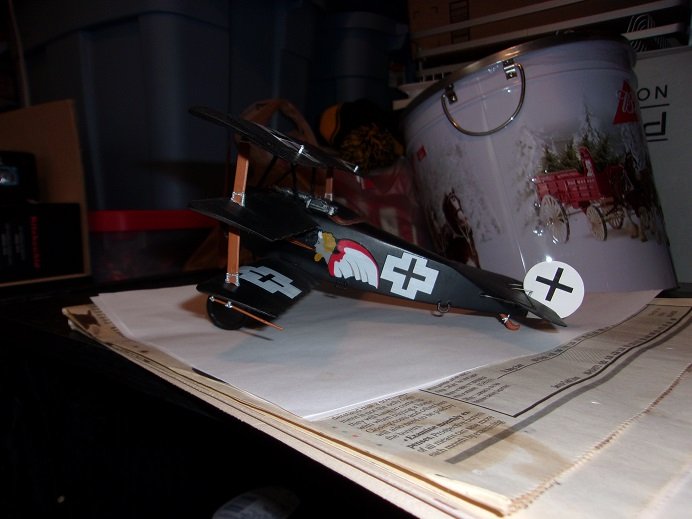
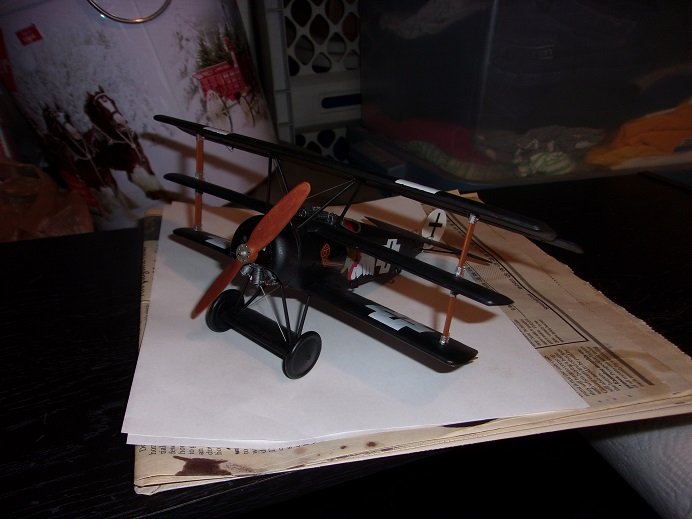
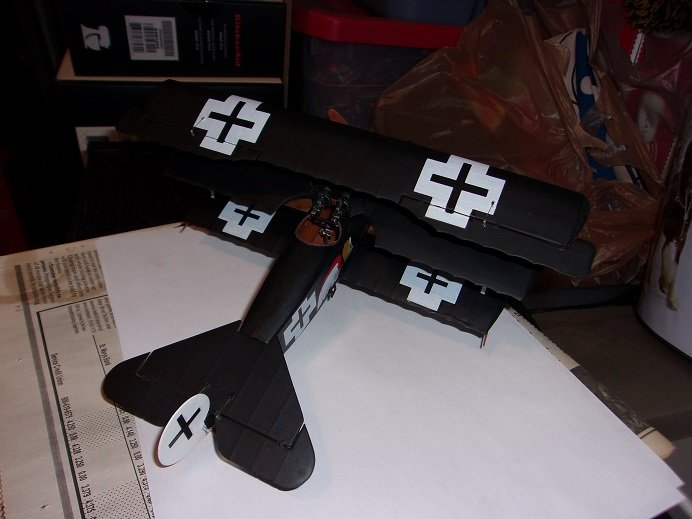
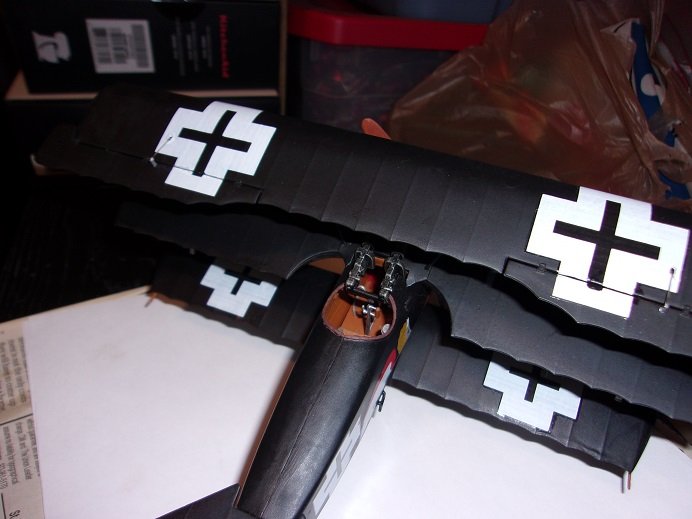
I thought these looked a little dark. I had plenty of light I thought, and I did use flash...... her are some I took in another room. I have two other Fokkers on my wish list for Christmas........love these planes!
- 100 replies
-
- 12
-

-

-
I finally finished this one. I figured it was too much to bring out the airbrush just for a rudder, so I thought to use a brush.......it turned into a real trial! I painted it once..........then a second coat seemed to make the first coat release from the rudder in chunks! so........clean it off and repaint, only to have ghosting rule the day. I changed the paint to a newer bottle and the process went a bit better. once satisfied, the model was quickly finished off.....that meant adding the control lever in the rudder........gluing it on the model.........and connecting the cables. so Ltn. Josef Carl Jacob's plane is done!

-
it's a common affliction though.........I seem to be running low on flat black
-
Enzo Ferrari by CDW - FINISHED - Tamiya 1:24 Scale
popeye the sailor replied to CDW's topic in Non-ship/categorised builds
good you had a great day........more glad that you all are safe -
most of the time, there are tell tale aspects to be able to tell which production it is. it does make a difference to a savvy collector. I have been chatting with a fellow from the Netherlands, and he suggested I look at the Scalemates site. here you can see a production timeline and box changes along the way. I bought the Budweiser Clydesdale wagon model a short time back, and until the other day, I had been hard pressed to find out when it was produced. interesting to find that it was produced in 1978. the bad thing about the kit, is that it has stick on decaling and they are kinda degraded..beginning to peel off the backings. I've been looking for them, but it's looking like I'll be making decals and fudging the rest with paint. the site lists thousands of known models amazing how many Connie, Cutty, and Victory models there are out there! the do list the C.S.S. Alabama and the U.S.S. Kearsarge. they show you how many folks on the site have the kit......I guess it's up to you to see if they are willing to part with it.
-
sometime ya gotta just fly by the seat of your pants look'in good
-
don't ya just hate that ?!?!?! Murphy..........I knew it!
-
when I bought the U.S.S. United States back in the 90's, I paid $89.99 for it........I believe that's what the others in the series went for. I built the C.S.S. Alabama.....Also built the U.S.S.Constitution and the Cutty Sark. I've already built my second Cutty Sark, and I've got in my stash another United States and Connie kit. these were great kits back in the day......
-
Enzo Ferrari by CDW - FINISHED - Tamiya 1:24 Scale
popeye the sailor replied to CDW's topic in Non-ship/categorised builds
the chassis looks awesome.......and the interior looks superb as well......very nice! -
looking really good OC..........you've made quite a bit of progress