


glbarlow
-
Posts
4,127 -
Joined
-
Last visited
Content Type
Profiles
Forums
Gallery
Events
Everything posted by glbarlow
-
 The center section isn’t hard, with all the tapering and fitting around hatches, nope not hard at all 🙂
- 399 replies
-
- 3
-

-
- winchelsea
- Syren Ship Model Company
- (and 1 more)
-
Really exceptional work and photography. Fun to watch these Speedwells coming together.
-
Thanks Mike. The design and laser cutting of Chuck’s models are definitely next level.
- 840 replies
-
- 2
-
-
- winchelsea
- Syren Ship Model Company
- (and 1 more)
-
I just can’t do another big model for a while, so I’m envious
-
Such patience to not have it already n the model. Well done! The gangway is more tricky than it seems.
-
And just when I thought geometry class was over. I’ve managed one, let’s see if I can do two b Thank you Dusan
- 840 replies
-
- 1
-
-
- winchelsea
- Syren Ship Model Company
- (and 1 more)
-
Most of the Winchelsea parts that must hold an edge like pillars, moulding, etc. are provided in boxwood. I love AYC, but as you note the boxwood is both critical where an edge is needed and provides a nice accent.
- 131 replies
-
- 1
-
-
- Medway Longboat
- Syren Ship Model Company
- (and 1 more)
-
Such patience to place and align those frames. Well done as always Rusty!
-
Thanks Rusty, now I’m at it again, taking off those bow mouldings to fit the cat head support 😊
- 840 replies
-
- 2
-
-
- winchelsea
- Syren Ship Model Company
- (and 1 more)
-
I’m enjoying your rake on this great model. It’s up next for me after Winchelsea. Boxwood for the windlass is an excellent choice.
- 131 replies
-
- 1
-
-
- Medway Longboat
- Syren Ship Model Company
- (and 1 more)
-
Remember you are creating the hull. It’s less about char remove and more about shaping. I left the back edge of the char from midships forward o the bow and the front edge from midships to the stern until the very last to keep from losing the proper shape. It’s a good time to look at multiple other logs at this stage and see what they learned, one is in general power tools aren’t the best option, it’s elbow grease time. Keep those scouring pads, they are useful for char removal later.
-
Thank you, I appreciate your commenting. It is certainly worth doing it again to get it right.
- 840 replies
-
- 1
-
-
- winchelsea
- Syren Ship Model Company
- (and 1 more)
-
Well done BE, another outstanding model completed. I have Chuck’s long boat on hand, it’s likely my next model once I complete Winchelsea. Your log, as it has been before, will be an excellent resource.
- 91 replies
-
- 2
-
-

-
- 18th century longboat
- model shipways
- (and 1 more)
-
Absolutely, only one of many things I’ll never view the same on other models again.
- 840 replies
-
- 2
-
-
- winchelsea
- Syren Ship Model Company
- (and 1 more)
-
Well done! Like you my elm tree pumps and waist cannon weren't installed until the end of Chapter 11. Your wood selection and paint choices, not to mention the framing cutout, make yours unique with lots of visual appeal.
- 399 replies
-
- 2
-
-
- winchelsea
- Syren Ship Model Company
- (and 1 more)
-
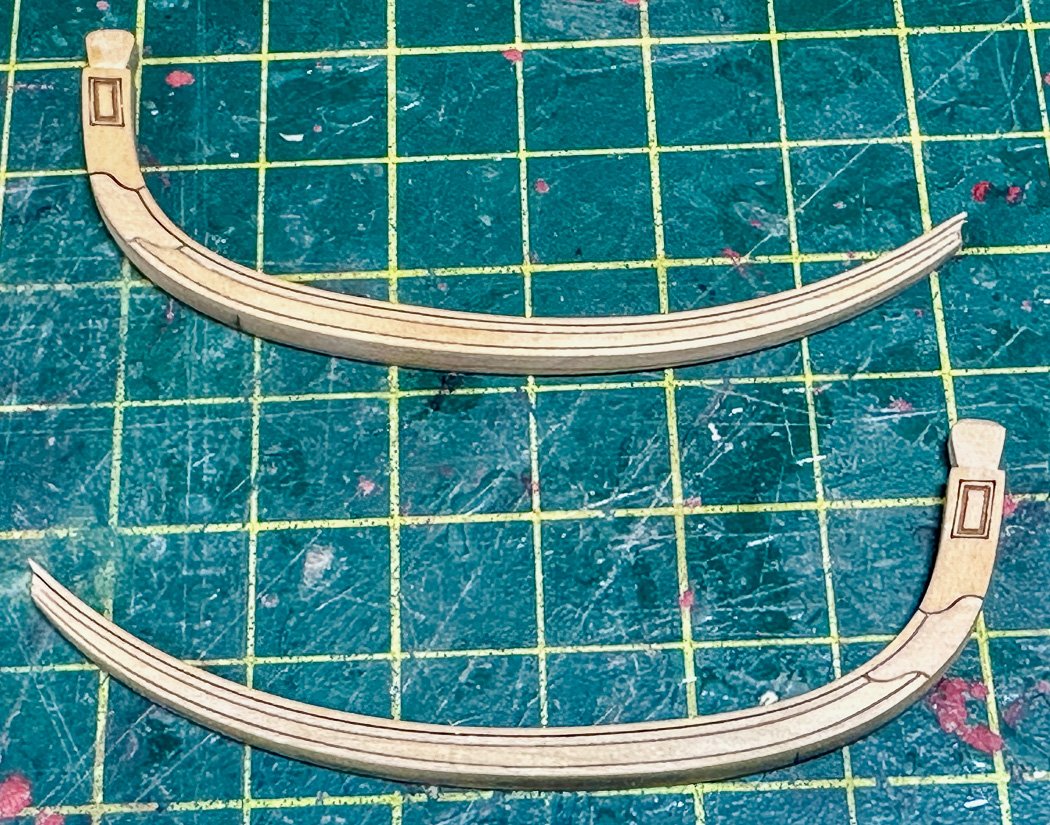
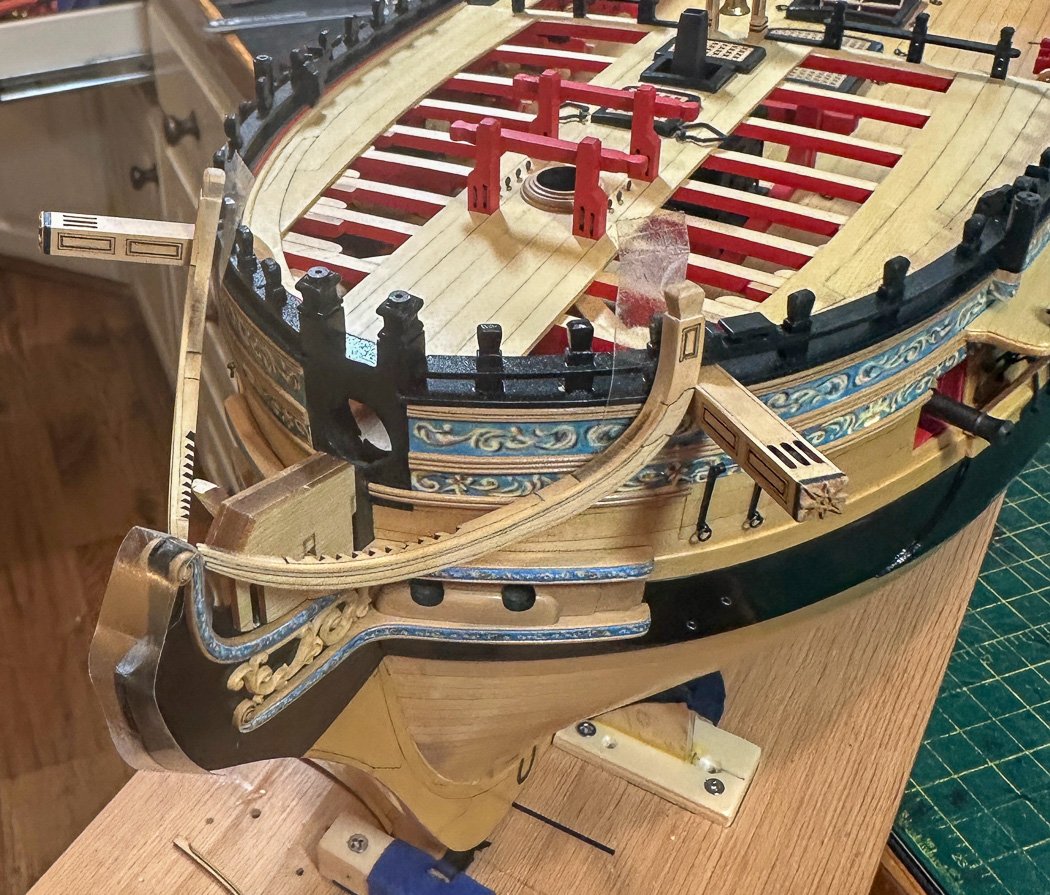
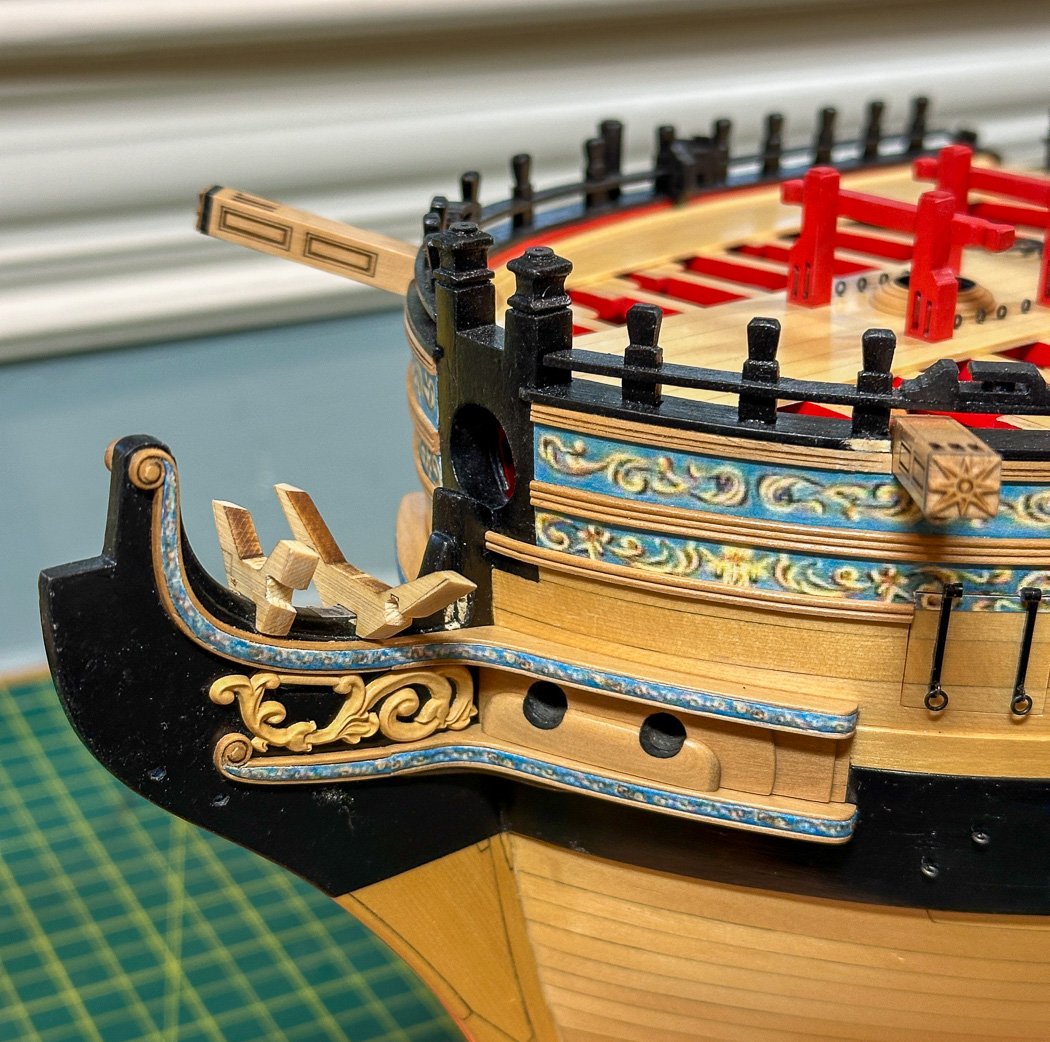
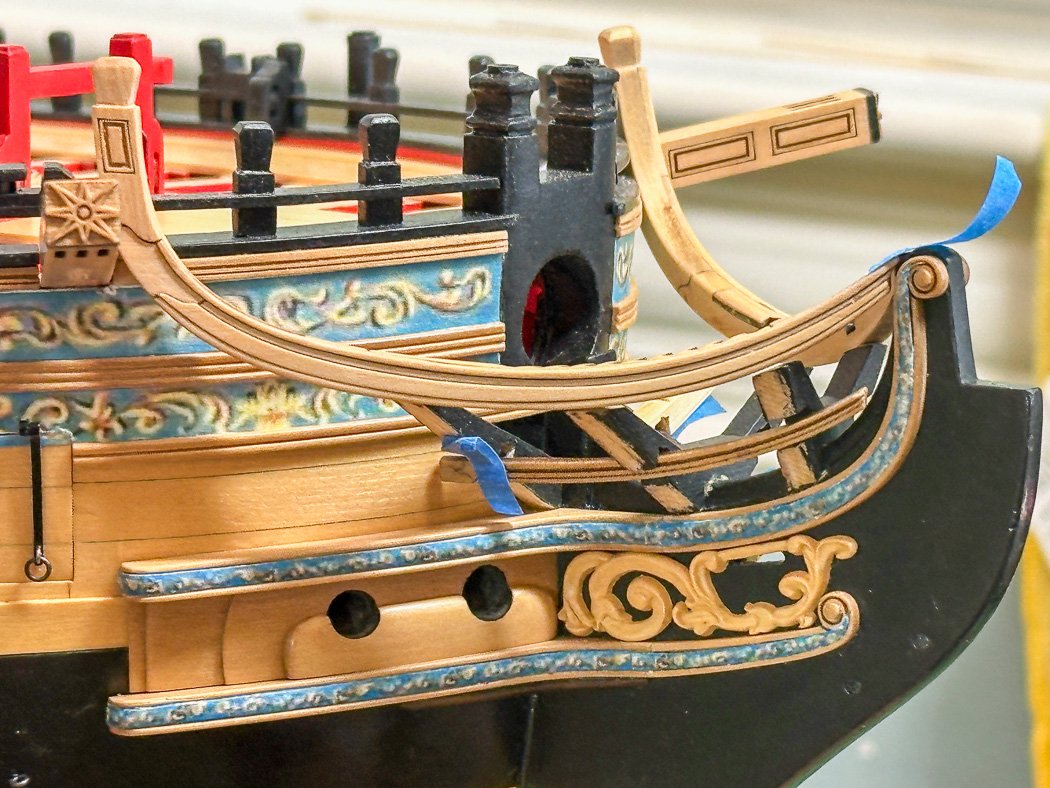
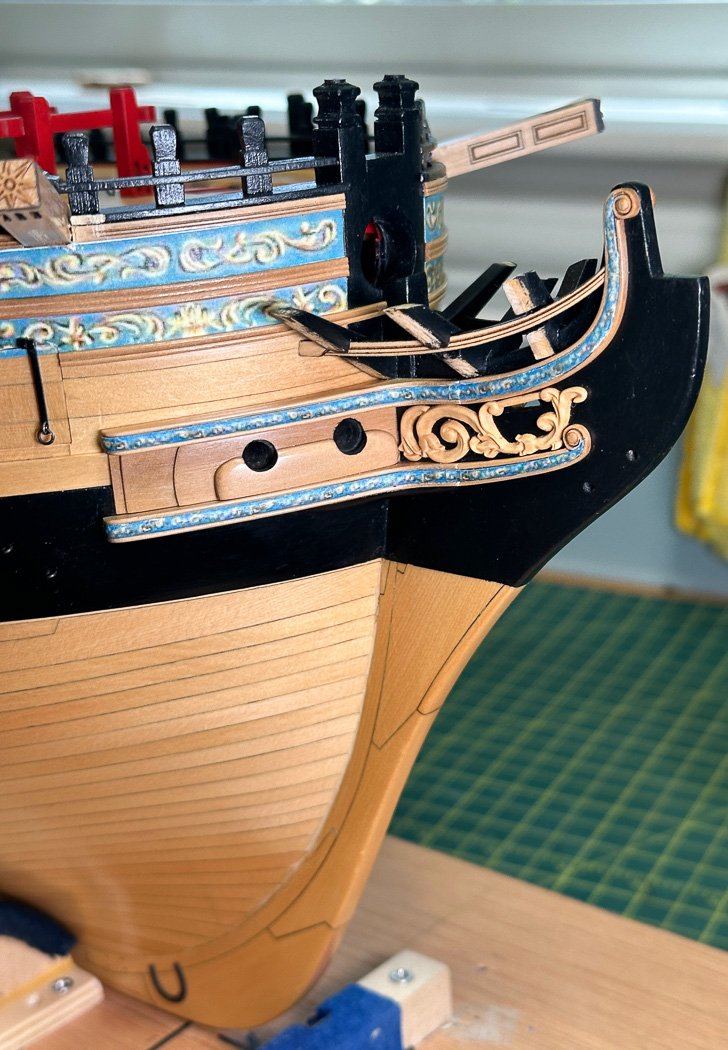
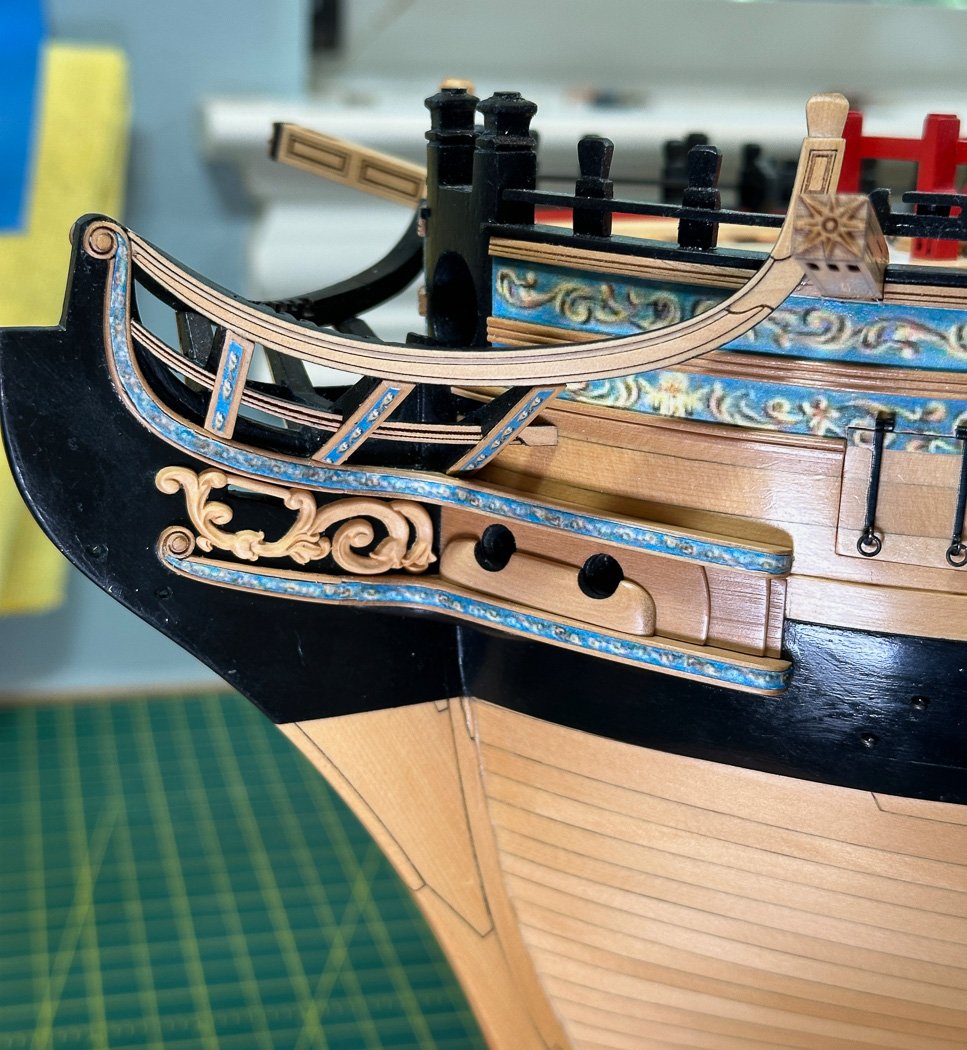
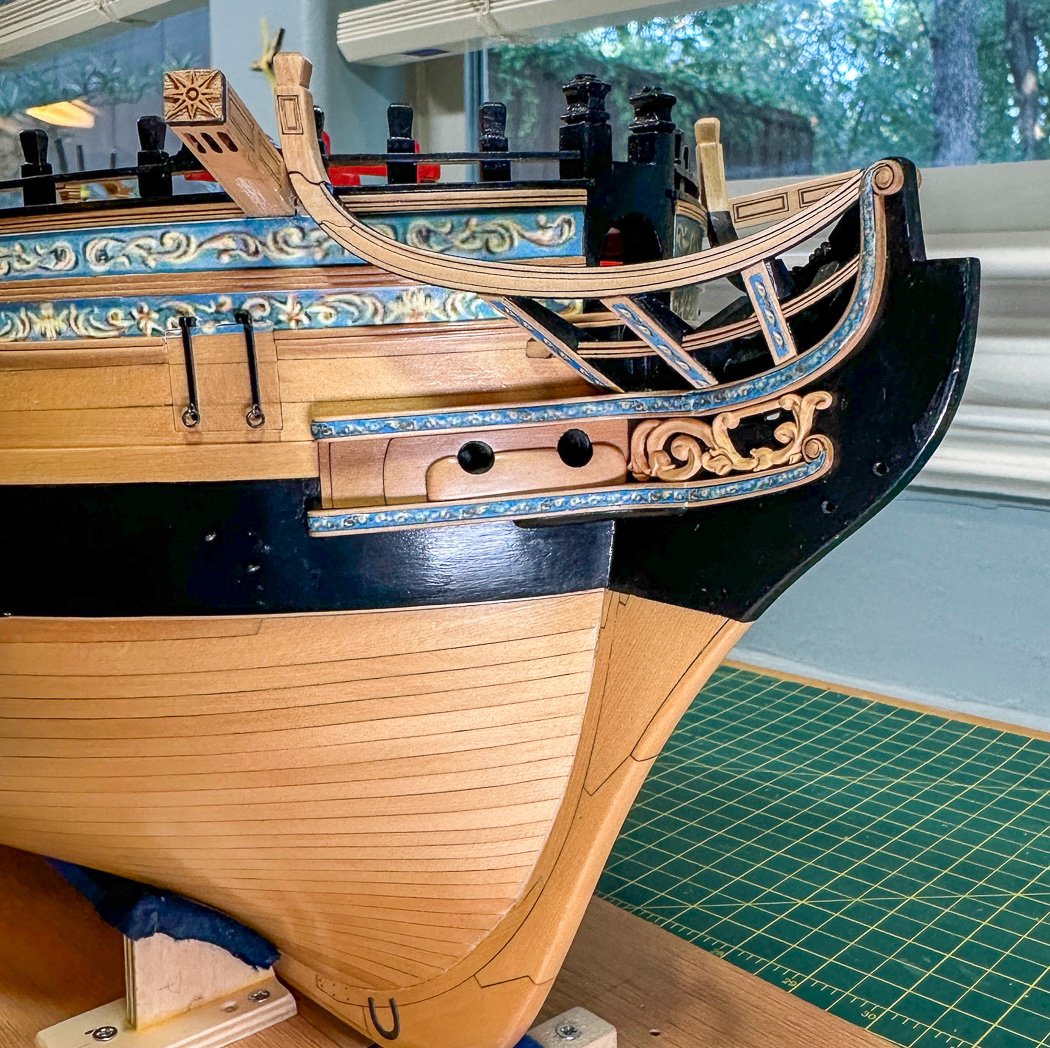
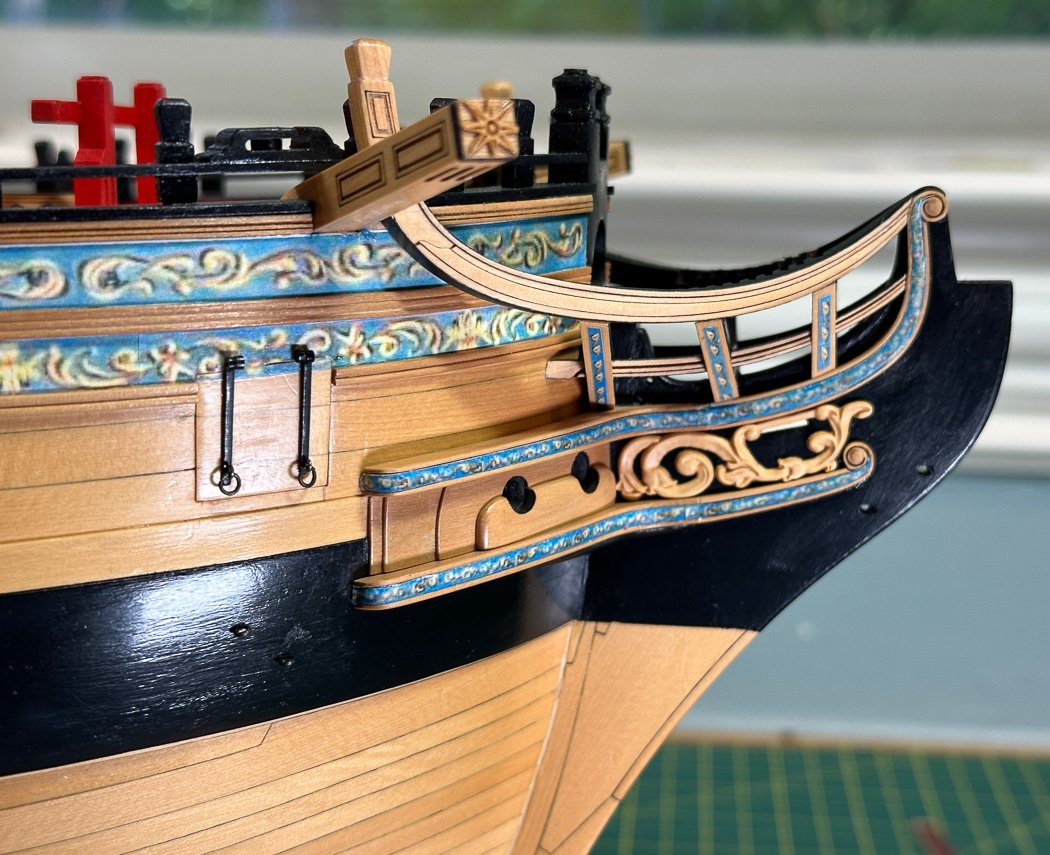
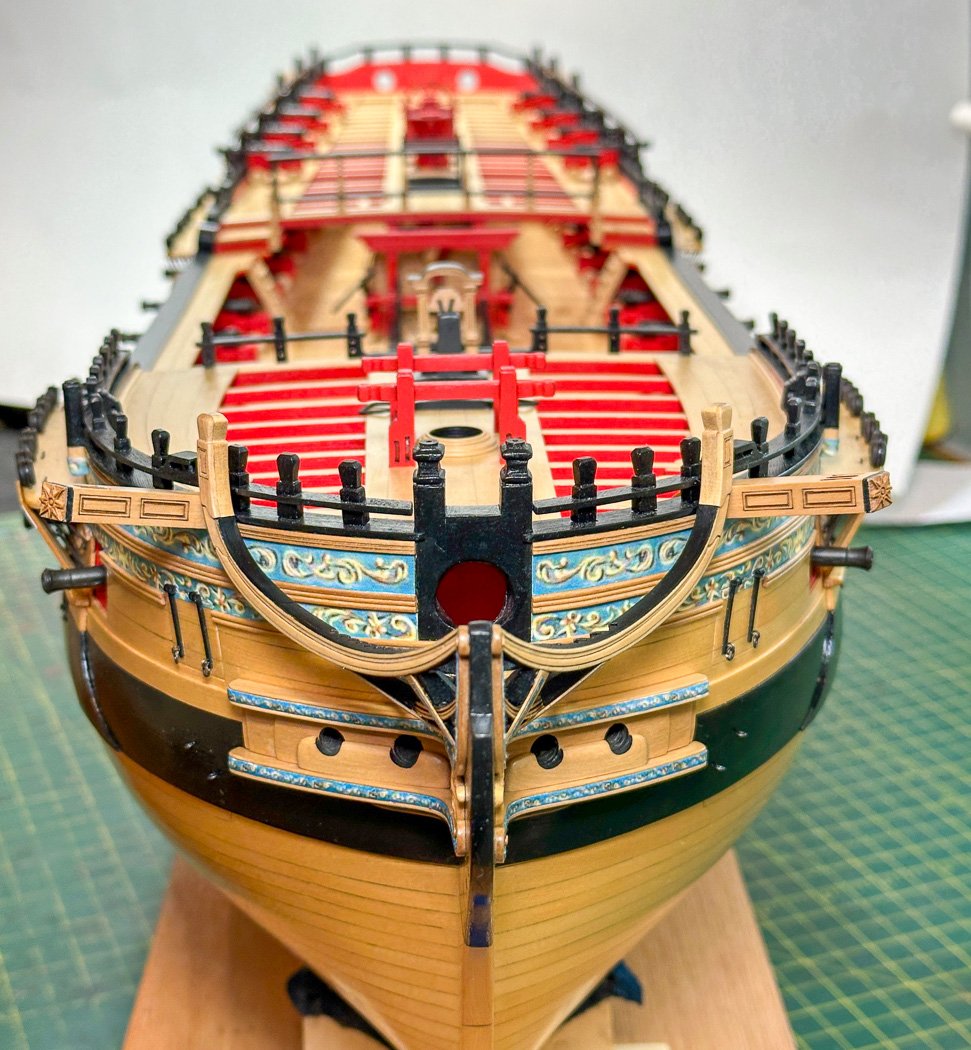
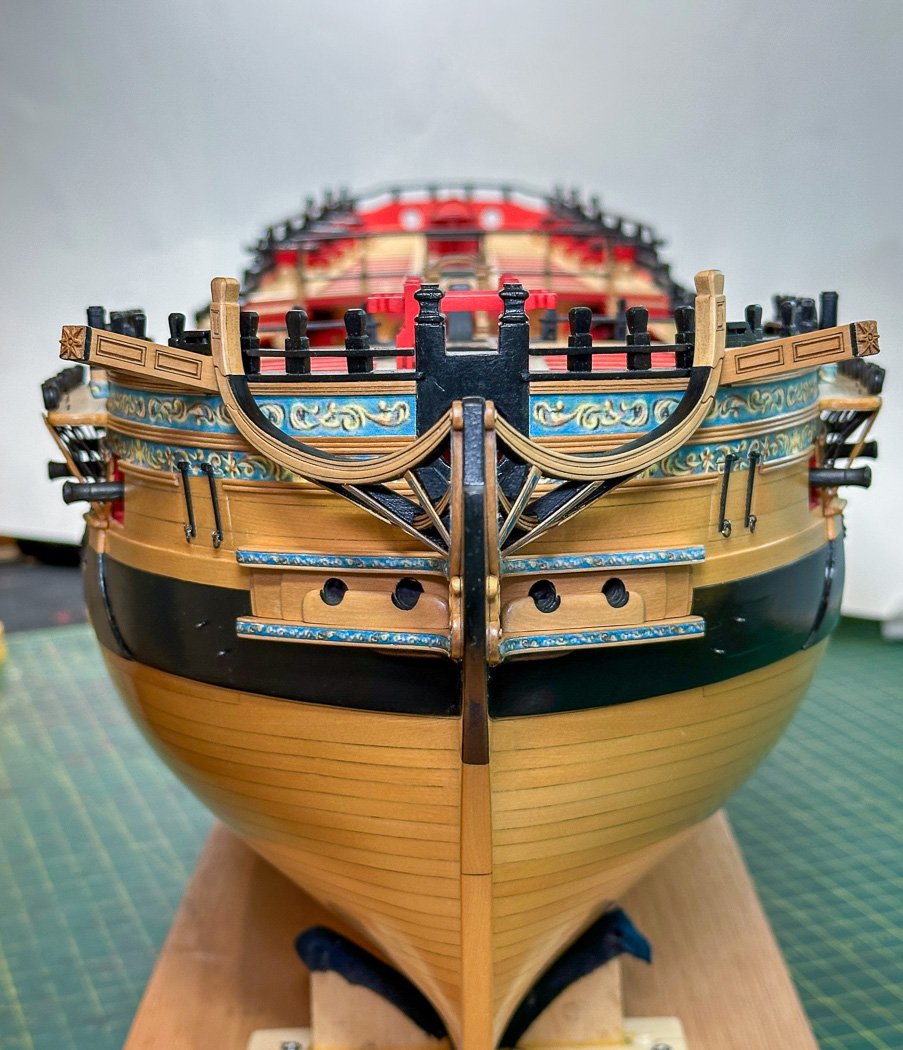
Main Rail, Timbers, and Lower Rail - Chapter 12 It’s been a while, I took some time off for summer activities but that’s not the main reason for the delay between posts. I have to say solving the first part of chapter 12; the main rails, timbers and lower rail has been the most challenging and frustrating of my three year journey with Winchelsea. The main rails themselves are a work of art, multi-dimensional and made from six laser cut pieces of multiple thicknesses they are fun to assemble (how @Chuck cuts this stuff so small, thin, and complex is beyond me) . Shaping and fitting them isn’t overly difficult. I had very little luck with rubber cement, double sided tape or even Blu-Tac so mostly I just fumbled my way through, dropping them to the floor multiple times until I got it close. As I’d learn later I spent too much time on this and ended up having to make another set more conducive to the timber set-up. The main lesson is to have all the component parts complete before making too many adjustments on each alone. It’s not like this isn’t made clear in the monograph, I should listen better. The timbers. Here is where my peace and harmony came to a crashing end. I made many timbers, my thanks to Chuck for sending me extra, I needed them. At first it seemed straight forward; use the provided jig, cut them, and stick them on add the upper rails after cutting some nice notches for the lower rail and move on. Timber, as it turned out, is not a work I want to hear again unless its related to falling trees. Why you might ask is it not so simple as it may appear. Because there are many, many, many angles to account for and two sides to match on top of that. The rise of the main rail at the cat tail, the angle of all three timbers supporting the main rail from cat to stem, the notches in those timbers, which aren’t a lot of fun to cut, matching the curve of the lower rail with its run from bow to stem, and the lower rail fitting flush in the notches for the later to be added cover boards (note: I used an intentionally short piece of rail to first get the timber notches angled correctly). At this point I quit taking photos. There are no new ones because I was doing the same thing over and over to get it right. I could have settled on 'good enough' a few times, I hadn’t done that yet so I wasn’t now. I would also like to point out that I skipped high school geometry class whenever possible. Here’s what I learned - and again the monograph doesn’t hide this point, it emphasizes it - nothing can be done serially. It all has to be done as one big puzzle assembled all together before anything is installed. Eventually my one exception was fitting the center timber (after determining its angle on my hull wasn’t the same as the jig) and working out from there. Ultimately the bigger challenge was the lower rail. Also as I noted I wasn’t having a lot of luck with rubber cement and only limited success with my ever ready double sided tape, so fumbling fingers was my path forward. I considered installing a small trampoline below my work table so the many dropped parts would bounce back up into my hands. There was a lot of touch up painting needed at the end, some of it yet to be done in the photos. I seem to be making a bigger point of this than I’ve seen in other logs so perhaps it’s just my ineptness, others must have found it far easier to complete. I just have to say for the first time I really didn’t enjoy the process and I’m glad it’s behind me. As they say, and I firmly put into practice, failure is the path forward to learning. I did get there…eventually. Ultimately the rails are a signature look and a unique complement to the model. While it would have been nice it had been easier for me, it’s all worth it in the end. I looked at my past models and more fully appreciate how Winchelsea’s main rail design is so next level. With all my whining in this post I’m very glad I took the time to do it as best I could, now I know so much more about angles on angles. My high school geometry teacher would be proud, if he could remember the guy supposed to be in the empty seat. Plus it’s not like the remaining steps of chapter 12 are going to be a walk in the park. So on with it. Thanks for stopping by with your comments and likes.
- 840 replies
-
- 25
-
-

-
- winchelsea
- Syren Ship Model Company
- (and 1 more)
-
Once faired the reference marks are just a guide, a good guide, but just a guide. As you’ll see in other logs, running long thin battens become the means to mark wales and ports once faired. If all the bulkheads are firmly seated (even across the top deck area and flush with center keel board) across the top and squared you’ll be fine. The bow pieces, not installed yet on yours, can be supplemented with balsa to aid planking the curve of the tricky bow area.
-
Excellent planking, very well done. The first coat of WOP is usually dull as the wood absorbs it. It’s about the third or fourth coat the beauty appears (I kinda loss track of how many my Winchelsea has). I do a light sanding with 400 grit after 2nd or third coat. Not sure how much WOP I’d put on wood below wales. Tamiya tape provides an excellent seal, much better than blue painters tape.
-
Very nice and well done. Lots of small parts to line up and fit.
-
Yours are closer than mine were. It’s all looking really nice. The natural wood is a nice look.
- 399 replies
-
- 2
-
-
- winchelsea
- Syren Ship Model Company
- (and 1 more)
-
Look back at many logs, you’ll find fairing is one of the most challenging and crucial steps of your build. It defines all that comes after. In this case the char actually helps as a guide.
- 399 replies
-
- 1
-
-
- winchelsea
- Syren Ship Model Company
- (and 1 more)
-
I guess now we know where the name came from😁
