
HOLIDAY DONATION DRIVE - SUPPORT MSW - DO YOUR PART TO KEEP THIS GREAT FORUM GOING! (Only 51 donations so far out of 49,000 members - C'mon guys!)
×


glbarlow
-
Posts
4,111 -
Joined
-
Last visited
Content Type
Profiles
Forums
Gallery
Events
Everything posted by glbarlow
-
 I start with an acetone bath, then blackening for 90 seconds, then a water rinse, dry and a slight buff with a soft cloth. The acetone bath is an important step. I have learned not all blackening solutions, like CA, are equal in quality or results. Foe me paint designed to look like metal rather than just black paint works ok, but only if weathering powder is applied, and not as good as blackening for some things.
 -
Thank you JJ, as long as we’re having fun right. Thanks Rusty. Accurate description, and I have so many upcoming opportunities to get freaked out.
- 840 replies
-
- 4
-

-
- winchelsea
- Syren Ship Model Company
- (and 1 more)
-
Thank you. At least that piece got a fresh coat of paint.
- 840 replies
-
- 1
-
-
- winchelsea
- Syren Ship Model Company
- (and 1 more)
-
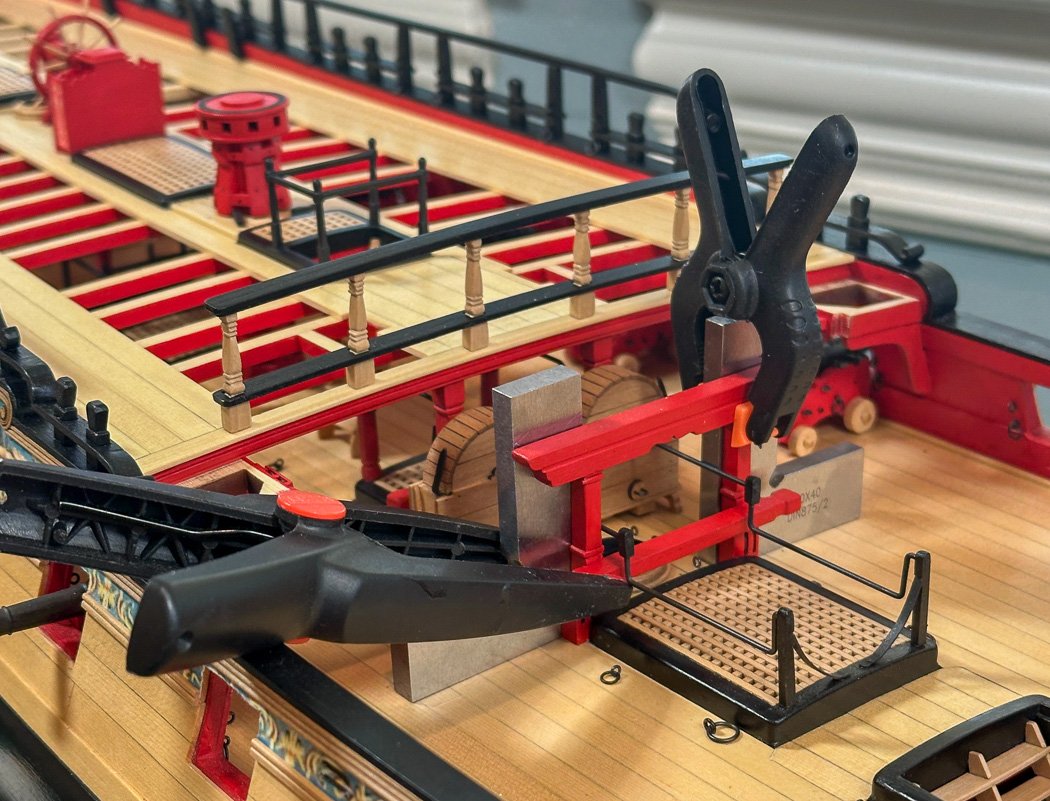
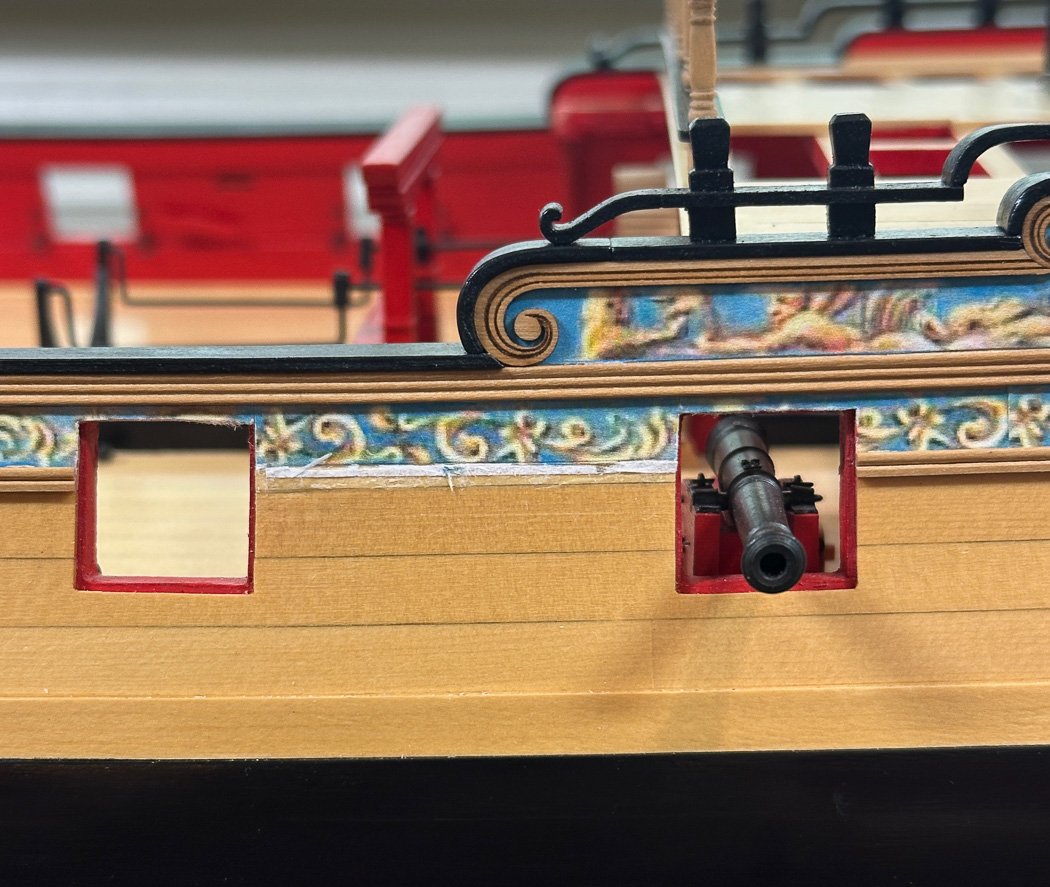
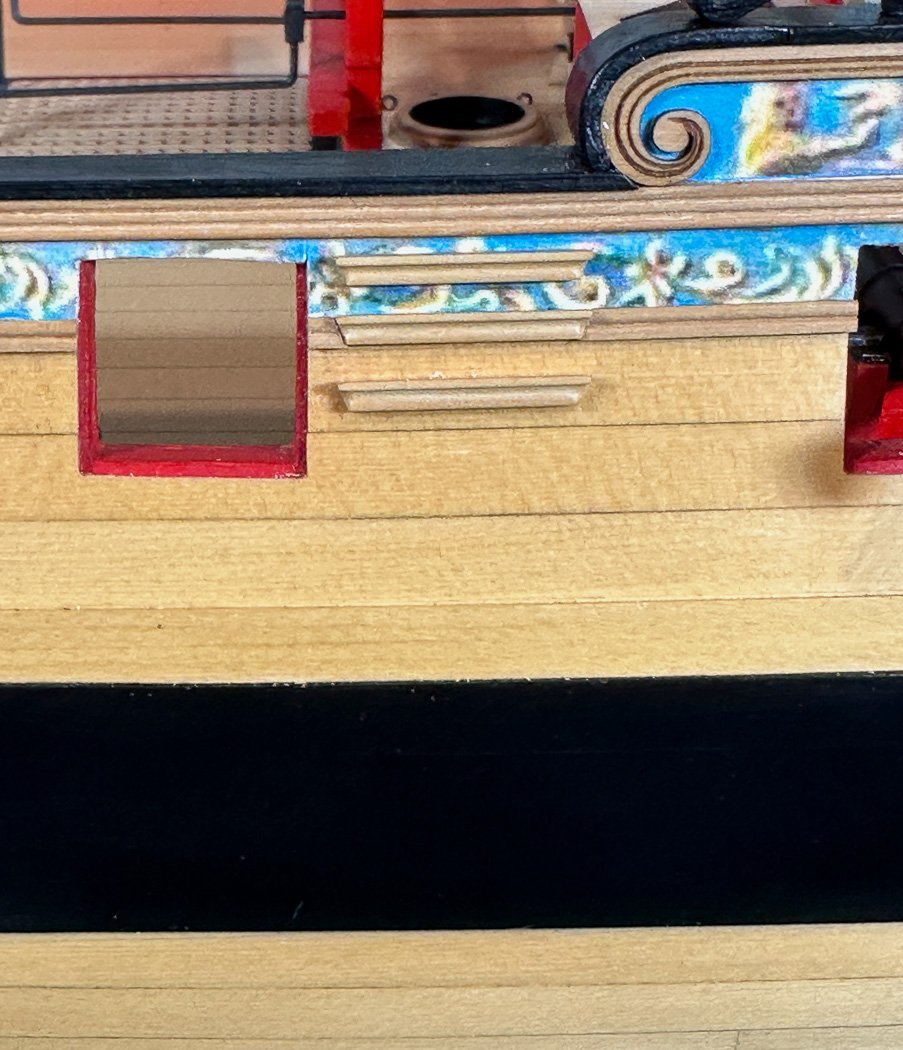
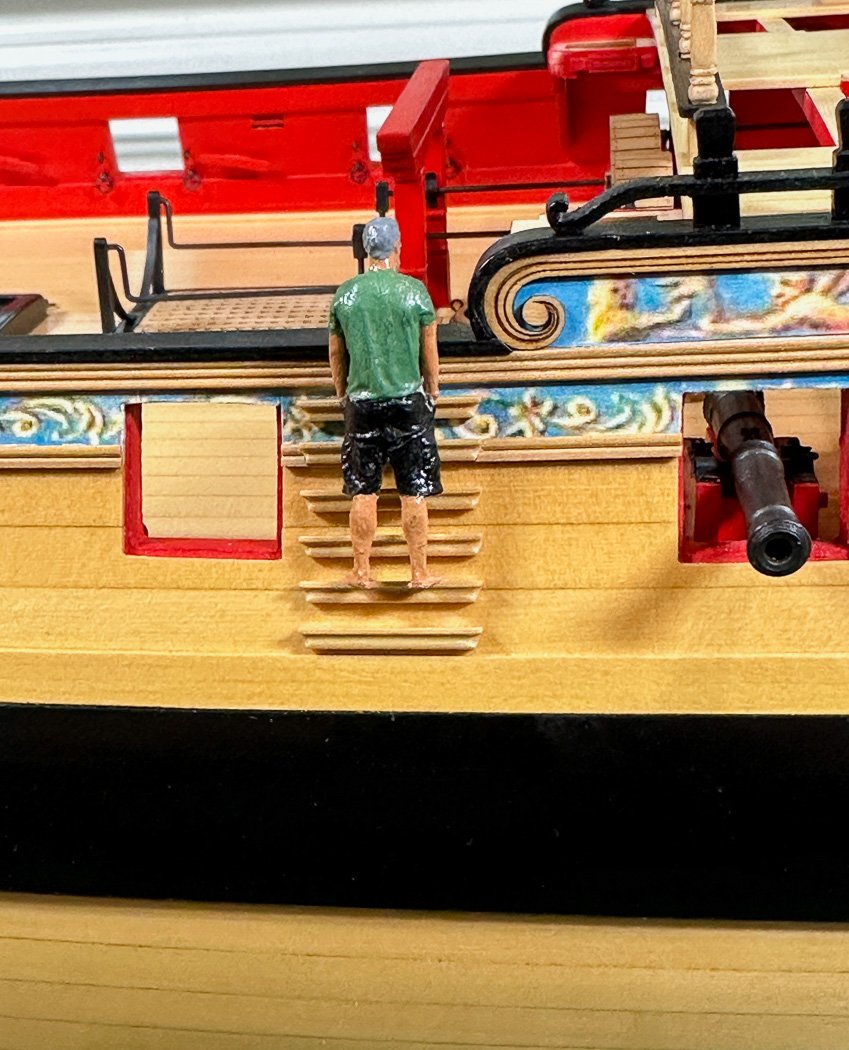
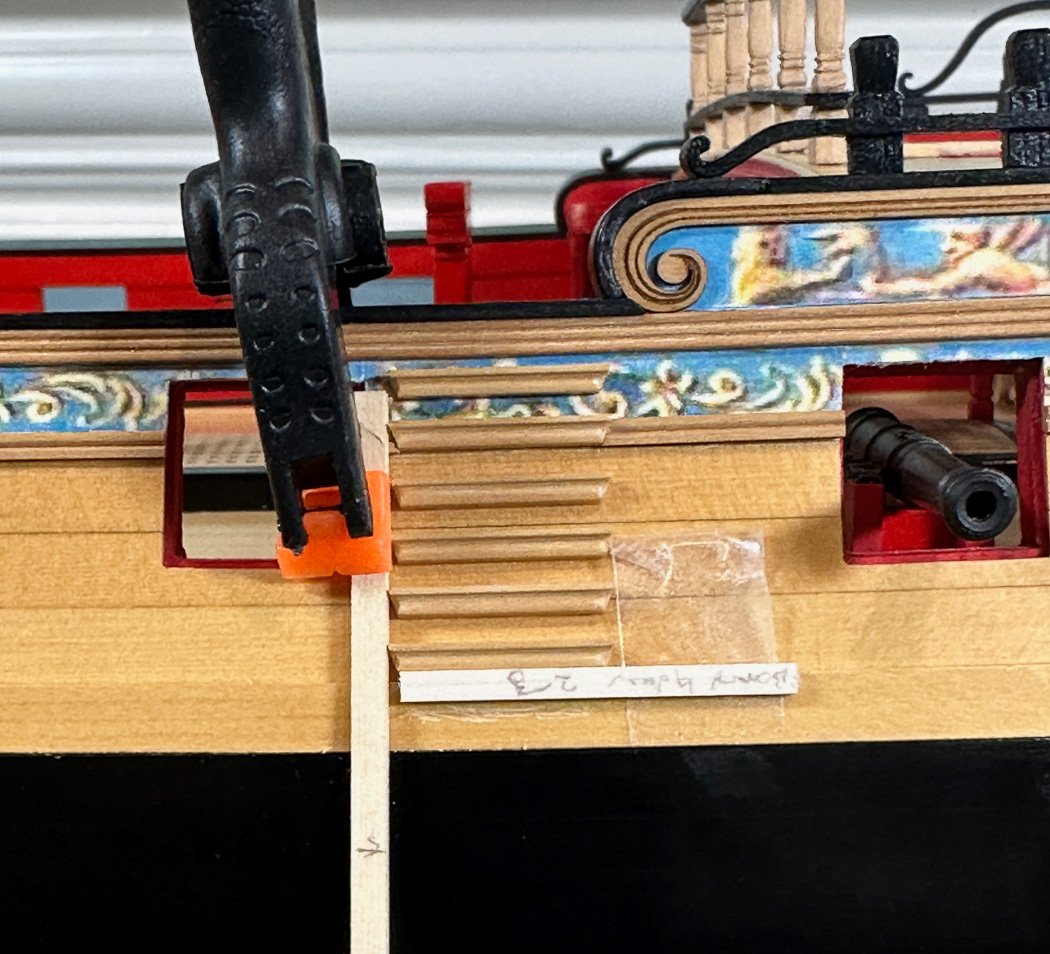
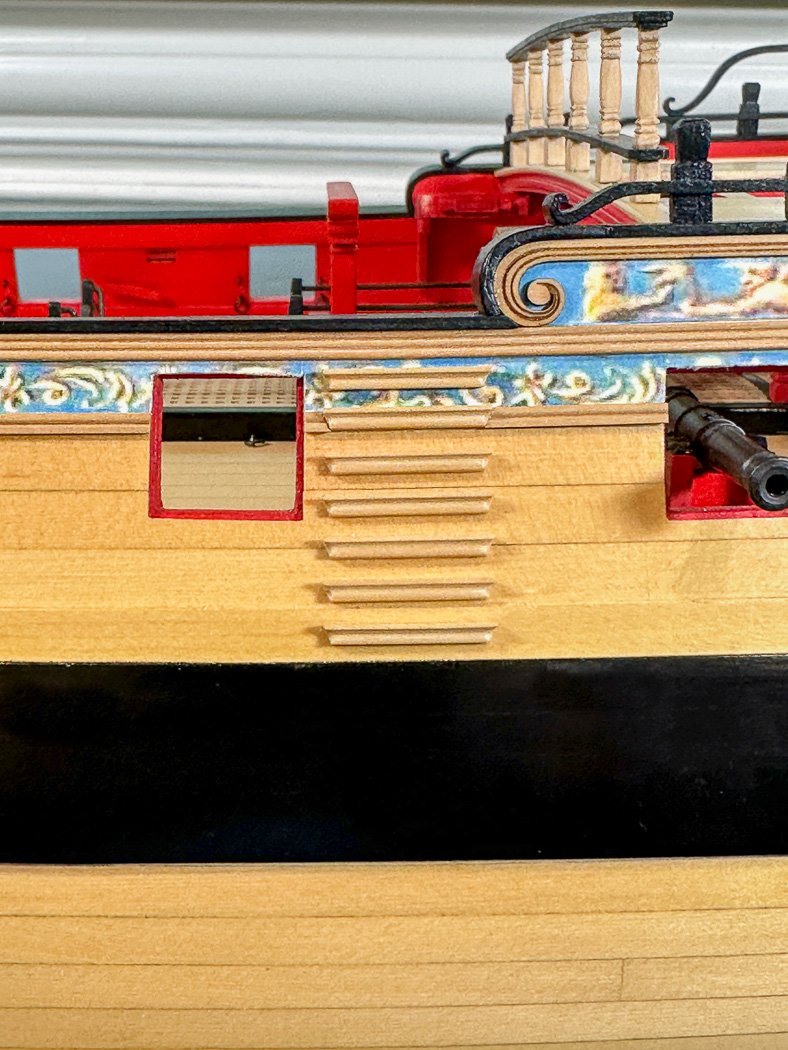
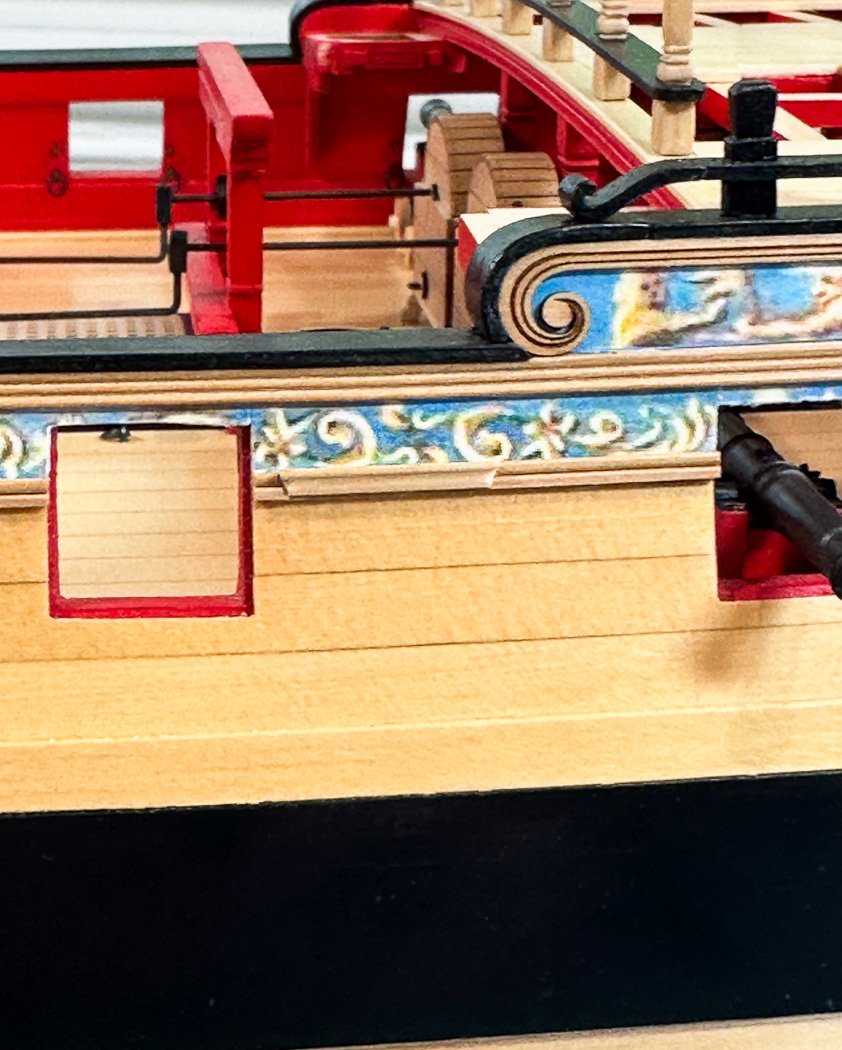
Boarding Ladder I have a friend making me a display stand, he’s an artist with “big wood.” I can’t wait to set Winchelsea on her final home. I had to turn her over to get the final fitting on the three cradles she’ll sit on - something I should have done much sooner. So of course something broke. Fun it was clearing, cleaning, repainting, 18/0 and 10/0 spotter and shader brushes, and reinstalling this piece, or pieces as they became, (especially the tiny metal braces on the inner edges) with everything around it complete and completely in the way. A lot of patience and slow going, In the end all is ok again. I made some decisions installing the boarding ladder. First was to remove the complete molding rather than try and cut into it. I also elected to scrape a pattern similar to the moulding. Then by sanding a 67.5 angle on each side and a reverse 67.5 on the re-cut to fit separated molding I could create an integrated look for the anchor step. Anchor step because I would space the rest based on the fit of this step within the moulding. I used a round file and 400 grit to round the pattern into the side of each step after scraping them from a length of boxwood strip. I kinda like the result. I printed the frieze pattern on tissue paper, a first for me. I just didn’t like the outcome of wrapping the top step, partially because I couldn’t get a clean look on the sides, admittedly I didn’t try very hard. While the wrapped step looks great I preferred a natural look atop the frieze. I split the distance between the top and second step for spacing. I lined all the steps up with the right edge of the port, it being perpendicular to the actual water line (the photo isn’t straight on so the perspective is off). Mini-me had a new view of the ship standing here on the ladder. He's to scale so I like the perspective he provides to size and space. The plans show 6 steps with the last one on the black strake. I measured out how that would work on my particular hull, the spacing would have looked awkward with the top two steps fitted as they needed to be. So I reduced the spacing for the remaining four steps for a consistent look. But I worked it out. After measuring, cutting and re-cutting multiple test spacers (2.23mm wound up to be the right gap) to allow a seventh step sitting in the middle of the black strake. Ahh symmetry … and some drama. Determining the jigs by measuring and remeasuring and making the steps was fun. Removing the moulding without taking the frieze with it, and with a #11 blade scratching into the multiple coats of WOP to create a bondable surface for the glue provided a few deep breath moments. I used CA, applied with a straight pin onto the step with just enough to adhere without spillover onto the hull. It all turned out ok. Thanks for stopping by.
- 840 replies
-
- 17
-
-

-
- winchelsea
- Syren Ship Model Company
- (and 1 more)
-
Who would send hate mail. You made the right and best decision. We love our dogs, taking our previous 17 year old beagle for that last trip is heartbreaking, no matter how right it is to do.
- 443 replies
-
- 3
-
-
- Indefatigable
- Vanguard Models
- (and 1 more)
-
Nice metal work, my least favorite thing. But then it looks so good on the model. Consider weathering powder, these look good, blackened and weathered.
-
Well done B.E. Congratulations on another superb model. Always a pleasure following your logs. What’s next up?
- 648 replies
-
- 2
-

-
-
- Indefatigable
- Vanguard Models
- (and 1 more)
-
It looks so nice, really well done. Your patience and effort to learn the new skills to make this is quite impressive.
-
Thanks for the nice comments. The weathering powder rally does make a big difference, especially on metal and wood meant to be metal, like my stove. Air brushing too makes for a nicer look on things like cannon carriages. I had no idea how to use one, but with guidance from here on the forum I sorted it out. Amazon has some nice, reasonably priced setups. My advice, don’t go too cheap. A good brush and an actual compressor is worth the extra money. The only down side is the brush takes about as long to clean as it does to paint, for me anyway.
- 840 replies
-
- 7
-
-
- winchelsea
- Syren Ship Model Company
- (and 1 more)
-
Thanks for the comment Eric. My cannons are a two step process. First airbrushing with Admiralty Paints Ironworks Black (I love the stuff, a rich matte black), airbrushing both the carriages and the guns produces a much more even finish, especially on the barrels. Then a four different brush application of Doc OBrien’s Rusty Brown weathering powder (which I also more lightly apply to the cap squares to bring it all together. Don't know why but the combination turns the cannons into a nice gun metal gray, credit goes to Chuck for the Rusty Brown, not an obvious choice. Enjoying your work on Cheerful as well.
- 840 replies
-
- 6
-
-
- winchelsea
- Syren Ship Model Company
- (and 1 more)
-
Thank you for the kind words. Glad my log will be of some help. Both Cheerful and now Winchelsea are great build, lots of challenges and lots of fun - with a little frustration here and there.
- 840 replies
-
- 3
-
-
- winchelsea
- Syren Ship Model Company
- (and 1 more)
-
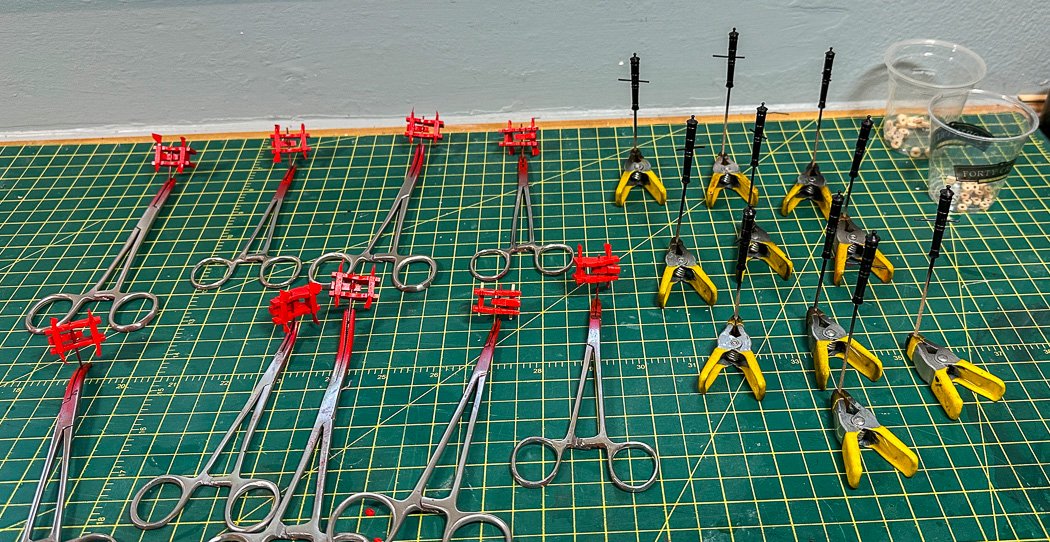
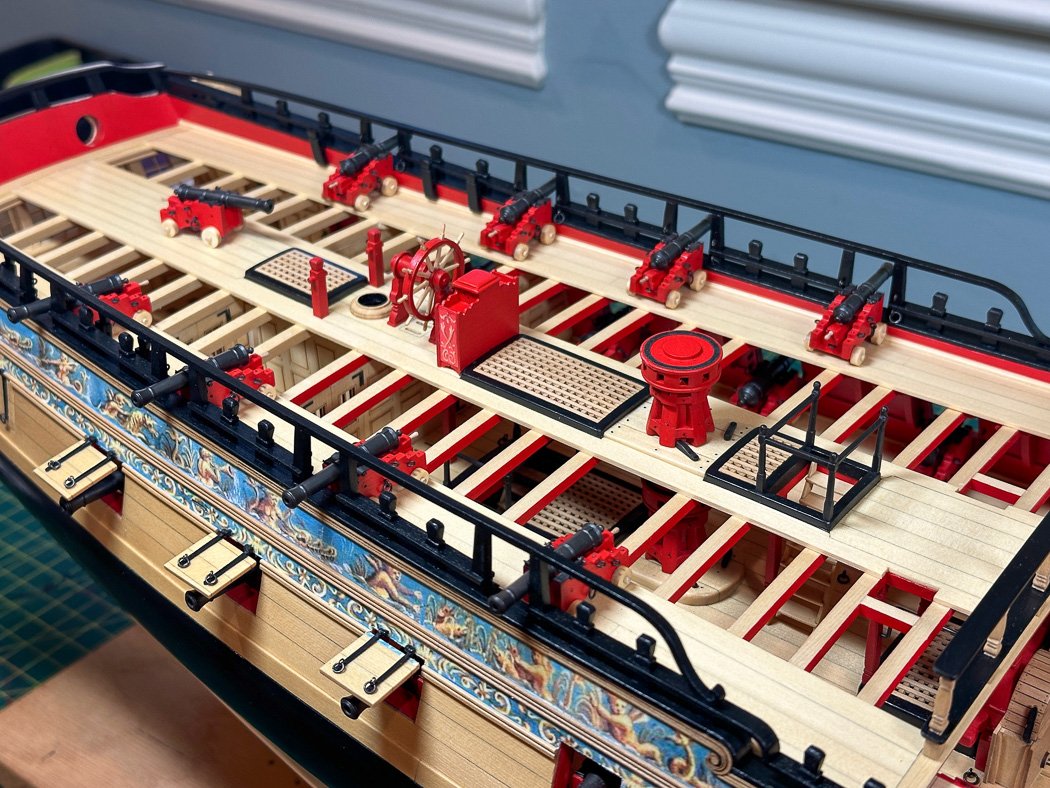
Quarterdeck Cannon No lengthy explanations, the quarterdeck cannon were made just as the main deck guns detailed in an earlier post. The carriages were freed of char and air brushed. One difference from the main guns are the cannon; before being air brushed with Ironwood Black I elected to replace the thin resin trunnions with 19 gauge wire by drilling through the guns using my mill. Or perhaps I should say the decision was made for me with at least three of the guns already having the plastic ones broken off while still in the bag. No doubt carelessness on my part. The production line is ready. The completed guns sitting (not glued, that comes later) on the q-deck. I always build one extra … just in case. On to Chapter 11.

- 840 replies
-
- 17
-
-
-
- winchelsea
- Syren Ship Model Company
- (and 1 more)
-
I’ve never seen a Nikon lens with f/40, interesting. I too rejected ring lights in my photography due to limited use and high price. This seems like a nice price effective choice. Thanks for sharing.
-
First Quarter deck cannon complete and posed next to its main deck companion. Seven more to go

- 840 replies
-
- 18
-
-
- winchelsea
- Syren Ship Model Company
- (and 1 more)
-
Chris…the man, the legend. is this the NRG magazine all us members should receive?
-
For the whole model or just the wood?
-
Not sure basswood for boxwood is a fair exchange, glad it works for you.
-
This I know from building. Cheerful and Winchelsea. This is next level.
-
I’ll watch you for a while 😁
-
Mostly due to the size and available (or I should allowable based on my wife’s review) display space I’m really trying to convince myself Speedwell is not my next project. With each new innovation that gets harder and harder to do…..I mean, to scale door handles and books on a table in the cabin, wow.
-
Not all of us have high praise, I think they’re a junk company that proudly lists kits based on stolen IP from China. As Chuck notes The Modeler’s Saw Mill is an excellent US source for wood. I recommend you replace what you have with Alaskan Yellow Cedar (much less than boxwood and easier to work with, though boxwood is amazing). See my Cheerful or Winchelsea build log for more photos on how it looks planked on a hull. Then toss that junk away after sending MS a demand for refund (which you likely won’t get, but you’ll feel better) and post a nice Google Review.
-
Very vivid and nicely done!
-
Perhaps for you, not my guidance at all.

