


glbarlow
-
Posts
3,836 -
Joined
-
Last visited
Content Type
Profiles
Forums
Gallery
Events
Posts posted by glbarlow
-
-
-
-
It’s not often there are two Glenn’s 😊
-
1 hour ago, glennard2523 said:
Looks can be very deceptive. Not so neat in some places when you are up close.
I think maybe he meant this Glenn😬
-
3 hours ago, DelF said:
I like the idea of a strip along the edge of the copper. Another idea I’ll borrow!
Derek
As another option: After establishing the waterline on my Vanguard I ran a row of full plates on top of and even with the top of those. It neated up the look quite a bit.
Every time I look at it...so many plates...Speedy is much more manageable. I still won’t do it but glad you guys are enjoying it. -
59 minutes ago, glennard2523 said:
think it would be ok with thin 3mm strips.
One possible problem to check is that extra height doesn't prohibit the cannons from going through the port, I'd rig one up and poke it through one with a dry-fitted piece on the sill. I know I started to do that on my little Nelson project and determined the cannons weren't high enough to allow it. Painting them red (or whatever color) helps conceal the different layers of wood.
-
On 3/9/2020 at 3:24 AM, DelF said:
paper deck on which I'll draw my own planks
This is a fantastic approach...use pencil to draw the planks then you can redesign it every year🤣😂
- Edwardkenway and DelF
-
 2
2
-
8 hours ago, DelF said:
otherwise I would have run out of strips
I’m a bit concerned about several builders near running out of strips both first and second planking...
we all have our methods around gun ports, thanks for sharing yours. I like the idea of a file with a single face, I need to find one of those.
I sometimes cut a jig from scrap about 3-4mm height, long enough to hold on to, and the exact width of the gun port. Then attach 220 to one width side and 320 to the other with double sided tape and use it for a “file.” Being the exact width of the gun port and smooth wood on the sides gives me consistency.
Looking good!
-
I’ve found it easier to open up the gun ports, hatches, and rowing ports after each plank, never letting it get completely closed.
I like the look of the lasered deck. I’m trying out your phatic blue for some parts, thanks for the lead.
Good job on the bulwarks.
-
I am quite the opposite, I’m excited about it. Great materials, good instruction, plenty of support.
Sorry you got the wrong message from my posts.
- paulsutcliffe and mtaylor
-
2
-
In case you were wondering about guidance for building Cheerful
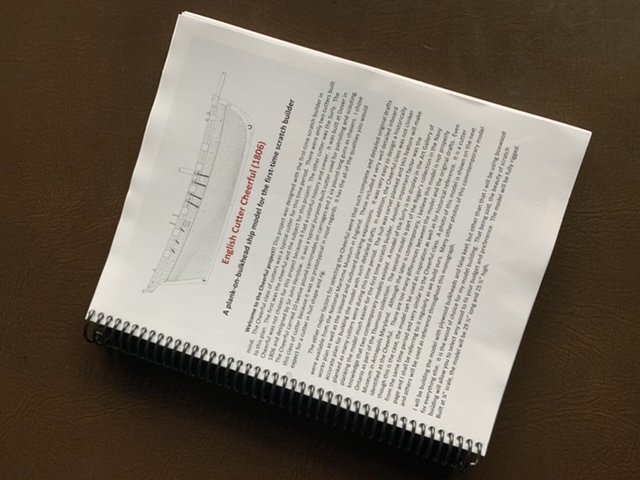
I printed Chuck’s chapters from his website, 120 pages including color photos of step by step instruction. Just sayin’
-
4 hours ago, SpyGlass said:
Be a little careful on the term smooth.
I’m ok with my use of the word smooth in this context. Smooth as in the clear definition of the hull without hills and valleys and the basis of what you want it to become. I put a coat of water based poly on the first planking to seal and then light sand that with a medium grade paper. Never had an adhesion issue. But then I use CA...
-
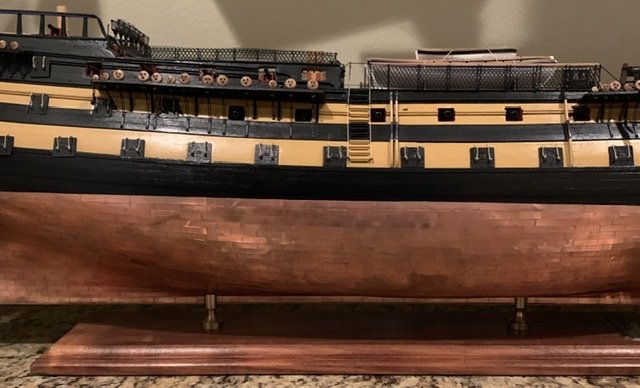
Here is my Cutter Cheerful for my first scratch build, it’s not quite done yet.
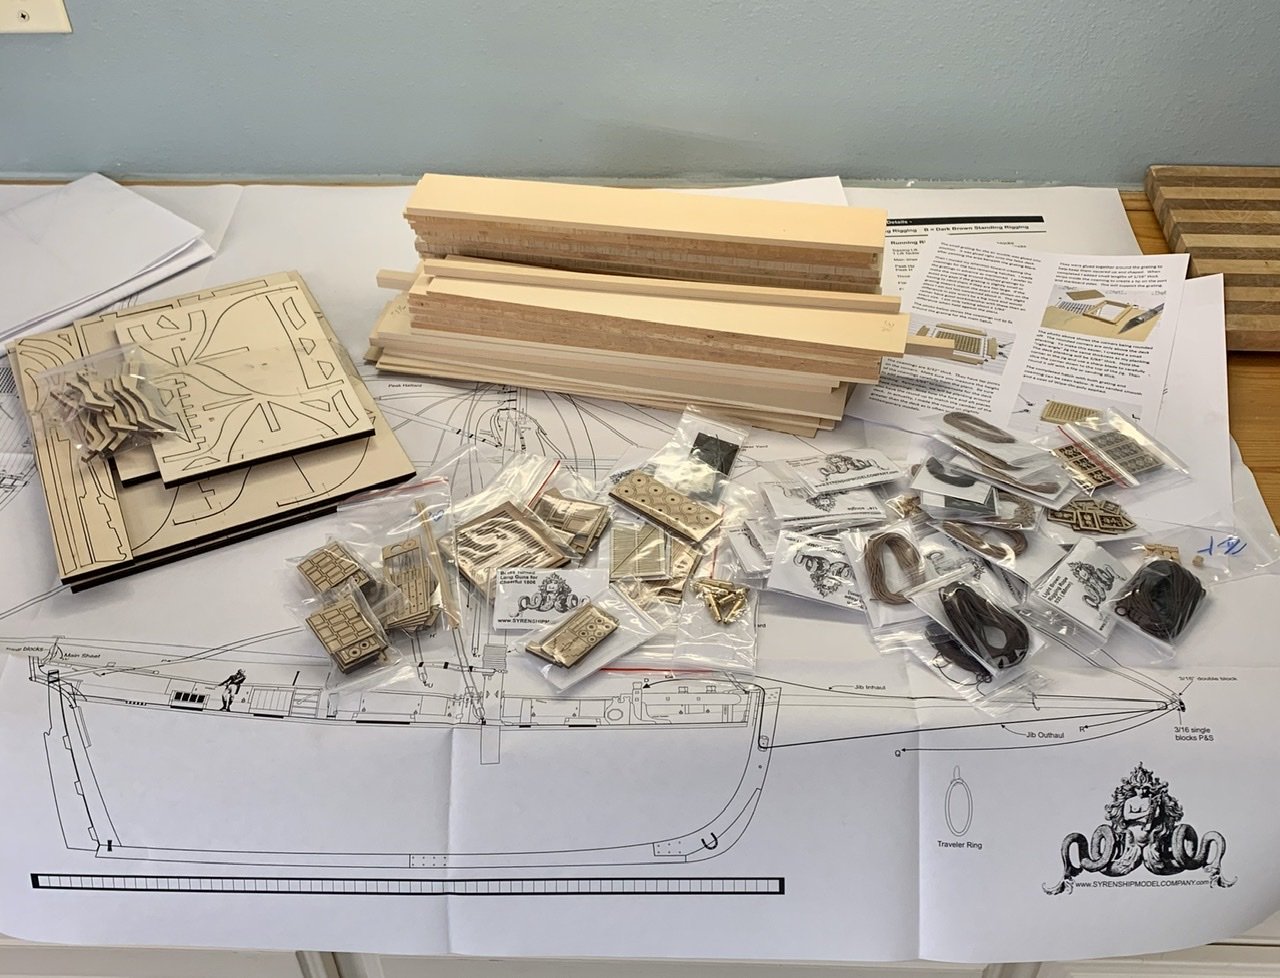 Thanks @Chuck for amazing material. The task ahead is daunting but I have great wood, plans, guidance, and mini-kits to get there. The Alaskan Yellow Cedar is like butter.
Build log to follow once I begin.
- mtaylor, DelF, GrandpaPhil and 6 others
-
9
-
I was referring to the outside of the hull. I know we just glue on the strips, but for beginners to get them lined up and spaced properly will be a good test. I really hope they sell well, its important beginners have a good first experience. For me, although I'd built the Blue Nose first, I really learned the good stuff from building the Virginia AVS using a detailed practicum from Bob Hunt. I still use that for reference on rigging methods (that I forget between models). So my recommendation is the model itself is of course important, but the accompanying instructions - which you are really good at. The beginner won't have a clue about using plans, but learning all the steps and how to do that will lead them to their next purchase of the Alert or Speedy 🙂
-
Nice looking little boats - I'm thinking that side moulding might be a challenge for a beginner but I'm sure you explain it well in your instructions. This is the kind of kit I'd like to get my grandson when he gets a bit older, I wish you the best of luck in finding a market for it. There is just so much mass produced, but heavily marketed crap, on the places and website beginners would go to look I hope they can separate from all that to find a kit of this quality. I'm a fan.
-
On 3/3/2020 at 7:45 PM, VTHokiEE said:
how smooth does this first layer have to be
Your first planking is very smooth as first planking's go. My experience is the smoother the better, from what I see in the photos you’ll be fine with a little filler in the dips then some sanding. Nothing dramatic necessary. The second planking will pick up any big height changes and with its thinner wood less adaptable to sanding it out.
Nice work!
-
If I’m following your question cutting a plank to fit is very hard work and difficult to repeat for each plank. For me there are two steps, taper and bend. I use a 4-5mm plank, taper it to fit (so there are the same number of planks from top to bottom) then bend it into the curve to fit the hull.
My next step after lining the hull is tapering a plank to fit. If the plank at its widest point is 5mm at midship then you need to trim it along its length to, for example, 2.5mm (width determined by your tick marks) where it meets the bow. The next step is fitting that tapered strip to fit the inward and downward curves of the bow.
I’ve done planking the same way, taper-soak-twist for a long time. Recently I discovered Chuck’s plank bending technique, it works great. It takes a little practice and even with the excellent tutorials a little hands on work to get settled using it, but it’s well worth the time spent. The videos Chuck and VTH linked you to explain how that works.
I hope this helps and I’m understanding your question. There are tons of tutorials and methods on this site, it’s just about finding what works for you. But I’d try this one first.
-
If you go with boxwood I don’t think you have to do all the detail around the masts and hatches. If you don’t go with the boxwood then send it to me, because I can’t seem to find any😂
-
I'm not sure what "purists" would be bothered by, I think it looks great. Nice job!
-
Up to you but those joints may stand out more than you want. The gun ports break it up already. It’s easier in my opinion to open a port with a #11 blade with a full strip across it than to line up edges.
I’m planning to use the laser cut deck at the moment.
-
12 minutes ago, Duanelaker said:
That link
I corrected the link. Thanks for the catch.
-
8 hours ago, VTHokiEE said:
I have some coming my way.
These come in handy for managing the glue, I keep a supply and go through about 3 per build.
https://www.amazon.com/gp/product/B008LRT7TO/ref=ppx_yo_dt_b_asin_title_o04_s00?ie=UTF8&psc=1
-
Planning to use this great log to help guide me in my build of the Cheerful.
- Canute, Ryland Craze, Rustyj and 2 others
-
5
-
I’ve used this CA on every model I’ve built. So far (the oldest is about 20 years old) nothing has fallen off, it works for me.
https://www.amazon.com/Insta-Cure-Filling-Bob-Smith-Ind/dp/B0000DD1QQ/ref=sr_1_6?keywords=Ca+glue&qid=1583261674&sr=8-6There is a medium version of this same brand I keep on hand for certain jobs for a little longer setup time.

HMS Speedy by Vane - Vanguard Models - Scale 1:64 - Master Shipwright (limited edition)
in - Kit build logs for subjects built from 1751 - 1800
Posted
I think sometimes “because it looks good” is enough of an answer. If we’re not under contract to a museum we’re ok making a few aesthetic decisions on our own.