


glbarlow
-
Posts
4,133 -
Joined
-
Last visited
Content Type
Profiles
Forums
Gallery
Events
Everything posted by glbarlow
-
 I believe the shoulders on the mast should be thinner and flatter per the plans, but it's your model. Nice work on the stop and chocks - it's hard getting all that stuff to line up right, well done.
 -
I wrote it with you in mind Bob😊 All I can suggest is start building. Flirt will be a nice introduction to Sphinx.
-
I guess my post today on your Dallas build is a model you finished long ago, I didn’t notice the date…oops. Your Flirt is common along well. Nice work!
-
Well done, congratulations! No need to fear rigging Flirt, other than ratlines rigging is a favorite part for me. The complexity is fun, just start inside out and bottom up. Don’t do final tension and fix lines until most all are installed and don’t over tighten, a little slack is fine. My favorite rigging too is taking a 6-8 inch pencil size wooden dowel, cutting off the threading end of a large sewing needle, filing or sanding the rough edge smooth and gluing the pointed end into the dowel. The resulting open V allows me to ‘push’ ropes about, especially handy when attaching rope to belaying pins. Look forward to seeing your next build.
- 41 replies
-
- 2
-

-
- artesania latina
- dallas
- (and 1 more)
-
Well, that’s sort of lining the hull😊. I enjoy seeing our different planking styles and how both come out looking great. Also, I’m looking for misspelled words🤣😂.
- 345 replies
-
- 1
-

-
- Duchess Of Kingston
- Vanguard Models
- (and 1 more)
-
Thank you. I may reconsider. It’s the stem that gives me pause, but then again gotta love the zebra look😀
-
Why thank you BE, I’m always an admirer of your work as well.
-
I like having misspelled words to keep you entertained 😂
-
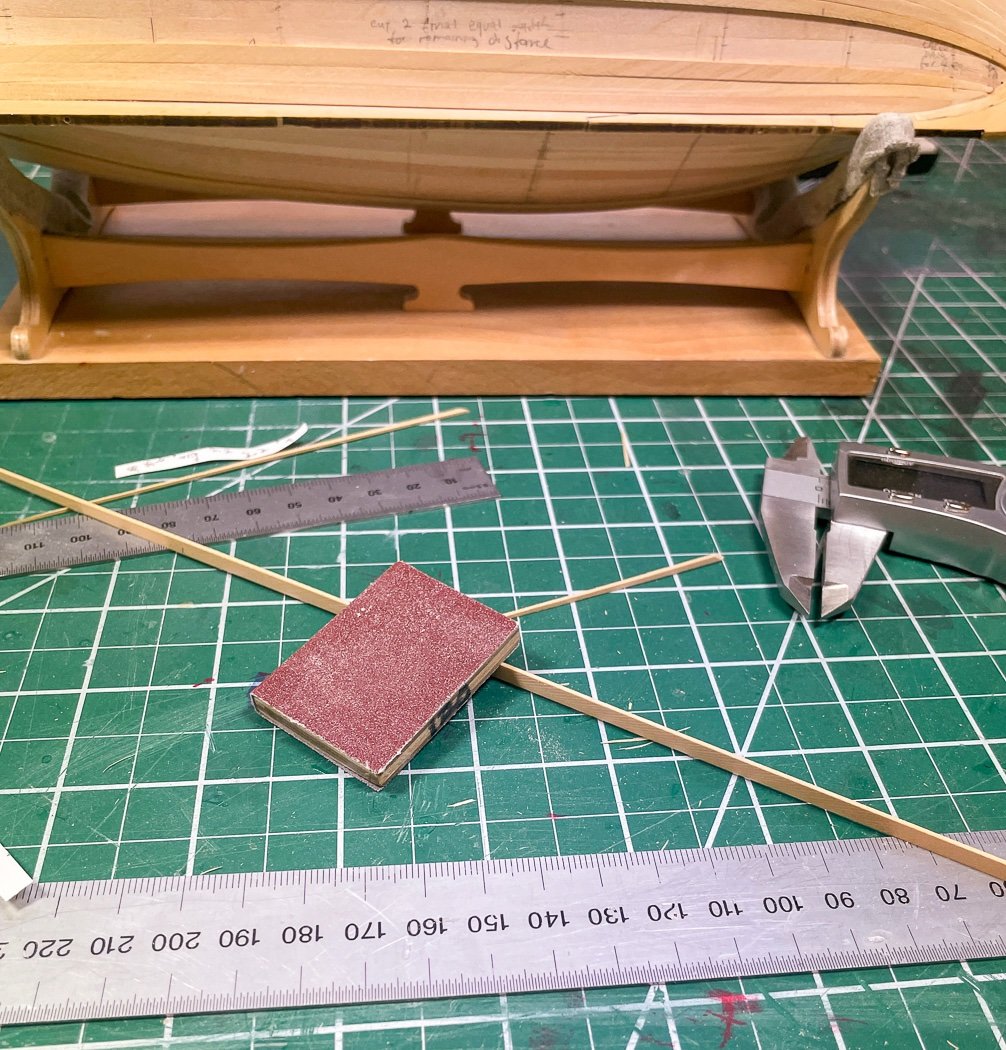
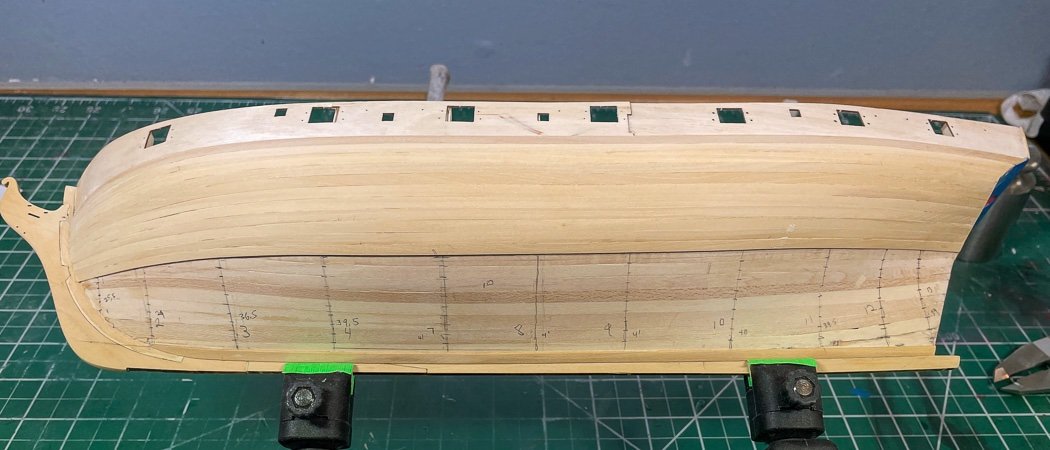
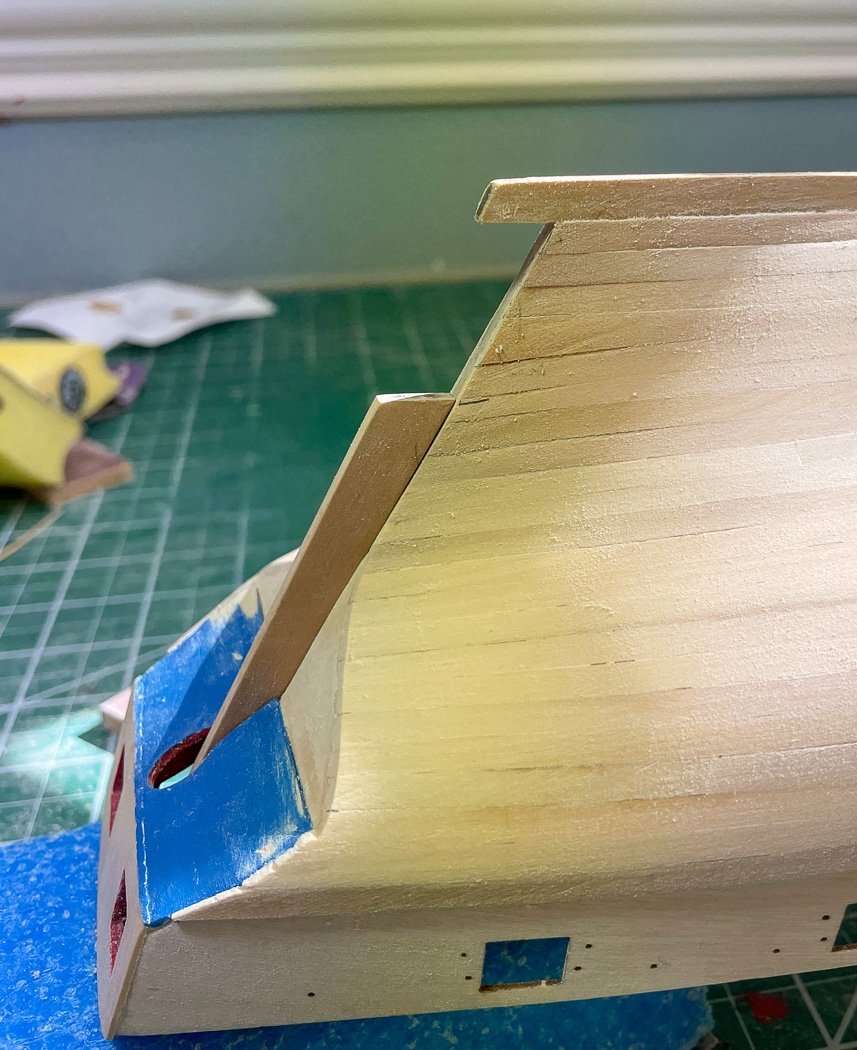
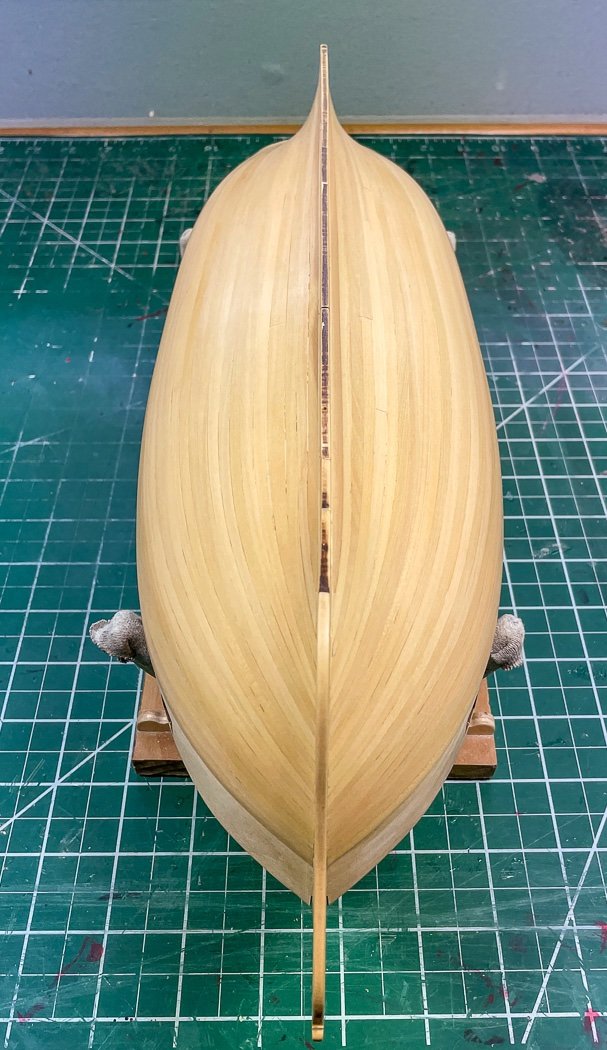
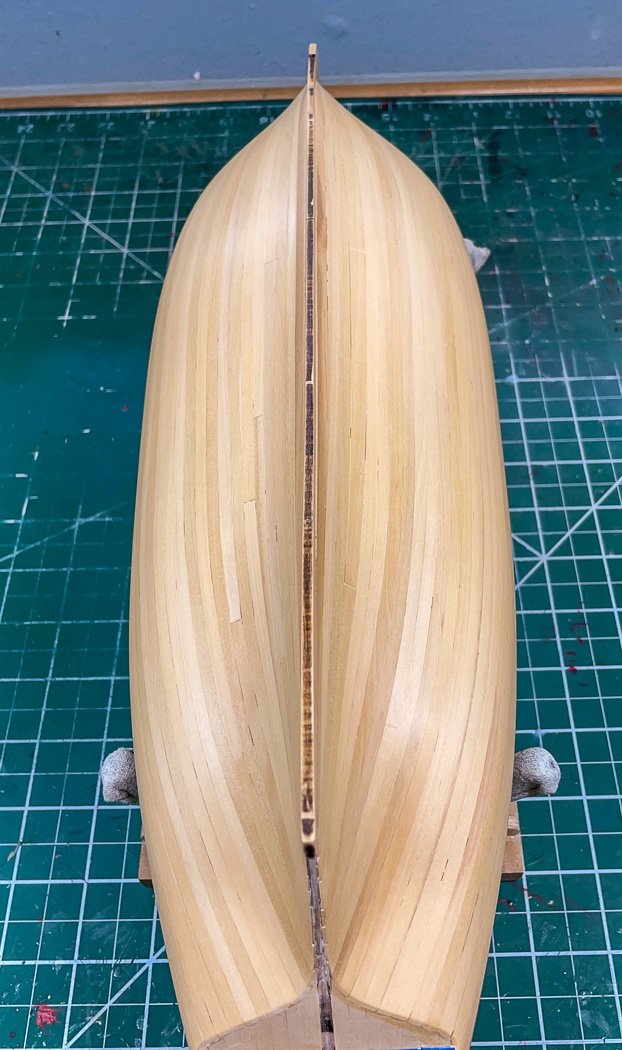
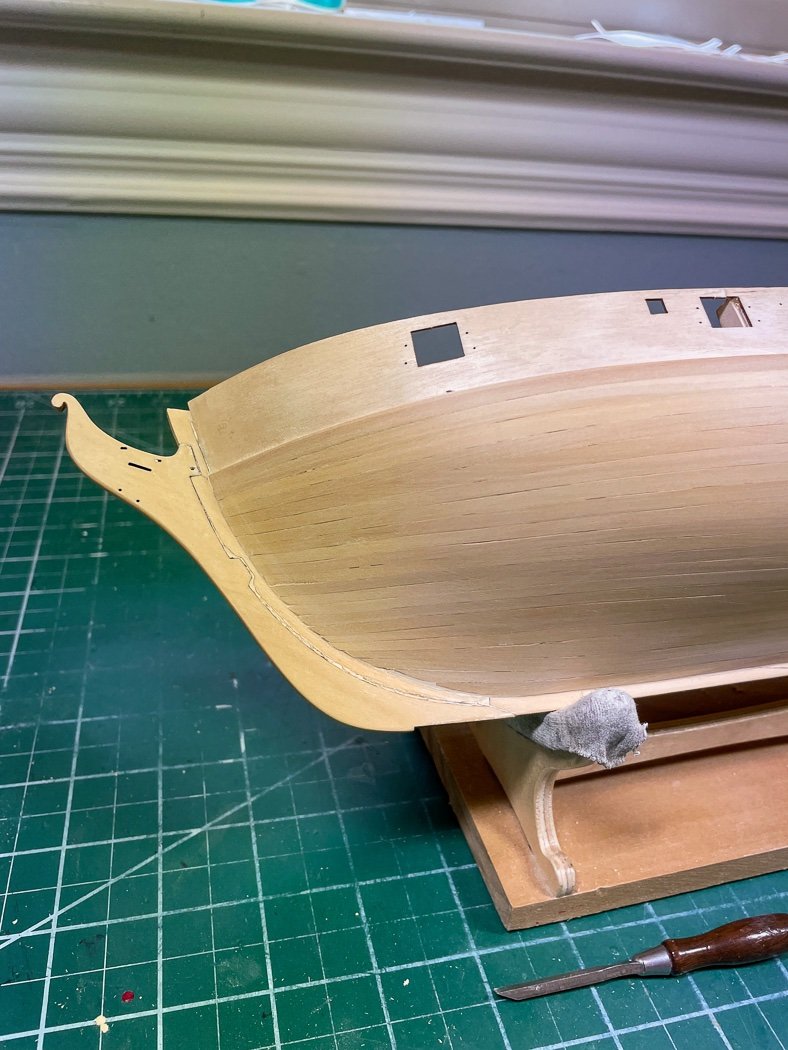
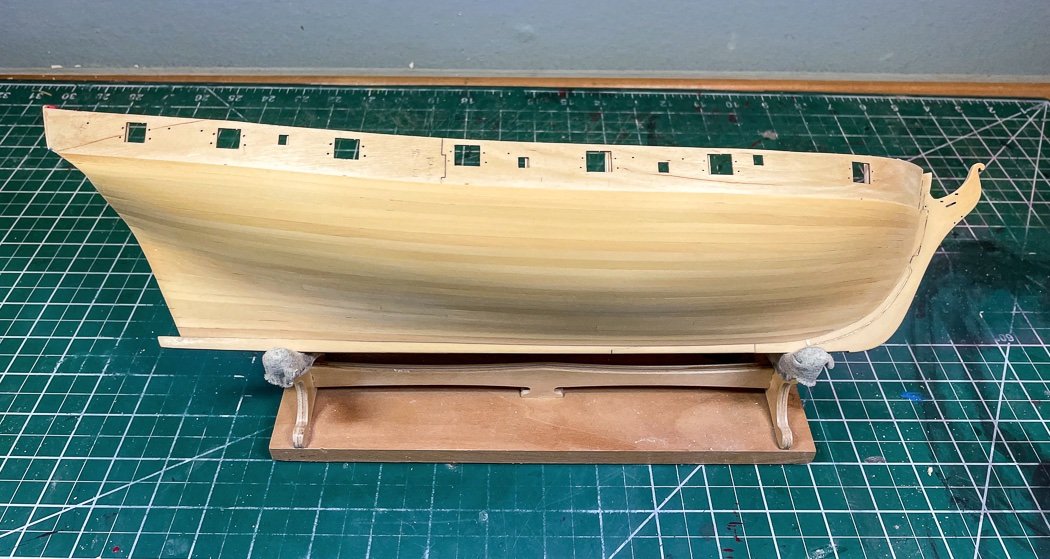
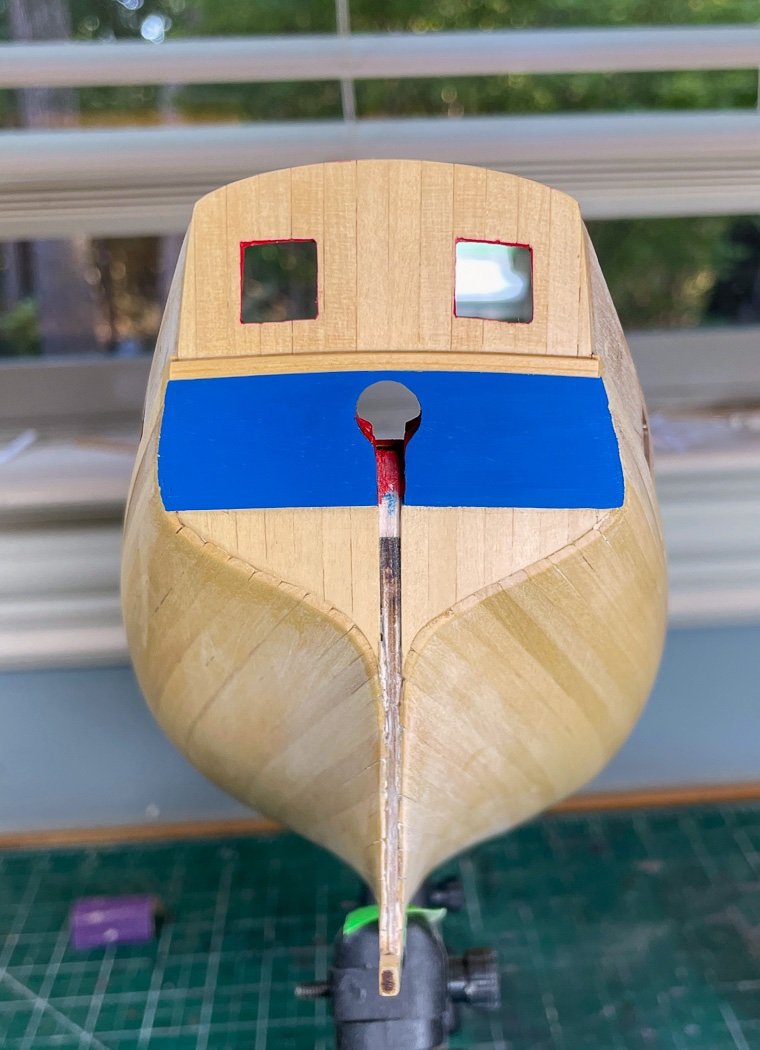
2nd Planking - Part 2 I thought I’d provide a bit more detail than just the one photo in the prior post regarding the second planking. I’ve written about lining the hull earlier in this log and in my Cheerful build. I’m not sure how I ever planked a hull without doing this, along with hot iron plank bending. I proved the point to myself again with the starboard side of Flirt. I figured I only needed to line forward of midships and run full width planks to the stern. That sorta worked but as it turns out it gets narrow at the 2nd and 3rd to last bulkhead and then flares out at the sternpost, at least on my hull, so I ended up doing some patch work on the underside. That’s fine on a hull I’ll later paint white, not so fine on my next project. Winging it doesn’t work out well when you’re single planking an unpainted hull. So on the port I completely lined the hull as I should have in the first place - the run of the planks is better than the angle shown in this photo - I’ll show you from the side in a minute. While I realize I’m fully in broken record mode I encourage everyone to learn and take the time to follow this method, even if you want to nail and clamp with PVA and heaven forbid soak your planks, you still need to know the right plank widths. I probably still don’t do it as well as I should, but I feel better getting one gold star as a Lining Evangelist. Lots of ways to achieve those plank widths, mine involve digital calipers (to transfer widths from the planking fan and tick strips to the wood) a scalpel and a metal rule. Mark the planks, lay the rule over the plank, and cut with the scalpel (or any #11 blade). I had a little difficulty keeping the rule from sliding off the boxwood during the cut. That may be because I was working with three fingers on the holding hand, having sliced my index finger when the wood slipped (sliced, not cut off, I’m fine thanks for asking 🙂 ). So the 1 KG weight came in handy to keep things were they were supposed to be. Bevel or chamfer has come up a couple of times on other logs, with diagrams and everything. Personally I thought the terms were interchangeable but I guess technically they aren’t. I plan to keep using the word bevel because chamfer is just a weird word. So what do I do - really neither after I read the definitions. After I taper and before I bend I bevel. See, I used bevel, because that is a fun sentence. The objective is a tight fit between planks. With proper beveling, oops, I mean edge softening and plank bending at my bending station (I won’t repeat all that part) I can get a tight fit. I use one of my little home made sanding blocks with 150 grit and knock the corner off the top inside edge of each plank, only the top. How much - well its a feel thing. Basically I just round off the edge and that’s enough, on tighter bends I may need a little more. Almost always I need more at the twist of the plank at the stern. The thing is to not get carried away, which is why neither the strict definition of bevel or chamfer really applies. After these planks are glued down they will be sanded heavily - if too much of the edge is removed or there is too great an angle I’d sand right to the frame between every plank. So I think of it more as turning an edge to a curb, or a hard edge to a soft shoulder. Anyway that’s what I do. I never edge glue, doing what I described makes that very unnecessary, especially for us CA planking guys. I hope that helps those that have asked and got a laugh from those that didn’t - why did he write so much on that topic, because that’s what I do. I don’t have a second planking photo of this. For both the first and second planking I shape for the stern post as I go. Much easier to do it a couple of planks at a time than trying to figure out at the end which one plank is screwing up the fit. This, as we all know, is a task that seems should be simple, but making the post fit involves a lot of fiddling (I love that British word, perfect description). So with all that I completed the second planking. I don’t use stealers, whether real ships used them or not I don’t like the look. But as I said the width got narrow then faired out at the post, stealer opportunity right- so what I did instead was grab a 6mm billet from my small boxwood stash and cut a plank at the same 1mm thickness as the 4mm planks from the kit and tapered it to fit from the stern post to about 3 bulkheads in. Some may call that a stealer, I call it planking with all the wood available to me including what wasn’t in the kit. It's all getting painted white so why bother…good question. I know others have commented they like my zebra colored boxwood hull. I think it’s growing on me. I think I have a nice run of planks at the stem, I later added a little watered down PVA and boxwood sawdust to fill the areas that needed it. In retrospect I should have followed the instructions and not added the stem when I did. That sucker is very fragile, I've broken it off twice. As a result it will be painted white below the water line and black above, my dreams of a natural stem faded away at the crack of the wood and the ensuing repair. With the second planking complete I finished up the stern with my cerulean blue painted counter. There are three small laser cut trim pieces included in the kit, I’ll probably add the upper two later. I elected to use my new found (from Cheerful) scrapping skills and made a bolder trim piece to marry the transom to the counter. Not the best photo, it has more definition than what’s showing. I now turn to laying the deck, I’ll pick it up from here next post. As always thanks for the likes and especially the comments.


-
Glad you’re back building. Next up Vanguard model of your choice 👏🏼👏🏼👍🏻
-
It’s time to start betting the over-under on when UK Glenn finishes this model against James time, we could have a new record.
-
They are stiff foam, so soft. A little pressure melds it with the wood, within reason given the shape. The same company sells various grades of adhesive sandpaper. So you attach the grit of your choice to the shape of choice by removing the making on the sandpaper. It can be removed and changed out once or twice before the adhesive gives out. The sandpaper will stay attached indefinitely to the foam shape if you don’t pull it off.
-
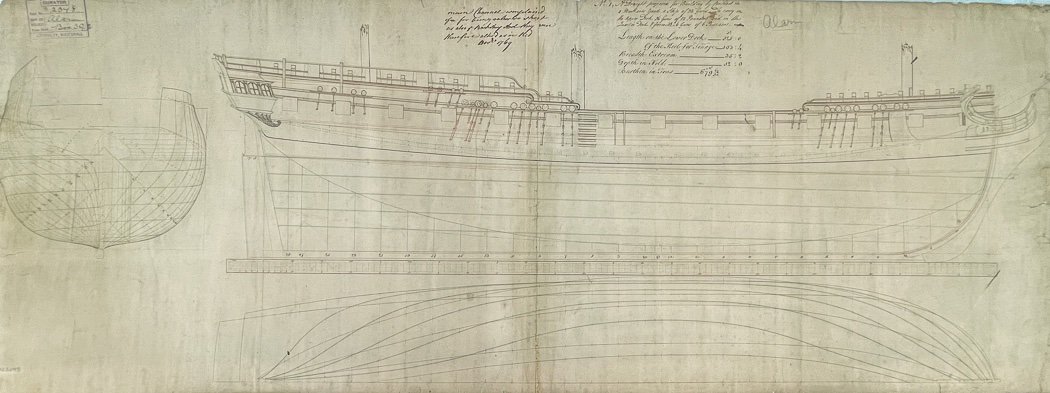
I'm joining the family, soon I'll start my own Winchelsea. This first post is a place holder, I'm compelled to finish the Vanguard Models HM Flirt I'm already working on before embarking on this great project. So it will be a while before I actually start work. I also have the NMM draft for Cheerful and Pegasus framed hanging on my workshop walls, Winchelsea (or actually the type ship she was) will soon join them. I love these wonderful drawings, realizing I'm building a ship based on actual plans. All these years later they still exist for us to follow, with a whole lot of help from Chuck. I've printed the plans (40x30, no scale), the first chapters of monograph are printed and spiral bound, I have Yellow Cedar lumber and chapter parts from Chuck already on hand. I keep looking at the bin where I've stored them, smelling all that wonderful Yellow Cedar, I can't wait to start. Having recently finished Syren's HM Cheerful I have an idea just how fun its going to be. So for now I'll continue to check out other build logs and look forward to making my first actual build post here. See you soon.
- 840 replies
-
- 20
-
-
- winchelsea
- Syren Ship Model Company
- (and 1 more)
-
Airbrush “controls”
glbarlow replied to glbarlow's topic in Painting, finishing and weathering products and techniques
I’m afraid this post has gotten off track. I was only asking about the controls on the airbrush I bought. I’m not looking for a a different compressor, a different airbrush, or different paints. Thank you, I’d like to close this post. I have the answers I was looking for regarding the controls of the airbrush I have. If you read my replies I have only a small limited interest or use for an air brush. I appreciate the extra info, perhaps others will find it helpful. -
The Soft-Sanders are a game changer - worth the small cost - though I'm not sure if they ship across the pond. Soft Sanders They are also available on Amazon
-
Flags can be made by the builder (Chuck describes how in his Cheerful monograph) no need for Chris to do that. Stands are builder's custom decisions and vary by builder, no need for Chris to do more than he is. Chuck is not providing a stand for Winchelsea, the crown jewel of his line at best he may provide some instruction on how to build one. There is no need for the kit price to be increased for things that we can do for ourselves in the manner we choose, and as Chris says whatever he might do would be questioned anyway - as it has been here. I'm glad for instance Chris doesn't increase the price by including copper plating I'd never use. The same sheets can be purchased from Amati for those that want a copper bottom. Chris is a start-up. I doubt the ROI on flags or stands is worth the effort he'd put in for limited buyers. His money is in models. He's already providing a diverse range from rowboats to frigates, that's enough. New product development has to be the singular focus of a two person start-up.
- 355 replies
-
- 11
-
-

-
- vanguard models
- Sphinx
- (and 1 more)
-
As another opinion, I’m not interested in flags or stands and wouldn’t want an increased cost of the kit for something I wouldn’t use. I appreciate the stand you do provide. Actually I appreciate the nice coaster I found in the box even more.
- 355 replies
-
- 9
-
-
- vanguard models
- Sphinx
- (and 1 more)
-
Are you sending out new box tops?🤣😅😂🤣🤣
-
I’ve been successful using this method on my Cheerful and Flirt. Do you have similar discussion on the garboard? I still struggle with the very end of planking as I near the keel. Some of which comes with properly cutting and placing the garboard.
-
Maybe a new topic, not really Vanguard related.
-
Yes, I’m finishing up the planking. I’m sure I’ll keep going past that.
-
At least there is no VAT premium
-
It’s not my first Rodeo John, the reason I was looking for a different one is my Dremel is to fast, too large, and does what you describe. I prefer hand drilling with my different sized pin vices for accuracy, but wanted this for more tedious and repetitive work. I now have David’s combination of screwdriver and chuck. It has one speed, very slow, so just what I was looking for. Now, back to David’s build.
-
Thanks BE. I really like boxwood as well, I may be a little spoiled by the even warm tone of the Alaskan Yellow Cedar I used for Cheerful and will use again for Winchelsea. The batch of boxwood I have has a lot of variation, but since I’m painting the hull white I can do a little sorting. I also forgot the one dark strip at the top will be covered by the wale, which is why I put it there at the time🤪
-
I do the same with beveling the top edge, you get a feel for it after a while. I taper, bevel, bend, and test fit until the plank lays there nice and tight and follows the hull lining marks. It’s much slower that other methods I guess, but I’m not in a hurry so…
