-
Posts
4,126 -
Joined
-
Last visited
Content Type
Profiles
Forums
Gallery
Events
Everything posted by glbarlow
-
So we’re cutting the curved planks on the forecastle?
- 1,784 replies
-
- winchelsea
- Syren Ship Model Company
-
(and 1 more)
Tagged with:
-
If I send you some brass can you make mine😂well done.
- 642 replies
-
- winchelsea
- Syren Ship Model Company
-
(and 1 more)
Tagged with:
-
It looks like you’ve sanded the deadwood area at the stern to accommodate both plankings at the thickness of the sternpost (which you don’t attach until after the second planking). Once you have the bulkheads squared up and glued into place the next step is fairing the hulls, sanding them front to back so that a batten (thin long plank) lays smoothing across all bulkheads most of the char should be gone when you’re done. Use the search function for Lady Nelson builds, between looking at all of them, the Amati video, and the instructions you’ll be able to determine next steps in the build sequence a see examples how to do it.
- 19 replies
-
- Lady Nelson
- Amati
-
(and 2 more)
Tagged with:
-
Nice work on the model and the case. Time for you to start your Cheerful😁
- 436 replies
-
- vanguard models
- alert
-
(and 1 more)
Tagged with:
-
I deleted that because I went and checked what was used, turns out it was neither shellac or varnish but something more high end. I also deleted it because it really wasn’t relevant, just frustration with so many my way is better than all other way comments. My edit better reflects my point. where are the links to your work so we can see your way in the form of results, my links are below?
-
I seriously doubt a hull coated in shellac would survive a dunking in alcohol, that’s a bit silly. However, I look forward to seeing your Flirt finished in a hard coat of shellac once you start it. I actually don’t know how you botch something you wipe on and off with a cloth, that would take effort. A can of WOP, which will last for multiple models, cost $12.98 and is at the consistency I desire. Why would anyone waste time, energy or effort buying $14.97 pint of polyurethane and $21.95 quart of mineral spirits to mix their own. I can afford $13 every three models. I never understand why some feel compelled to convince others their way is the only way. If we know anything it’s that there are many ways to accomplish the same thing, I don’t need to validate my choices by denigrating the choices of others. I’m moving on from this post, content in the lasting beauty of my WOP finished models and no plans to buy shellac.
-
CA is perfectly ok to use with rigging if sparingly used with a very light touch. Clear Matte acrylic is a good alternative but without the holding power. Seems like learning to seize lines to blocks is the skill you need for next time. Sorry to say in my experience and in my opinion once the CA is there in excess and dried there isn’t much to do except regret not redoing it when you look at it later. As Chris noted the clear acrylic might help, but really the thing to do is do it over after learning to seize lines. I don’t think any of us tie bowline knots on models. There is no magic solution.
-
Again we’re all entitled to opinions informed by experience, or not. As I said earlier these types of posts incite all sorts of opinions posed as preferred methods. Ultimately the builder has to experiment, develop the necessary skills to do it well, and choose their own best course. Then later in your experience curve you can reply to posts like these with your opinion. Bottom line, as these type of posts prove over and over, there are as many options, methods, and opinions as there are model enthusiasts. A lot of them even work.
-
As Mark noted there is not a one size fits all, as this string continues on you will see many options based on personal preferences, one is not better than another, it’s what finish makes you happy. For what it’s worth, I prefer Satin Wipe On Poly. The key for me is to wipe it on and wipe it off before it dries. My opinion is glossy, which many options create, is not a good look. But that is just my opinion, which is what the other suggestions are, opinions. Experiment with the basics and decide what your opinion is on what’s best.
-
Well said…
-
I’m glad you find my log helpful, that’s always my goal. Your Nikon 3100 should have a white balance setting, I’m a Nikon shooter as well (mine are D850, Z7, and Z7ii). Press the menu button and select the photo shooting menu, scroll down to the Whit Balance. It’s likely in Auto which is great for most things but will vary for every shot. There should be choices, I think cloudy will give you a consistent warmer look. And if not your photos look great, a perfect white background shot is hard to achieve without the right lighting and settings. It’s why my log photos are just at my workshop top with an iPhone. I only do white background for the finished photos.
- 102 replies
-
- Flirt
- Vanguard Models
-
(and 1 more)
Tagged with:
-
Pretty standard for parts like this to be laser cut oversized in quality kits. Spacers aside not every ship is built the same and the design allows room for adjustments to account for the variations among different builders. Nice build, and likely a new speed record. Perhaps you can get more light on your nice model for the photos?
-
I’m sure Rusty meant BE🤣😂. I struggle with how far forward to carry the garboard every time, definitely interesting and clever to use a wider plank.
- 857 replies
-
- Sphinx
- Vanguard Models
-
(and 1 more)
Tagged with:
-
Nice to see another Flirt underway, and glad I’m past this stage on mine. Very clean work. You can reduce the blue tint by adjusting white balance to a warmer setting, try daylight or cloudy instead of auto if a camera there is a slider in edit photos if a iPhone
- 102 replies
-
- Flirt
- Vanguard Models
-
(and 1 more)
Tagged with:
-
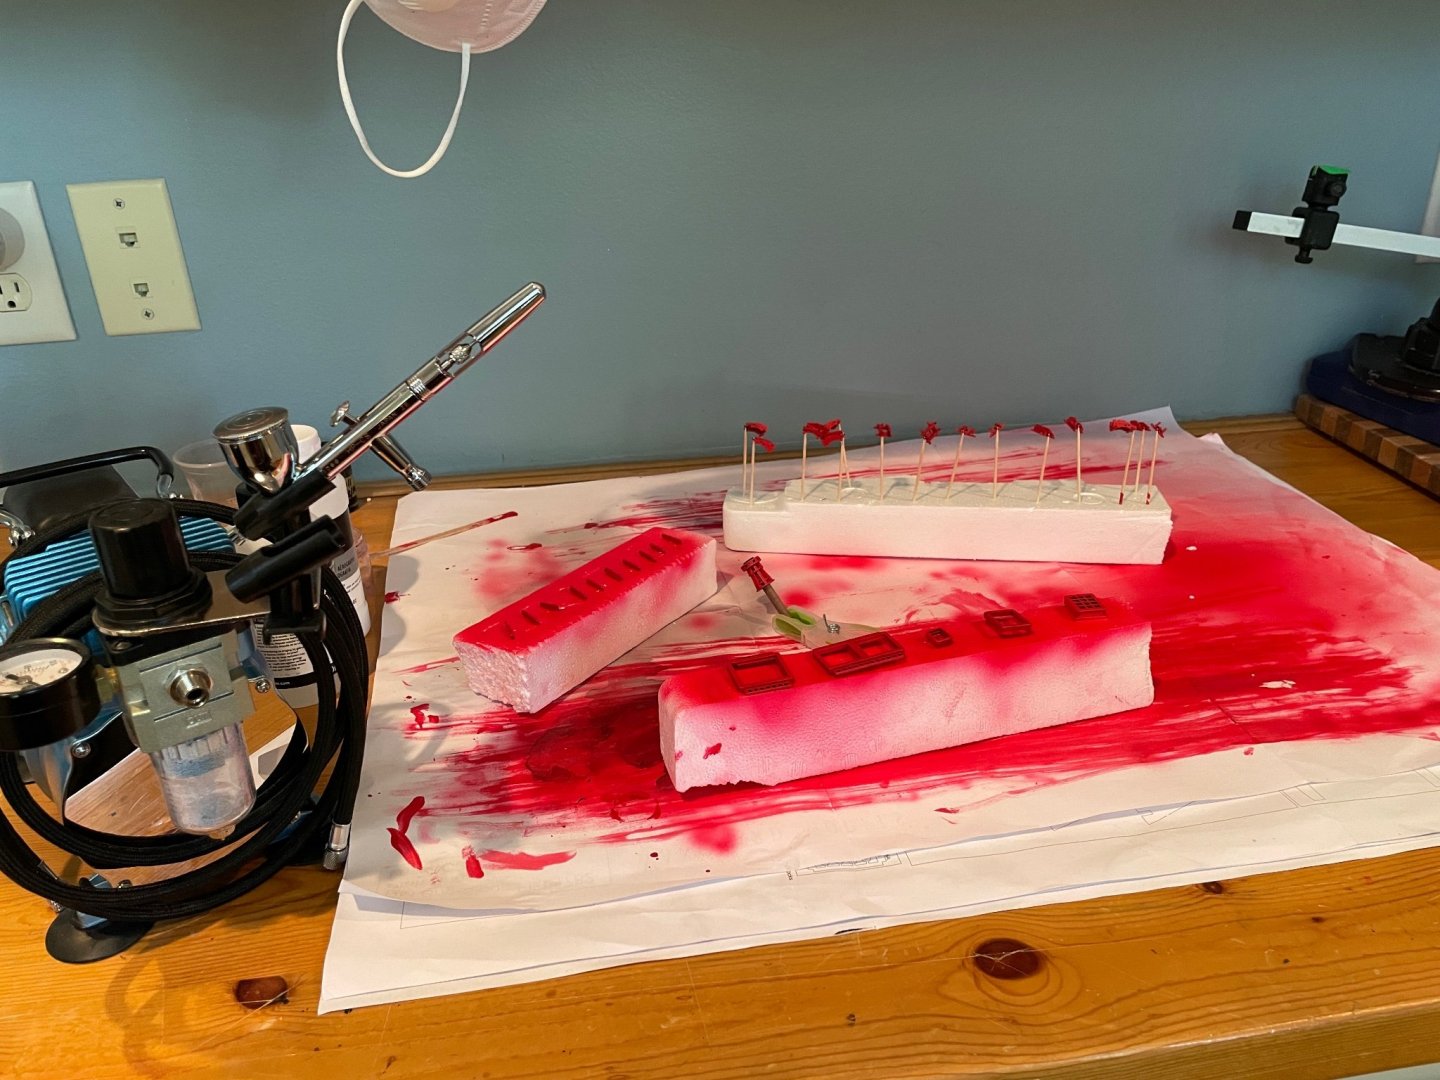
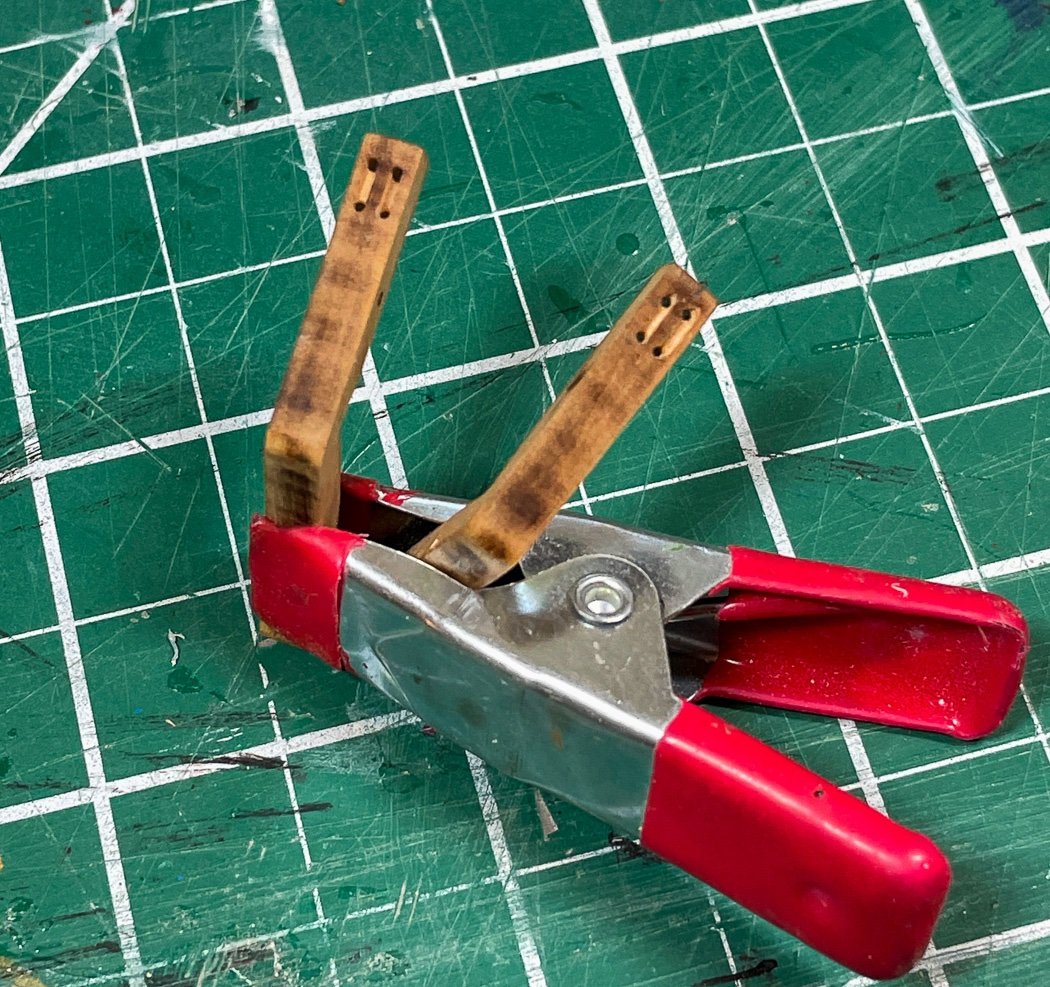
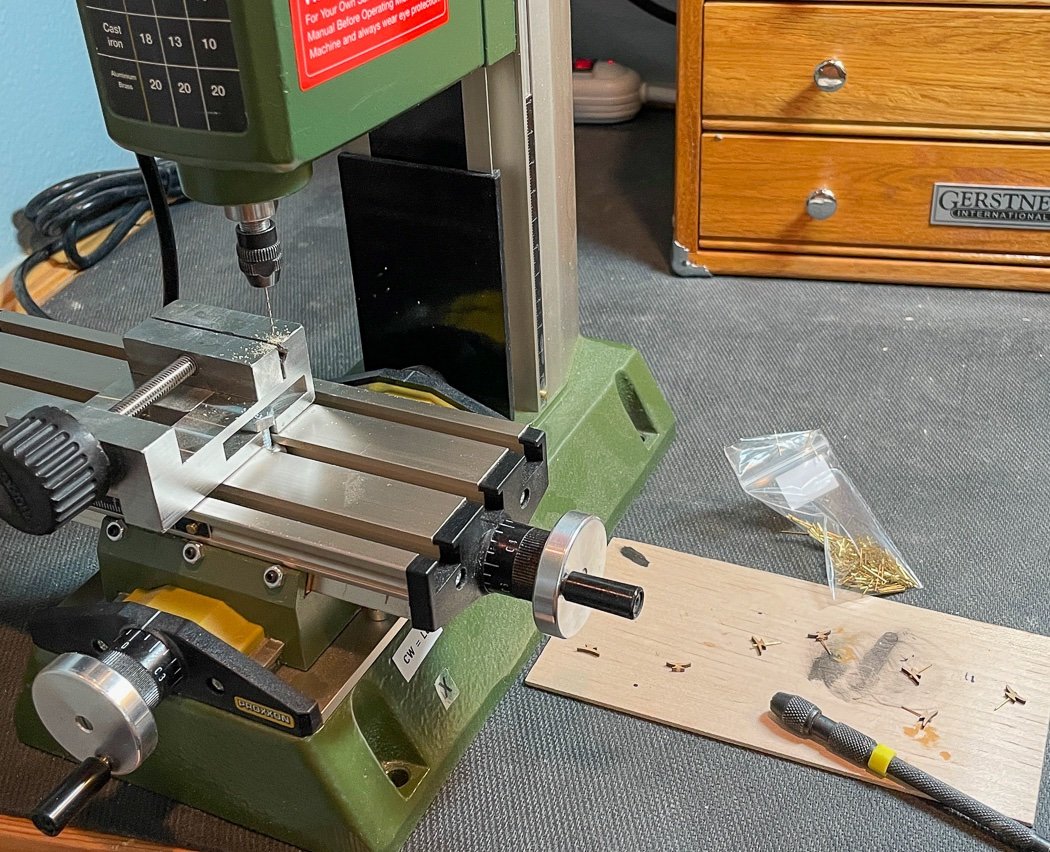
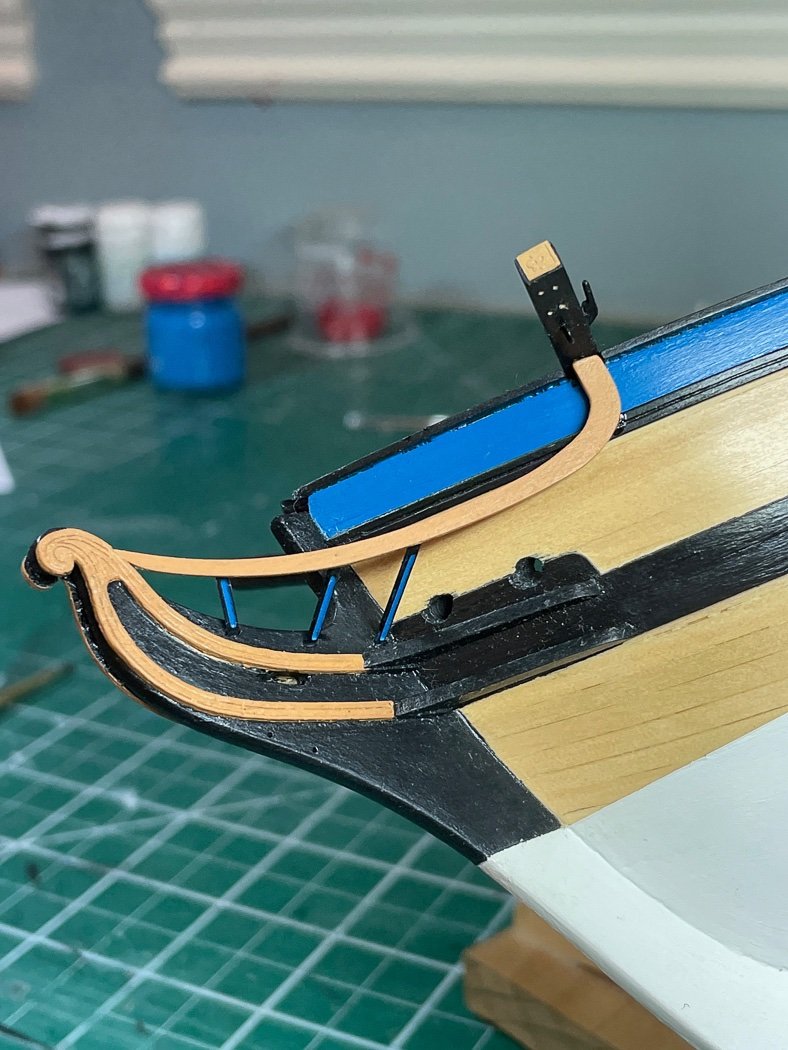
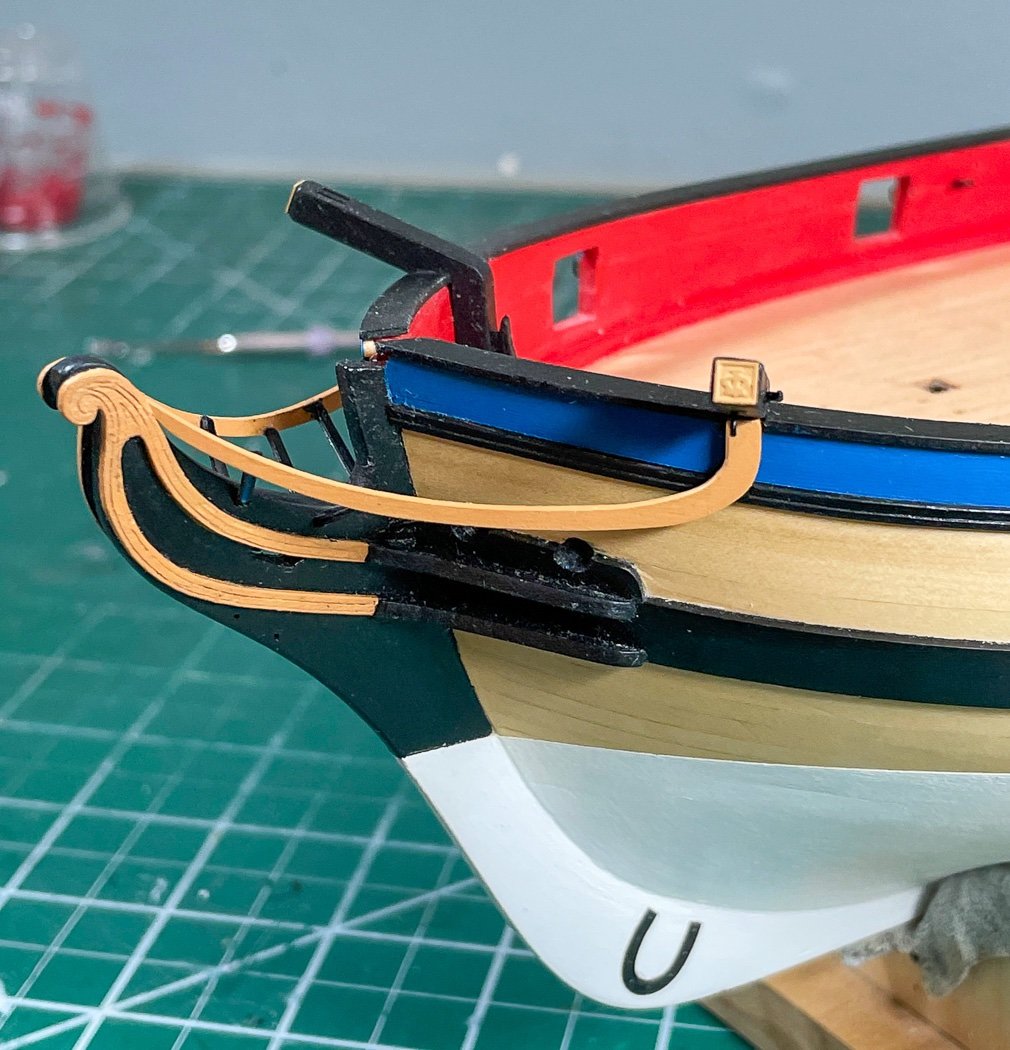
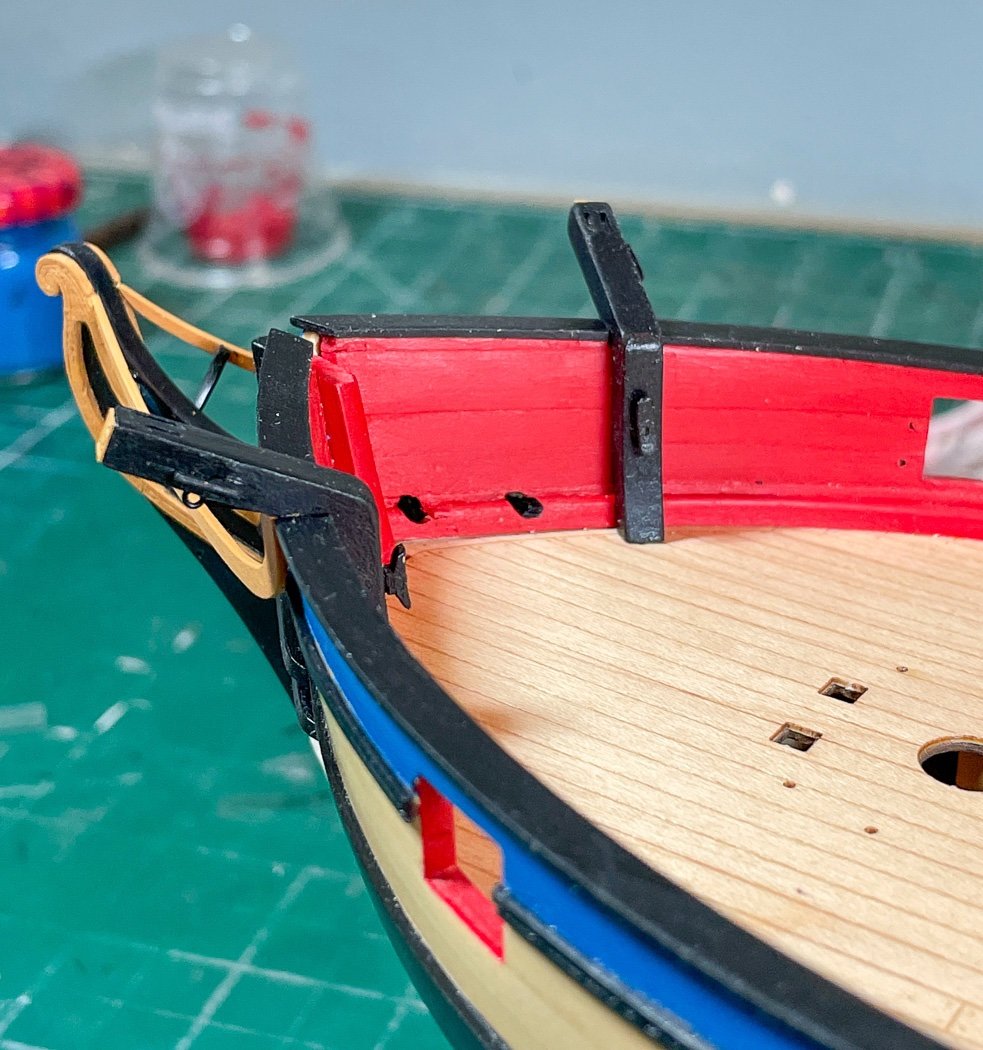
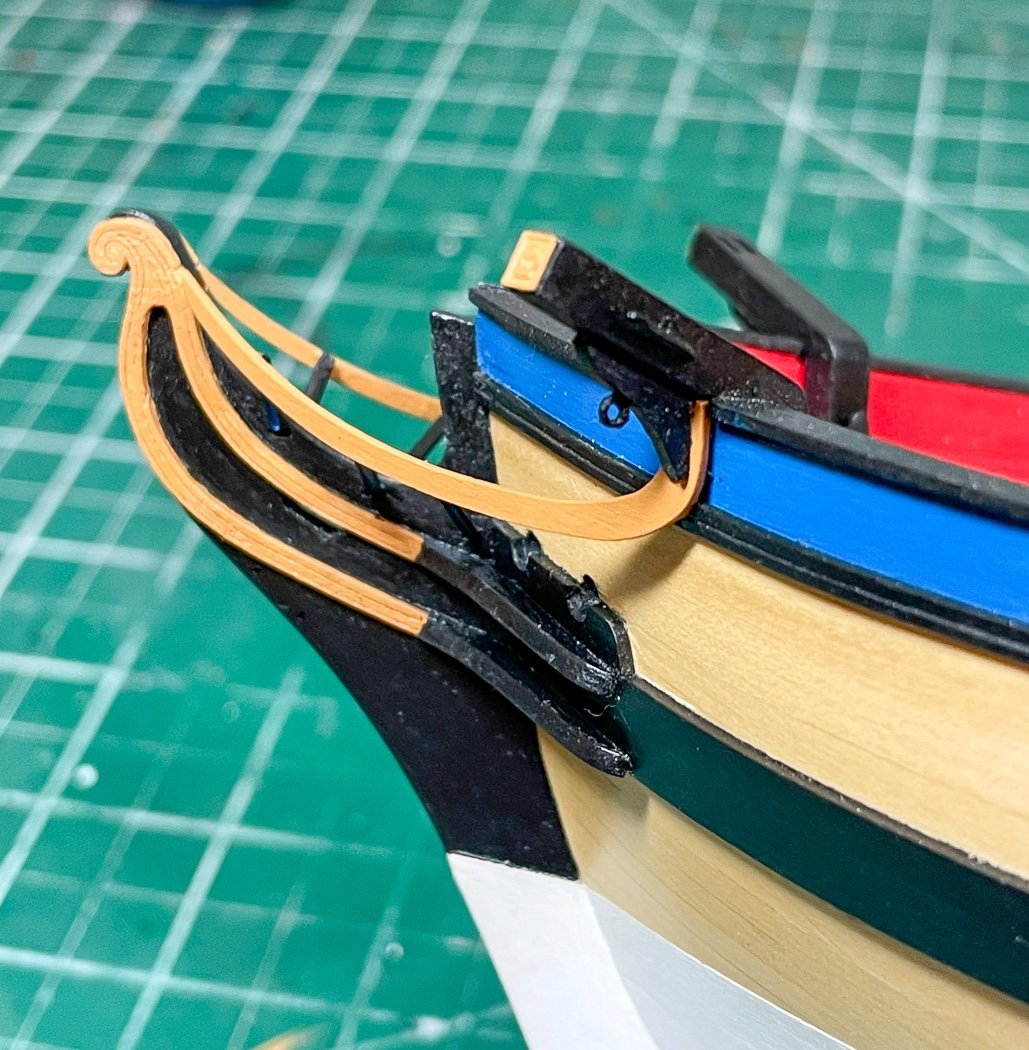
Catheads & Bow Decoration Installation of the catheads called for a little extra work beyond just gluing in the solid parts provided. I did some filing and sanding on both to match the angle of the deck and adjustments to get them flush with the bulkhead, including notching out for the spirketting I’d added earlier. They were pretty a pretty close fit, every ship is going to be a little different and require basic fitting adjustments. In addition I finally had the chance to use my mill, in this case to add simulated sheaves. I plan to rig the anchors later using these as I’ve done for other models. I also added a cleat to the back of both catheads for the same reason. I got started using Admiralty Paints Dull Black on this model, but really prefer Admiralty Paints Iron Works Black (which looks great on wood and what I used on Cheerful). I'm not going to change course now but It's probably the last hurrah for Dull Black. Really just to use the mill for repetitive work I drilled holes through the eight wood cleats required for the hull and glued in the nails as called for by the instructions. Conveniently Chris has provided the holes for both these cleats and the smaller PE cleats in the bulwarks, they were among those I’d drilled through from outside the gunport pattern way back at the beginning. That was a nice touch and saved a lot of measuring and drilling, this design feature pays off again for the gunport tackle eyebolts and rings. Then it was time for the bow vertical and main rails - I’ve built a lot of models with this feature but this design is quite clever. The vertical rails are three pieces of PE that pass through the stem with flex points allowing them to bend up to meet the main rail. I had do a little bit of filing but it worked out quite easily all in all. Though I chose a different paint scheme this is another nice design touch by Chris and Vanguard Models. My last modification was to add an eyebolt to the bottom of the knee, again part of the anchor rigging I’ll do later. While the instructions seem to show directly installing the knees right from the parts board I instead added a 15 degree angle to the back side using, very carefully, the Byrnes Sander. I thought this provided for a better fit that is more in line with the main rail. These close ups always disclose a lot of dust and needed paint touch up, which I do after seeing the photos. My next step is to build all the gun carriages, deck furniture and belay racks anything I want painted red. My intent is a single spray painting session for the bunch. I’ve never done this as I’ve mentioned but thought it’d be worth a try with my new spray painting gear. Simply setting it all up to paint will be a task in and of itself I’m guessing, and to be clear I’m doing none of that anywhere near the hull. It will take a while. Thanks as always for your time spent visiting my log, the likes comments are appreciated. I’ll be back soon.
About us
Modelshipworld - Advancing Ship Modeling through Research
SSL Secured
Your security is important for us so this Website is SSL-Secured
NRG Mailing Address
Nautical Research Guild
237 South Lincoln Street
Westmont IL, 60559-1917
Model Ship World ® and the MSW logo are Registered Trademarks, and belong to the Nautical Research Guild (United States Patent and Trademark Office: No. 6,929,264 & No. 6,929,274, registered Dec. 20, 2022)
Helpful Links
About the NRG
If you enjoy building ship models that are historically accurate as well as beautiful, then The Nautical Research Guild (NRG) is just right for you.
The Guild is a non-profit educational organization whose mission is to “Advance Ship Modeling Through Research”. We provide support to our members in their efforts to raise the quality of their model ships.
The Nautical Research Guild has published our world-renowned quarterly magazine, The Nautical Research Journal, since 1955. The pages of the Journal are full of articles by accomplished ship modelers who show you how they create those exquisite details on their models, and by maritime historians who show you the correct details to build. The Journal is available in both print and digital editions. Go to the NRG web site (www.thenrg.org) to download a complimentary digital copy of the Journal. The NRG also publishes plan sets, books and compilations of back issues of the Journal and the former Ships in Scale and Model Ship Builder magazines.


