HOLIDAY DONATION DRIVE - SUPPORT MSW - DO YOUR PART TO KEEP THIS GREAT FORUM GOING!
×


glbarlow
-
Posts
4,097 -
Joined
-
Last visited
Content Type
Profiles
Forums
Gallery
Events
Everything posted by glbarlow
-
 They are stiff foam, so soft. A little pressure melds it with the wood, within reason given the shape. The same company sells various grades of adhesive sandpaper. So you attach the grit of your choice to the shape of choice by removing the making on the sandpaper. It can be removed and changed out once or twice before the adhesive gives out. The sandpaper will stay attached indefinitely to the foam shape if you don’t pull it off.
 -
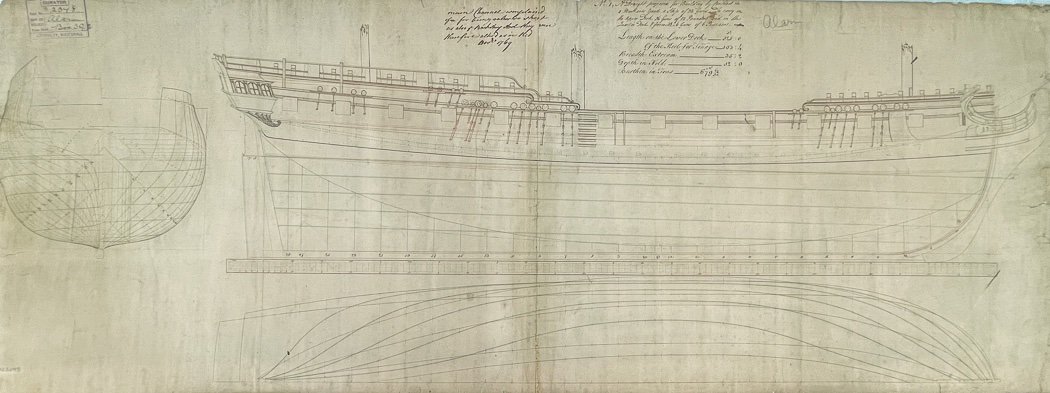
I'm joining the family, soon I'll start my own Winchelsea. This first post is a place holder, I'm compelled to finish the Vanguard Models HM Flirt I'm already working on before embarking on this great project. So it will be a while before I actually start work. I also have the NMM draft for Cheerful and Pegasus framed hanging on my workshop walls, Winchelsea (or actually the type ship she was) will soon join them. I love these wonderful drawings, realizing I'm building a ship based on actual plans. All these years later they still exist for us to follow, with a whole lot of help from Chuck. I've printed the plans (40x30, no scale), the first chapters of monograph are printed and spiral bound, I have Yellow Cedar lumber and chapter parts from Chuck already on hand. I keep looking at the bin where I've stored them, smelling all that wonderful Yellow Cedar, I can't wait to start. Having recently finished Syren's HM Cheerful I have an idea just how fun its going to be. So for now I'll continue to check out other build logs and look forward to making my first actual build post here. See you soon.
- 840 replies
-
- 20
-

-
- winchelsea
- Syren Ship Model Company
- (and 1 more)
-
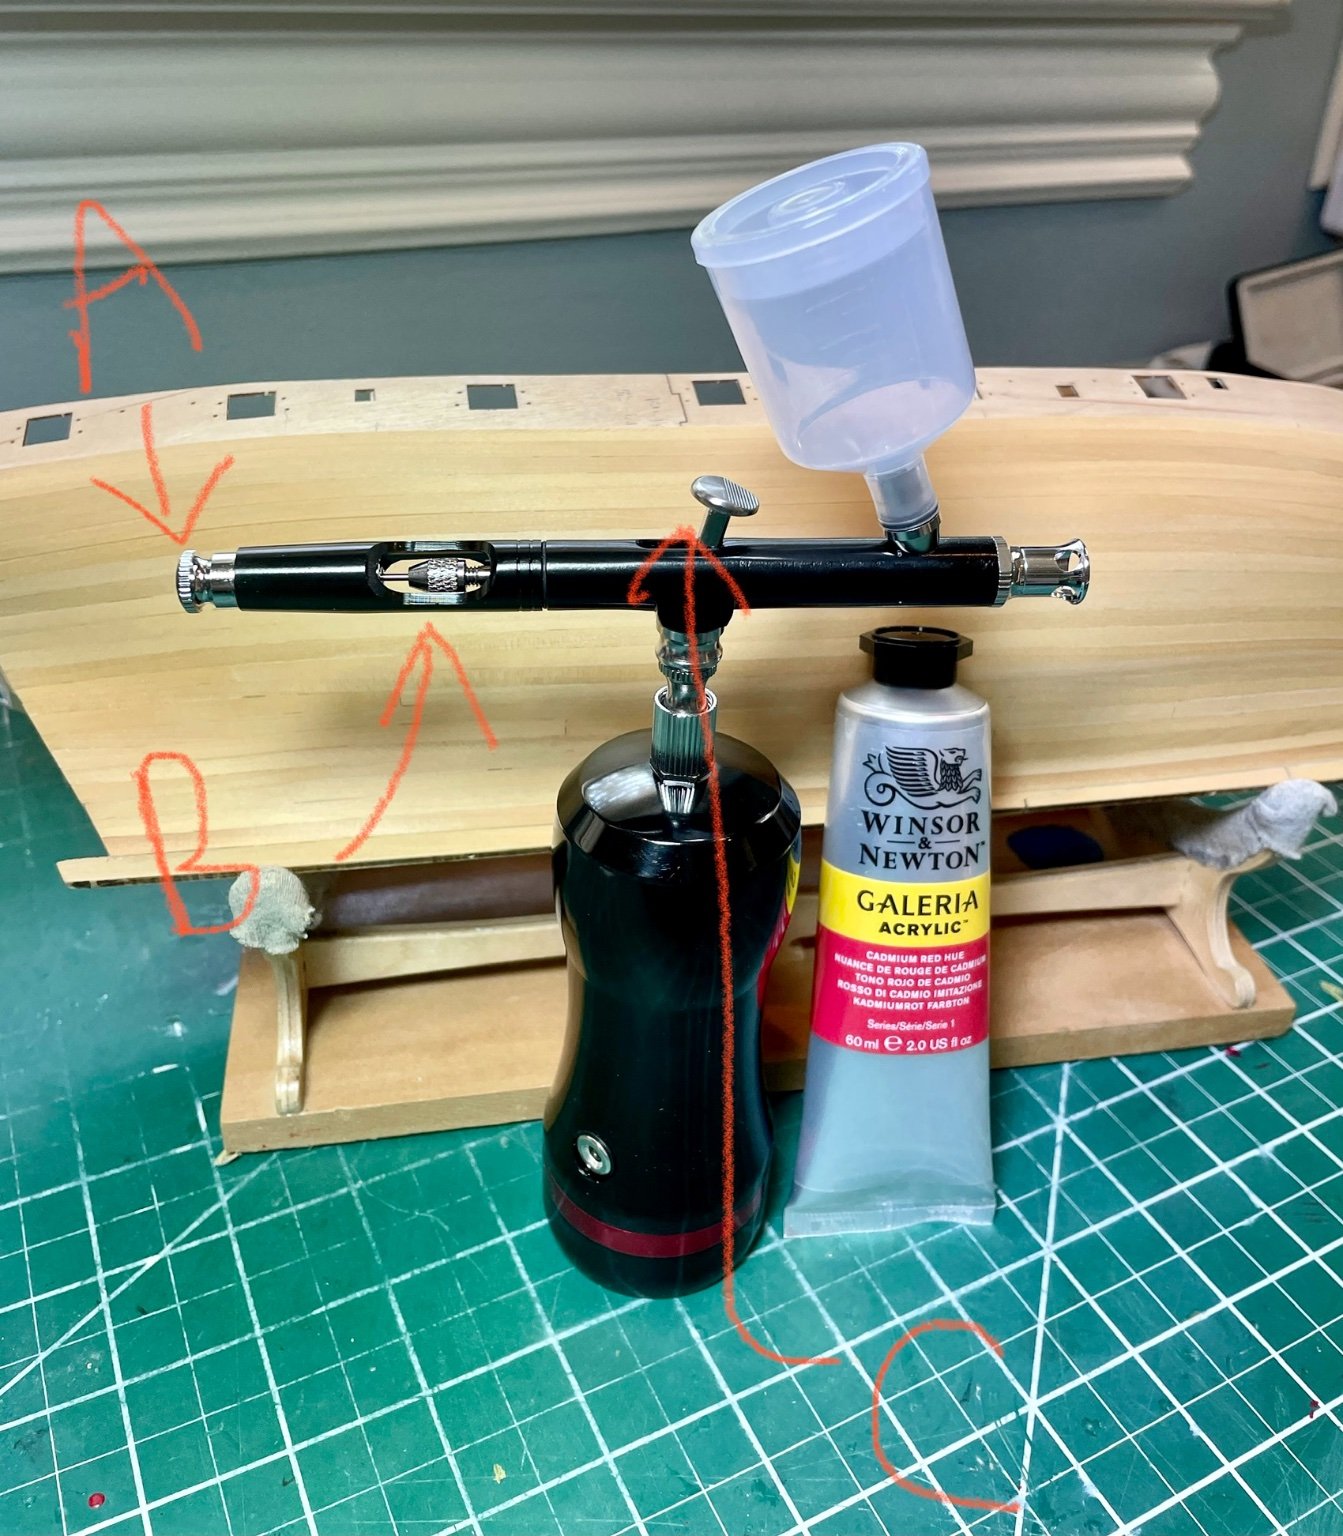
Airbrush “controls”
glbarlow replied to glbarlow's topic in Painting, finishing and weathering products and techniques
I’m afraid this post has gotten off track. I was only asking about the controls on the airbrush I bought. I’m not looking for a a different compressor, a different airbrush, or different paints. Thank you, I’d like to close this post. I have the answers I was looking for regarding the controls of the airbrush I have. If you read my replies I have only a small limited interest or use for an air brush. I appreciate the extra info, perhaps others will find it helpful. -
The Soft-Sanders are a game changer - worth the small cost - though I'm not sure if they ship across the pond. Soft Sanders They are also available on Amazon
-
Flags can be made by the builder (Chuck describes how in his Cheerful monograph) no need for Chris to do that. Stands are builder's custom decisions and vary by builder, no need for Chris to do more than he is. Chuck is not providing a stand for Winchelsea, the crown jewel of his line at best he may provide some instruction on how to build one. There is no need for the kit price to be increased for things that we can do for ourselves in the manner we choose, and as Chris says whatever he might do would be questioned anyway - as it has been here. I'm glad for instance Chris doesn't increase the price by including copper plating I'd never use. The same sheets can be purchased from Amati for those that want a copper bottom. Chris is a start-up. I doubt the ROI on flags or stands is worth the effort he'd put in for limited buyers. His money is in models. He's already providing a diverse range from rowboats to frigates, that's enough. New product development has to be the singular focus of a two person start-up.
- 355 replies
-
- 11
-
-

-
- vanguard models
- Sphinx
- (and 1 more)
-
As another opinion, I’m not interested in flags or stands and wouldn’t want an increased cost of the kit for something I wouldn’t use. I appreciate the stand you do provide. Actually I appreciate the nice coaster I found in the box even more.
- 355 replies
-
- 9
-
-
- vanguard models
- Sphinx
- (and 1 more)
-
Are you sending out new box tops?🤣😅😂🤣🤣
-
I’ve been successful using this method on my Cheerful and Flirt. Do you have similar discussion on the garboard? I still struggle with the very end of planking as I near the keel. Some of which comes with properly cutting and placing the garboard.
-
Maybe a new topic, not really Vanguard related.
-
Yes, I’m finishing up the planking. I’m sure I’ll keep going past that.
-
At least there is no VAT premium
-
It’s not my first Rodeo John, the reason I was looking for a different one is my Dremel is to fast, too large, and does what you describe. I prefer hand drilling with my different sized pin vices for accuracy, but wanted this for more tedious and repetitive work. I now have David’s combination of screwdriver and chuck. It has one speed, very slow, so just what I was looking for. Now, back to David’s build.
-
Thanks BE. I really like boxwood as well, I may be a little spoiled by the even warm tone of the Alaskan Yellow Cedar I used for Cheerful and will use again for Winchelsea. The batch of boxwood I have has a lot of variation, but since I’m painting the hull white I can do a little sorting. I also forgot the one dark strip at the top will be covered by the wale, which is why I put it there at the time🤪
-
I do the same with beveling the top edge, you get a feel for it after a while. I taper, bevel, bend, and test fit until the plank lays there nice and tight and follows the hull lining marks. It’s much slower that other methods I guess, but I’m not in a hurry so…
-
Airbrush “controls”
glbarlow replied to glbarlow's topic in Painting, finishing and weathering products and techniques
Thanks for the suggestions. I had previously looked into the Amazon compressor offers, not really what I want. This compressor is highly rated based on my research, I can also send it back anytime if not satisfied. I contacted Winsor & Newton, they recommended a brand of medium flow fluid, which I now have and said thinned properly their galleria paints work well with an airbrush, it is of no use to me limited to hobby paints. I appreciate the suggestions on the “trigger” and will put it to use. I haven’t tried it yet, I prefer brush painting but for some things like PE and gun carriages it might come in handy. I’ll practice first to see how it goes. I have the answers I was looking for, thanks everyone. -
Hope it continues to work for you.
-
New to an airbrush, thought I’d try it for some things like gun carriages. I see another topic for thinning a tube of acrylic like shown in photo. Still any thoughts appreciated Mostly though can you explain what turning A & B do. I know pushing C starts paint to flow, but what does pulling back and forth do? I just got this and thought I’d ask the group before I start painting the walls I still prefer brushing but for some mass production I thought I’d give this a reply. The battery powered compressor made this unit attractive to me to try. Thanks for any help.

-
Hadn’t seen such a diagram, I thought they were essentially the same thing. I don’t fret over it, no idea what angle it is. I knock off the top back edge and call it done. On some more severe twists at the stern I may knock off more of that edge until it’s a tight fit. It’s a feel thing that comes from doin it. With that I don’t want to hijack any more of David’s log than I already have. I’ll show a photo on my next log post.
-
Or the hull exactly the same on both sides. You’re doing very well, especially being off such a small amount. I know I can’t cut a perfect +-.1-.2mm every time. I have to make adjustments. The great thing about lining the hull is you can see after each plank if your “on plan” and adjust accordingly. NIce work!
-
Yes, only taper the top edge. I bevel the top edge of every plank it’s entire length to create a tighter fit to the plank above.
-
They are fun little things. I lost track and made too many of the wrong size, just great I thought😅
-
Thanks, I’m sure color variation is a nice characteristic of boxwood. It stood out more after the WOP.
-
Thanks. It’s only 1mm thick.
-
Well…it’s interesting….
-
Thanks for the likes and comments. Starboard planking complete with first coat of WOP. The boxwood absorbed it like a sponge. It seemed it was dry before I finished. I need more practice on the lower belt, not that any one would know after it’s painted white. I’m not thrilled with the uneven color of the boxwood. I spent a lot of time sorting pieces to color match then the WOP found whole new colors to display. I’ll do more sanding later, need to do that in conjunction with port side. More details and photos after the planking is completely finished. Back to work.