glbarlow
-
Posts
4,130 -
Joined
-
Last visited
Content Type
Profiles
Forums
Gallery
Events
Everything posted by glbarlow
-
 Hadn’t seen such a diagram, I thought they were essentially the same thing. I don’t fret over it, no idea what angle it is. I knock off the top back edge and call it done. On some more severe twists at the stern I may knock off more of that edge until it’s a tight fit. It’s a feel thing that comes from doin it. With that I don’t want to hijack any more of David’s log than I already have. I’ll show a photo on my next log post.
 -
Or the hull exactly the same on both sides. You’re doing very well, especially being off such a small amount. I know I can’t cut a perfect +-.1-.2mm every time. I have to make adjustments. The great thing about lining the hull is you can see after each plank if your “on plan” and adjust accordingly. NIce work!
-
Yes, only taper the top edge. I bevel the top edge of every plank it’s entire length to create a tighter fit to the plank above.
-
They are fun little things. I lost track and made too many of the wrong size, just great I thought😅
-
Thanks, I’m sure color variation is a nice characteristic of boxwood. It stood out more after the WOP.
-
Thanks. It’s only 1mm thick.
-
Well…it’s interesting….
-
Thanks for the likes and comments. Starboard planking complete with first coat of WOP. The boxwood absorbed it like a sponge. It seemed it was dry before I finished. I need more practice on the lower belt, not that any one would know after it’s painted white. I’m not thrilled with the uneven color of the boxwood. I spent a lot of time sorting pieces to color match then the WOP found whole new colors to display. I’ll do more sanding later, need to do that in conjunction with port side. More details and photos after the planking is completely finished. Back to work.

-
I don’t think so, why an extra step. I’ll do it BE’s way, though likely not as well.
- 857 replies
-
- 2
-

-
- Sphinx
- Vanguard Models
- (and 1 more)
-
A nice, and patient, touch on the columns, well done! Enjoy the coast.
- 857 replies
-
- 2
-
-
- Sphinx
- Vanguard Models
- (and 1 more)
-
Not at all. I’ll add WOP once I’ve finished the 2nd planking and likely paint white below waterline. Not there yet.
-
Throw in the rat lines and we have a deal! We can meet In he middle. Wait that’s the ocean.
-
You may have to prime that side, white over light and dark may not be even in color, or maybe it will.
-
Yes. Lay the next plank down up tight to the one above it at midships and run your finger forward. There is a point where it won’t lay flush and wants to cross the plank above it. Mark that point, it is where your taper starts. It varies as you move down the hull, not a single spot. It has to be done from the start, it won’t fix a severe mistake, to do that you have to over-correct a lot, can’t explain how on that one, or start over. Lining the hull is more work but keeps you on track,. For LN being such a small hull you can skip that and measure the height of the stem from the keel to the master plank (a full width plank generally about equal to deck level) and divide by the number of full width planks at midships. The result (like 2.3mm for example) is the width of the plank at the stem. So taper from the mark you made to 2.3, plank bend it to conform and do the next one. Recheck your stem measurement every 4 planks or so to update the stem width, hard to be perfect. If your line gets wavy either your mark or your measurement is incorrect so adjust. it’s your first model, it won’t be perfect. My advice is to try to do it right, shortcuts won’t help you on the second model.
- 71 replies
-
- 2
-
-
- Lady Nelson
- Amati
- (and 1 more)
-
Ship in a bottle - Foremast placement
glbarlow replied to Rik Thistle's topic in Wood ship model kits
What if he drops it, break the bottle and start over. Fascinating but something I could never do.- 1 reply
-
- 1
-
-
The wavy walnut line is a tapering issue along with plank bending shortfall. Basically you started the taper too far back from the stem. H We’ve all been there. You can paint over dry Wipe On Poly, I don’t know about oil, I wouldn’t think acrylics and oil go together
-
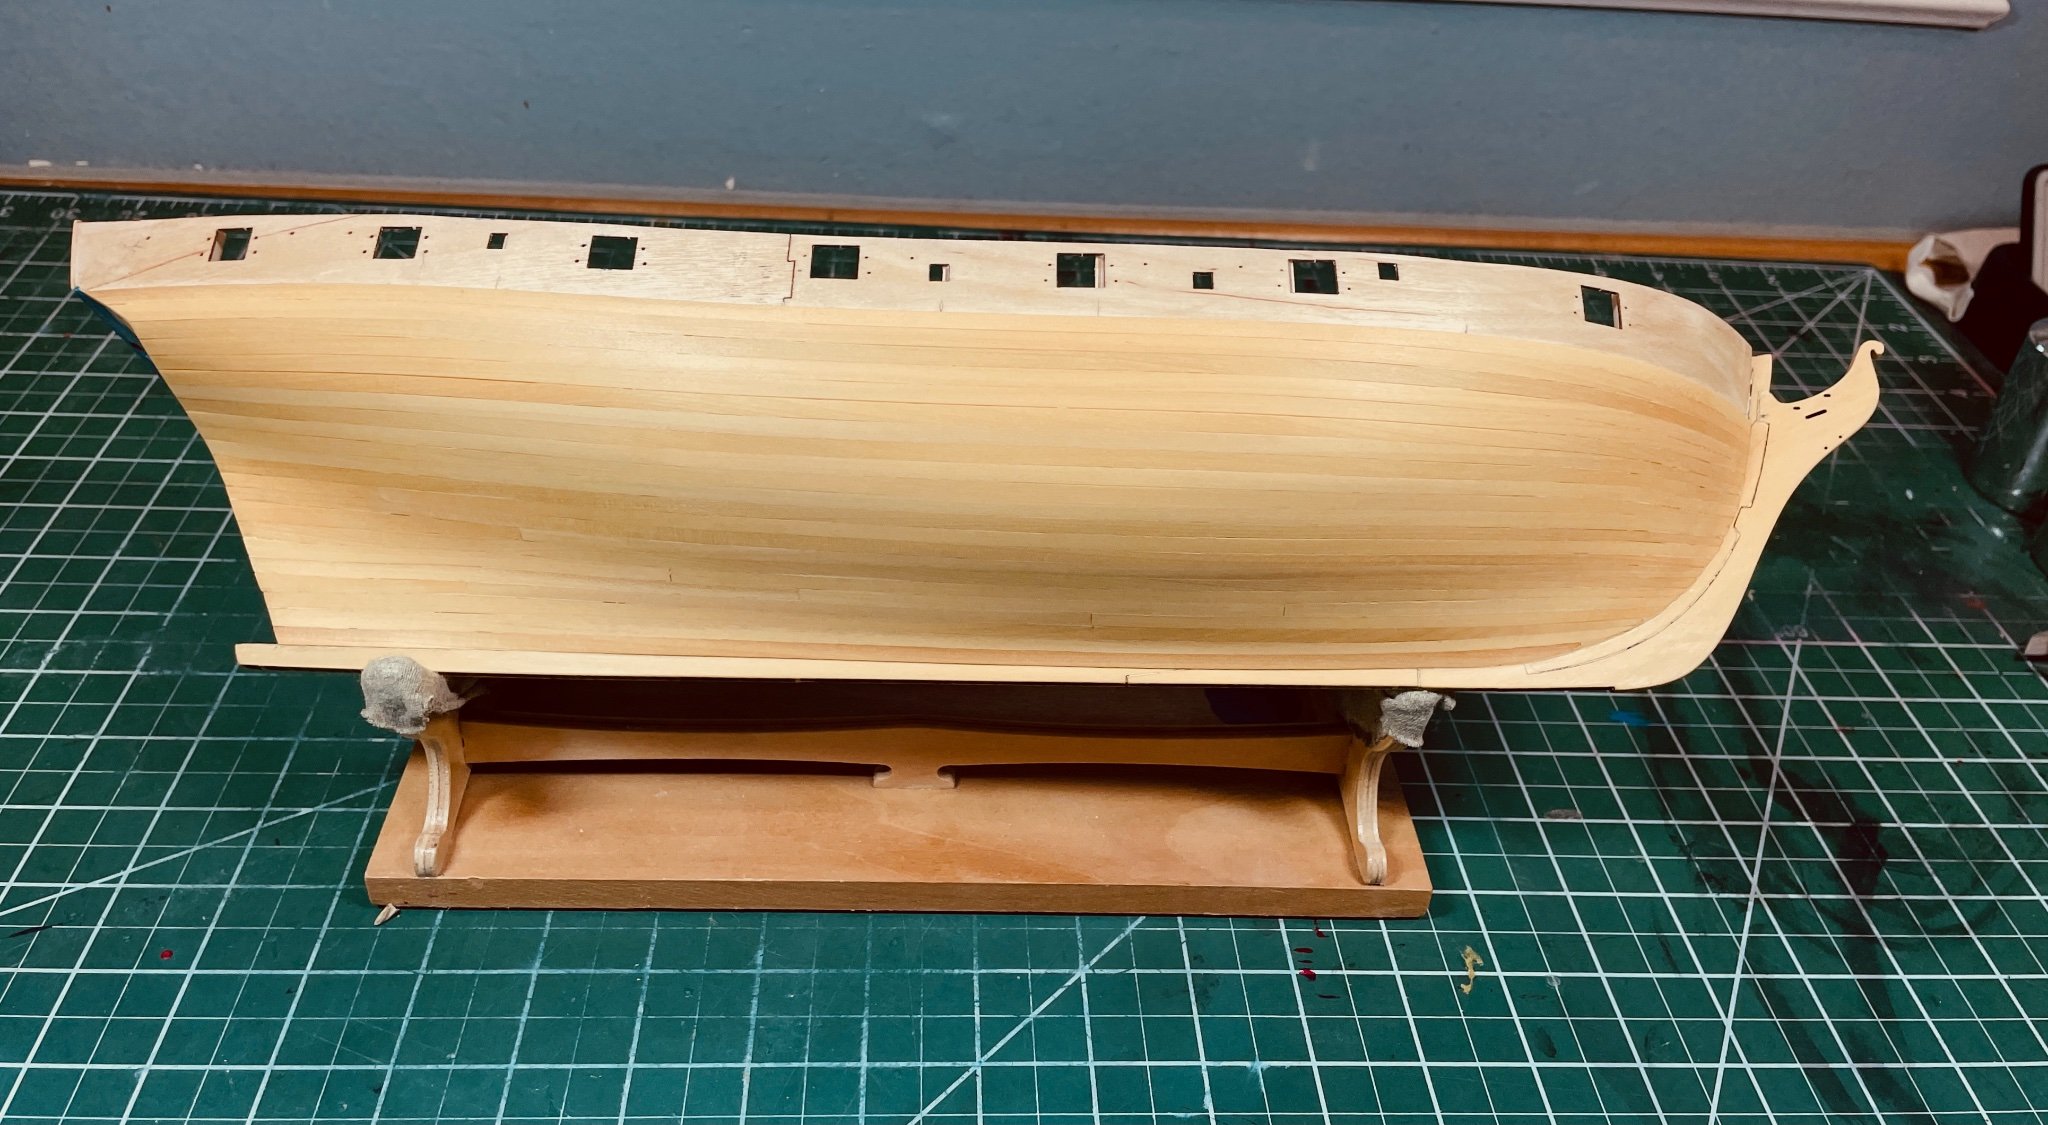
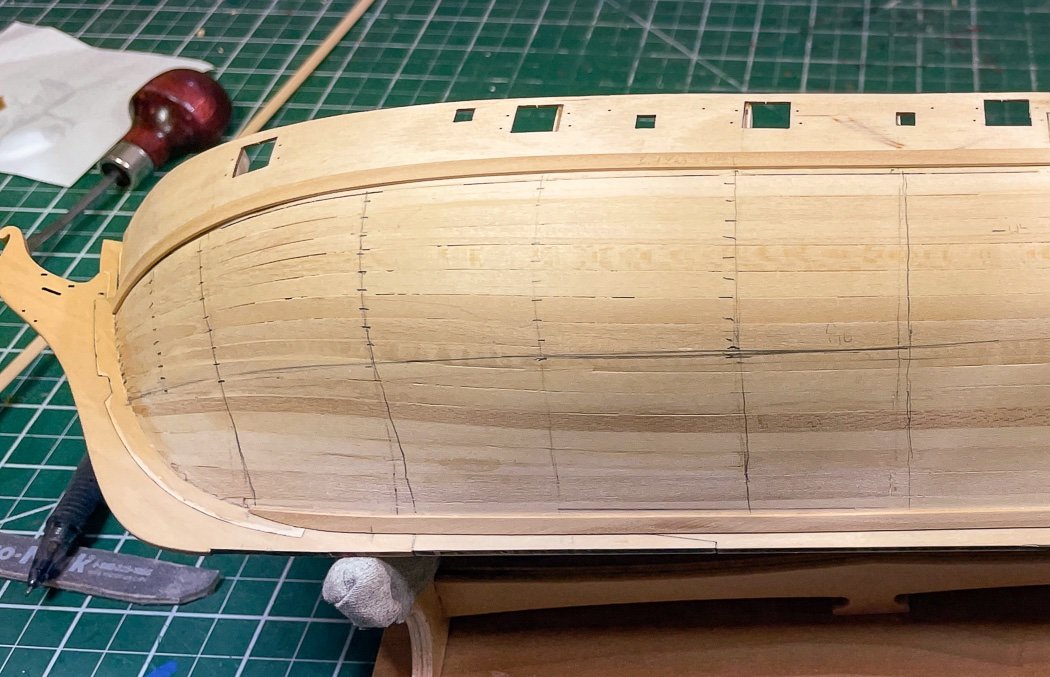
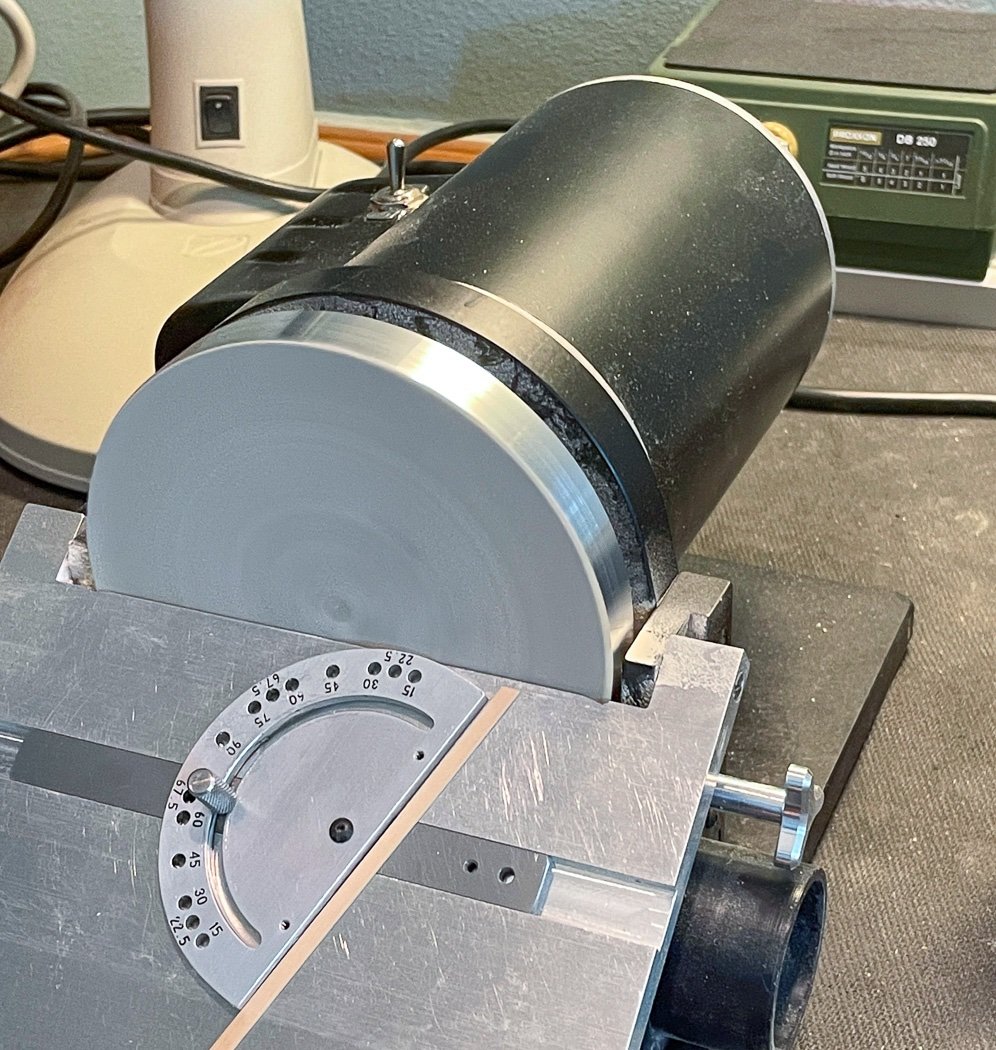
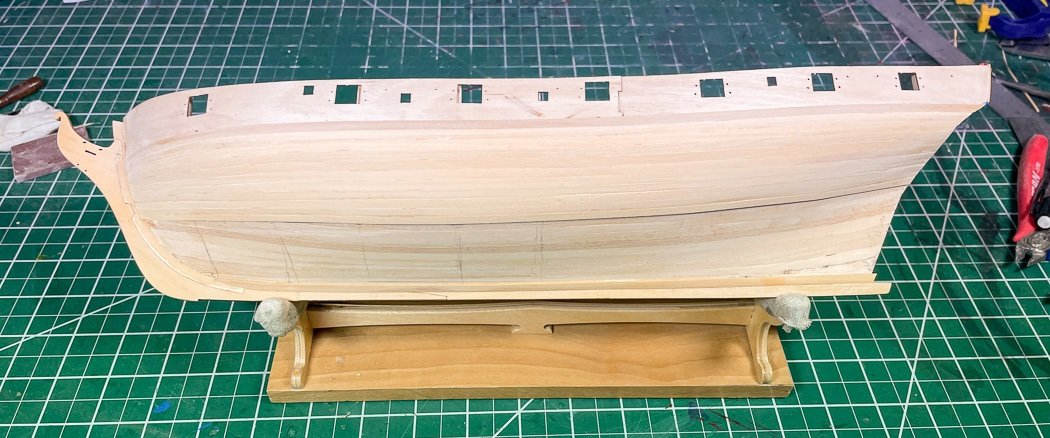
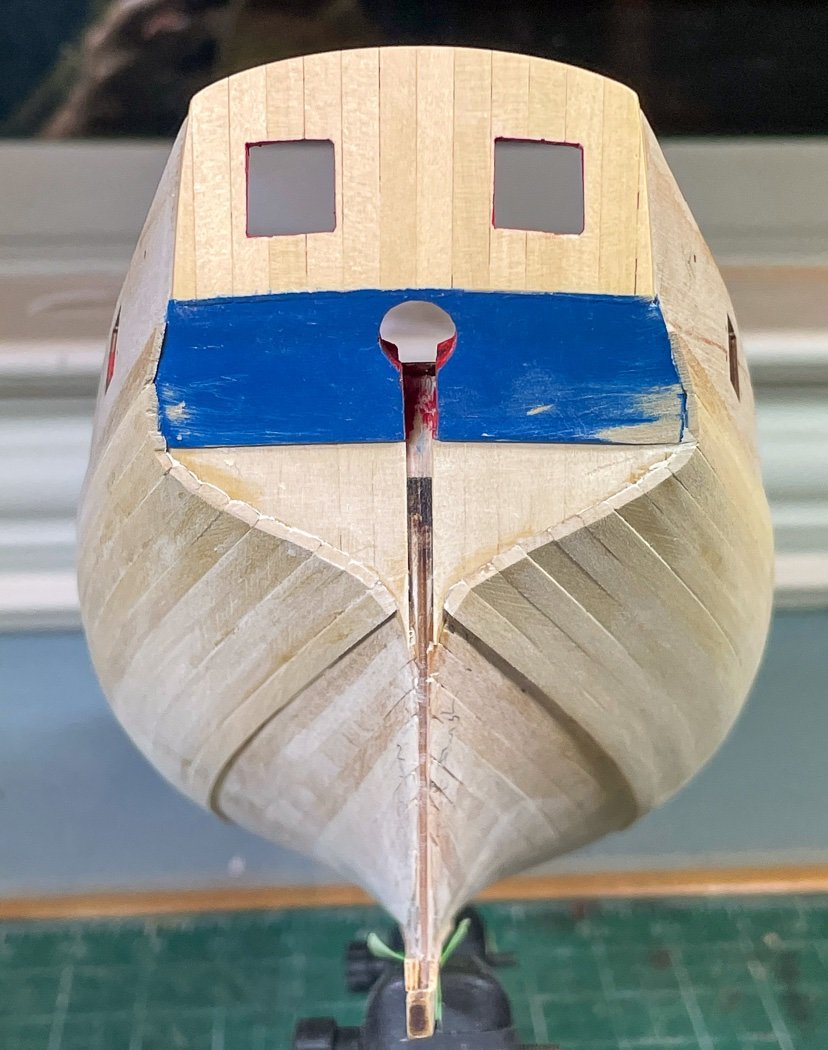
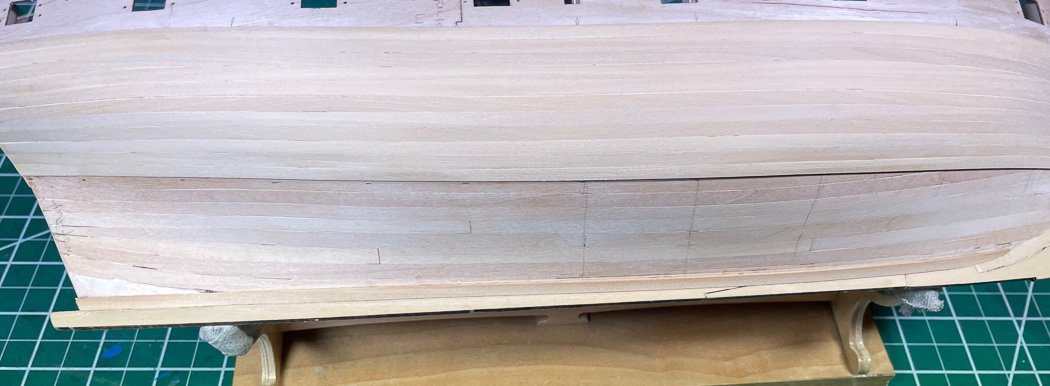
2nd Planking - Part 1 I’ve completed the first belt of the second planking on both port and starboard. My progress has been a bit slow because I’ve had a bit of a difficult time with Flirt. I had to work attaching the keel to address a slight warp in the former, but it and the keel are quite thin and I managed to break it off while using my Amati keel holder, this despite firmly gluing it using PVA. So a good deal of time was spent repairing that. Nonetheless I’m pleased with the result of the first band. I found the line for the first belt by determining 21 planks are required between the master plank and the keel. So I marked a line between bulkheads 7 & 8 (where full width is required at midships) ten plank widths down from the master plank and from there used artist tape to determine where to run the belt. To the stern is easy, its full width planks all the way. The bow is the artistry part, there is no magic answer, you just know it when you see it, maybe. I did better marking the second planking learning I’d marked it high on the first planking. It is wonderful affirmation to see the planks following the tick marks as I progressed. It takes time to line the hull like this, using a planking fan to determine the width at each bulkhead. I’ll say once again its time well spent. Sure there are other methods, on this model I probably could have winged it and been ok. I won’t be able to do that when I start Winchelsea some day, so I want to learn to do it right now. Once again the Byrnes Sander gets the right angle and bevel down the stem. It changes a bit with almost every plank, the sander really helps keep the planks tight to the stem. I spent some time on the garboard strake, never as easy as you’d think. One because it’s a good time to do it. After I line the lower belt I’ll add one or two planks above it and meet them coming down. More importantly in this case it added some needed support and strength to the keel. I always plank with CA, however in this case I used PVA and clamps on both garboards, they are now one with the frame. I haven't done any sanding I'll wait until the second belt is finished. The boxwood second planking looks good coming into the stern, even only rough sanded, again the plank bending including inward twists make it happen. I knew I’d chew up my painted counter some going in, it’s an easy fix later. You can see with the garboards how much sanding was required on the frame to fit the stern post. All that I did and I’ll still need a little more off the boxwood to get a good fit, really have to take that into account at the outset. The instructions aren’t kidding when he says remove wood from the frame to a 1 mm width. As I've noted before I really enjoy plank bending. Nothing more than a travel iron is needed to form the planks to fit to follow the curves and bends of the ship. It’s only rough sanded at this point, with the boxwood only 1mm thick I’ll wait until its completely planked to sand carefully sand it out. Off to finish the planking. As always, thanks for the likes and especially the comments.
-
Where’s your Flirt log Bob🤣
-
Looking good, nice work. I like the use of ebony. Where did you find it? I used it on Fair American, it really sands up nice to a high polish with WOP. But I have to ask how did a whore max help and does your wife know about that 🤣😂
-
How to seize a block to an iron band
glbarlow replied to Laggard's topic in Masting, rigging and sails
I’m going to drop out of this conversation. Best of luck to all. -
With that clamp in the middle and just the table to iron on not sure how you’re heating enough or long enough to hold the curve.
-
Just FYI, they are actually carronades 😁
-
Thukydides has done a nice job of explaining this method. I’m an absolute believer in it being worth the time to learn above all others. It is a trial to learn but well worth the time. Once you sort it out you’ll always be able to do it and share with others how you did. In time you’ll become the teacher. The simplistic way to think about line a hull is this: The widest point of the hull determines the number of planks needed to run the length of the ship from stem to stern. First determine that with a tick strip measuring that length top to bottom, divided by the width of your planks. That number of full width planks won’t fit at the stem, and often won’t at the stern so the planks must be tapered. The requirement is when you’re done you’ll have the same number of planks at the stem as you have at midships, they’ll just be skinnier. This method tells you how skinny. Take a tick strip and measure the length of each bulkhead, place each one in turn on the planking fan aligned to the left edge and move it to where the right edges matches the line equal to the number of planks required at midships. Now you know how wide each plank has to be at each bulkhead, transfer those marks to the bulkhead as a guide and also use them to know where to taper your plank. The strip of tape marking each belt is hard because it’s not math, it’s art. It’s breaking up what I described above by dividing the hull into sections or belts to help keep you on track with your measurements by making smaller sections. For a small model you may not need it at all, for a medium size one belt will do, for a larger model maybe two or three. The art is to find the flow of the hull so the planking has a nice sweep, only by doing it and gaining experience will you learn how to get that line, or better yet looking at other build logs to see what they did. Check out my Cheerful build log to see some photos and text on how I did it. But know this, I removed and redid my planking multiple times until I got a result I liked. This technique works great, but it takes time to learn and it takes time to do. My advice is to stick with it. There are many ways to plank a ship, the only bad way is trying to merge and meld all those or skip from one to another based on other’s preferences. It can get confusing fast trying to abide by too much advice, well intentioned it might be (like the post below who seems not to have read anything above it). Stick with this one method. Good luck, hang in there. There will be that moment when it all becomes clear.