glbarlow
-
Posts
4,126 -
Joined
-
Last visited
Content Type
Profiles
Forums
Gallery
Events
Everything posted by glbarlow
-
 Excellent work, very impressive!
 -
Dying/coloring rope; sources for purchase of quality rope
glbarlow replied to Tomculb's topic in Masting, rigging and sails
Looking forward to giving your rope a try -
The best saw blades for the Byrnes saw are the ones he sells. He no longer offers Thurston blades. I have his new ones, they cut great.
-
There is nothing the Byrnes saw cannot do, and do better. If you want to keep two saws the reason shouldn’t be because some other saw can do it. (Short of a full size table saw I suppose) The addition of the Byrnes cross cut table accessory opens even more possibilities. I easily cut lap joint hatches for Cheerful using it.
-
Dying/coloring rope; sources for purchase of quality rope
glbarlow replied to Tomculb's topic in Masting, rigging and sails
I tried some Crafty Sailor rope, it is terrible. The .018 size was way to small, .012 at best. When I cut it, the first three or more inches sprang unraveled like a broken clock spring. I emailed Crusty Sailor, who does have great to scale wood belaying pins, the answer was “that’s the way it came from the manufacturer.” I would not recommend this rope, not at all good quality. -
I could buy every tool you own and come no where close to the caliber of work you do. The latest example being your blocks, they are amazing. The stove is incredible, as are details like the charcoal stove. I hope this model ultimately will reside in a museum, a place that it can receive the admiration it deserves and viewed in person by many. Well done.
- 589 replies
-
- 8
-

-
- le gros ventre
- cargo
- (and 1 more)
-
Look into a Quad Hands, available on Amazon. It makes all rigging work easier. They allowed me to seize my served shrouds on the model. My experience is the seizing can be move a little it’s kept loose, but not a lot.
-
It would be interesting for all of us Cheerful builders to see some photos of yours. I think there is a forum post for works in progress you might consider. It’s a great and fun build for sure.
- 274 replies
-
- 1
-
-
- Cheerful
- Syren Ship Model Company
- (and 1 more)
-
I’ll look forward to seeing your line launched. I’ll give some a try.
-
It gives the masts and yards a nice matte finish and more of a real world look I think. I use Dull Black, which is oddly named as it’s the opposite of dull, on other places but more and more I like the Ironworks.
- 778 replies
-
- 1
-
-
- cheerful
- Syren Ship Model Company
- (and 1 more)
-
Well said Derek and Chris. It’s impossible to consider and identify every possible problem and answer. No one is wrong, it’s just a problem to solve. I think we’re all kinda in it to solve problems and build stuff.
- 725 replies
-
- 1
-
-
- vanguard models
- speedy
- (and 1 more)
-
Thanks Derek, I did give leaving them natural a passing thought, but the black does look good. I use Admiralty Paints Ironwork Black, I get it from Cornwall Boats on your side of the pond. It gives a really nice finish.
- 778 replies
-
- 1
-
-
- cheerful
- Syren Ship Model Company
- (and 1 more)
-
I’ve used both, I’d say it’s more than Syren being the Rolls Royce, there is a big difference in quality. Enough that I consider it a big step down to fall back on Amati stuff. To me it’s more Amati being the KIA of rope. There doesn’t seem to be many options in between. I don’t want to make my own but I may have to learn how.
- 355 replies
-
- 1
-
-
- vanguard models
- Sphinx
- (and 1 more)
-
Thank you. I enjoyed making them.
-
Not as long as you don’t over-tighten the chuck
-
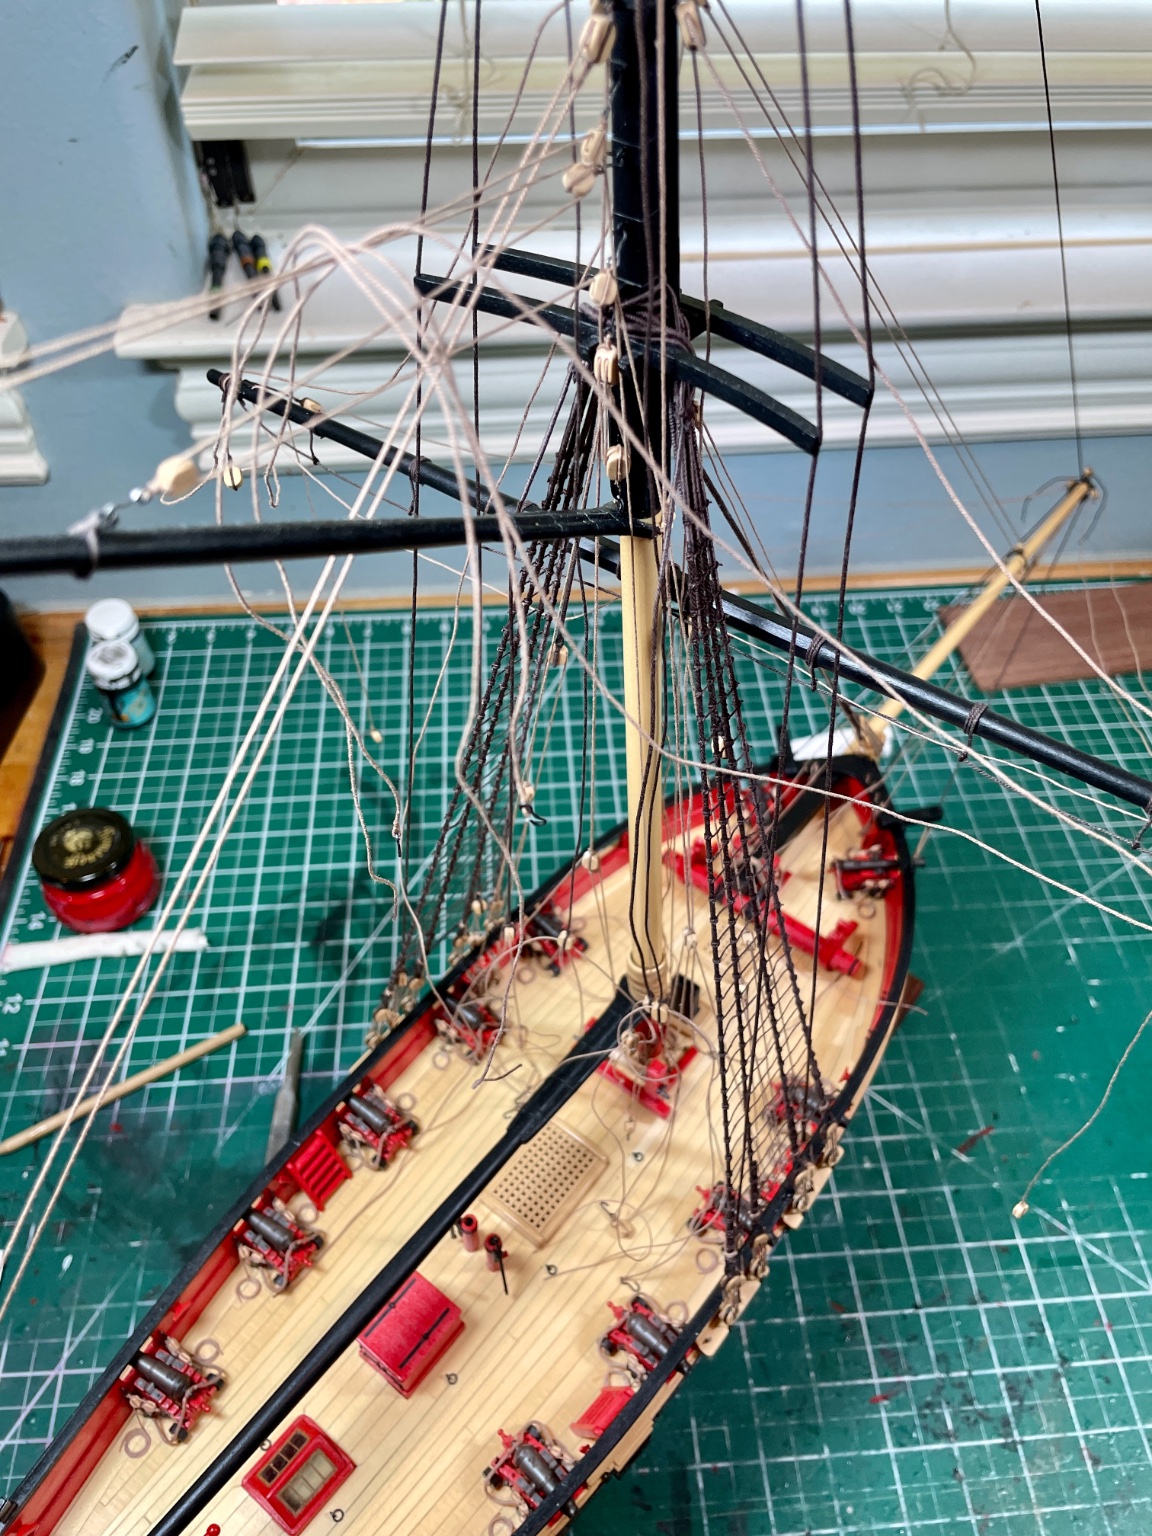
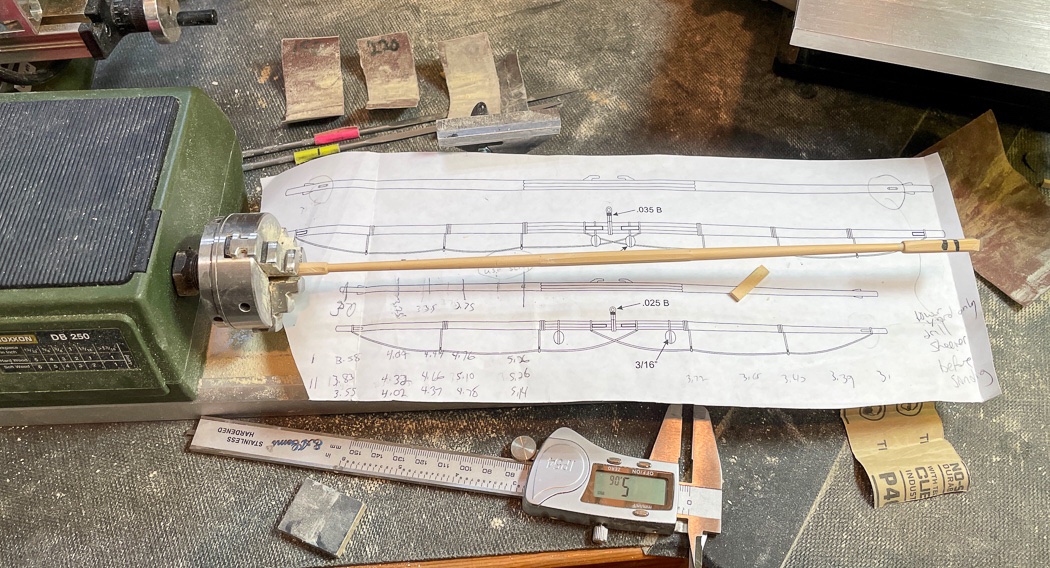
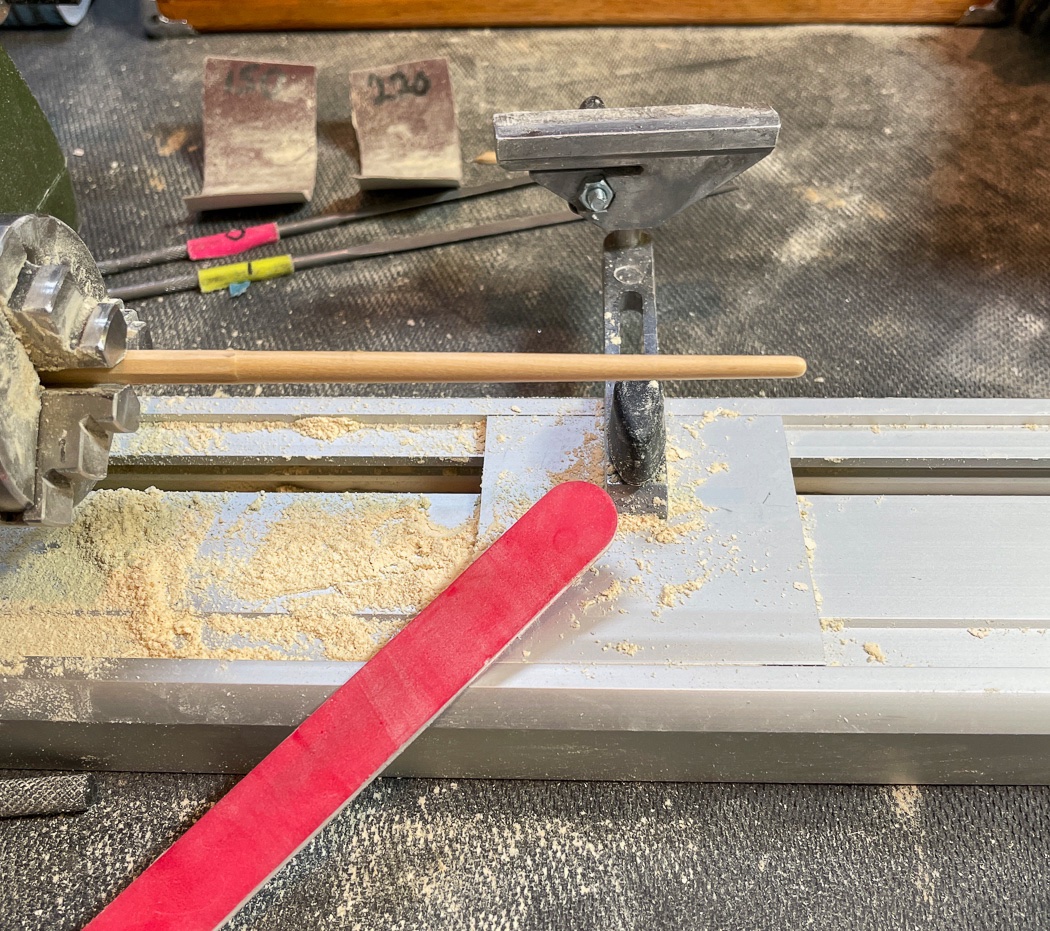
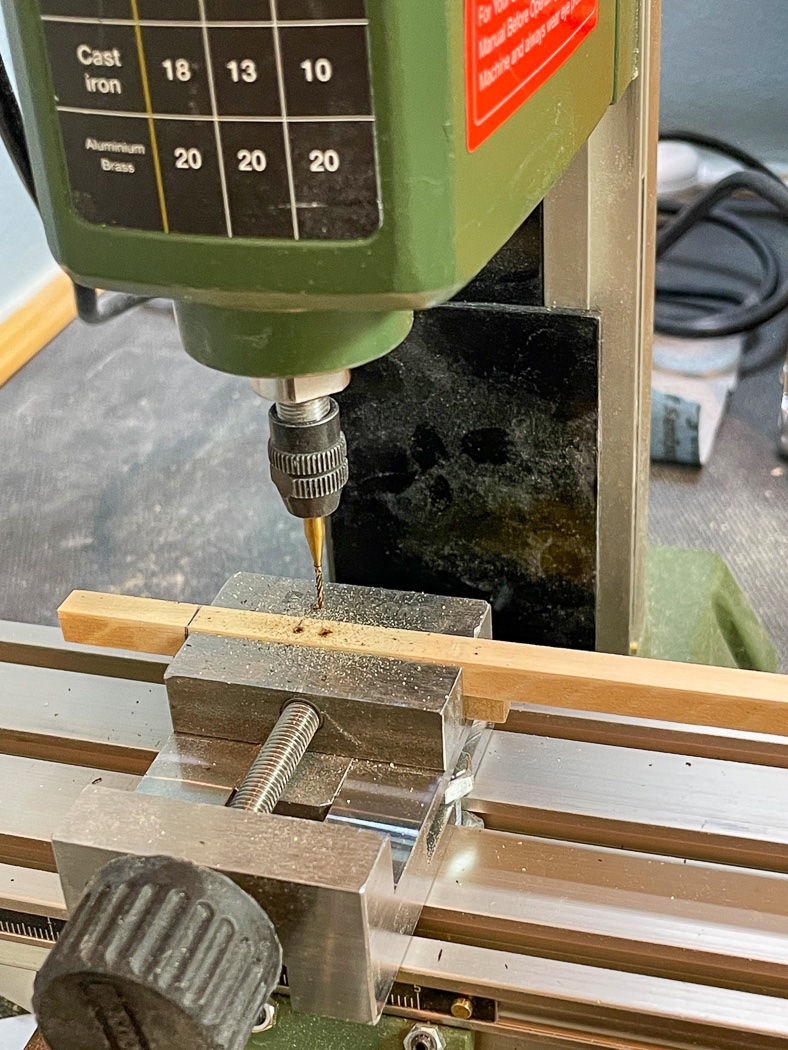
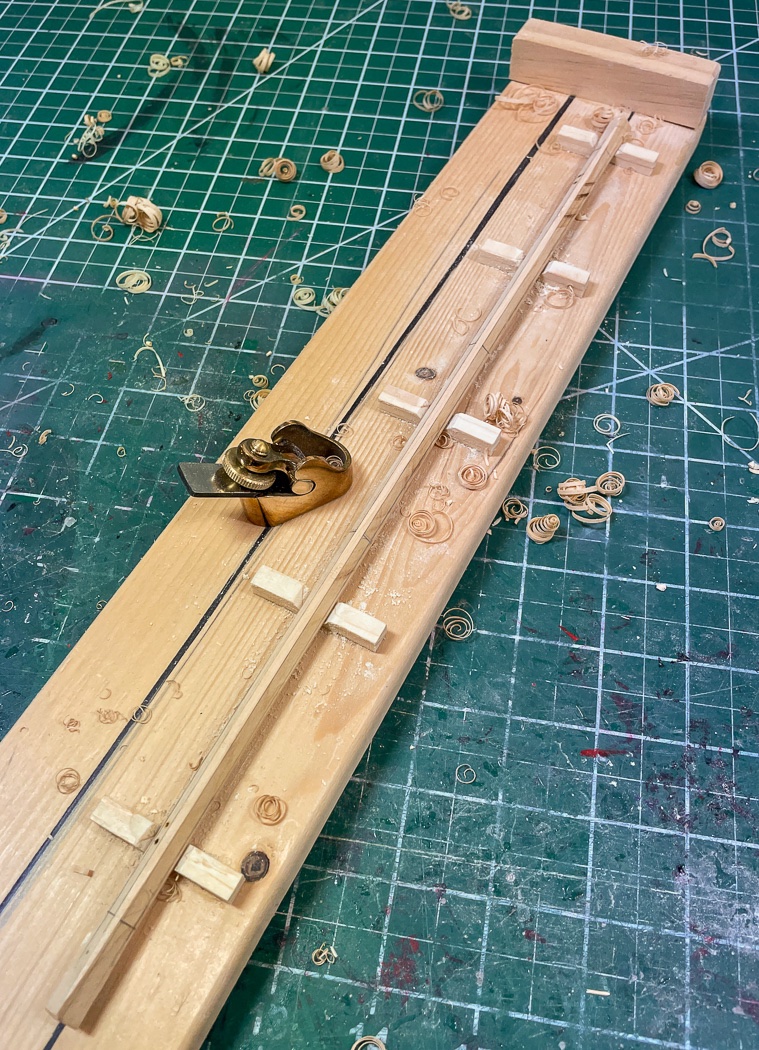
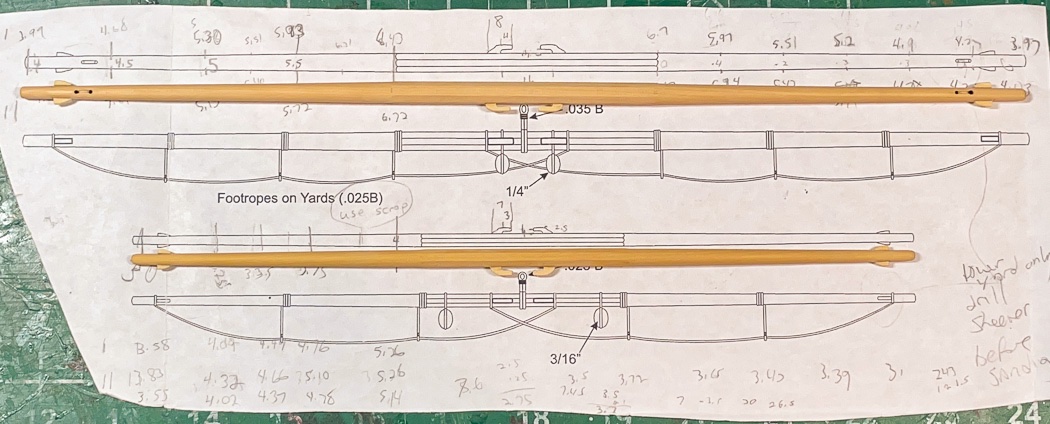
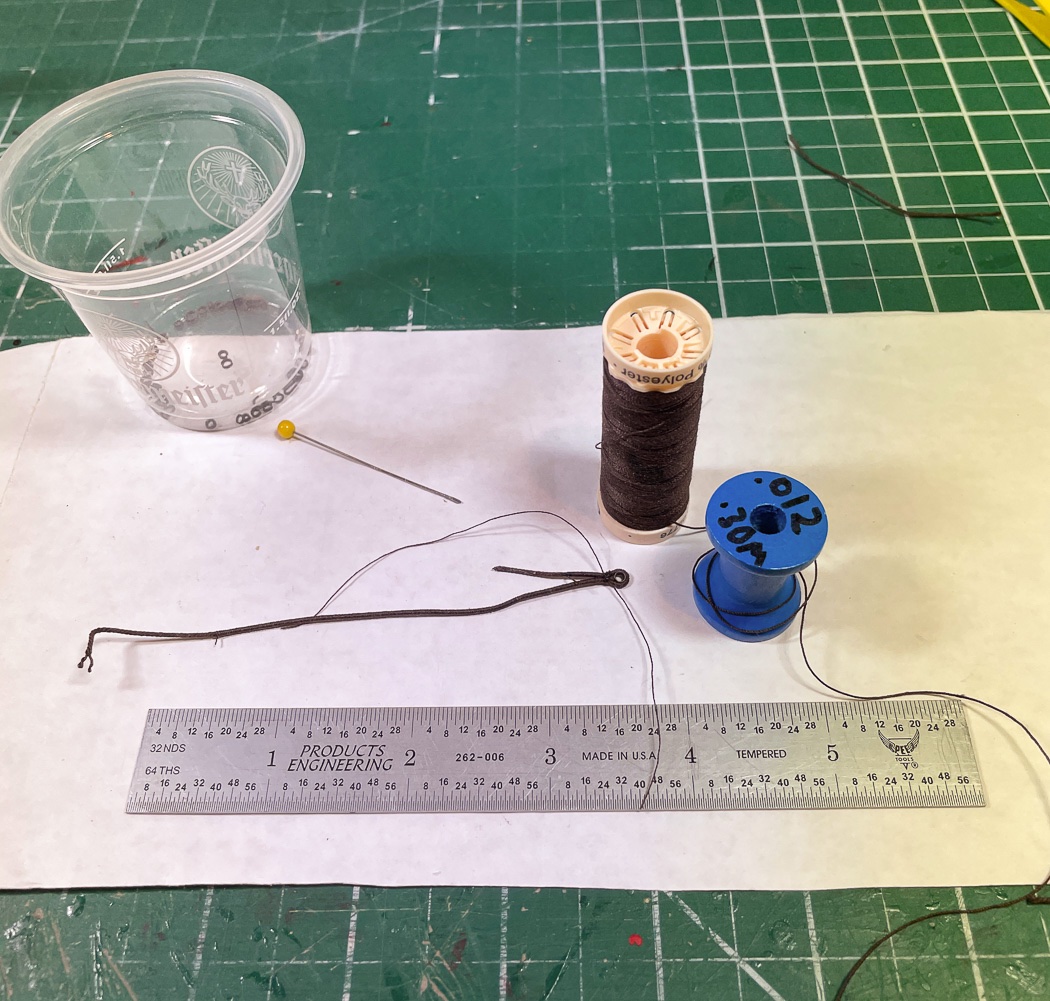
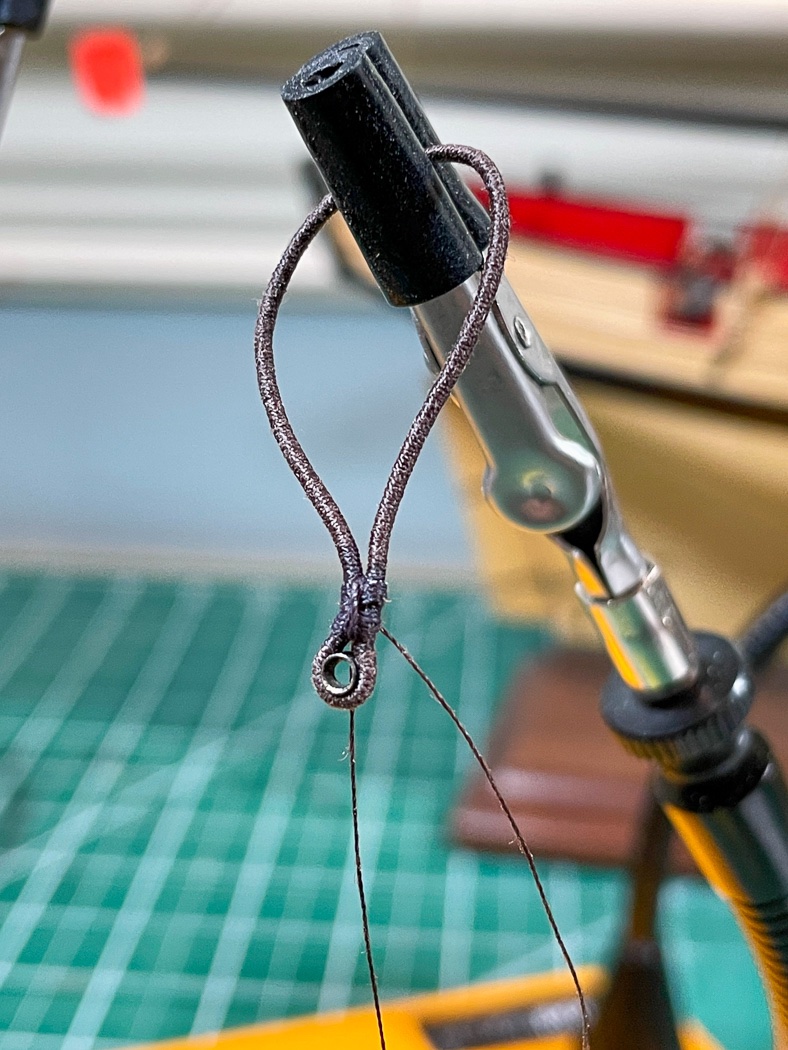
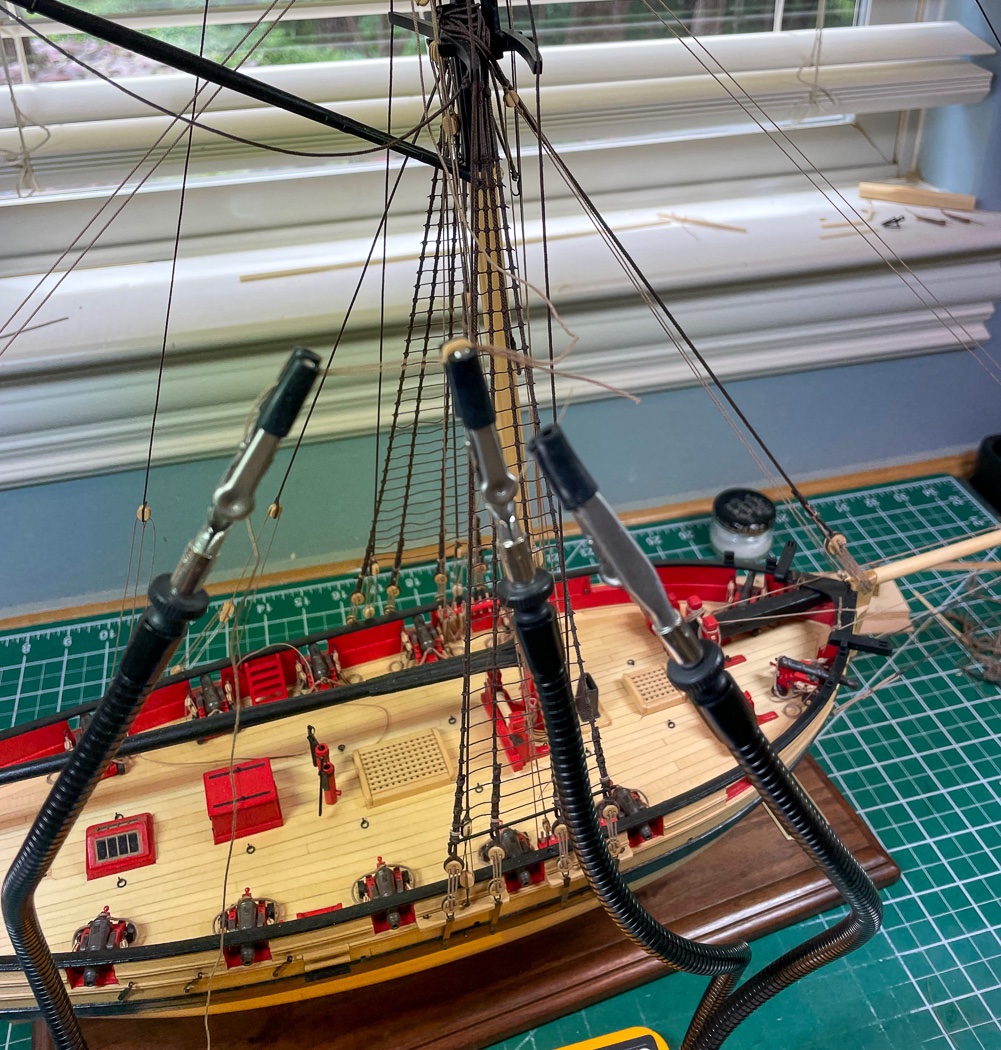
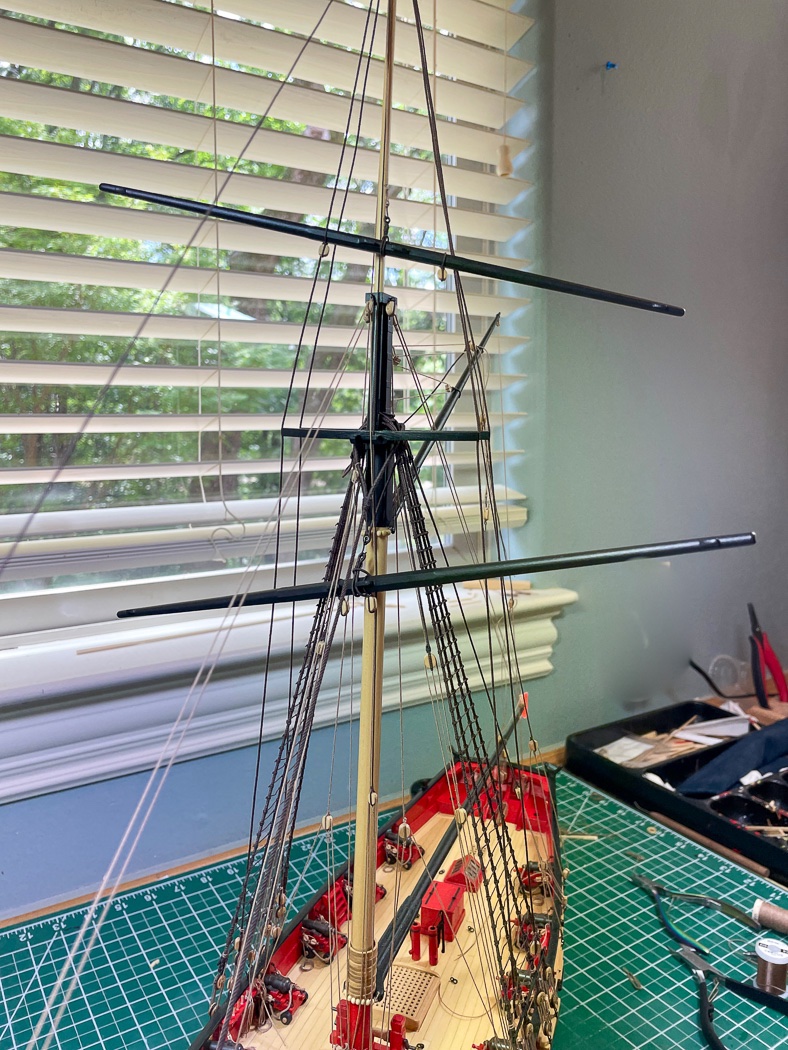
Making the Yards Aside from the anchors the yards are the last thing I’ll make for Cheerful, my voyage is getting close to the end. One last trip through the machines. Although the yards will be painted black I elected to use a bit of the boxwood I purchased from Modeler’s Sawmill for no real reason other than I wanted to work with a little box - its such beautiful and easy to work wood. Not that the Yellow Cedar isn’t, they are both excellent woods for modeling. It’s great that Modeler’s Sawmill gives us a new source of quality wood. First up after cutting square lengths to size was to drill the holes for the sheaves on the square stock, much simpler to do now then trying to add them to a rounded yard. Back to my octagon jig and the finger plane I’ve described earlier in this log, it’s the perfect tool for this job. First it was marking the wood using the 7-10-7 rule, then cutting to the pencil marks with the plane. I marked the center part of both yards that remain in octagon shape after shopping as shown on the plans, I wanted to be sure to have a nice pretty octagon for that part and gave it extra care. Off to the lathe, I cut both yards long to provide a good hold for the chuck. I had no problem with the length, not having a tail stock doesn’t present any issue. I just hold the end in one hand and sand with the other. I rounded the side furtherest from the chuck first for extra support. I measure and mark the plans at increments then frequently check those with my calipers as I sand with various grades of sand paper. I also used a 00 file to cut the ends clean and sharp. Although I removed it for this photo I also wrapped Tamiya tape at the outer edges of the center octagon do ensure a clean line there as well, then smoothed out the transition as the last step with a very fine grit sanding stick. Of course the real challenge with yards is sanding the second side to its mirror twin of the first - I mark them side I and side II to keep track and take measurements much more frequently. It’s true rounding masts and yards can be done with a hand drill. Having done both I believe the lathe makes it simpler and easier to manage the incremental sanding required. Where the lathe shines, or at least this particular Proxxon model, is in the ability to slide the yard inside the chuck to expose only one half. This particularly helped with the 12 ½ inch main yard. After checking and rechecking the measurements I added the stops and my yards are made, the machines go quiet. The main yard sling is first served then a thimble (selected from my jar-o-thimbles) is added. The short end of the sling is cut off just short of the thimble (done after this photo) and the long edge turned and glued using CA to form the loop. I seized it with twelve turns, crossed the two ends of the seizings twice through the center, and finished off with a square knot on the bottom where it won’t be seen. The seizing covered the two glued ends of the loop, you’d never know it was there. The topmast sling was made the same way except it isn’t served and of course is shorter. I added the topmast lift and tackle, working near the trees to complete the block seizing. Once again I marvel the difference the addition of the Quad Hands has made for my work. I have the medium plate size but added a 4th 16” arm. This tool comes in handy so many times throughout the rigging process, I can’t recommend it enough. So with that the yards are complete - oh wait that’s not how they go. 🙂 It seems I have some rigging to do, back to the Quad hands and my dwindling rope supply. Thanks for the likes and the comments, they are always appreciated.
- 778 replies
-
- 21
-
-

-
- cheerful
- Syren Ship Model Company
- (and 1 more)
-
The little mini kits are all a highlight of this build. Well done.
-
I don’t think I was paying anything extra for a US shipment, does that change?
- 355 replies
-
- 3
-
-
- vanguard models
- Sphinx
- (and 1 more)
-
I understand your not being able to make it, just wish there was a third option. Maybe with Ben there will be.
- 355 replies
-
- 4
-
-
- vanguard models
- Sphinx
- (and 1 more)
-
That would be great if it meets Syren quality, I’m looking forward to see your offering!
- 355 replies
-
- 4
-
-
- vanguard models
- Sphinx
- (and 1 more)
-
My one request for your consideration is to provide the best quality rope to go with such an amazing kit. Normally I replace kit rope with Syren products but that is no longer an option and I have little interest in making my own.
- 355 replies
-
- 8
-
-
- vanguard models
- Sphinx
- (and 1 more)
-
I’m really impressed with the quick service and quality of the wood from Joe’s Modeler’s Sawmill! I purchased some boxwood of various thicknesses just to have on hand. I’m too far along with Cheerful to make much use of it but just for the joy of working with boxwood I made the two yards from what I bought. Really excellent quality wood! I’d encourage everyone just to buy some stock to help get Joe’s business off the ground. Most of us know how much we miss Hobbymill, let’s contribute to keeping a great source in Modeler’ Sawmill. I’m so tempted to build ‘Surly,’ paint it blue and make it from boxwood. 😜
-
I know the places that gave me an extra challenge or two, getting the bow right was one of them.
- 274 replies
-
- 1
-
-
- Cheerful
- Syren Ship Model Company
- (and 1 more)