glbarlow
-
Posts
4,126 -
Joined
-
Last visited
Content Type
Profiles
Forums
Gallery
Events
Everything posted by glbarlow
-
 I always enjoy your detailed descriptions of your work and appreciate your taking the time to describe your process. The barge looks great!
- 185 replies
-
- 1
-

-
- queen anne barge
- Syren Ship Model Company
- (and 1 more)
-
Simply beautiful work Rusty, amazing!!
- 642 replies
-
- 1
-
-
- winchelsea
- Syren Ship Model Company
- (and 1 more)
-
You can justify it because it’s great for hanging pictures around the house 😁
- 778 replies
-
- 1
-

-
- cheerful
- Syren Ship Model Company
- (and 1 more)
-
I thought what I have IS what Ryland recommended, especially given they were described as cuticle cutters, clearly I was wrong. Nice review but I think the essential point is both cut clean and close, except maybe not on fly fishing thread. I’ve made the adjustment for the angle, that’s no longer an issue. I too ordered the toenail version because you just can’t have too many sharp thingys. Nonetheless I’m happy with my passing on what I thought was Ryland’s recommendation. Angle aside they are great for close cutting. Having either one is a step up for rigging work.
- 725 replies
-
- 1
-
-
- vanguard models
- speedy
- (and 1 more)
-
I’ve thought about it, I just have no place for that behemoth, even as beautiful as it is. Maybe though. I’m hoping Chuck turns to the USS Hornet as his next masterpiece. i like “Launching” as the word for fixing the model to its base...nice!
- 778 replies
-
- 1
-
-
- cheerful
- Syren Ship Model Company
- (and 1 more)
-
I ordered two of them for my Kindle.
-
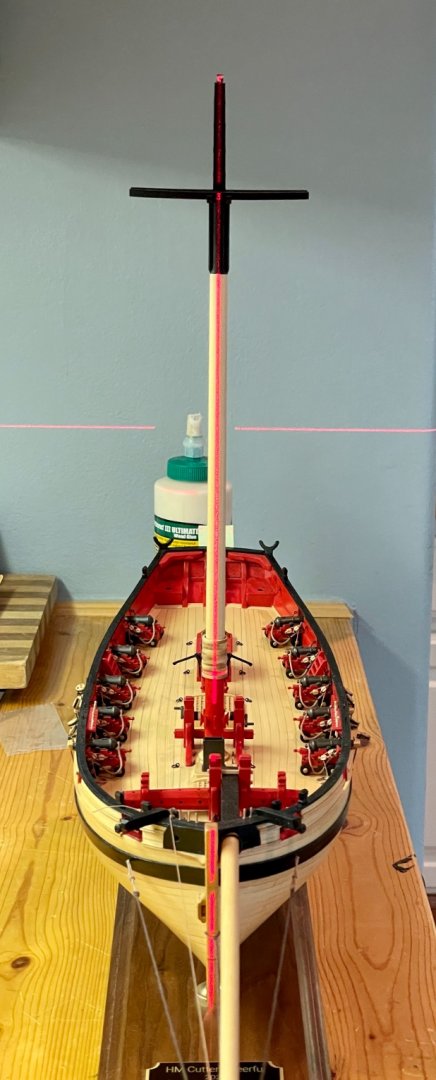
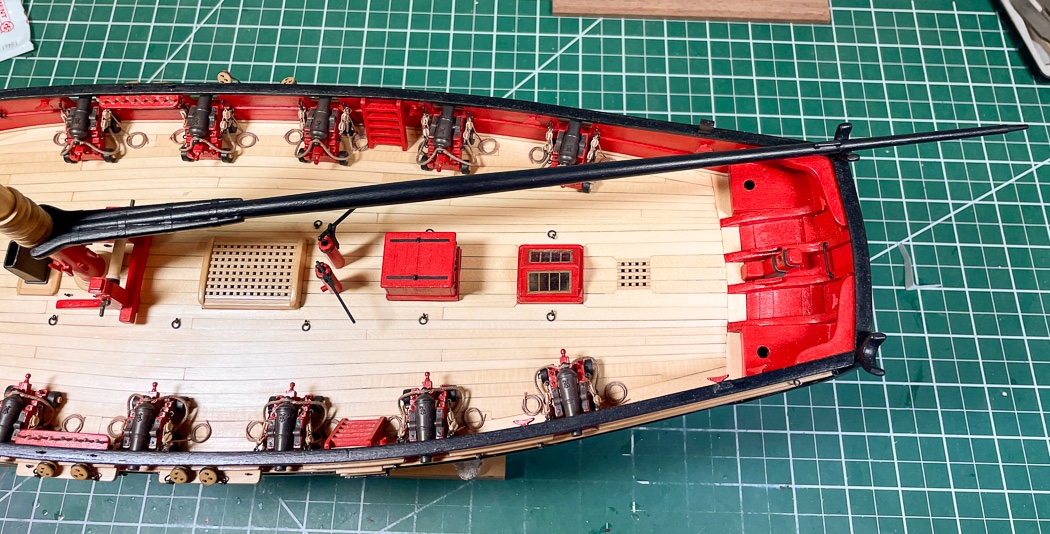
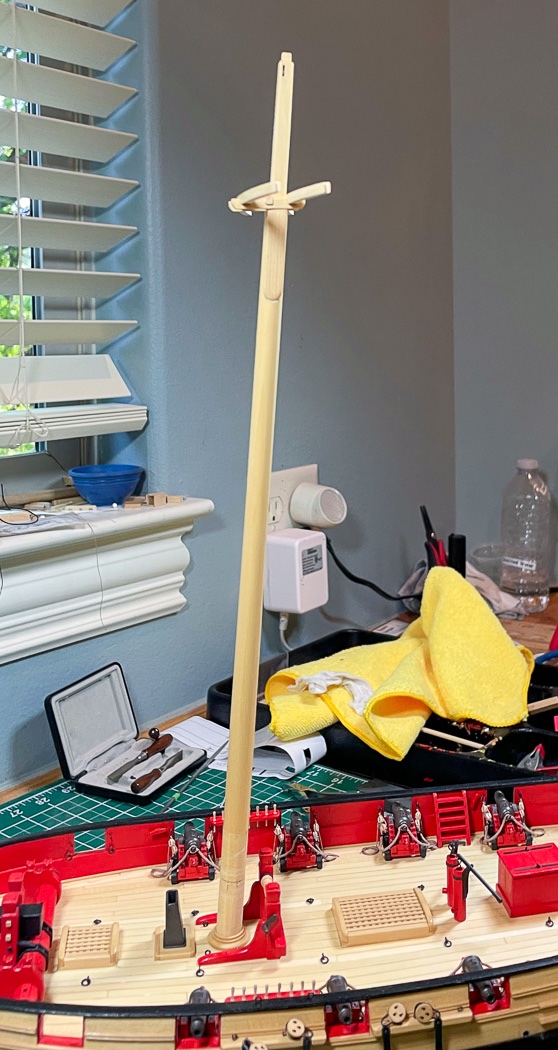
Masts continued I’ve now epoxied the ship to its permanent base and glued in the main mast. Both are very anxious steps, after nearly 12 months work I certainly did want either the ship or the mast off-center or unbalanced especially since neither step can be undone or stopped once started. First the ship to the base. I had bubble levels at three places on the deck, on the mount, and on the worktop. I rehearsed everything several times before adding the mixed epoxy to the brass rods and pedestals. I had paper towels at hand to wipe the inevitable excess epoxy from the pedestals and keel. With only 5 minutes before the epoxy set, I moved fast but with a light hand. ...Sit the ship on the base, wipe excess, check levels, sigh a sigh of relief and walk away for the night, turn around and check levels again... It was much the same for the main mast, only this time I used a laser level. I hadn’t moved the model from its leveled position and again everything was rehearsed. I knew adding the Tite Bond would make it a tighter fit so not to panic. The challenge here is not so much the rake of the mast, which I checked with a bubble level on the tree anyway, I knew the rake was established correctly way back when I built the frame. The level made sure the mast was straight from the bow looking back but I had to eyeball the left/right orientation of the trees to the deck below. Again rehearsal was essential as I’d established reference marks to key in on looking from above down to the deck. Fortunately I have a decently calibrated eyeball, and in the end everything came out right. Now the quandary, do I follow the monograph and next rig the boom? That means also gluing the top mast and mast cap in place. That in turn means seizing shrouds and other mast top ropes on the ship, rather than making them off the ship and simply dropping them into place before adding the mast cap. I’m sure it will be fine either way. It’s a little sad to note that other than some dead eyes, yards, and the anchors, I’ve made all there is to make. Lots of rigging to go but I’ll be finished in a couple of months. Then what will I do......, Thanks for stopping by, sorry I was too laser focused (see what i did there) to take more pictures of this very critical step. Your comments and likes are always appreciated.
- 778 replies
-
- 12
-
-
- cheerful
- Syren Ship Model Company
- (and 1 more)
-
I’ve yet to need to replace the filters and I’ve had it for about 18 months. It will tell me when through an indicator. I simply vacuum the the filters when I think it needs it, not that often. It’s easy to lift the cover and decide.
- 778 replies
-
- 2
-
-
- cheerful
- Syren Ship Model Company
- (and 1 more)
-
Thank you for saying so, glad you’re enjoying it.
-
I have the BIOGS 2.0. It works great for me and judging by the three layers of filters when I clean them it’s removing plenty of dust. I know it’s working in auto mode when it kicks on when I sweep the floor. It works for me in my in-house work shop. Thanks for the comment too, very kind.
- 778 replies
-
- 2
-
-
- cheerful
- Syren Ship Model Company
- (and 1 more)
-
Thank you for saying so. All kinds of things this model has taught me to do.
- 778 replies
-
- 1
-
-
- cheerful
- Syren Ship Model Company
- (and 1 more)
-
Don’t stop reading yet, there’s more to come😊
- 778 replies
-
- 1
-
-
- cheerful
- Syren Ship Model Company
- (and 1 more)
-
My friend the air can. Really though my Rabbit Air system removes a lot dust from the room. It’s always in Auto mode but after a dusty job I leave in running on high overnight. It makes a big difference for the model, and my lungs.
- 778 replies
-
- 5
-
-
- cheerful
- Syren Ship Model Company
- (and 1 more)
-
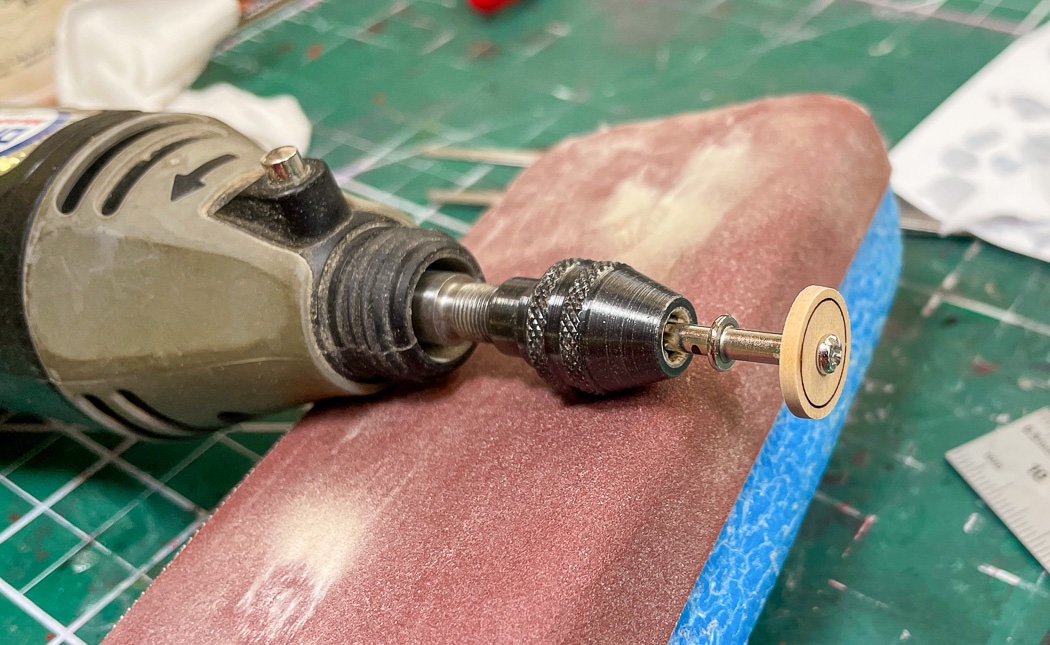
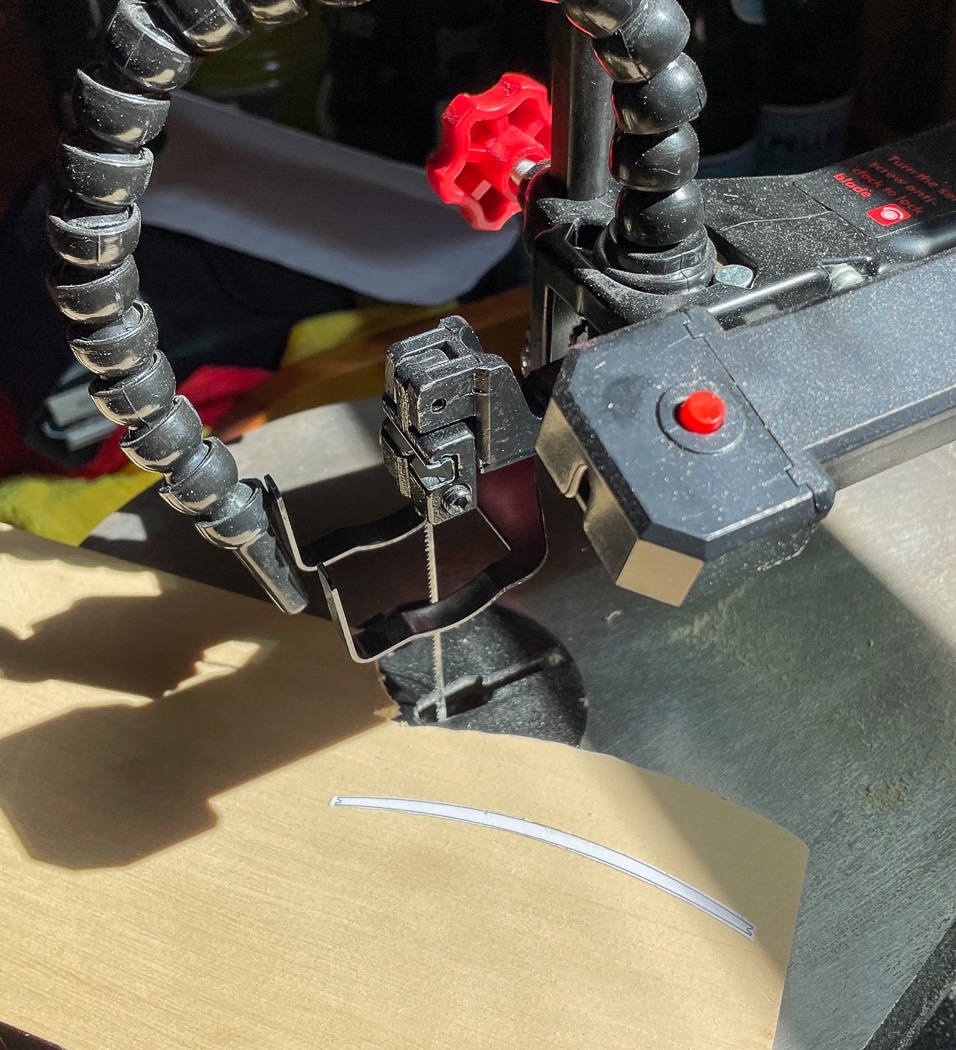
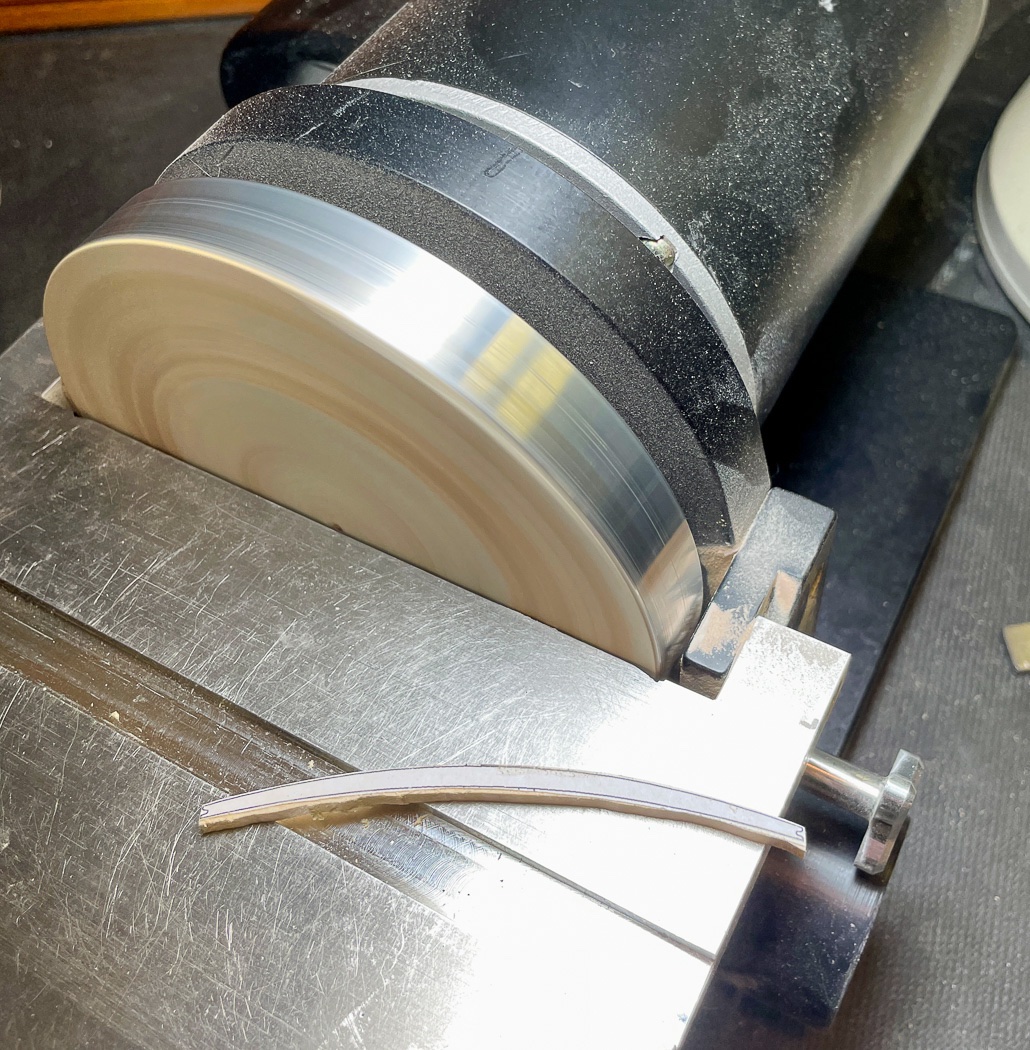
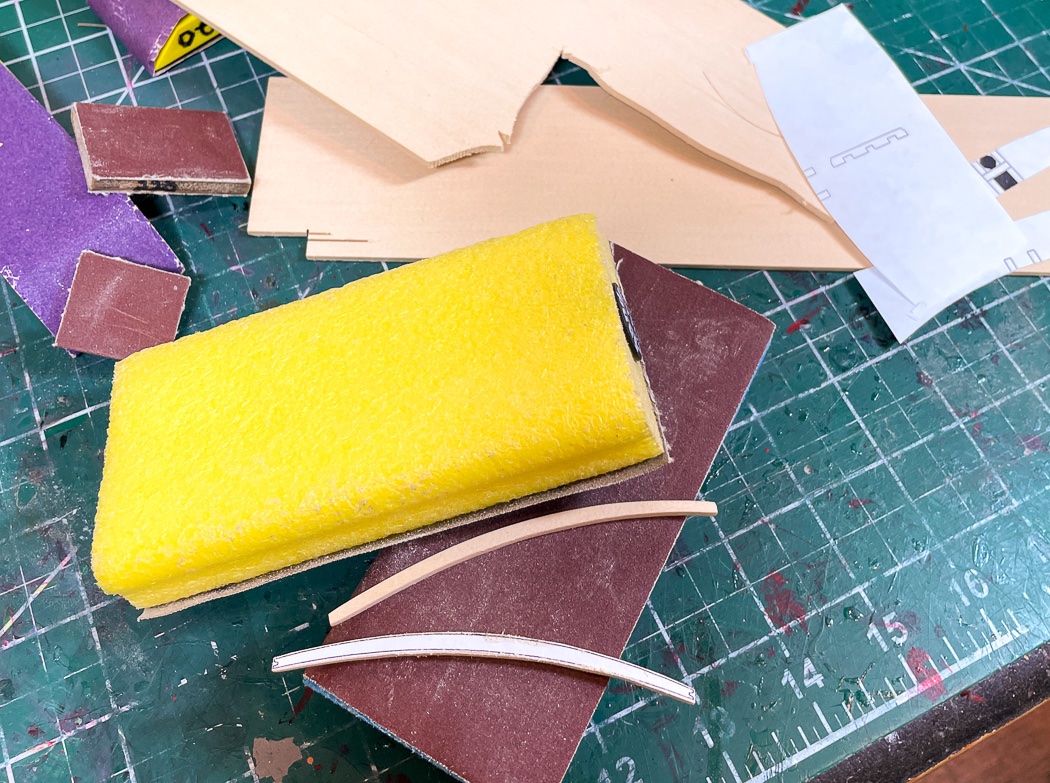
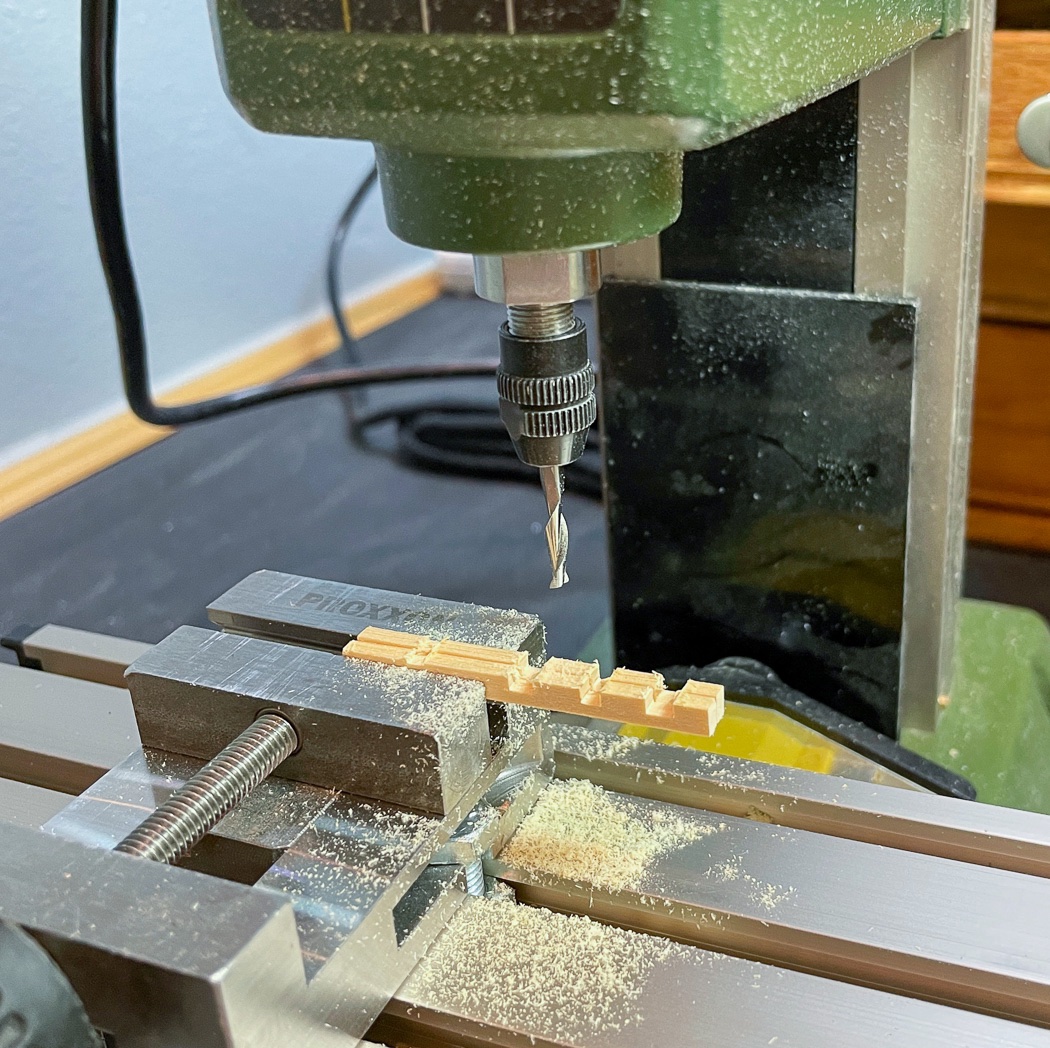
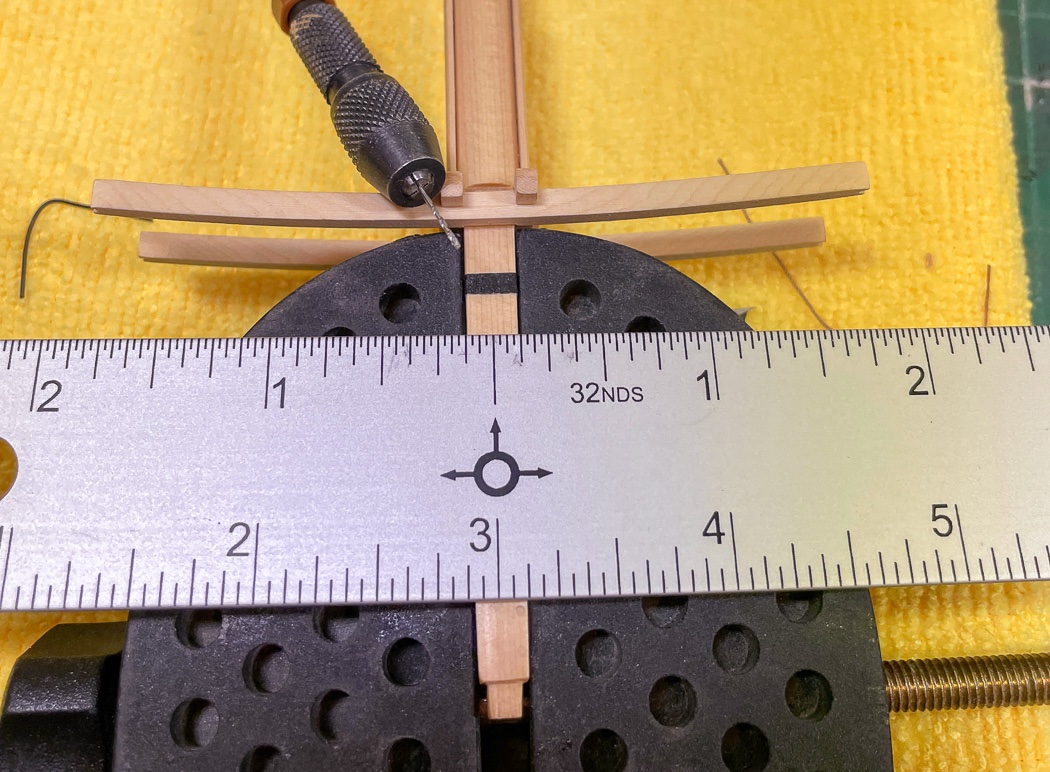
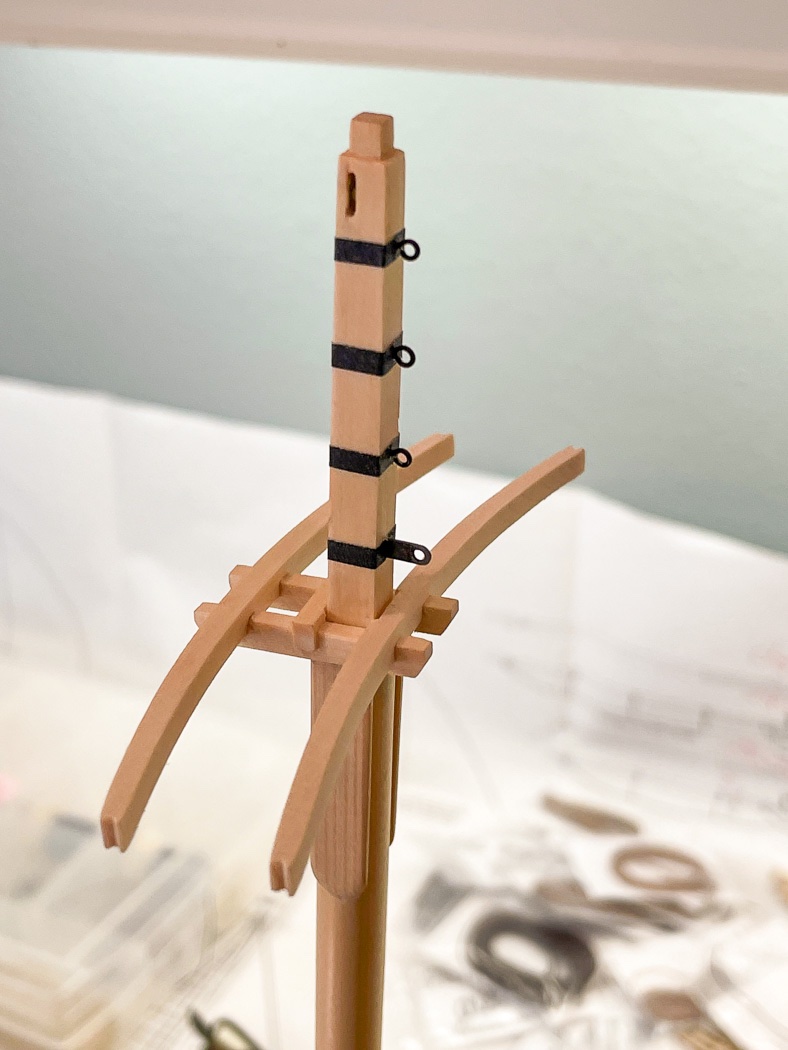
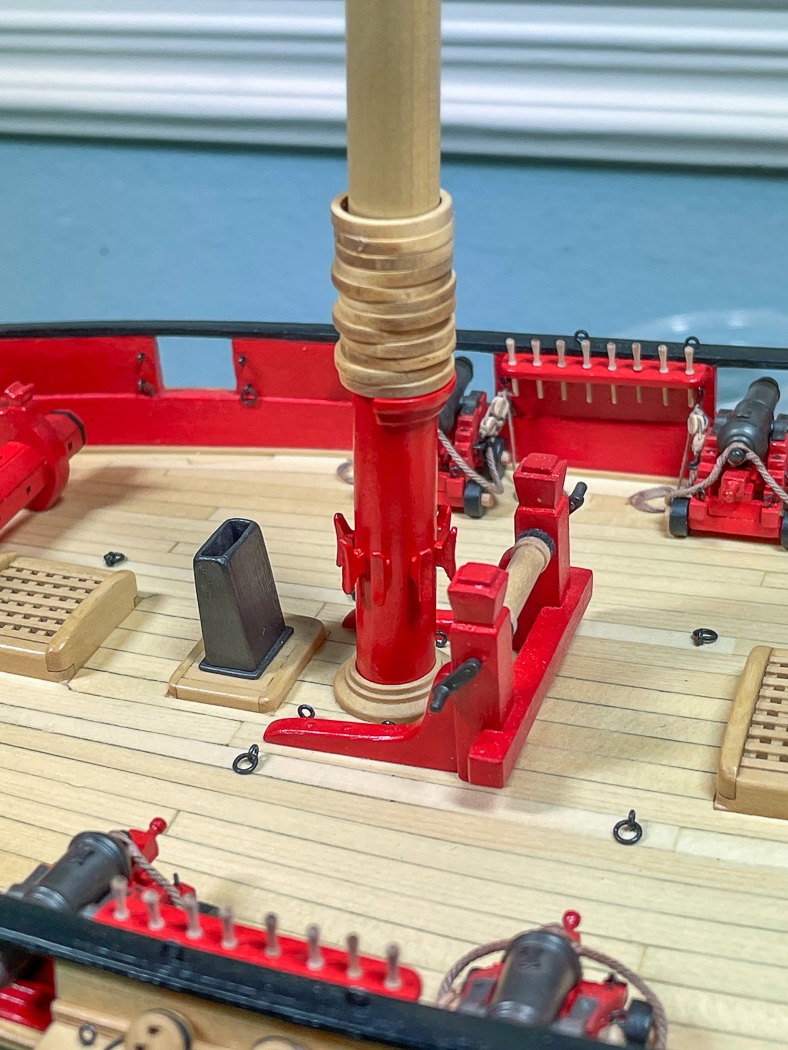
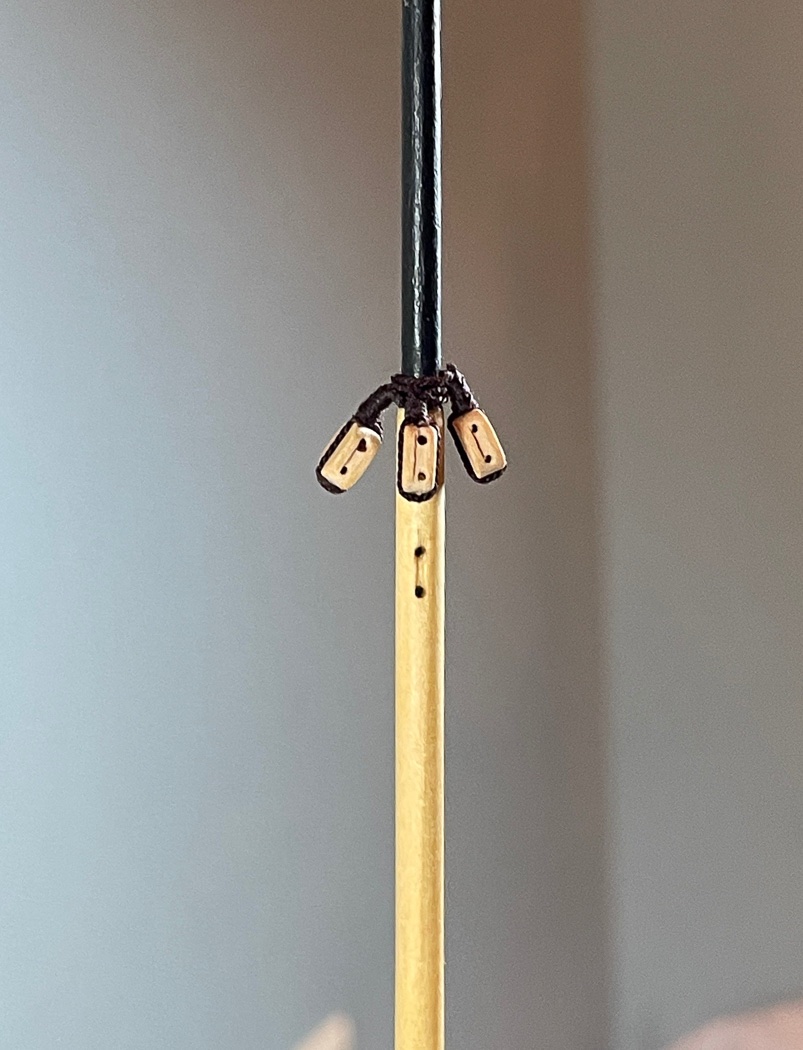
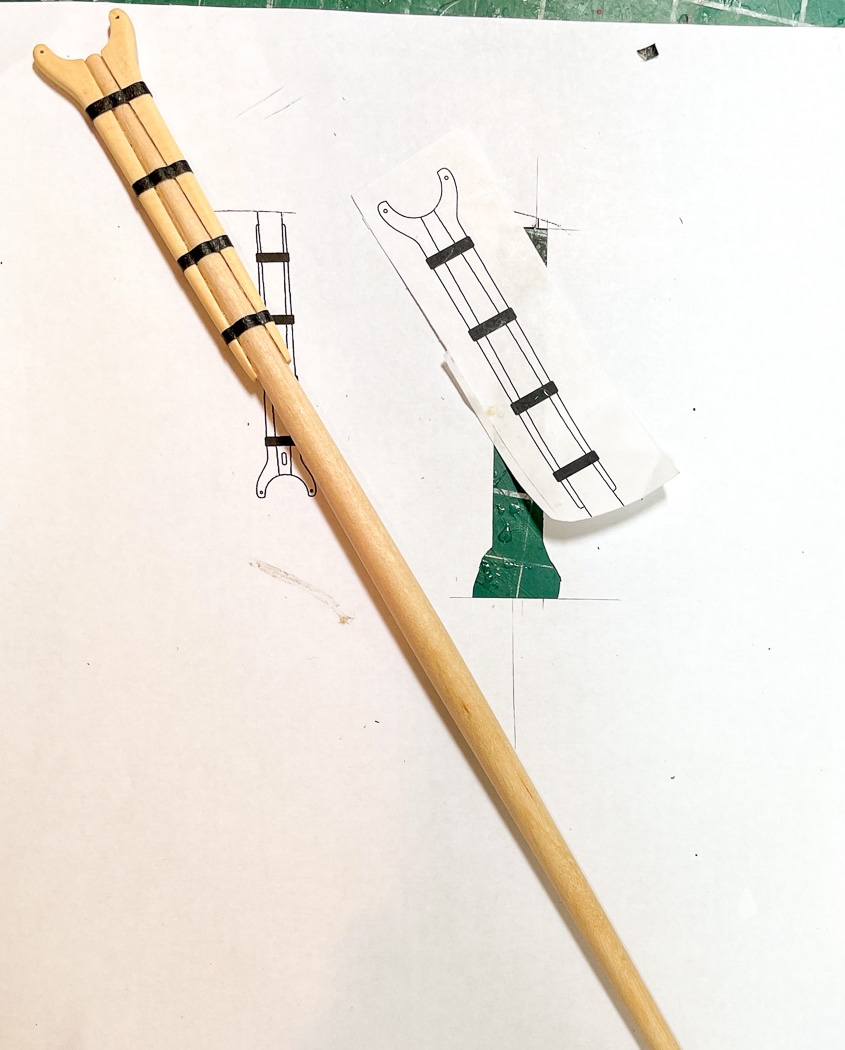
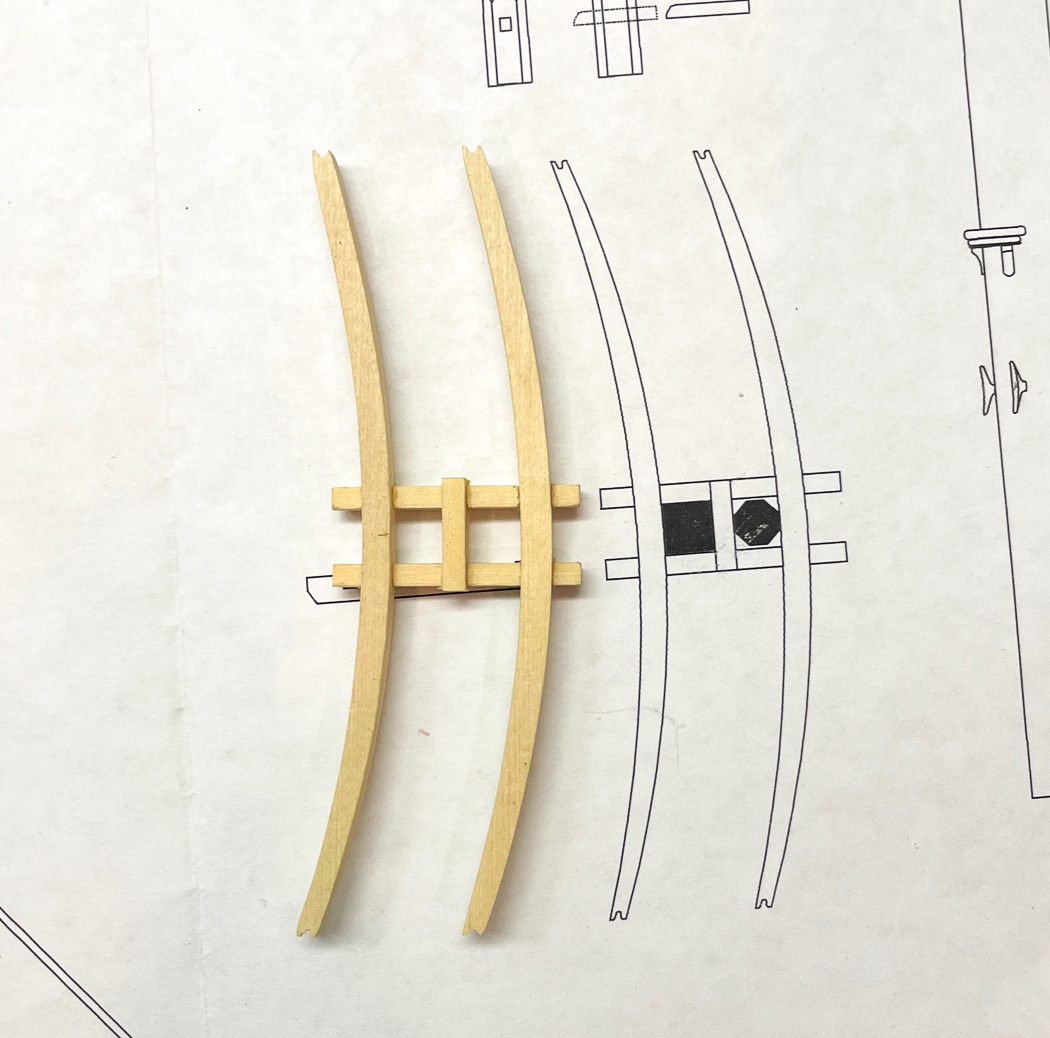
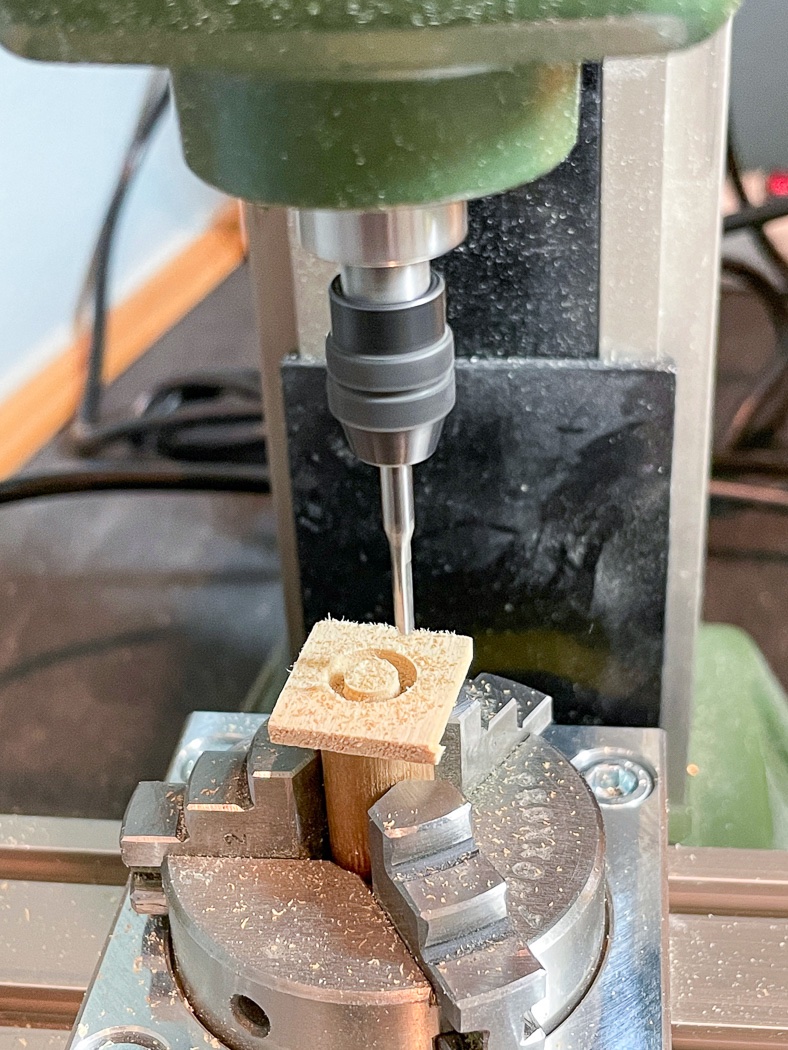
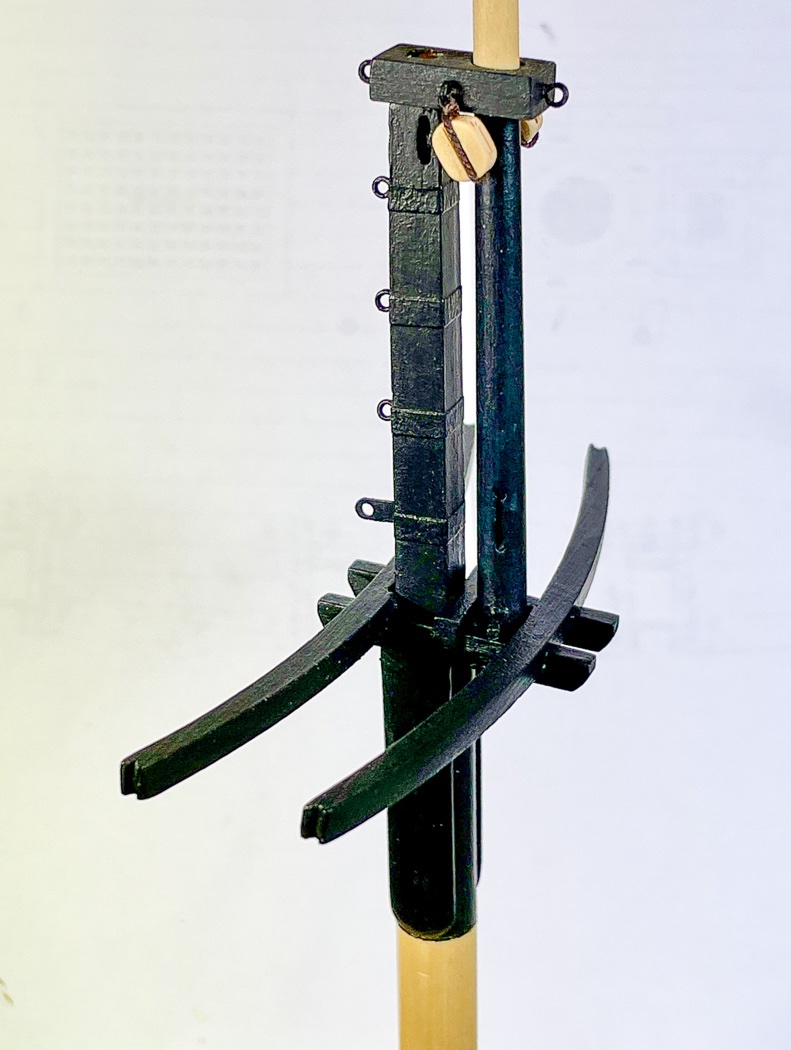
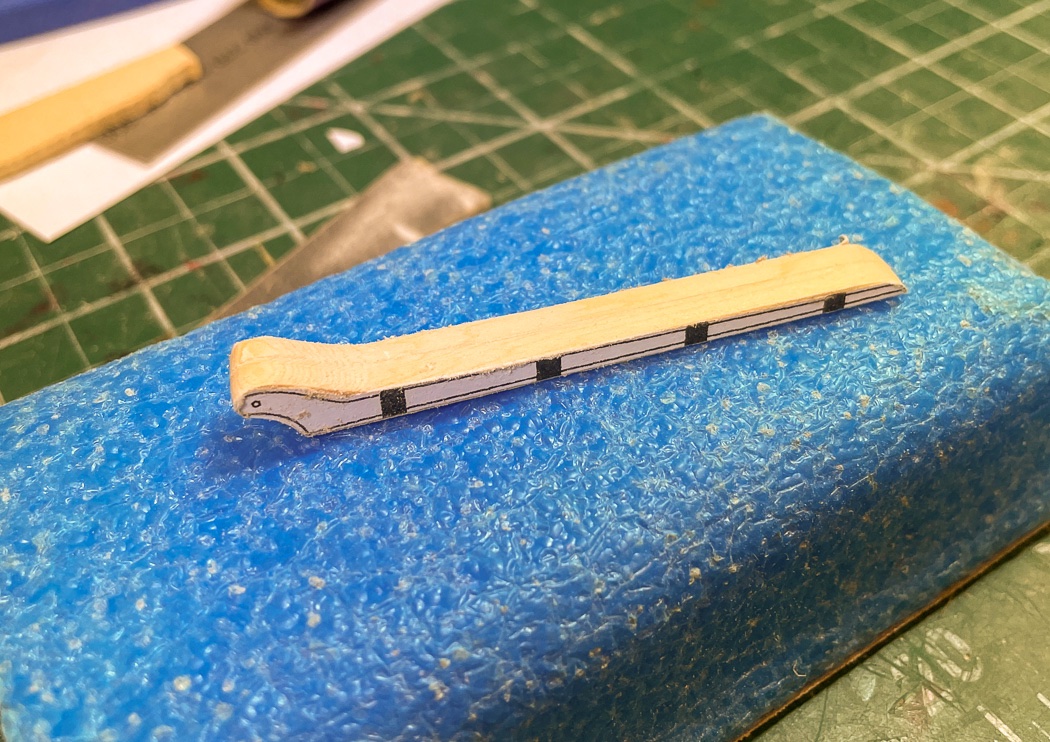
The Masts A few more things to build as I tackled the masts. I described turning the mast with the lathe in an earlier post, the top mast followed the same process so I won’t repeat it here. The trees proved to be a fun little mini-project, more complex than I had thought. The things we remove from the laser cut parts sheet of a kit this time I made from scratch using three sizes of wood. I cut and shaped the cheeks from 3/64 wood, flattened the sides of the masts and attached them. I cut out the bows of the tree from the plans and glued them to 1/8 wood and rough cut them with the scroll saw. I’m comfortable cutting outside the edges, I’d rather sand it to the proper shape, but the scroll saw makes that so much less work to do. I sanded the outside curve with my Byrnes sander then back to my various sanding tools to get the inside curve proper. Using extra long 3/32 wood cut to size I added the three required slots using my now trusty mill. I’m so glad I bought the MF 70, it’s more than proved its usefulness during my build. A quick assembly of the parts matched up to the plans then came the tricky, and as my British friends say, fiddly part. Adjusting the cheeks and mast so that the trees are parallel to the deck consistent with the aft rake of the mast takes a bit of time. No magic, just cut file, dry-fit, adjust repeatedly until its right. The key of course is to go slow, as always you can take more off but you can’t put it back on. I used the laser level to make sure the mast was in the right position and bubble levels on the deck and trees adjusting until they matched up. One thing to remember, with all the attention on adjusting the parallel it also has to remain horizontally level to the deck. Seems obvious but easy enough to forget. I used black masking tape for the mast bands, handy stuff and another Amazon purchase. Another handy tool is this centering ruler, I used it to locate where each of the top three eyebolts, made from 24 gauge black wire, are drilled and glued in. For the bottom mast ban I cut, shaped, and blackened a bit of 1/64 x 3/32 brass strip. The mast side was simply filed down into a bolt size pin and glued into a drilled hole. This extended bolt is a small detail, but aside from being authentic it really adds to the overall appearance of the trees. The mast cap was another adventure and a reminder about how smart model designers are when they cut parts boards. You’d think rectangular block, two holes, one round one square, done. Which is essentially true but it too has to be cut to be parallel on the raked mast, done. What’s a tad tricker is the distance between the two holes. Despite following the plans, the main, top mast, and trees don’t end up being precisely sized (at least not mine). The spacing of the holes on the mast cap have to be such that the top mast and mast, again accounting for rake, are also parallel to each other (adjusting for very small .5-1.5mm differences). Which is a long way to say I had to make a second one when the matched to plan’s version had the top mast with more rake than the mast. Clearly user error, I sorted it out but the mast cap proved to be more than just a little block of wood with two holes. Back to the mill to cut a nice little 6mm truck for the top mast and we’re done. The trees as a mini-project all took a bit of time but really was kind of fun to sort out. I painted it all black and added the 4 eyebolts to the mast cap. I rigged the block to the two sides. The fore and aft bolt blocks have tackle attached, so the eyebolts aren’t glued in. I’ll remove them, add the blocks and tackle, and glue them in at an appropriate time. Still nothing glued together at this point, all dry-fitted to ensure it all works. I may not glue the top mast and mast cap onto the mast until after the shrouds and more of the rigging new dropped into the gap between. I followed Chuck’s recommendation of using a Dremel to sand off the char from the mast rings by attaching them to the centers I removed after. The char was a bit challenging, but I kinda like them like this, distinctive character. I turned my attention to the base of the mast, remembering to put on the mast rings before adding the boom rest. I got a little carried away and failed to take photos of this step. I went a different way with the boom rest, I decided to use my original and ultimately too small mast coat by cutting it in half for the boom rest, I like the look and it was a good fit. Then I added the cleats from Syren after sanding the char and shaping them a bit. Each are pinned by a cut-off kit nail into holes between the cleat and mast. Some of these will bear tension later, don’t want them popping off. And finally I painted it my favorite red from the boom rest to the deck. I like to rig as much as I can off the boat, so much easier that way. So added the three blocks on the top mast for the eventual stays The port and starboard block need a bit of length given the way the tackle will run, I tried a couple of options then settled on my standard method using 50wt thread but instead of the usual 5-7 turns I added 21. That seem to give it the right heft and length. My new cuticle cutters proved handy for a tight trim, but as I’ve noted before care is required to not cut things you don’t want to cut. I don’t know how many times I’m going to have to learn that lesson. The boom and gaff were cut on the lather the same way as the masts, though I just used a dowel instead of cutting from square stock. The bands are also from black masking tape. I cut the jaws using a jewelers saw, once again with the pattern cut from the plans and rubber cemented onto the wood. I then used the usual practice of rubber cementing the two jaws together back to back and sanding them into identical pieces before adding to the boom (the photo is before all that sanding was completed). Both it and the gaff are painted black still using Admiralty Paints Iron Works Black and onward we go. I’ll now decide it I want to shape the two yards while my work area is a mess of sawdust, or change it up and do some rigging Thanks for stopping by. The comments and likes are always appreciated.

- 778 replies
-
- 24
-
-
- cheerful
- Syren Ship Model Company
- (and 1 more)
-
That’s some fine cutting on the scroll saw, I couldn’t get remotely close doing that. Best of luck turning her over, or maybe you can lay on the ground and work up from the bottom 🤣😁
- 642 replies
-
- 2
-
-
- winchelsea
- Syren Ship Model Company
- (and 1 more)
-
That’s a lot of informed customization. I’m challenged enough sorting out scaled vs. actual, too much math. I’ve found I can influence the set of the deadeye by where I set the lanyard knot, twisting it left or right on the shroud. Not really a reliable process but it works some the time, and it may not work on a served line, but anyway... Once again your nautical knowledge is impressive, as well as your always excellent craftsmanship.
-
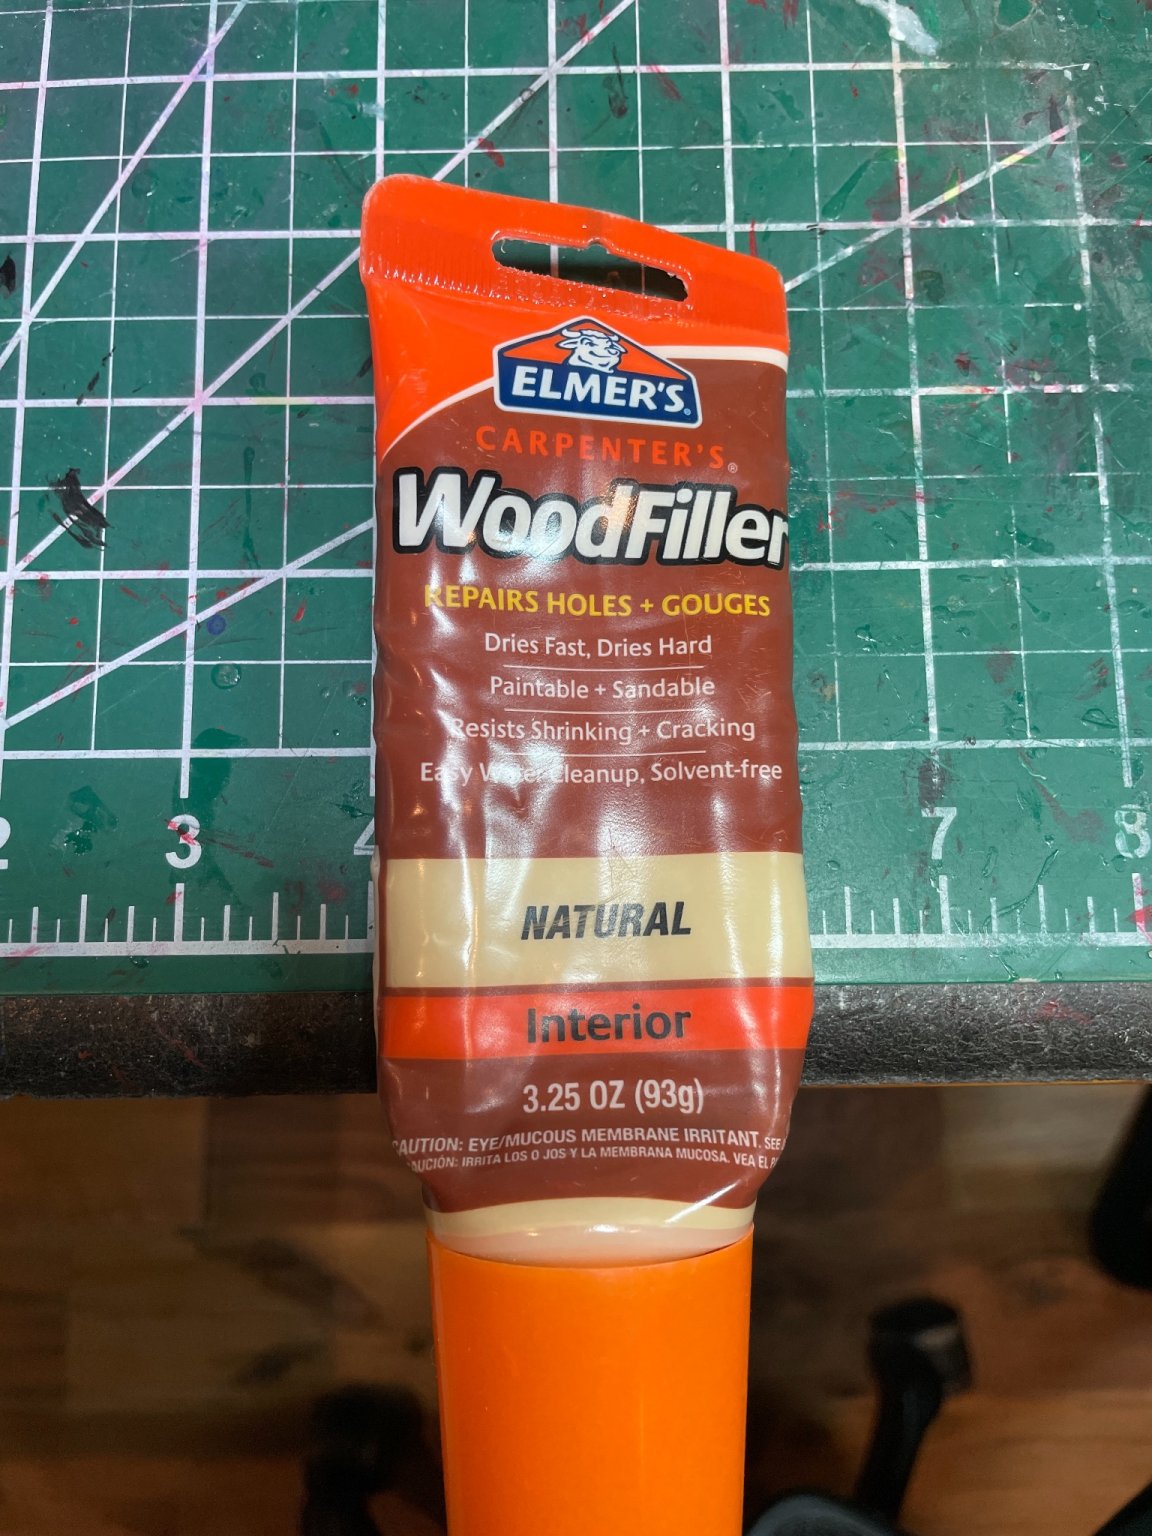
It shouldn’t matter if it’s oil based on the first planking, may be an issue for second planking. You have plenty of wood to sand. Can’t have it all filler.
- 139 replies
-
- 1
-

-
- Lady Nelson
- Amati
- (and 2 more)
-
Oh, I see. I checked, that's just an artifact of the lighting and the photo. The very end/tip of the bowsprit is sanded smooth, but the grain of the wood does appear - especially after adding the WOP. Very fine eyes you have there Mr. Garthog.
-
My favorite more like toothpaste consistency than what you have. The quad hands is only one solution. I’m sure what you have is fine.

-
I’ve mentioned in my log that riogrande.com, a jewelry store is a excellent source for modelers tool including ring making mandrels.
- 778 replies
-
- 2
-
-
- cheerful
- Syren Ship Model Company
- (and 1 more)
-
It is a difference maker and well worth it. I find the 4 hand option more to my liking with its smaller footprint.
-
You want the first planking as smooth and even as you can get it. It dictates the look of the second planking.
-
If I’m looking at the same photo, the bowsprit fire end from the side?, that is the block on the far side sticking out. They aren’t rigged yet. The blocks and the guy hooks share the same ring bolt. or was it something else?
-
Sorry Bob, the specific brand escapes me. They are ring mandrels I ran across on Amazon while looking for something else. Very inexpensive and quite useful.

- 778 replies
-
- 3
-
-
- cheerful
- Syren Ship Model Company
- (and 1 more)
-
I know the feeling. They have a different angle of cut, I have to tilt my hand more. But they are handy.