
HOLIDAY DONATION DRIVE - SUPPORT MSW - DO YOUR PART TO KEEP THIS GREAT FORUM GOING!
×


glbarlow
-
Posts
4,097 -
Joined
-
Last visited
Content Type
Profiles
Forums
Gallery
Events
Everything posted by glbarlow
-
 You put @username while your typing the post and a drop down box will appear with names, like @Freezing Parrot then that person gets notified. There is a little icon that looks like two chain links leaning to the left when your creating your post, click on it and complete the dialog box. Your can click and highlight a portion of a repliers post and a post will pop up with Quote Selection. Click on it and it will create a reply back to that person. Good, glad to see you have a plan to get you there on the first planking. My point about advice is while some of its bad, often there is good advice from two people that are opposing methods, both will work fine, but as the builder, especially as a first timers you need to choose one of the two, not do both. Judging by the photo you’re going by you’ll be fine. We don’t want you to be one of those builders that just stops posting. I mean MSW really needs a freezing parrot amongst us😀
- 114 replies
-
- 2
-

-
- Lady Nelson
- amati
- (and 1 more)
-
That’s too much! The plans should show a bearding line, it would be a lot less than that. It looks like you’d already taken a lot from the former, plus you could sand down the first layer a lot. You need something to glue the sternpost to. You may need to replace those lower ones. Then just sand down to match the sternpost with the second layer. One problem with all the great advice is not to follow all of it, sometimes it conflicts. Hang in there.
-
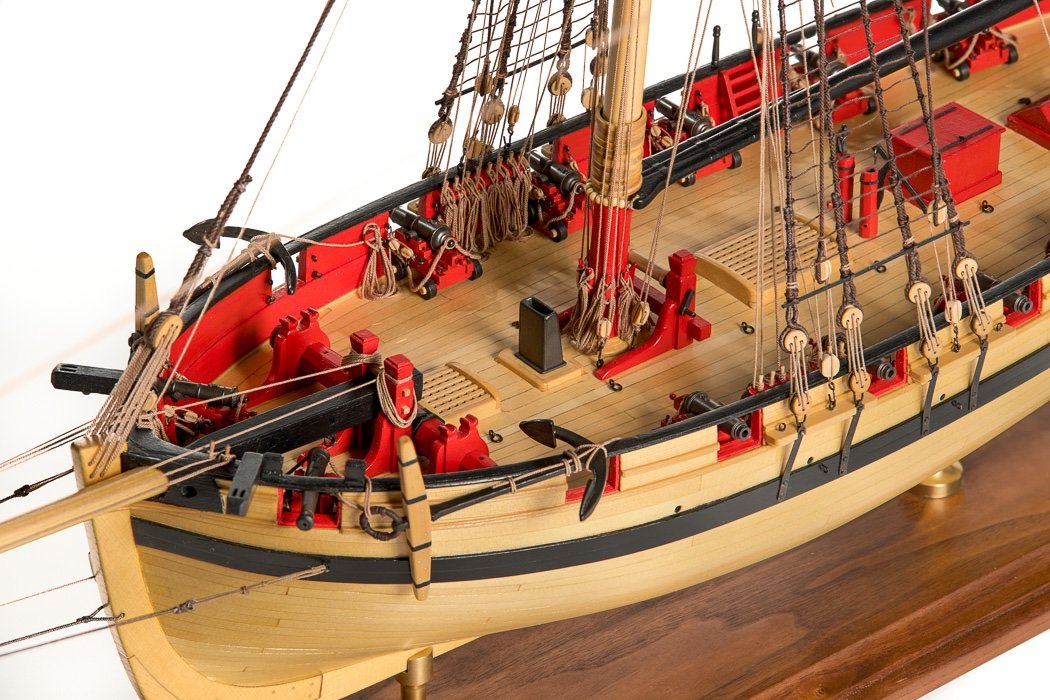
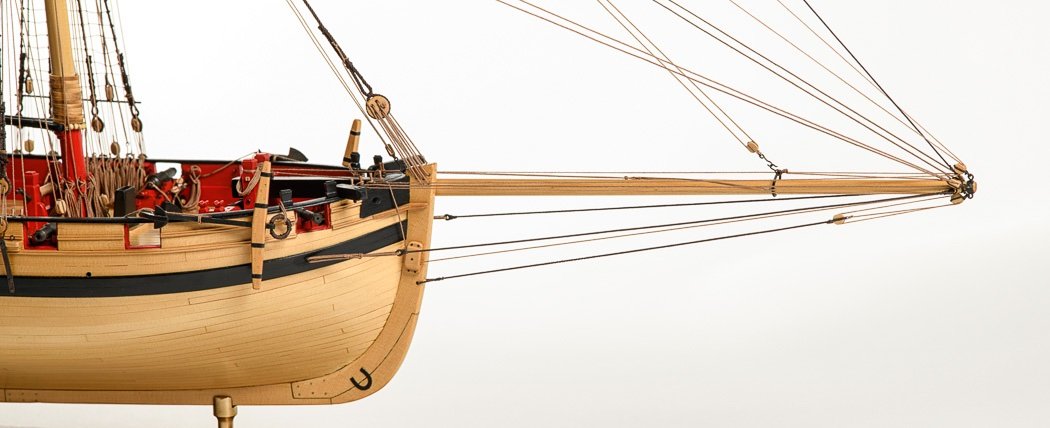
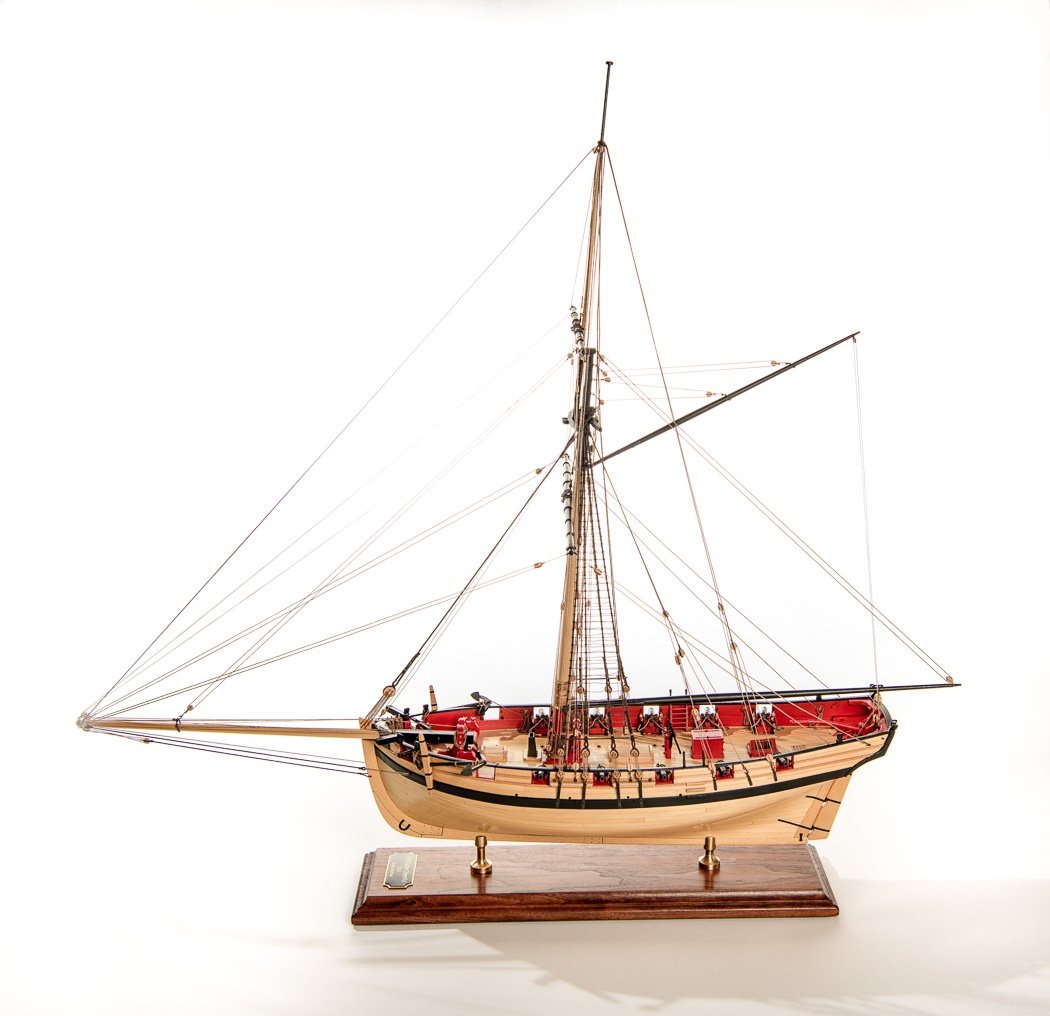
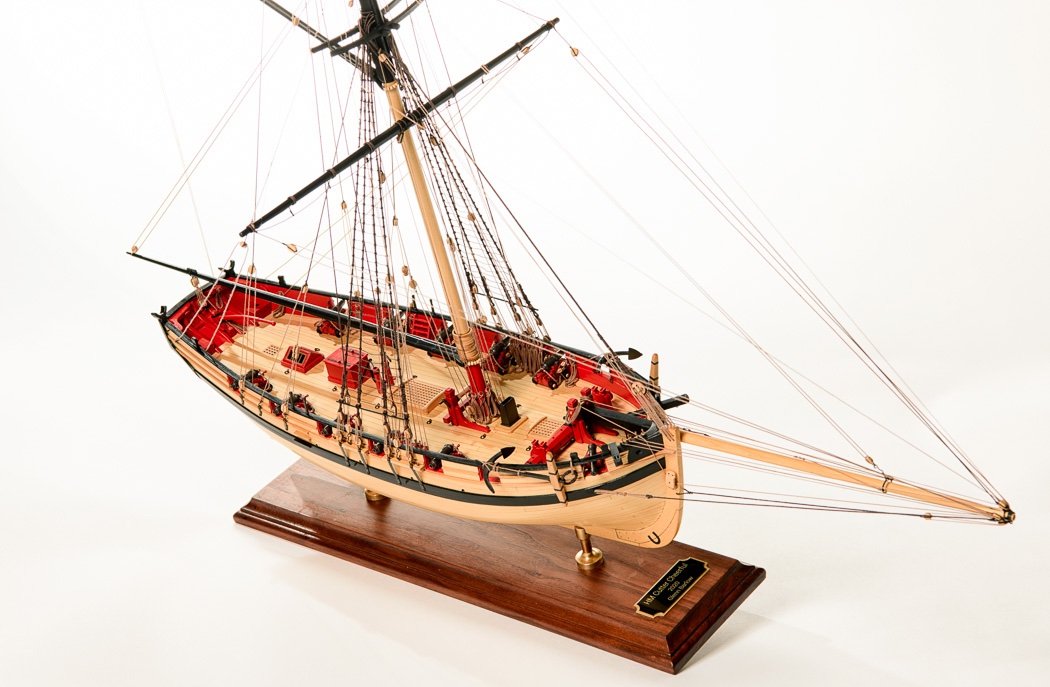
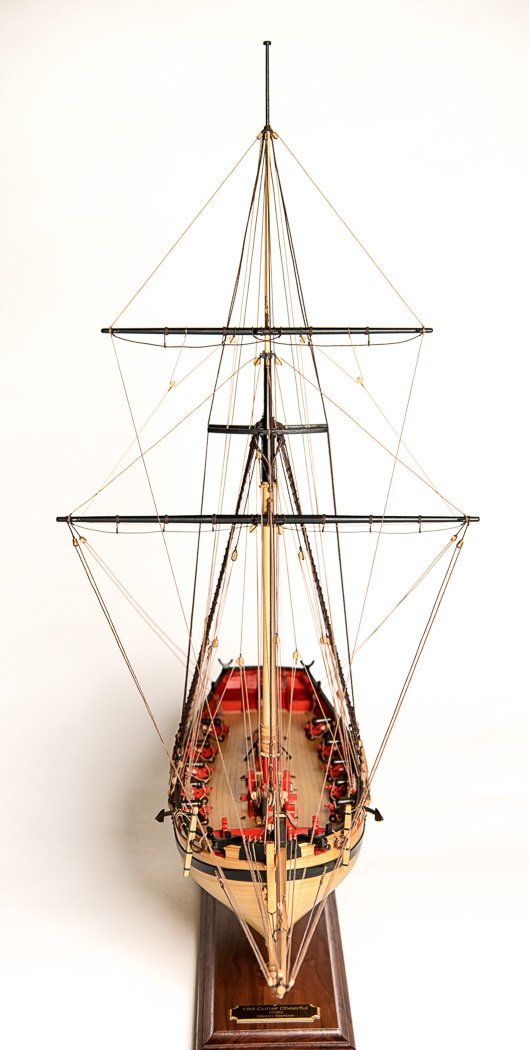
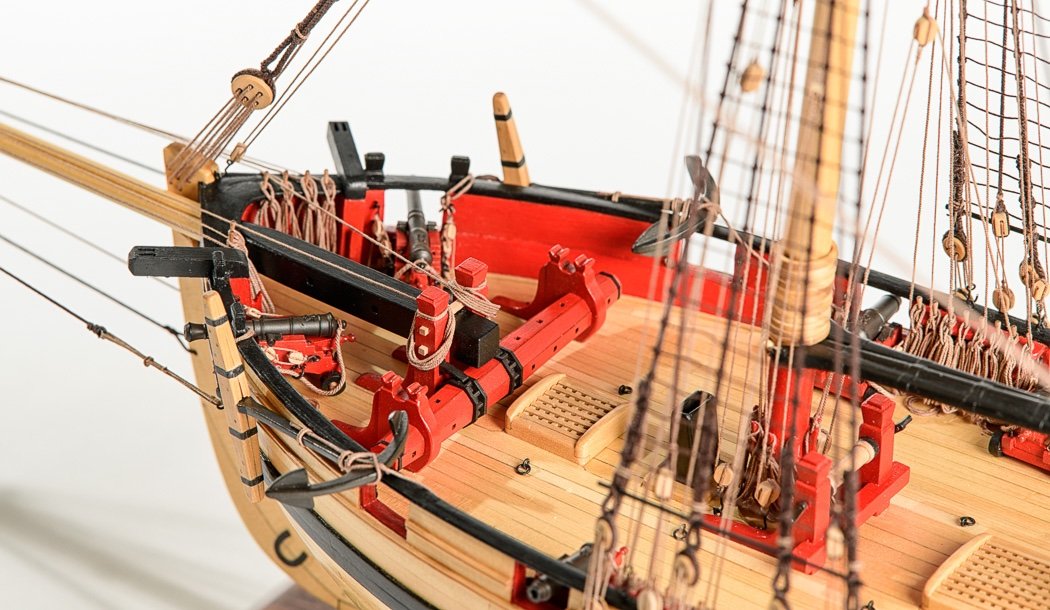
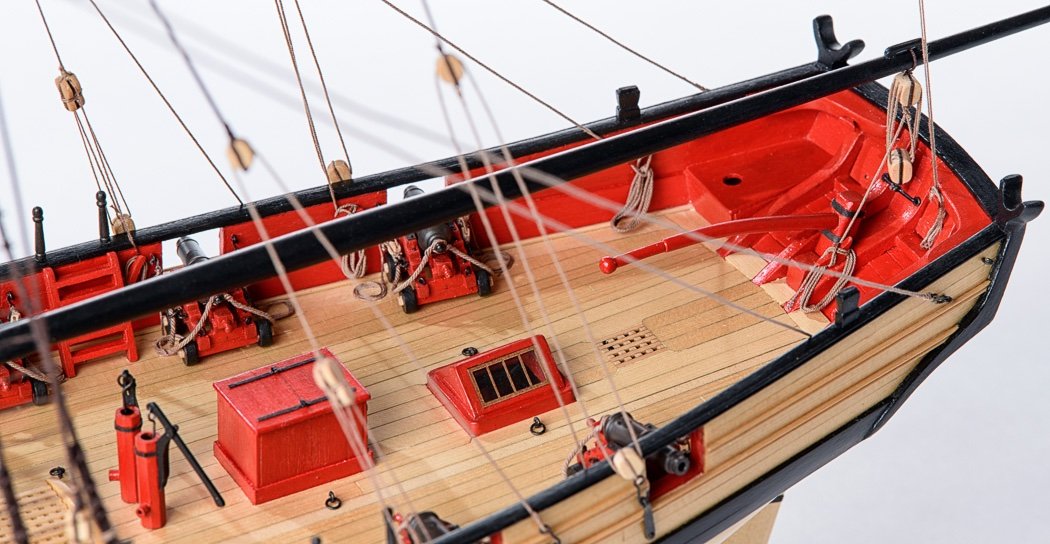
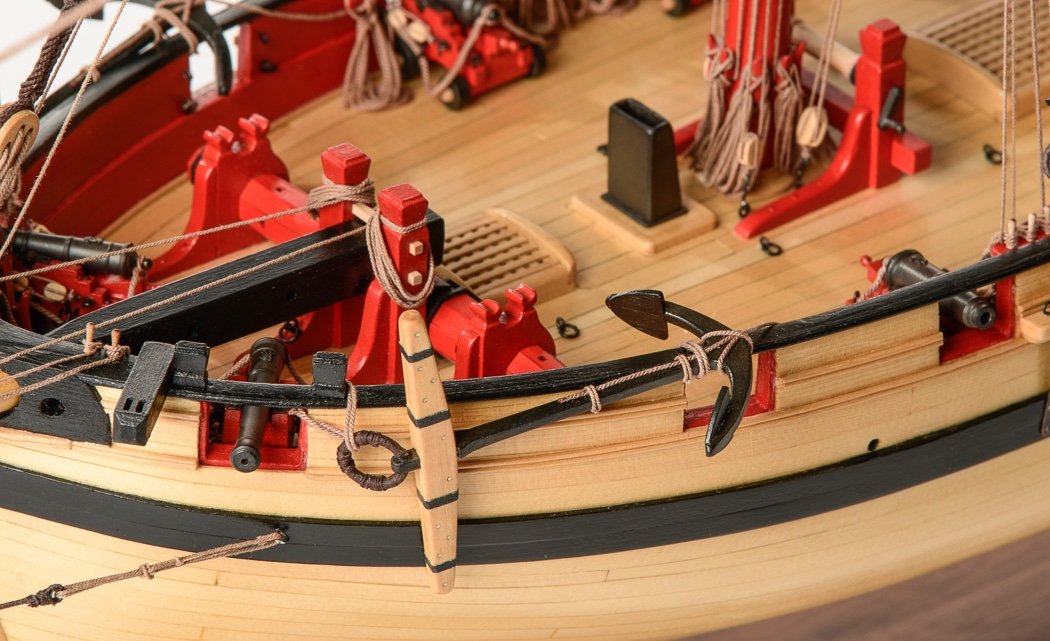
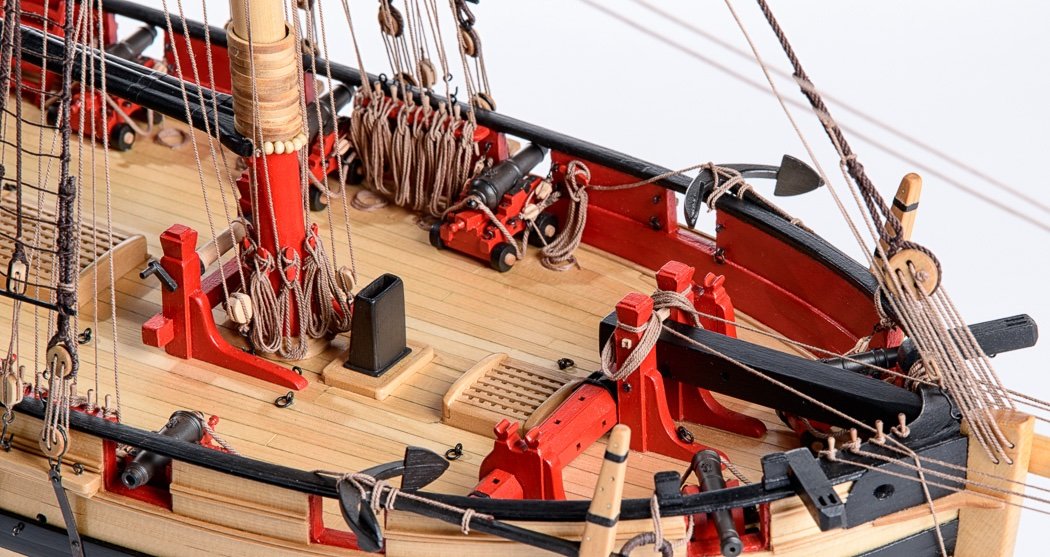
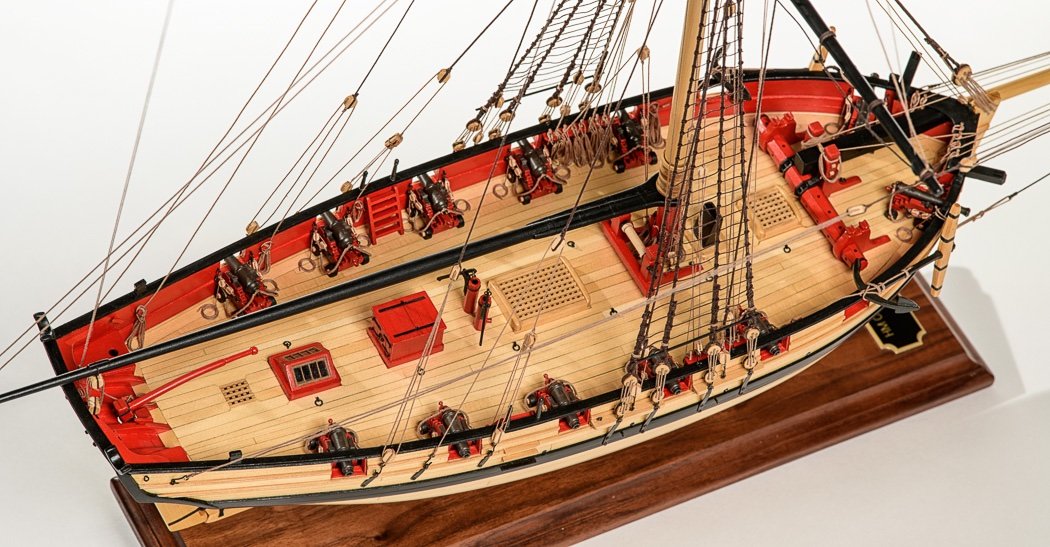
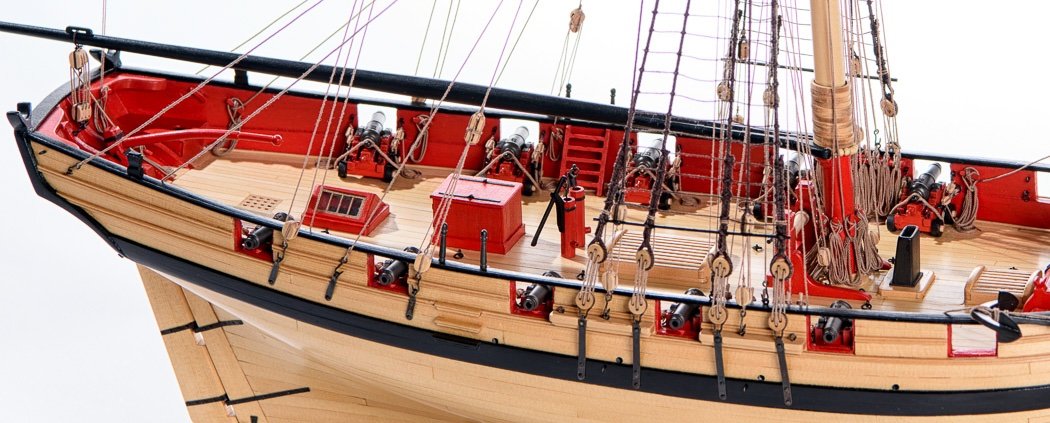
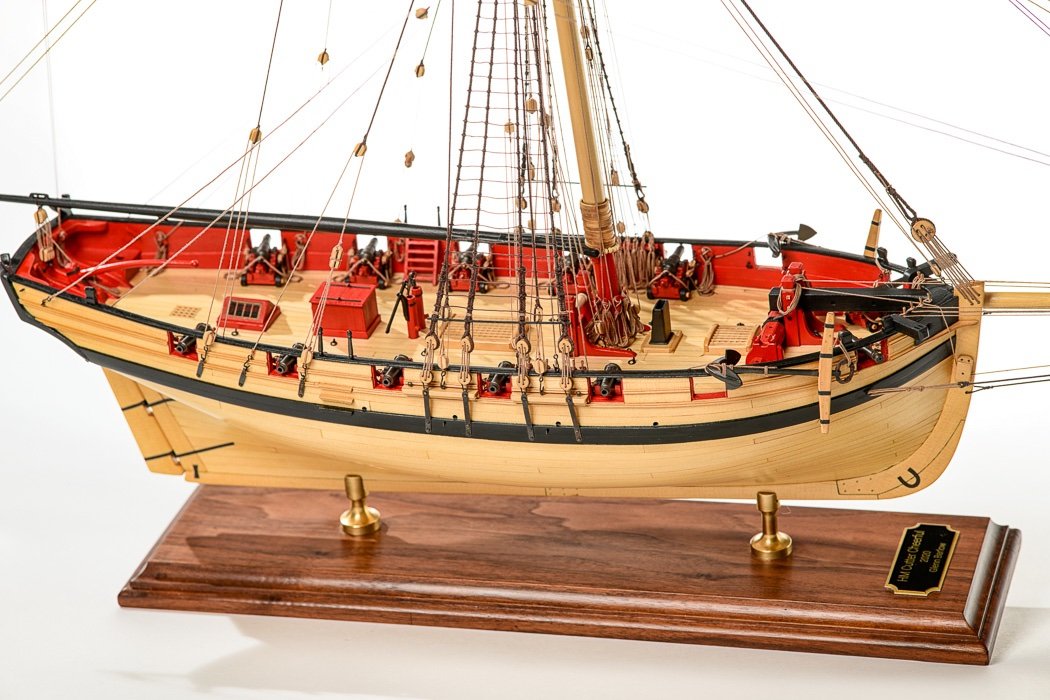
I’ve reached the end of my thirteen month journey, this is my 59th and final log post on my build of HM Cheerful. Thank you to the 52 of you who’ve followed my build and the many others who have stopped by with a like. A special thank you to all who’ve taken the time to leave a comment, many of you more than once. It is inspiring to read your replies, often they were my motivation for the next post. When I thought about building HM Cheerful, I started by reading the first couple of chapters of the monograph downloaded from the Syren Ship Model Company website located here. I say first couple it’s because I stopped reading, realizing there were so many things, techniques, processes, skills, and knowledge I didn’t possess. There were many big steps, starting with single planking a hull I would not paint, I had no idea how I’d accomplish (I’m still not sure why a square tuck is actually a triangle). I dove in anyway, figuring it out as I went, trusting I’d come up or find the solution. I knew one thing, I wasn’t going to quit. I sincerely thank @Chuck for his unwavering support and guidance, aside from a great design and mini-kits, he is always available to answer my questions. I also want to thank those who came before. Aside from frequently reviewing Chuck’s build log in addition to the superbly written monograph I also found @Blue Ensign and @Rustyj to be reliable resources, I thank them as well for the help I obtained from their Cheerful build logs many years after they’d completed them. Finally my thanks to @DelF. While he isn’t building Cheerful (yet) he and I frequently exchange PMs, me the greater benefactor of his master level skills and techniques I was able to apply to my own build. Both our work shops are the richer for “hey I want one of those, where’d you get it…' Aside from building my first semi-scratch model I wanted to create a log that not only tracked my progress but was detailed enough to be of assistance to future builders, paying it forward for all I’ve learned from others. I wanted to de-mystify aspects of this build, step by over-written, over-photographed step. I realize maybe it wasn’t always the best solution and often was one I modified or learned from others. They were methods that worked for me. I took as much satisfaction in writing the log and filling it with photos as I did the actual building. As a result I’m sure I’m in the running for the ‘excessive use of the written word’ award. Many of you have commented I have been of some help, I’m very glad to know that. My related objective was to provide enough of a resource that others looking at Cheerful as a build option and first thought “no way,” might instead take it on. I hope I’ve done enough to encourage others to say “well that guy did it…” So with that, here are the final photos of my finished HM Cheerful: I hope to read and follow your Cheerful logs, it is a well designed model and a fun build. At the request of my neck and shoulder muscles I’m going to take a break from building, but I’ll be back. Thank you for hanging out with me!


- 778 replies
-
- 33
-

-
-

-
- cheerful
- Syren Ship Model Company
- (and 1 more)
-
You might want to put a few planks as a deck in the open area below the skylight. You can’t see much through the window on mine, but there is the glimmer of a planked floor. The 1/64th rabbit is a challenge, I’ll also be interested to see how your jig works out. Perfection is achieved on alternate Thursdays…😊 Great work on the mini-kits, they are a fun part of the build. I also did them early when I needed a break from building the hull.
-
The Amati keel clamp is what I use, plus cradles I make from scrap wood depending on what stage I’m at https://www.micromark.com/Amati-Keel-Klamper-Swivel-Vise-for-Ship-Modelers
-
Wow, thank you for the comment, that’s quite a lot. I do ok I think, but there are many many builders far better than me, maybe I write a lot more. I’ve taken the photos, just need to sort through them and put the post together. Thanks again for your post, I really appreciate the kind words.
- 778 replies
-
- 1
-
-
- cheerful
- Syren Ship Model Company
- (and 1 more)
-
I used this same Amati clamp throughout my build, and other builds, without any problem.
-
They don’t necessarily have to be the same height off the deck, they are more tuned to the wales and the waterline. As you note, test fit the cannons to see if any adjustments are necessary. I know I didn’t make any. some members, and we all enjoy having them, are better at commenting than building, a grain of salt is advised. Remember the only judge that matters is you. It’s your ship.
-
Thank you Herman for the kind words. I still shiver when I recall the first frame crashing to the floor.
-
As shown in my log I had three different sized hatches as I took from the plans. For reasons I don’t recall and make no sense I reversed the aft most hatch and the companionway. I’m sure what ever makes you happy with the deck furniture works. The hatch covers are a good time to experiment with basic scratch building. The walnut strip in my kit was so brittle I couldn’t get anything decent. So I used some boxwood I had and made lap joints, more realistic than 45 degree mitre joints. But again, be successful and have fun on your first model, it’s a learning experience to build on. I didn’t make any changes to my gun angles, I’d definitely wait until the final deck to even consider it. As you get there I’ll note I had to scratch built the bits, I couldn’t ‘get the bowsprit to fit otherwise. FYI, I successfully obtained my college degree, and I had to work at this using other electives, without taking a single math course😂😅🤣 I’m quite proud of that, but never told my kids so maybe not that proud.
-
Your fairing indeed has paid off. It feels good to get those first planks on, you’re off to a great start!
-
Thank you Bob for your kind comments, I very much appreciate them!
- 778 replies
-
- 1
-
-
- cheerful
- Syren Ship Model Company
- (and 1 more)
-
I have ebony wales on my Fair American. I’m sure you know to be very careful with the toxic extremely fine dust it creates. Wearing a mask the whole time I sanded them smooth in the traditional way, 200 down to 400 grit, I also put a coat of WOP over it as the last step careful not to leave any excess. Finally, I thoroughly vacuumed and cleaned my work area. I was amazed at the smooth, almost black glass finish when I was done, it’s really very pretty. But that was my one and only experience with ebony
-
Thanks for the kind words, I doubt my Cheerful even ranks in the top 5 but i have had a good time building it. I thought about the plaque but then decided it’s when I started not when I finished…plus I can’t get it off the stand:-) I don’t put my models in glass cases. One wall of my office all book shelves, it will go on one of those shelves and every six months or so will be taken down, lightly dusted turned to face the other direction as i do the others and put back on the shelf. Leslie says if the Winnie meets standards we can put it on the credenza in the family room, but that’s likely 3 years away so who knows…
- 778 replies
-
- 3
-
-
- cheerful
- Syren Ship Model Company
- (and 1 more)
-
Each tick strip for each bulkhead will be different, but incrementally smaller or larger. Before about lining the hull I’d physically hold planks at the waist to see how many it took to cover the ship there with a full size plank, say 5mm and that it took 15 planks, so that’s 75mm to cover at the widest/tallest point. Then I’d measure at the bow with a strip of paper from top to bottom, say it was 25mm. You know you need 15 planks to fit in that space so 25/16=1.7. Starting at the widest bulkhead each 5mm plank has to be tapered to 1.7m at the distance of the bow. This is what lining the hull is doing, only more precisely. Truth is for a hull as small as LN, the middle, stern, and bow are all you need to line. I’d reread the .pdf. Validate your correctly using the planking fan, and cross check your work doing what I described above. At some point you’re going to say, ”how did I miss that” after you figure it out. Do Not Quit, MSWhas a secret squad that will find you 😂🤣😅
-
I’m not sure what else to offer beyond what I’ve said and carefully reading Chucks lining the hull .pdf tutorial. I don’t mean to be flippant, but clearly you’re doing it wrong. The marks are based on the tallest to the shortest with only a smooth transition from one to the next. Maybe John’s table will help.
- 114 replies
-
- 1
-
-
- Lady Nelson
- amati
- (and 1 more)
-
Create a tick strip to match the longest/largest bulkhead, likely the center most one. Measure it, Divide that length by the width of one plank (different for first and second planking). It should match a whole number or close to it. If it’s an odd number make your upper belt one more than lower belt. It’s likely not to an exact full number, you can make that up later two-three up from keel where it won’t be seen. The first belt line should start at that full number of planks (if that’s 6 planks of 5mm planks that’s 30mm down). The point of the planking fan is what the width of the planks all the other bulkheads will be, they will not be whole numbers and at the bow a 5 mm plank may be only 2.5mm (or some number). Since you’re work isn’t likely to be precise you need to recheck the numbers every 2-3 planks and adjust. Bottom line a single plank must run from bow to stern. There must be the same number of planks at the bow as there are at the waist, just more narrow.
- 114 replies
-
- 1
-
-
- Lady Nelson
- amati
- (and 1 more)
-
First divide into two bands. The length of the first tick strip is the length of the bulkhead in the top band and the second of the bottom band. The width of the ticks is set by the planking fan set by the number of planks in each band. In other words the plank will taper. Chuck has a .pdf on lining the hull. It’s hard to understand without following that .pdf. Two maybe thee planks might be full width, after that you’ll have to taper the planks. It takes practice to get it right.
-
I guess I have, but not before fall. I may have to enlarge my work area😂
- 778 replies
-
- 1
-
-
- cheerful
- Syren Ship Model Company
- (and 1 more)
-
Thanks Derek, very kind of you to say so being a master yourself. Many of my newly learned skill came as a result of your help, thank you. Next up are the final photos then recovering my ship room, no small task. We’re off to Montana later this month so probably the next project will be later this summer. I’ve neglected my photography since the pandemic, I haven’t posted to my Facebook business page in over a year, so that needs attention. And of course time with the grandkids before school starts. My next project is Flirt followed by Winchelsea, with Sphinx in there somewhere, that should cover the next three to four years.
- 778 replies
-
- 5
-
-
- cheerful
- Syren Ship Model Company
- (and 1 more)
-
I’m happy to hear you’re finding the log useful. I enjoy writing it and have spent quite a lot of time doing it. I appreciate your taking the time to comment.
-
I like your choice of red, Cheerful is go RED or go home and you’ve gone RED! Nice work on some tricky steps. They don’t look like much but I know how hard they are to get right. Every step done right now pays dividends later. Your fairing looks really good.
-
Be sure to soak them in acetone before blackening and don’t touch them in between. There are lots of discussions here on methods about blackening.
- 114 replies
-
- 1
-
-
- Lady Nelson
- amati
- (and 1 more)
-
You made short work of the square tuck. Very nice job!
- 274 replies
-
- 2
-
-
- Cheerful
- Syren Ship Model Company
- (and 1 more)