The Main Stay, Foresail Halyard, and Jib Halyard
It bears saying again. I am grateful for all the build logs on MSW. I learn so much from so many, I hope my log helps others as I’ve been helped.
Back to work, though work has slowed down lately. I think I’m either reluctant to reach the finish line or procrastinating because ratlines are now on the agenda. I do not like ratlines, Sam I am. The good news is there are only eight total shrouds so how long could it take…I don’t know because I haven’t started them…
The Main Stay
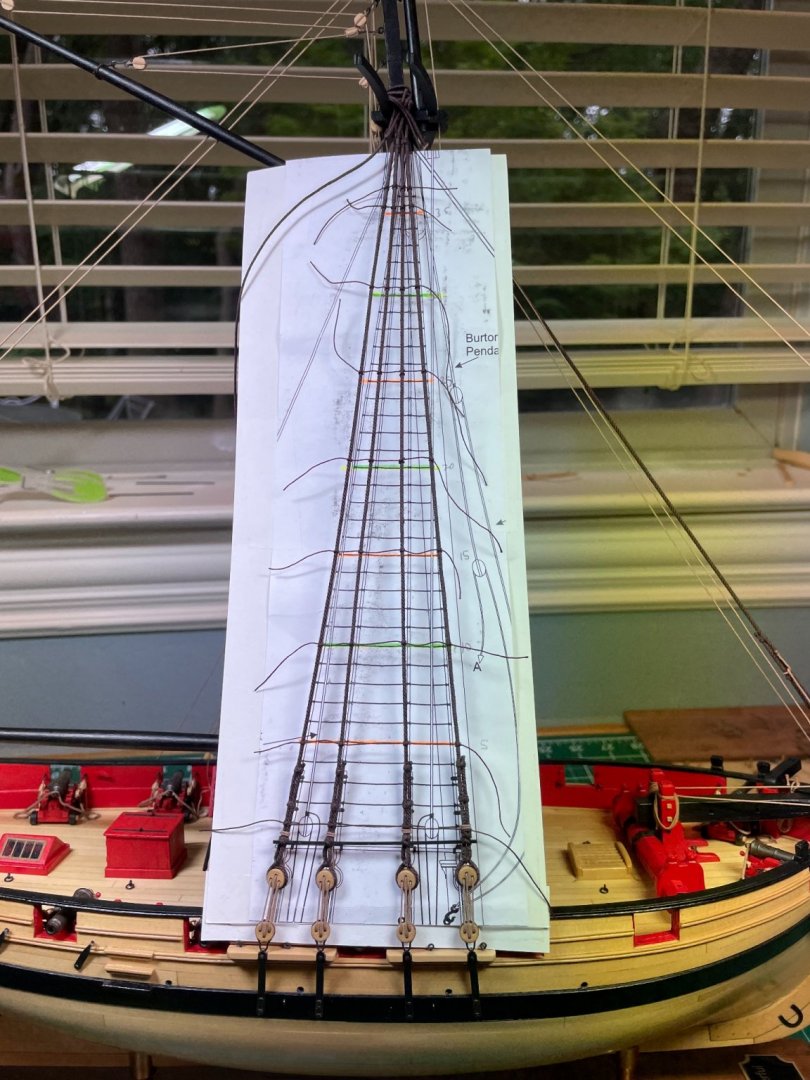
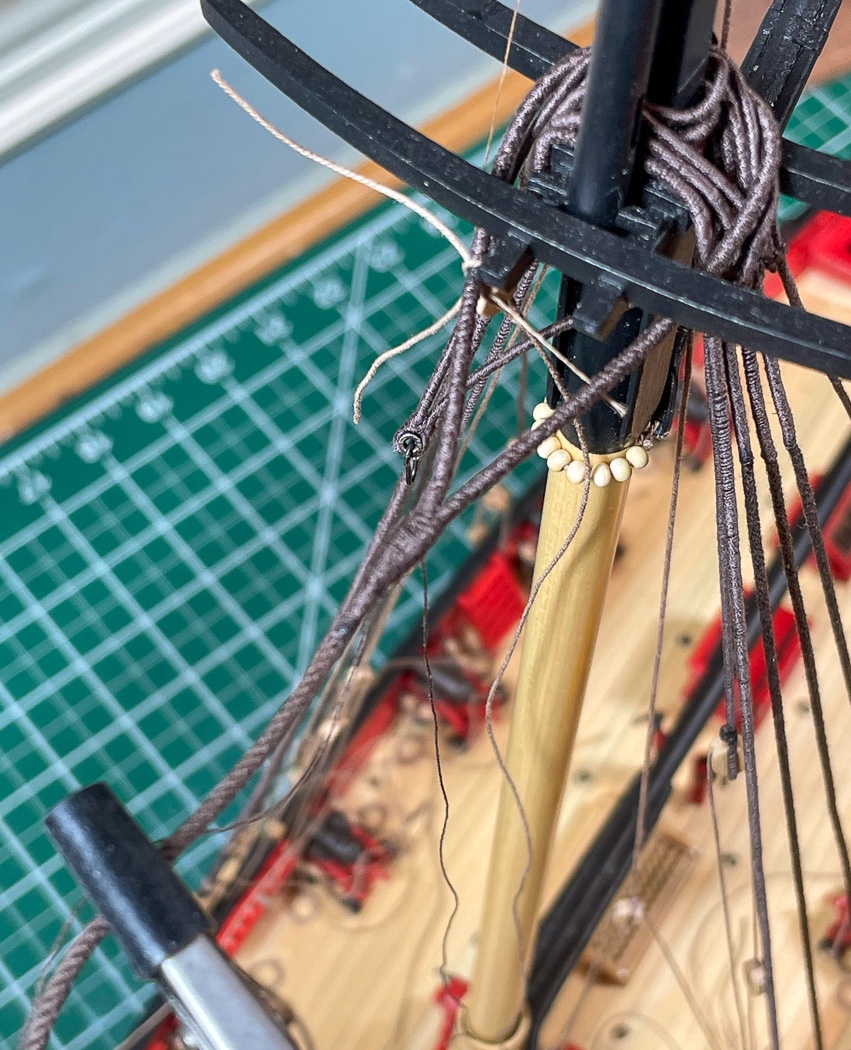
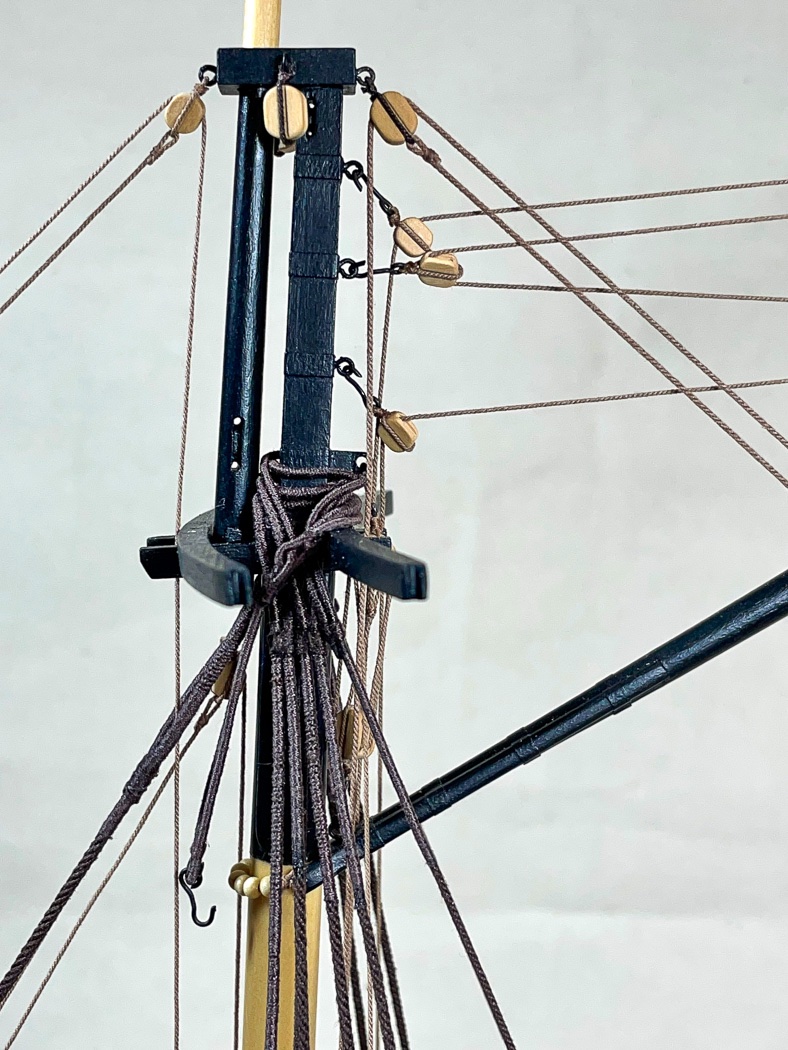
It’s just one ‘string’ but the main stay takes some time and thought to get right. It’s served around the mast to just below the eye, so I had to do a bit of measuring and testing to determine where that was. There is no precise definition of where to form the eye, I just eye-balled how big I wanted it to be it using the .054 Dark Brown rope that is used on the stay. I found a black grease pencil useful for marking the dark brown rope (or China marker I believe my Brit friends say). The black is hard to see but there is no chance it will show through the serving, so I prefer it to a brighter color. The measurement is a little tricky, the stay sits on top of a lot of other rope around the mast head, it’s important to make sure it’s snugly seated. The sling wants to get in the way so I had to check and recheck for a proper fit.
Of course I served the stay extra long even having measured repeatedly, why not. Cheerful does not have a mouse on the main stay, instead it is a seized eye. This particular seized line required a different approach than my other seizings. In part because of the large .054 served rope and because it’s very visible, I wanted it to look good. My normal seizing technique just wouldn’t work to my satisfaction, so having marked where I wanted, I cut the end of the served line at a sharp angle (using the toe nail clippers, here they exceed both cuticle cutters and scissors). Important obvious note, the serving has to be sealed so it doesn’t explode as its cut. I elected to use CA to seal the end of the serving since the cut would be covered by the seizing. I then glued that angled cut to the running length of the stay, again using CA. (I didn't like how the serving looked terminated on the running end, so I cut off the one in the photo and did the whole thing again.
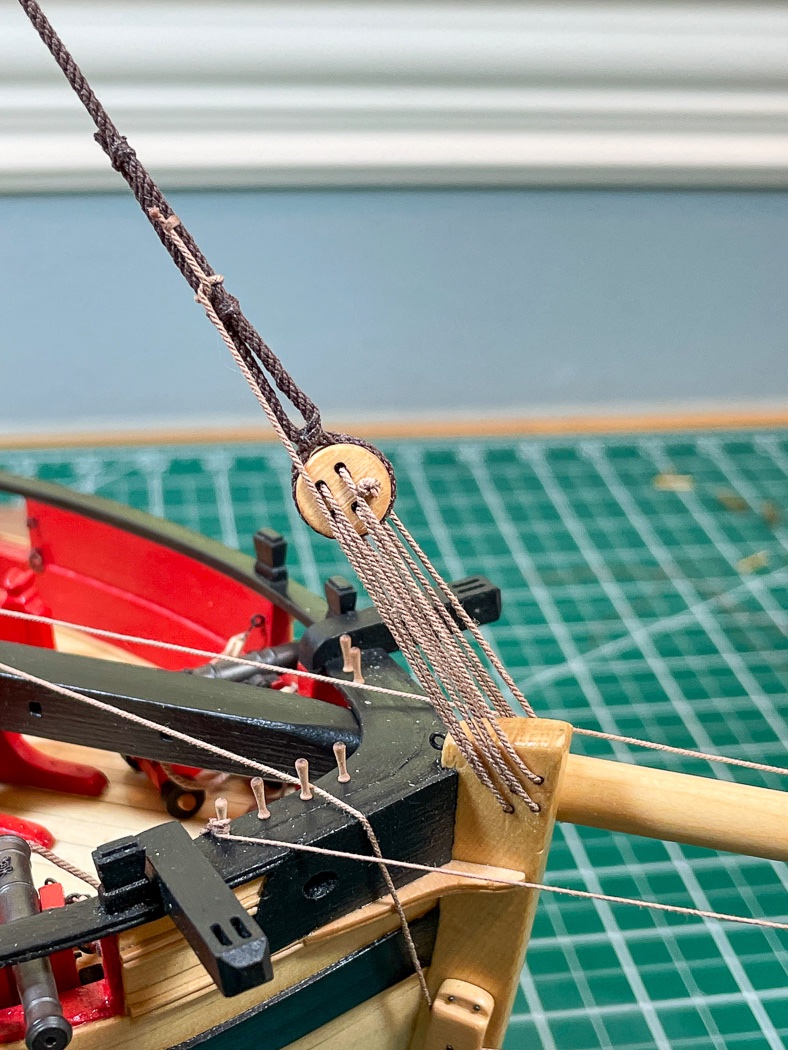
BEFORE I did any of that I added the foresail Halyard block very loosely seized to the stay. This block, along with the tackle seized to the block are fitted to the main stay inside the loop and close to the trees. Even with the quad hands this would be a difficult block to add to a completed stay with its awkward location. It was SO much easier to slip it on before closing the eye, you can see it unfinished two photos above and the block seizing completed after the main stay is installed.
(failed focus on this photo) To do the main stay seizing (you can see that loose foresail block in this photo as well ) I started by tying a square knot with 50wt polyester thread just below where I had glued the eye. I had used .012 rope on the shrouds and deadeyes and tried it here, it looked too heavy, the thread is a better look. I left enough of the short end to pass it up through the center of the seizing then proceeded to wrap with the long end of the thread until I was far enough over the splice to suit my eye. I’m normally big on precision with the number of wrappings, but here I just stopped when it looked right. Actually I went further, decided it was too much and backed up. I tied another square knot with the remaining long end and the short end of the thread on the bottom where it isn't seen. I painted it with very watered down white glue, now I have a main stay eye.
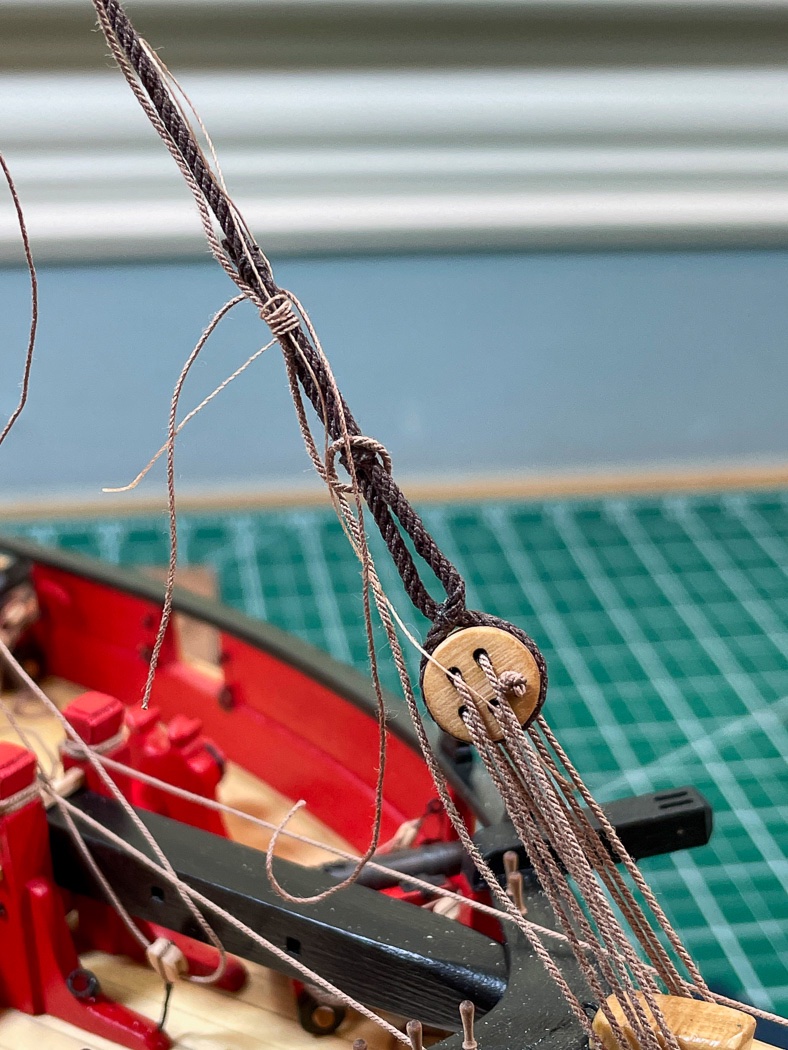
On to the other end of the stay, I turned in the large 5 hole deadeye purchased from Syren just as I did the shroud deadeyes, clove hitch at the overlapped base and two seizings above (7 turns instead of the 10 at the deadeyes) per the plans. Here I went back to .012 rope because for the “heft.”
The seizing of the lanyard is also a bit tricky. I ran a .025 lanyard connecting the stay to the stem, those 5 holes on the stem are finally used after the stem being one the very first things added to the ship so long ago. To finish it off requires a single hitch above the first seizing on the stay, then the running end of the lanyard seized to the stay. No problem, except all that is kinda hanging in the air and that hitch has to be kept taunt. I could have employed the quad hands, but room to work would be tight. Instead I tied the lanyard far up the stay with one short piece of tan rope and tied another to hold the loop of the seizing thread while I passed it around the stay between the seized loop with sharply pointed tweezers. In the photo I was using 50wt thread but after completing it I decided it was too heavy so I cut it off and re-did it with fly-tying thread. Just a quick moment to thank @DelFfor the fly-tying thread recommendation. I admit I was a bit skeptical at first, but since then I’ve used it to seize almost every block on the model. To me, it provides the right look and scale, and is well worth the not insignificant effort to see it while doing seizings. Not finding a good color match for the light and dark brown rope on Amazon, the thread came from some random fly fishing website found during a google search.
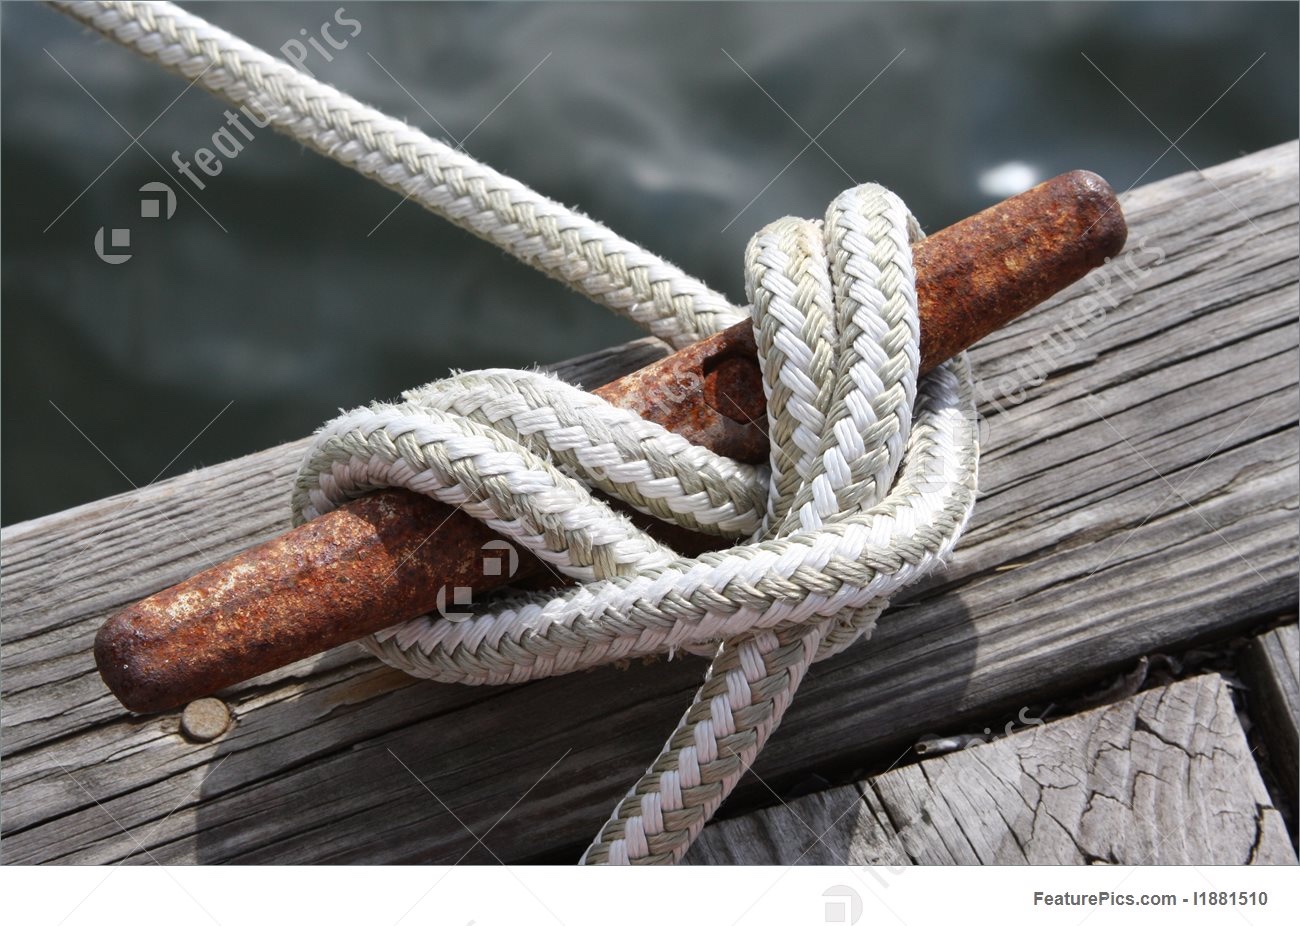
Here is the finished stay at the lanyard end. Please note the proper stopper knot ripped from the pages of my Ultimate Book of Everyday Knots, a book I recommend for everyone including outside model building. Amazon has it Here
Foresail Halyard
Next up is the ratlines, nope I can put it off a little longer. Next up the foresail halyard.
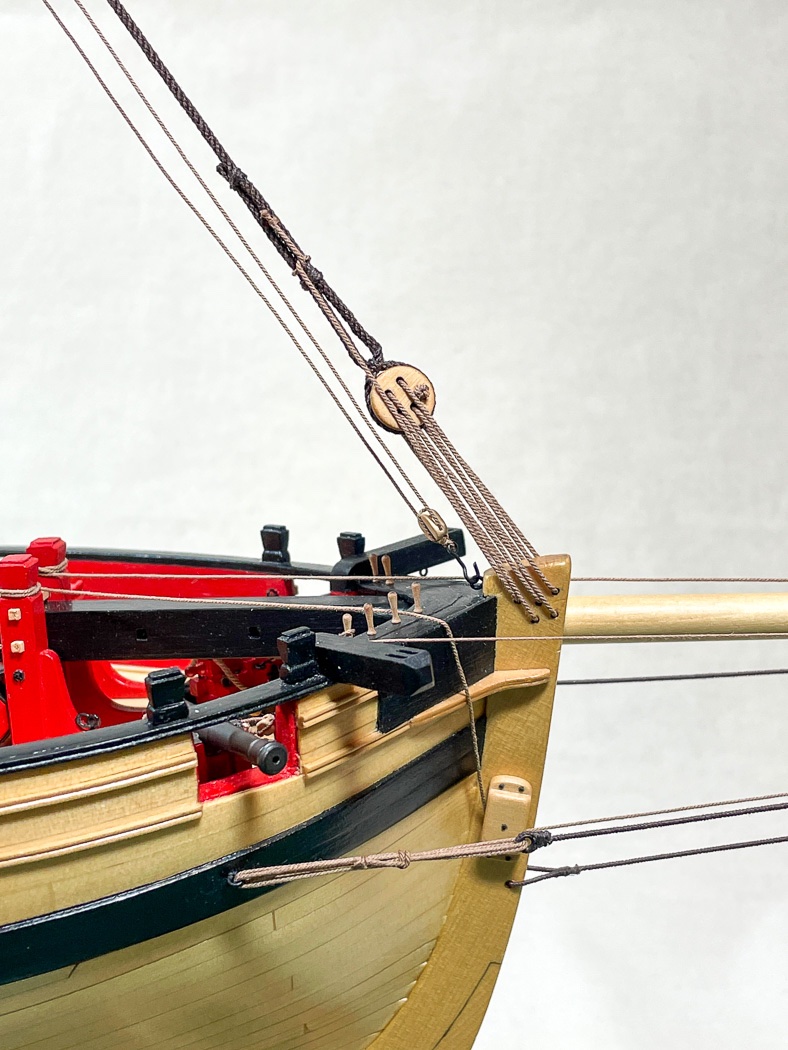
Having seized the block on the stay earlier this was now pretty easy. The running length goes to a block seized with a hook attached to an eyebolt just behind the stem (so that’s why I put that eyebolt there so long ago).
Another note I’ve said before but bears repeating. Not every eyebolt/belaying point are highlighted early in the instructions for most any model. I always look ahead to the rigging section and study the plans to locate these. They are frequently so much easier to add early before room gets tighter. Like this one it can be forgotten for months until I actually need it.
The running length runs down through that block, back up top and belays to a cleat at the base of the mast. This is makes for a really long piece of .018 rope. The challenge for this halyard is to balance the tension on the line enough so that it looks right, but not so tight that it’s pulling the stay out of alignment or into an award pulled out look. The halyard doesn’t really need to be very tight, over-tightening doesn’t gain anything.
And now for the ratlines.- No wait, I can still put those off.
Jib Halyard, In-haul, and Out-haul
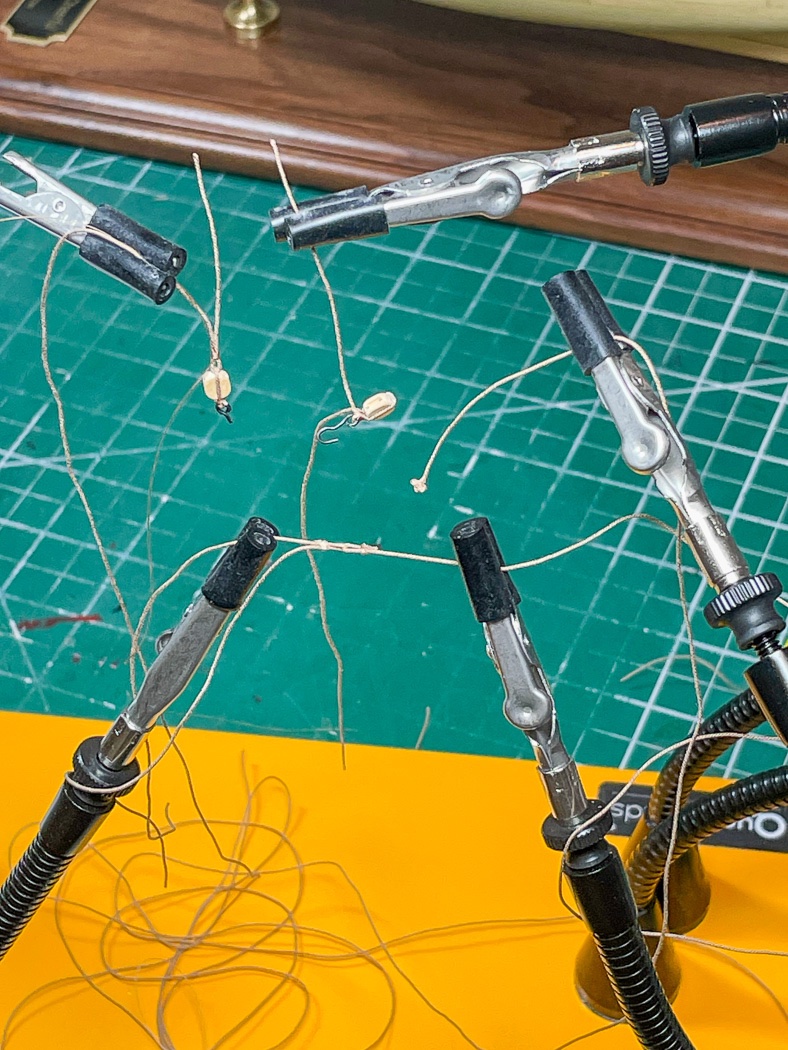
This one is fun. Three distinct tackle that work in sync with each other to manage the jib. I made up all three as a first step knowing I’d install them as a working unit.
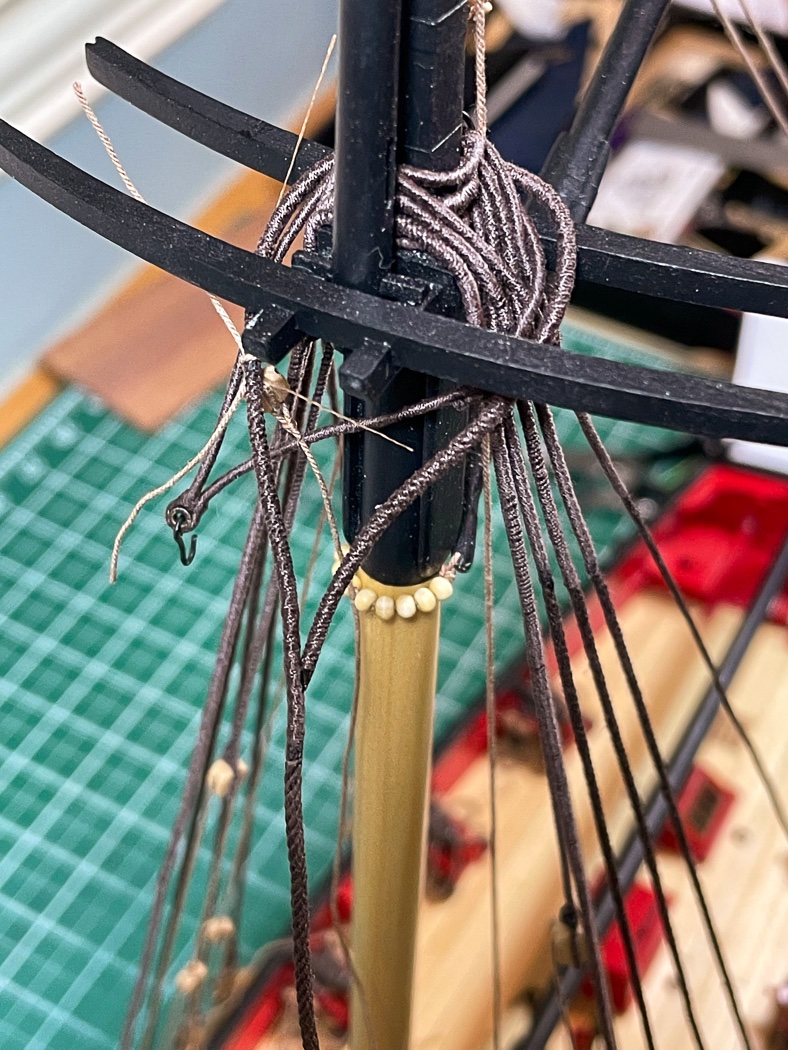
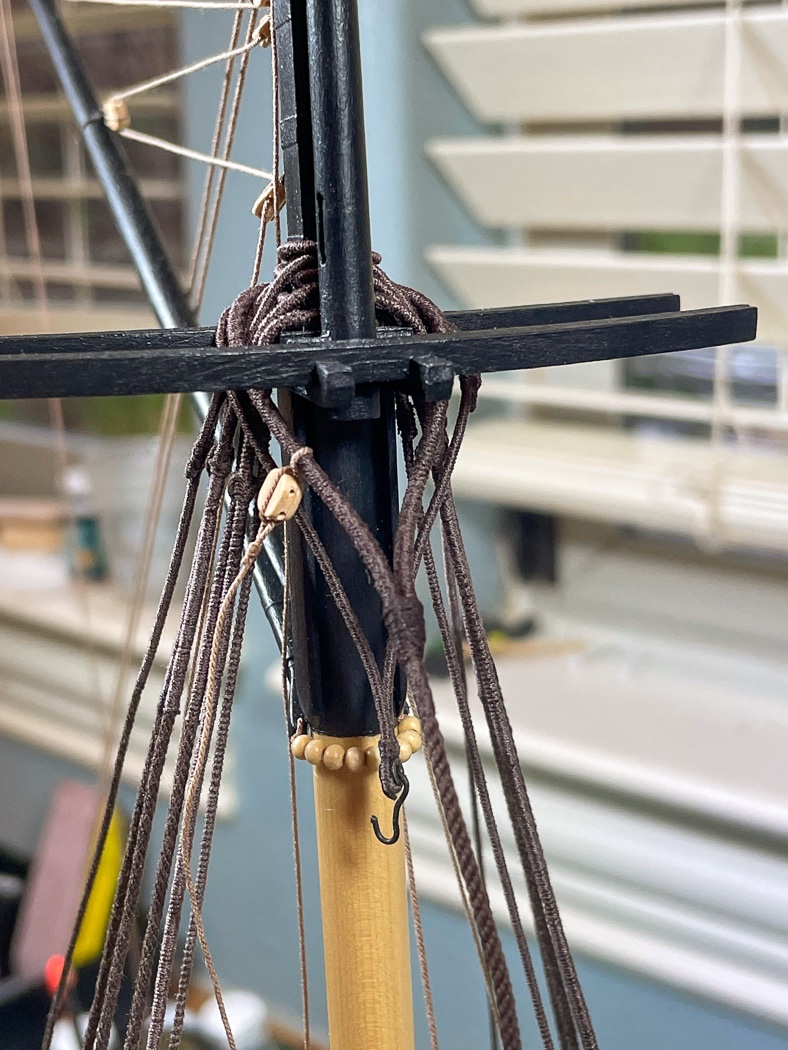
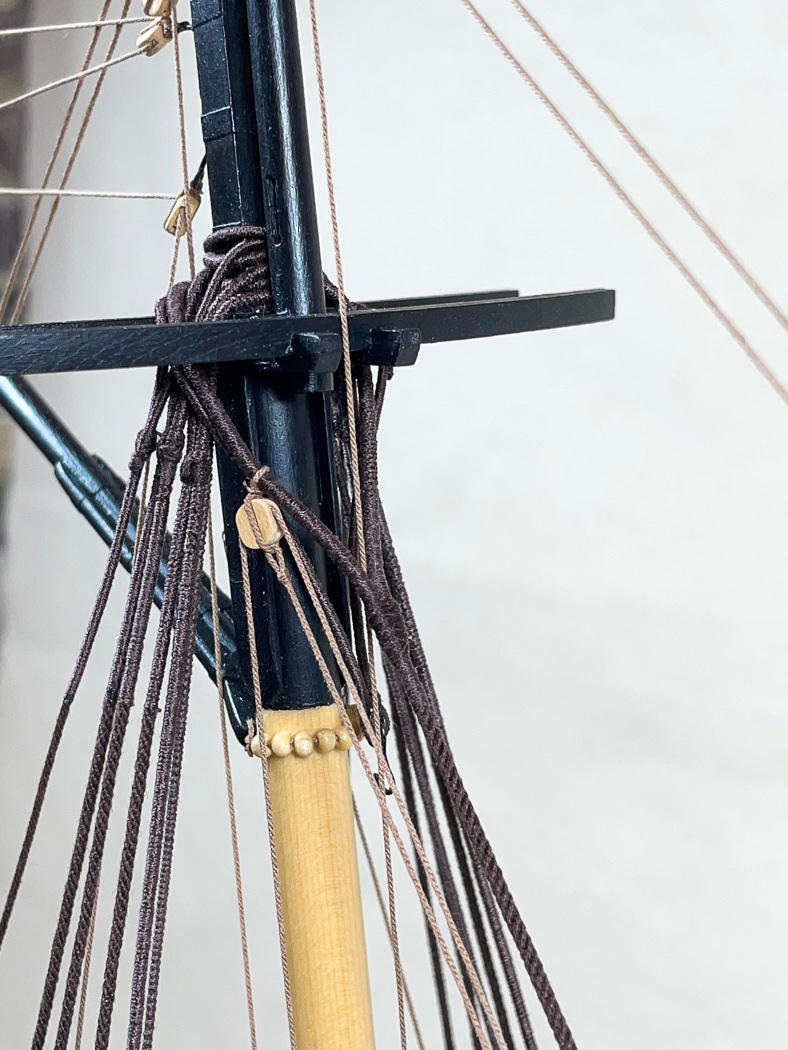
A .018 line seized to a block at the mast cap runs down through a block seized to a hook (I installed that eyebolt but left it unglued before placing the mast cap, so again an easy install on the block). That hook is seized to the hook on the traveler ring I had remembered to add way back when installing the bowsprit. It’s just going to flop around there for a minute. On a side note, the mast is looking pretty cool with all those served ropes.
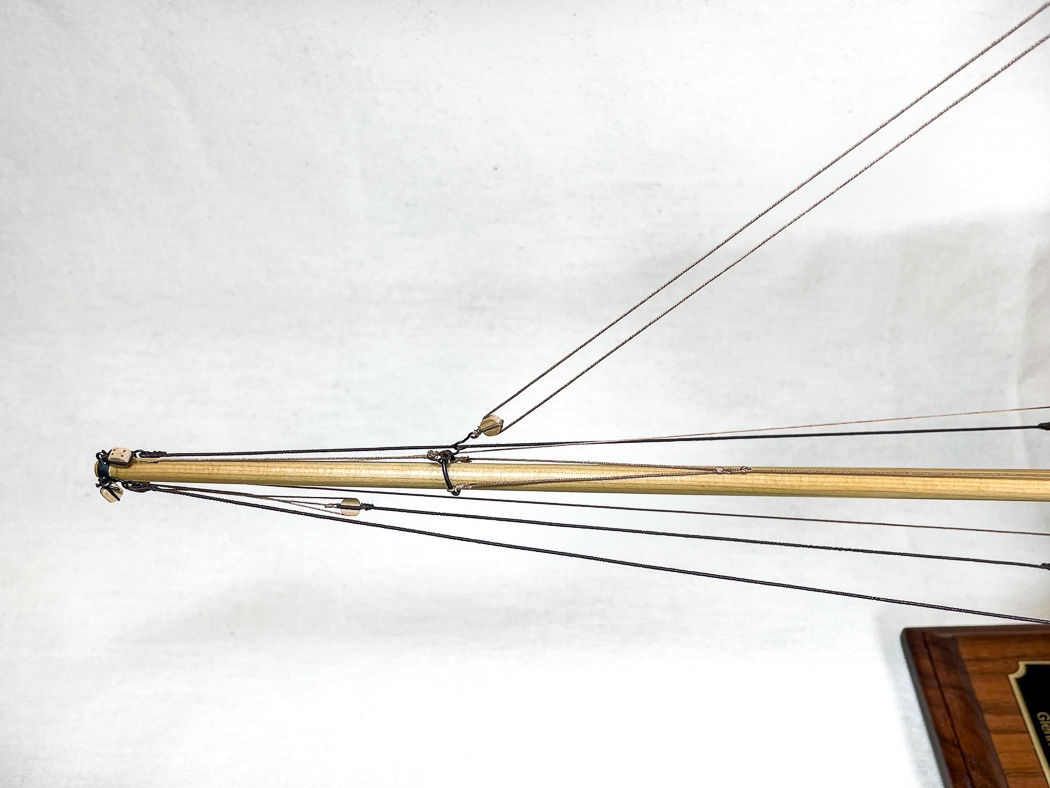
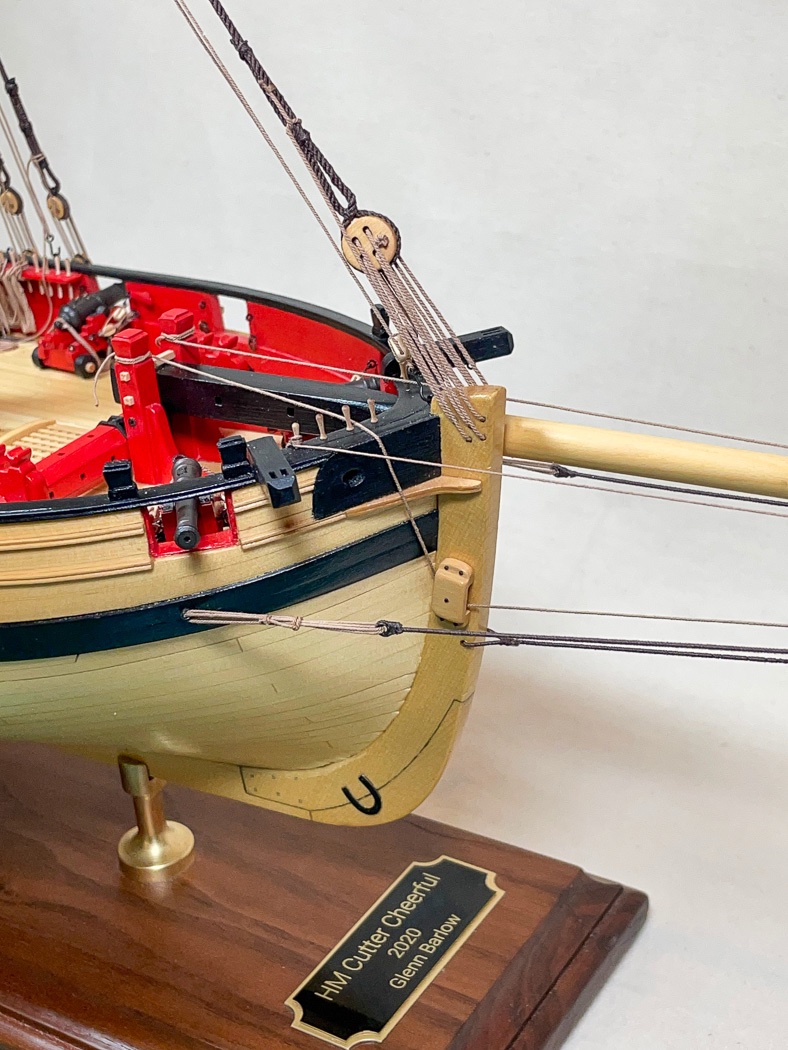
(another focus problem, I’m getting sloppy) The out-haul starts with a stopper knot (again from my book of knots, I normally just do a figure eight knot when a stopper is required, but like the main stay lanyard its very visible) runs from the traveler ring forward to the sheave cut into the bowsprit (so that’s what that’s for) back to the fixed block I’d made on the starboard side of the stem, then up and over belayed to the bowsprit bitts starboard post.
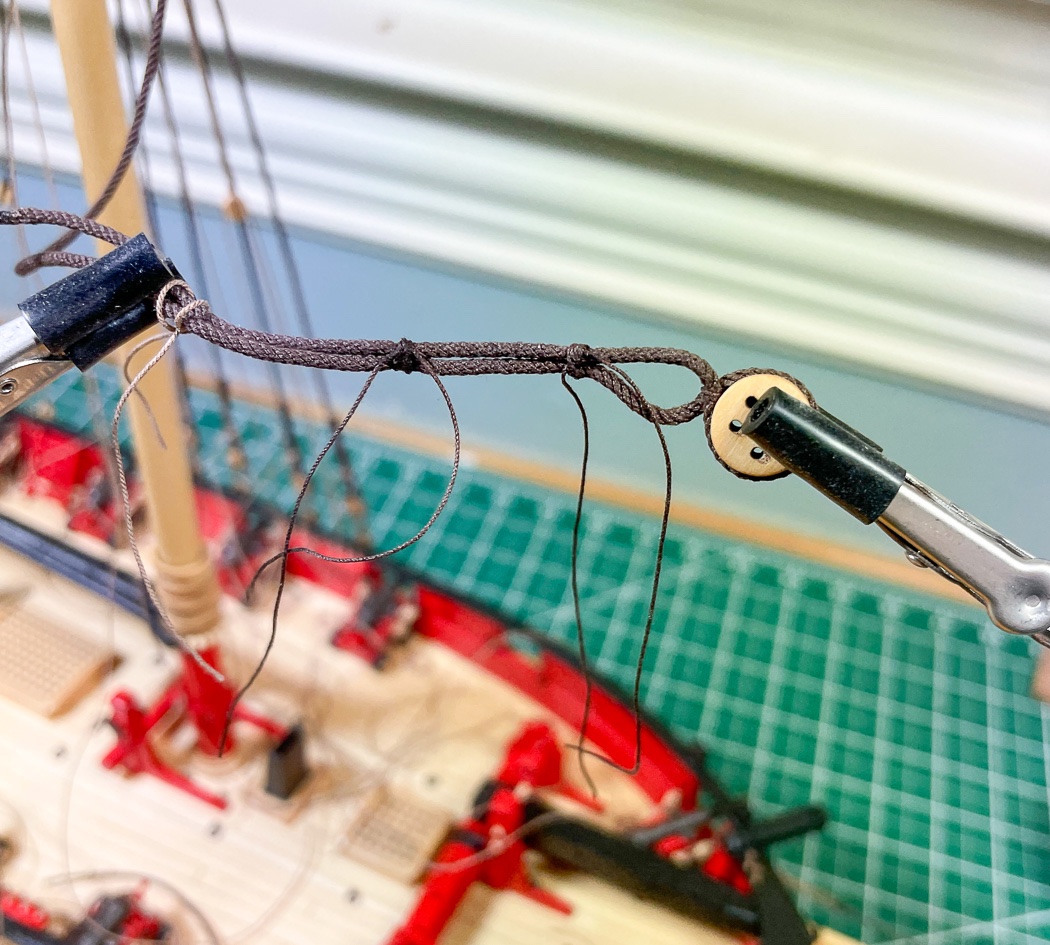
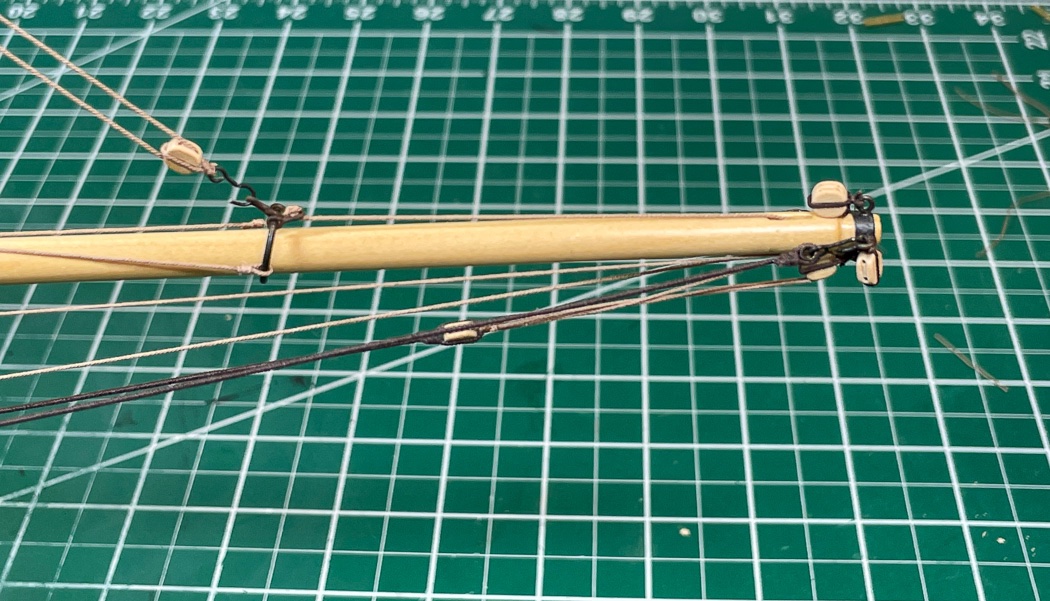
Finally, the trickiest of three lines, the in-haul, is actually two ropes joined together (no thimble this time). It requires a V with its ends tied to either side of the traveler ring (I gently glued these with the lightest touch of CA to keep them on the sides and not slip down to the bottom of the ring) with the peak of the V seized to another rope (all of these are .018). To have the V centered I attached the two ends to the traveller then seized a loop at the resulting center. The result is the in-haul with its two seized lines laying along top of the bowsprit and belayed to the port bitts post. I left the loops at the joining of the two ropes a little large to give a better look of the joined lines, no reason to squeeze them tight.
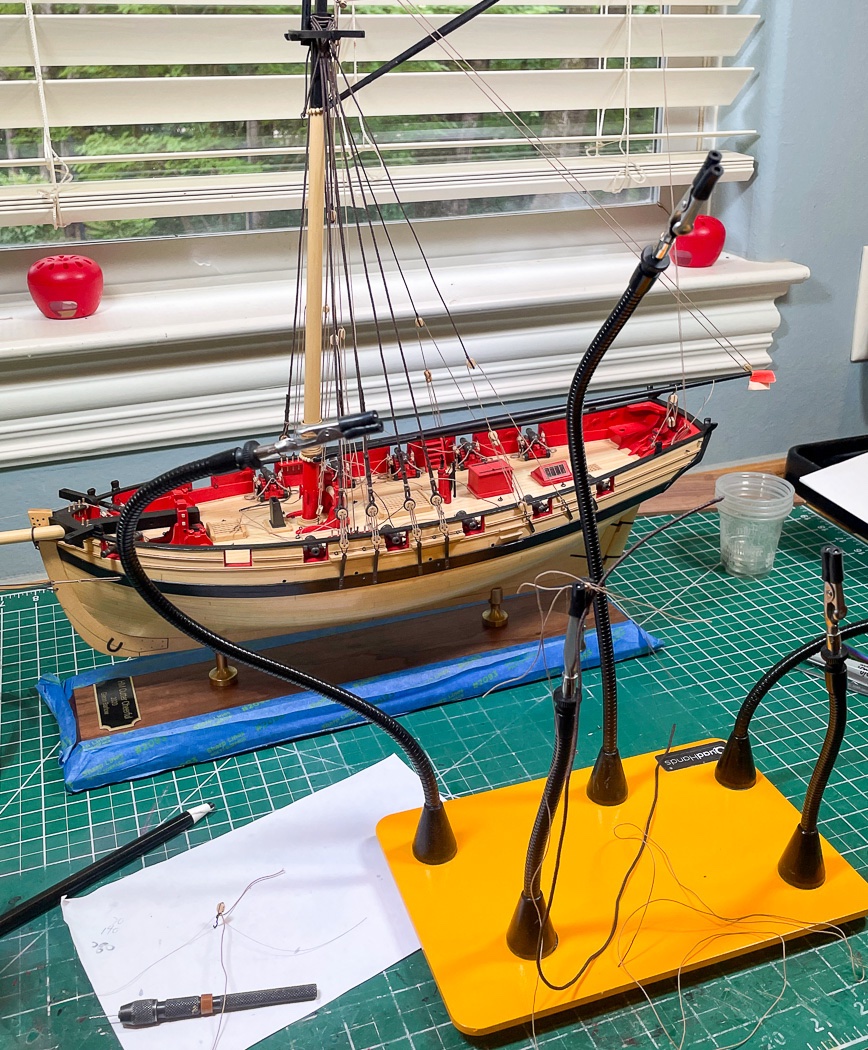
The tricky and fun part is pulling the right tension on all three, back and forth and together to arrange the traveler ring into a fixed position on the bowsprit. Per the plans I chose this to be 80mm from the far end of the bowsprit, which kinda looks right.
And this is how it all looks like this in the end. And now it’s time for the ratlines..unless there is something else I can find to do first….
Thanks for stopping by. The likes and especially the comments are always appreciated.


 I started with one once you started making your own parrels, you never cease to amaze.