Adrieke
-
Posts
1,625 -
Joined
-
Last visited
Content Type
Profiles
Forums
Gallery
Events
Everything posted by Adrieke
-
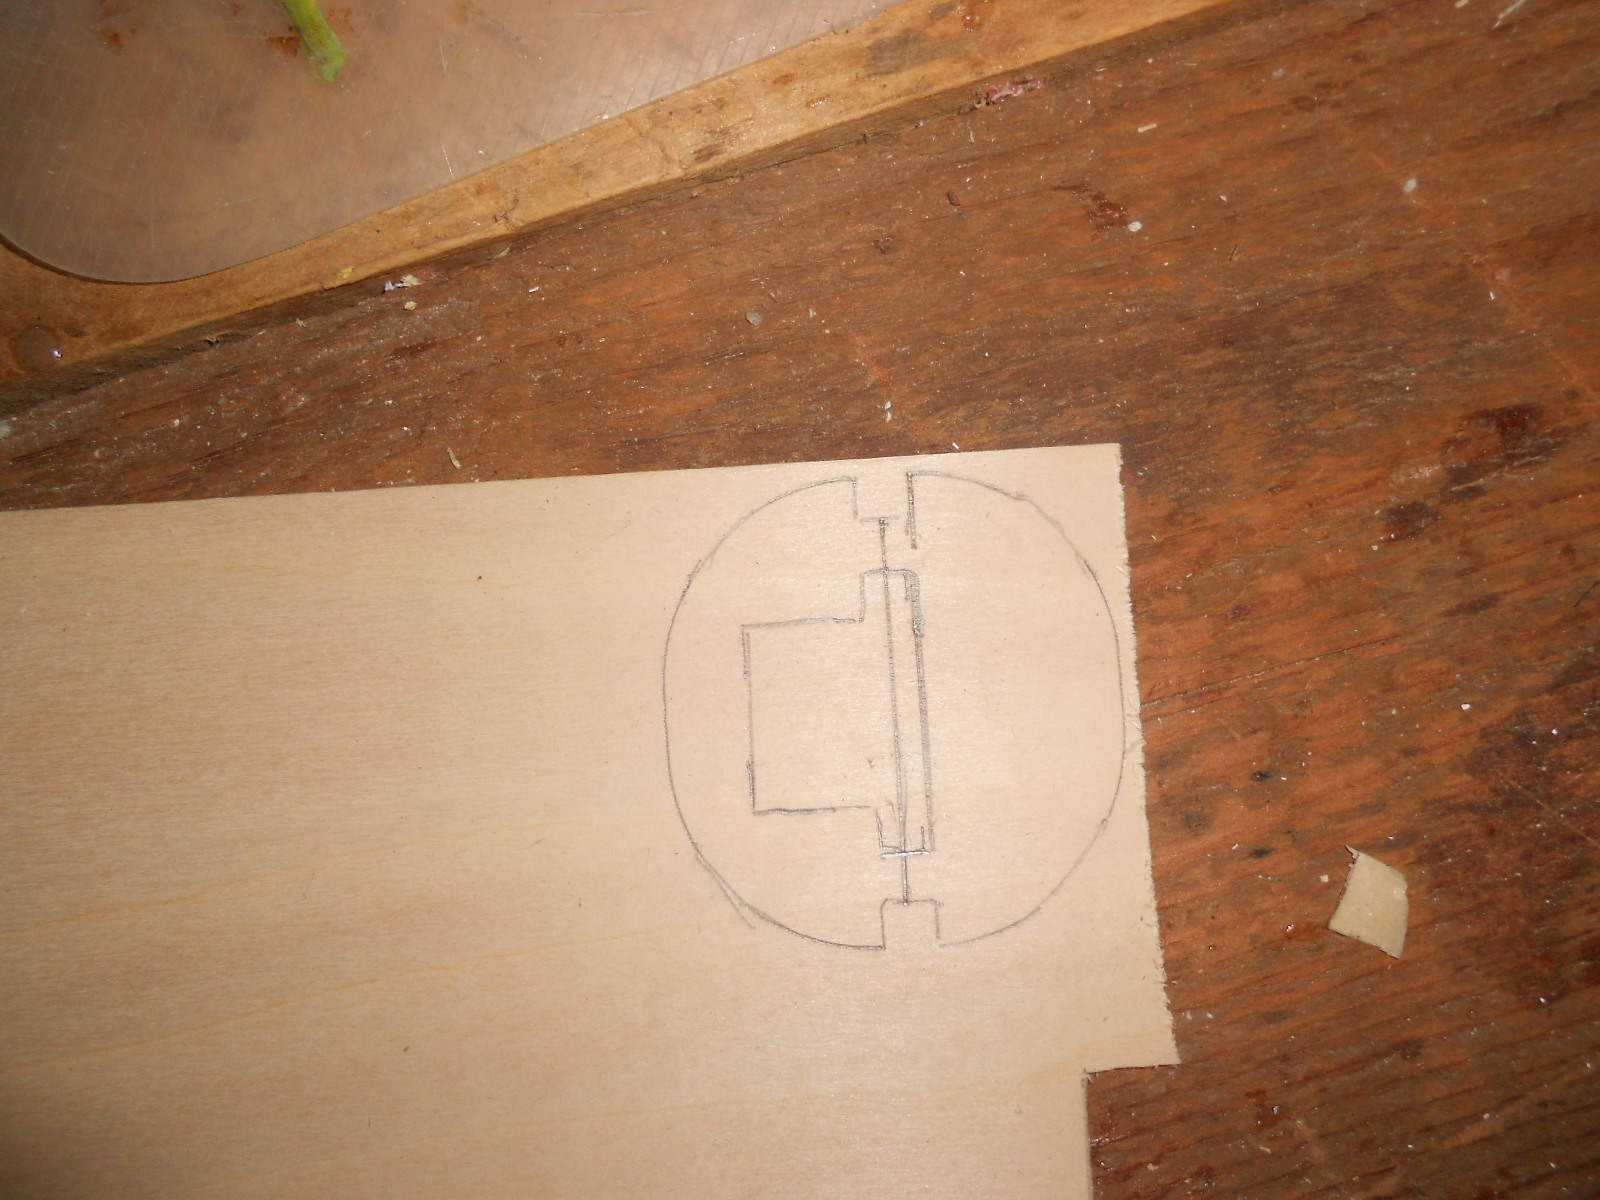
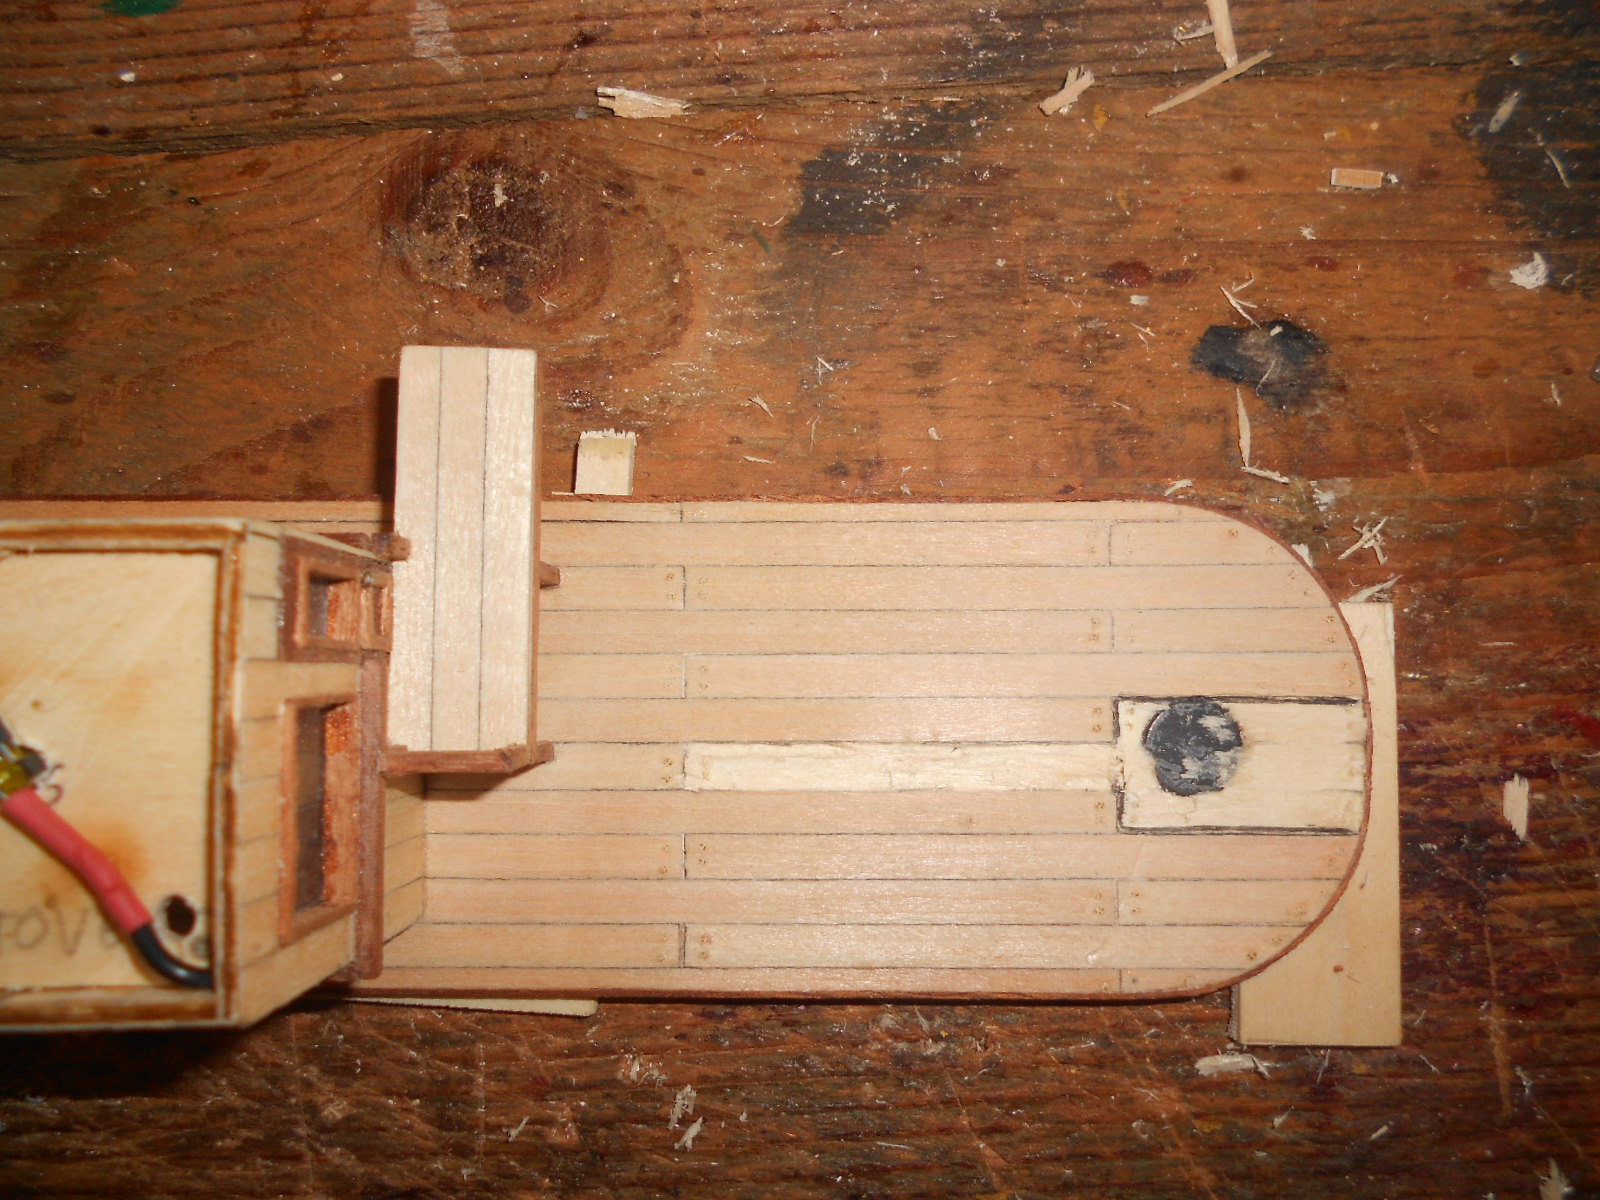
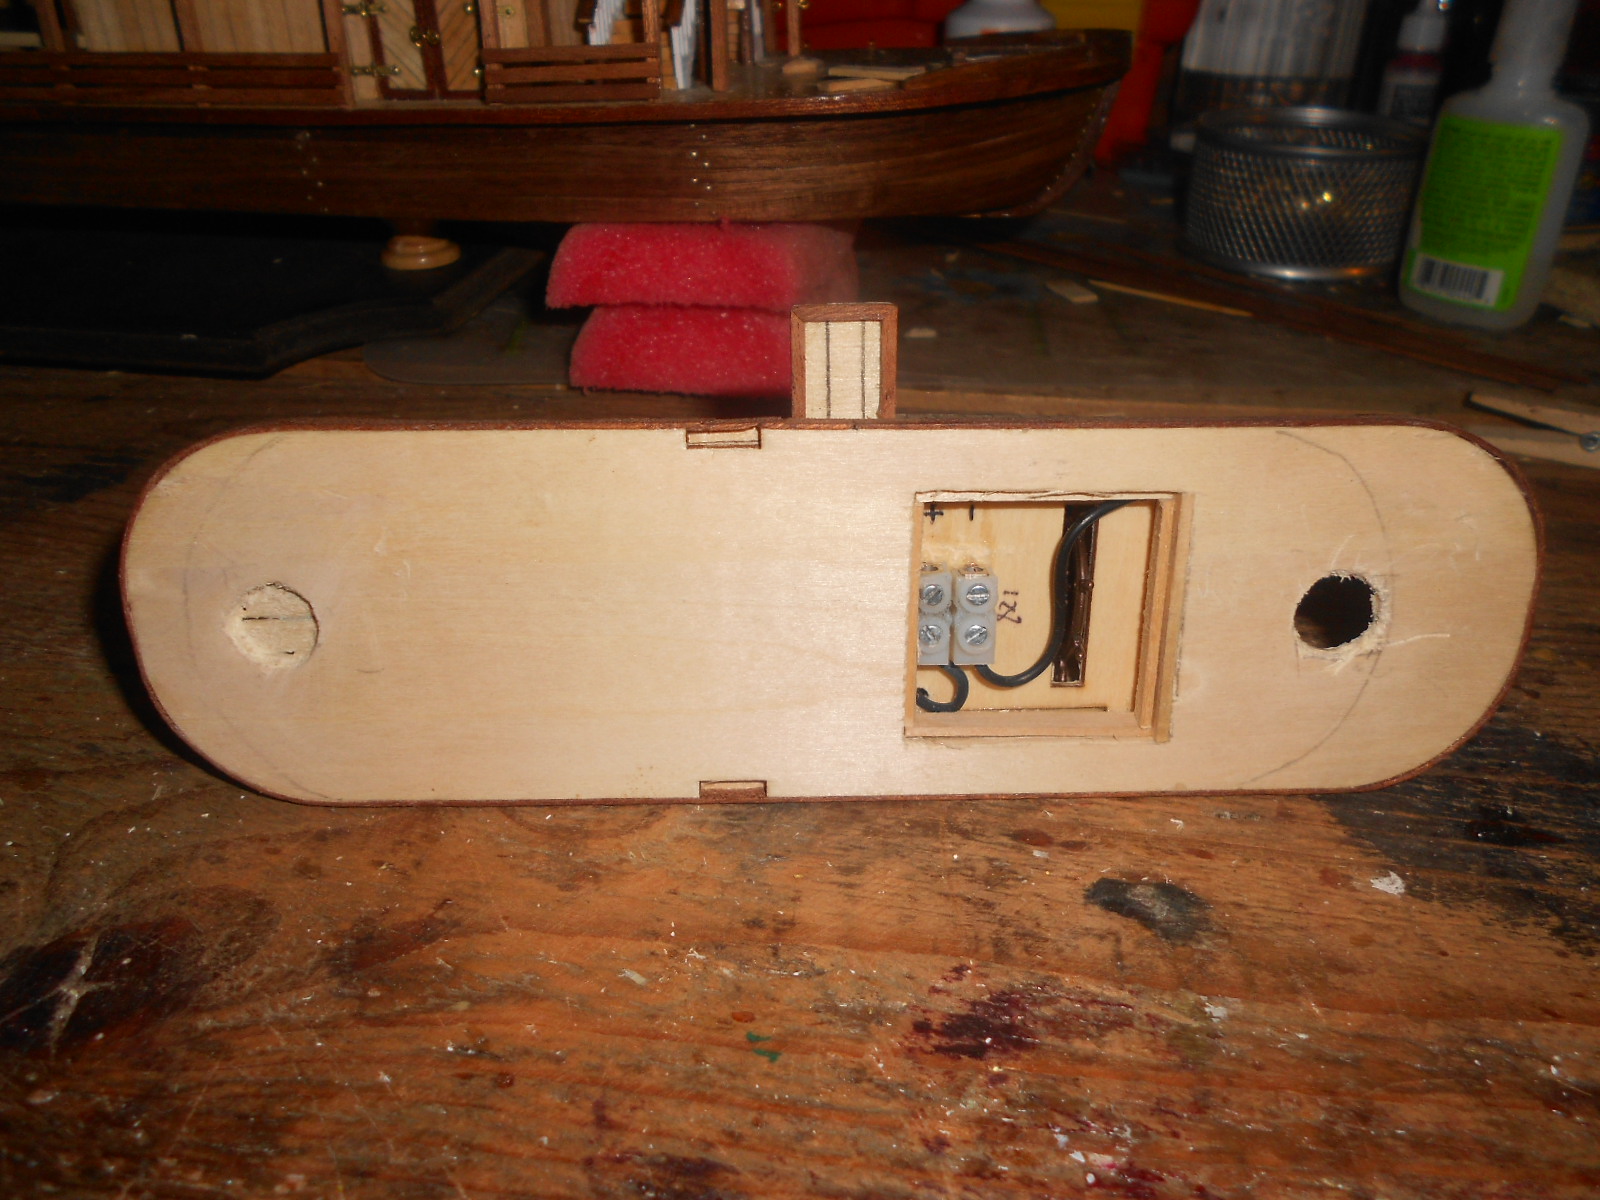
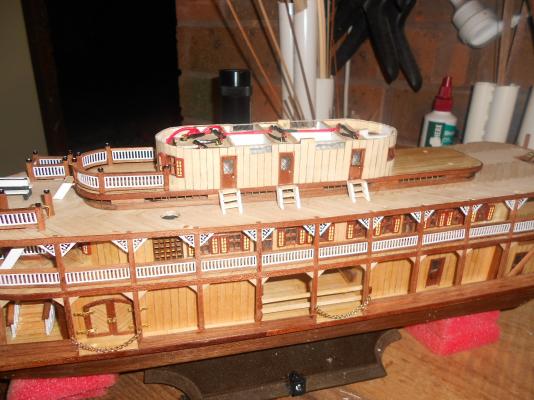
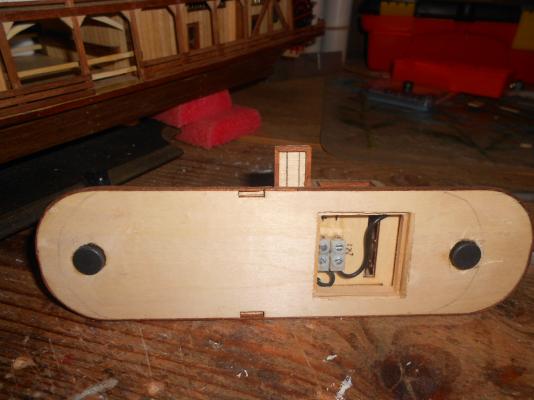
 to finish off the top deck I traced the outline of the 2 curved end of the 3rd deck on 1.5mm plywood. this will allow me to add a magnet at the back and a strip of metal at the front as you can see on the next picture the magnet is showing though the planking so I had to replace it here I removed the planks I have planked it all again but forgot to take a pic of it. also installed the 2 new parts and the magnet. just looking for a piece of metal the right size and Sjors if you go over to the GF build you ll have a surprise there

- 1,038 replies
-
- 2
-

-
- King of the Mississippi
- Artesania Latina
- (and 1 more)
-
dragzz as Robert said look at post 11 on page 1 of his log and you ll see the issue
-
very nice work on the doors
-
looks good
-
i have seen abuild on here of the constitution where the builder had added the rivets and it look s amazing
-
Keith i probably need to replace the planking on both sides as the magnet is showing through a bit. but atleast i tried yup Robert you wil have plenty of fun on this build hmmm thre is still the endeavour Sjors. havent done much on it and i can only start the GF when i have planked th ehull of the endeavour. besides the deal was you finished doing the ratlines . never specified the ship and now you even have another ship so :P
- 1,038 replies
-
- 1
-
-
- King of the Mississippi
- Artesania Latina
- (and 1 more)
-
thanks Randy but so close and yet so far. there is still so much to do thanks Keith. yes they are to keep the top held on the last bit that has me worried as I am not sure yet if it will work I wasn't sure at first with glueing them together as I have to drill holes just where the seam is but so far only one has given me trouble
-
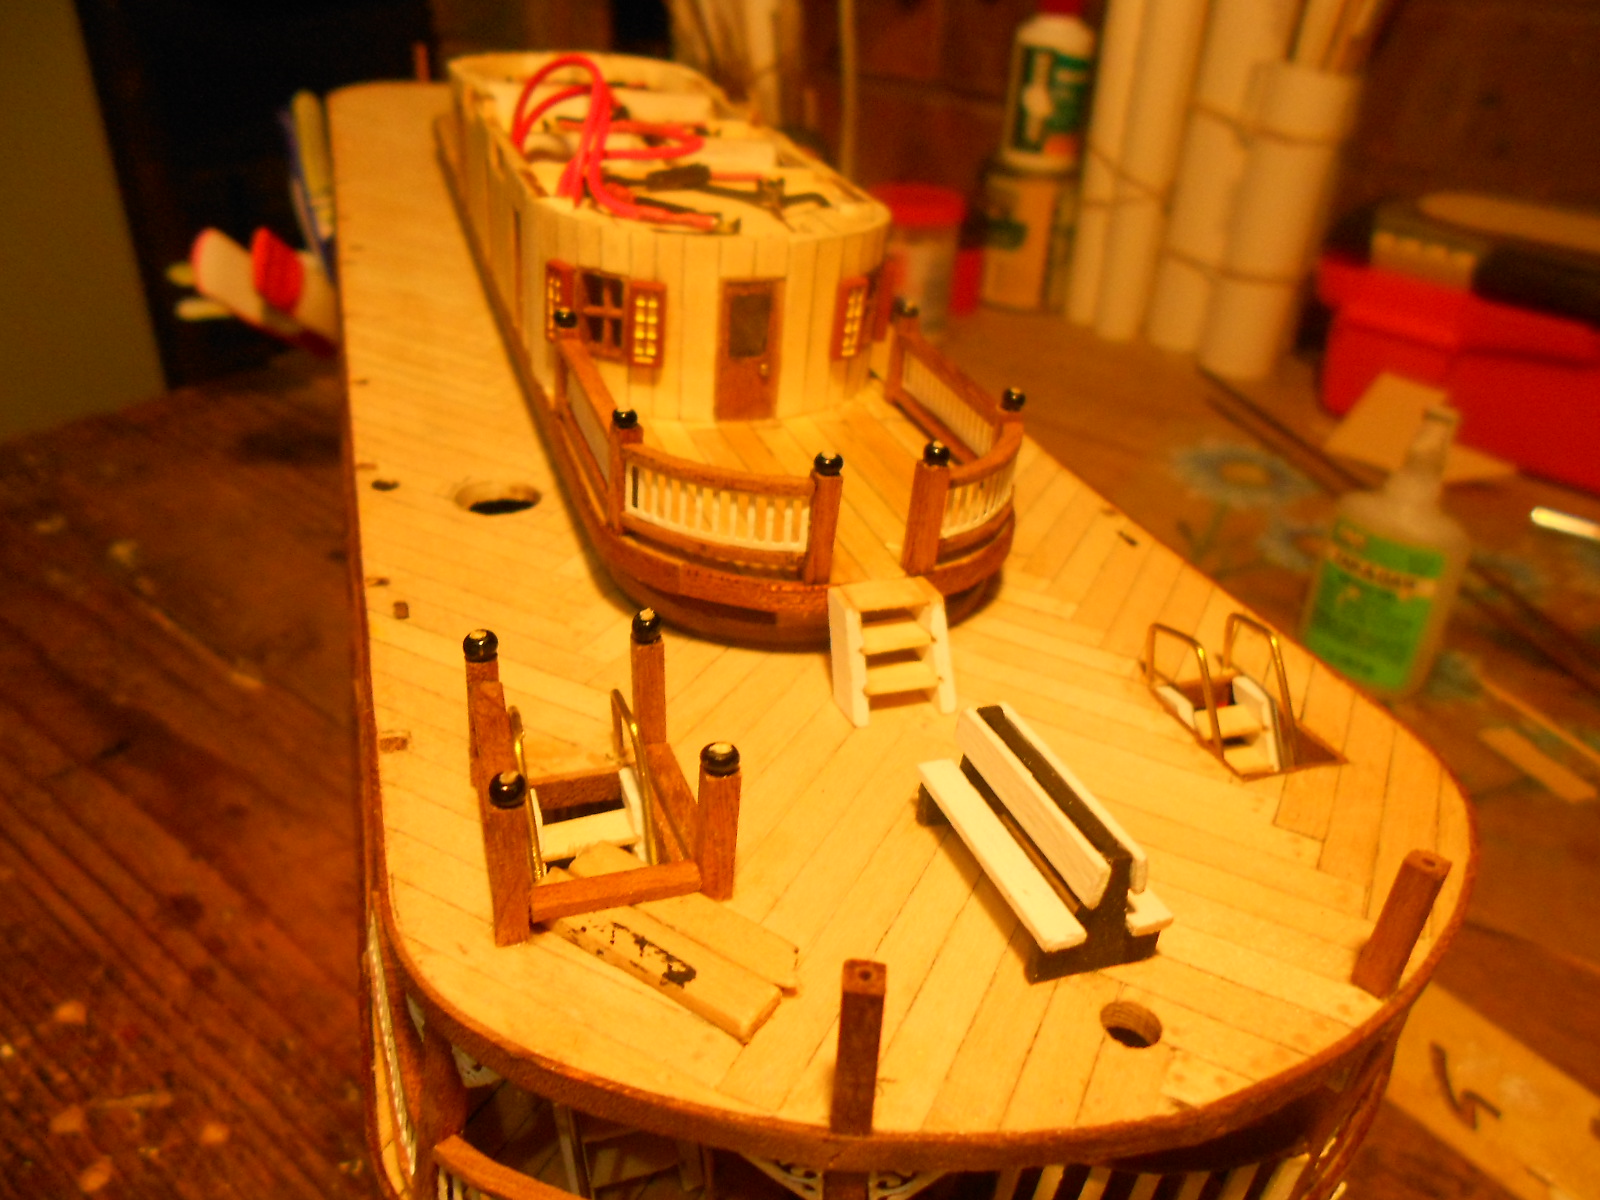
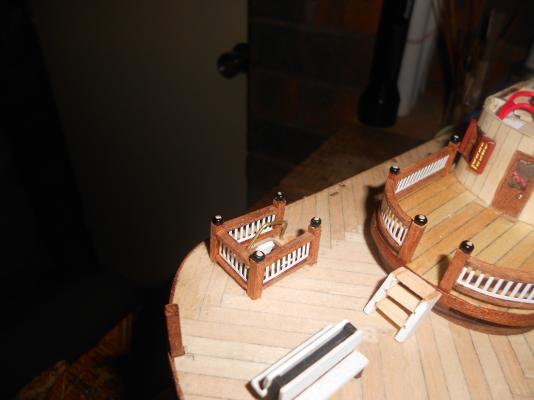
I have started on making the last few posts. as I mentioned I had to use 2 strips of 1.5 x 3 to create the 3x3 posts see if you can find which one of these posts is made of the 2 strips with the lower railings on I could also put in the chains unfortunately I pushed 2 of the railings out on this side . one is already glued back on also working on finishing the last few stairs

-
gets a seat at the back and wait for the clown to perform
- 1,616 replies
-
- 2
-
-
- caldercraft
- agamemnon
- (and 1 more)
-
the suggested method should hopefuly take care of that
-
hello dragzz could you can take some pictures of the bad parts ?
-
hello dragzz soak them in hot water then clamp them between 2 pieces of wood and let dry for a day
-
thanks Popeye i doubt that Popeye, i had many moments where i just thought of giving up on it. yesterday worked further on the lower railings and the top ones around the stairs. also glued two pieces of left over 1.5x3 sapely together to create some more 3x3 as i need to make 13 more of the little posts with the black bead on top. hopefuly it will work out wiht the seam almost invisible
- 1,038 replies
-
- 2
-
-
- King of the Mississippi
- Artesania Latina
- (and 1 more)
-
sorry to hear about your mishap and hope yo l be back at the work bench soon
-
thanks Sjors, Mick and David
-
Mick yup that happens with those tiny parts that you have to detail but when all is fitted in all looks good might i make a sugestion but remember its your call and if you can still easily get the part off? the part 195 with the 3 parts 194 on to it doenst look right . i think the part 195 goes on the other side and you just put the parts 194 on to the base just like the ones on the left and right also i know its not in the manual but rounding the corners of the 194 pieces might improve the look .
-
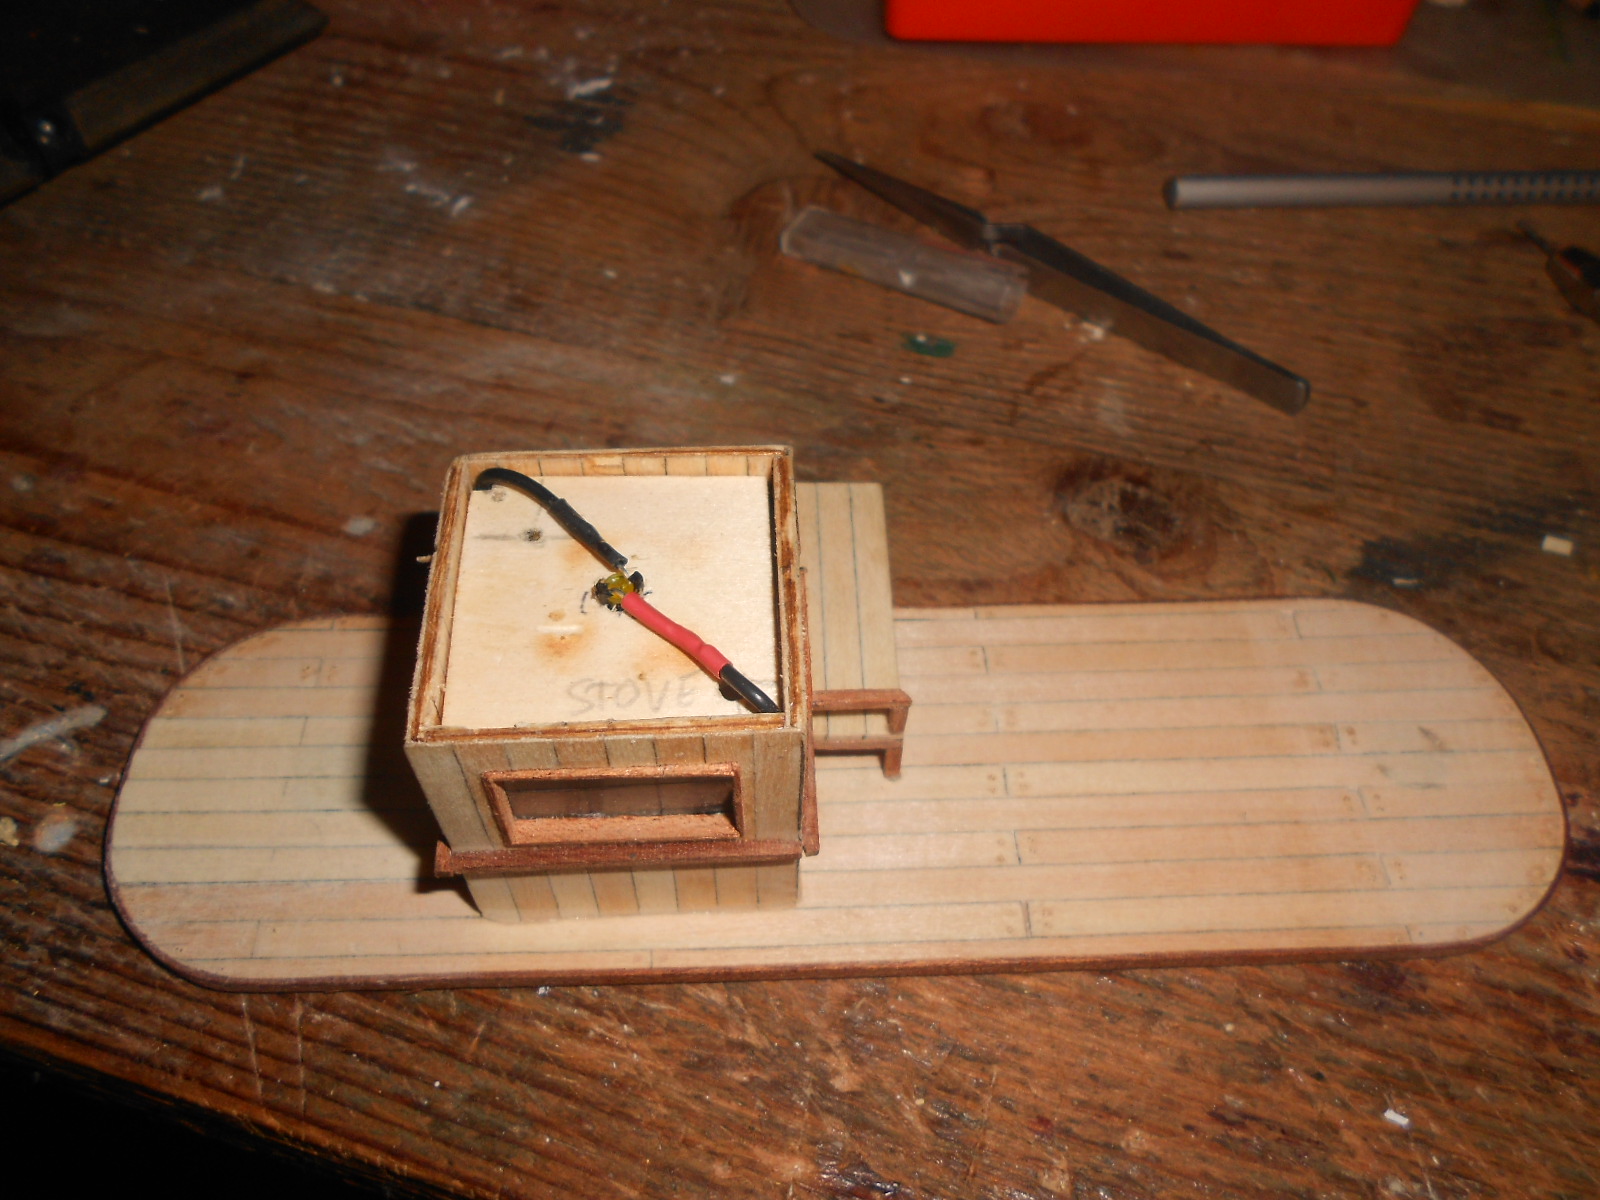
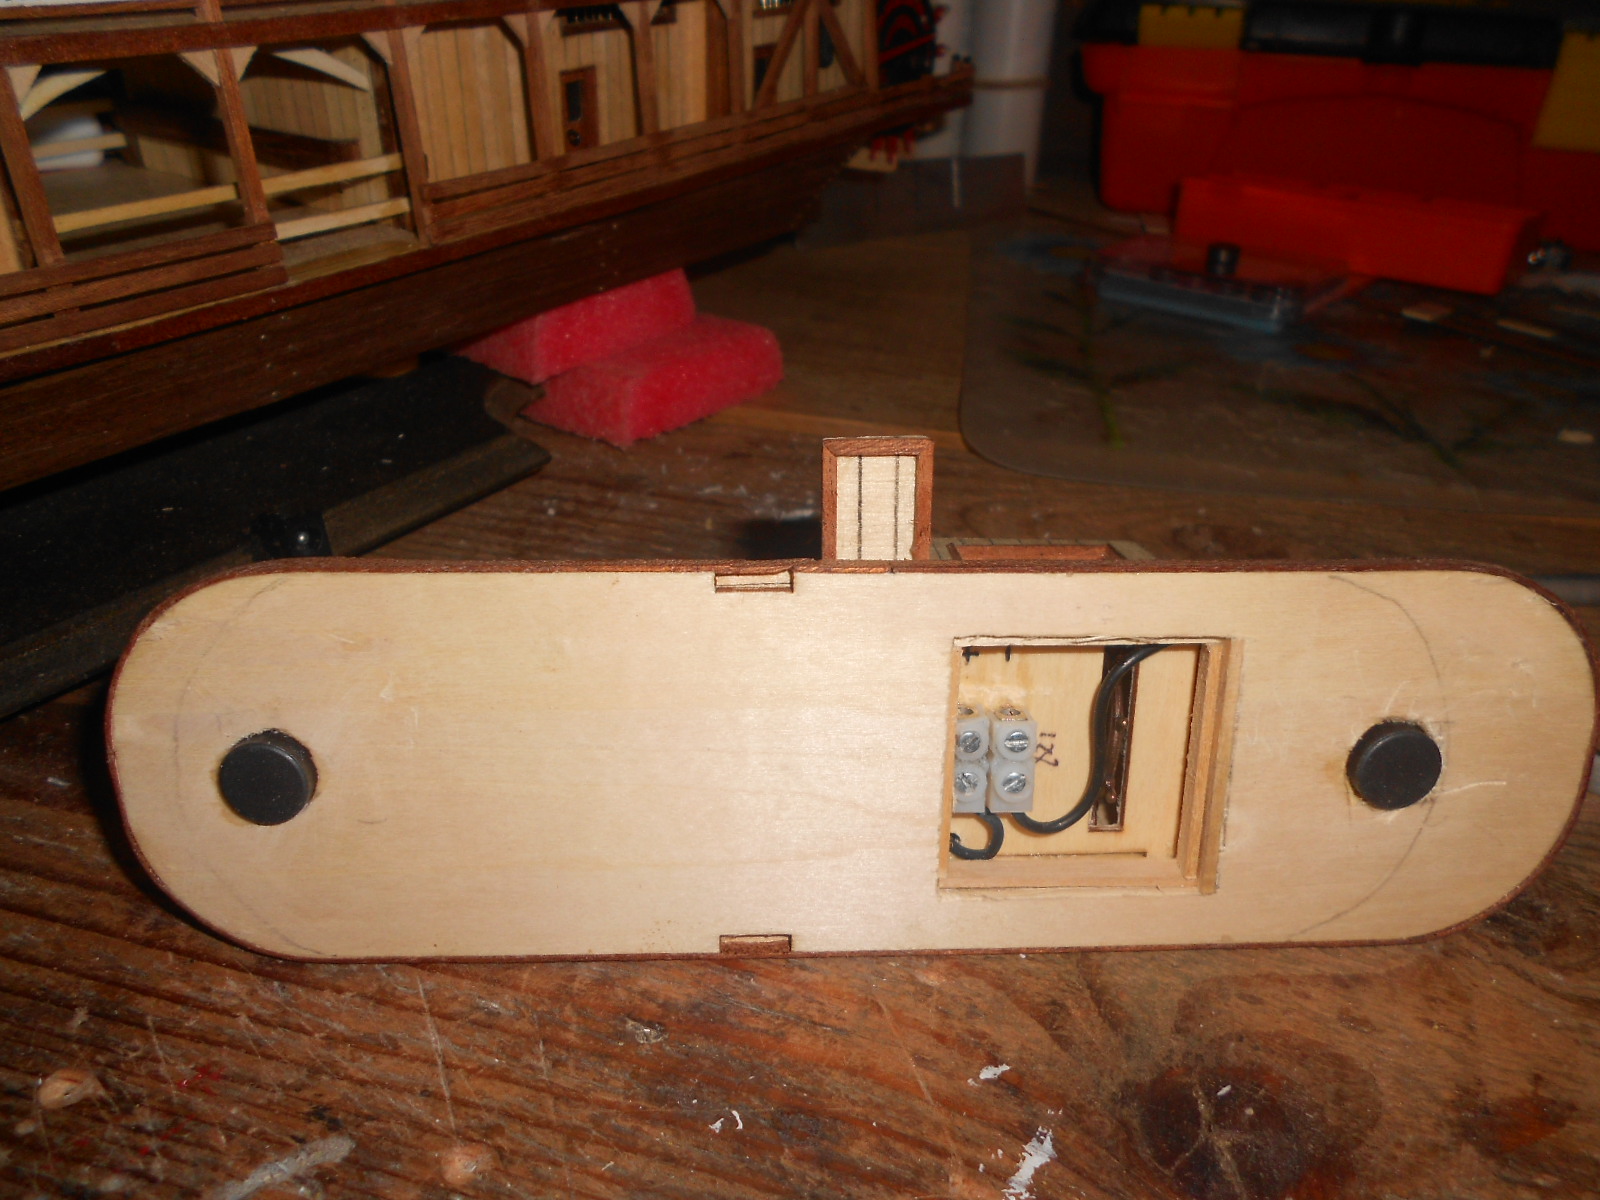
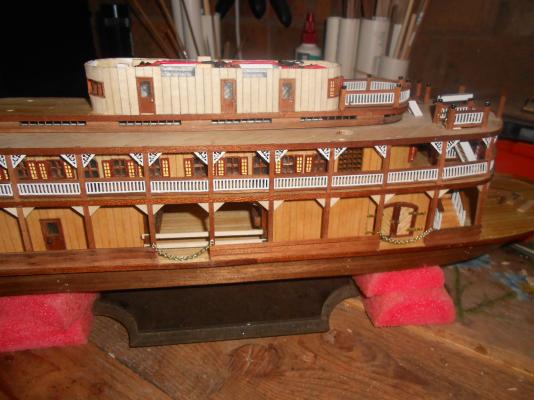
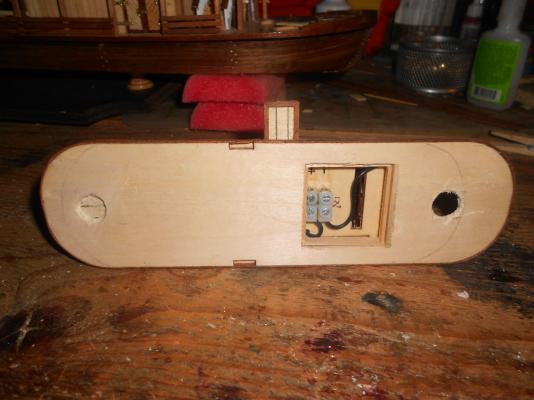
thanks dragzz the wood is 3x3 sapely for paints I use some left over revel paints. the varnish is plain clear but it does leave a bit of yellowish tint. I have bought some admiral paints and varnish that I will use on my endeavour thanks Sjors but they are just little things I am adding my camera is a cheap one so quality is not that good. the pictures usually turn out yellow when I don't use the flash thanks Robert thanks Anja. I am almost completely back to normal just a bit of a flair up of the rash which I assume may be because of the building but the ointment is helping with that and thank you for the confidence. I do feel that in the almost 2 years I have been building now I have learnt not to be afraid and that anything can be fixed. now I just need to work on improving my skills thanks Randy although I only had one day this weekend (had to work Saturday) I feel like I have done a lot I finally managed to get some magnets. after some deliberation I decided to fit them inside the top deck so I craved 2 round holes. the first one went well without damaging the deck planking the second wasn't so great so I had to redo some of the planking here they are fitted one magnet is showing a bit through and at the other I need to replace some planking that I seem to have dented also finished the first railings around the stairs

- 1,038 replies
-
- 5
-
-
- King of the Mississippi
- Artesania Latina
- (and 1 more)
-
hello Mick I think photo 172 is one side and 173 is the other side. what do the instructions for these photos say ?
-
very good start
-
very nice planking of the hull Robert
-
Randy I know how you feel. when I started back on the kom at first it was difficult but I made a promise to myself to finish it :mellow:
-
that looks prefect are you going to simulate tree nailing on it ?
-
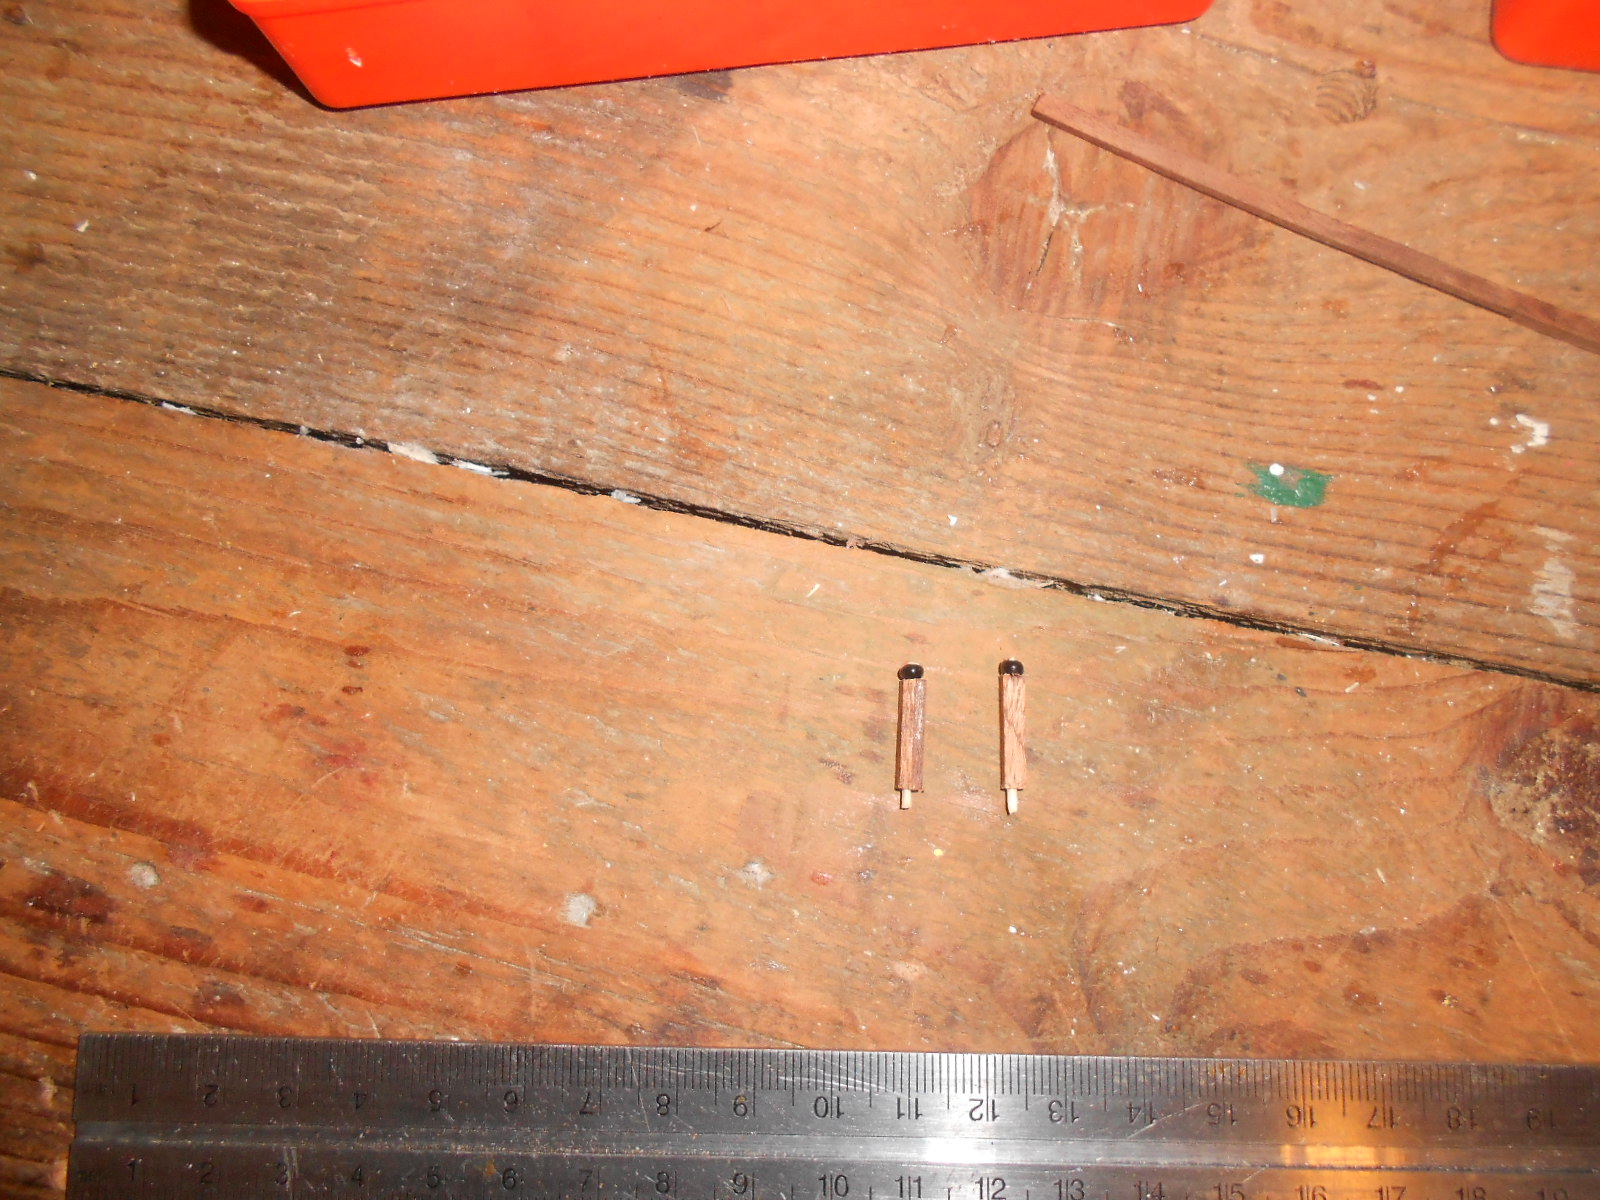
thanks Mark to secure the little stairs for the third deck more securely I drilled some holes and filled with a thinned down toothpick. the stairs will only be glued on top of these little dowels so that they come up with the third deck if I ever have to remove it for repairs just waiting to finish all the stairs and touch them up with white paint

- 1,038 replies
-
- 5
-
-
- King of the Mississippi
- Artesania Latina
- (and 1 more)
-
drawing lines on the deck wil also help you keep it all straight because it is very easy to wander if you ar enot careful . ask me how i know
-
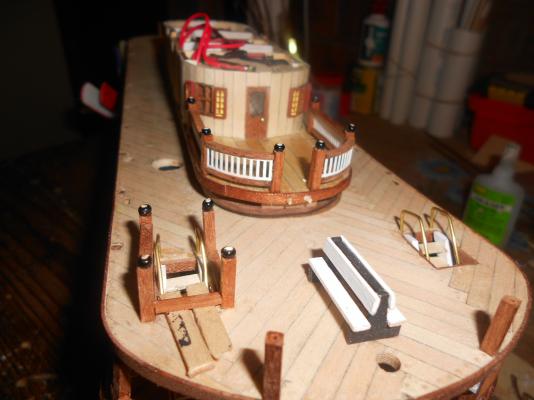
very nice Robert do be careful with the 2 pieces that will hold the paddle wheel. a fair bit into the build i broke one of them