HOLIDAY DONATION DRIVE - SUPPORT MSW - DO YOUR PART TO KEEP THIS GREAT FORUM GOING! (Only 20 donations so far - C'mon guys!)
×


DelF
-
Posts
1,409 -
Joined
-
Last visited
Content Type
Profiles
Forums
Gallery
Events
Everything posted by DelF
-
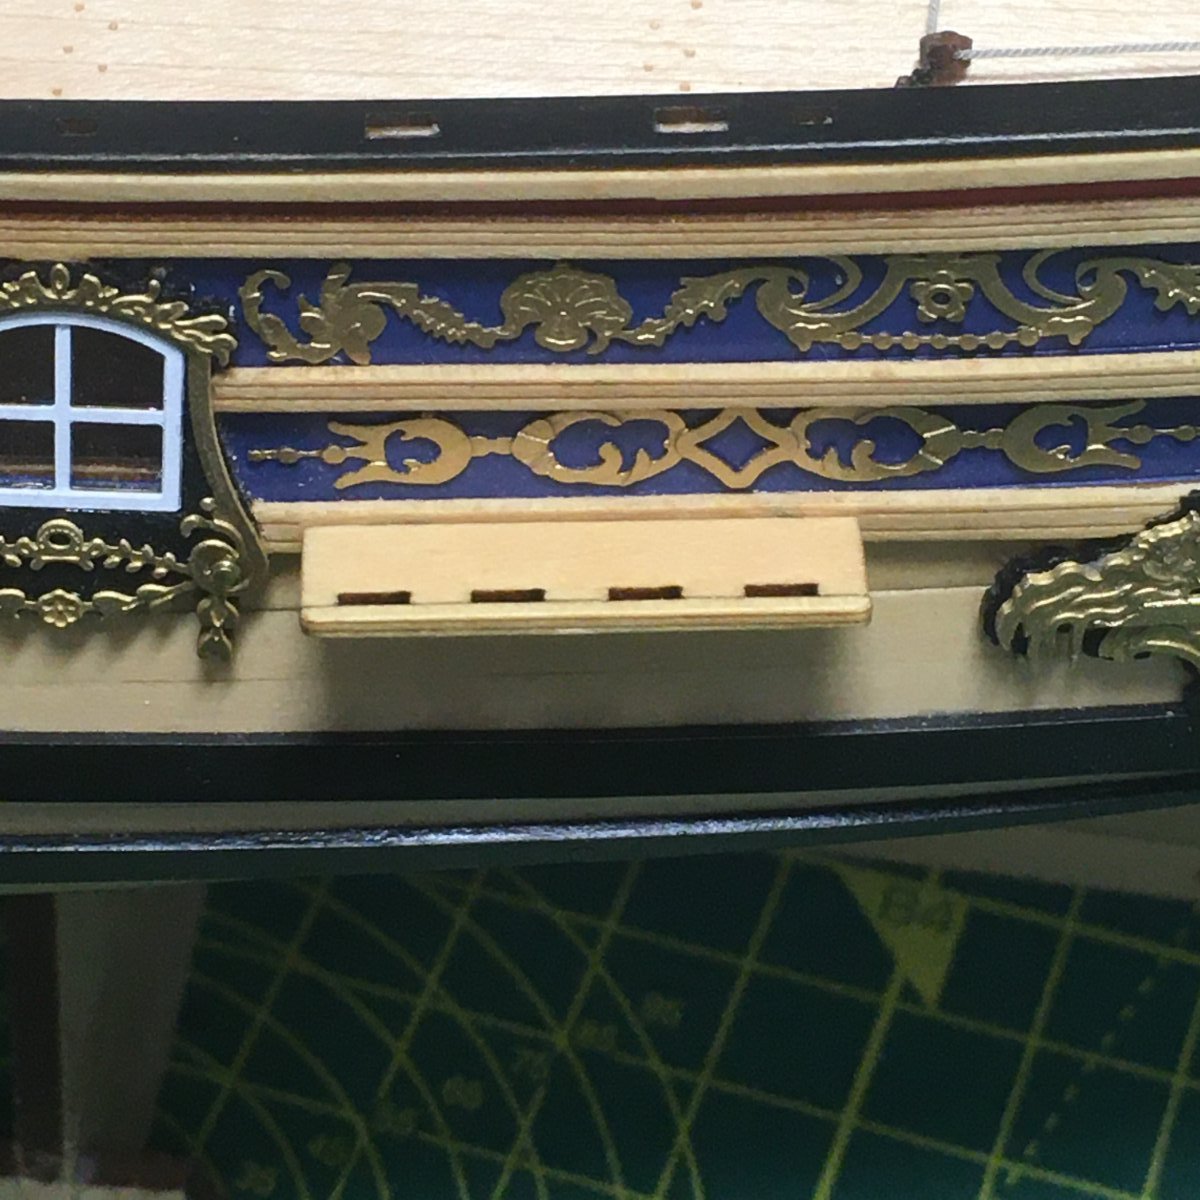
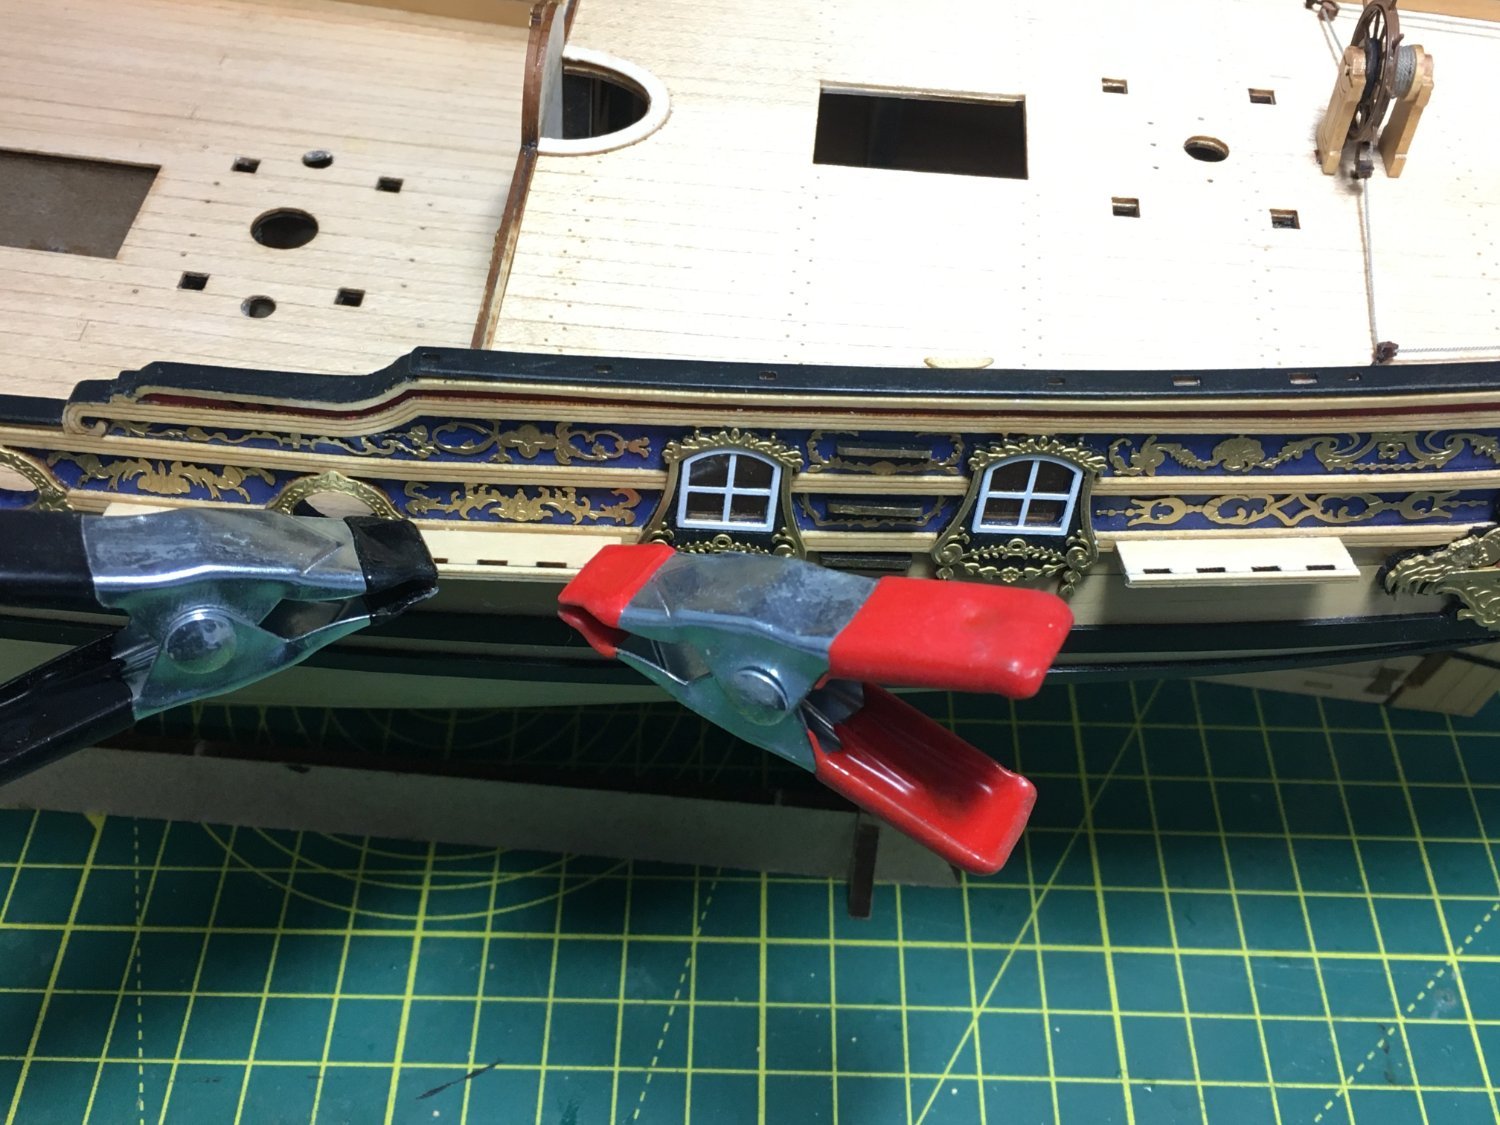
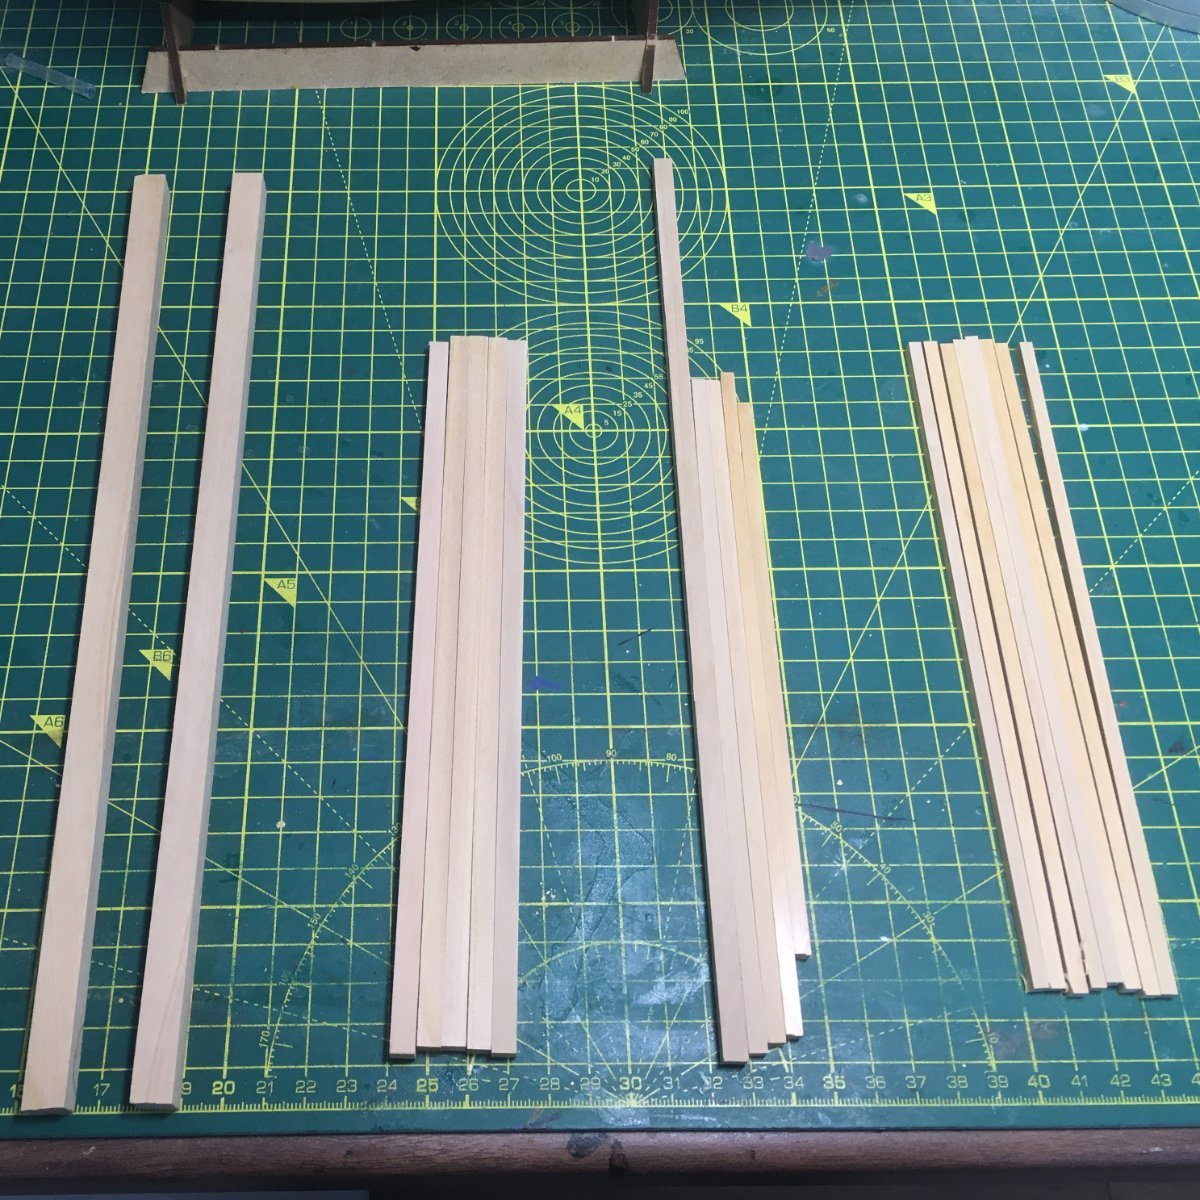
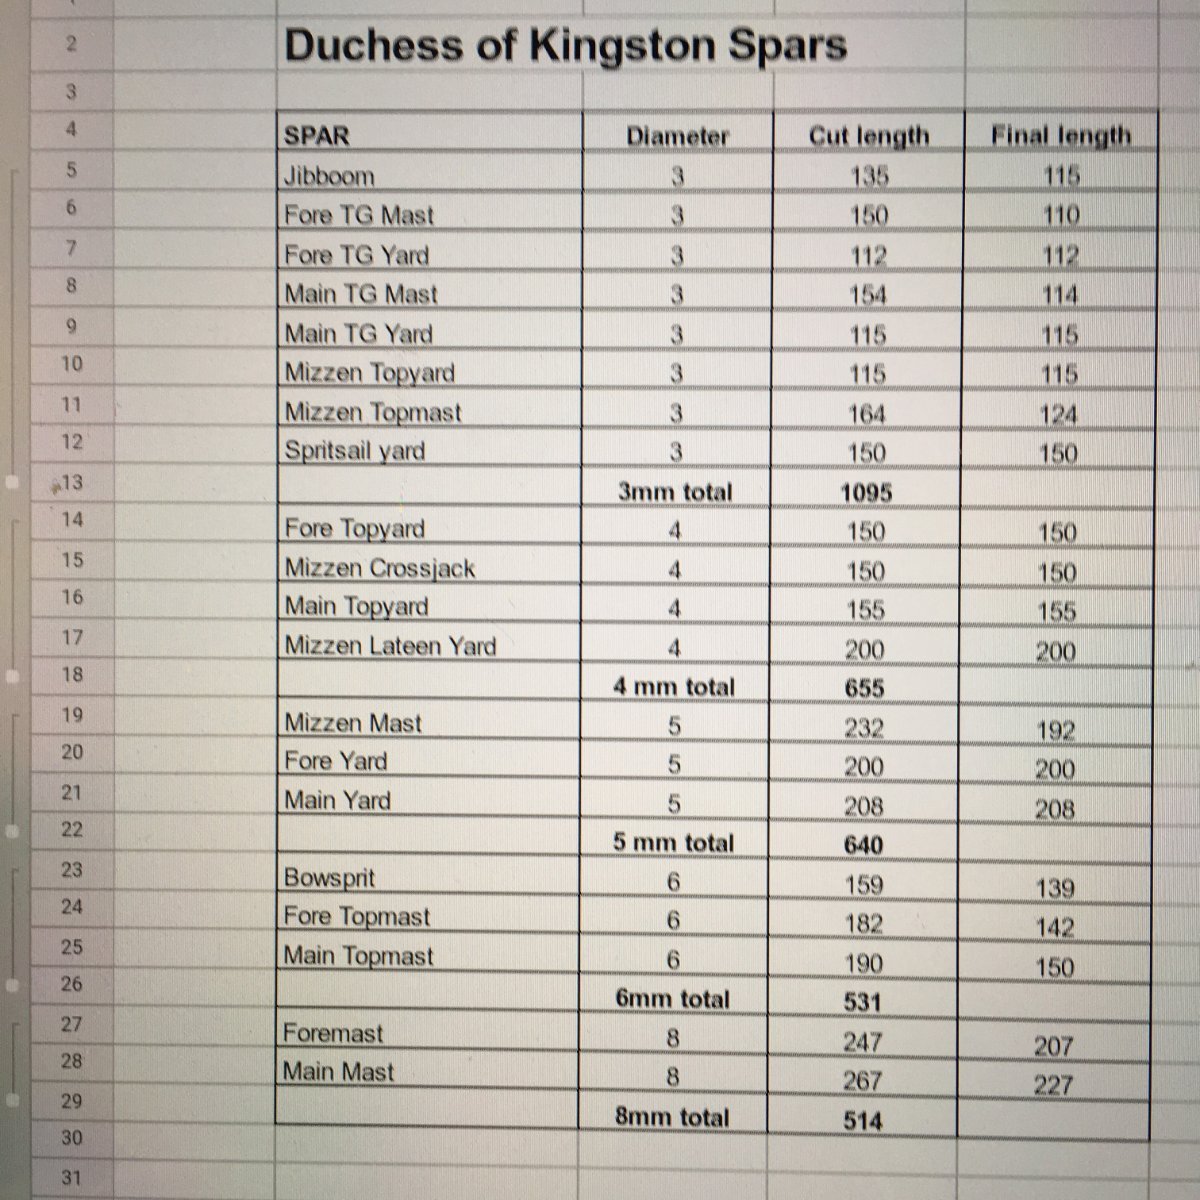
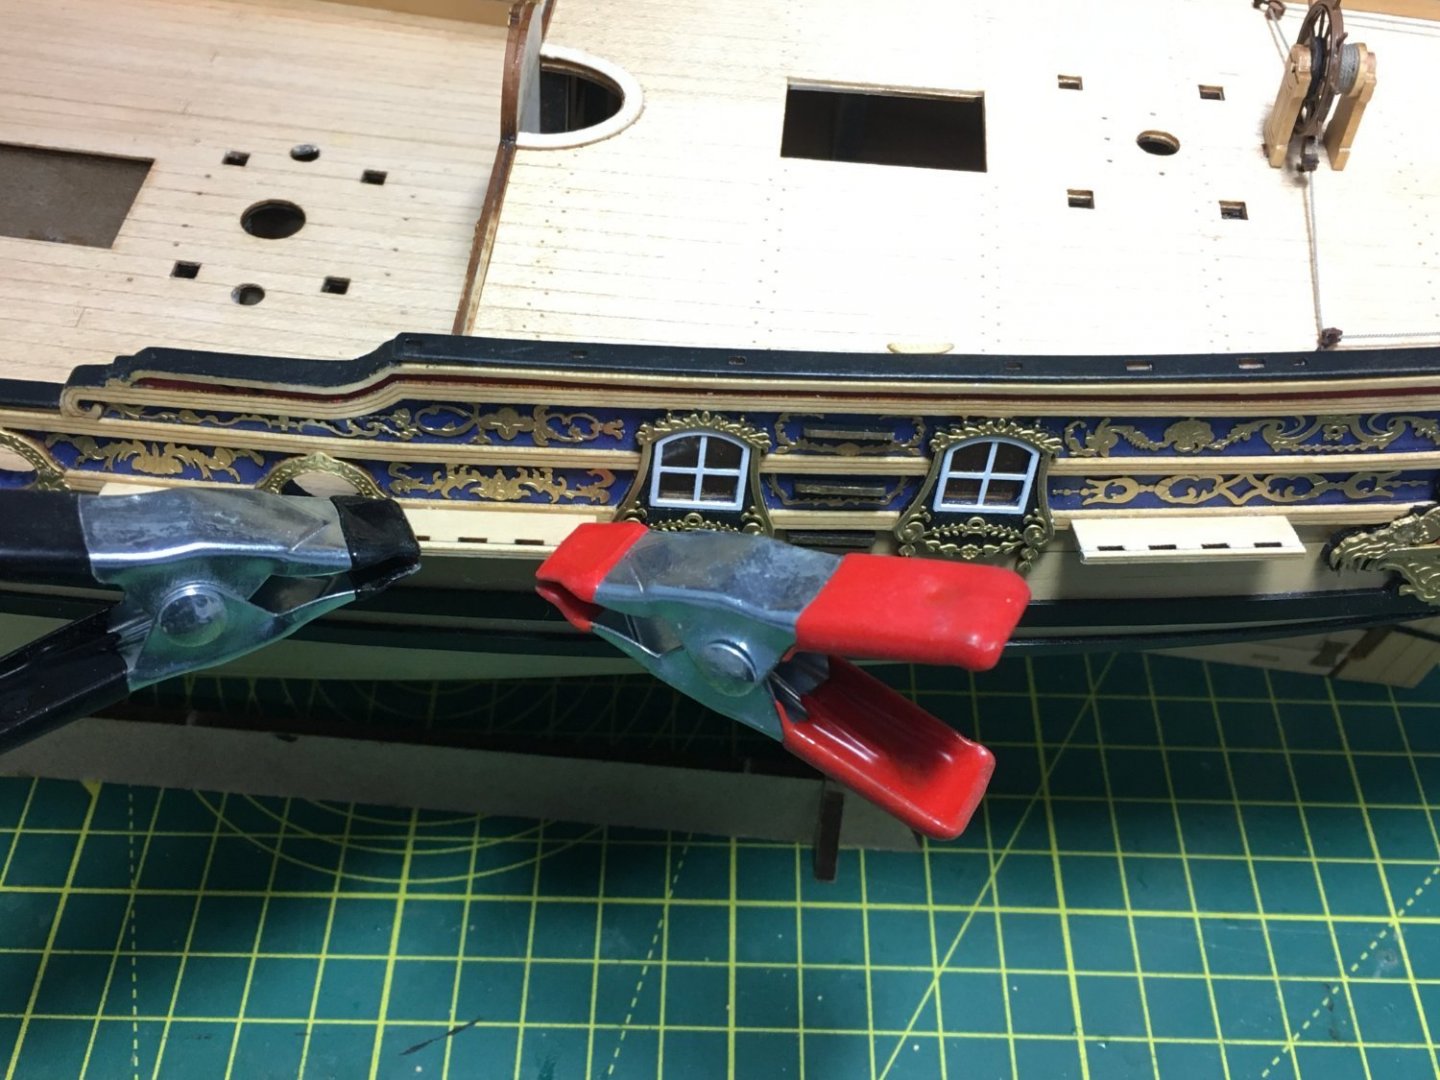
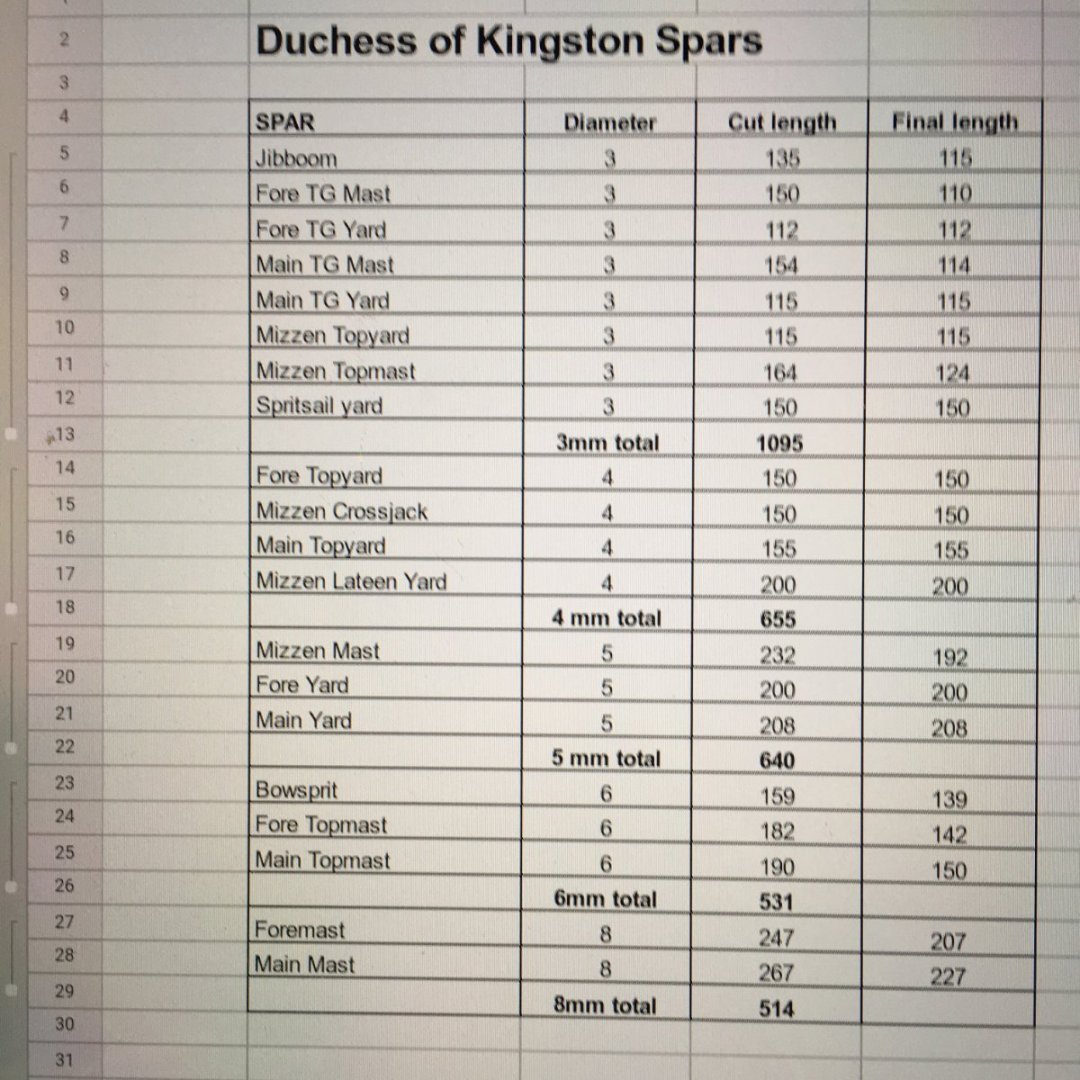
 Channels & preparing the spars Pinning the channels to the hull and fitting the covering strips to the channels was straightforward, following the instructions in the build manual. Gluing the covering strips after the channels were in place proved quite tricky, especially on the fore channels where the strips had to be curved. Clamping worked but was messy and had to be redone in a couple of places. On reflection it would have been easier to fit the strips off the model. I tickled the channels with 400 grit paper to soften the edges and gently round the front corners: A quick final job for the day was to cut timber from castello boxwood sheets for the spars. Nothing wrong with the kit supplied dowel, I just prefer to make my own from boxwood. I like the colour and the ability to work from square to octagonal to round. I was fortunate to find some small offcuts left over from Caroline and Speedy that gave me all the sizes I needed. To keep track I made up a quick spreadsheet checklist - possibly OTT but I've learned from experience how easy it is to go astray on jobs like this. Where necessary I'll add extra for holding in the lathe or milling machine. Here's the sheet and the initial spar blanks waiting to be cut to their final lengths. I'm just glad there are no stuns'l booms! Next job, some more deck furniture interspersed with spar making. Derek


- 345 replies
-
- 14
-

-
- Duchess Of Kingston
- Vanguard Models
- (and 1 more)
-
Hi Dave If you're treating Endeavour as a 6th rate built before 1773 then I would have no reason to doubt Lees. Half the topsail yard may sound small for the topgallant, but it actually looks OK on models of the period. The length of topgallant yards changed in 1773 from half to two thirds of the topsail yard which would make yours about 132mm if Endeavour had been built at this later date. Still well short of Caldercraft though. Personally, I would trust Lees. Derek
-
Hi Rodric I can highly recommend the micro woodturning tools made by Robert Sorby of Sheffield. See here for their use on my current build. The set I have includes a parting tool which works well, although I must confess I often use the method @wefalck describes in the previous post. On small diameters, <5mm, I use a jeweler's piercing saw instead of a fretsaw. Derek
-
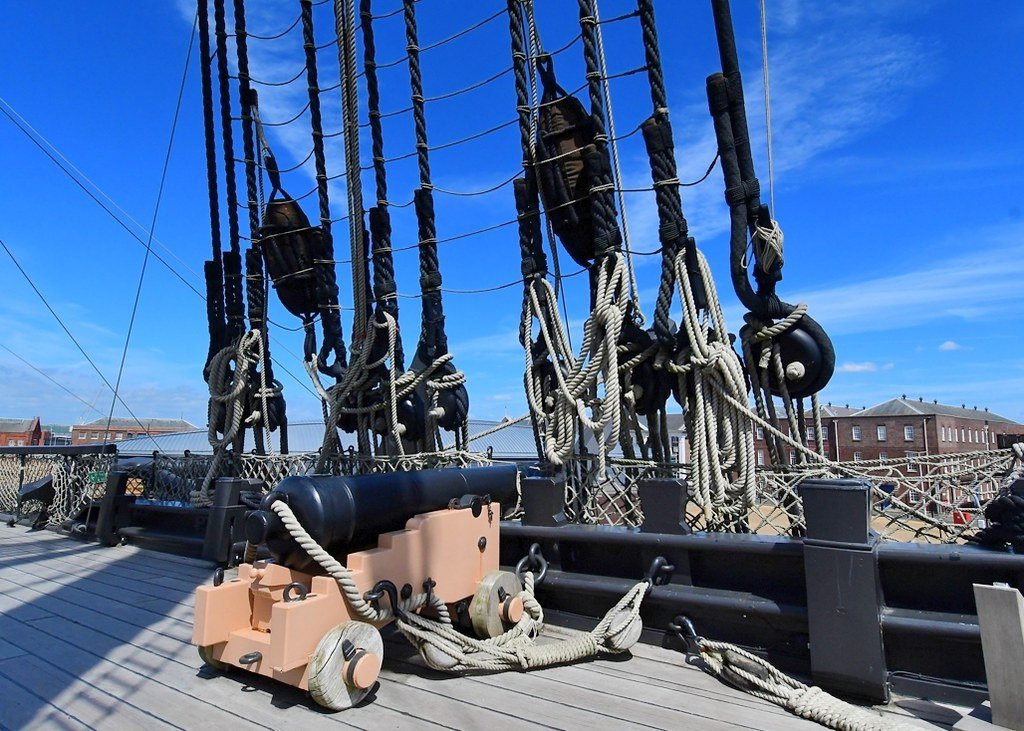
Just to prove I can be as pedantic as the next person, those look like the fore shrouds (judging by the anchor buoys) so should be 11 inches in circumference. Standard deadeyes were 1.5 times the shroud circumference, so 16.5 inches across. Or in layman’s terms, bloody big😂🤣
- 345 replies
-
- 4
-

-
-
- Duchess Of Kingston
- Vanguard Models
- (and 1 more)
-
+1 for the Proxxon - I wouldn't be without it. If you go for it I would recommend you consider the optional 3-jaw chuck. The collets supplied with the lathe are fine, but the chuck makes setting up quicker and easier. You can also get a bed extension, but I've never needed it - as @LyleK1 says the hollow headstock allows you to turn any length.
-
That'll look great when it's gilded - you've matched the etched side perfectly. The aft deck is looking very neat and shipshape. Derek
-
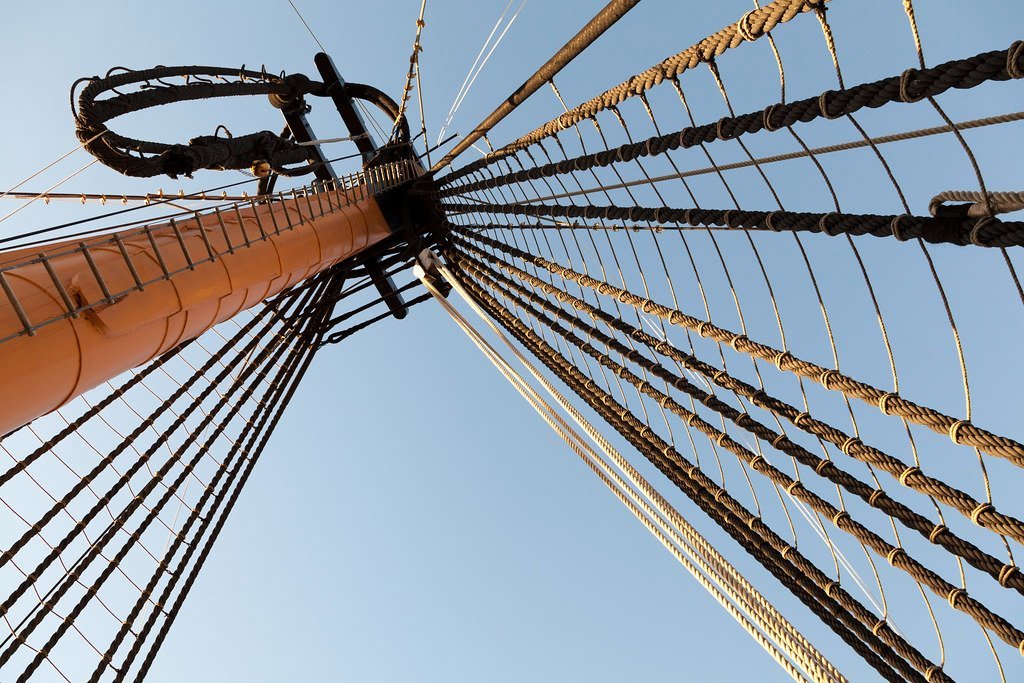
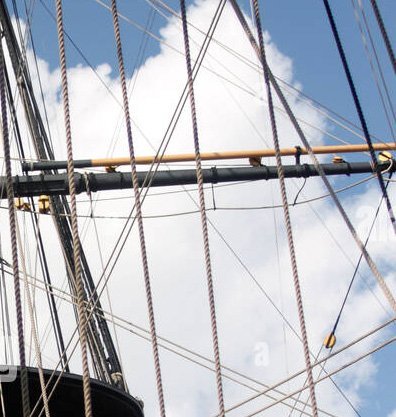
Hi David. The colour of rigging in the days of sail is often a topic for debate!. My understanding is that standing rigging was treated with pine tar, also known as Stockholm tar, which is very dark but not the same as the tar used on roads nowadays. It can look black in ordinary light, until you see it alongside true black. The latter is just too stark for my taste. I googled this shot of Victory's shrouds which shows the effect light can have, with those in shadow looking black and the rest looking more or less brown as the sun hits them at different angles. Notice also how pale the running rigging is. Of course modern ropes aren't necessarily the best guide to those used in Nelson's day, but by all accounts the hemp used in running rigging did bleach to a fairly light shade. Personally I don't like the rigging to look too bright, preferring a light grey such as this rigging on one of Victory's guns: As with much of ship modelling, historical evidence on the colour of rigging can only take us so far, which leaves plenty of scope for exercising personal preference. One final point on colour. In the later years of sail rope was replaced by steel cable for standing rigging. If the square riggers you saw were of this vintage you might have seen steel rigging painted black. On footropes, I agree the ones shown in the manual look a bit too straight. However to provide a secure platform for the sailors they wouldn't have been too loose either, apart from the upper yards that didn't have stirrups. Google helped again with this shot of the footrope on Victory's fore top yard: You'll see there is a gentle curve between each pair of stirrups. I've found the best way to achieve this is by applying dilute PVA to the footrope after it has been fitted and then hanging about three bent pieces of wire (nothing too heavy) over each section of rope while it dries. This imparts a satisfactory catenary curve, and is best achieved before the yard is fitted to it's mast. Hope this helps. Derek
- 345 replies
-
- 7
-
-
- Duchess Of Kingston
- Vanguard Models
- (and 1 more)
-
I'm sure you'd enjoy it. You're doing a fine job on Speedy and the Duchess feels like a natural progression. Similar skill level, but with different points of interest and challenges - no coppering but lots of decoration, for example.
- 345 replies
-
- 4
-
-
- Duchess Of Kingston
- Vanguard Models
- (and 1 more)
-
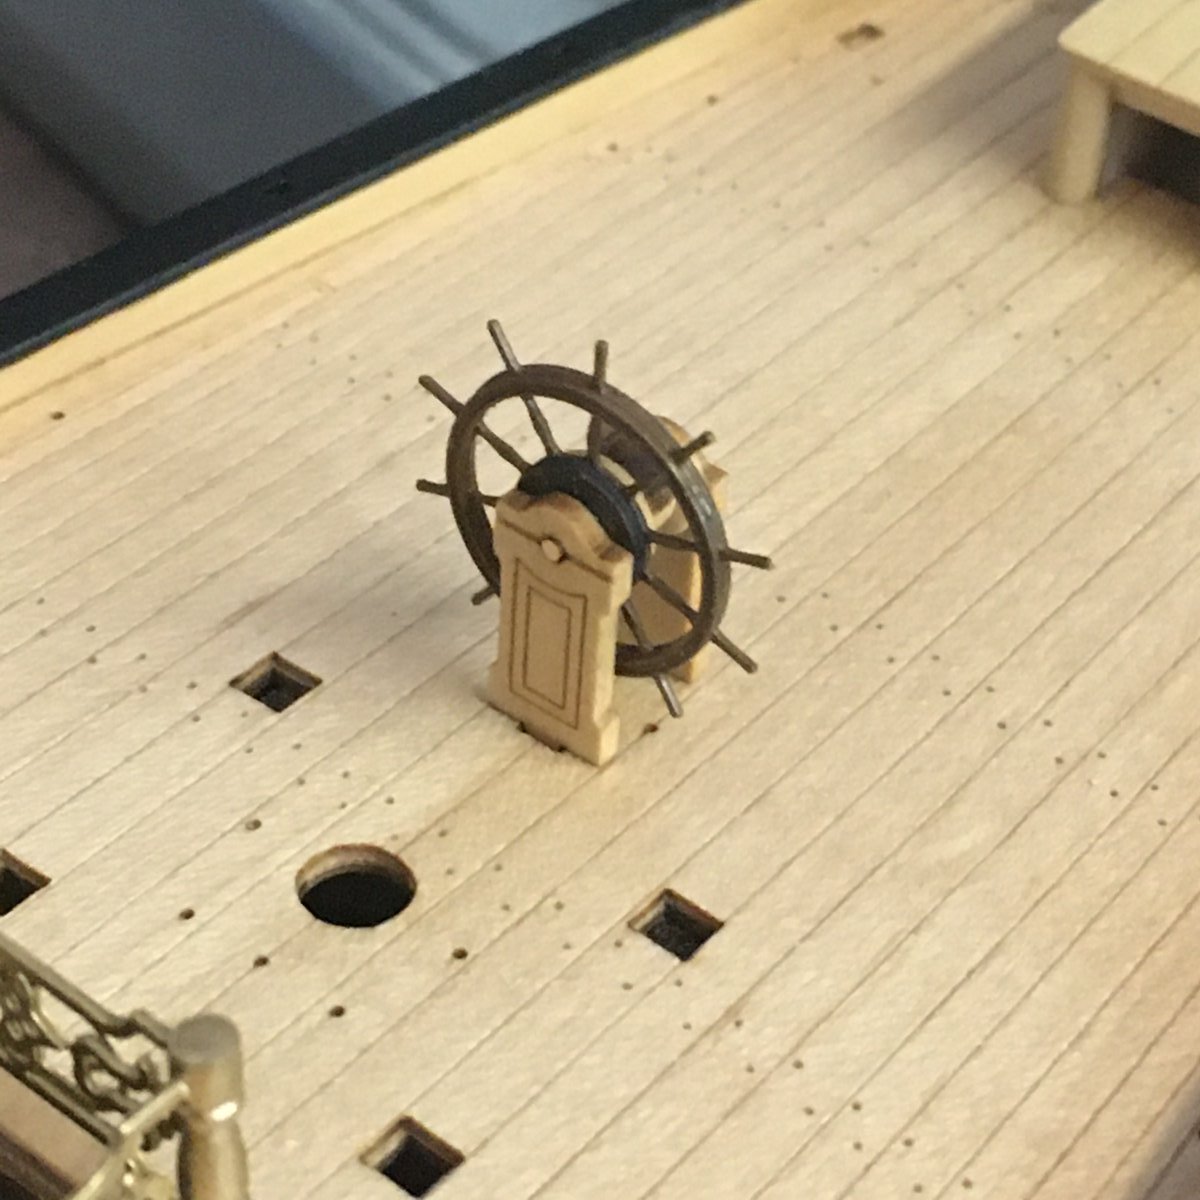
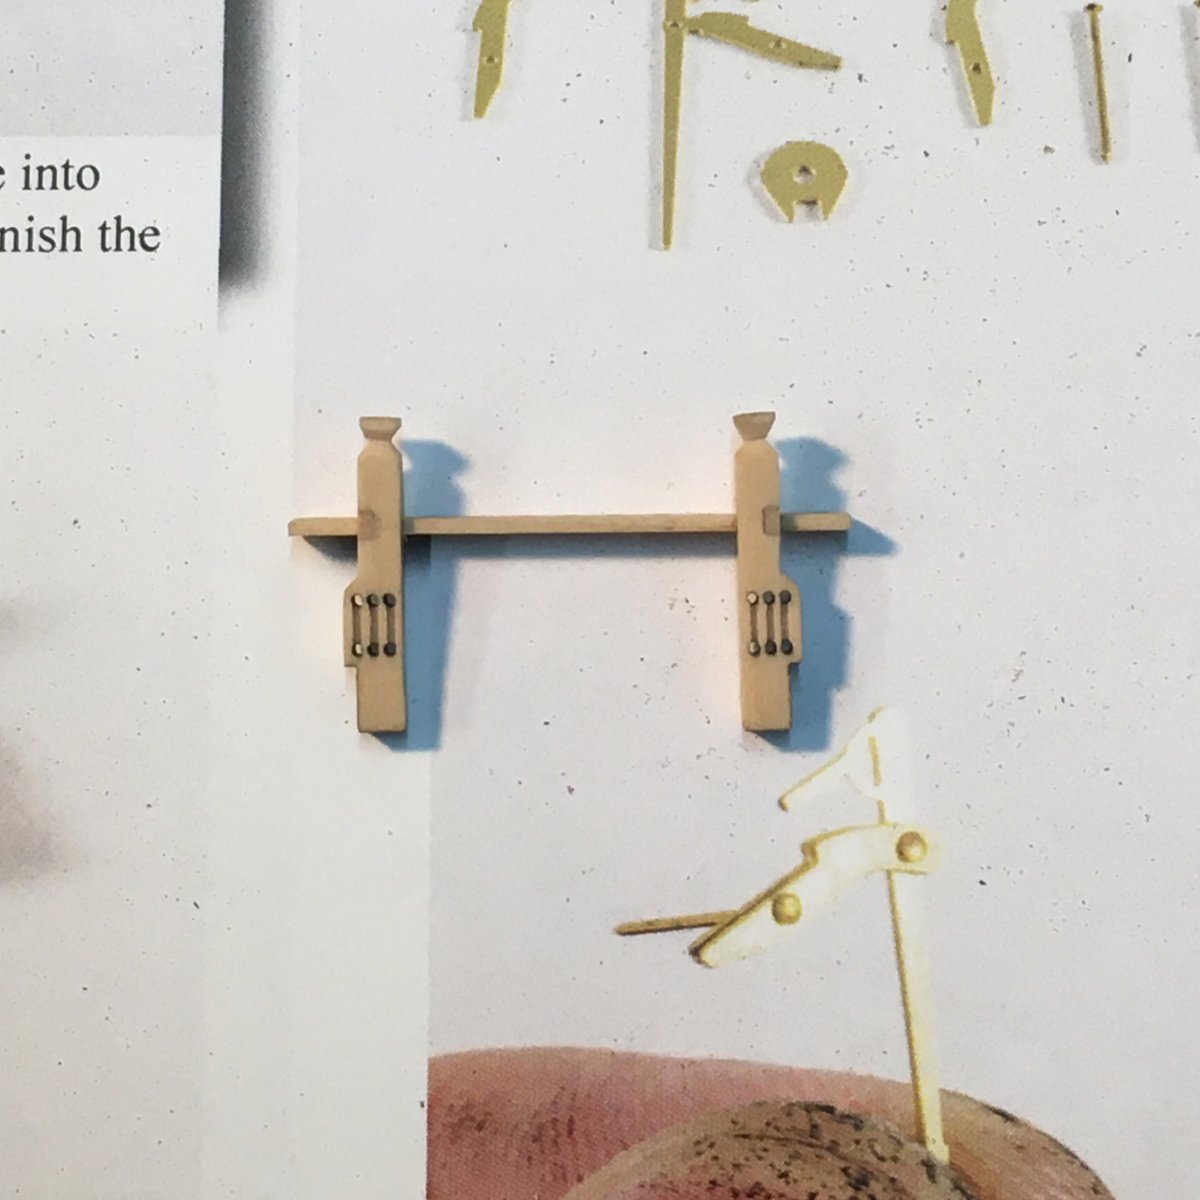
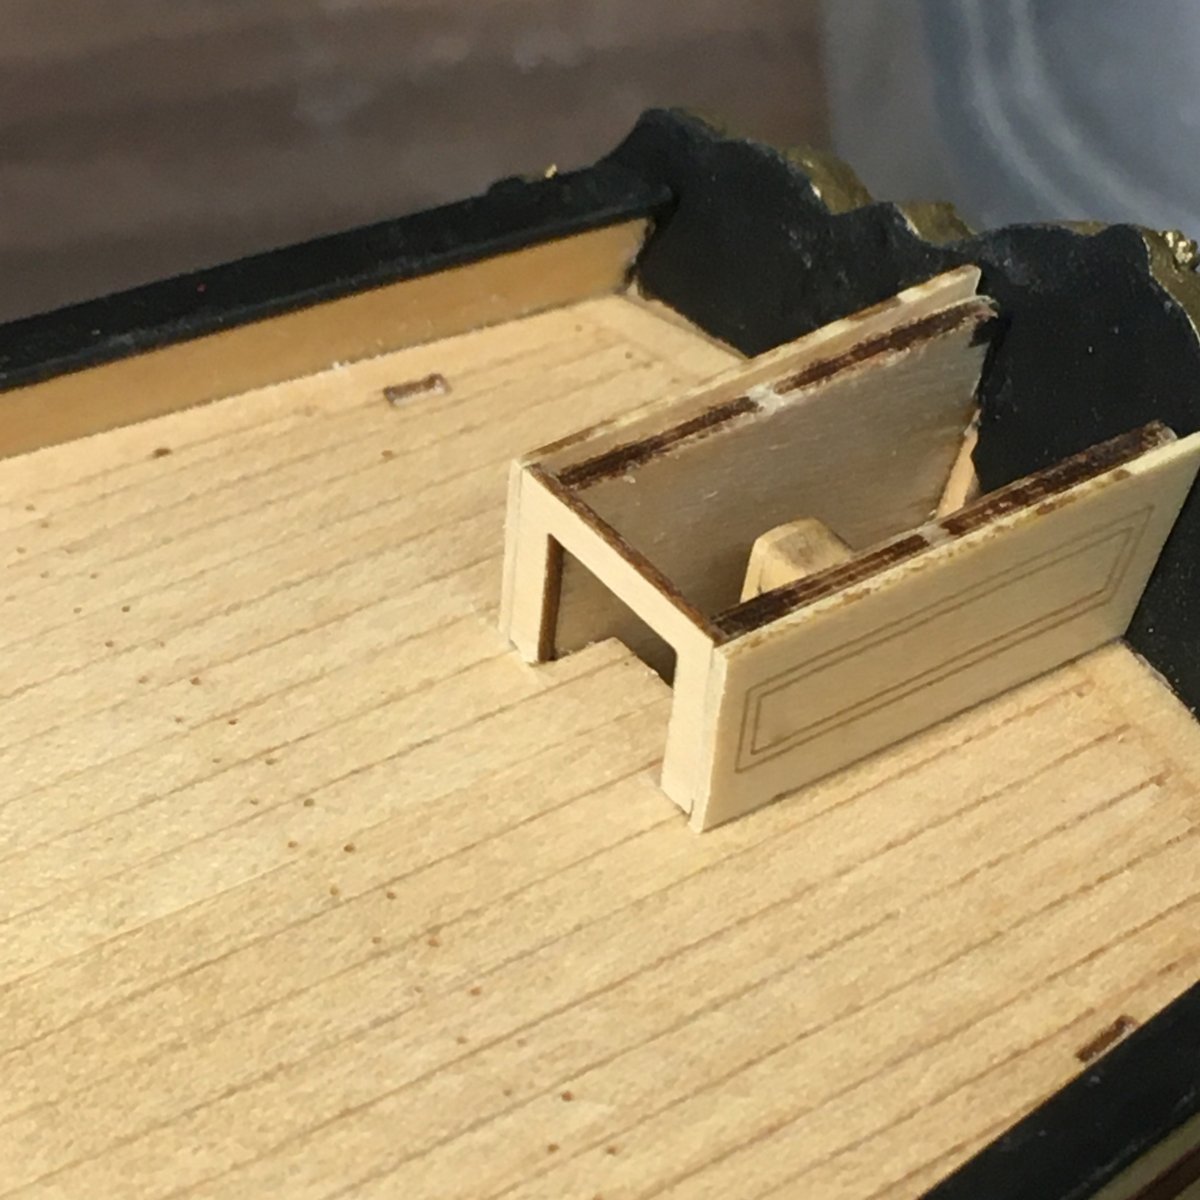
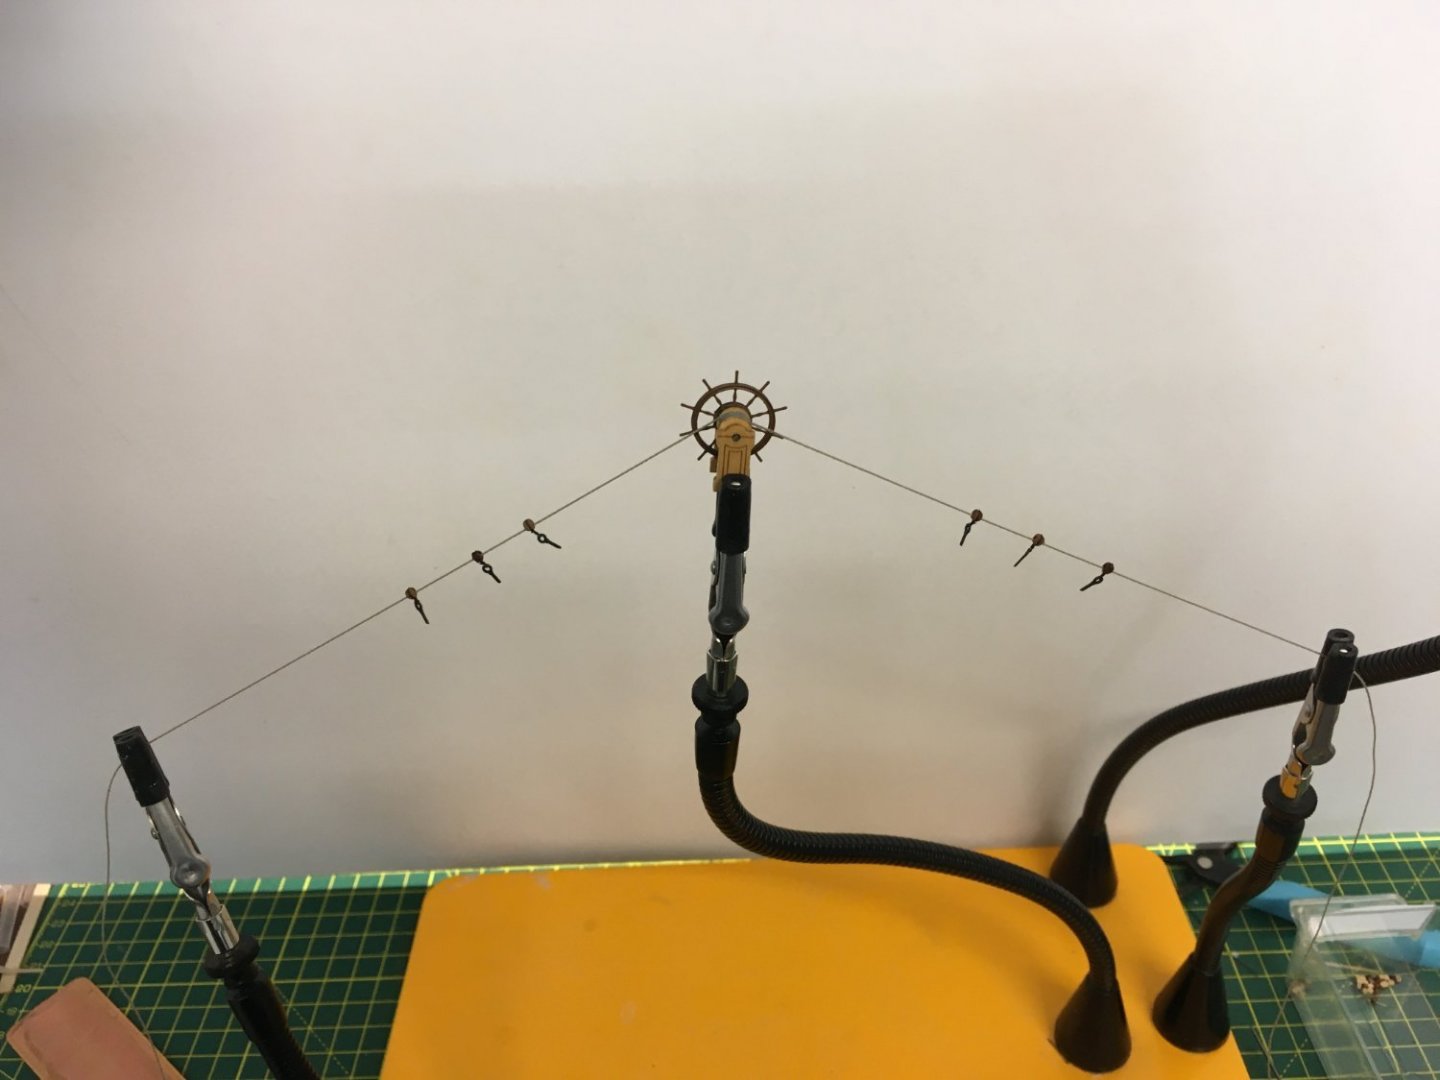
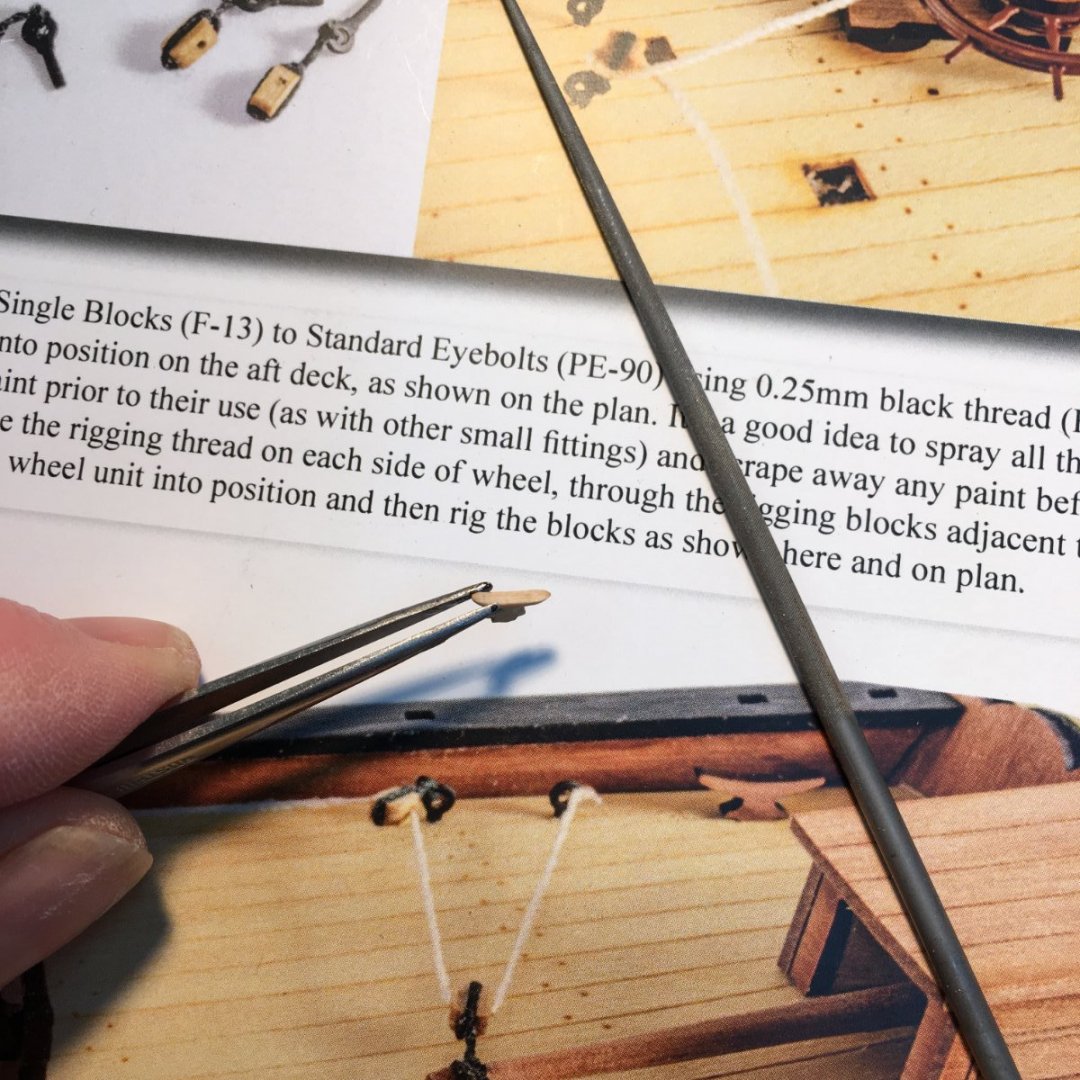
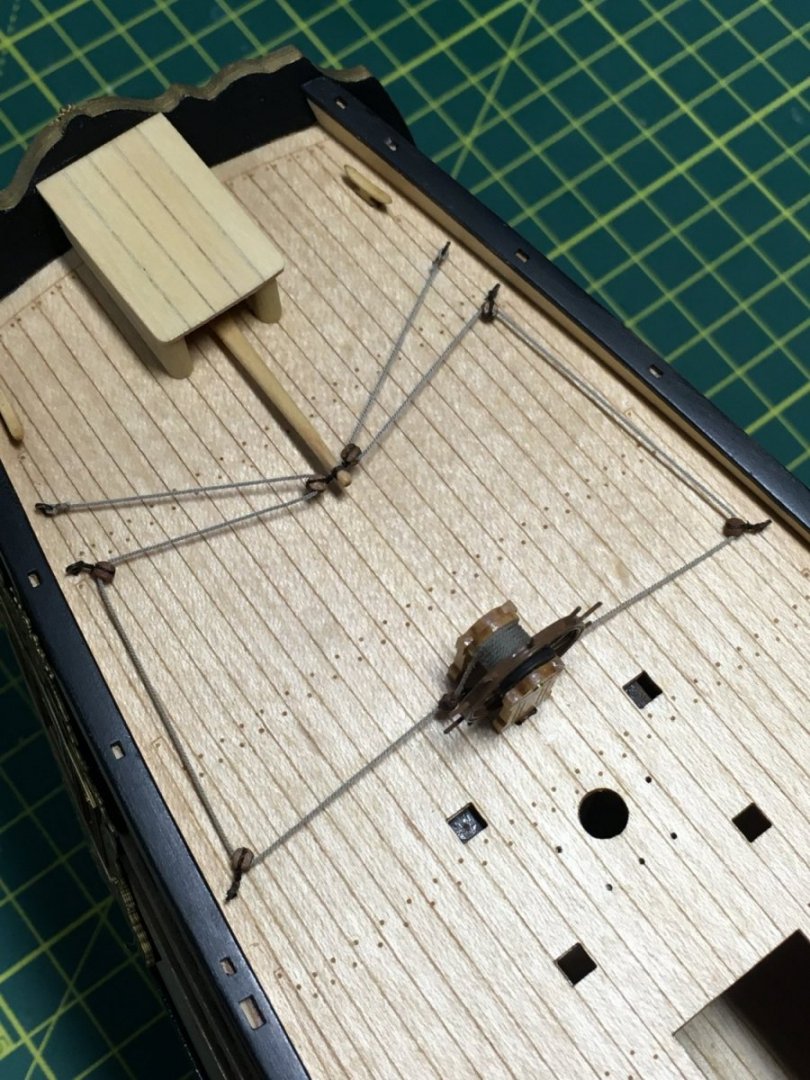
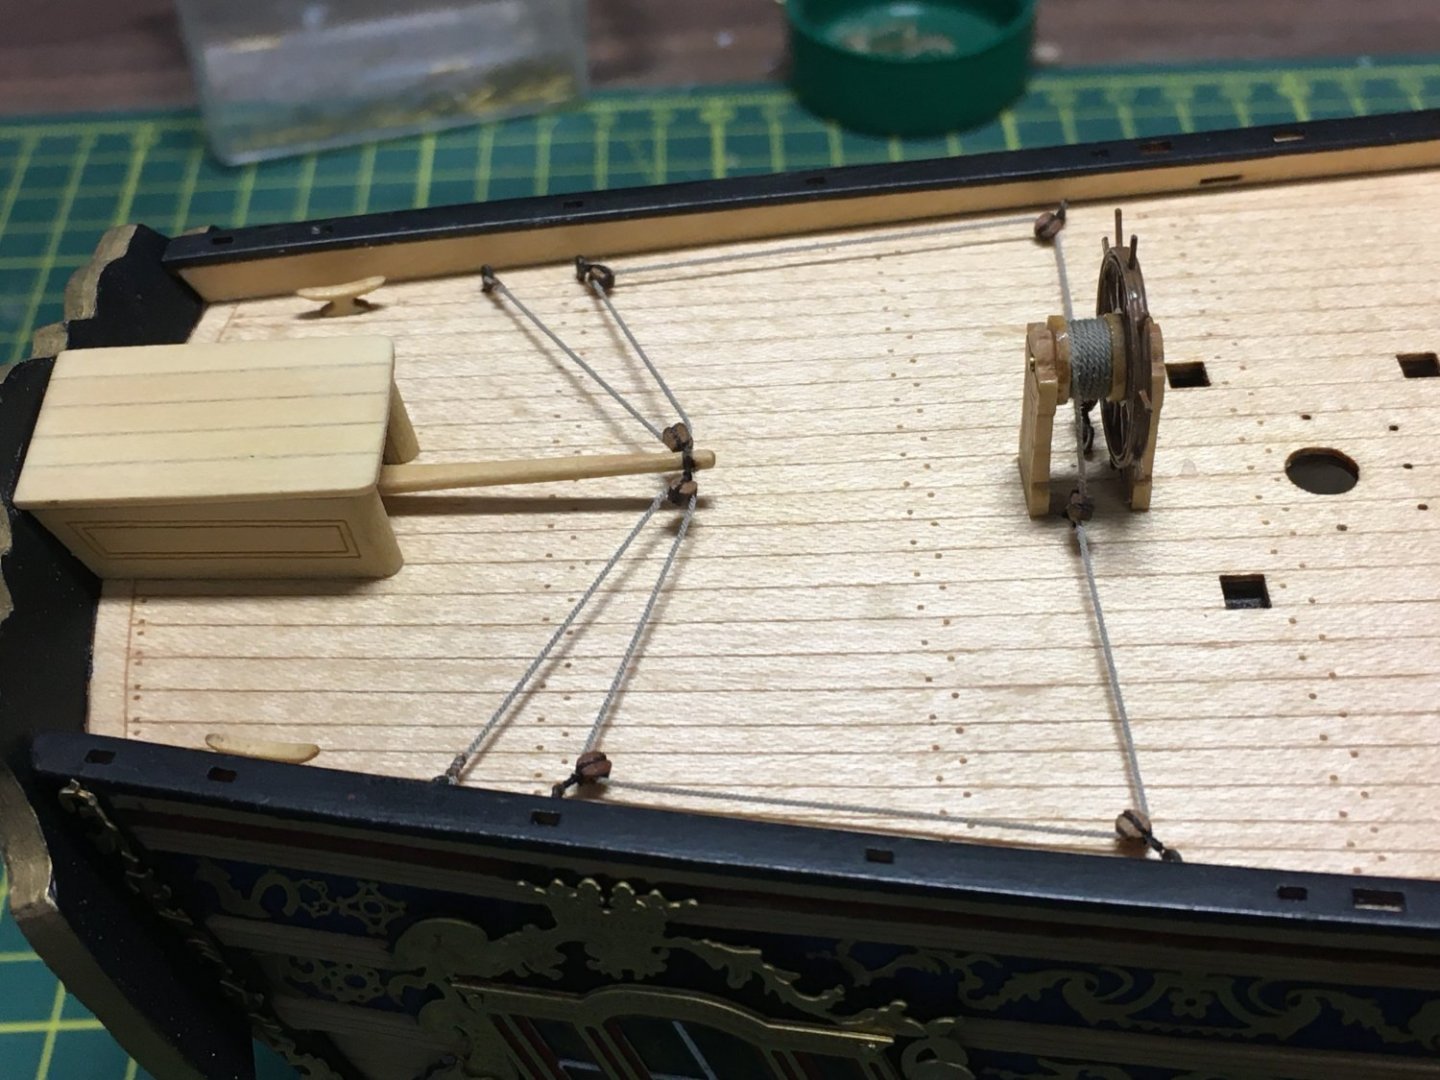
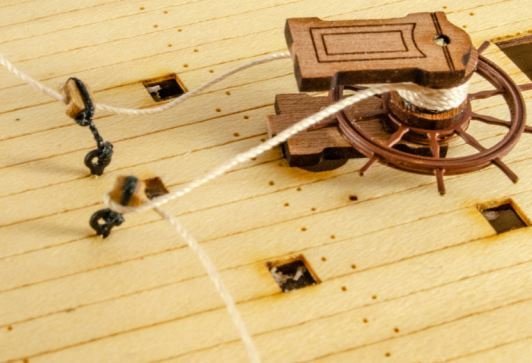
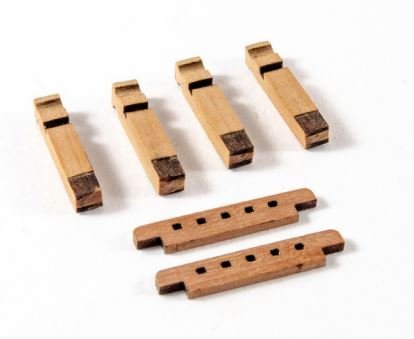
Steering Gear The ship's wheel was a straightforward construction from laser cut wood and photoetch. I primed the PE by blackening the parts before painting them with Admiralty walnut. Before rigging the wheel I prepared and fitted the four cleats required on the aft deck. It's worth spending a few minutes with a fine file to round the cleats into the correct shape: The 2mm pear blocks for the tiller rope are truly tiny. As noted in @desalgu's log they appear considerably smaller than the regular blocks supplied if you don't go for the pearwood option. As I've said before, I would always go for the pear option in Vanguard kits - they rival any other commercial blocks on the market. To strop them I used Gutermann Mara 120 thread, seizing them to ring bolts with 18/0 fly tying thread. I've covered these techniques and materials extensively in my Speedy log . For the tiller rope itself I used the Rope Rocket to make a length of 0.25mm rope using three strands of Mara 120. I figured it would be easier to reeve the rope through the blocks before the ringbolts were fastened to the deck. As per build manual I applied dilute PVA to the rope to hold it round the wheel - here's the quadhands coming in useful whilst the glue was drying: Incidentally, there is a right way to wind the rope on the wheel and a wrong way. On the port side the rope must come off the forward end of the wheel, and off the aft end to starboard. This is because the holes for the ringbolts immediately below the wheel are offset so that the port block is further forward, ensuring that the rope is led straight down to the blocks on either side. This might be clearer in a picture from the manual: Needless to say I got it wrong, but fortunately spotted the problem before applying glue. Once I'd got that right glueing the wheel and the ringbolts in place was straightforward, finishing off with seizing the tiller rope to the aftmost ringbolt on each side: In this picture I've also fitted the roof to the little tiller housing, rounding the front corners to better match the half round pillars on the front face. Btw, the tiller rope looks a lot darker in this picture than in real life. I might look at the channels next. Thanks for looking in. Derek

- 345 replies
-
- 18
-
-
- Duchess Of Kingston
- Vanguard Models
- (and 1 more)
-
That wheel's come up really well. At the risk of trying to teach Granny to suck eggs, be careful not to cut the brass rod too flush to the uprights otherwise you won't be able to smooth off the pinched ends. I cut mine about 1mm from the uprights and used a fine file to tidy up the ends: Derek

-
Part of the fun for me is seeing how I can enhance the model. I've said it before, but with other manufacturers I've had to depart from the basic model in order to compensate for poor materials, poor design and historical inaccuracies. That is not the case with Vanguard. Well done on the waterways, by the way. I wouldn't be without my mill now - everyone I know who has the mini-mill swears by it (including Professor Glenn😄). Power tools aren't essential to make great models but they allow people like me with only average skills to achieve much more than we could with hand tools. Derek
- 345 replies
-
- 3
-
-
- Duchess Of Kingston
- Vanguard Models
- (and 1 more)
-
In my defence guys, I couldn't find a supplier for small amounts of these more unusual shades. You had to buy 3,000 or 5,000 metres or nothing (or even 10,000 for some sizes). However I've spent a lot of time experimenting with rope making over the years and in that time I tried dozens of different threads and dyes. It'll be a relief from now on to be able to go with just one type of thread and no dyeing. Although the latter was satisfying when I got it right, it was always a struggle to ensure I got the dye recipe consistently right throughout a build. Anyone looking closely at one of my models will probably spot some subtle differences - arguably more realistic as real ships would have had a variety of shades as ropes lightened with age, but I think I'd prefer consistency in a model. Syren makes great rope but distance and cost make that a less attractive option for me. I like being able to produce exactly what I want, when I want. Derek
- 345 replies
-
- 3
-
-
- Duchess Of Kingston
- Vanguard Models
- (and 1 more)
-
Yes Will, it’s #854.
-
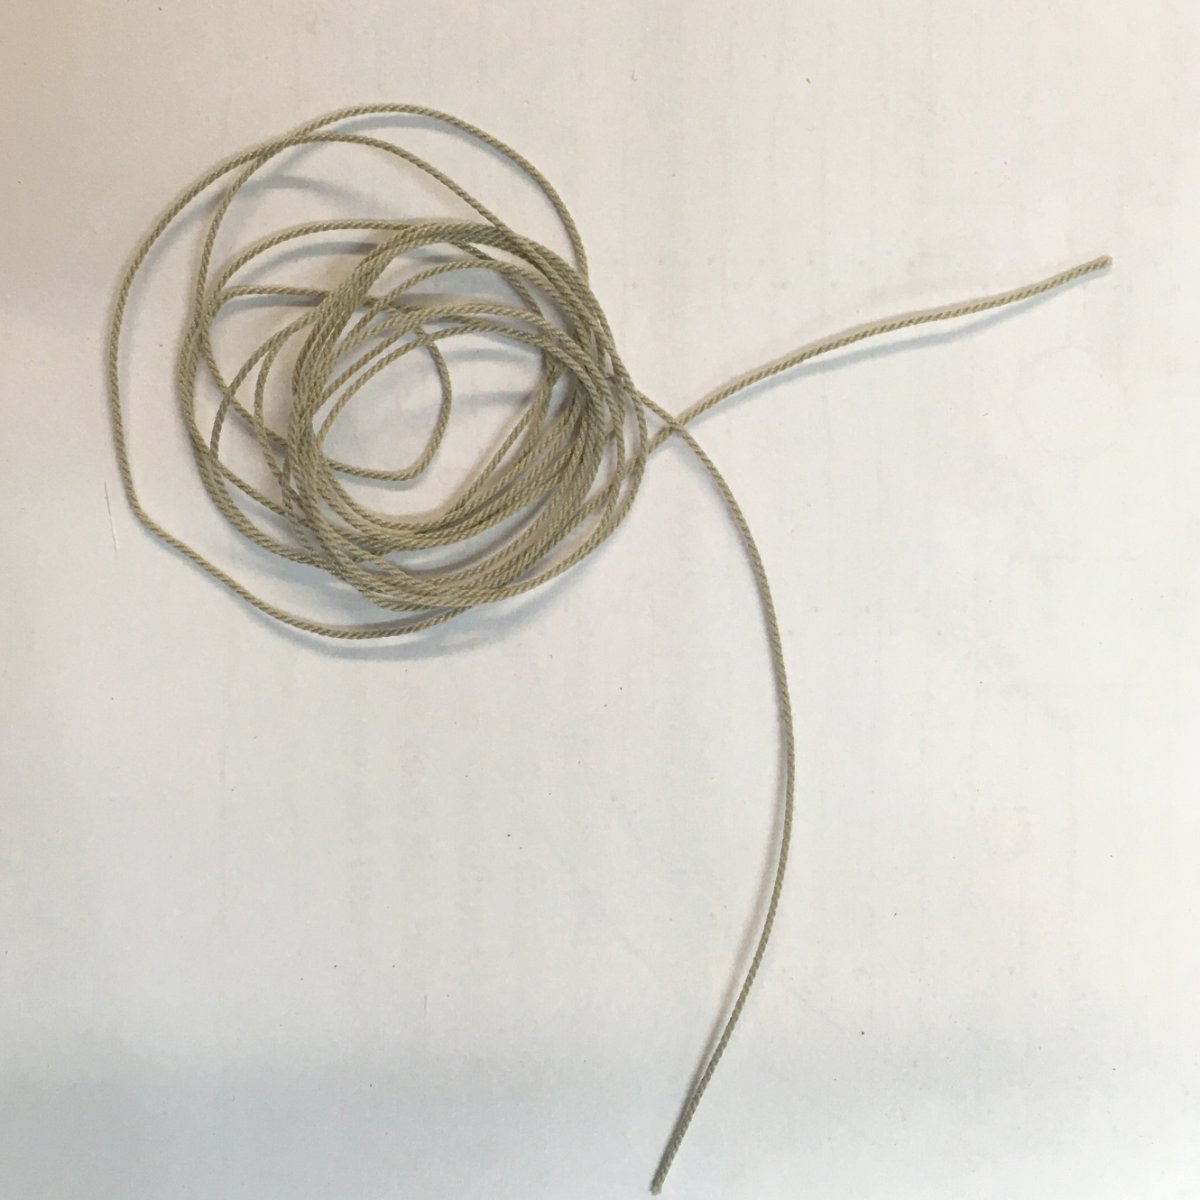
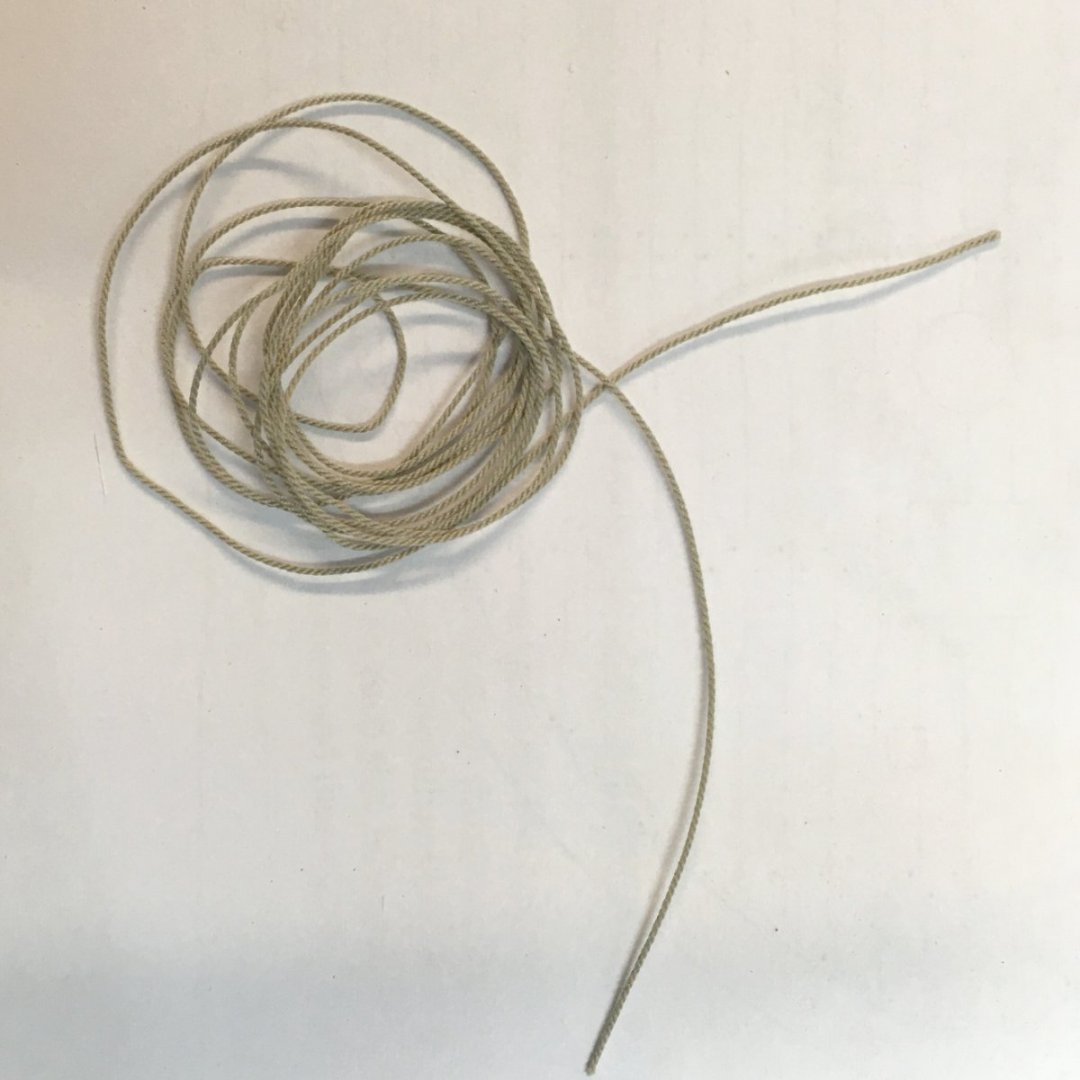
I've been using my Syren Rope Rocket for several years now, and have enjoyed making my own rope from Cordonnet thread. Having read Chuck's description of Gutermann Mara I decided to give it a go. Here's my first attempt, using three strands of Mara 70 to produce 0.5mm rope. Using the oven for anything other than cooking is a capital offence in my house, so I used a hot air gun (the sort crafters use, not paint strippers!) to prevent unravelling and it seems to have worked. I've now tried different sizes of standing and running rigging and I'm pleased with the results - and very pleased I can leave behind the messy business of dyeing. I've now ordered a supply of #696 for standing and #854 for running rigging. Thanks Chuck, for starting such a helpful thread. Derek

-
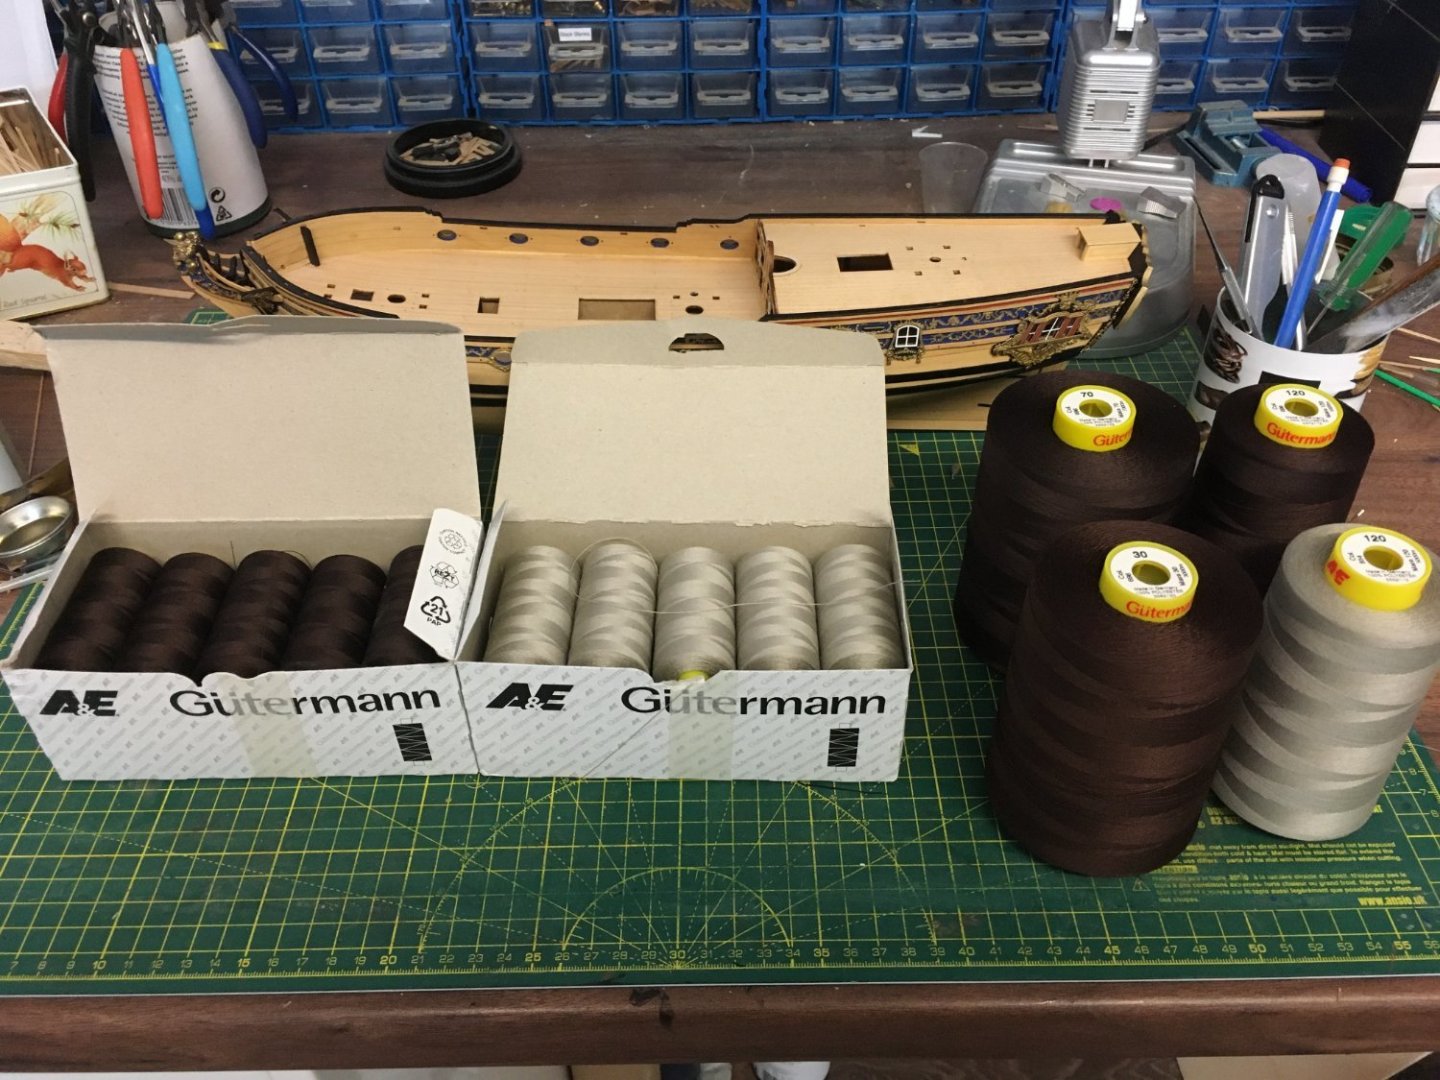
Moving to a new rope Although Vanguard supplies good quality rigging line I still prefer to make my own on my Syren Rope Rocket. I think it gives the most realistic results, and gives me more freedom over producing my own colours and sizes of rope. In particular I'm not a fan of pure black standing rigging, much preferring shades of dark brown. Until now I've used Cordonnet cotton thread, dyeing the resulting rope with a variety of acrylic inks. For some time I've considered moving to Gutermann Mara polyester thread, having read Chuck Passaro's persuasive account. I particularly liked the fact that Mara comes in a huge range of shades, some of which make very acceptable standing and running rigging without the need for dyeing. A potential downside was the need to bake the rope in an oven to 'set' it and prevent the ends from unravelling. However I read in an early post from Chuck that he'd also used a hairdryer with good results. I ordered a small quantity to try Mara for myself and was pleased with the results. Here's my first attempt at running rigging - three strands of Mara 70 producing 0.5mm rope. Possibly needs to be laid up a little tighter, but not bad for a first attempt. Incidentally, I used a hot air gun (the sort crafters use, not paint strippers!) for just a few seconds on the finished rope and that was enough to stop any tendency for the rope to unravel: I've decided to switch to Mara and have just received my order from William Gee, a long-established UK haberdasher: These thousands of metres will probably be enough to last several lifetimes! I've bought sizes from 120 (fine) to 30 (heavier) and in two shades, #696 for standing, and #854 for running rigging. I haven't measured the diameters of these different threads, but #120 looks as fine as the nominal 0.1mm thread in the kit. I've tried using it to strop 2mm blocks and it looks good. On to the tiller next. Derek
- 345 replies
-
- 11
-
-

-
- Duchess Of Kingston
- Vanguard Models
- (and 1 more)
-
Thanks for posting this - I'd not seen the Sea of Words book before. I've just found a used second edition on World of Books for £3.99 and free p&p so that'll probably prompt me to read the O'Brian books again. I got the Harper Collins editions in the nineties, and tend to read through the whole series about once a decade. They never go stale. Derek
-
I thought it stood for Back Of Boat (Looking great, whatever Bob stands for)
- 840 replies
-
- 10
-
-
-
- winchelsea
- Syren Ship Model Company
- (and 1 more)
-
I've just been looking at those blocks too. They're definitely smaller than the ones shown in the manual, which are the ones that come with the basic kit and look closer to 3mm to me. Put a 2mm pear block next to a ring bolt and they look really tiny, unlike the ones in the manual. Although they look tiny, I think the pear blocks are the right size. I measured them at 2.15mm which equates to about 5.5" full scale, which is the right size for a block with 0.25mm/(5/8") rope. If you look at a model such as @Rustyj's Duchess that uses the pear blocks I think it looks better than versions using basic blocks. Personally, I would always go for the pear option in Vanguard kits - they are the most realistic kit blocks I've seen. I agree that 0.1mm thread is better to seize the pear blocks, and you'll no doubt need to drill out the holes to accommodate the tiller rope. Derek
-
Those hatches look superb, as does your deck planking. Derek
- 857 replies
-
- 4
-
-

-
- Sphinx
- Vanguard Models
- (and 1 more)
-
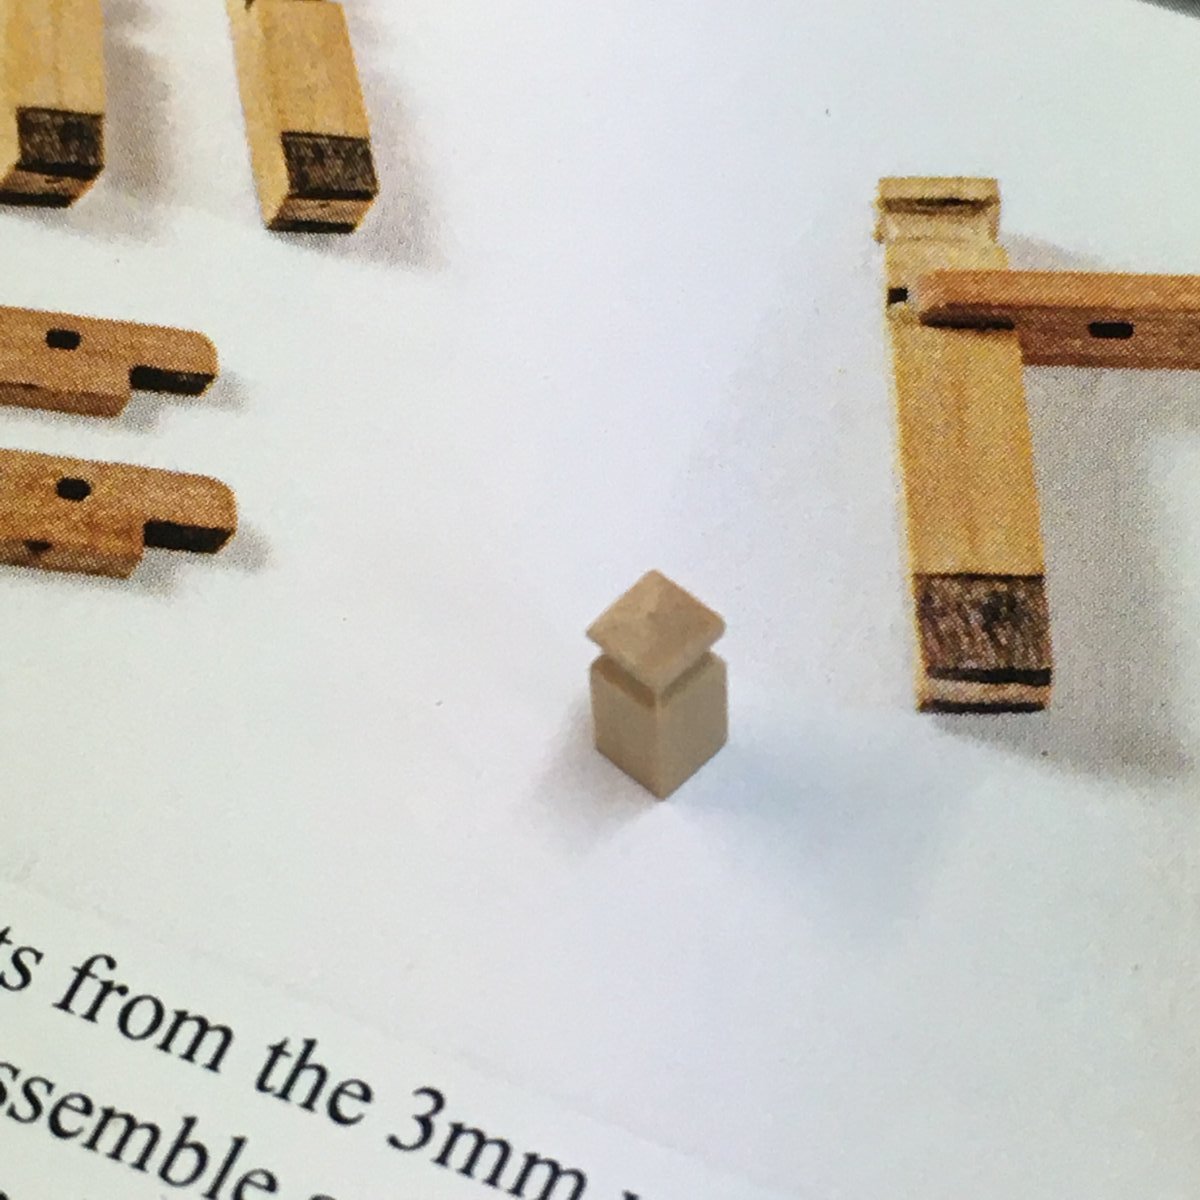
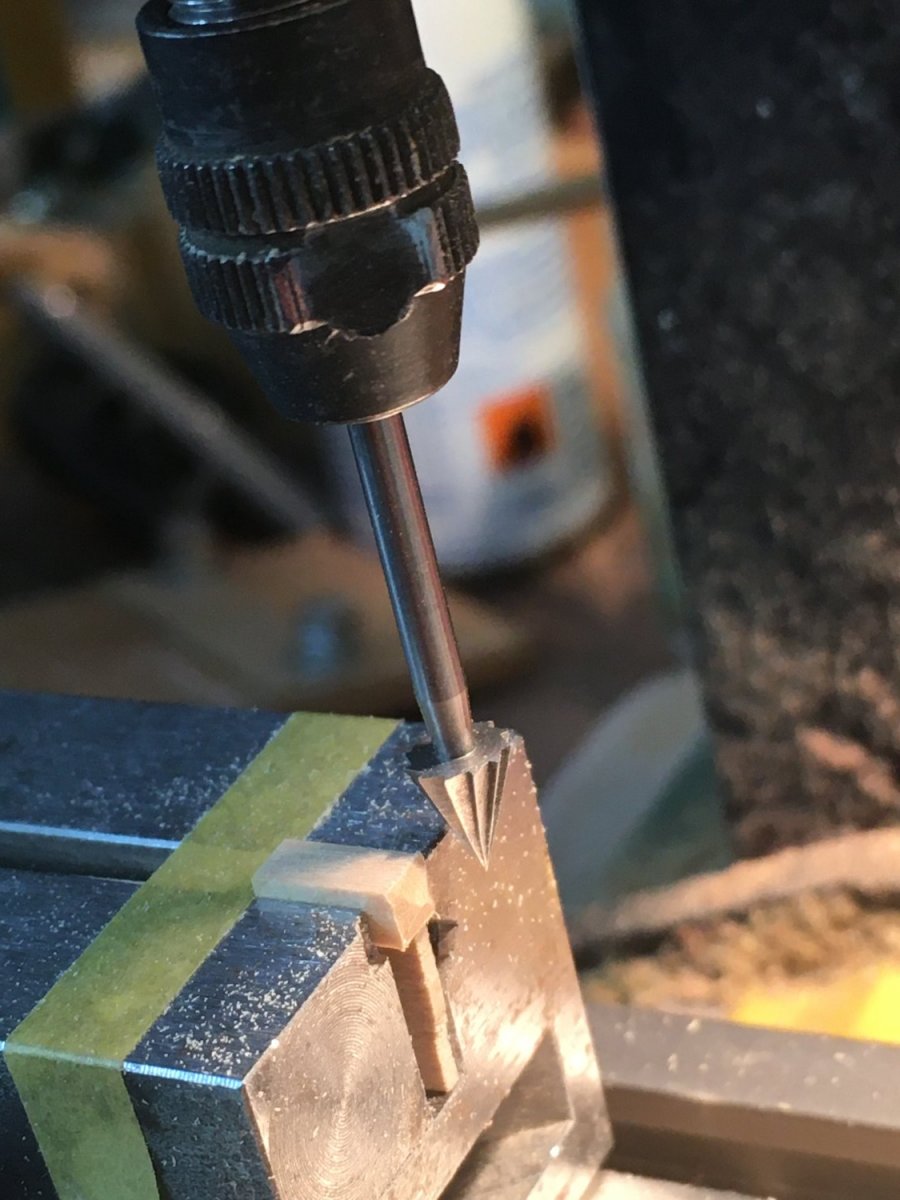
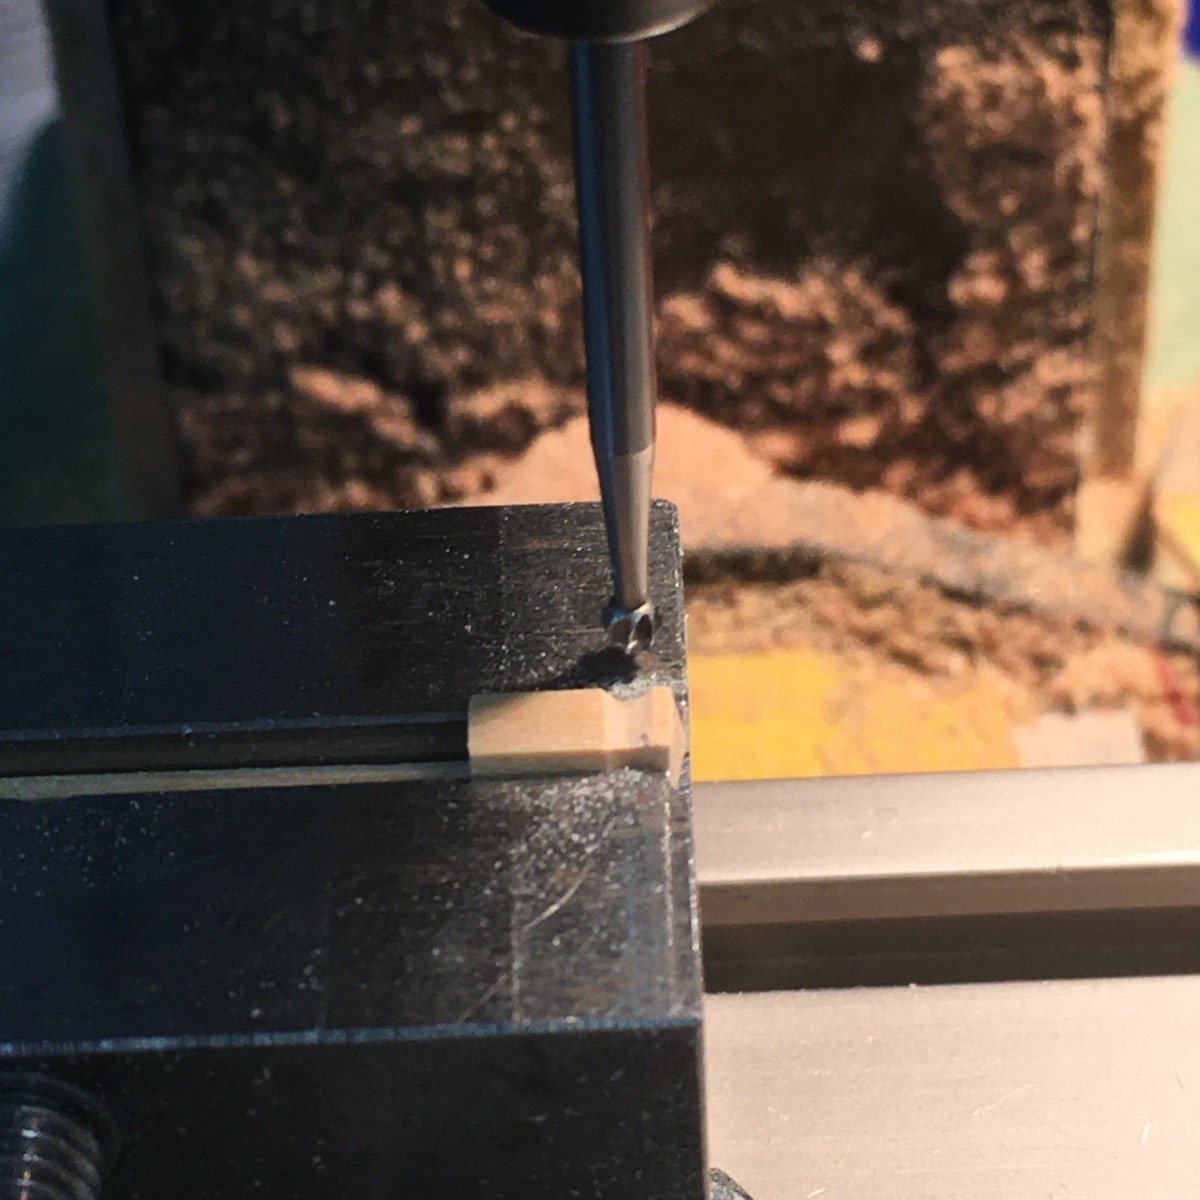
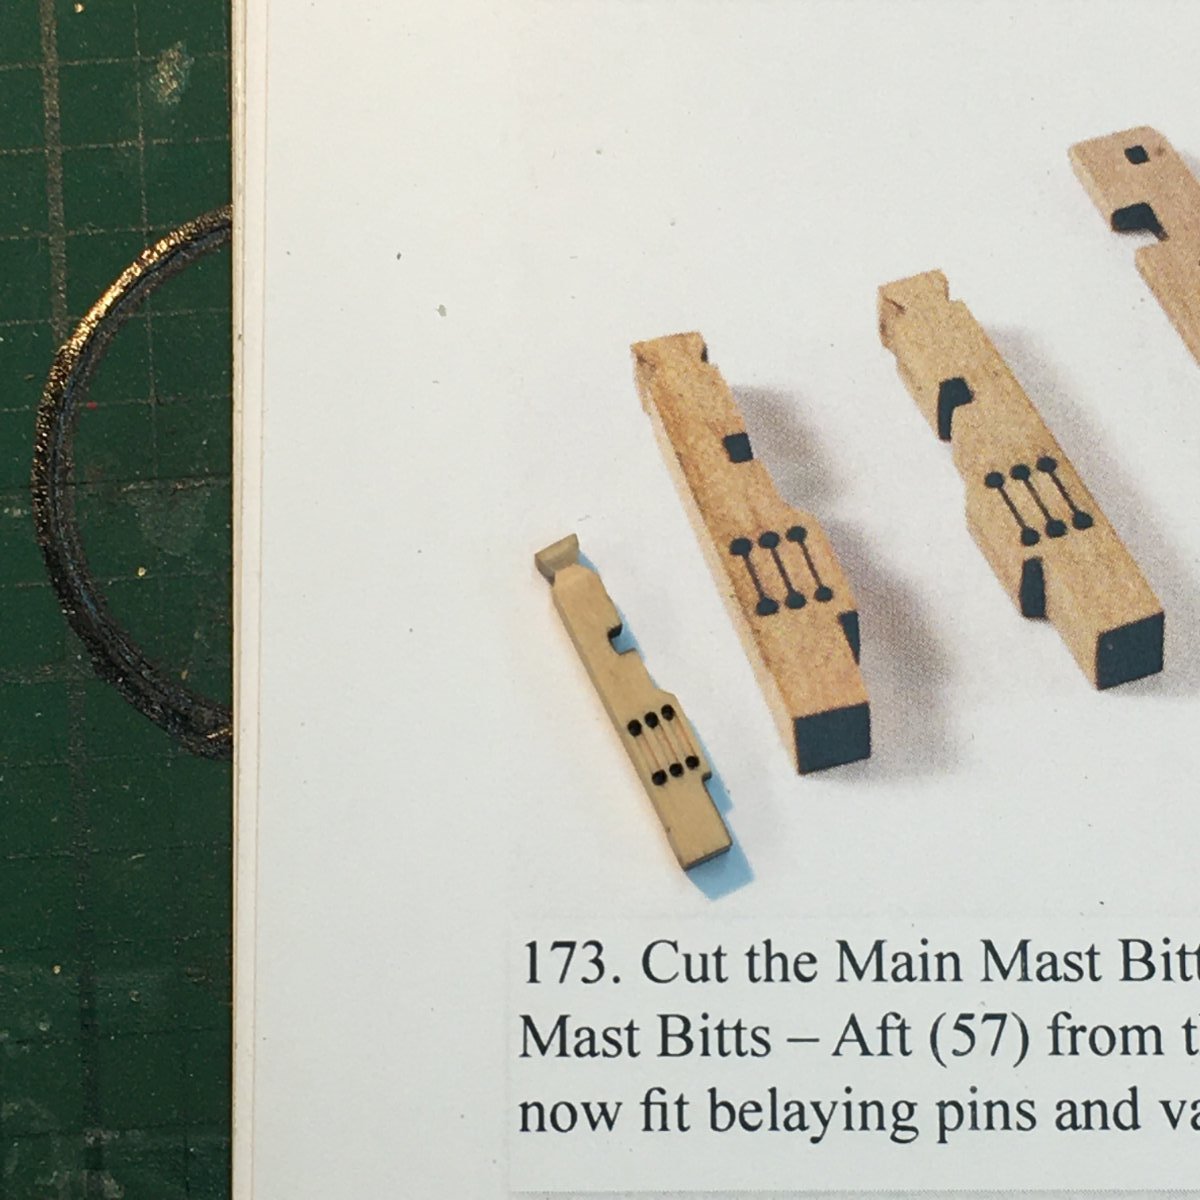
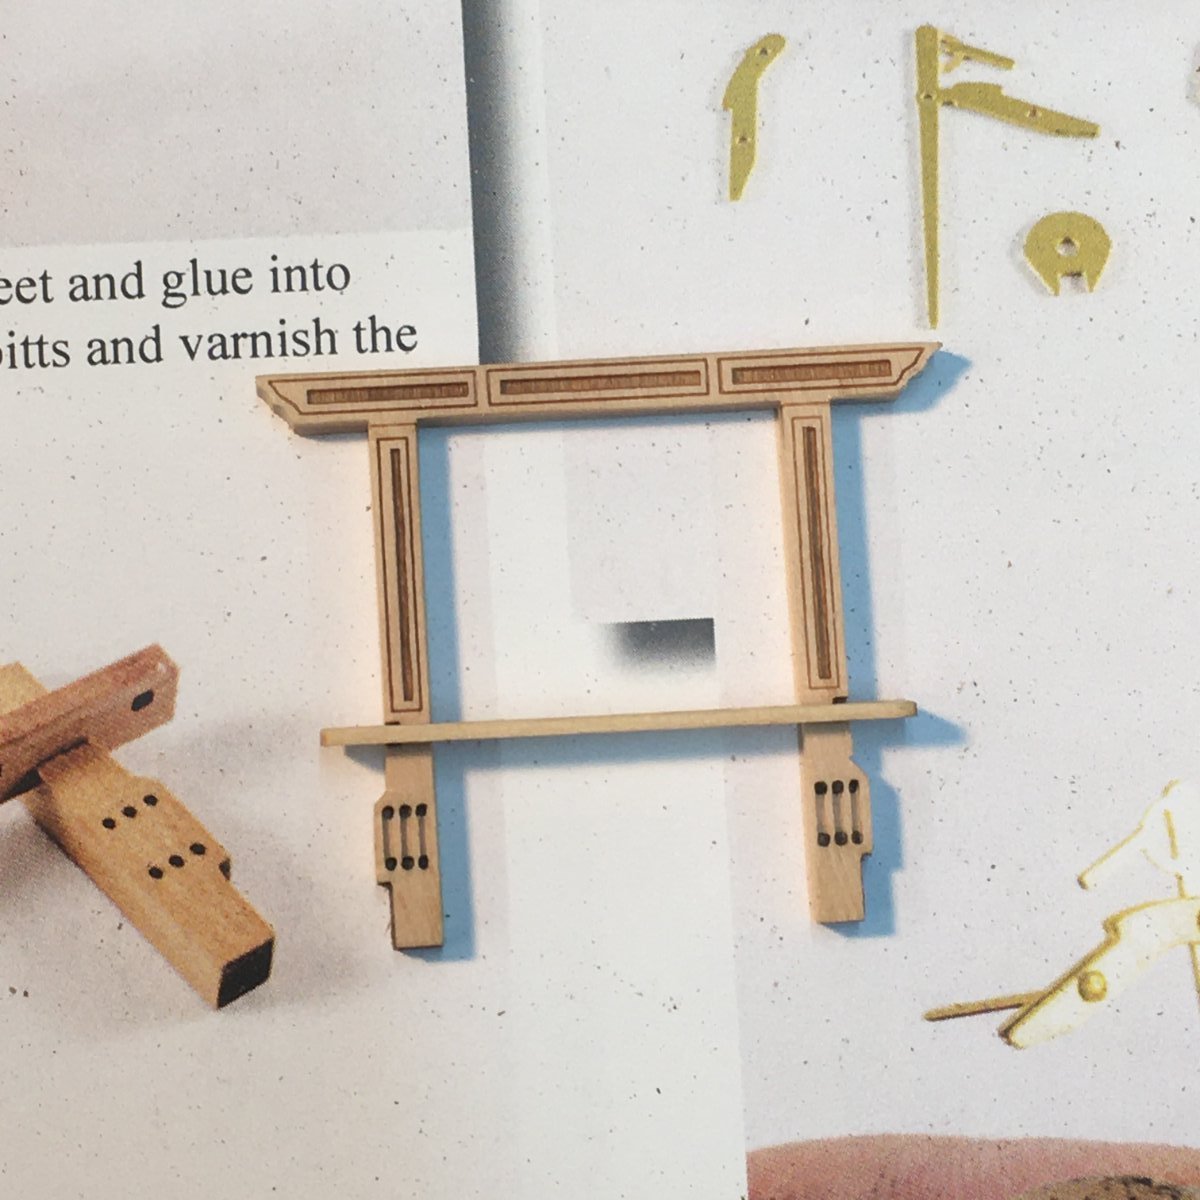
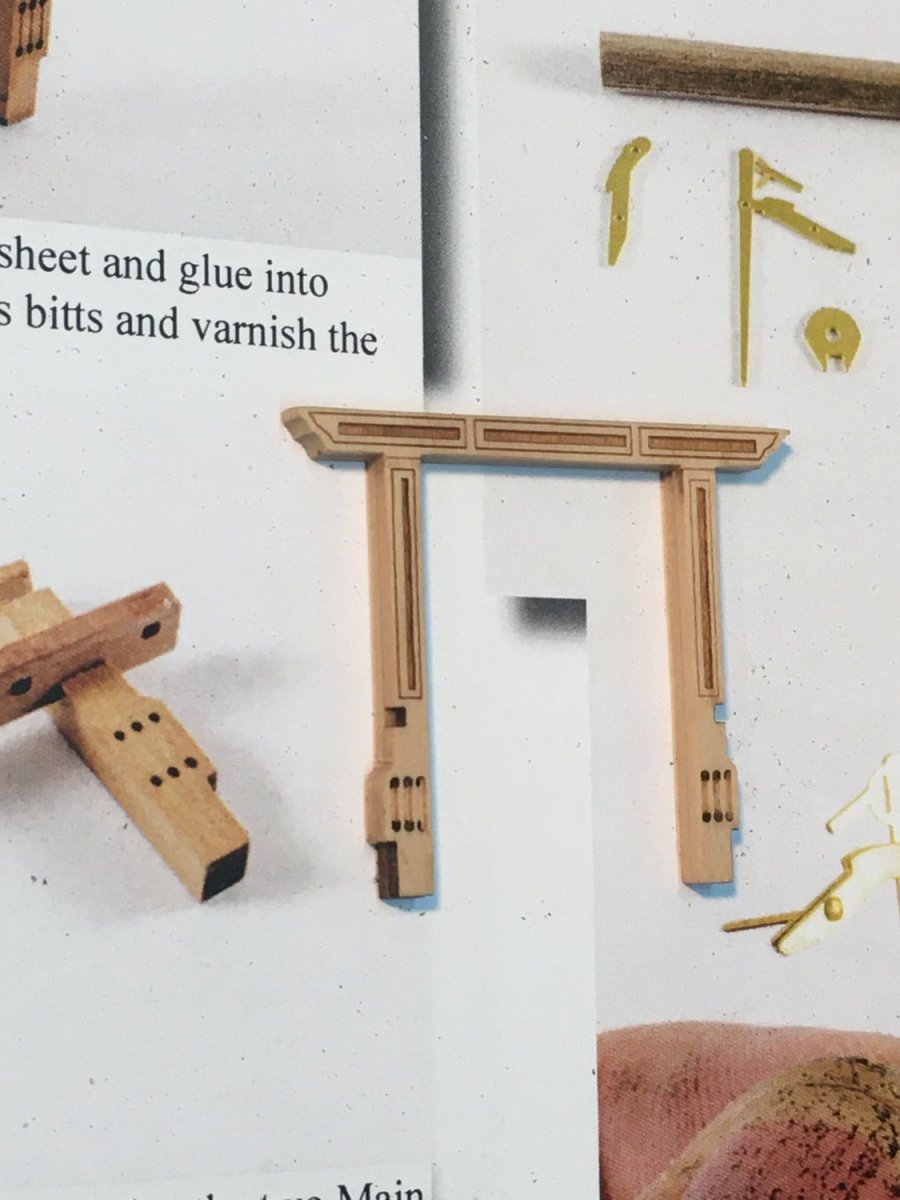
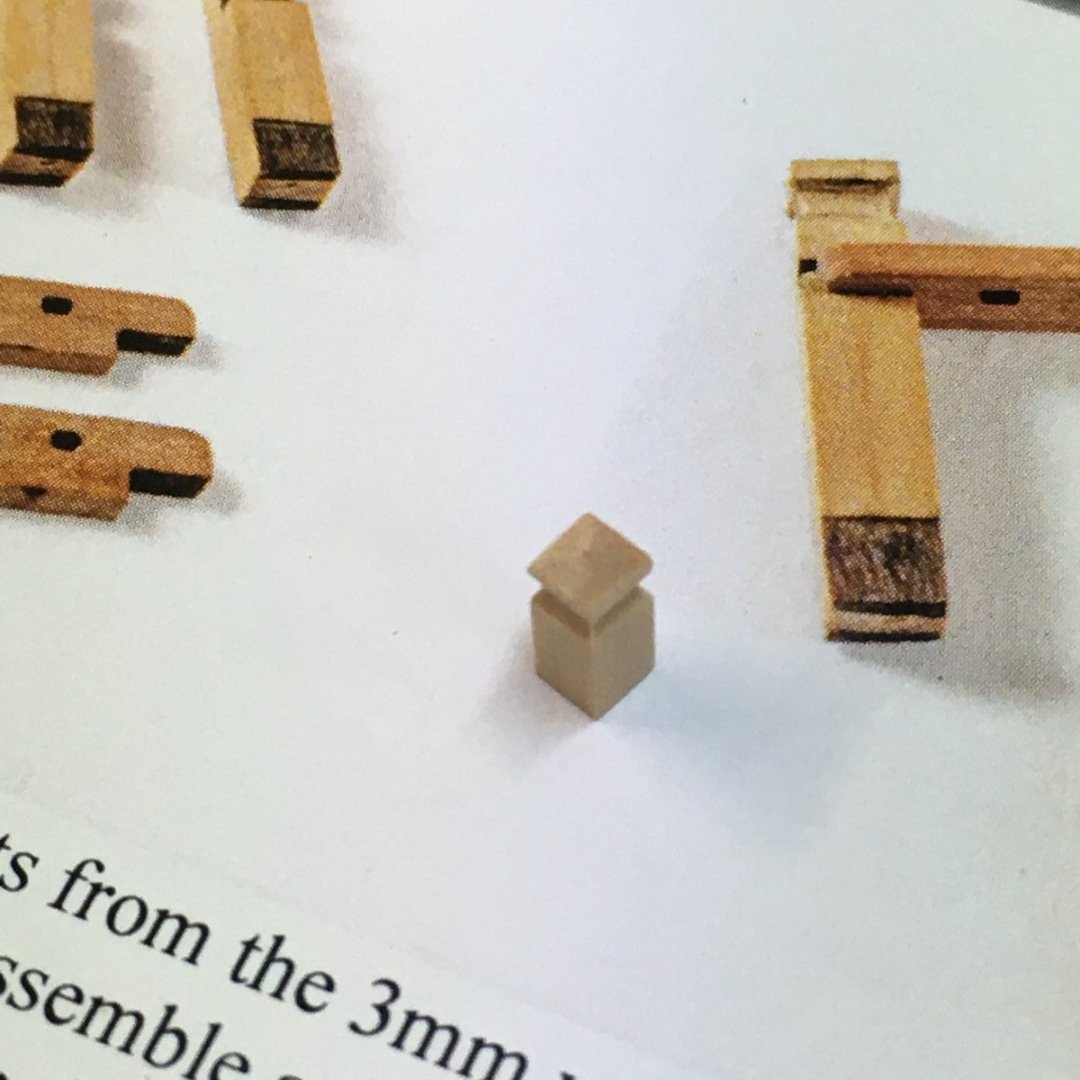
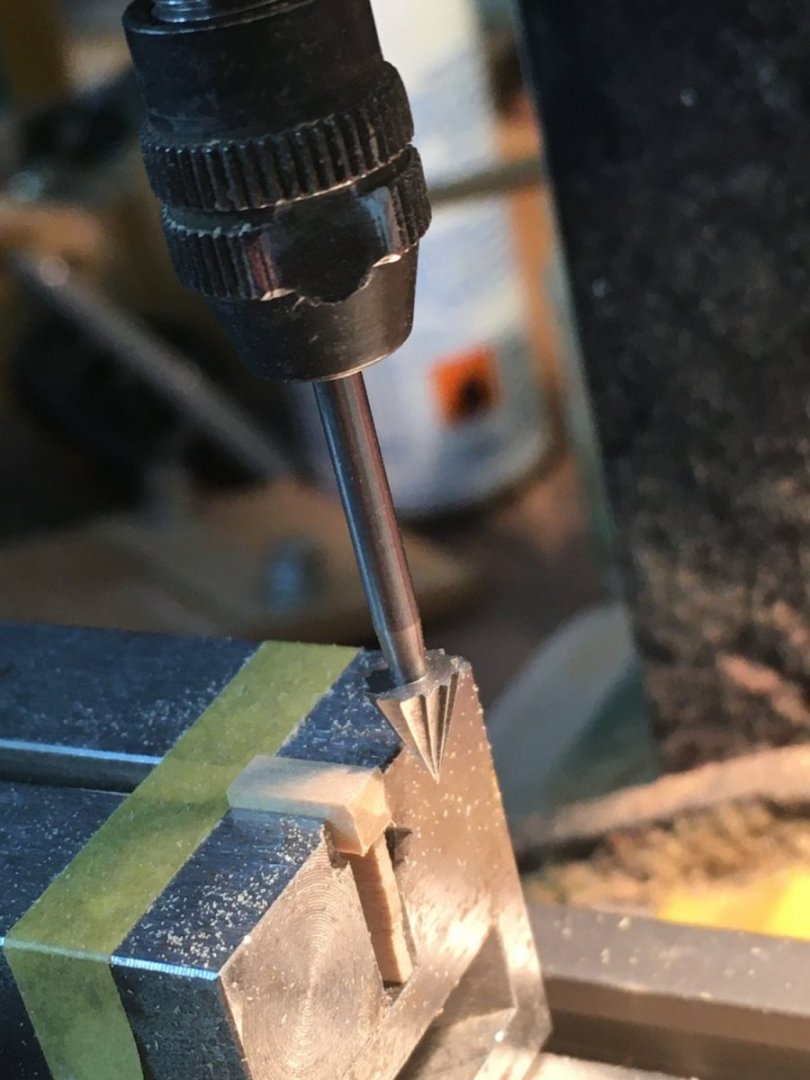
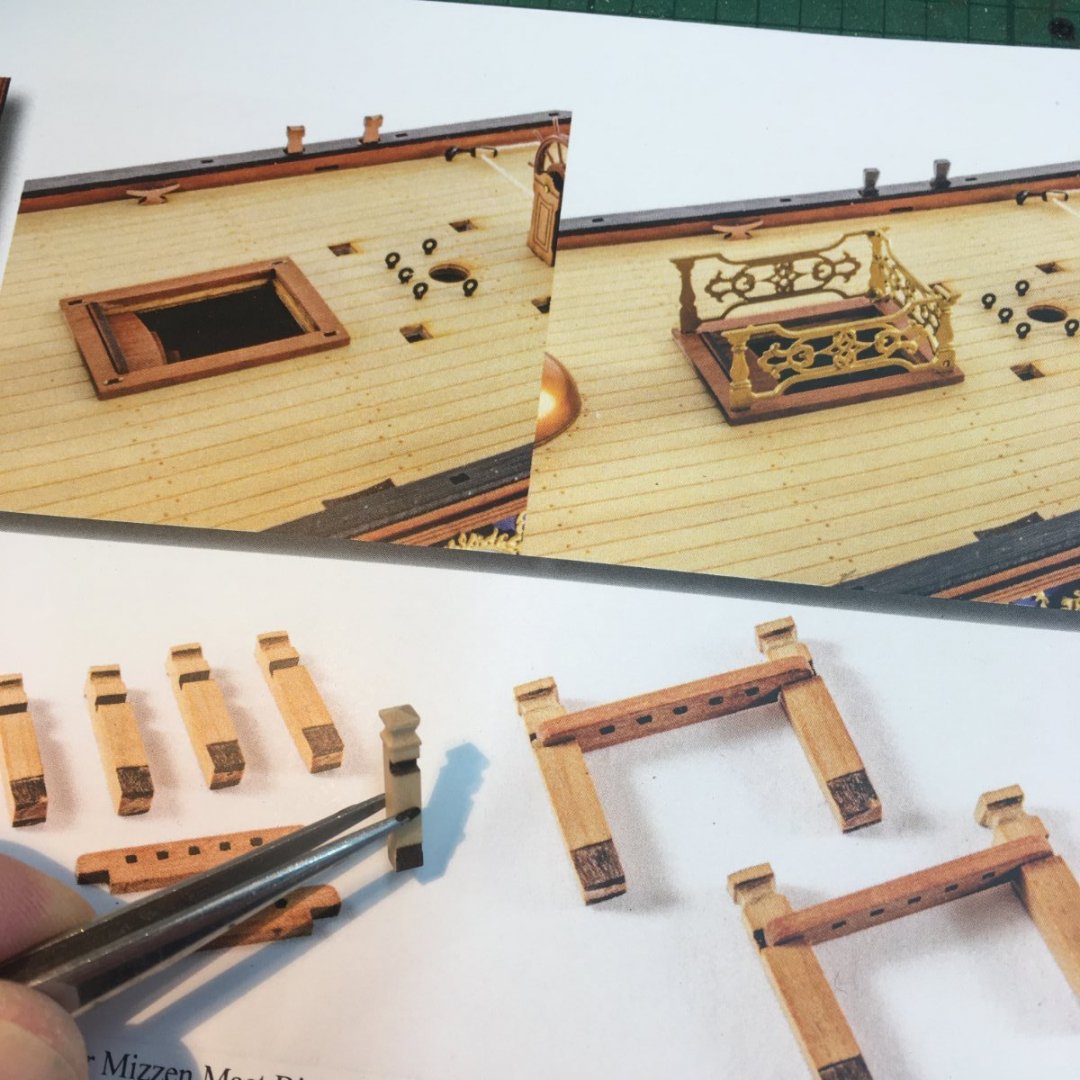
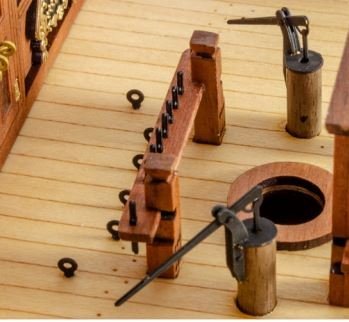
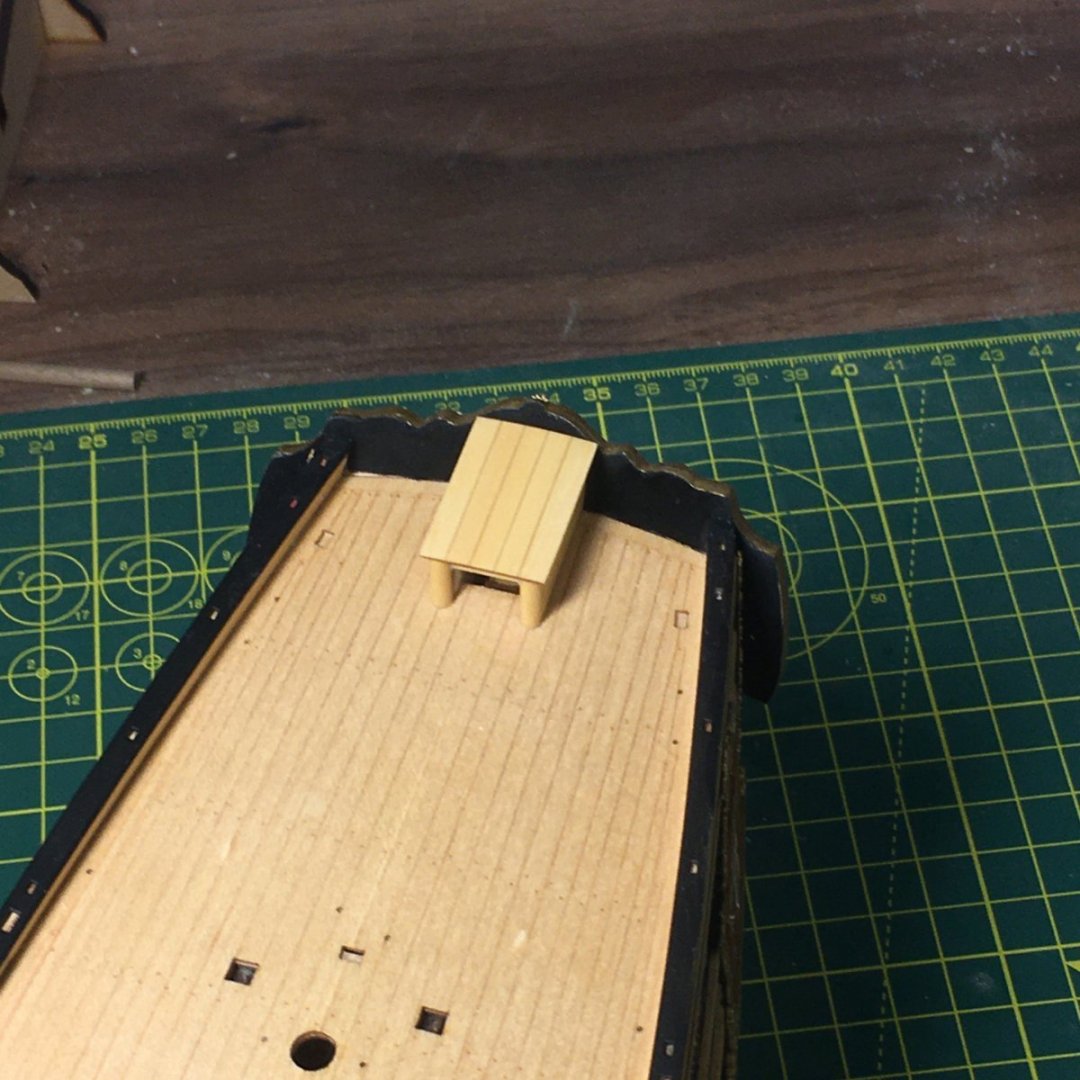
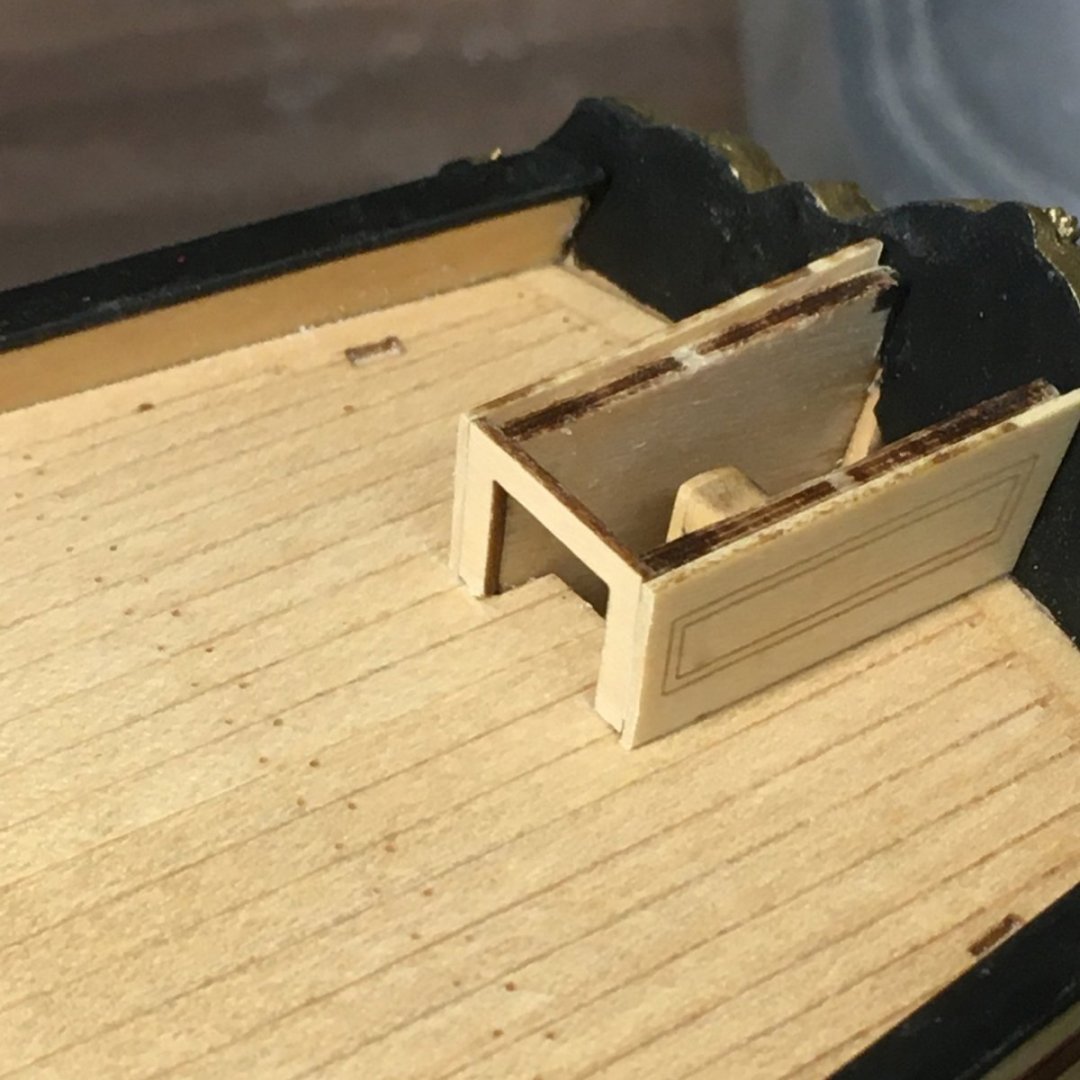
Bitts & pieces I enjoy making deck furniture so I stopped following the manual for a while and skipped ahead to make the mast bitts. The mizzen bitts are made from 3mm and 1mm sheets, laser cut as shown in the manual: The manual recommends using a round file to clean the laser char from the groove near the top of the bitts, and to repeat the groove on the sides thus making the bitts three dimensional. However I found that I had to file quite deep to get rid of all the char, and the resulting grooves made the top of the bitt look flimsy. I decided to remake the tops, taking the opportunity to make them slightly more decorative. I started by using an angled bit on the Proxxon mill to create a shallow pyramid on a short 3mm square length of boxwood, followed by a ball cutter to make grooves all round: The tape across the vice in the first shot allowed me to do repeat cuts on all four sides of the four tops (remember them?!). To cut the grooves, I ensured repeatability by lining up the right hand end of the top with the edge of the vice. Here's one top finished: The next step was to cut the top pieces off just below the groove, slice the corresponding pieces off the original bitts and replace them with the new top pieces: I intentionally () made the new tops very slightly larger than the originals - by about 0.1mm all round - so that the joins looked like a decorative feature. I shall hold off fixing to the deck for now. The bitts fit through holes in the deck and I would normally pin them for extra security, but in two cases there is nothing under the hole to pin to. I think I can glue a piece of wood under the holes in the deck to provide a surface to pin to, but I'll decide later. The main mast bitts presented different challenges. The groove round the top was v-shaped and relatively easy to clean up and replicate all round. I didn't think it was worth replacing the tops just to replicate the pyramid on the mizzen bitts (I may change my mind before I fit them!). The laser cut bits have holes to represent sheaves so I used a 0.5mm end mill to make grooves between the holes. I'd normally round the bottoms of the grooves to represent sheaves but they weren't quite wide enough. I don't think it'll show at this scale. Here's my bitt against the originals: The main issue I had with this bitt is that the groove in which the belaying rail fits is on the side and extends the whole width of the bitt, leaving a visible gap when the rail is fitted as this picture from the manual shows: I plugged the gaps with pieces of boxwood but I couldn't get a very good match: Looking at this photo I might be tempted to remake the bitts from scratch (or make sure they are festooned with rigging to hide the dodgy bits 😁). The gallows went together without any issues. Because they are made in two halves there is a proper stopped slot for the belaying rail. As with the main mast bitts I milled grooves for the sheave holes: One final little job was to make up the housing for the rudder head. Made from 1mm sheet this cleaned up well, although I found I had a lot of sanding to do to remove the machining marks from the surfaces. Fortunately the plank and panel lines are etched deeply enough to allow this. The only change I made was to the front of the housing, where I felt the join between the sides and front looked a bit crude: (Yes, I know the paint needs touching up!) I had some spare 2mm boxwood dowel I'd made up for Speedy's spars and I cut a short length in half to cover the front sides of the housing: The roof of the housing is just dry-fitted at this stage. Thanks as always for looking in - likes and comments are much appreciated. Derek


- 345 replies
-
- 14
-
-
- Duchess Of Kingston
- Vanguard Models
- (and 1 more)
-
Good progress David. I liked your idea for holding the canopy and shall copy it when I get round to painting mine. Derek
-
Welcome to the mill club Tim!
-
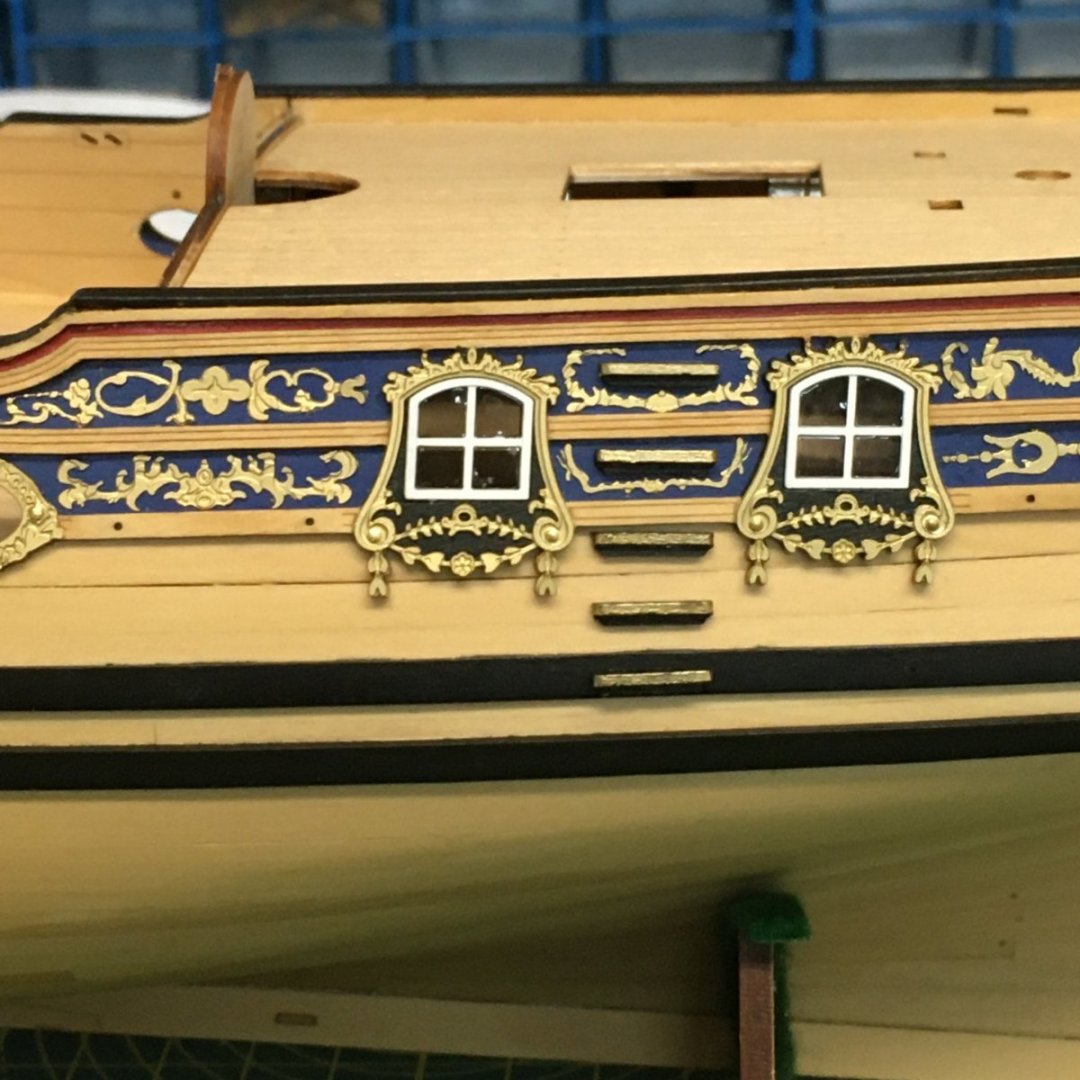
Your decision to go for bare brass rather than yellow paint has paid off - those hair brackets look really smart.
-
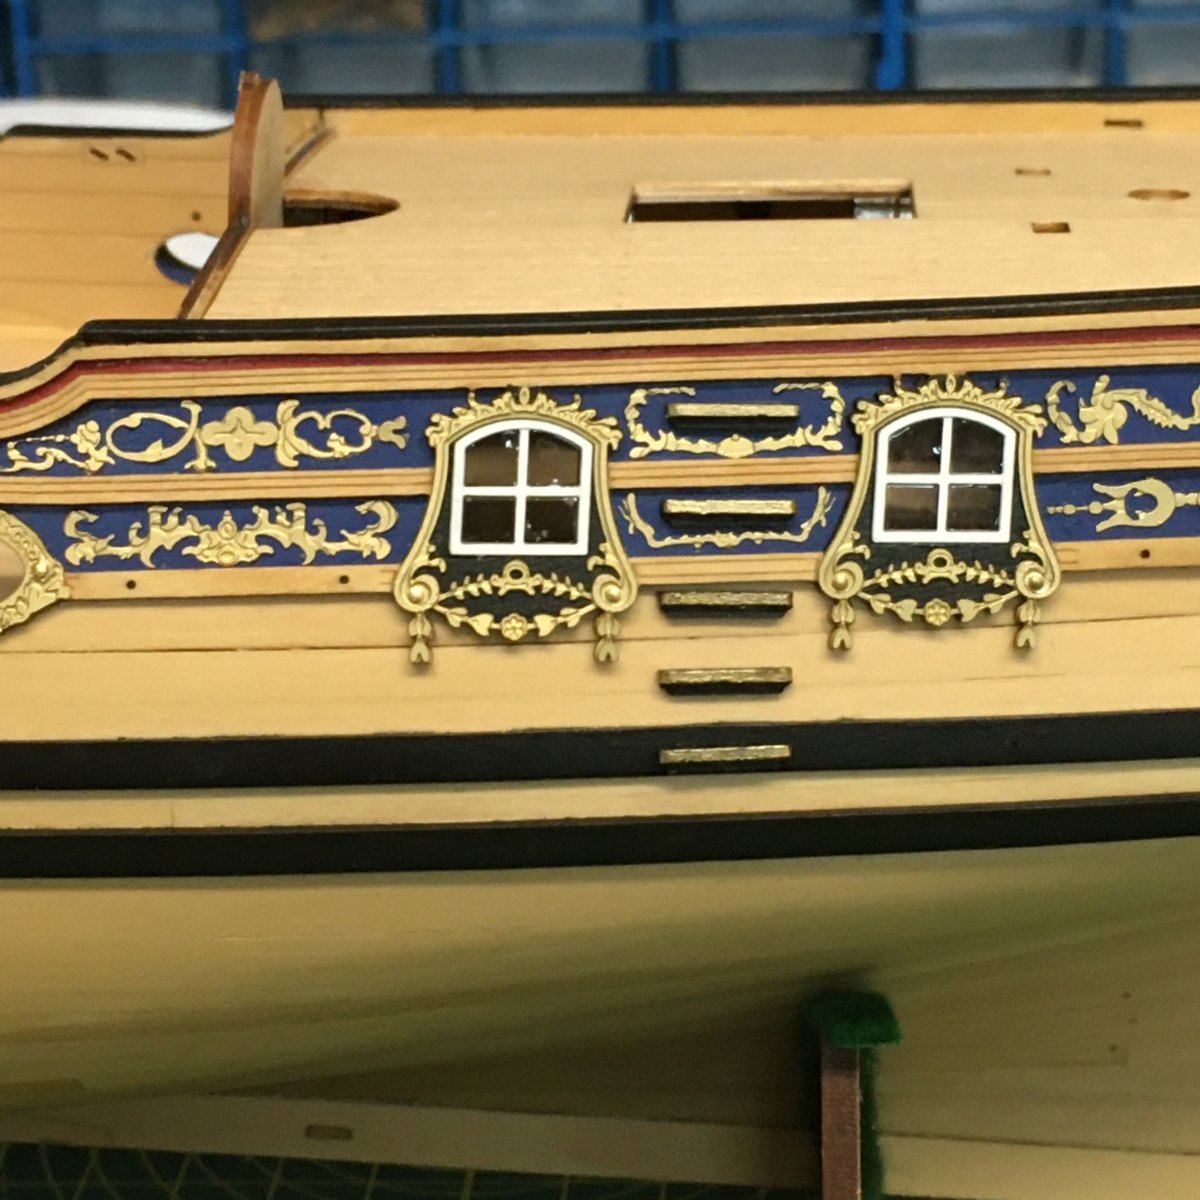
Boarding steps Time in the shipyard is limited just now, as this is the time of year I have to get outside with a chainsaw and loppers to try to keep the jungle (aka my garden) in some semblance of order. So, just one little job to report on. The steps are simple to make, each comprising two small laser cut pieces of 1mm sheet glued together at right angles. However I thought the plain wood looked a bit too plain, especially on such a bling-laden ship, so I painted them black with a gold edge. I also spaced them more evenly than shown on the plans. Getting them parallel to the waterline was slightly tricky, as my eye wanted to follow the lines of decoration along the sheer. Derek
- 345 replies
-
- 11
-
-
- Duchess Of Kingston
- Vanguard Models
- (and 1 more)