


moflea
-
Posts
78 -
Joined
-
Last visited
Content Type
Profiles
Forums
Gallery
Events
Posts posted by moflea
-
-
-
-
-
I have used several brands (and no name brands) and had the same problem with all of them. It's not really important though as they are relatively cheap and do enough work before breaking.
- michael101, mtaylor, thibaultron and 1 other
-
 4
4
-
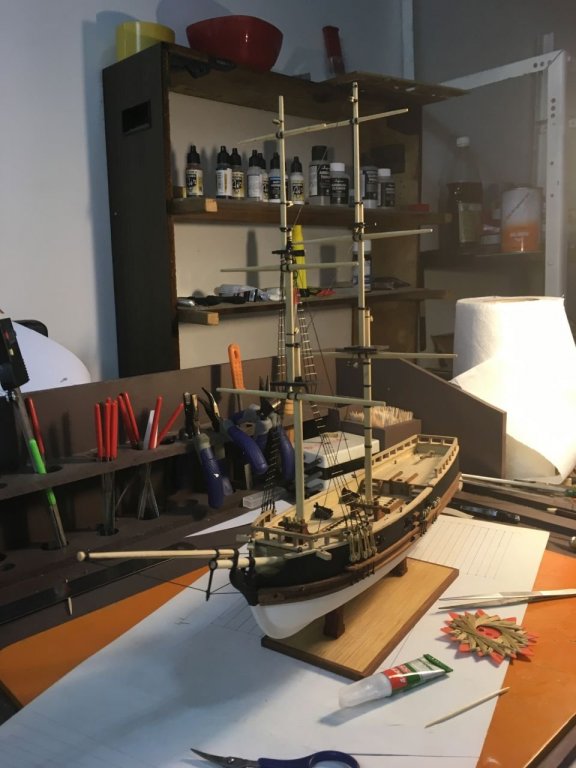
Real life kept me away from the workshop for a while, but I am ready now to finish this little ship. I have to finish her until the winter is coming. I don't have any pictures to post right now, as I am looking for a way to build a display case. I want to do something simple and decent and I will soon start adding pictures.
-
8 hours ago, Backer said:
My admiral always says that a man can not do multitasking. Only a woman can do that.
My wife THINKS she can do multitasking, although she doesn't/can. I simply admit I can't.
Back to the topic, I always work on two projects, and, like some guys said, when I feel frustrated/bored/blocked, I switch projects and refresh my brain.
-
That's a good suggestion. Just don't try to design your model in Fusion or any other similar app from withing the virtual machine.
The problem with virtual machines is that they don't use the full capabilities of your video card. VirtualBox does install a pseudo card driver, however it can be hardly used for the software we are talking about. We are using VMs for almost anything at work, but when it comes to CAD design, they simply cannot handle it.
Ben is right, do your design in Mac and do the milling in a VM.
-
I'm a big fan of Sketchup. However it might prove cumbersome when it comes to ship design. I know it can be done but I have a feeling it's not the best tool for this. If you ask me, I find it unacceptable to NOT have a built in splines engine after all these years. The extensions you find are kind of old and, as I struggled with them a few time ago, buggy (unless they've fixed some issues in the meantime).
You don't need only the 2D tools to draft a plan. You also need surfacing smoothing possibilities, spline curvature analysis and so on. I'm using Sketchup for every project, but when I tried drafting a ship plan I went for something else.
- thibaultron, Nirvana, Don9of11 and 1 other
-
4
-
What a wonderful work you did so far, Marc... (I've seen your work on the french forum so keep this one updated as well). SR is one of my favorite ships.
I'll certainly follow your build log.
In two or three words, can you tell me why Tanneron's model is false? I was always fascinated by that model (never saw it in real life though) and to me it looked like a real reference (after all, it's displayed in a naval museum).
- Nek0, Bill Morrison and FrankWouts
-
3
-
There is also Autodesk's Fusion 360, which is pretty much the Solidworks. You can download it and register as an enthuziast or hobbyst and you get free access to it (unless you work in a business above 100k/year). You must renew the register every year.
- Moxis, coxswain and Jolley Roger
-
3
-
-
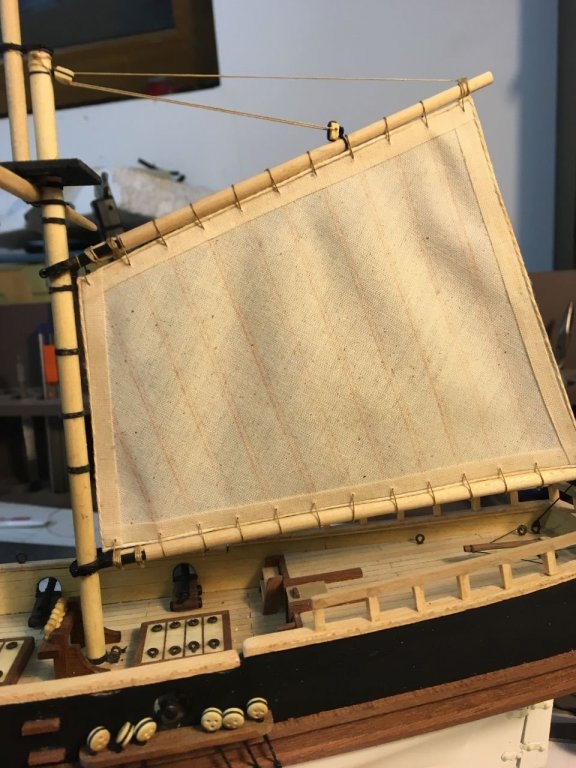
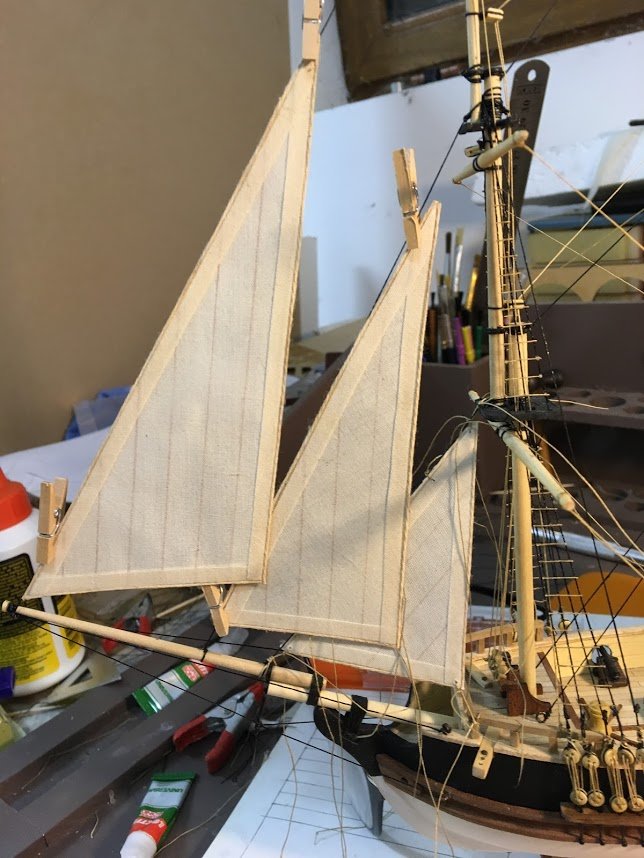
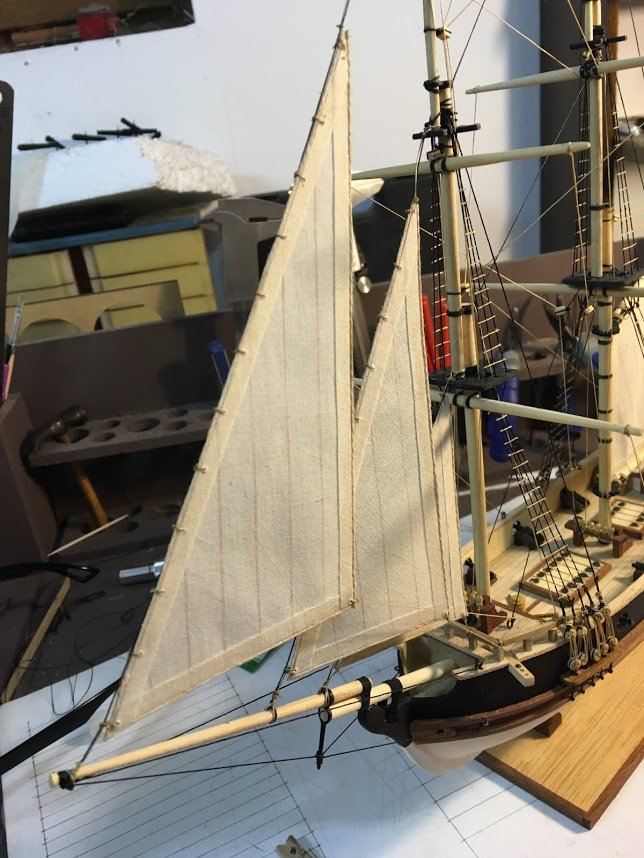
I'm at the stage of mounting the sails. The upper and middle ones of the both masts (I know they have designated names but I prefer the save the time searching for it) will go nice I think. I am thinking now about the lower ones. I don't like in particular the way it looks in the box picture. I'm also considering making them furled but I have a problem with the sails I made because I've impregnated them with diluted PVA and are quite stiff.
I think I have to experiment with them for a while.
Alex.
-
-
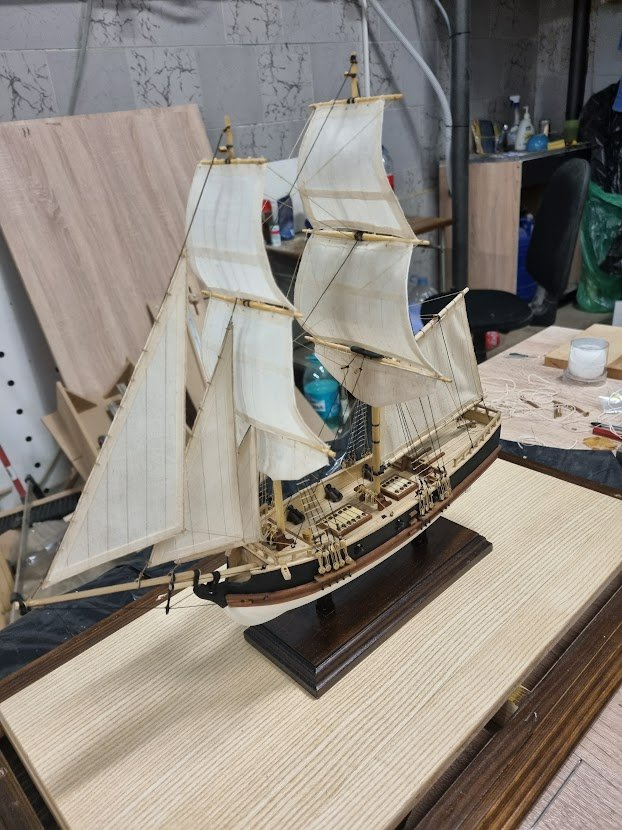
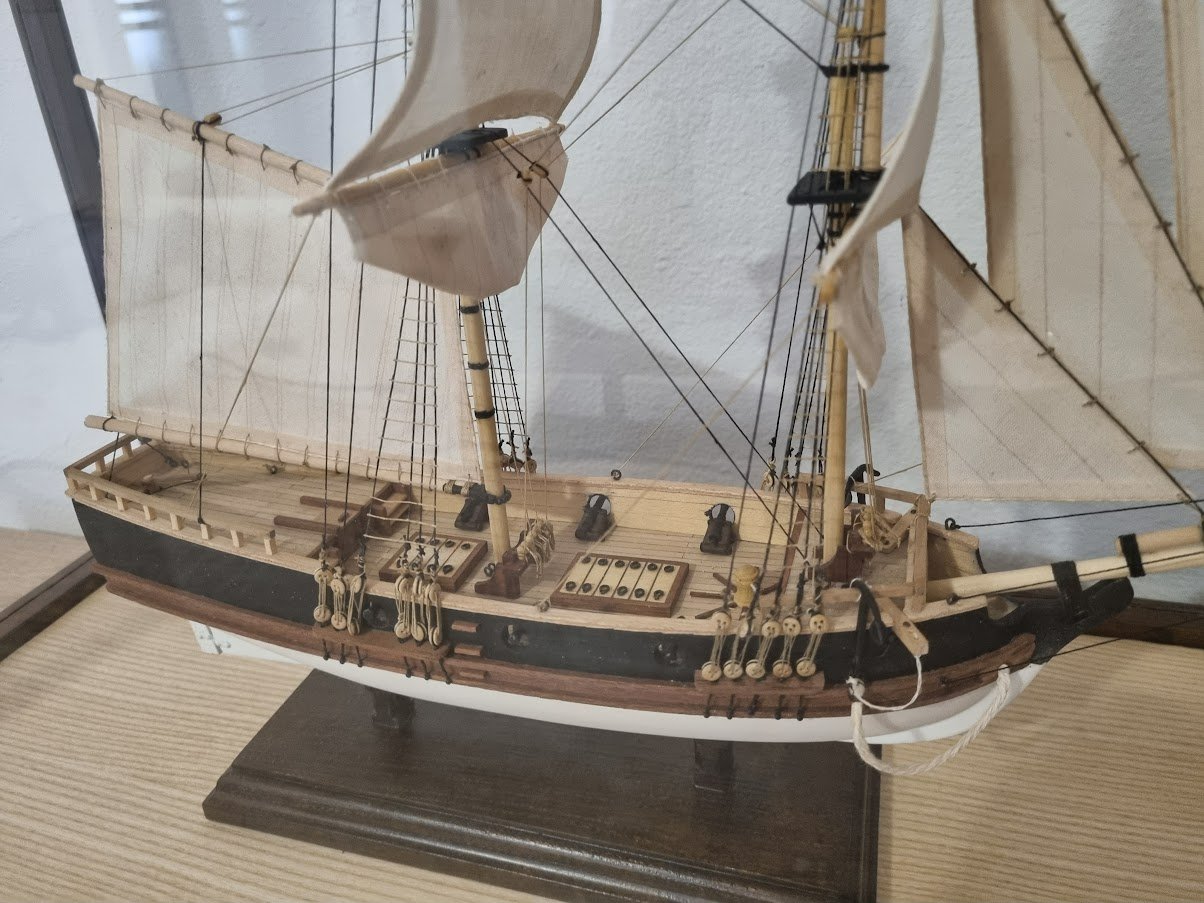
I finally finished the rigging. All the rigging lines are strong and nicely stretched. The only thing I don't like about it are the knots, not that they are visible but crowded around the masts in a manner I don't like. I will place a note near the displayed model to read "Magnifiers are not allowed near this model."

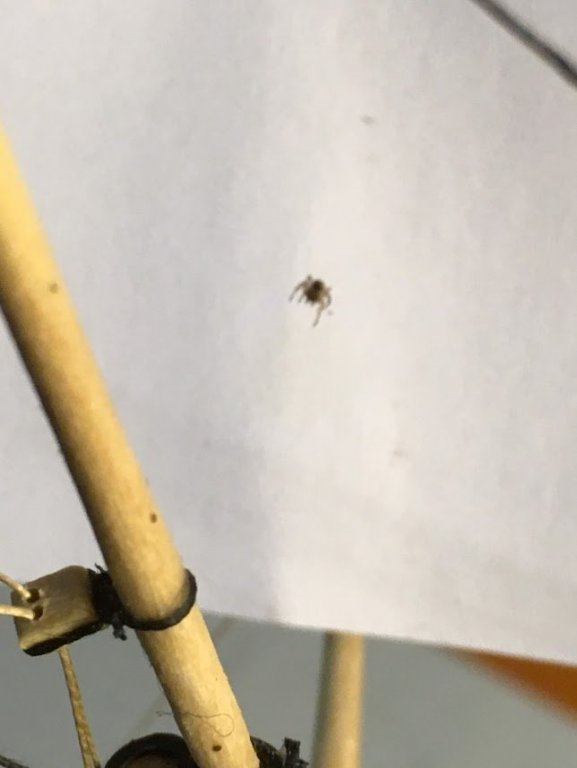
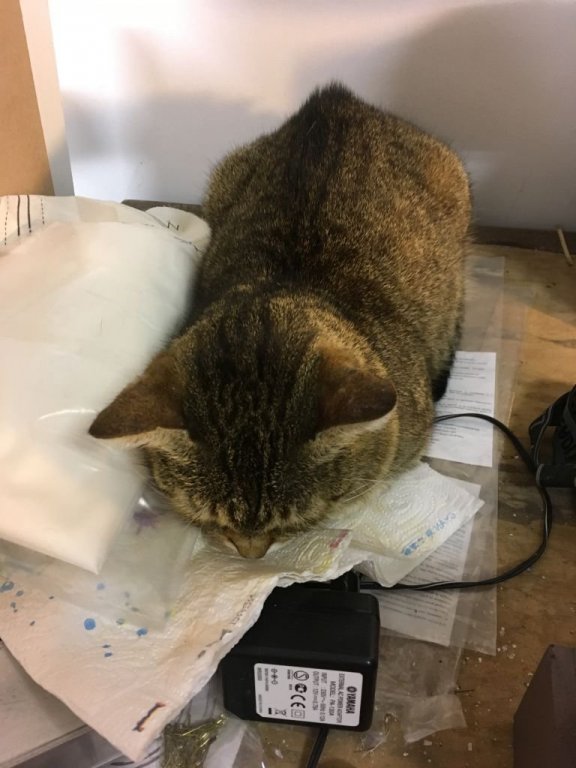
This little fella keeps reminding me that there is no time to pause the work. He built his own rigging lines between the masts, showing way better skills than mine. I was indifferent enough to not follow his techniques.
-
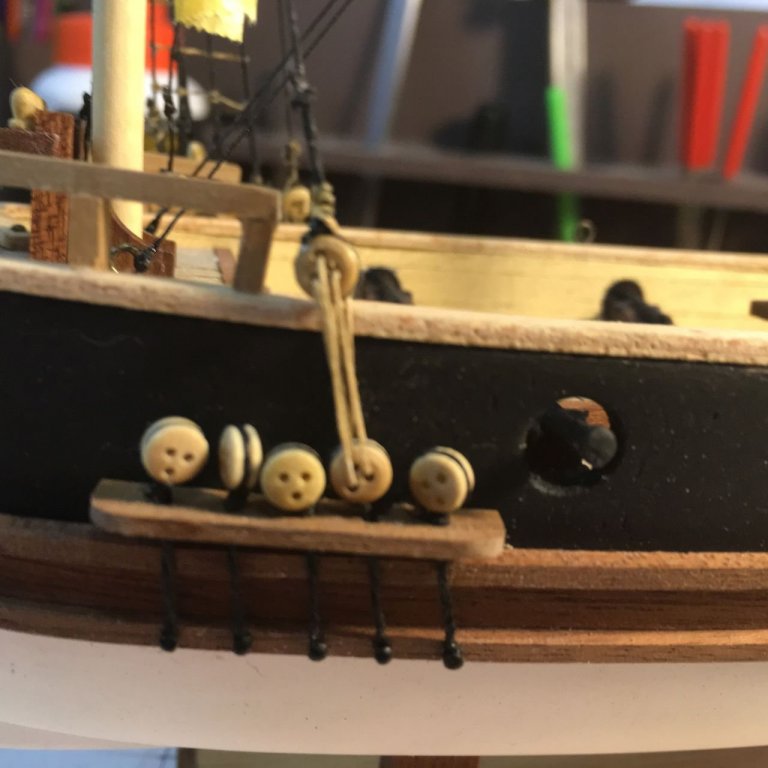
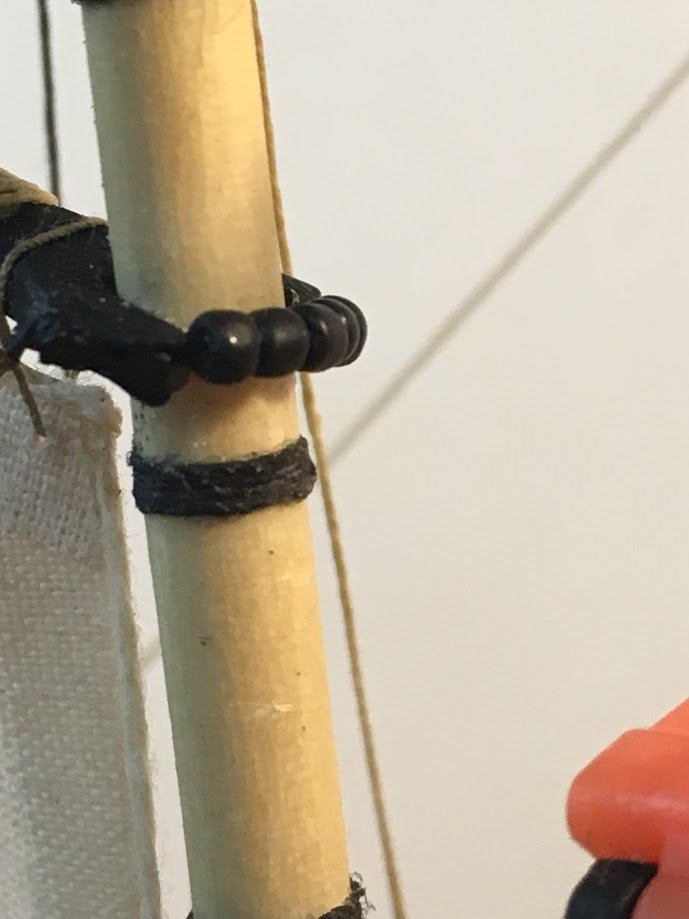
Here is a closeup of those parrels.

And here is the Fluffy Union.
I will cut all the ends after I finish the rigging so all the threads will stay in place. As they are now, I still can loose them or tight them in place so the masts stay perfectly aligned.
- Tigersteve, coxswain and lmagna
-
3
-
-
Thank you for the likes and the comments. The shininess went away after the black paint dried, so it's ok. I'm sure you can find plastic beads, I would search in supermarkets in the toys section, where the girl's stuff is (I did find such beads but they were like 3 mm in dia). Another shot would be in some markets or stores that have really cheap "jewelry". Cheap, so they would be made of plastic instead of any other material. Anyway, I would explore the stuff made for little girls, I am sure you can find them.
Before I found those earrings, there was an online store in my country selling all kind of beads. Yes, most of them were glass, but I found some metallic ones also.
I really need to improve my skills in making knots. Unfortunately the scale of this ship is so small it's almost impossible to control the knots. To get an idea, there is a 1 mm space where 8 shrouds are to be tied. I'm lucky my phone zooming capabilities are so poor. I have practiced some knots on the workbench before I would try them on the ship. All good and nice, but doing them on the ship in those tiny spaces... different story. So many clove hitch knots turned into overhand knots with the help of CA to hold them.
Alex.
-
While I was checking every jewelry box I could find in the house, the Admiral remembered she has some earrings she never wore. And voila, they had beans, around 1.5 mm in diameter. After I fixed them, I realized I didn't even need a pin, a thread through the holes would have been just as fine, but well, it was too late.

I am not pleased with the way it looks, it's kind of over sized, but I'll take it. The beads are still a little too shiny, even after they were painted with mat black. I will varnish them later with some mat varnish I have, I hope their shiny look will go away.
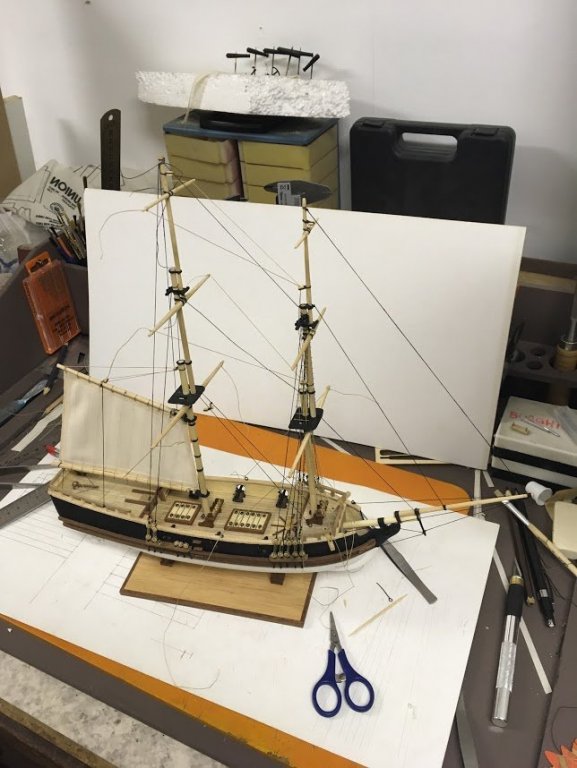
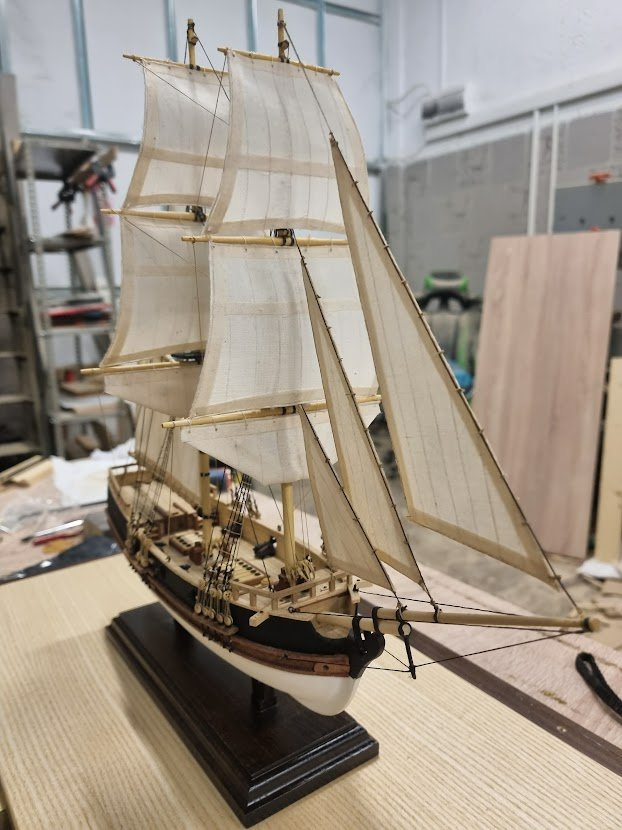
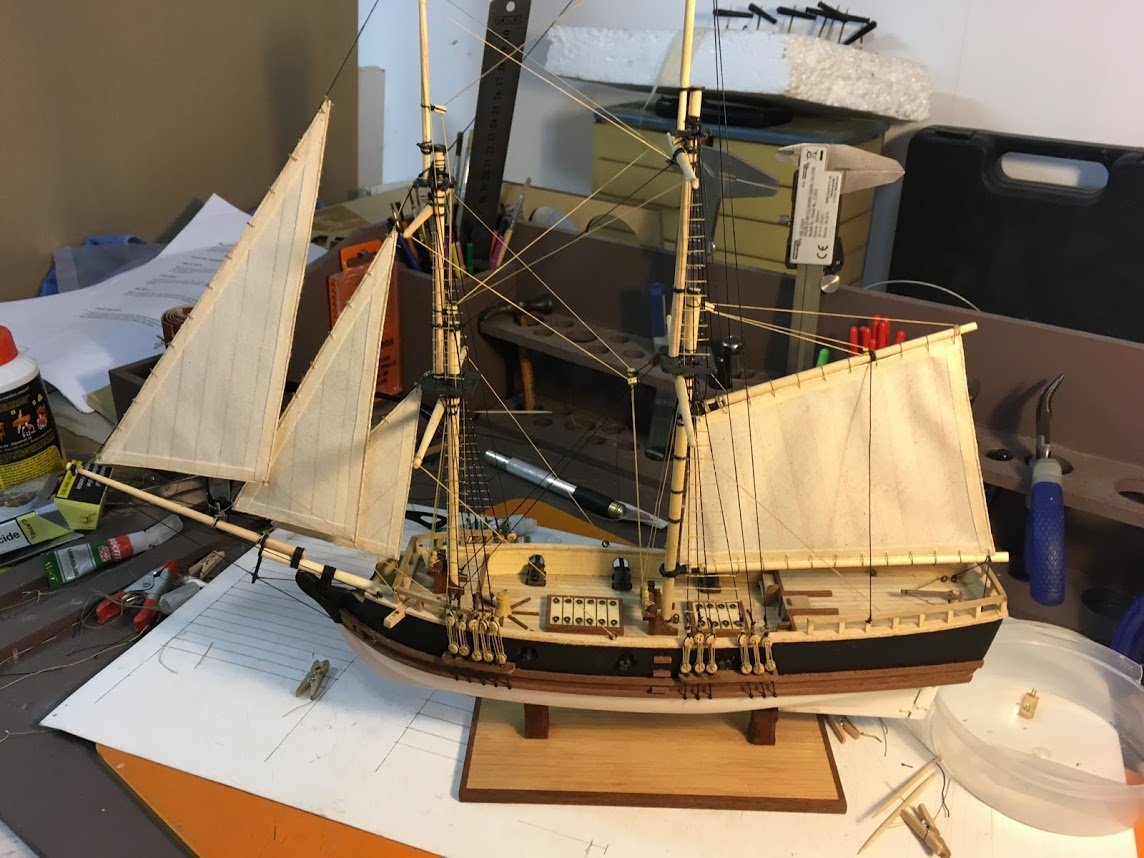
Now it starts to look like a real ship.
After rigging the lower spanker, the whole thing is very strong. I will rig the upper one later because I saw there is a tendency of the mast to twist a little, so it will be done after the sails on the main mast will be tied.
Alex.
-
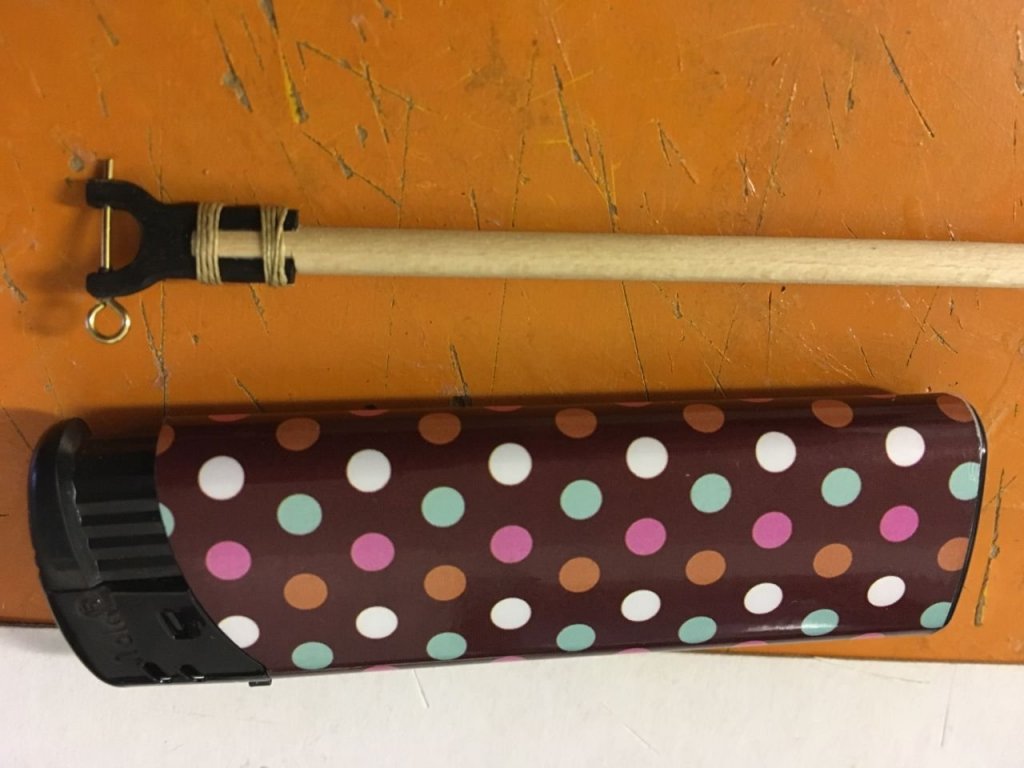
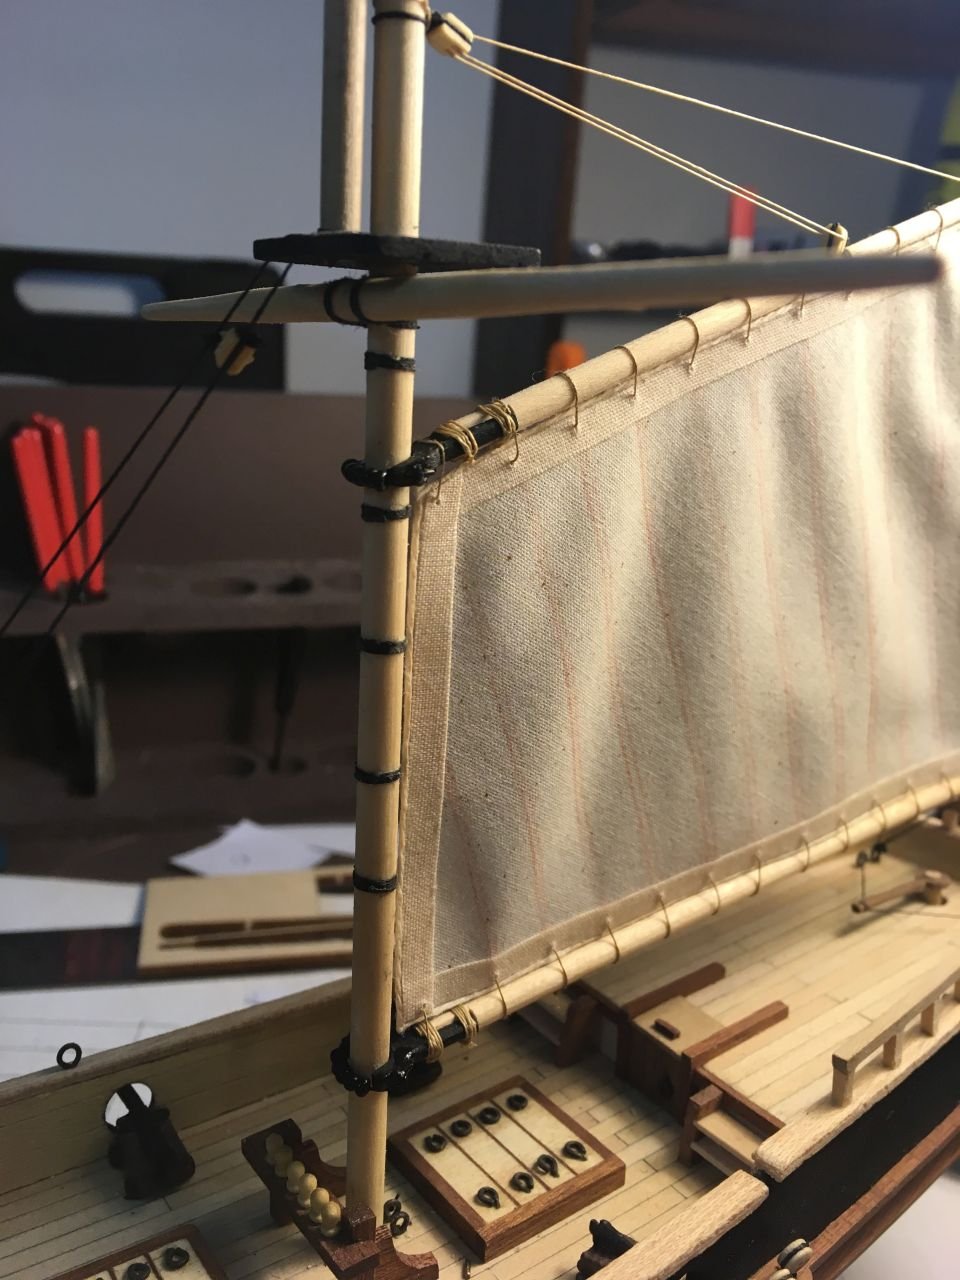
I remade the jaws, this time from wood. I drilled a hole on the sides for a pin to go into the mast. The lighter is to show the small scale.
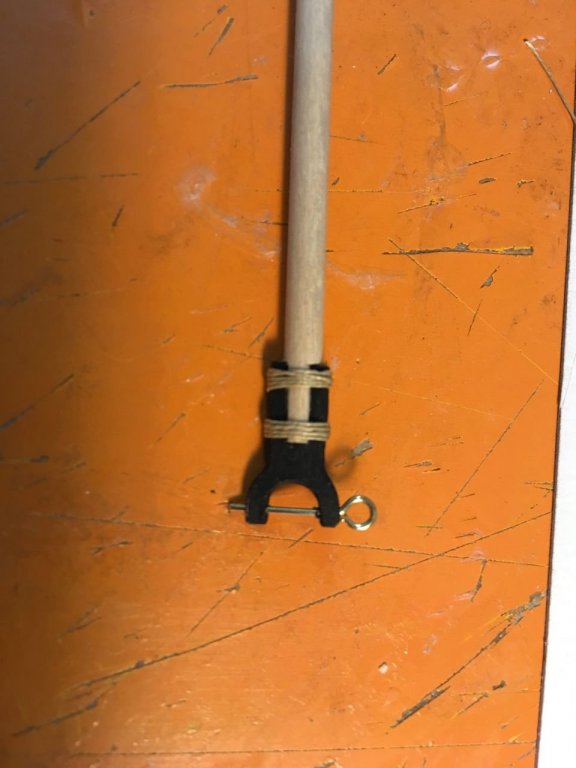
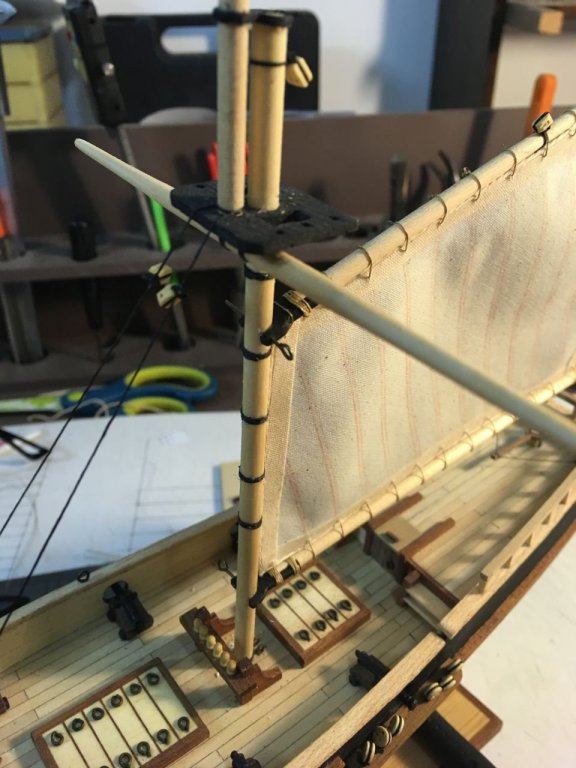
I also tied the sail to the spanker boom and gaff.

Test fitting the whole thing. Two pins are inserted into the masts.
-
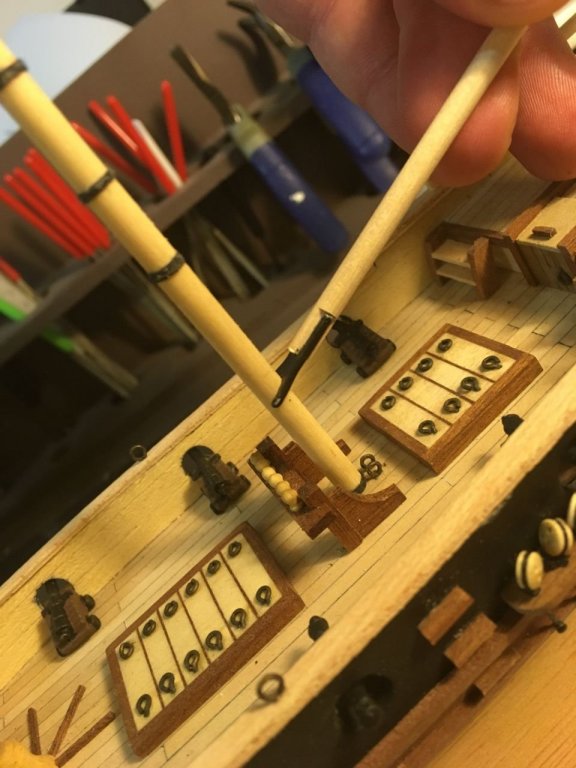
Actually you gave me an idea. I know how in real ships these things were made, but when you posted this picture I realized i can make some kind of a brace that can be supported with a pin below (so it wouldn't slip) and the rigging would support the upper part. I can definitely try that. Not sure I can make those beads (just look at the size of my fingers in the photo), but I'll think of a way to simulate the whole thing to NOT look out of the real world
")
I have 2 more builds at the same time but this is the more advanced one. It is amazing how you can imagine how the builders did it at the time... so you can figure out what all the bits and pieces were supposed to do in maneuvering wooden ships. There's nothing more magnificent to me than wooden ships... especially those in the 16-17th century. Most beautiful vehicles ever
I don't know where this obsession came from (I can't even swim or visited an wooden ship), but since i first saw a ship model when I was 12, I really got a feeling for them, and now, 31 years later I still envision them before I sleep.
And thanks a lot for the likes.
Alex.
-
I am now at a point where I need some advice. In order to proceed, I have to install the spanker boom and spanker gaff, along with the corresponding sail. The picture below is from the Constructo's plans.
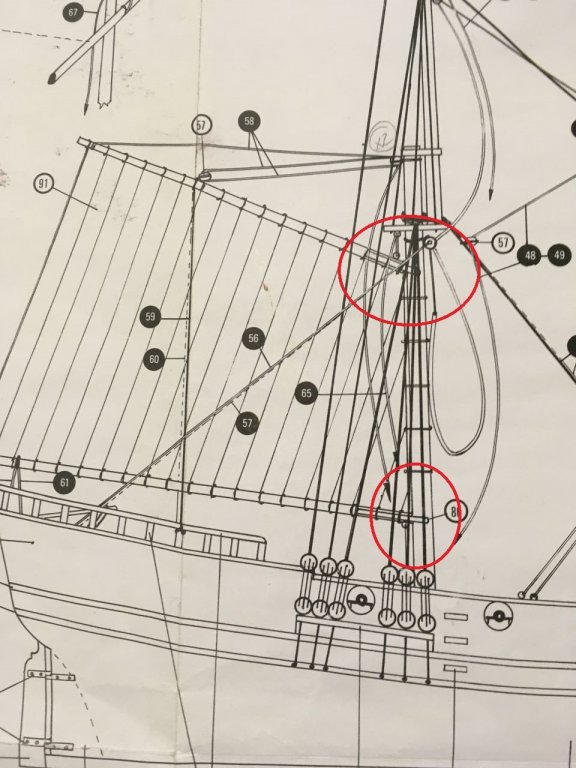
I am wondering... what's the best way to attach them to the main mast? The picture below shows more details.
I don't trust CA to hold them... The mast is made of wood, obviously, and the end of the spanker is made from cast iron. This is the weakest connection I have to handle. Like I said before, the ship will be sent to my sister-in-law (who is 2300 km away from me
). I trust all the components to resist the trip, is these connections I am worried about.
I considered drilling a hole in both the mast and the spanked end and to install a hard wire to help the joint. There is close to impossible to drill a hole in the cast iron (which is 1mm thick
 )
)
Would some resin hold them better? (I have to think of a way to support the spankers while the resin dries). Any idea would be more than welcome.
-
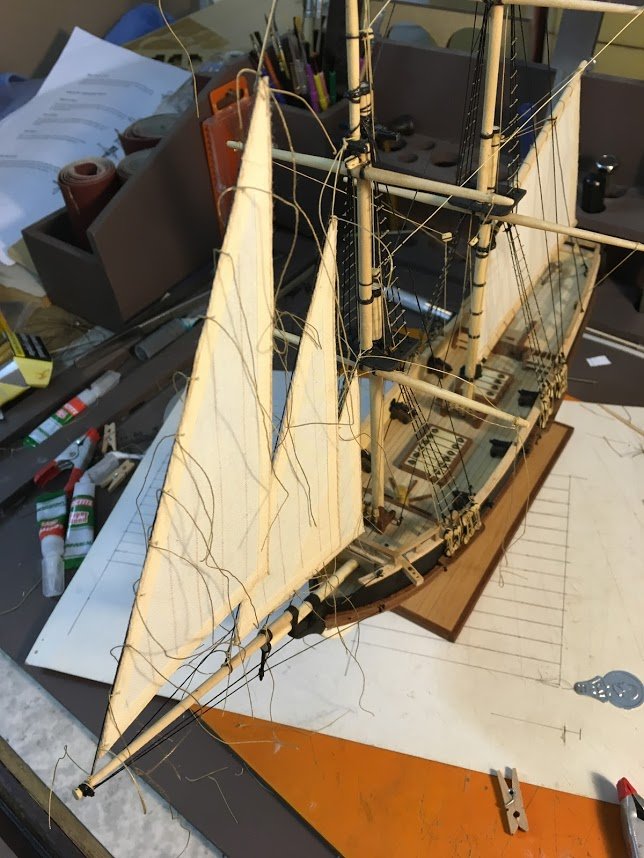
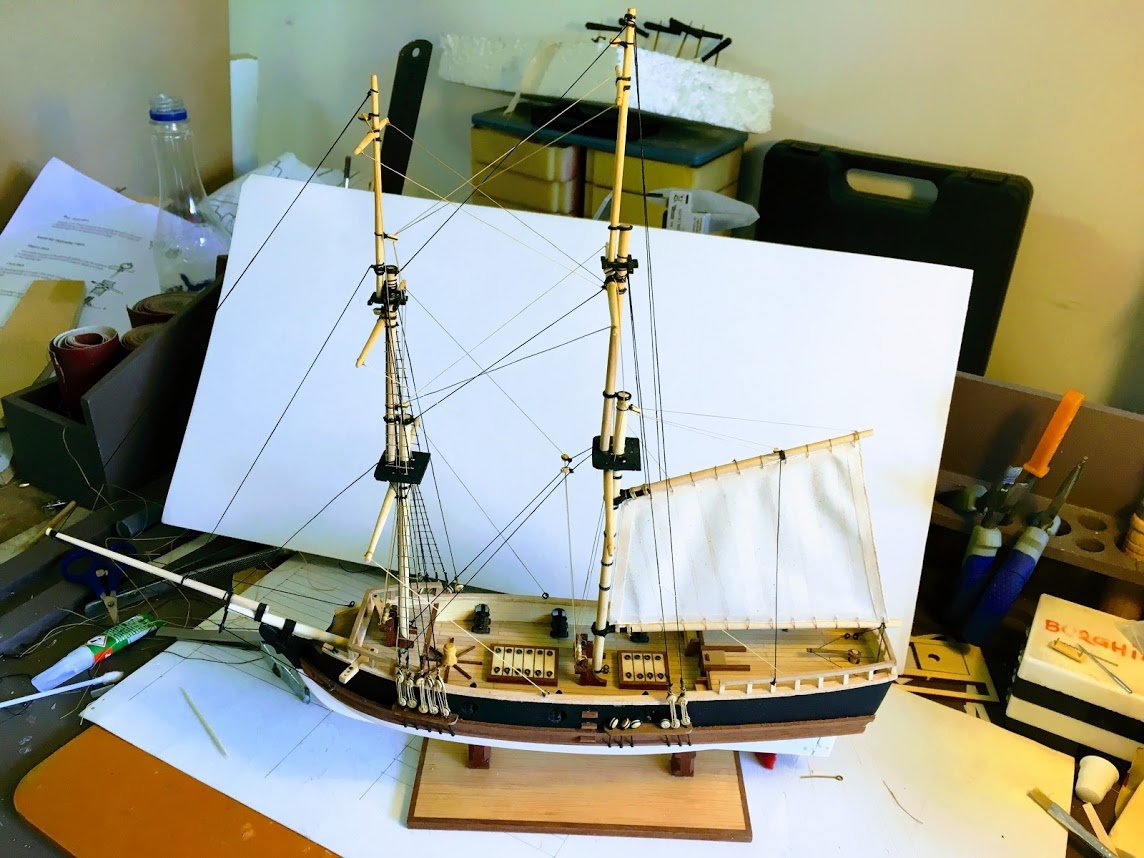
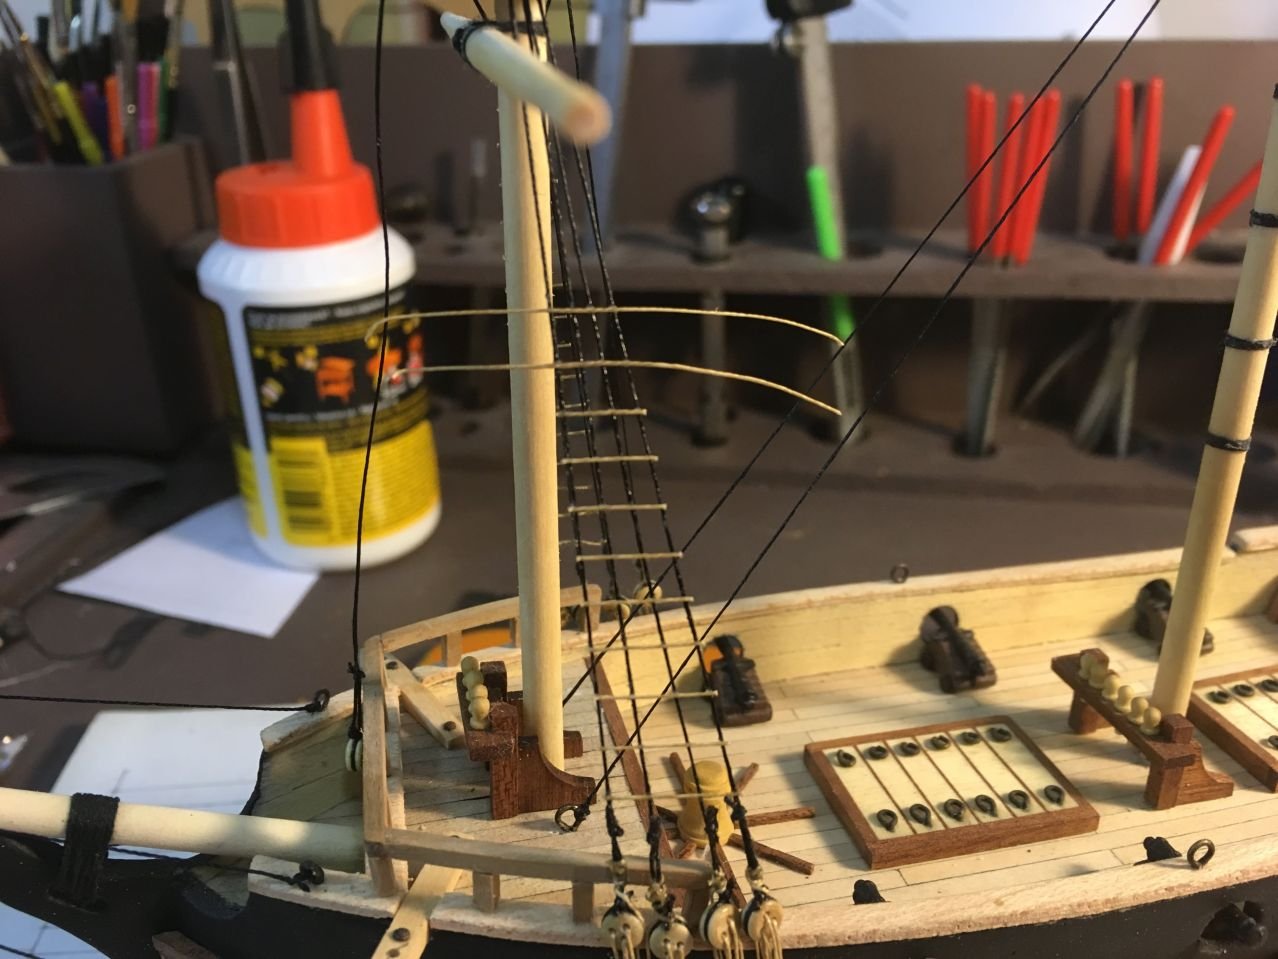
Both masts were installed.
I have read in some books and posts that there is a certain order to install the pieces (masts, spars, sails, shrouds...). I've spent a lot of time thinking what the order should be for this small ship. I came up with an order that looks good so far, I can reach all the narrow places with no effort. At least so far
My order would be: masts & spars with all the blocks fitted, standing rigging, shrouds & lanyards, running rigging, sails, and some leftover running rigging at the end.
-
Now comes the point I know I'll get a lot of criticism that I hope I can handle
I was trying to do the ratlines like all the masters here are doing... using clove hitch knots. I really tried that. I was using a 0.12 mm linen thread. The distance between the shrouds at the bottom is around 3 mm, and at the top is less than 0.5 mm. No matter how good the clove hitch knots were, the scale is just too small and the knots were way too visible and large and it didn't look right to me
, it was like a tic-tac-toe table with all the cells filled. I've tried using a thinner thread, it was kind of all right but then, you couldn't see the thread anymore unless you were about 20 cm away from the ship (during this process I realized my curses vocabulary is way richer than I thought).
So I decided to do something to get over with, and that is to glue the ratlines directly on the ship. I know...

I know it's not ok but my skills are just not good enough at this scale.
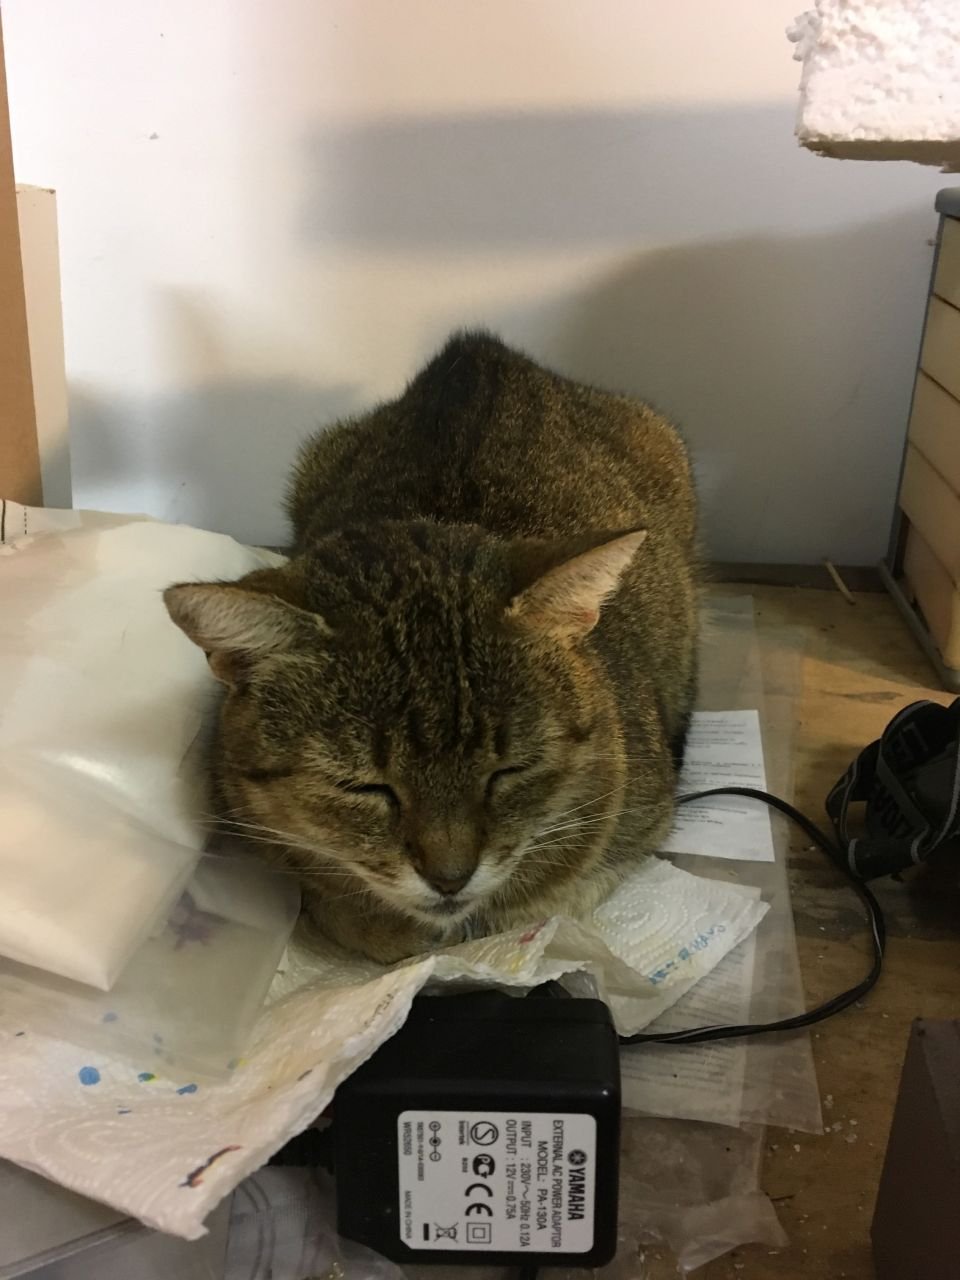
I forgot to mention that sometimes I get assisted by this sailor. But after seeing the mistakes I was doing, she decided she has something better to do. I later realized she was sleeping on the cloth sails I've just purchased, so in my precedent post about preparing the sails, it was a hard process of getting rid of all the hair.

-
I started rigging the deadeyes on the channel plate.
The kit provided some weird copper like wire to simulate the chain wales (not sure if this is the term). It couldn't be blackened and it looked really strange, so I decided to use a black thread, twisted so you can't say it's actually a thread
Also rigged a lanyard in the picture above. The process was easier than i thought.
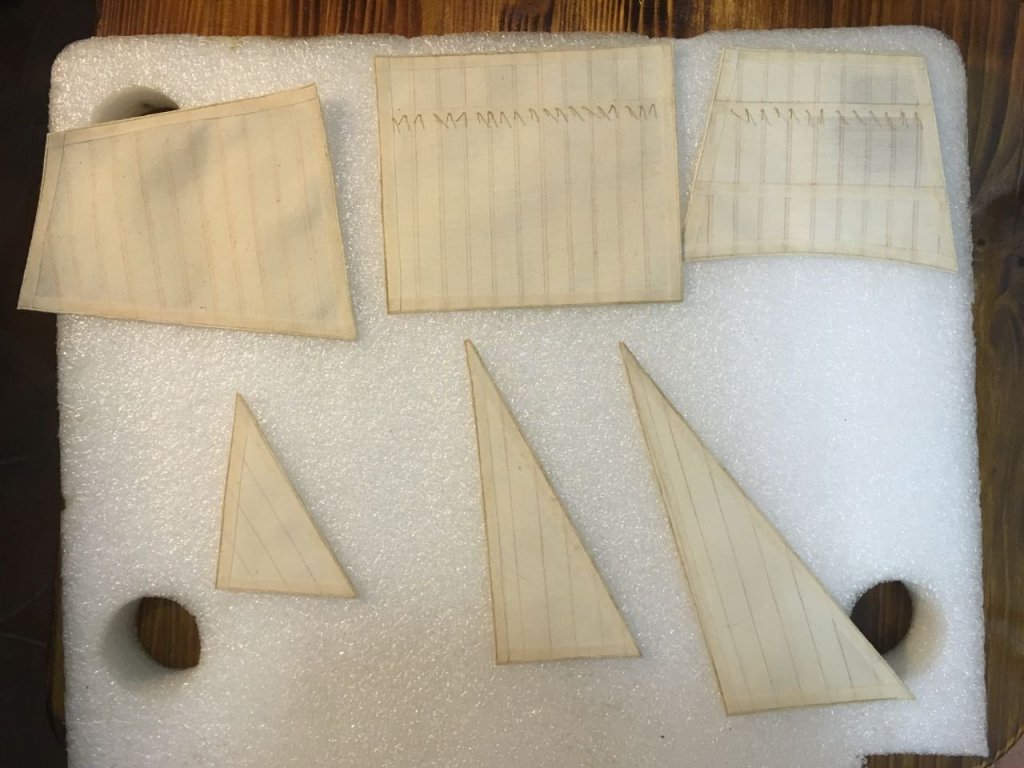
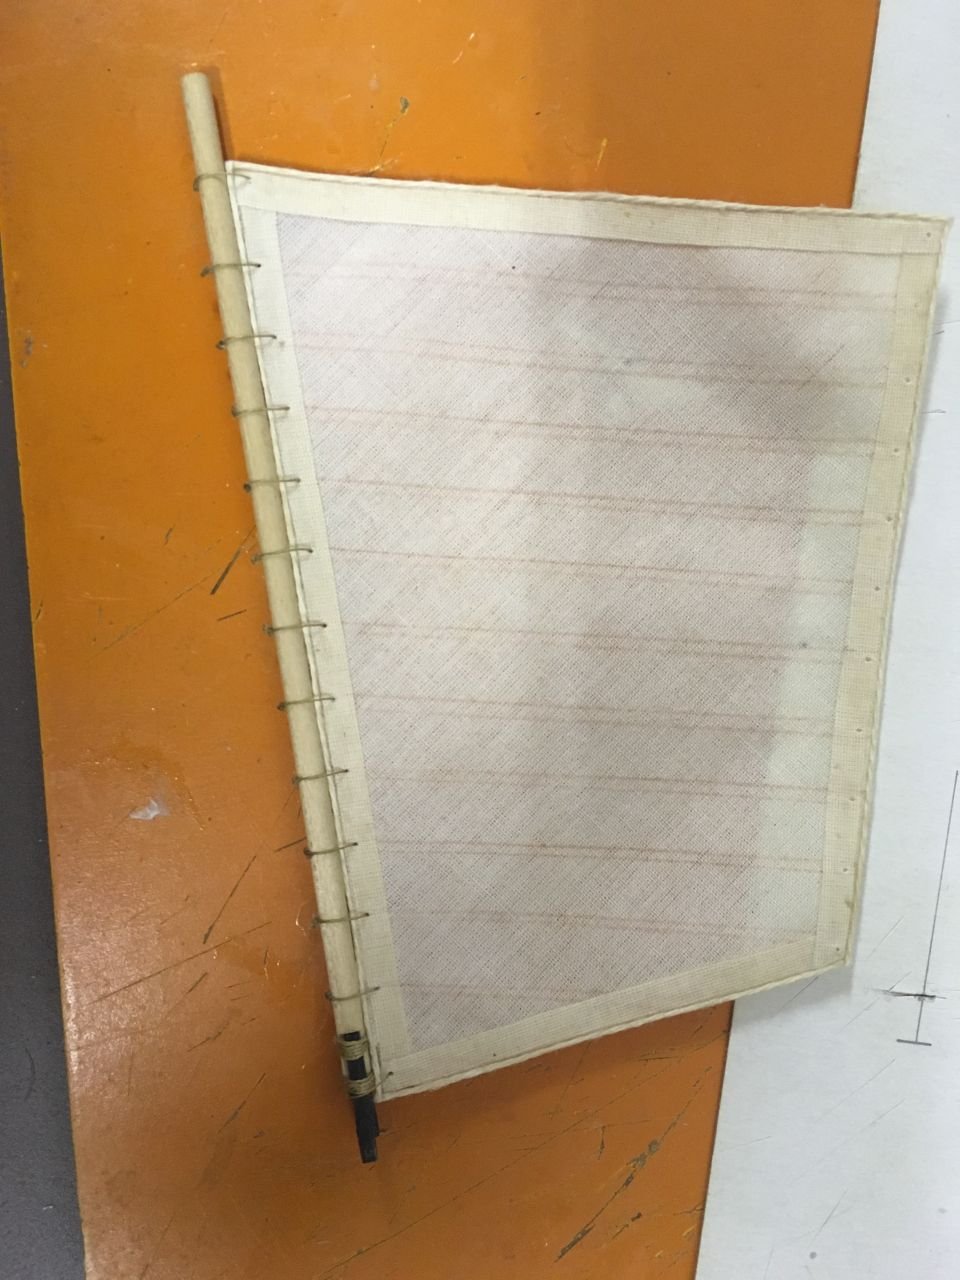
Also, some more sails were made. In the picture they look more yellowish than they actually are.
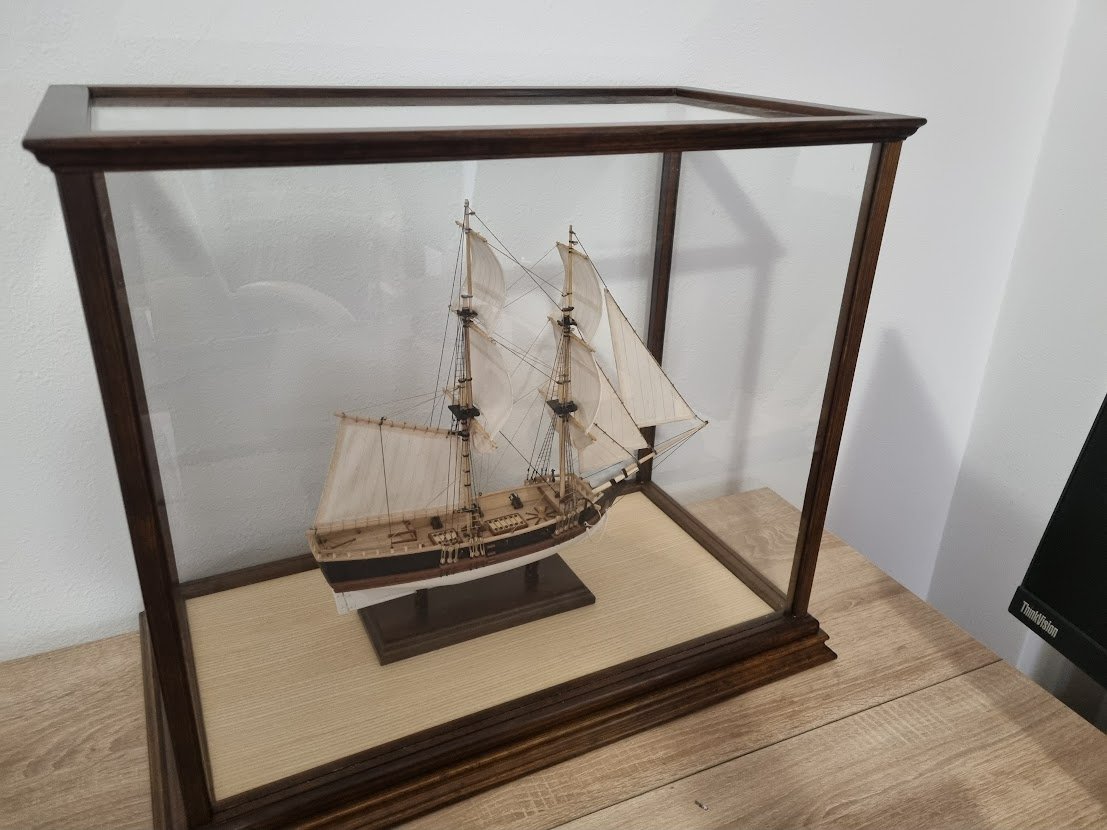
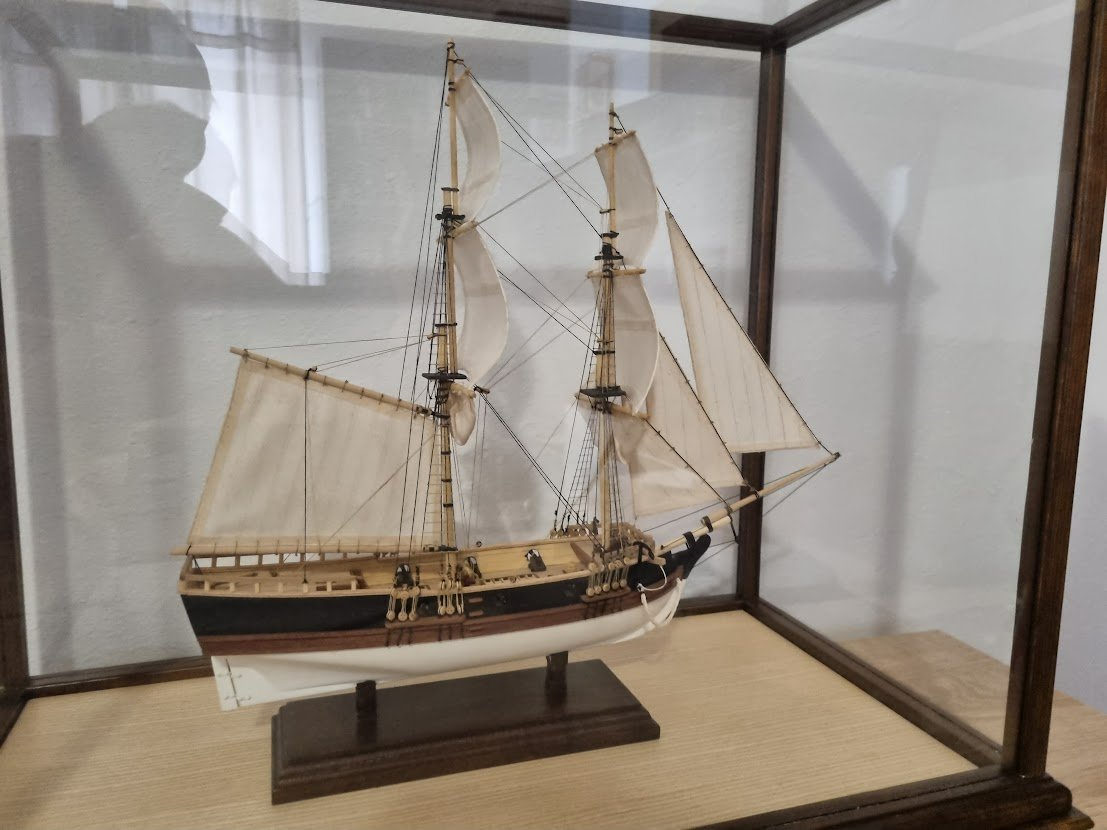
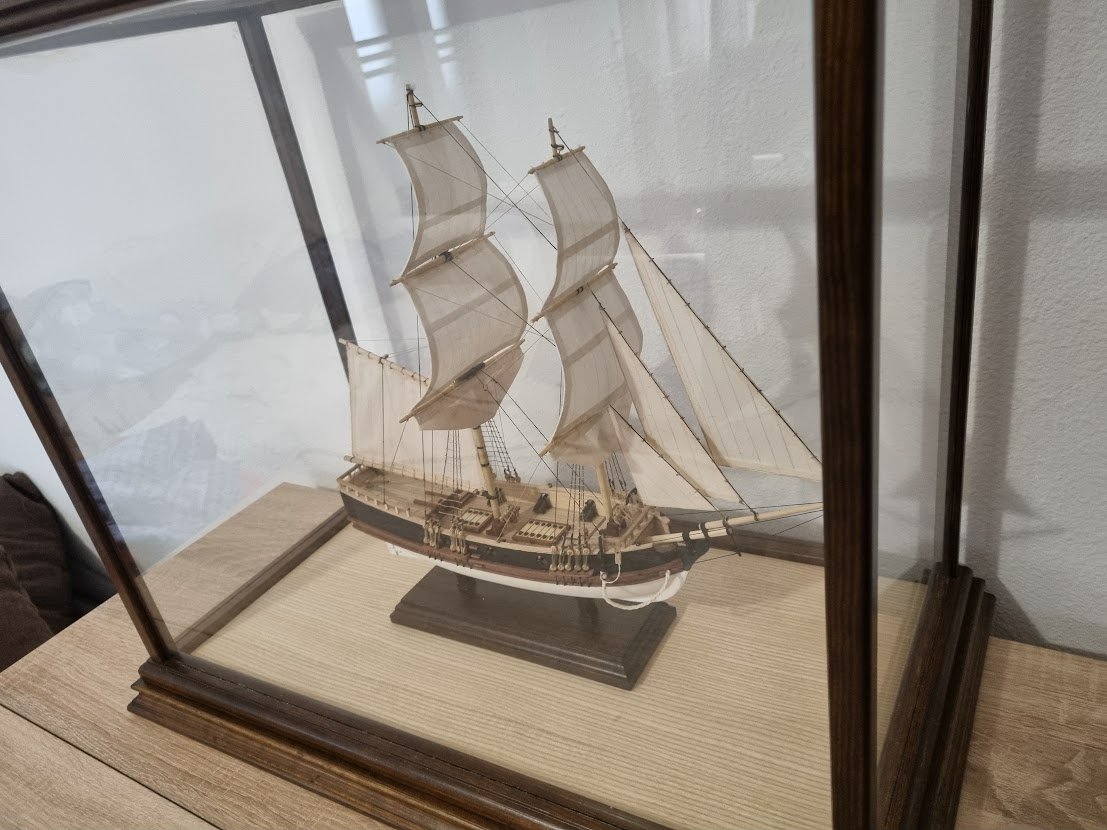


Union by moflea - FINISHED - Constructo
in - Kit build logs for subjects built from 1751 - 1800
Posted
Thank you for your kinds words. The work is far from outstanding but it surely was a LOT of fun doing it. Now she stands before me on my desk like a little jewel begging not to go away from me")