HOLIDAY DONATION DRIVE - SUPPORT MSW - DO YOUR PART TO KEEP THIS GREAT FORUM GOING!
×

.jpg.f26acc9a74319261612561bfa7da1303.jpg)
vaddoc
-
Posts
1,600 -
Joined
-
Last visited
Content Type
Profiles
Forums
Gallery
Events
Everything posted by vaddoc
-
.thumb.jpg.6fd4c1b78768bb3efd745ab810936005.jpg) How true Bob! Nothing beats laying a baten on the hull. This was a lovely post, made me feel a bit like a shipwright of old!
How true Bob! Nothing beats laying a baten on the hull. This was a lovely post, made me feel a bit like a shipwright of old! -
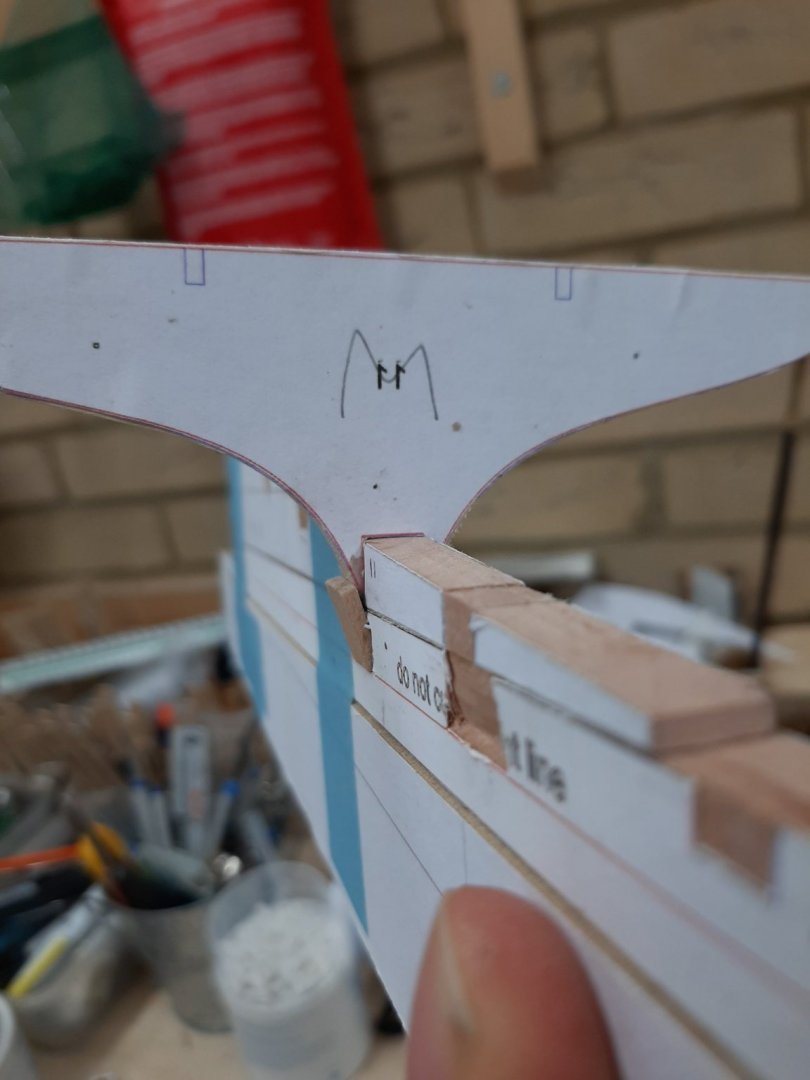
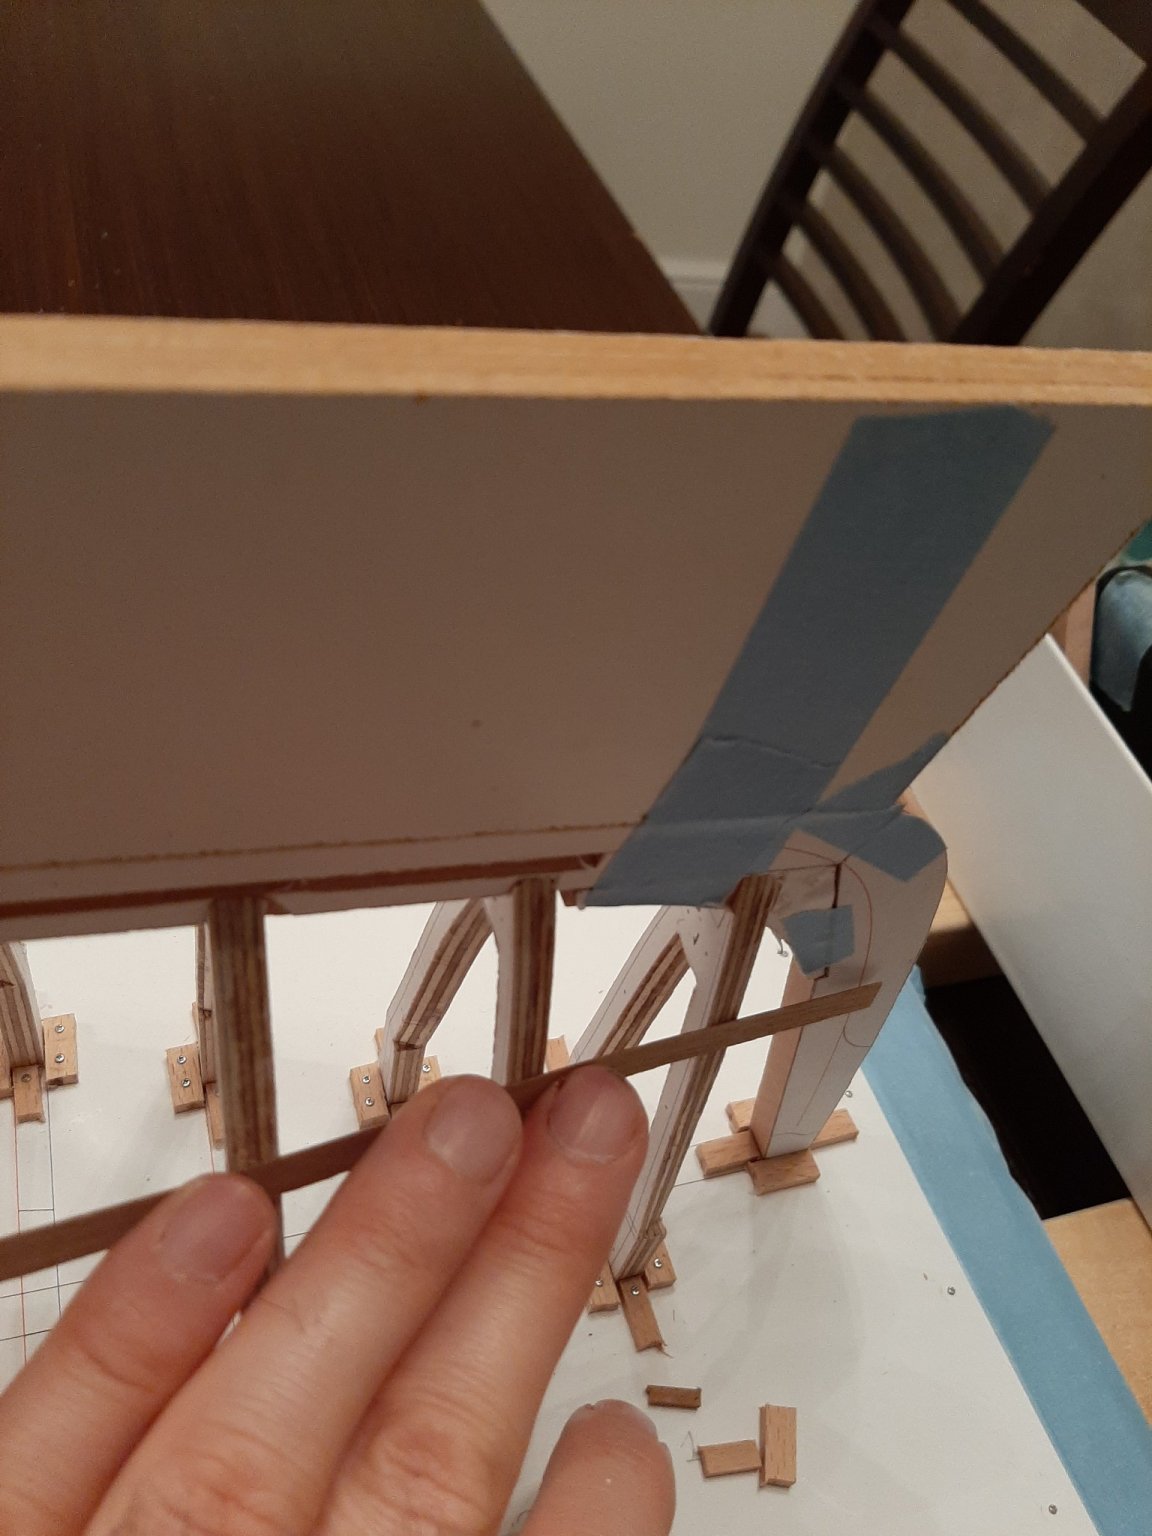
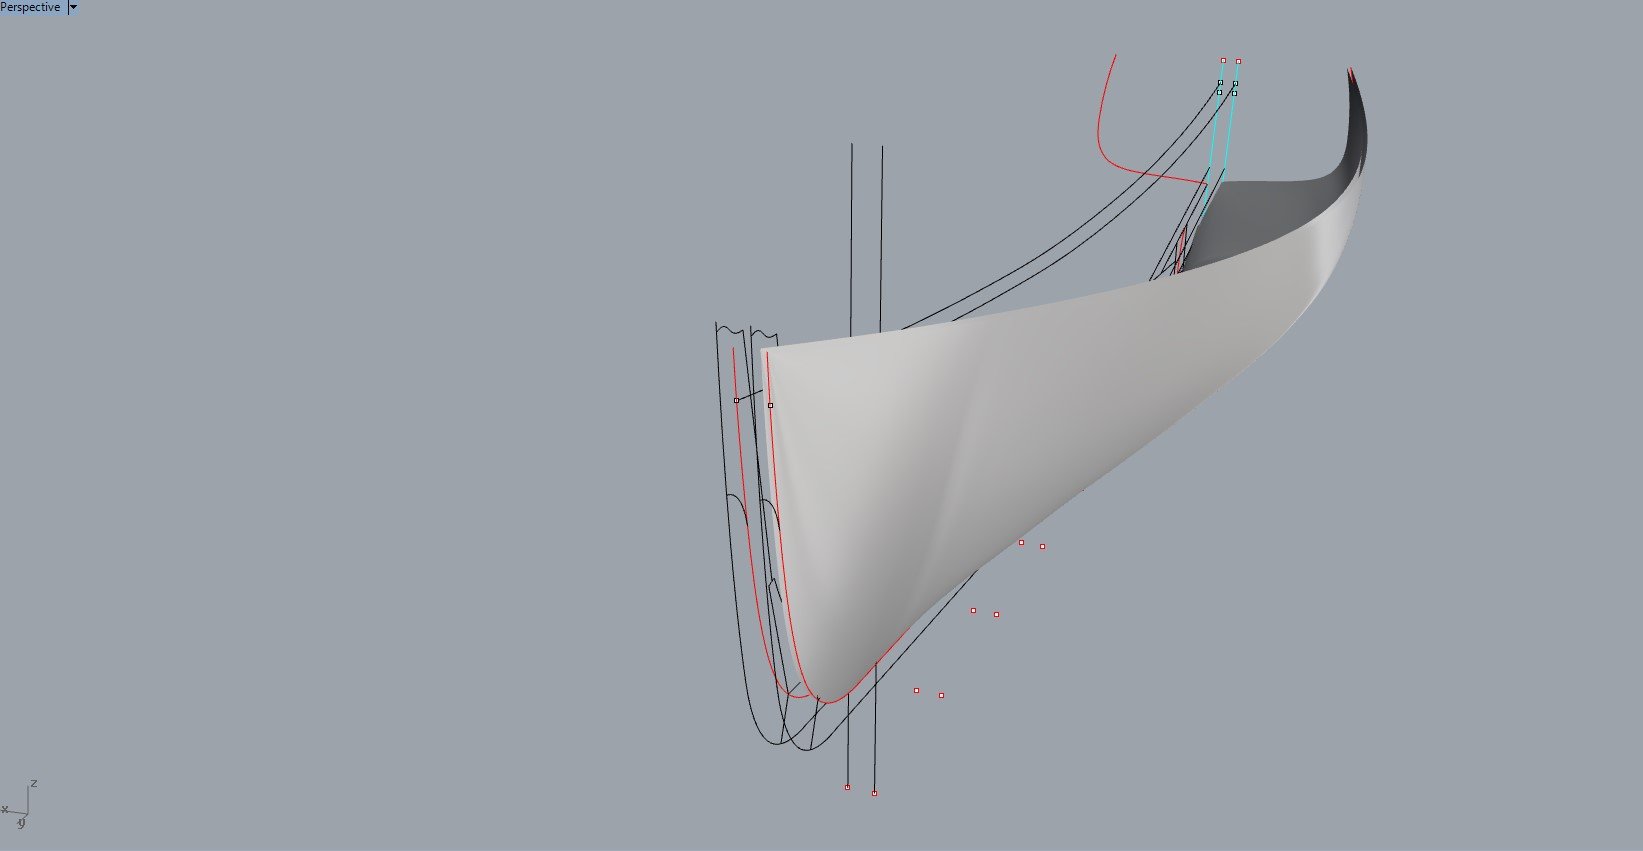
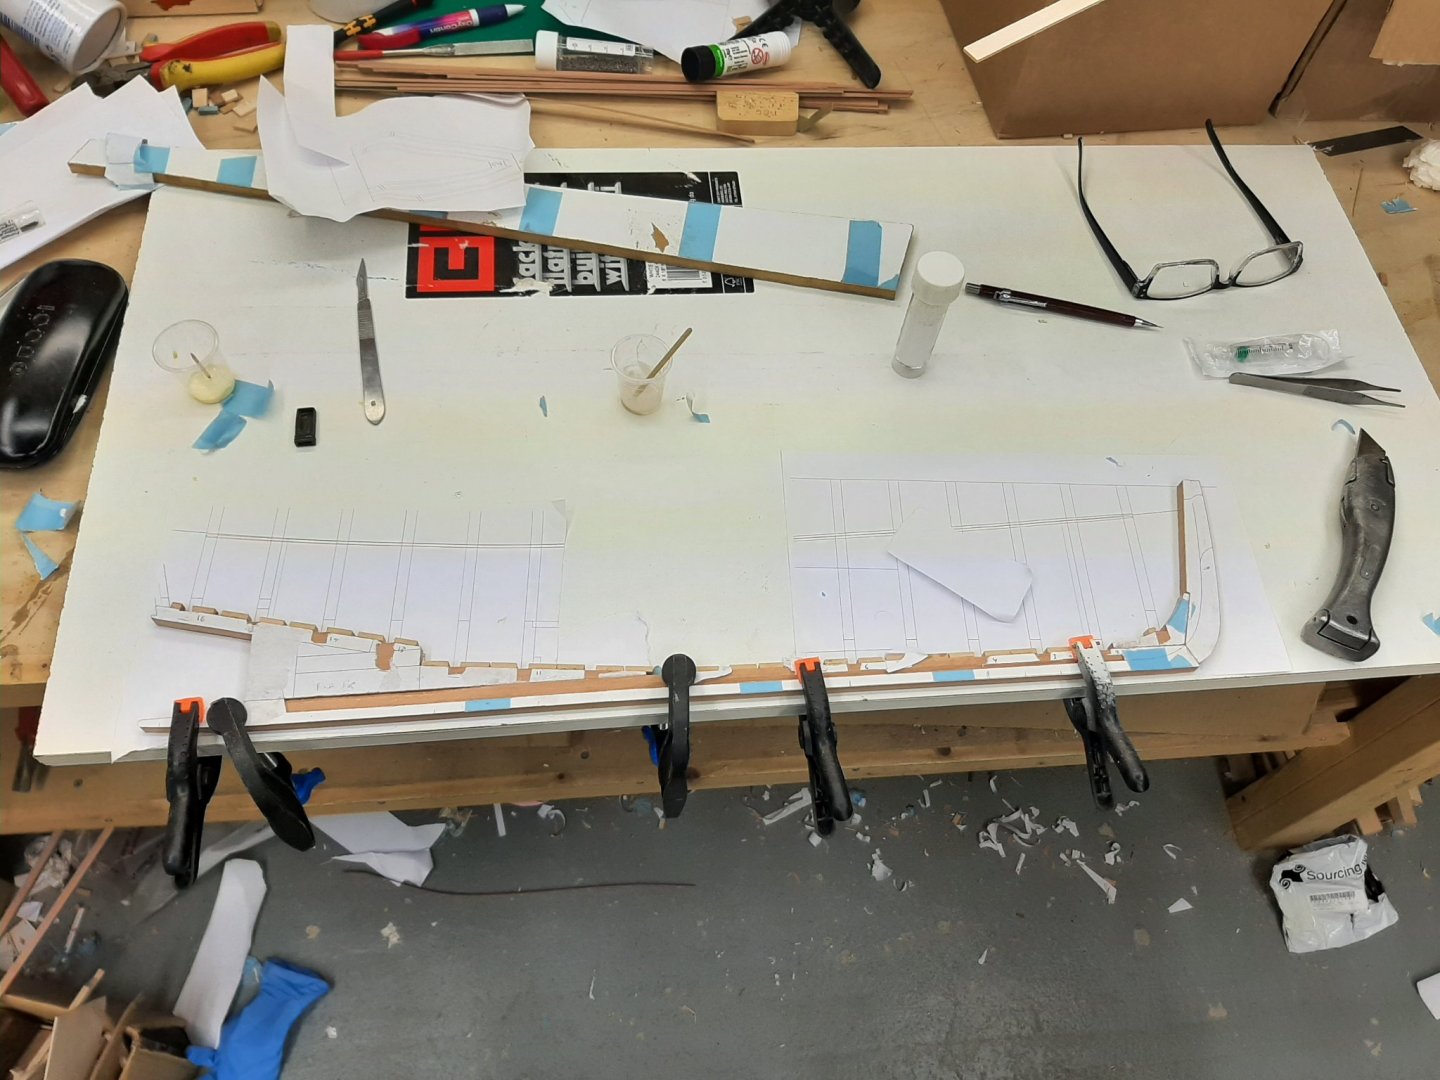
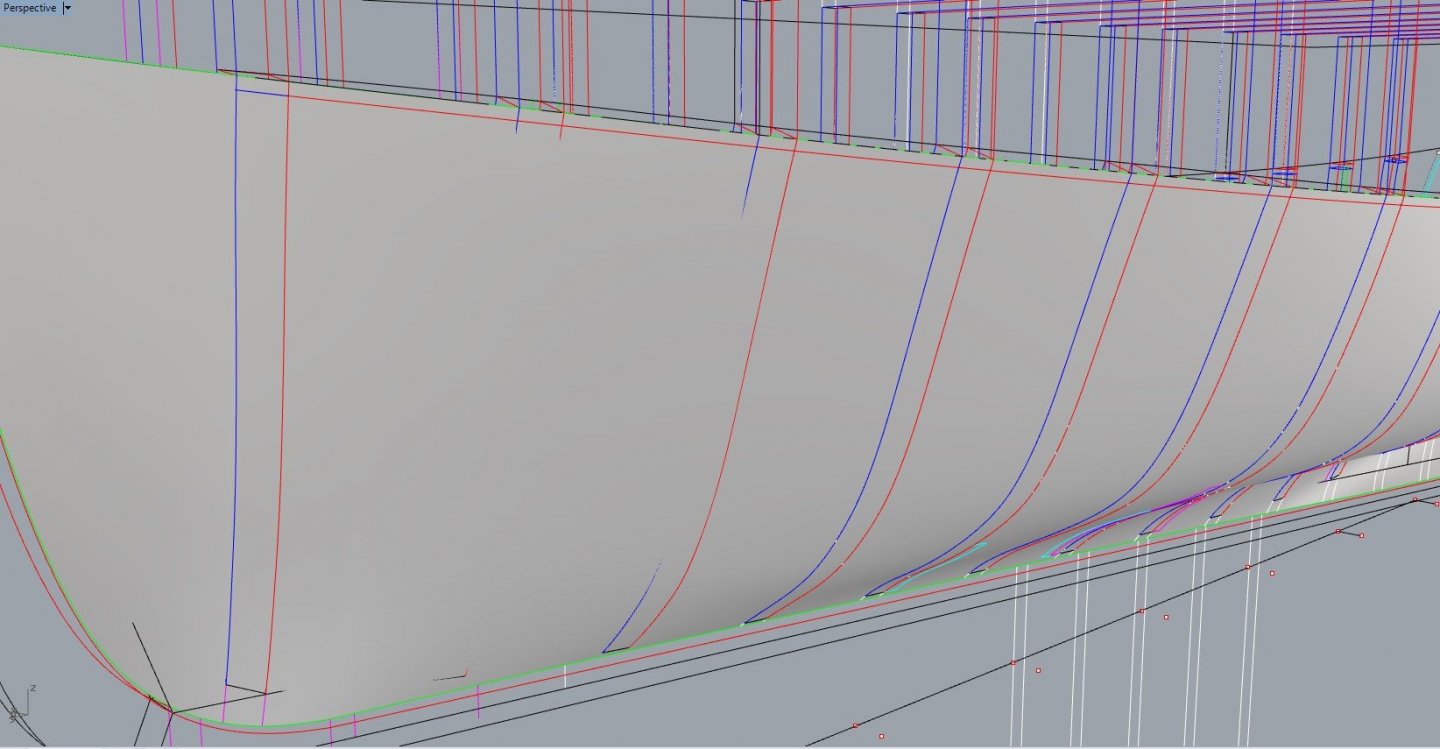
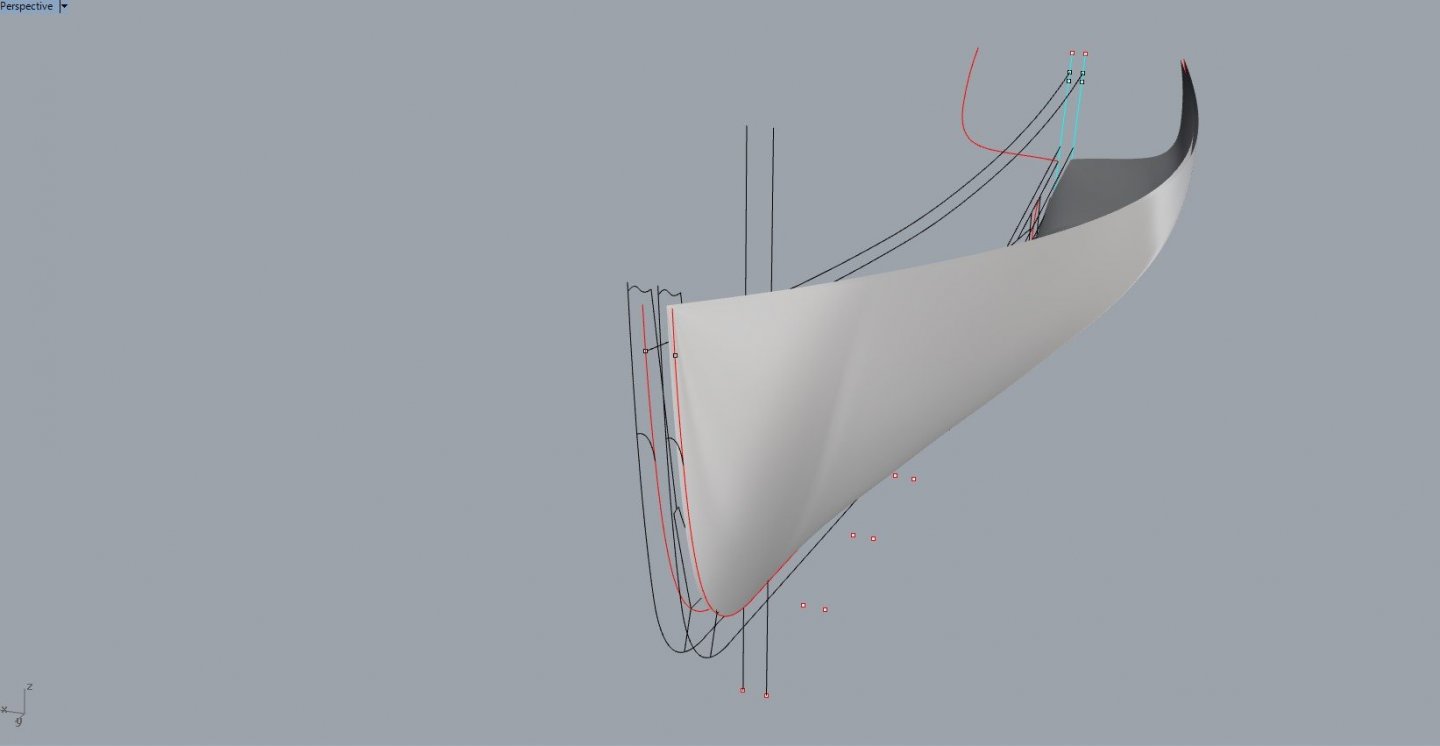
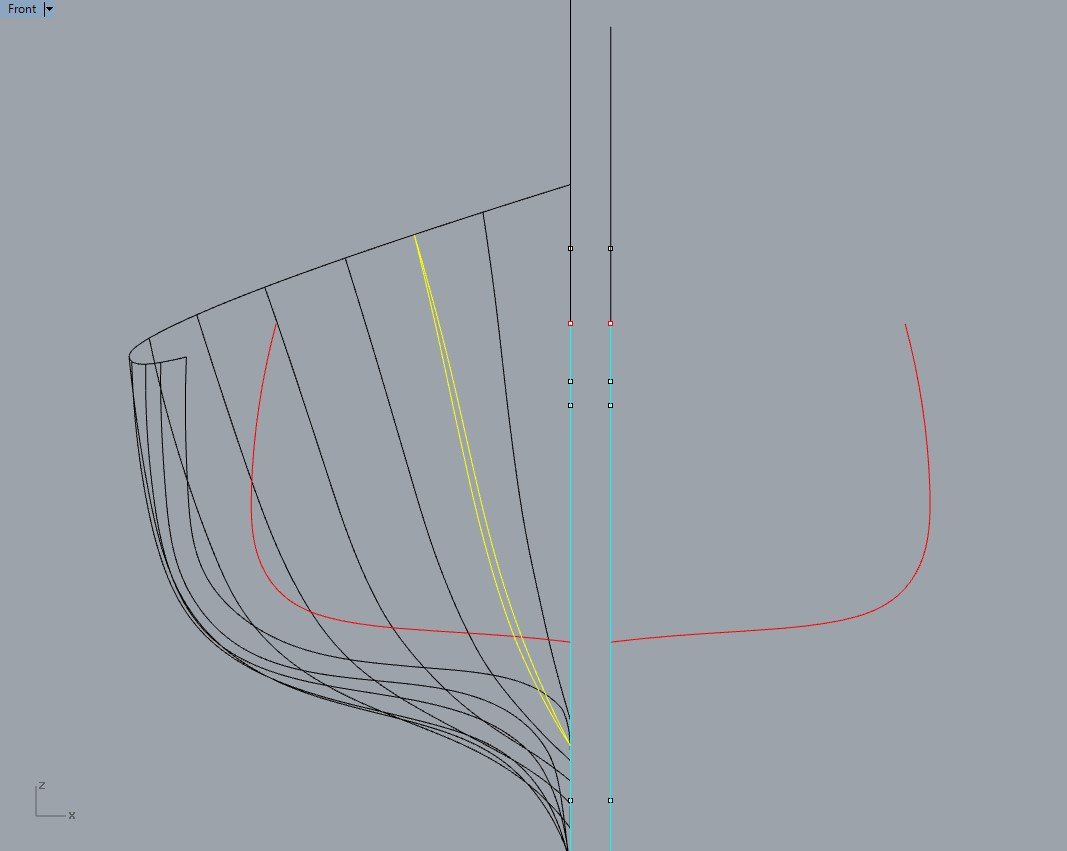
Many thanks to all for your likes and comments! Indeed Bob, in all plans the transom might look vertical but essentially is the projection of the angled transom to the vertical plane. When I developed the plans on CAD, I did the opposite - that is I projected the transom as given in the plans to a surface in the appropriate angle. Then the sheer was faired and the hull developed and faired. The problem was that the notches on the frames were not deep enough to accept the keel. This was evident as the transom was very accurately cut and positioned but the keel was hovering high up without touching the transom. No idea how this happened as individually all pieces all seem to be very accurately cut but still refused to work together. So I am forgetting CAD accuracy-I ll just sand and shim things as needed until all curves flow nicely! But I checked the hull and it looks ok.
-
Enamel over Acrylic?
vaddoc replied to Phalpenny's topic in Painting, finishing and weathering products and techniques
Peter, have a look at the link bellow but also a nose around MSW - lots of good info. You will need to thin the paint, best thing to practice on scrap pieces of wood, NOT on the model. Cheap plywood works great. When you feel comfortable with your chosen finish, then apply it to the model. Paint should not be thick and enamels behave much different to acrylics. Have a read, principals are pretty much the same for enamels as well. -
Enamel over Acrylic?
vaddoc replied to Phalpenny's topic in Painting, finishing and weathering products and techniques
Enamel over acrylic is generally fine allowing time for the acrylic to "cure". fat over lean! A few comments from my experience though: The Valejo polyurethane varnish is good but I am not too impressed with its adhesion to substrate-never used it on bare wood though. Probably it would be fine but I do not think it is designed for this purpose. There are dedicated wood sealers which would be a better choice for sealing wood. The Valejo polyurethane is water based so it will raise the grain and sanding will be needed, I do not think you will be able to brush the paint straight away. I would use a sanding sealer, sand smooth to 400 grit and then paint with enamel and low odour mineral spirit. If you don't mind the trouble, Humbrol enamels are great. Or you could just use very dilute enamel as first coat to seal the wood but sanding sealer is better Vaddoc -
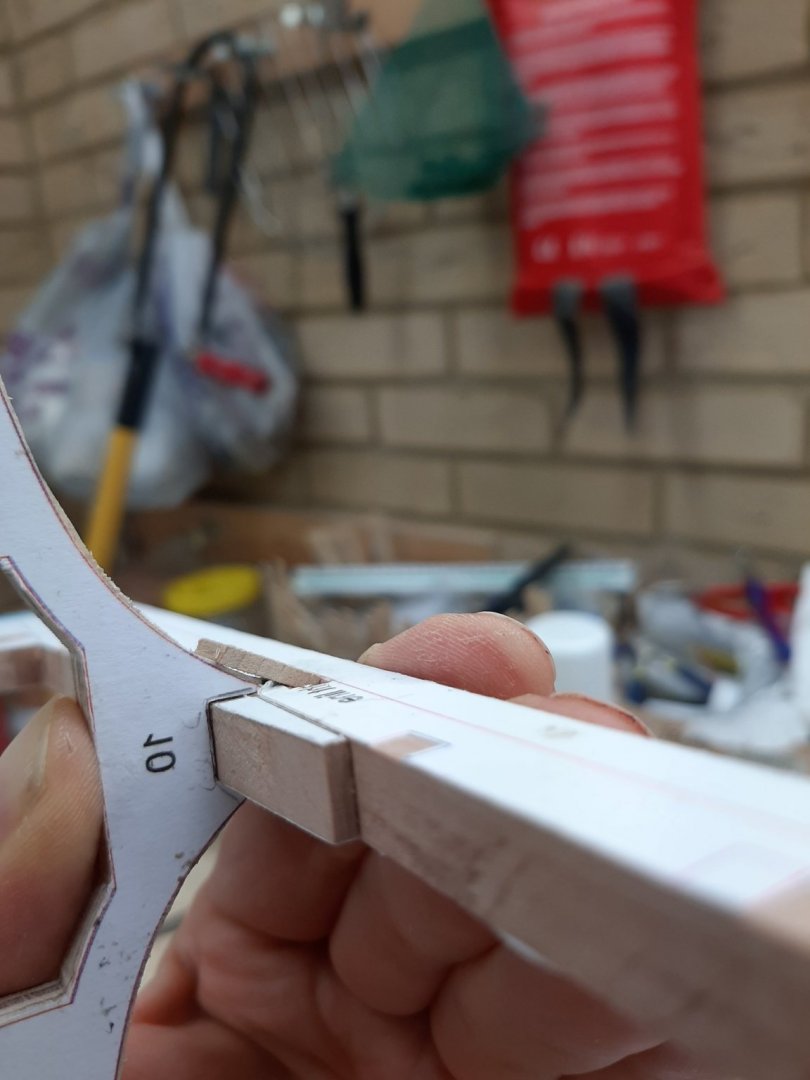
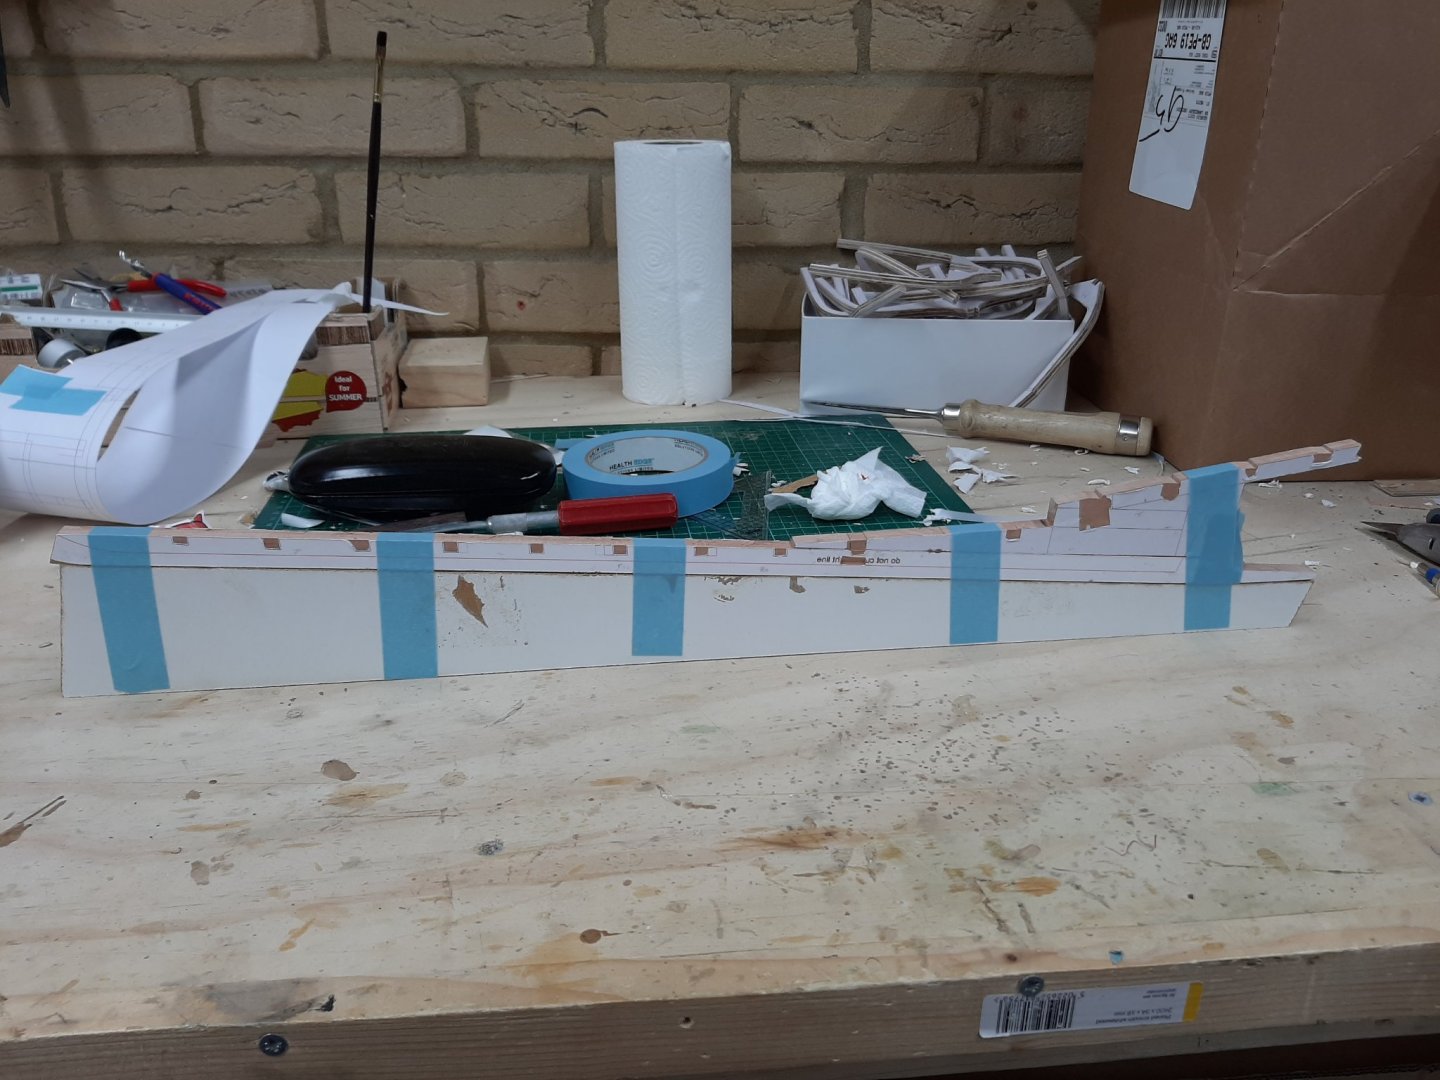
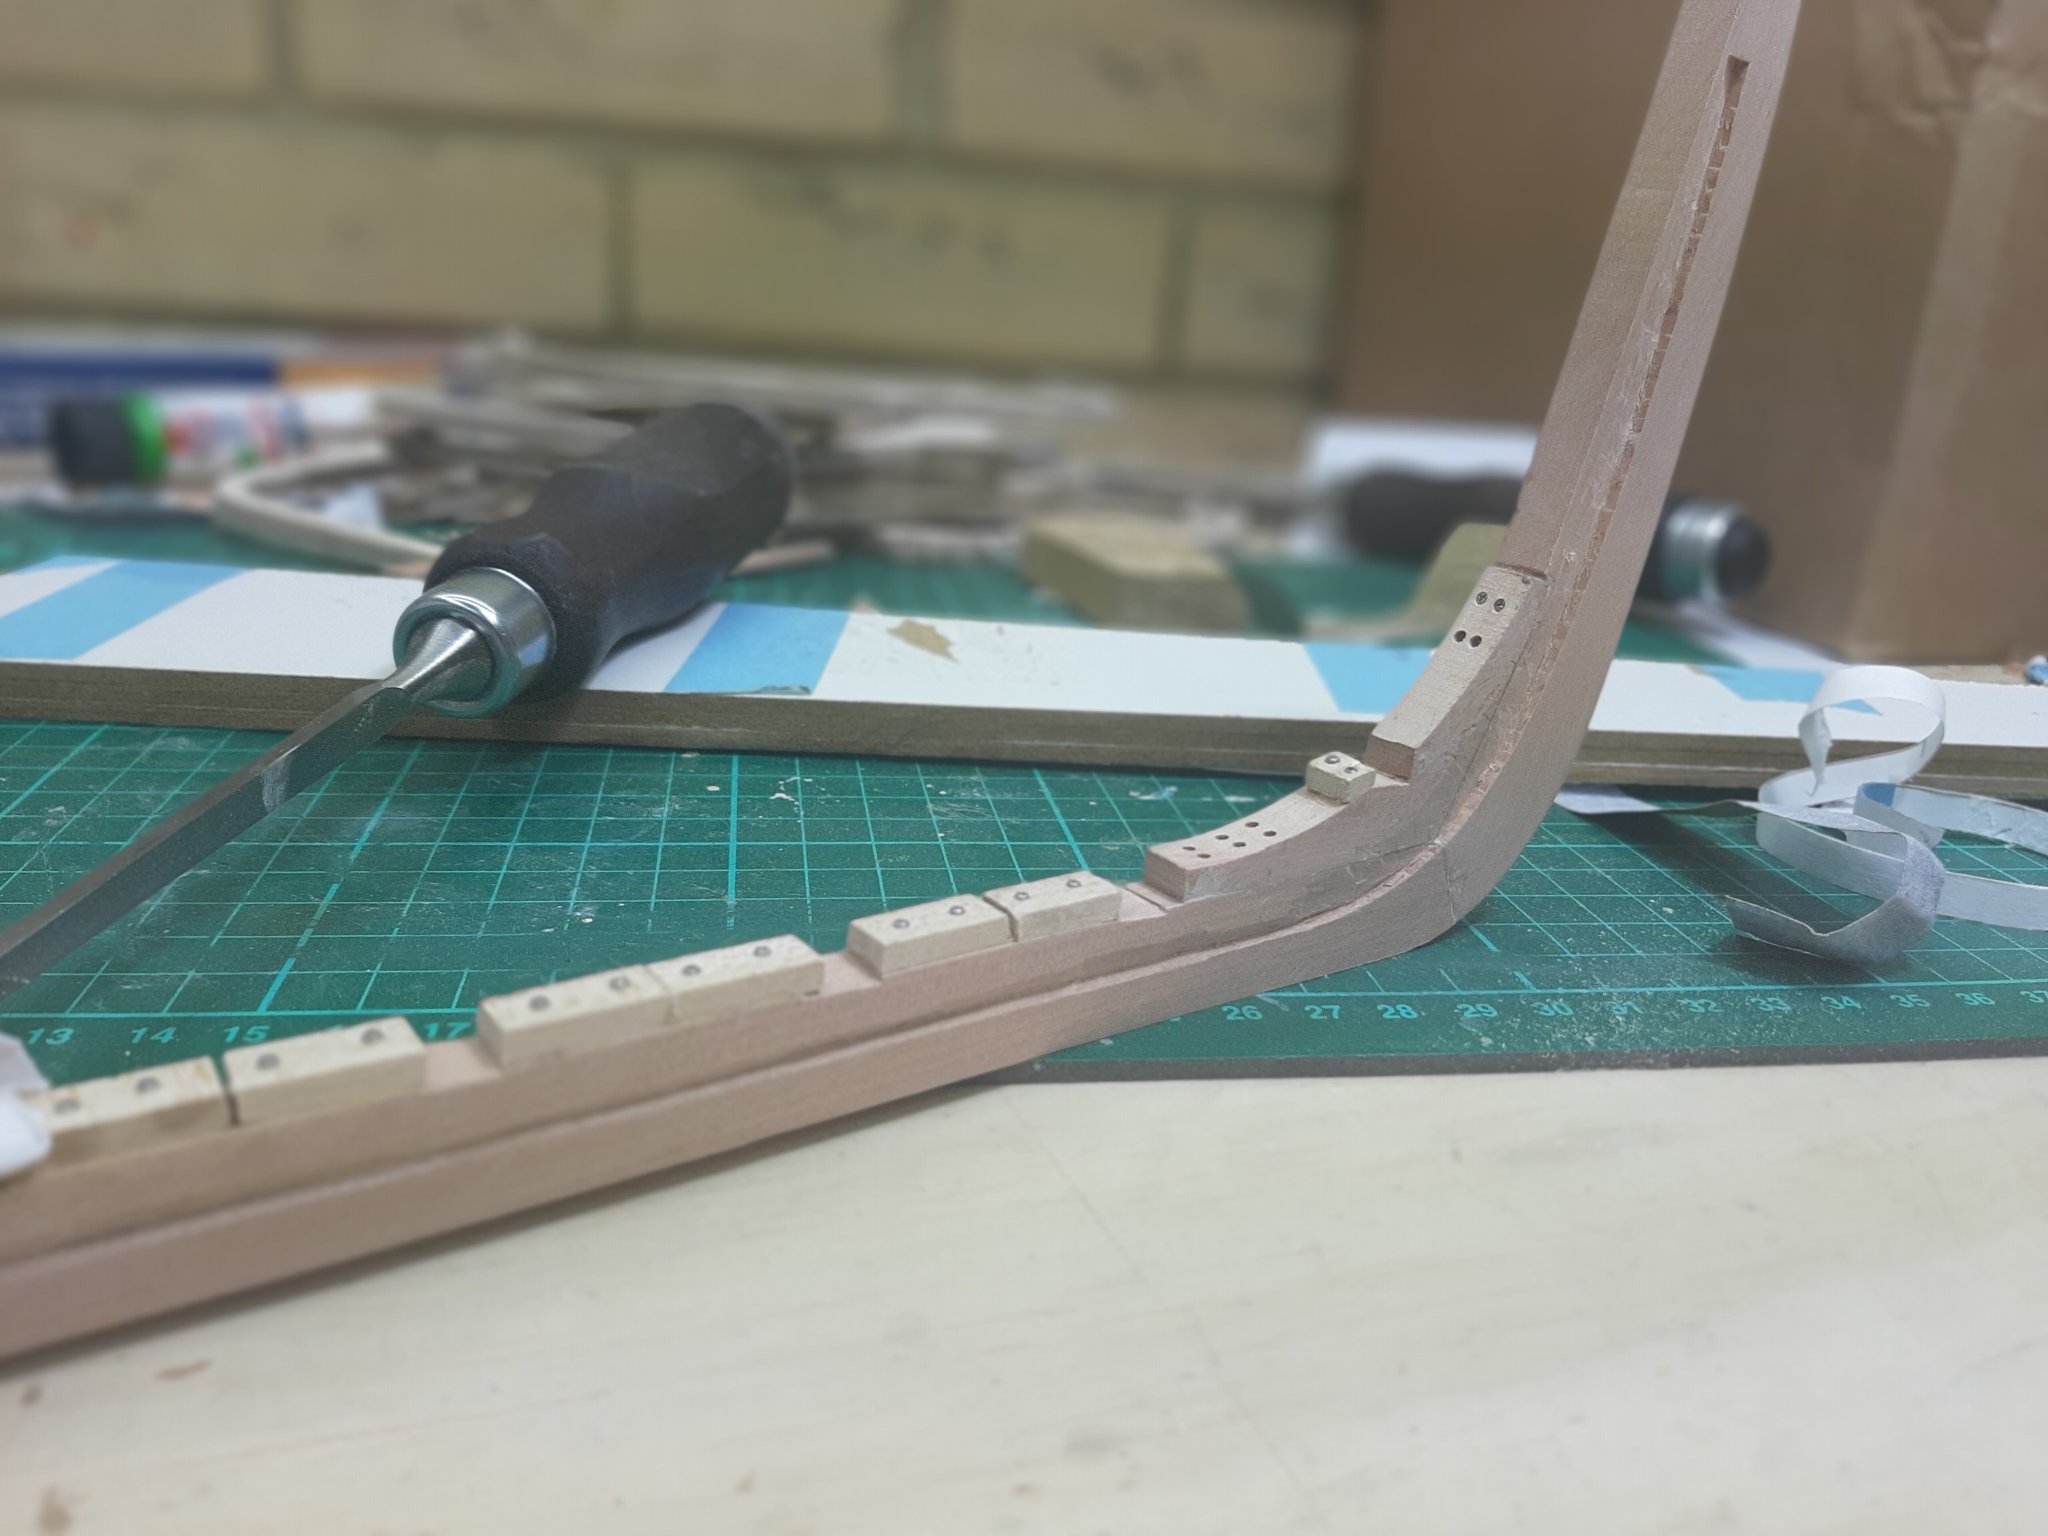
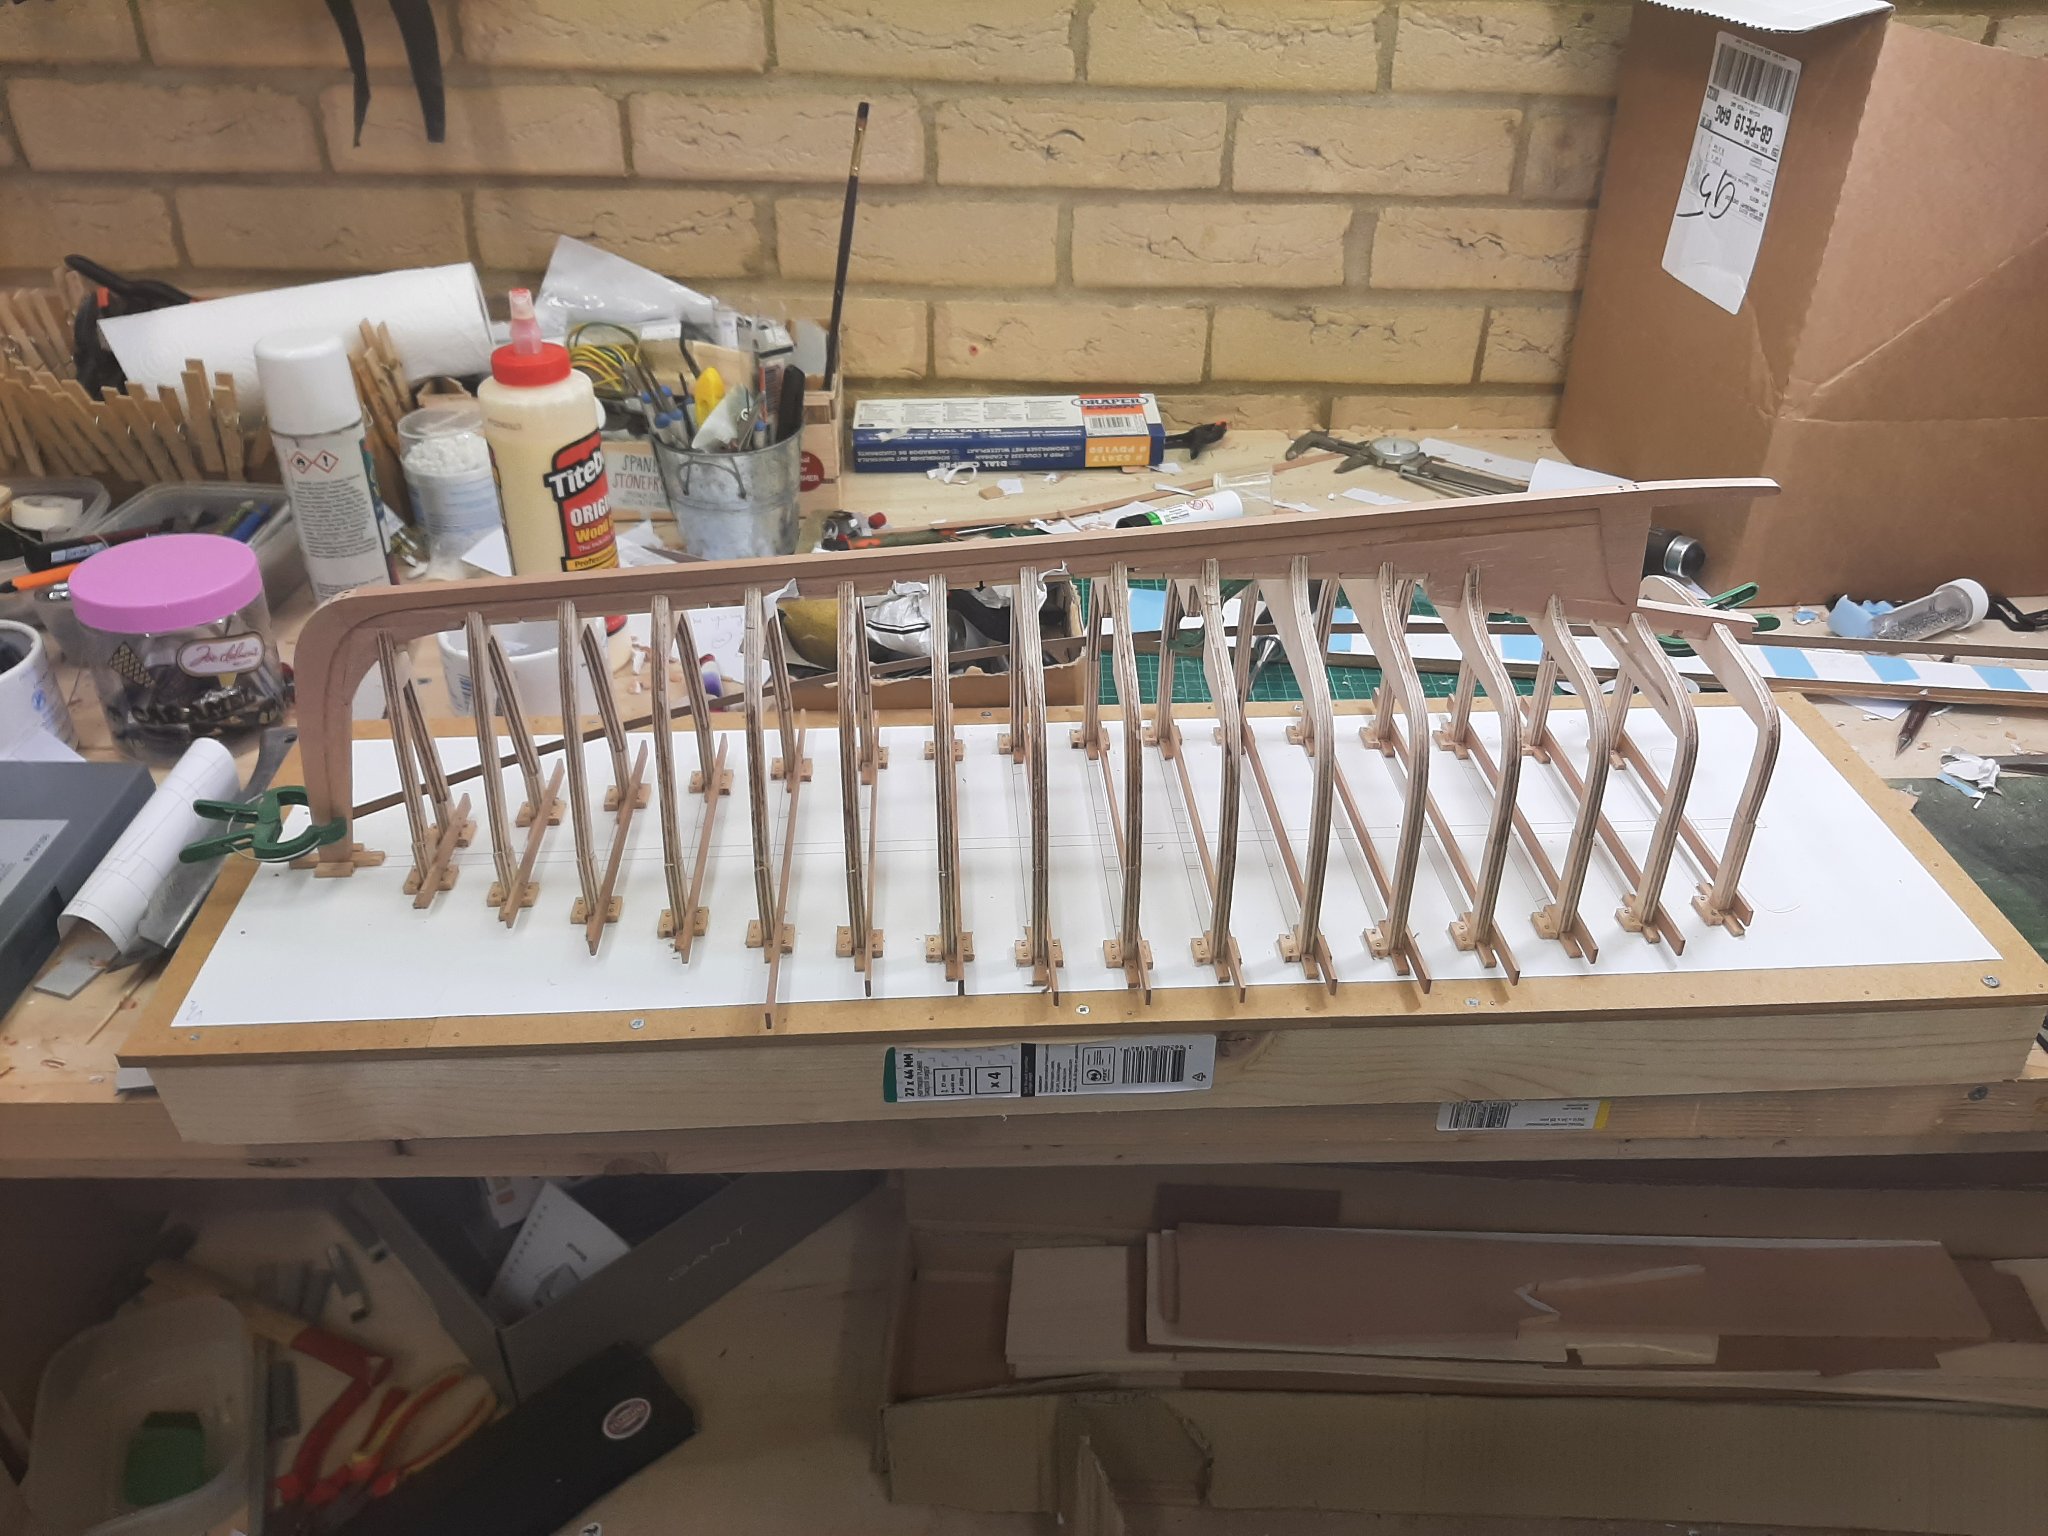
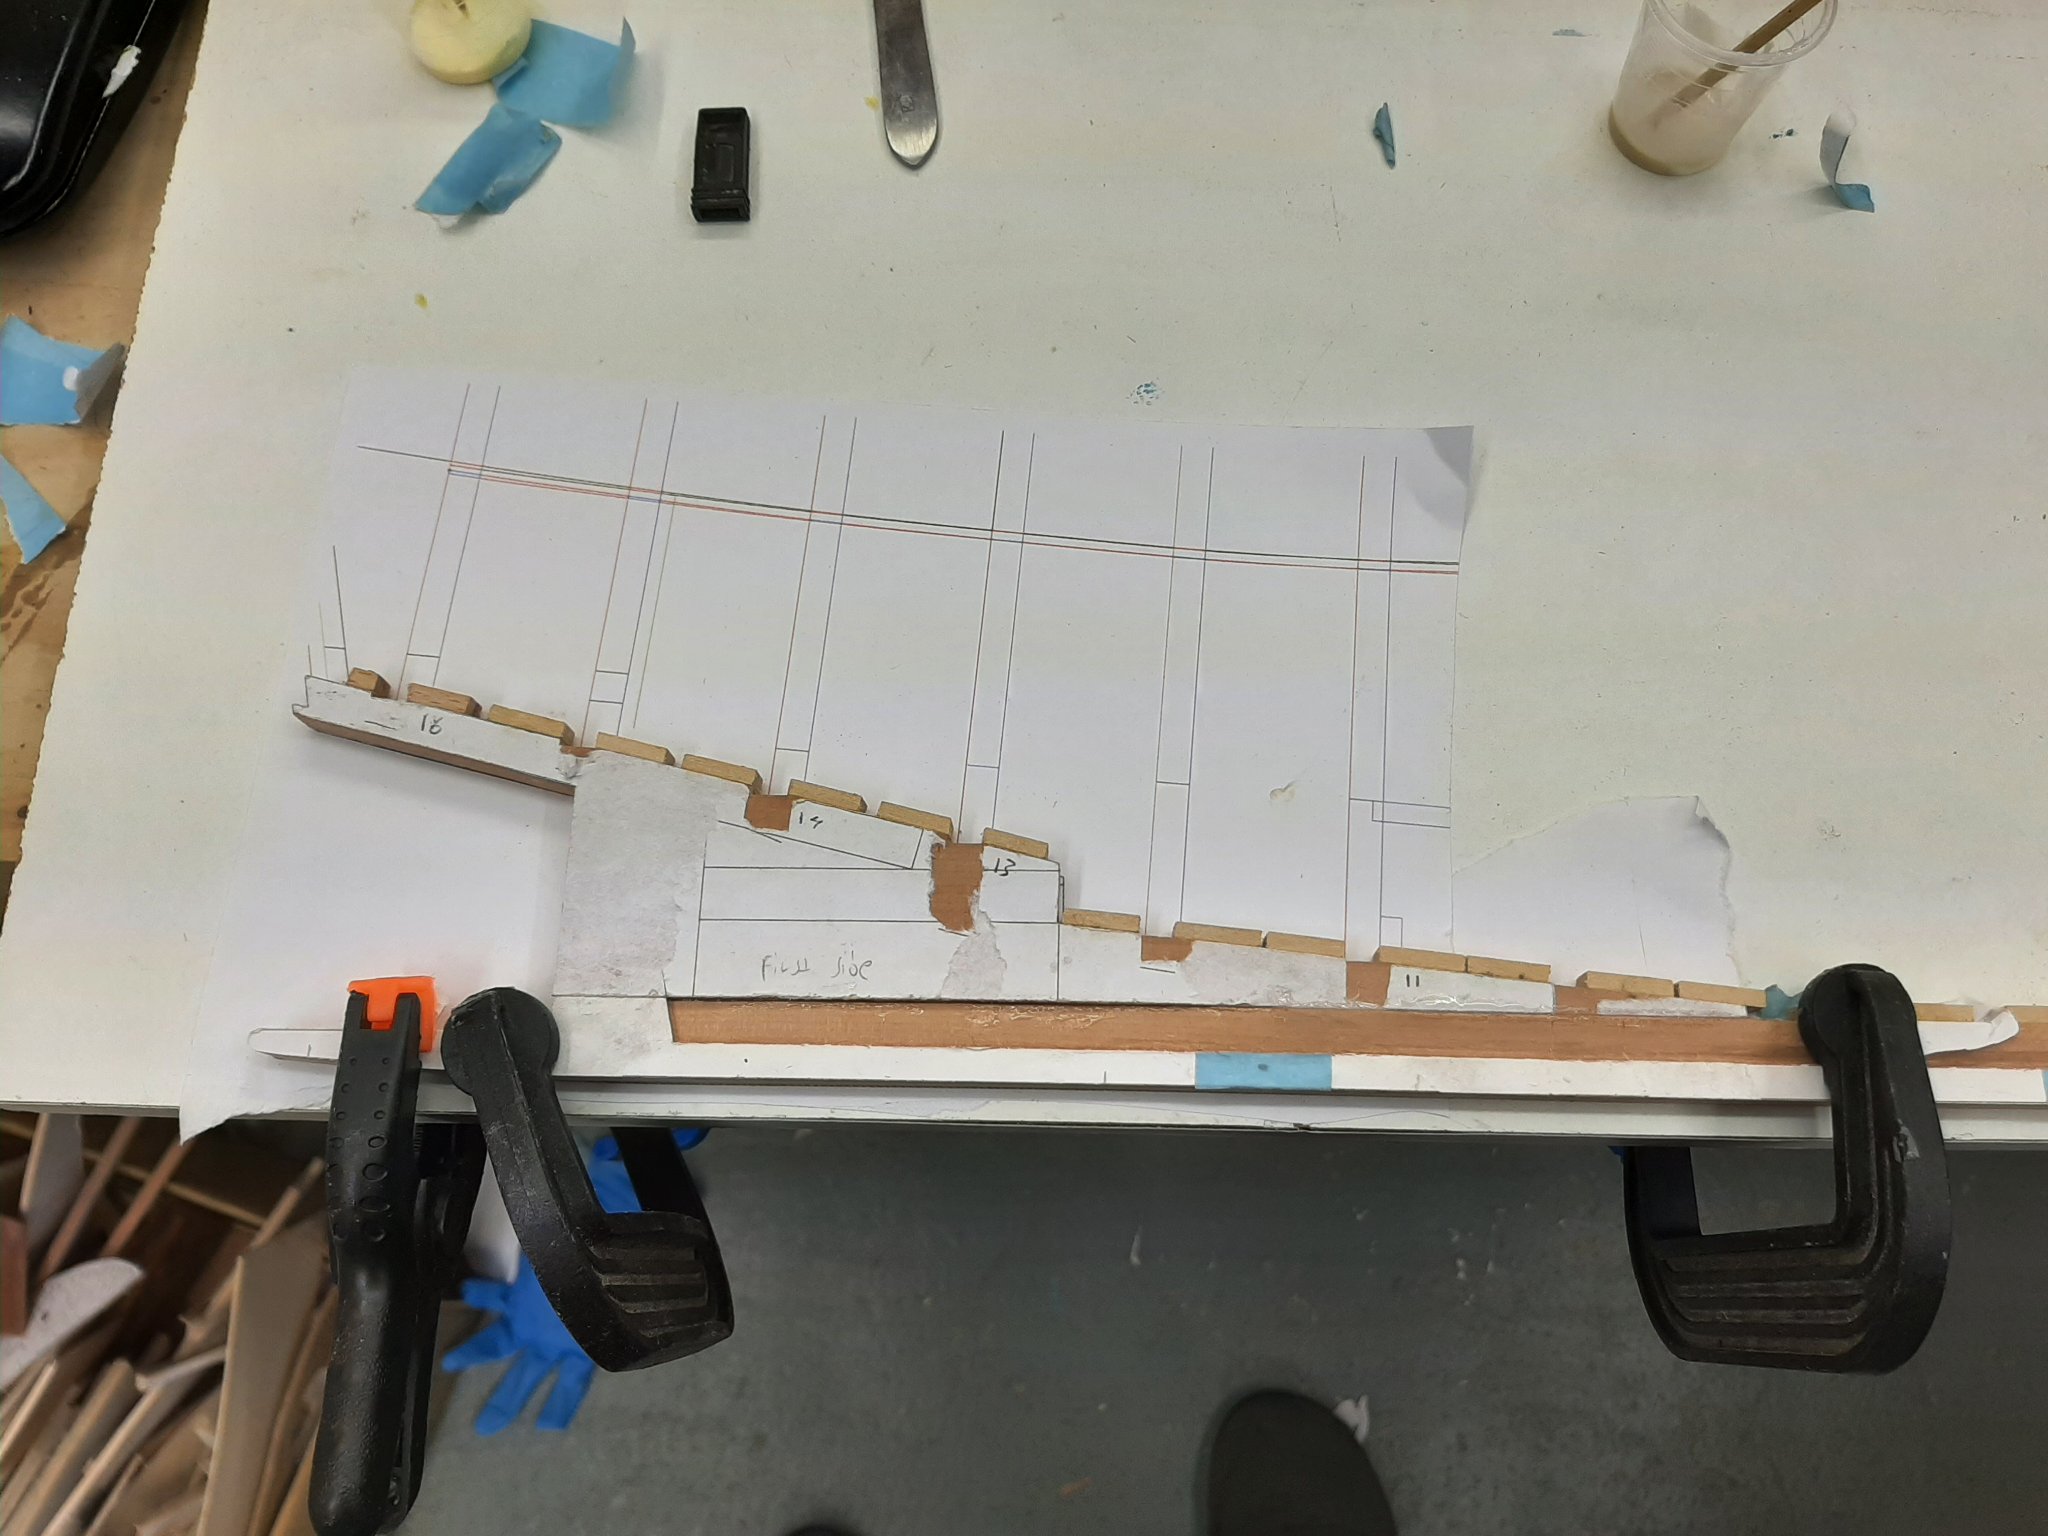
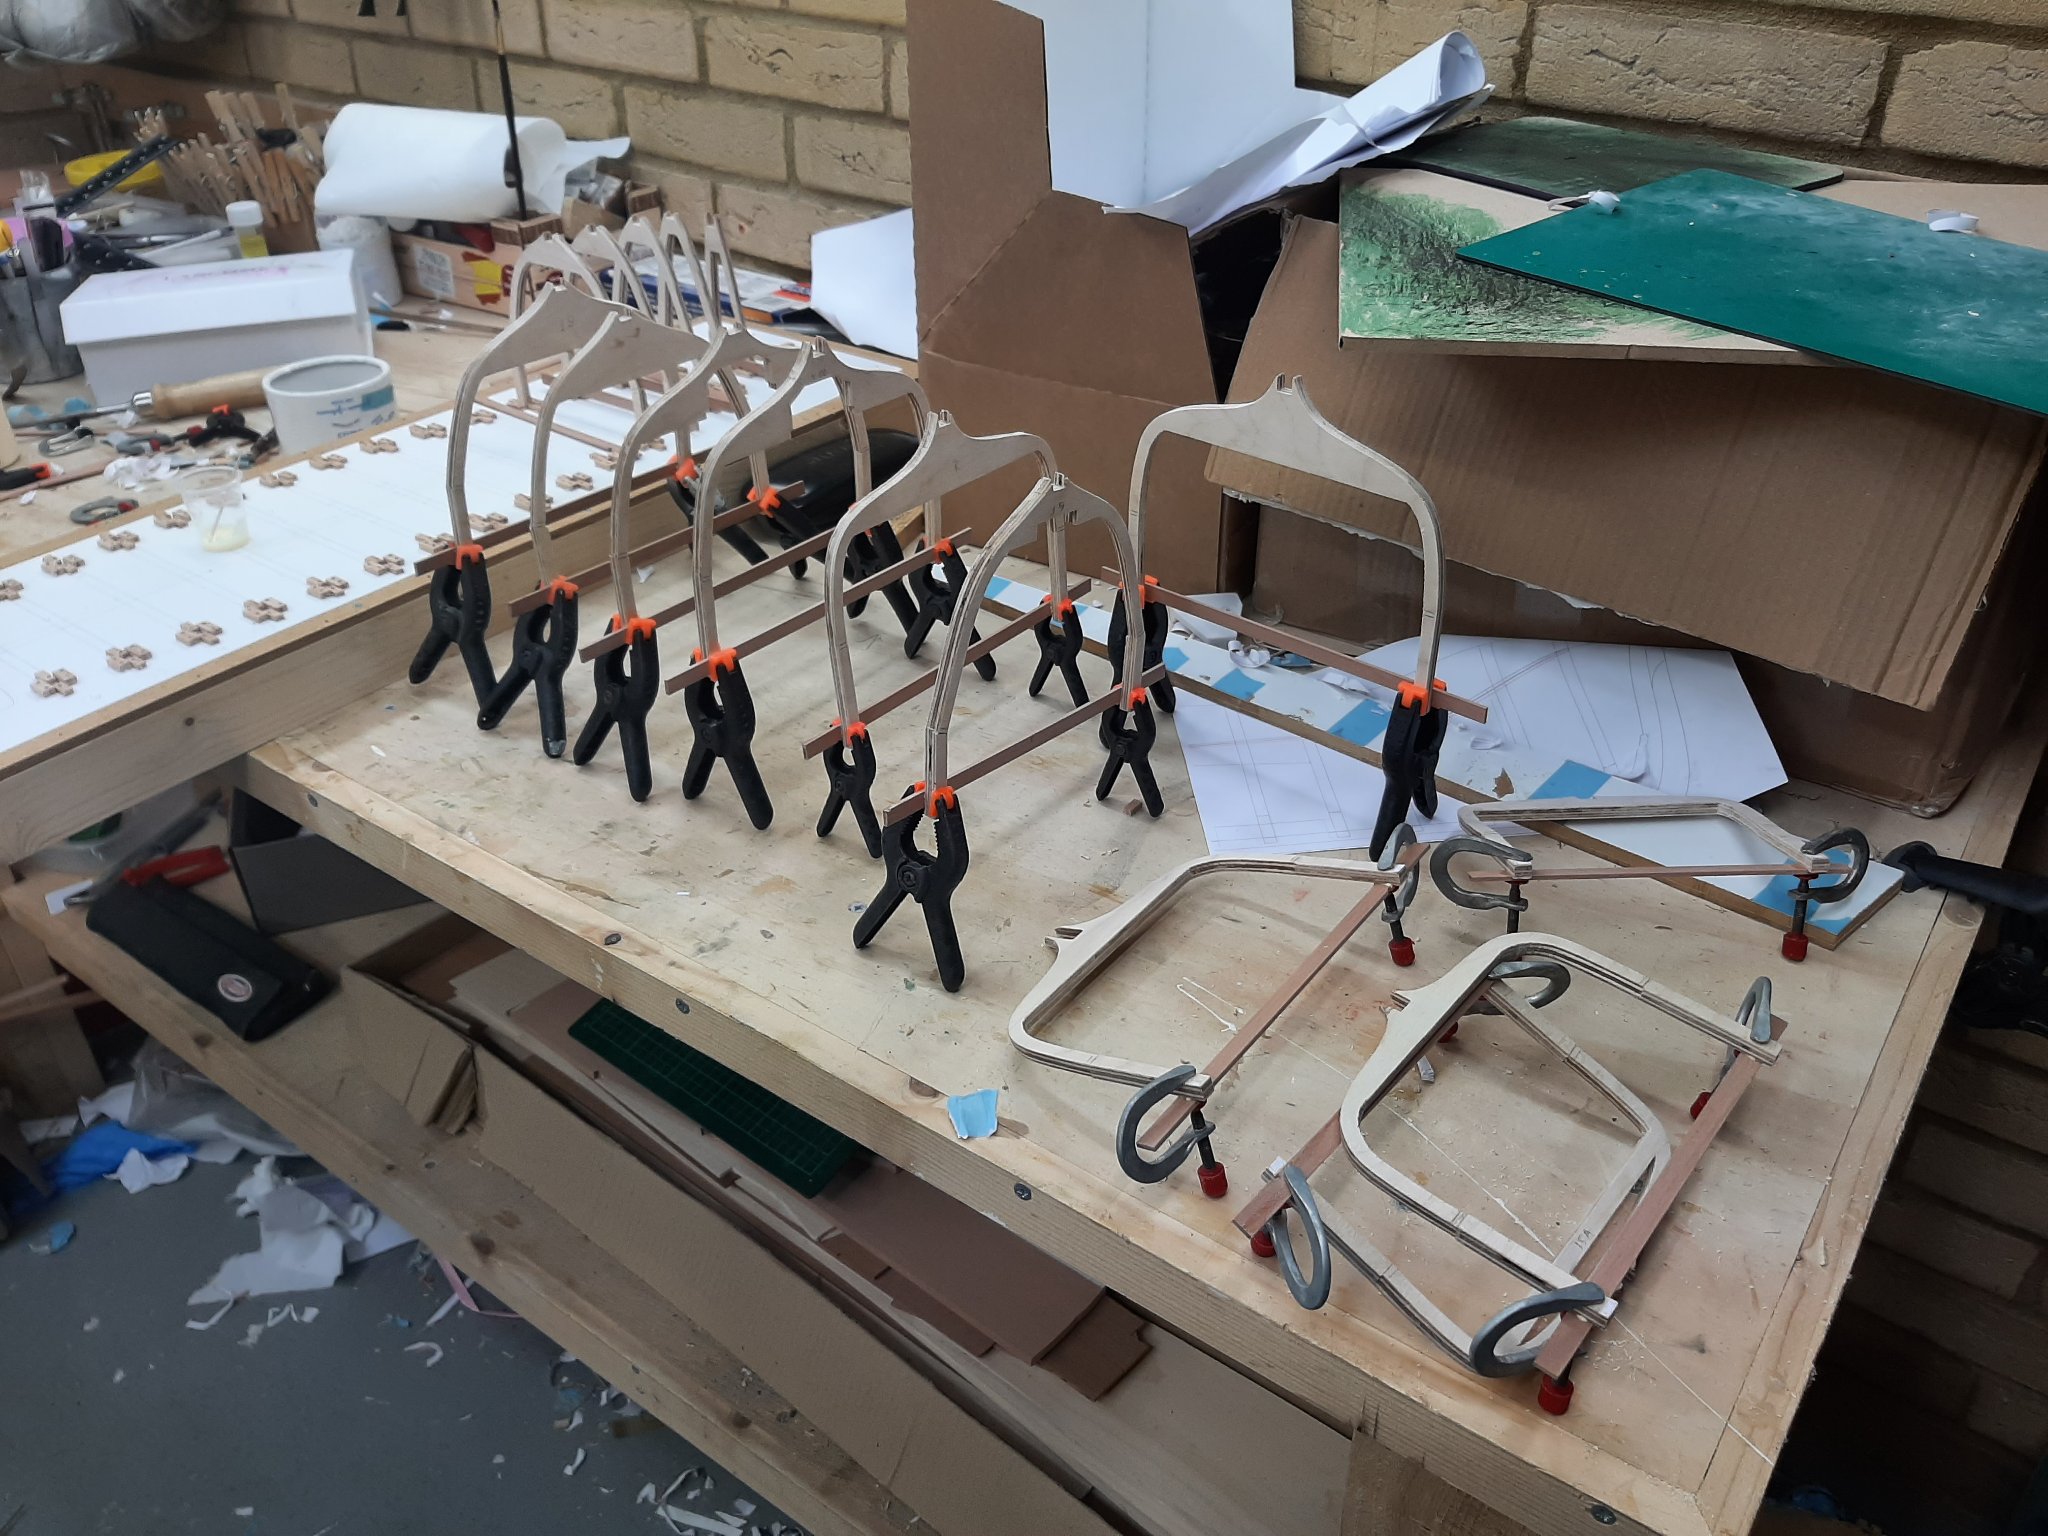
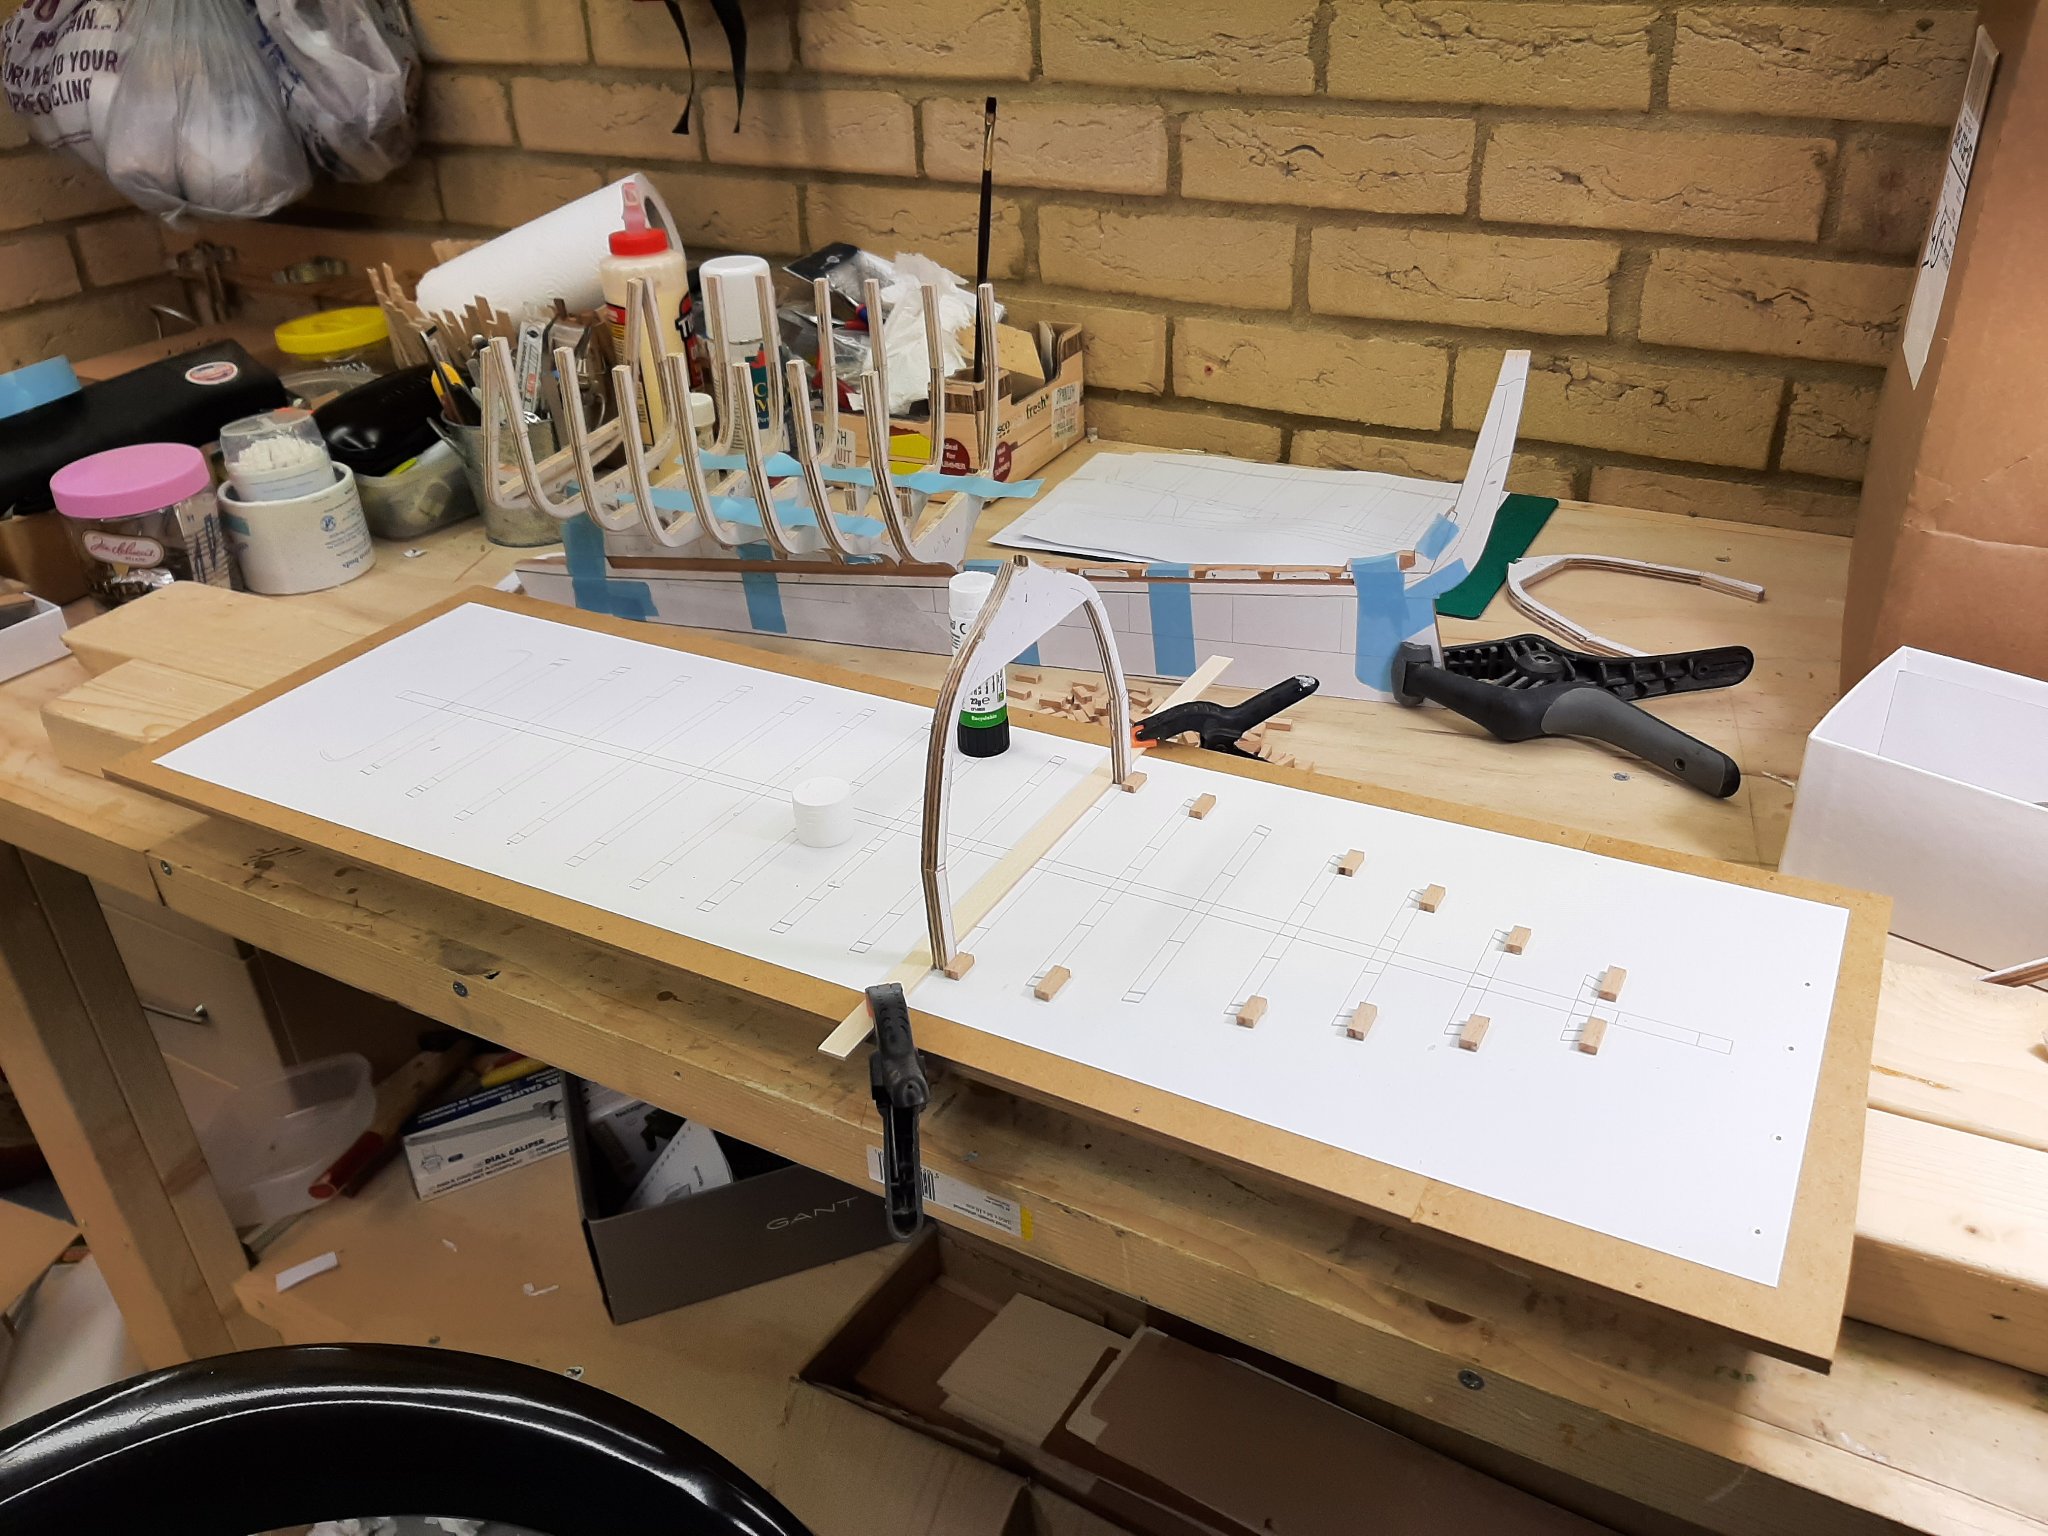
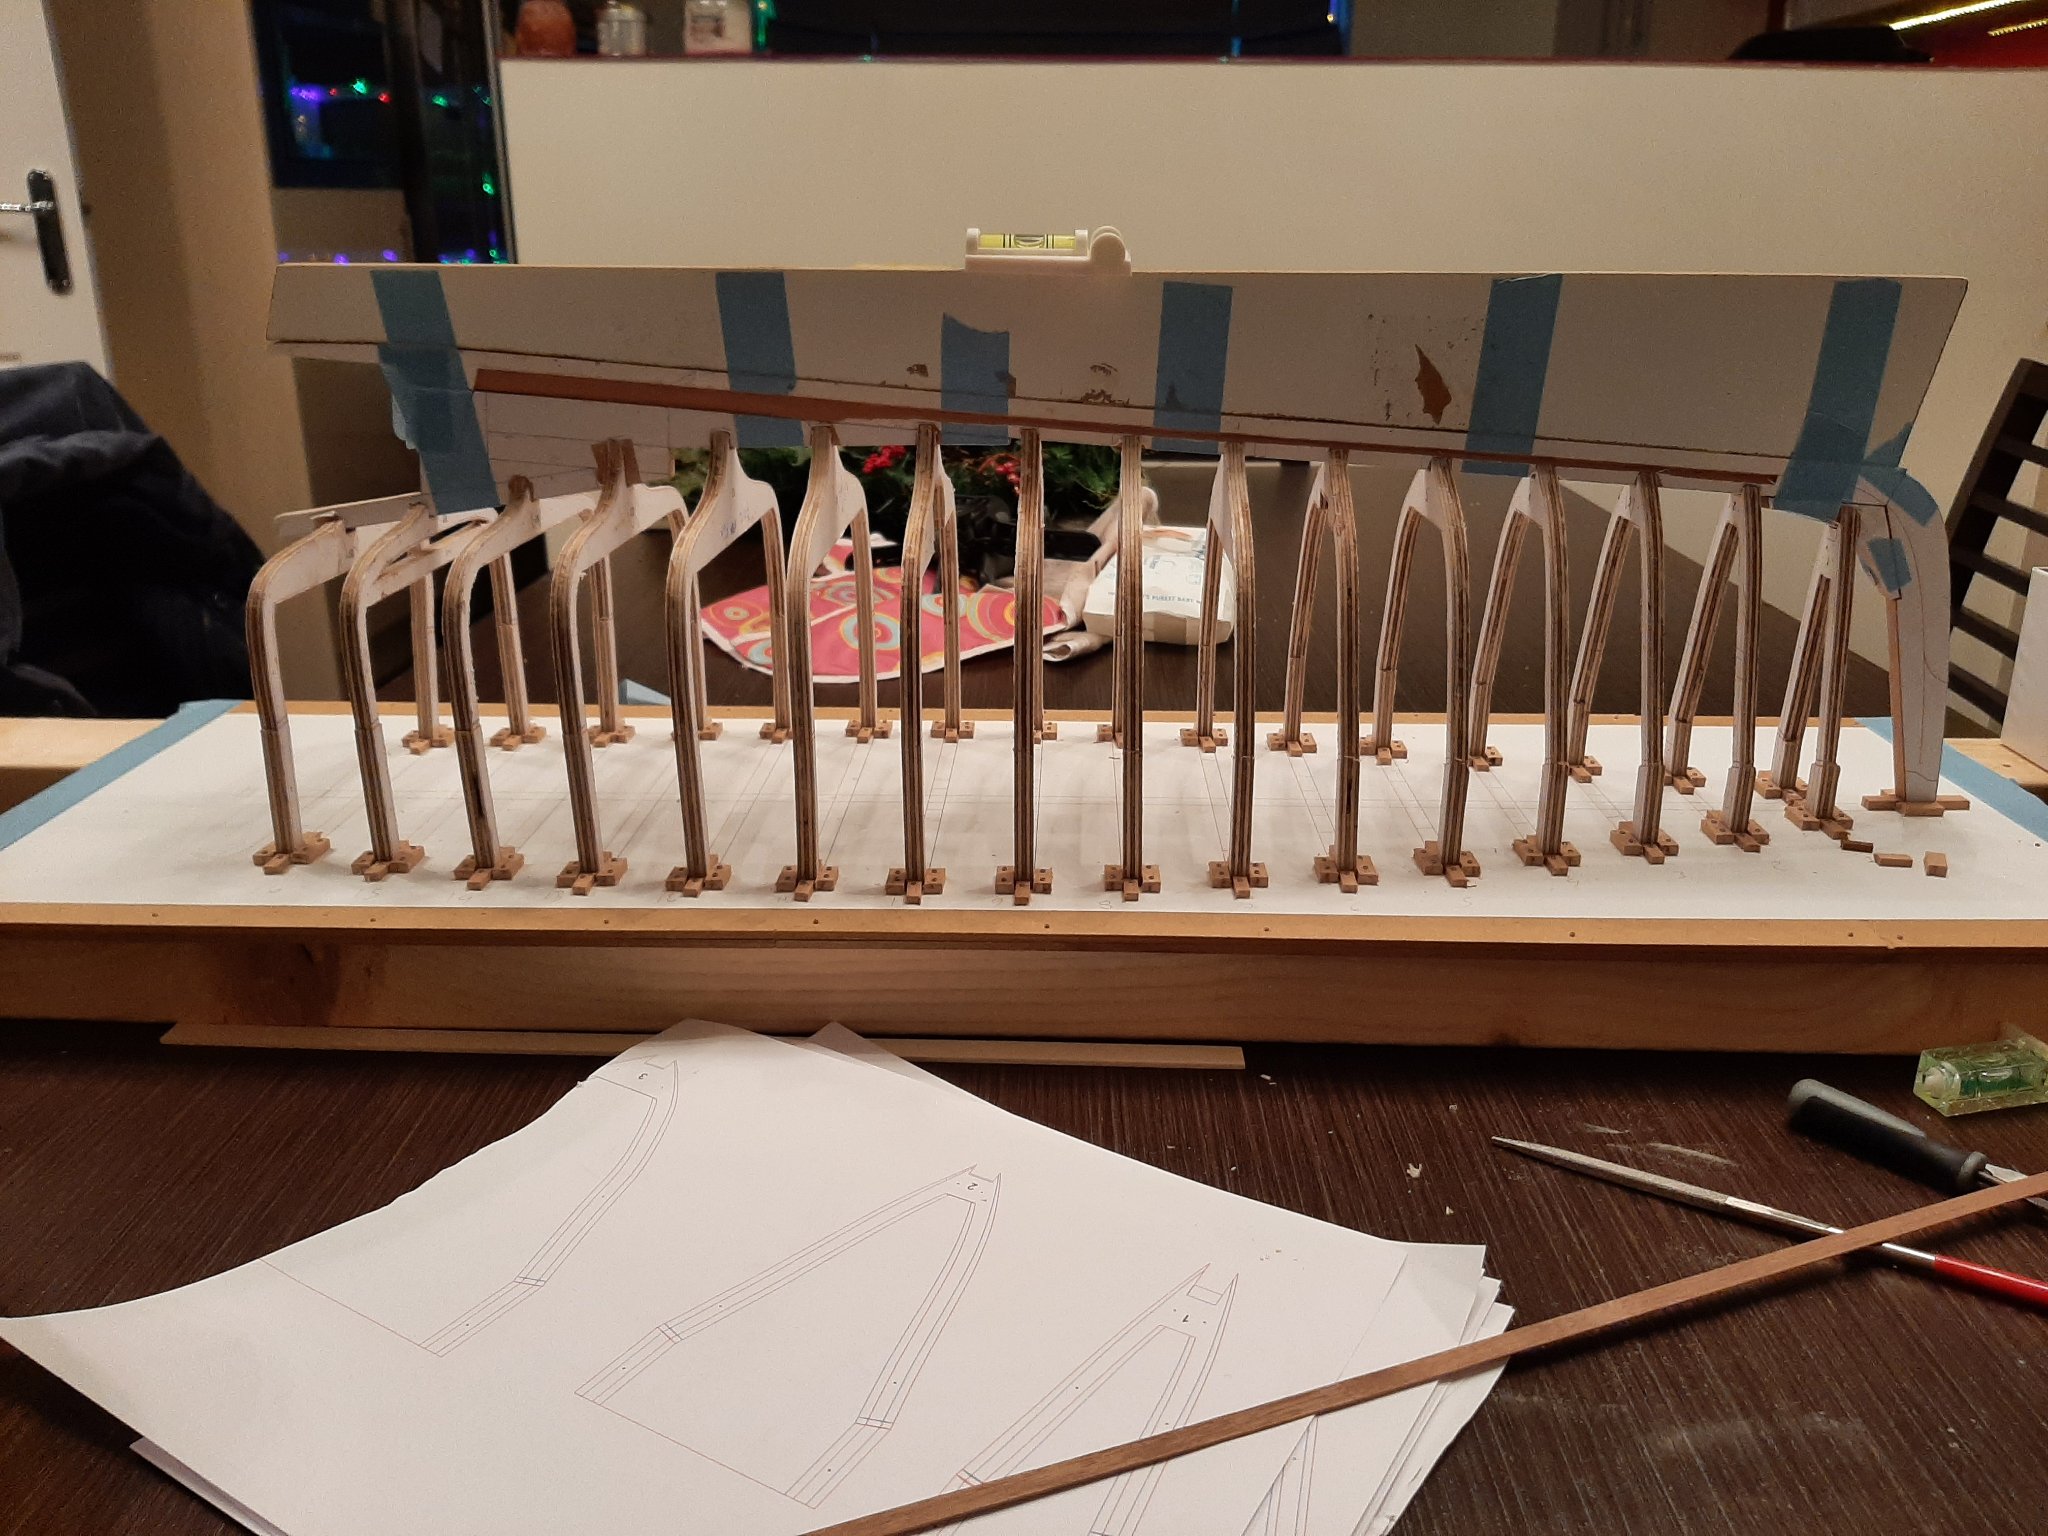
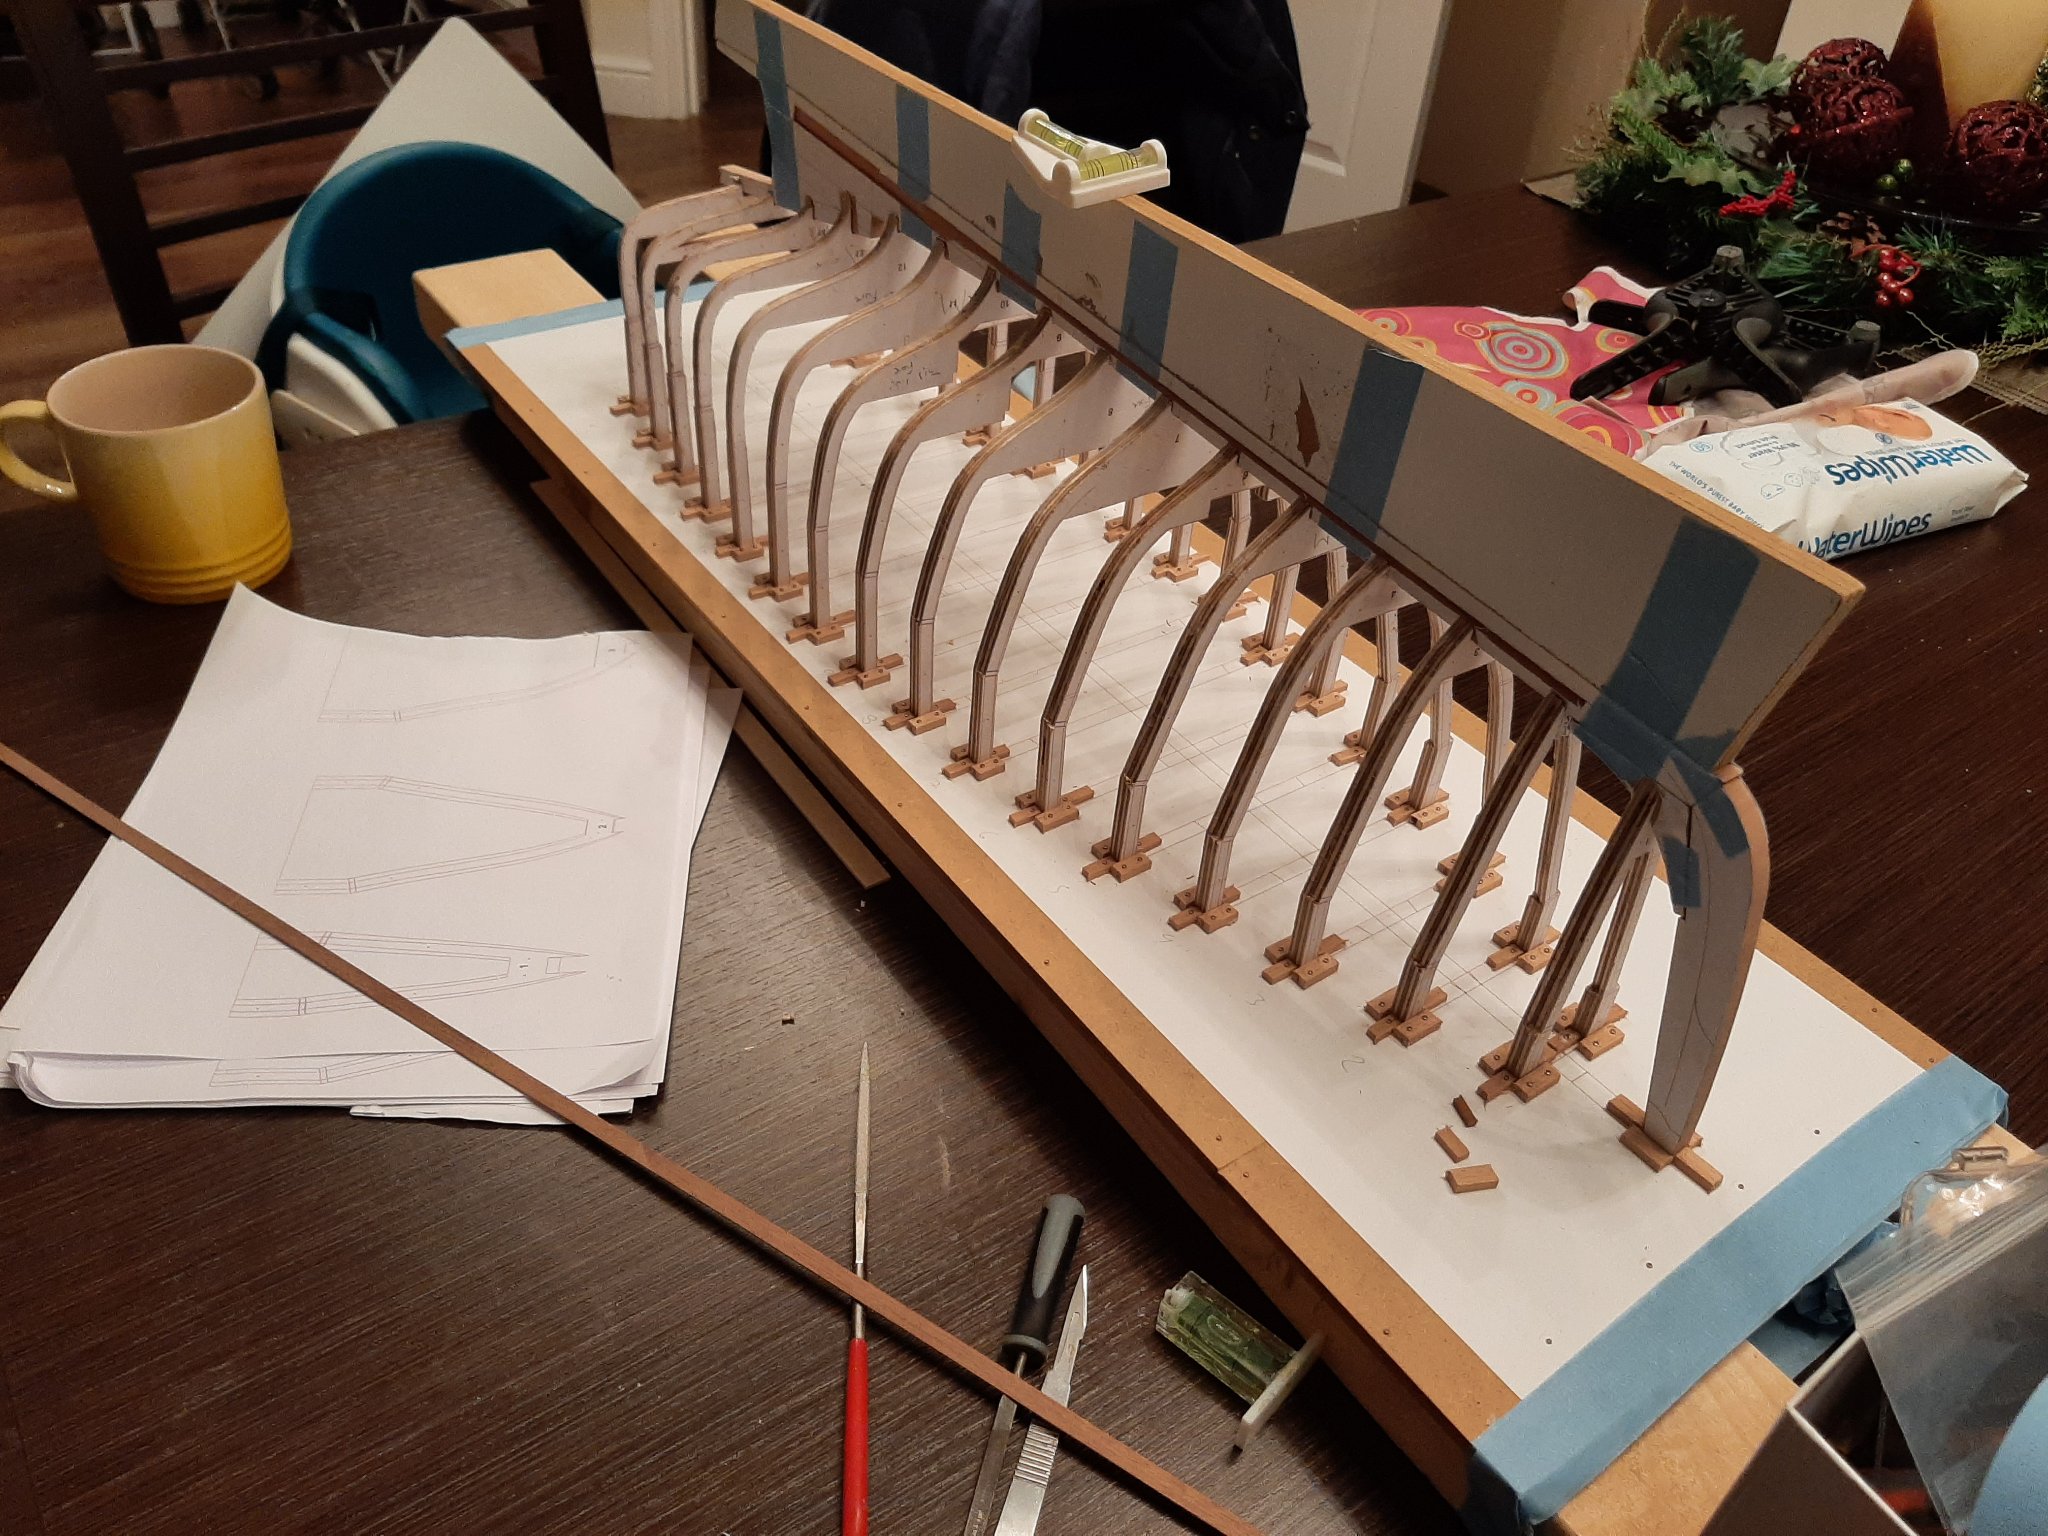
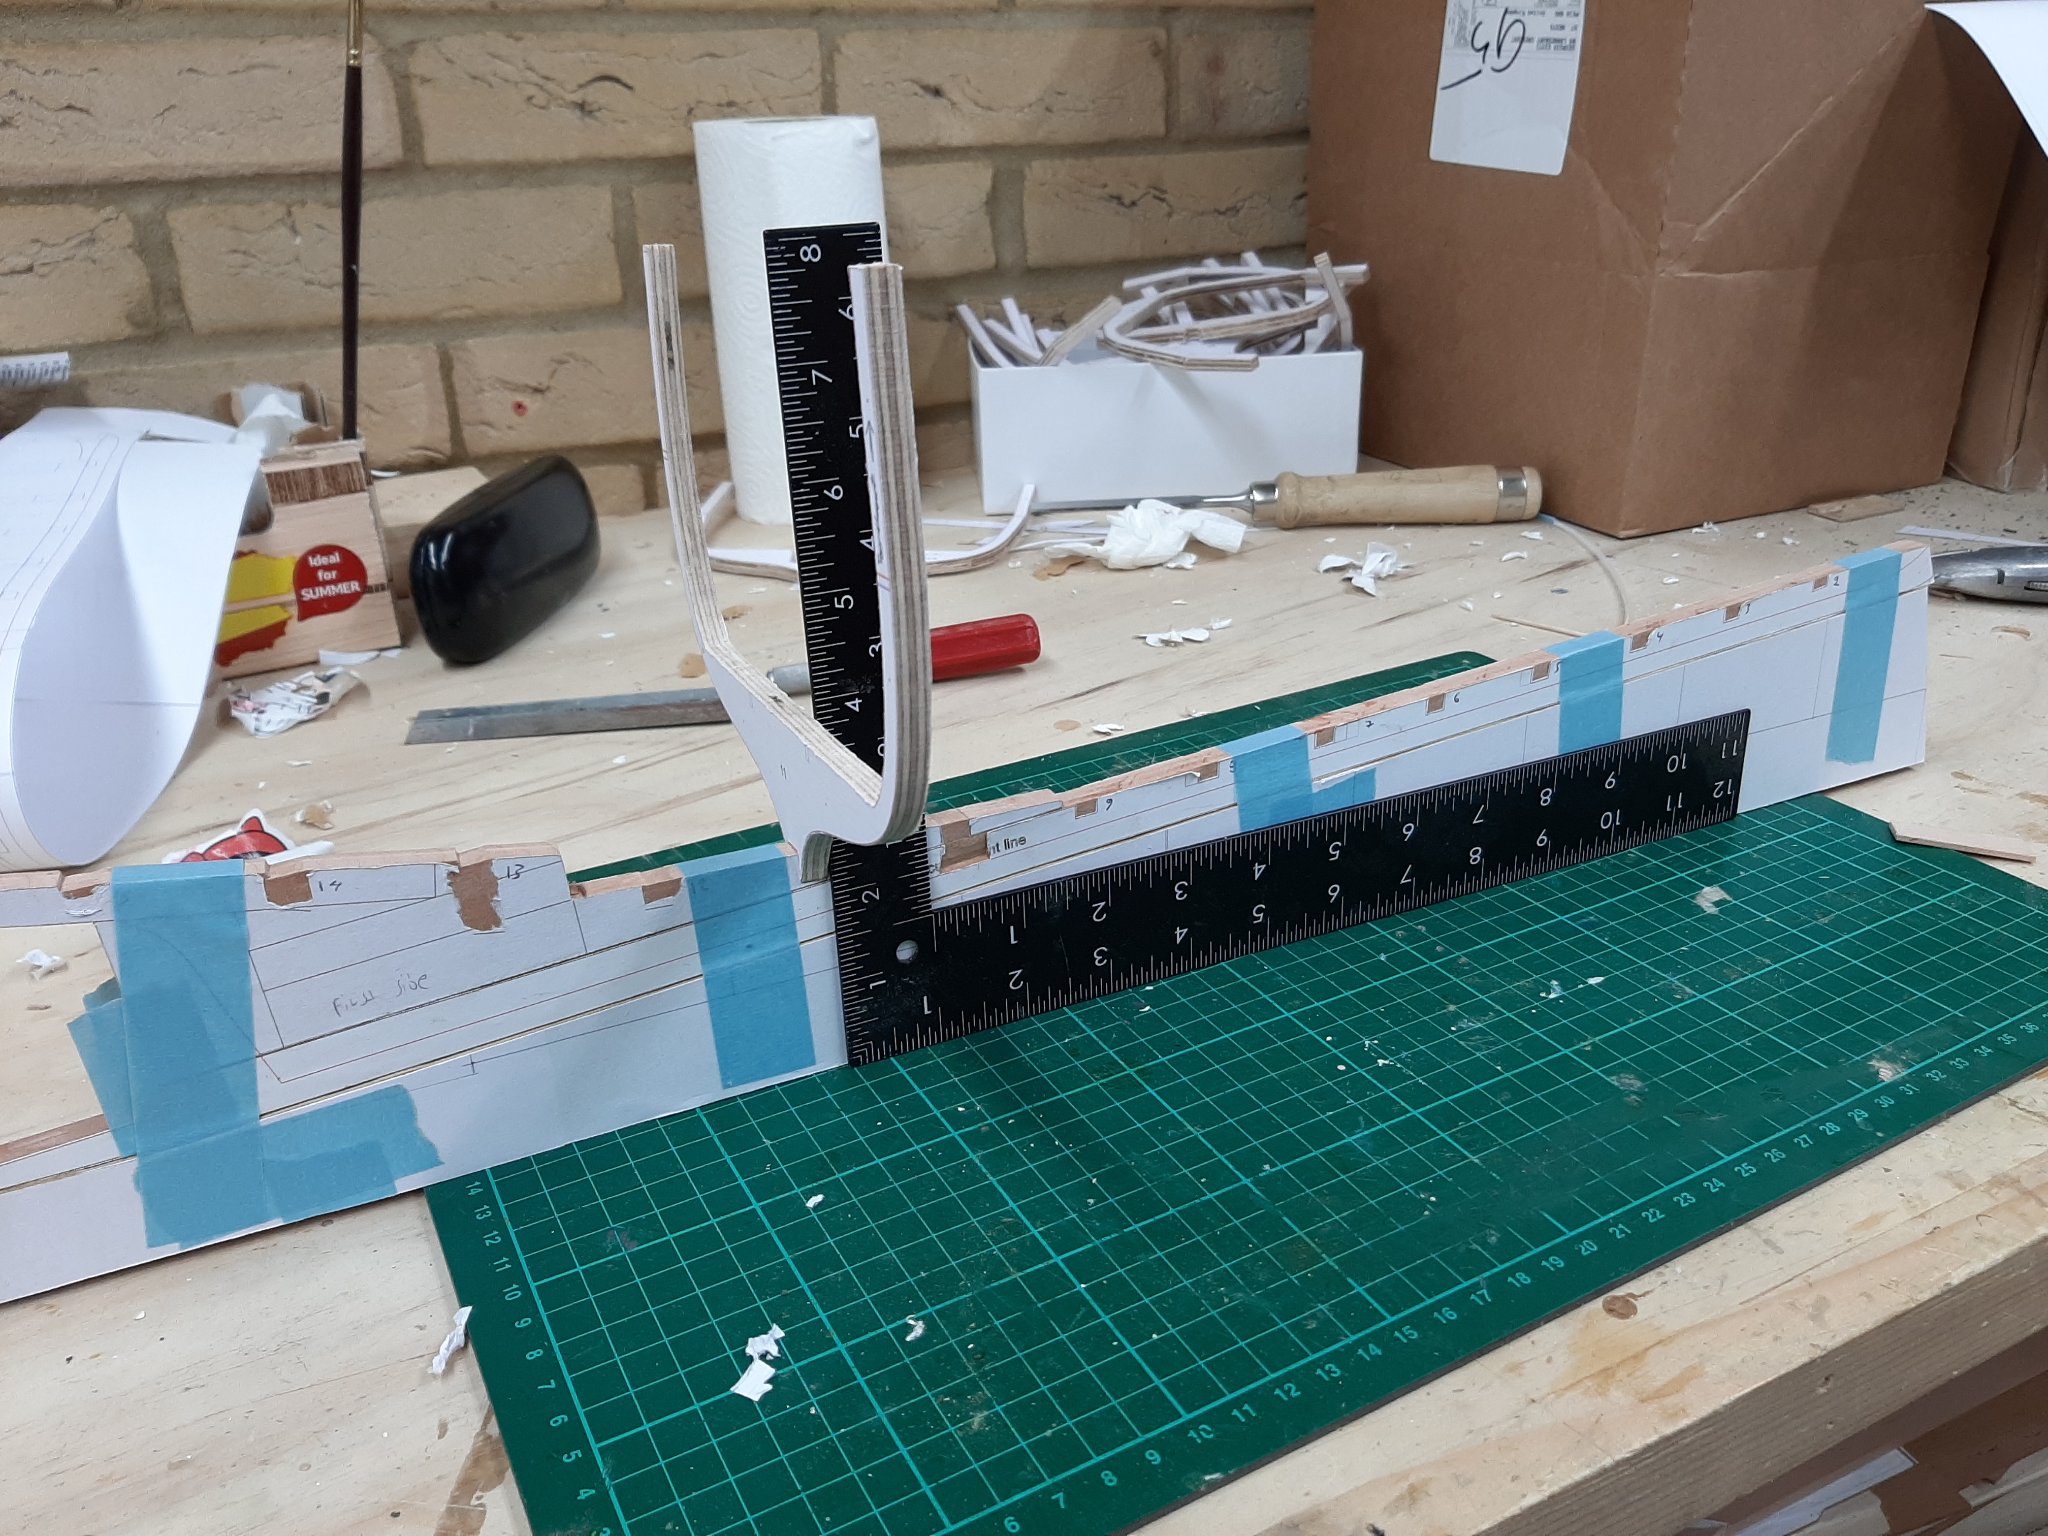
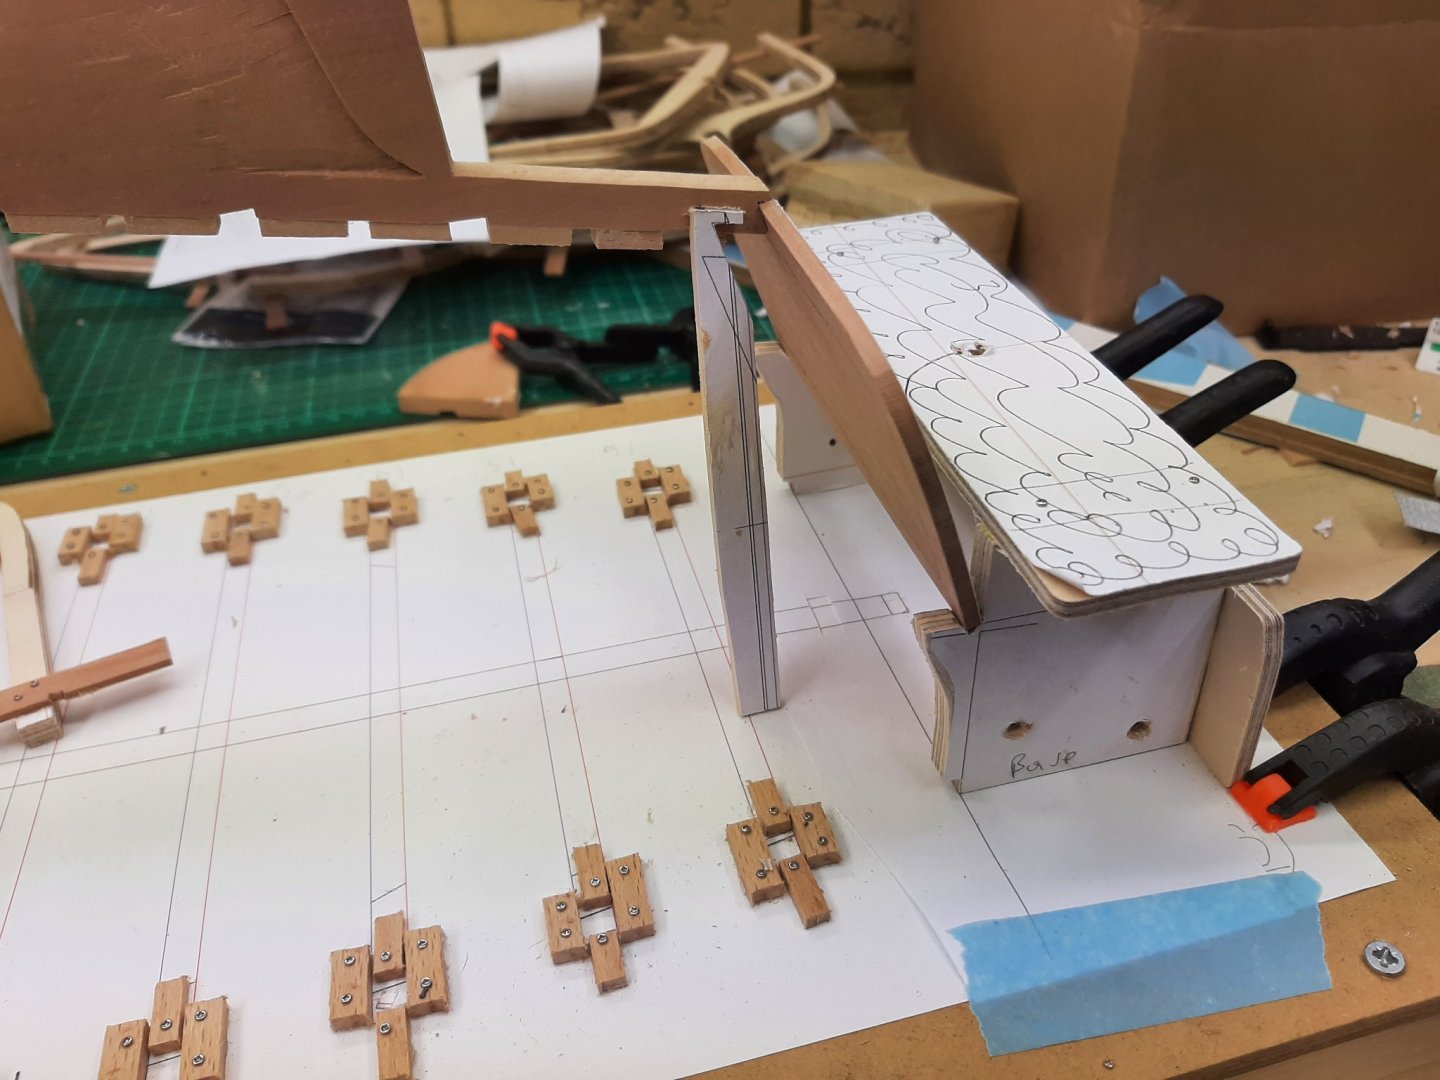
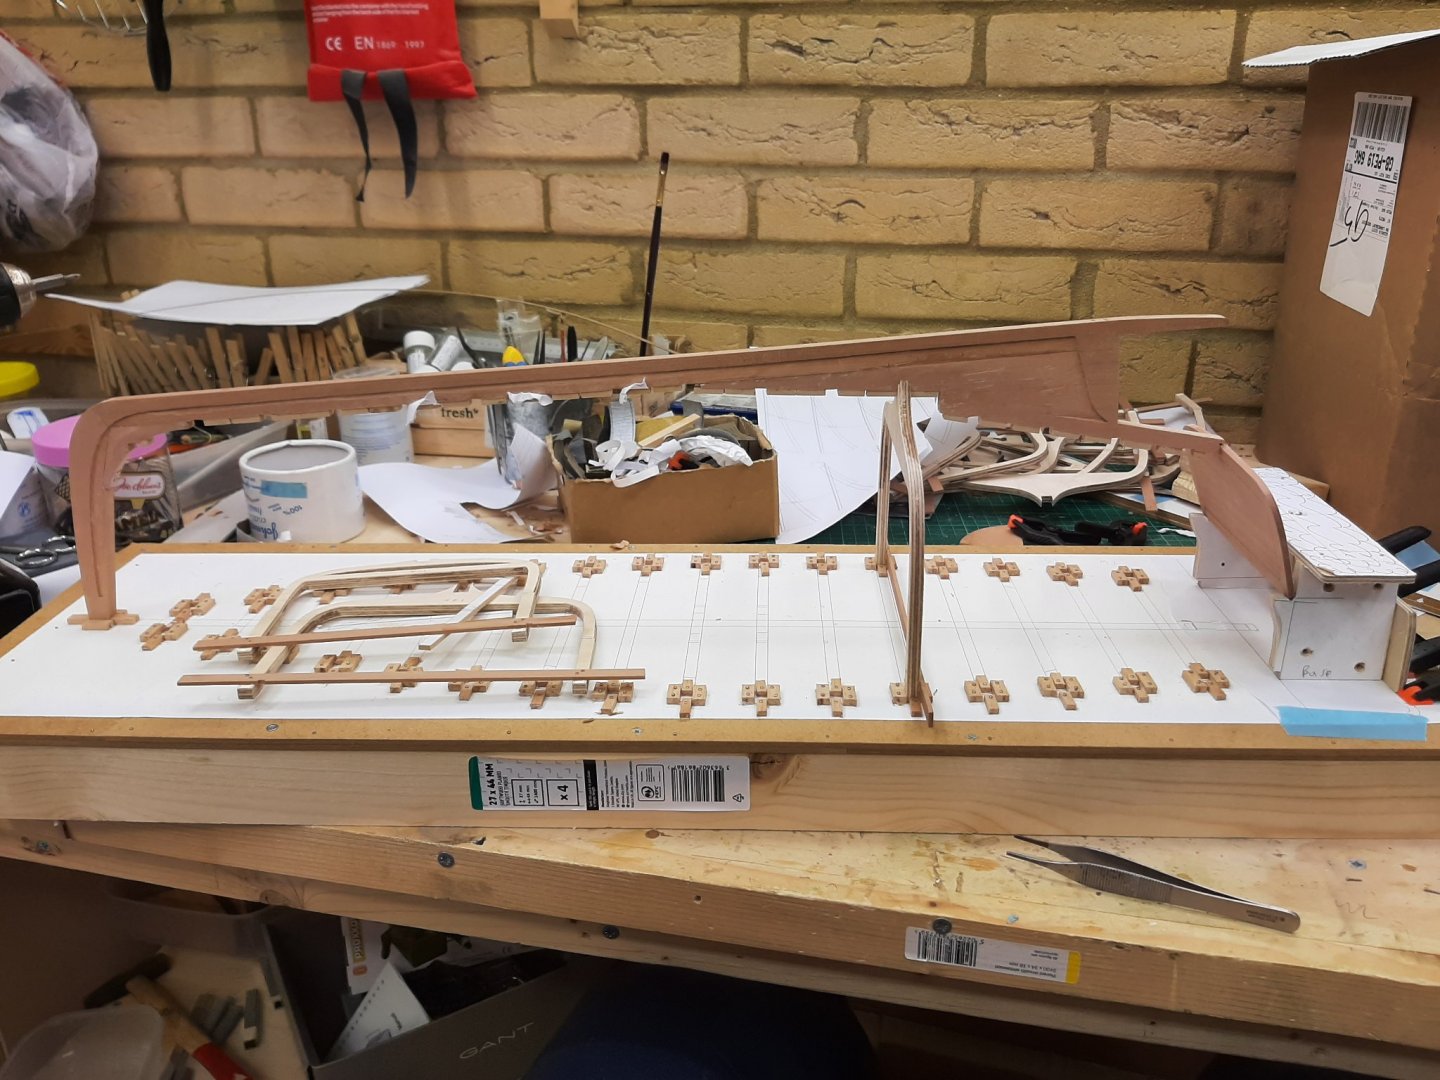
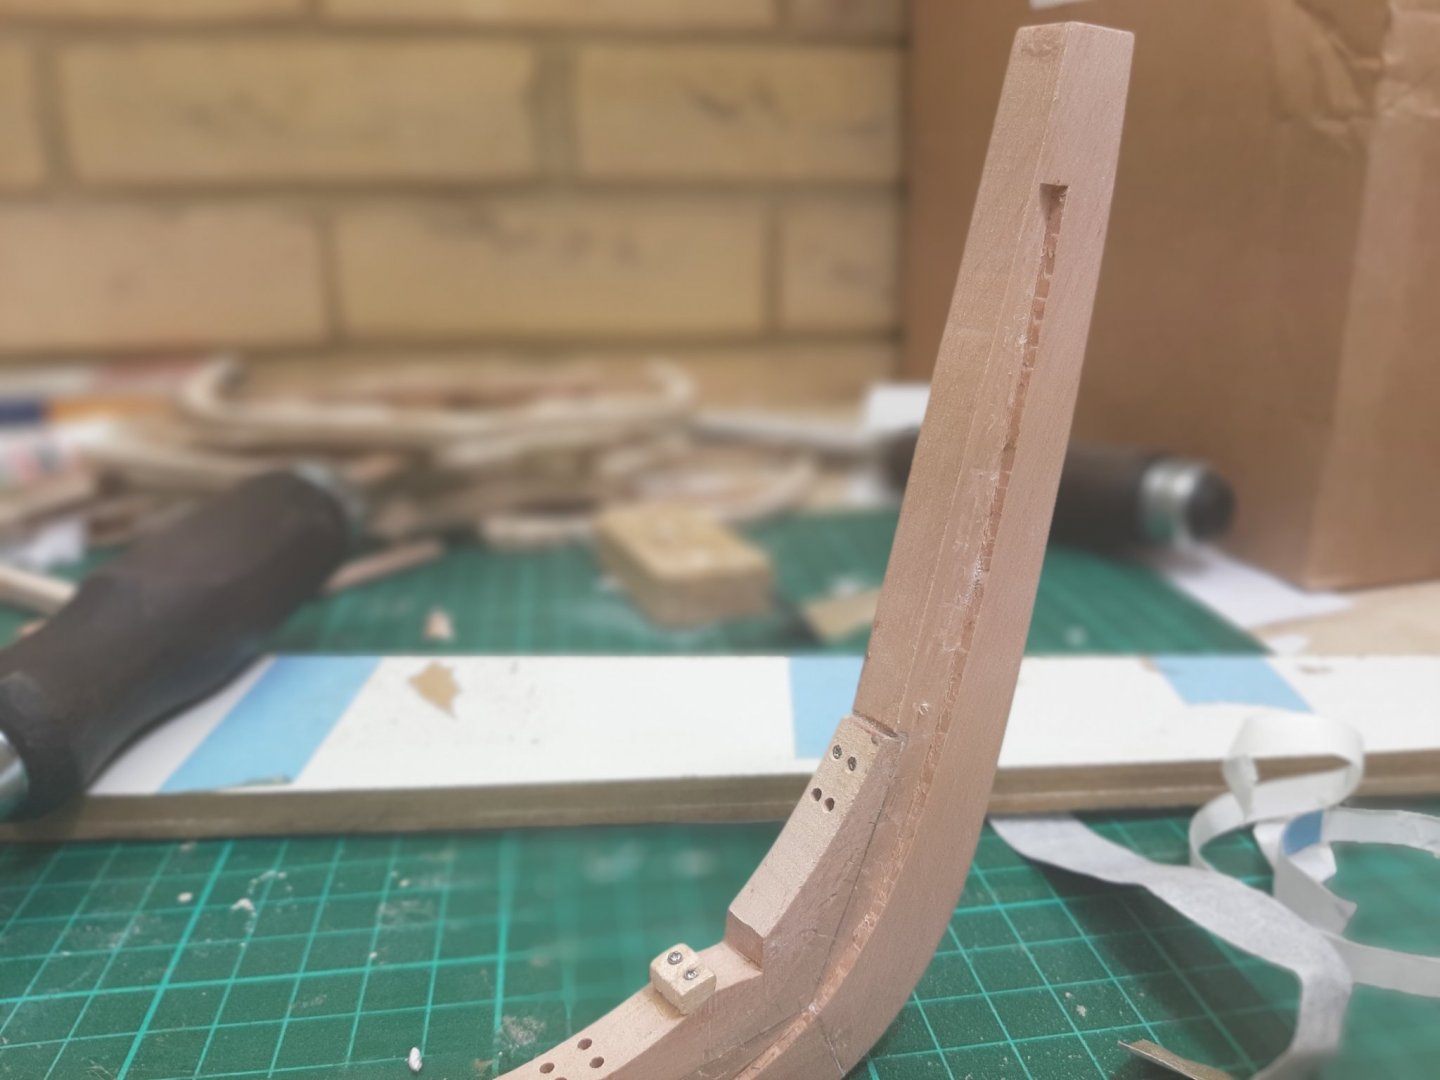
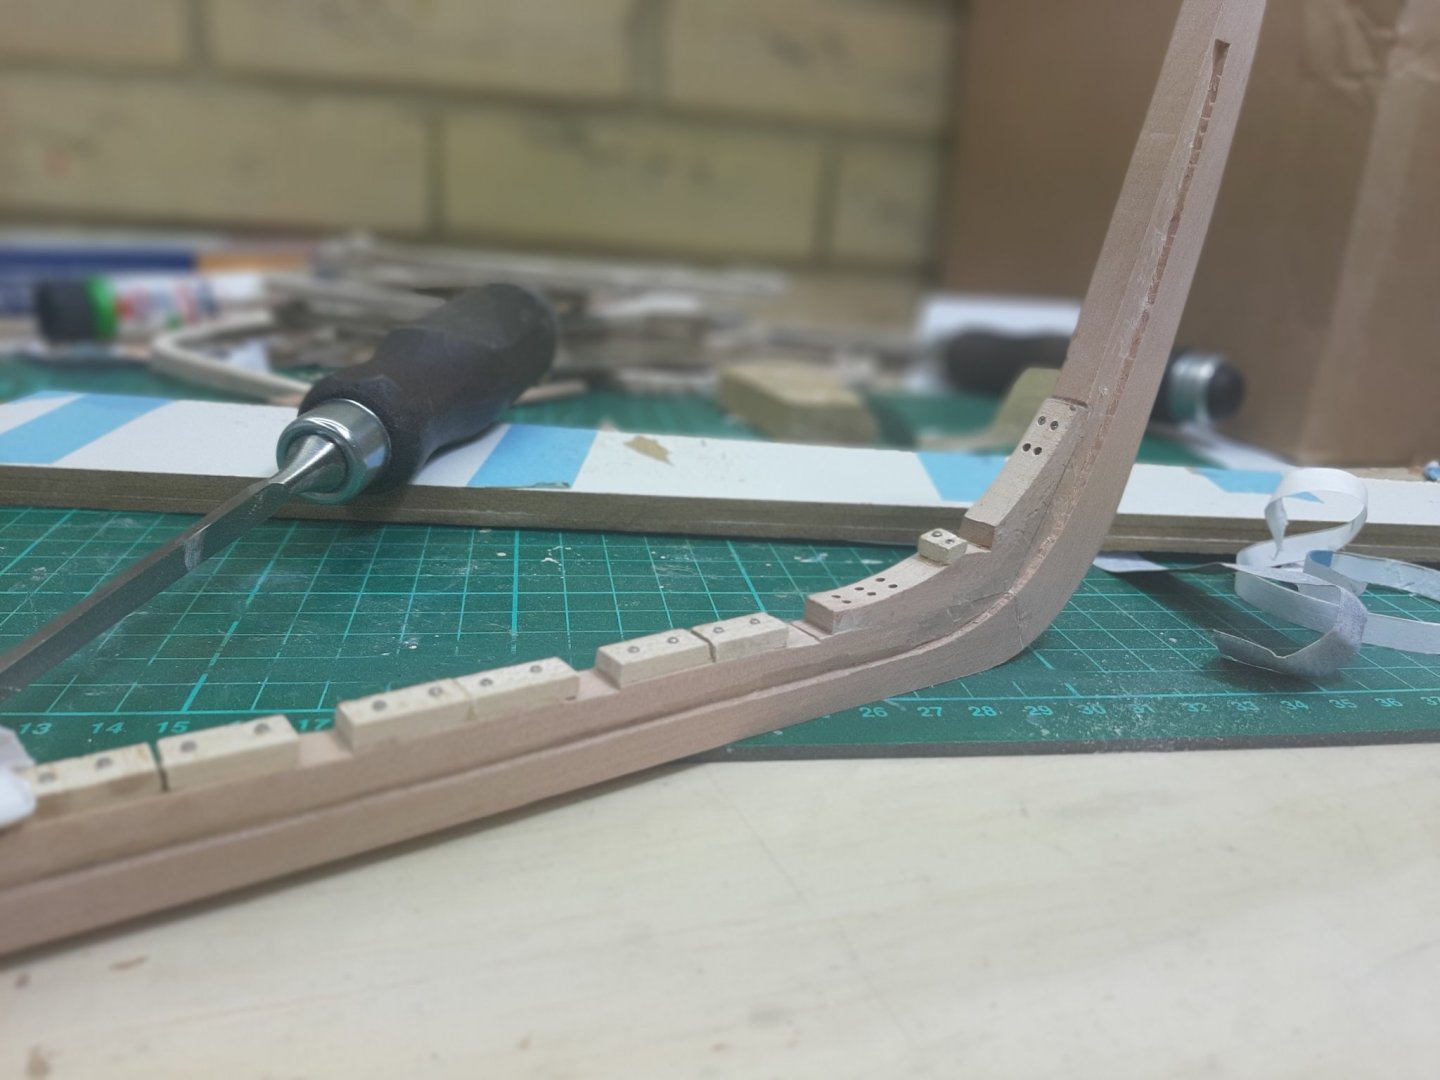
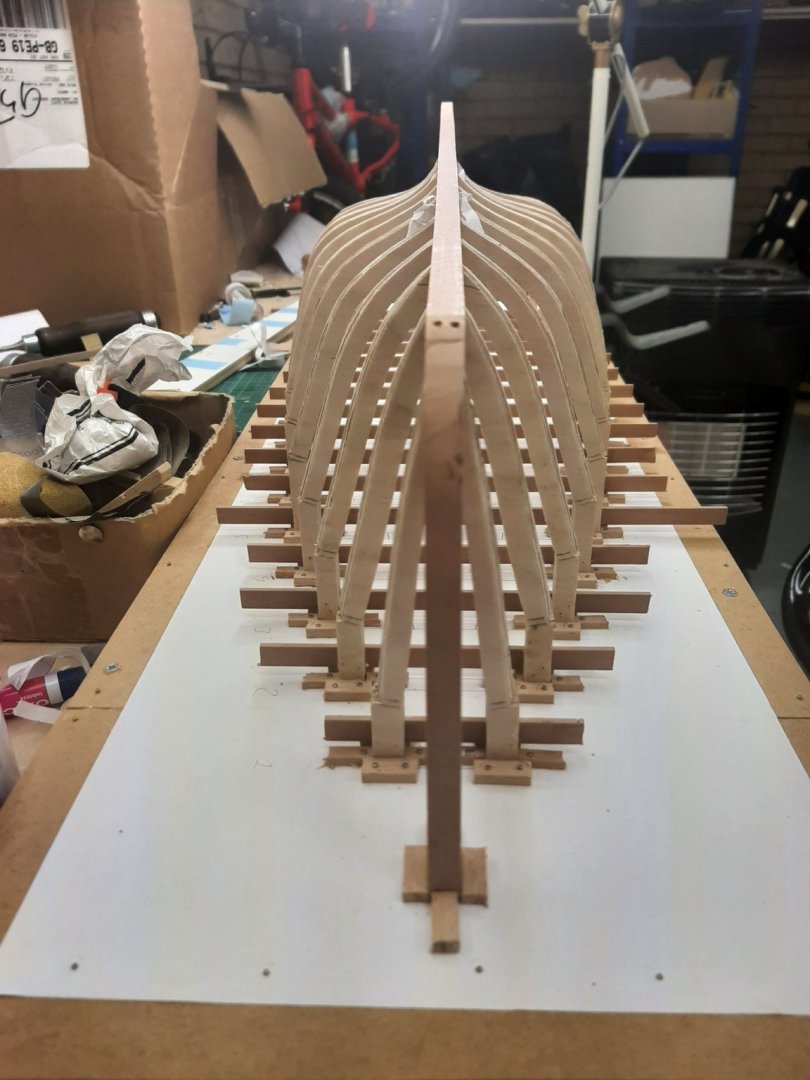
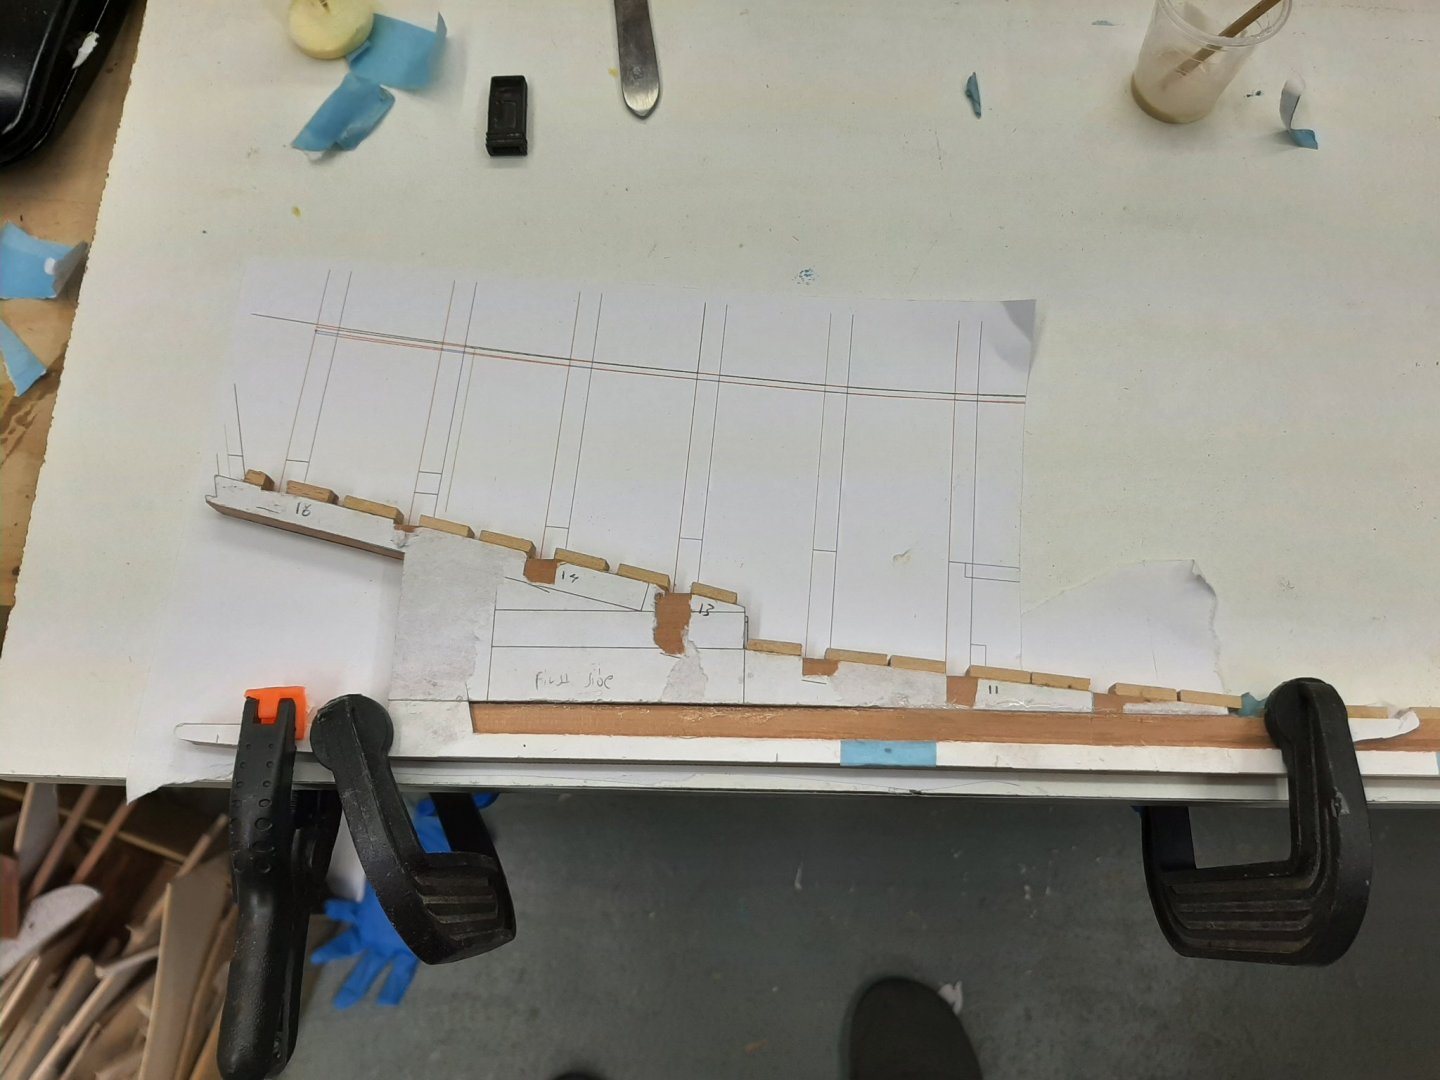
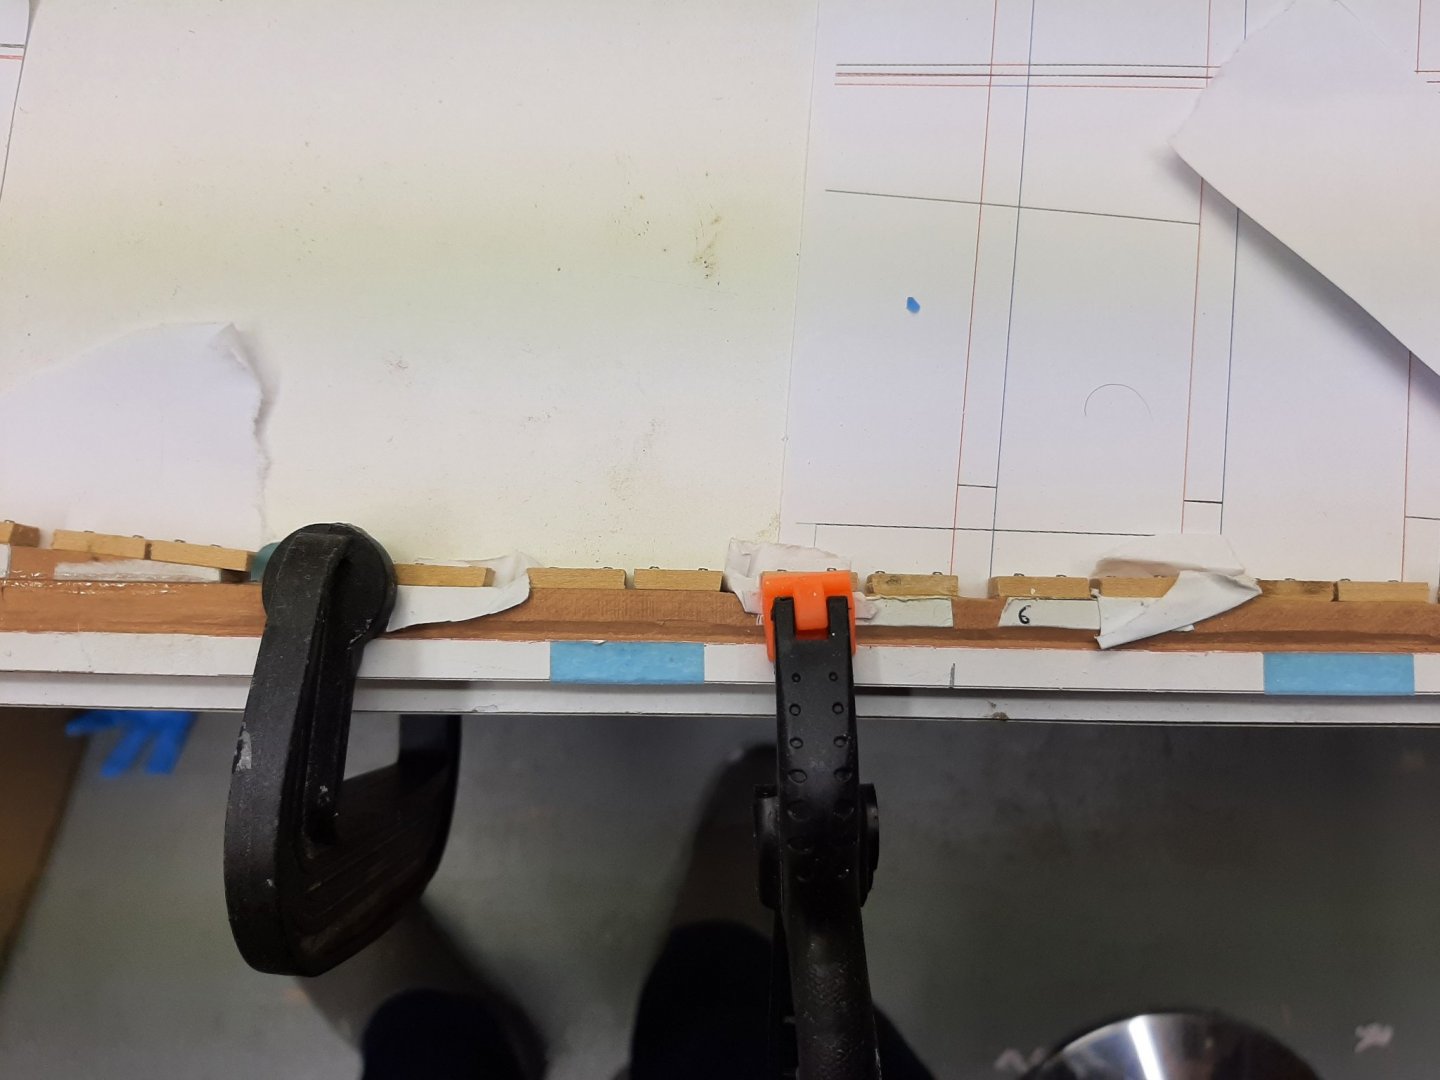
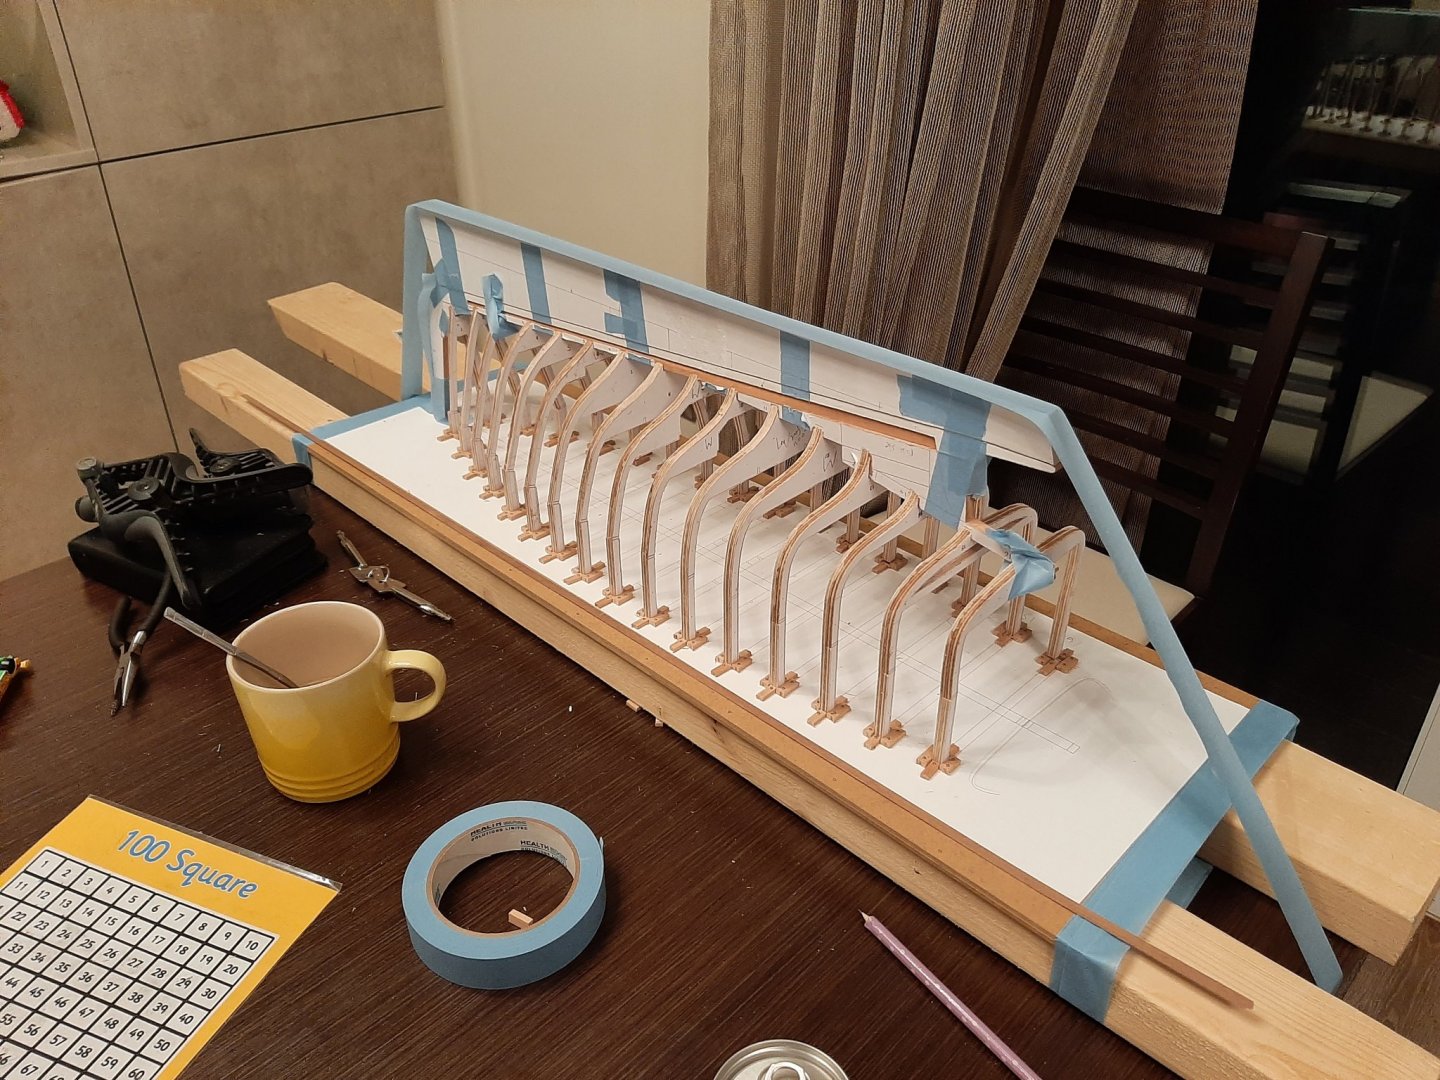
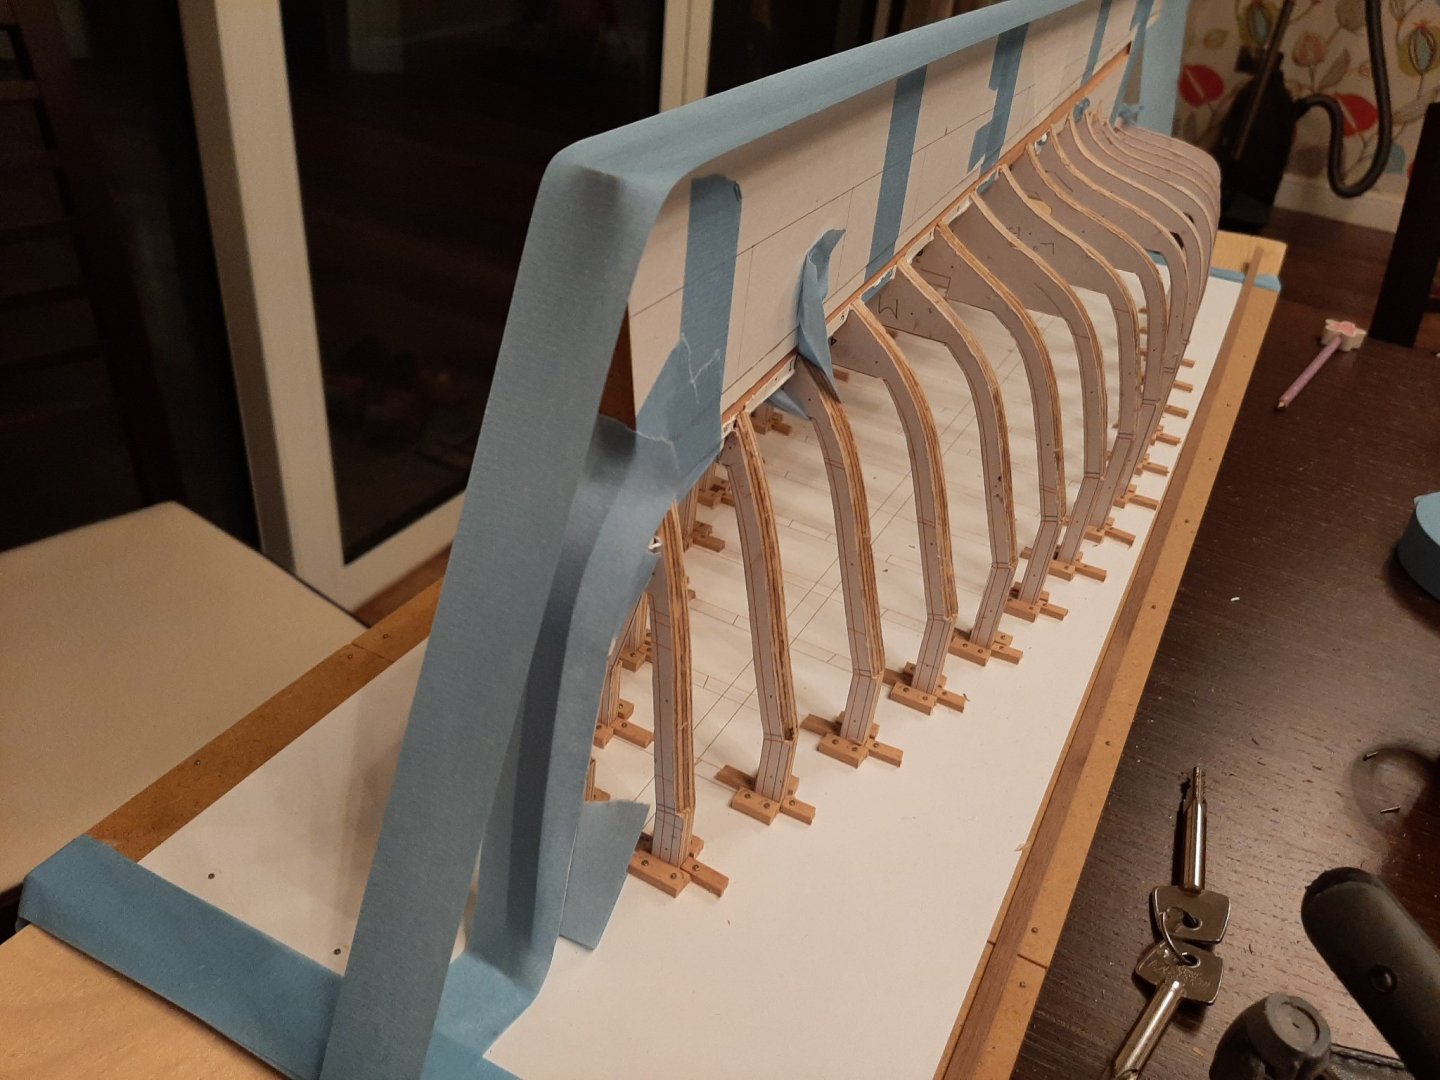
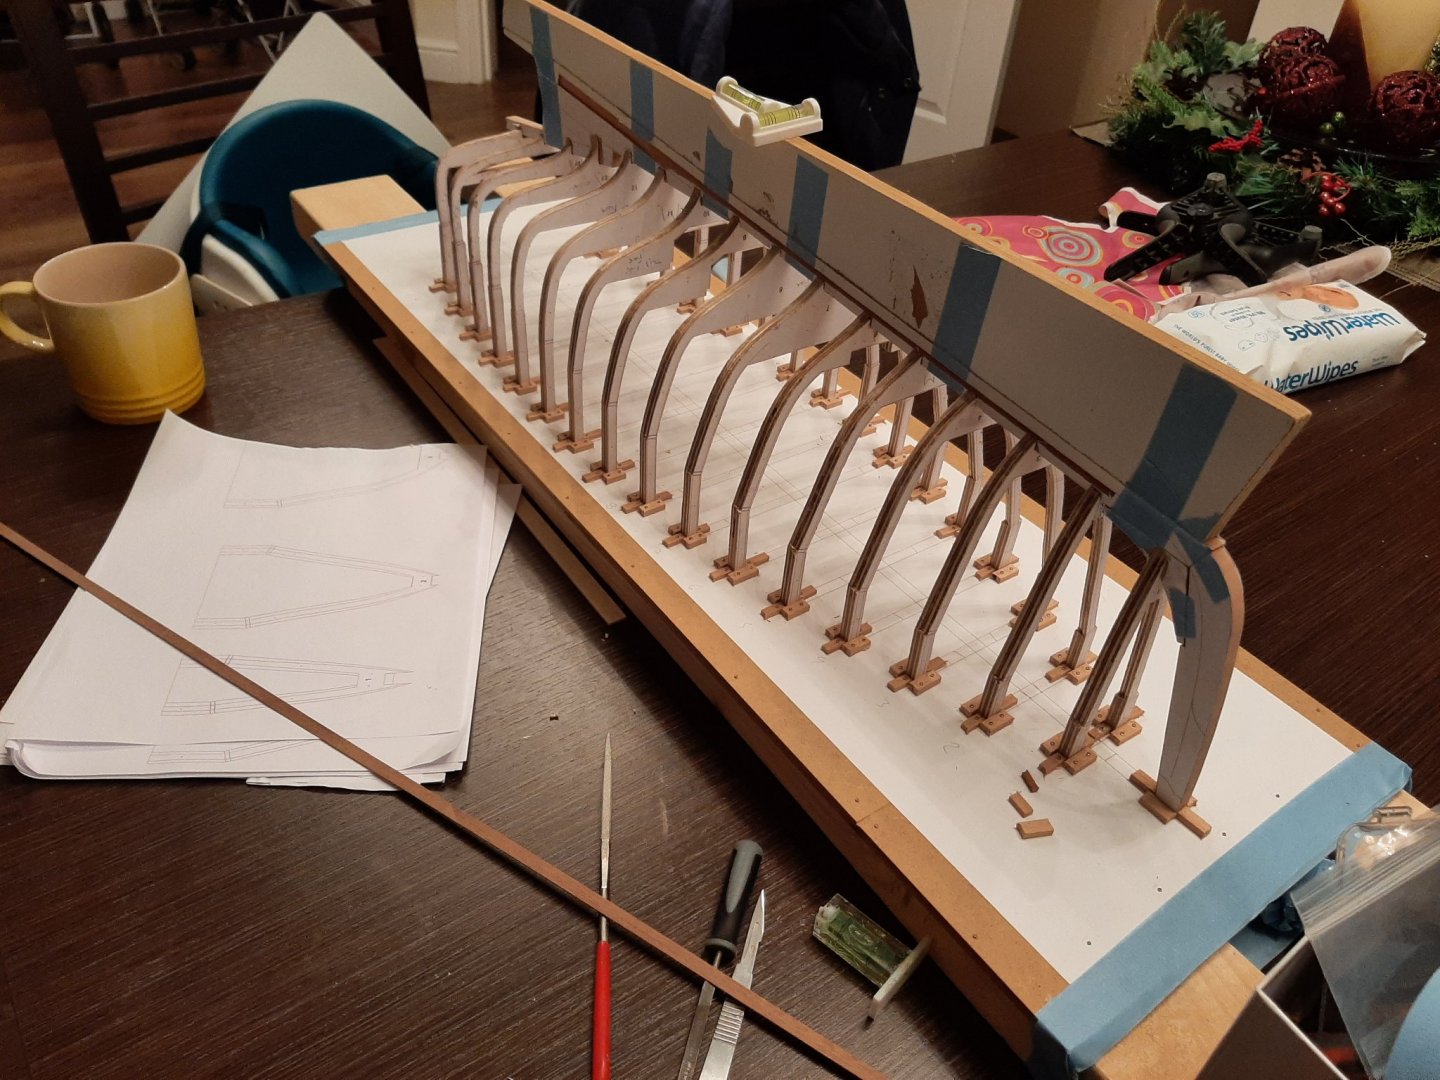
Dear friends It is done! Using the transom jig and the stem as guides, I checked all frames. Almost all had to be sanded to allow the keel to sit properly down at the proper level. Especially frame No 3 had a lot of material taken off. I cannot explain this as everything was cut quite accurately but in any case the frames are now in their proper position, the keel is straight and at the proper height and angle, the same with the trasnom. Next jobs: 1. Connect all the frames with longitudinal wood pieces to increase rigidity 2. Epoxy the frames to the keel 3. Glue the frame to the transom, cut the bevels and secure the transom to the keel 4. Glue and shape the side horn timbers 5. Plank the boat! Vaddoc


-
Good job Hakan! I thought the first method was desperately difficult but the last method seems elegant and the frame came out fine. Indeed, the scale make this task even more difficult. The boat is coming along fine Vaddoc
-
Very true Eric I recently spend time to hone my chisels. I especially focused on the strop until both surfaces were like mirrors. They are now so sharp that any casual contact with fingers will draw blood. However, I now see how a chisel should work, it should effortlessly cut the wood in any direction, with or across the grain. If it does not, it is not sharp enough.
-
Vanda-Lay treenail maker
vaddoc replied to JerryC's topic in Building, Framing, Planking and plating a ships hull and deck
Well, with a needle and a drill press 200-300 in 15 min should be achievable. Have a look in this old thread, maybe it would work for you. -
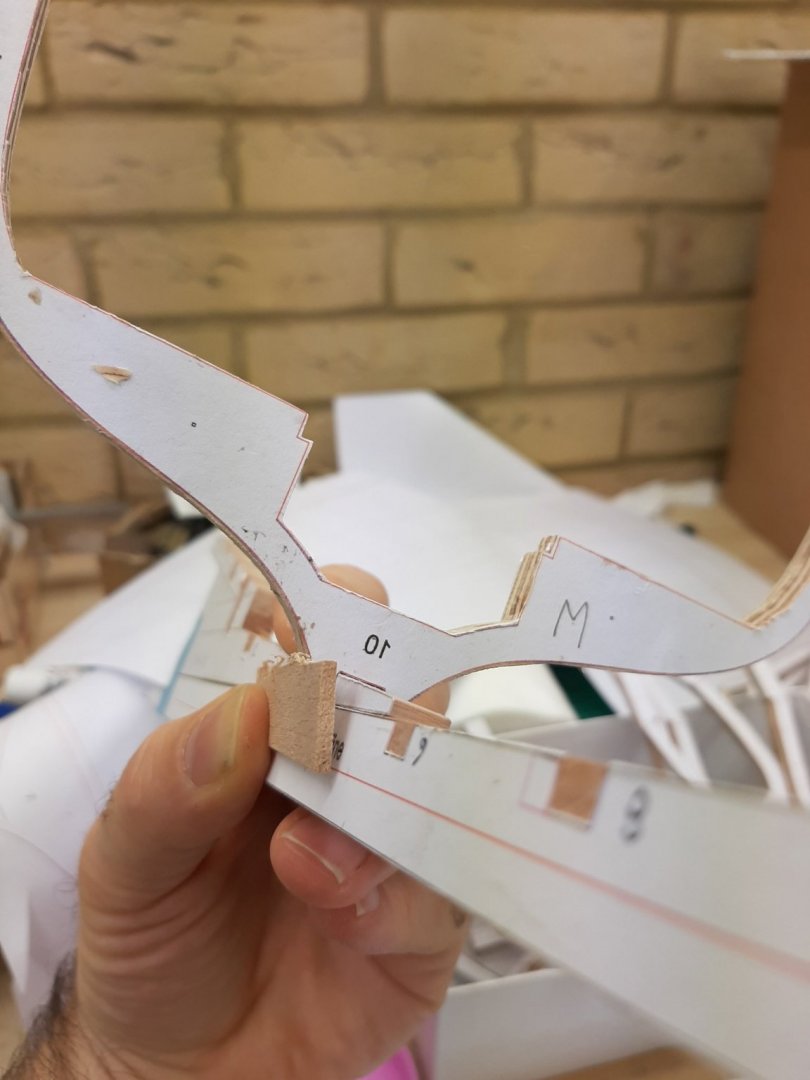
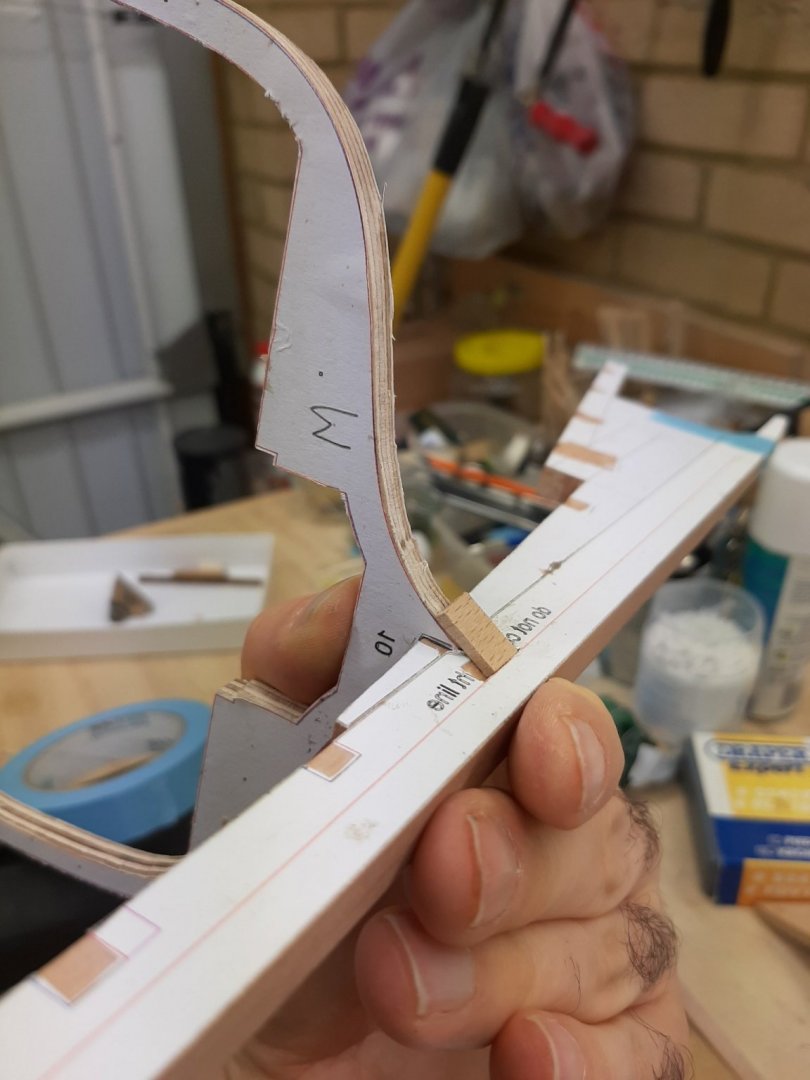
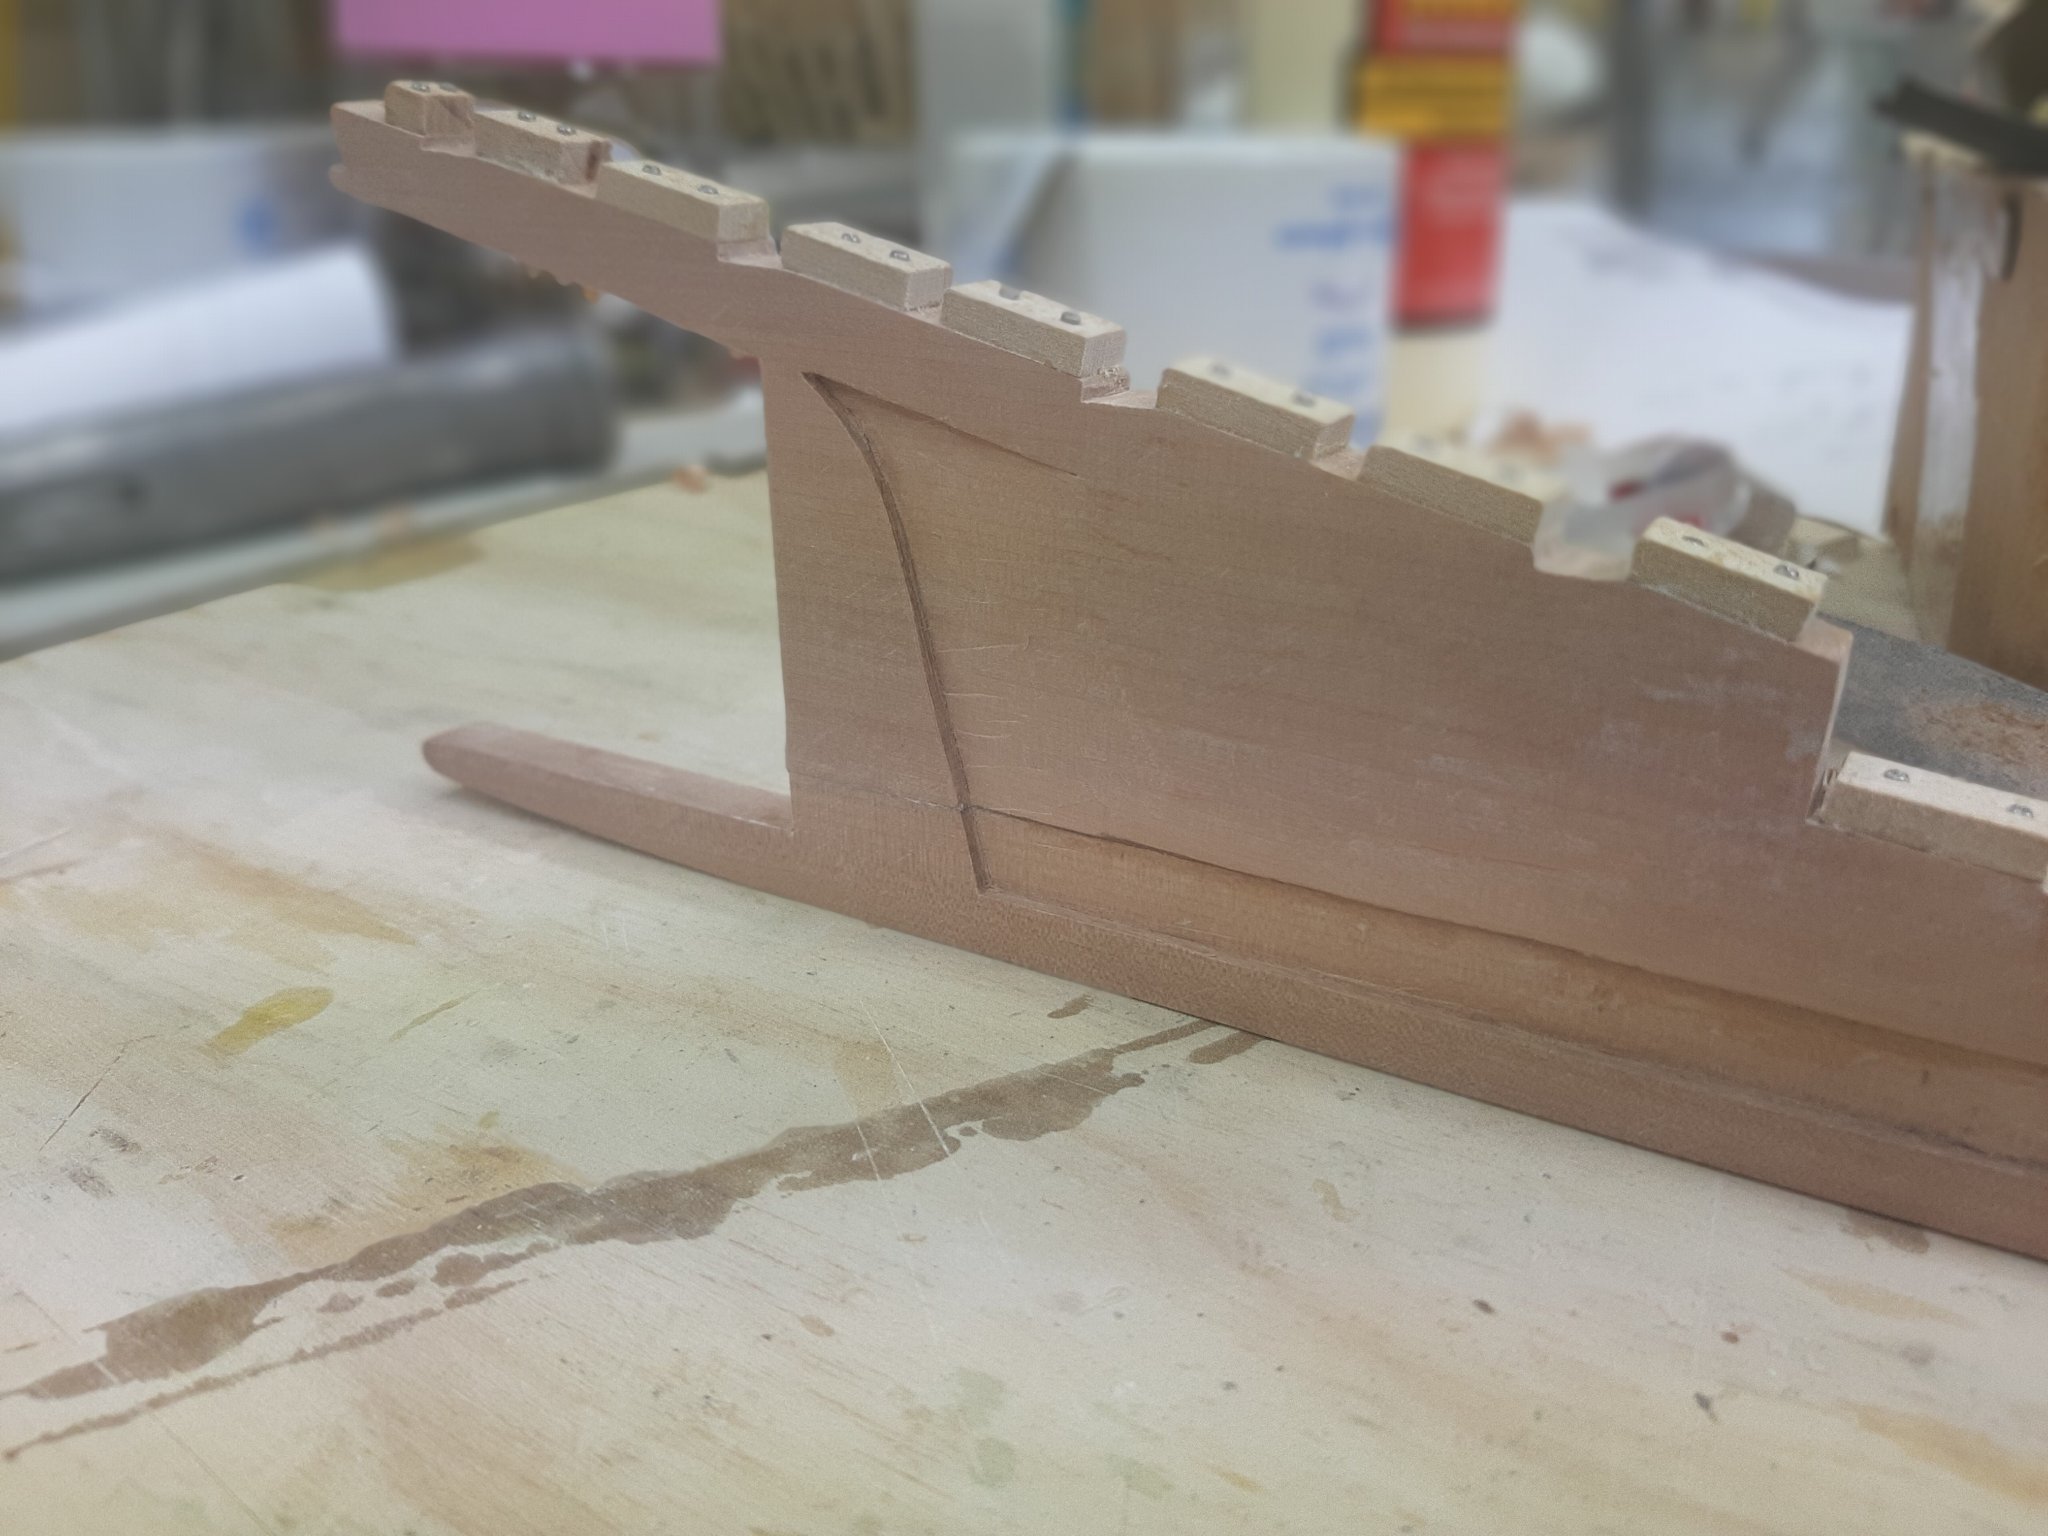
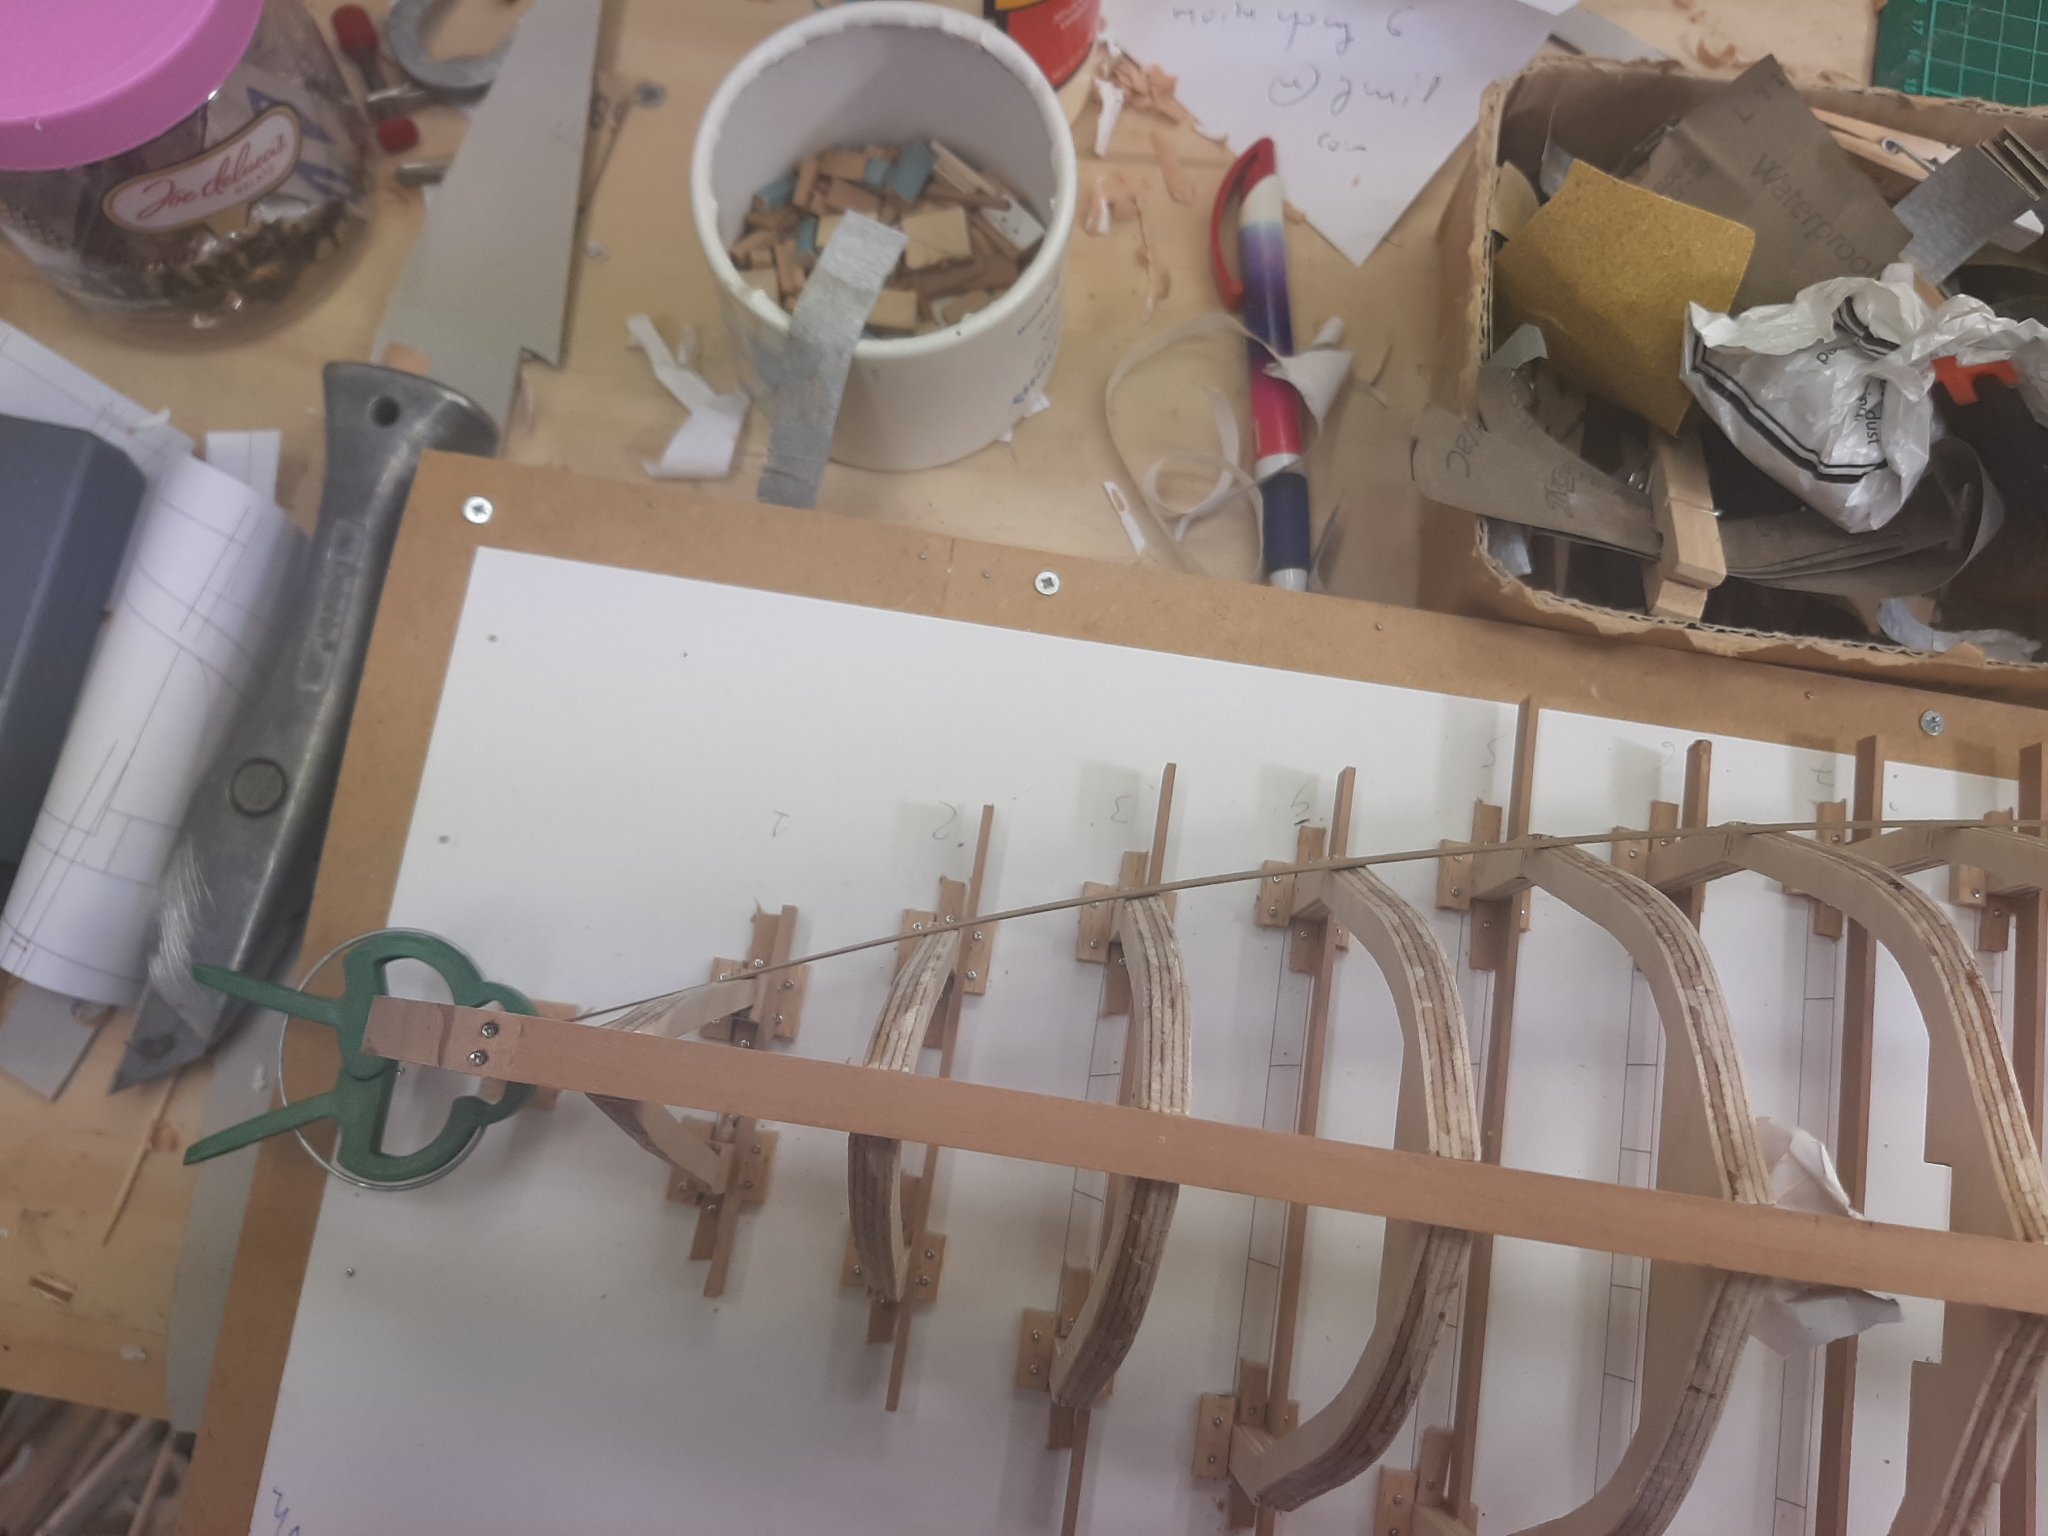
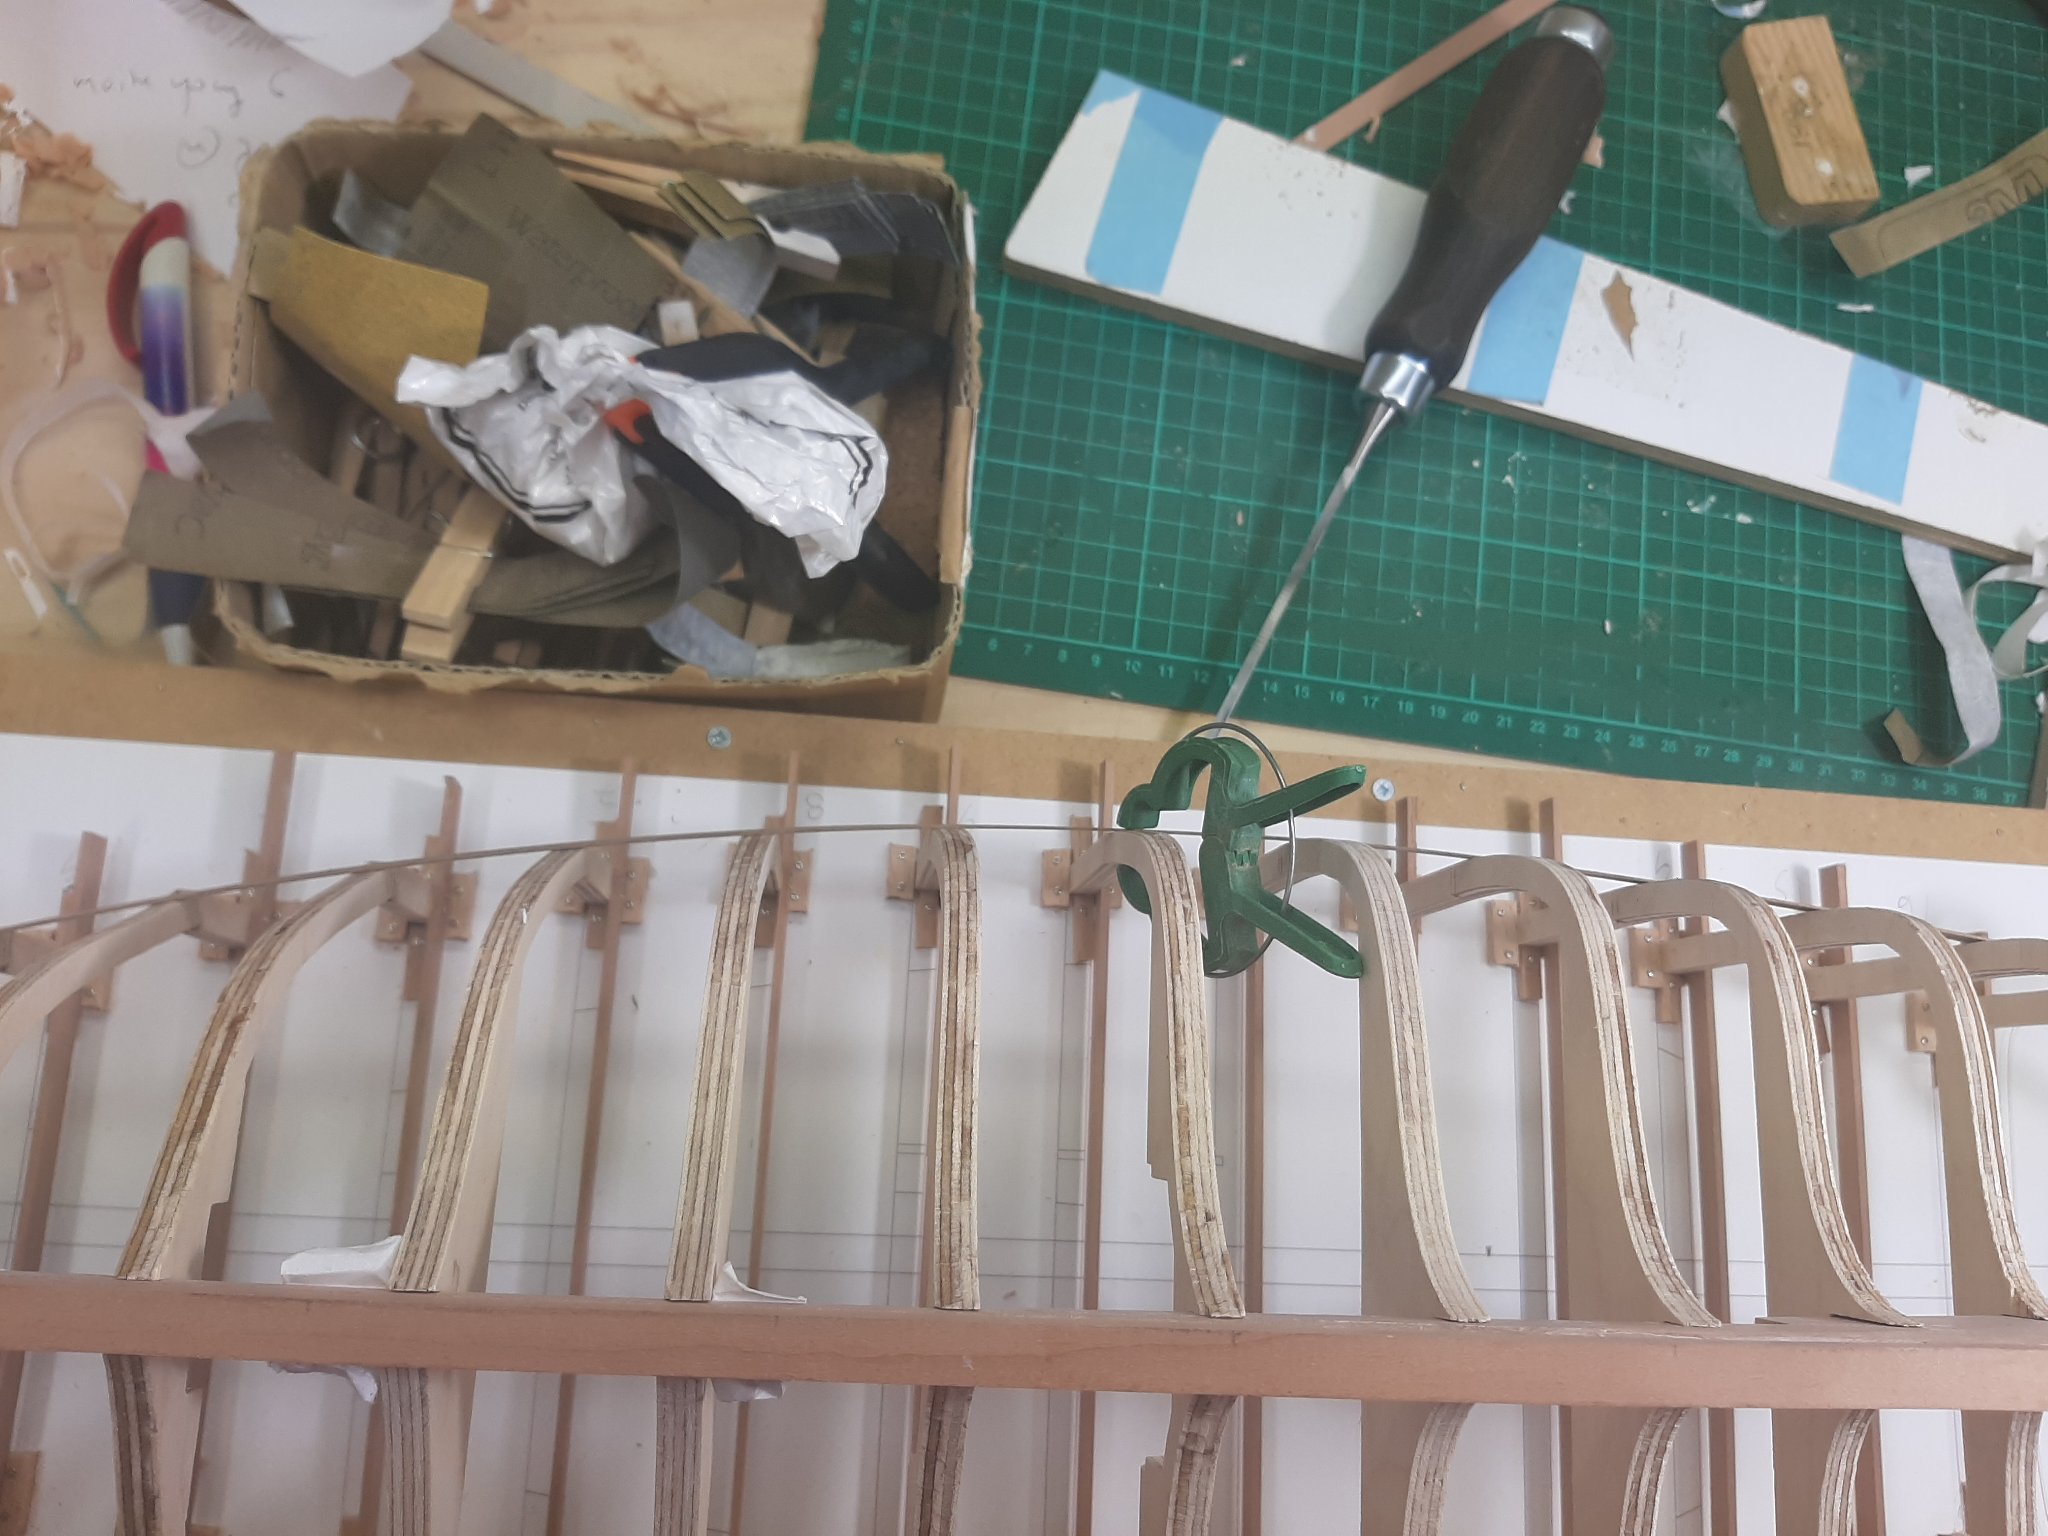
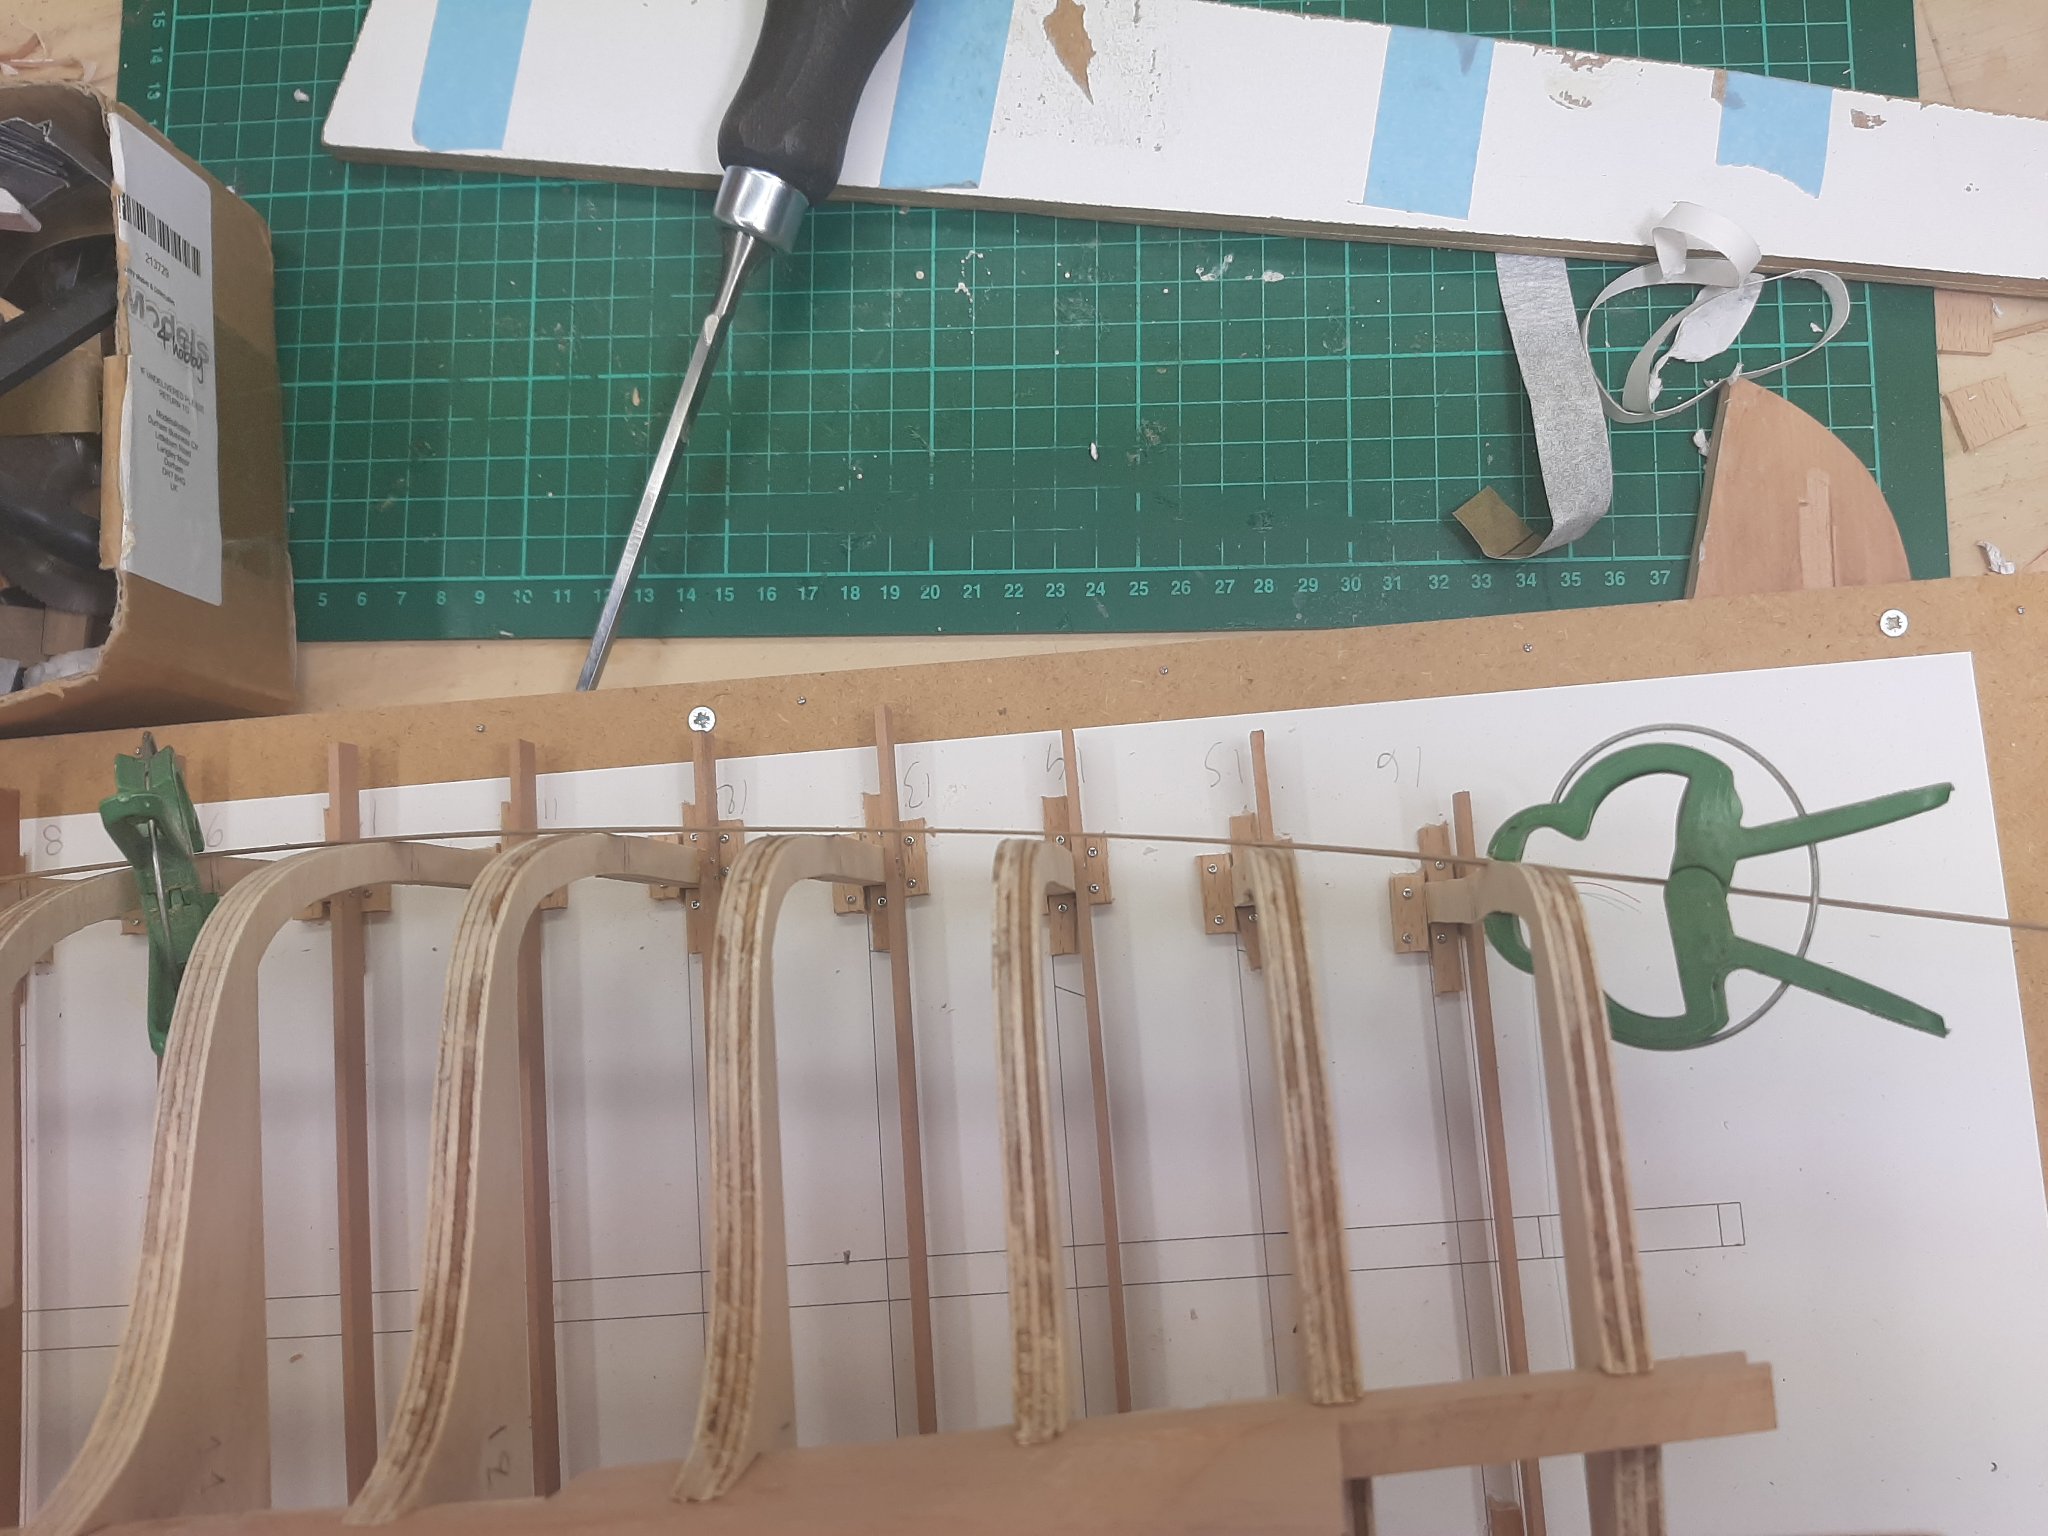
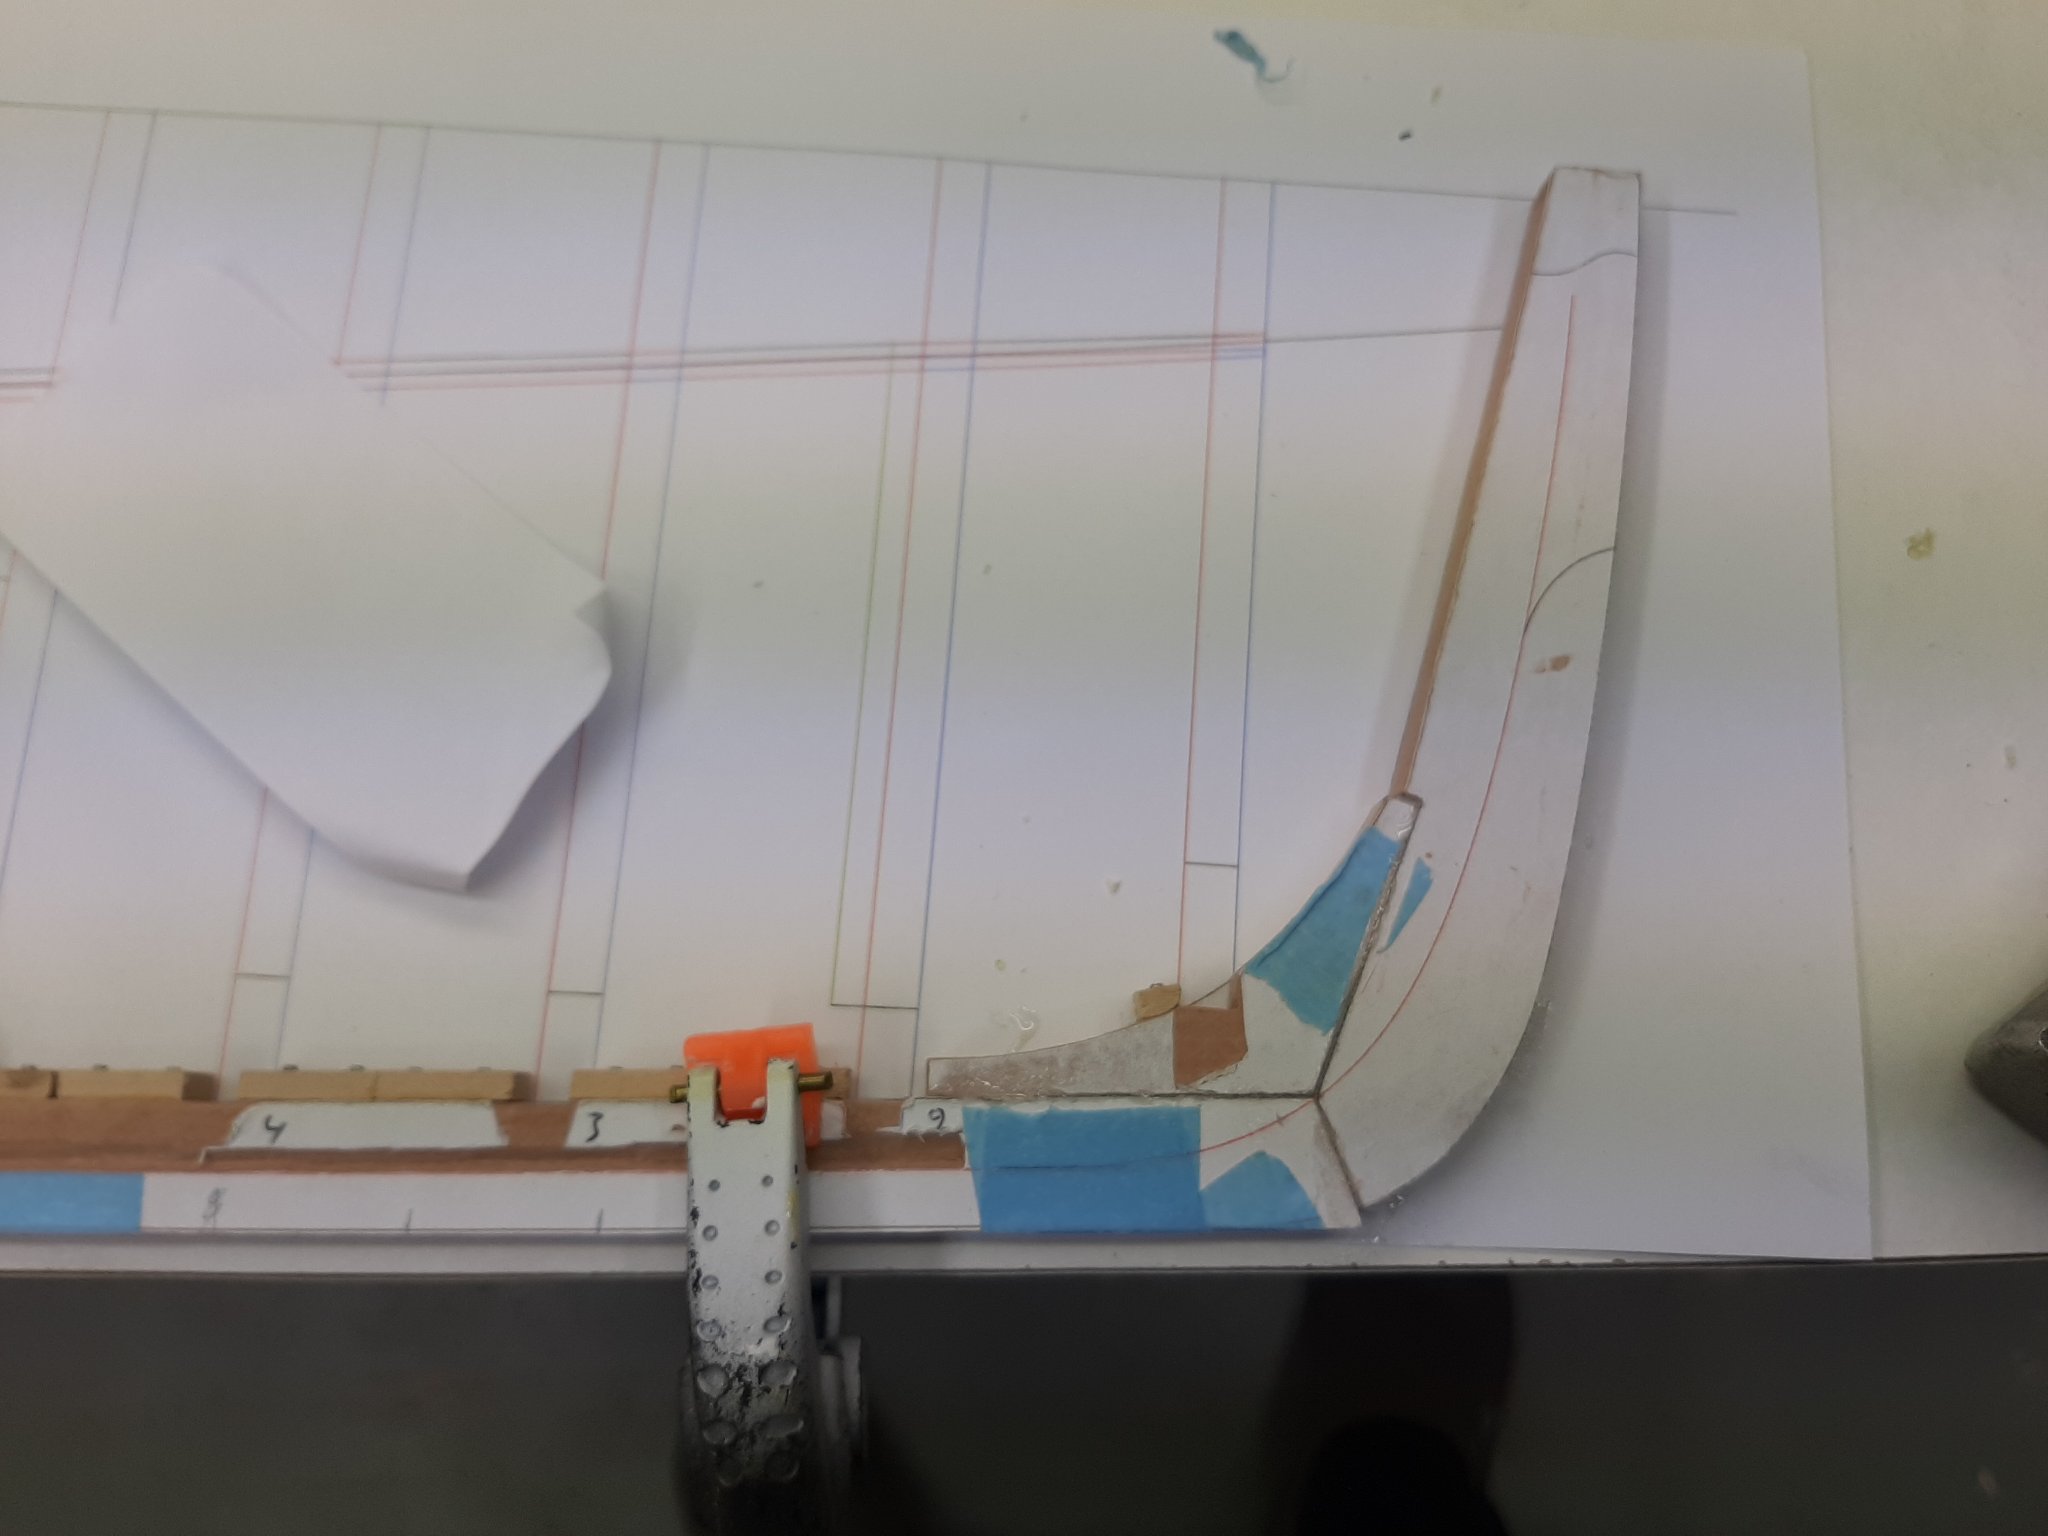
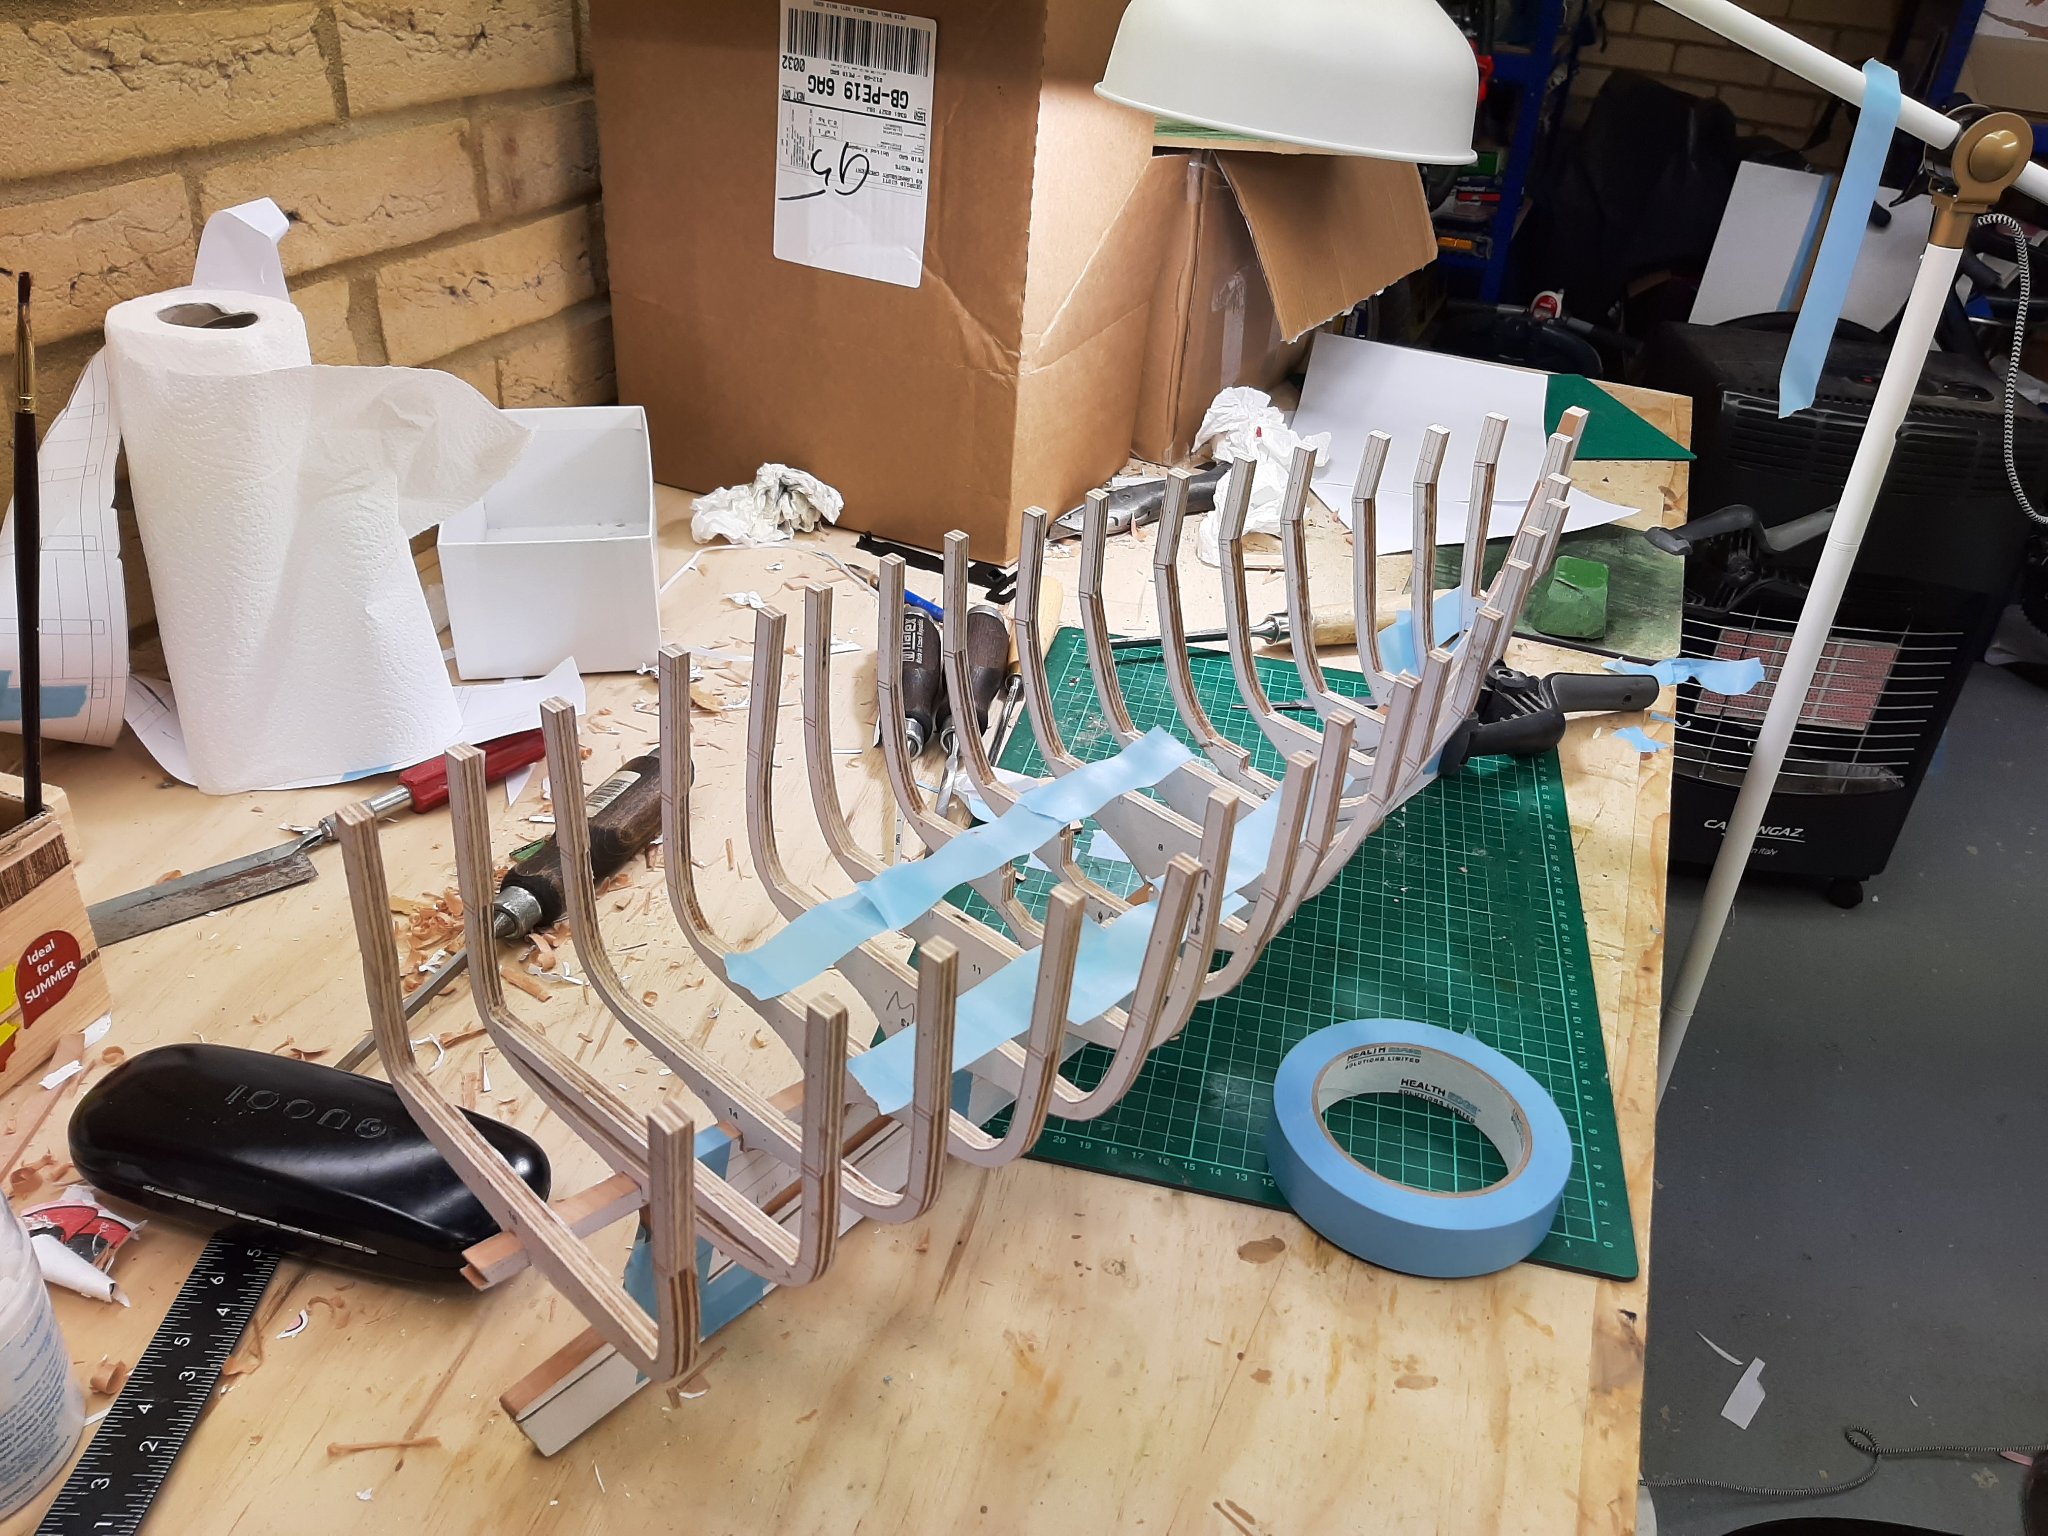
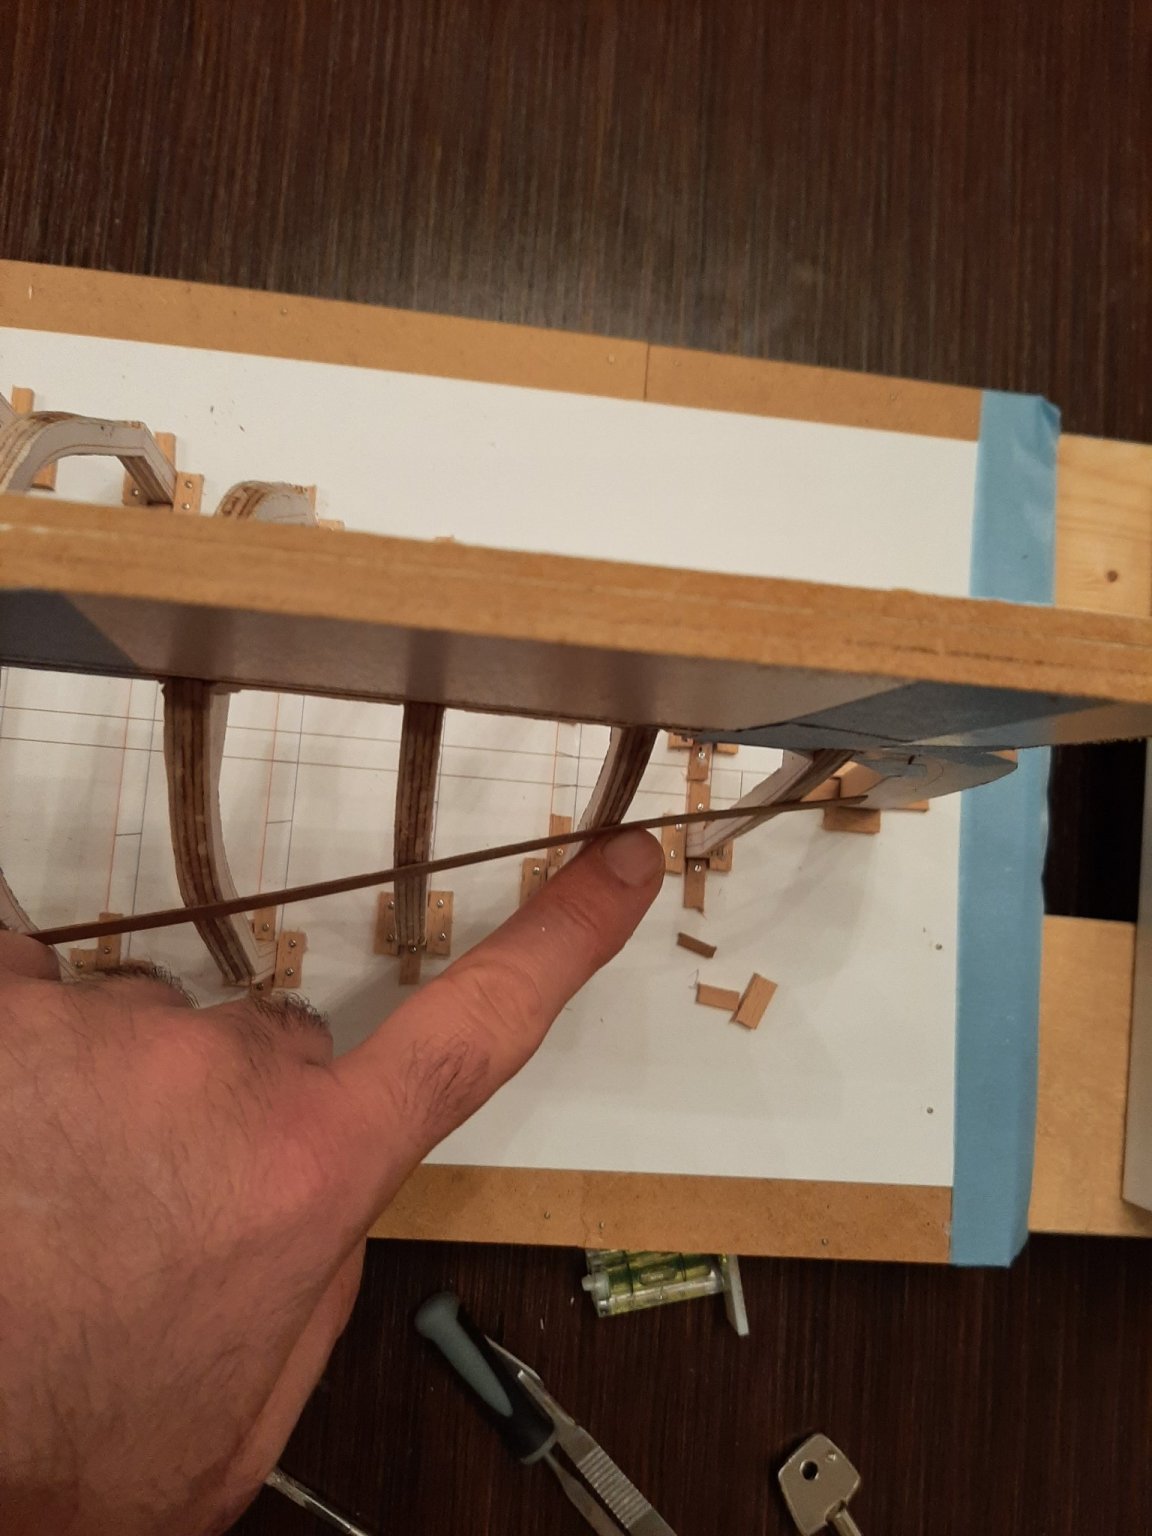
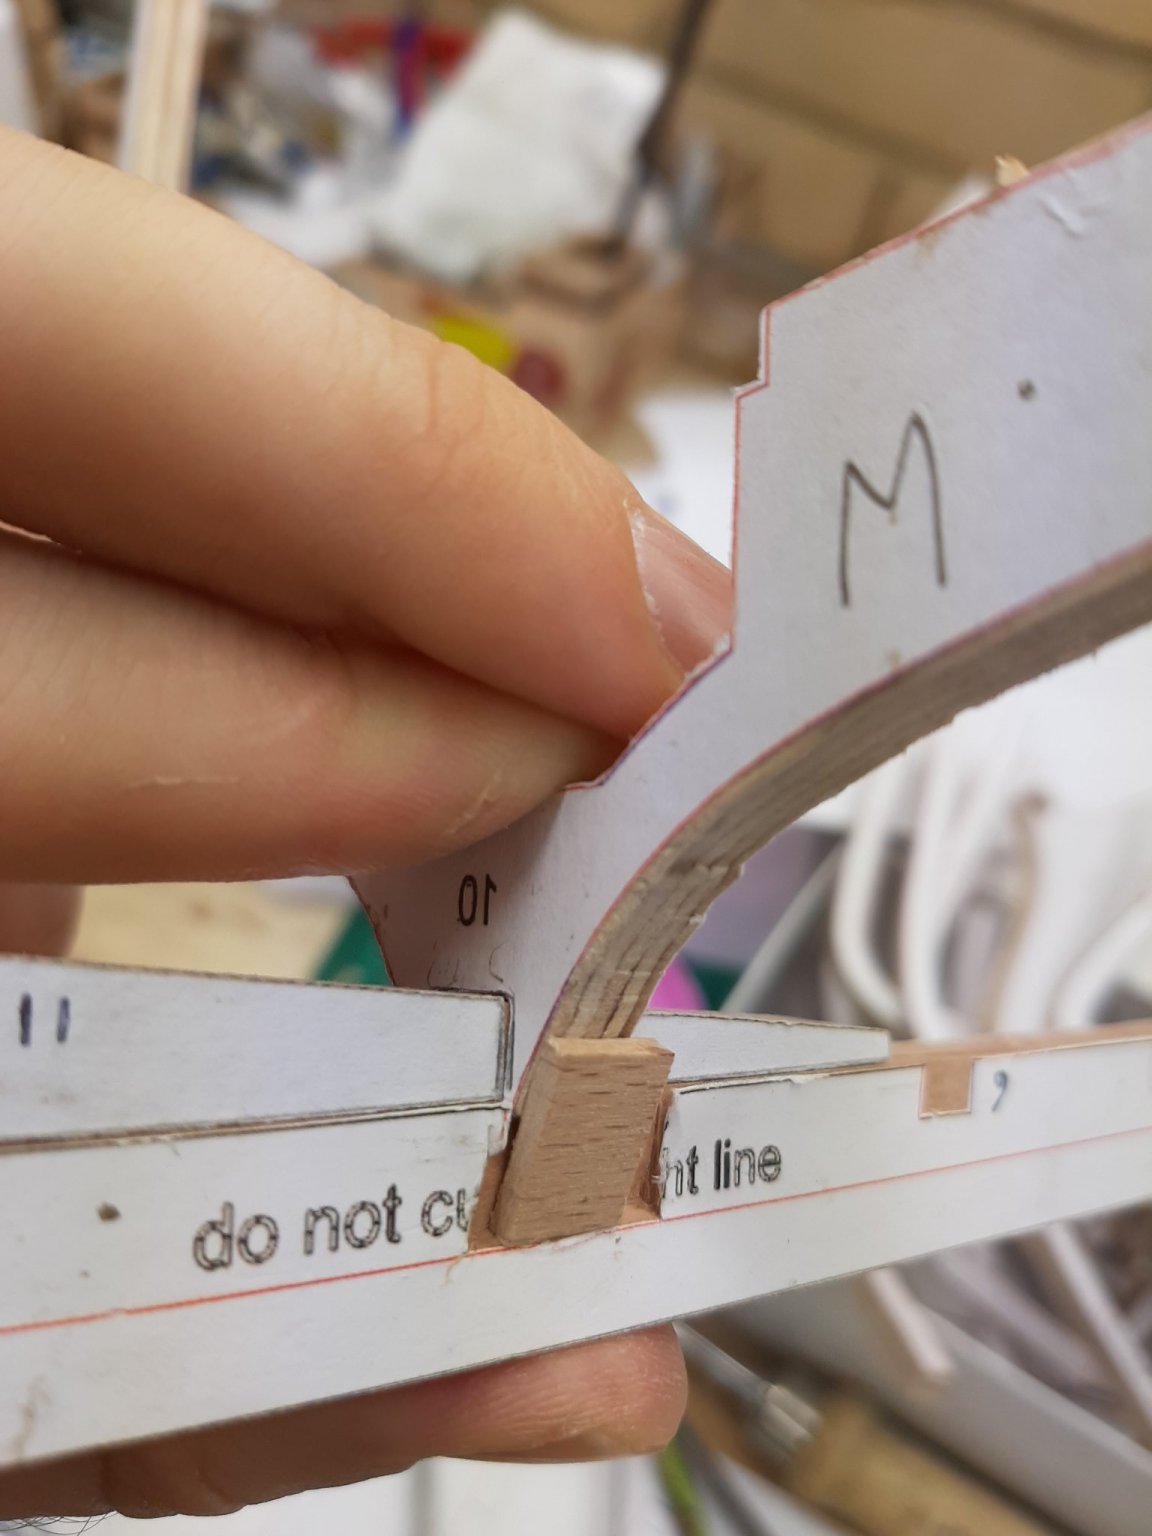
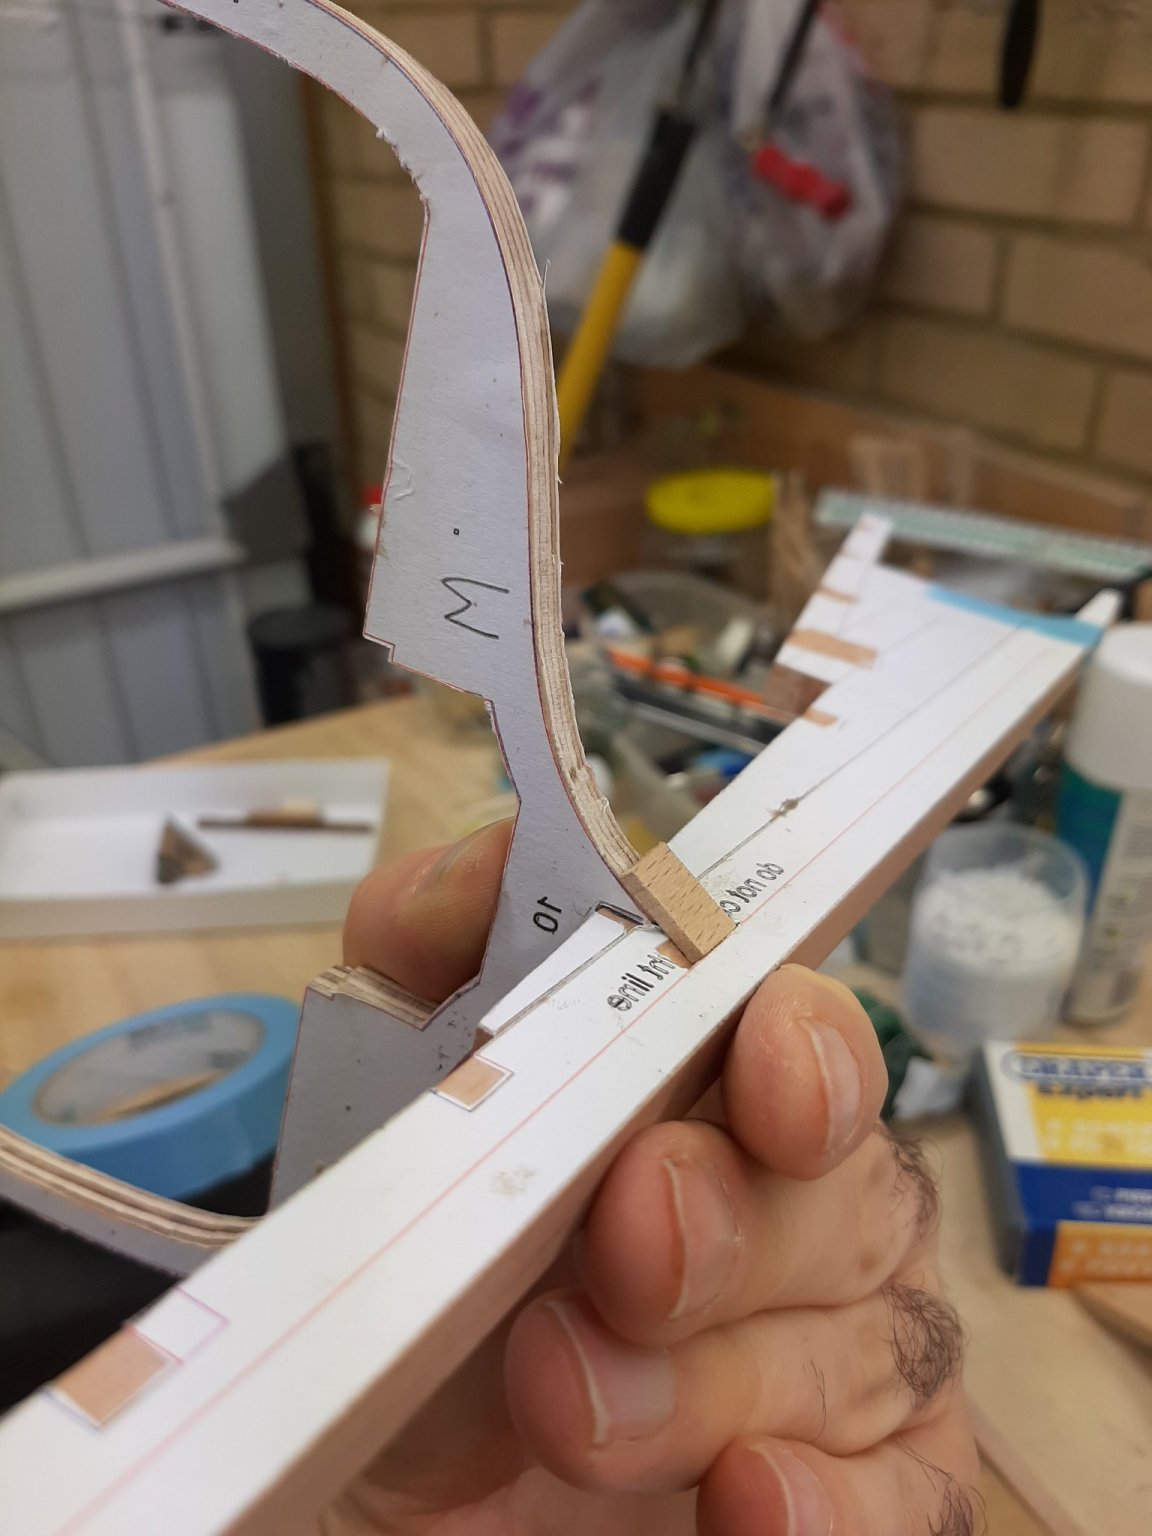
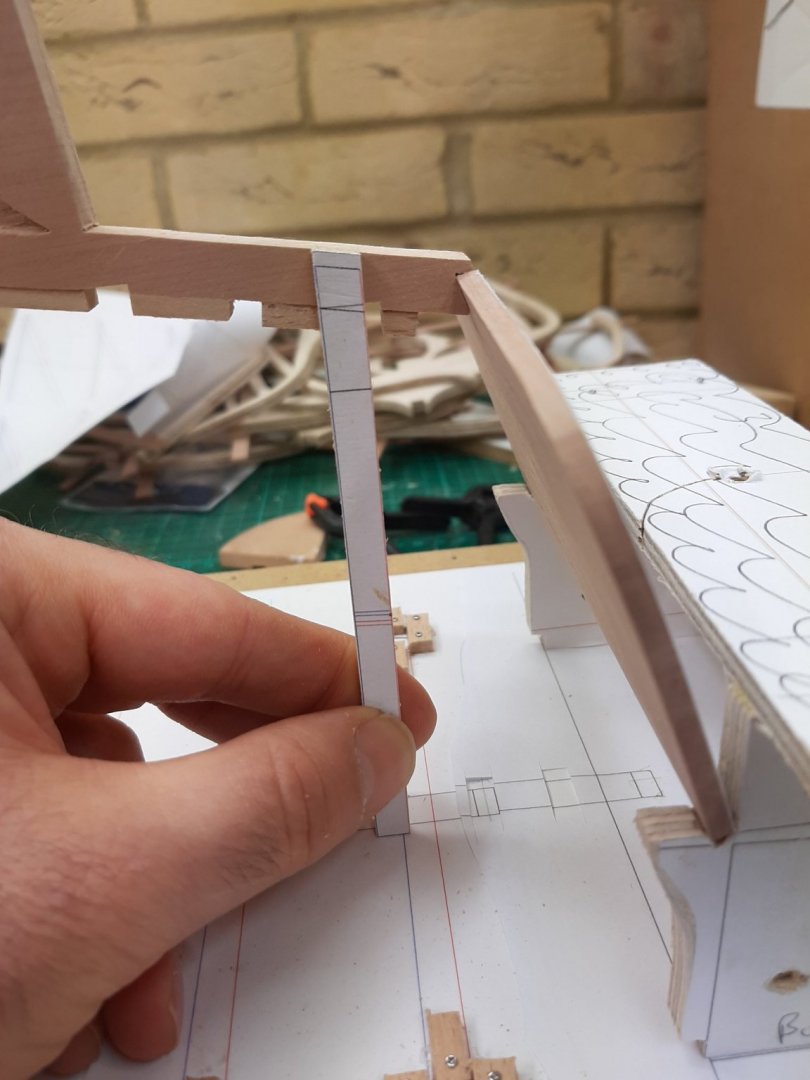
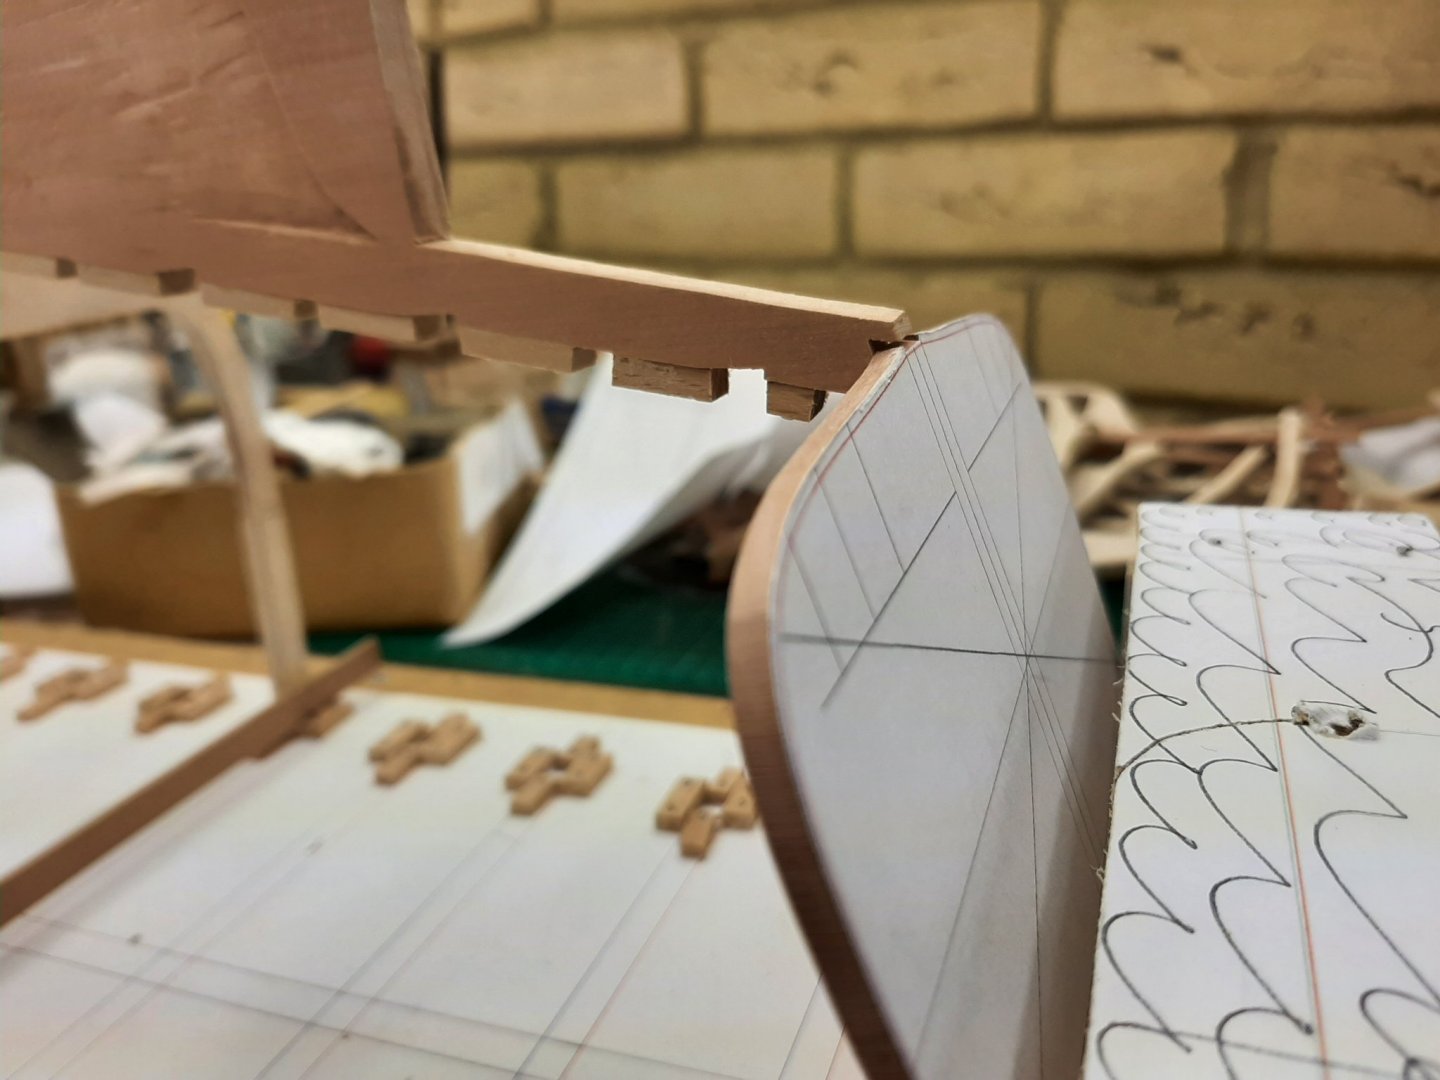
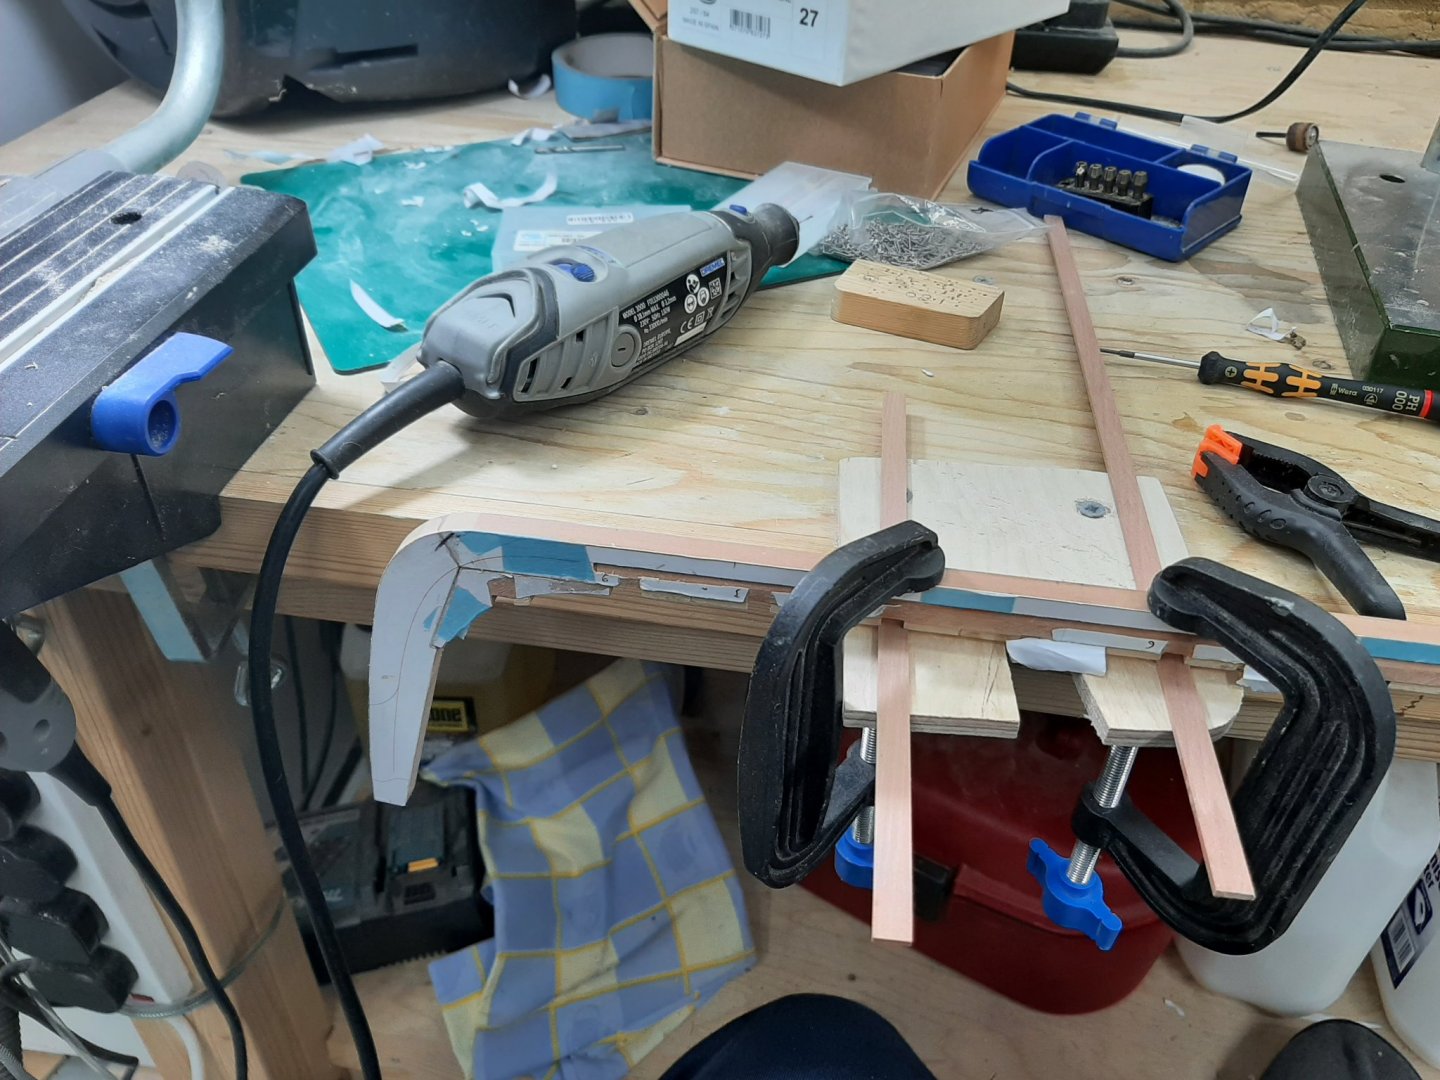
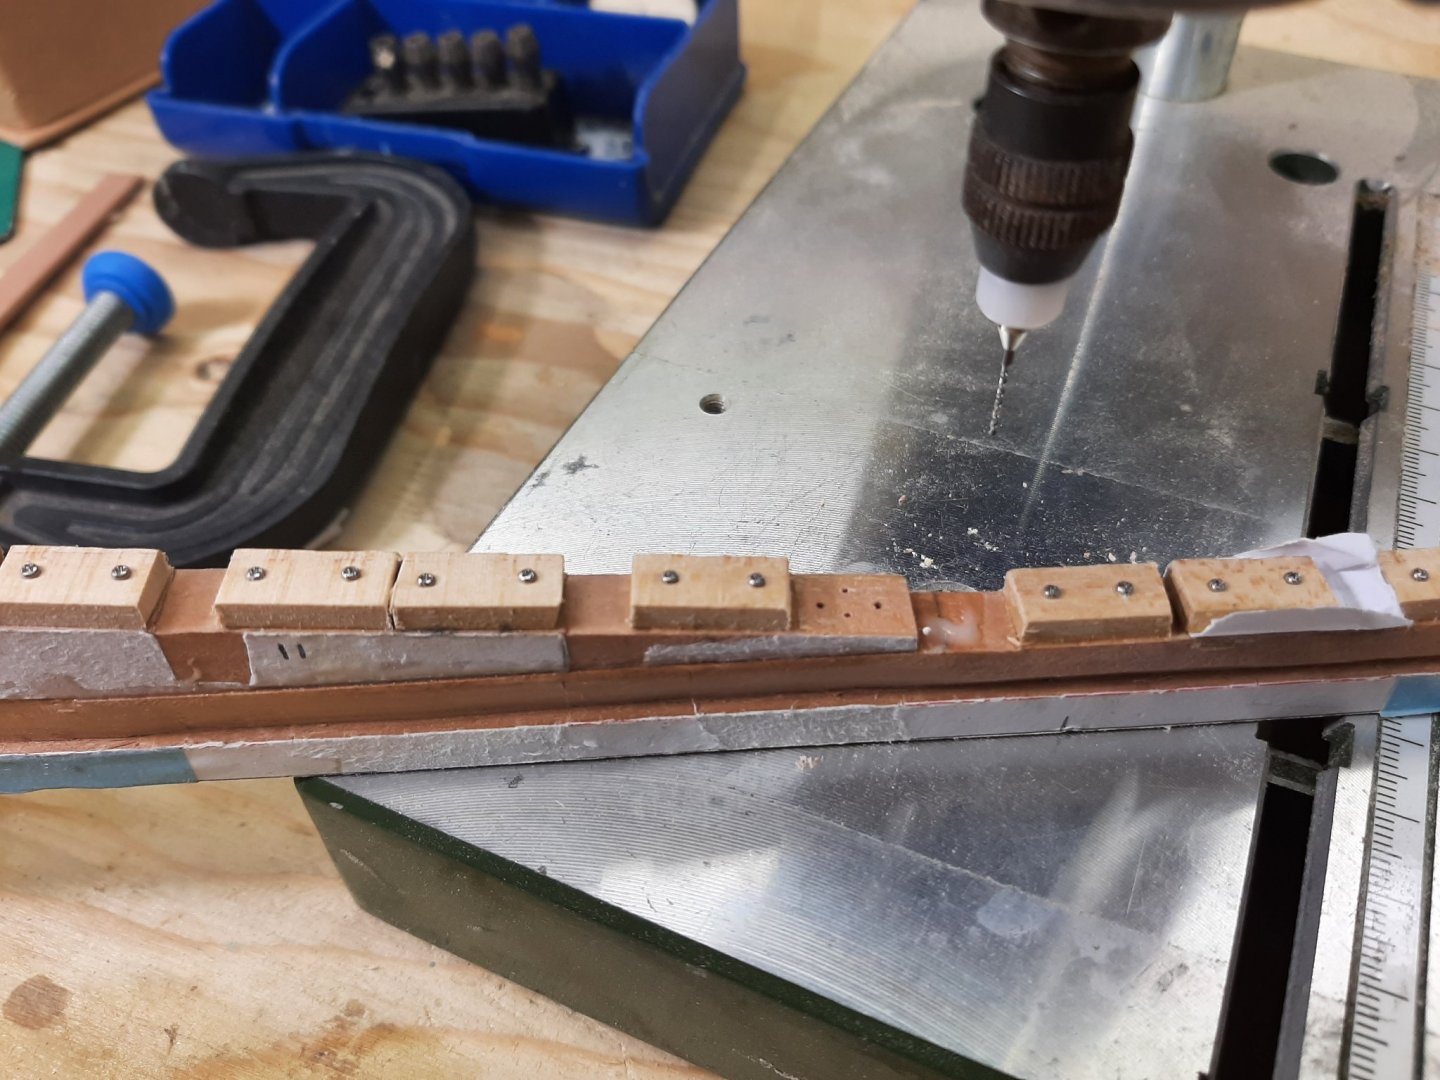
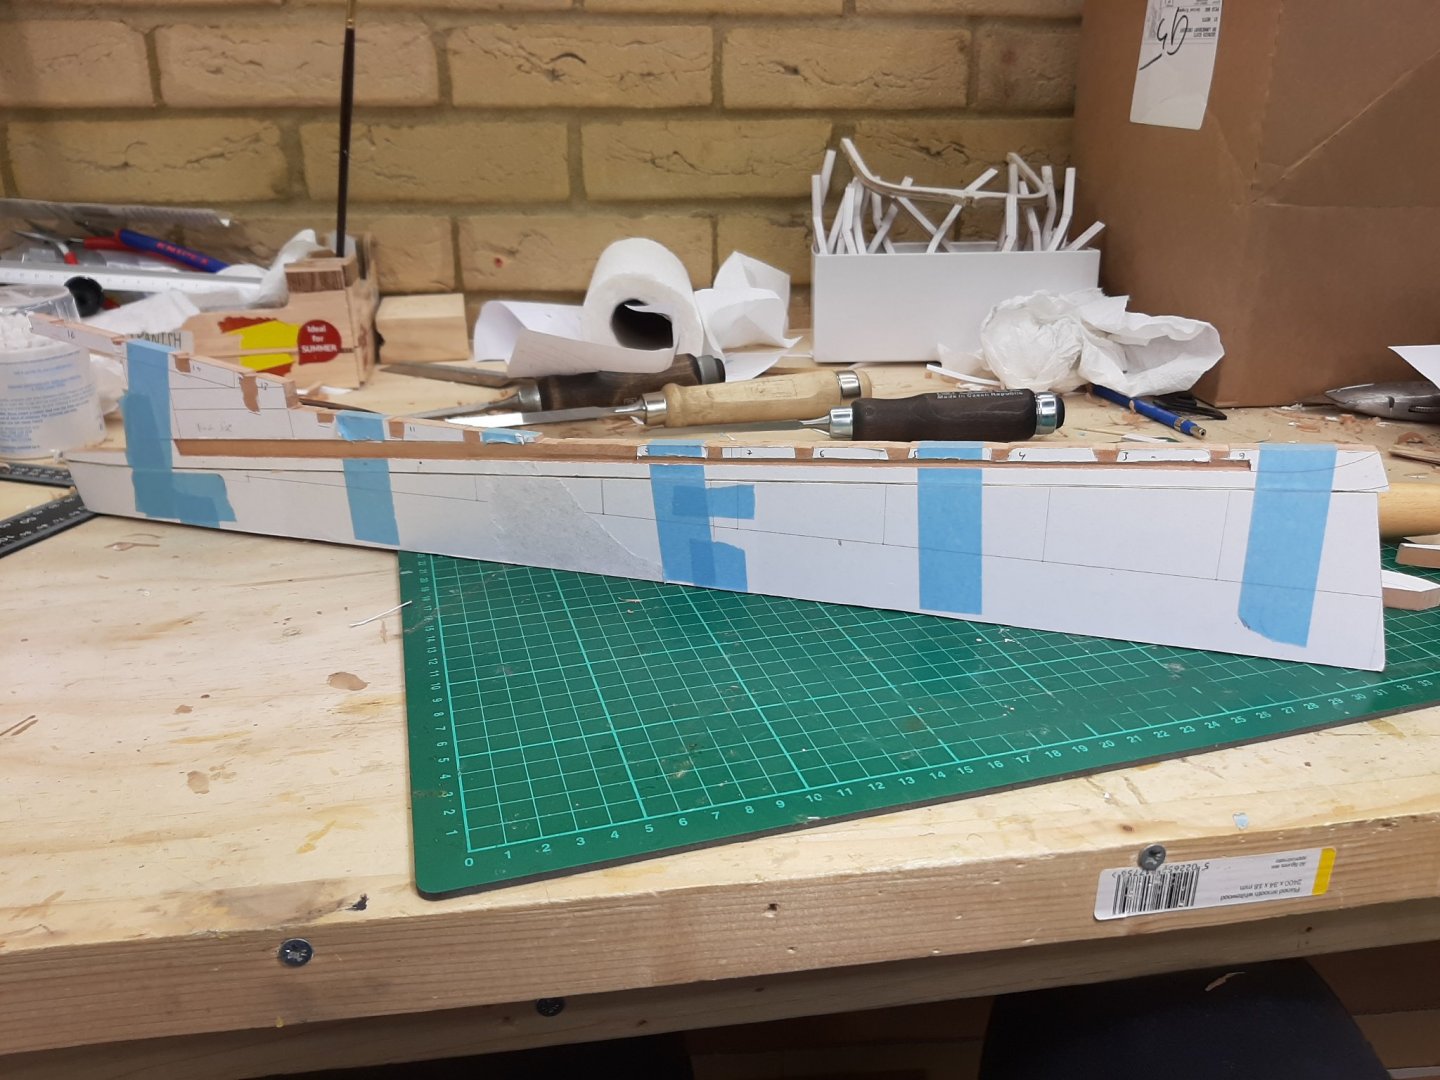
Bob, Hakan, GL and to all that hit the like button-many thanks! Now, I am struggling with this boat, it just refuses to come together nicely. The CAD plans are accurate and all the individual pieces seem quite accurate as well. However, something is wrong-this was made apparent today when I cut and installed the transom. Today I had the whole day free and spend it going back and forth between the garage and the computer in the house. I did a bit more work on the transom plans, then cut it from pear wood (took three expensive attempts) and also made a frame to strengthen it. Then I was just too frustrated to take pictures, I apologise! Now, the problems started when I tried to install the transom to the keel. The height and angle of the transom is critical as it cannot be sanded or shimmed - it will show. Also, it needs to be dead centered and squared. A jig is needed to hold the transom securely into the proper position while the boat is planked. I made a jig from scrap plywood using a template directly from the CAD plans. Now, the transom was very accurately cut, the jig showed the proper height and angle. Well, the keel was sitting too high. So I removed all the frames. I made a couple of templates and checked the height of the keel at the position of the last two frames, with the keel resting only on the stem and transom jig - spot on. So some of the frames need more sanding to allow the keel to sit lower. Next photos show the transom jig and the pattern confirming all angles and heights are now correct. I randomly chose frame 12 to check-indeed, it lifts the keel too high! So I will need to check each frame on its own to make sure it fits without pushing the keel up and out of position. Then I hope that the boat will finally come together properly. Now, I have also started doing a bit of thinking on the planking. It is probably going to be more complex than I thought as there will be quite a mismatch bellow the turn of the bilge between the bow and stern and probably stealers will be needed which is I think rather unusual for such a small boat. Stay safe all Regards Vaddoc

-
Vanda-Lay treenail maker
vaddoc replied to JerryC's topic in Building, Framing, Planking and plating a ships hull and deck
My last boat is held together almost exclusively by tree nails - I must have used close to 5000. Easy and inexpensive to make in bulk using needles, a drill press and a disc sander down to a diameter of 0.5 mm. Fast too. There is a thread on this somewhere on MSW -
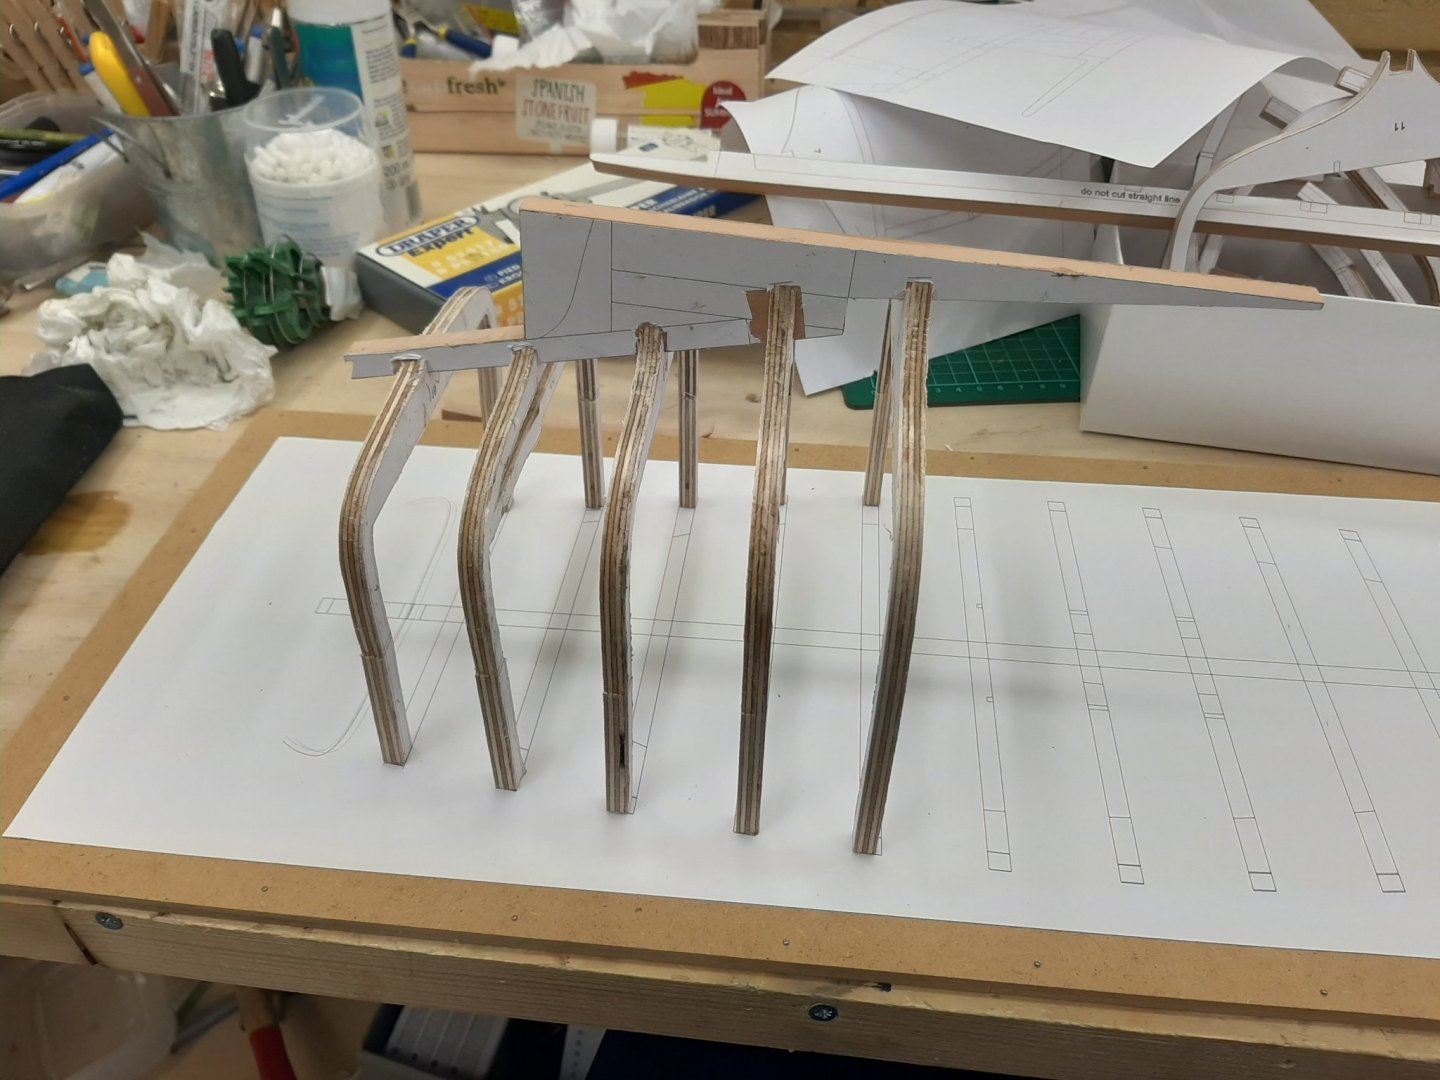
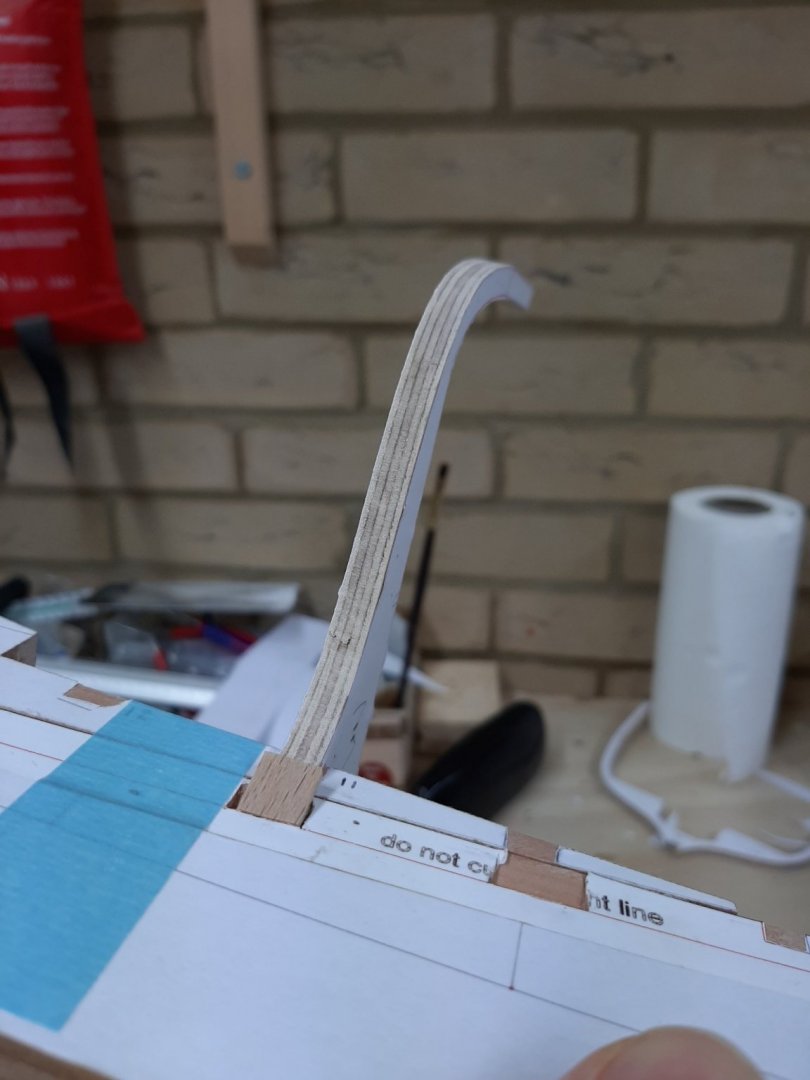
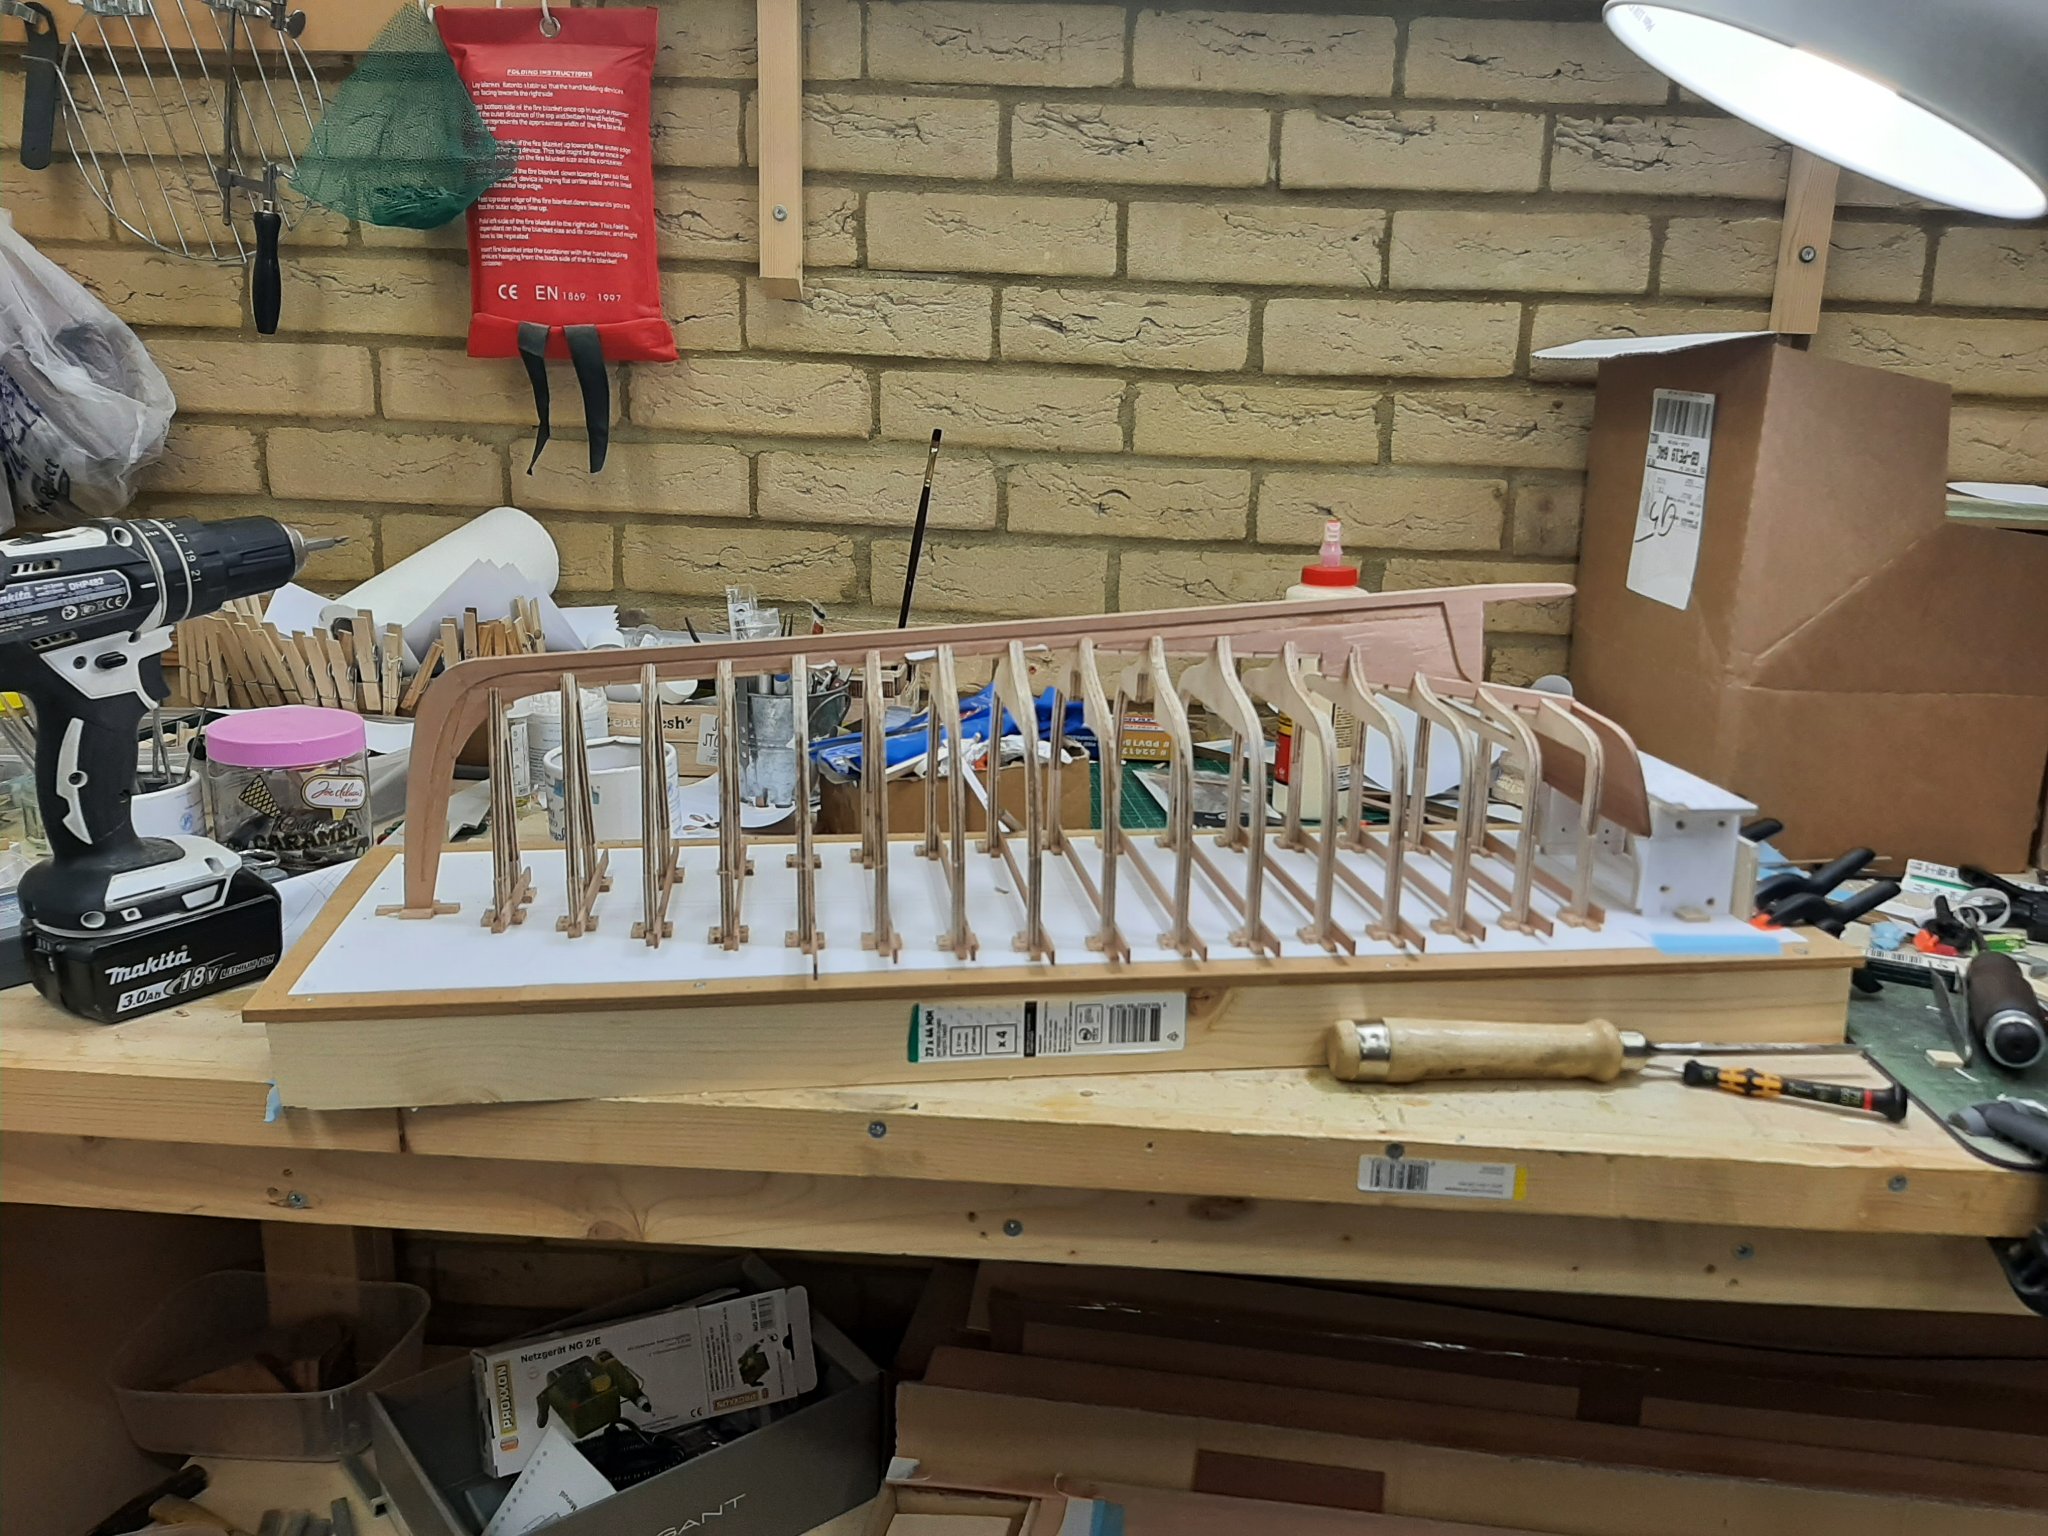
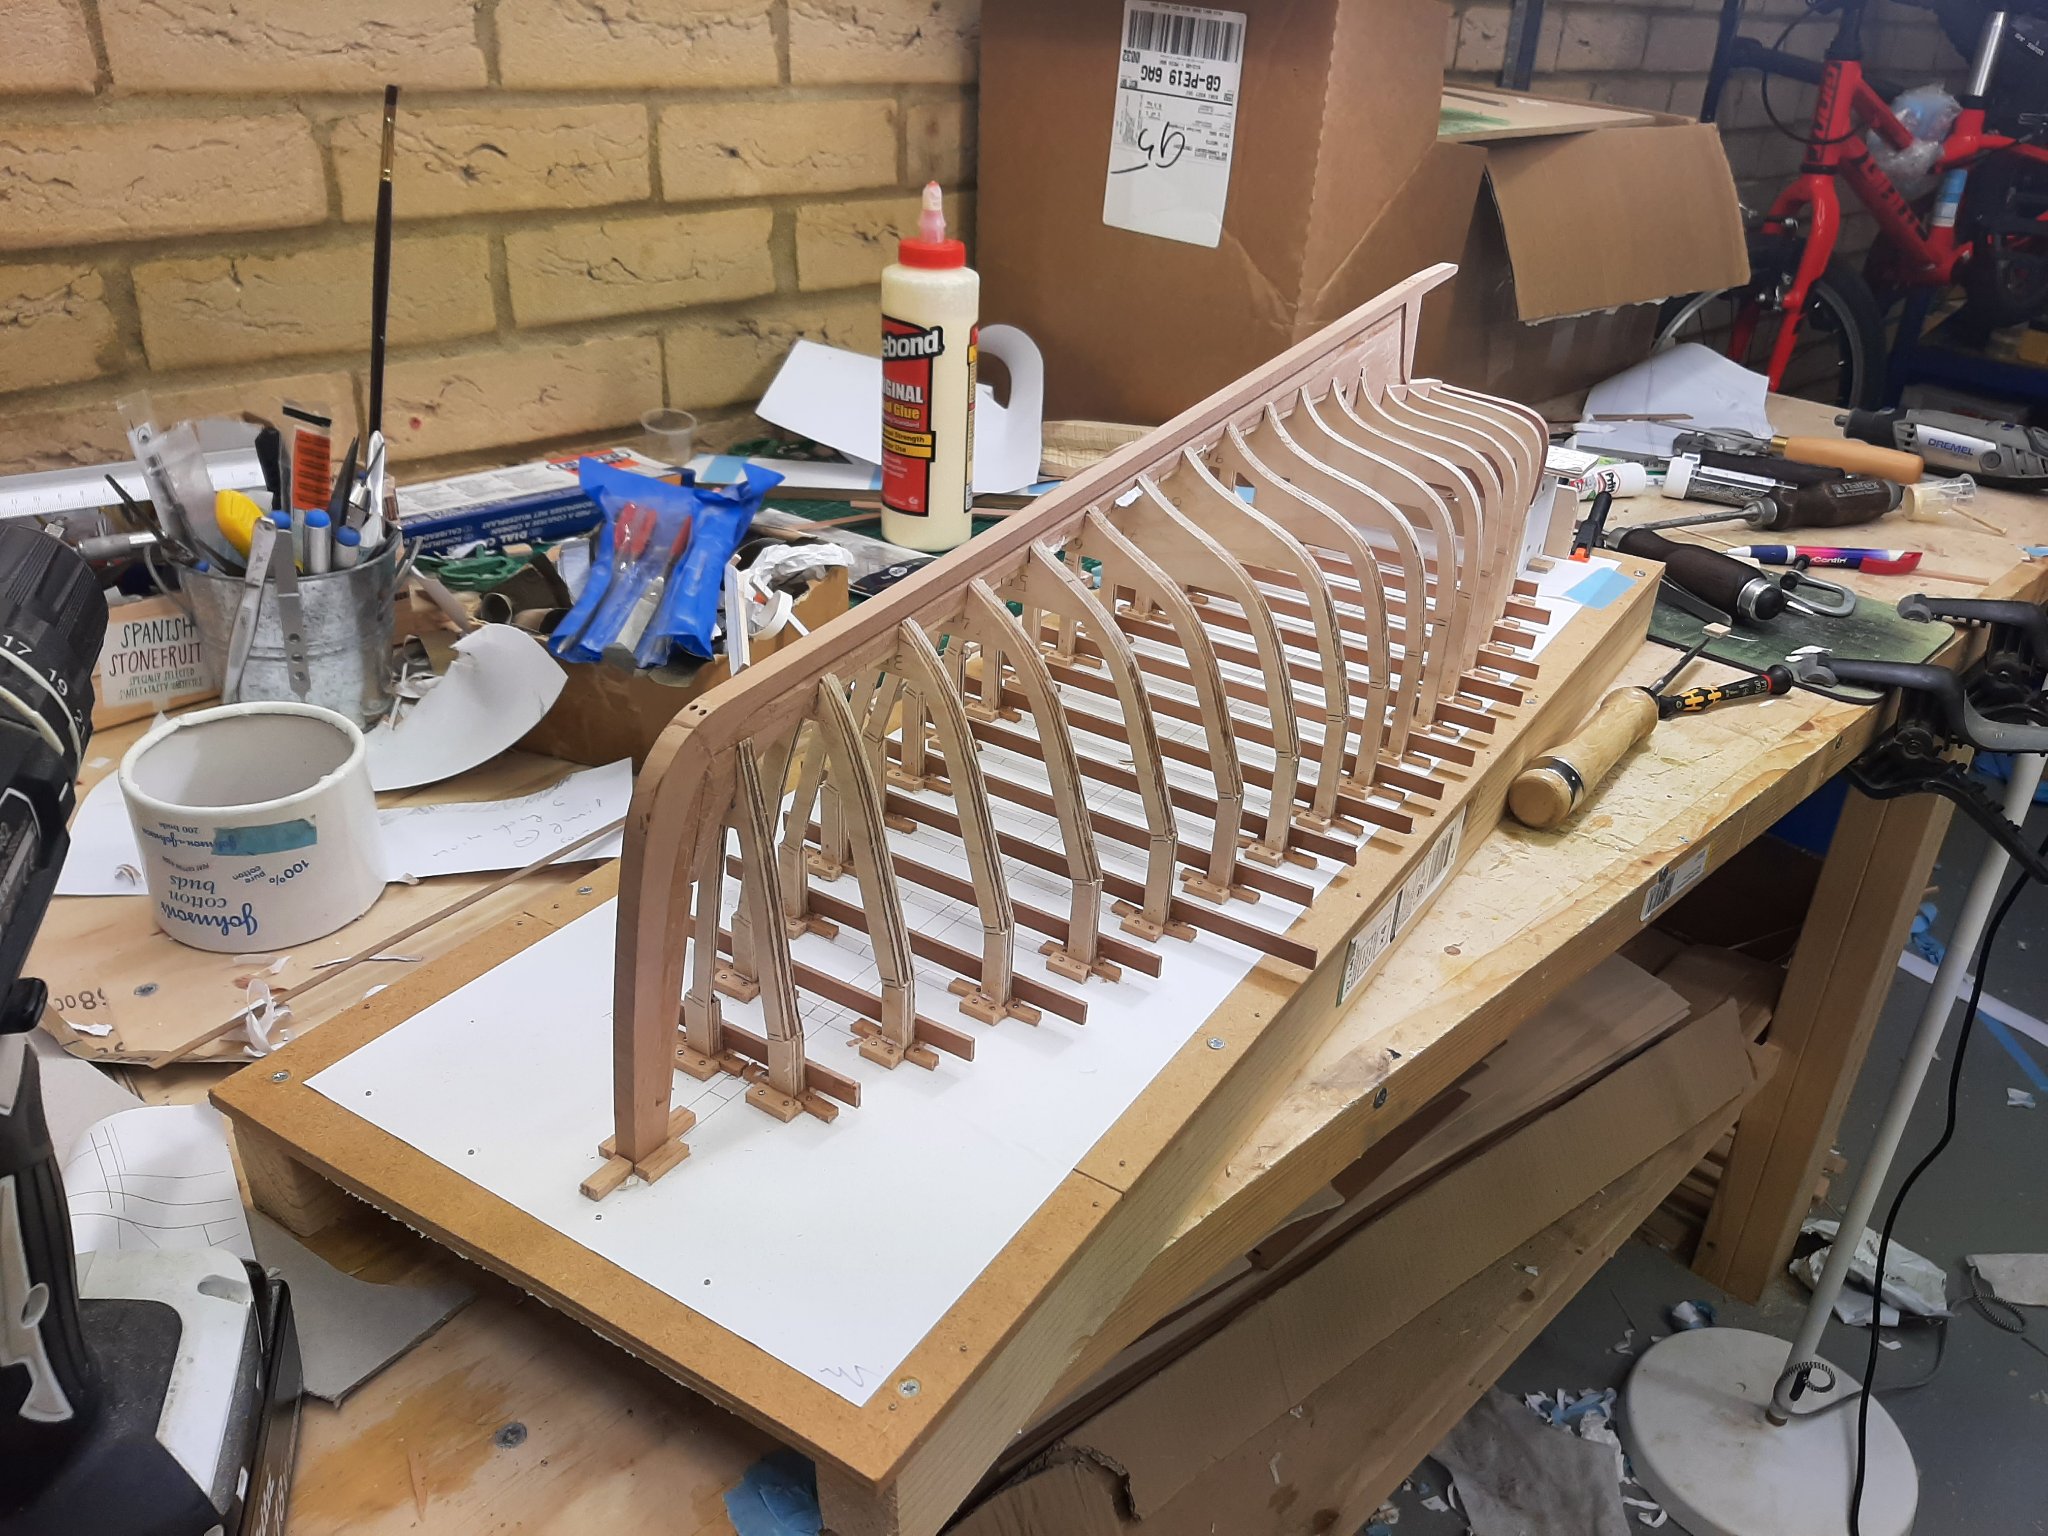
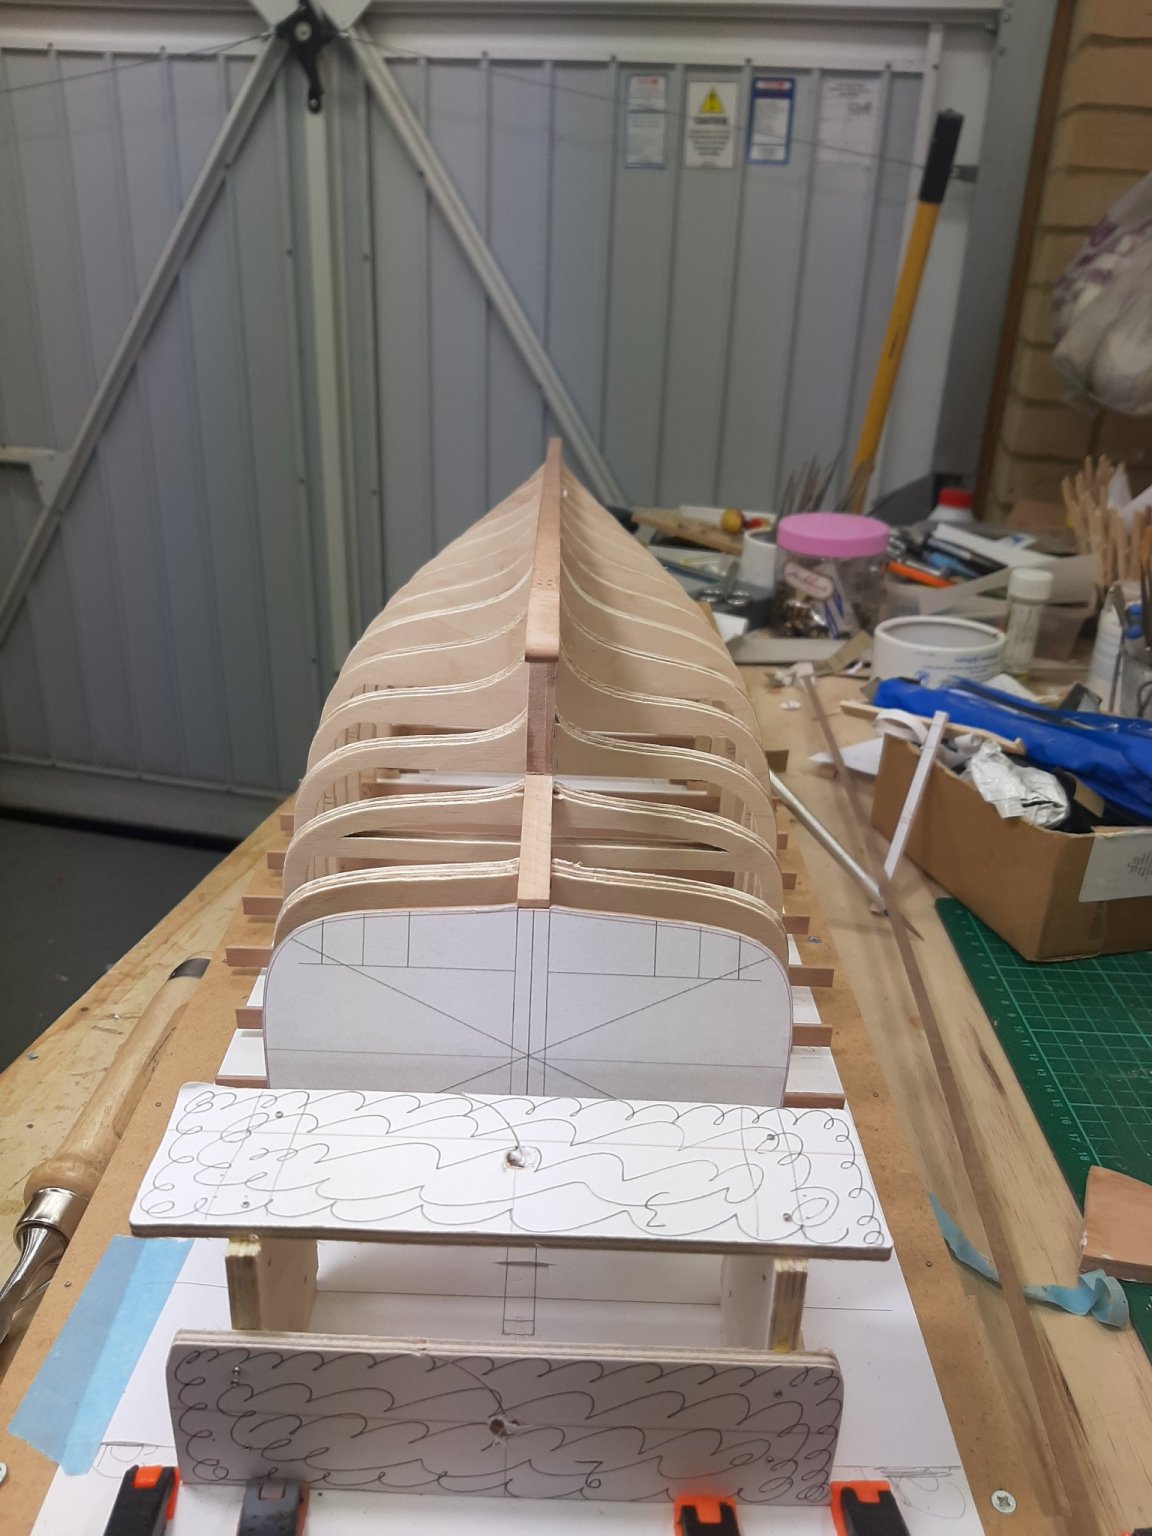
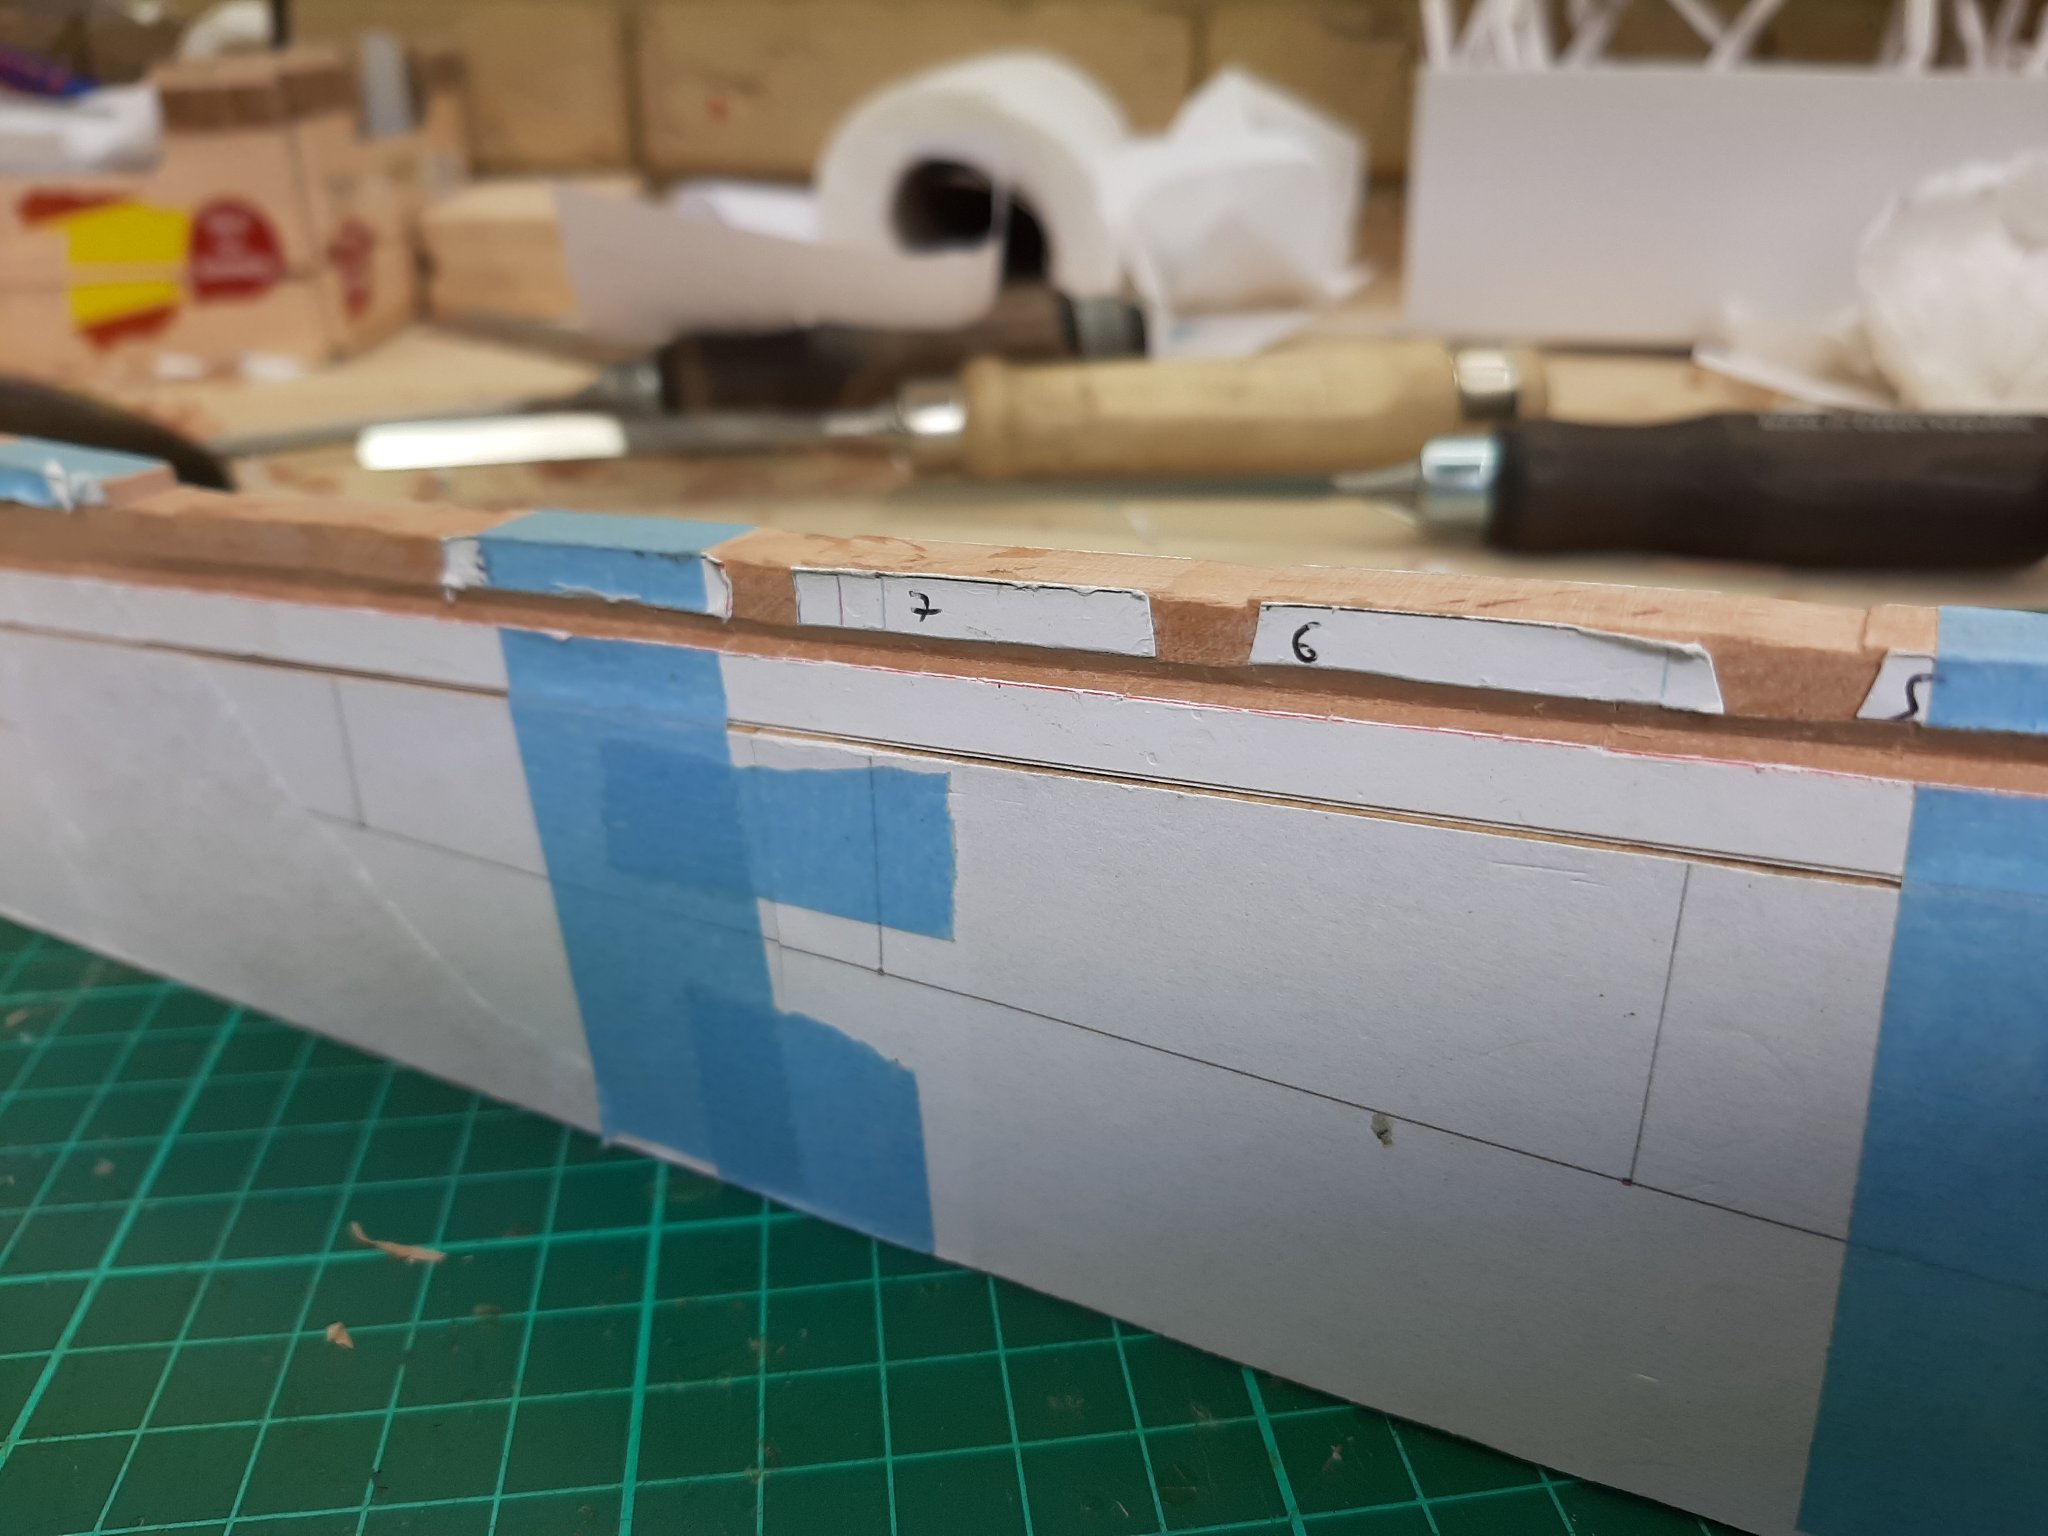
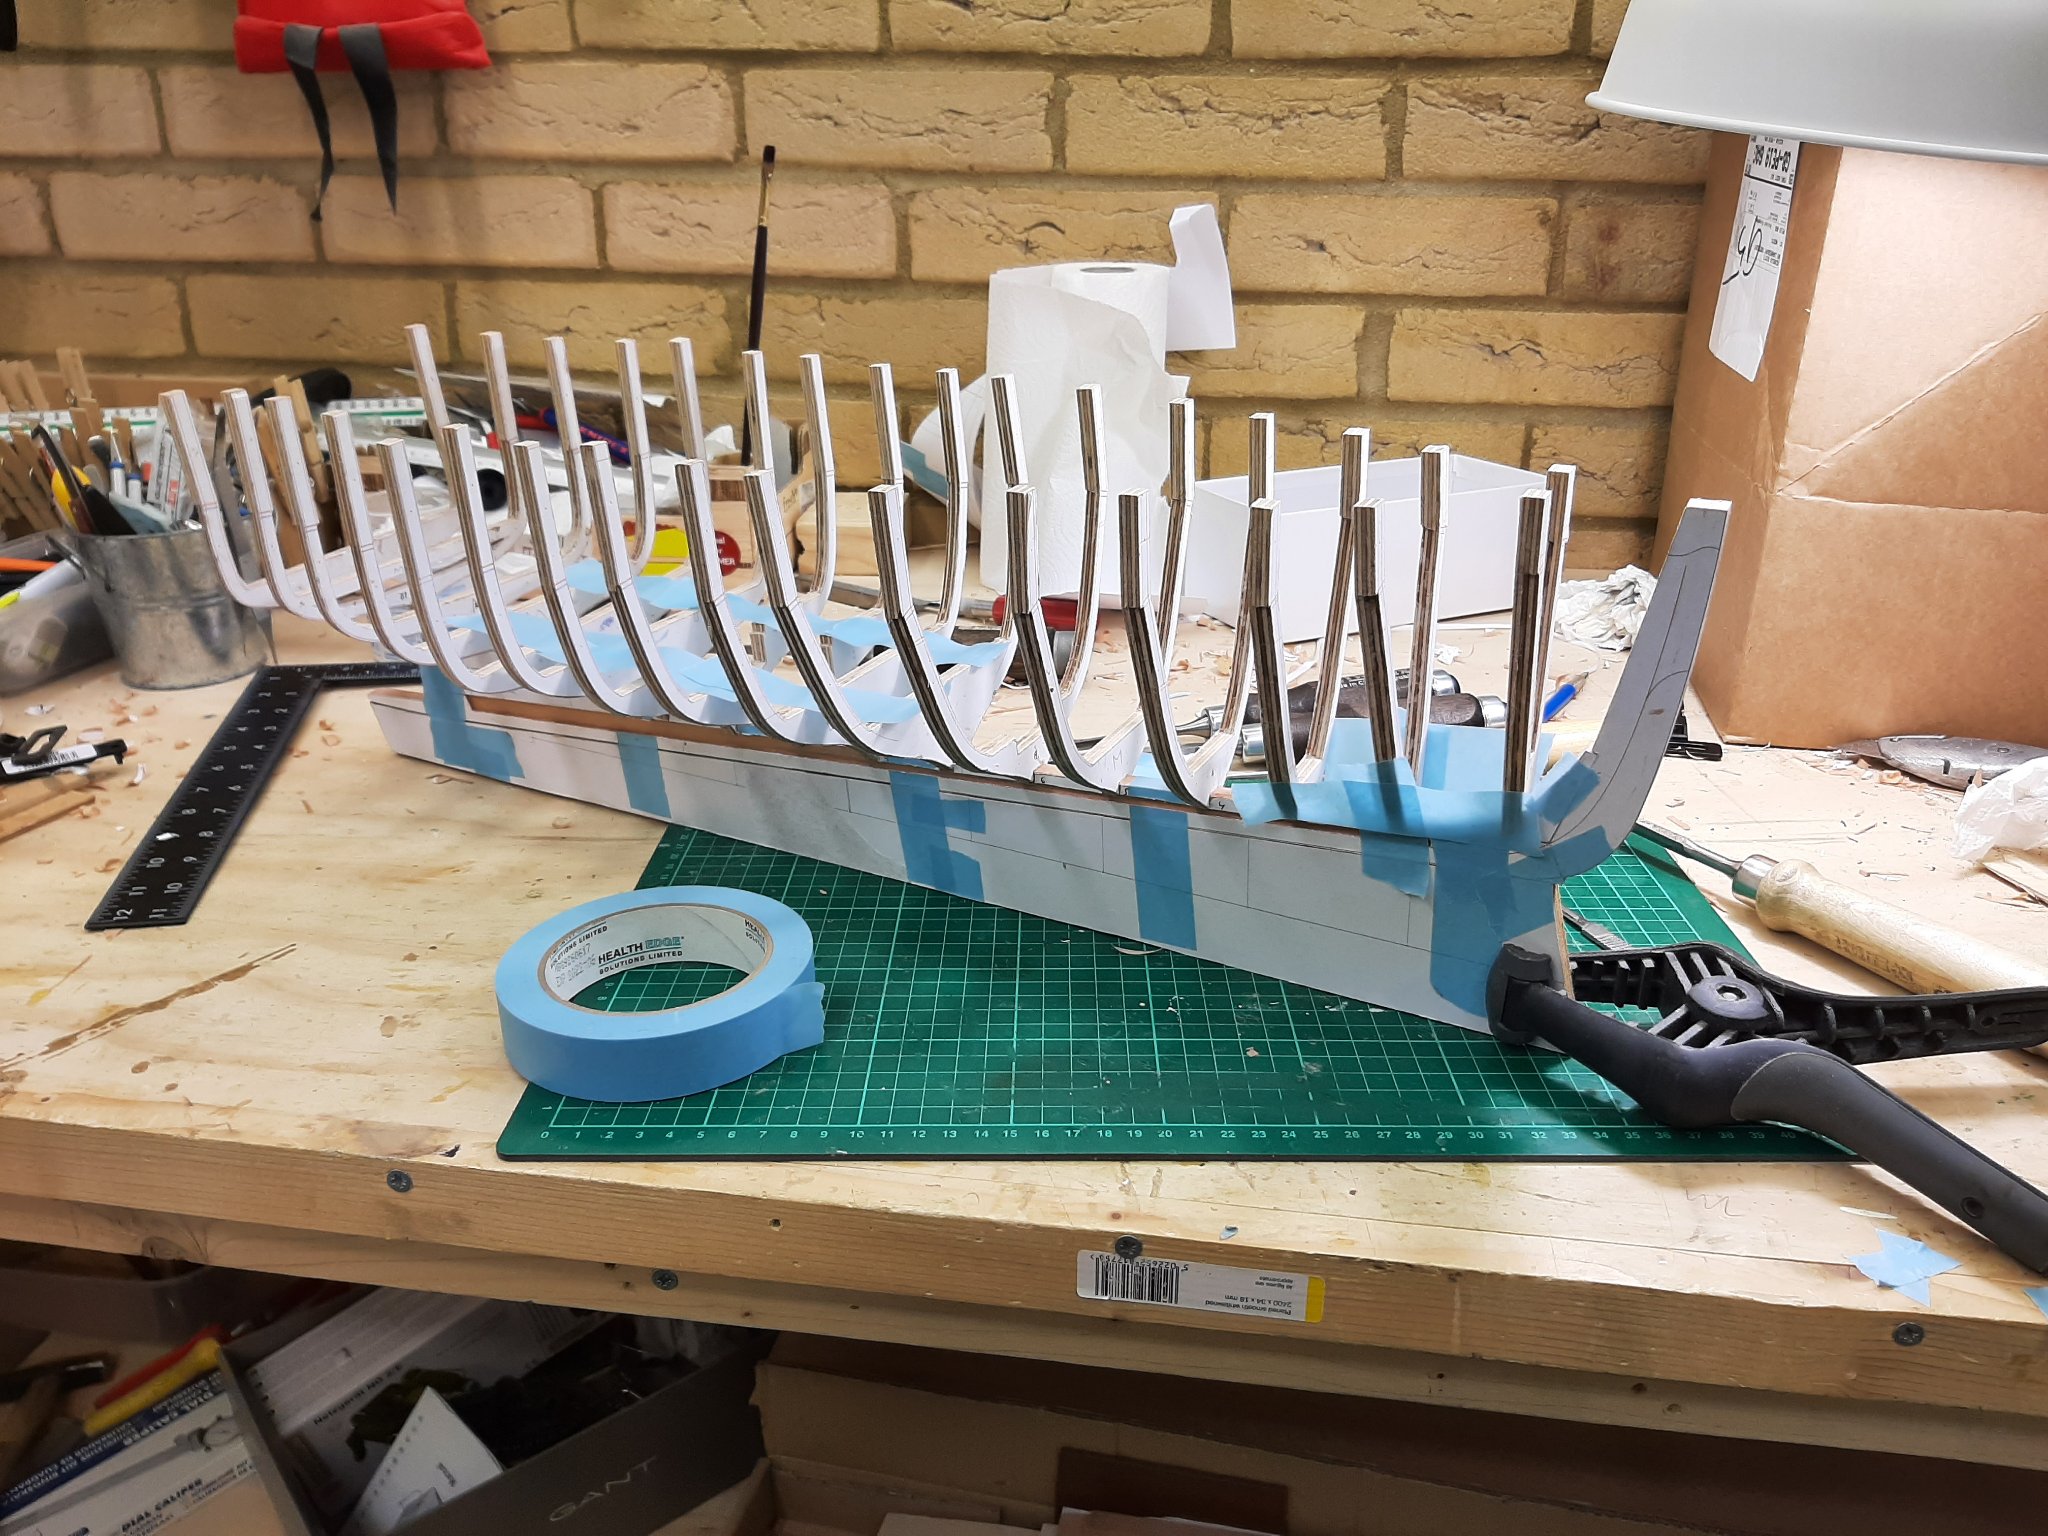
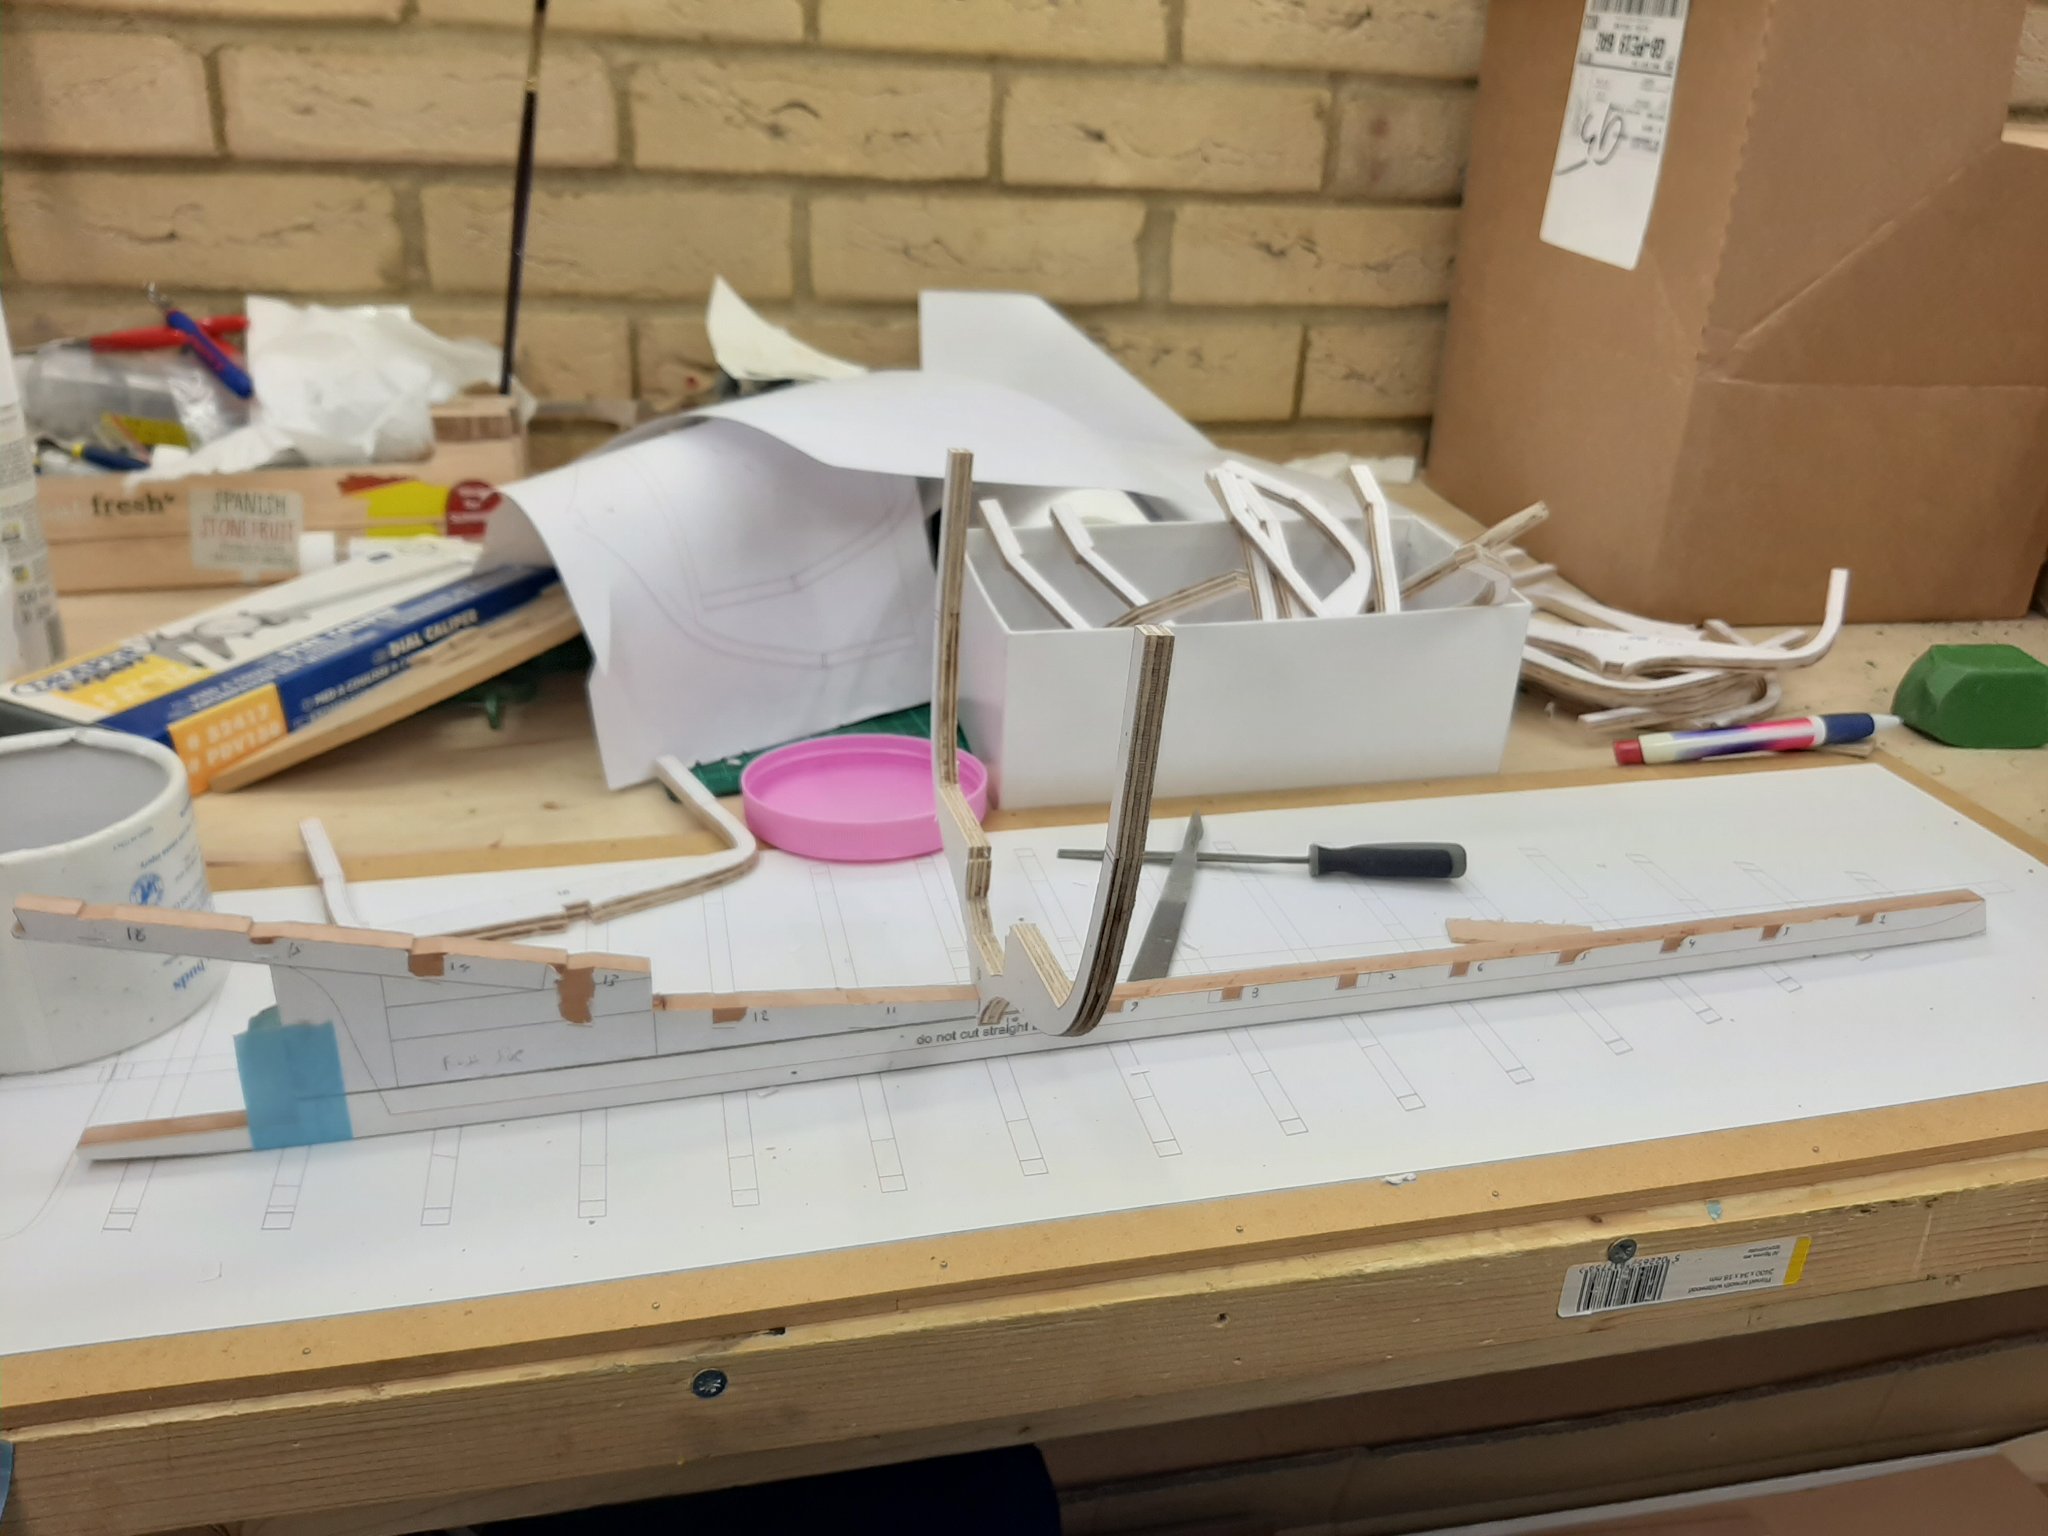
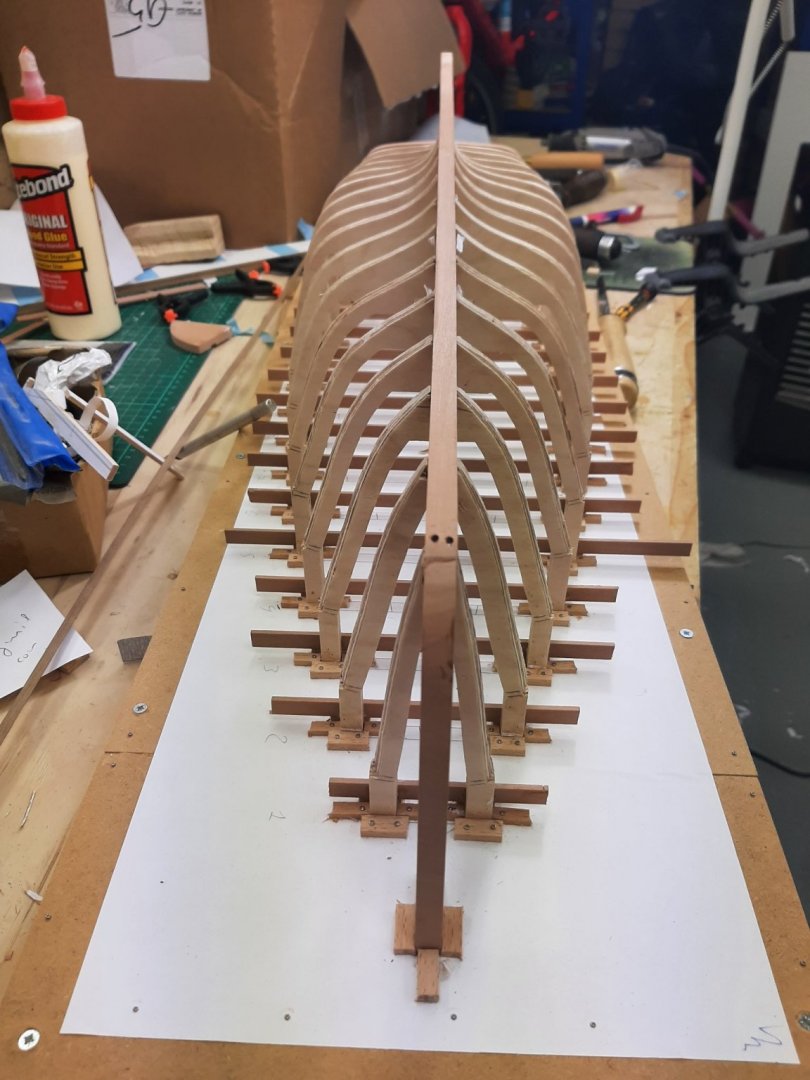
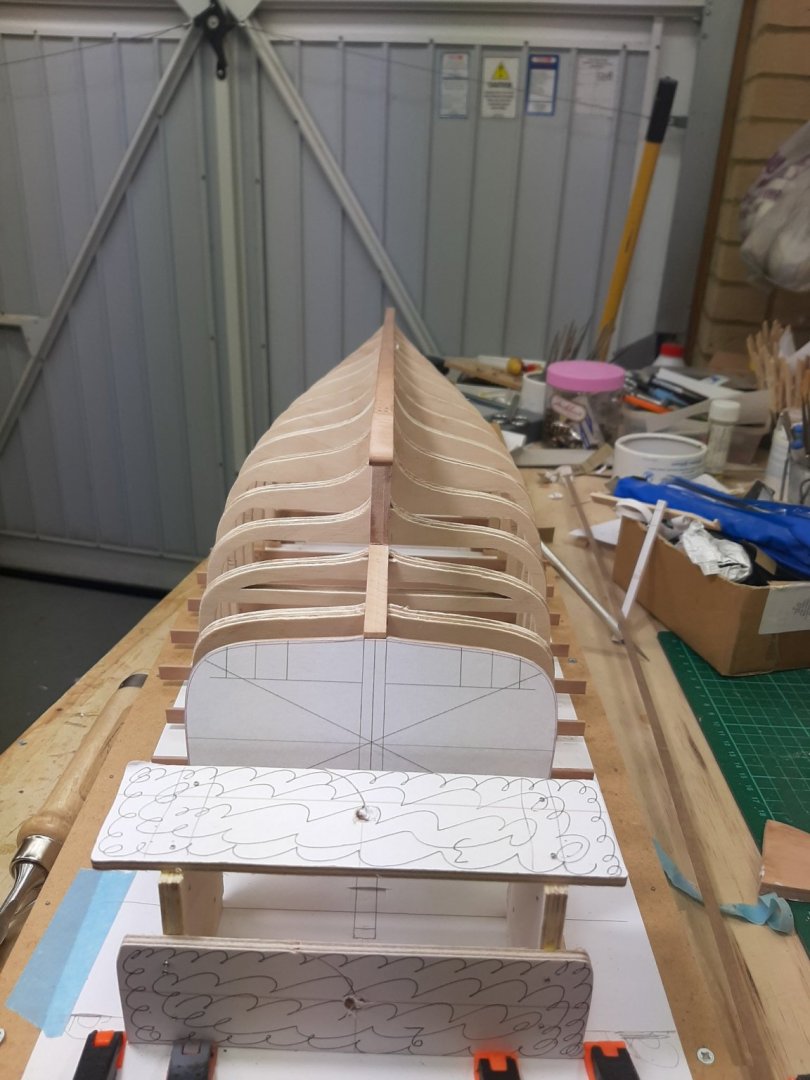
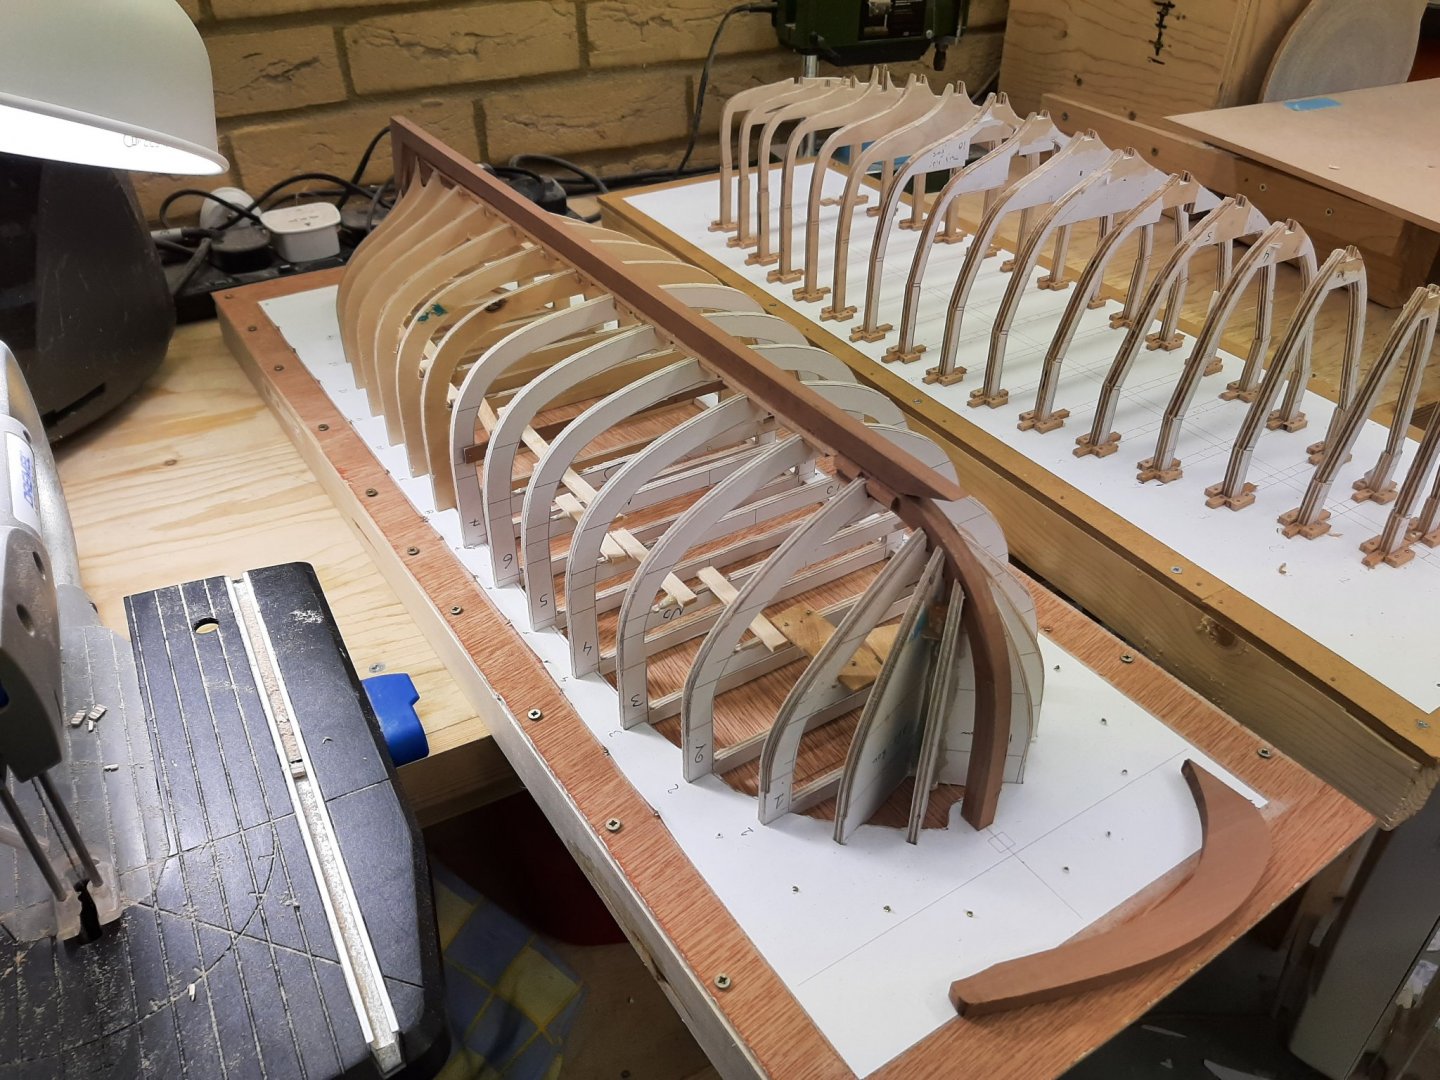
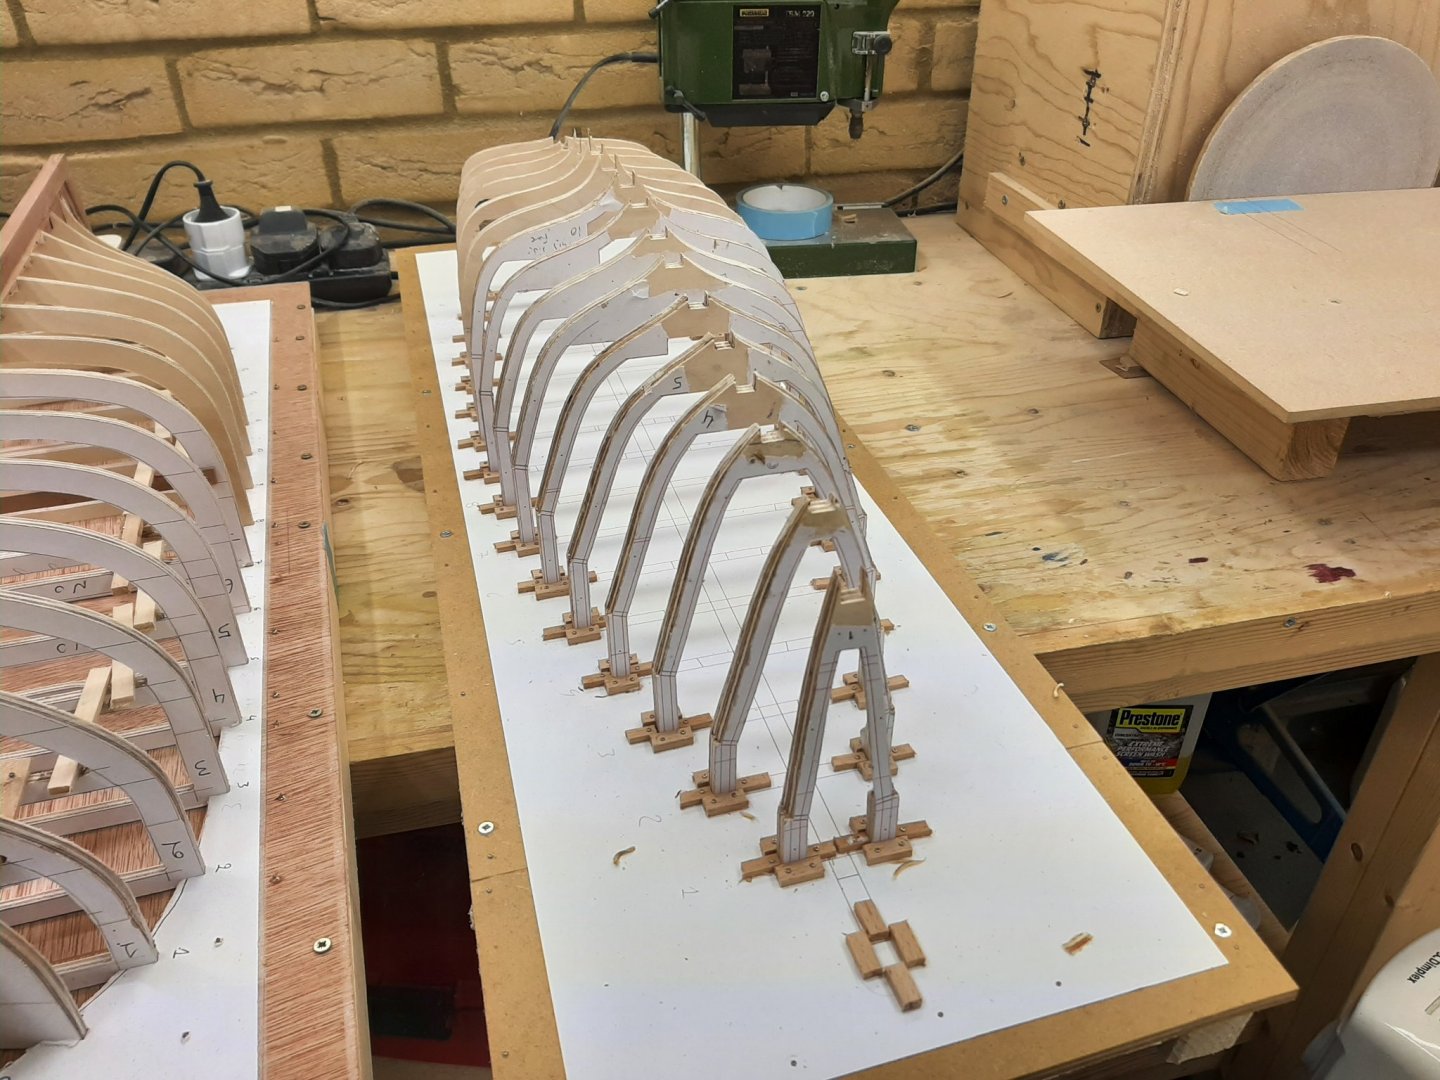
I hit a bit of a milestone today, the backbone of the boat is ready! I first finished the cross members in all frames and removed the paper templates. Then, I continued work cutting the rabet. At the bow it was relatively straight forward. At the stern however, things were more complex. The problem is that the keel is not horizontal but slopes downward towards the stern. I have no idea how the planks will be arranged and as a result I am not sure how to hollow the deadwood. I installed all the aft frames and eyeballed things, I think there will be more wood to remove but I don't think I am far off. I ve been using the strop on my chisels every few cuts and now they are extremely sharp, even a casual contact with the fingers will draw blood. This allowed however for very precise cutting. Next I removed the paper patterns from the keel and sanded to 240 grit. Then I assembled everything and checked for fairness. It looks ok, maybe a tiny amount may need to be taken off frame 1 at places but really it is not far off. Next, I need to make (again, could not find it) the transom and secure it to the hull. I will need to add some side horn timbers and also to make some kind of jig to hold the transom in place. A last photo, aren't boats beautiful...


-
Thanks Wefalck The normal magnetic steel variant is made of some kind of soft mild steel and the head gets destroyed very easily. The stainless variant is just a touch magnetic and much more resilient.
-
Fantastic model George! At a proper scale too. Very nice hull and great paint job. Is it enamel paint? I like the colour of the rubrail, is the wood stained? Vaddoc
-
Thanks Hakan I buy these screws by the thousand from our Chinese friends at Aliexpress. They come in various lengths and I find them very useful. They need a pilot hole of 0.7 or 0.8 mm. A good screwdriver is also needed, AAA or AA. The AAA shaft has the same diameter as the head of the screw if it needs to be deeply countersunk. Look for "self tapping Philips head screw" but get the stainless steel ones (non-magnetic), plain steel have their heads round off very easily. Having said that, the last "stainless steel" I got seem to me to be just plain steel, they are rubbish all 2000 of them... Regads Vaddoc
-
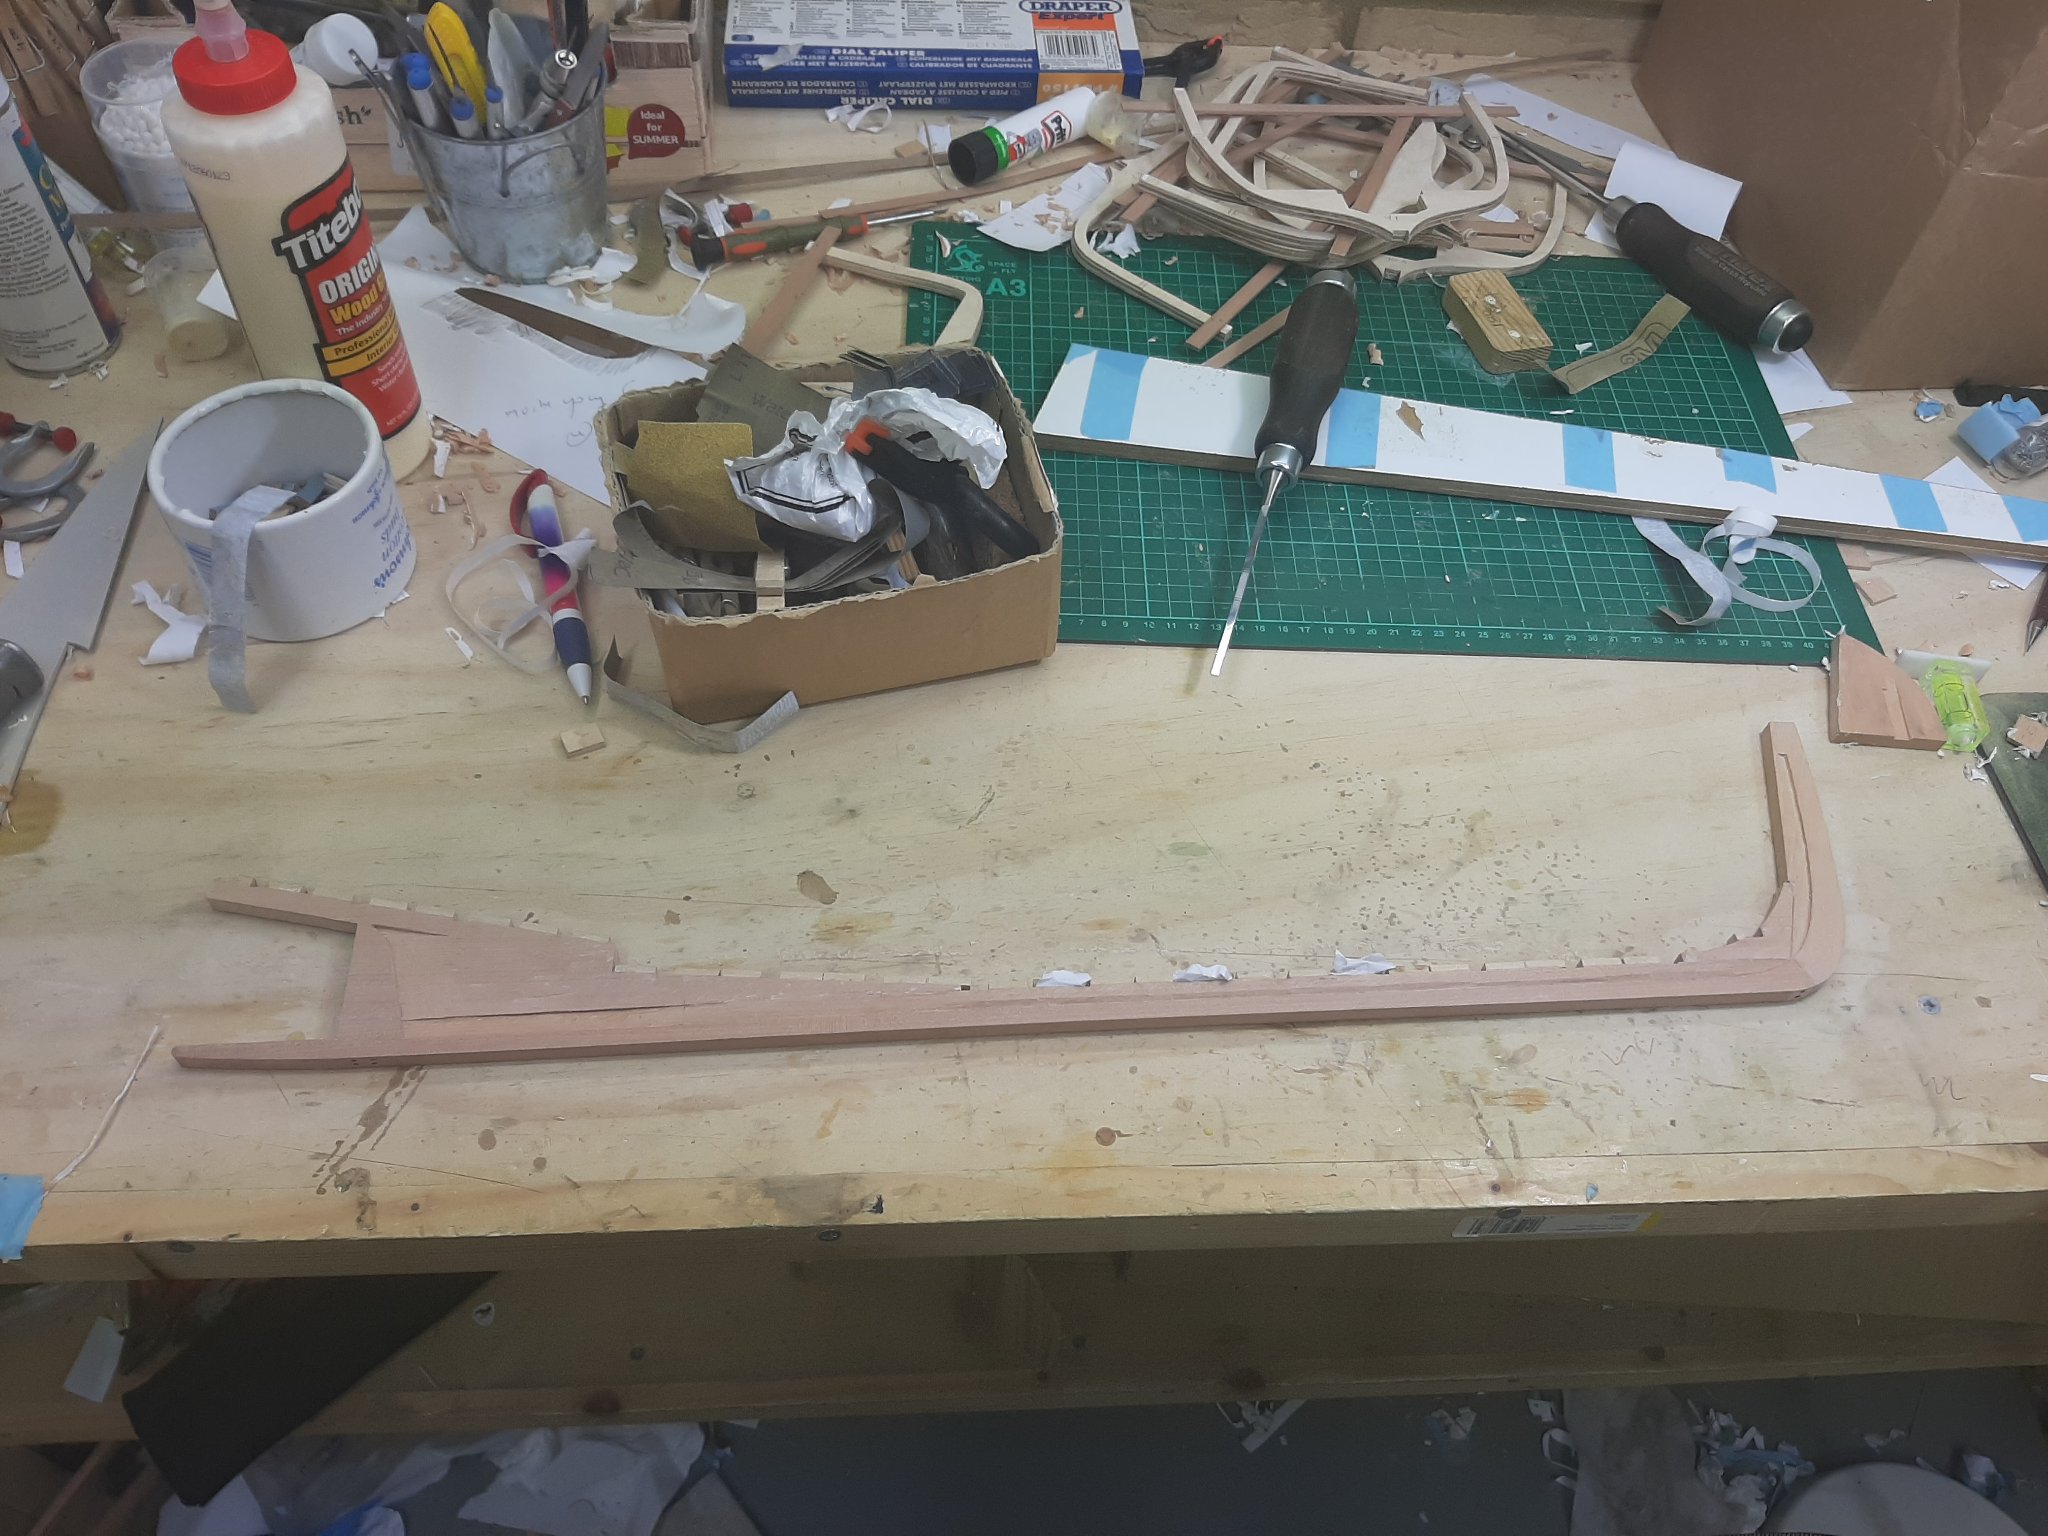
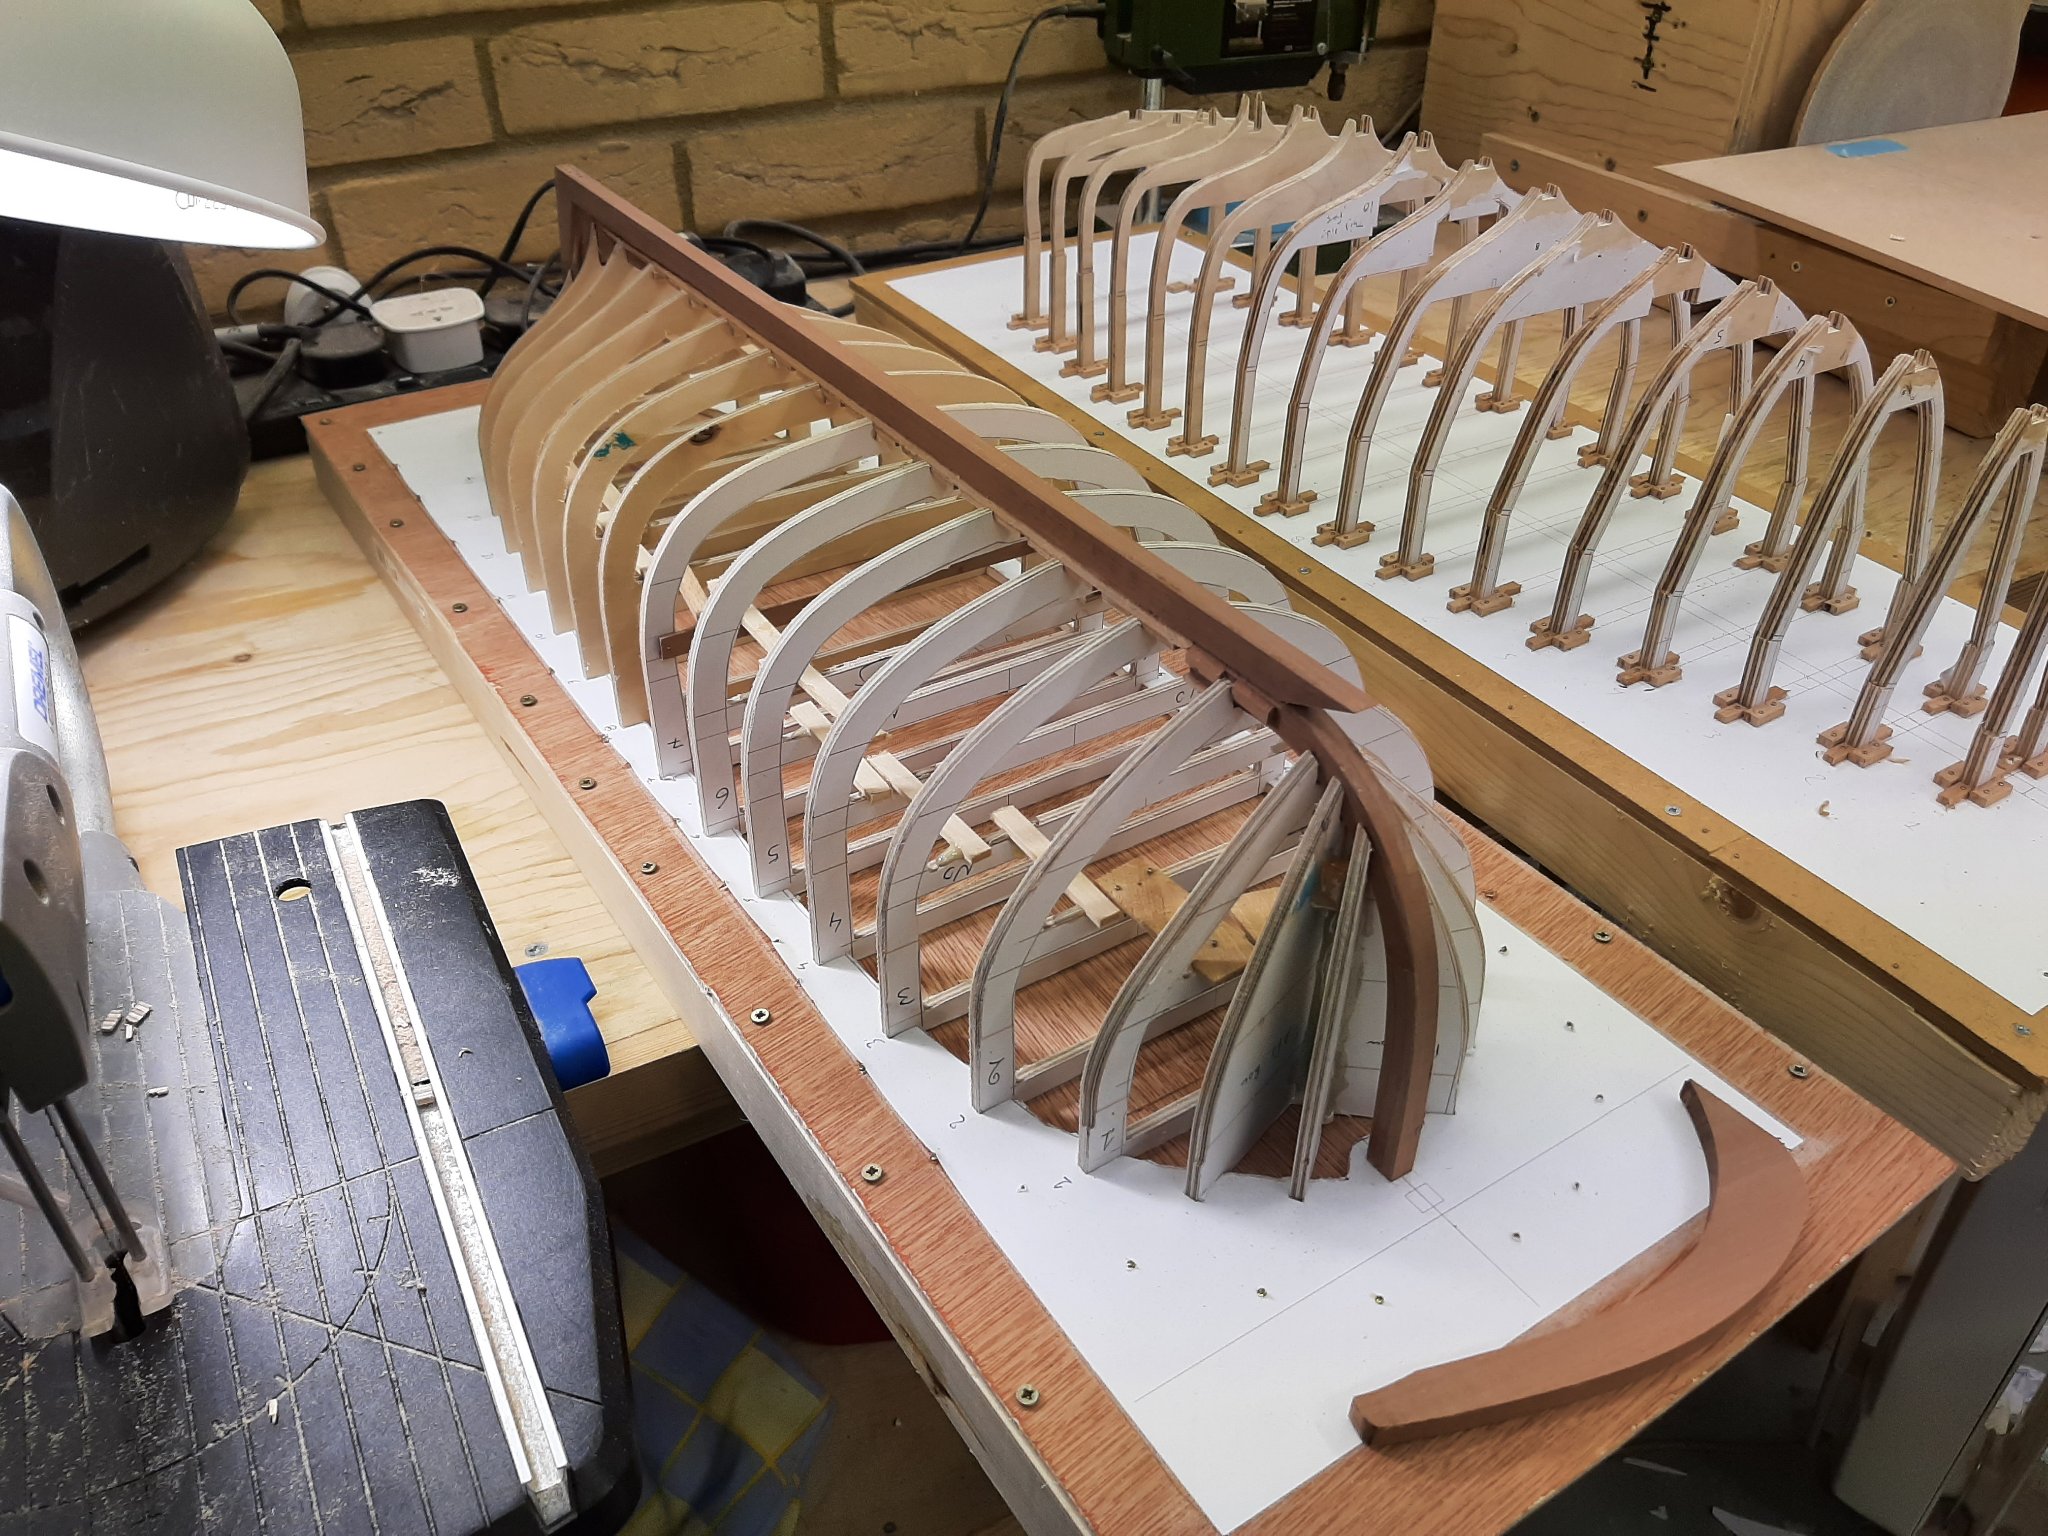
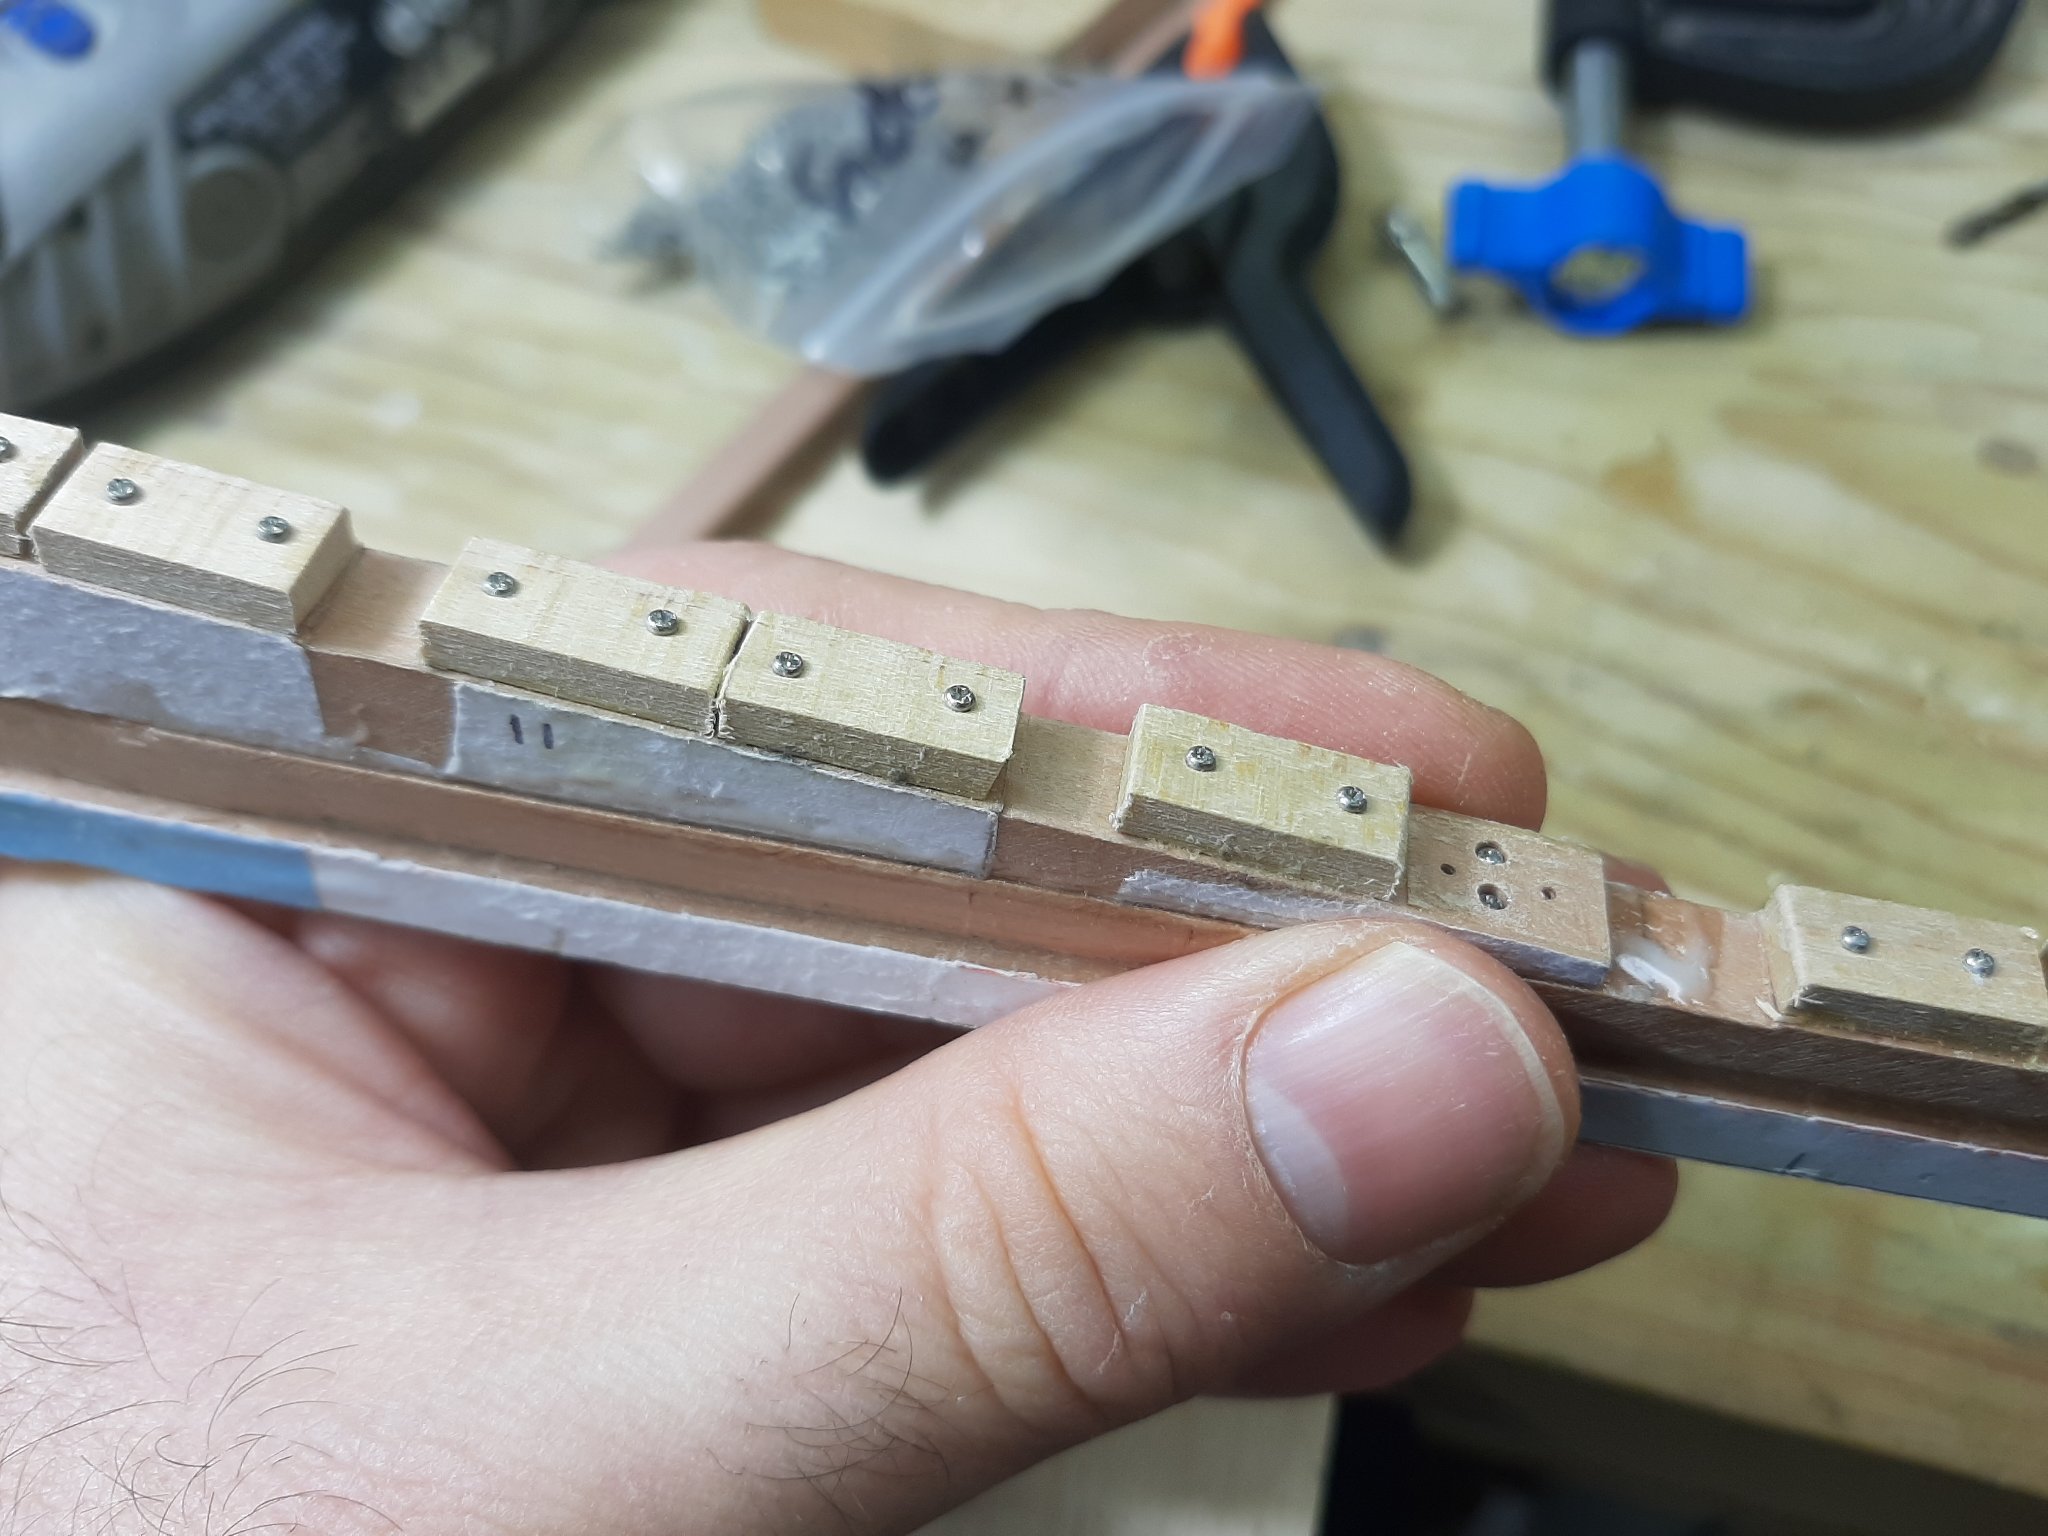
A lot of progress today, things at last seem to fall into place. It is bitterly cold and England seem to be boiling with coronavirus. I had requested a week's annual leave and since we cannot leave the house, it is an opportunity to work on the boat. I attached small pieces to the top surface of the keel to keep the frames in place. These are glued and screwed in place except three that will need to be removed later so that floors can be attached. It is not an elegant solution but will be invisible and in this boat I have accepted that I will cut some corners to speed up the construction. I then brought everything together and checked for fairness. I had to chisel away some wood from frame No1 but happily, it seems that the hull is now fair. Planking will tell: the planks will be 2 mm stiff beech which will not tolerate any waviness in the hull. Then, I glued the stem and stern timbers. I used initially epoxy, thickened with plaster. The reason is that when I made the pieces, my disc sander was very slightly out of vertical alignment so I needed something with gap filling capabilities. It actually went very well and the keel is very close to the plans. In the next photo, the two boats are side by side. They are so different, I am very curious how planking will go. After a couple of hours, the epoxy had hardened. However, it is not enough-it needs further strengthening. I inserted 1 mm screws and secured the knee to the keel and to the stem-4 screws each. I took pictures which unfortunately were lost. I then inserted 2 more screws to secure the stem to the keel. The bow is now super strong. The holes will be filled later on before painting. Then I screwed the stern assembly to the keel. I had to remove a block to insert the screws underneath. I had huge troubles though inserting screws to the other end as I could not use the drill press. Finally I manage to get one screw in place-It should be enough. I then started to glue cross members to the frames. These will later be also screwed in place and more pieces will be glued length wise to stiffen up the structure. Next, I will finish the keel, that is cut the rest of the rabet and remove the paper pattern and sand it smooth. Now, on another note, I cannot find the transom. I am absolutely certain I had cut it but I simply cannot find it. I ll need to make it again and then it will be time to bring everything together. Best wishes Vaddoc


-
Much better run of the planks the second time! A few observations from my studying of lapstrake: that might interest you: 1. Due to the shape boats have, an illusion of a flat sheer at the bow can be created. To avoid this, some times it is good to have an "exaggerated sheer" at the bow. 2. Generally the garboard should not rise too much at the stem. Some times though if it does, it pushes the rest of the strakes higher at the stem so the planks have a more pleasing curved run. 3. The strakes at the maximum curvature of the hull should be less wide, to accommodate the curve. Also, looking from the side the planks bellow the waterline are viewed at an angle so can be made wider as they will appear more narrow to the eye. (the hull is quite straight there as well) 4. The sheer strake will not have the overlap but will be covered by the rub rail so the width needs to be adjusted accordingly 5. After the initial marking, a 2x2 mm strip can be used to mark the position of the edge of the plank on the rest of the frames ensuring a fair curve. A 2x4 can also be used and will show how much the plank needs to be spilled, the less well it sits on the frames, the more spilling will be needed. Indeed, the hull ultimately needs to be eyeballed. I have noticed the same, that if the strakes appear somewhat straight when installed, they won't be far off. Looking good Hakan, carry on Regards Vaddoc
-
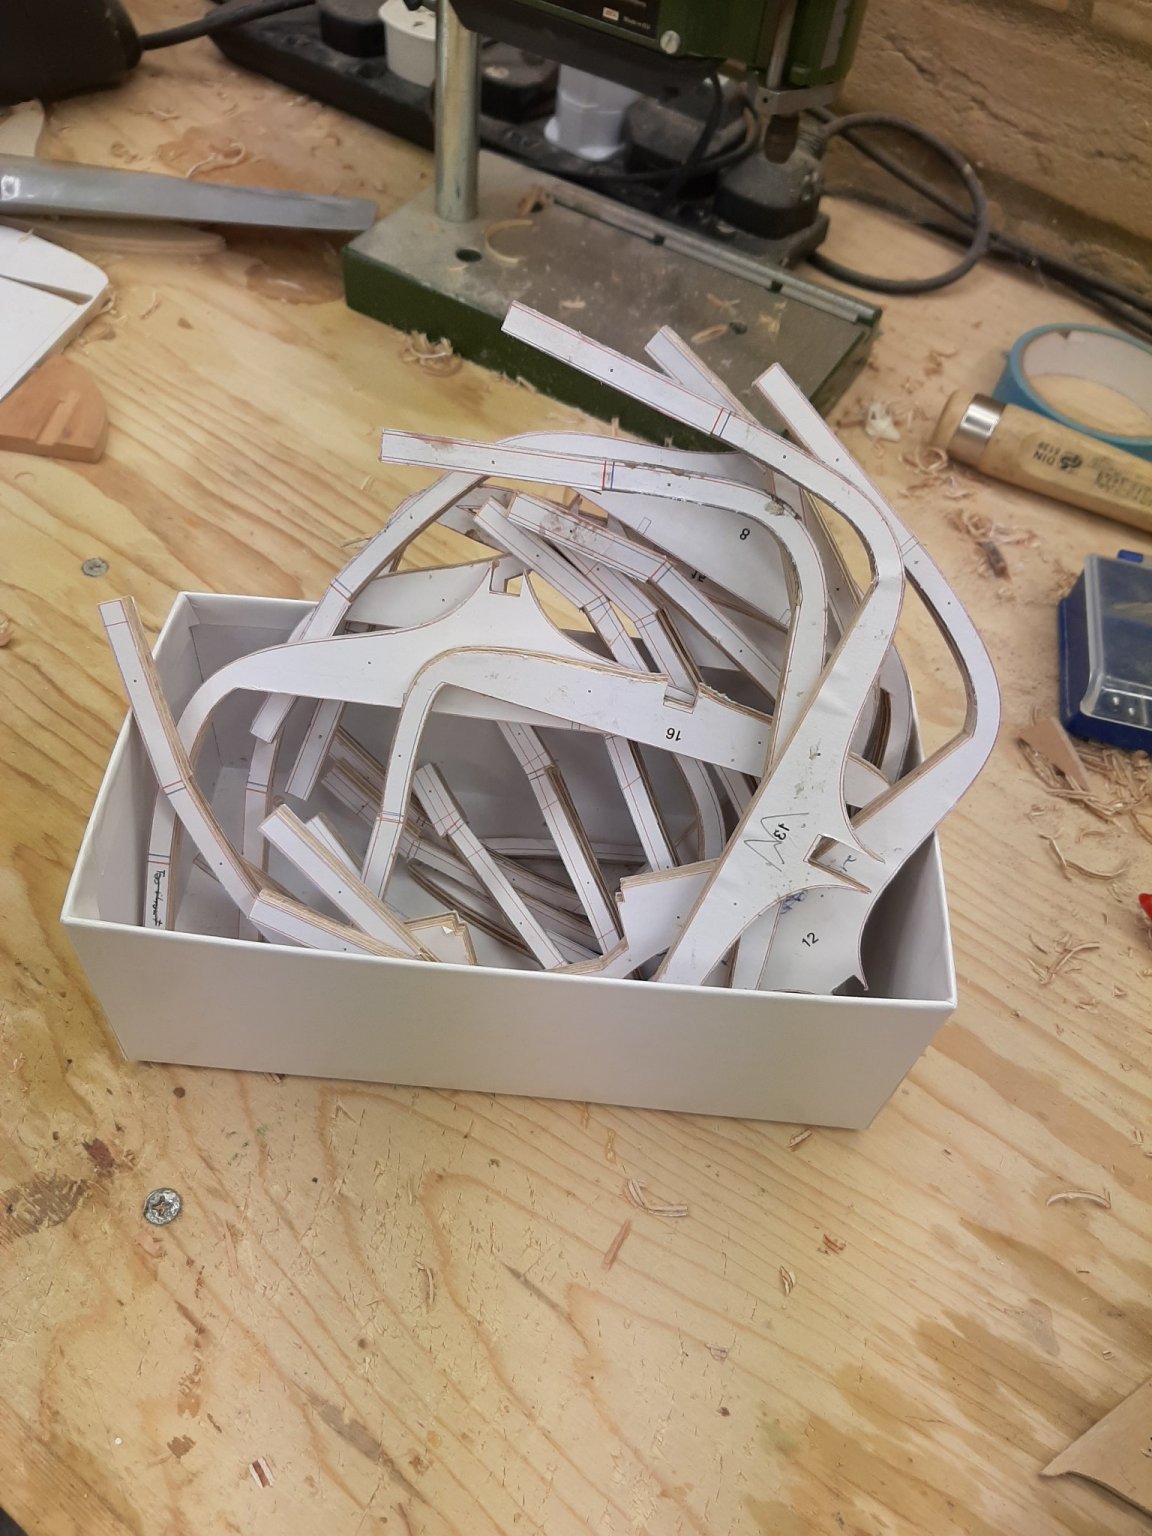
Ok, I think it is done Next photo shows the new surface and how off frame 2 and to a lesser degree frame 3 was. I had to keep frame 1 as removing it I was getting a very wrong surface and I am absolutely not keen to re-loft the boat. I hope it will be fine, bit of sanding, bit of shimming... This are the new frame templates ready to be glued to the nasty plywood. This does not mean the hull will be fair, the frames need to be replaced and fairness to be rechecked with a batten Regards Vaddoc
-
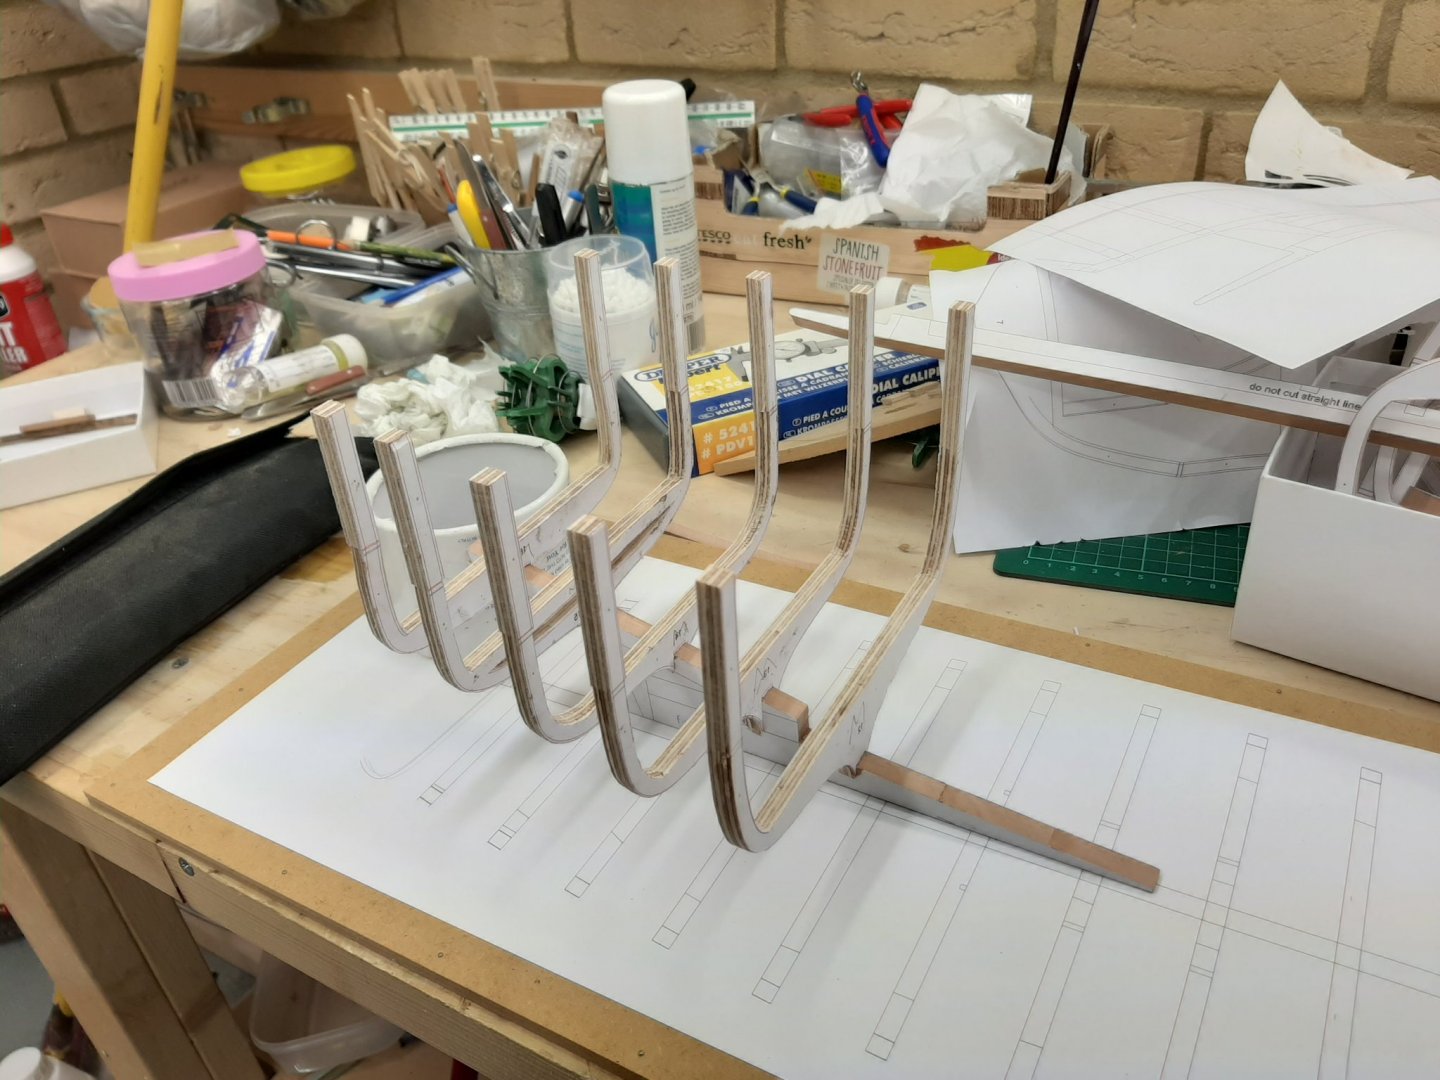
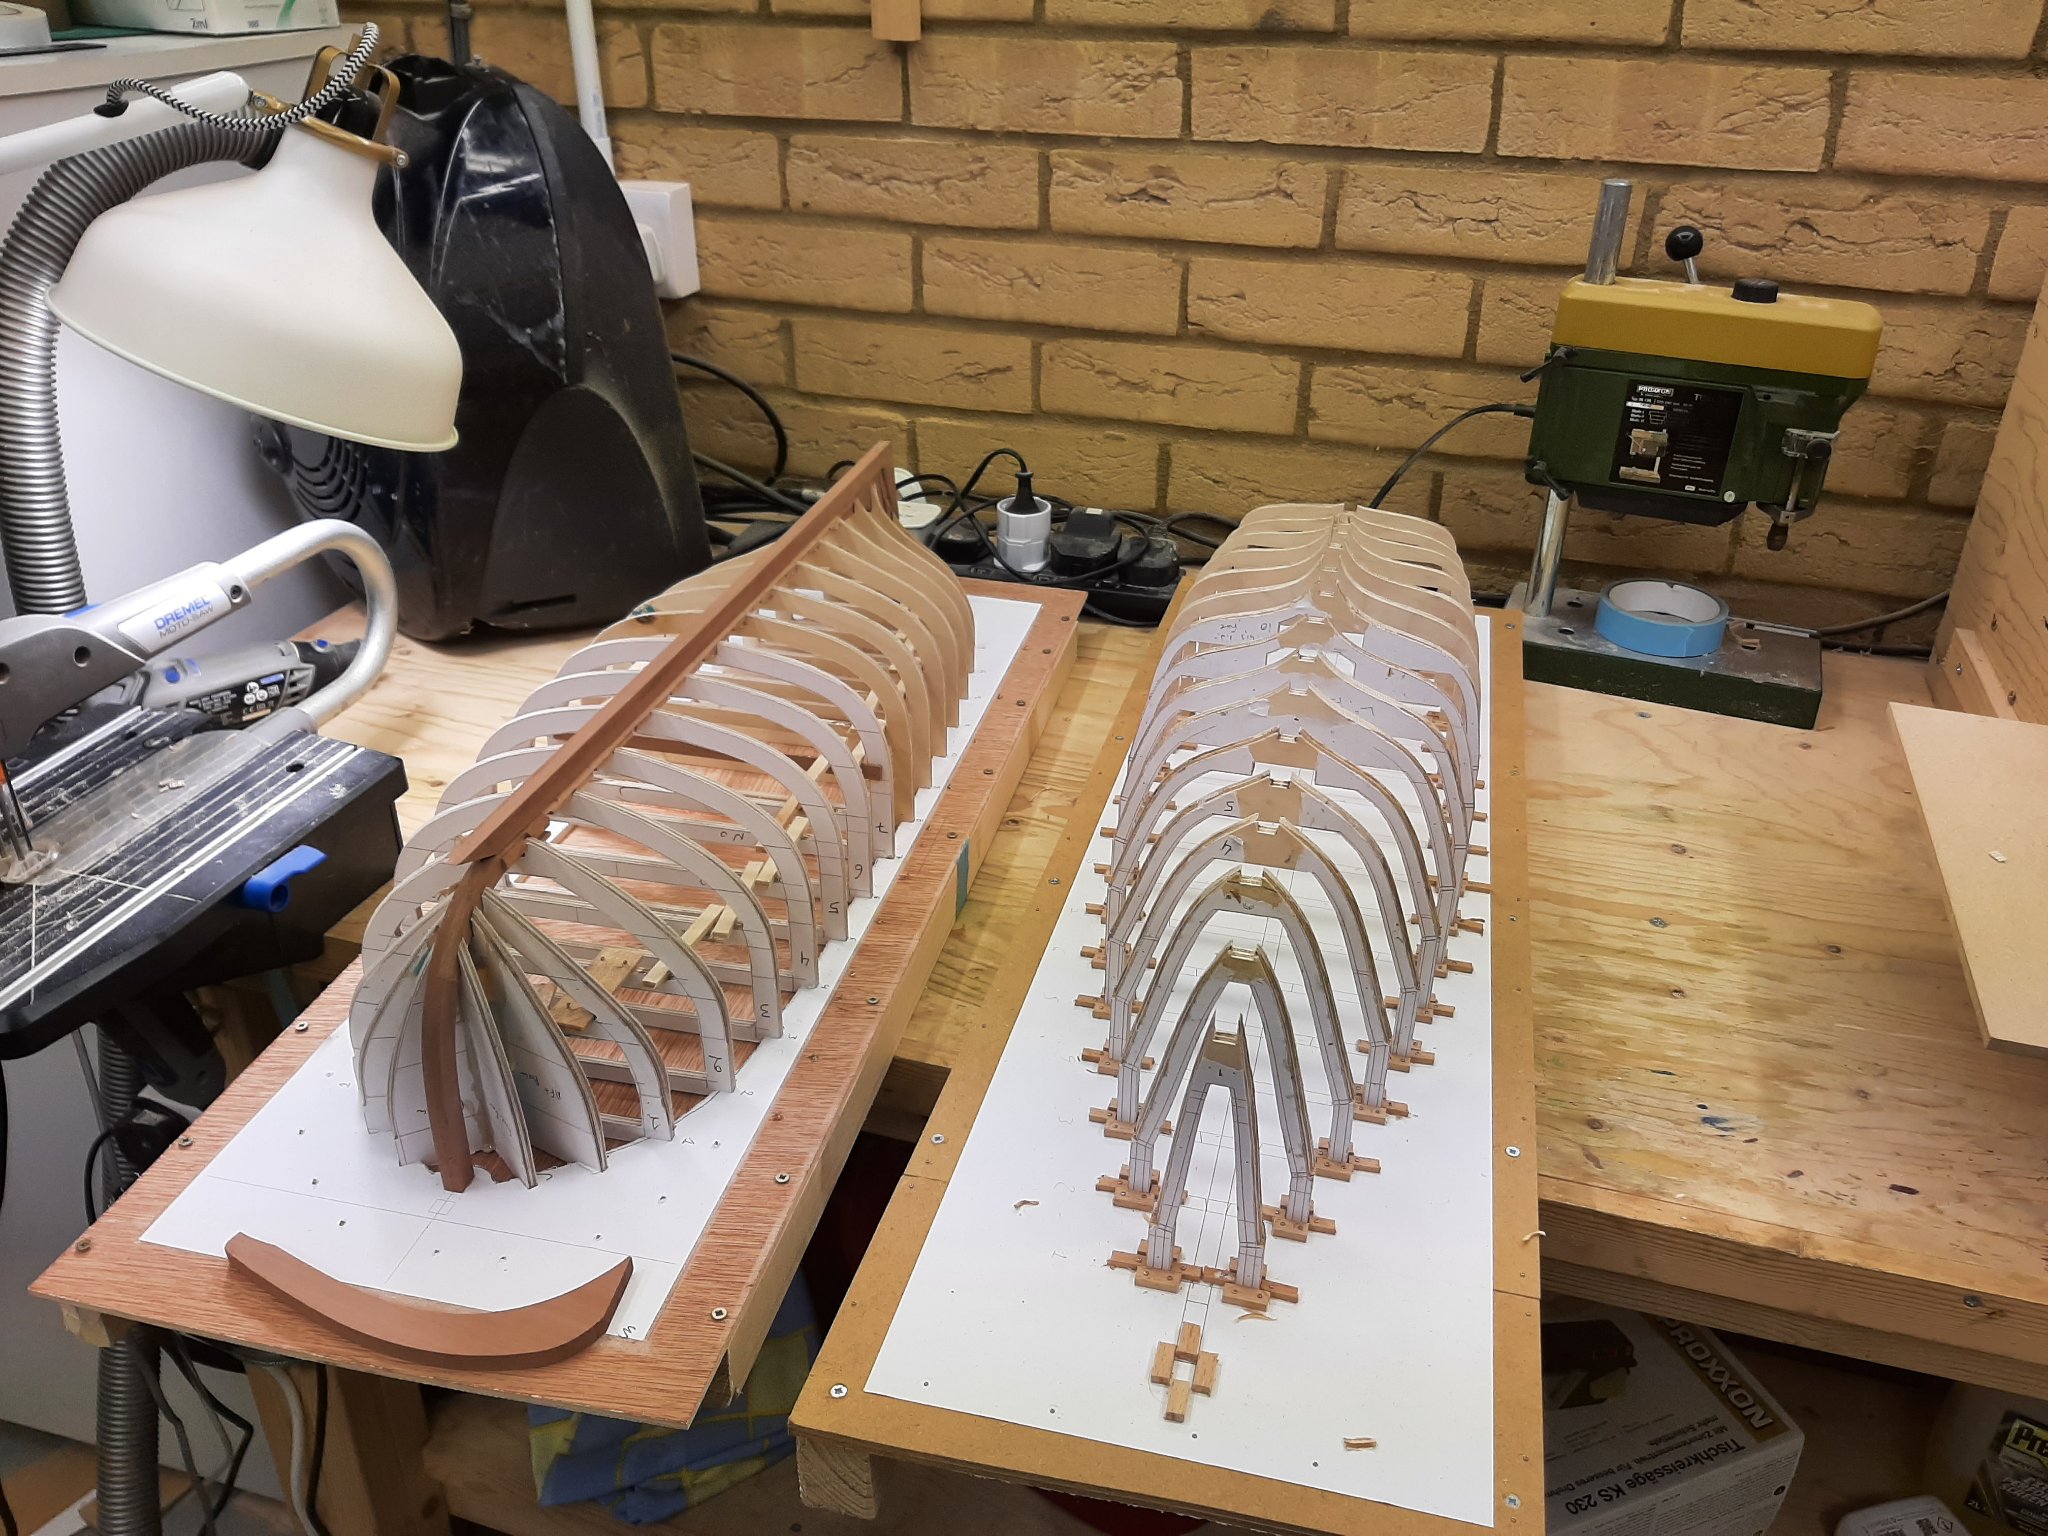
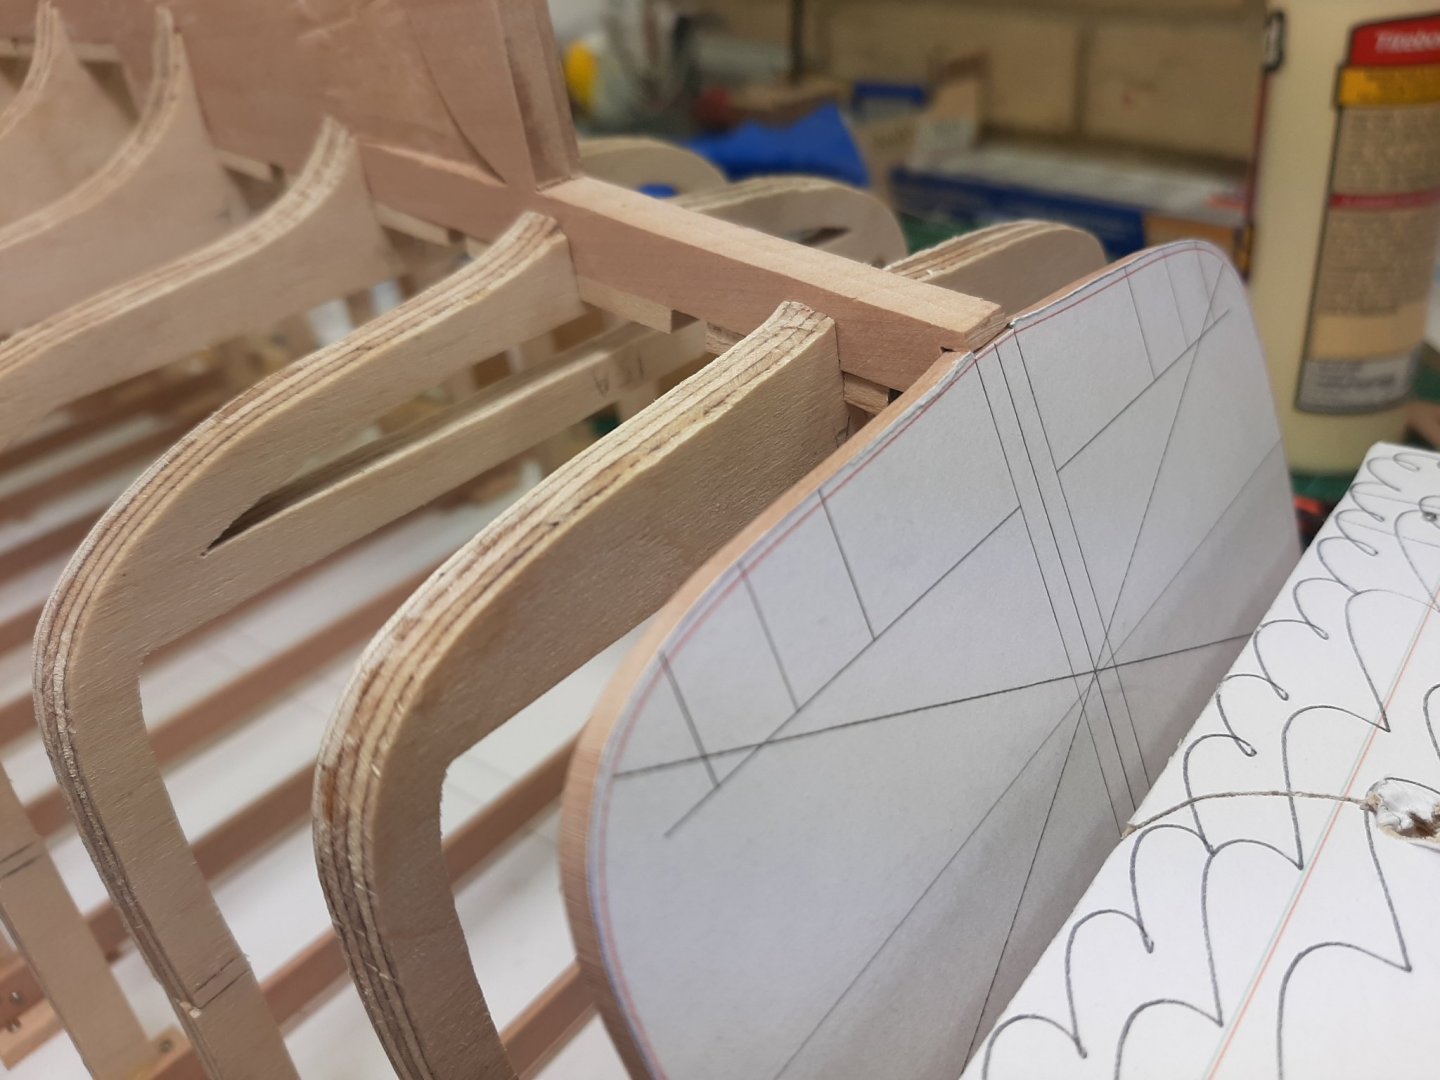
Many thanks to all for your comments and likes. Now, there has been some more progress, and then things went pear shaped. First I finished the rabbet at the keel. It came out fine I think and actually seems to be quite forgiving in regards to the angle the garboard will have. I was very careful to preserve the straightness of the rabet line. At the stern, a lot of wood had to be removed, this job was done relatively easily with sharp chisels. Next it was time to fit the frames on the keel and see the shape of the boat for the first time. Something did not look right but of course the frames would not stay in place. The most accurate way to positions the frames is upside down as the vertical projections from the sheer extend to the same horizontal level quite accurately. However, the frames are not rigid at all and some are a bit warped. Best thing to do is to accurately secure them to the top view pattern of the boat. I used little pieces of beech from strips that were too warped to be used in the model. I used initially Pritt stick to glue into position and then 1 mm screws. Then I tried to put everything together but things really didn't want to work together. Every piece seemed to belong to a different boat... After a lot of sanding-fitting-sanding-fitting, the whole thing came together. Now it was time to check the bevels and the fairness of the planking. Midships and towards the stern, the bevels look ok. Towards the bow, the bevels on some frames look a bit too acute but should not be too big a problem. However, frames 2 and 3 seem too narrow and really wrong. Now, if these frames are indeed correct and it is just the shape of the hull, the planks going over frame 1 would actually never meet the rabet at the stem. Something is very wrong. I went back to CAD. Now, there was a small ripple on the hull surface near the bow which I thought was not important so did not bother to correct Just to check, I quickly fixed it and then compared the difference in frame shape at position 2. Oh dear... I suspect frames 2 and 3 are about 2 mm to narrow. So now I need to go back to CAD and redo frames 2 and 3, possibly also frame 1 and 4, but leaving the rest unchanged. Hopefully this is going to work, otherwise I ll need to make all the frames again. If this is needed though, I ll make them out of beech. Actually I have half a mind to just go for it, we ll see. It is freezing cold in Cambridgeshire, there is Covid all around and most of my work commitments have been cancelled. I should be able to do some work and get some control over the situation. Regards Vaddoc


-
Very nice Hakan! Seems to carry a lot of sails too. Yes, I would think maintenance should keep you busy year round! Back to your model, you still have 9 planks to squeeze in your bow and stern. This second plank looks a bit wide but maybe it is the angle of the photo. Very interested to see how it will turn out, as I have two boats almost ready to be planked-one carvel, the other clinker. Vaddoc
-
This is a good start Hakan. The 2 planks look good, I think you are planning for 9 planks a side. Interesting to see how they ll run. By the way, our aging eyes have trouble distinguishing ' from " in a 14 inch laptop, "blue water" though we did get! Come on, show us the boat! Regards EG
-
I was hoping you 'd pick this up again Hakan! Have fun building your model, I ll be watching from the back rows. Vaddoc
-
What a wonderful model! Regrettably I ve only been able to visit GL. Excellent job with the planking and rabets. Actually, top job with everything. Clearly you 're having a lot of fun! Could you explain how you stained the wood? It came out very good. Merry Christmas and a happy new Year! Vaddoc
- 86 replies
-
- 2
-

-
- whaling
- clinker built
- (and 2 more)
-
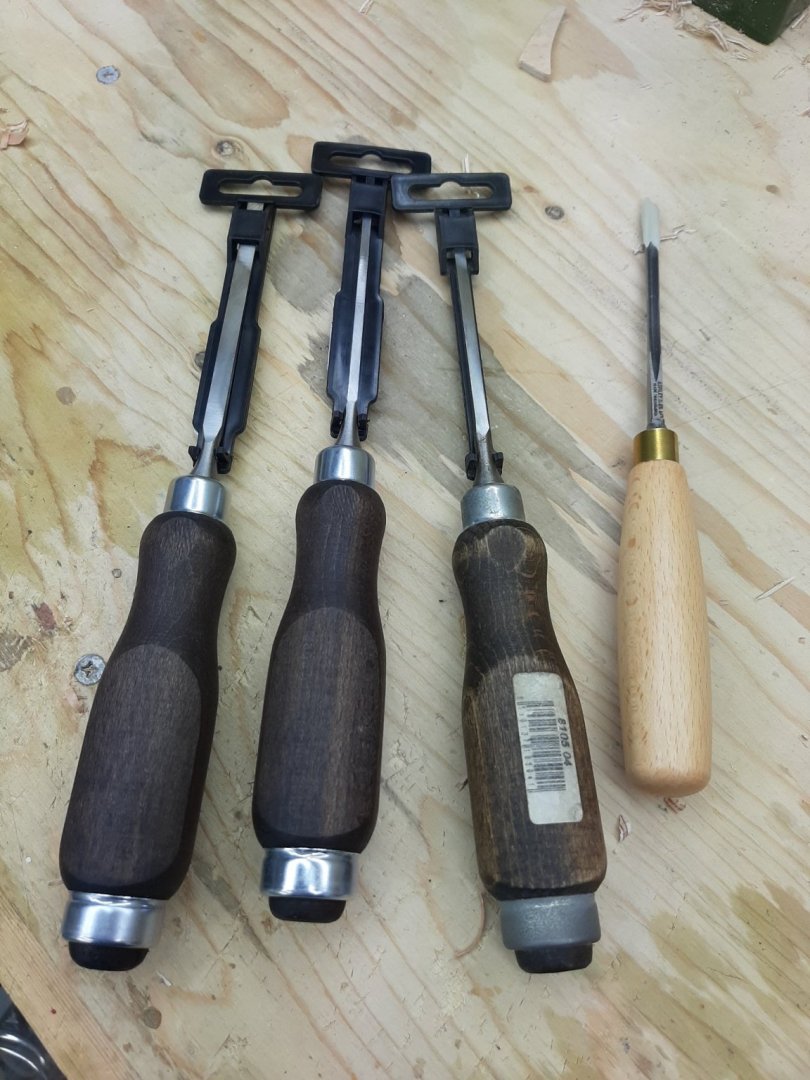
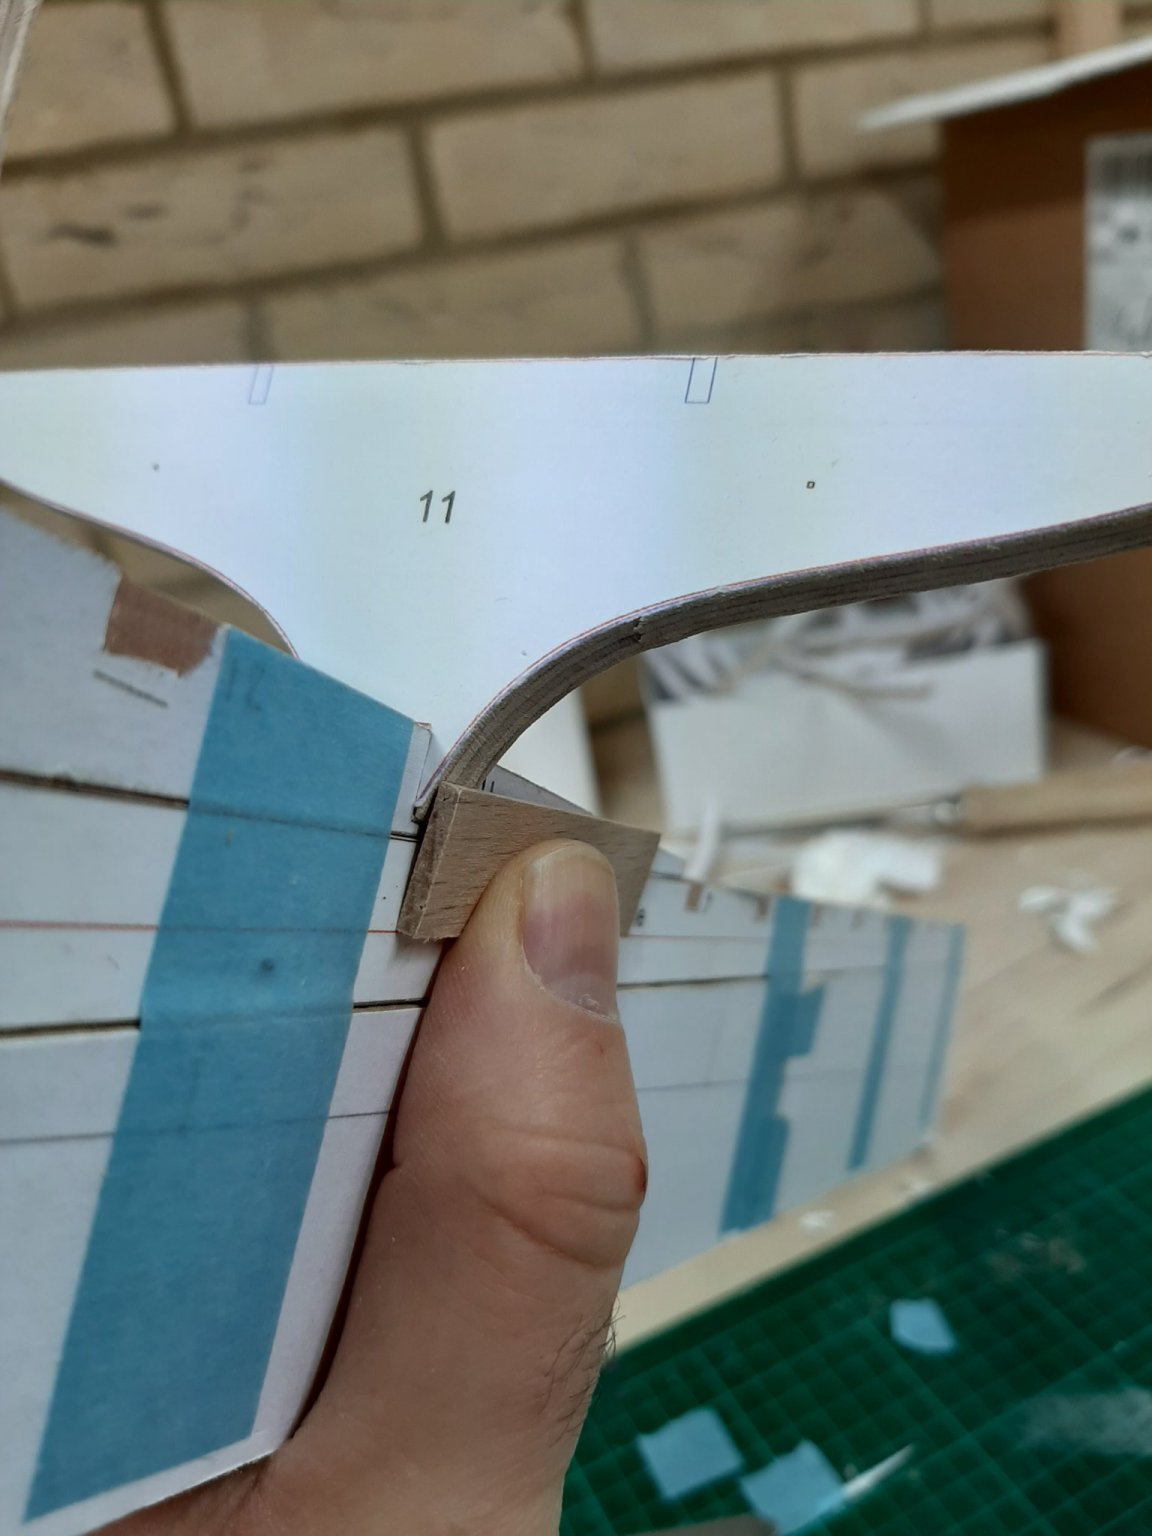
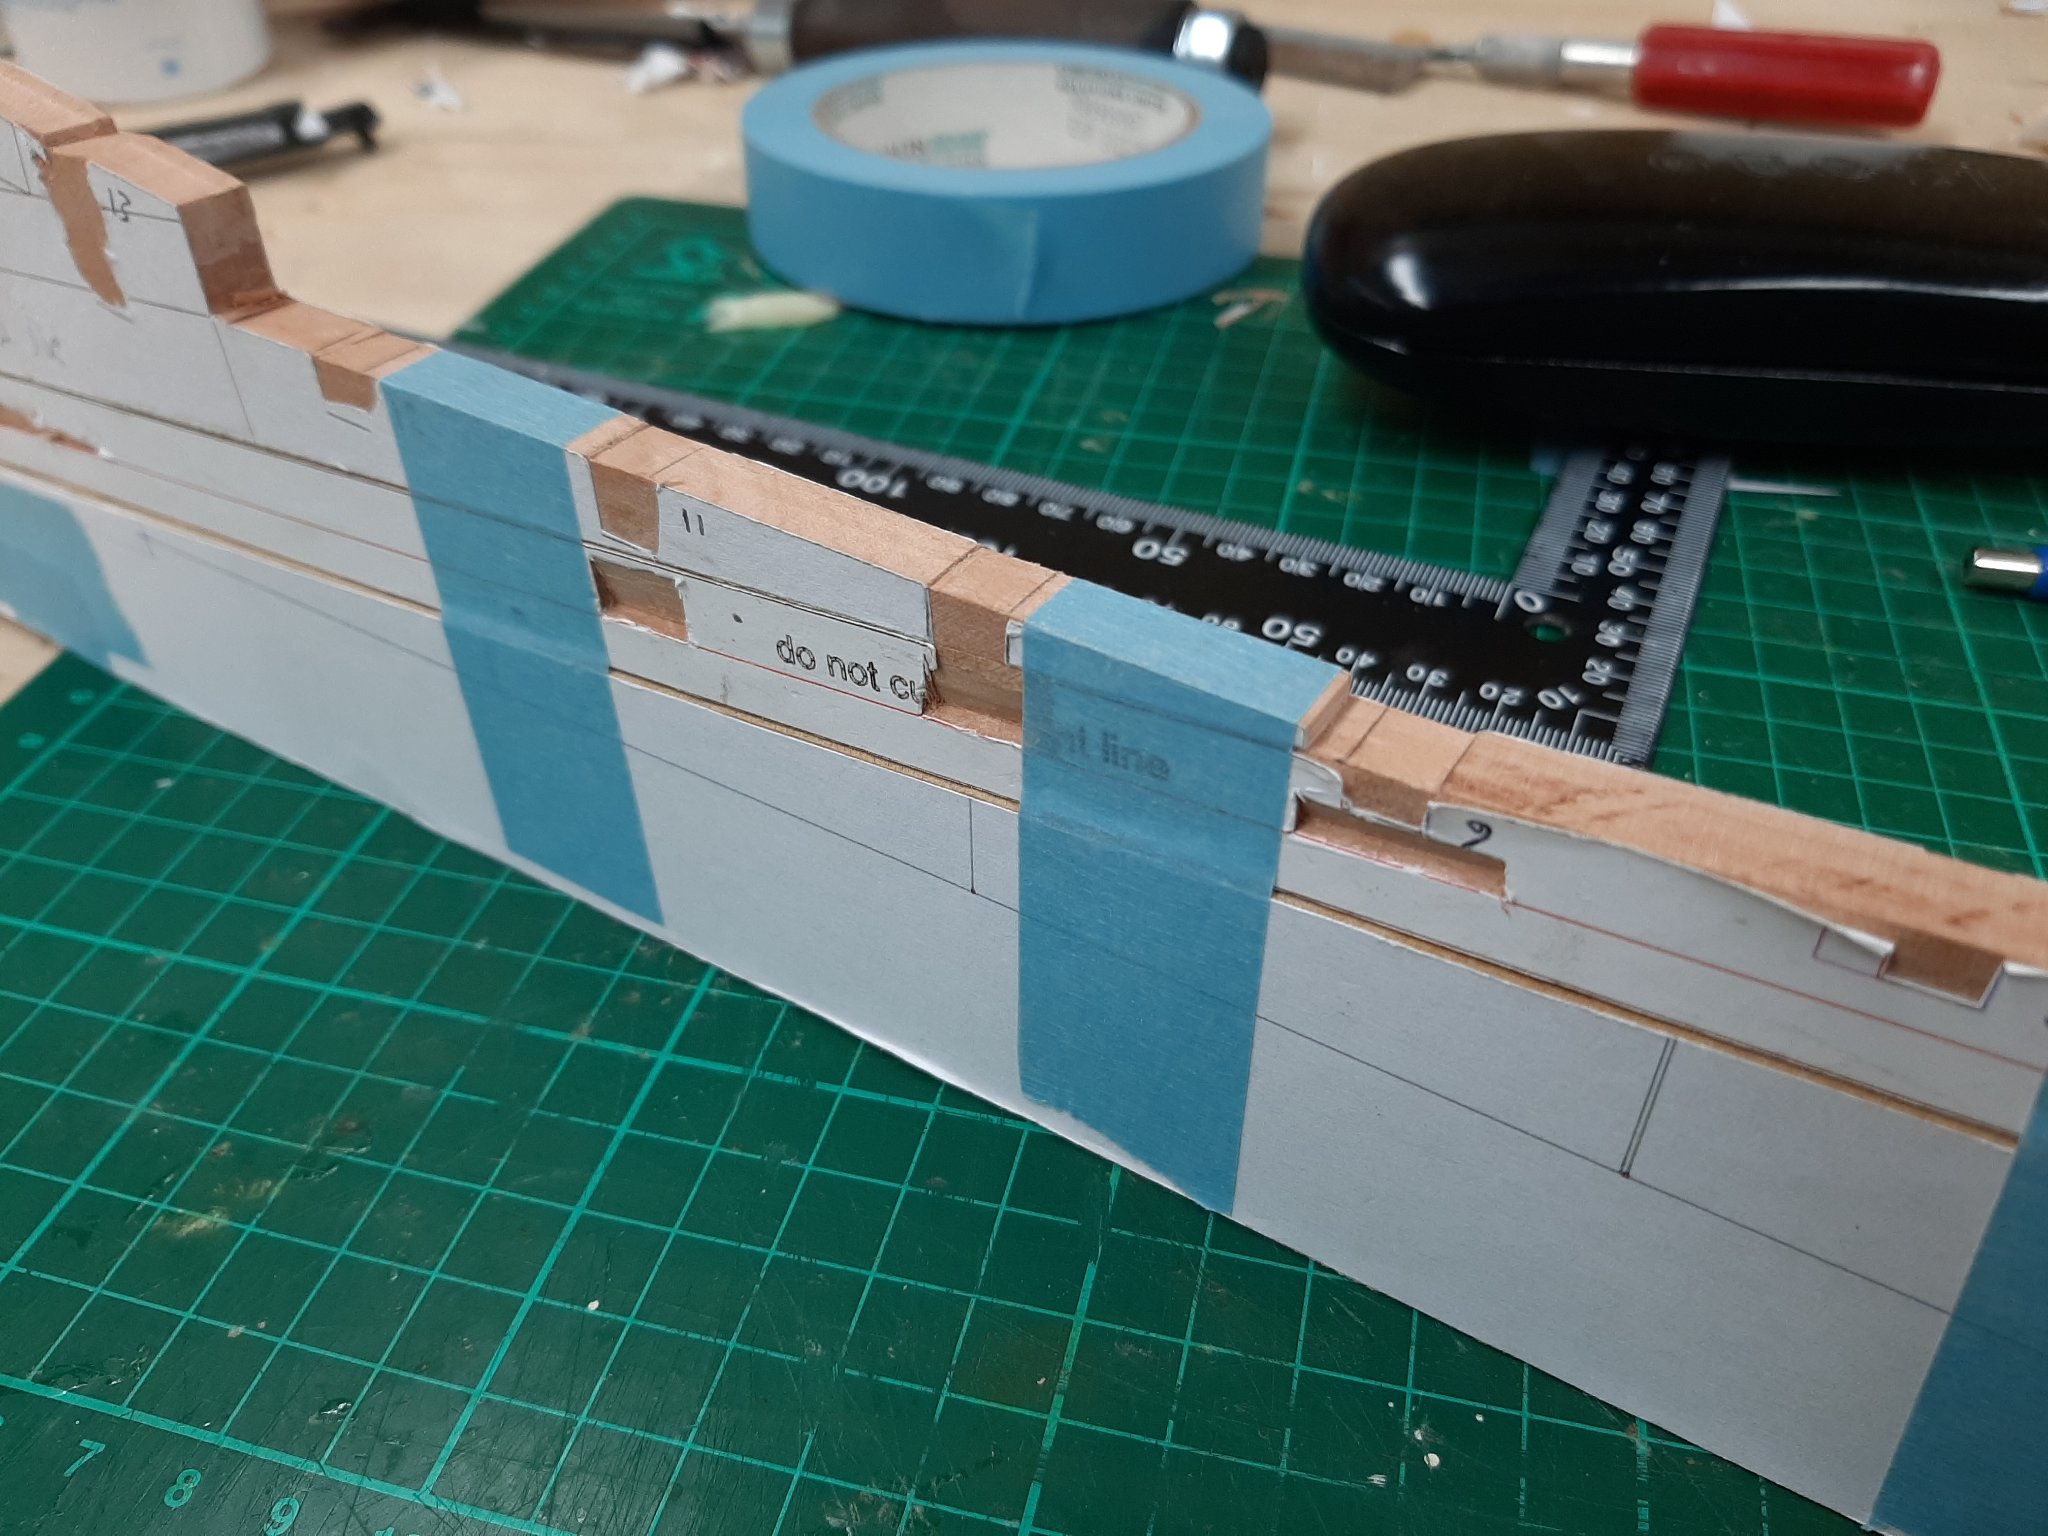
A bit of progress so time for another update. I have not been able to work much and have not taken as many or as good photos as I could. I bought a few more chisels, two Narex 6 and 3 mm and a 3mm Ashley Isles V chisel. I really enjoy using the Narex chisels, they seem to get sharper and hold their edge better than the Aldi chisels I ve used. The Ashley isles seems very good as well, actually it arrived honed and ready to use! I also made a new honing guide and a jig to maintain the honing angle. Very easy to make with scrap material but it is essential to use a drill press to make sure everything is parallel and horizontal. The guide functions very well but I did not take a picture-will do and post it. Back on the boat I finished the bevels in all frames. Using an 8 mm Aldi chisel this job was actually quick, easy and accurate. I spend some time to hone it razor sharp but I found that even on the soft plywood, I had to use the strop very often. I ordered one from Narex. I regretted using plywood for the frames very much. It is very soft and it seems to have internal stresses because it bends and changes its dimensions after cut to shape. The reason I used plywood was cost and also because it will be completely hidden. Never again. Now, at this stage I need to think carefully before doing anything to make sure I don't mess things up, the various tasks need to be completed in a specific order. So, first I need to cut the rabet at the keel, deadwood and stem. I made the first cut at frame 11, it came out very well. However, then I realised that the keel is not horizontal but sloped and that the frames are vertical but at an angle to the keel. So I made a kind of base to keep the keel at its correct angle. I used scrap hardboard I found in the garage, it came out fine and does the job. I then cut the rabet at frames 10 and 9. I used chisels taking it slowly and checking constantly. So far I am very happy with the outcome, the rabet is coming out much better than in the Yawl. Next: Complete the rabet Attach the deadwood and stem Deal with the frames to strengthen, straighten, arrange in the jig and somehow attach to the keel Merry Christmas and a great new year to all! Vaddoc