

.jpg.f26acc9a74319261612561bfa7da1303.jpg)
vaddoc
-
Posts
1,605 -
Joined
-
Last visited
Content Type
Profiles
Forums
Gallery
Events
Everything posted by vaddoc
-
.thumb.jpg.6fd4c1b78768bb3efd745ab810936005.jpg) Looking very good Bob! To figure out gaff rigging, Tom Cunliffe's and Leather's books would be very helpful, you probably will need the basic rigging lines. You might also find my Deben log helpful. These books also explain the top sail arrangement. I watched again the video you posted with her sailing in that busy harbour. The deck looks very clean and the rigging appears very simple which is surprising, I would have expected many more ropes, probably using winches simplifies things.
Looking very good Bob! To figure out gaff rigging, Tom Cunliffe's and Leather's books would be very helpful, you probably will need the basic rigging lines. You might also find my Deben log helpful. These books also explain the top sail arrangement. I watched again the video you posted with her sailing in that busy harbour. The deck looks very clean and the rigging appears very simple which is surprising, I would have expected many more ropes, probably using winches simplifies things. -
Phil, just found time to catch up, you have come a long way and the boat looks great! The way you build is fascinating. How did you "ink" the deck? Looks very nice.
-
Brian, this is a truly fascinating log, just managed to catch up. The American civil war history is largely unknown to most Europeans, blending the building of the boat with the historical circumstances around it makes a most interesting read. By the way sir, your boiler room looks fantastic! Lovely work
-
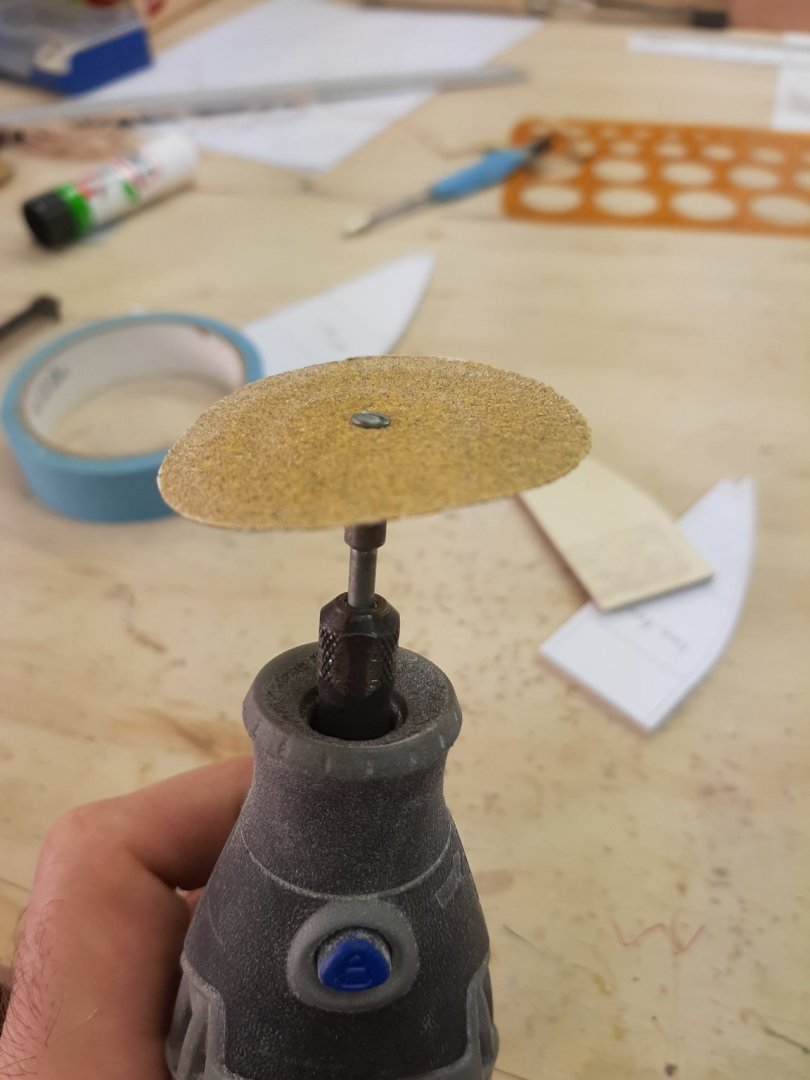
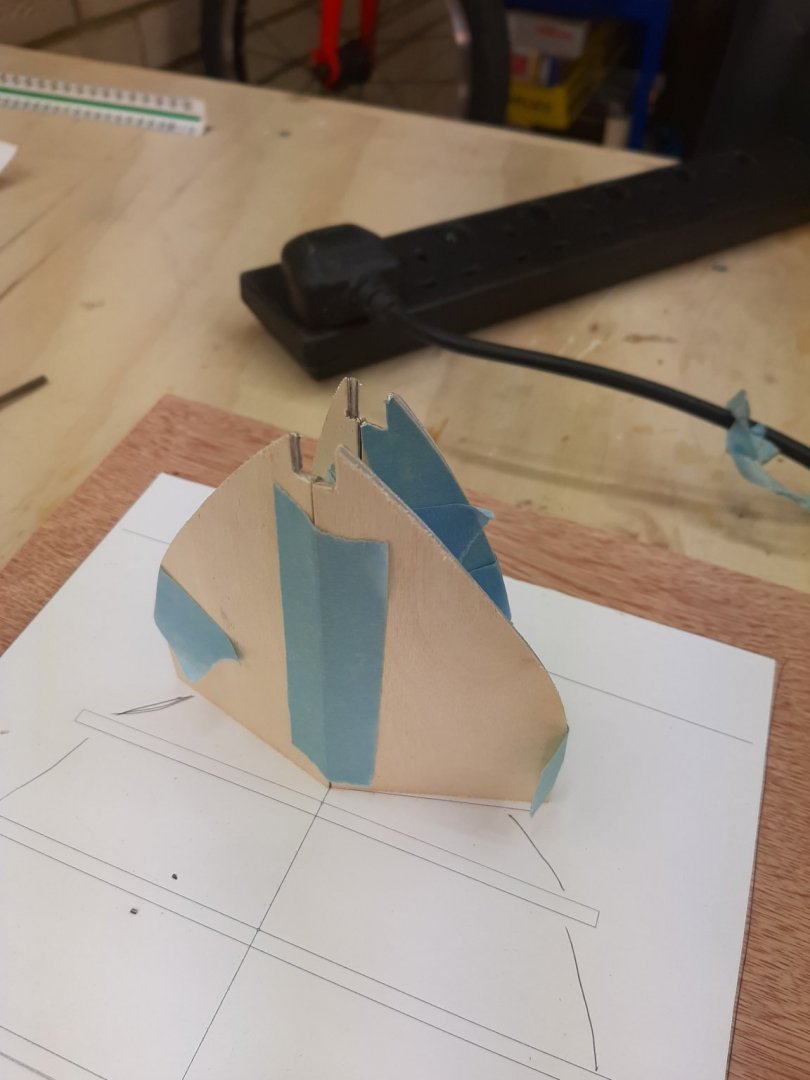
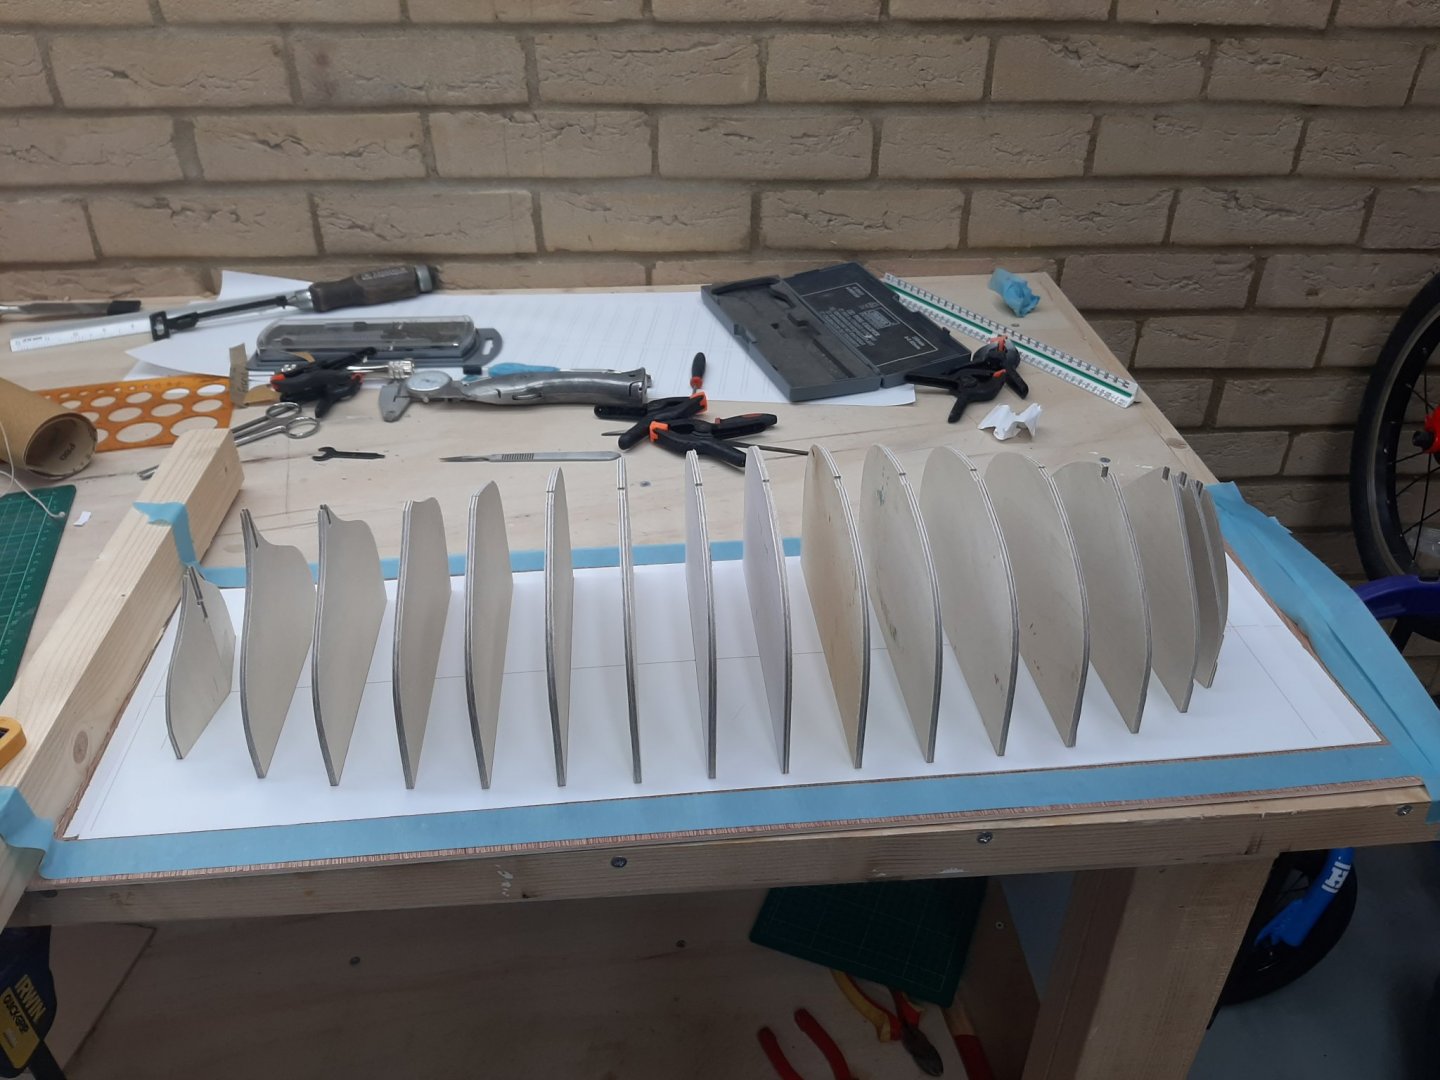
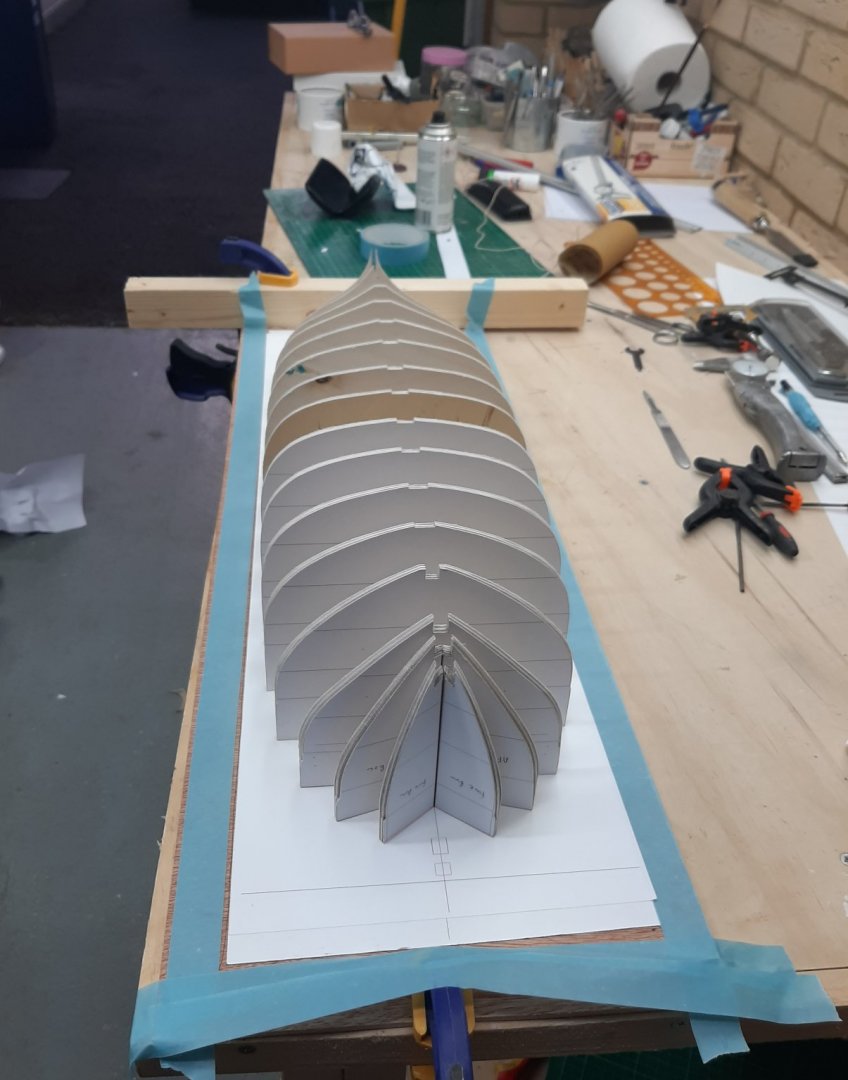
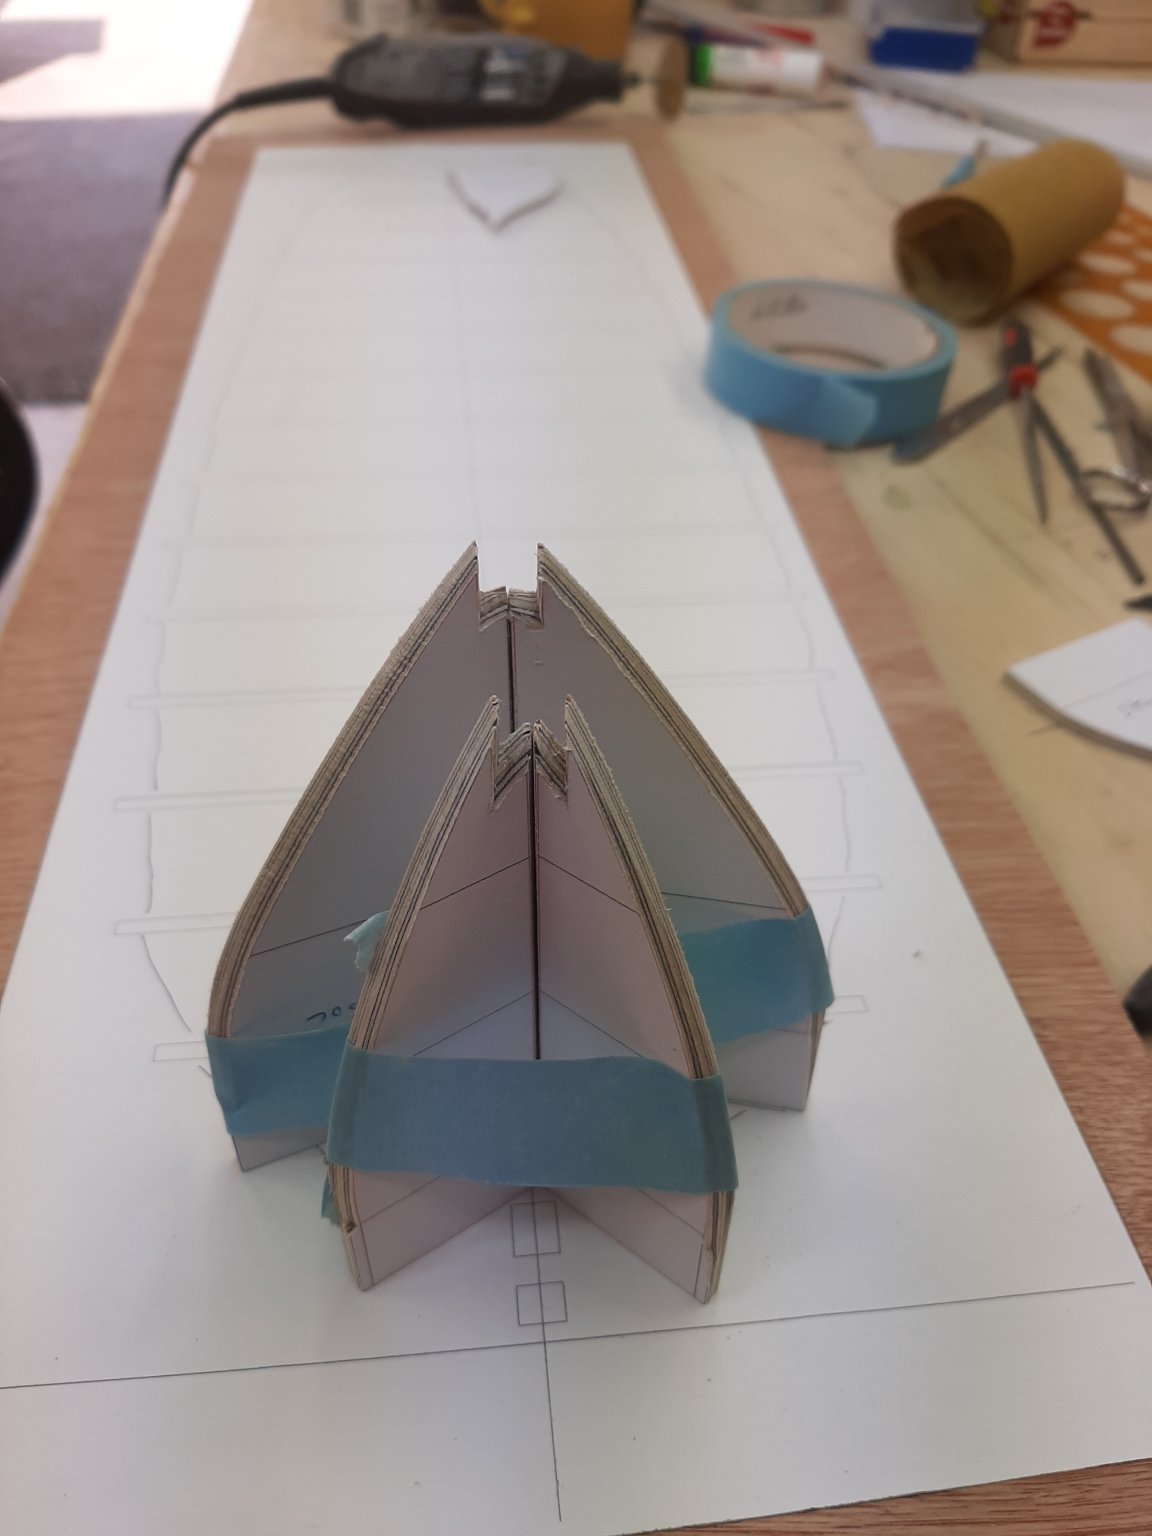
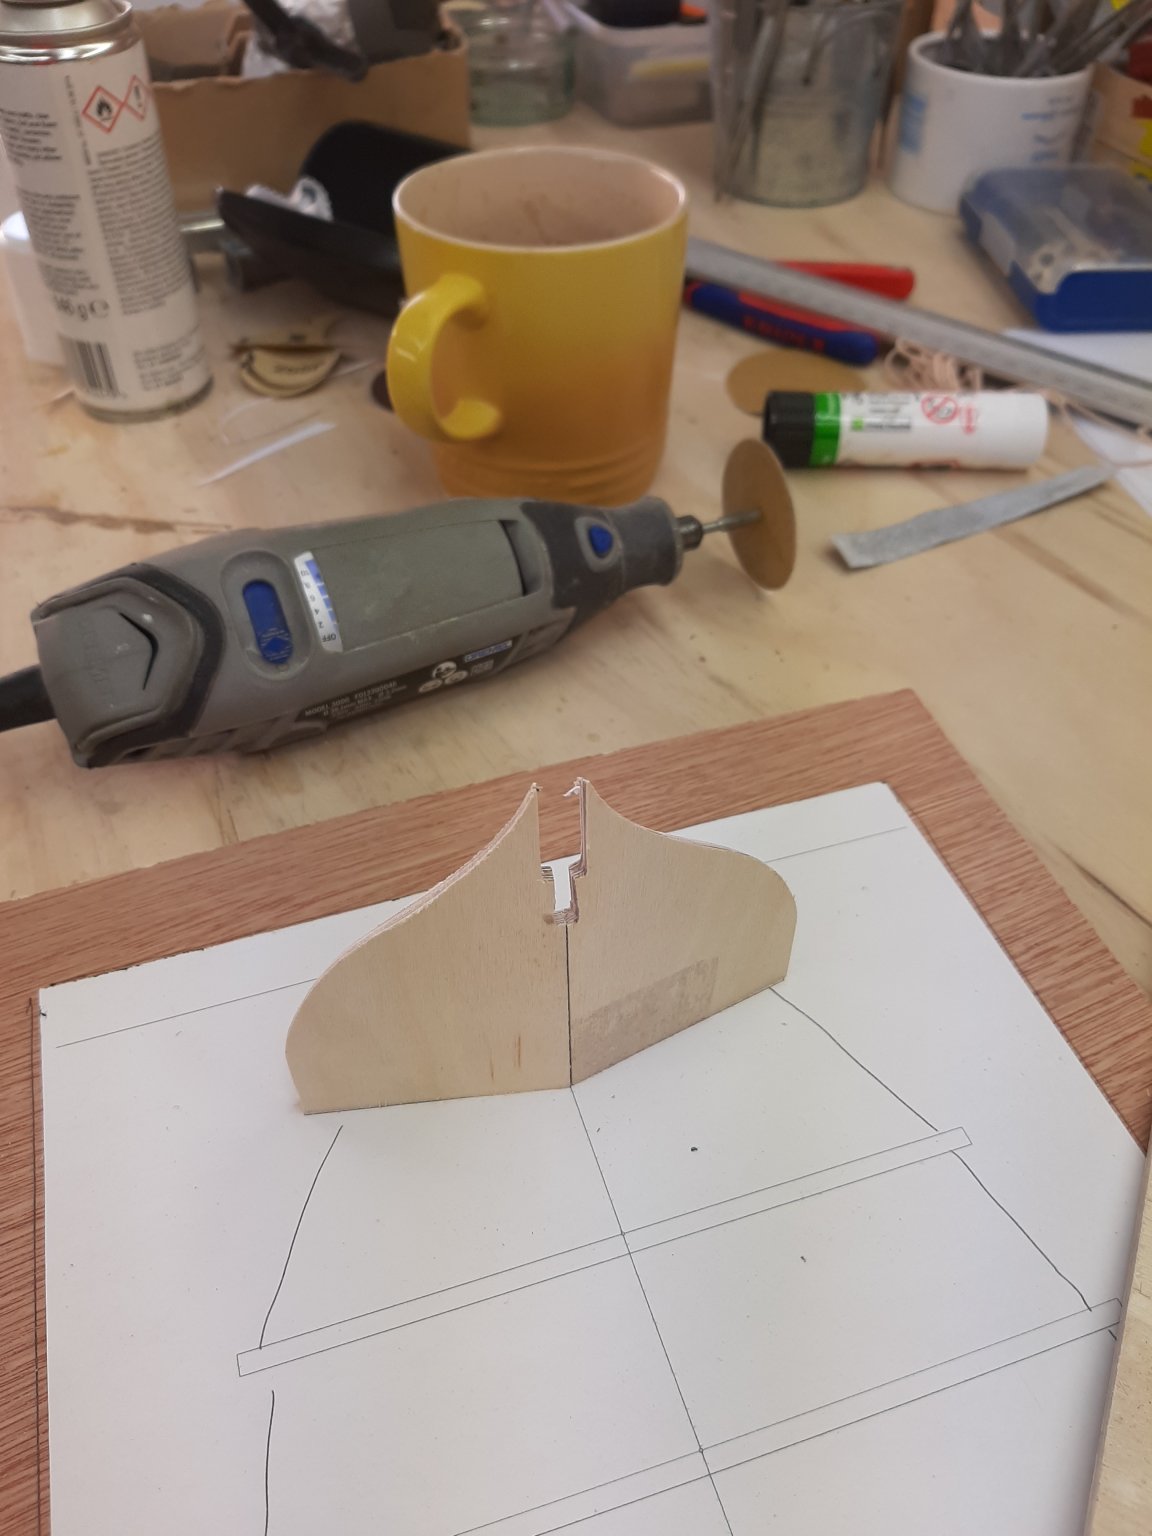
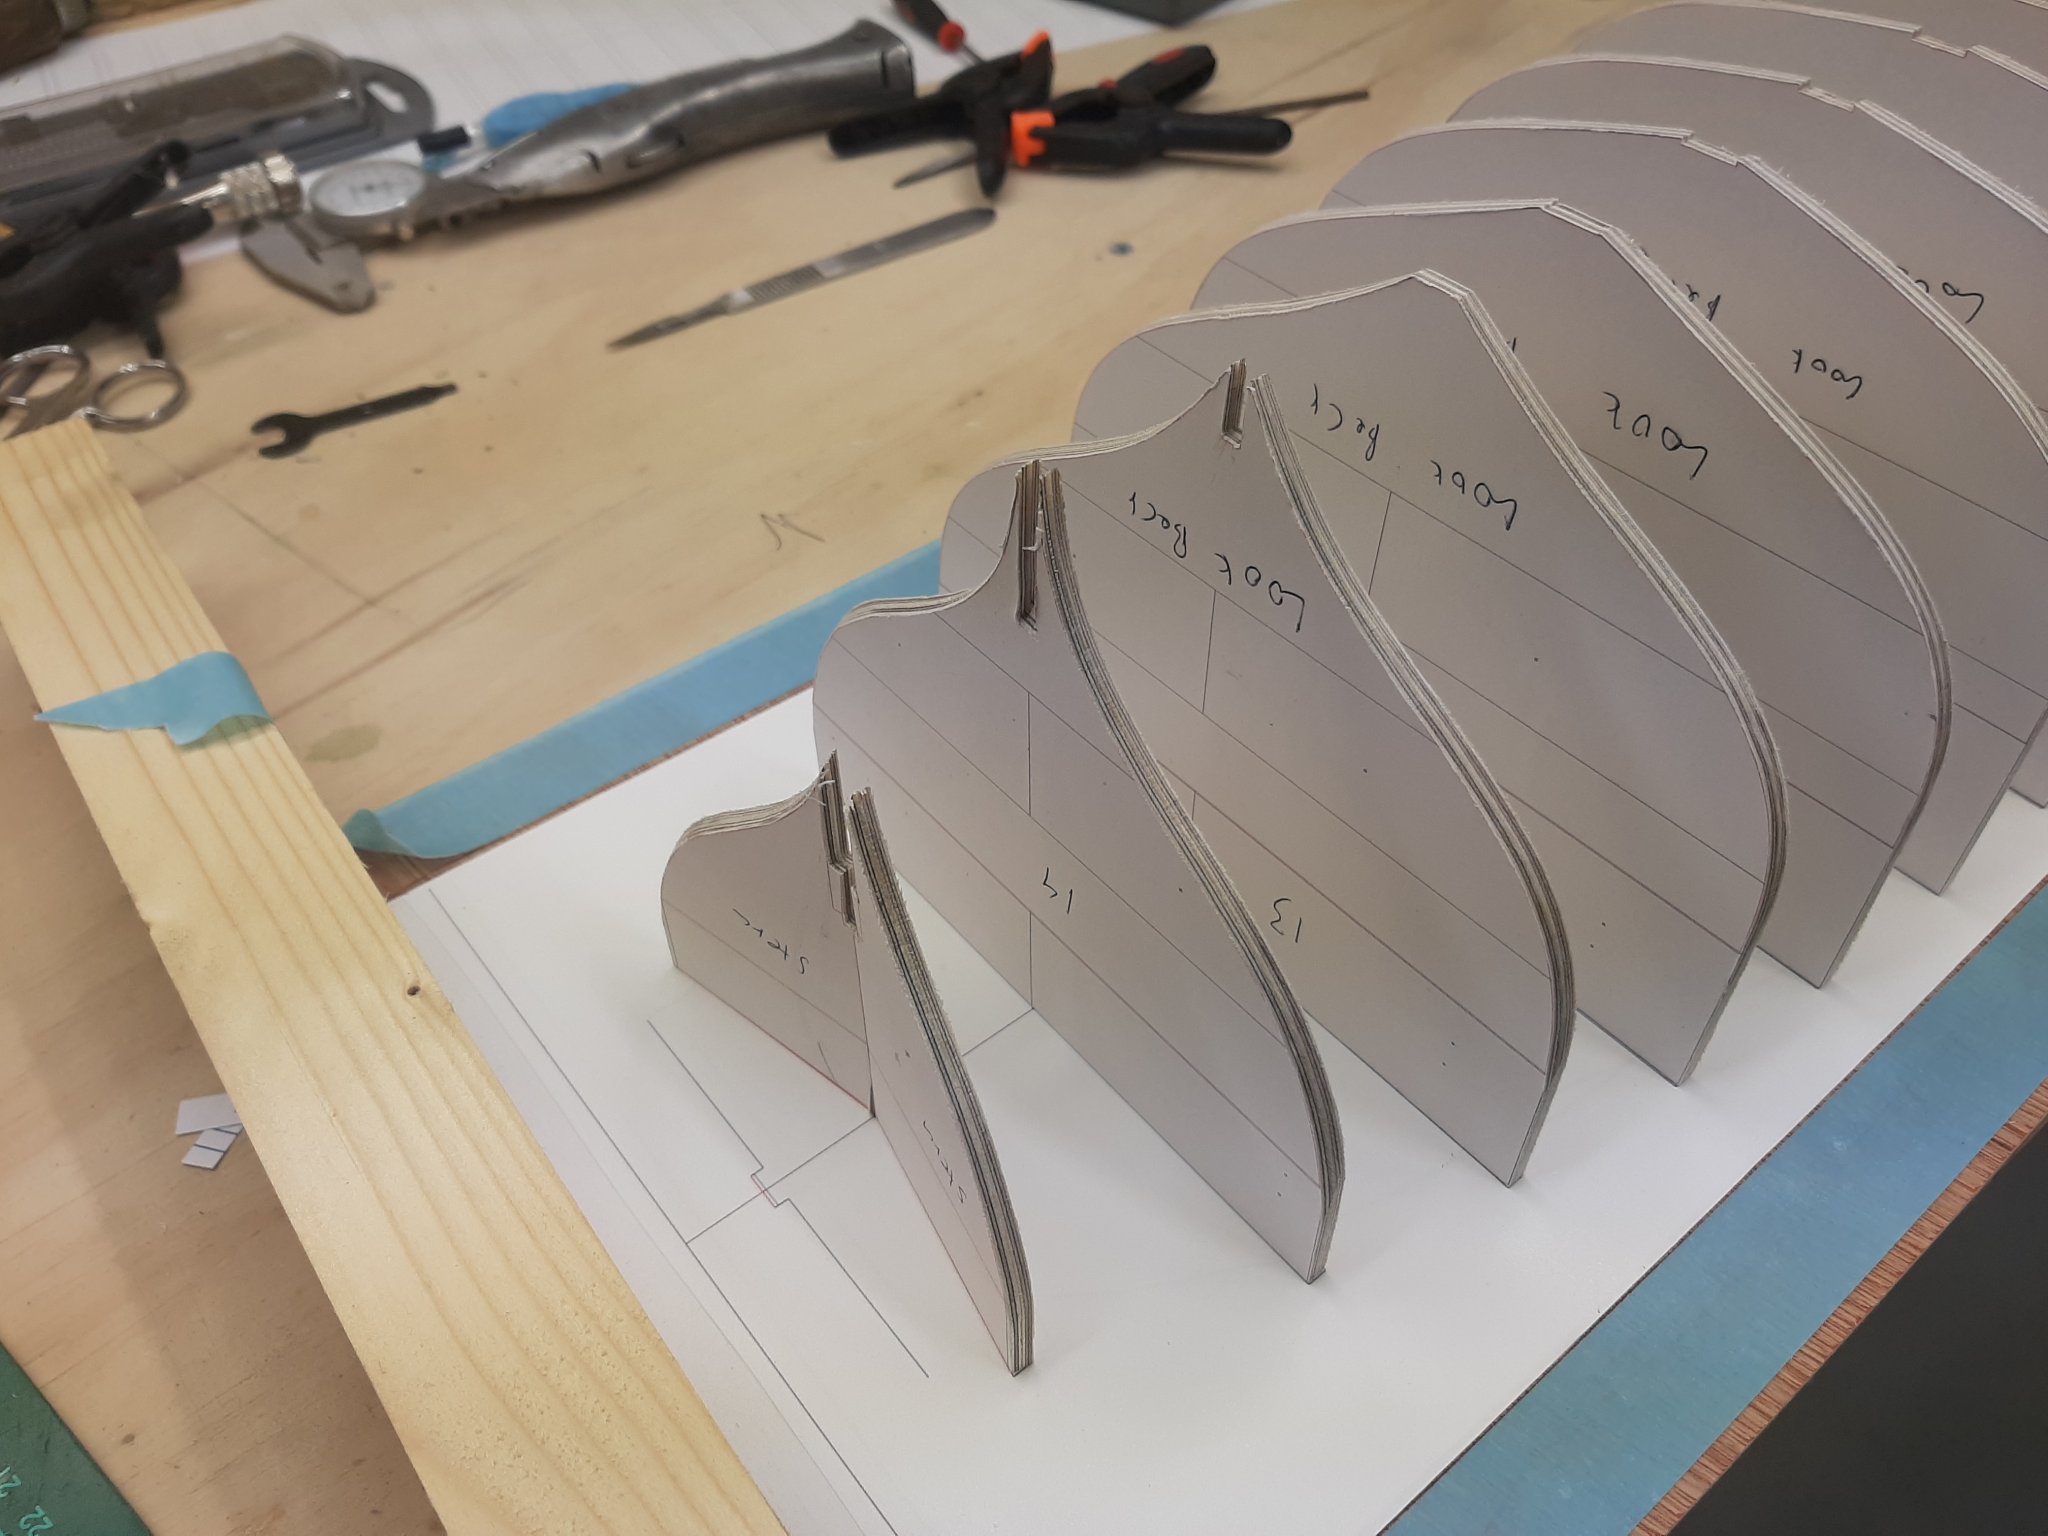
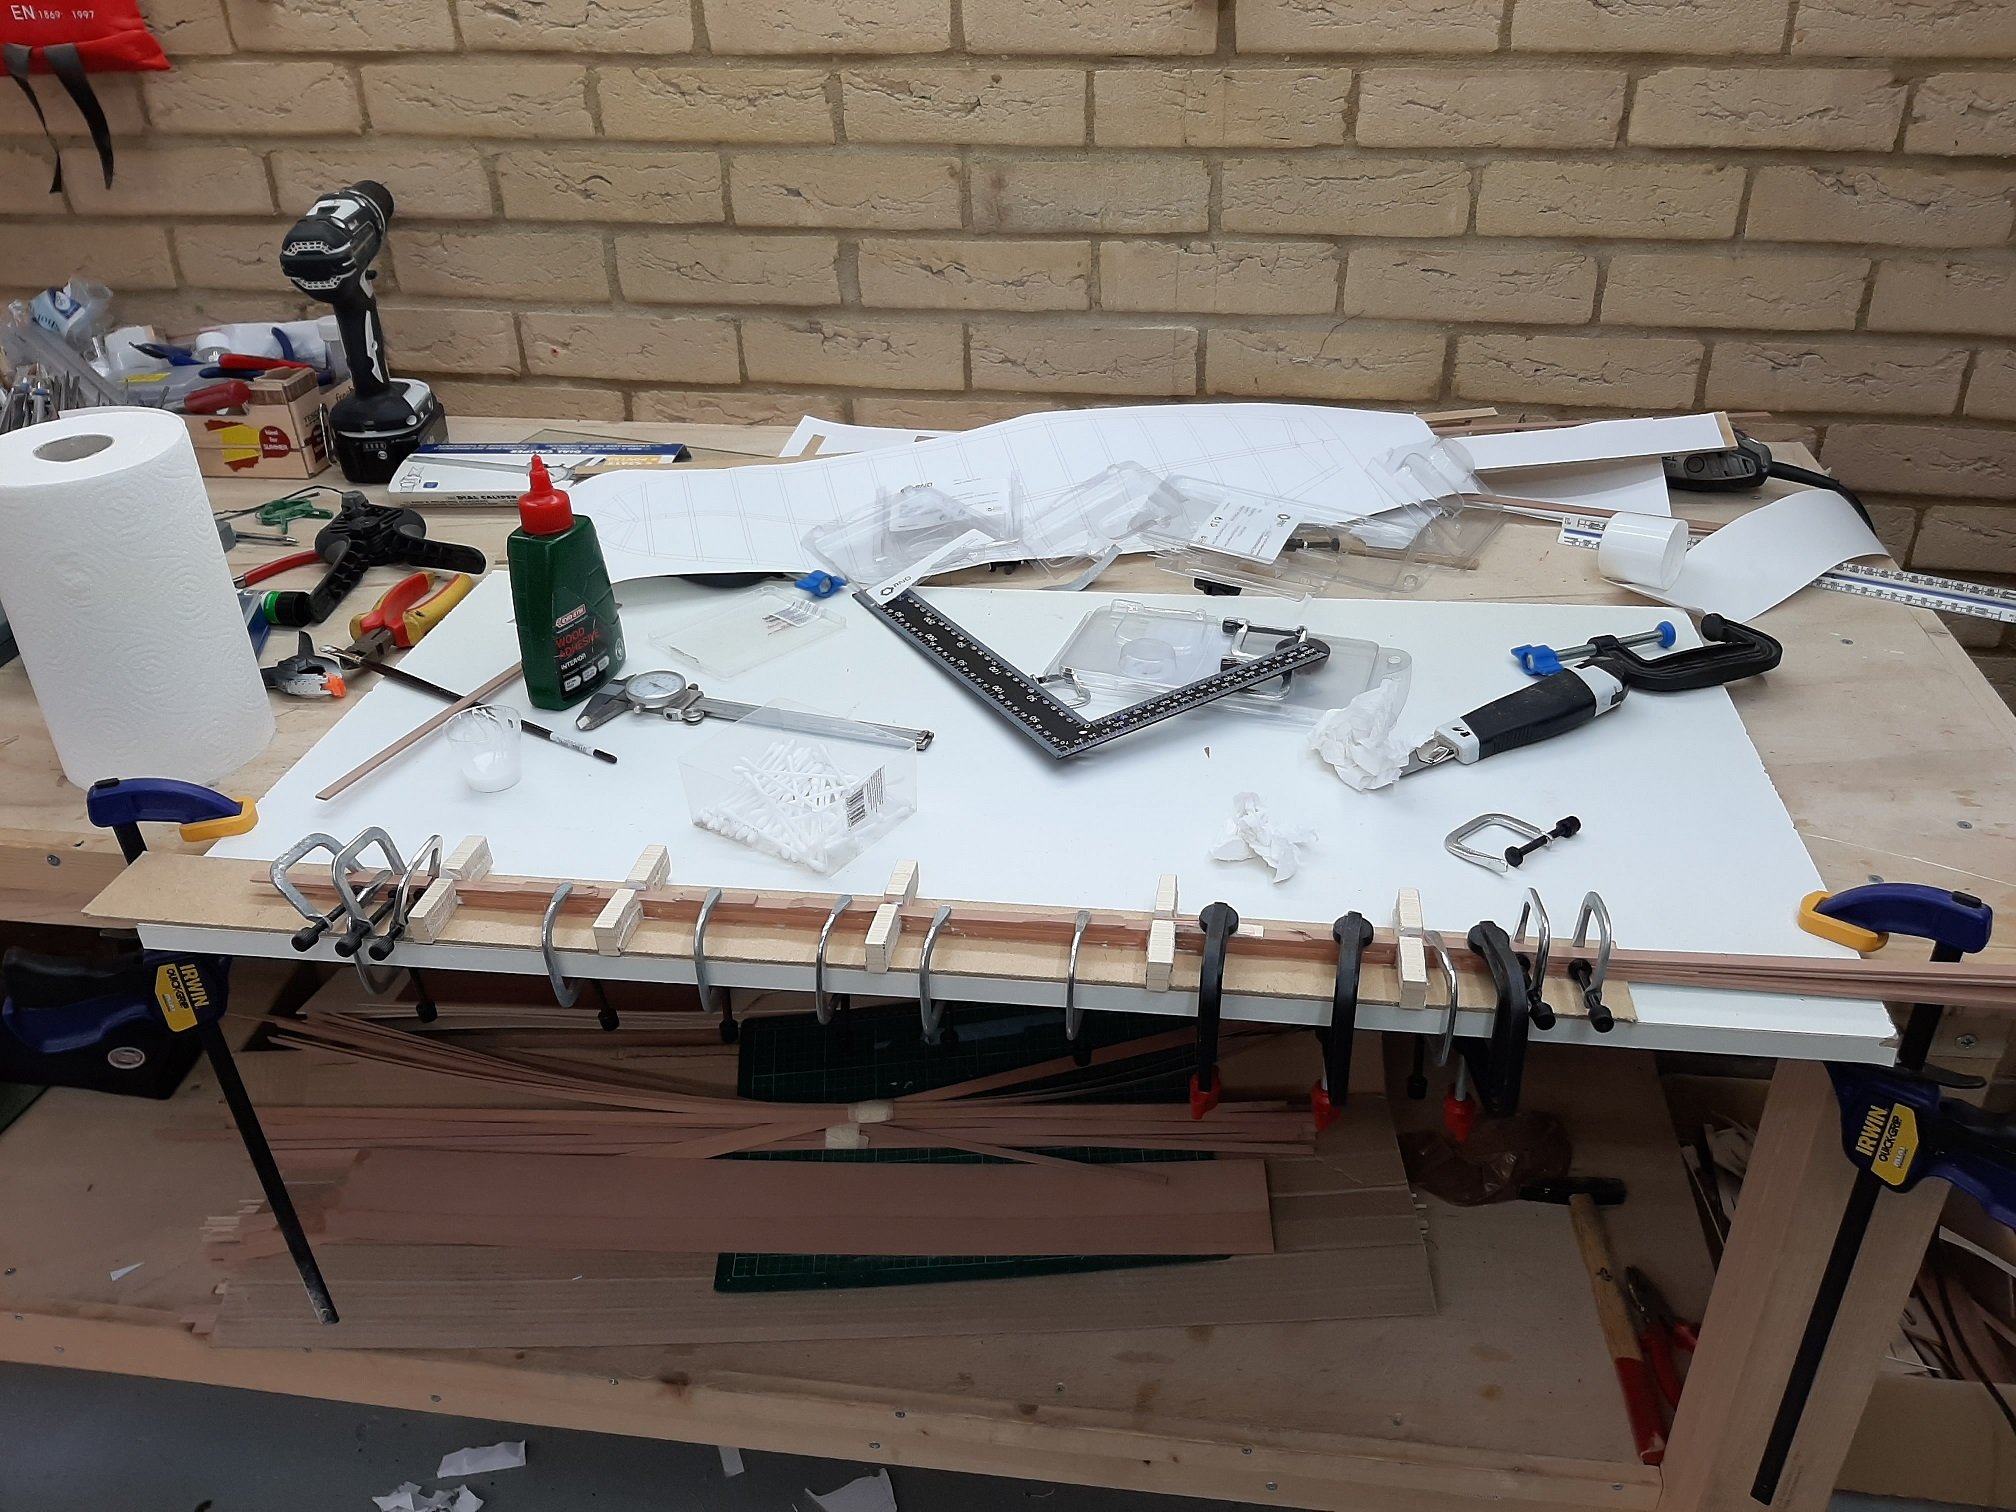
A very frustrating day today but a nice photo came out in the end that deserves a post. Today was one of those days that everything went wrong. Things went pear shaped at work and when I came home, I did what looked like the most sensible thing after a frustrating day: pick up the most frustrating hobby there is! And things went wrong again. I first shaped all the frames and sanded all the bevels. The cant half frames were very complex and a bit tricky to make but all came out fine. For the sanding and shaping of the frames I used the disc sander, a carpet knife and a makeshift sanding disc, made with two round pieces of sandpaper 100 grit glued together and mounted on a dremel bit. Then things went down hill. I discovered that there were mistakes in the plans for the jig. Trying to figure out how they happened, I realised that frame No 1 was actually 3.8 mm thick in the plans instead of 4mm. Although this looks insignificant, due to the acute bevel at the bow it resulted in 1.2 mm gap with the planks. I fixed the plans and printed everything again. I may get away with remaking frame No 1 as I can just glue the new print on top and fix the bevels, this is due to the alignment marks I ve put in the plans. Then I tried to glue the new print on the jig and managed to spray the wrong side with glue! I think that I will need to print it out again as it is so tacky that will be impossible to cut but I took the opportunity of this mistake to set the frames in place and have a look. It does not look too bad! Before everything collapsed I tried a strip and the bevels look right. I somehow have a feeling though that planking this boat will be pretty challenging. Time to wrap it up for today!


-
Now, this was a surprise! Craig, you have the eyes of a hawk, I completely missed this. The first word is definitely "Davit", the second I agree it very much looks like "socket". Your proposed arrangement with the axle rod in these sockets and the davit resting on the transom looks very tidy and actually simplifies construction. Also, another thing I missed is that if we accept that all the drawings of the original plans are to same scale, the davit is small and would not reach the keel. Certainly a very light duty davit but then again this boat was meant for the smallest of the warships. Excellent, many thanks! Vaddoc
-
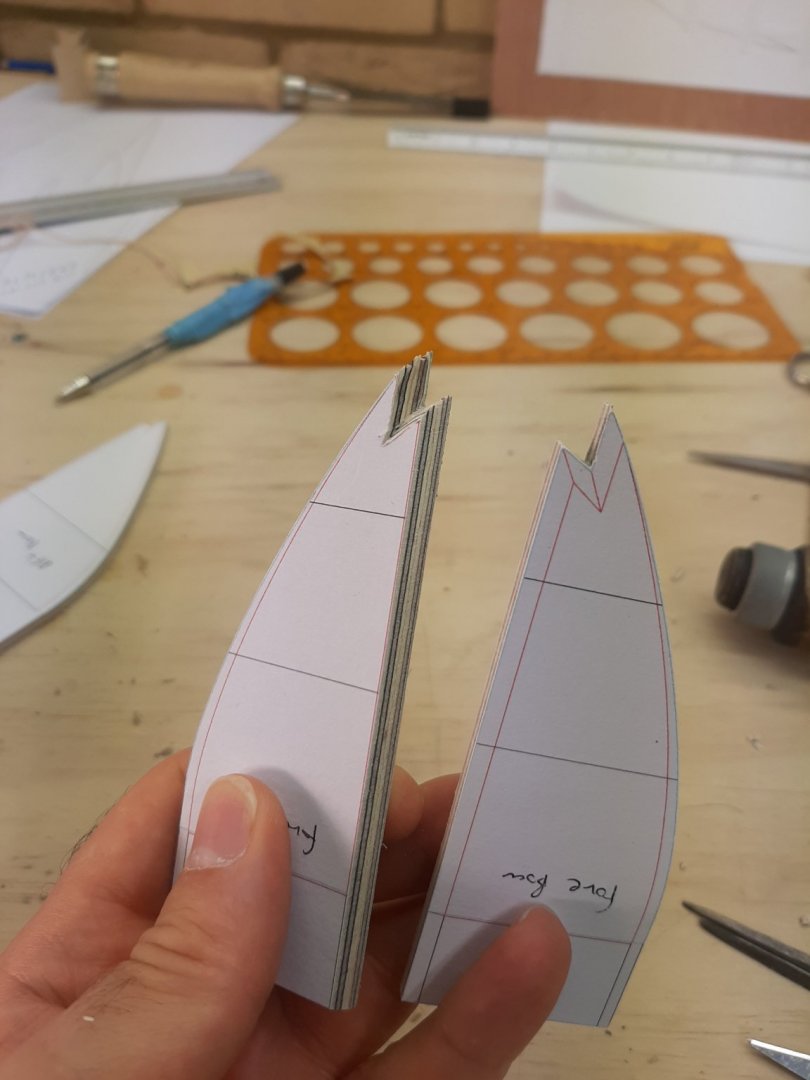
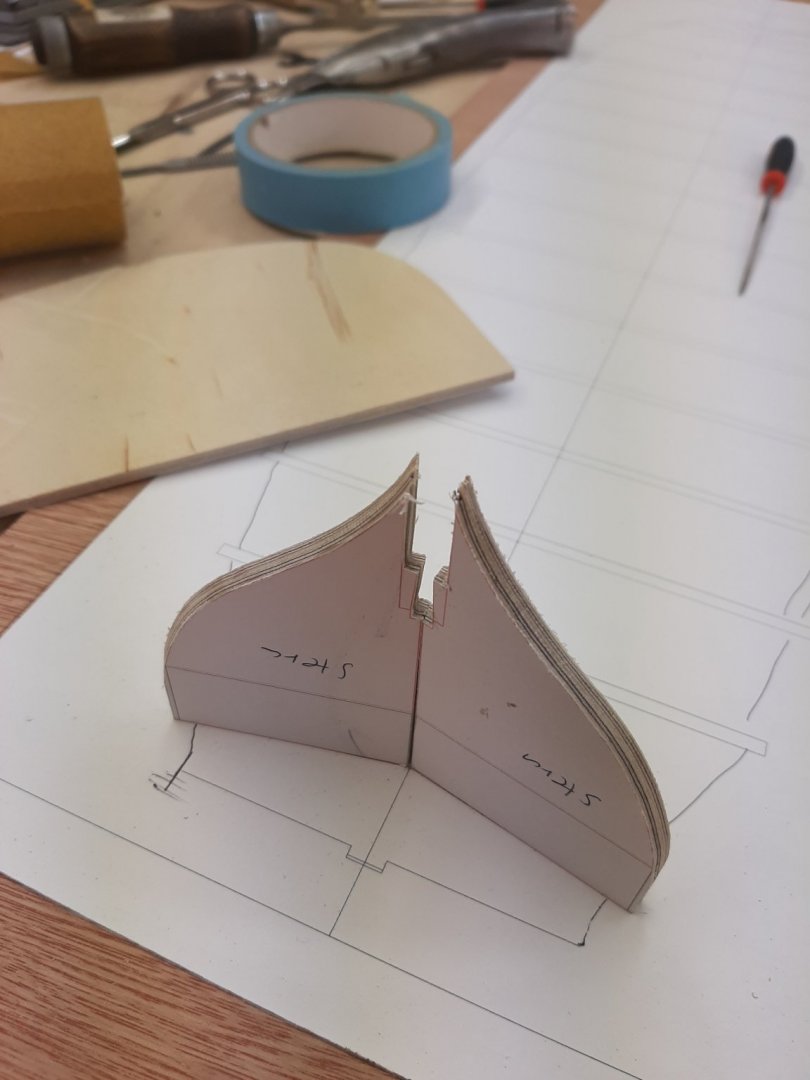
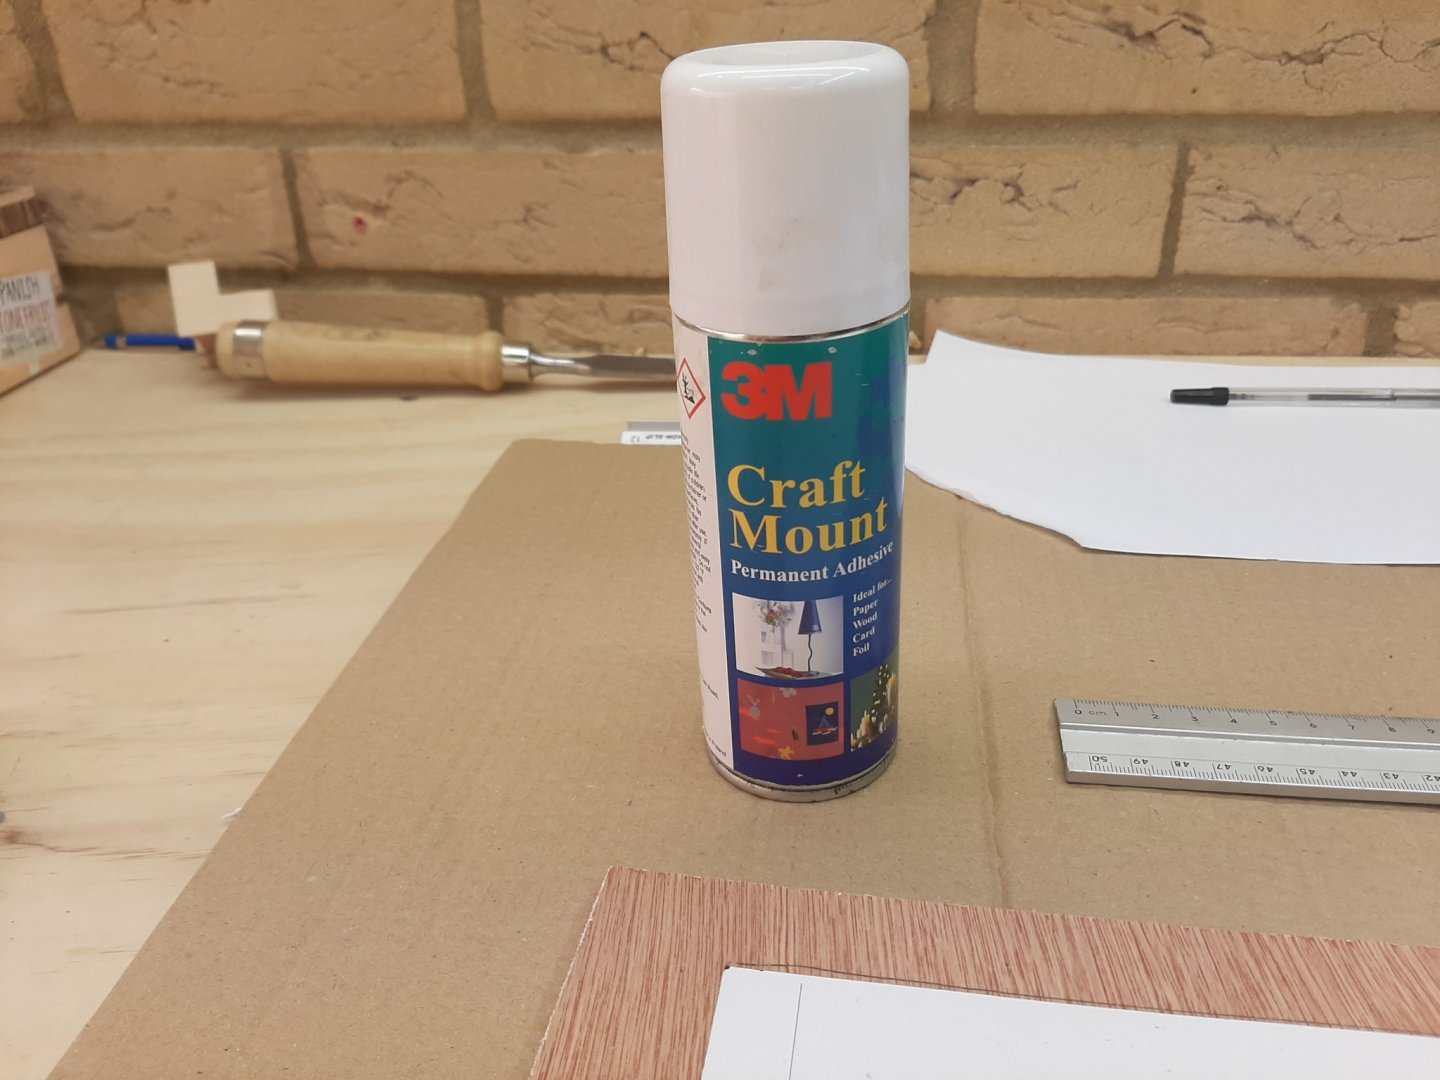
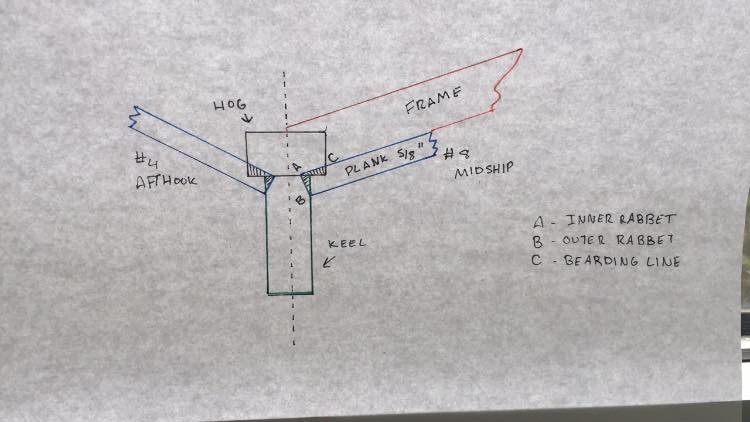
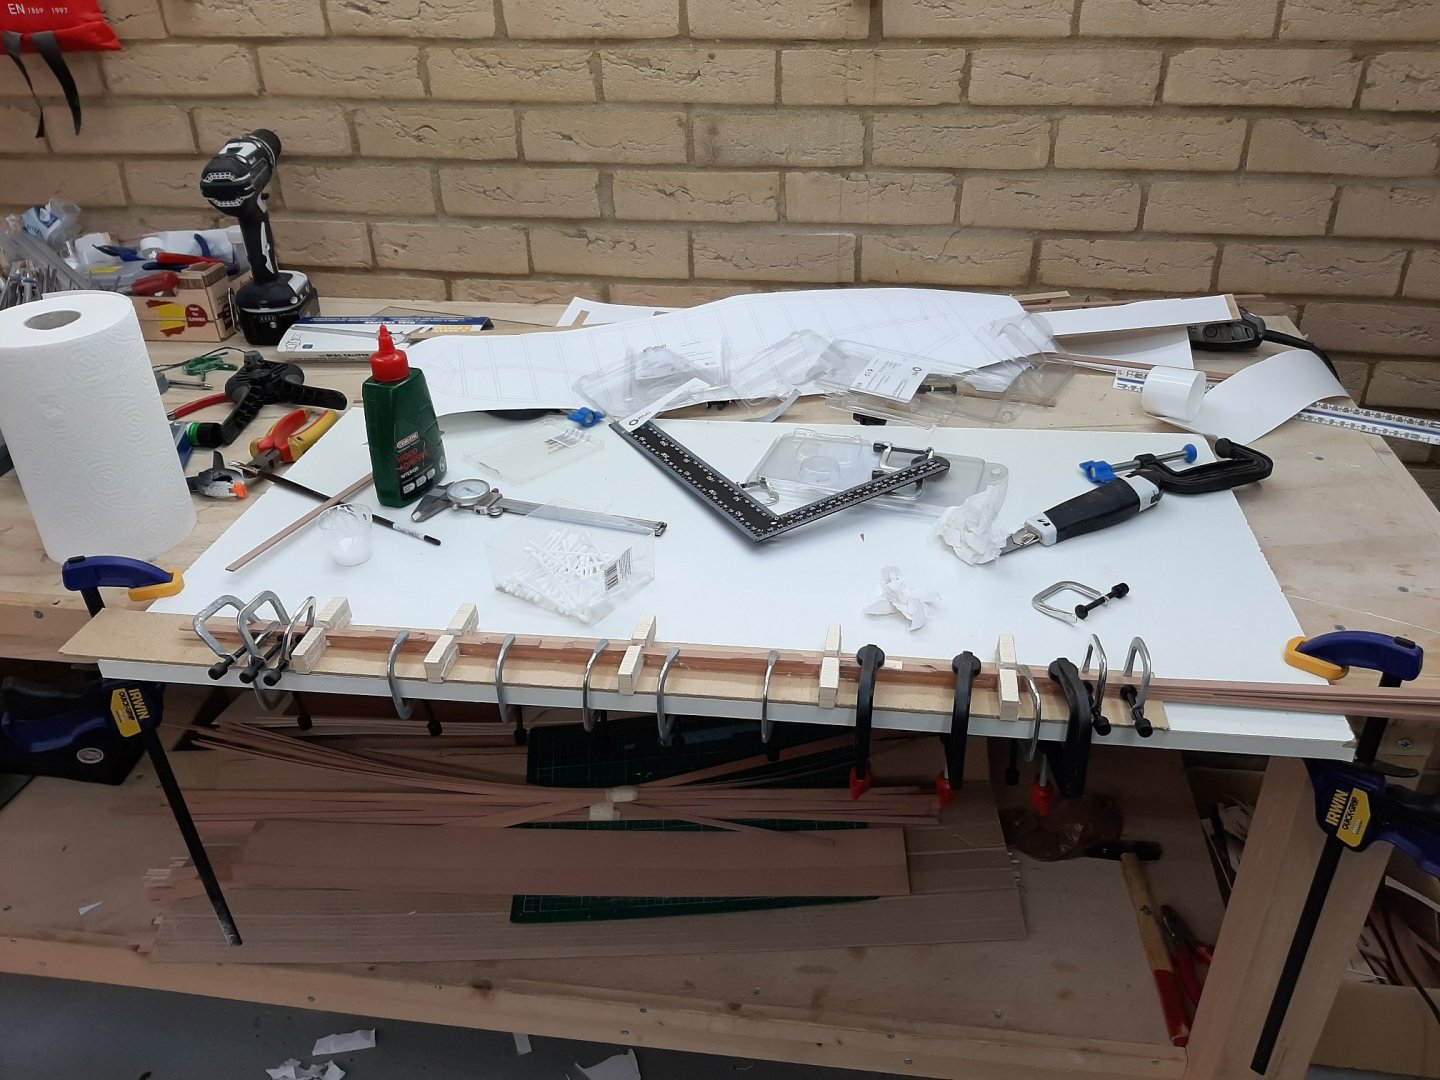
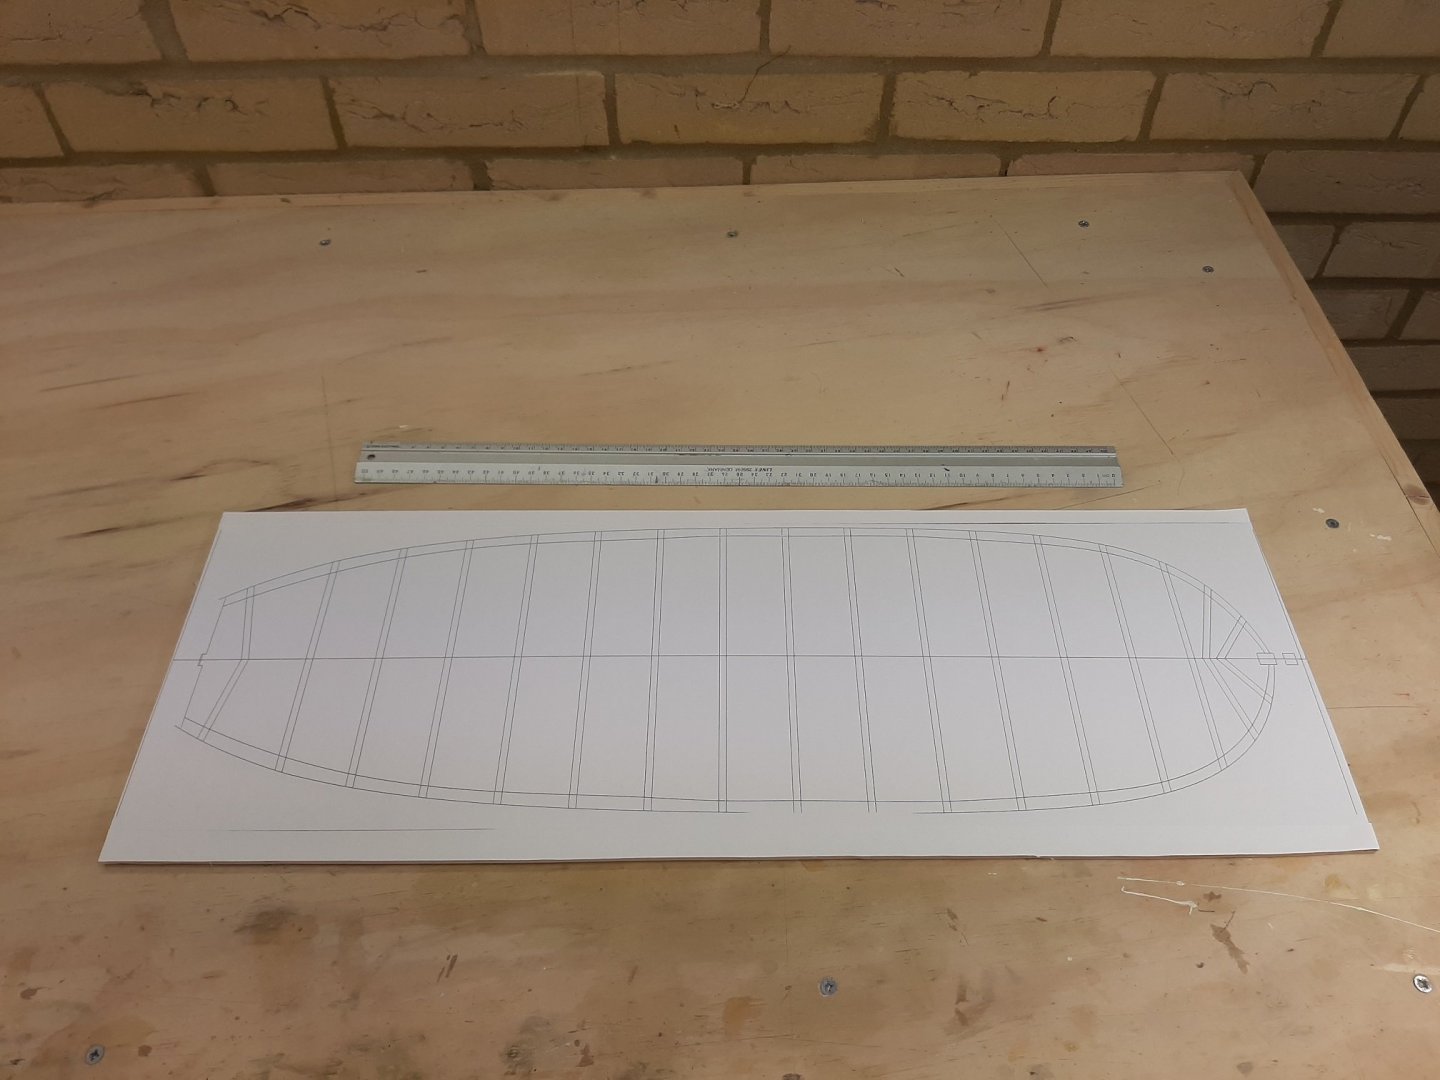
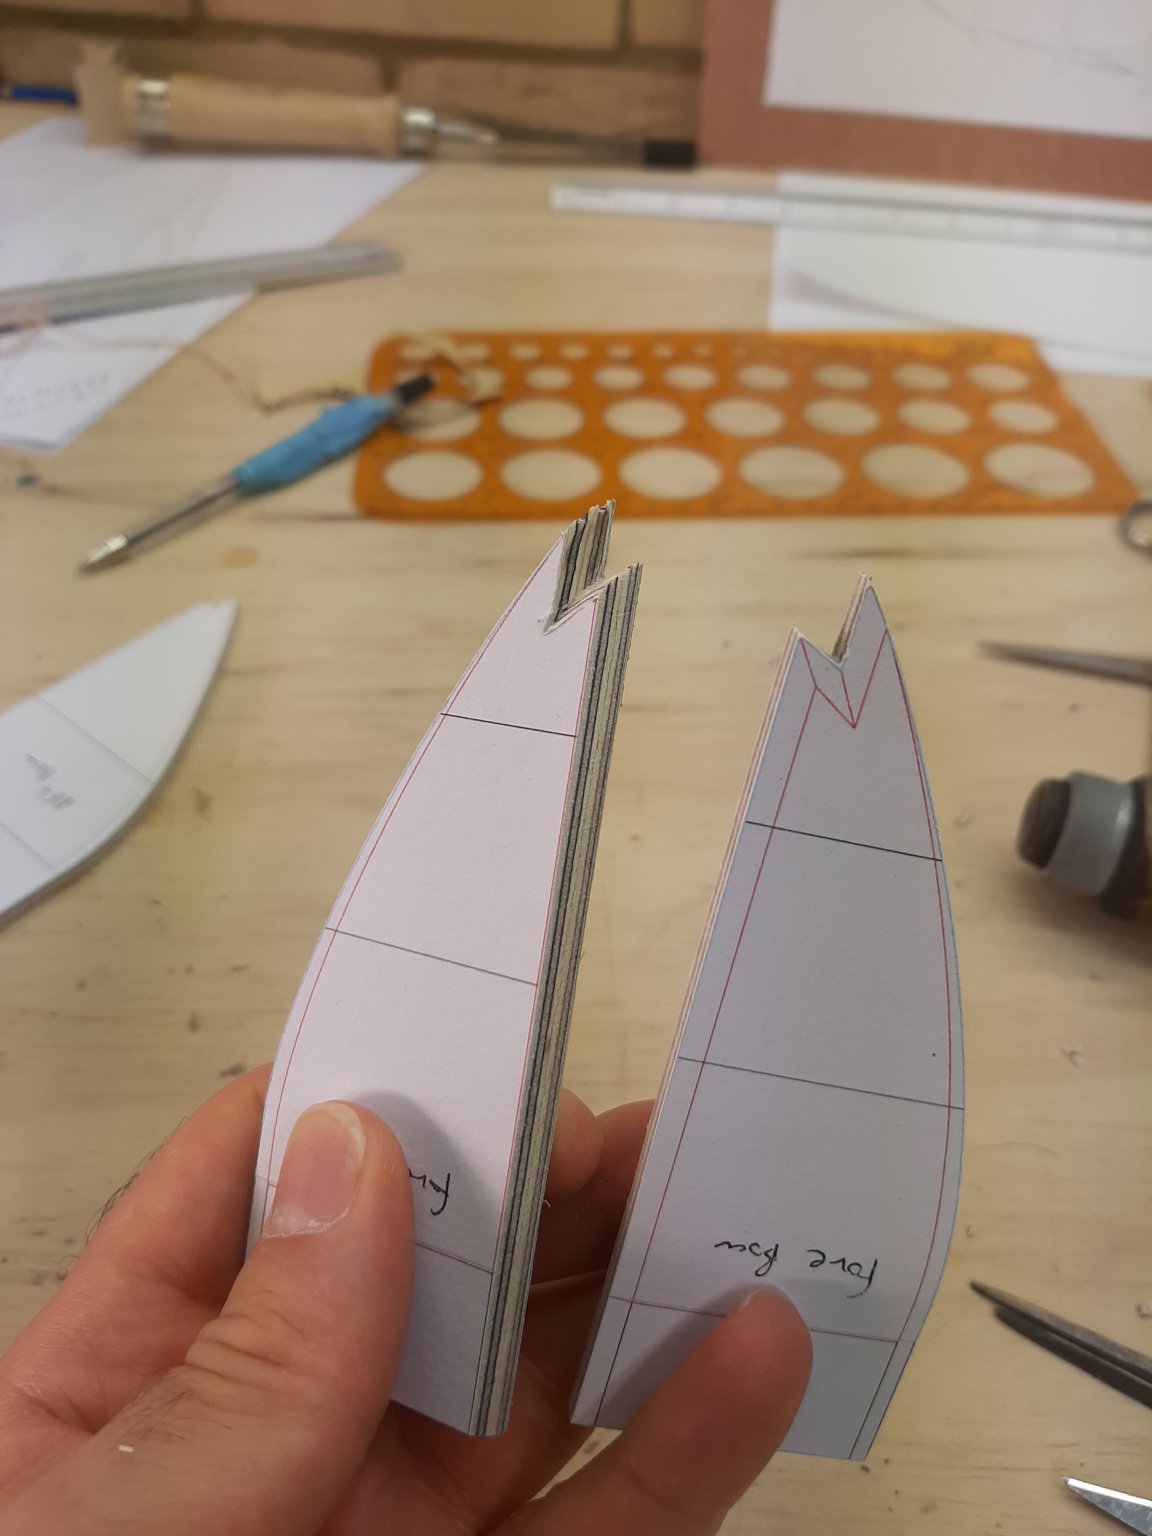
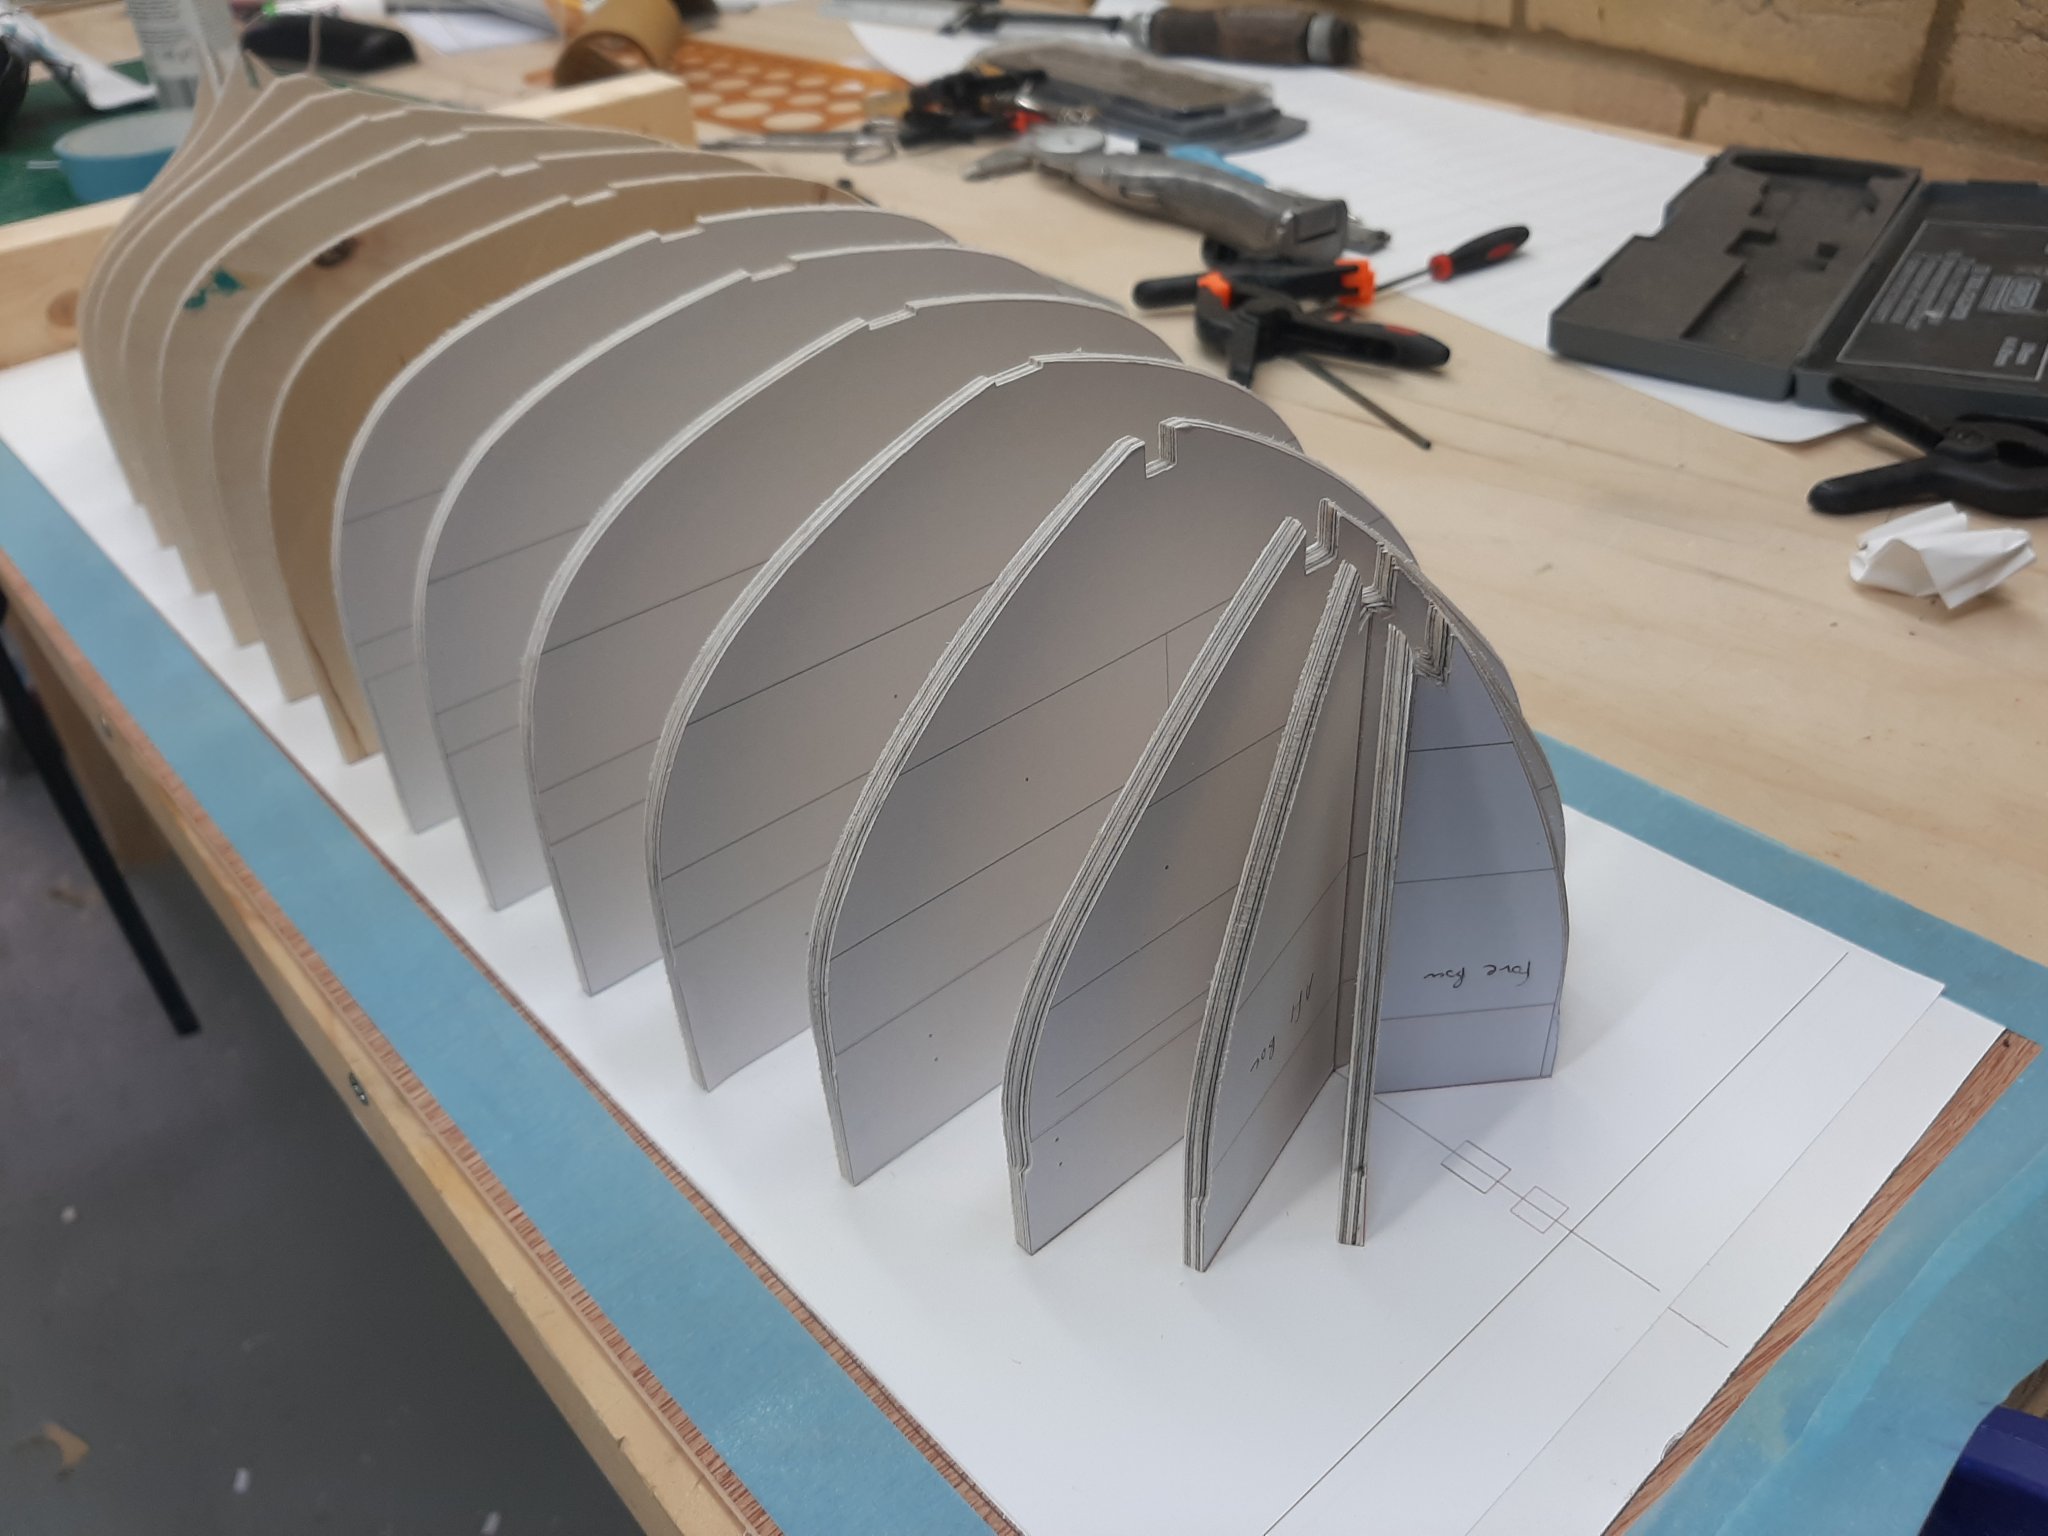
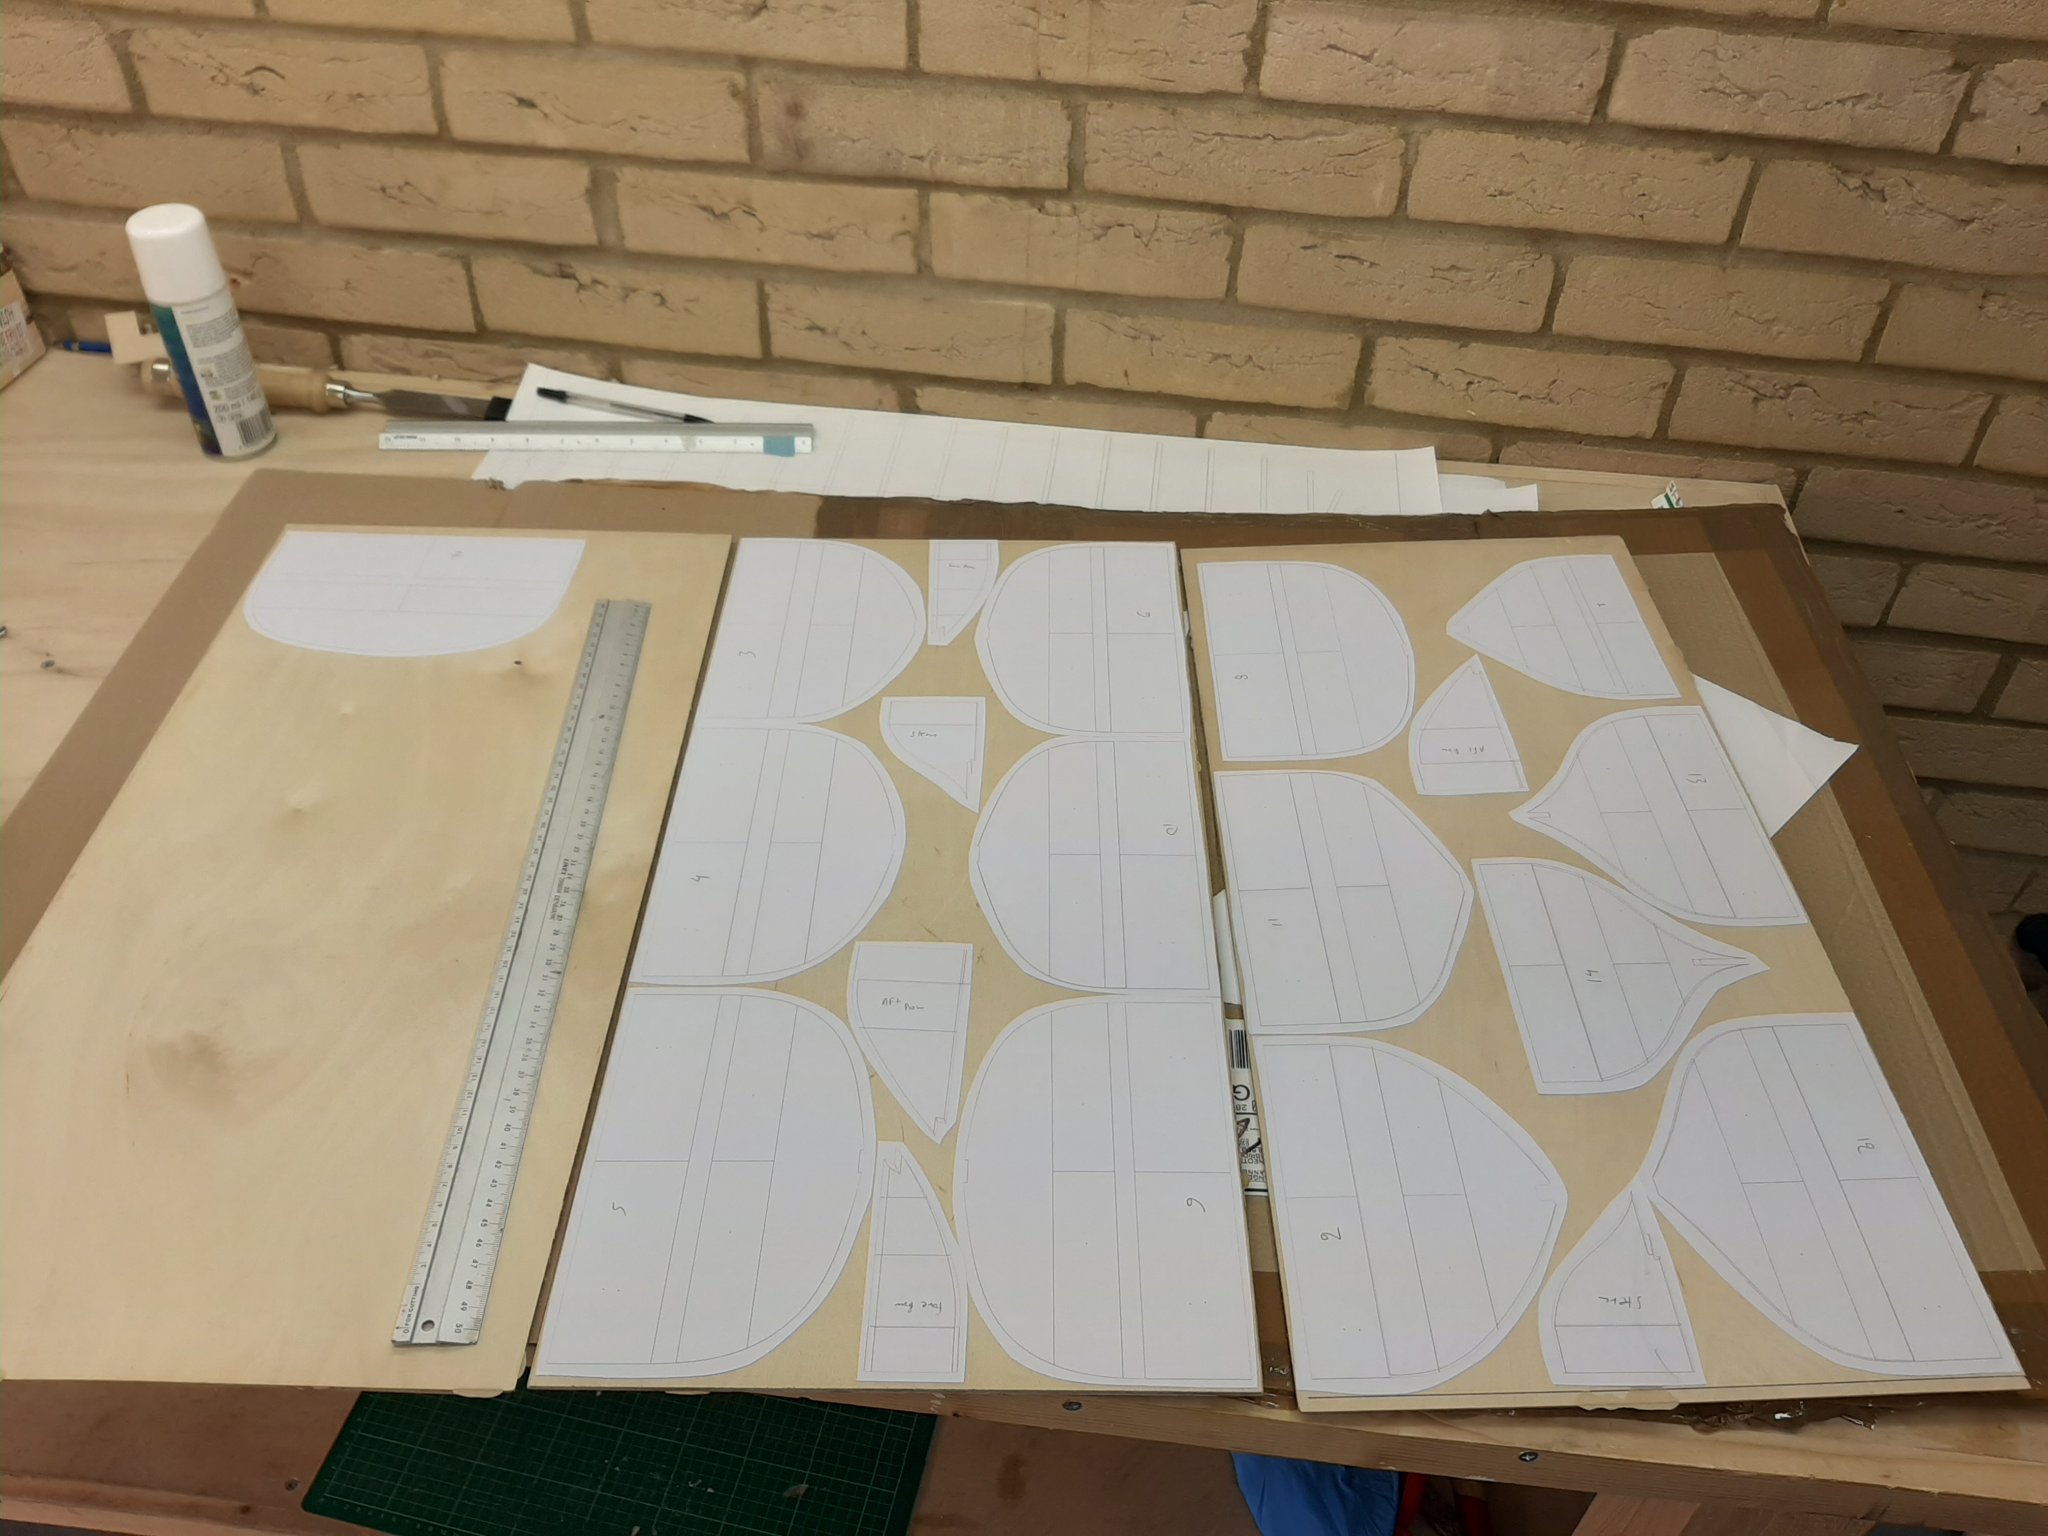
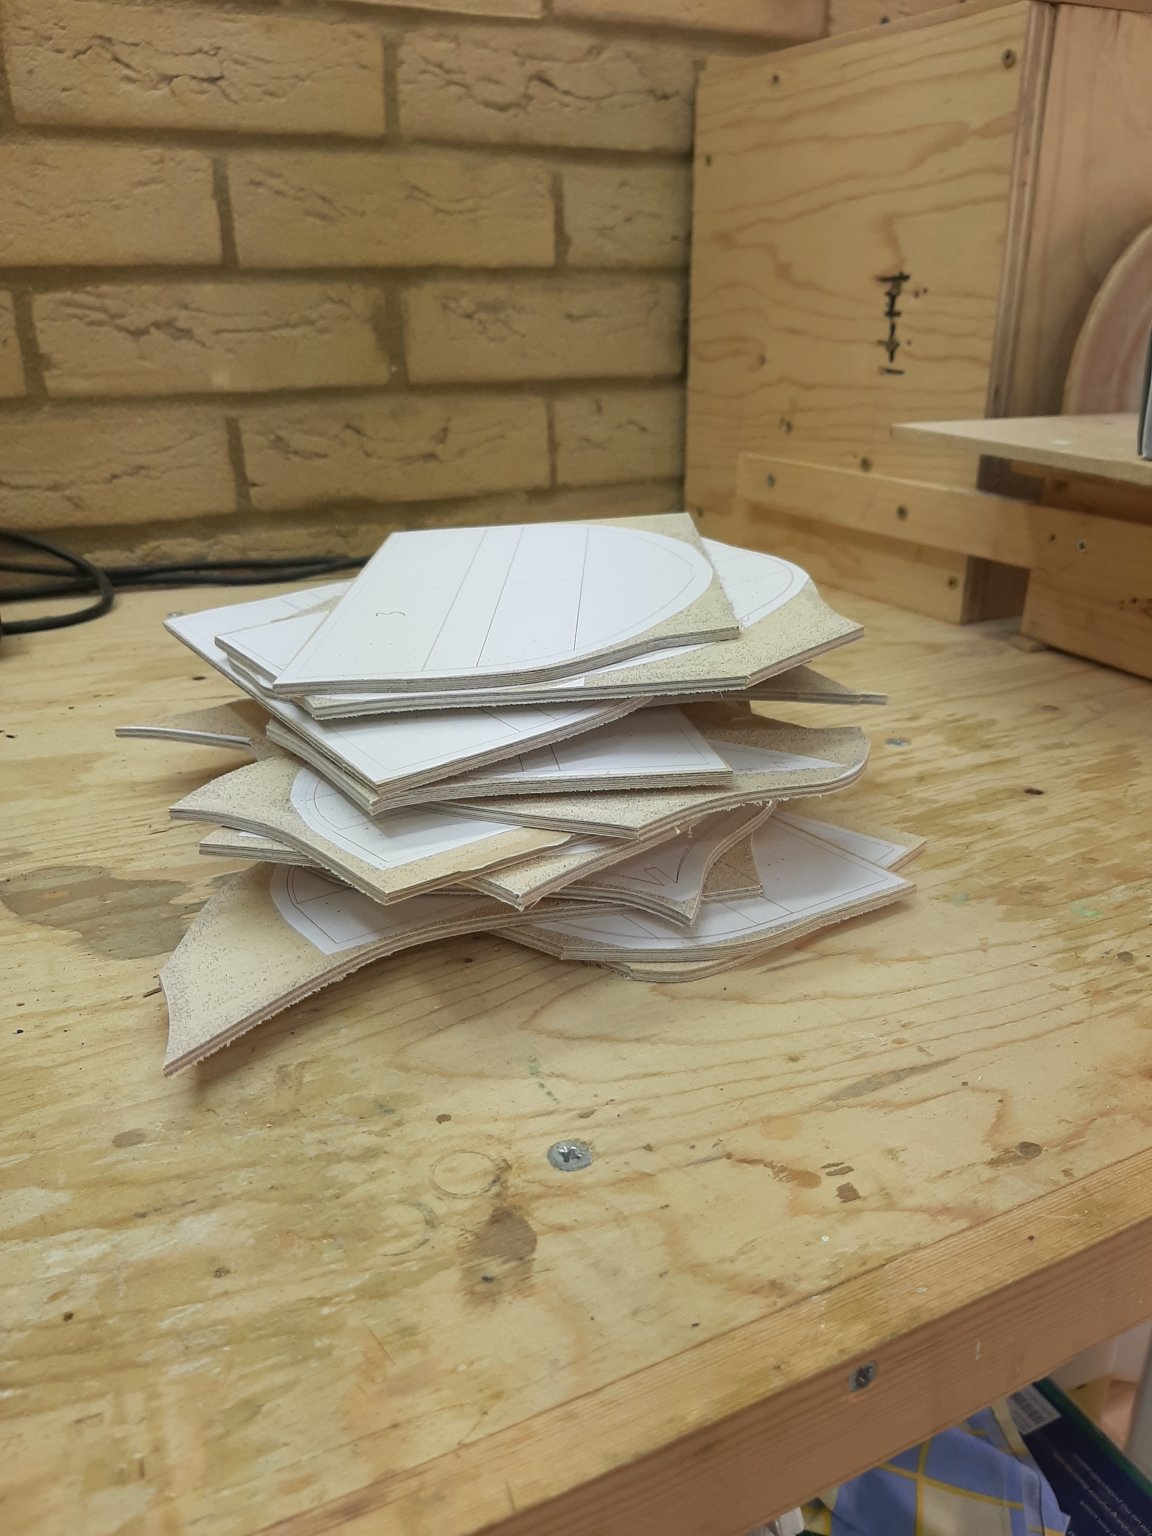
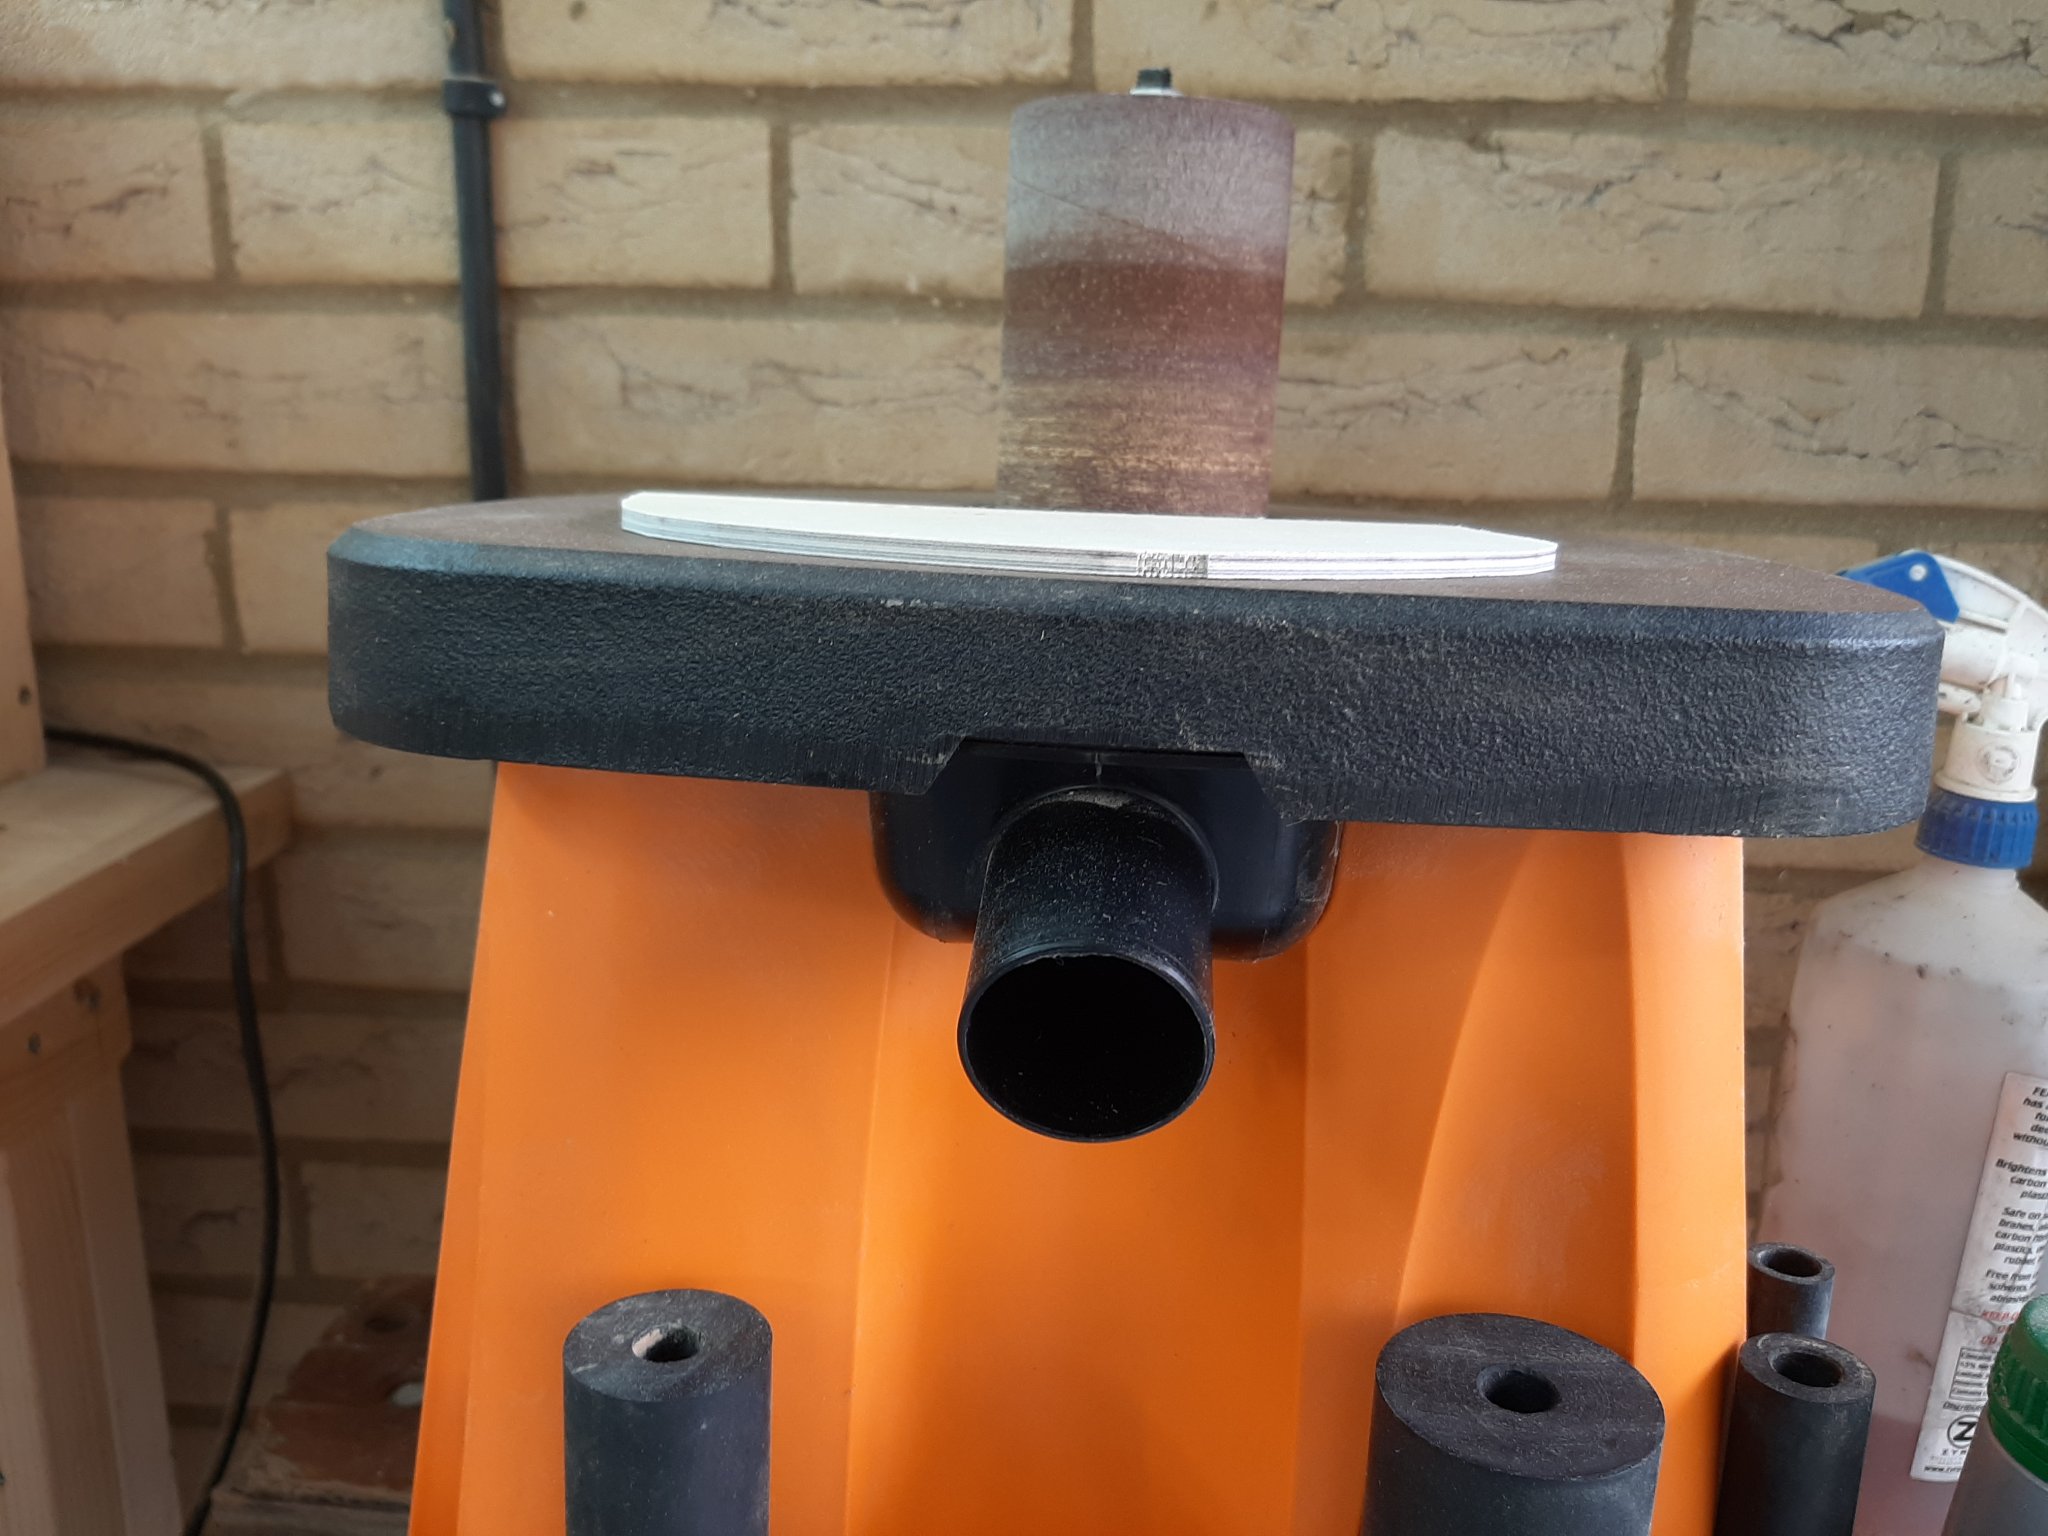
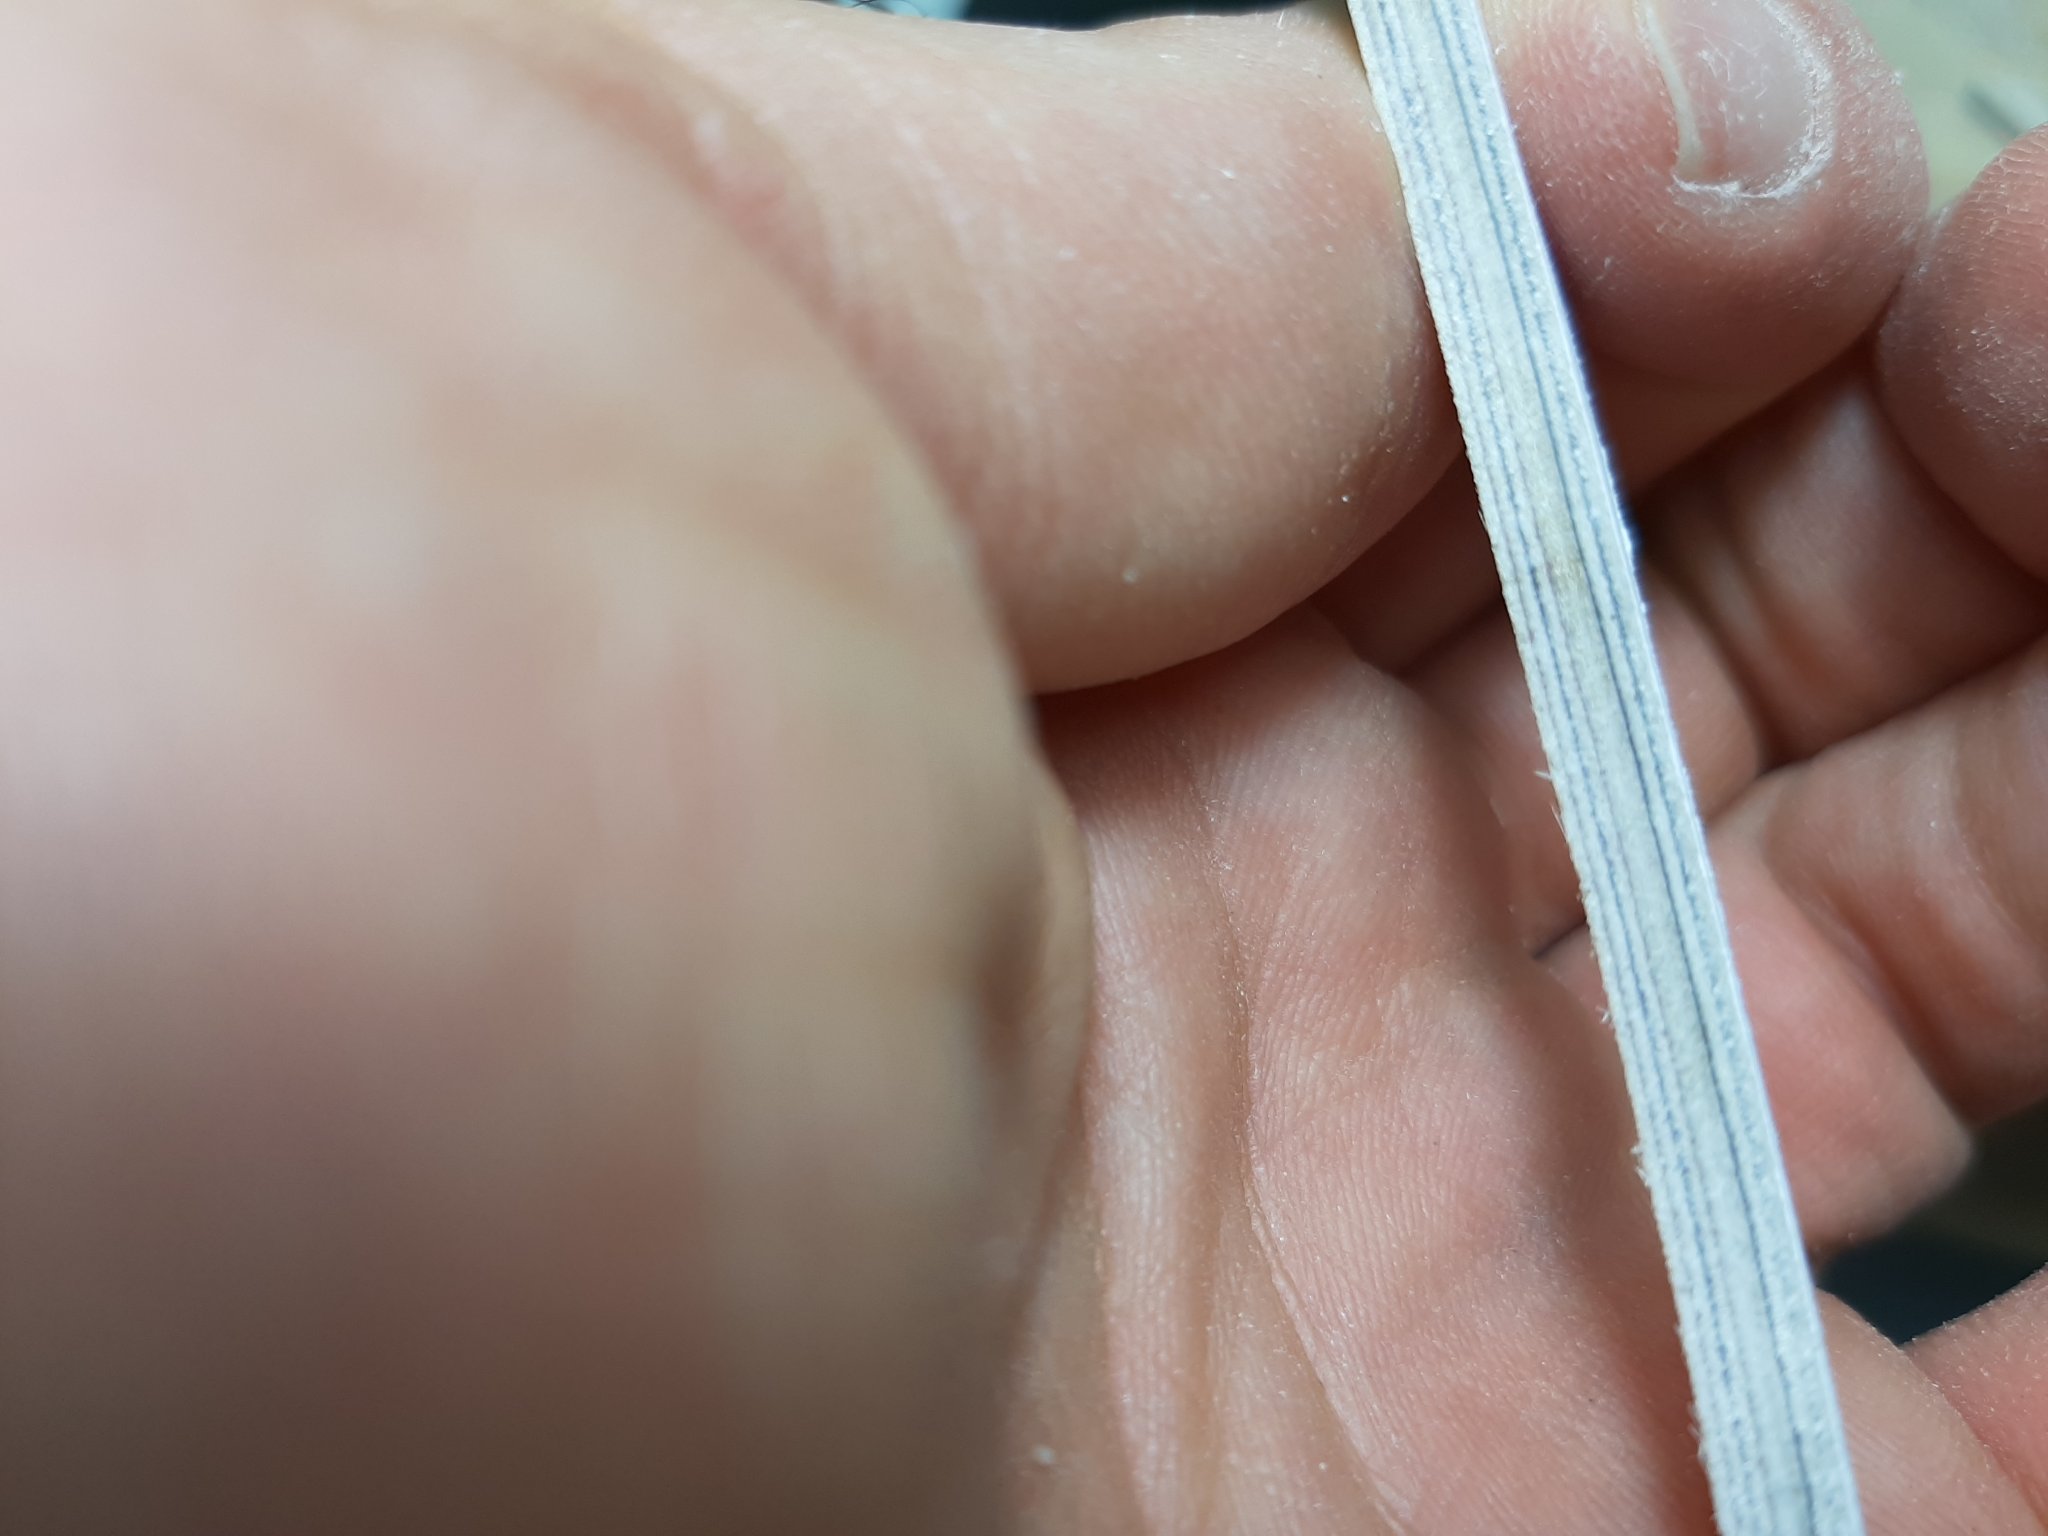
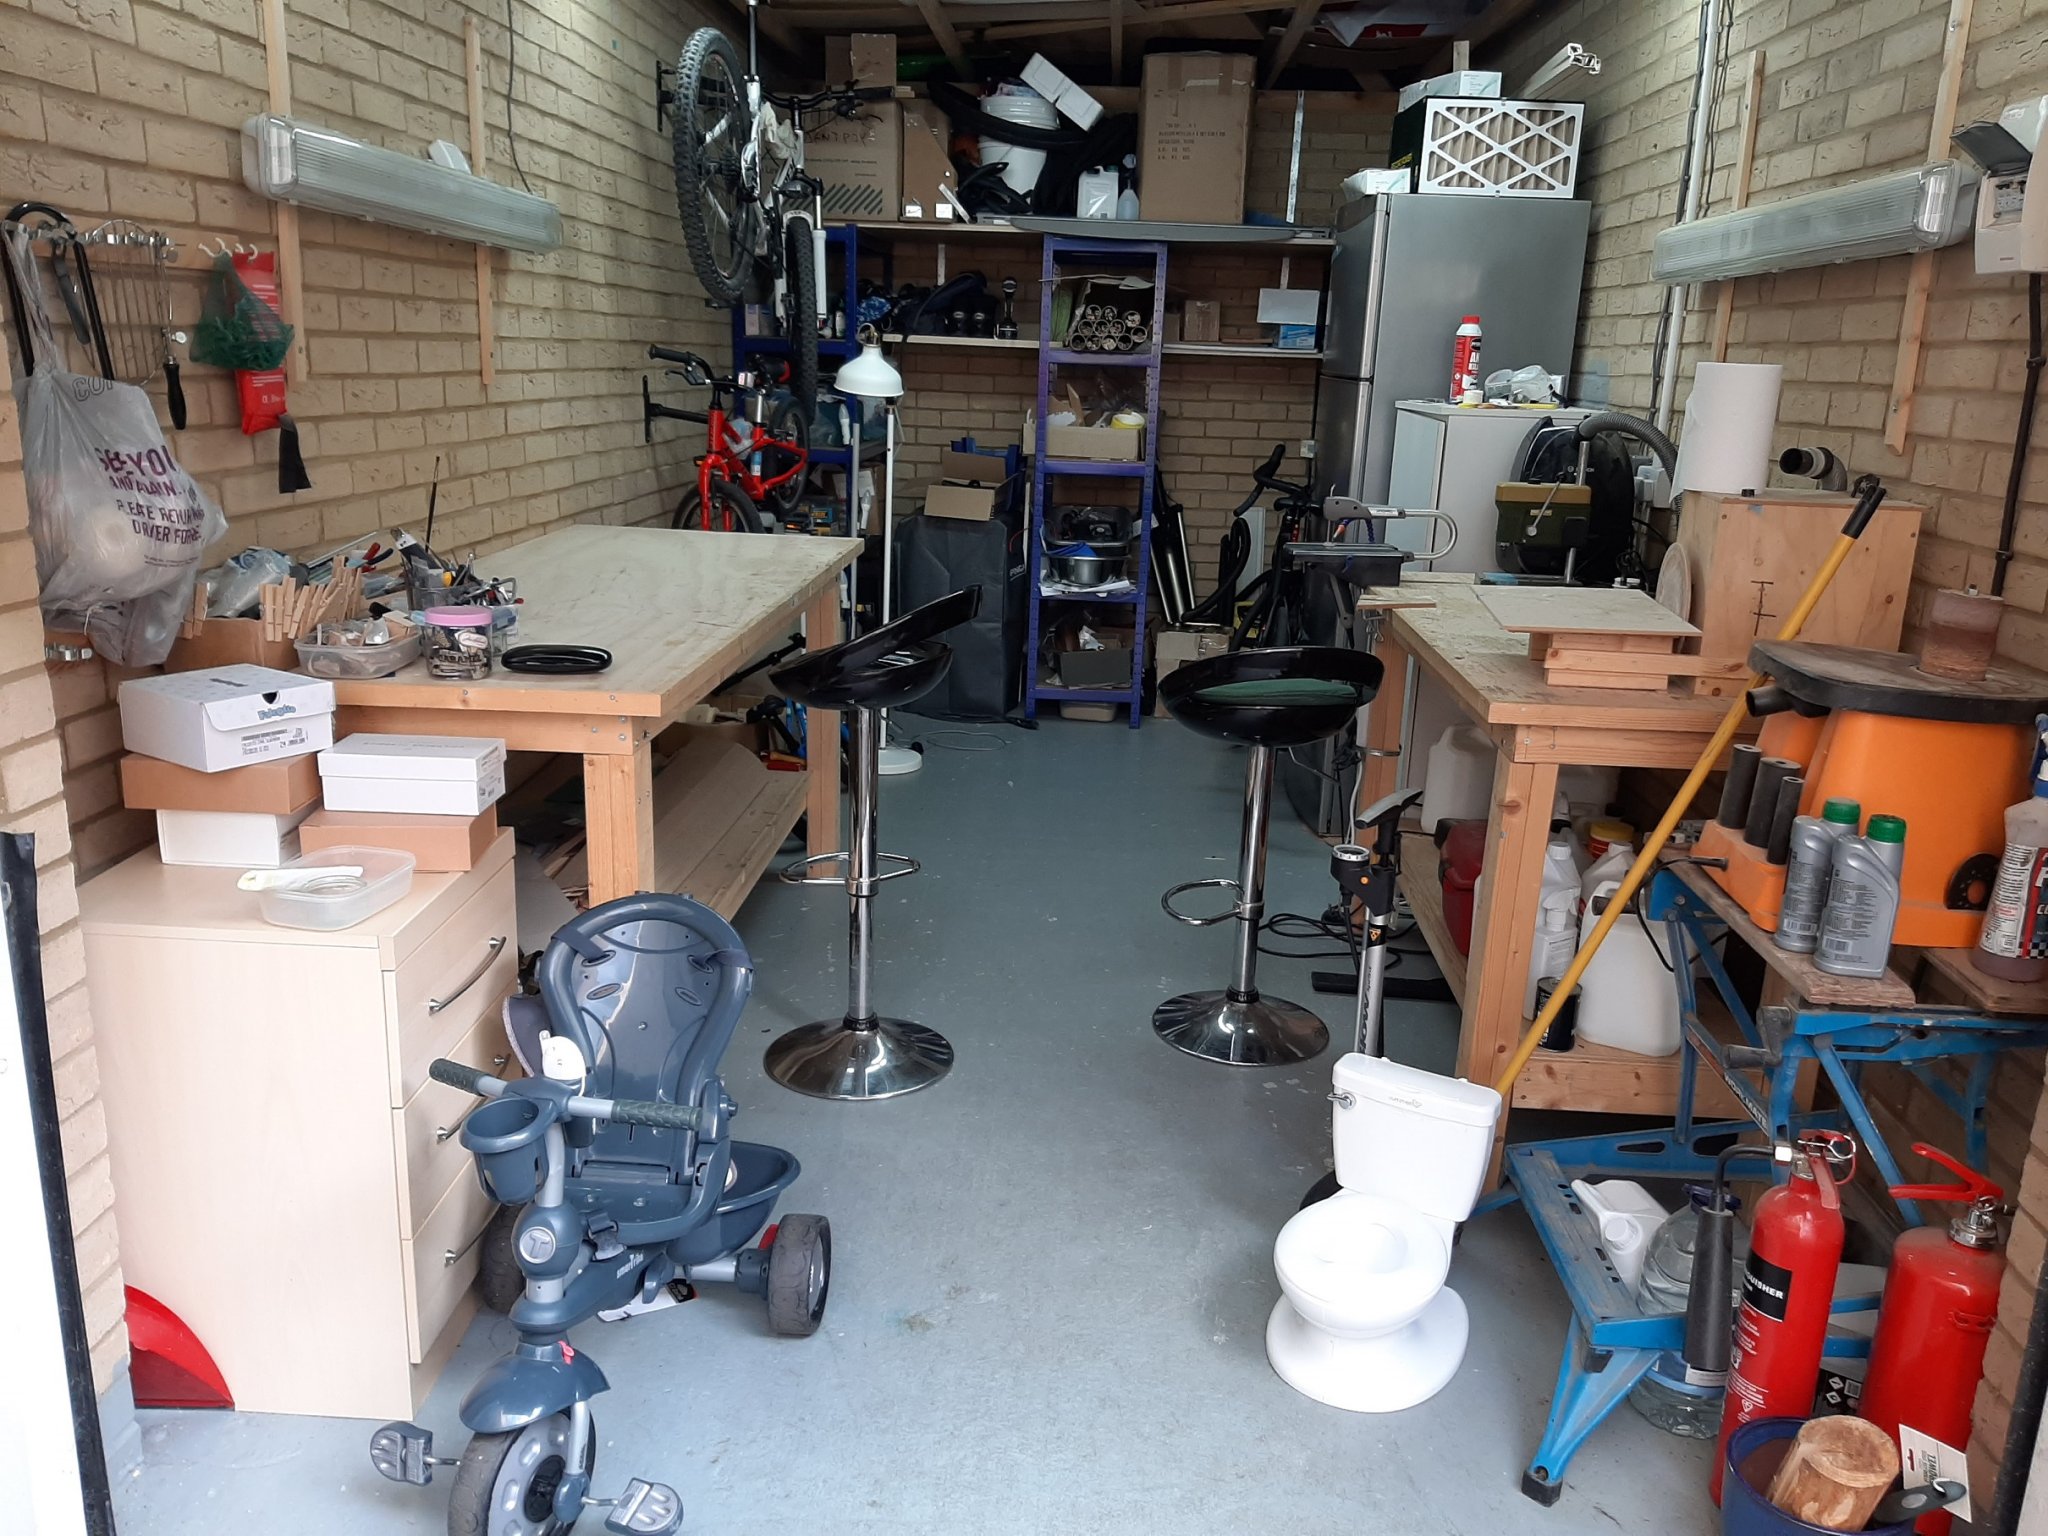
Bruce, Vlad and Druxey, many thanks for your comments. I have corresponded through PMs with Bruce (very grateful Bruce!) following his very kind offer to help but on this occasion should not be needed. Now Druxey, I ve been digesting your suggestions and I think you are right. As much as I like to laminate staff, a solid piece of wood should be just fine, as long as it is good quality. So I am preparing a large timber order from Arkowood in Germany. The timber I had received in the past was top quality and I am taking the opportunity to also order beech for the planking as well as a few extra sheets of pear for future use. Overall £200 worth of wood, however the admiral is on vacation abroad with the girls so again a rare opportunity which should not be wasted...Building in large scale is expensive. I did however order some strips the size of half keel, in case I need to laminate the hull from two pieces!😉 The lamination this time would be vertical and invisible. Ok, lets move one to the garage now, there is some wood dust further down I promise! I did a lot of work on the 3D plans and improved a lot of details. I also managed to get my printer to talk again with my computers so I can now print in decent quality. I printed the patterns for the keel, the hog, the jig and all 17 temporary frames. My lines kept coming out curved instead of straight but I managed to solve this problem as well. Now, the garboard planks will intersect the hog which will need to be shaped. The shape and angles can be found from the temporary frames after everything is erected but the 3D easily shows this so the hog will be shaped (grossly) before attached to the keel. The photos bellow explain this, these are the frames (inner surface of the hull) Chapelle mentions in "Boatbuilding" that a boat will either have a rabbet or an apron (hog in a sense) but that both are not needed. This looks logical as both options are there to secure the lower edge of the garboards. However, it seems that it is not uncommon that both are used and this is how my boat will be built. The following photo taken from my searches of the net shows what I mean. (source: https://buildinganfldpunt.home.blog/2019/04/06/the-rabbet-lines/) At the same time, I have been laminating the plywood for the frames. The only way to get perfectly flat plywood is to laminate it. I used very good quality plywood from Cornwall models, 2 & 1.5 mm thickness. I had to make sure that the film of epoxy was thin as the sheets were just a tiny bit oversized and I did not want the laminate to be more than 4 mm. I forgot to take pictures of the process but essentially thickened epoxy was applied to one sheet, the other sheet went on top, then a plastic film, then a thick flat table top and then whatever heavy items I could find to pile on top. The result: perfectly flat, spot on 4 mm thick very strong plywood! The second photo shows how straight the 600 mm edge is. One thing to mention, I have stopped using talk powder to thicken epoxy as I am slightly worried whether it could contains asbestos. I used gypsum and the results were pretty much identical. Then I glued the patterns to the wood. I decided to use spray glue instead of the Pritt glue I ve been using so far. I used the Craftmount 3M spray glue, it is the cheapest in their range (still expensive) but works very well and I think I prefer it over Pritt, at least for these large surfaces. The ruler is 50 cm long, this will be a ridiculously large boat! I then changed the sand paper and the work top on my home made disc sander. I used 80 grit as there will be some heavy sanding happening. Then at last I cut some wood! I roughly cut the frames and then followed the outline within a mm or two. The final trimming to the lines will be done with the disc and the drum sanders There certainly will be some curves in this boat! The frames are completely flat The laminate came out very nice The little motosaw did very well and had no trouble cutting the thick plywood but I did a few breaks to allow it to cool. That was a lot of cutting the poor thing did! I will finish the frames but then I will need to stop as it will take a couple of weeks I think for the wood to arrive. I previously was thinking to also laminate the stem and false stem but now I think I ll make them out of solid wood. We ll see. Regards Vaddoc


.png.1dfd49988b1172b90cf02fe6690229a6.png)
.thumb.png.d25a5f8a941c00920d386eb8d2f2c26c.png)
-
Excellent outcome Bob! I d be a bit concerned trying to polish the varnish though, I think it is risky. These pastes are abrasive, they work by removing a layer of varnish and little scratches with it, so that the light reflects better. Your newly sprayed surface is completely flat and smooth, the only reason the light does not reflect like gloss is the medium (dust) suspended in the varnish. I do not think the paste or cloth will work very well. If you want to increase the shine, I d put some wax on after the varnish has cured.
-
Bob, your paint job turned out great. Photographs are very unforgiving and reveal the tiniest of flaws but your hull looks great. Absolutely protect acrylic paint with varnish. The more matt the varnish (so the more matting medium it has suspended), the more difficult it is to use. You could also spray a gloss coat or two and then a satin on top to bring the shine down. But definitely test on your rocket first!
-
I do not mill my own wood Druxey and getting a piece 600x8x11 is difficult (can be ordered though-expensive). Even if I do, it might not be straight or it might bend later on with the changes in humidity. I do have lots of strips though and a laminated piece will never bend. Furthermore, keels I think were usually made of several pieces, although probably not in small boats like this. But you do have a point, maybe I am overcomplicating things I need to order lots of wood for the planking so maybe it worth also asking for a solid piece to make the keel or two halves to glue together for stability. Money is tight though at this time! I need to sleep on it-maybe you are right.
-
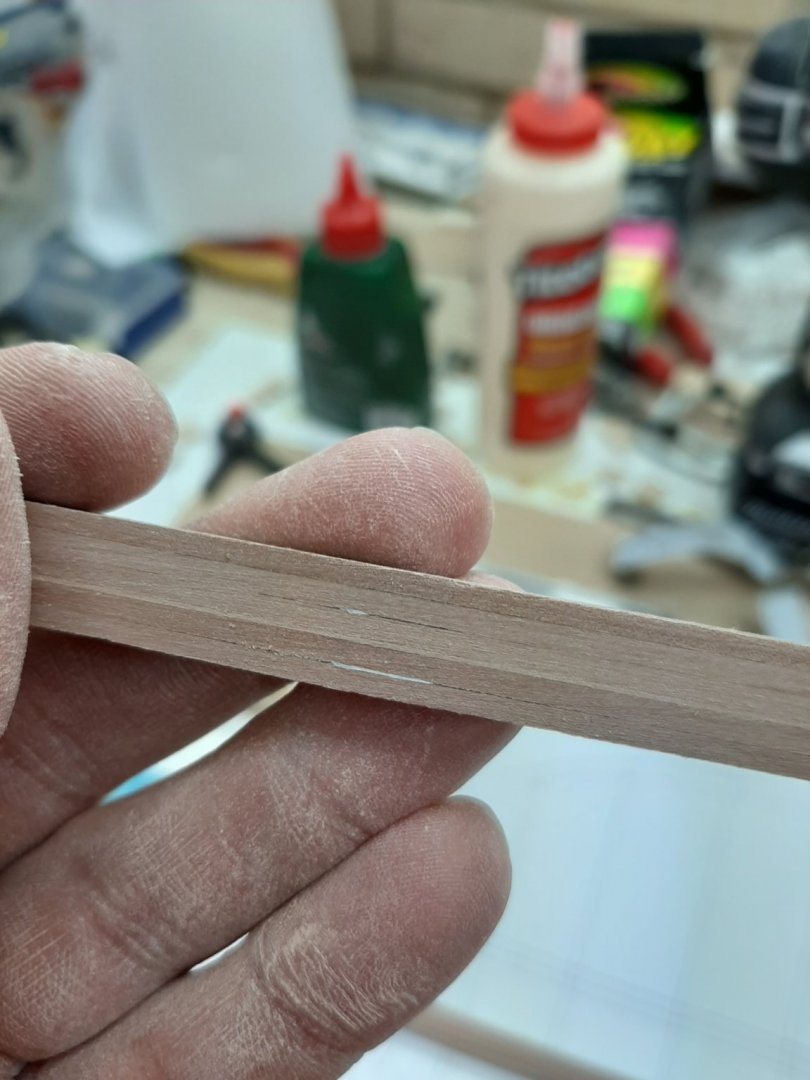
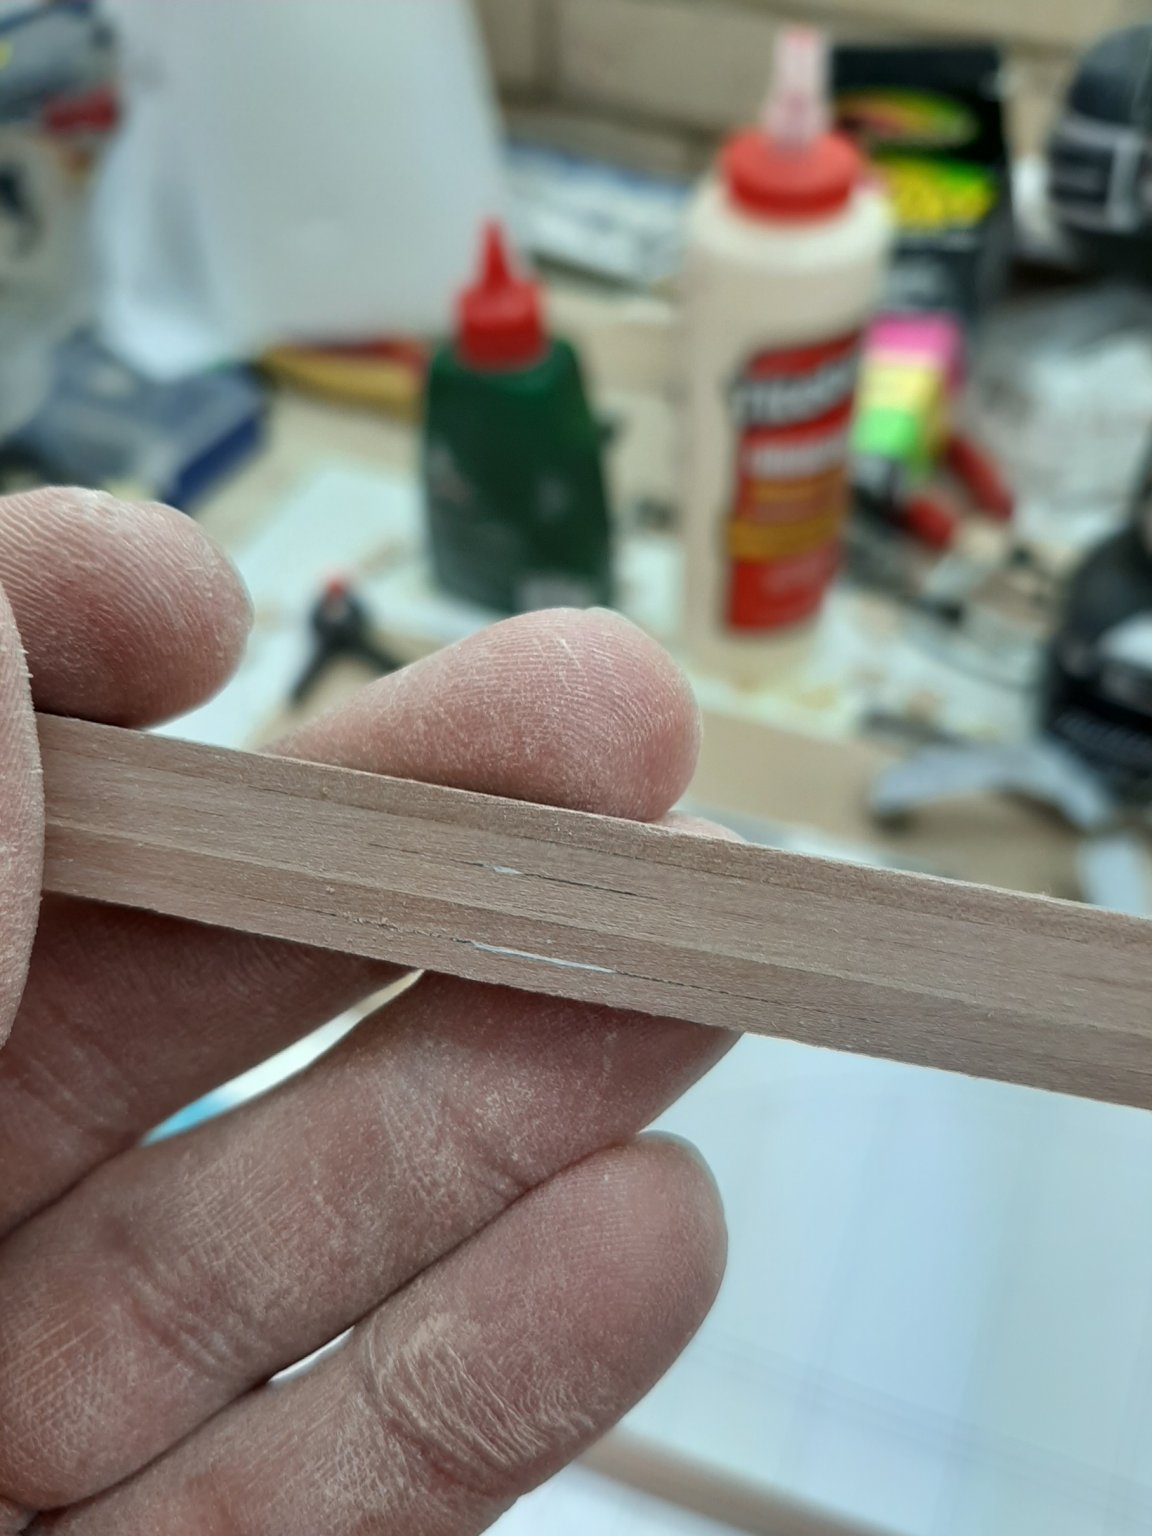
Oh, I ve used Epoxy extensively so far! The problem with removing epoxy is than in the uncured state, usually there is not enough room in the jig to scrape it off and after it has cured, using power tools or heat is much more dangerous than in the real boat as easily the pieces can be destroyed or too much material to be taken out from the wrong places. This is why I wanted to try PVA, to make sanding easier and the process less messy. However, after all my efforts these last few days, my opinion is that using PVA to laminate wood is feasible but difficult. The opening time is not long enough and the glue is not rigid enough to counteract the pull of the wood. Much better to use epoxy Now, this morning I woke up with two keels, the epoxy one in the jig and the PVA whch I made the first time. I decided to sand the PVA keel smooth and I discovered that the pieces of paper I used to make sure the jig would not stick to the keel, had become embedded in between the laminates! So this keel goes also to the scrap pile. Last hope the epoxy version. I took it off the jig and it looks reasonable. I carefully chiselled the big pieces off and then sanded the keel smooth. It was much easier than I expected. I use Z poxy finishing resin thickened with talk powder and 120 grit 3M silicon carbide sand paper. I used my respirator, fired up my air filter and then vacuumed the fine dust as it is certainly not healthy to breath and also there is a small chance it may have some asbestos in (I ve been recently reading about asbestos). The final outcome is acceptable, the keel is quite straight and flat. It is 8 mm wide as intended but 10.5 mm high instead of 11 mm-I think it should be fine. I wanted to make the keel appear as a solid piece of wood as I will not be painting the boat but this is not possible with epoxy. I could glue a veneer on the sides of the keel or laminate it again with the strips vertical instead of horizontal. Or maybe try PVA once more, this time making sure the strips alternate in their direction of curve. Or maybe leave it as it is. Decisions-decisions...


-
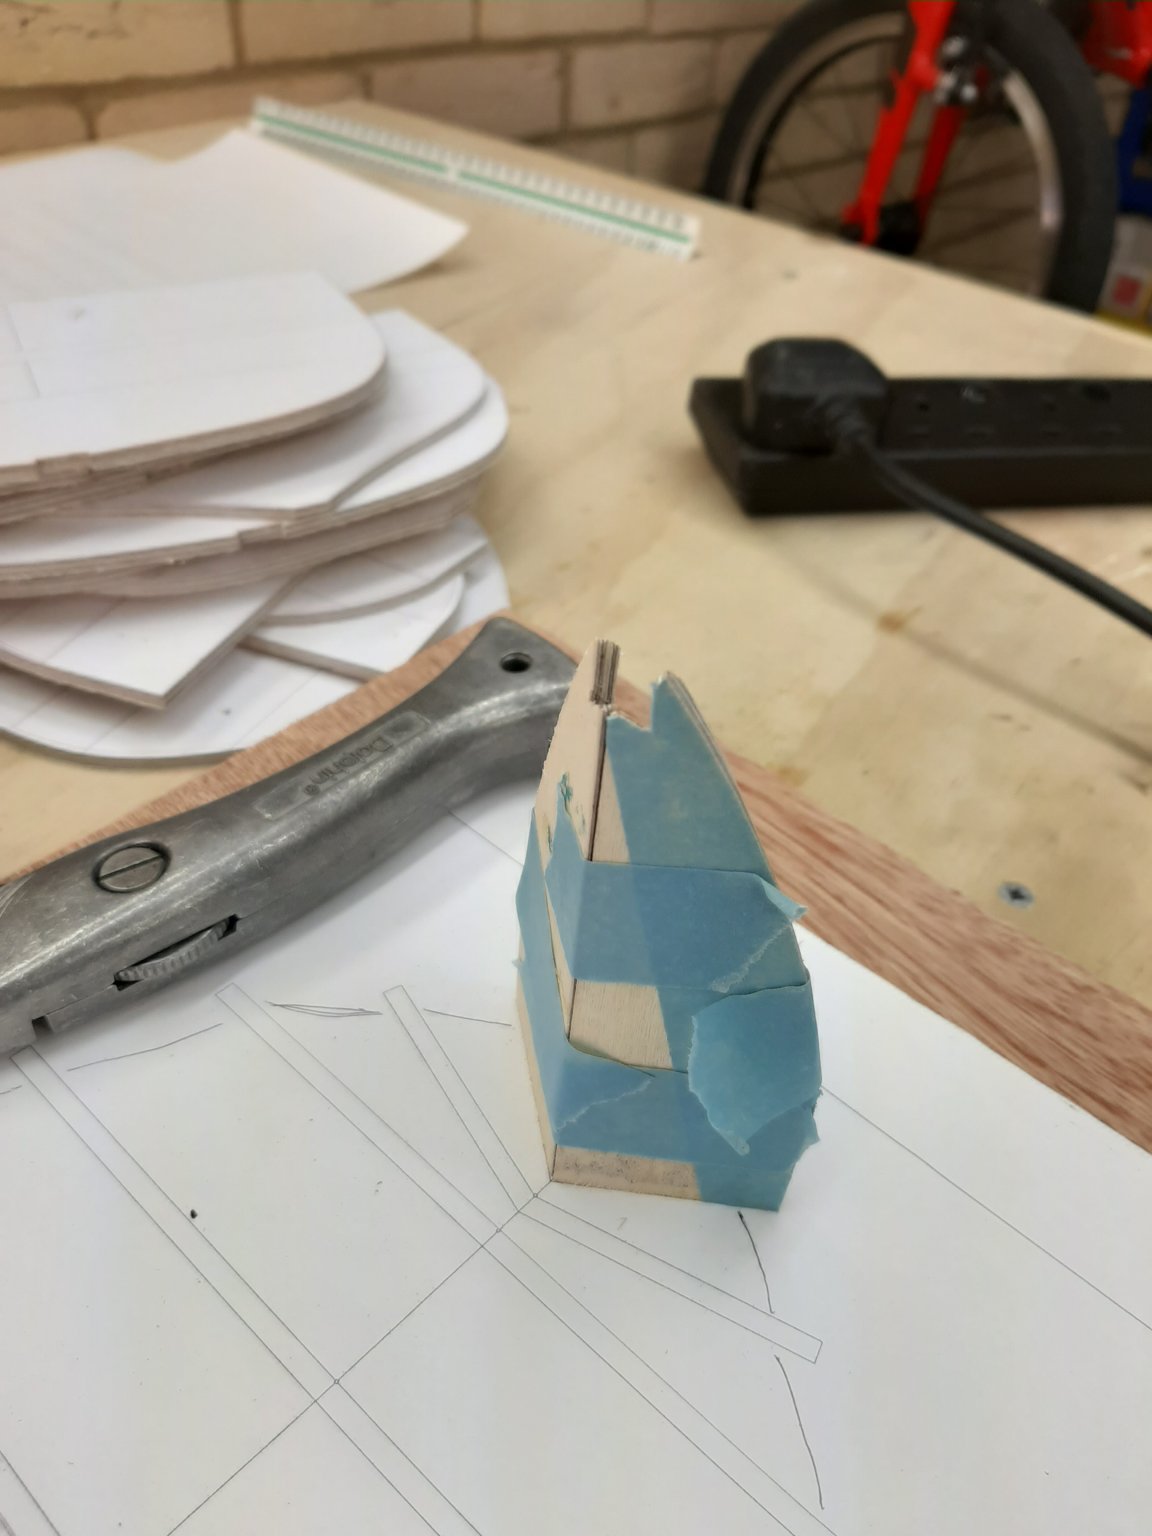
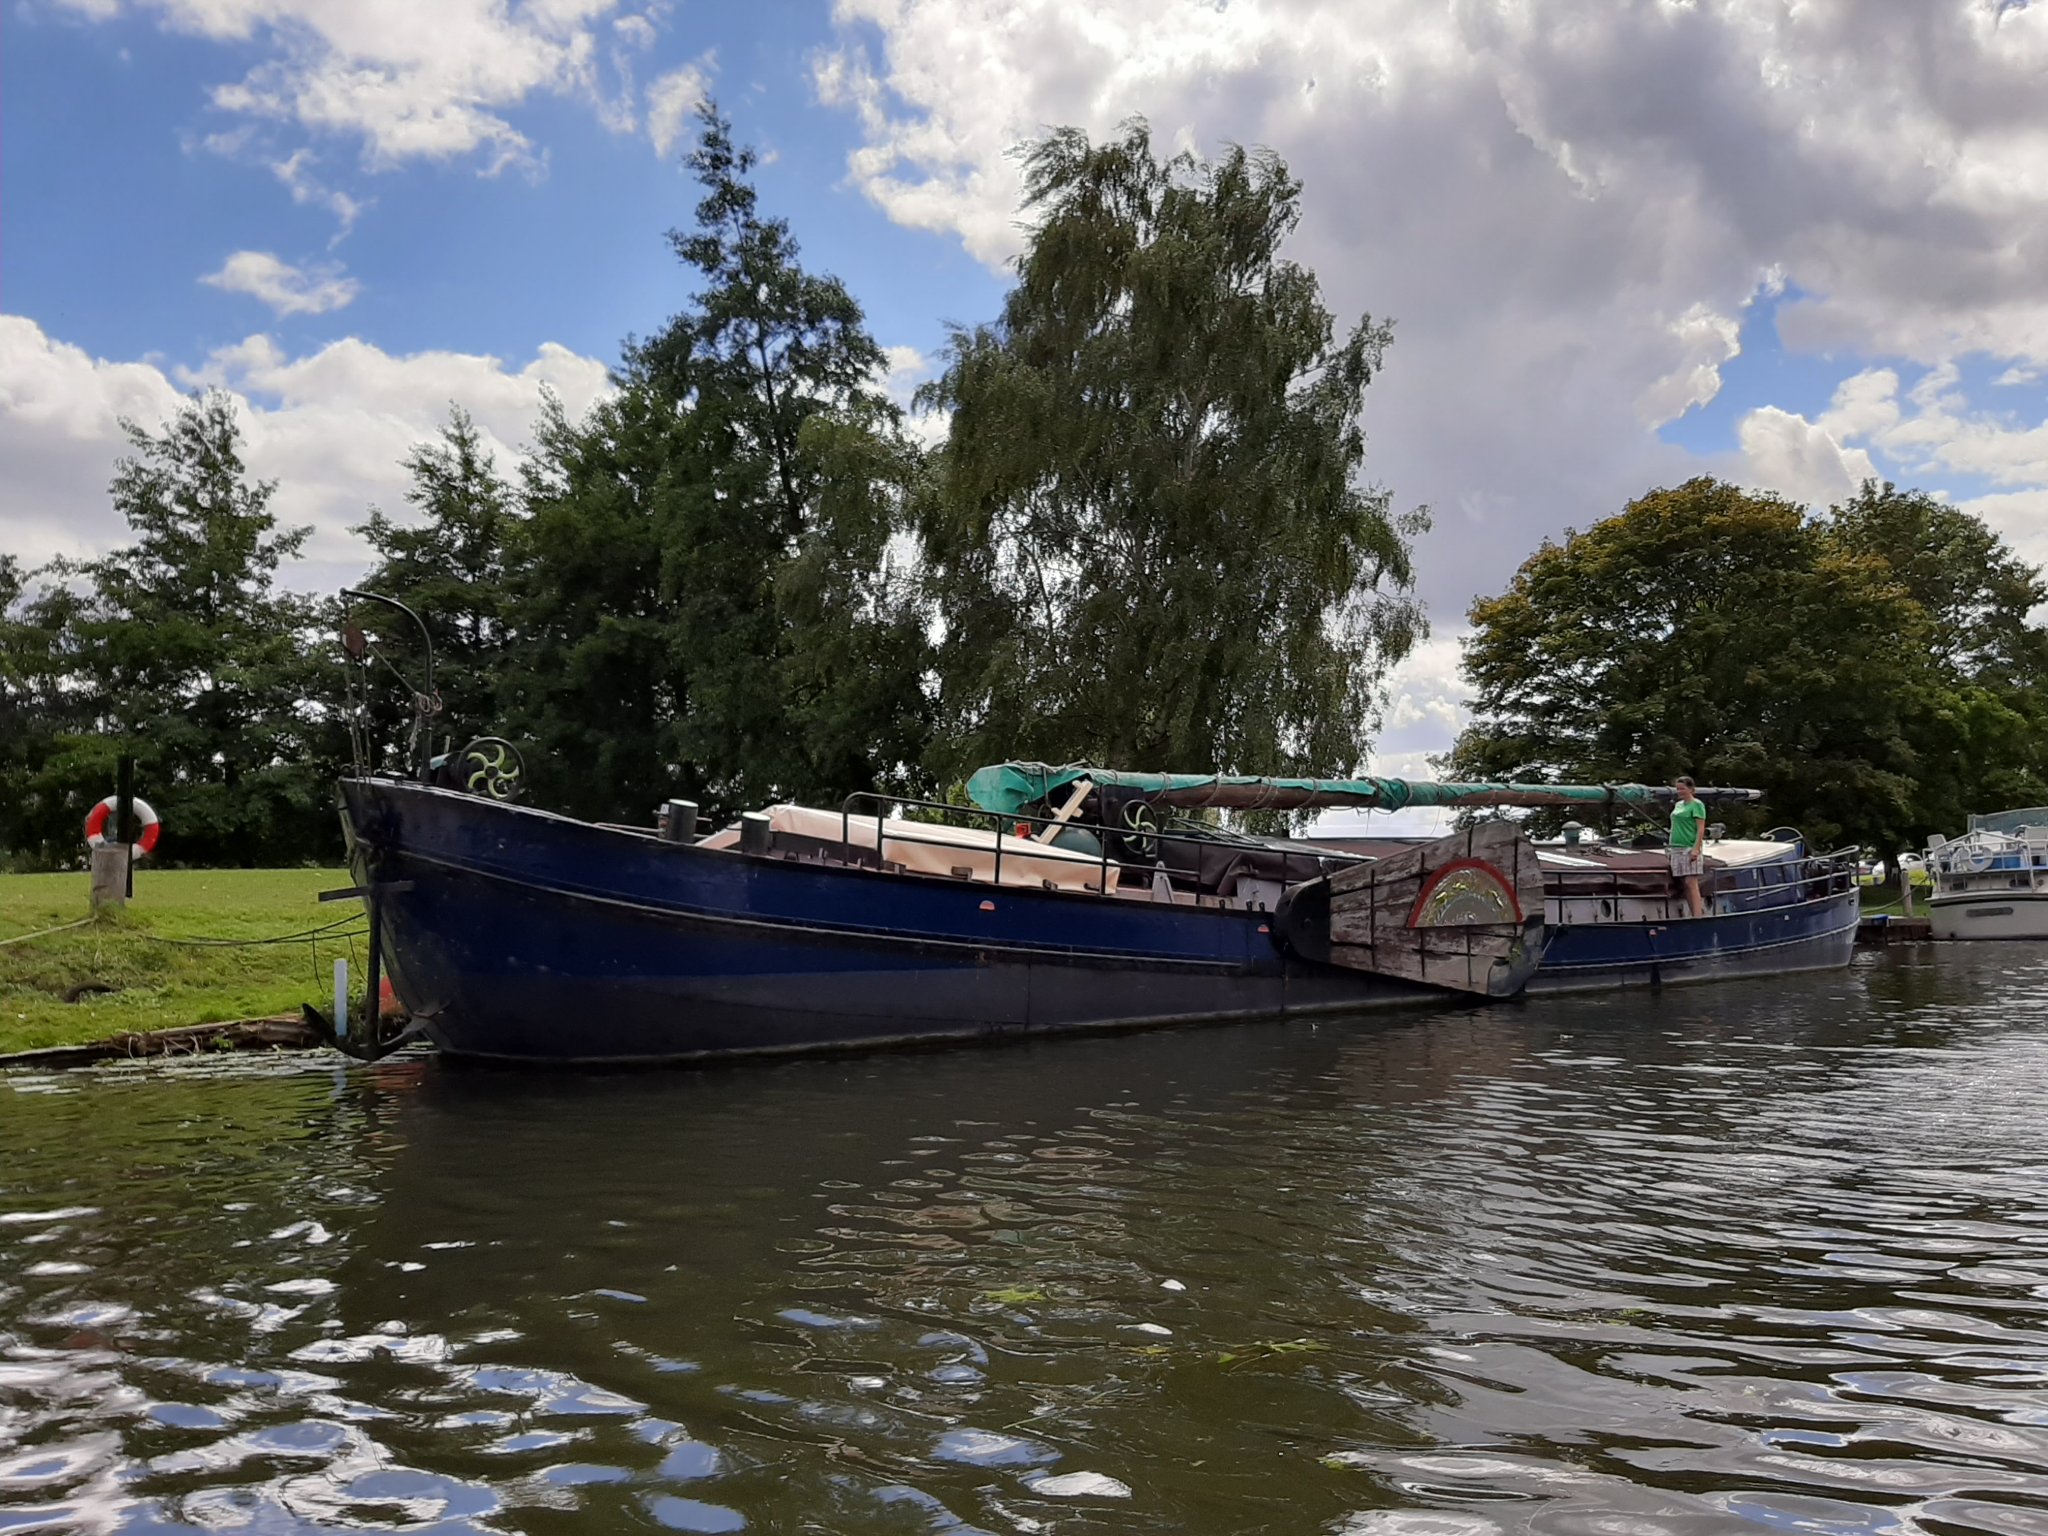
The build continues at the same pace, on step forward and two backwards, as if to prove that indeed CAD accuracy is not really important or needed, considering the abysmal tolerances of creating the pieces by hand. I made the keel once using PVA, stacking the strips one on top of the other. The keel came out straight but the strips were not very well aligned sideways and a lot of sanding would be needed to make the sides smooth. Also, the keel is quite flexible despite being 8 x 11 mm and laminated from 6 strips. I then made another one, this time with the strips stacked sideways and compressed along both height and width. I had to remake the jig as every time it gets sacrificed. Clamping was very complex. The keel came out bend and also not flat.💥☠️! I could attempt to use the first keel but I thought I would try epoxy. It is very messy but has lots of open time and should produce a very rigid keel. So I made the jig for the third time, laminated the keel but this time clamped it in a different way. I left everything clamped but tried to clear as much epoxy as I could from the wood before it hardens. No idea how it will come out but I have a suspicion it will probably be S shaped. We ll know tomorrow morning. In the mean time, we visited Ely with the family and went on a short river cruise. The boat in the photo bellow is the most interesting boat I ve seen in British rivers. It has a long mast on a tabernacle (the chain plates are visible), external boards and a proper sea anchor but I doubt it would be very sea worthy, probably is very heavy as well. No idea what purpose it serves.


-
Thanks G.L.! So far more frustration than excitement but we ll get there! This looks like a nice book Allan, there was a copy on ebay for sale for £20 which seemed a good price-so I bought it. Regarding the era of the boat, the MNM dates it "end of 18th century". Indeed, these boats were swapping between carvel and clinker but I will build it clinker, simply because I want to make a proper lapstrake and mess about with plank shapes etc. Regarding the davit, there are two problems with your very nice drawing. First, the plans (in the first post of this log) show two lateral support poles which I am not certain where they should attach. The second is that I did not really intended this boat to have a keelson, just steam bend ribs (more likely they would be used instead of solid frames) and the floor supported by floor boards. As I said previously, I still have not found a source with info how these boats were actually built. Certainly though, some strong support would be needed for the pivot rod.
-
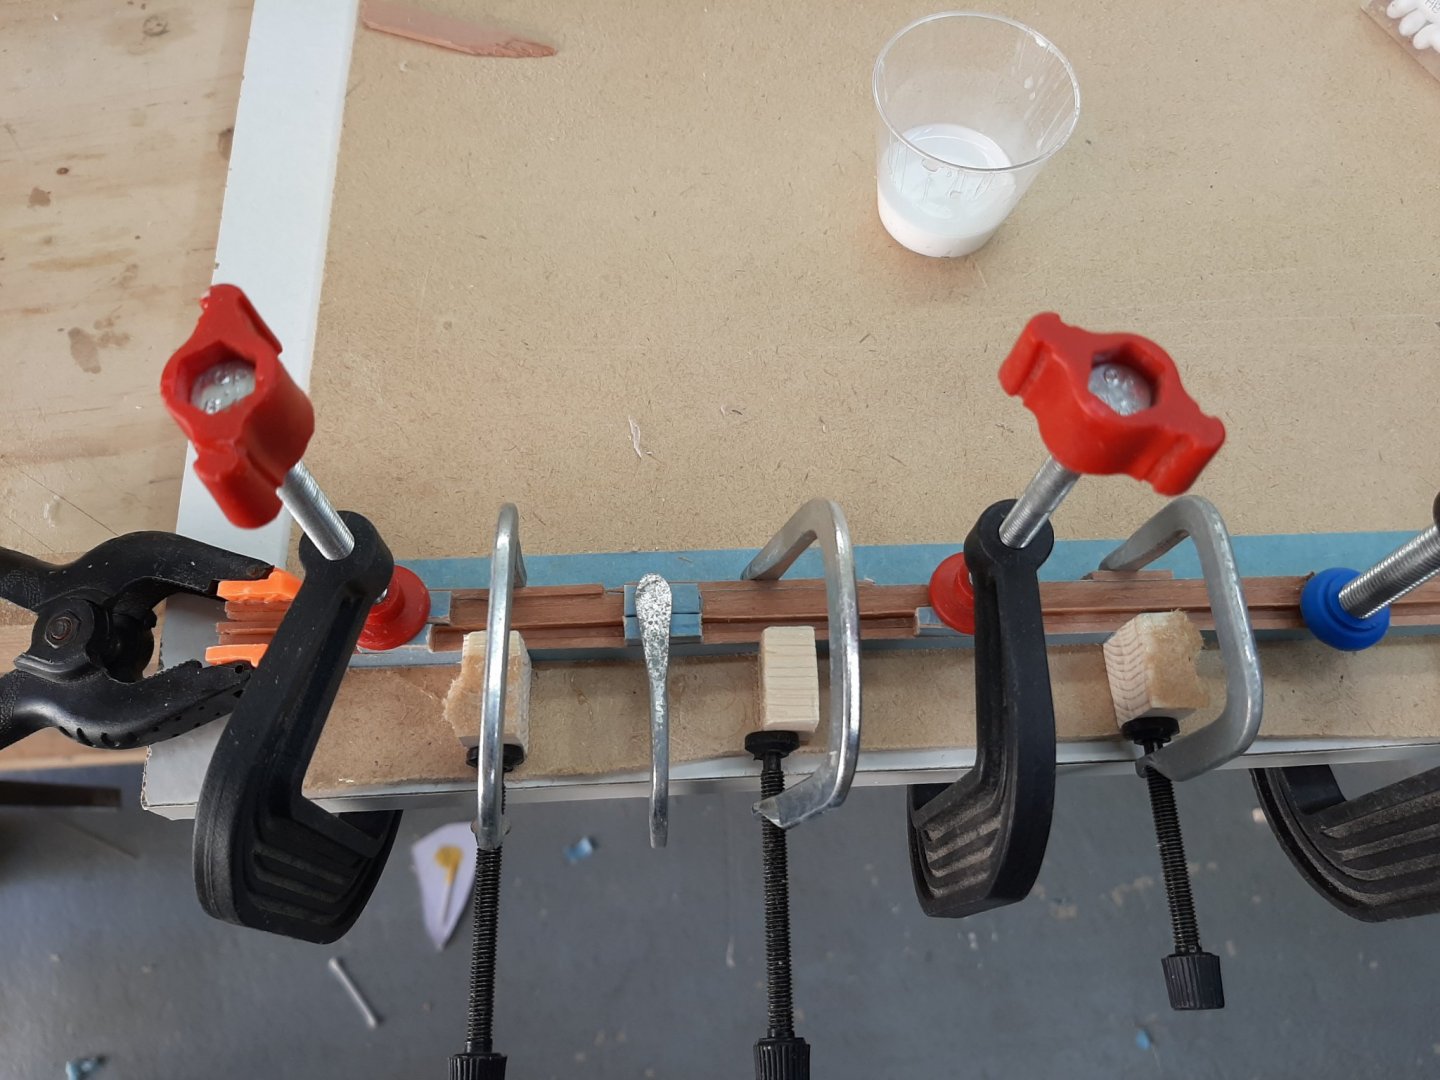
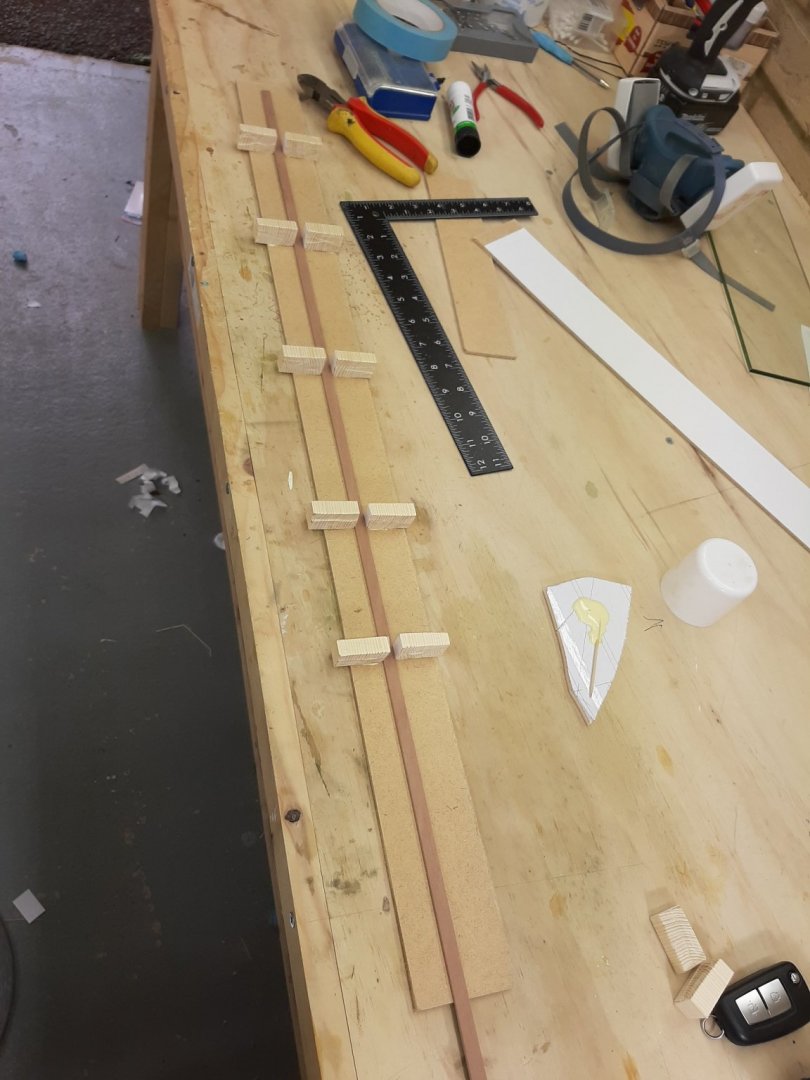
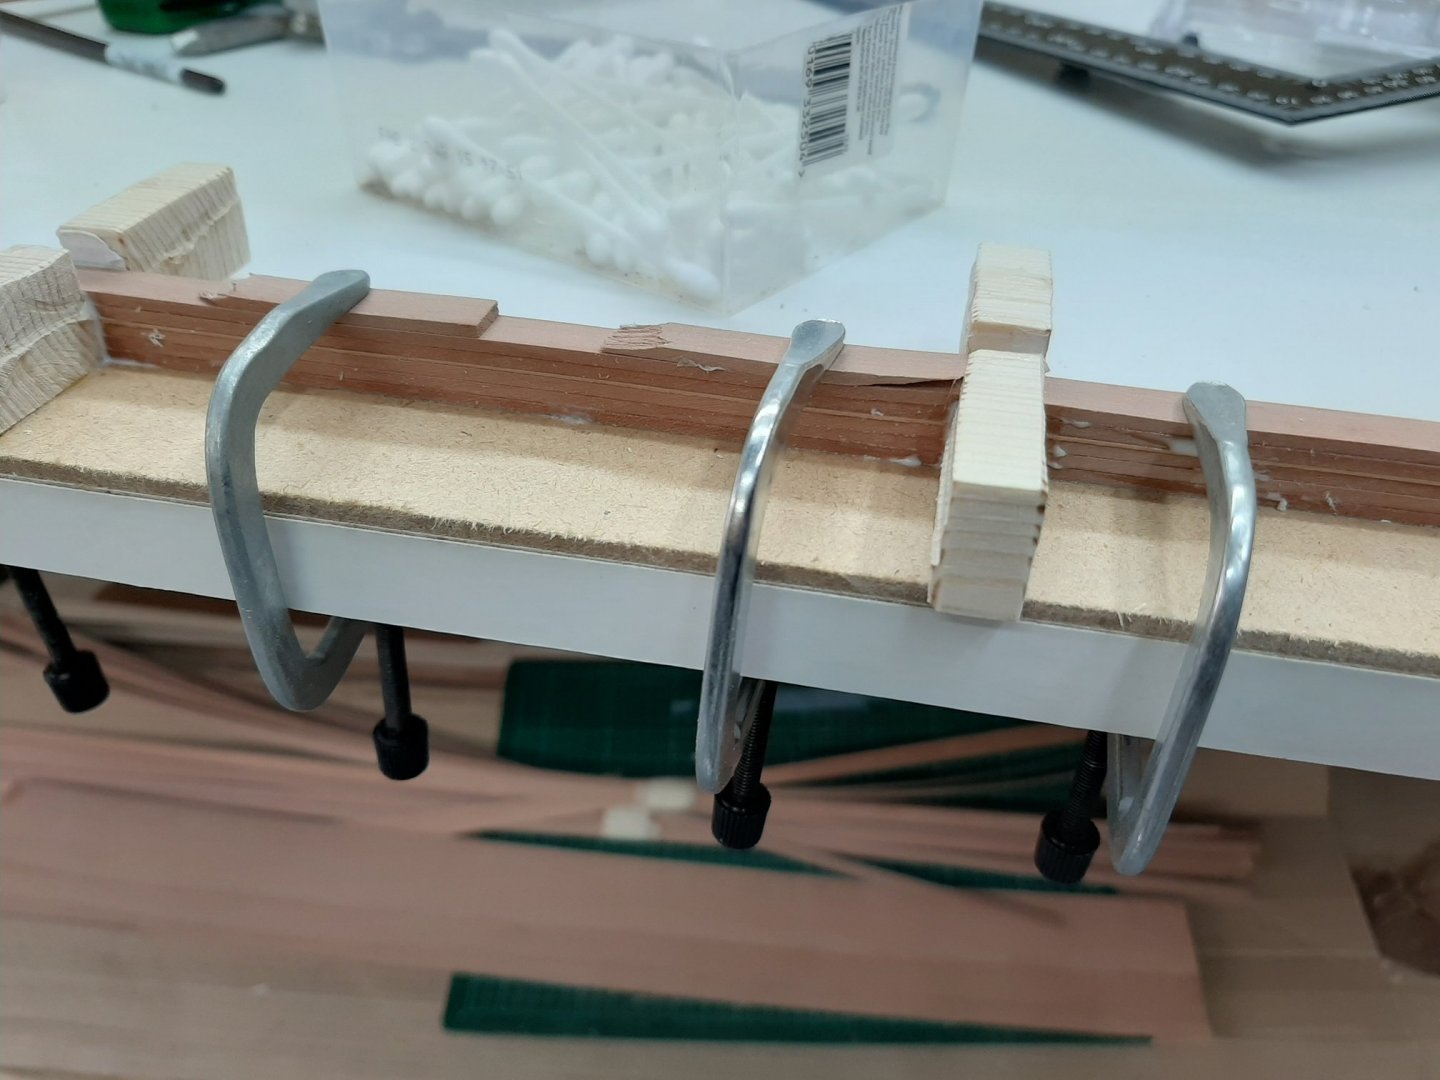
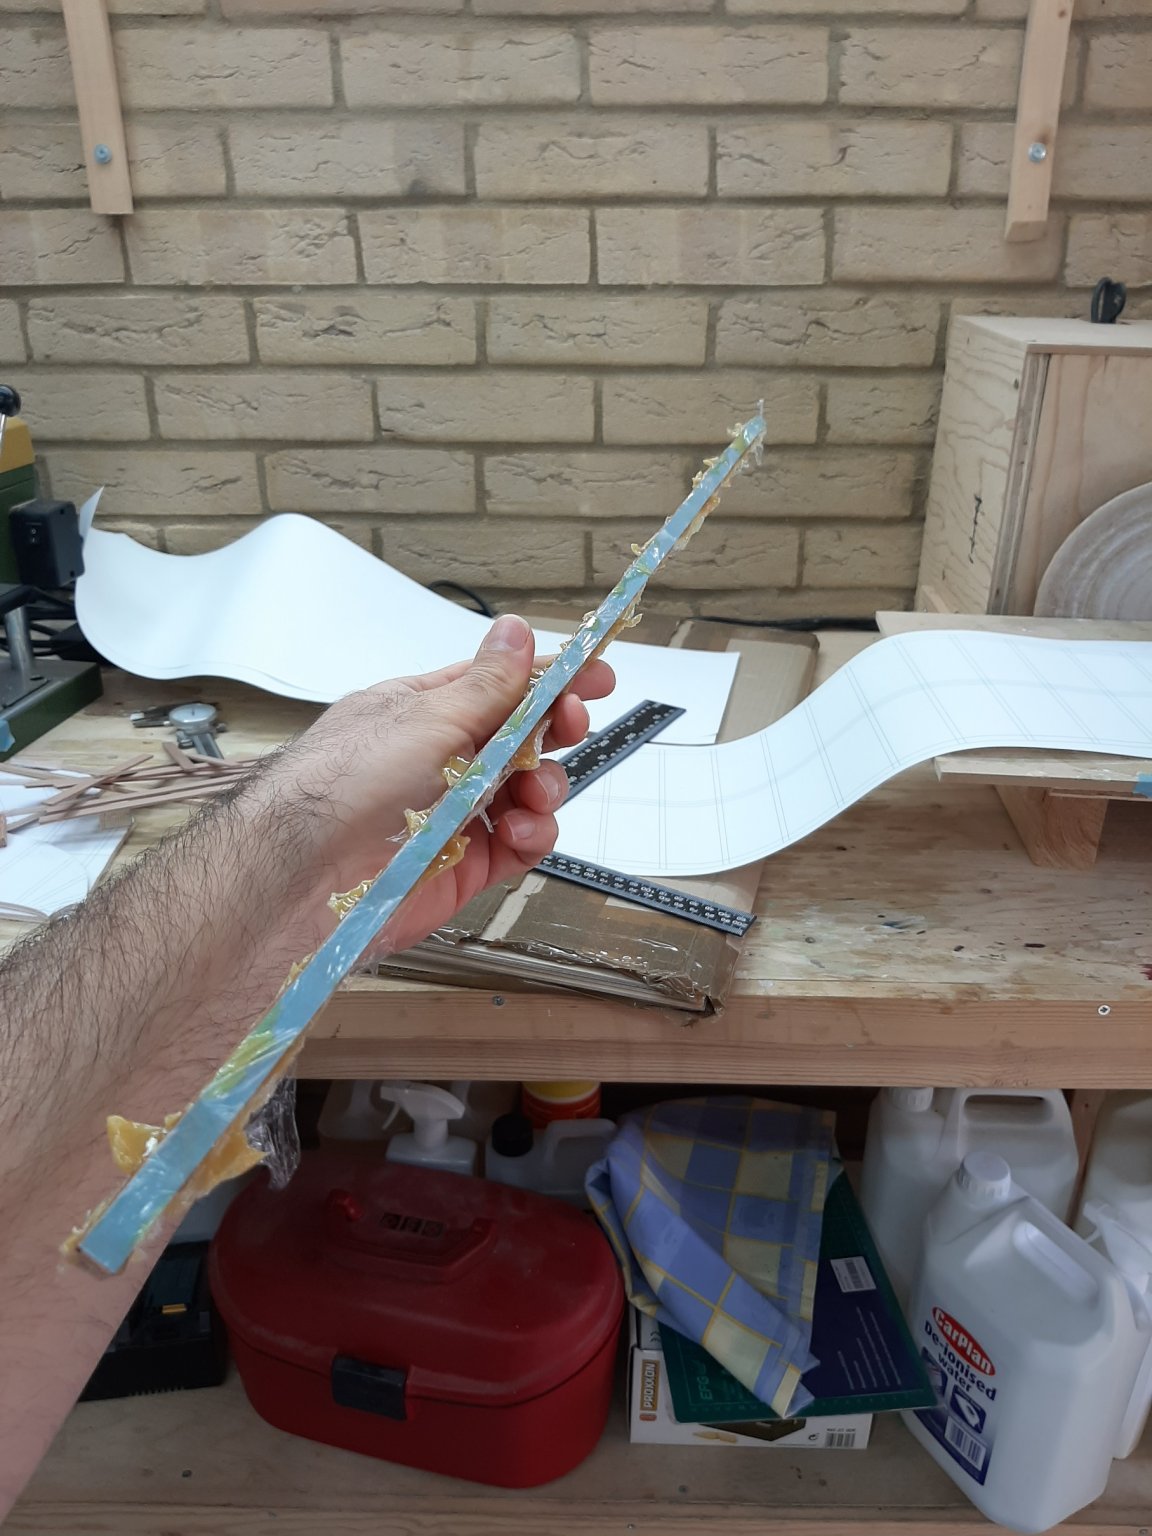
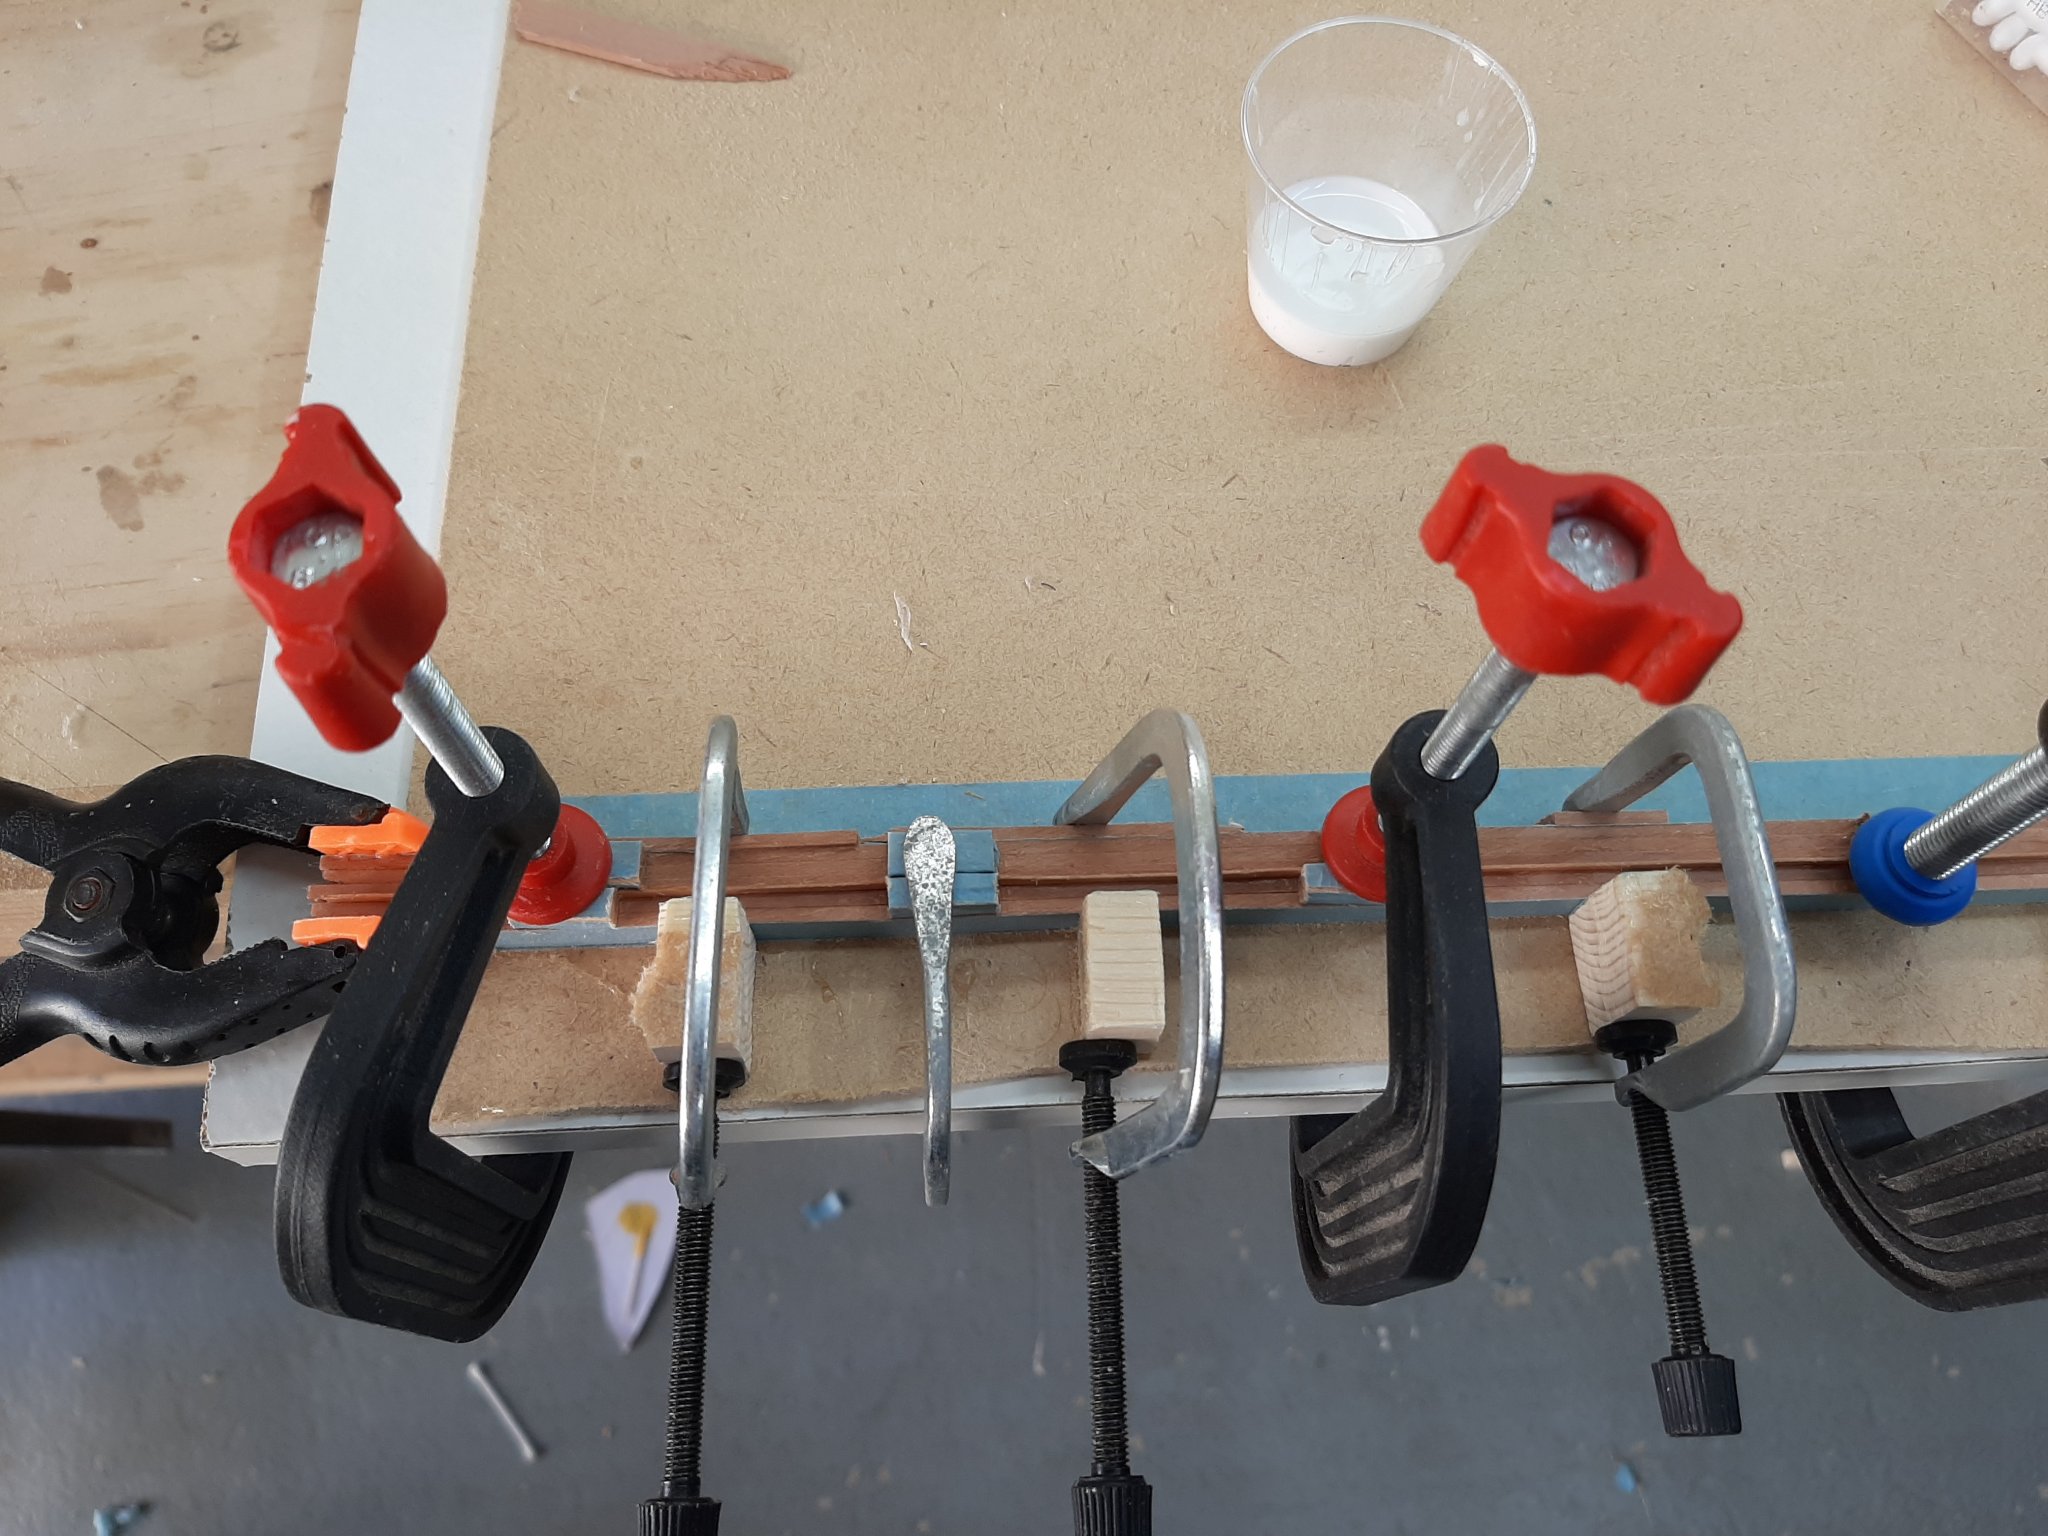
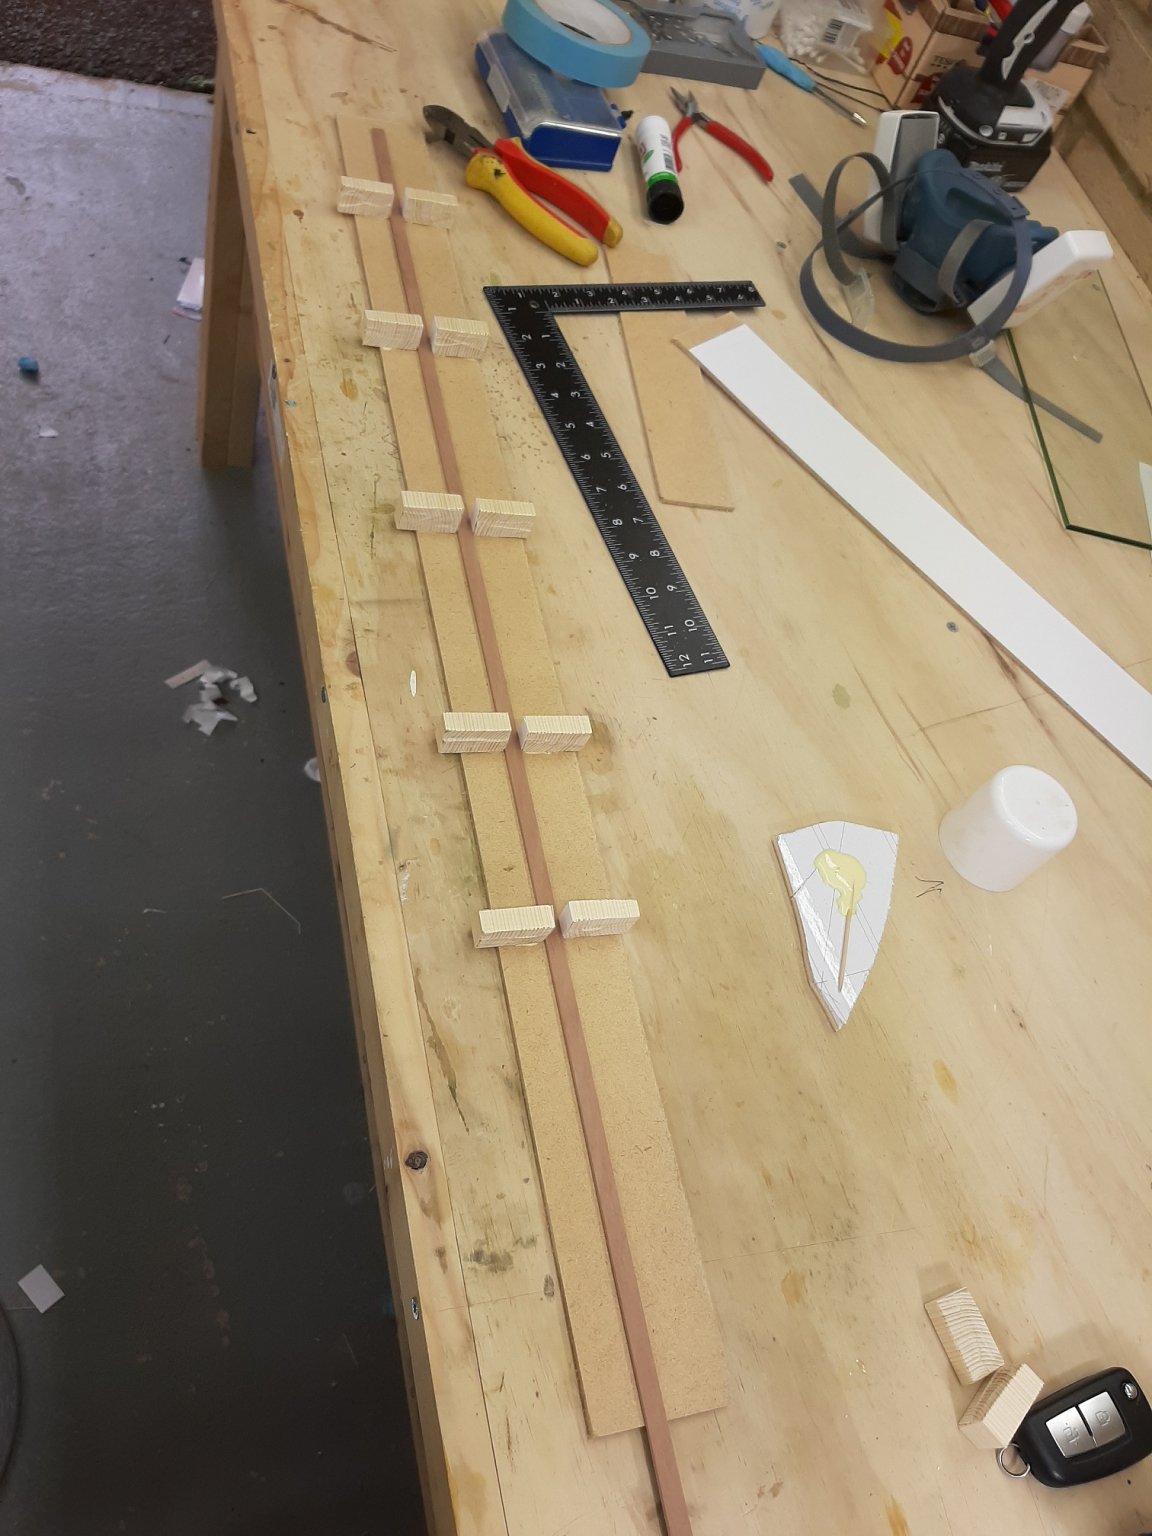
So, it has been one step forward, two backwards so far. My printer problems continue. Looking at my print outs, even just eyeballing the lines did not look straight. I checked and indeed, they were curved like a bow. That means that the jig I cut three days ago was wrong. A few hours worth of work gone in the scrap pile. After a lot of try and error I managed to a get a straight print out so I need to redo the jig However, I then decided to tackle the keel. The keel should be 8 mm wide, 11 mm in height and close to 60 cm in length. It has to be laminated from thinner strips, in this case 5 strips 2 mm thick and a strip 1 mm thick. I decided this time to use PVA instead of epoxy for three reasons, the mess the epoxy makes, the mixing and preparation needed and also because epoxy would increase the height of the keel quite a lot and would be visible-I intend to leave the boat unpainted. I used white PVA and not aliphatic, bevause it dries clear and not yellow and also for the slightly longer opening time. However the keel also needs to be dead straight. So I made a jig with pieces of timber perfectly aligned, 8 mm apart. Their face is covered with paper so that they wont stick to the laminated keel. The bottom strip has masking paper in the bottom surface for the exact same reason. It went well but not perfectly. I want the sides of the hull to be smooth and I am suspect they wont be. There should be some room for sanding, if however it does not come out right I ll need to redo it, this time with the keel laying on its side.


-
Indeed, somehow it feels nice knowing a boat is waiting patiently in my garage! Allan, I have the book and went through it. Somehow I did not register that the sailors were just hauling in the line just with bare hands. So this is sorted, no blocks or capstan. I still however have no source of info as to how the davit was attached and do not really know were else to look.
-
I saw that but it is not beefy enough and not attached in the right place to raise this massive panel. Also there are no air or oil lines going in, it looks more like a simple dumper. Maybe there is another mechanism hidden within the panel.
-
Very nice Keith! Isn't that a latch on that panel that drops to hide the staircase? Another thing, that panel seems very heavy, how is it supposed to be lifted up?
-
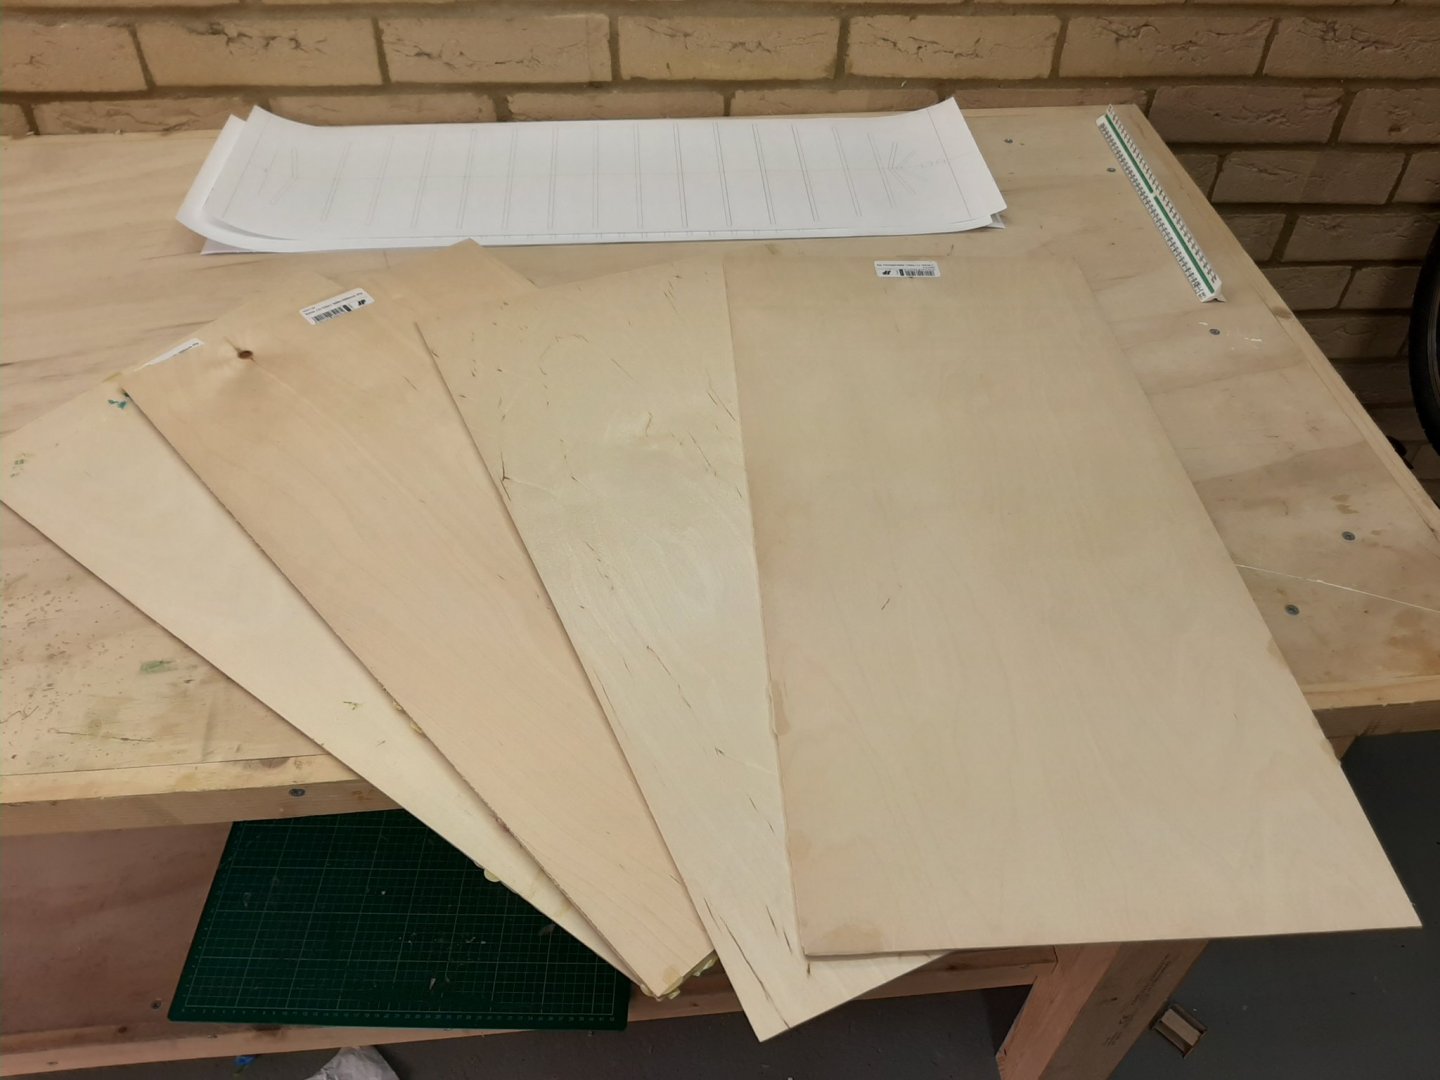
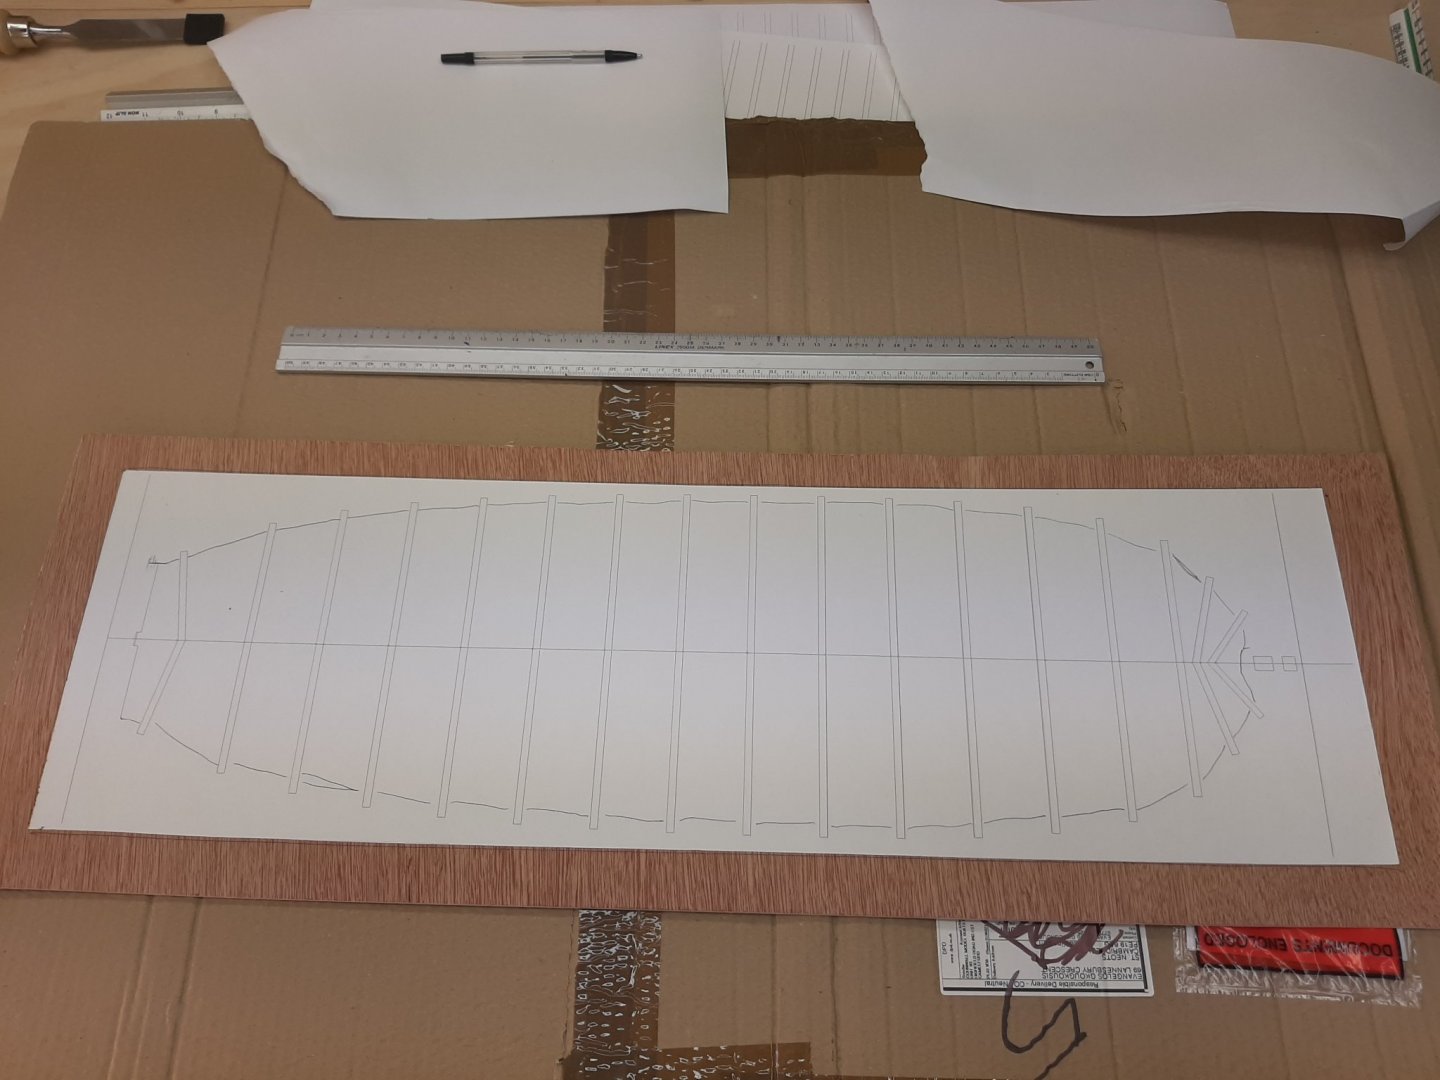
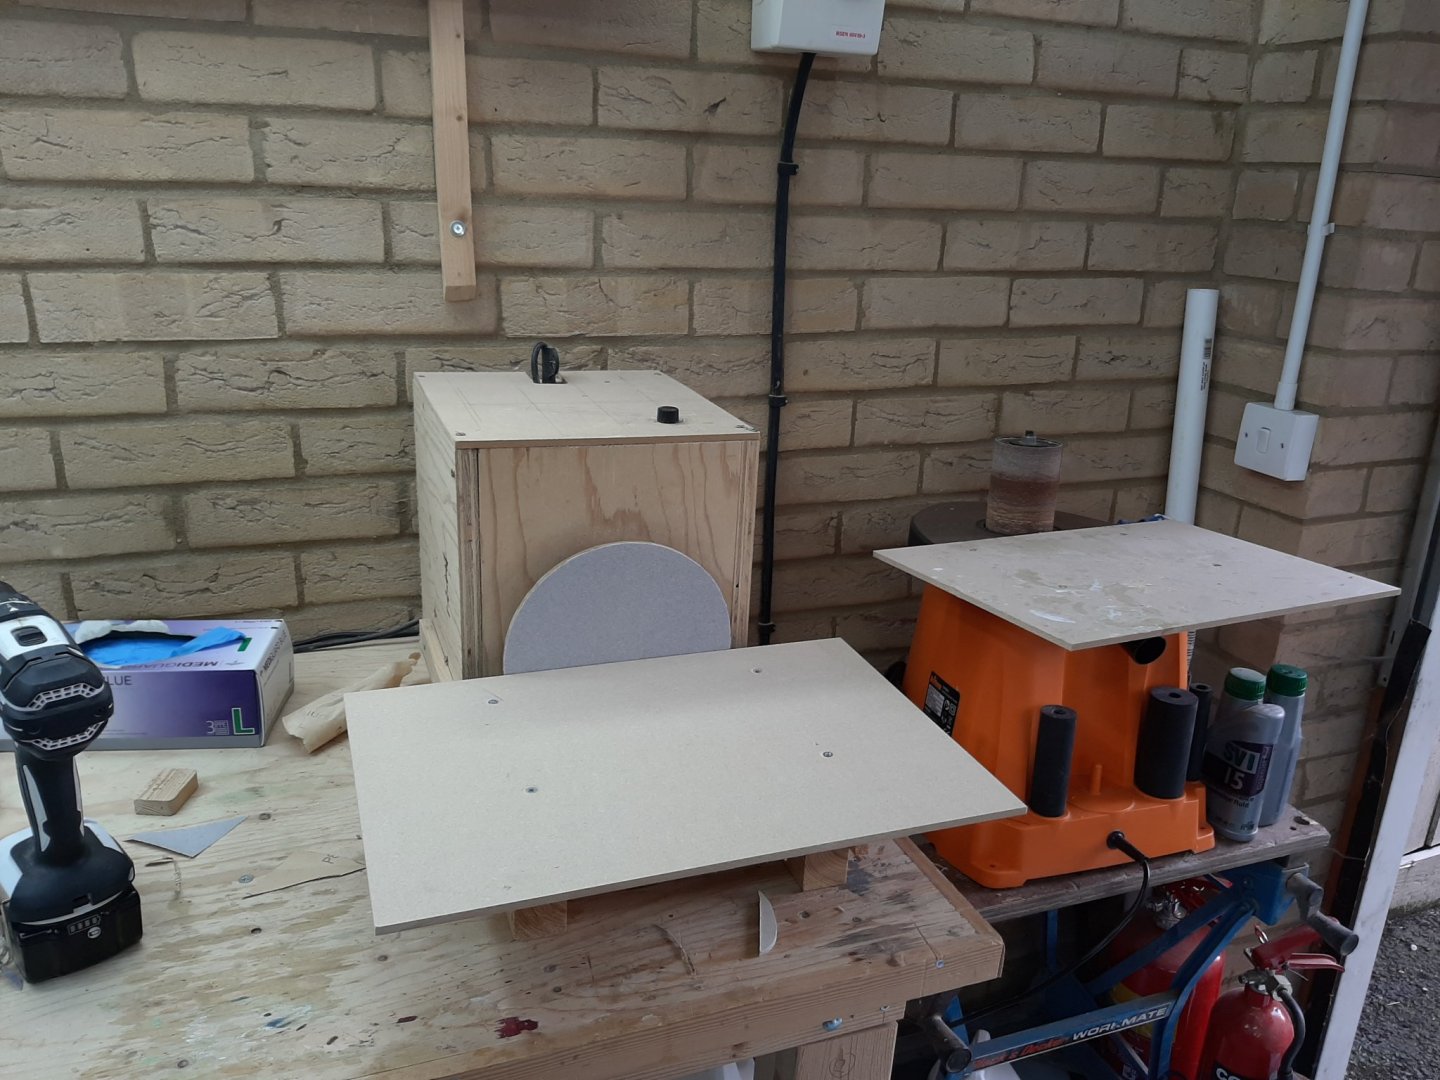
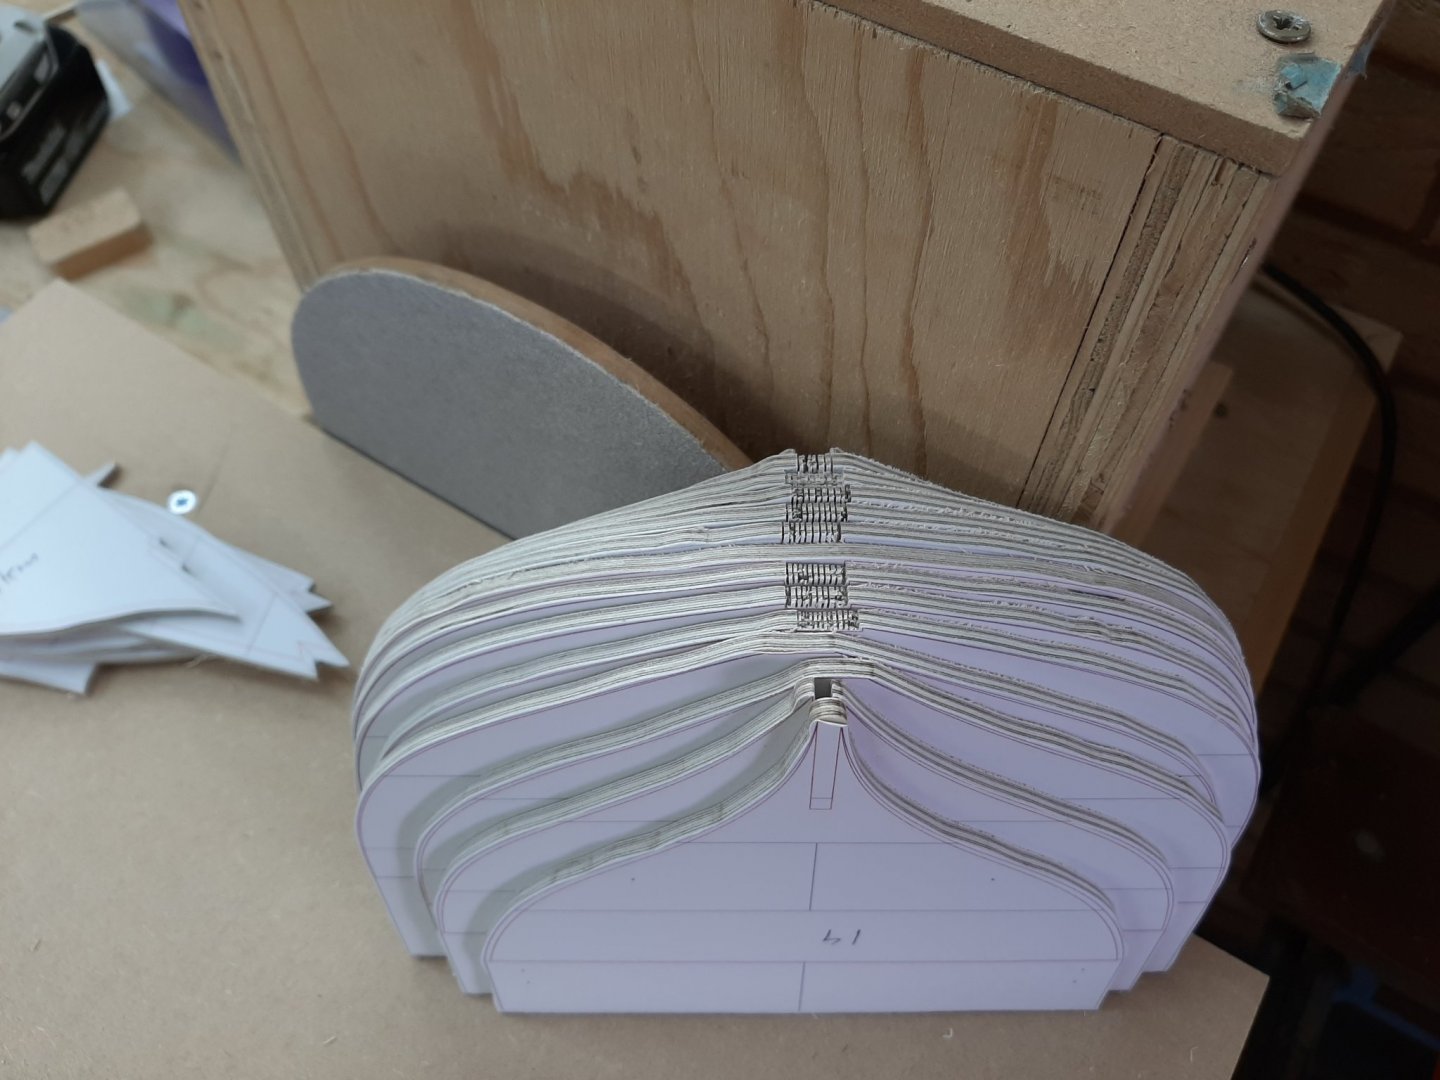
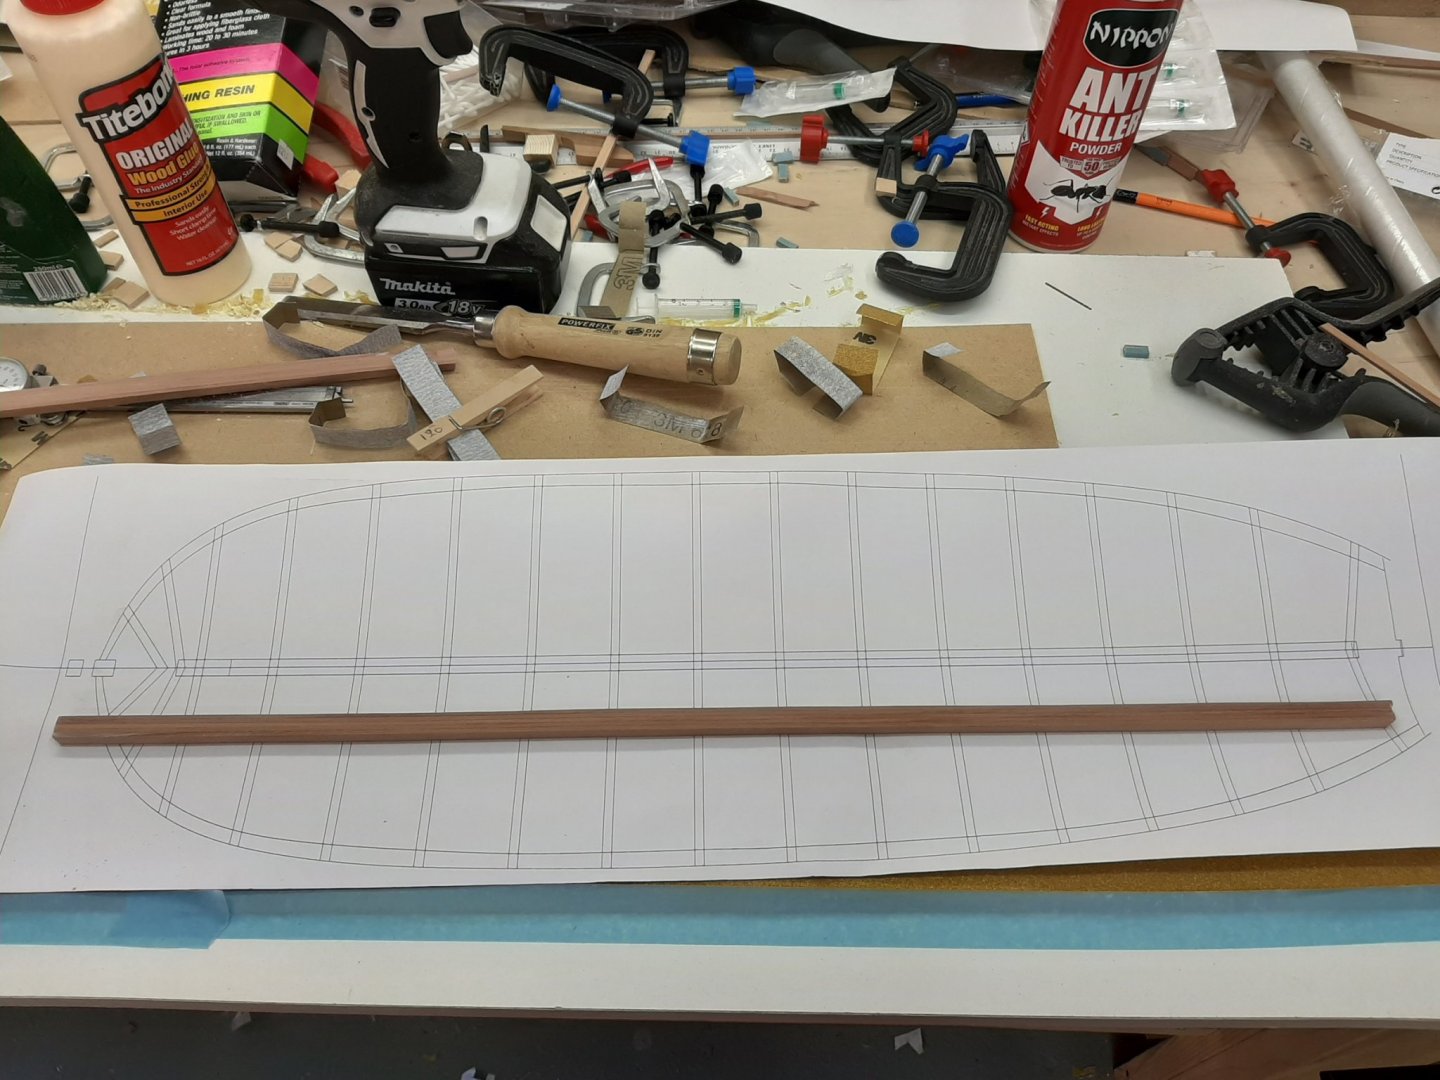
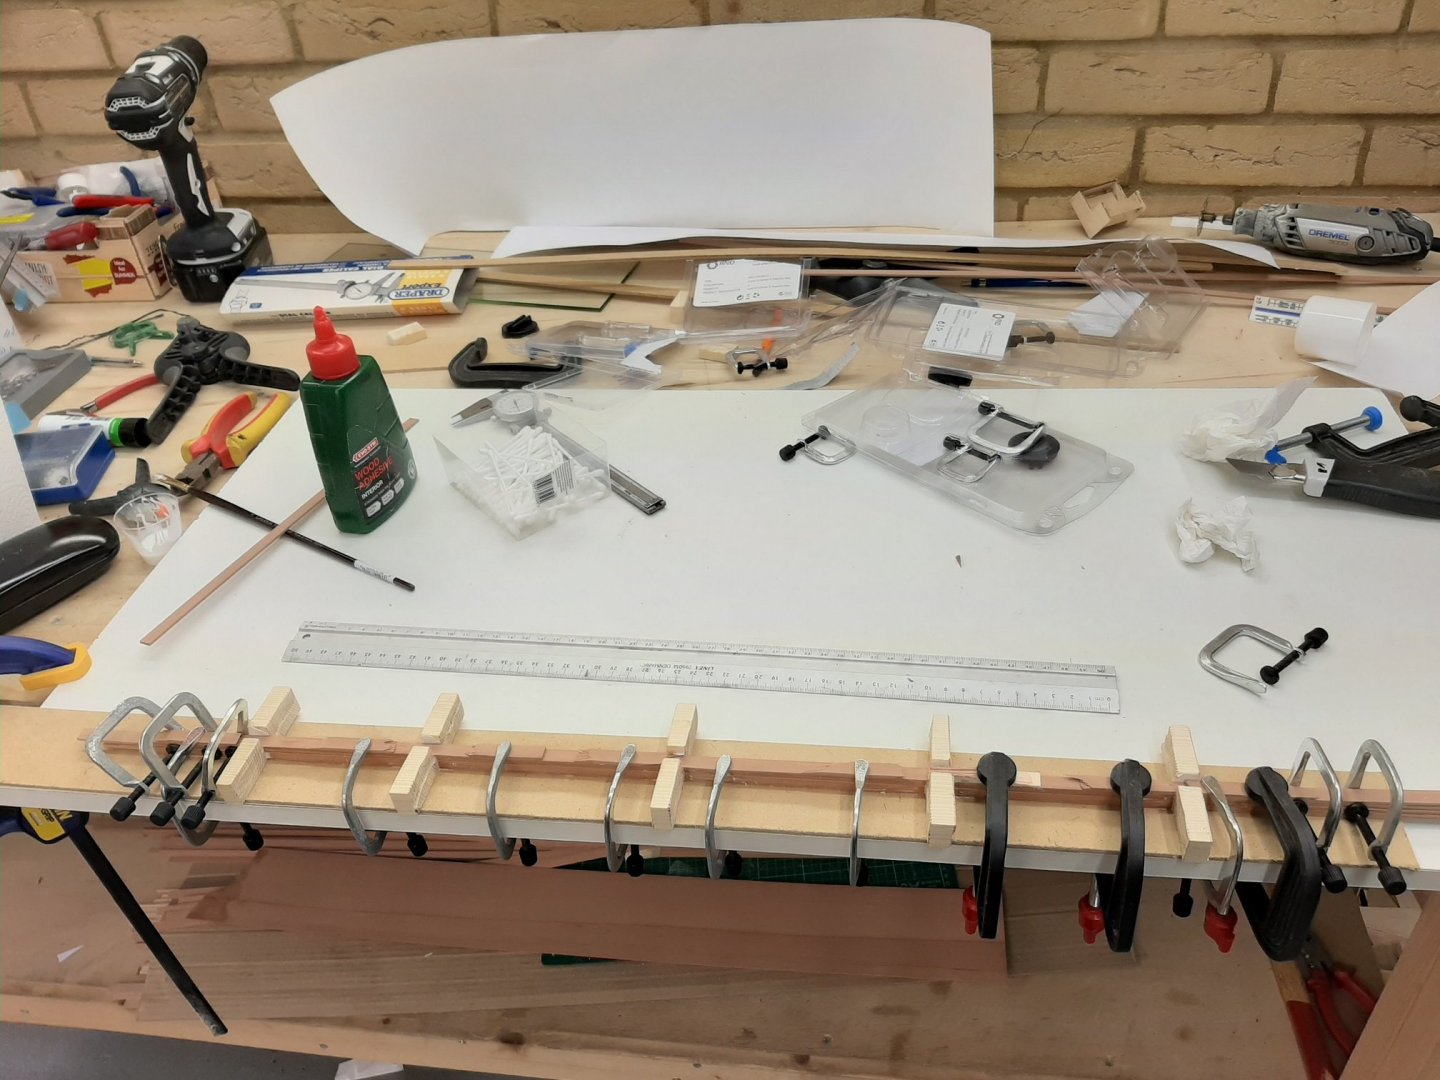
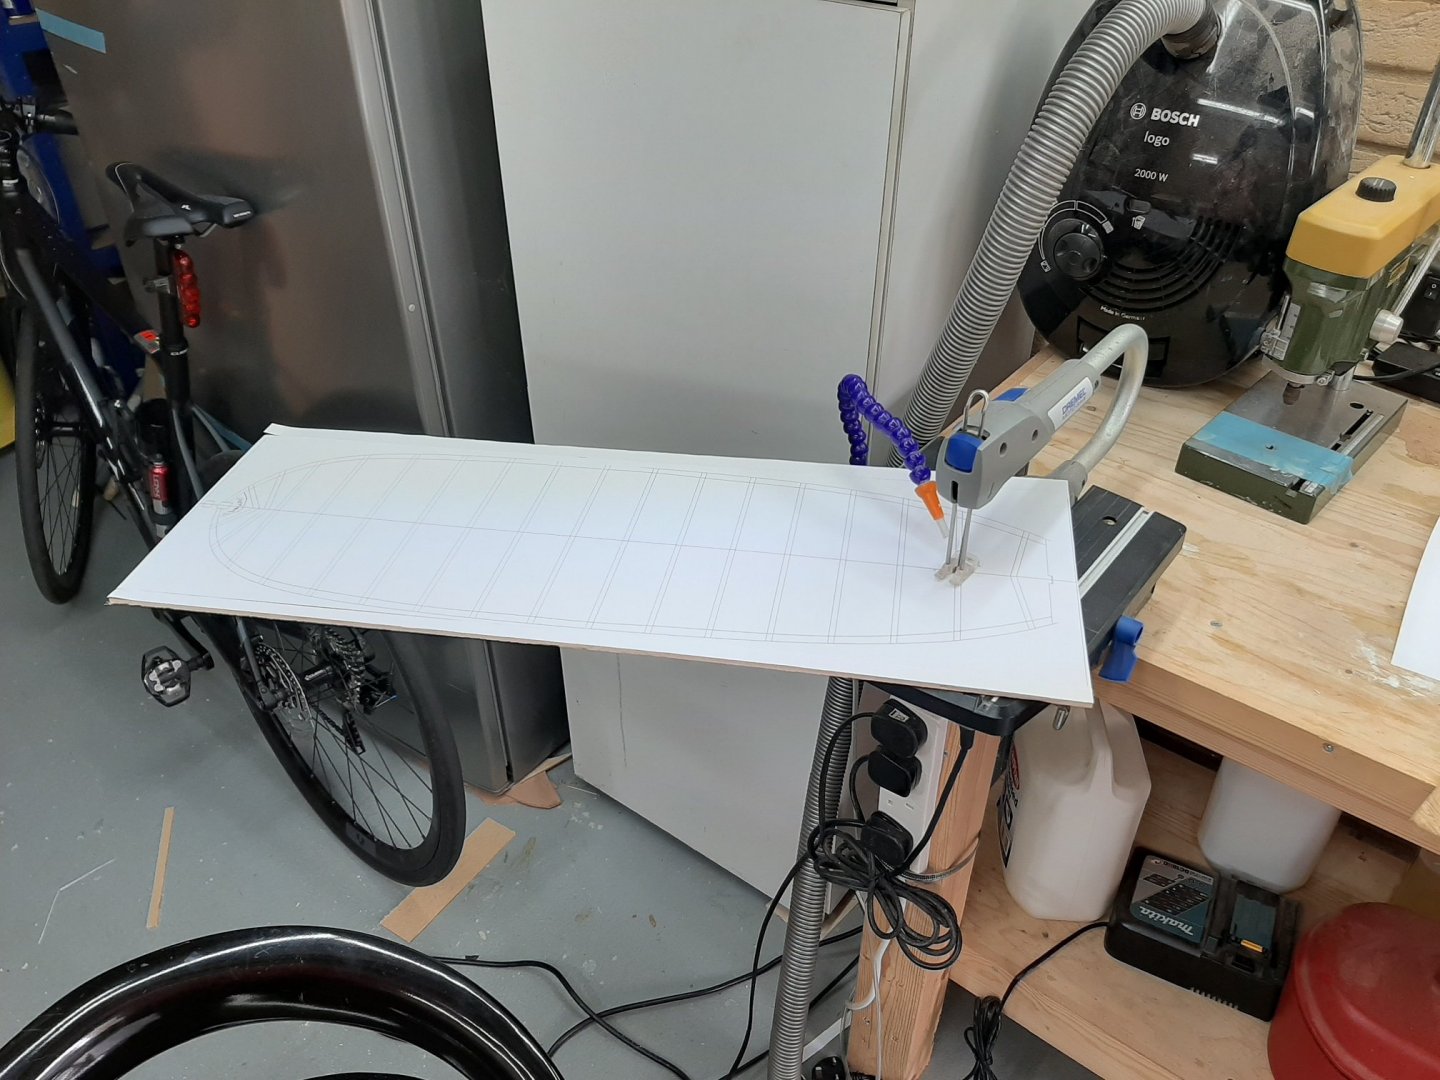
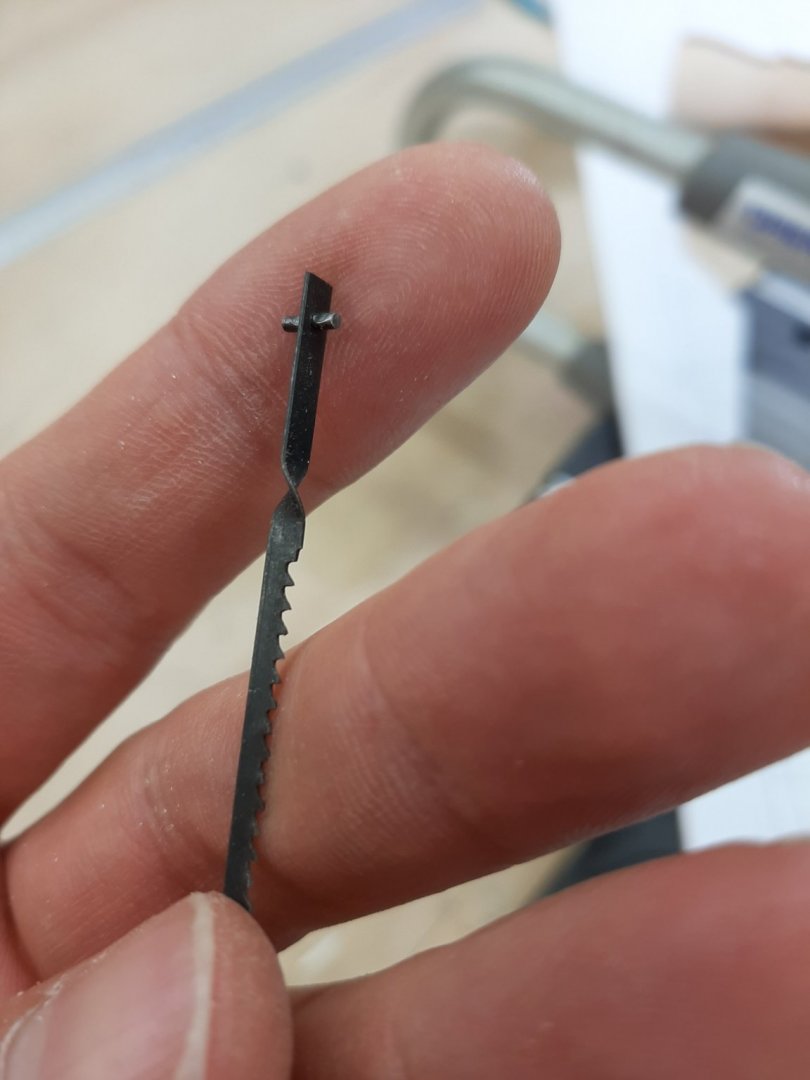
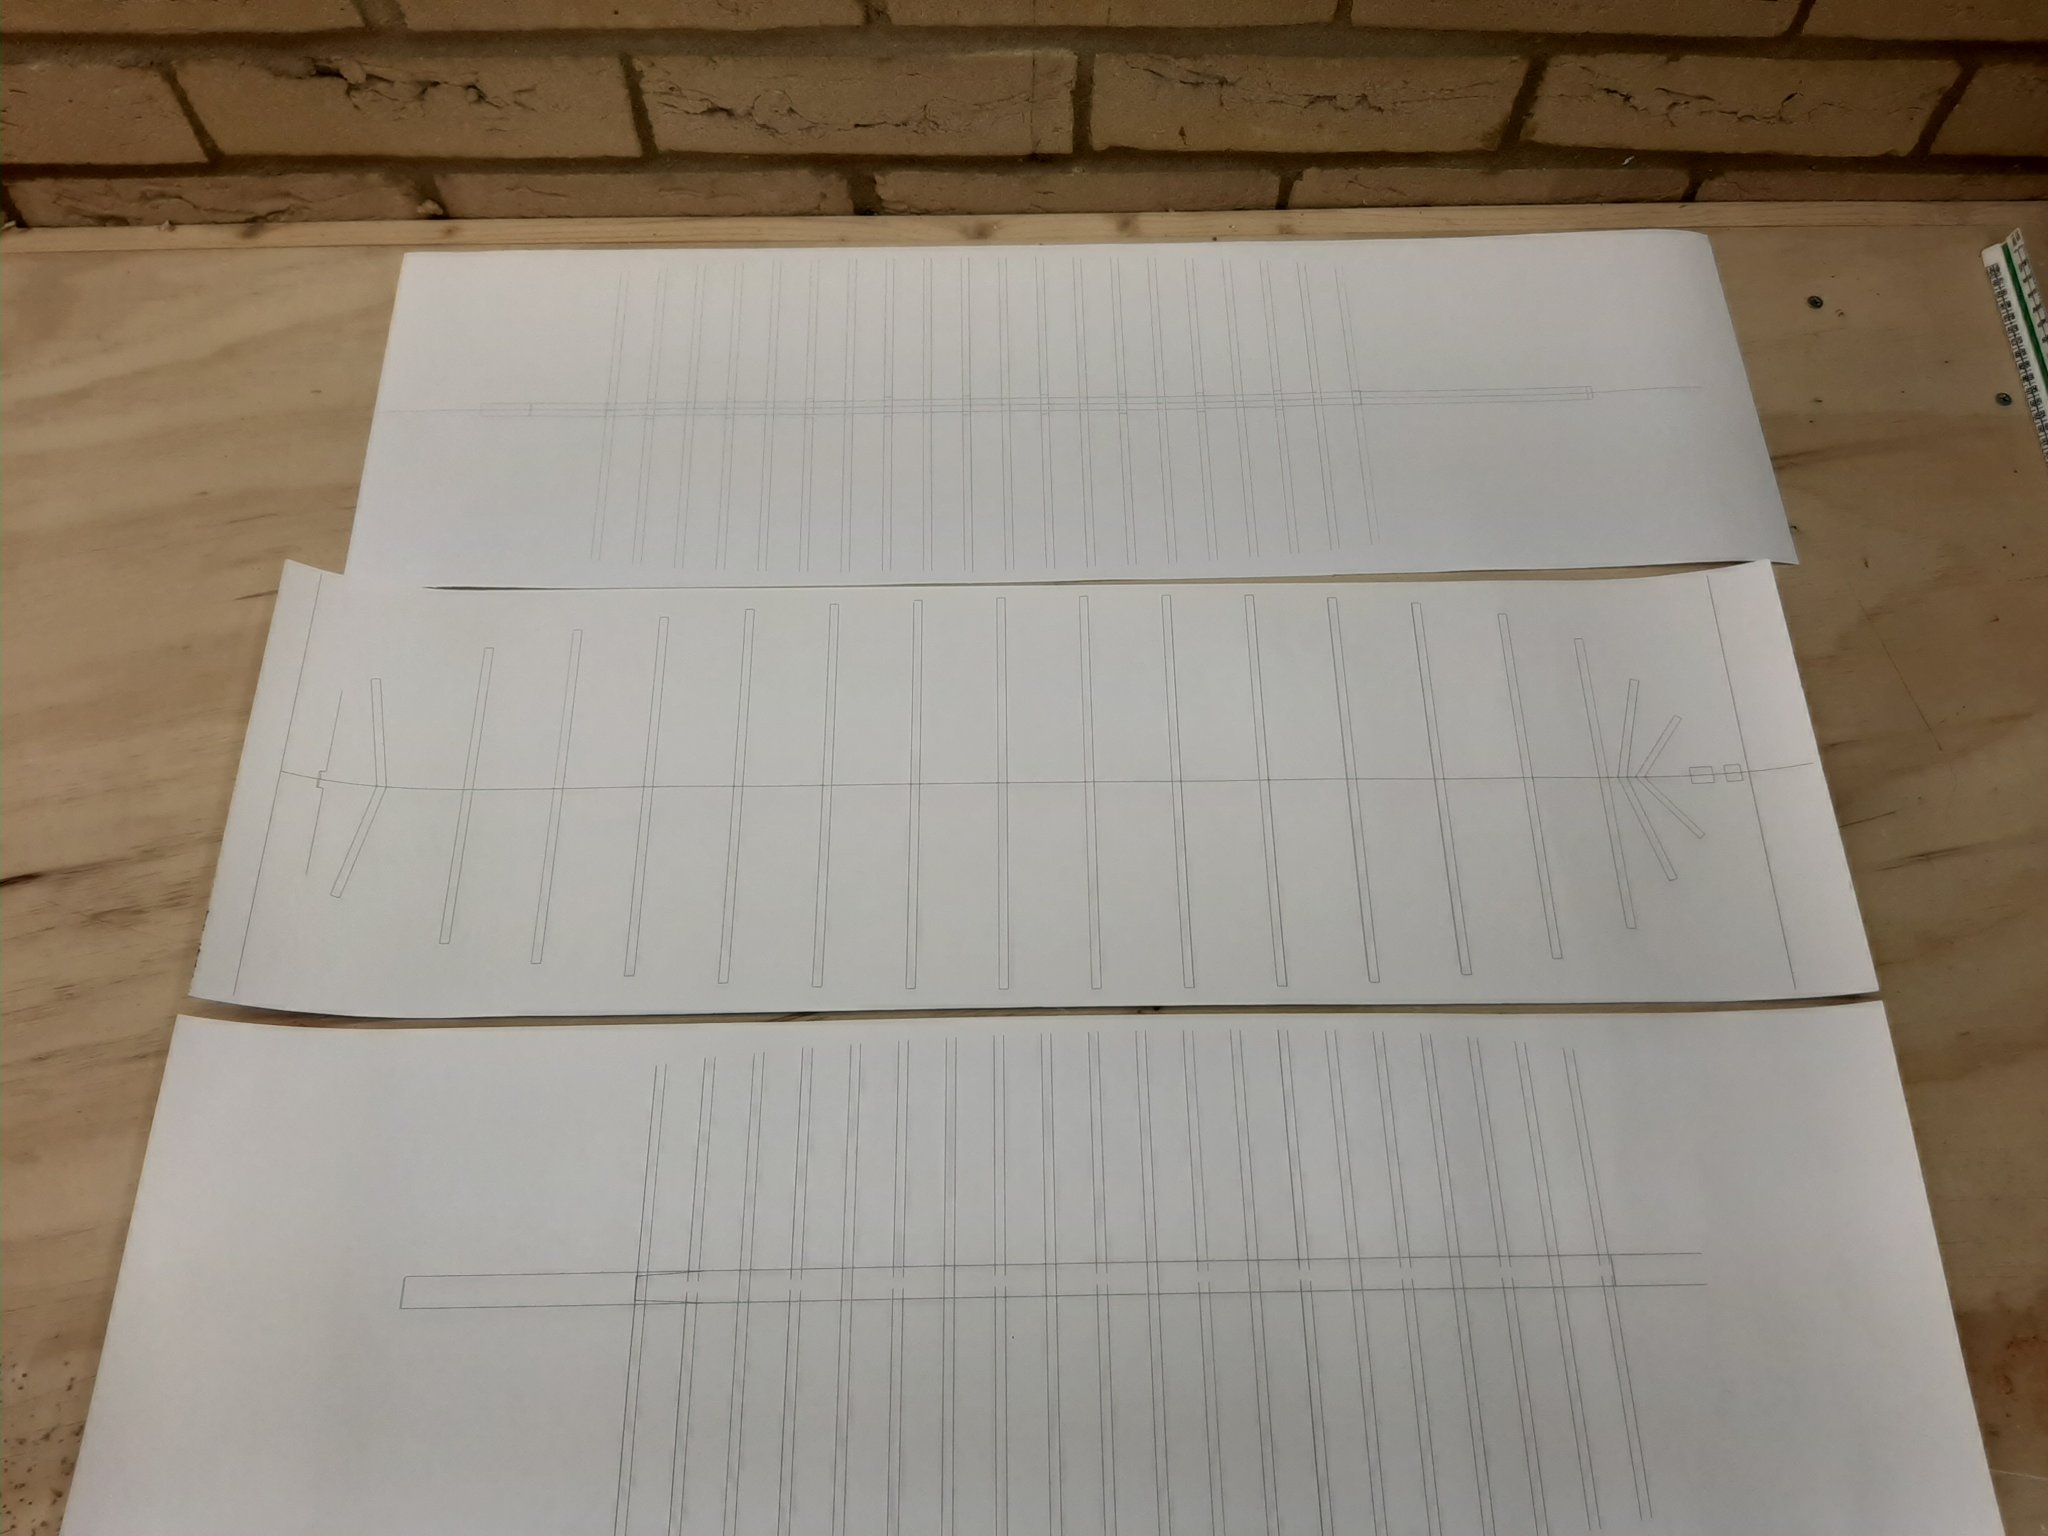
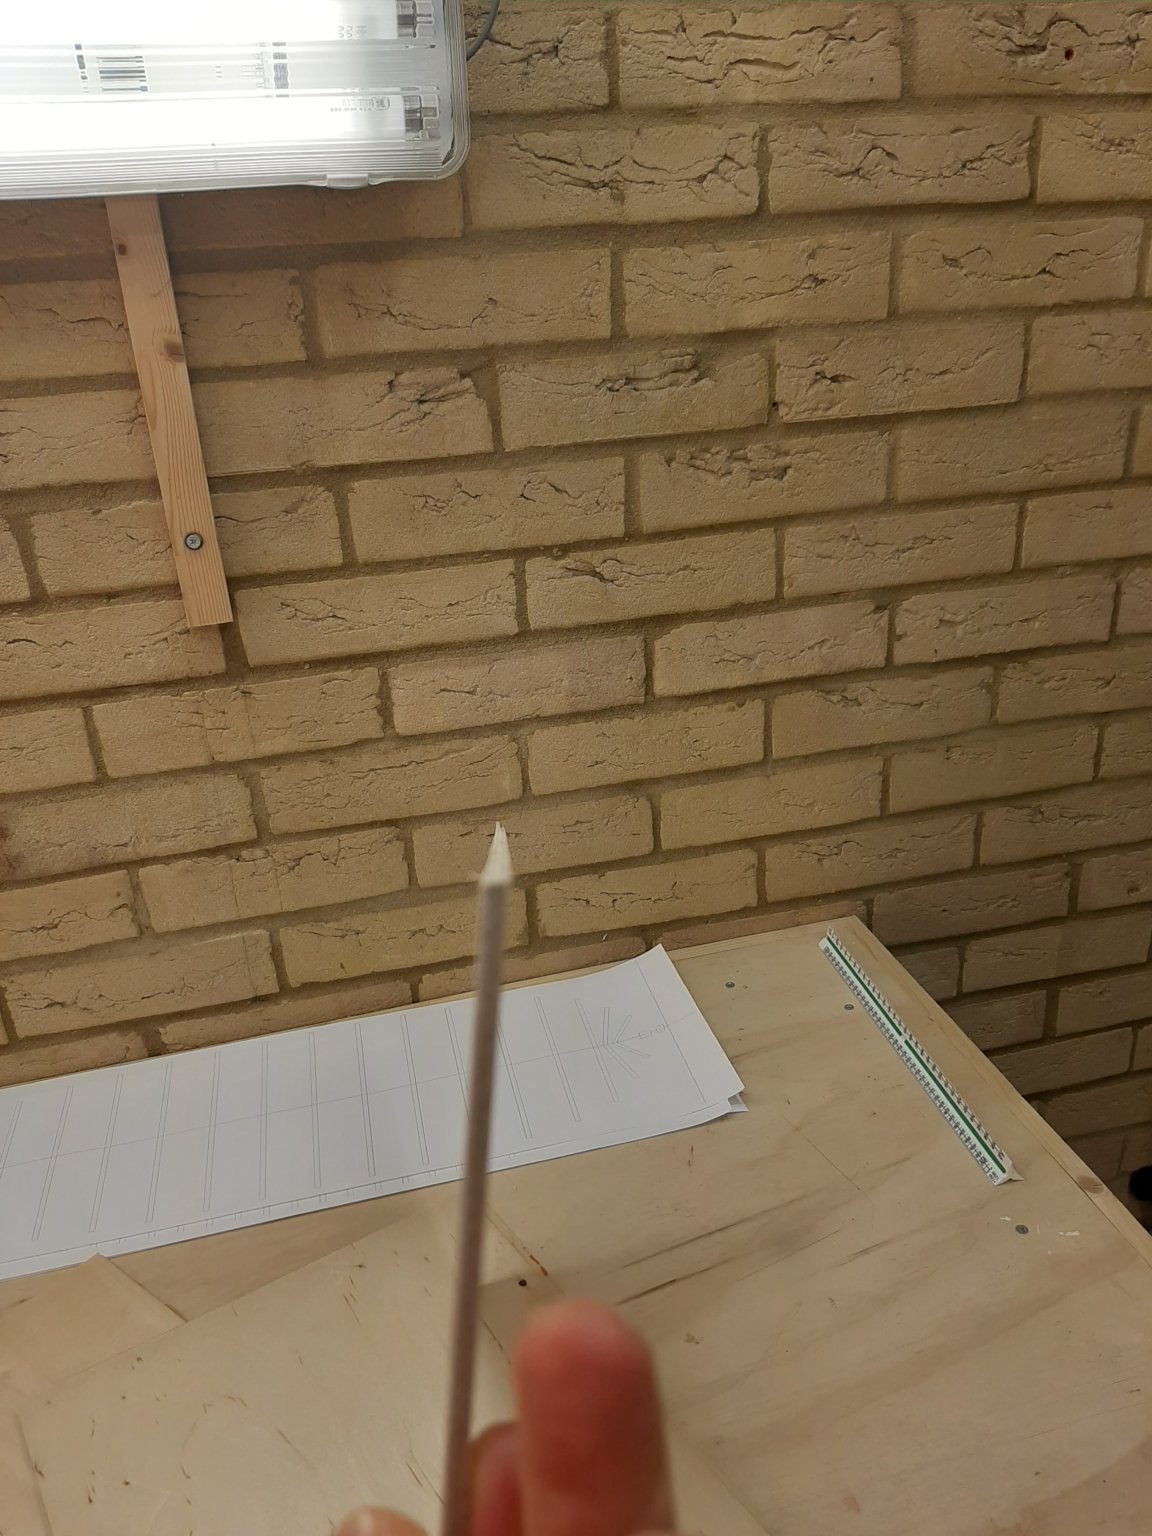
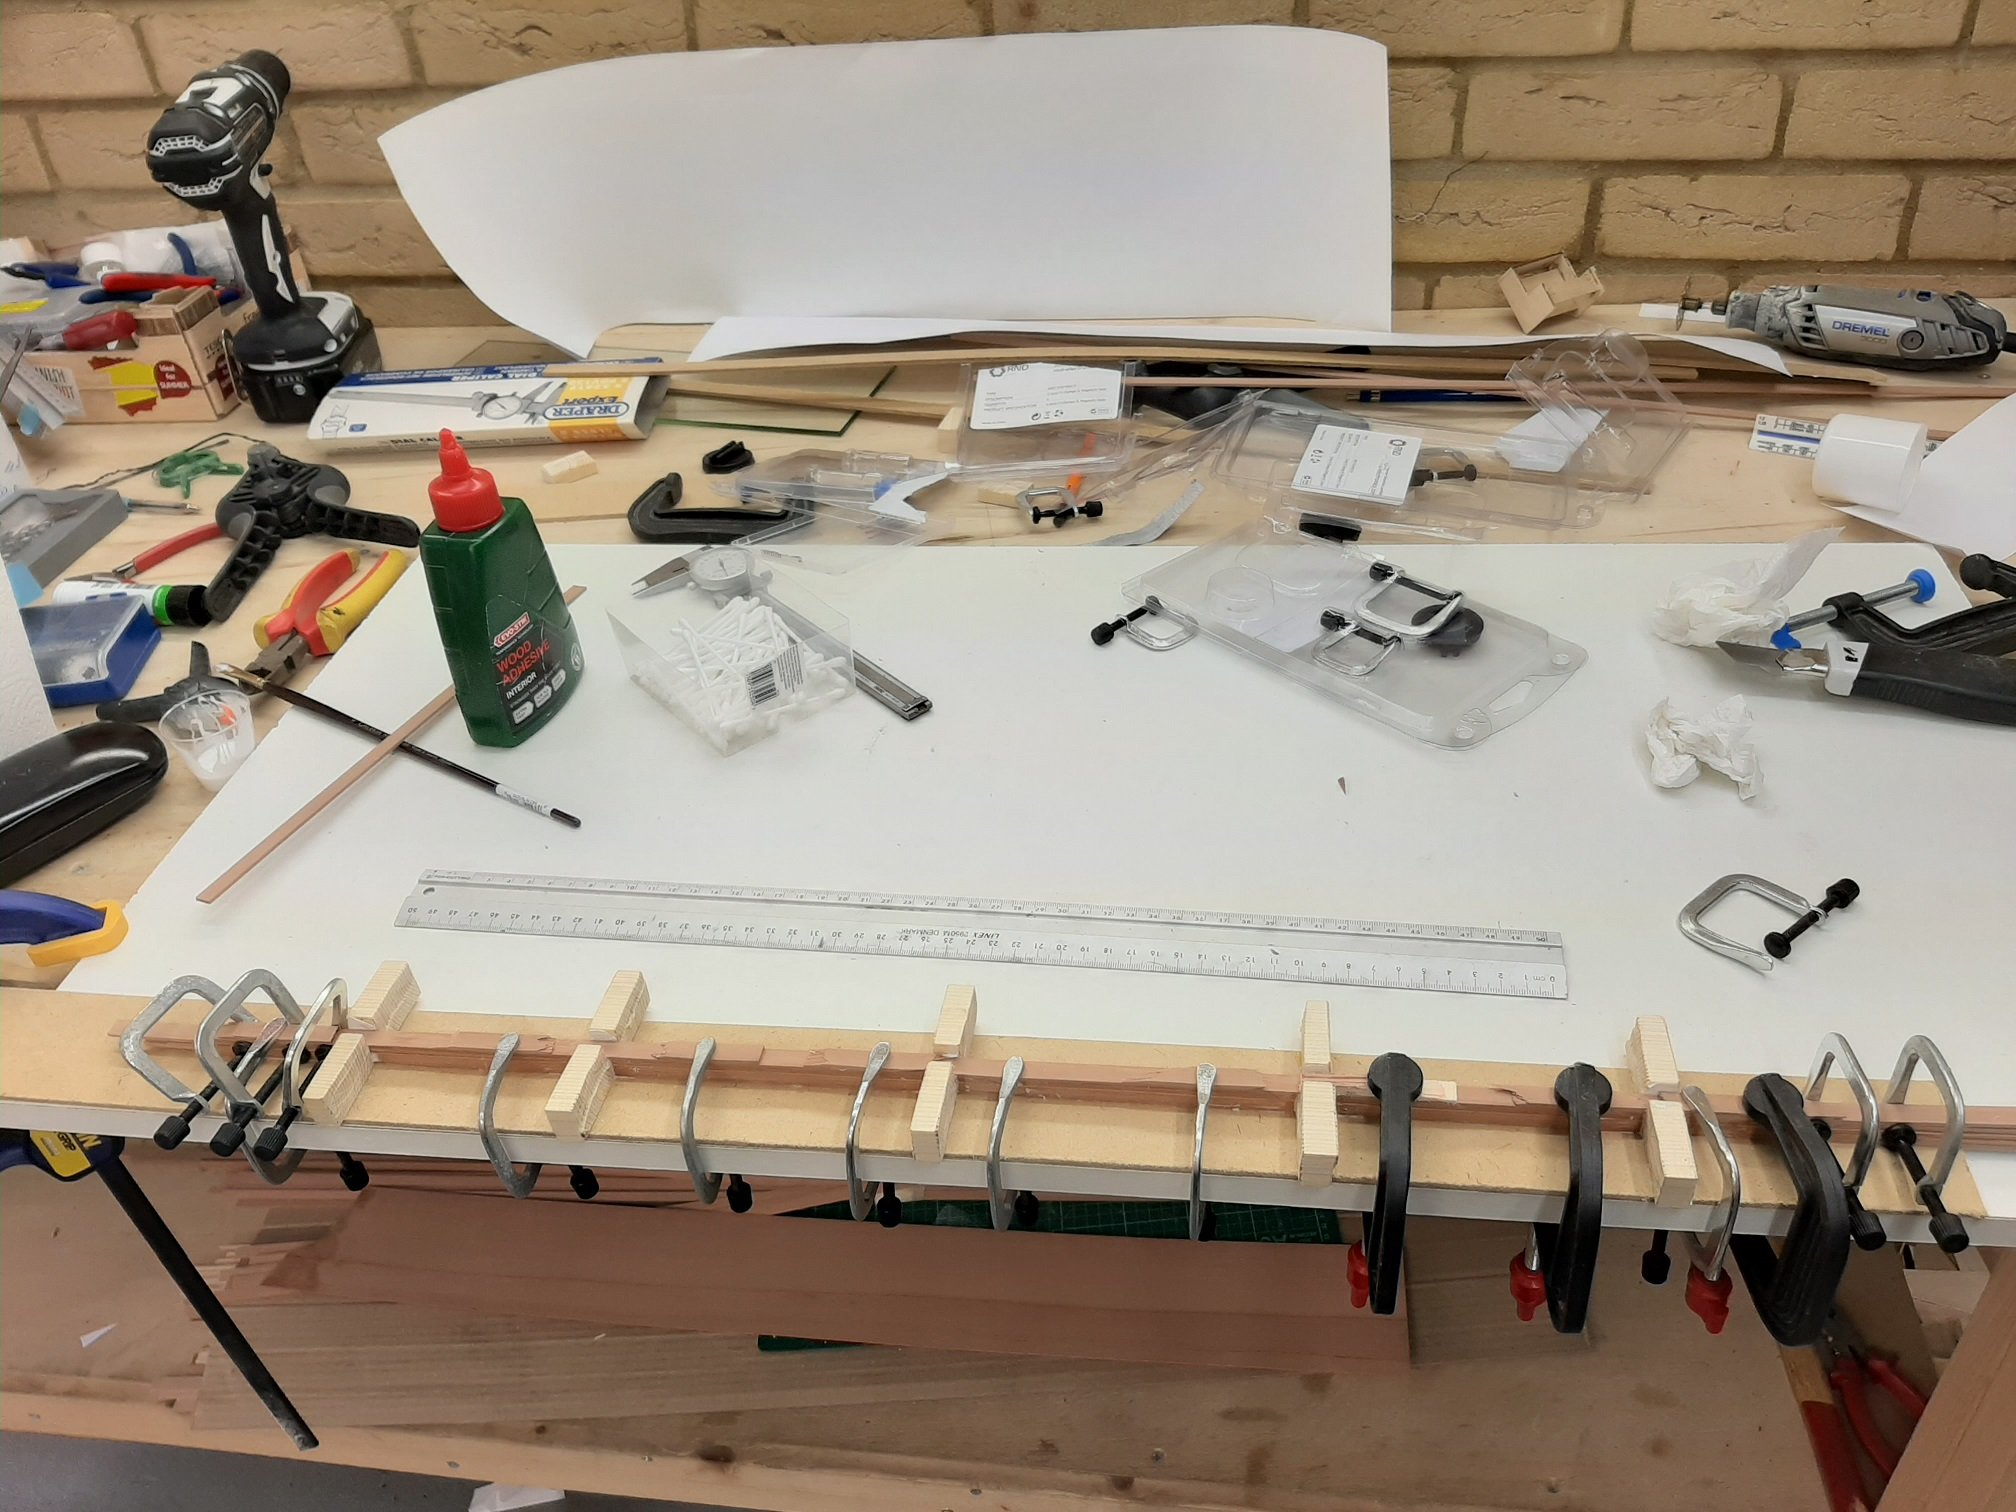
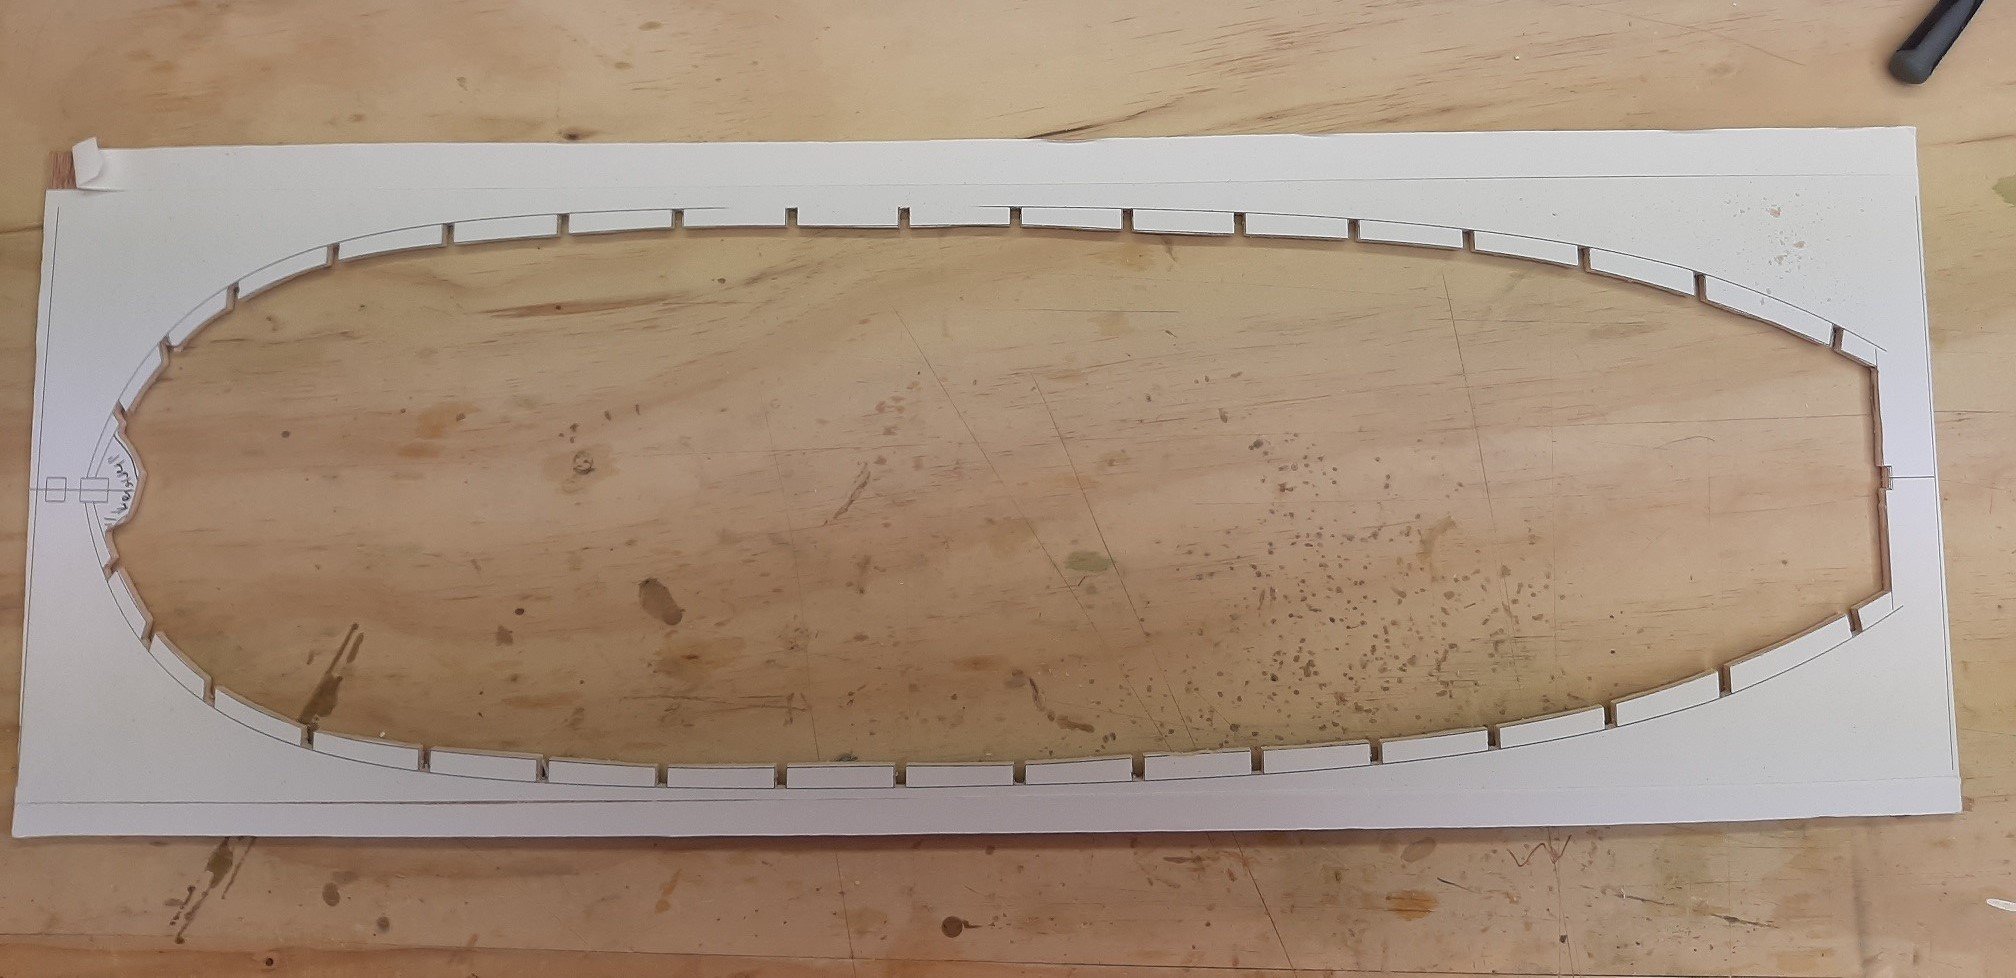
Well, I once more thought of giving model making a break. The Deben took many years to complete and I thought I 'd lay low for a while. However, after I cleaned and tided up, the work benches looked empty and miserable... So I started making some wood dust! I first printed the outline of the boat with the frame positions for the building jig. I had lots of problems as my (windows) computers refused to print the CAD drawings in any reasonable quality. Finally I used the admiral's Macbook and this sorted the problem out. This boat is again going to be a big boy, the ruler is 50 cm long which means the sheer planks will be close to 80 cm long! It also looks quite a beamy boat. The plans are for 3 mm sheet but the only material I could find was hardboard which was awful. So I used some plywood I had handy, it is 3.6 mm but we should be fine. For cutting the plywood to size, I used the small Proxxon table saw with the carbide tip blade. It is certainly underpowered which is a good thing since this is the most dangerous tool I own. It cut however the plywood very easily and cleanly in all its 70 cm length. This is all I need really. For cutting the pattern I used my trusted cheap and cheerful (£66.99, bought new 6 years ago!) motosaw. No one seems to like it but I 've found it does absolutely everything I need. It also has some twisted blades so that it could be used sideways for infinite cut lengths. It cut the plywood very easily but then again I have cut very thick stuff with this saw. I finished the cuts but before I sand to size, I need to laminate the plywood for the frames. They are supposed to be 4 mm thick, laminated from 2 sheets, 1.5 and 2 mm, allowing 0.5 mm for the epoxy but they will likely end up a bit off. So much for CAD accuracy! I am not entirely sure how the jig will work, and also I do not have a clear idea how these old boats were actually put together. I ve done quite a bit of research in books, logs and the web but there is no real info or photos or drawings. Regarding the david, I found a picture that shows it was removable, it would be hooked on an axle, through a window cut to the floor boards and used to lift anchor cables. In this boat, there seem to be two side poles that provide lateral support, no idea where this end up. However, this means that a capstan would be needed which this boat does not have. Maybe blocks were used, maybe secured to the stem. A bit of a mystery this one. The images bellow are the only ones Google returned Next to laminate the plywood, laminate the keel, make the sternpost, the stem and the transom, cut the rabbet, bring all together on the jig...but this will take a very long time. No worries, as one of our friends here in MSW says: "The wood is patient" Regards Vaddoc
.jpg.4cb5ea1aa0cadd6158e61f2ad60ff5d3.jpg)


.thumb.png.2c0cedca651c06e52f6aa787a2552711.png)
-
Thank you very much all for your kind words! I contacted George Whisstock and indeed he was very happy with the boat and may actually use some of the photos in his blog. I hope that you will join me for the new journey building the yawl. It may be just a "simple" boat (as the admiral said frowning), but I would like a project a bit shorter in duration and would like to make it as best as I can. I suspect it will turn out to be not that simple actually but more on the Yawl log. Regards Vaddoc
-
Dick, my boats are held together exclusively by tree nails( and a bit of epoxy). I use the screws to temporarily hold things together, then proggressively replace with treenails. I have used many thousands! I buy the screws by the thousand, either from aliexpress or ebay. There are two kinds, I only use the stainless steel ones as they are harder. The ordinary screws are mild steel and the head gets rounded off easily. Easy to tell between them, the stainless steel ones are non magnetic. At these scales I find them very useful. They need a pilot hall with 0.7 mm drill. Extremely strong hold of the wood
-
Hull building
vaddoc replied to mauryd824's topic in Building, Framing, Planking and plating a ships hull and deck
This is essentially planking of the hull! Maury, you can do anything you want as long as you can make it work. Planking is challenging but entirely feasible (and for me, fun). If you spend some time working on it, you ll figure it out. -
This is a very interesting project. 1/16 looks a better scale and allows the use of wood nails. You could also use 1 mm screws, inexpensive and versatile.
-
Maybe you could also try maple some time. Similar colour but much more consistent, harder so it does not mark, holds an edge beautifully and bends really well. Especially in the US it should be inexpensive as well.
-
Bob, I am a bit confused, did you have to sand the hull for a second time? It seems that after you sanded off the orange skin, you got the settings right and your paint went on fine.


.png.f65b13b081158c8d5b194f6ea590b58c.png)


.png.513dbb99042eea51ab5e7eac5334b116.png)