.jpg.f26acc9a74319261612561bfa7da1303.jpg)
vaddoc
-
Posts
1,520 -
Joined
-
Last visited
Content Type
Profiles
Forums
Gallery
Events
Everything posted by vaddoc
-
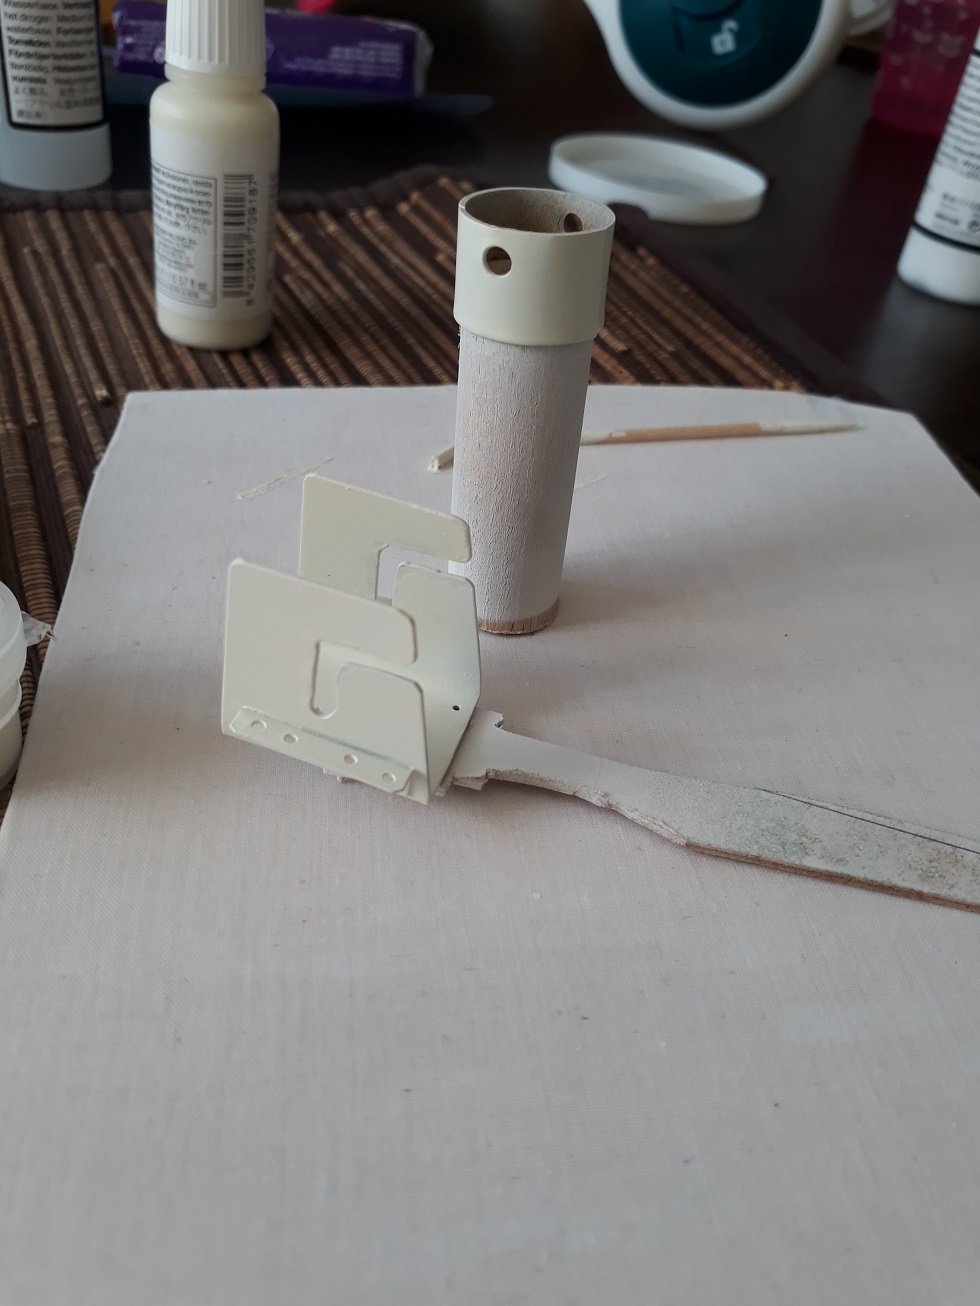
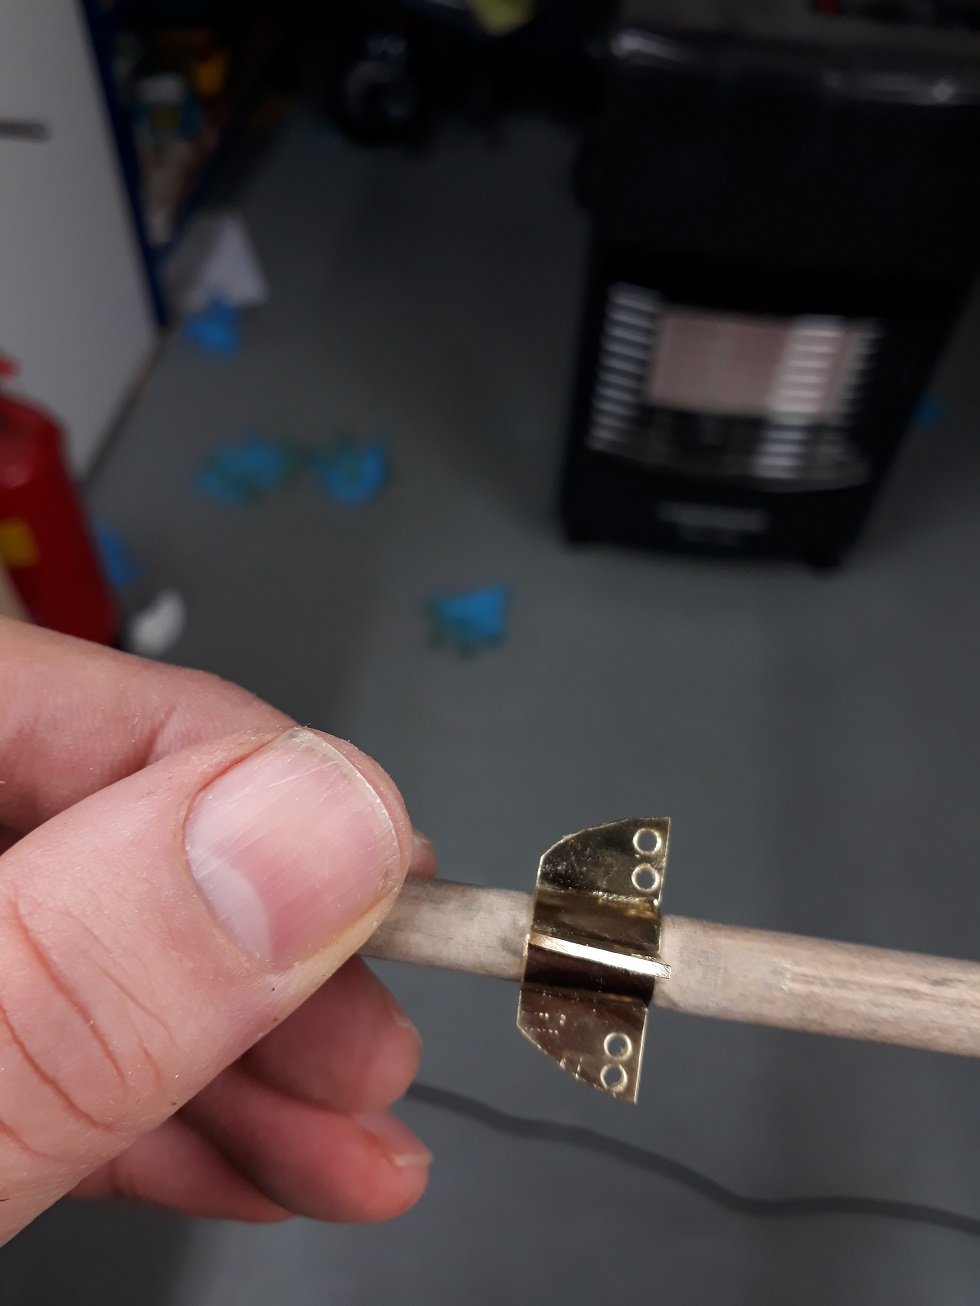
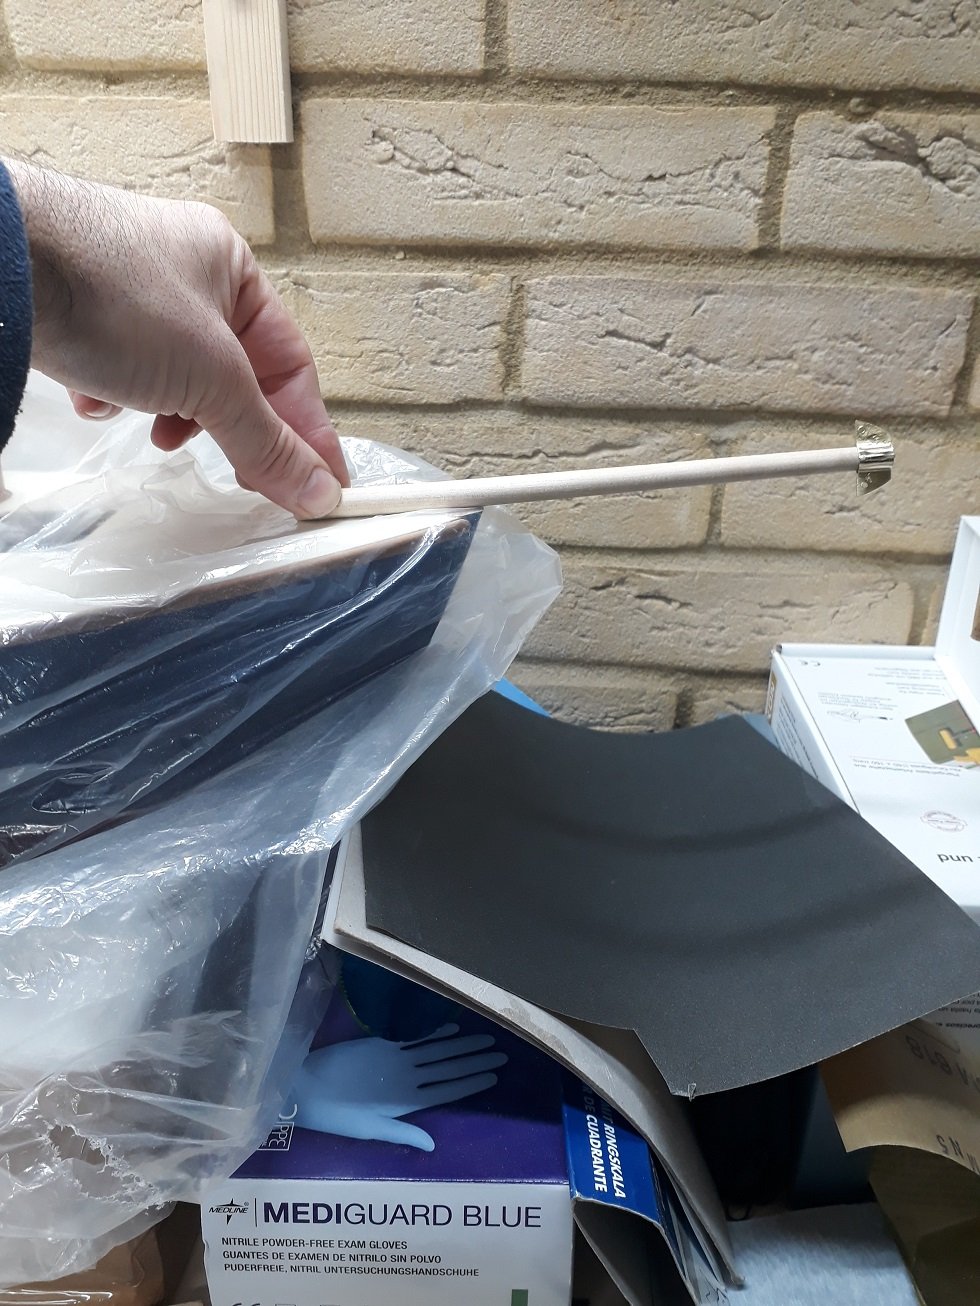
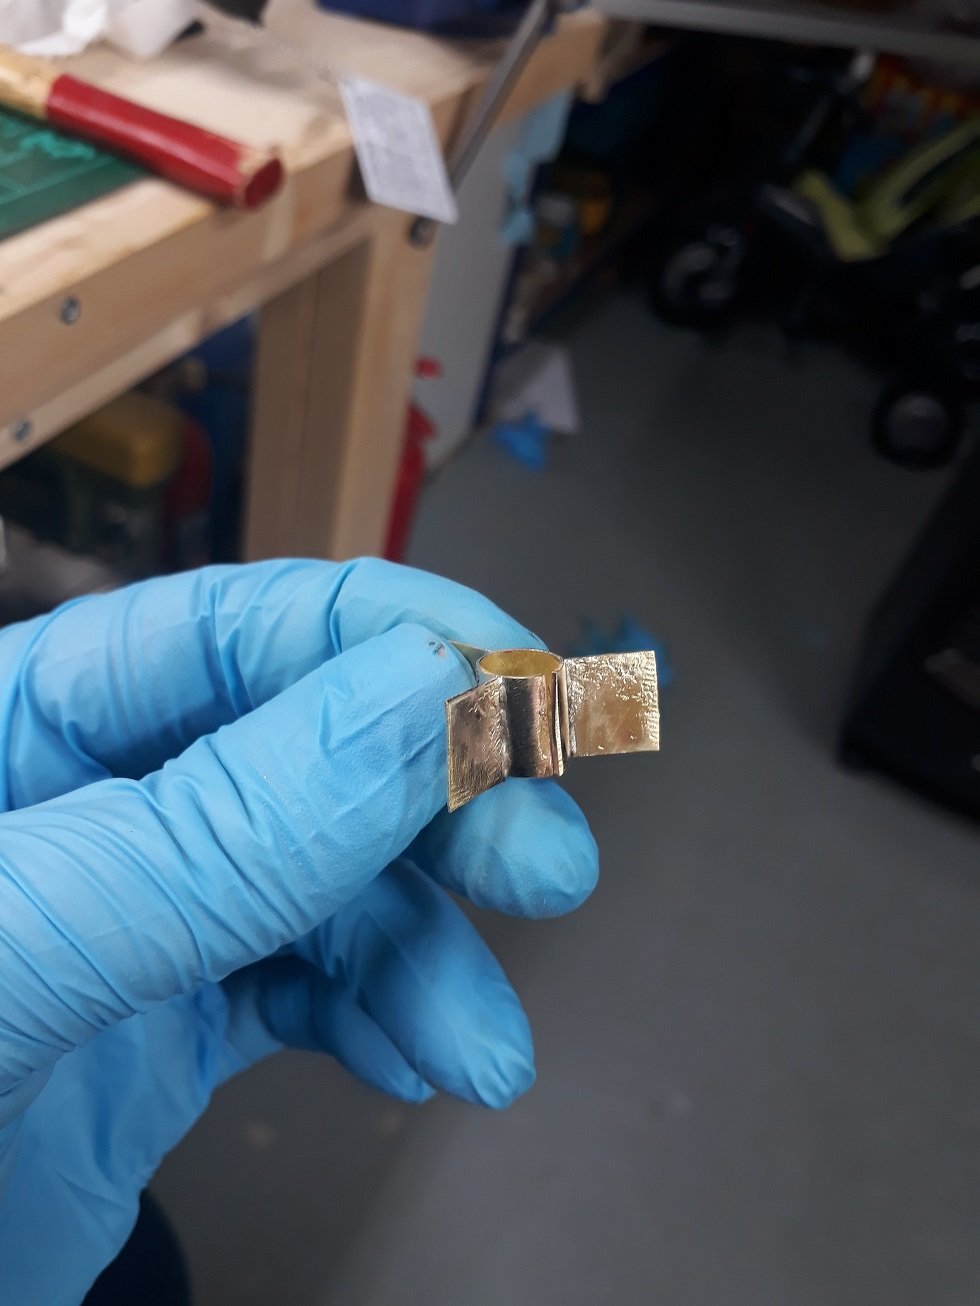
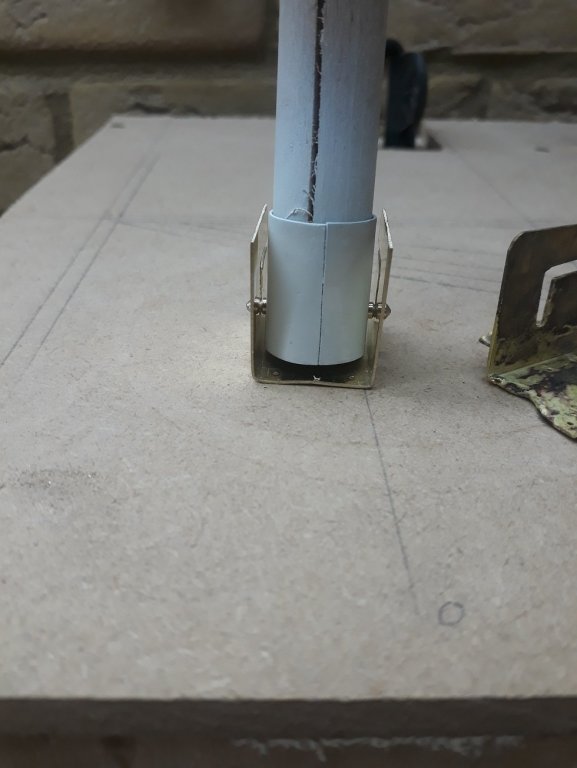
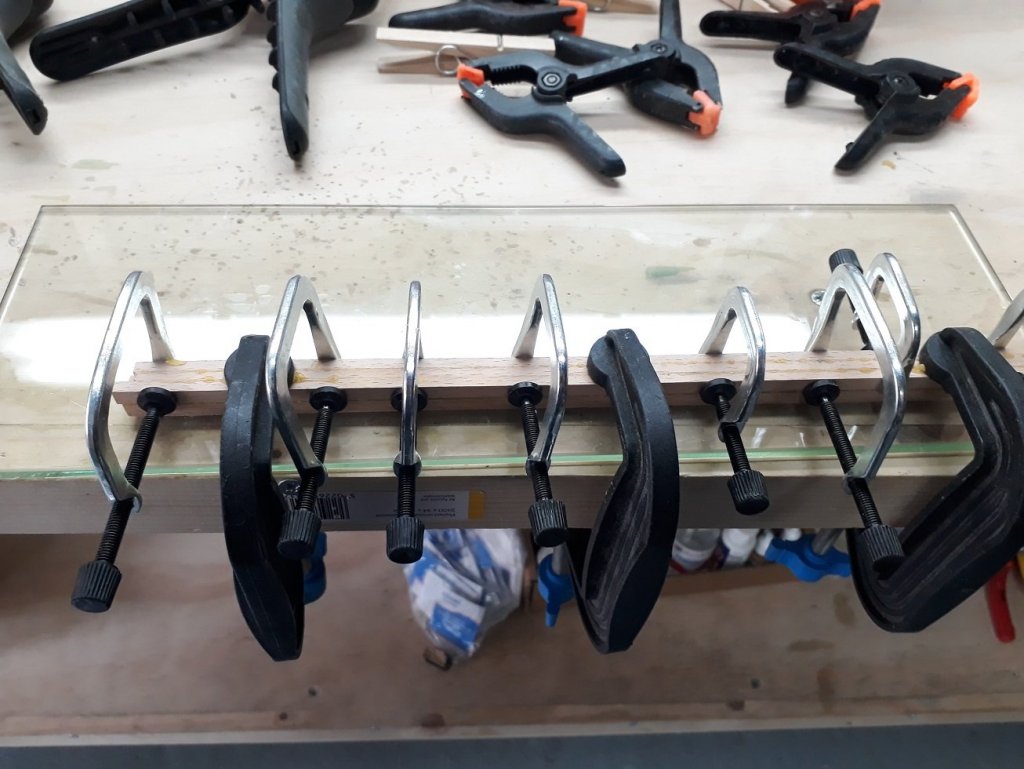
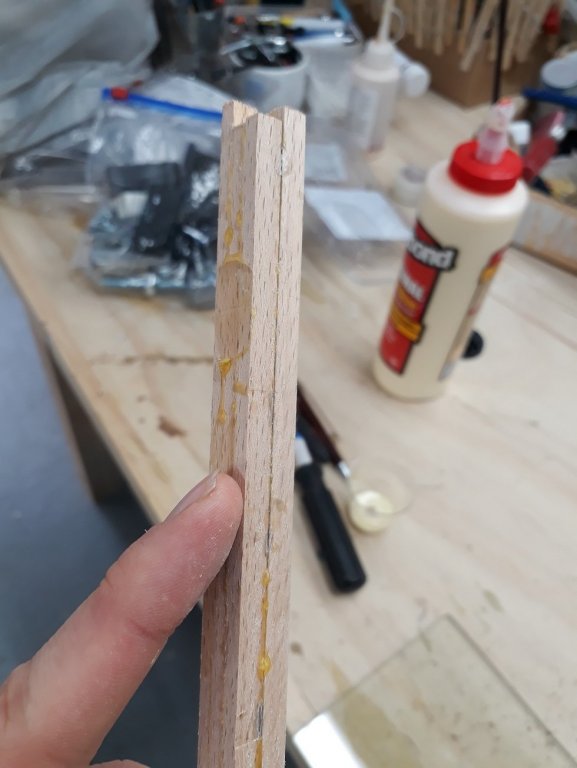
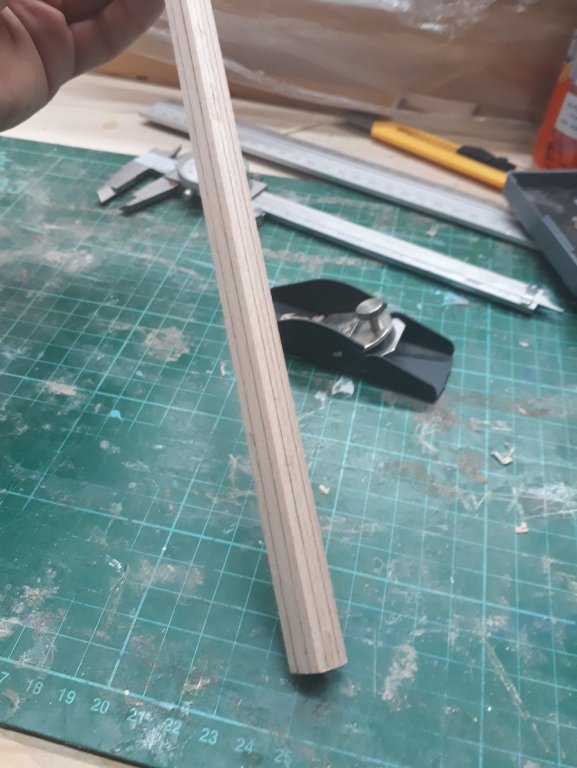
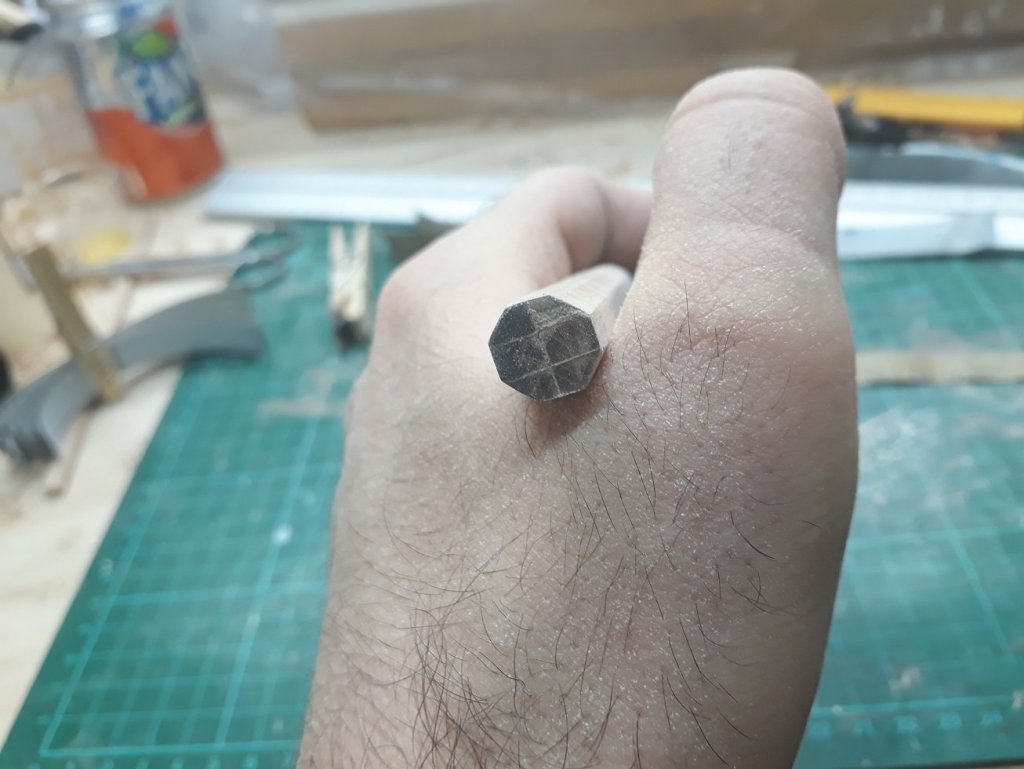
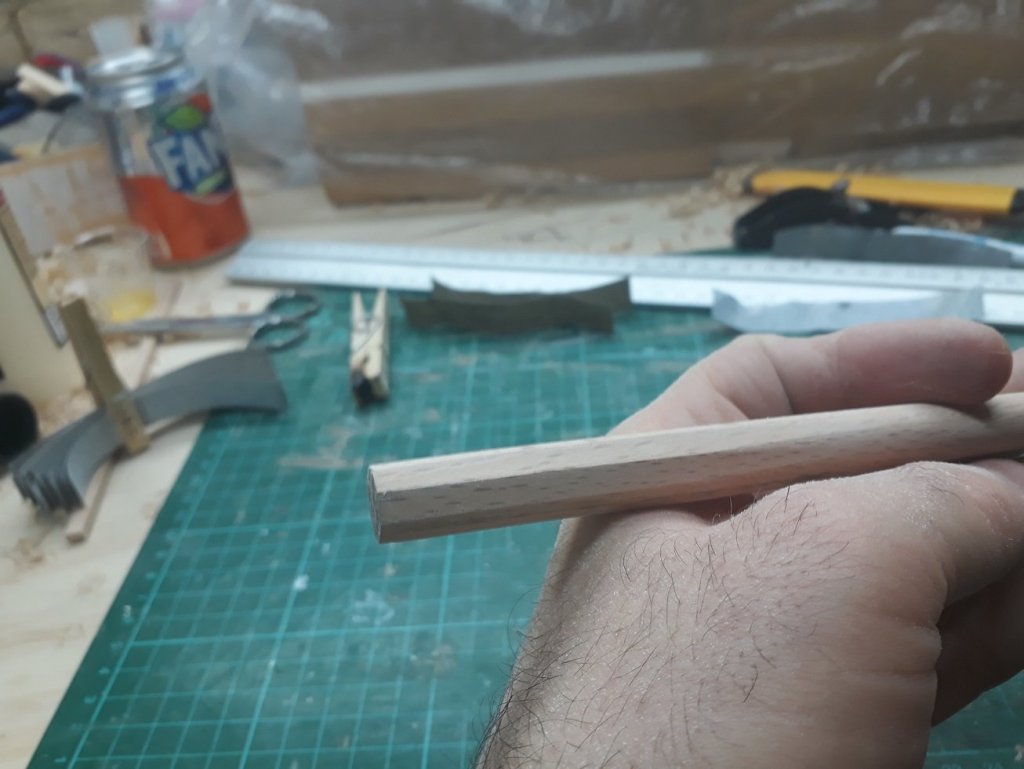
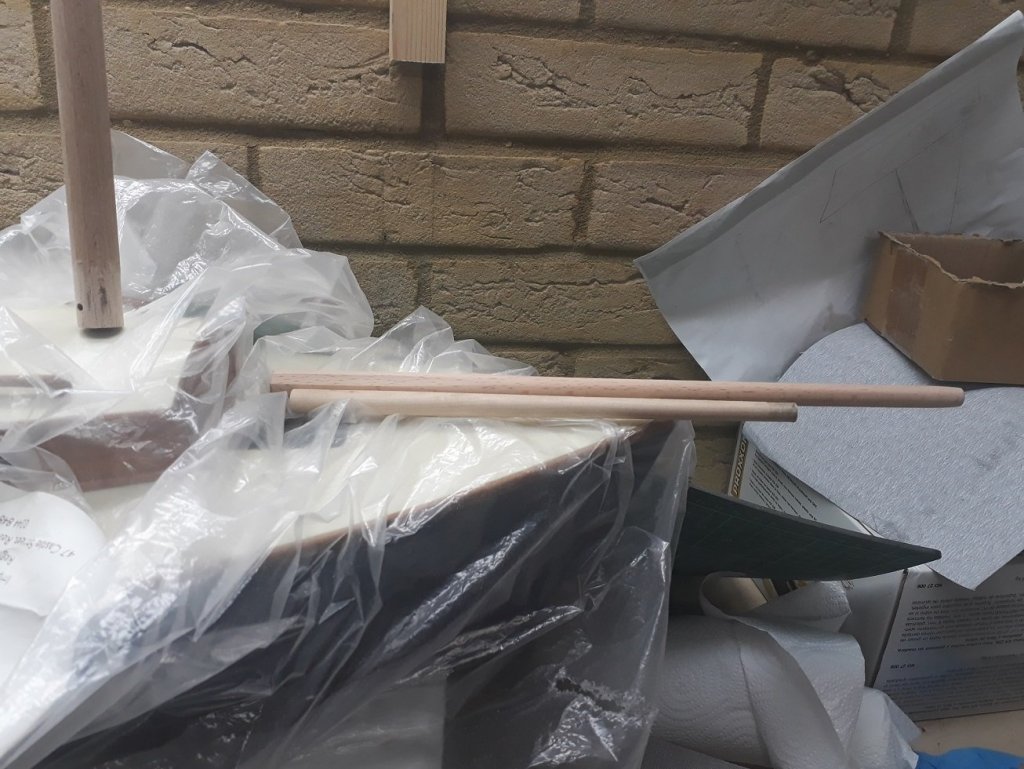
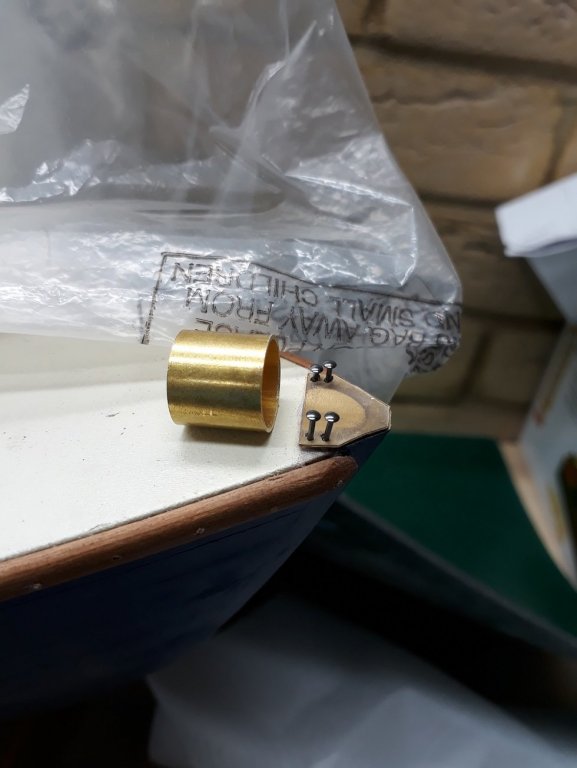
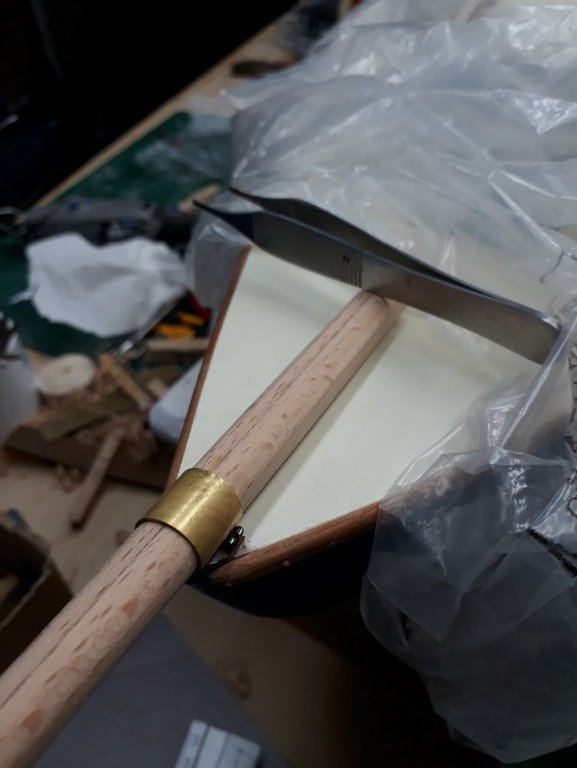
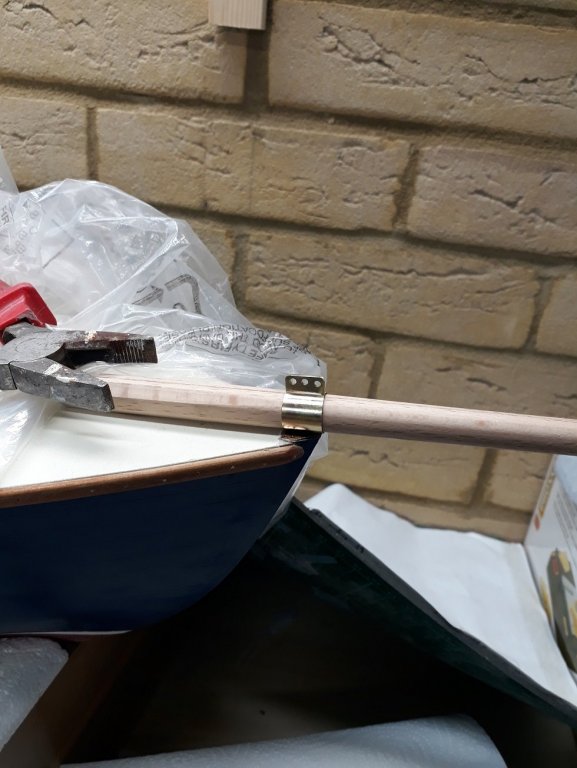
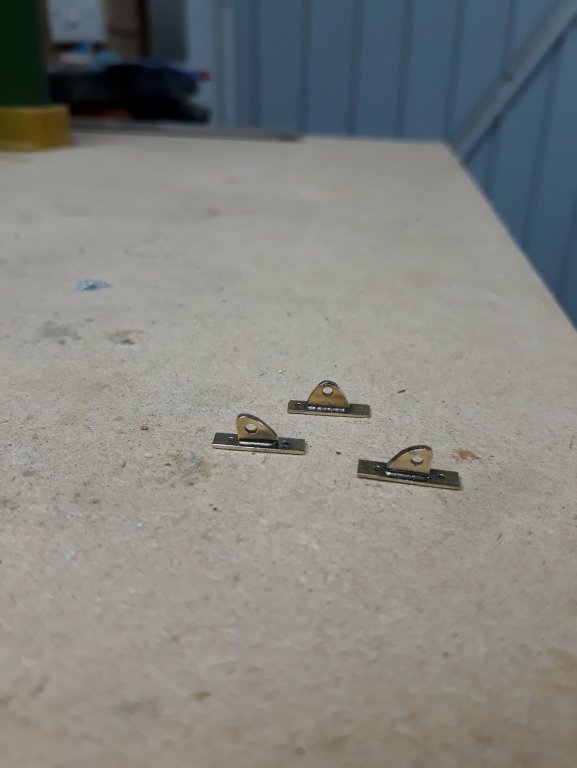
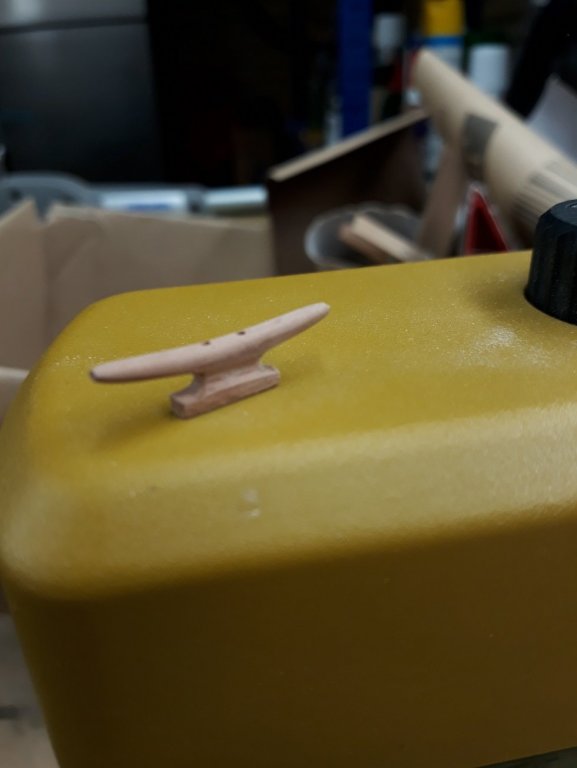
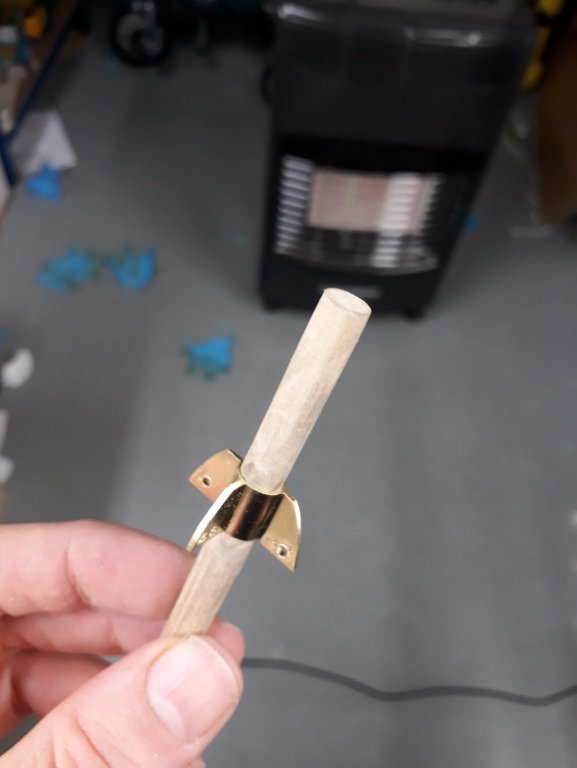
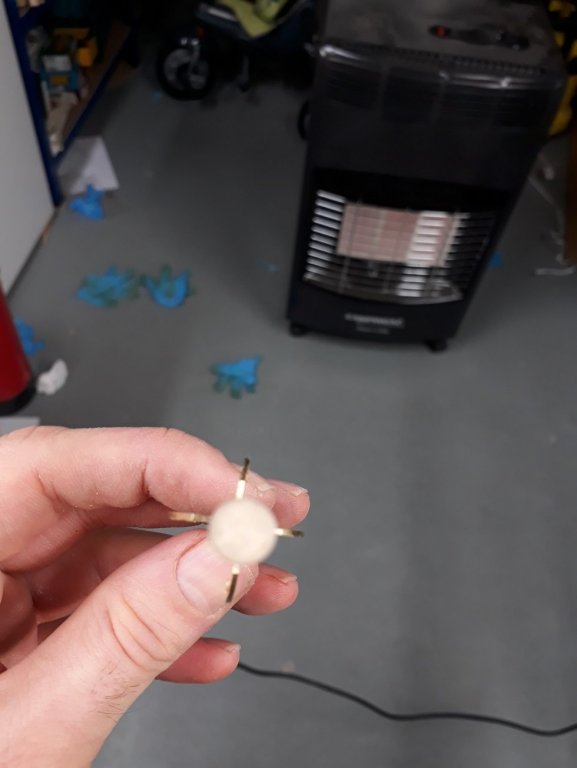
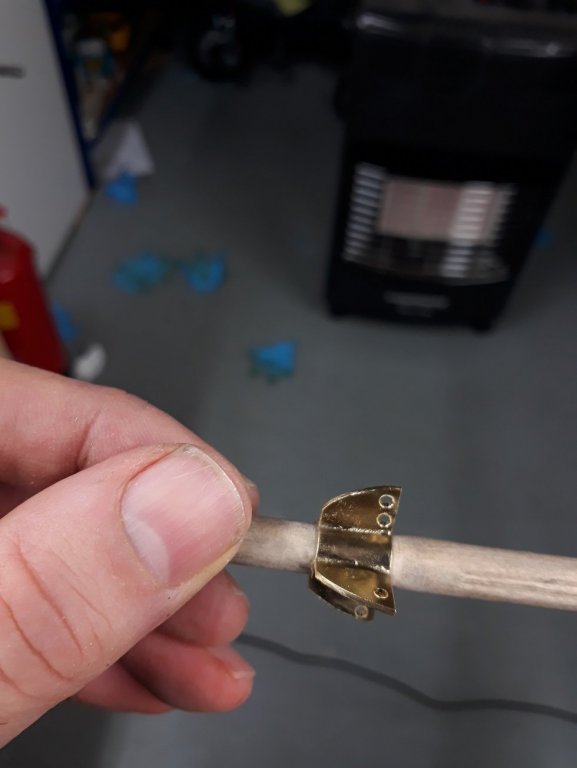
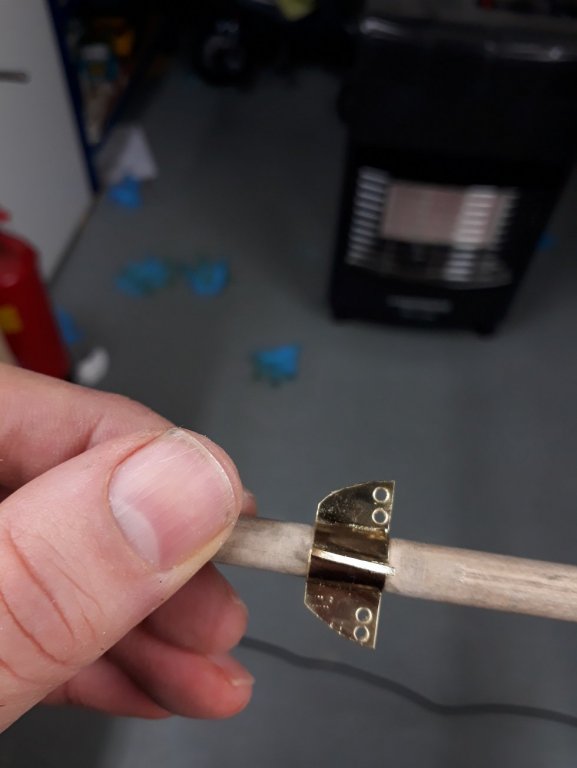
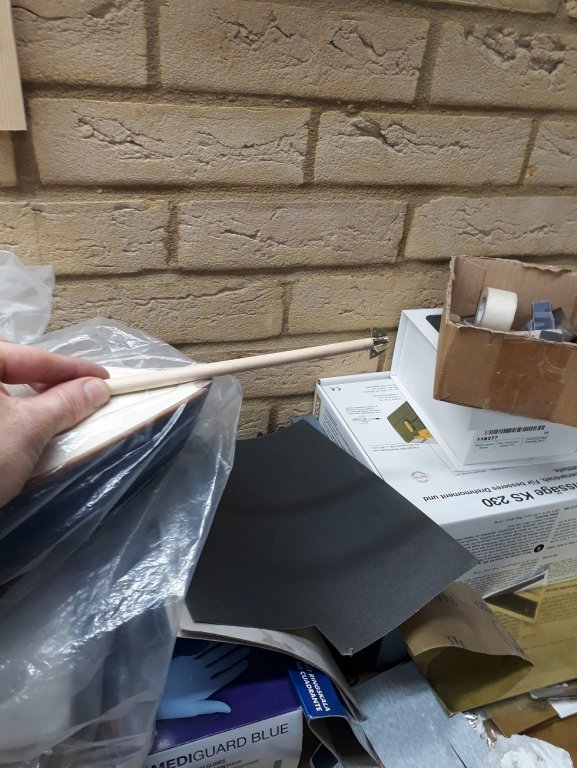
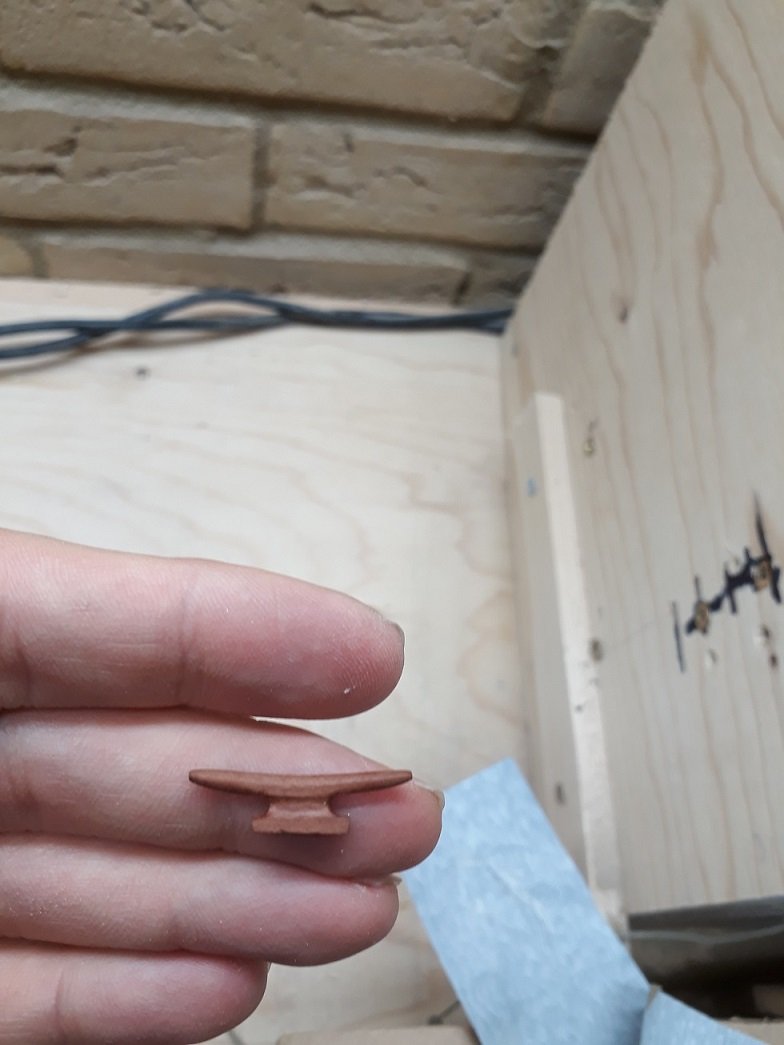
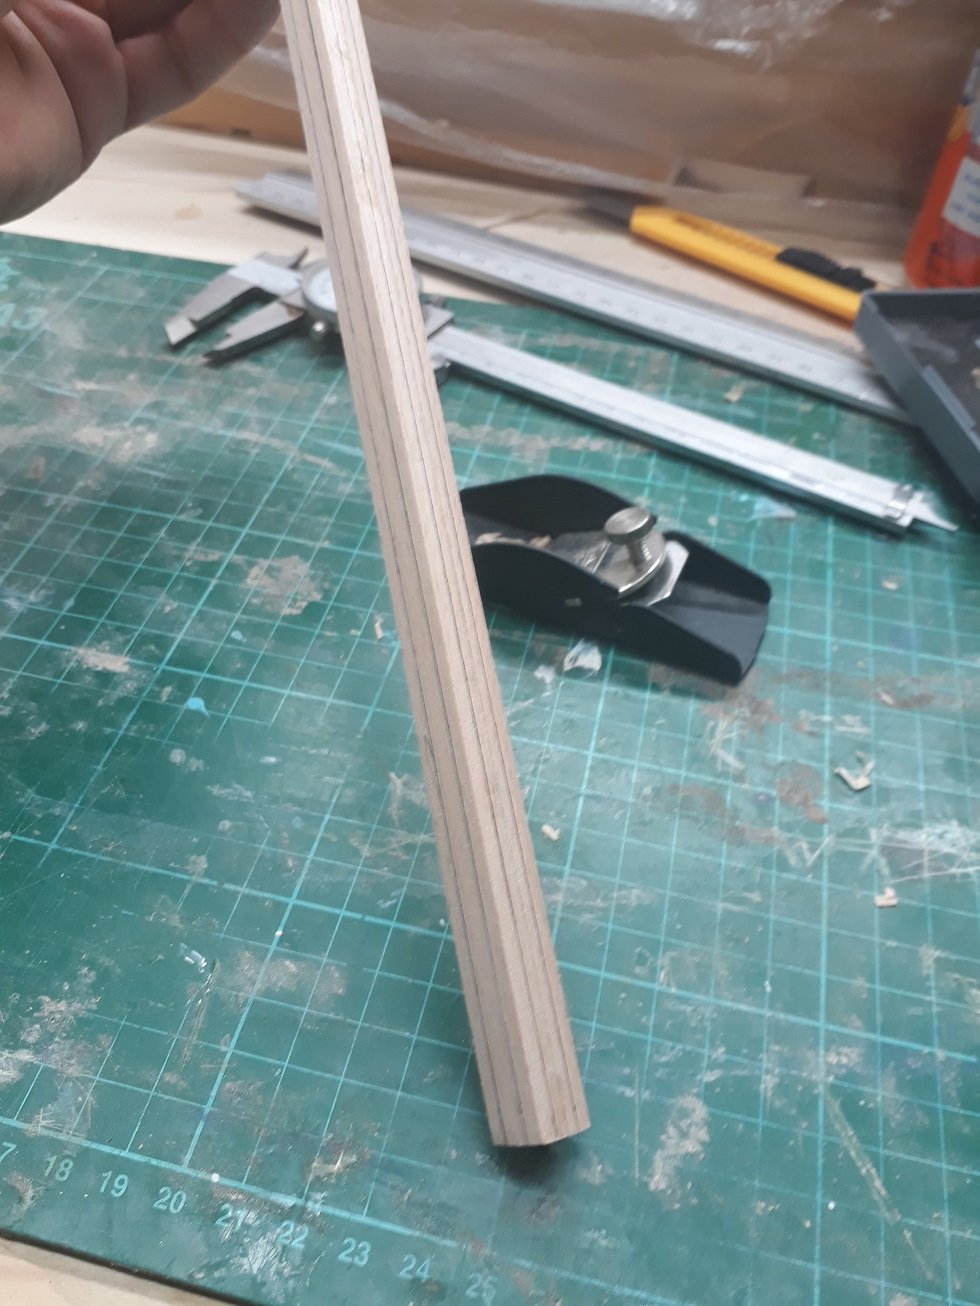
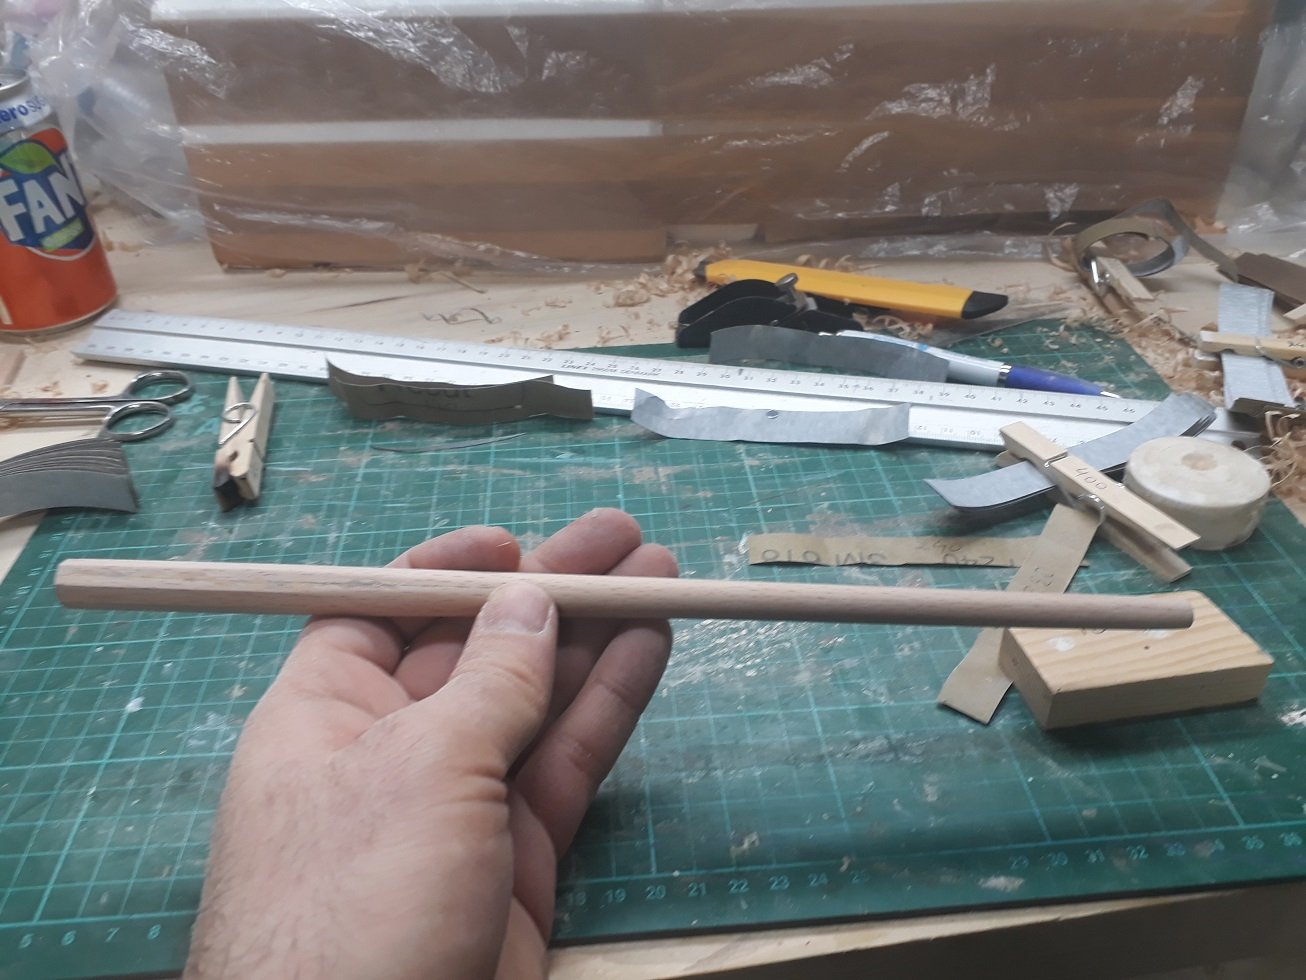
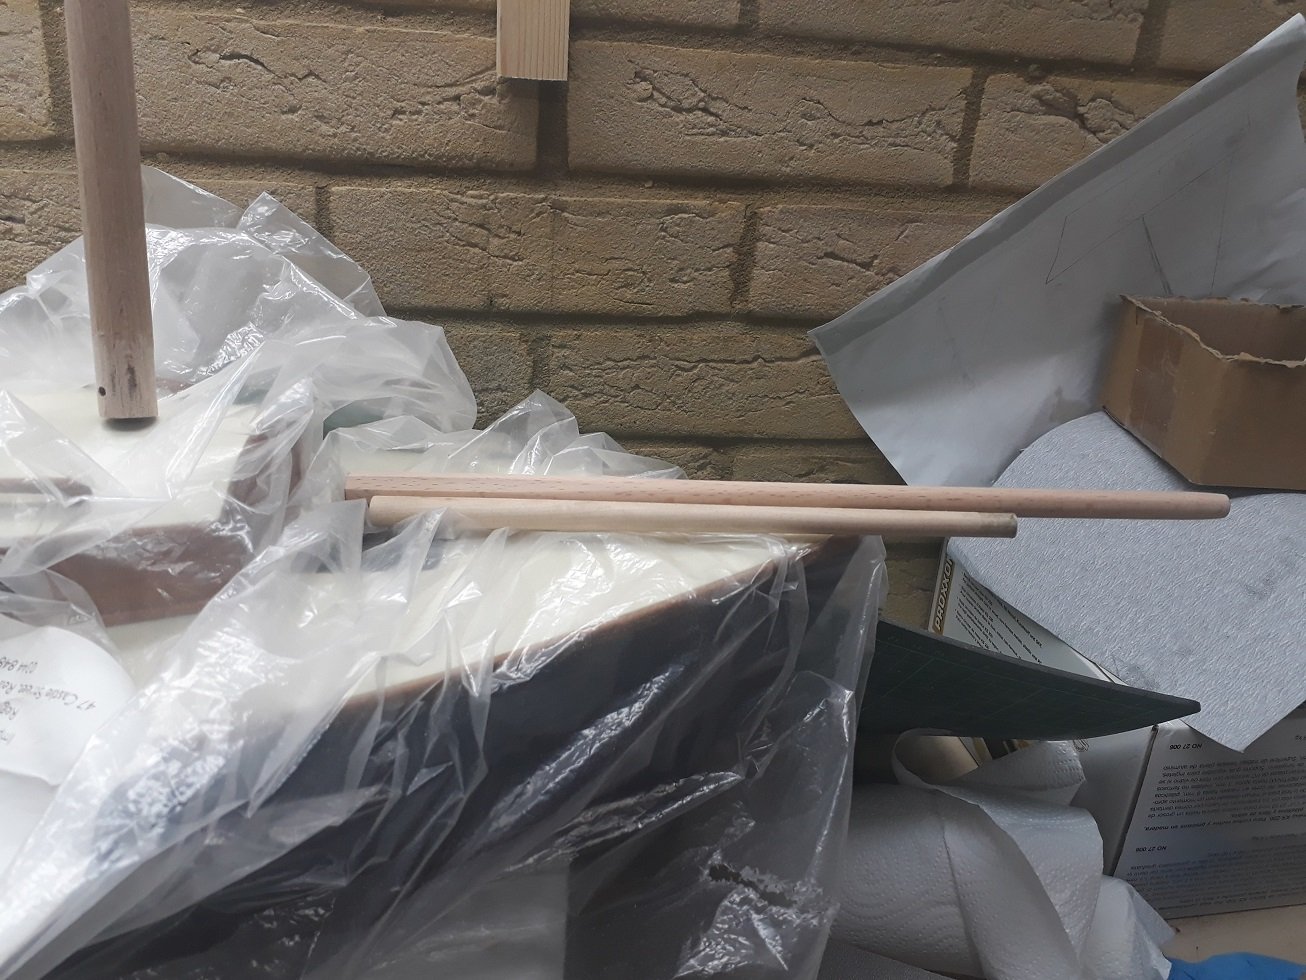
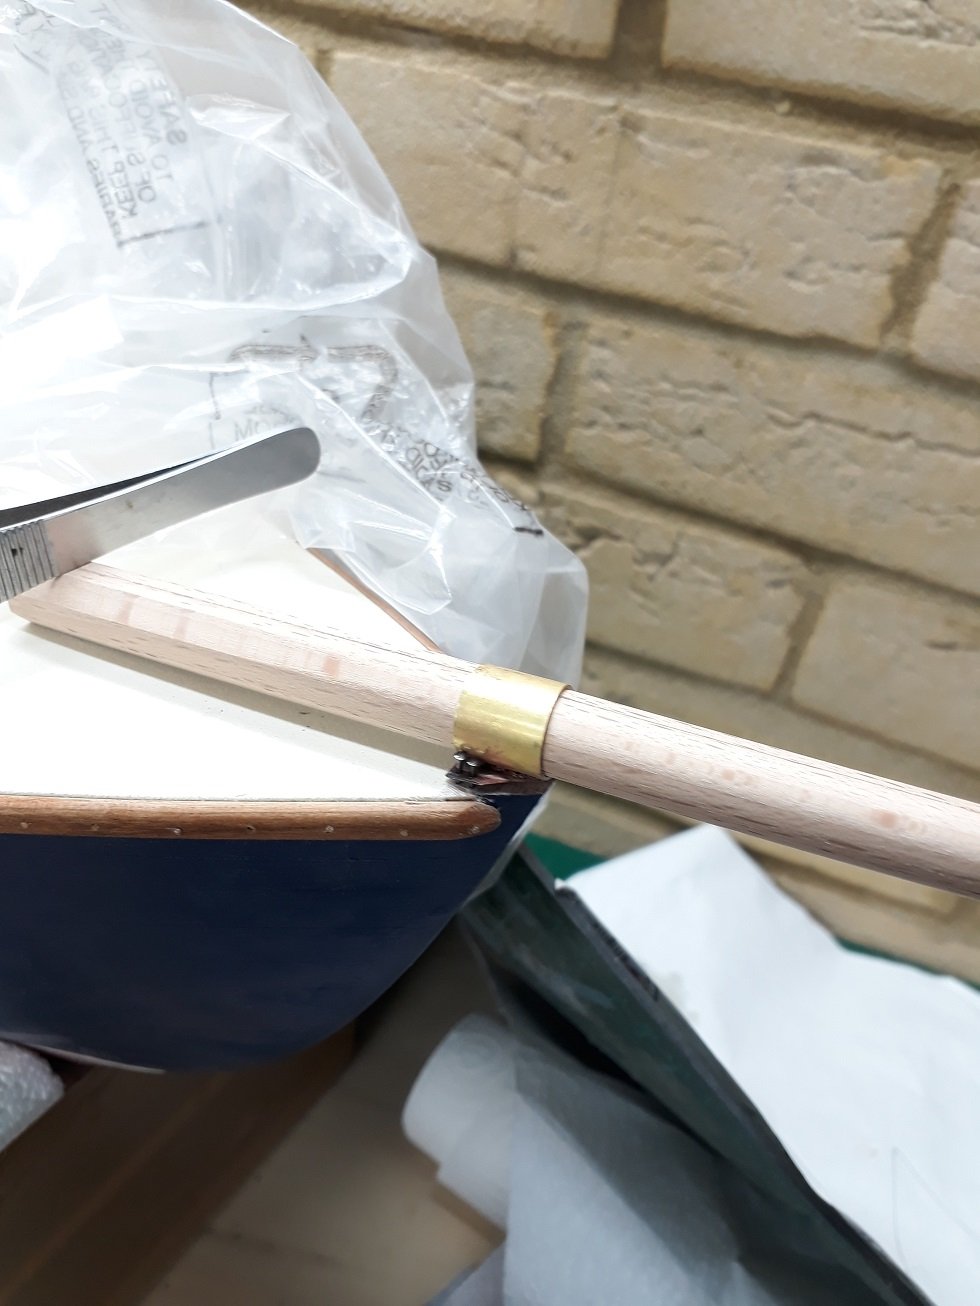
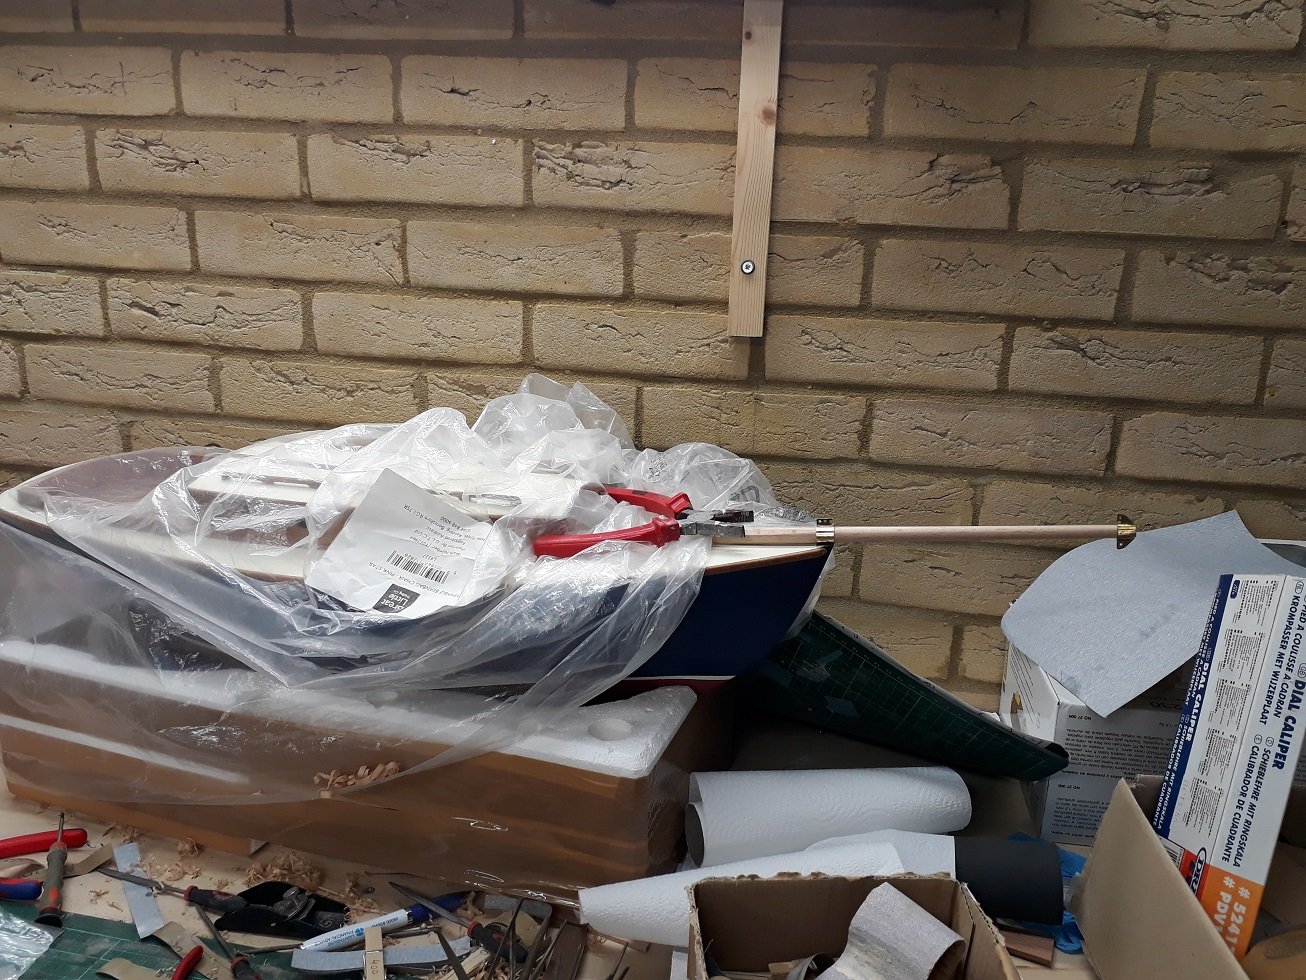
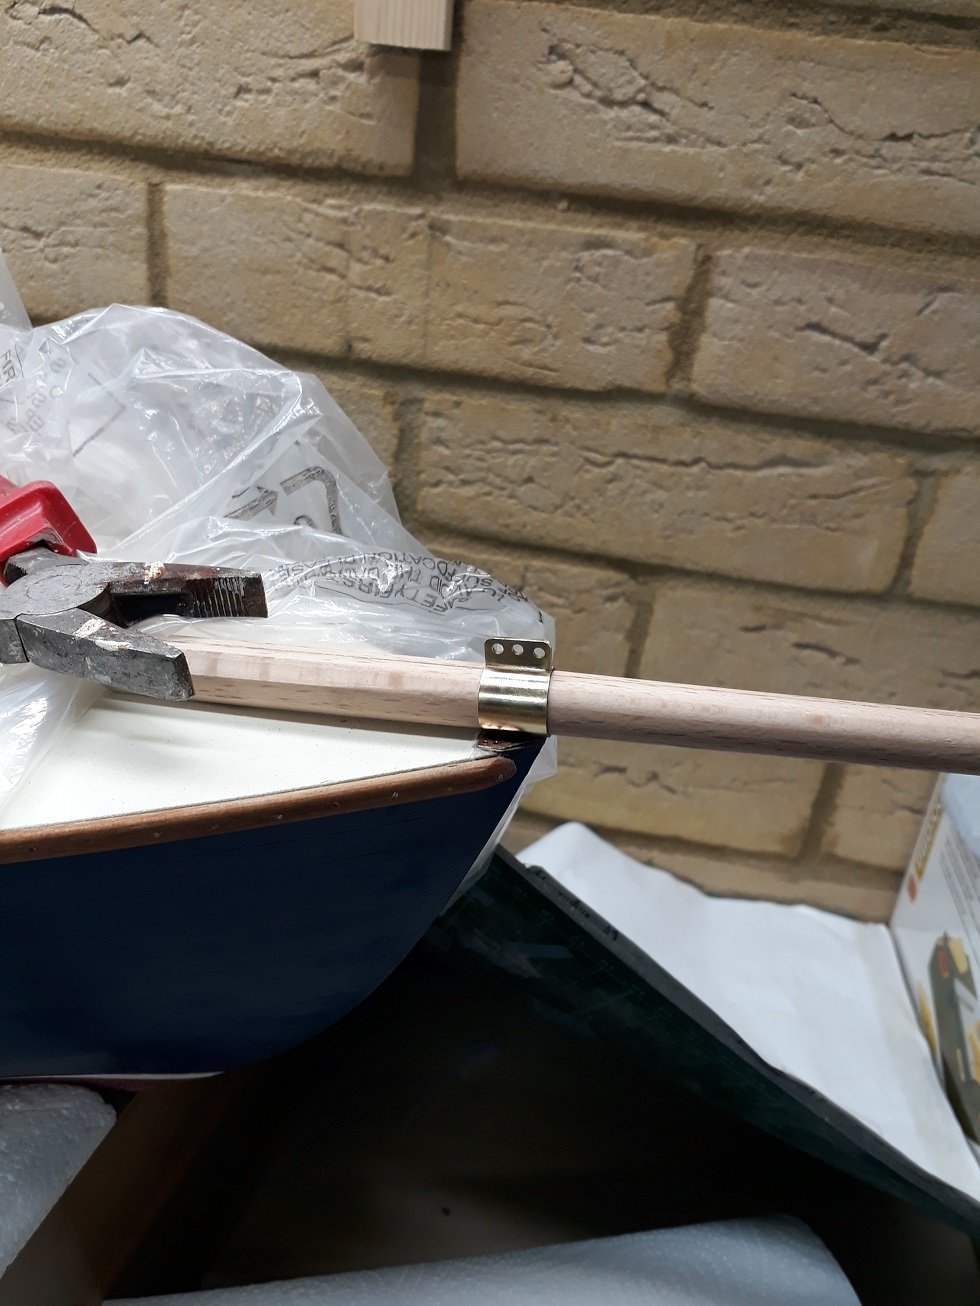
.thumb.jpg.6fd4c1b78768bb3efd745ab810936005.jpg) Dear all Since the last post I did a bit of work on the boat, although it was 2 steps forward and one backwards! First of all, I did not like the tabernacle. I used soft solder and did not wash the acid flux off so the brass started to corrode giving a green/blue tint. Also, I used some old leftover paint from the deck which was probably spoiled in some way. So I stripped the paint off and de-soldered it. I then tried to silver solder it and managed to melt the whole thing! Then I made the tabernacle again which is quite fiddly and not really easy. I had to make the axle once again as the old one did not fit. I proceeded to silver solder it and managed to melt it again! I made it for the third time and of course none of the previous two axles fitted so I had to do that as well. It came out reasonable but not as good as the first time. Then the side pieces were soldered, the corners ground and the mast base shortened and re-drilled. Everything was primed and then painted with fresh paint. Only thing left is some varnish, probably enamel. Next was the bowsprit. I took the dimesions from the drawings in the plans but it looked a bit short to me. I would like a more dramatic bowsprit even though it might be unnecessary and not really accurate. Also, I wanted the base to be square. So, I laminated some beach with PVA glue. I ended up with a thick solid piece of timber. Next was turning it into a dowel. Somehow I managed to set up my horrible cheap plane correctly and the job was pretty easy. Of course I forgot to leave the base square, I remembered only when it was shaped as octagon. Oh well, I think actually there are boats with octagon bowsprits out there... The new bowsprit is much larger and certainly much more dramatic! Next was the gammon iron. Here there is a massive problem. The top of the stem must be left square to allow for the iron to be bolted. I missed this part and sanded it off. I had to think of a way to arrange things, not accurate but close enough. Also, I had to provide a point to attach the foe bits of rigging. I soldered a few bits together and will nail these down with black iron nails. Hopefully it will blend in when all else goes on the boat Next I made the templates for the cleats and cut one, finished with Tung oil I also made the fixes for the bob and whisker stays. These will be secured with either brass or shiny black iron nails Lots more left to do and quite a lot of head scratching coming up Regards Vaddoc
Dear all Since the last post I did a bit of work on the boat, although it was 2 steps forward and one backwards! First of all, I did not like the tabernacle. I used soft solder and did not wash the acid flux off so the brass started to corrode giving a green/blue tint. Also, I used some old leftover paint from the deck which was probably spoiled in some way. So I stripped the paint off and de-soldered it. I then tried to silver solder it and managed to melt the whole thing! Then I made the tabernacle again which is quite fiddly and not really easy. I had to make the axle once again as the old one did not fit. I proceeded to silver solder it and managed to melt it again! I made it for the third time and of course none of the previous two axles fitted so I had to do that as well. It came out reasonable but not as good as the first time. Then the side pieces were soldered, the corners ground and the mast base shortened and re-drilled. Everything was primed and then painted with fresh paint. Only thing left is some varnish, probably enamel. Next was the bowsprit. I took the dimesions from the drawings in the plans but it looked a bit short to me. I would like a more dramatic bowsprit even though it might be unnecessary and not really accurate. Also, I wanted the base to be square. So, I laminated some beach with PVA glue. I ended up with a thick solid piece of timber. Next was turning it into a dowel. Somehow I managed to set up my horrible cheap plane correctly and the job was pretty easy. Of course I forgot to leave the base square, I remembered only when it was shaped as octagon. Oh well, I think actually there are boats with octagon bowsprits out there... The new bowsprit is much larger and certainly much more dramatic! Next was the gammon iron. Here there is a massive problem. The top of the stem must be left square to allow for the iron to be bolted. I missed this part and sanded it off. I had to think of a way to arrange things, not accurate but close enough. Also, I had to provide a point to attach the foe bits of rigging. I soldered a few bits together and will nail these down with black iron nails. Hopefully it will blend in when all else goes on the boat Next I made the templates for the cleats and cut one, finished with Tung oil I also made the fixes for the bob and whisker stays. These will be secured with either brass or shiny black iron nails Lots more left to do and quite a lot of head scratching coming up Regards Vaddoc


.thumb.jpg.99e9c6bb90ab873ccbf2488a7c67ece6.jpg)

- 536 replies
-
- 11
-

-
Holding small parts for soldering
vaddoc replied to BETAQDAVE's topic in Metal Work, Soldering and Metal Fittings
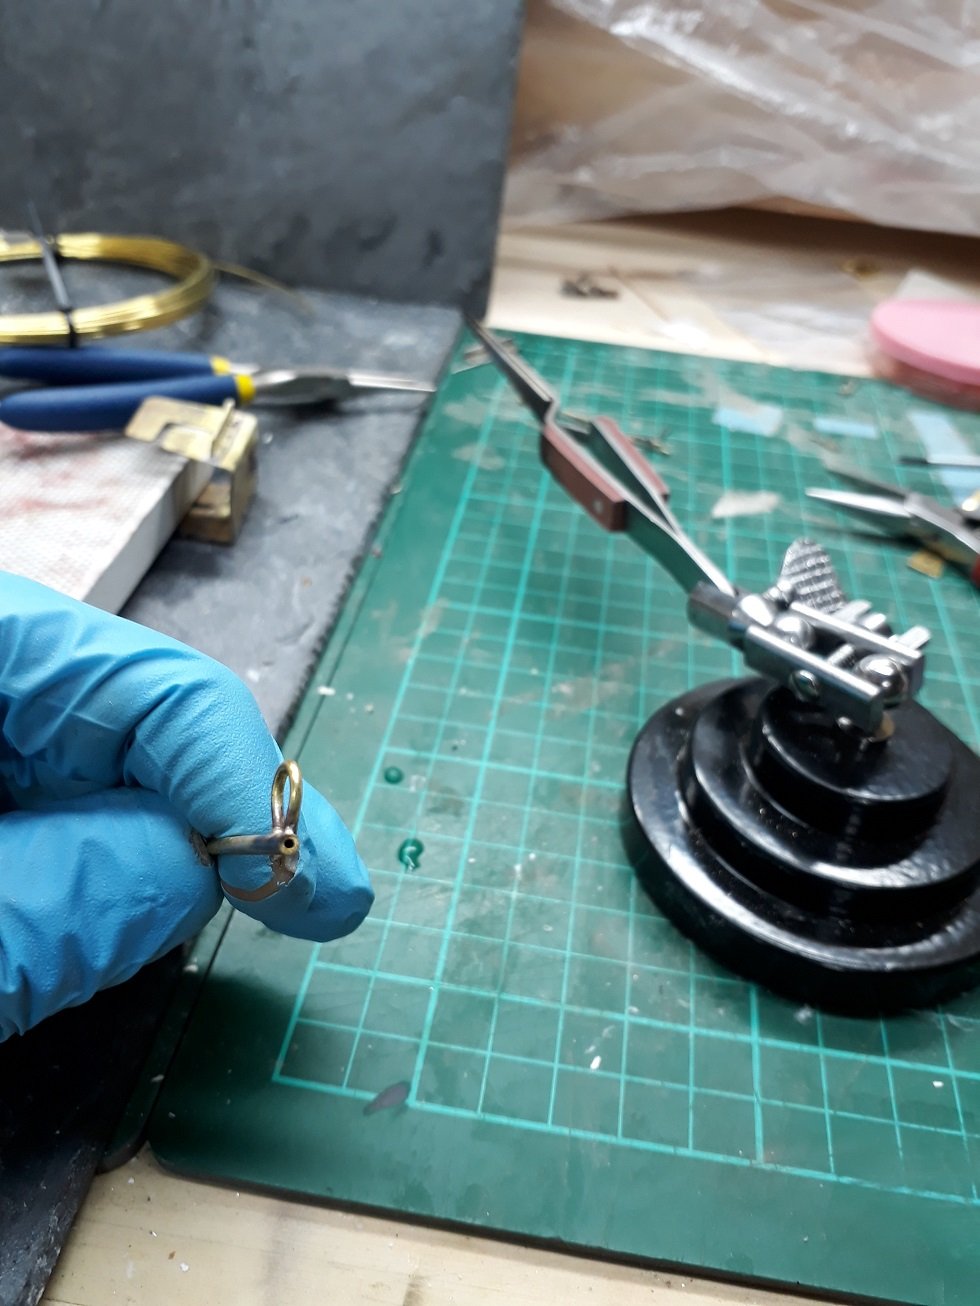
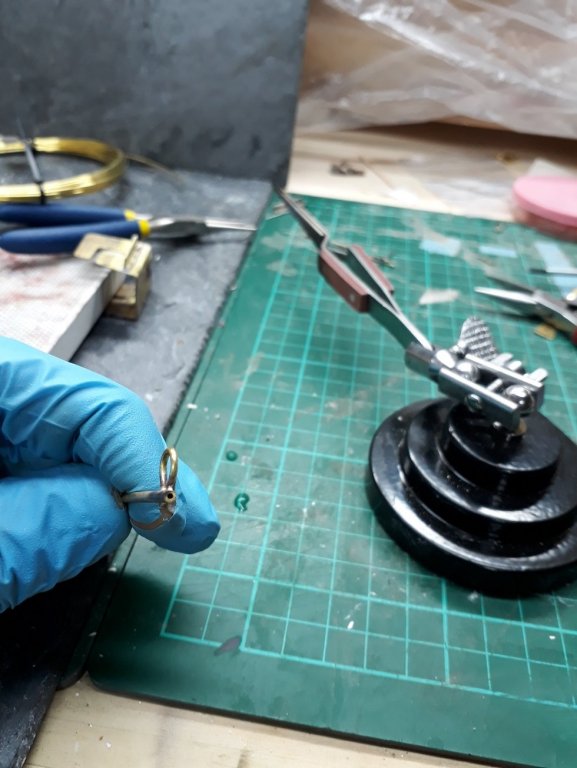
I found a solution with these forceps https://www.amazon.co.uk/gp/product/B01AYLIH1S/ref=ppx_yo_dt_b_asin_title_o03_s00?ie=UTF8&psc=1 They are stainless steel, very robust and do not transmit heat. Very cheap also. There is a base that goes with it but you can also use whatever else. Highly recommended. I prefer silver soldering as it is much more controlled. Vaddoc -
CAD help needed
vaddoc replied to Cabbie's topic in CAD and 3D Modelling/Drafting Plans with Software
https://www.amazon.com/RHINOCEROS-MODELING-DESIGNERS-VERSION-670526003986/dp/B00AFB9ORO ! -
The way the metal bends to your will Michael is truly inspirational. Indeed a treat for those of us that when picking a fight with metals we usually lose.
-
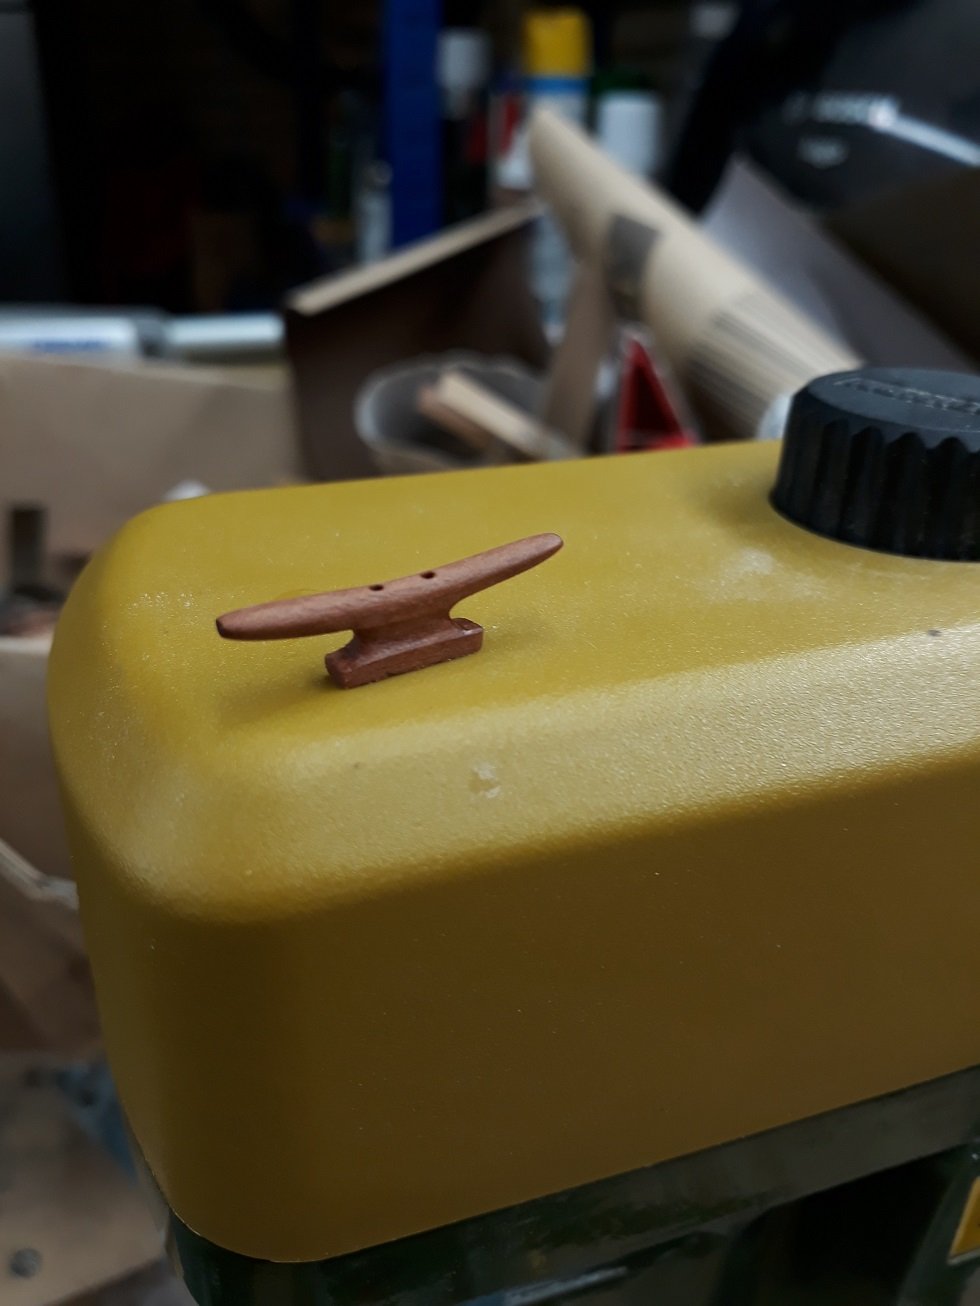
Pleasure! I made a cleat with this template, in the last two photos the cleat had a bit of tidying up sanding and a coat of Tung oil


-
Actually, it is nearing the time I will need cleats so I sat down today and did a bit of CAD. Maybe this template will help others. The printer settings can be used to scale up or down. The vertical lines are for through bolts/tree nails. cleats.pdf
-
I am not sure if this project is "little" but I have been patiently waiting for when it would make it near the top of your busy priority list Michael. Looking forward for the rest of this journey. Vaddoc
-
Another way to make shackles
vaddoc replied to vaddoc's topic in Metal Work, Soldering and Metal Fittings
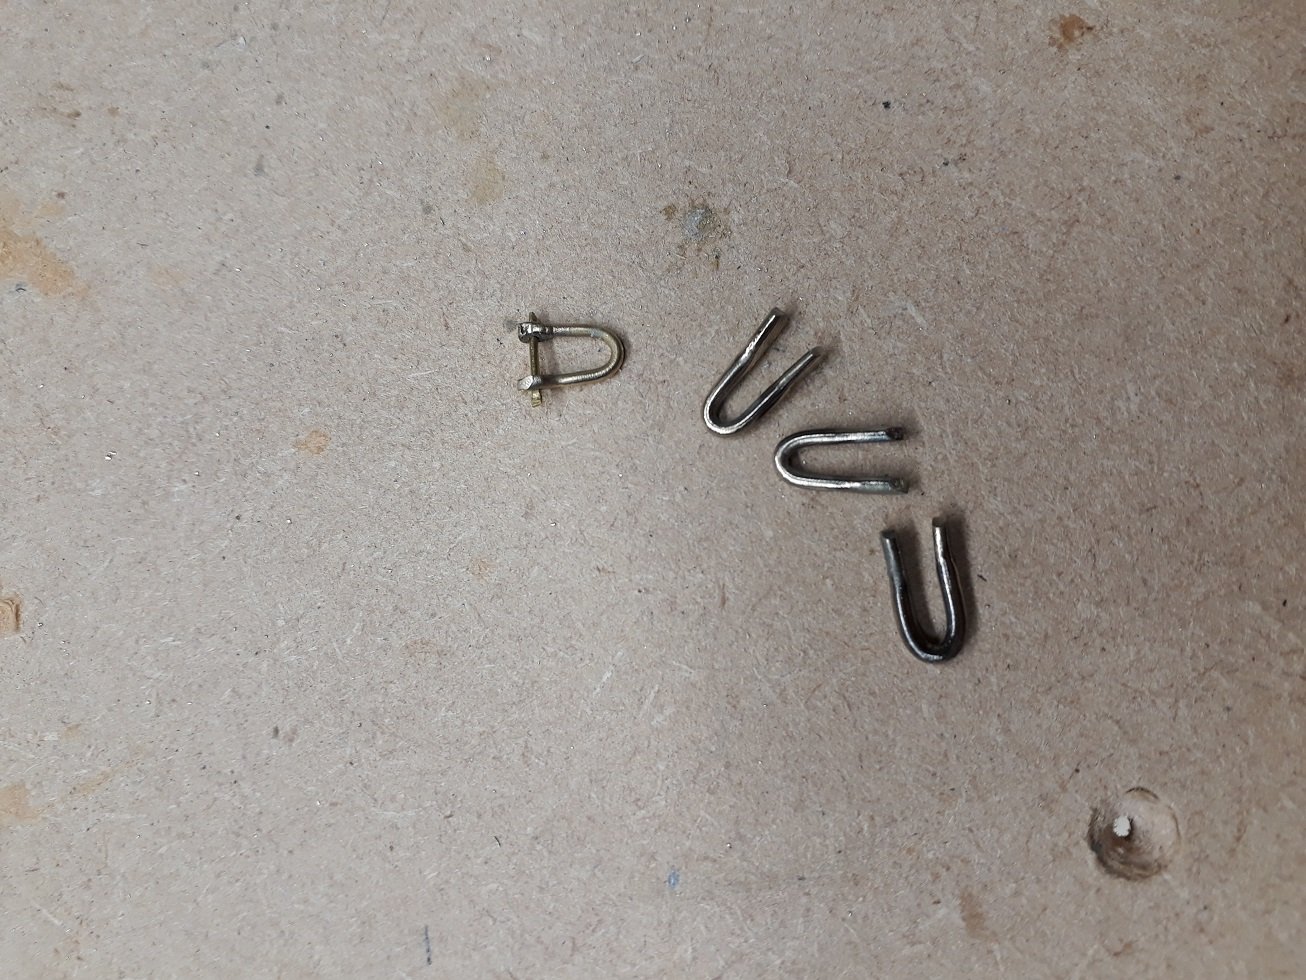
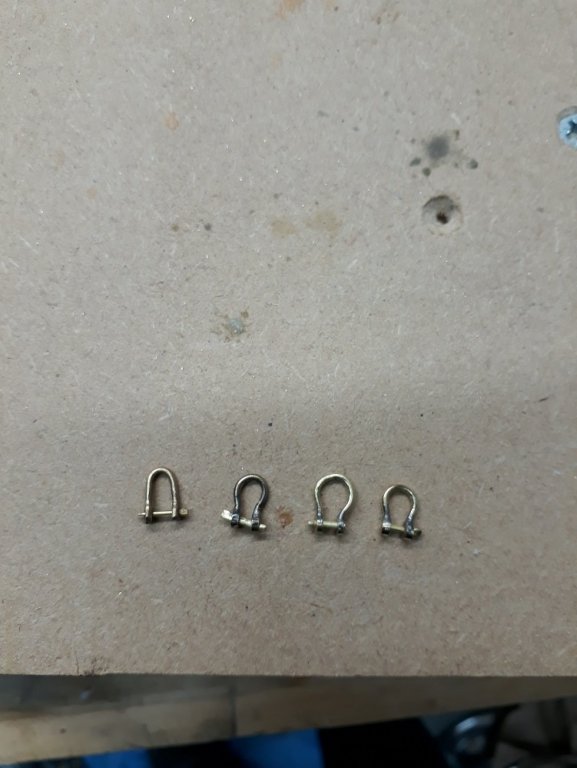
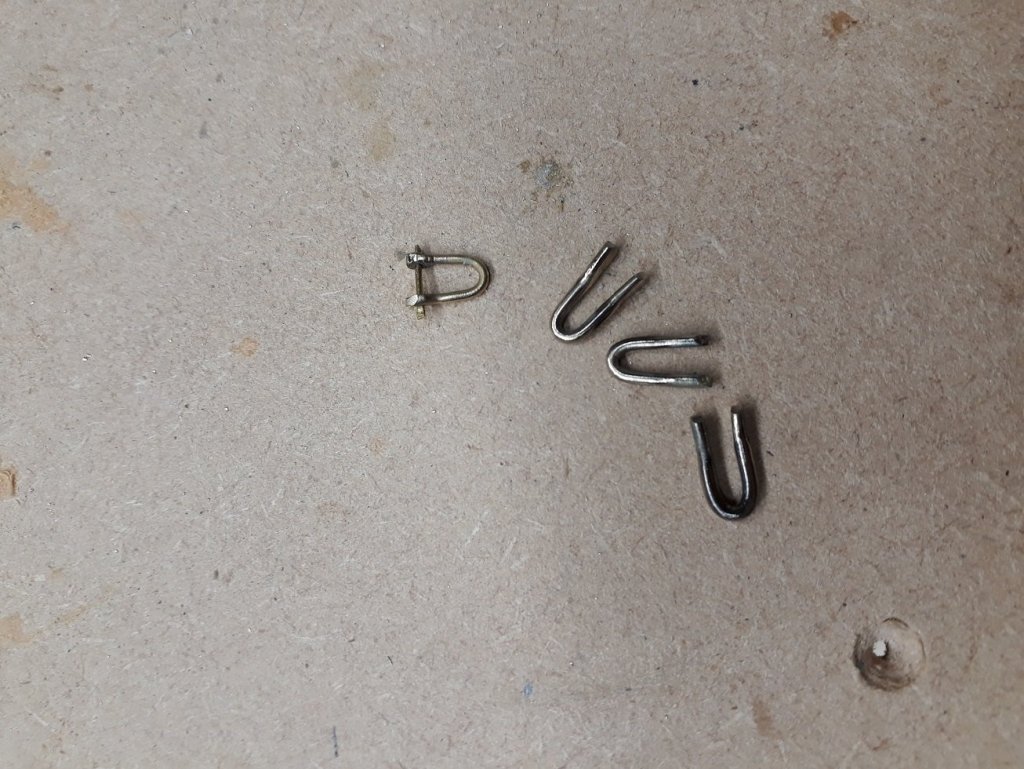
You are right in both Welfack. It is of course much easier to make U shaped ones and indeed I ll need some later on but horse-shoe is a much more interesting shape! You are also correct about the rings and for the 1.2 mm wire, a 2.7 mm tube would be nearer real life dimensions but I do not have this odd size and the 3 mm looks a bit wrong. There is plenty of thickness to widen the hole to accept same size bolt but there is no real need as the bolt will be invisible on the boat. I intend though to make some smaller ones using 1mm or 0.8 mm wire and same 2 mm tube, this will be closer to real life dimensions. This is a good way of making shackles of any shape and size, quickly and consistently at a fraction of the price for bought ones. -
Another way to make shackles
vaddoc replied to vaddoc's topic in Metal Work, Soldering and Metal Fittings
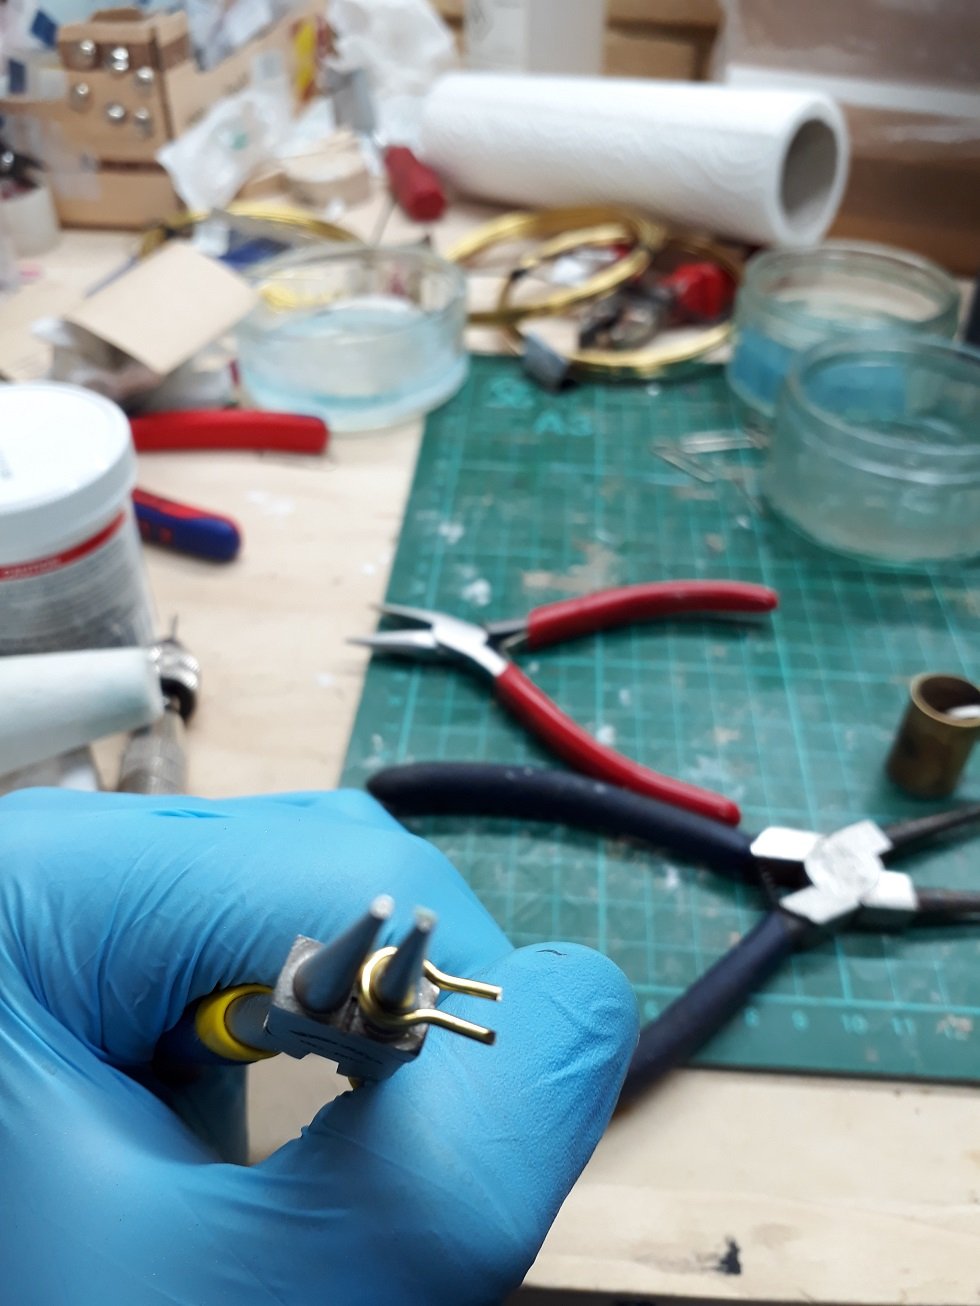
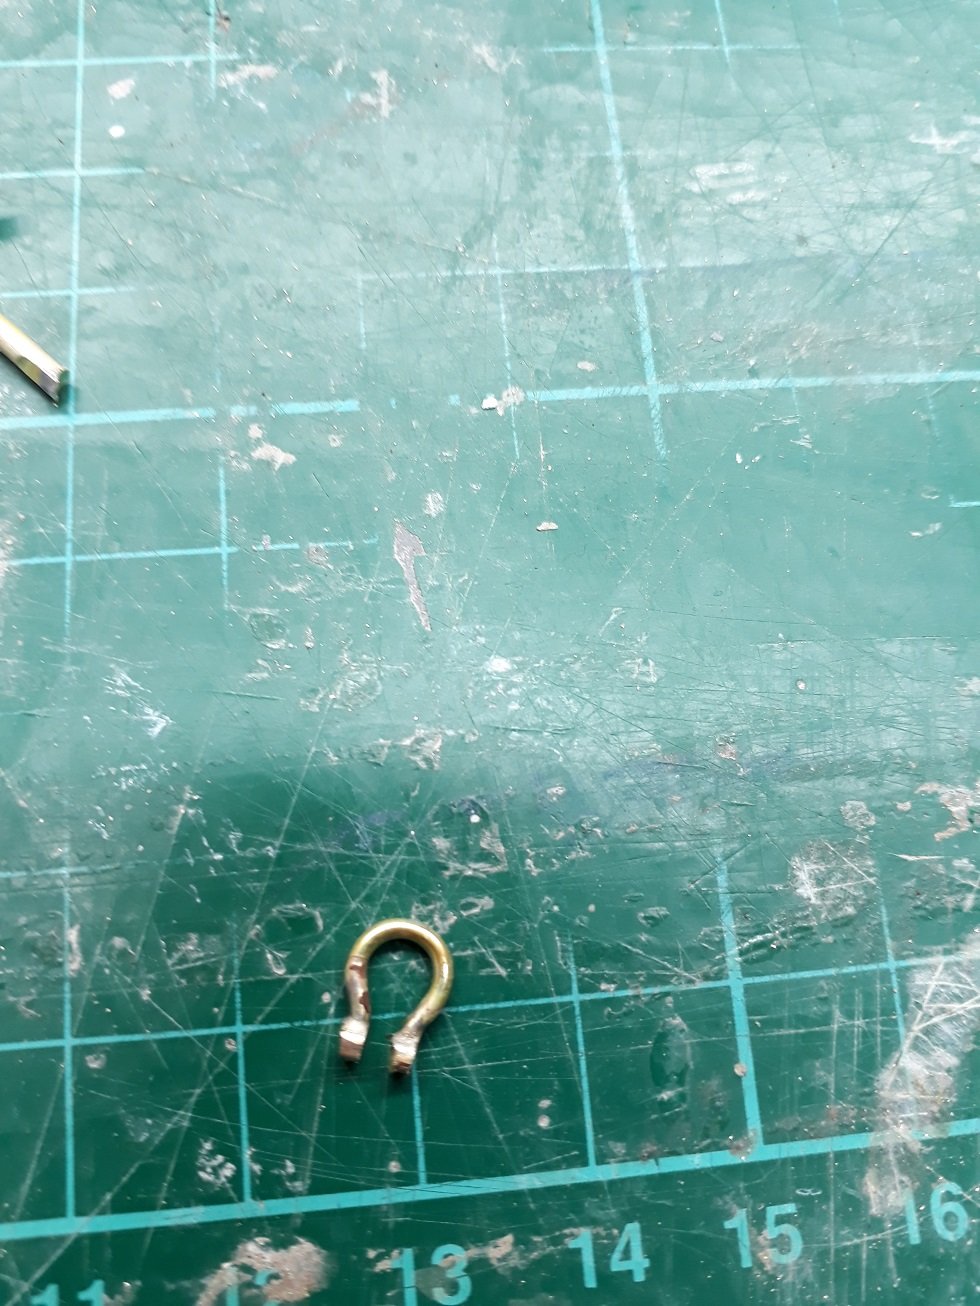
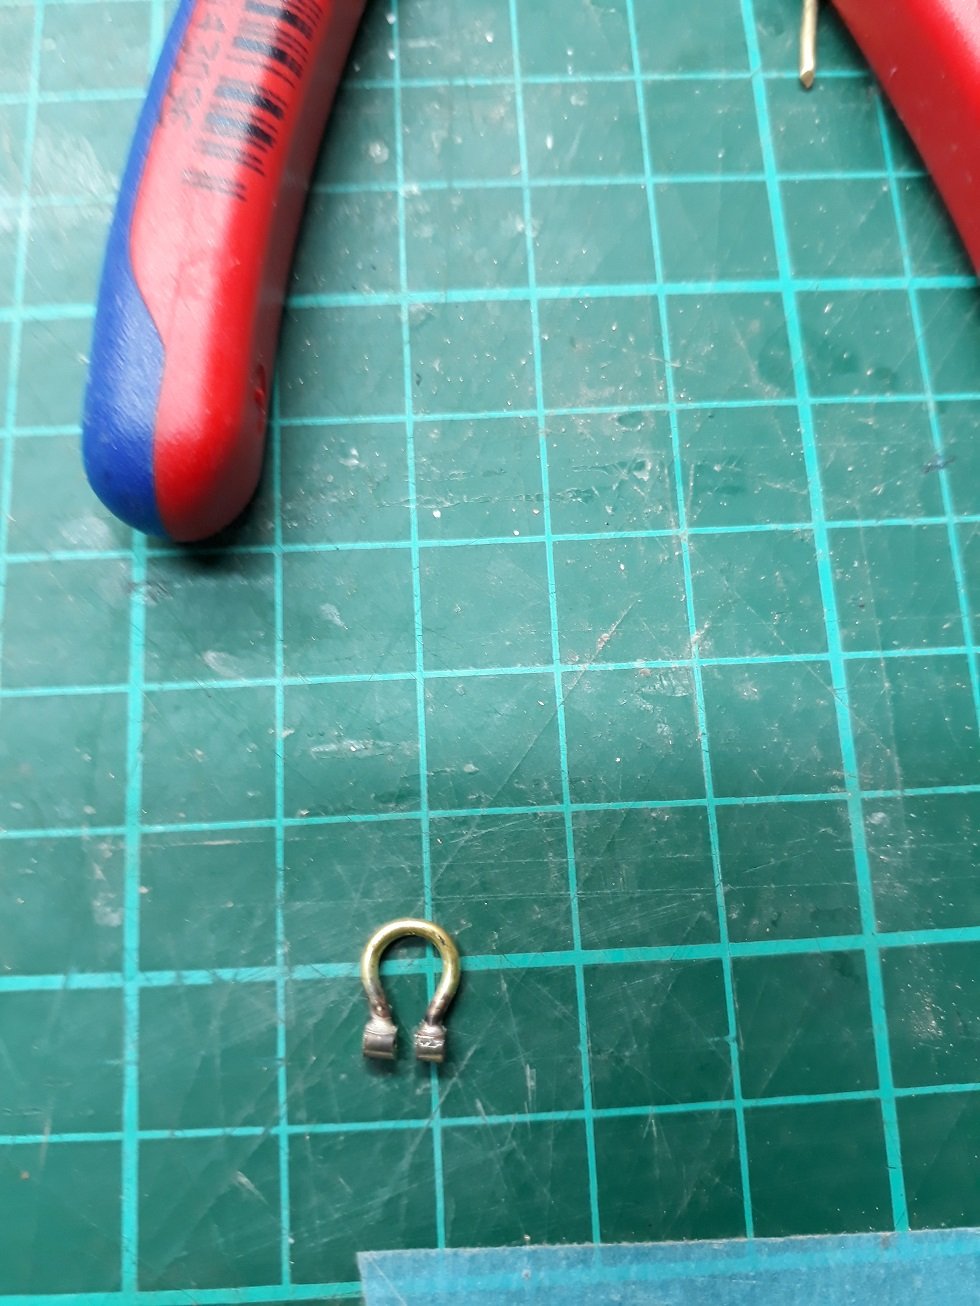
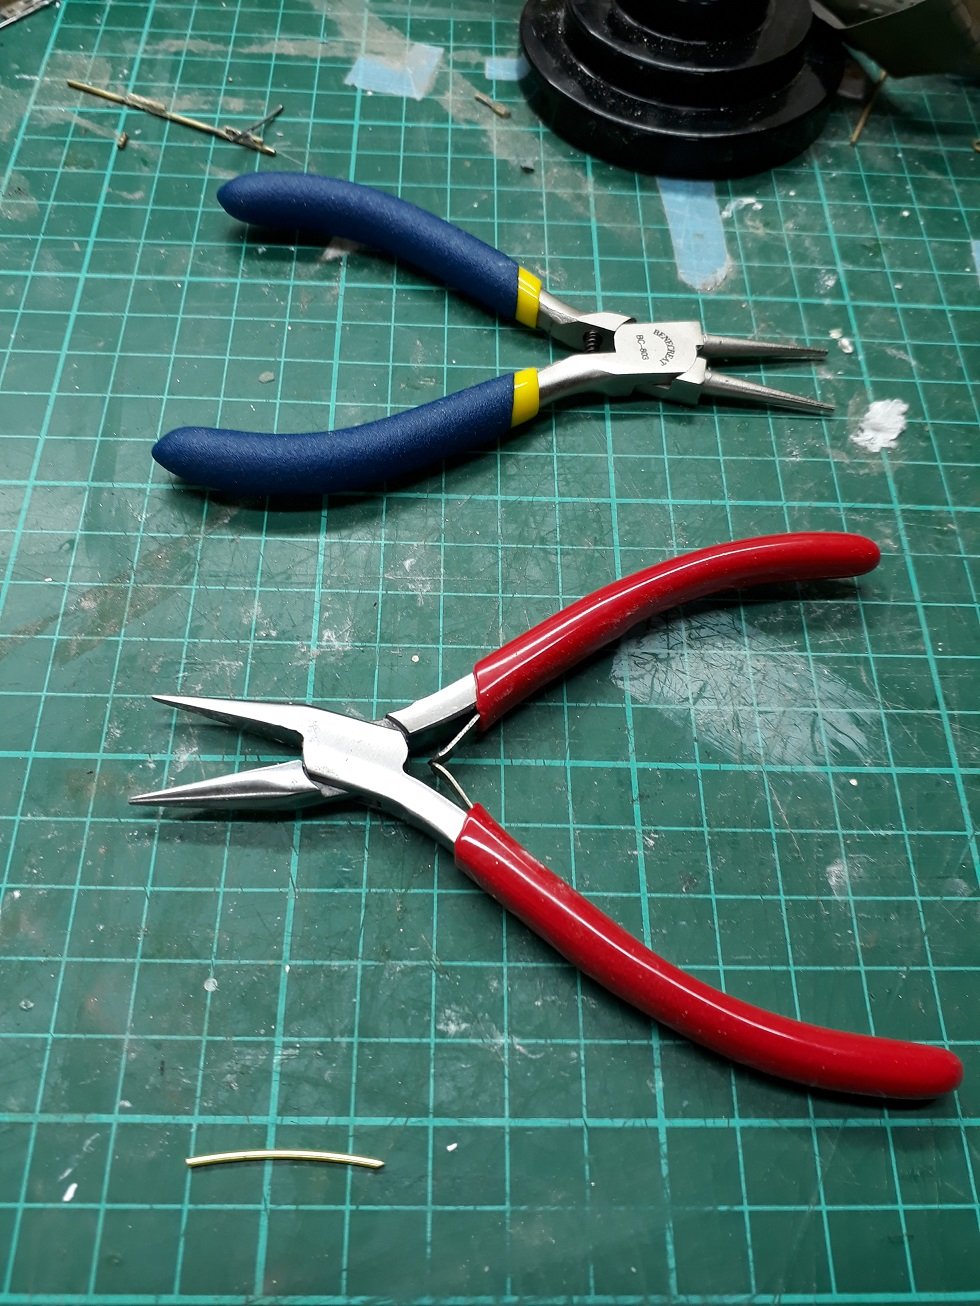
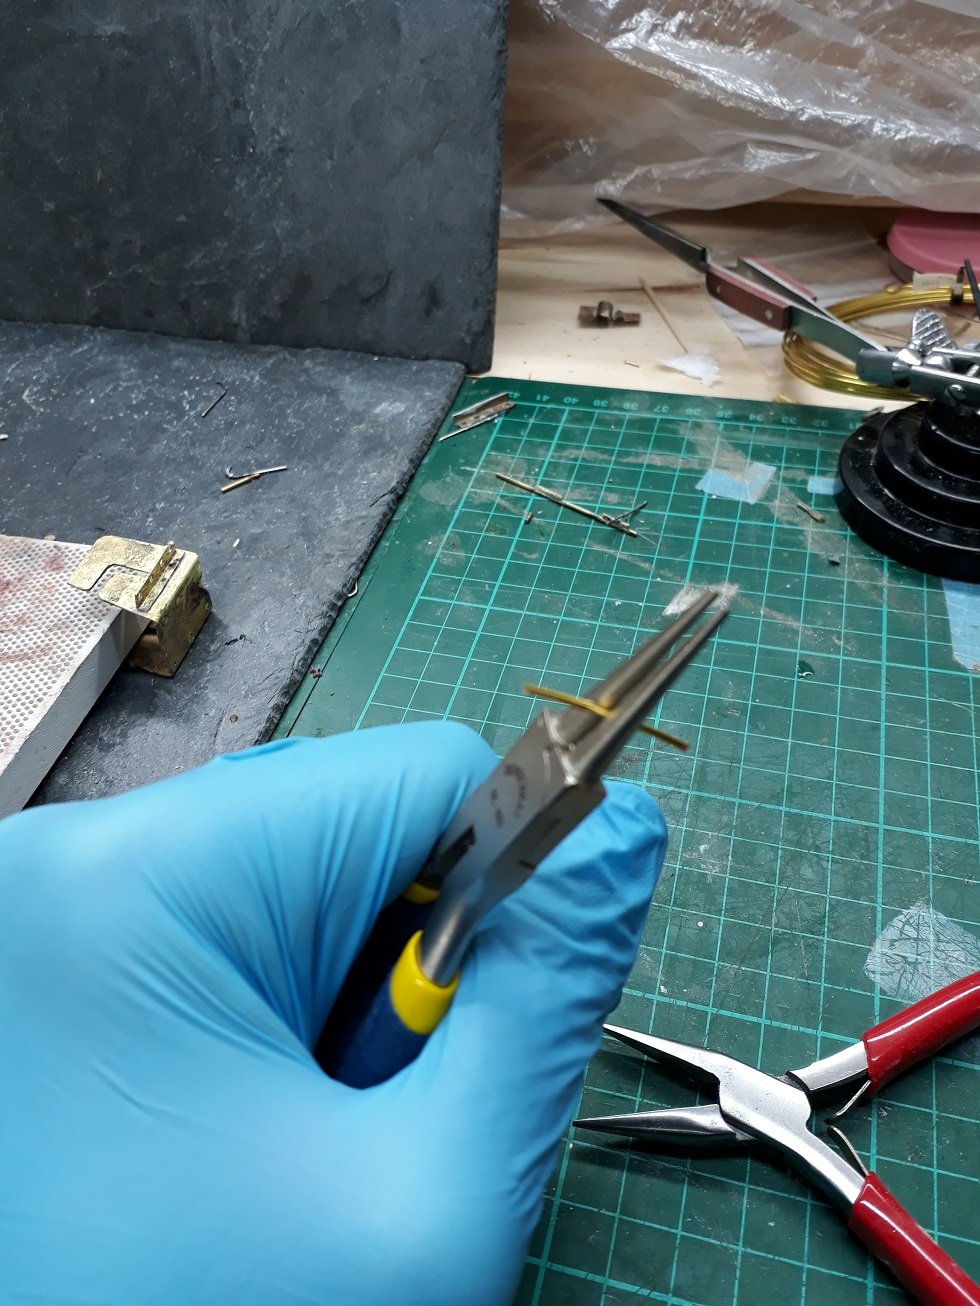
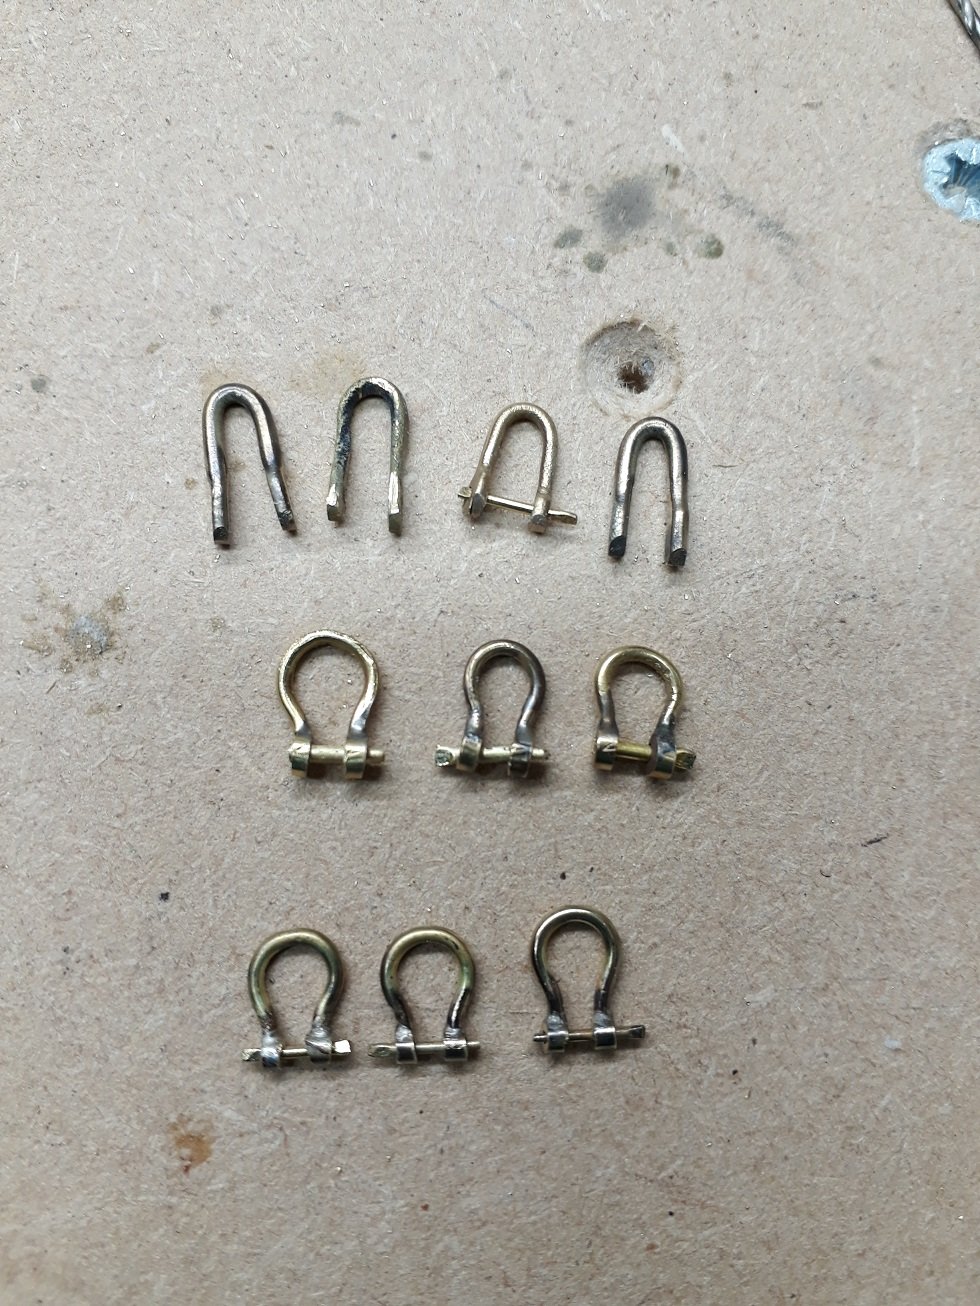
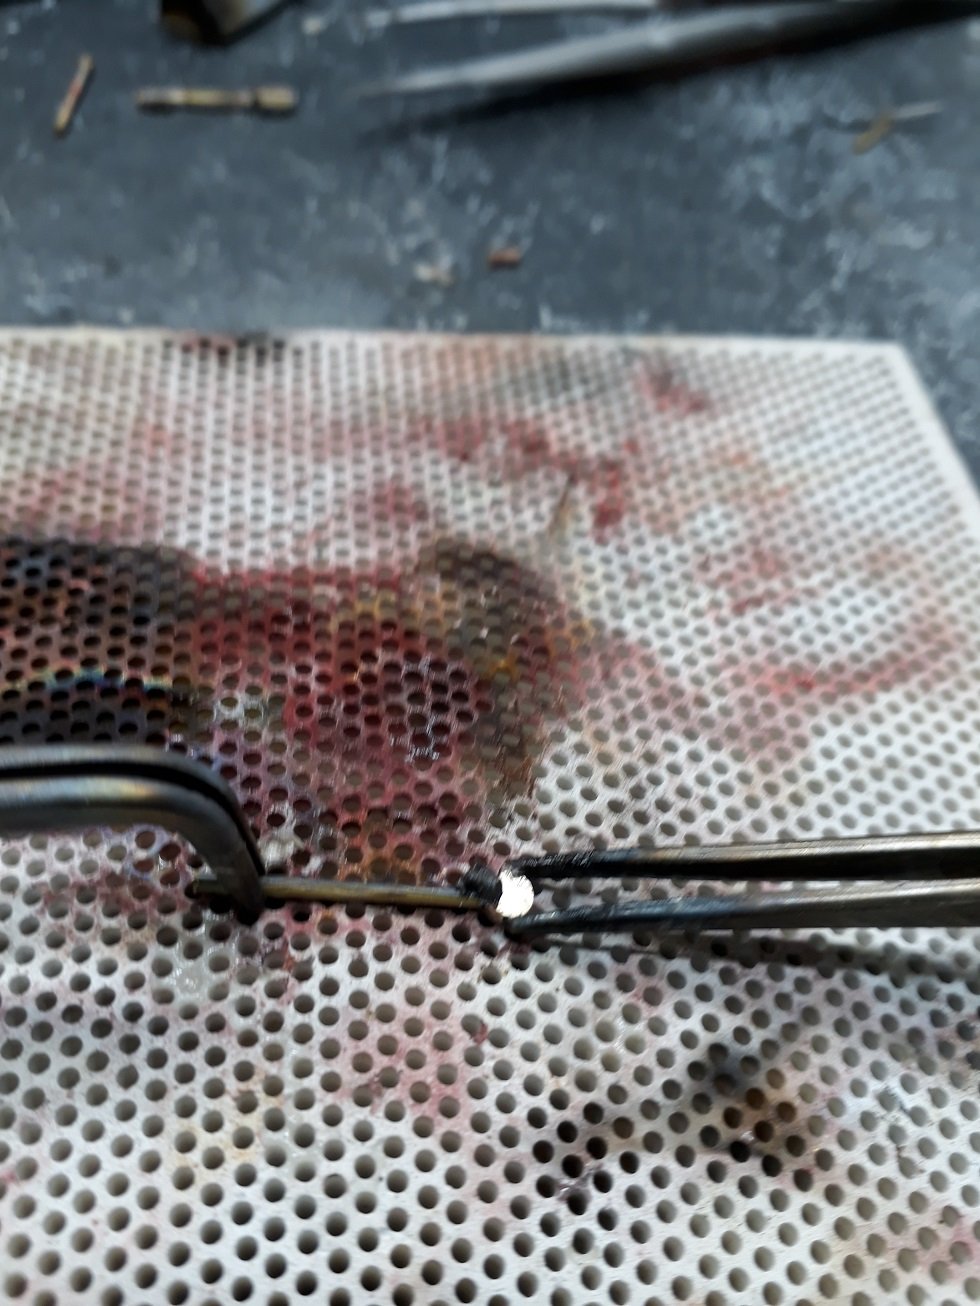
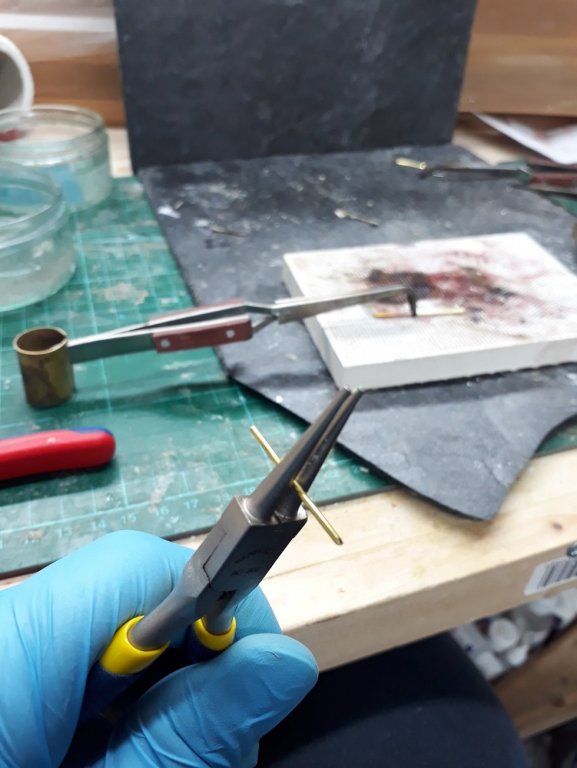
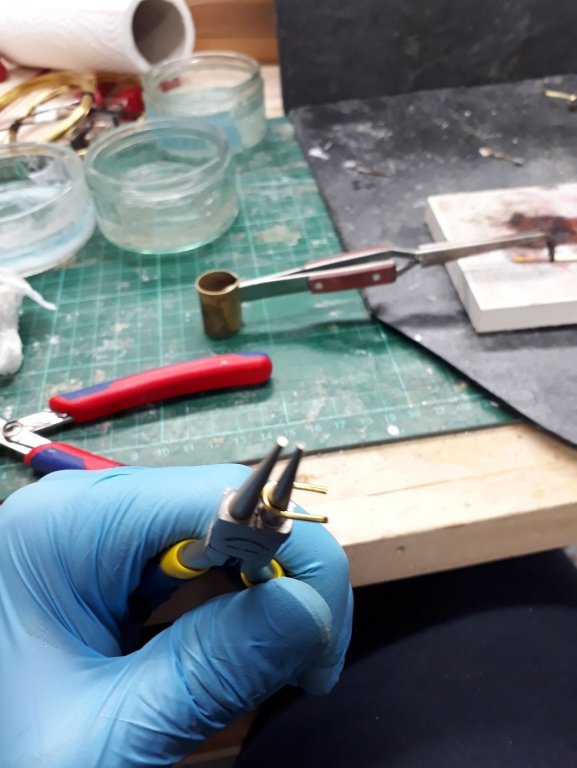
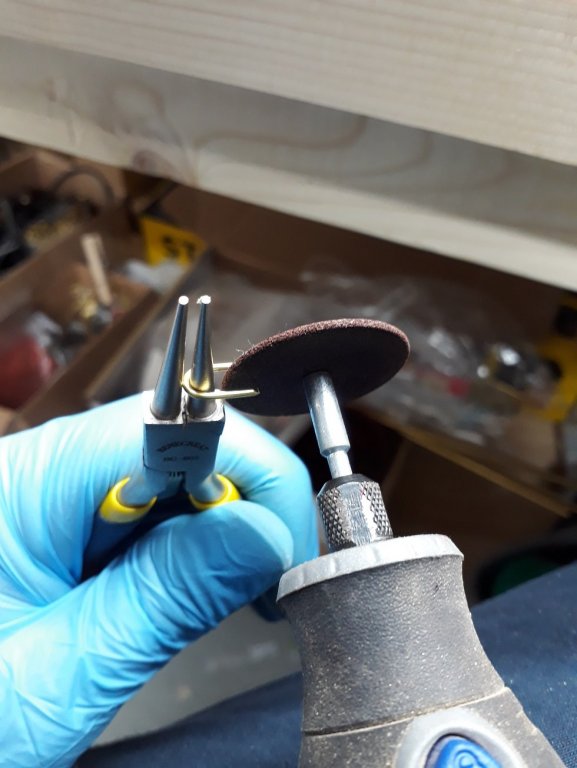
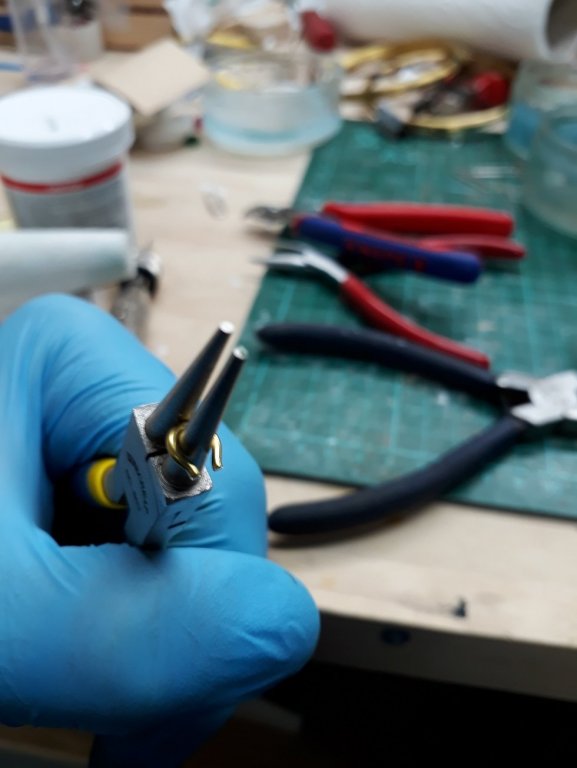
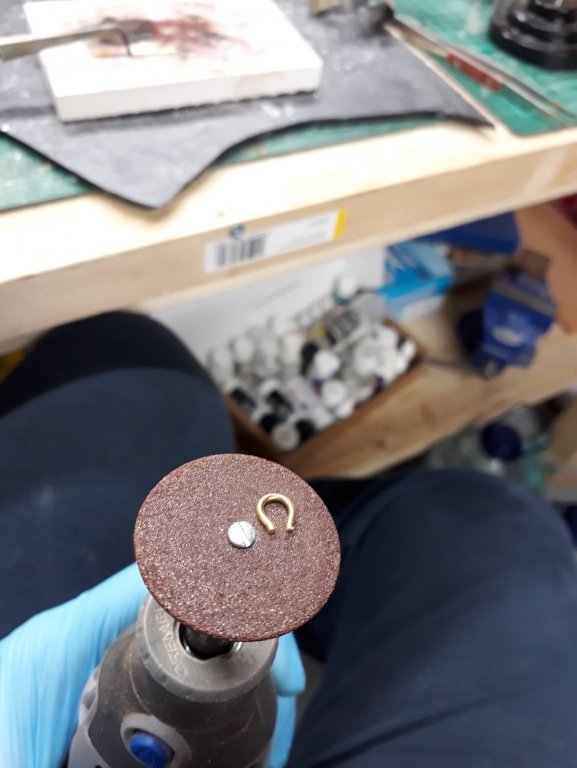
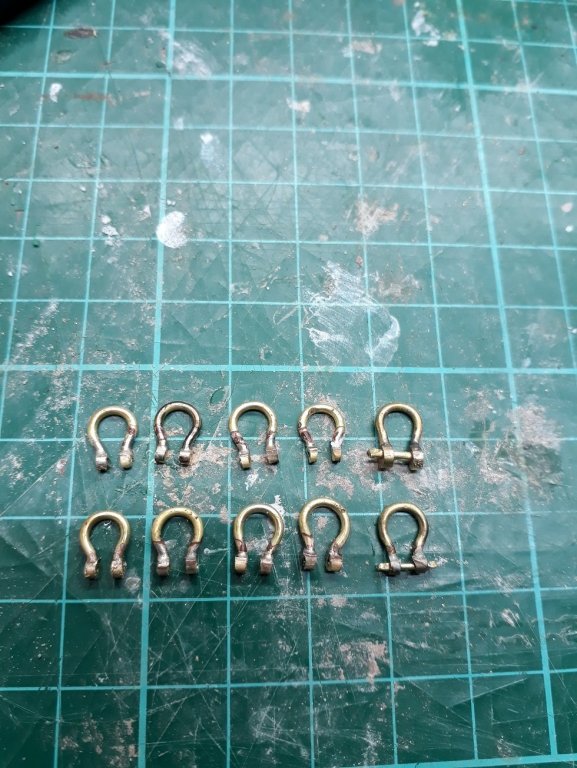
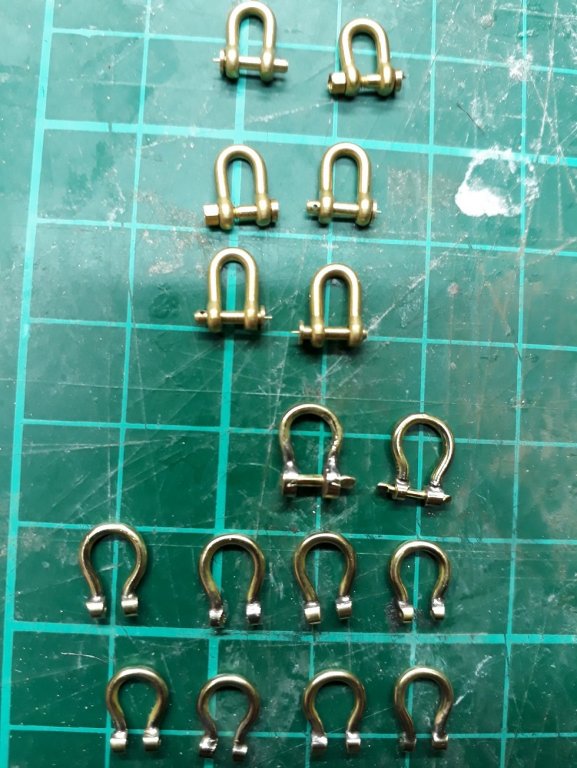
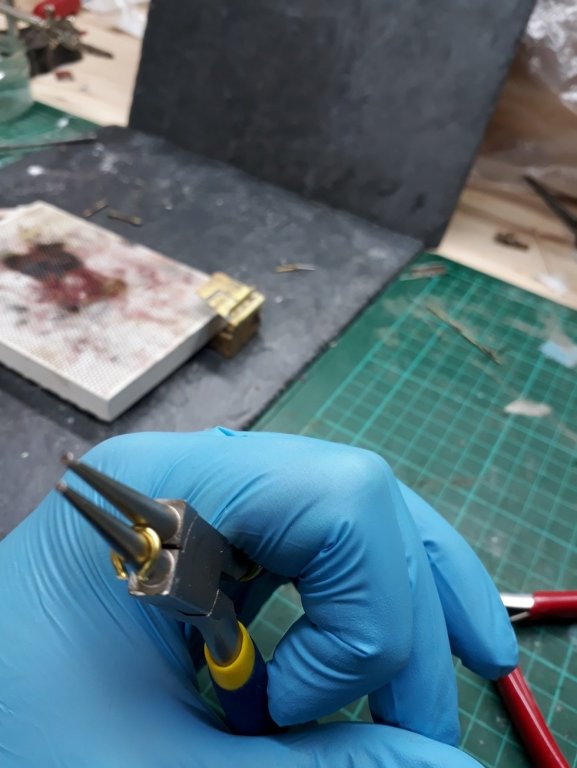
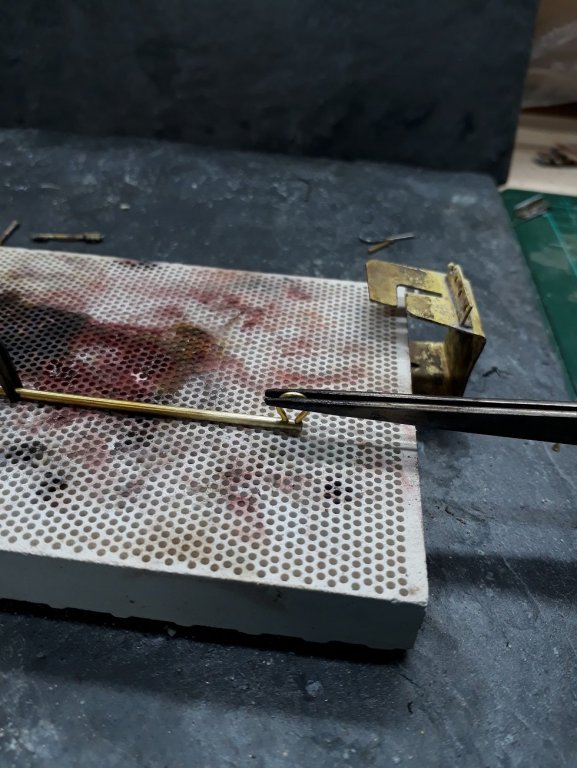
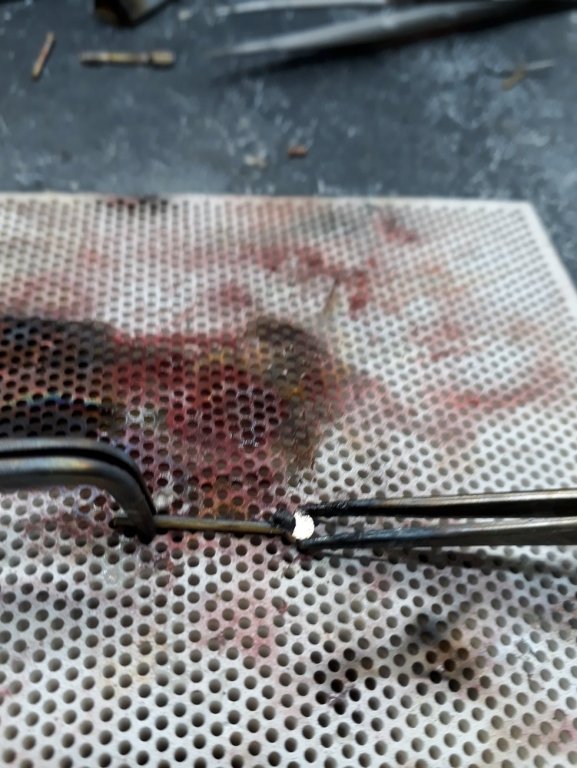
I ve standardised the the method and now it takes less than 10 min for each shackle. I ll post a few more pics: Clean the 2 mm tube and sand a flat and secure for soldering. Cut a piece of 1.2 mm wire, bend with fingers round the pliers Use second round pliers to bend into final shape in one step, using something appropriate to maintain gap Trim the excess and sand flat the ends by touching on the disc Secure for soldering, use a tiny amount of paste Cool, then use the disc to cut free and shape the shackle The shackles come out very consistent in shape and size. These have not been polished yet After a bath in acid and polishing, I think they look great. This is how they compare with the bought ones (expensive) Smaller sizes can easily be made and much smaller brass tubes are available as welding supplies.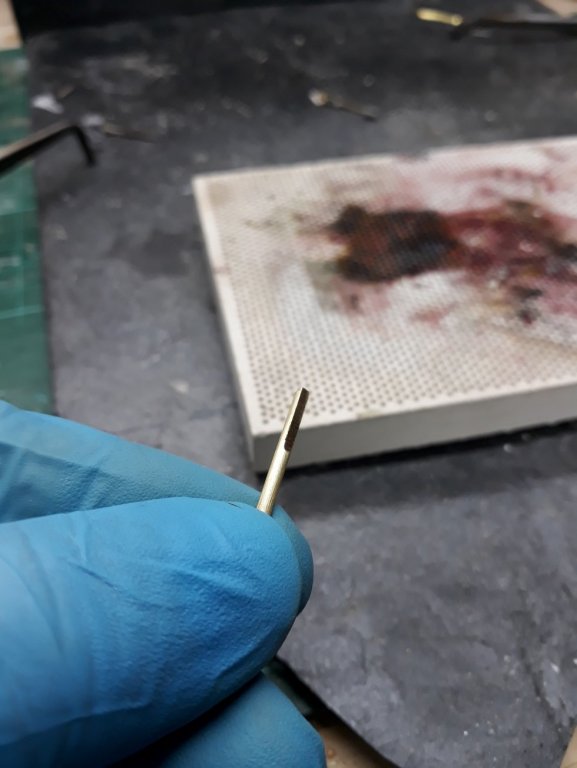


-
Welcome Mark! Indeed consider starting a log, very rewarding.
-
Hand brushing is a good alternative, quite satisfying as well! I have only basic painting skills and do not want to use an airbrush. I have had excellent results with hand brushing using Valejo colours following these rules: 1. Use very good brushes, with appropriate width for the job 2. Thin the paint (should be runny but not like water), avoid heavy coats. 3. For Valejo, use the hand brushing thinner, different and better than the air brush thinner. It congeals if left so must have resin in it (this is what valejo claims so not easily reproduced at home). Get the 60 ml bottle, it is not expensive. 4. Use a bit of retarder. 5. Start from dry and end on wet. Take your time, you can go over the area 2-3 times. Avoid puddles at the edges. 6. Trust the paint! Do not go over again to "correct" or smooth out brush marks. They will disappear. You ll probably need a dozen or more coats either way. 7. Best to seal the wood, I use a water based wood sealer sanded to 400 grit 8. I use plastic pots with caps that seal pretty well and are cheap. The paint stays wet for months. 9. Use only frog tape or Tamiya tape or equivalent. The paint will bleed under ordinary masking tape or electricians tape. 10. Acrylic paint is not tough so needs to be protected with varnish or some topcoat Hopefully these will be of help to some. May not work for all but I was able to paint my 80 cm hull with almost no brush marks. Vaddoc
-
Another way to make shackles
vaddoc replied to vaddoc's topic in Metal Work, Soldering and Metal Fittings
It's a type of ceramic, google honeycomb soldering block, it is very cheap and works well. -
Another way to make shackles
vaddoc replied to vaddoc's topic in Metal Work, Soldering and Metal Fittings
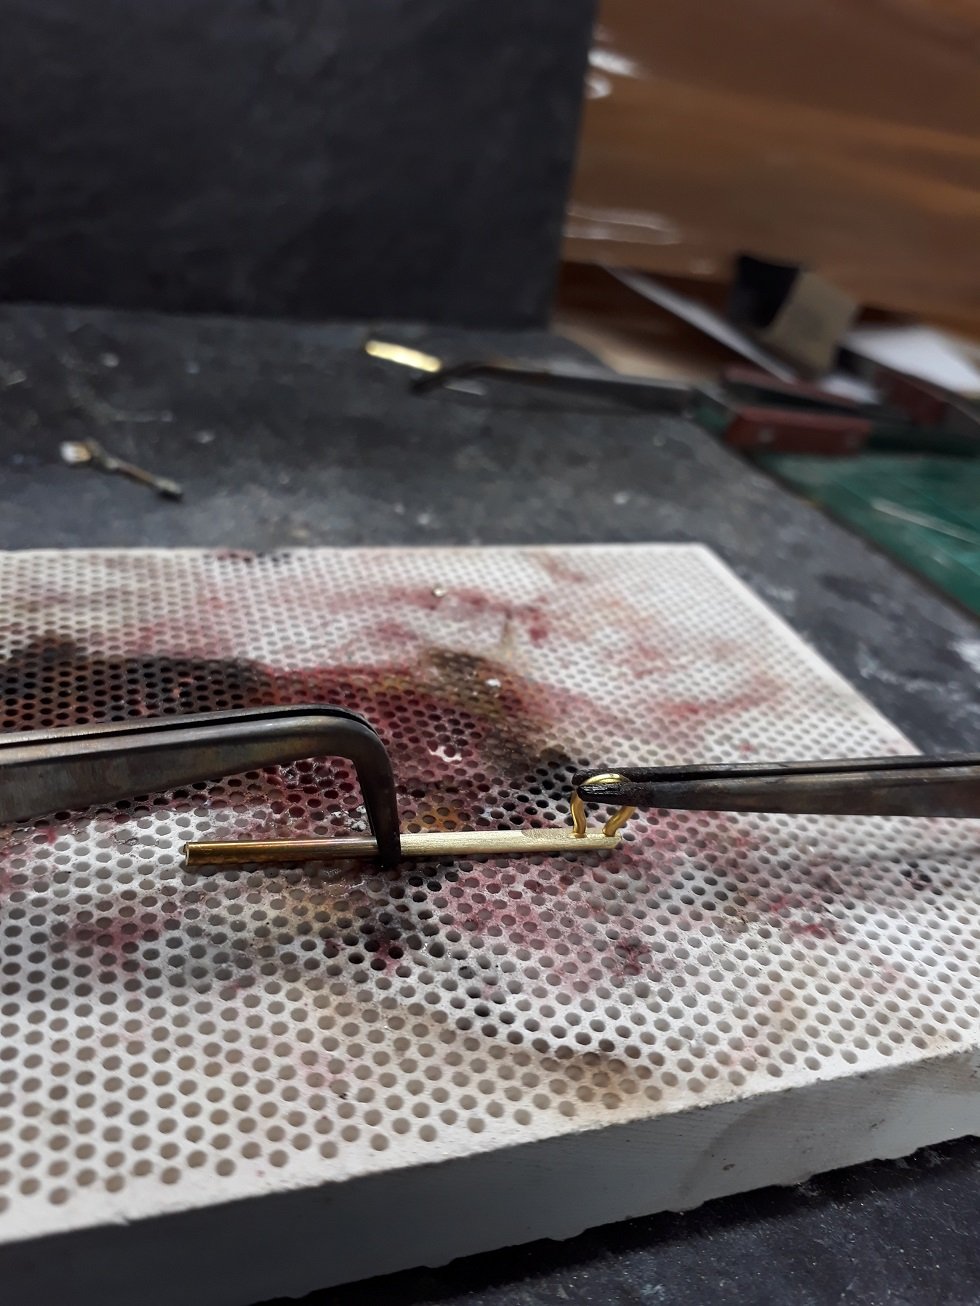
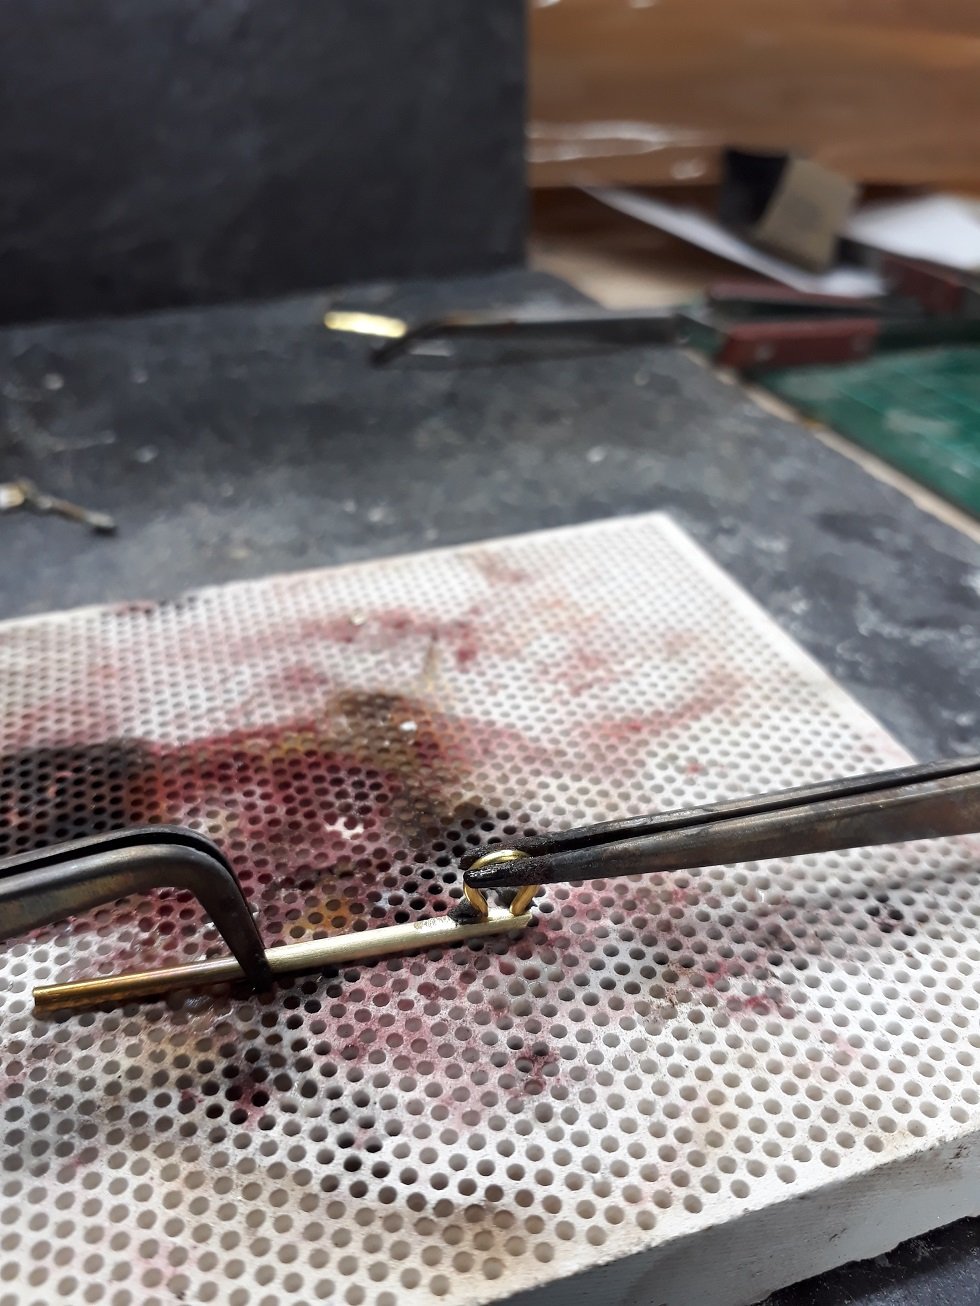
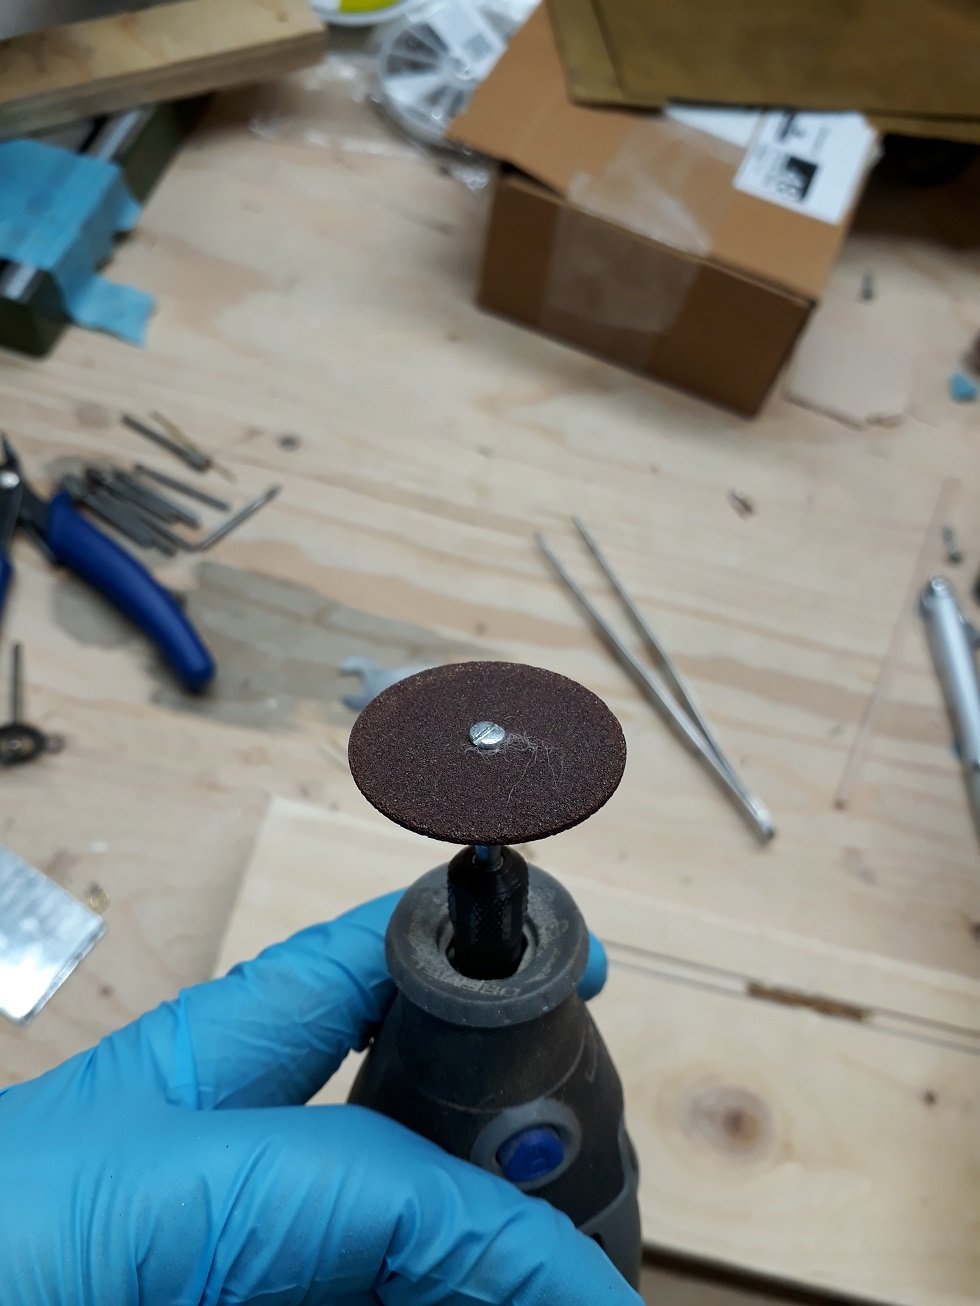
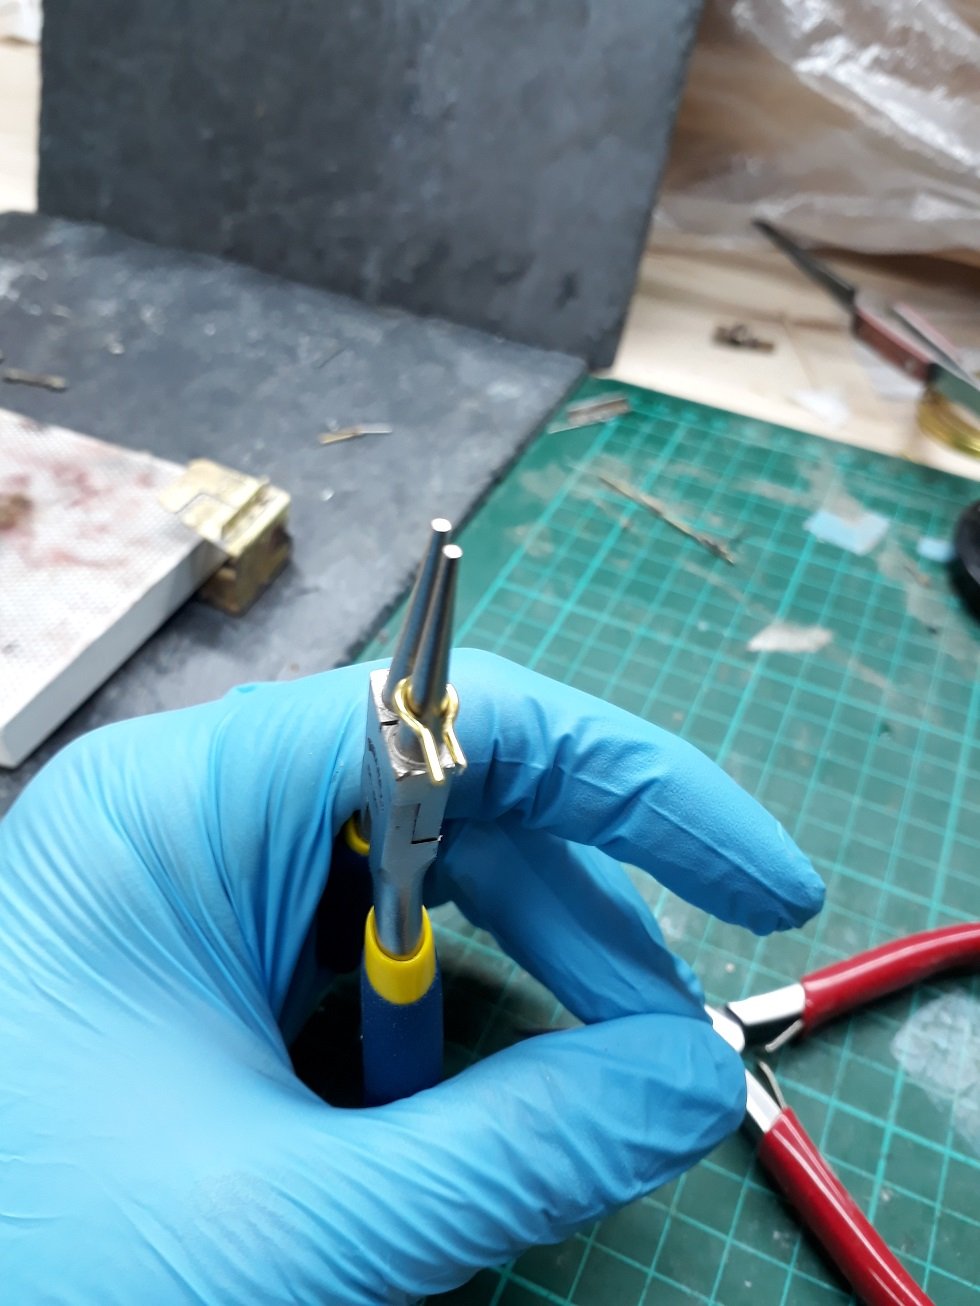
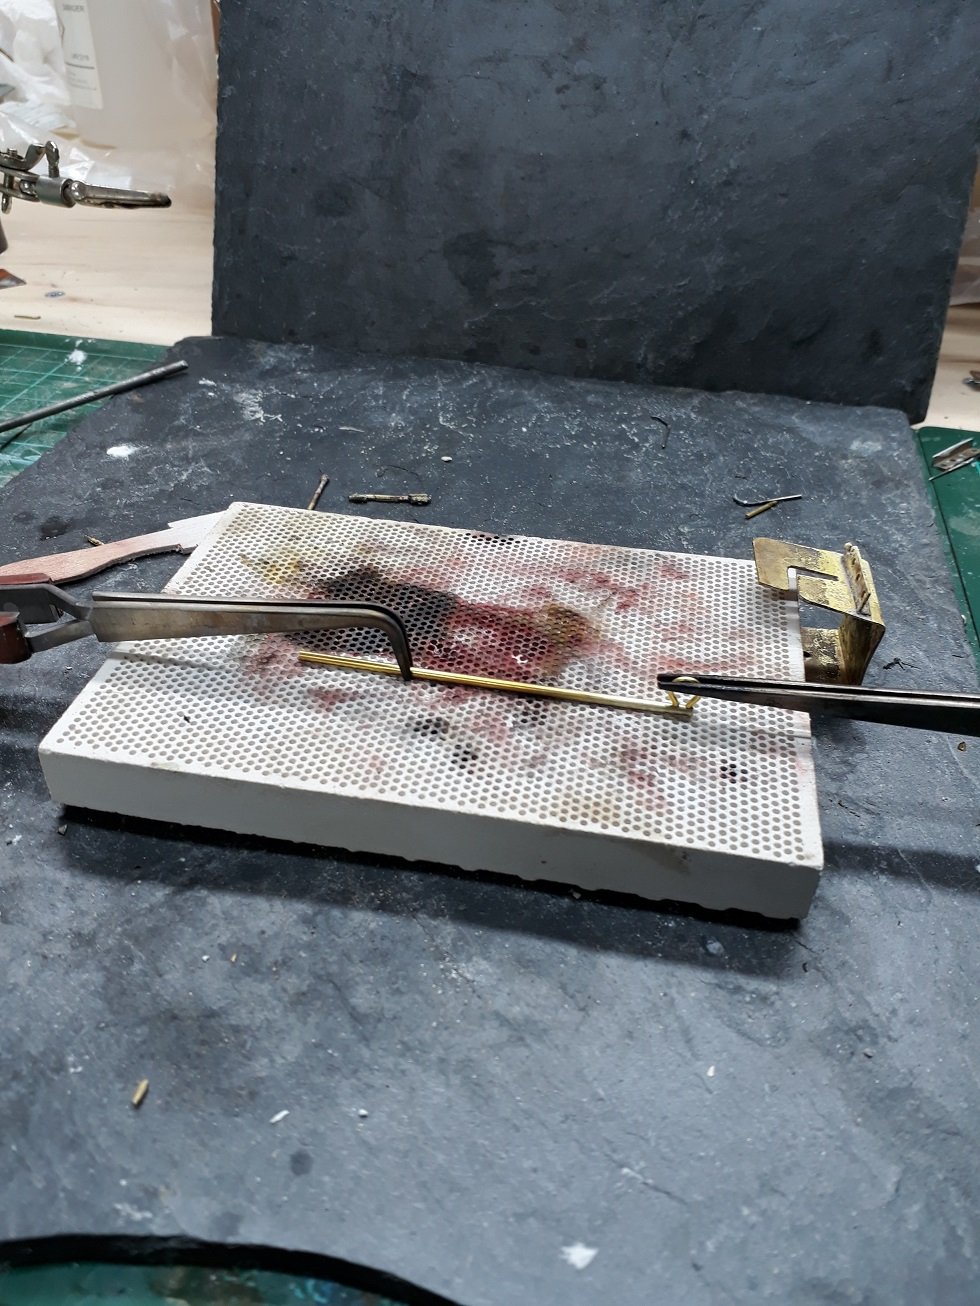
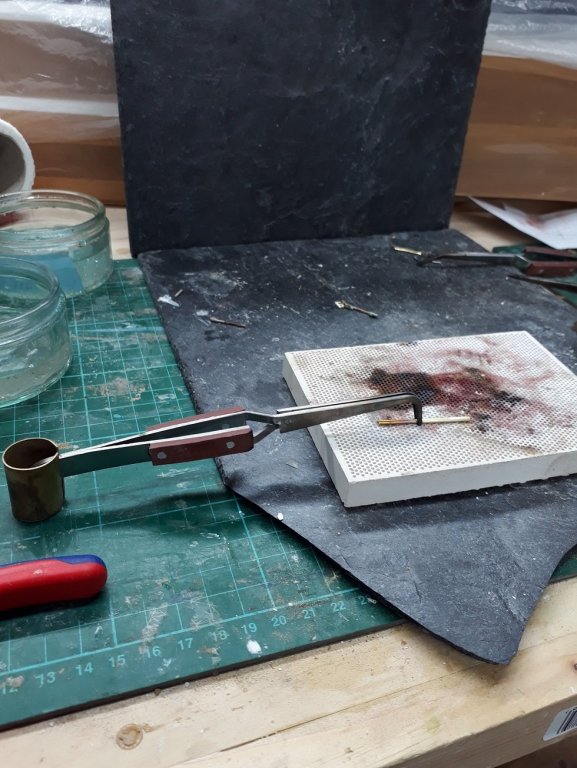
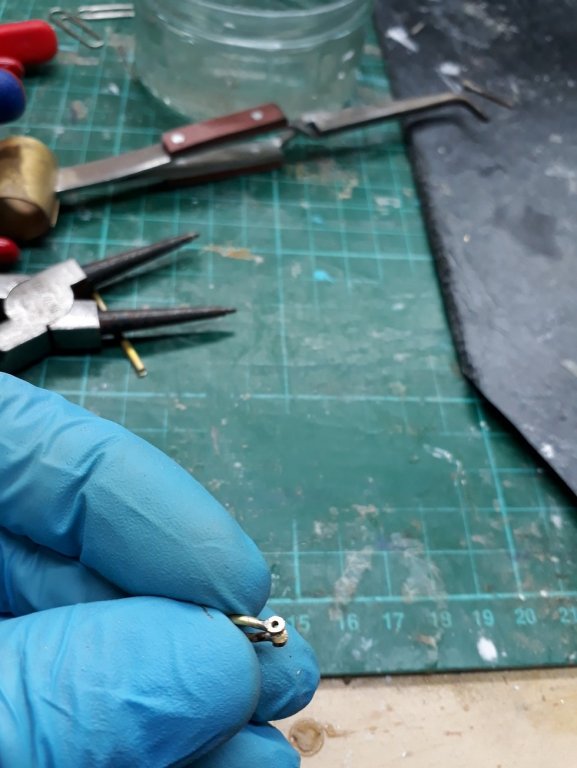
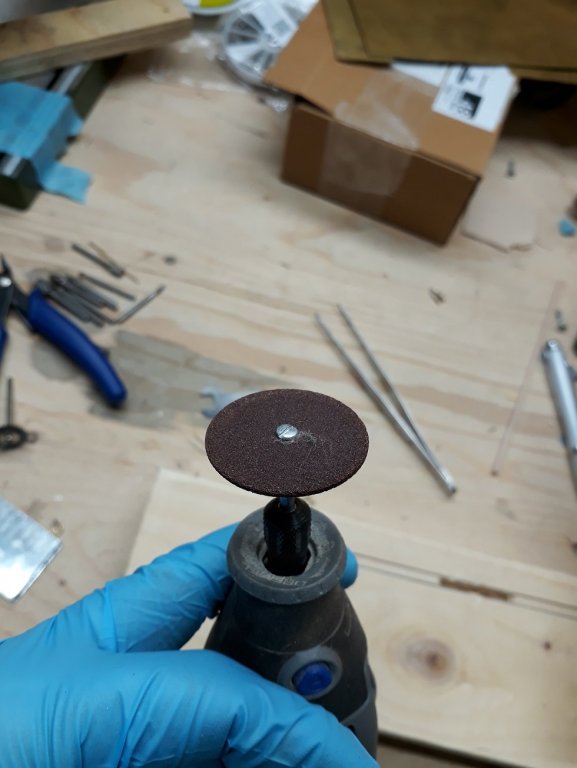
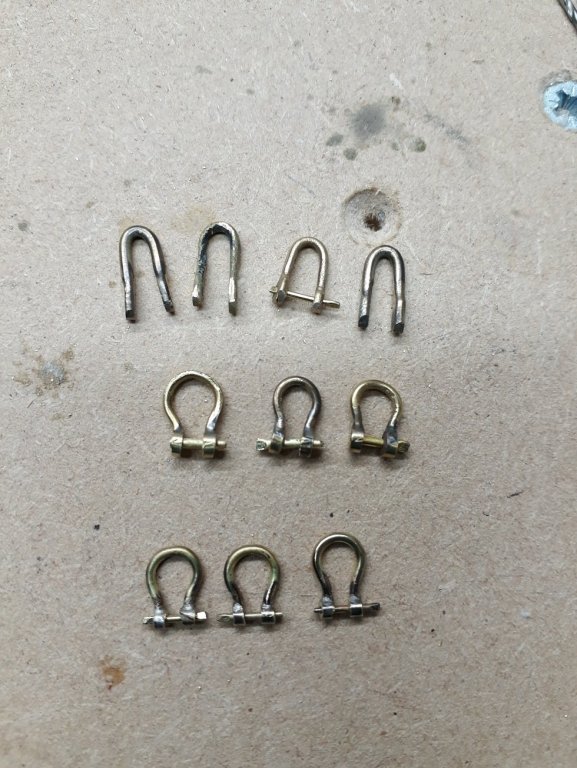
Ok, I think I concluded on a quick and easy way to make shackles, at least in large sale. Very similar to the one Tony used. Here it goes: Get some 2 mm brass pipe (has a hole around 0.8 mm) and also some needle pliers. Take a length of 1.2 mm brass wire, about 2 cm. No need to straighten or anneal. Hold it at an appropriate position and bend it to shape. A second pair of flat pliers is very useful Trim the ends and touch to the disc sander to make sure they are flat Now silver solder on to the pipe. It helps if the surface of the pipe is sanded a bit flat. A tiny amount of paste is needed The result in two consecutive shackles Now, using the brown dremel wheel cut the pipe to form the shackle, trim the ends as needed. Use a wire brush to polish the brass. A short piece of 0.8 mm wire with crushed ends finishes the shackle. The bottom shackles in the next photo are made with this method, I think they are the best and most consistent. This is a quick, cheap and easy method, it needs quite a few tools but nothing too exotic. Regards Vaddoc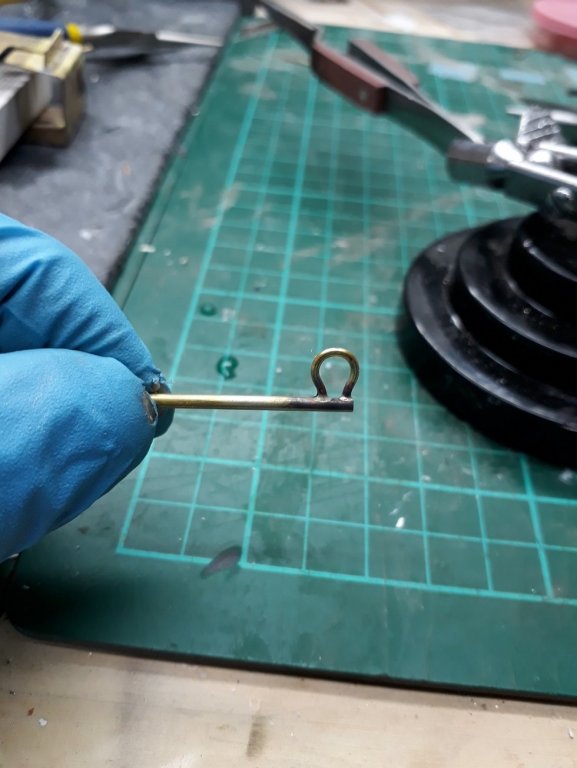


-
Straightening thin brass wire
vaddoc replied to vossy's topic in Metal Work, Soldering and Metal Fittings
Indeed, this is how I straighten brass wire. I first anneal the wire and then roll it between two thick pieces of very flat MDF. Works perfectly every time but only if the wire is annealed first. -
So in the first video, the central planks are quarter saw, and the rest just flat saw cut in the middle?
-
Use a hard dense wood, cut a pattern, define the lines with files, finish with sandpaper up to 400 grit, apply tung oil. I made all the cleats I needed in my previous boat quite easily. Link to that page https://modelshipworld.com/index.php?/topic/9355-24-exploration-gaff-rigged-ketch-by-vaddoc-scale-112-a-tad-roberts-design/&page=8
-
Another way to make shackles
vaddoc replied to vaddoc's topic in Metal Work, Soldering and Metal Fittings
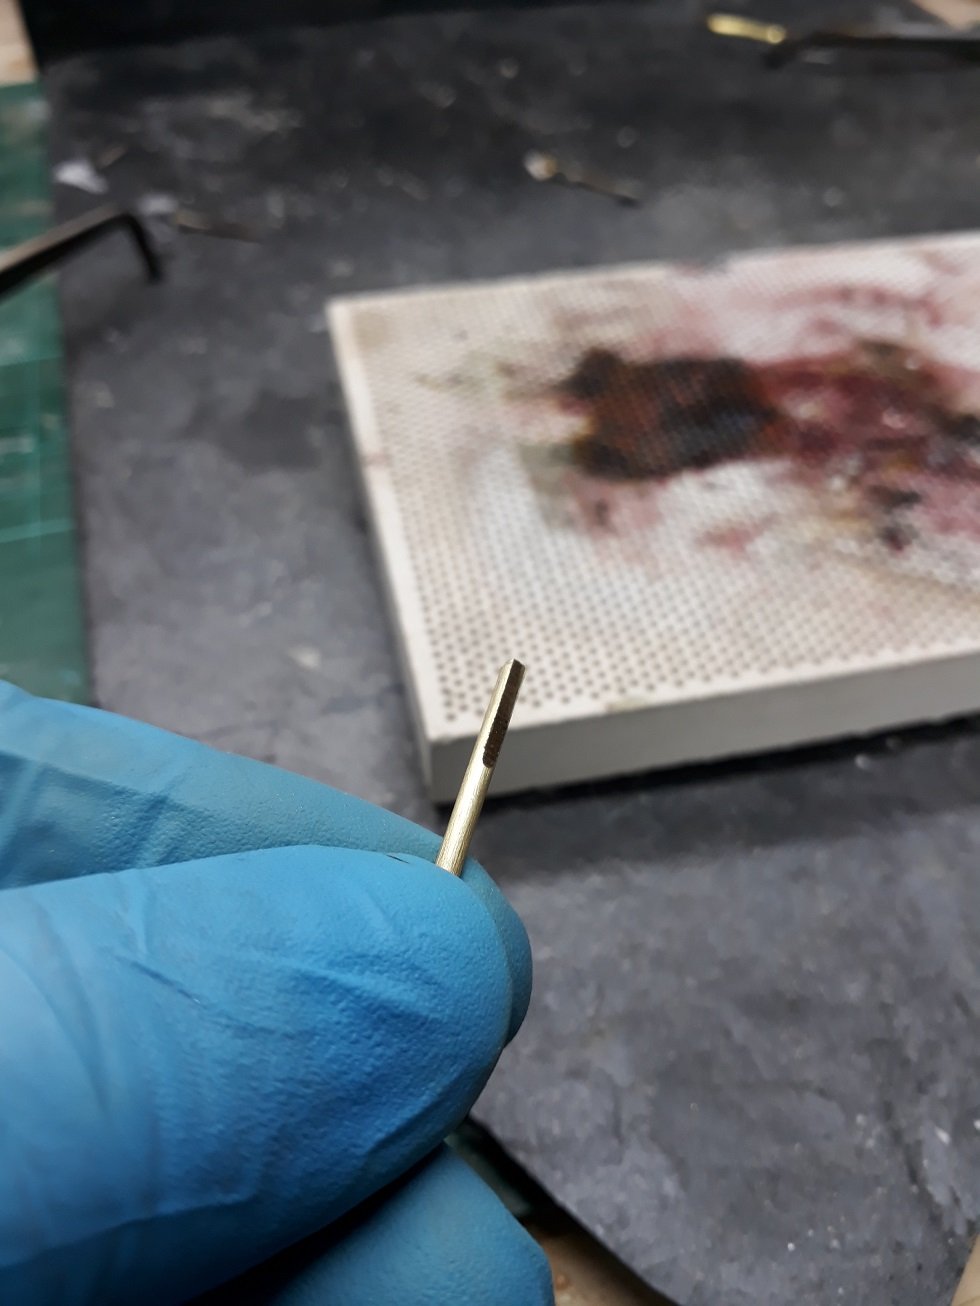
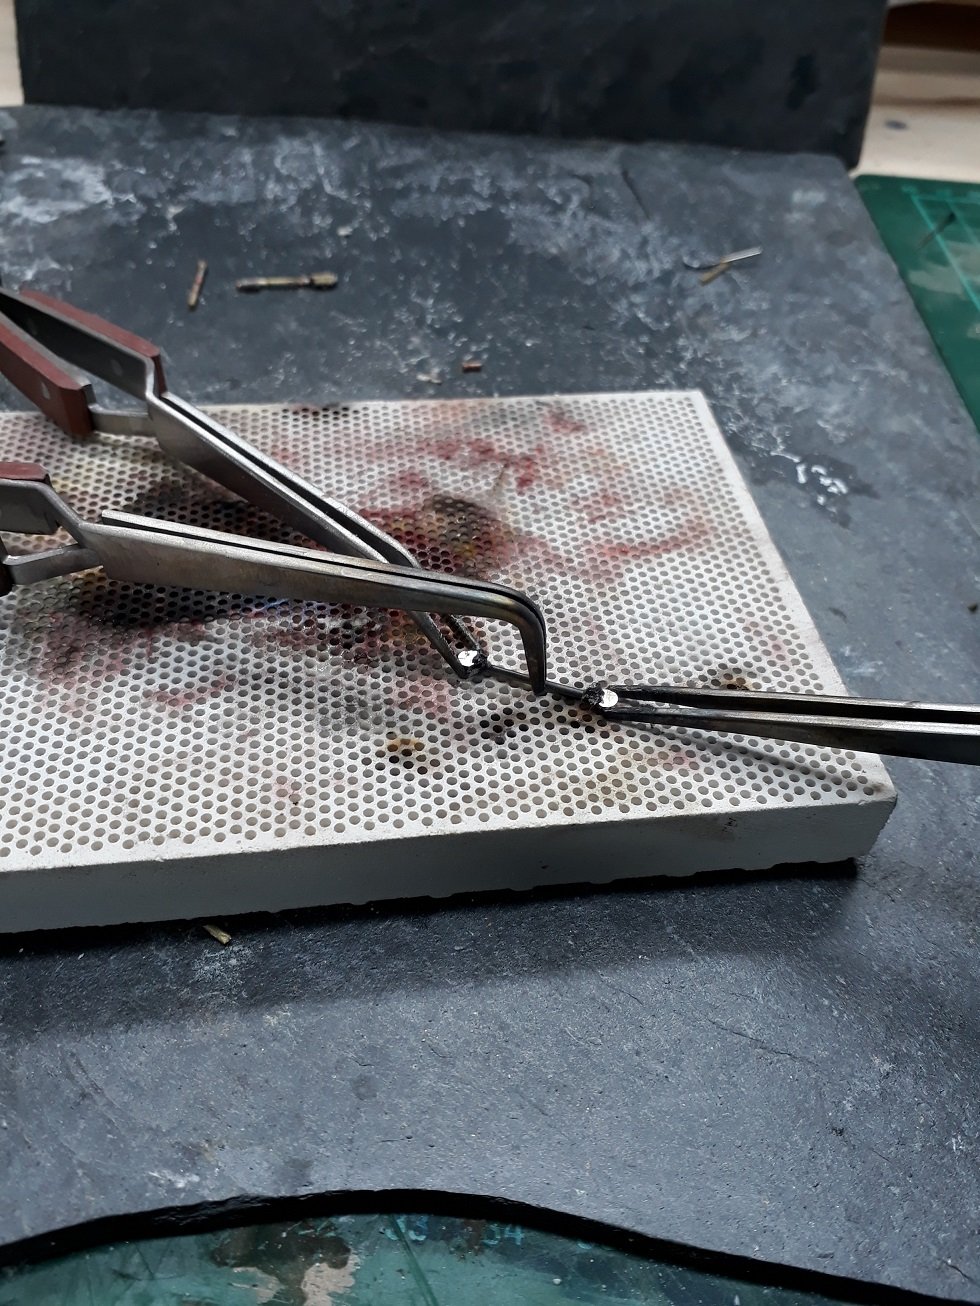
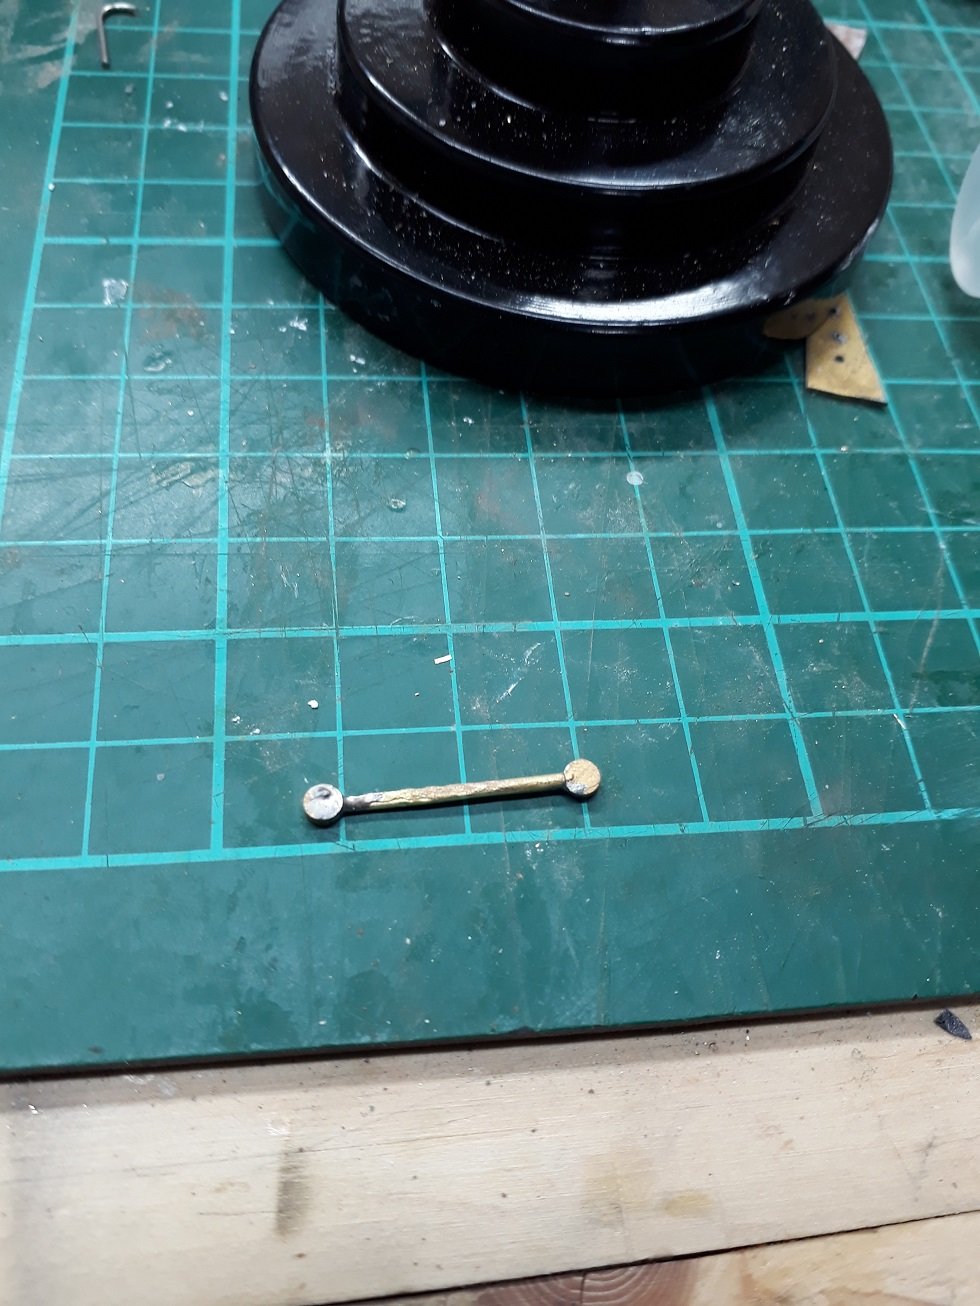
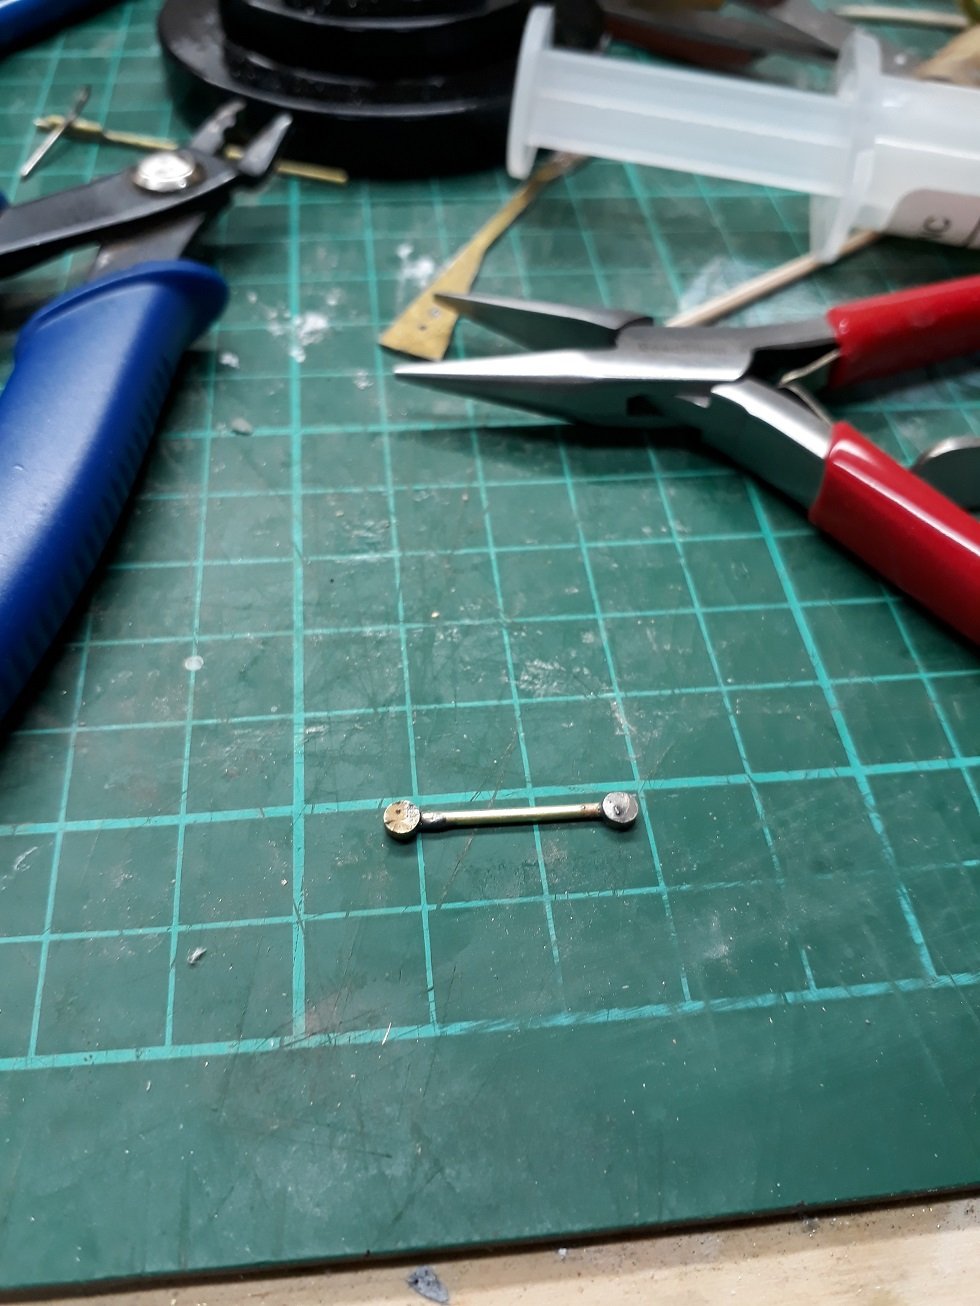
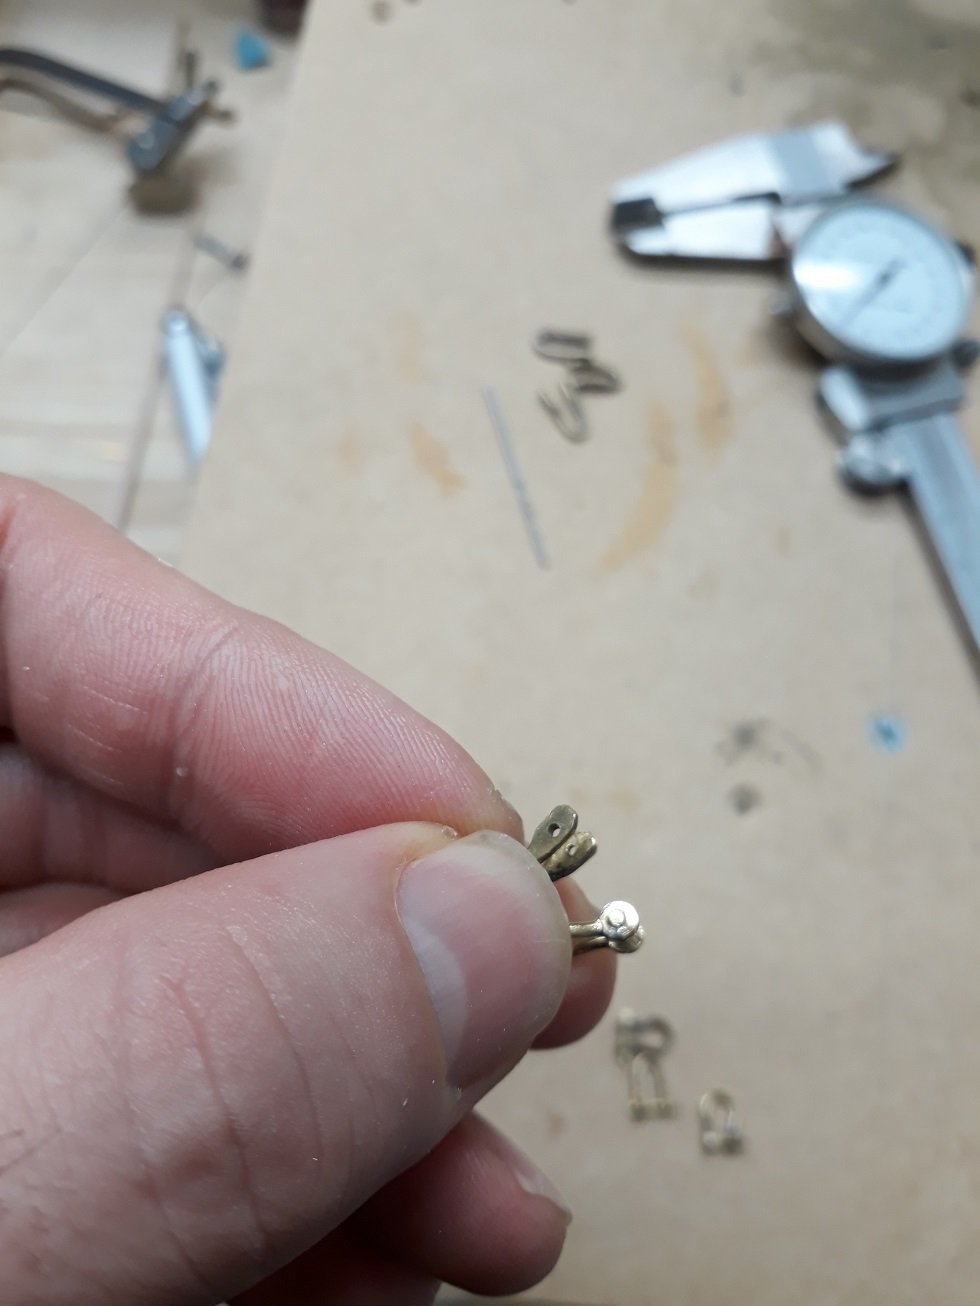
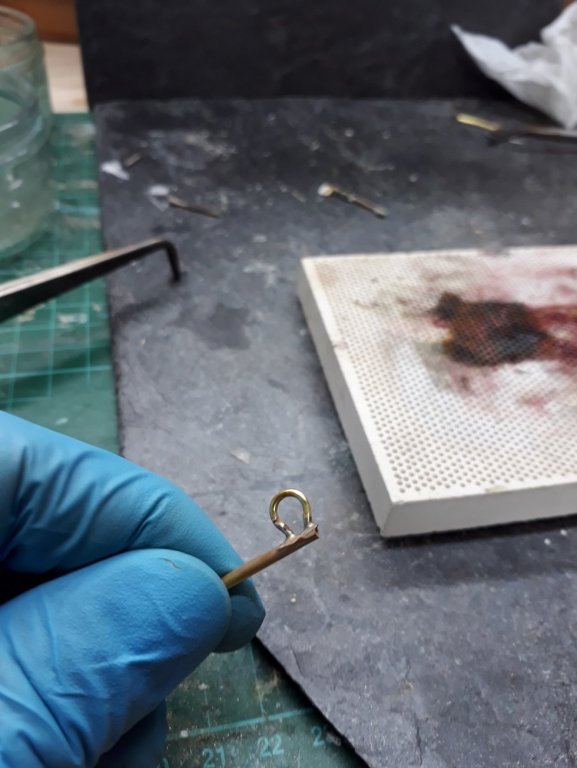
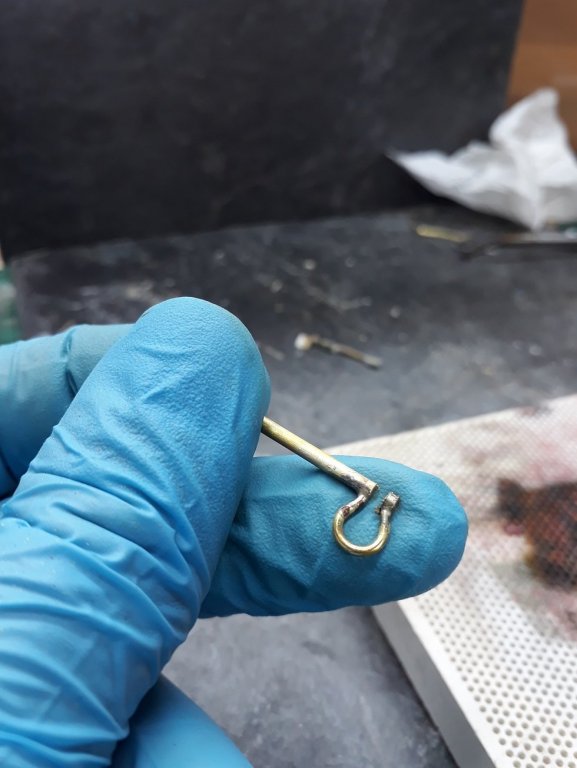
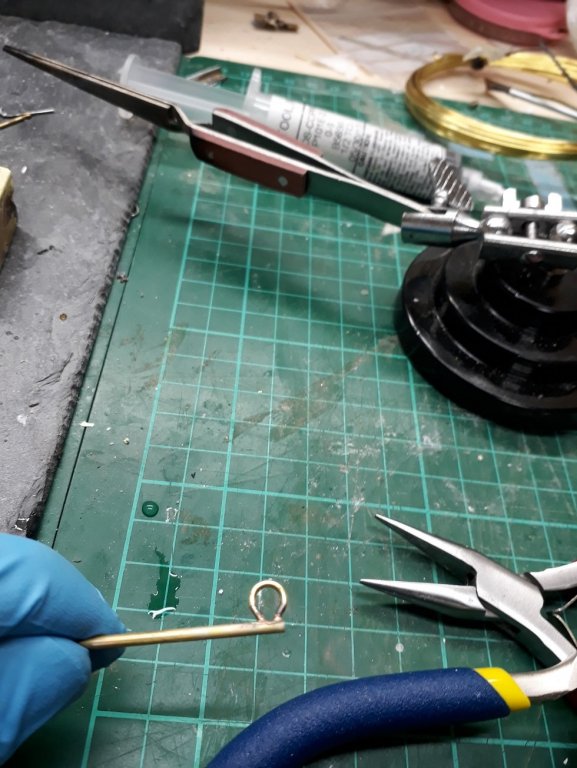
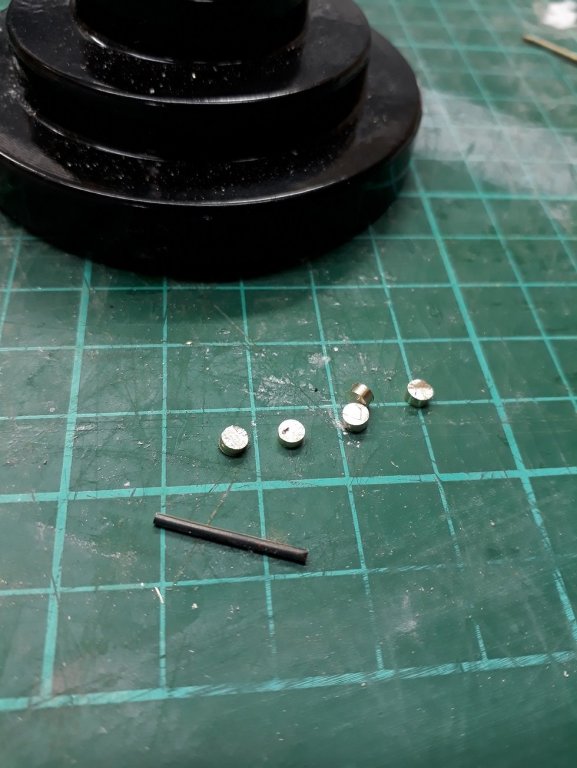
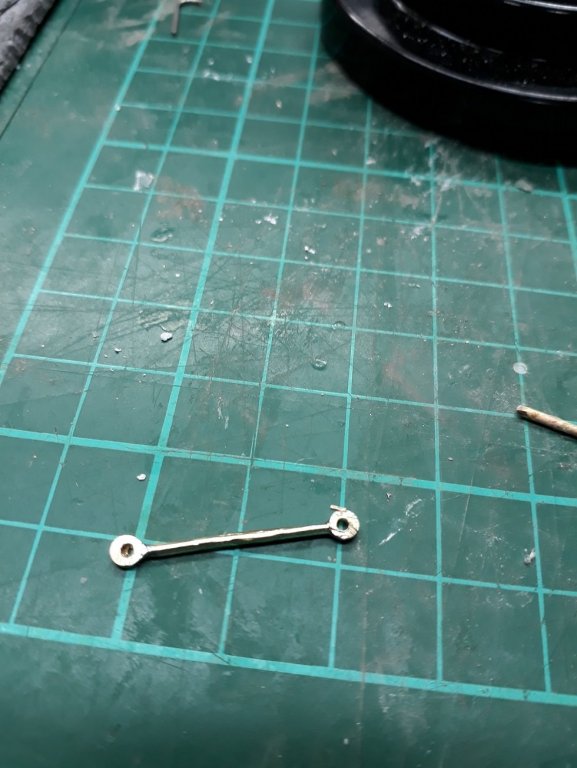
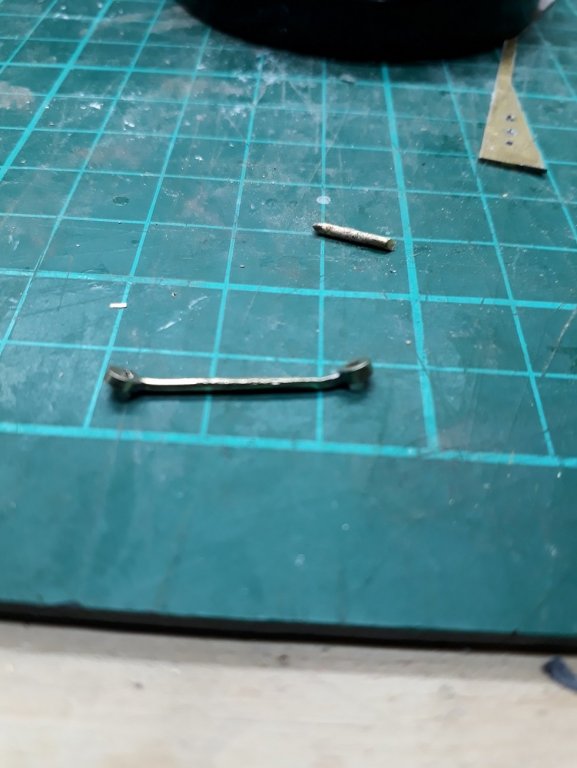
Dear all I experimented a bit more but this is a difficult nut to crack. I think however I can suggest another method that seems to work, at least for the 1:10 scale I work at. The shackle made this way is on the left, the one made the previous way on the right. I used 1.2 mm brass wire, annealed, straightened and cut to 1.8 cm segments. I then used 3 mm brass rod to cut disks around 2 mm in thickness. This was actually very quick and easy to do with the jeweller's saw. The only issue is that when they cut away they tend to fly off. The rod was polished with 600 grit sand paper in advance. I then soldered the discs to the ends of the rods with soldering paste, one at a time or both in one go. Easy to do but the usual preparation is essential, maybe will help to sand a small flt on the disc. The end result is this The second time it came out even better Then I drilled the ends with 1.3 mm drill. This is difficult to do with the drill press as the tungsten drill broke bending the rod, I think some kind of jig is needed. With the dremel it is even harder and gets very hot. Then, I bent the ends 20 degrees, just at the joints. If the soldering is not good, at this stage it will fail. Then, without any jig but only using pliers, I formed the loop alternating ends so that the loop is uniform. No annealing is needed, the wire will happily bend without braking. A short segment of the same 1.2 mm wire, crushed in one end is used as a pin. Because the holes are not perfectly aligned, there is just enough tension to keep the pin in place, no glue needed. If the holes happen to be aligned, a small twist in any direction should fix the pin in place. The new shackles look much better. This is I think a reasonably easy and quick way to make shackles and it seems to have reproducible results. Certainly cheaper than buying shackles. I ll experiment with 0.8 mm wire and 2 mm rod to see if it still works.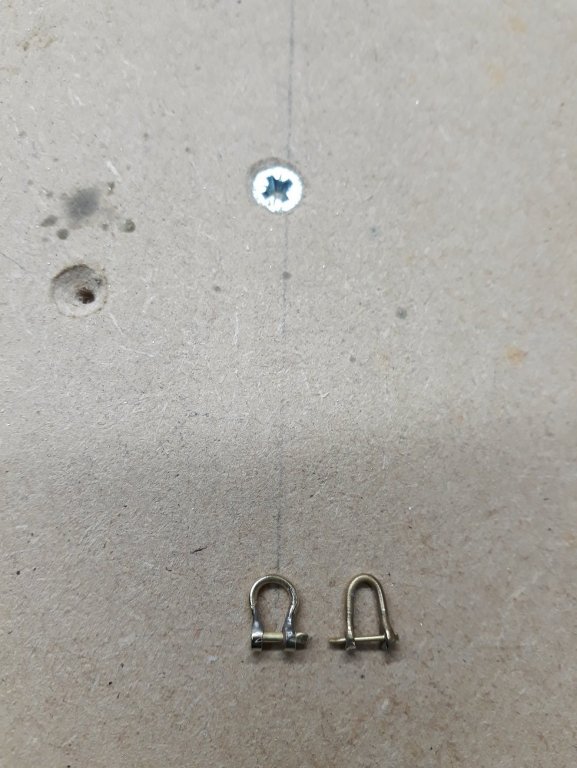


-
Another way to make shackles
vaddoc replied to vaddoc's topic in Metal Work, Soldering and Metal Fittings
Many videos on you tube with robots and huge machines forging shackles. This however is closer to what we need, watch how he bends the ears 25 degrees and then only heats the middle to bend into shape. Maybe we need to bend the metal while red hot so have a candle always burning instead of butane torch. But brass will not behave like steel. -
You could also use adhesive film for the portholes, sand blasted glass effect. You can get levels of transparency or not at all transparent. This is used for windows/large glass doors.
-
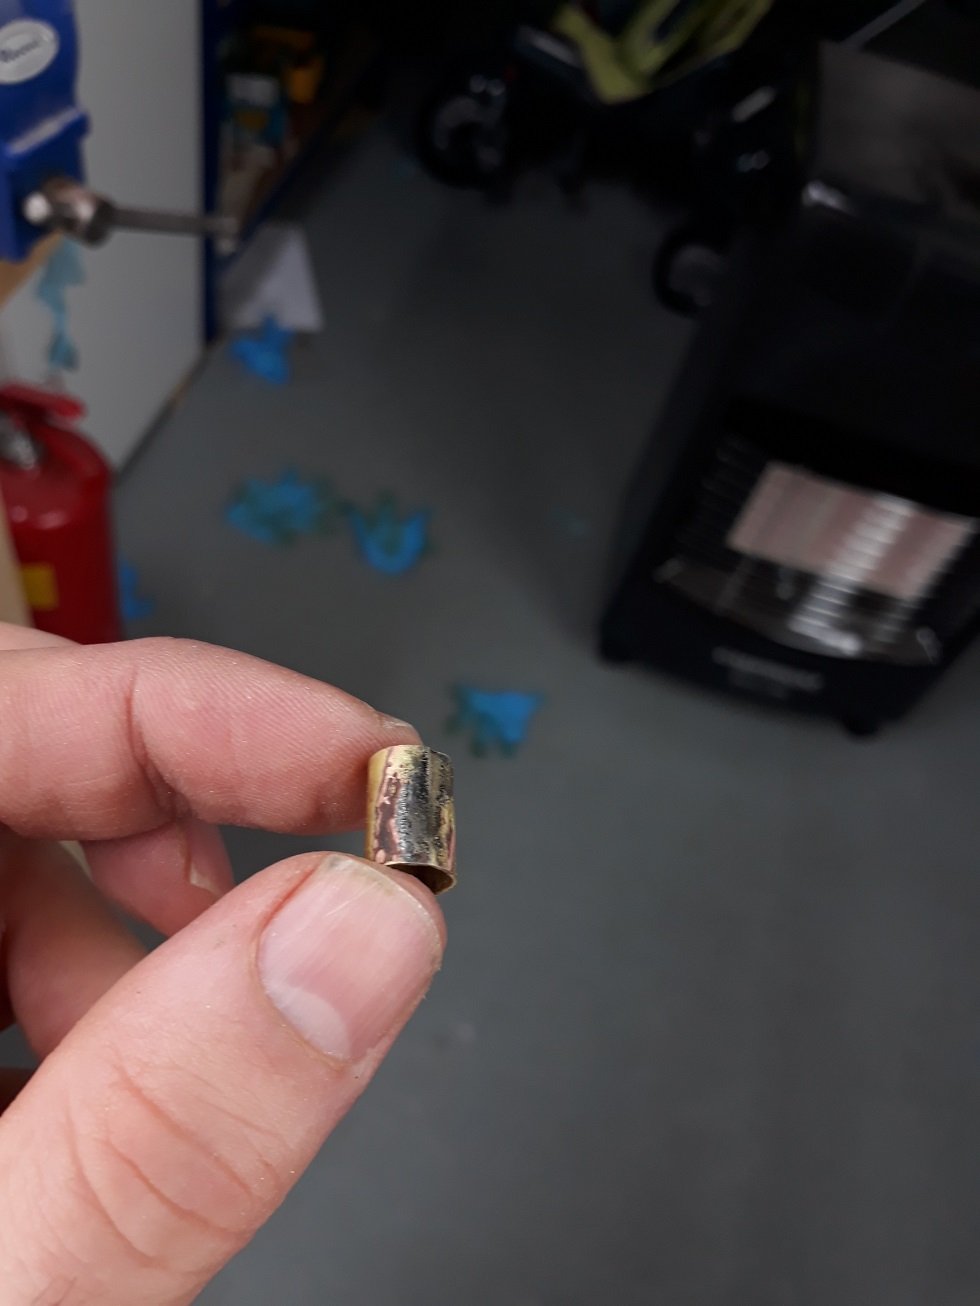
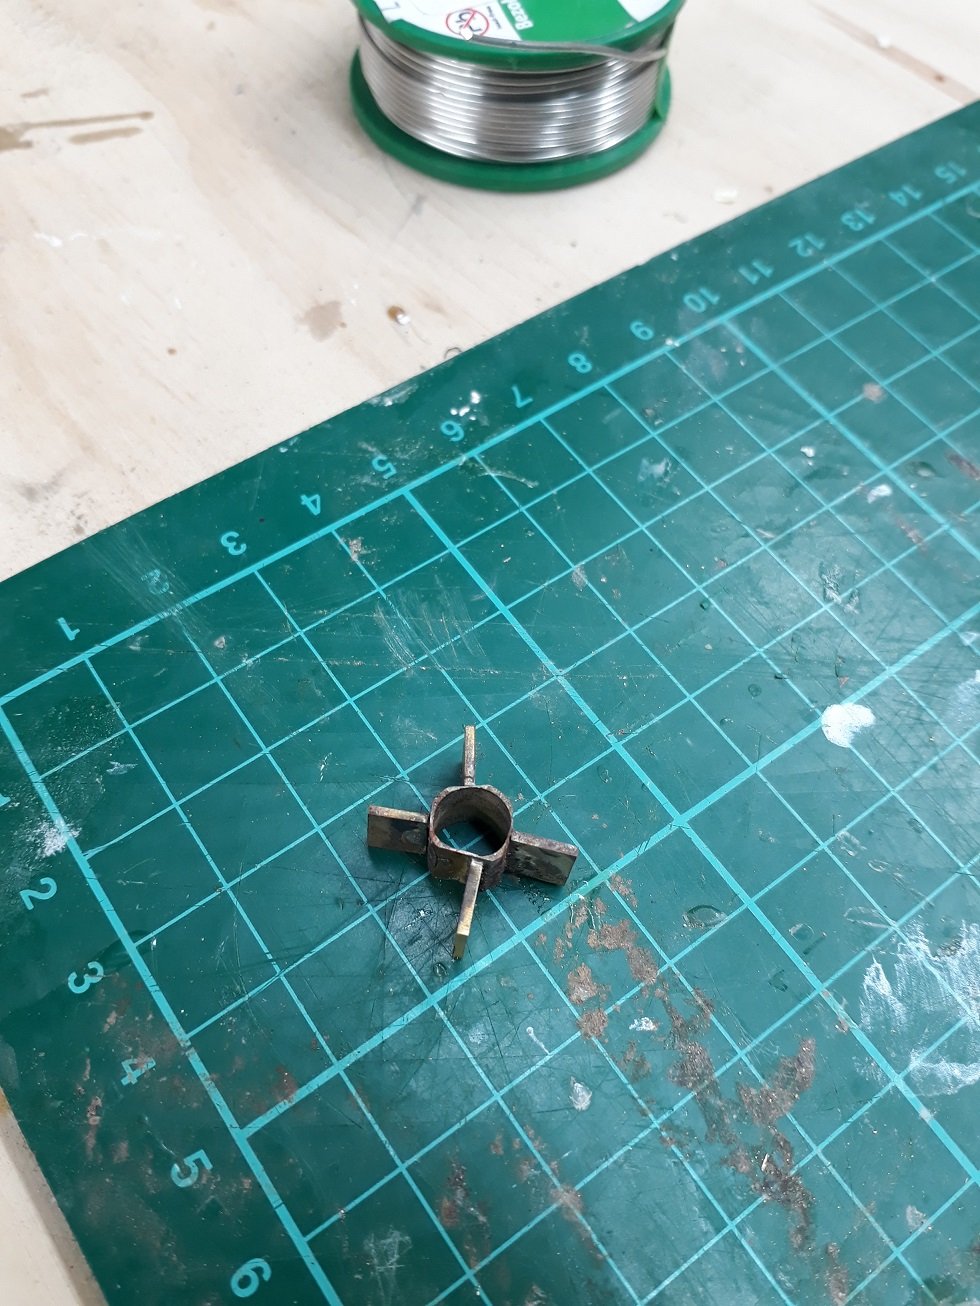
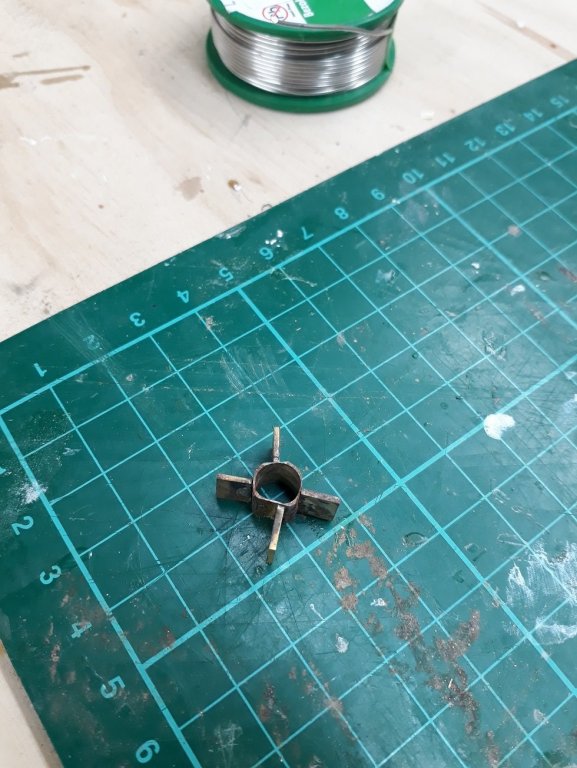
Today I put my newly acquired soldering skills to work and made the cranse iron. I bought some flat nose pliers and really they are essential for metalwork. I am now able to make tubes which is great. I tried the soldering paste but it is messy. Solder strips and borax are much more controllable. The next pic is using paste, the solder splashed all around The cranse iron came out reasonable, considering this is actually the first item I have ever made. The solder did splash a bit but does not show, I think that the steel brush I used carried over brass so the whole piece is shiny brass colour. I messed up a bit with the holes and also it is not very symmetrical but with the rigging on, it will not be visible (I hope) I also made some shackles, I think I need to reduce their length and maybe increase the width. It is freezing cold in the garage even with the gas stove full on, so no more work today. Vaddoc


-
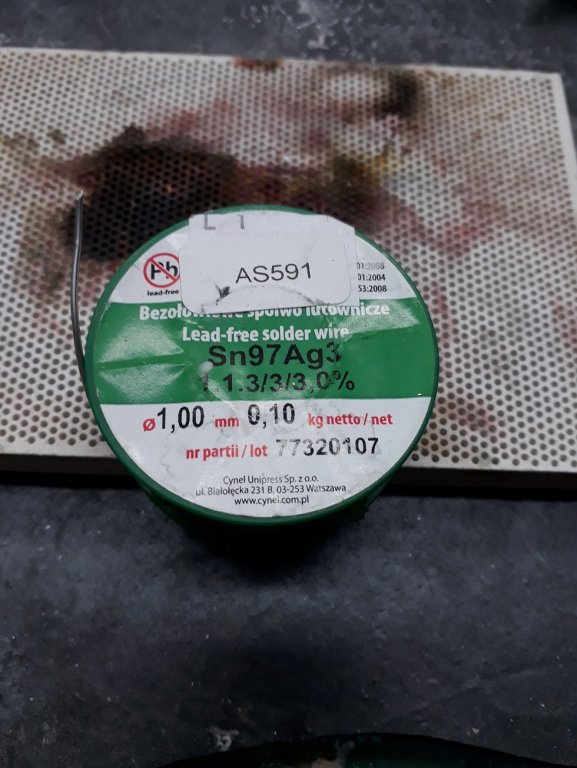
It is a type of lead free soft solder with a bit of silver. It was recommended I think by Kurt so I got some to try. My limited experience is that it is easy to work and very strong. Still, I think I prefer silver solder.
-
Another way to make shackles
vaddoc replied to vaddoc's topic in Metal Work, Soldering and Metal Fittings
Thanks Mike and Druxey. Frankie, solder is really very soft. Michael, I think you are right, copper would be softer and easier to work, yer stiff enough to hold its shape. It should blacken easier than brass and if left, the patina would resemble phosphorus bronze. Too bad I have a lot of brass!😀 I made a few more today, indeed they fast become much more consistent. Not one broke. Vaddoc -
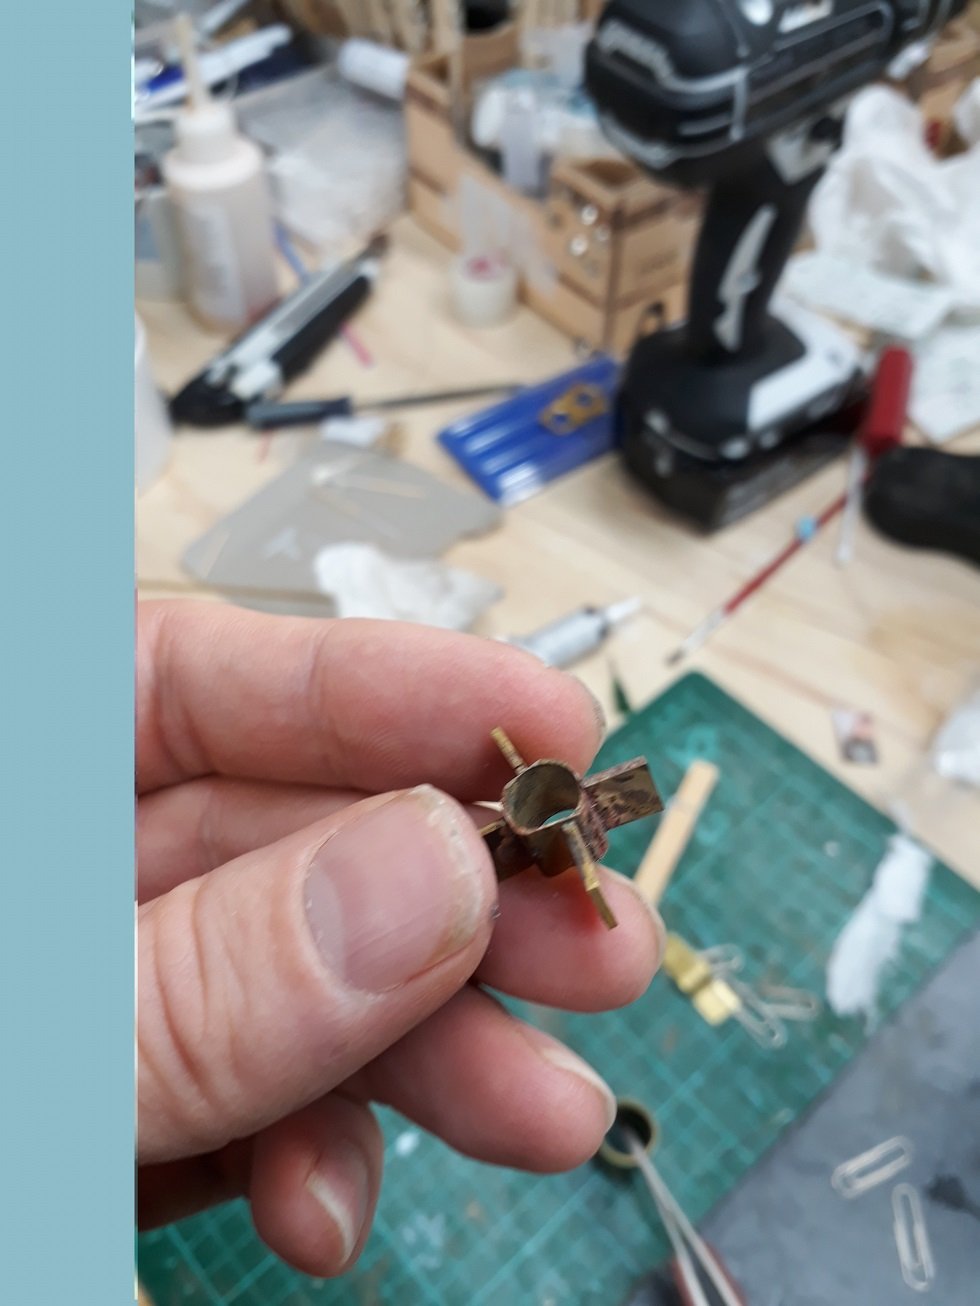
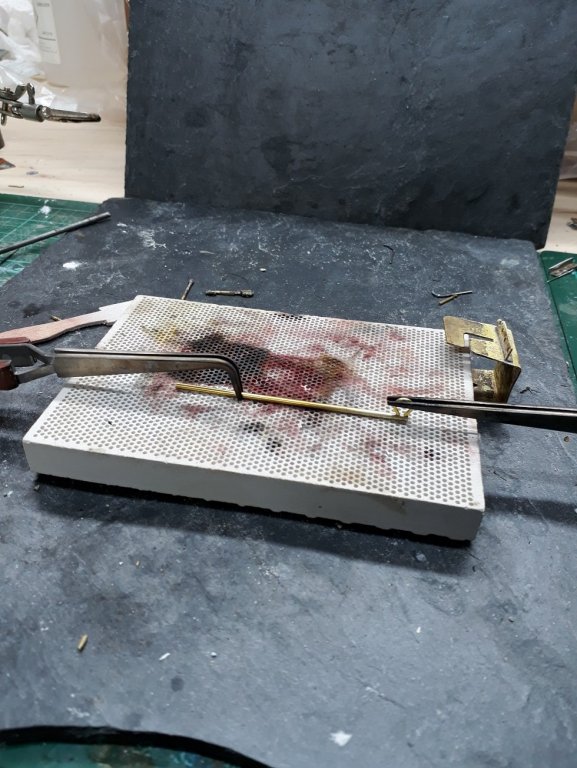
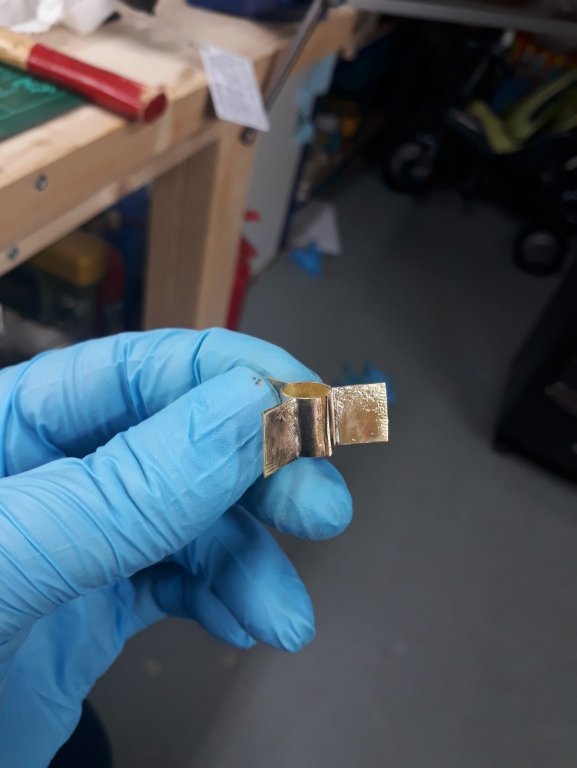
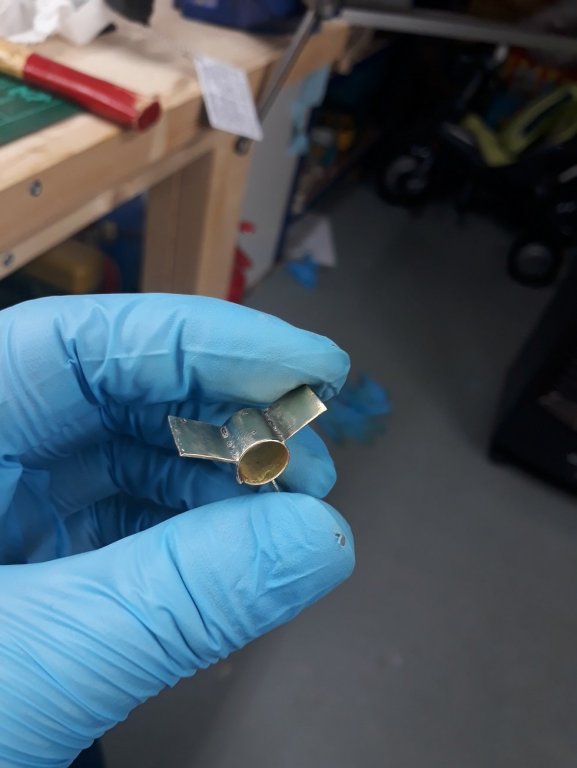
Today's quick update is about silver soldering. I think I 've cracked it! Due to rare circumstances I have time to work on the boat. It is time to make the brass hardware for the rigging but this was a major headache as my metal work is very basic. So far my joints have been very inconsistent, a product of luck rather than skill. Also, I knew my flux was wrong, as it could not cope with the high heat. So I got some borax and some soldering paste and for 2 days now I 've been experimenting. The paste is ok but can be unpredictable. Borax is just fantastic! Initially it was pure frustration, as it bubbles it pushes the pieces apart. I learned however to trust the flux, it really copes with very high heat, gives plenty of time to re-position the pieces and add the solder. Worked like magic. The next photo shows a test piece that took an awful lot of tries to make. I tried so many times that the brass tube was almost completely sanded away. This one however, I soldered each piece with the first attempt, in a very controlled and standardised way. The joints came out great. I didn't even had to bring out the big boy, the little proxon torch managed to heat everything up. I am happy, I now am confident I can reliably silver solder stuff. Vaddoc


.jpg.2d8bdb8bc5738a3b8ad89cb6e85cf89f.jpg)