.jpg.f26acc9a74319261612561bfa7da1303.jpg)
vaddoc
-
Posts
1,605 -
Joined
-
Last visited
Content Type
Profiles
Forums
Gallery
Events
Everything posted by vaddoc
-
.thumb.jpg.6fd4c1b78768bb3efd745ab810936005.jpg) How very nice! Your weathering skills are fantastic. A very enjoyable and educational journey.
How very nice! Your weathering skills are fantastic. A very enjoyable and educational journey. -
This is how I started, working on the dining table. One important thing with modelling is lighting, very strong white (daylight 4700K I think) makes working easier and less tiring. Also, light from many angles to eliminate shadows. It looks you could use a few more lumens, maybe one of the high output bulbs? With all the reflection in the white walls you ll probably get no shadows and brilliant light.
- 84 replies
-
- 1
-

-
- sherbourne
- caldercraft
- (and 2 more)
-
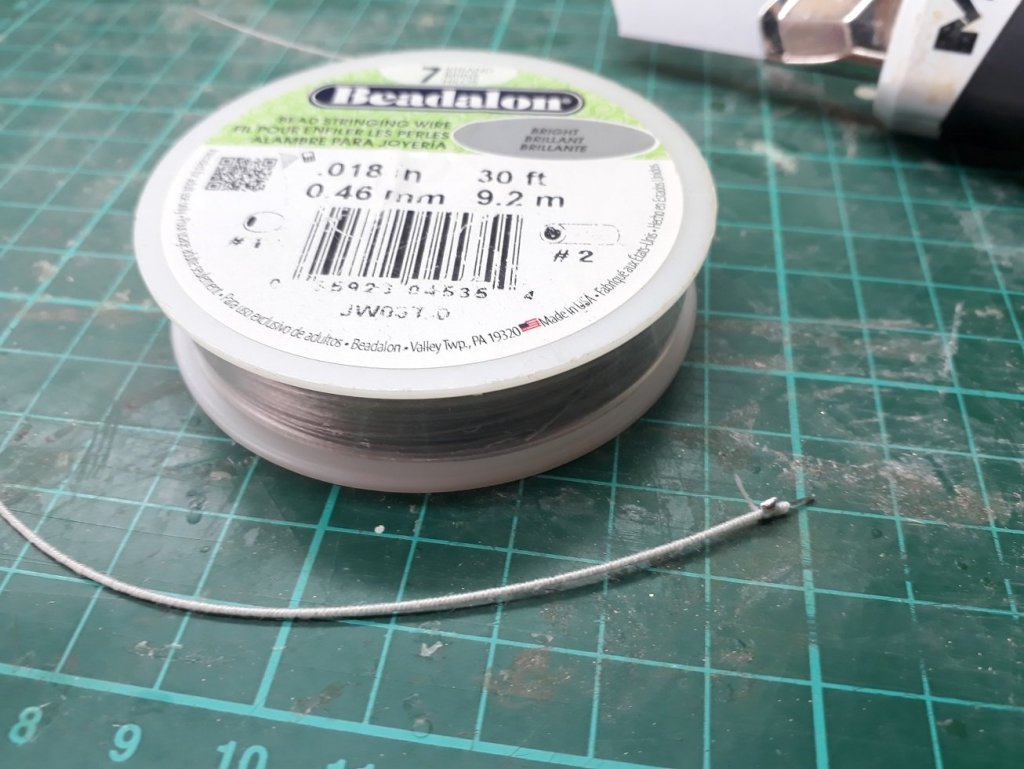
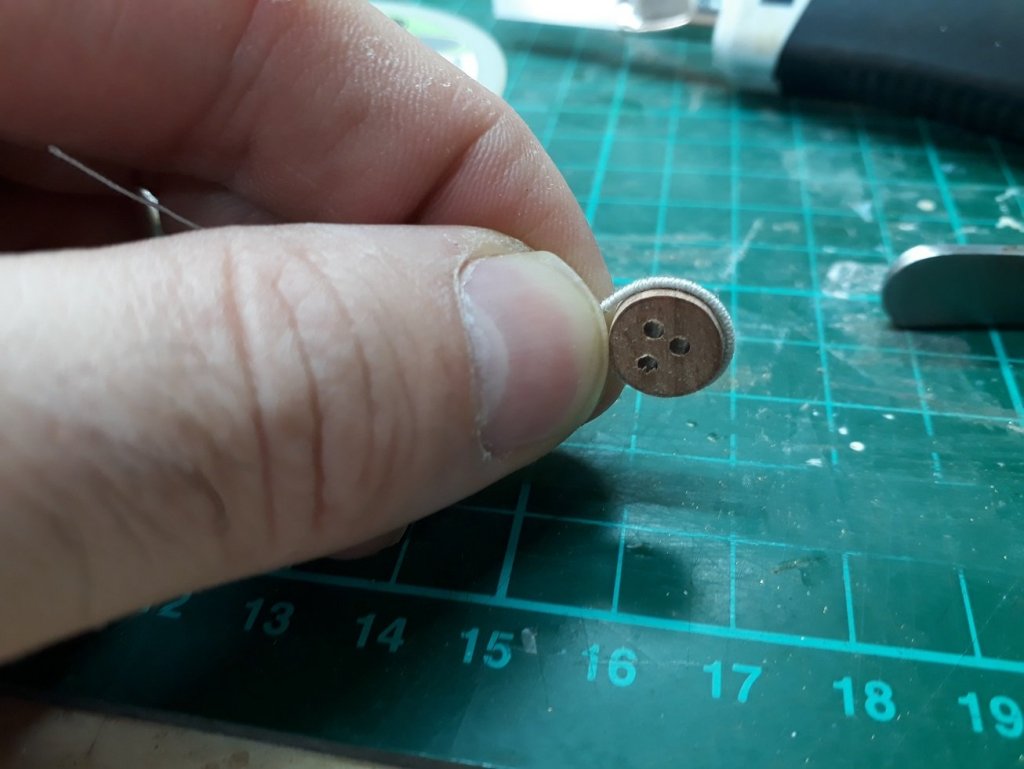
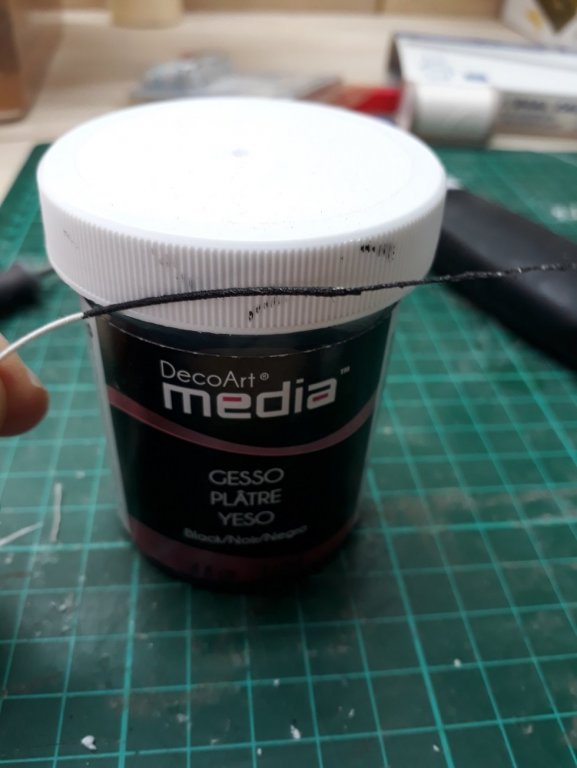
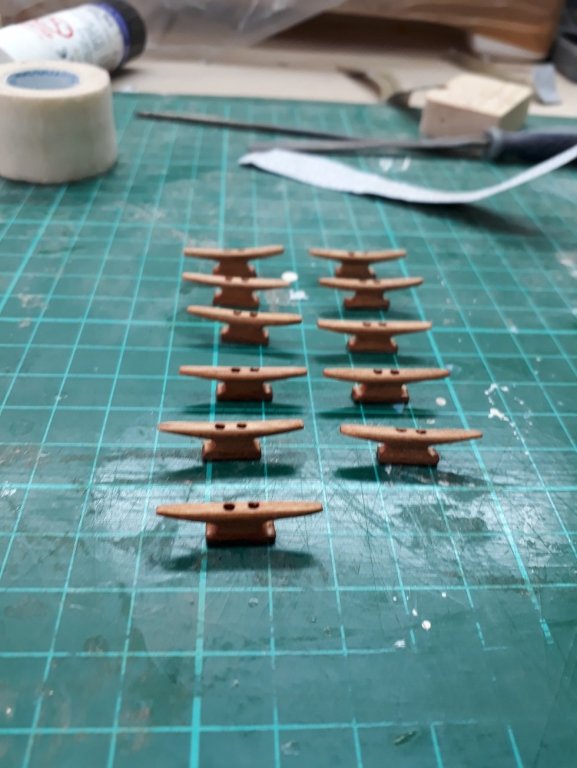
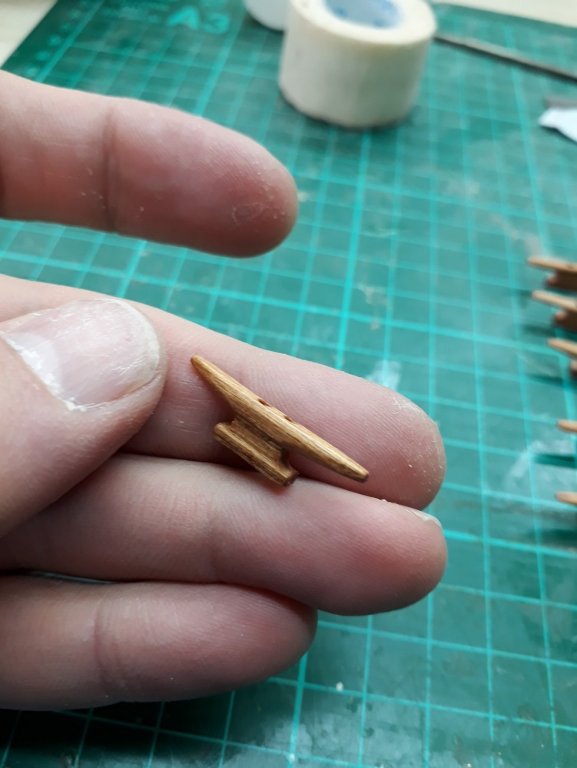
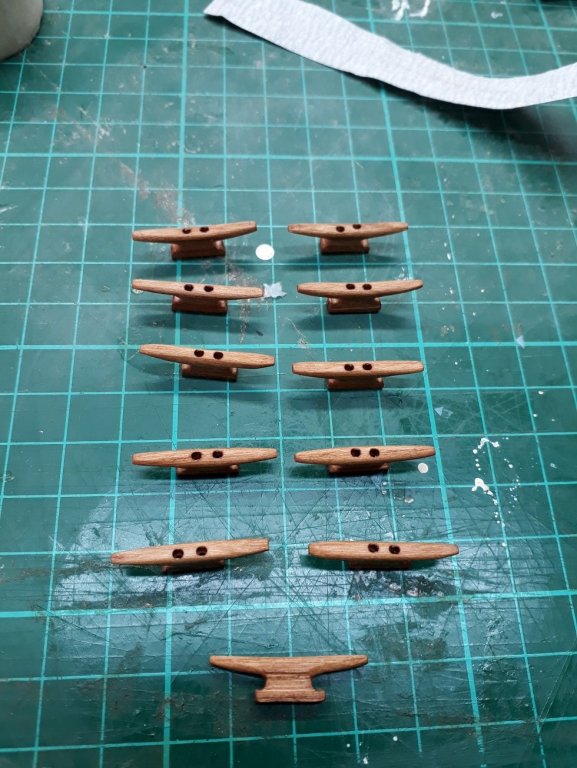
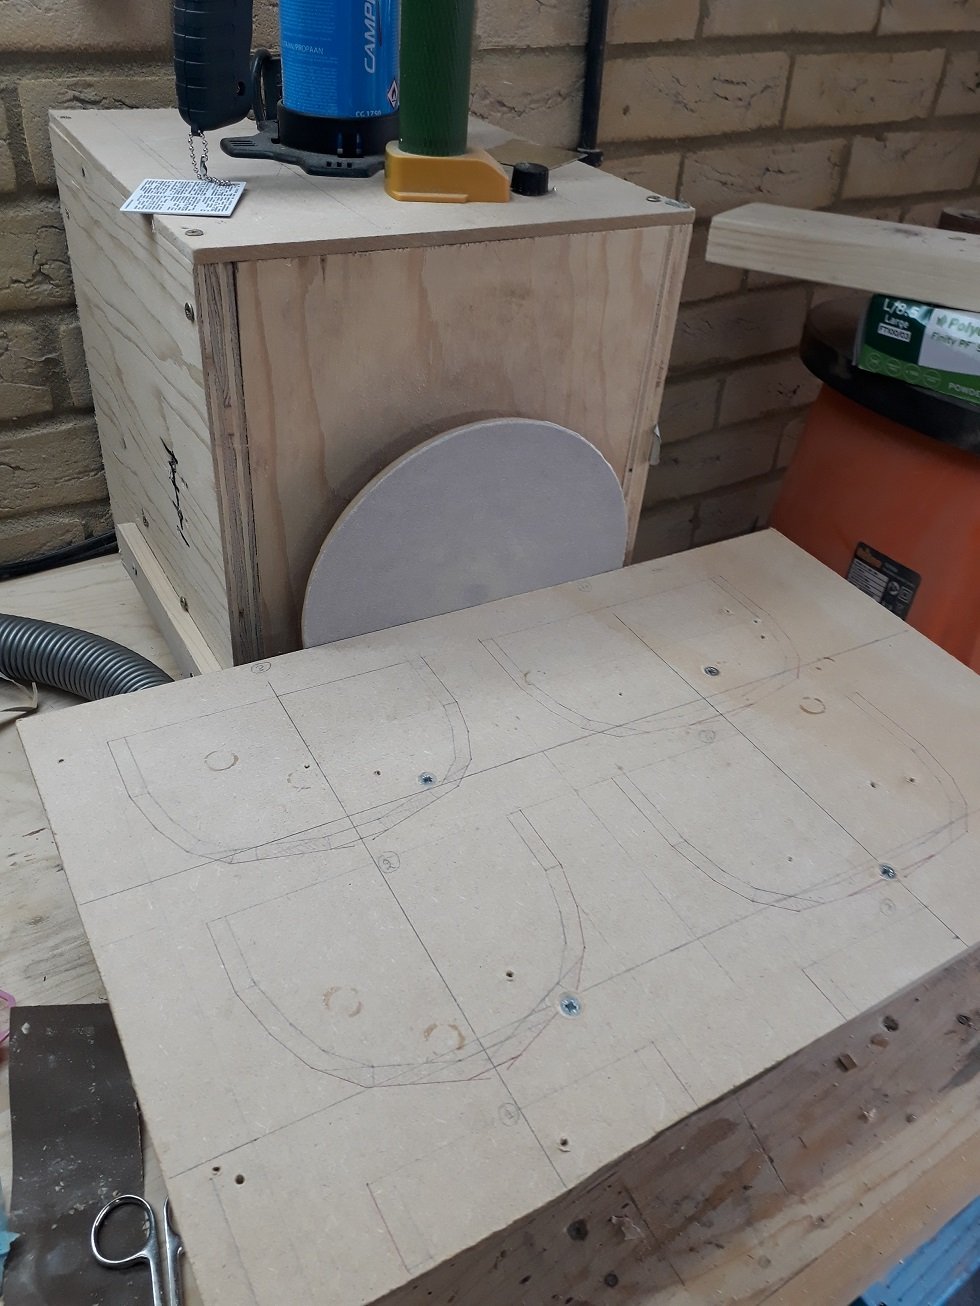
Mark, I think you are spot on, indeed it make sense to actually have deadeyes due to the tabernacle but also nowadays in most instances there would be wire rope for the shrouds. However, this could be served and actually a search on the net showed that served wire rope shrouds are commonly used. So this is what I ll do! There has been some more progress but really disconnected. In regards to shrouds, I have 0.45 mm and 1 mm wire rope and I think that 0.65 mm would be a good compromise. I ve ordered some beadalone wire rope which is fantastic, encased in a plastic sheath and very flexible. A bit of experiment showed it responds very well to serving and will happily go round the deadeye I thought of using something to imitate tar and I used some black gesso I had. It worked beautifully but any handling of the rope later on brings on fuziness and dulls the black colour to grey. Much later it occurred to me to use black thread... I then cleaned the garage and changed sanding paper and work surface on my home made disc sander Then it was cleat time! I will need quite a few and although I ve standardised the process, it still takes a long time. They came out fine though. I ve decided to use 1 mm micro screws to secure them instead of tree nails so they are drilled through (1.1 mm) and then counter drilled to 1.8 mm. I also made a serving machine but I did not like it. I ve ordered some bearings and plastic cogs, I think I can make it work. Three pairs of shrouds plus two forestays plus two backstays mean about 6 m of wire rope to serve, possibly more! Vaddoc


- 536 replies
-
- 15
-
-
I think so but it will still need to be annealed and cleaned of all oxides dirt and oils. For silver soldering and blackening no way round good cleaning to raw metal
-
Maple is also fantastic for planking.
-
Might work: Heat with a torch to red hot, using gloves or forceps leave in pickling solution (or just warm vinegar), polish with steel wire wheel on Dremel. You should now have bright polished brass that should blacken well. Disclaimer: My few previous attempts at blackening brass were pretty much disastrous, admittedly years ago.
-
I ll take a sit in the back and join you in your journey if it's alright Edward. Vaddoc
- 84 replies
-
- 1
-
-
- sherbourne
- caldercraft
- (and 2 more)
-
Best & Strongest wood glues.
vaddoc replied to irishrover1970's topic in Modeling tools and Workshop Equipment
As others said, PVA works when clean surfaces are in close contact. All PVAs will perform adequately, no huge difference one brand from the other. (There are differences between aliphatic and plain white PVA) If there are gaps or close contact is not certain, I use epoxy thickened with talk powder (or wood dust, I ve even used ground coffee, all worked the same). Epoxy alone is too brittle and in my experience these joints can fail. Epoxy is brilliant stuff but can be messy. Best not to come into contact with skin as sensitivity builds up over time. I use single use syringes, pots and gloves, it is an acquired skill. Unlike PVA, epoxy resins can be very different, some hard and some really flexible when fully cured. I now use only zpoxy which is fantastic. 30 min as glue, finishing resin for laminating. Regards Vaddoc -
Types of glue, Original,, Premium or Ultimate
vaddoc replied to JamesT1's topic in Modeling tools and Workshop Equipment
To not be confused, there is plain PVA glue which is white, dries clear and has large opening time. And there is the aliphatic PVA, which is yellow, dries not really clear and has very short opening time. Titebond original is aliphatic, non waterproof and has a really short opening time. The other ones are waterproof and offer slightly longer opening time. Not important for our purposes I use usually an aliphatic PVA (happens to be Titebond original at the time but others work the same) but when I want long opening time or no marks to show on the wood I use hardware store white PVA.- 1 reply
-
- 2
-
-
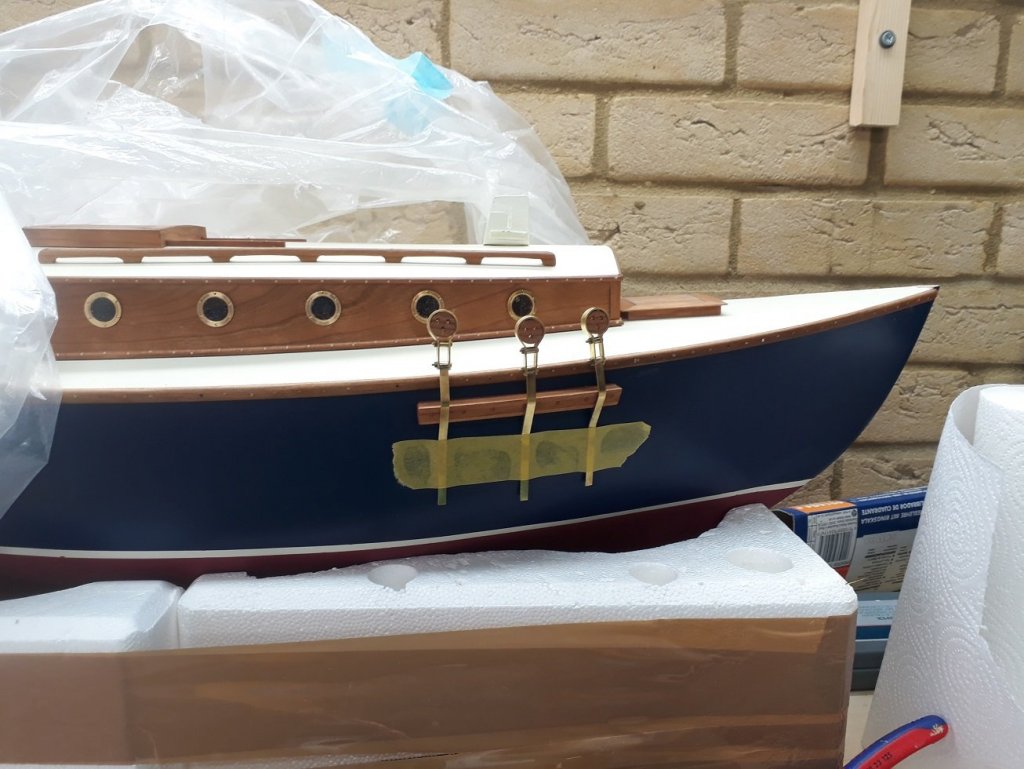
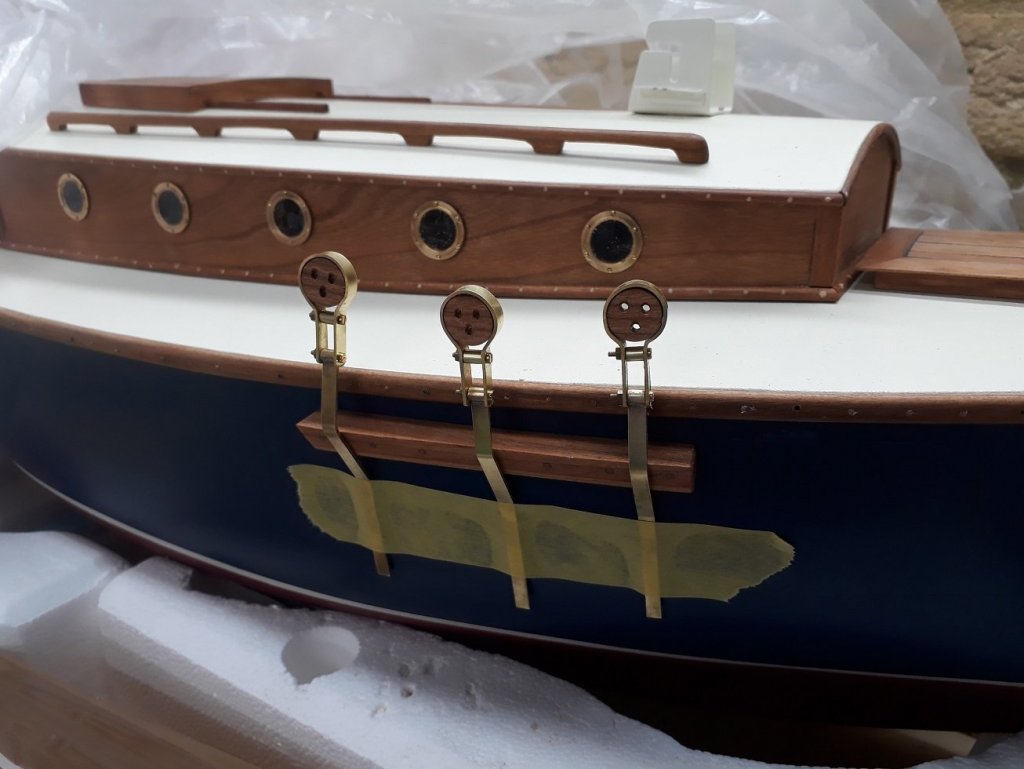
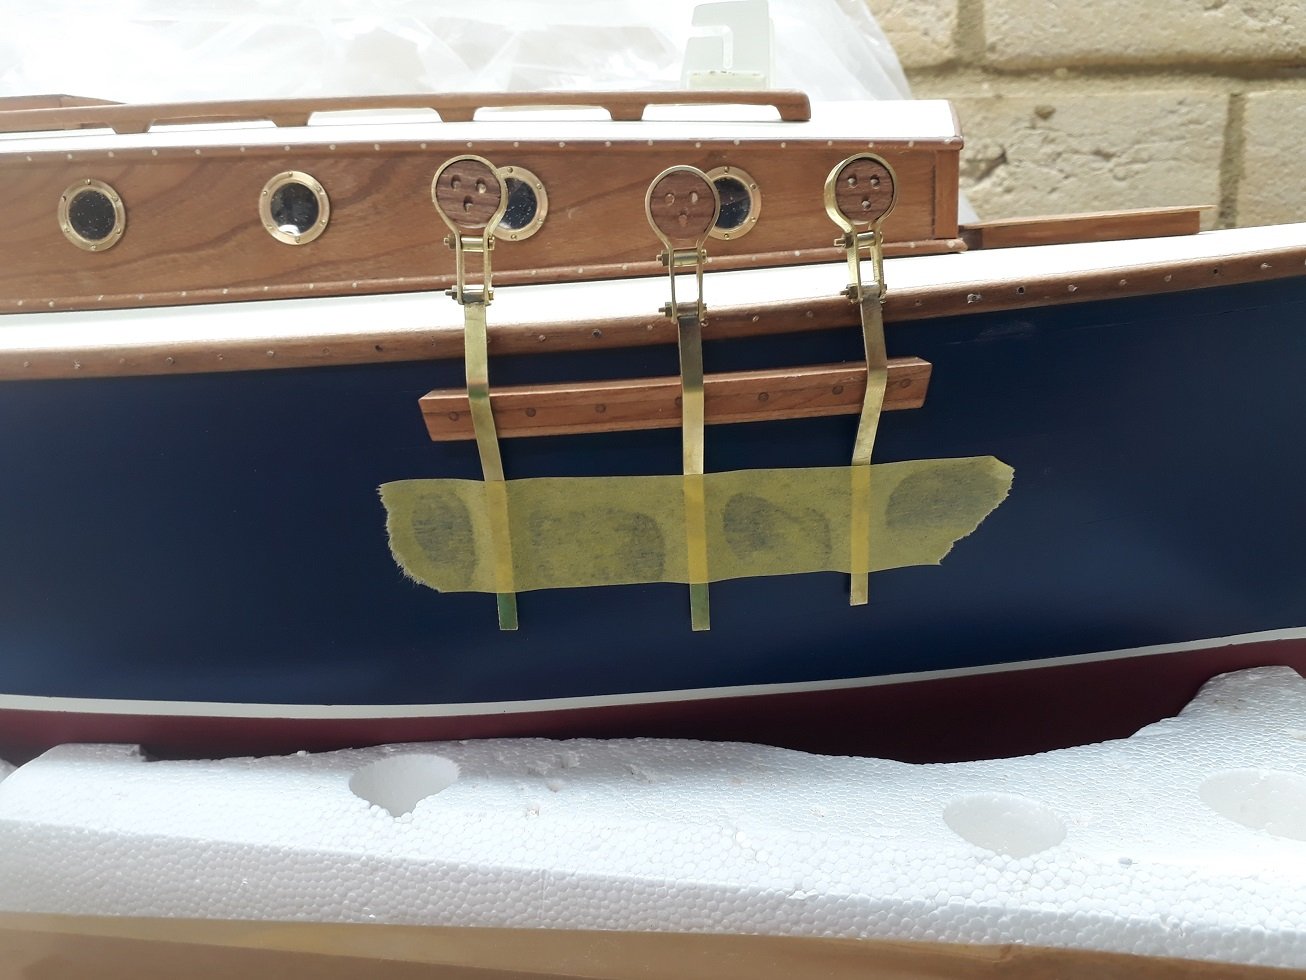
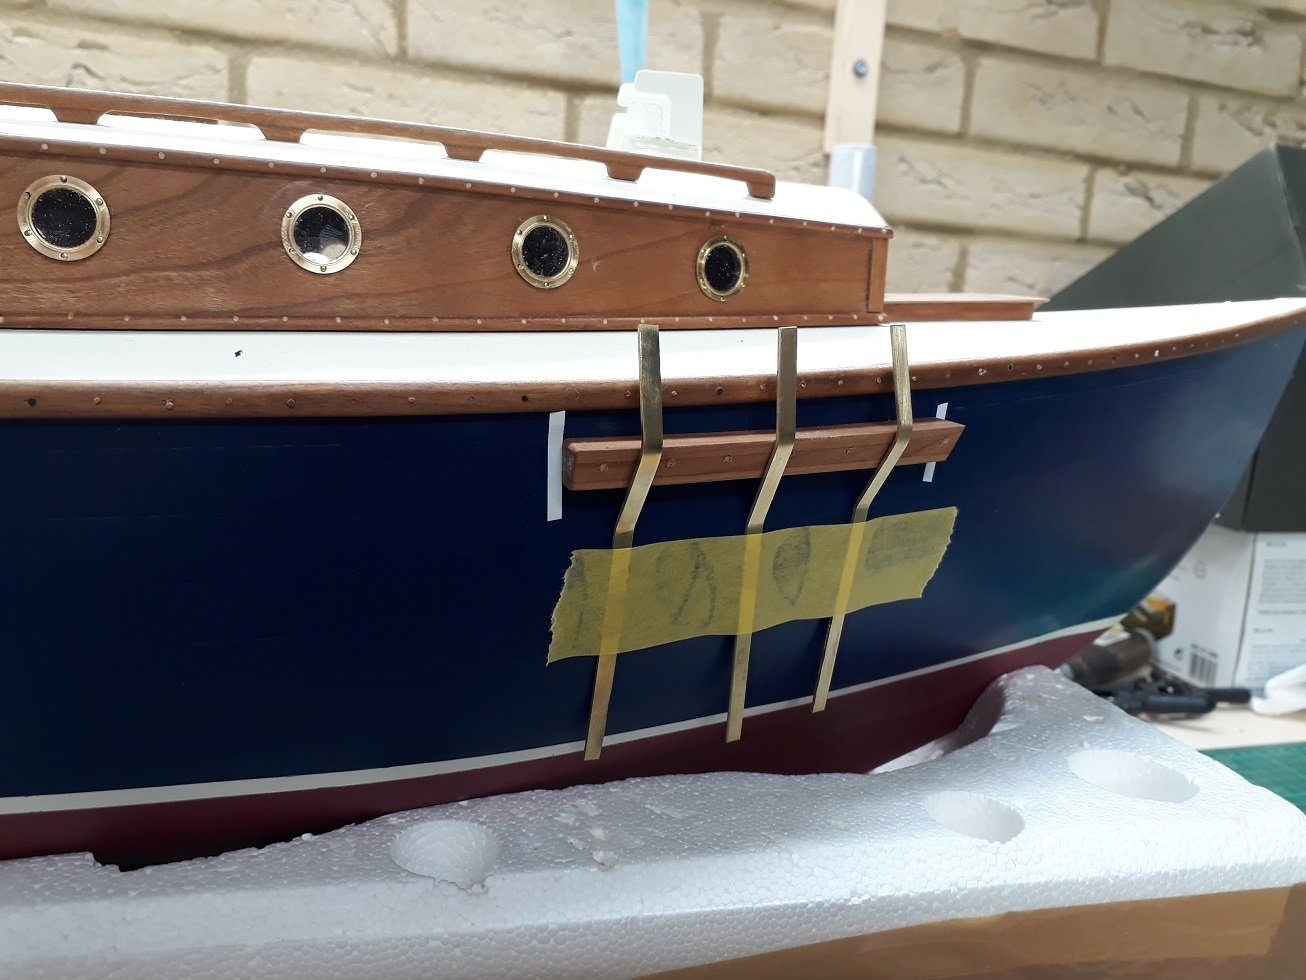
Thank you all for your comments and likes! I started thinking about rope sizes and I realised that the deadeyes are very large. They need to be proportionate to the ropes they will carry so I decided to reduce the diameter. Also, I made the brass hoops again using this time 0.7 mm brass instead of 0.4 that I had used initially. I think it looks better, more to scale. I polished the brass an then applied Renaissance wax. I could not find my Loctite so I used again the wax to secure the nuts to the bolts. Some of the deadeyes are a bit loose so I will apply some wax to the wood, from previous experience it might lock them in place. All the new parts ready for assembly, everything put together but still need to drill the holes to the chainplates I think it looks fine I am a bit undecided whether to use rope for the shrouds or wire rope. There are advantages to the latter, less work and most importantly the standing rigging will not stretch over time. This is important as the mast with all the spars etc will be quite heavy and will be held in place exclusively by the shrouds and stays. The tabernacle absolutely cannot support the mast, there is too much leverage. The boat will still maintain its traditional appearance. Otherwise I ll try again to make an acceptable rope using synthetic threads. My experience with these so far is not great but I know that cotton rope will stretch and stretch even if I try to pre-stretch it, over spin it etc. Regards Vaddoc


-
I d also look at Proxon , purpose built for modelling and excellent customer care. But this looks ok, it will certainly serve you well and it is very cheap. No doubt a generic rebranded saw made in China. The large gaps near the blade might be a bit of a problem, maybe you ll need to make a new insert. I ve used my scroll saw heavily since bought and it is permanently on my bench. Quality wise I have a Record air filter that is great.
-
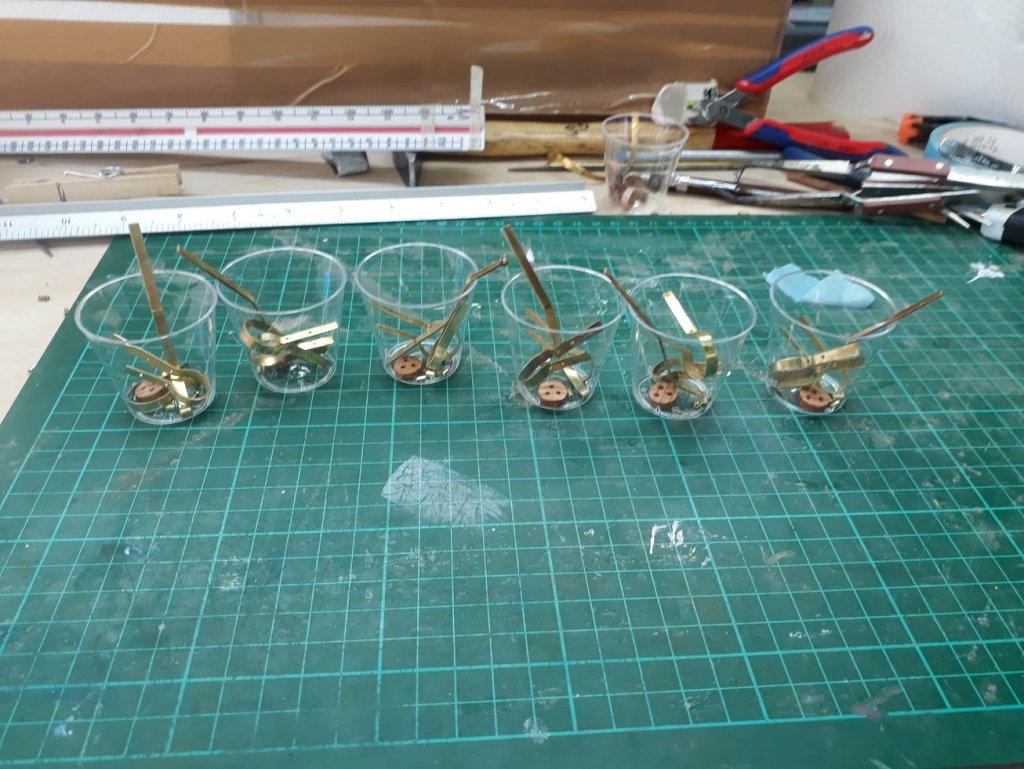
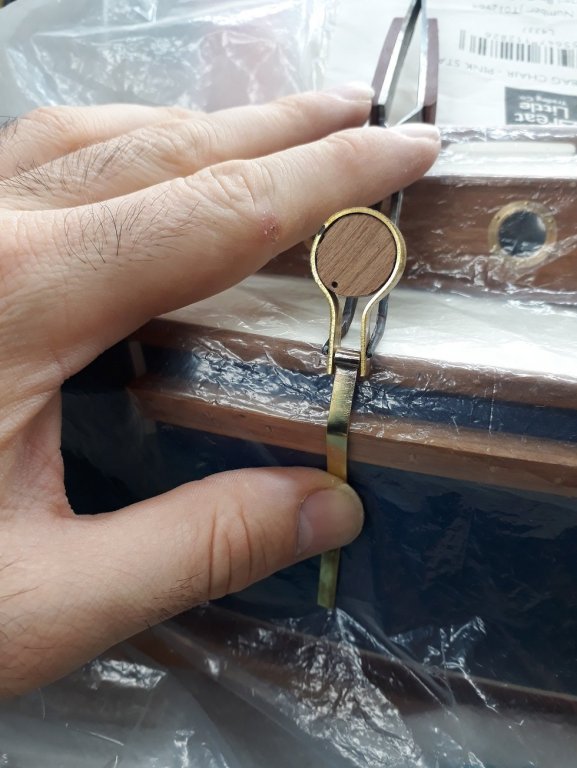
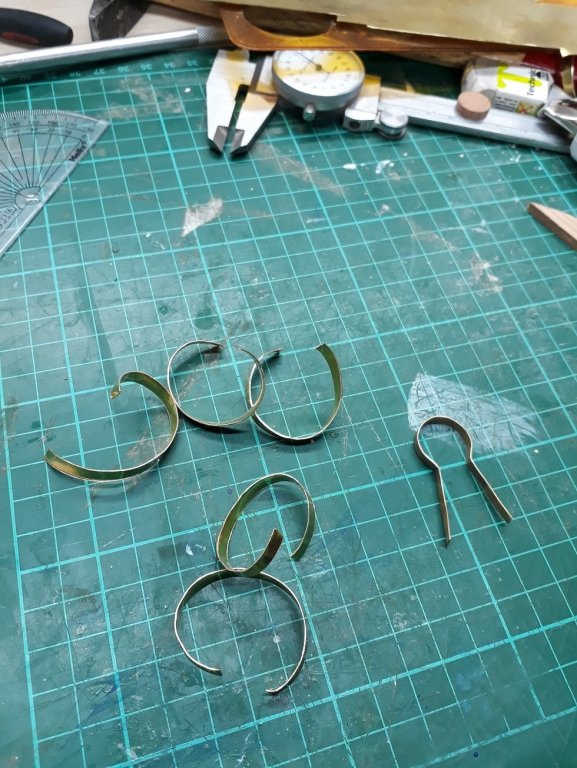
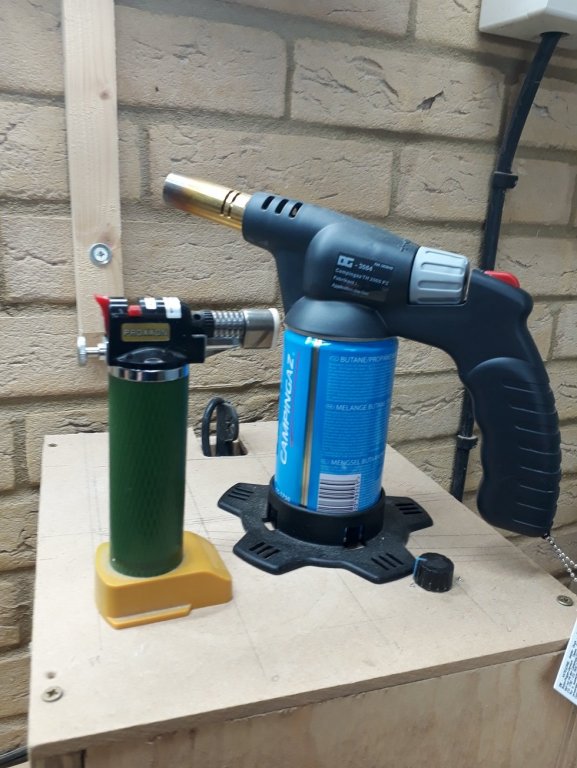
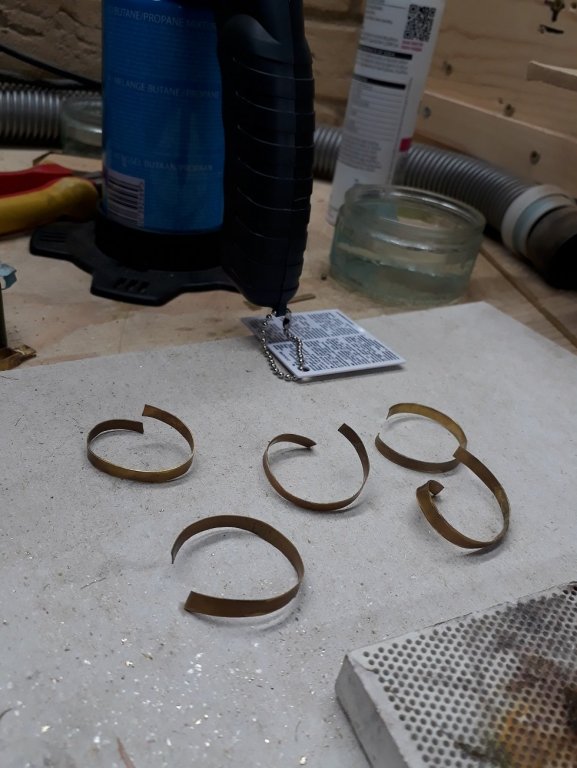
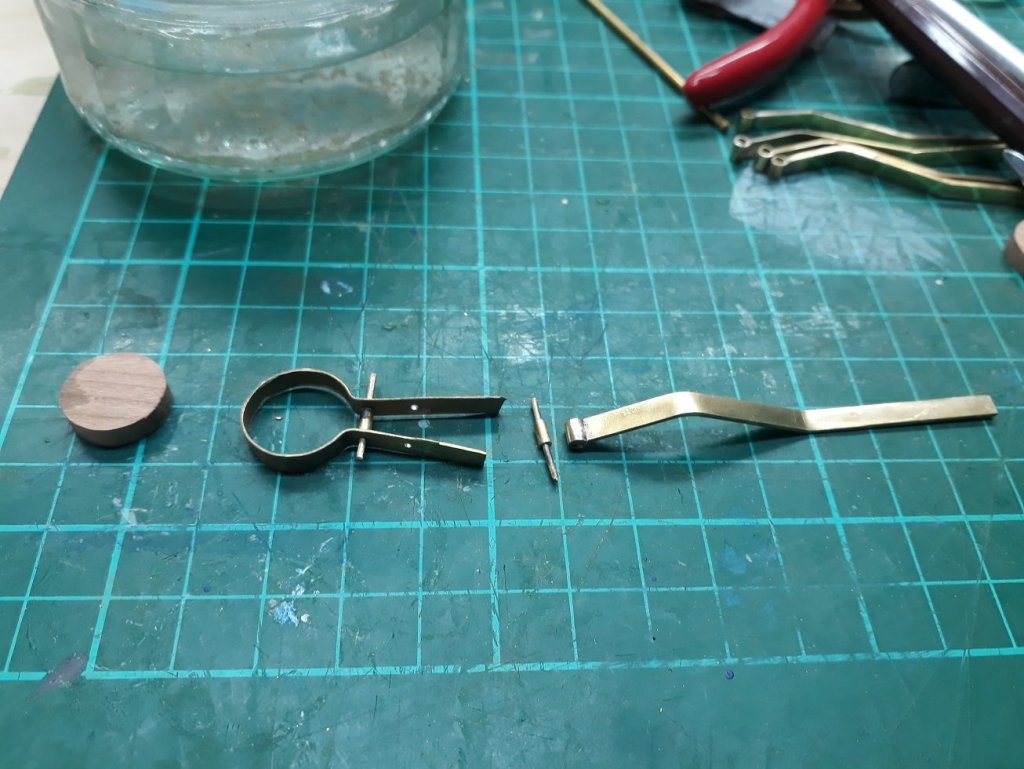
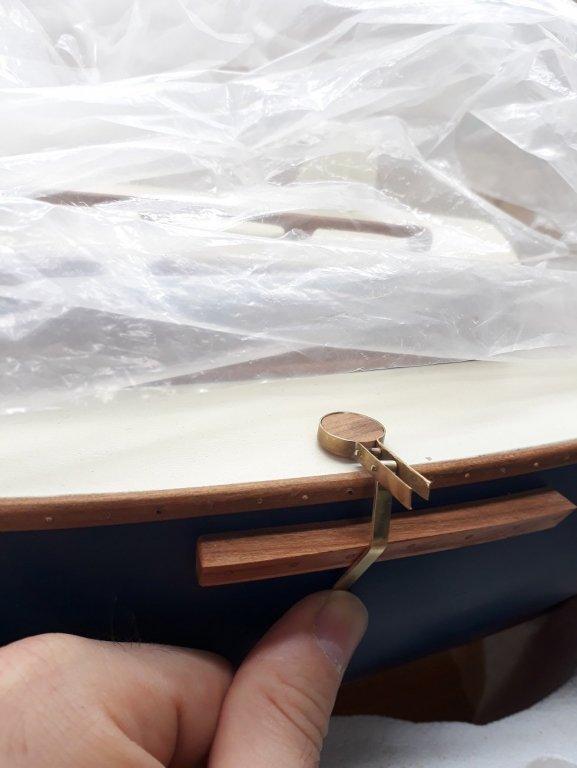
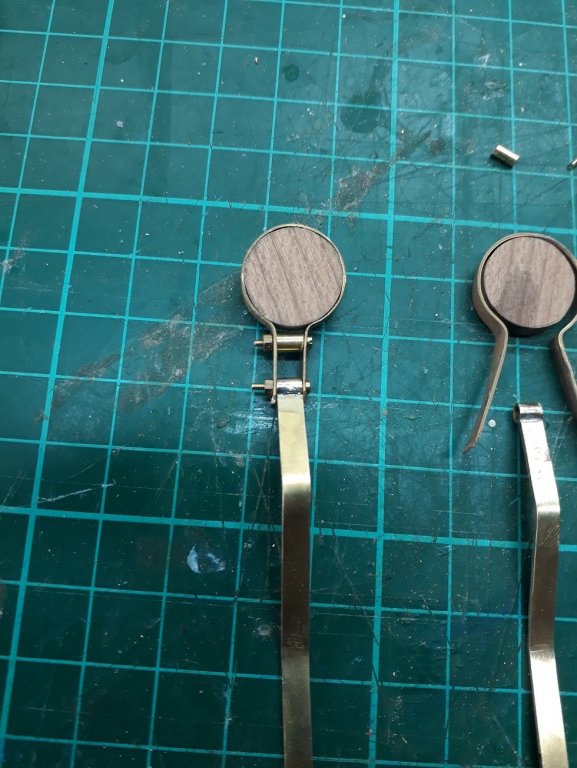
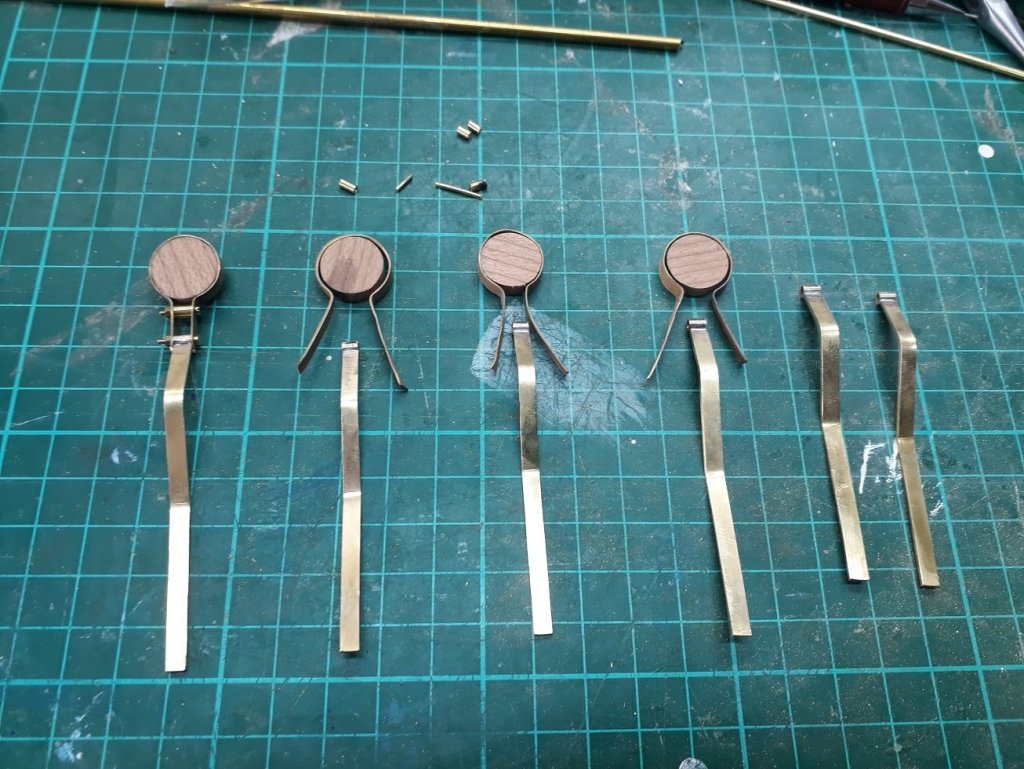
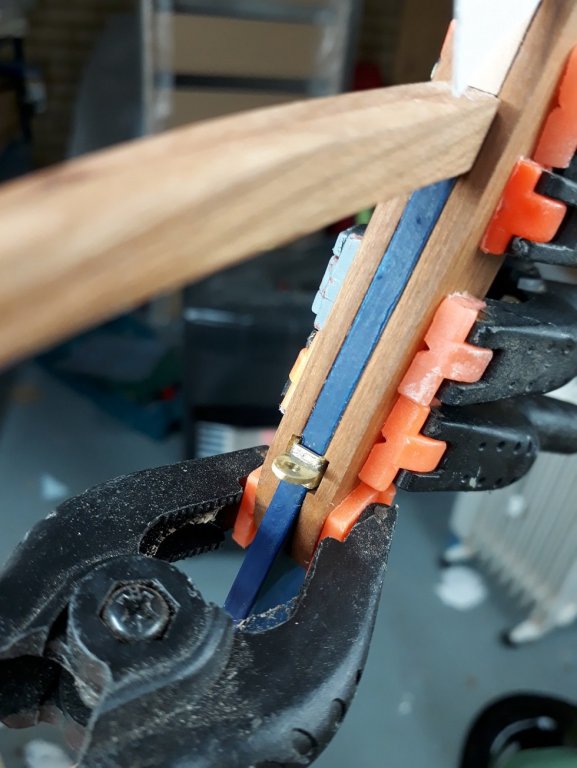
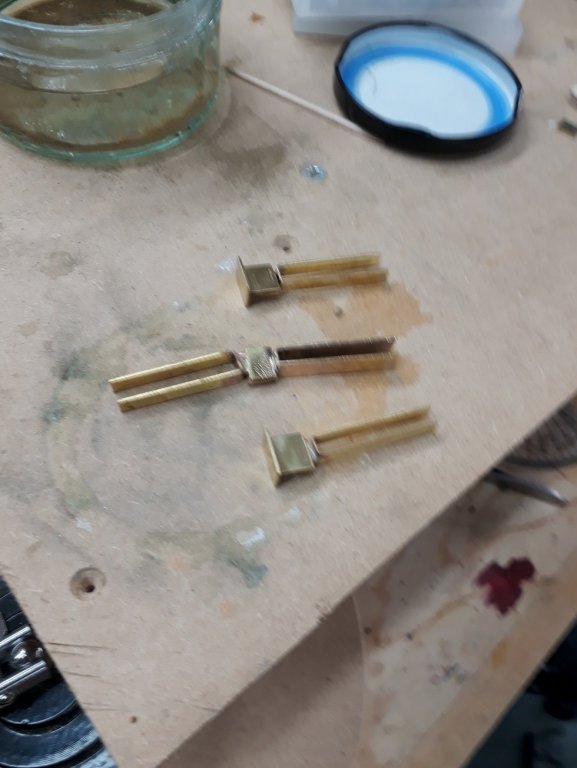
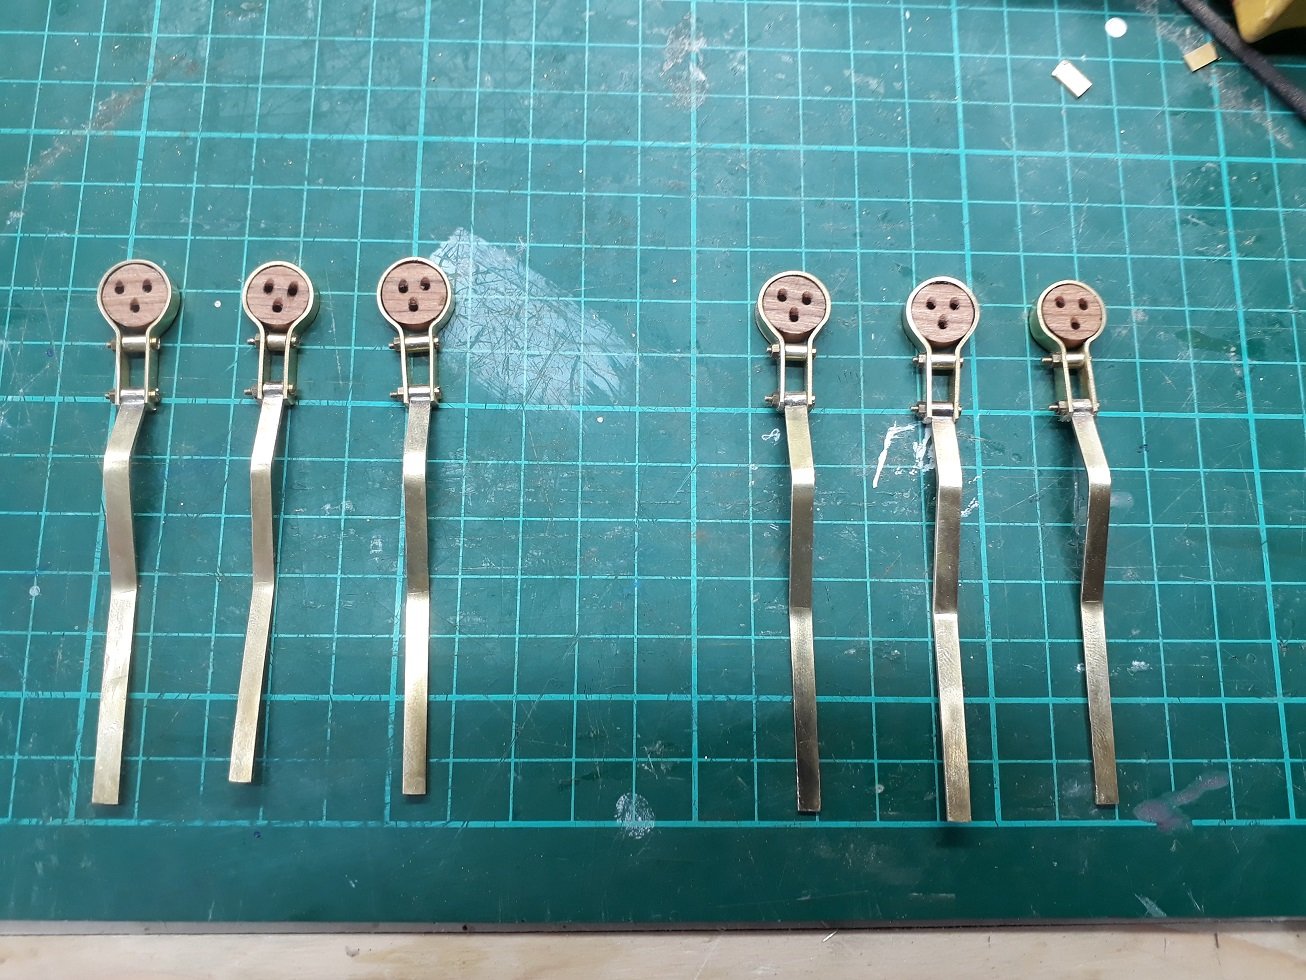
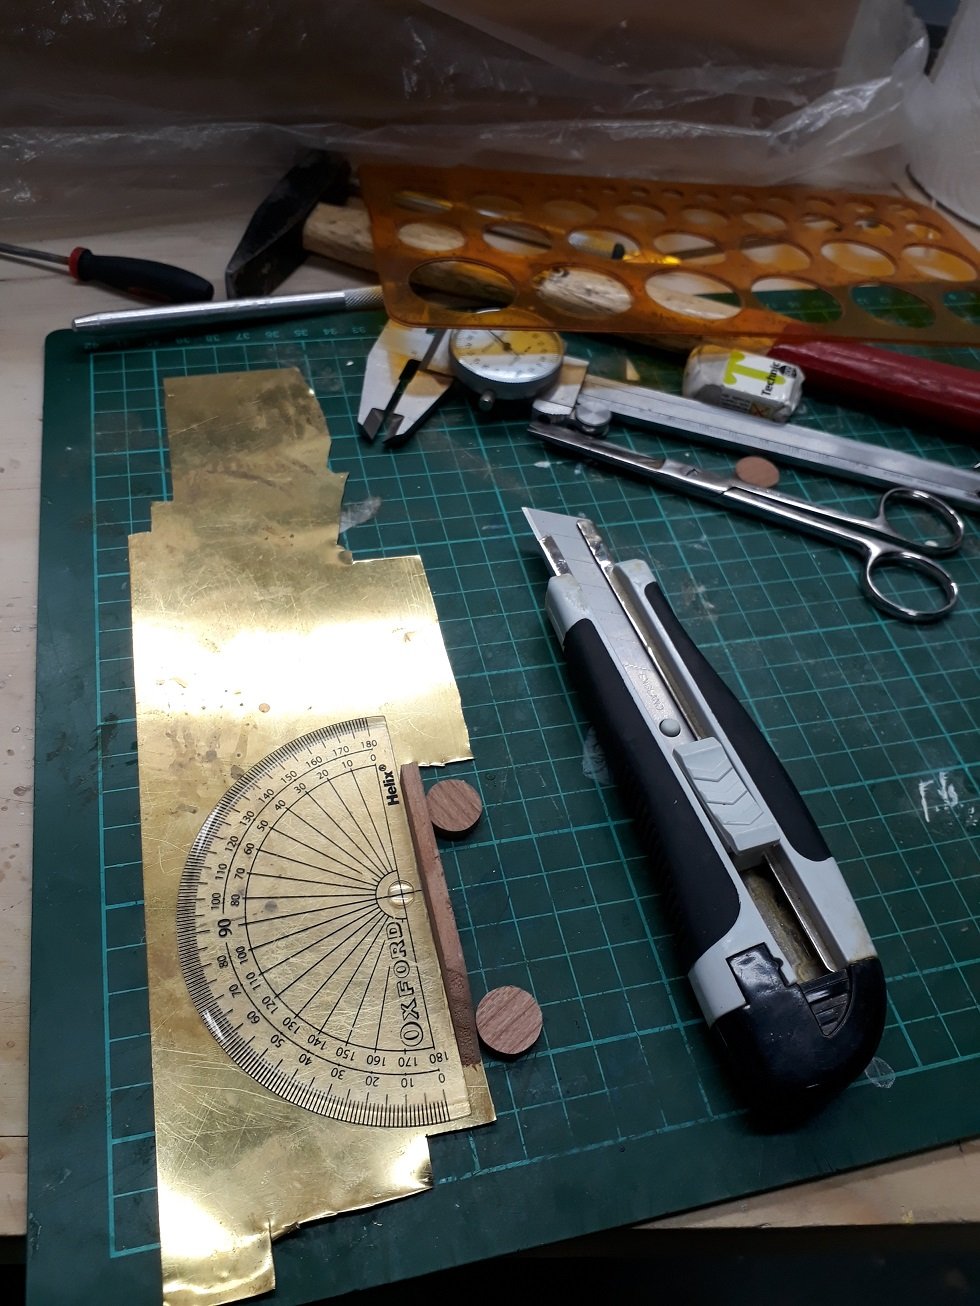
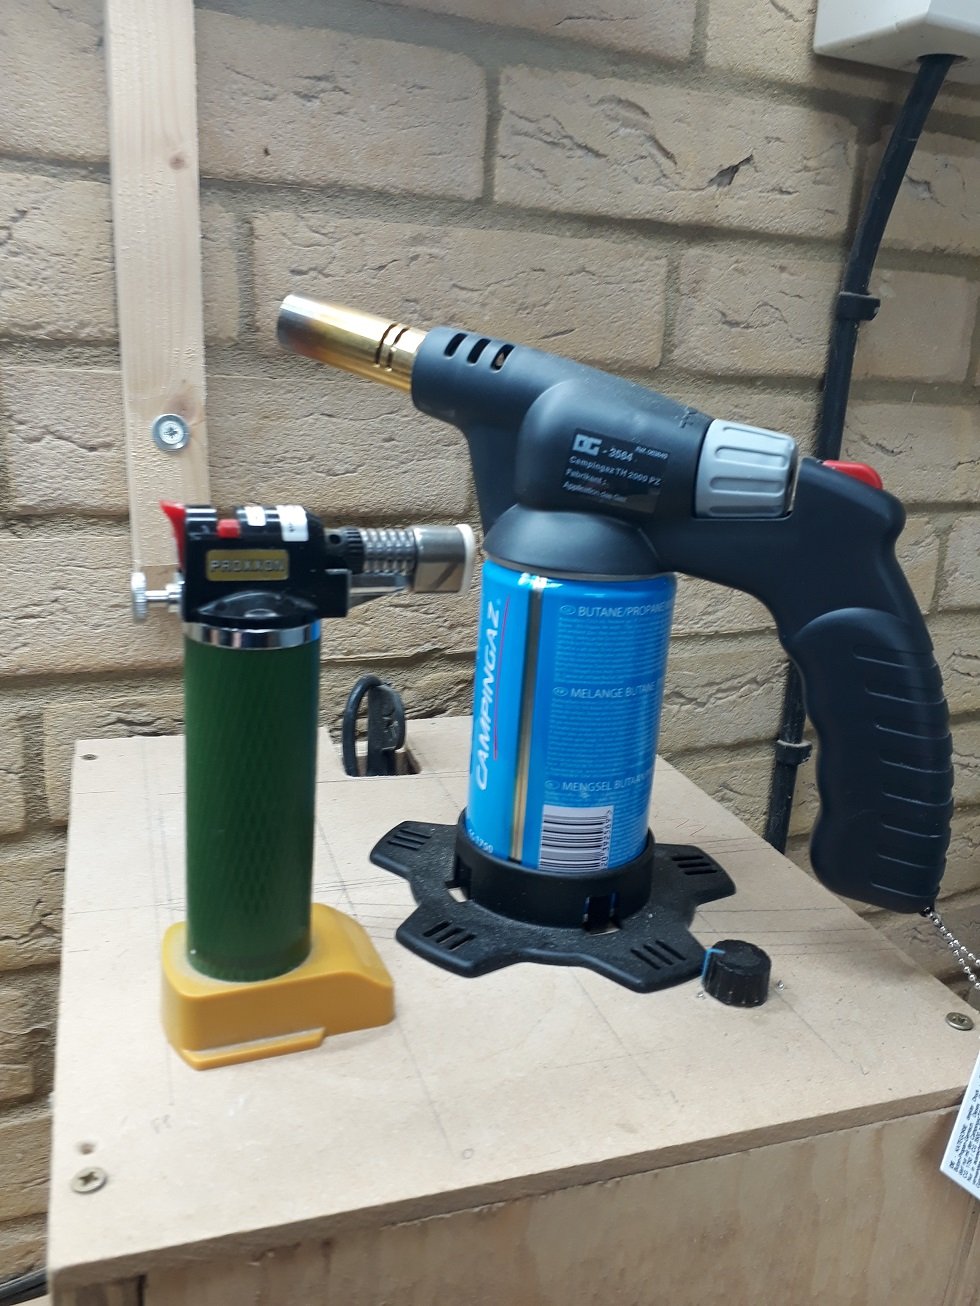
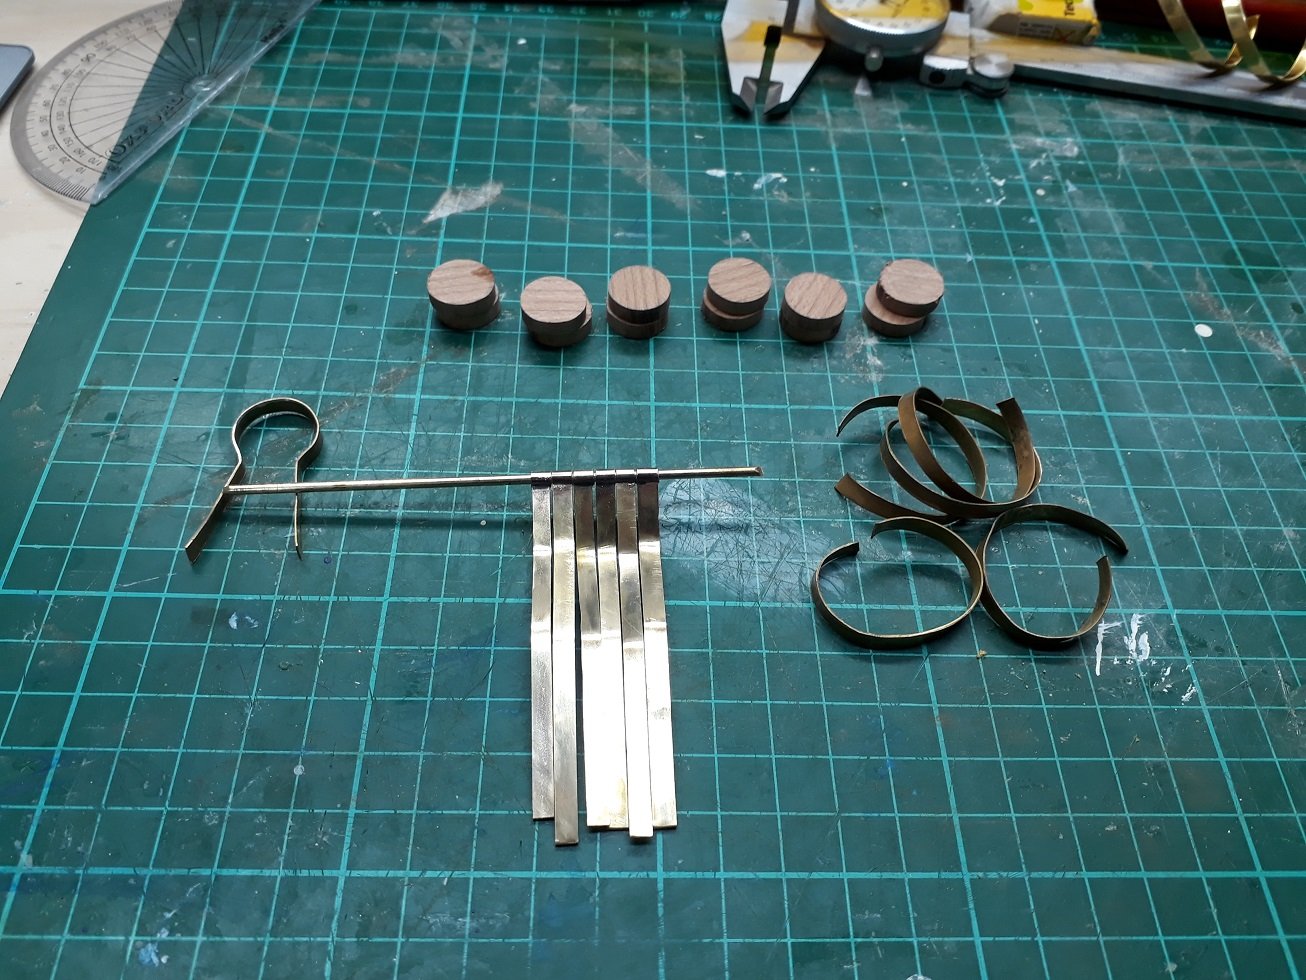
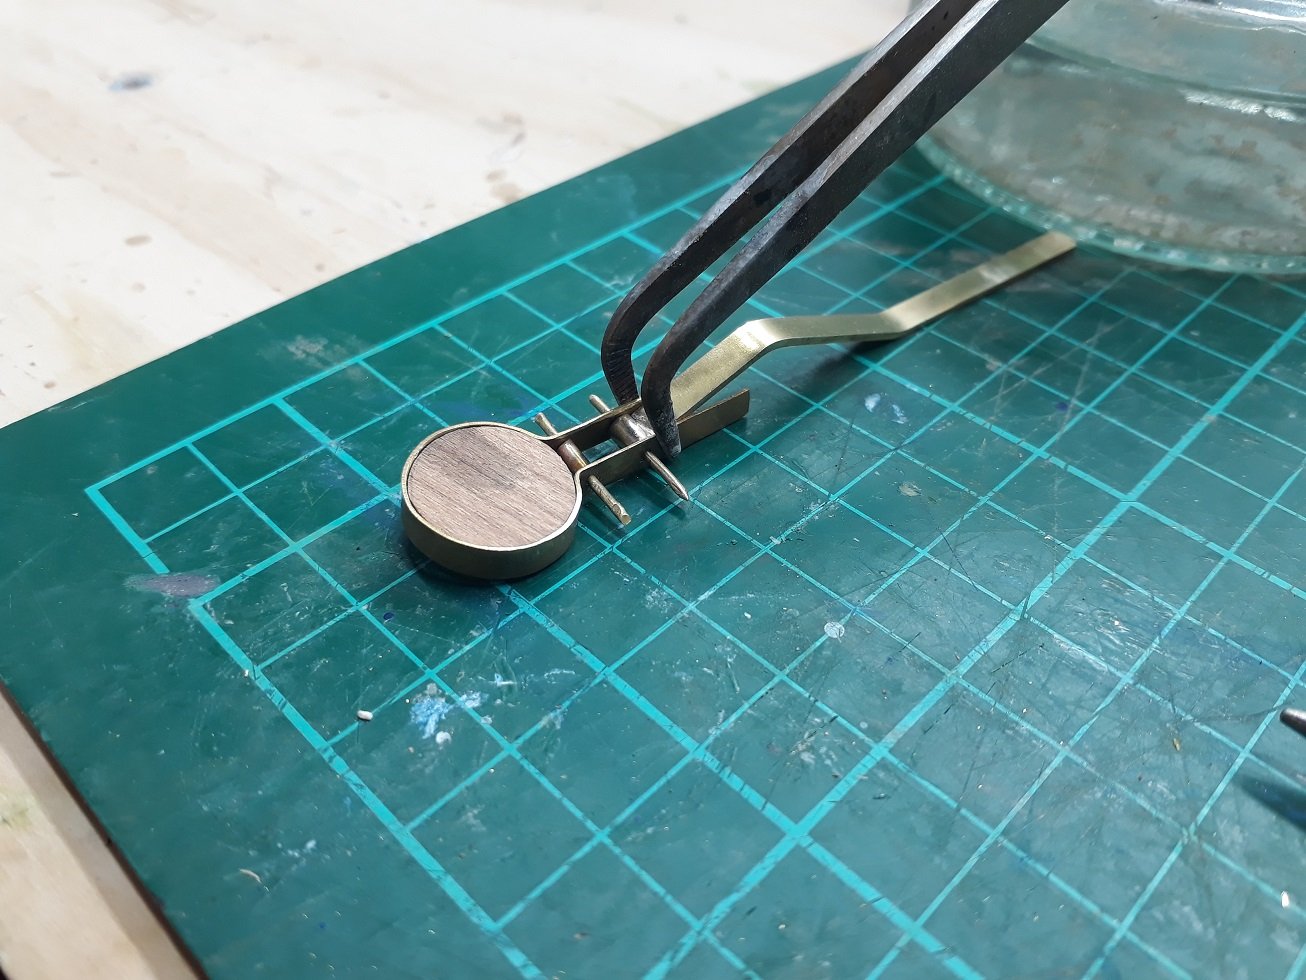
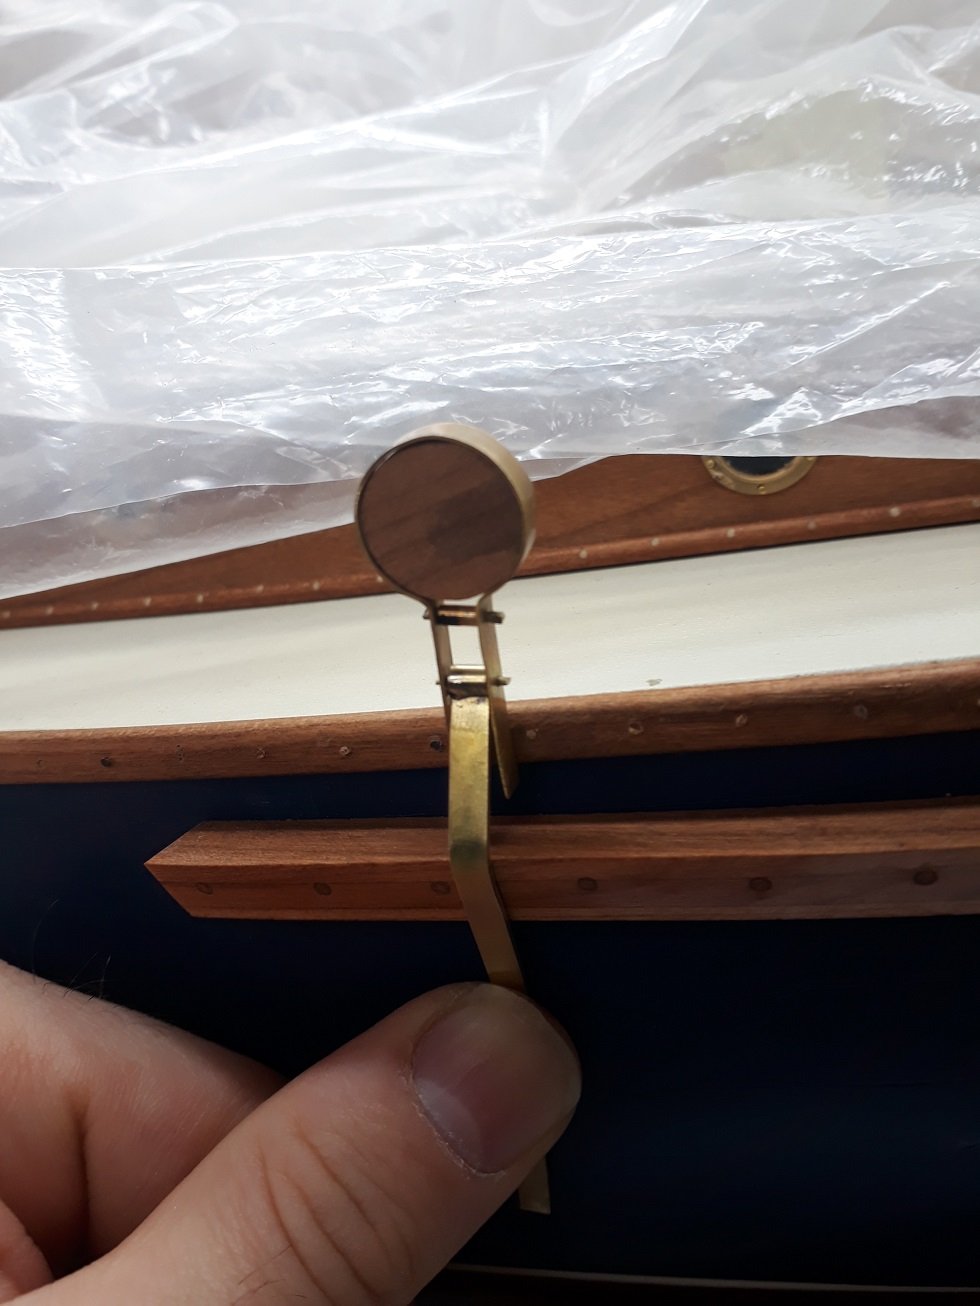
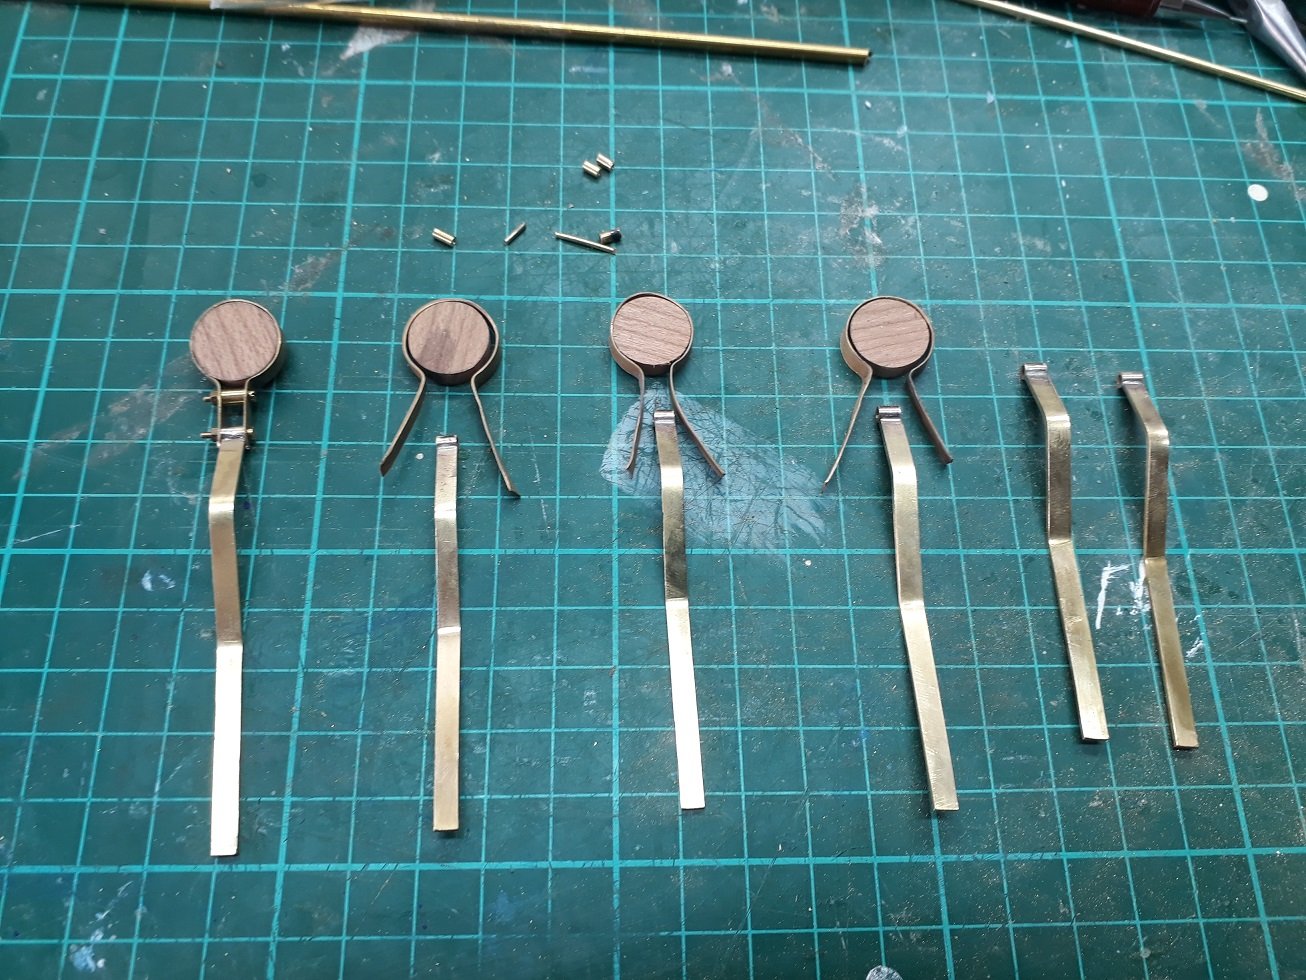
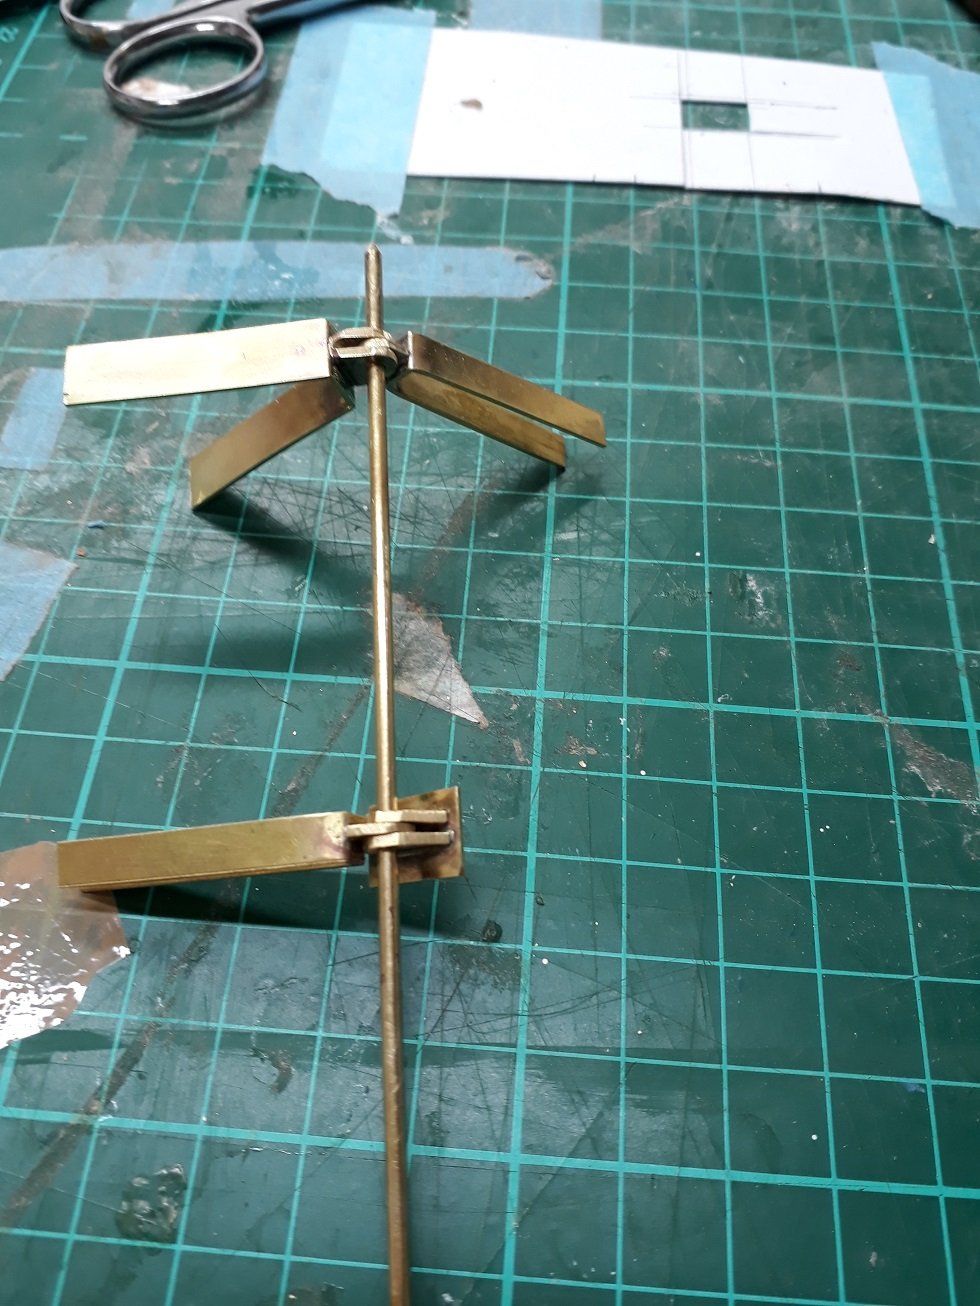
Many thanks for your likes, another quick update. I did some more work on the chainplates and dead eyes. All six chain plates are ready, I re did the first two as I was not happy with the soldering. I made a deadeye and used some scrap brass to test the scale of the assembly. It looks ok bearing in mind I am after a bit of a dramatic effect! Cutting thin strips of brass was a bit challenging. I used the knife and then finish with the scissors. The strips came out curled and with sharp edges. They had to be sanded and then annealed so I brought the big boy out. Heating to red hot immediately straightened the strips quite a lot but also made them very soft. The big boy needs care as it can easily melt the brass. So with all the components in place, the assembly started. I want the part to be functional and move. The plan was to use a 2 mm tube through the 3 mm tube that is attached to the chainplate and a piece of 1 mm wire as axle. It worked...kind off. The upper connection in this first attempt was a 2 mm tube and the lower one a 3 mm tube, with a piece of 2 mm in it so that there would be no play with the 1 mm axle. This looked wrong. Also, I secured the wire by crushing the ends but I did not like this either. I looked into my inventory of random things and found some 1.2 mm bolts and nuts. I made the part again and this time it looks much better, still needs the bolt to be trimmed, the deadeye eyes to be drilled, the wood to be oiled and the brass polished. Both tubes are now 3 mm (with a 2 mm tube inside, drilled through to accept the 1.2 mm bolt) I think it will be fine but it needs a lot of work. It is difficult enough to cut such small pieces of tube and also not easy to free-hand drill though to accept the bolt. It takes a lot of time to make each deadeye but at least I have standardised a process that works. In the next photo, all components awaiting assembly. This is actually a nice and fun part of the build. At some point I will need to start making the very many cleats, blocks and shackles and also to bring out my rope walk as I expect I will need a lot of rope. I still need to make the gaff and the boom and both will be pretty complex to make. Still a long way from finishing! Vaddoc


- 536 replies
-
- 14
-
-
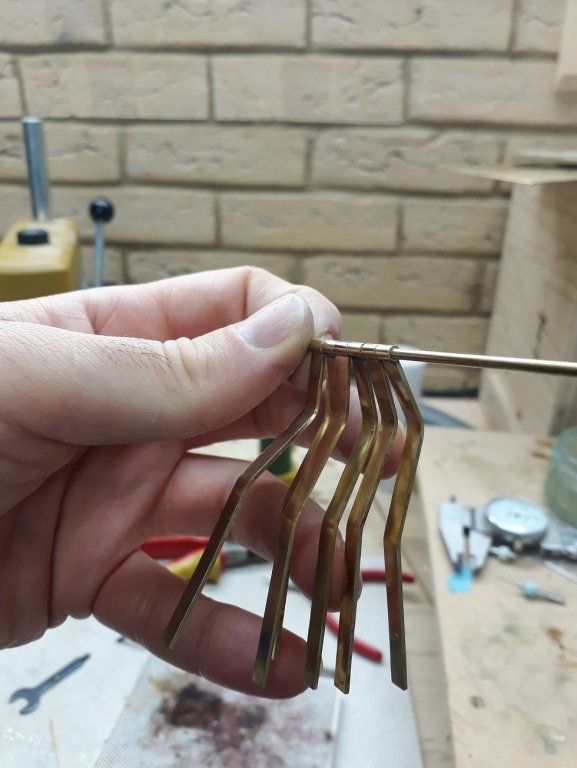
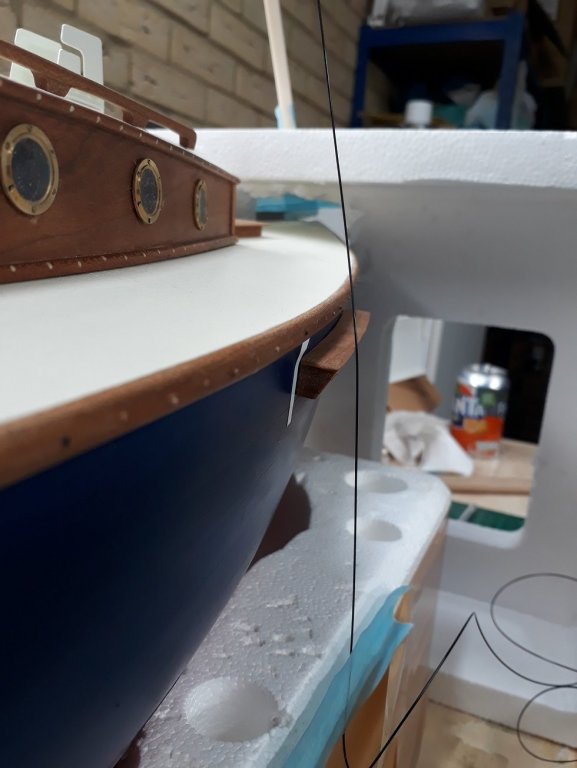
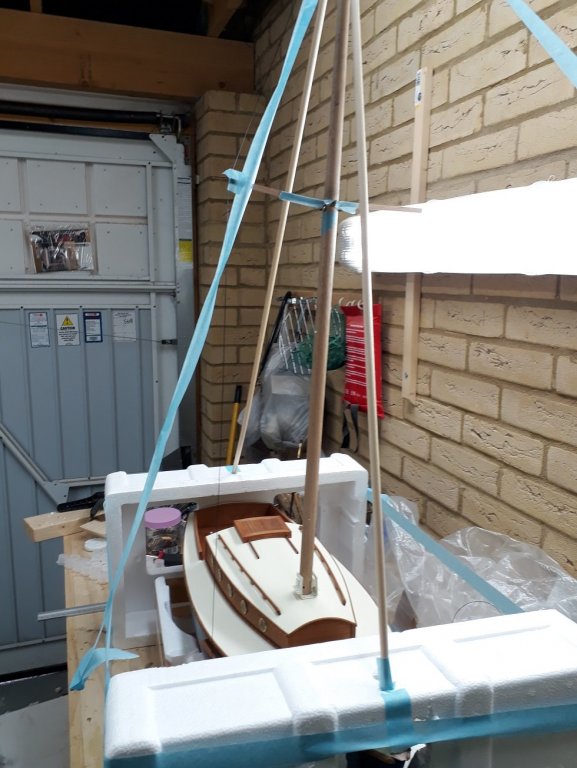
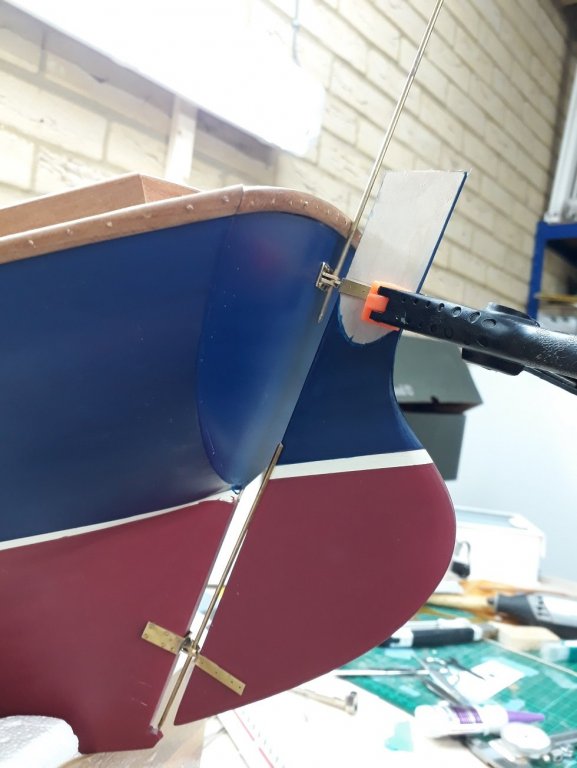
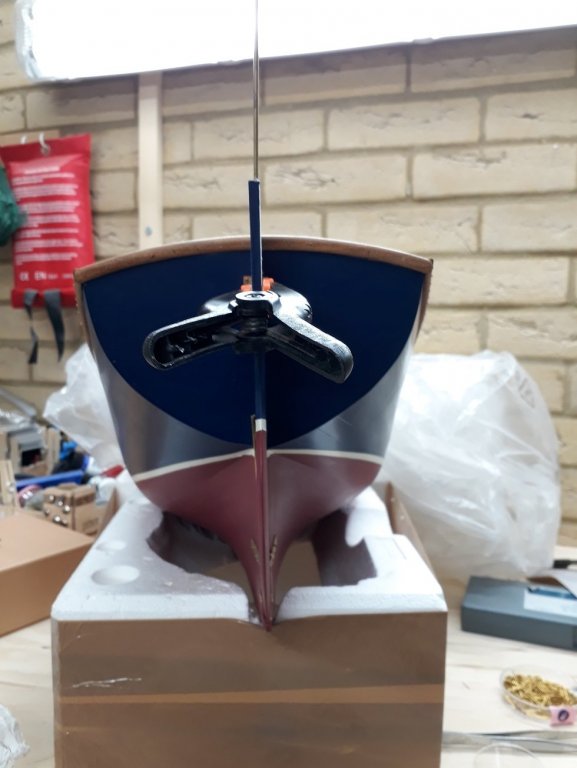
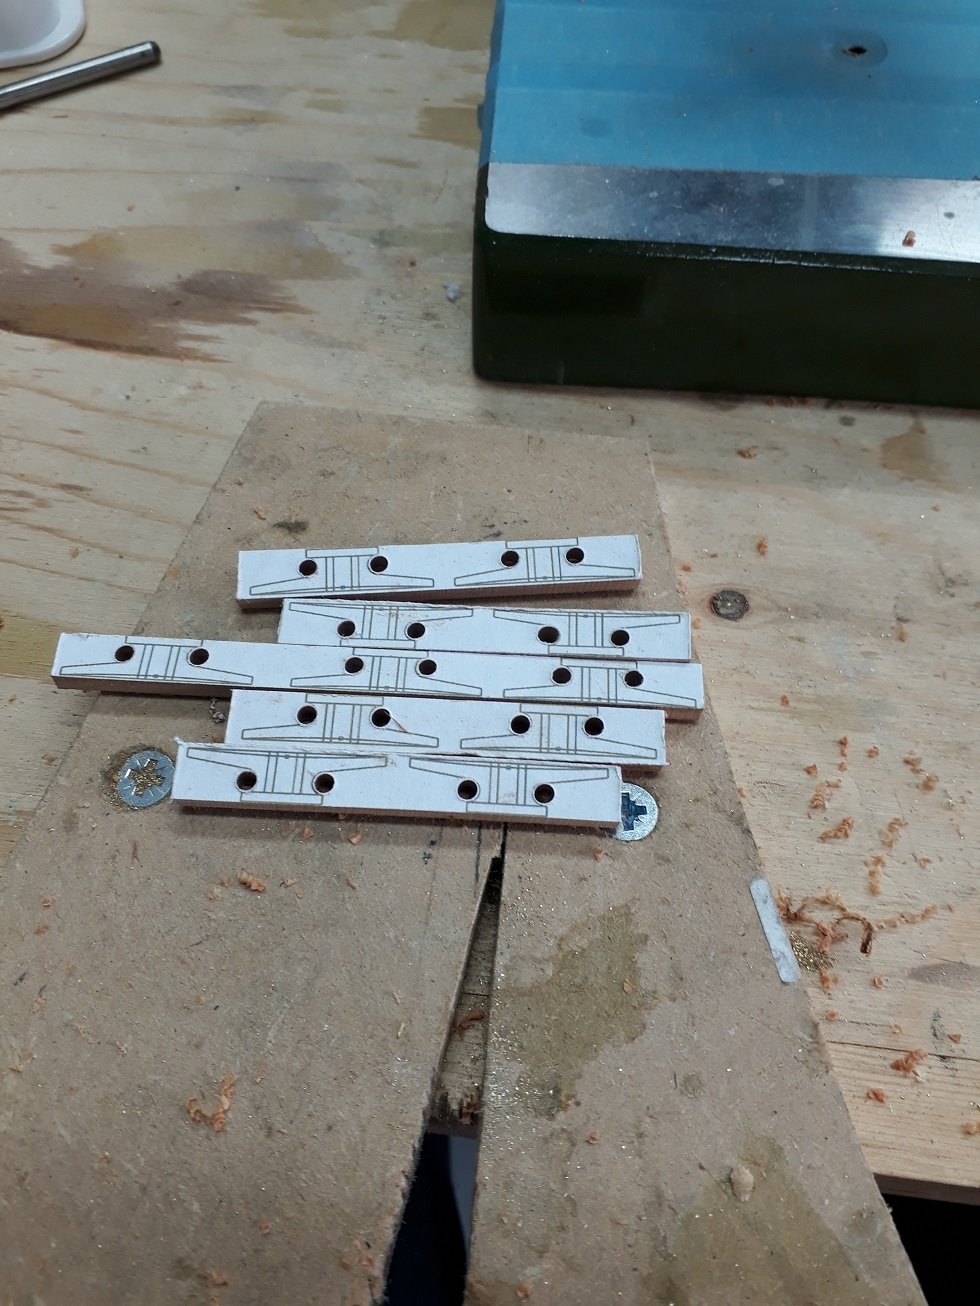
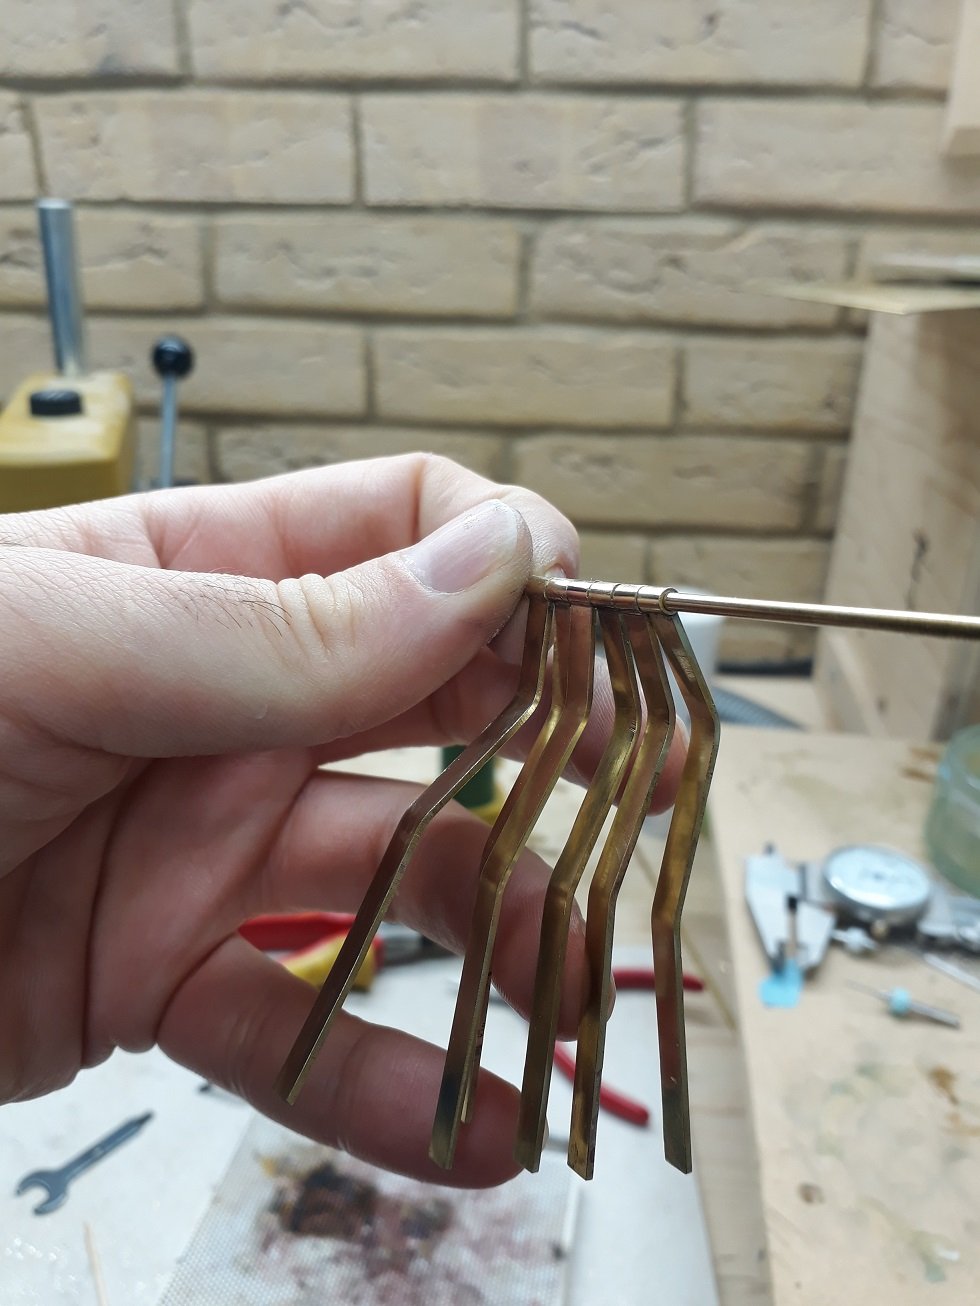
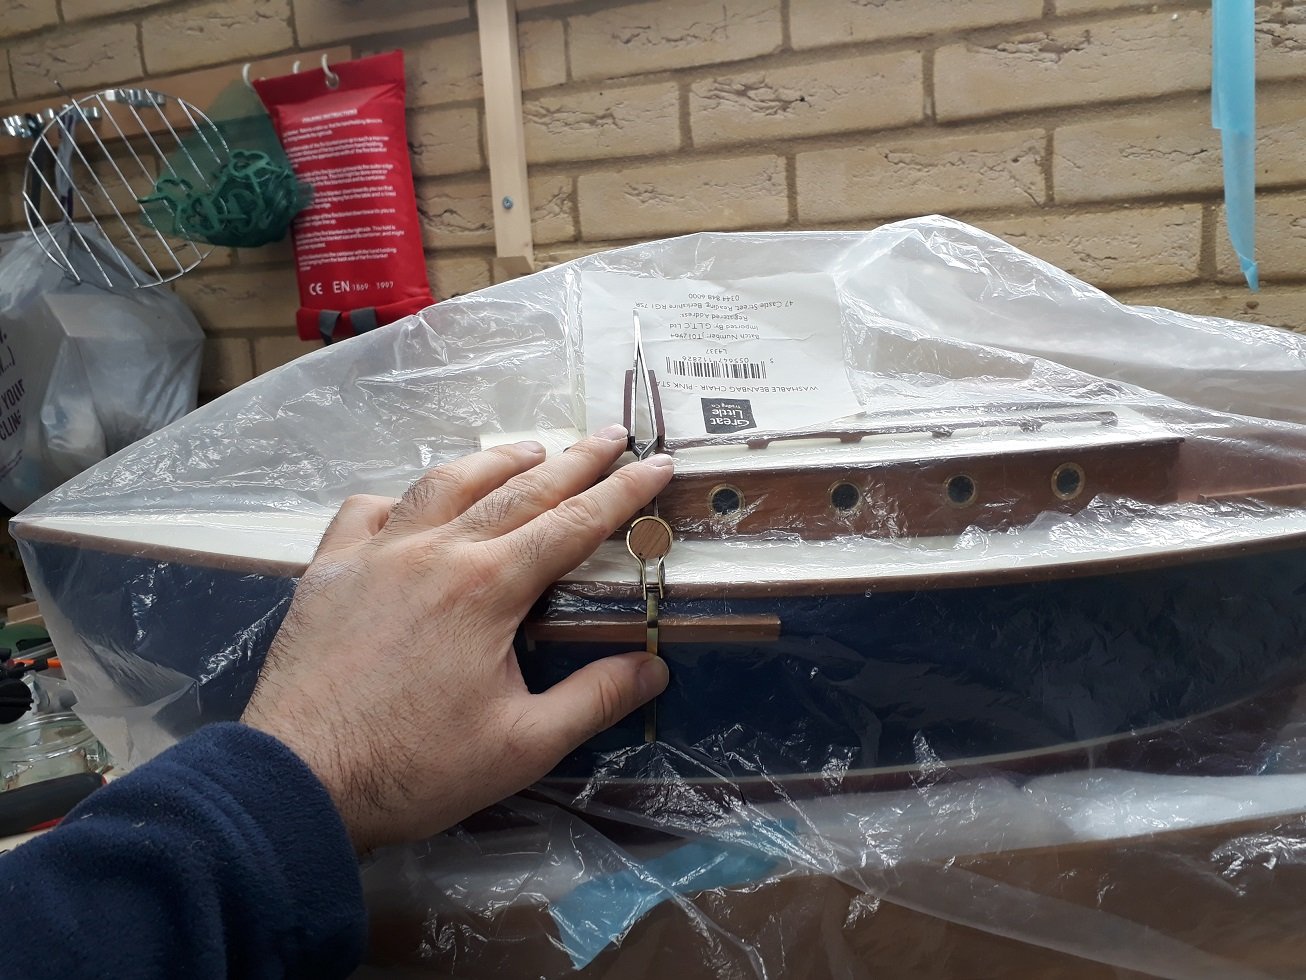
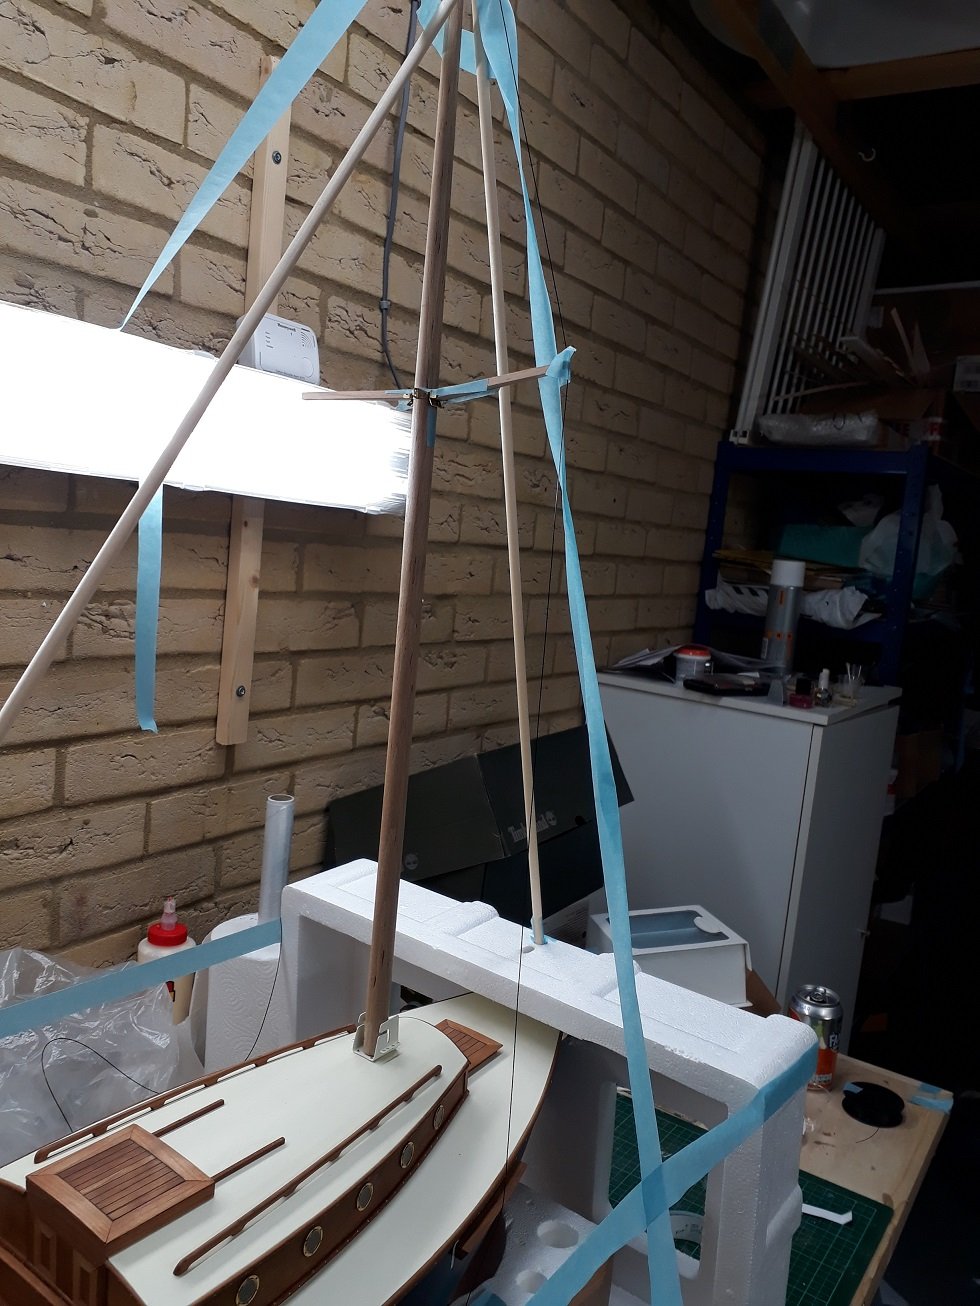
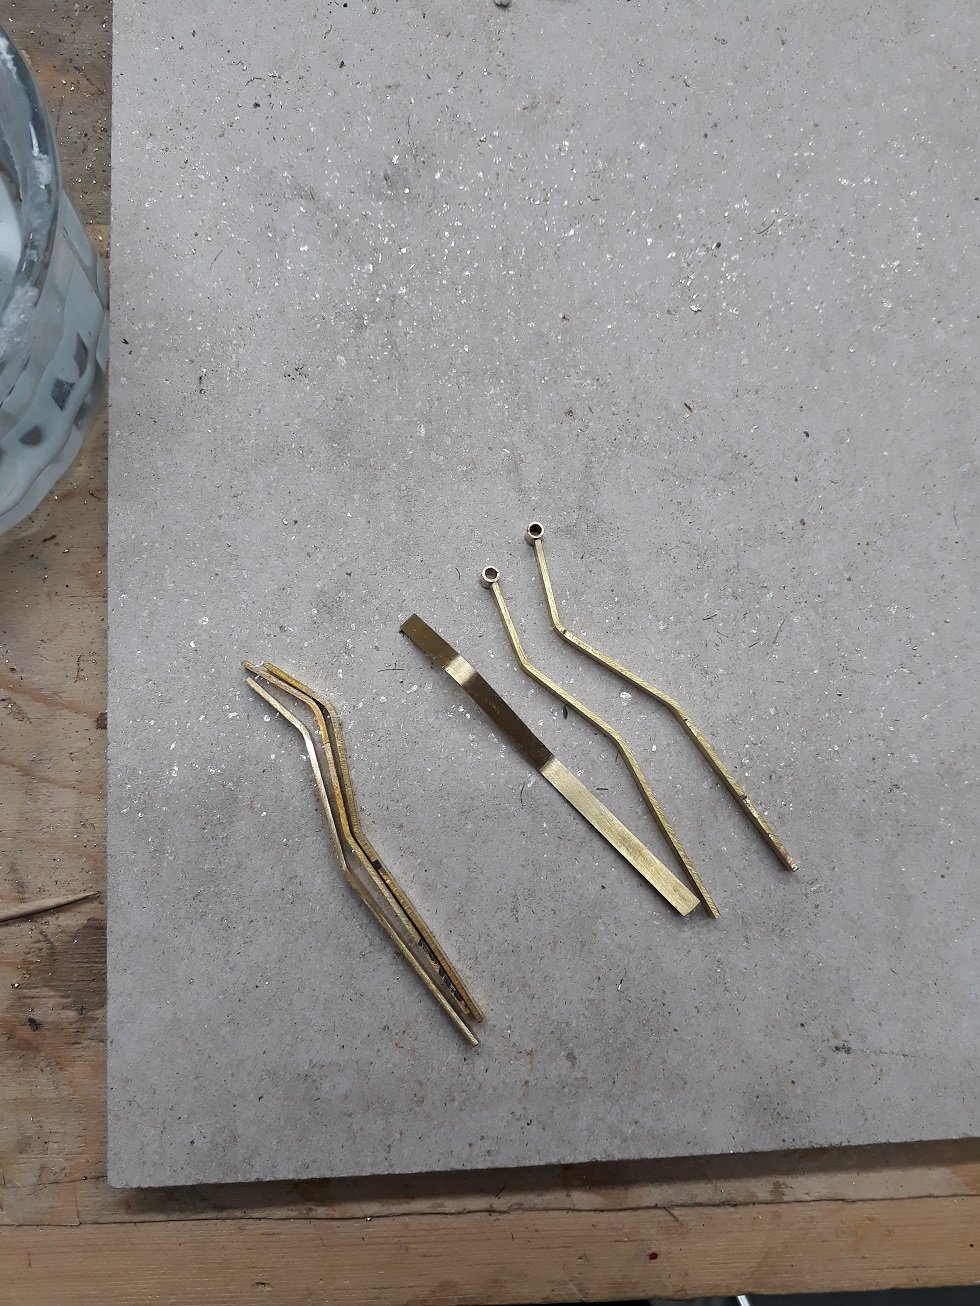
Bank Holiday in UK and a long weekend so I managed to do some more work. Mark and Keith many thanks for your comments. I worked a bit more on the gooseneck, I ll post some pictures later but it still is not ready. Then I changed focus and started making the chainplates. To define the angles, I had to make a mock rigging. Not elegant but worked fine. The middle pair will reach the top of the mast via spreaders so the angles will be different. The chainplates before final trimming. The pieces of wood (I do not know how they are called) need final sanding of the tree nails and a final coat of Tung oil. With all chain plates trimmed I started soldering pieces of tube to attach the dead eyes. This actually is proving difficult. The chain plates will be nailed to the planking but I cannot drill the holes for the nails because I destroyed all my carbide 0.7 and 0.8 drills. A piece of drill was left in the hole in a brass piece I was drilling and I did not notice. Trying to complete the hole I destroyed several carbide and a couple of steel drills. Carnage! I cannot use steel drills on my drill press as the colet does not grab such small drills well. A final photo of all the chain plates awaiting soldering and drilling Regards
.thumb.jpg.0baf55c10ea75e53dcf0ec5bc234ce8b.jpg)


- 536 replies
-
- 10
-
-
Beautiful work Keith, your hull looks way better than the real boat. I missed the beginning but I ll pull up a sit for the rest of the journey. Vaddoc
-
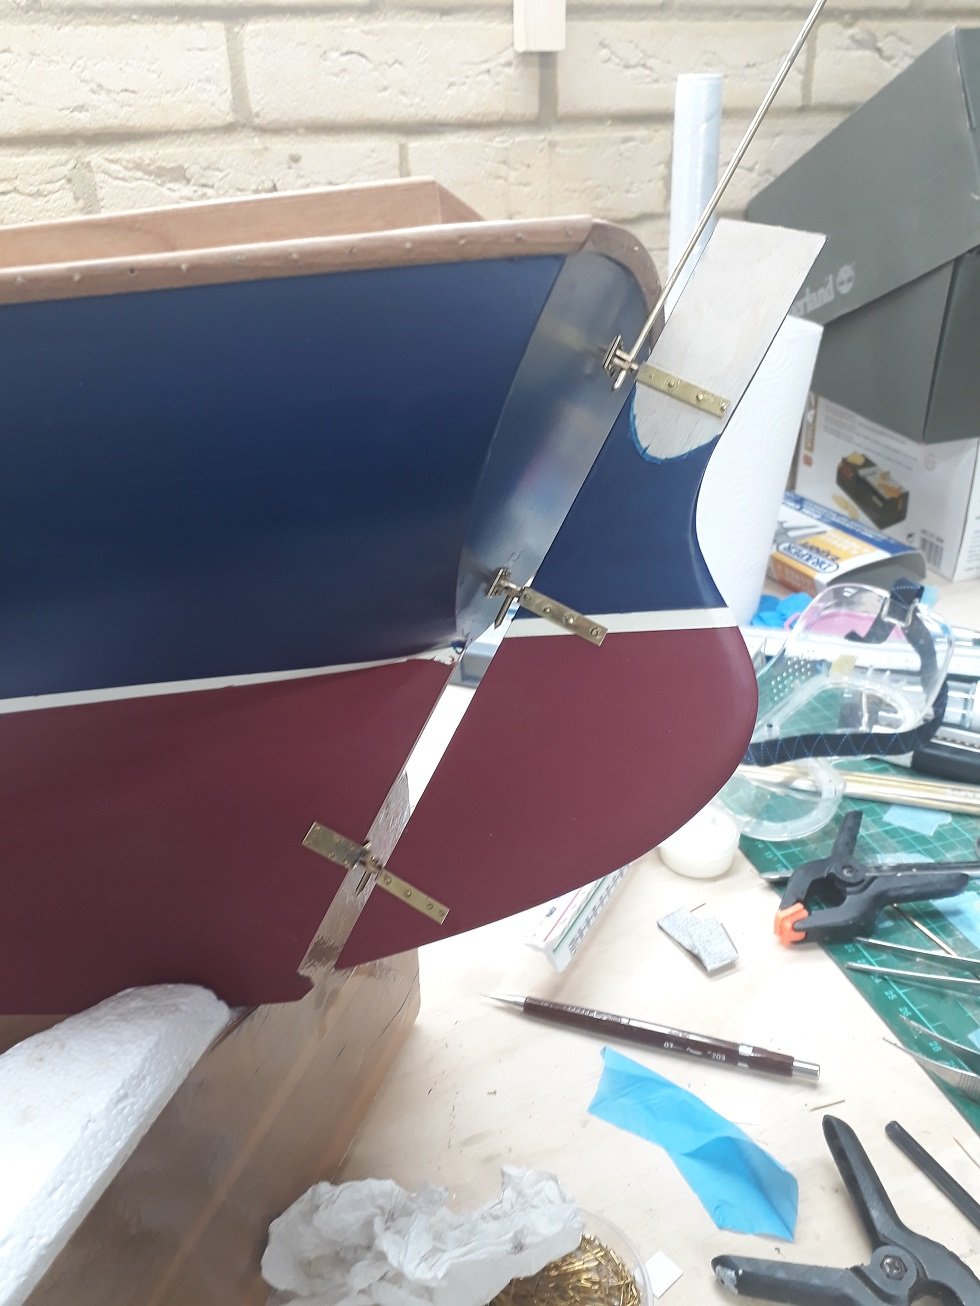
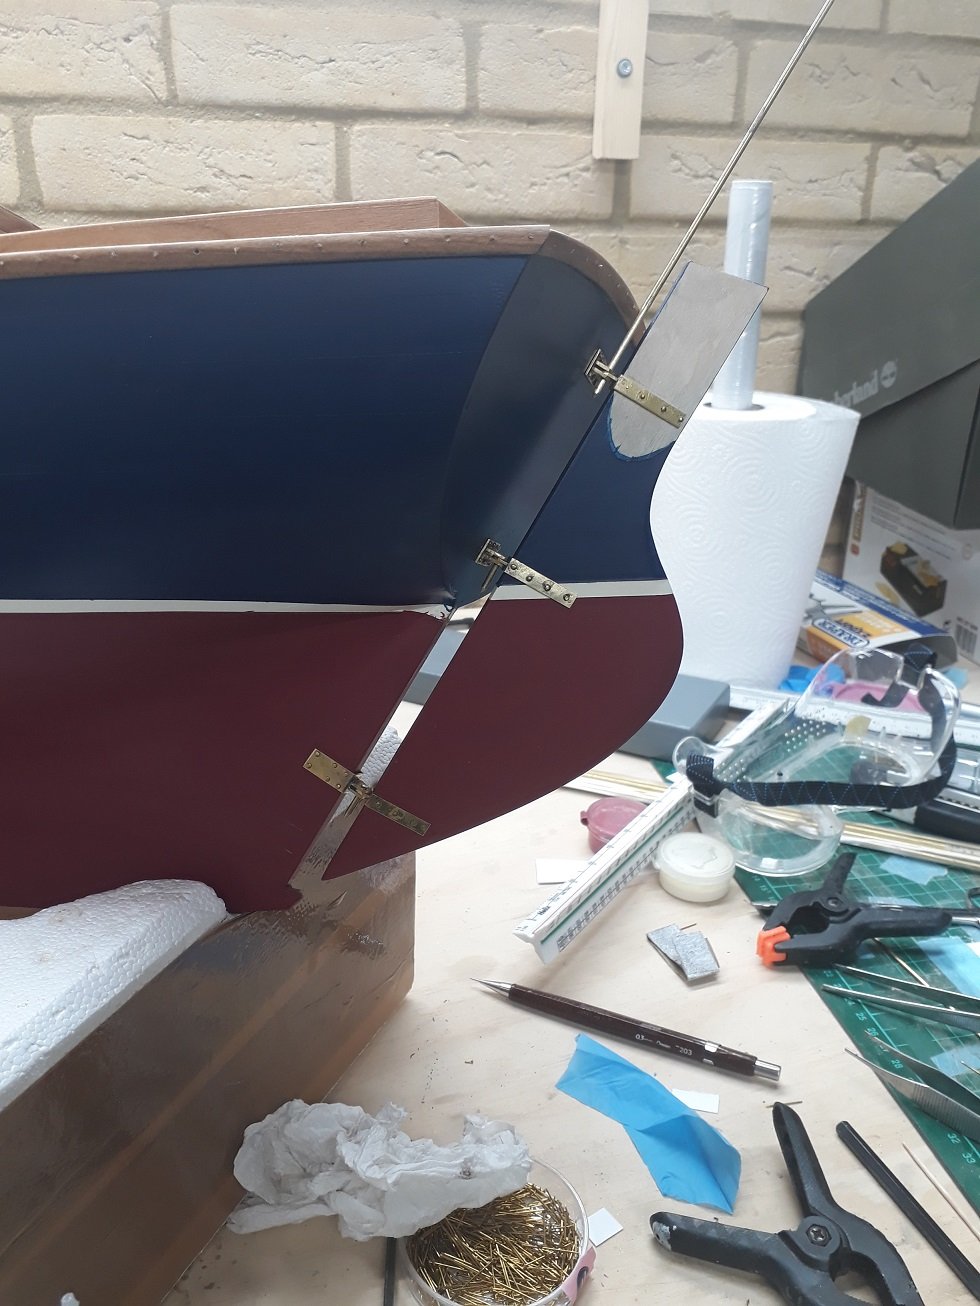
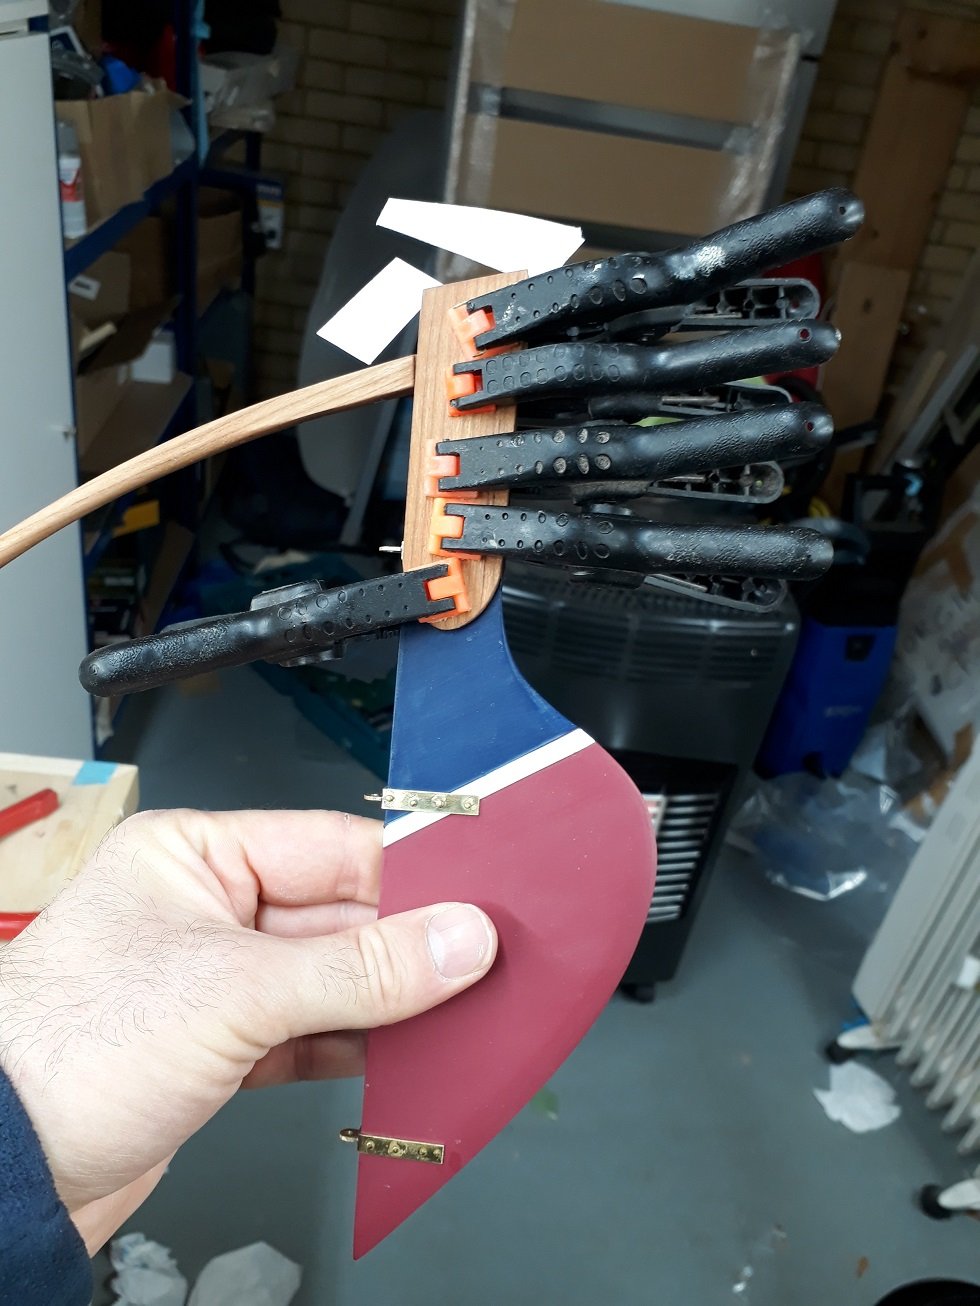
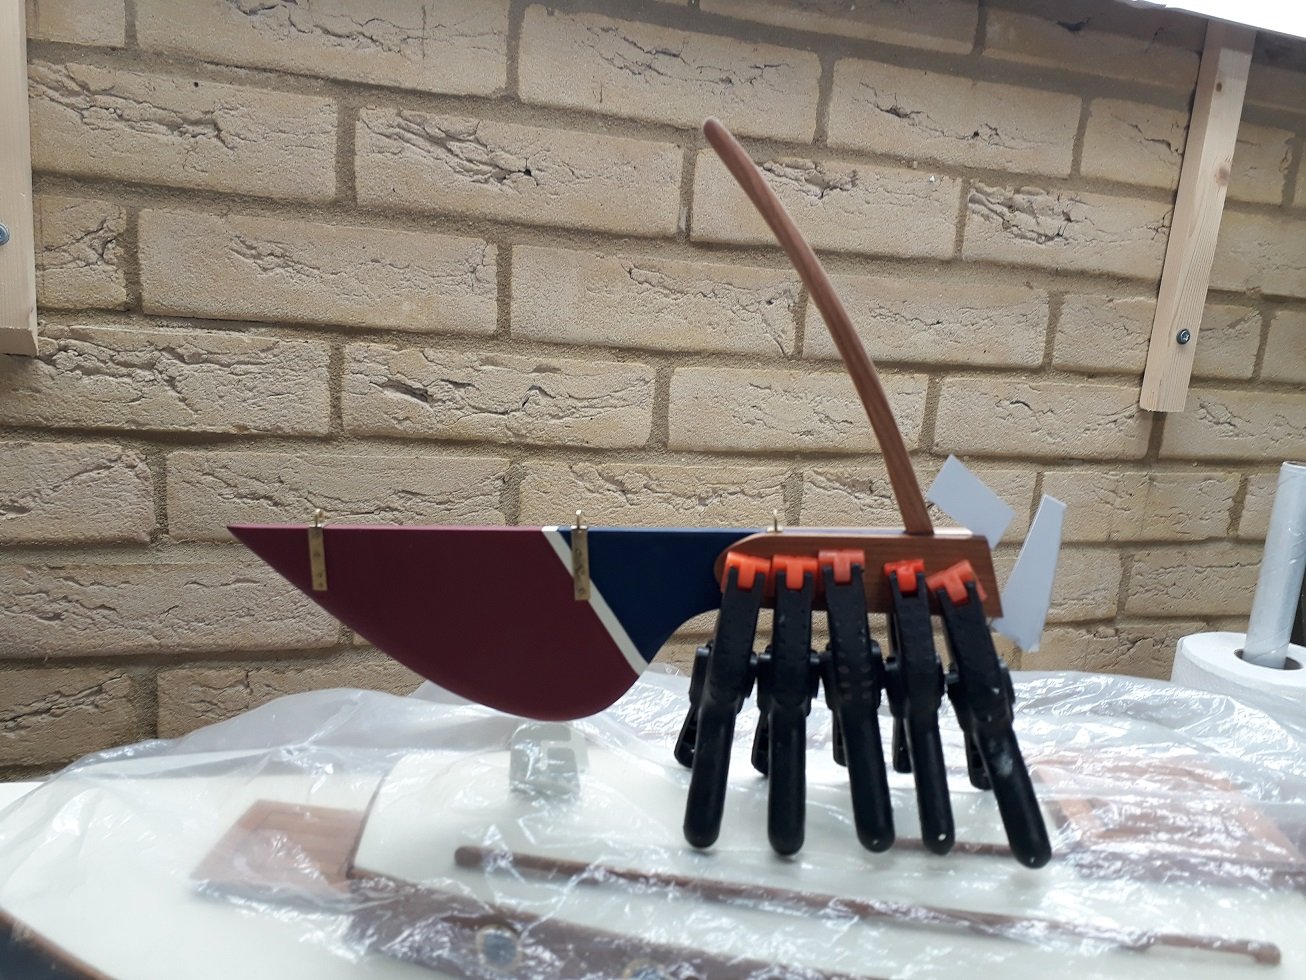
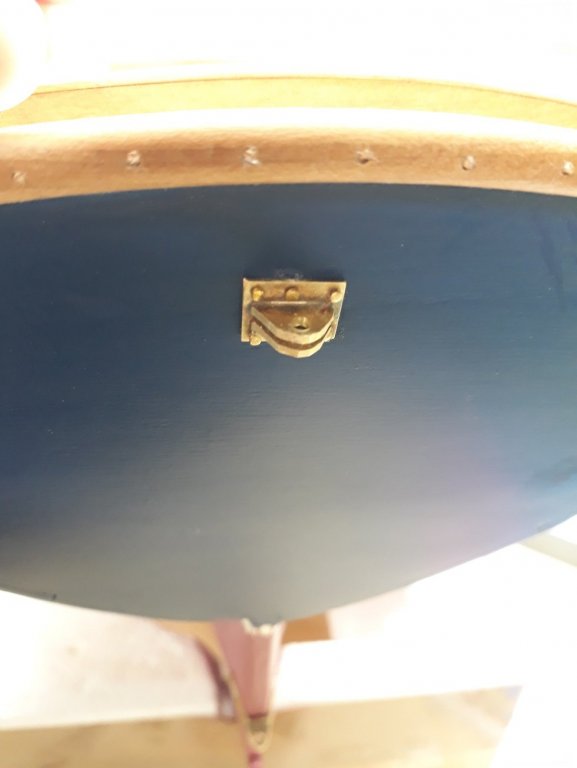
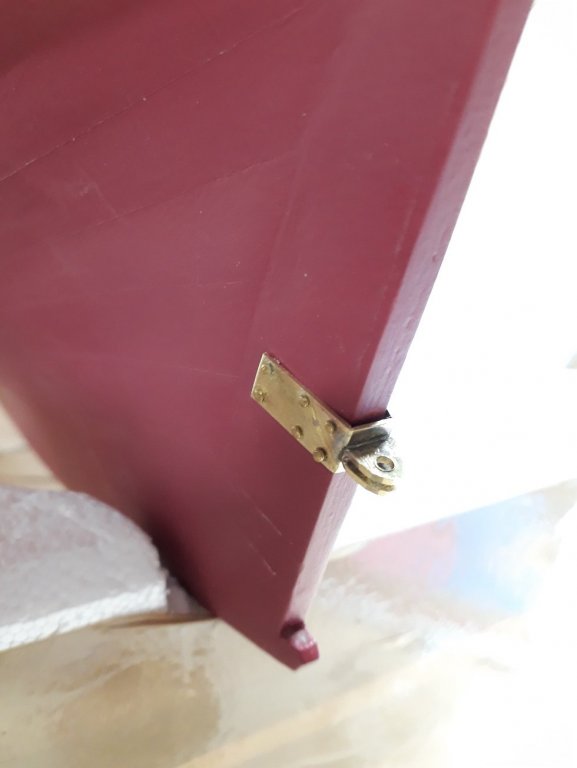
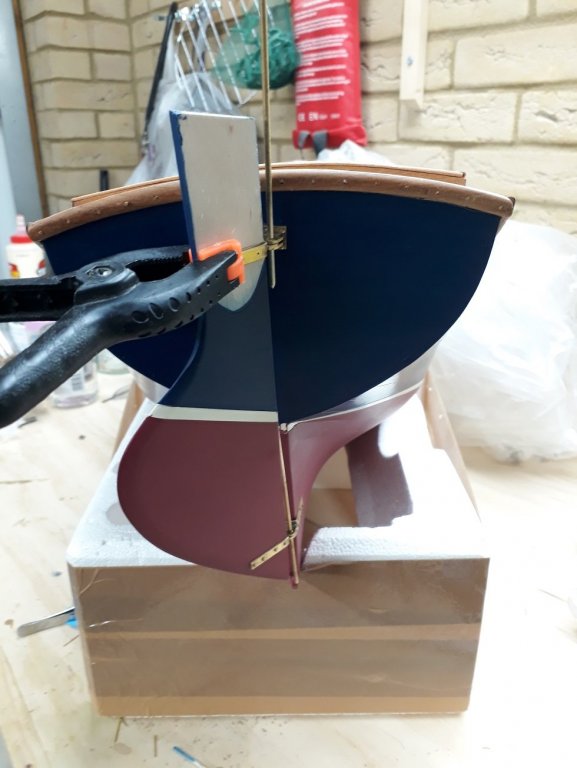
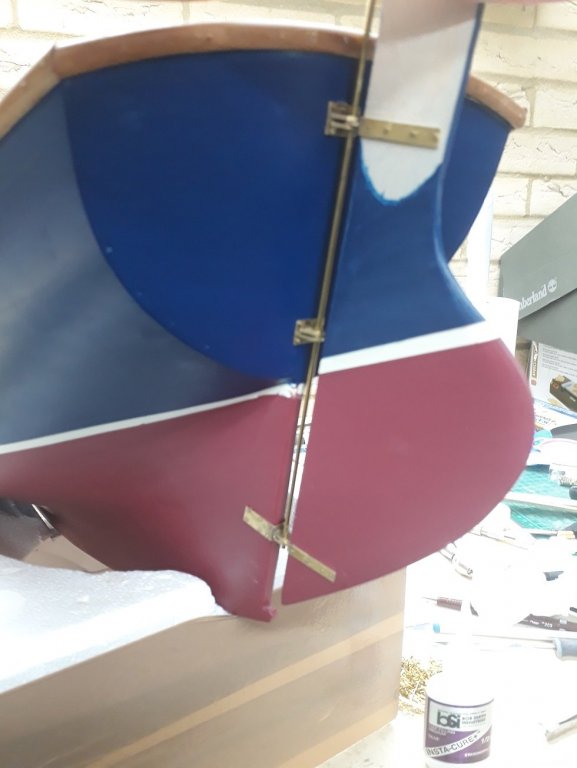
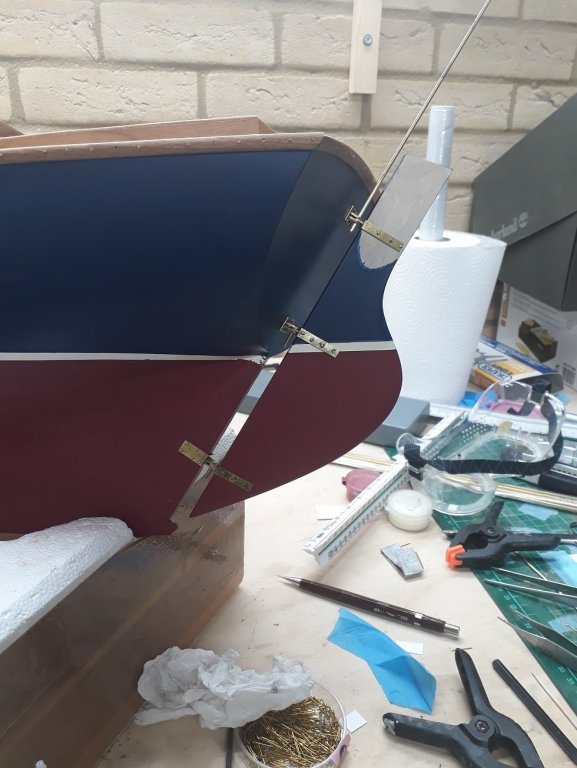
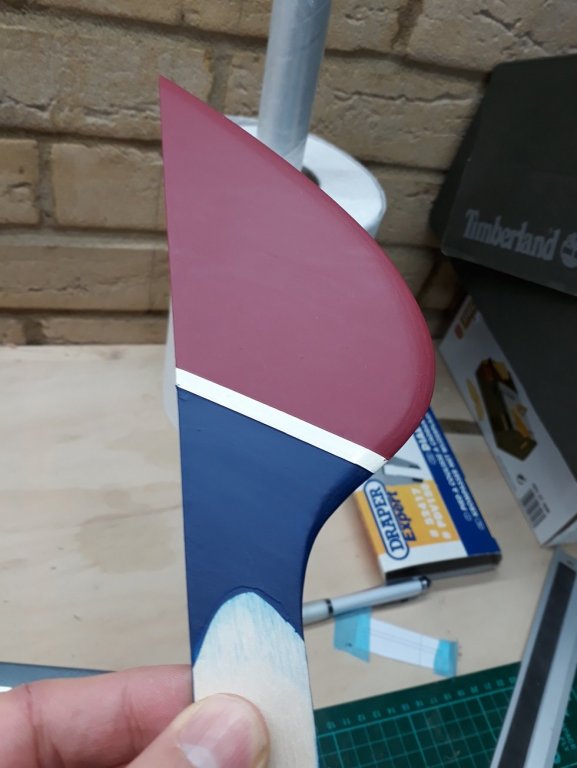
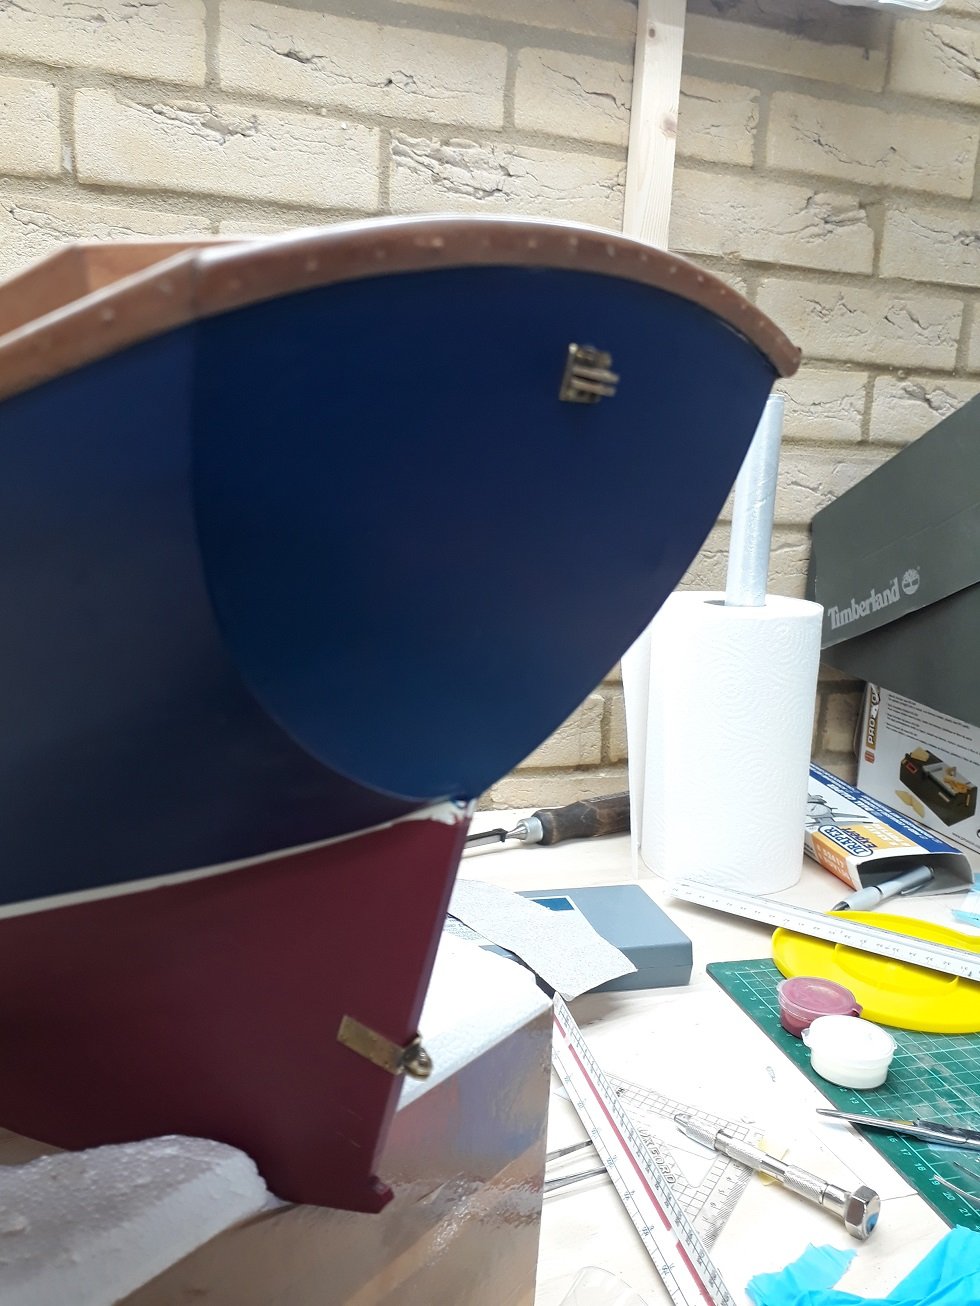
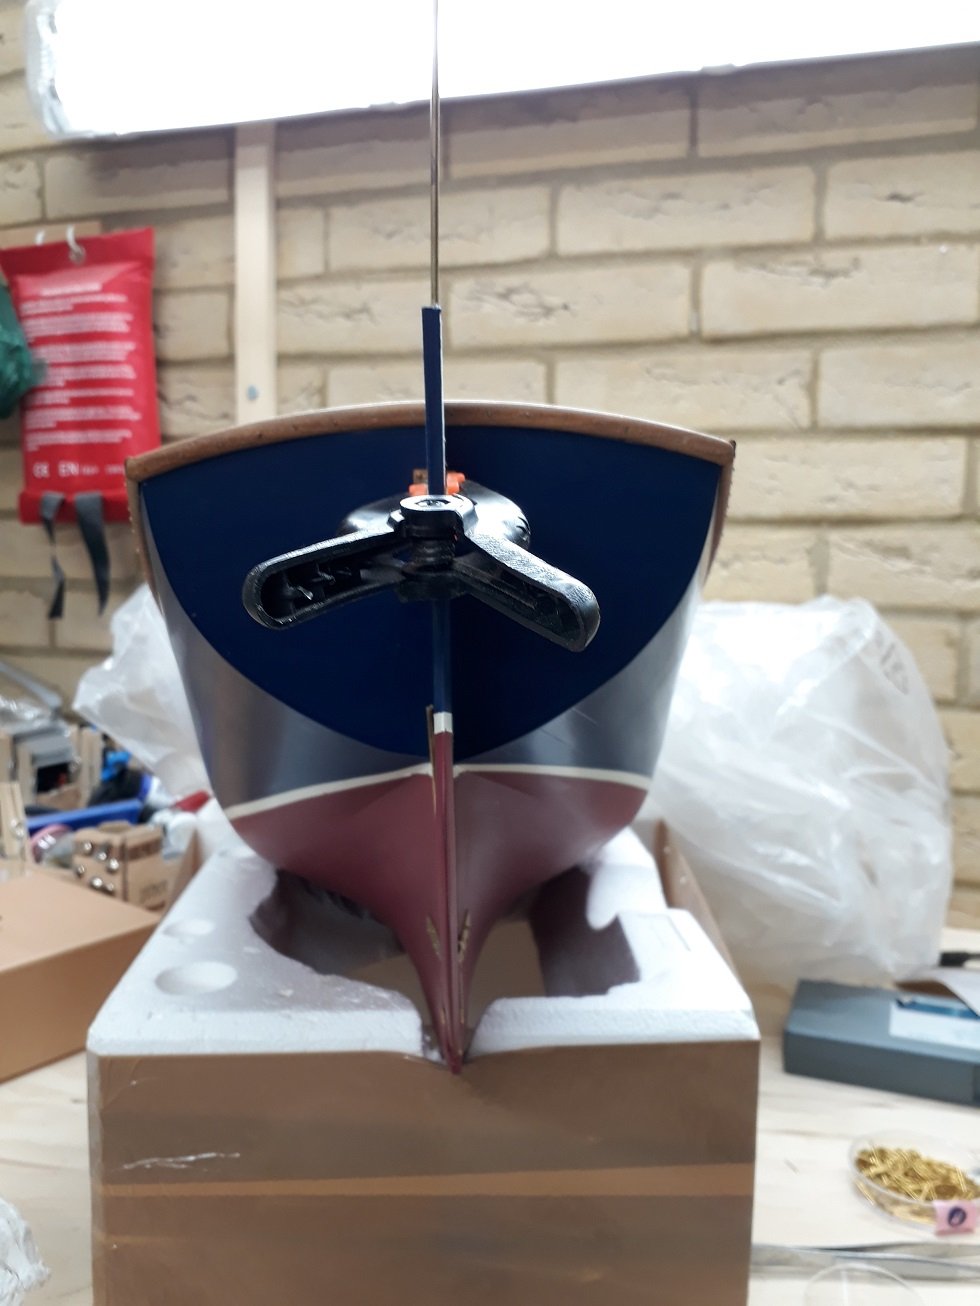
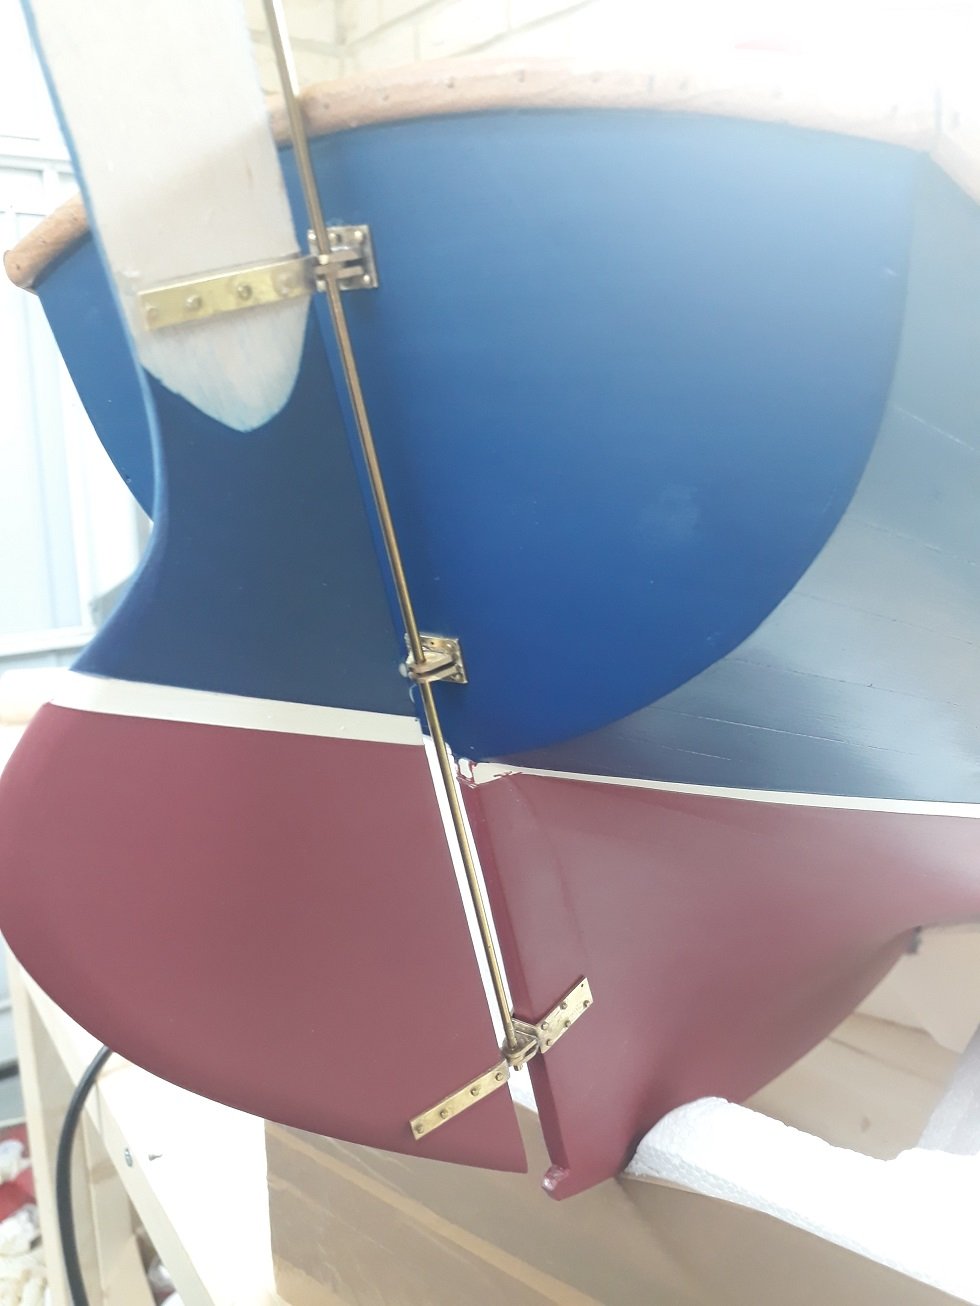
A milestone reached today, the ruder is ready! I must say it was much harder work than I thought. I mast have made the hinges 20 times over but finally I was left with 3 acceptable pairs. I wanted the rudder to have some functionality but this meant that everything should be aligned. So careful and gradual installation of the hinges was needed. The pin will be 2 mm wide. I initially drilled and installed the upper and bottom hinges. I used brass pins shortened as they are much better quality and much cheaper than the Amati nails. I used a proper CA glue (BSI insta cure +) instead of the rubbish cheap one I have been using so far. What a revelation! This glue takes no prisoners, a joy to use. The hinges are rock solid. Then the other halves were installed on the rudder. Alignment was perfect and the rudder could actually turn both ways. The most difficult job was to align the middle hinge. It went surprisingly well. It also turns which I did not really expect! The boat will probably steer very well but only Hercules will be able to turn the rudder, I think it might be a bit too large.. A couple of issues came up. Some scratches due to not being careful. Nothing can be done now! The biggest issue though was that I completely forgot and ignored the waterline! It is not aligned but luckily it is close enough. Again, nothing can be done now! Then I glued all the rest components of the rudder. The upper hinge is hidden by the wooden panels. Doesn't it look like a scorpion? The hull is now completed and I will start work on the deck fittings and rigging. Regards


.thumb.jpg.4f4087f3d1d50268e147a35046f10fd4.jpg)


-
Best type of micro drill bits for metal
vaddoc replied to BETAQDAVE's topic in Metal Work, Soldering and Metal Fittings
Very expensive though Vossiewulf! I buy the cheap chinese carbides £3/set of 10, the better quality steel rolled or milled drills from ebay but for sizes smaller than 0.8 mm I buy Heller which are expensive but good. In such small sizes the very cheap ones are false ecomomy and cause frustration, even drilling wood. Some times instead of silver colour drills I get black ones. I presume they are some kind of high carbon steel. These are always much sharper and rigid and drill better bur also they are quite brittle. I ve had a couple braking in the wood which indeed is a pain. Regards -
Best type of micro drill bits for metal
vaddoc replied to BETAQDAVE's topic in Metal Work, Soldering and Metal Fittings
These carbide drills are for use only with a drill press. They are very sharp, very hard and will cleanly drill through any material. However, they are very brittle and the slightest bend, as when drilling with a hand held drill, will snap them immediately. Steel is much more forgiving and will bend without actually loosing its alignment permanently. Carbide drills much better though. I have a large collection of drills with all sizes duplicate in steel for hand drilling and carbide for use with the drill press. Hope this helps Vaddoc -
Very enjoyable discussion for landsmen like myself! Your boat came out fantastic, loved the sailing stories. Regards Vaddoc
-
https://modelshipworld.com/topic/20644-problems-with-valejo-water-based-varnishes/?tab=comments#comment-628379 Done!
-
It was either the retarder or some contamination. I read that polyurethane varnishes have a bit of a fragile balance, keeping the polyurethane suspended in the water. If you thin too much or add funny chemicals, the bonds can break and the polyurethane becoming insoluble. Probably this is what happened in my case.
-
Thank you all for your good words. Indeed, a new sun rose and I overcame the difficulties. Keith I did exactly this, folded a U shape strip, not easy at 1 mm. I think it looks ok but much easier to re do if needed. Apologies for the out of focus picture, it is my cheap non-iphone Carl, spray cans are too messy and too expensive. I did a bit of research and experimenting though and finally all went well using plain wter based acrylic varnish. I suspect either the retarder or some contamination for the previous failure. Check a relevant thread I started All well now! Regards Vaddoc

-
Dear all Let me share what I found out from the internet Acrylic paint may take 30 days to cure and some say it might release some water vapour during the process. Probably best to wait a few days before applying enamel varnish. Water based polyurethane varnishes can be thinned with just water, no special fluids needed. However, there seems to be a rule not to use more than 10% water. Also, these varnishes should be brushed and maybe go over just once. They dry incredibly quickly. The surface will look terrible, full of brush strokes but this is alright. Polyurethane varnishes shrink as they cure and have an incredible levelling ability so it will be alright in the end. This has been my experience so far. I used Valejo polyurethane varnish over my very large hull with just a brush, unthinned and the result was excellent. I actually did a few trials with the Valejo water based varnishes, both the acrylic and the polyurethane in gloss and satin, thinned with water and unthinned. The results were pretty much the same, consistently very good irrespective really of how much they were thinned. They dry out incredibly quickly though, there is barely time to go over a second time. For satin, unless there is very little material on the brush, there will be brush marks not from the varnish but from the media within. Especially the gloss is very forgiving. Generally best to lightly load the brush. I went on and used the plain acrylic varnish on my rudder, not really being particularly careful. The result was pretty good and this time adhesion was good. I think the previous failure was either due to the retarder I used or due to some kind of contamination. I hope this will be of help to others Regards
-
I used water based varnish over acrylic paint Druxey. But indeed it is "fat over lean"
-
Shop Safety and Oops Repairs
vaddoc replied to BETAQDAVE's topic in Metal Work, Soldering and Metal Fittings
Many thanks Dave!


.jpg.6ead0a6245d37d6b519202457df9064b.jpg)


.jpg.b93db70a467e51e9941c27b4c683fecf.jpg)