

.jpg.f26acc9a74319261612561bfa7da1303.jpg)
vaddoc
-
Posts
1,528 -
Joined
-
Last visited
Content Type
Profiles
Forums
Gallery
Events
Posts posted by vaddoc
-
-
Dear all
It is rope making time!
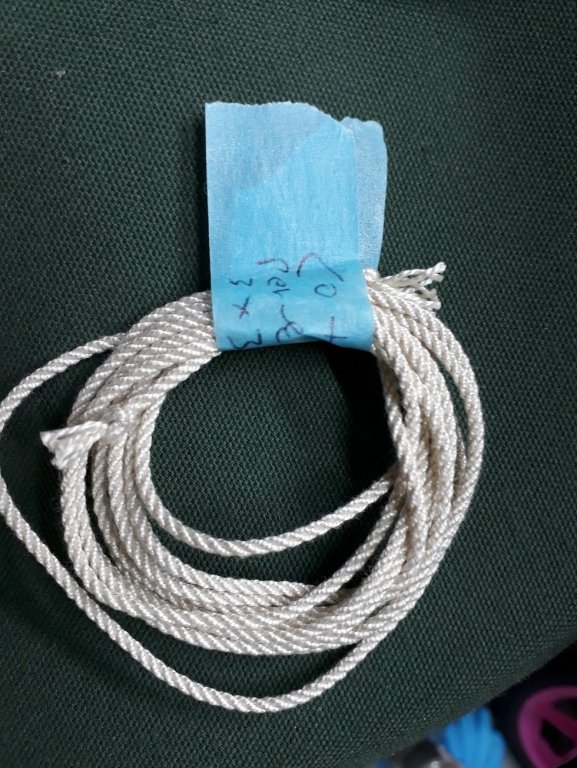
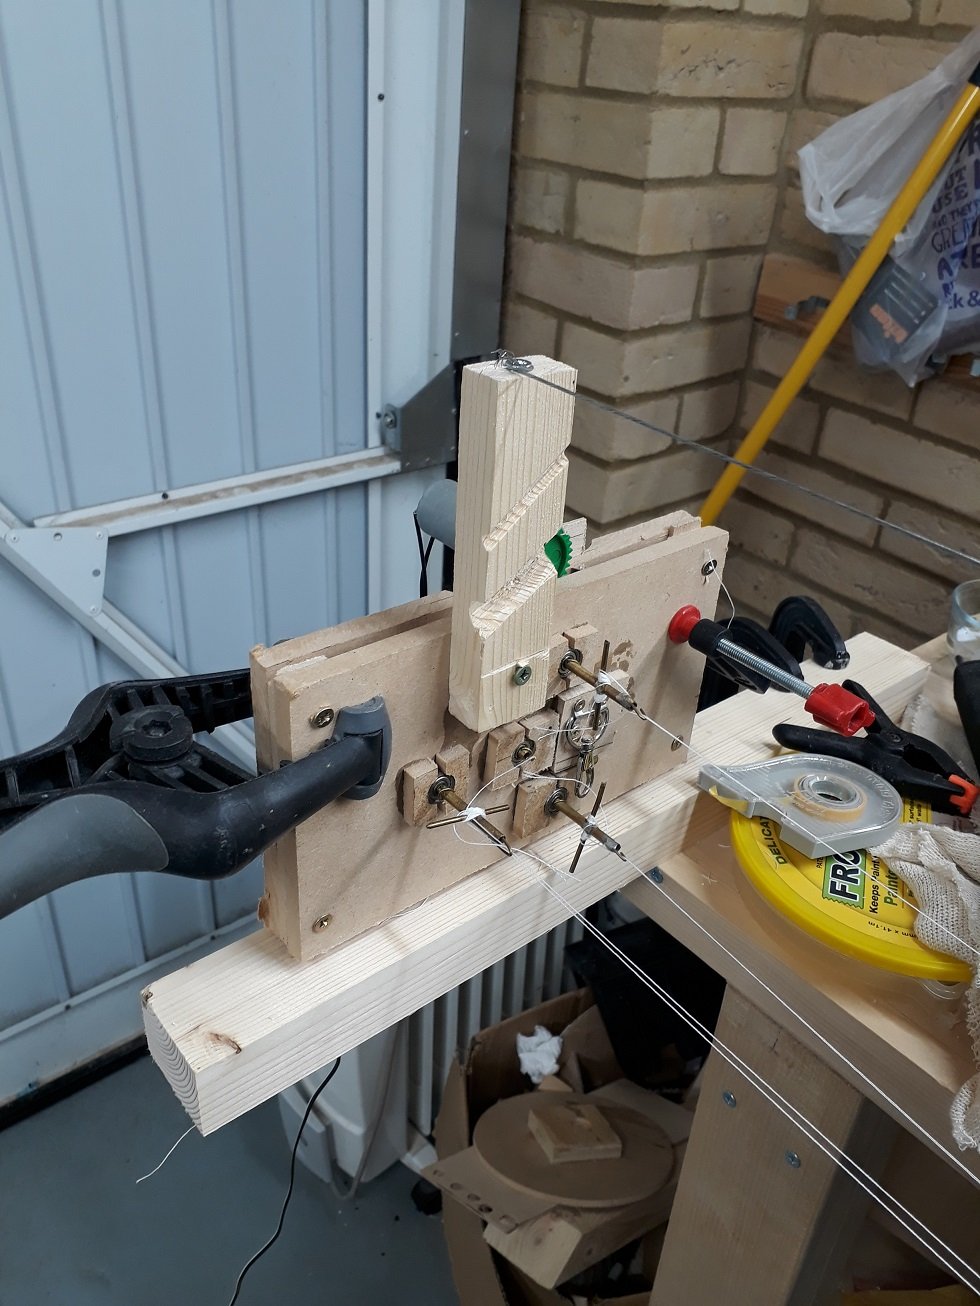
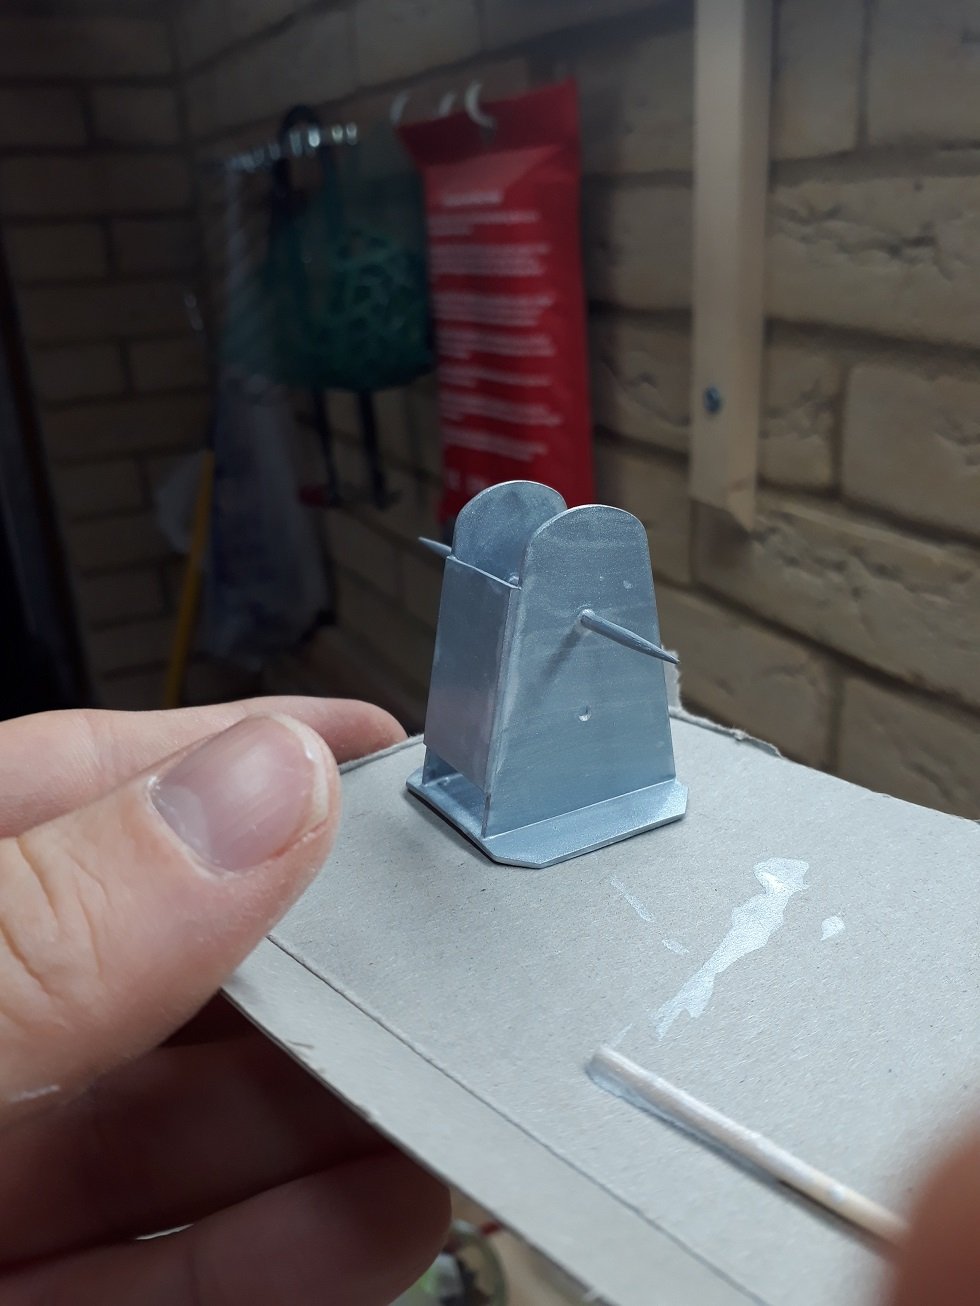
I decided to take a break from boat building and make some rope. I put together my rope walk and got to work. There were two weak points in my set up , one the plastic cog I was using for a cone, the other the bearing thingy that allows the rope to rotate. I cut and laminated discs from cheap lite plywood and with lots of sanding and milling I produced a passable cone. I have not found a good solution for the bearing thingy.
The following photos show my set up, I can produce rope up to 2.5, maybe 3 meters long.
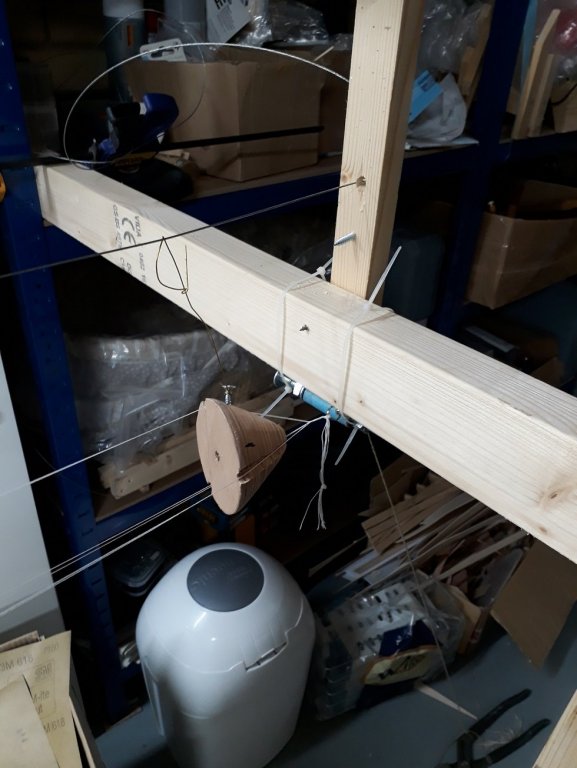

I will also reveal my secret settings: for 3 yarn rope, I use just the plumber's tool as weight. For 3 strand rope, I add the hammer!

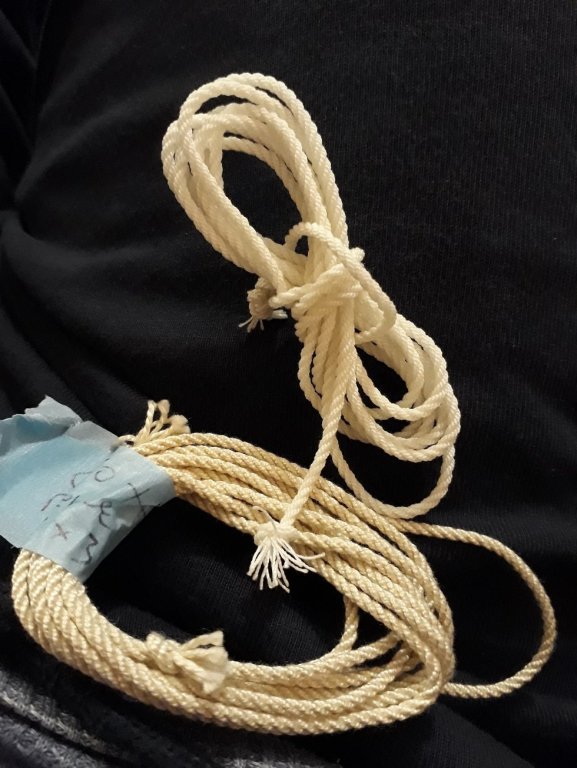
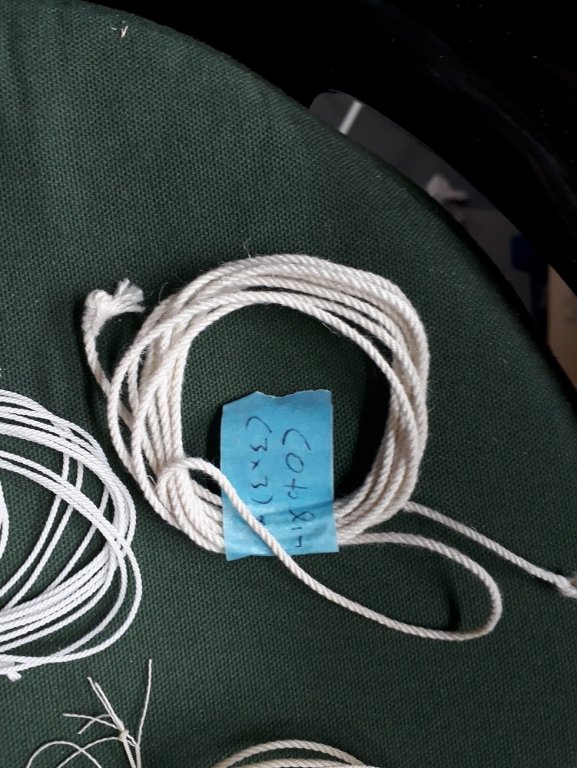
I can produce pretty good rope, the problem is what thread to use. I ve searched the forum and the net and this seems to be a common query, not really answered well. I have tried all DMC varieties, Bockens linen and I ordered some more threads. I still have not found one that I really like. Cotton produces very nice rope but for the scale I work at, if produced by three strands it is very stiff. It can be more flexible if produced from multiple yarns. The biggest problem though is that it stretches, in my previous boat the shrouds were sagging a few days after all the lanyards were properly tightened.
These are a few test ropes I made: The upper left is cottolin, a blend of cotton and linen fibers. It feels great and soft but is fuzzy. It may be less stretchy though. The upper one is a coats dual duty XP thread, polyester core with a cotton wrap. Nothing too exciting. The one in the upper right is DMC cotton perle, I think the best of them all but it does stretch. The bottom right is DMC Cebelia, pretty good, same as DMC Cordonet (not shown). The bottom left is Gutermann polyester extra strong thread. As a thread is very supple and nice, the more it twists though the more plastic it feels.
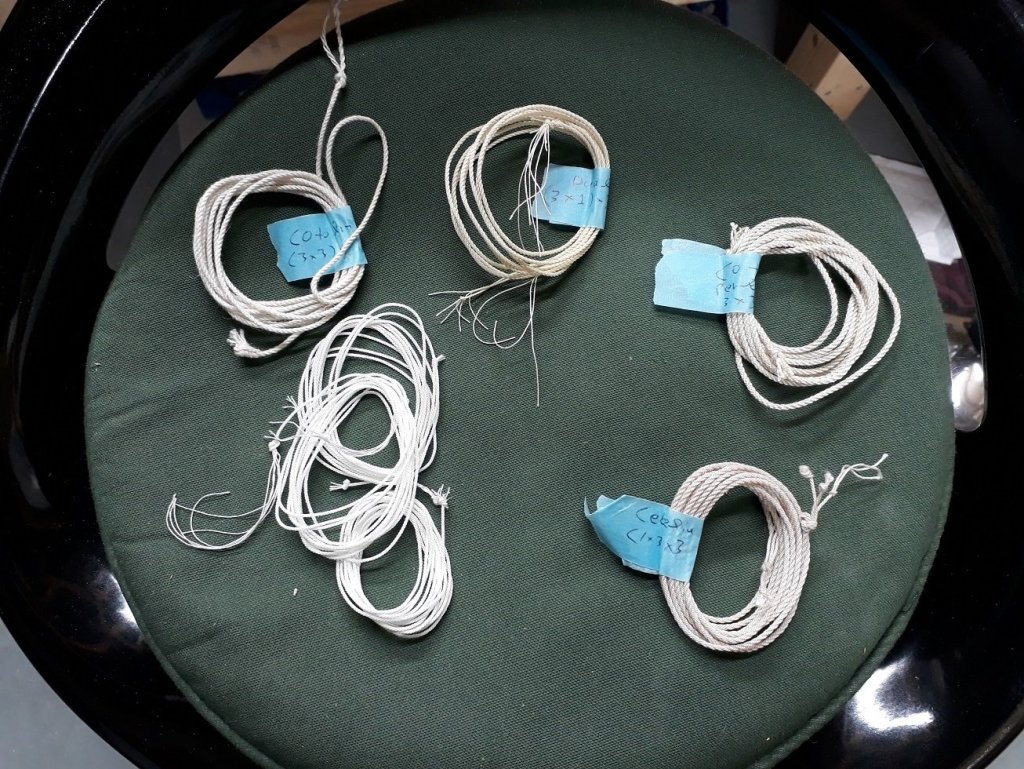
Bellow are 2 mm ropes, 3 strand polyester and 3 yarn DMC Perle. The polyester rope is like cheap hardware store cord.
There are many high tech synthetic or part-synthetic threads that are only available for industrial use and I suspect that one of these is the ultimate thread for scale rope that will have the properties of proper rope. It is impossible to find out which one though and even if known, prohibitively expensive to obtain.
I got some DMC cotton and cotton/linen fibres (unspun) to try and I may experiment with dying rope as well.
- GrantGoodale, Omega1234, cog and 1 other
-
 4
4
-
-
-
You can't go wrong either way. Only use Tamiya tape or frog tape.
I use thinned Valejo with some retarder with good quality brushes. No brush strokes, even when painting very large surfaces. It does take a dozen coats, 15 min between coats for proper coverage.
I have a garage turned into a shipyard but I mostly paint in the dining room table as there is no dust and it is always warm. I decided against an airbrush because of the need to buy the equipment, clean the airbrush, learn to set it up and use, mask the area and always paint in the garage.
I thought of going airbrush but I got an 1 inch brush so painting large surfaces is now not an issue. For my use it does not worth the trouble. I also enjoy hand brushing!
Hand brushing with the modern paints is entirely feasible. Airbrushing can have fantastic results.
If you don't mind the chemicals, long waiting times to cure and generally bigger mess, enamels with a hand brush can be great. I am not using it any more though, acrylics are just too easy.
-
Many thanks to all for your comments and likes!
My parents are visiting so I got a bit more time for the boat. I managed to do a little reading and finally I started work on the rigging!
I have just a vague idea how the rigging should be but I decided to go crazy and make it as complex as I can. I will try to incorporate anything that could reasonably be found on this boat and hope to end up with a web of ropes going to all directions. The problem is I have absolutely no knowledge on this subject. I will rely on Leather's "Gaff Rig" book, internet search and also on other logs from the forum.
Also, I have no information at all from the Whisstock plans on the rigging. To get the dimensions of the mast, boom, gaff and bowsprit I used the small drawings provided and measured the dimensions in relation to the beam, improvising a bit with Leather's help to get the probable dimensions.
I applied grey automotive primer to the tabernacle and then started painting with Valejo silver paint. The result was terrible. This is a very difficult paint, no matter how much I steer it does not seem to want to mix. It runs and leaves streaks. I ll persevere for a few more coats but I suspect it will need some wet sanding.

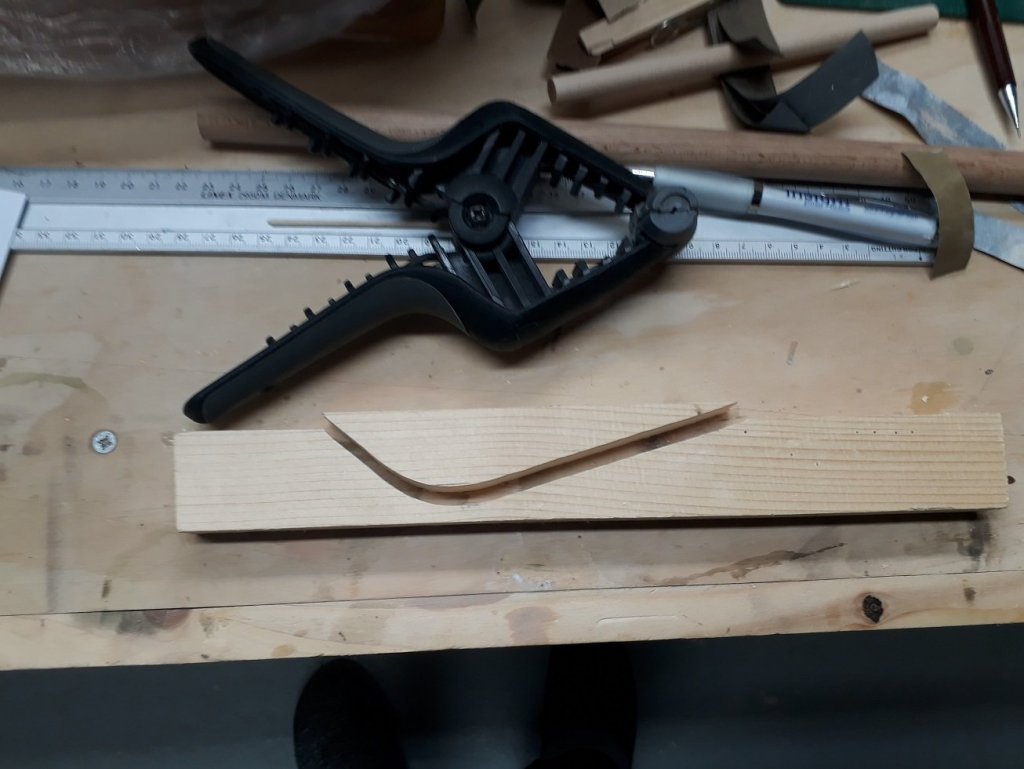
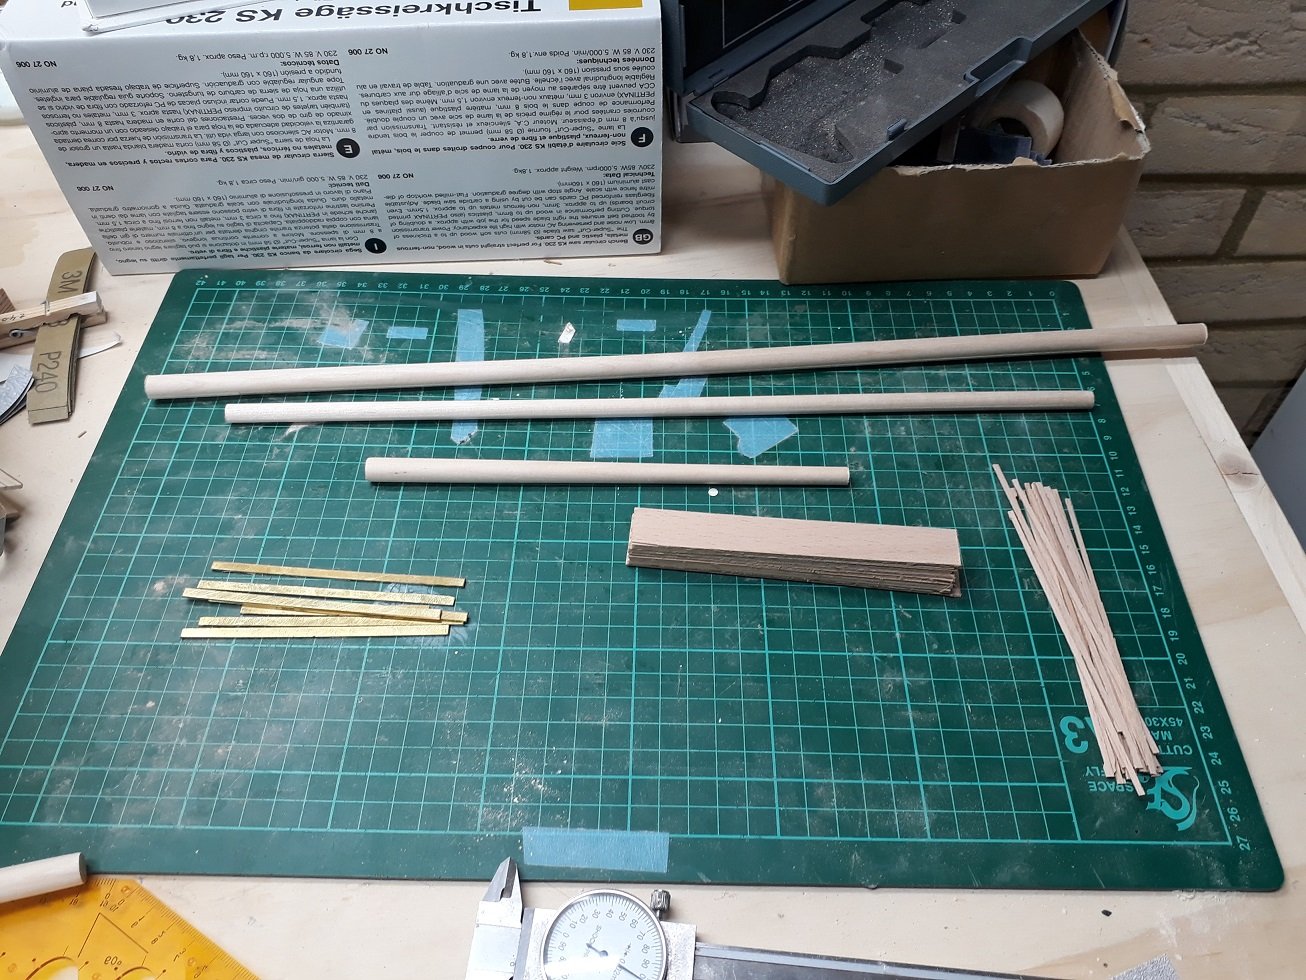
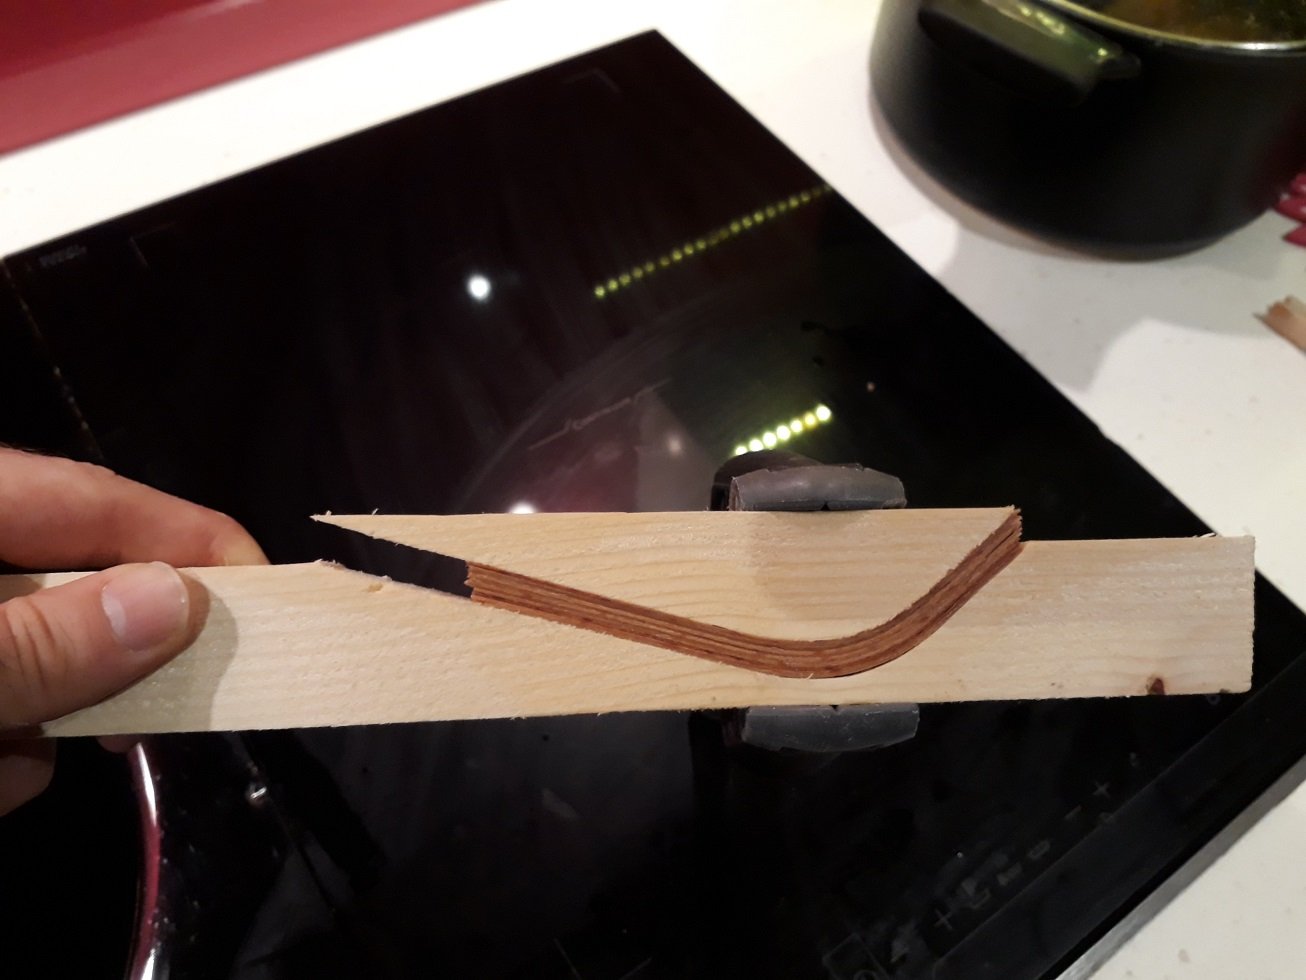
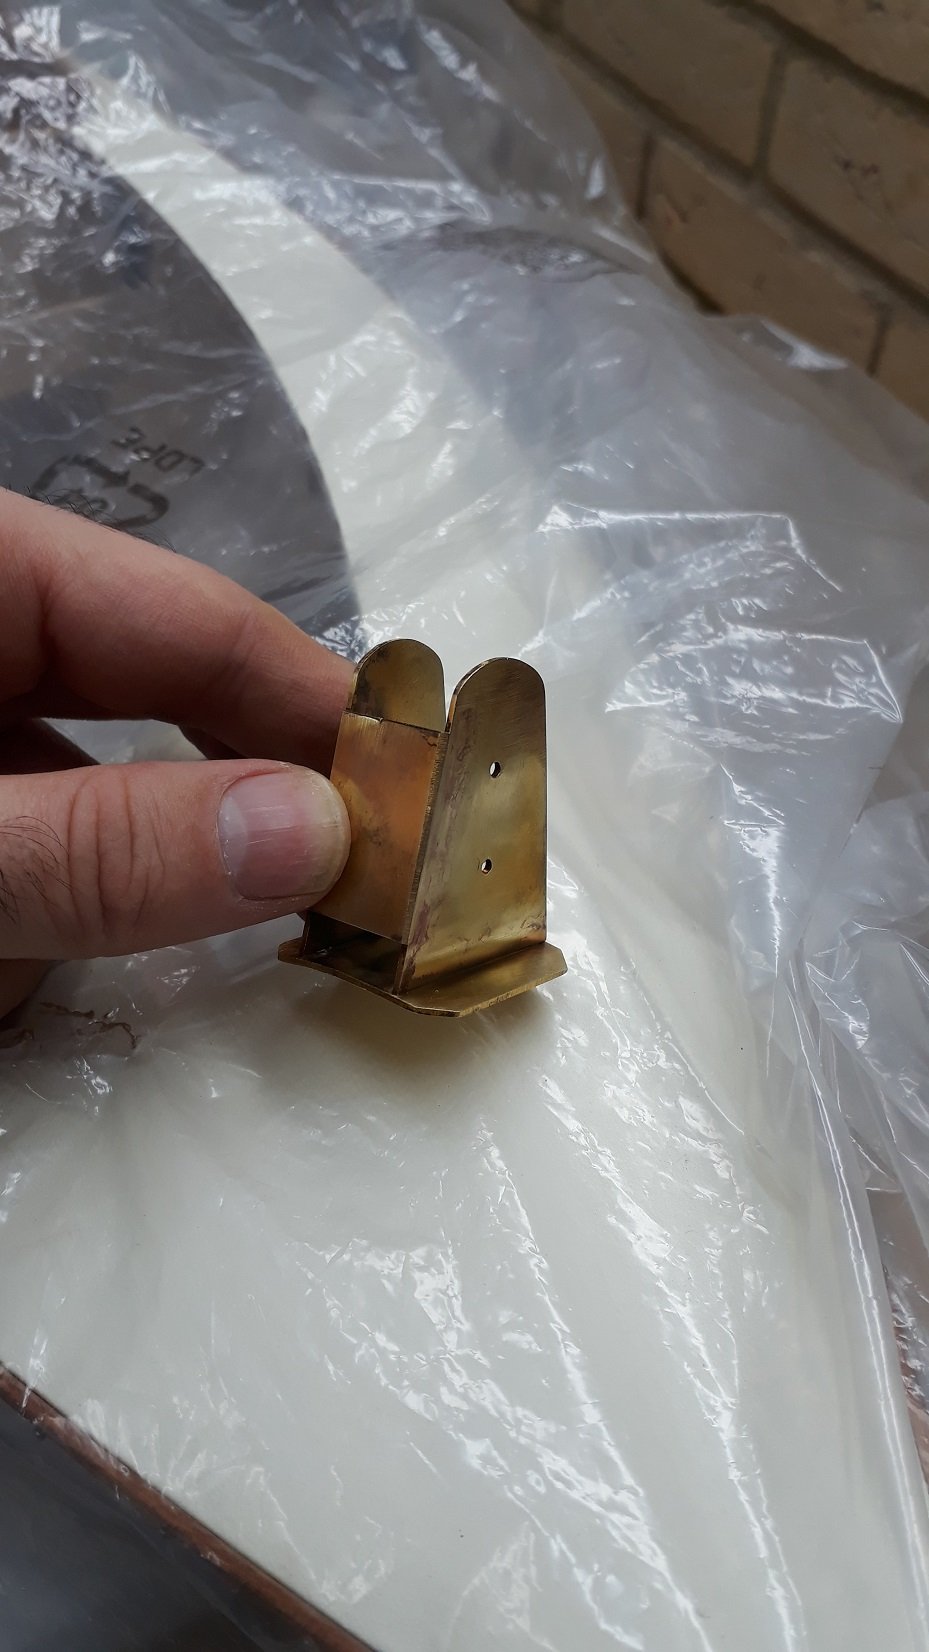
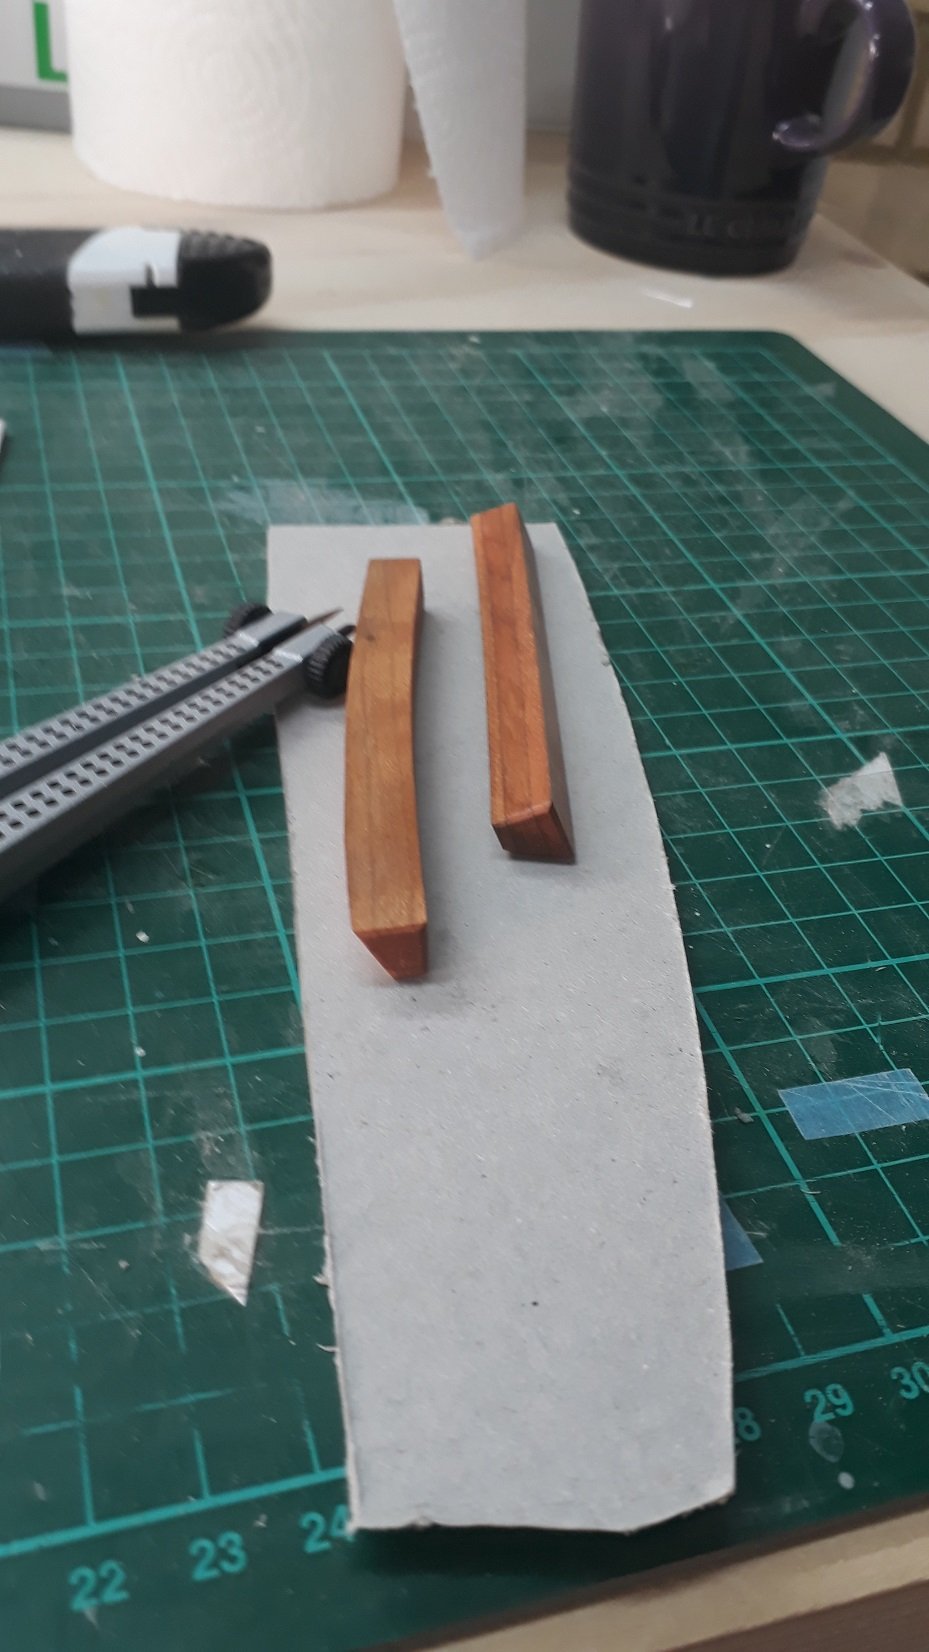
I then started work on the bowsprit, boom and gaff. I used birch as I did not have appropriate beech dowels and really do not want to buy more timber. In the photo the bowsprit is tapered and sanded to 400 grit but the dowels for the boom and gaff are untouched. I also cut some beech strips for laminating the gaff jaws, the little proxon table saw is great and I also produced some nice 2 mm offcuts strips. The photo shows also the brass strips for the chainplates, pretty stout as they are 1 mm thick.

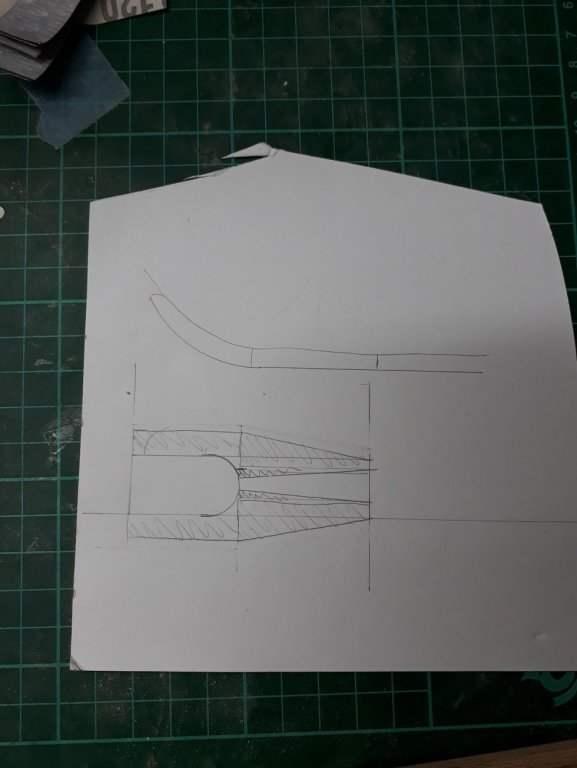
I made a drawing for the gaff jaws, I think I would like quite an acute angle.
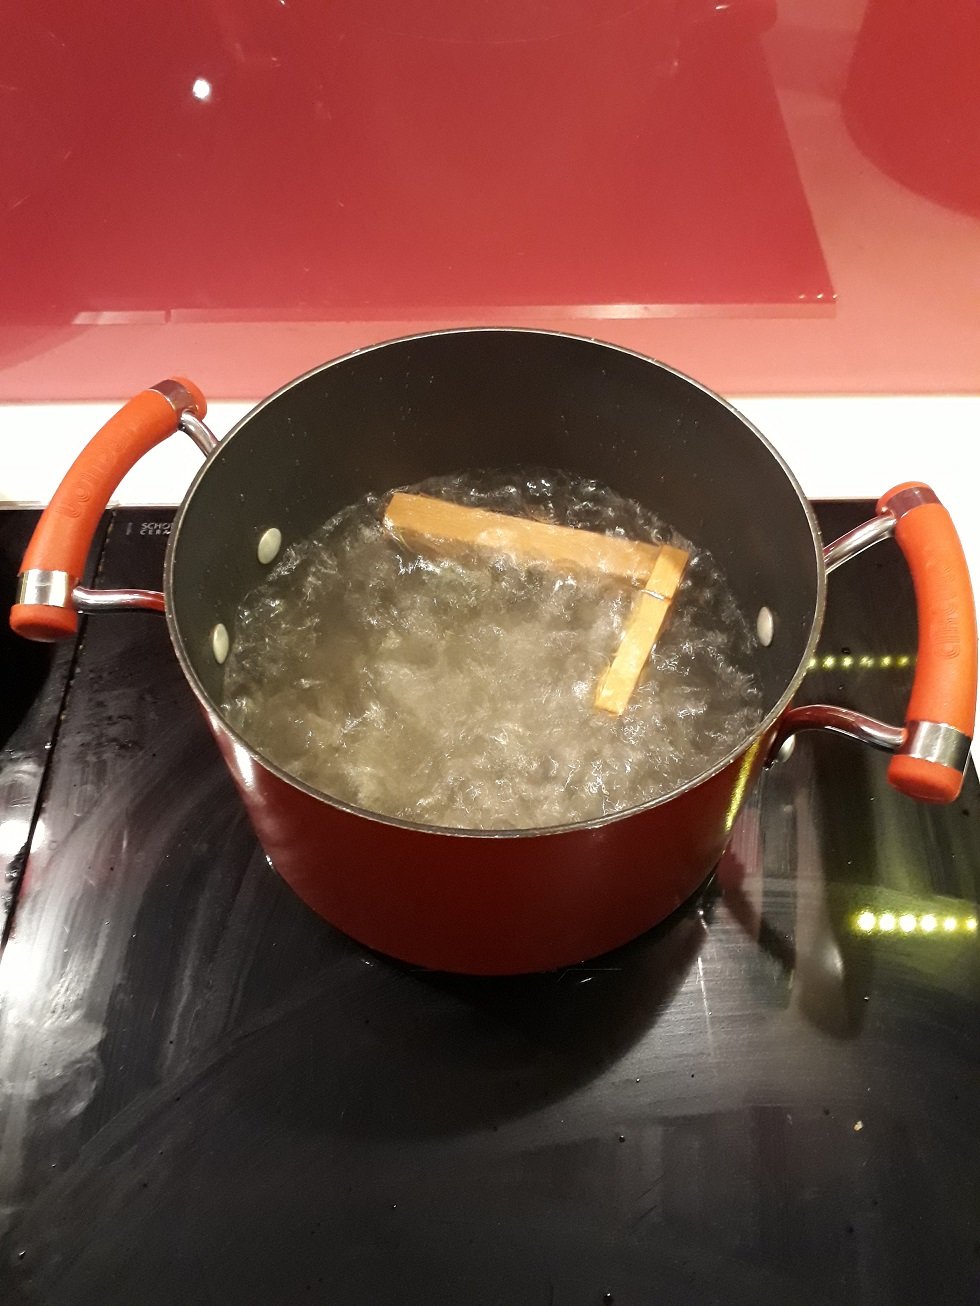
I also made a jig to steam bend the laminates, this will later be used for the lamination it self.
The first batch of laminates went into boiling water for a few minutes. The Admiral was behind my back when I was taking this picture, loosing patience as she wanted the same pot to cook dinner for the little ones...

The laminates bent very nicely into shape. Tomorrow I will get the rest boiled and bent.

I also finished shaping the boom and gaff. I managed to get my cheap horrible plane in a somewhat functional state and got a taper towards both ends. it is difficult to see it in the photos but it is there. I did not use a jig but they came out reasonably straight and very smooth.
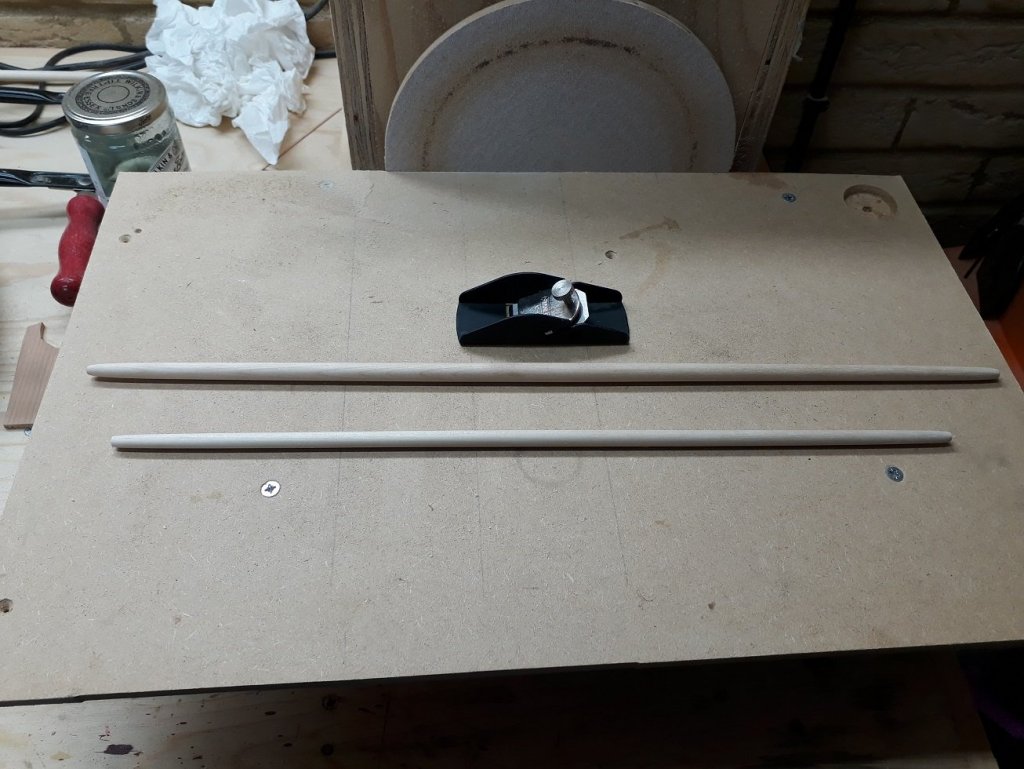
I really need a couple of high end mini planes and a honing jig. Can't see this coming in the near future though...
- Mark Pearse, G.L., Omega1234 and 3 others
-
6
-
-
I have a Dremel 3000 with the flexible shaft. I mainly use it for drilling holes, rarely cutting wood and metal and milling/sanding. It is a very solid piece of kit but I suspect the Proxon would be equally good. Can'y go wrong with either.
I went with a corded one and never felt the cord was a problem.
- Landlubber Mike, Canute, mtaylor and 1 other
-
4
-
I have never built a kit, only scratch build! I am sure someone else will be able to answer this one.
The boat on the pictures I must admit is maybe a touch extreme, some planks were 80 cm long and were cut out of 1000 x 100 mm sheets of 2 mm maple. The planks nearest to the keel and sheer were very heavily spilled. But a spilled plank will always sit much better than one forced to bend sideways into position.
- Zack Soderquist and mtaylor
-
2
-
Just a note on spilling. They say a picture is a thousand words.
In my current boat I went a bit crazy with spilling. Zack, note the shape the plank (the cardboard template) needs to have, to actually lie straight on the frames. This is spilling. You cannot bend a plank laterally.
- mtaylor and Blue Pilot
-
2
-
-
A little more work done so time for a quick update
Druxey, even very low tack tape seems to lift the varnish so it seem the real issue is the bond of the varnish to the paint.
Roger, indeed this was the plan all along and I think it worked fine.
John, many thanks for the support and for finding the time to drop by, hope you are recovering and feeling better!
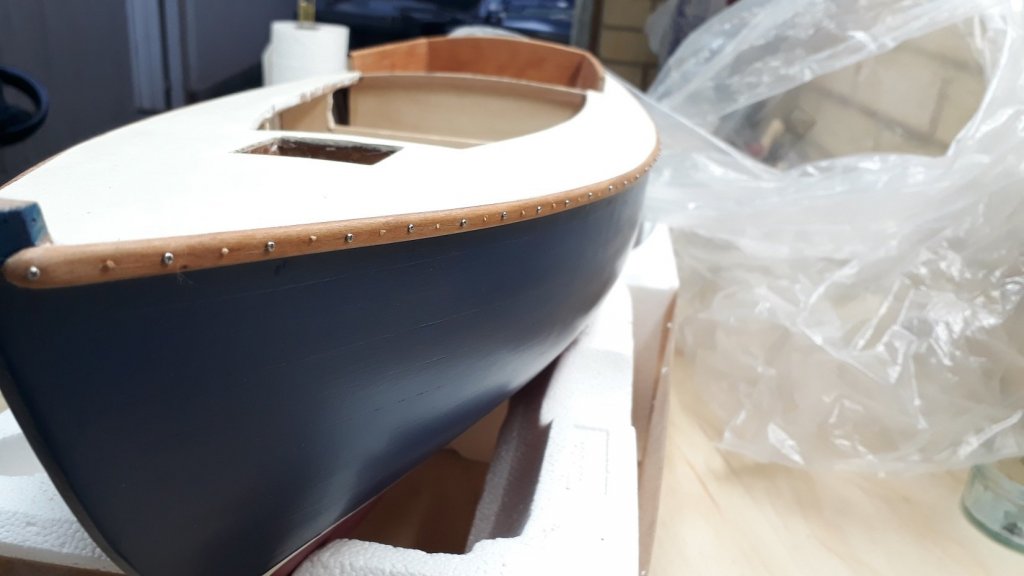
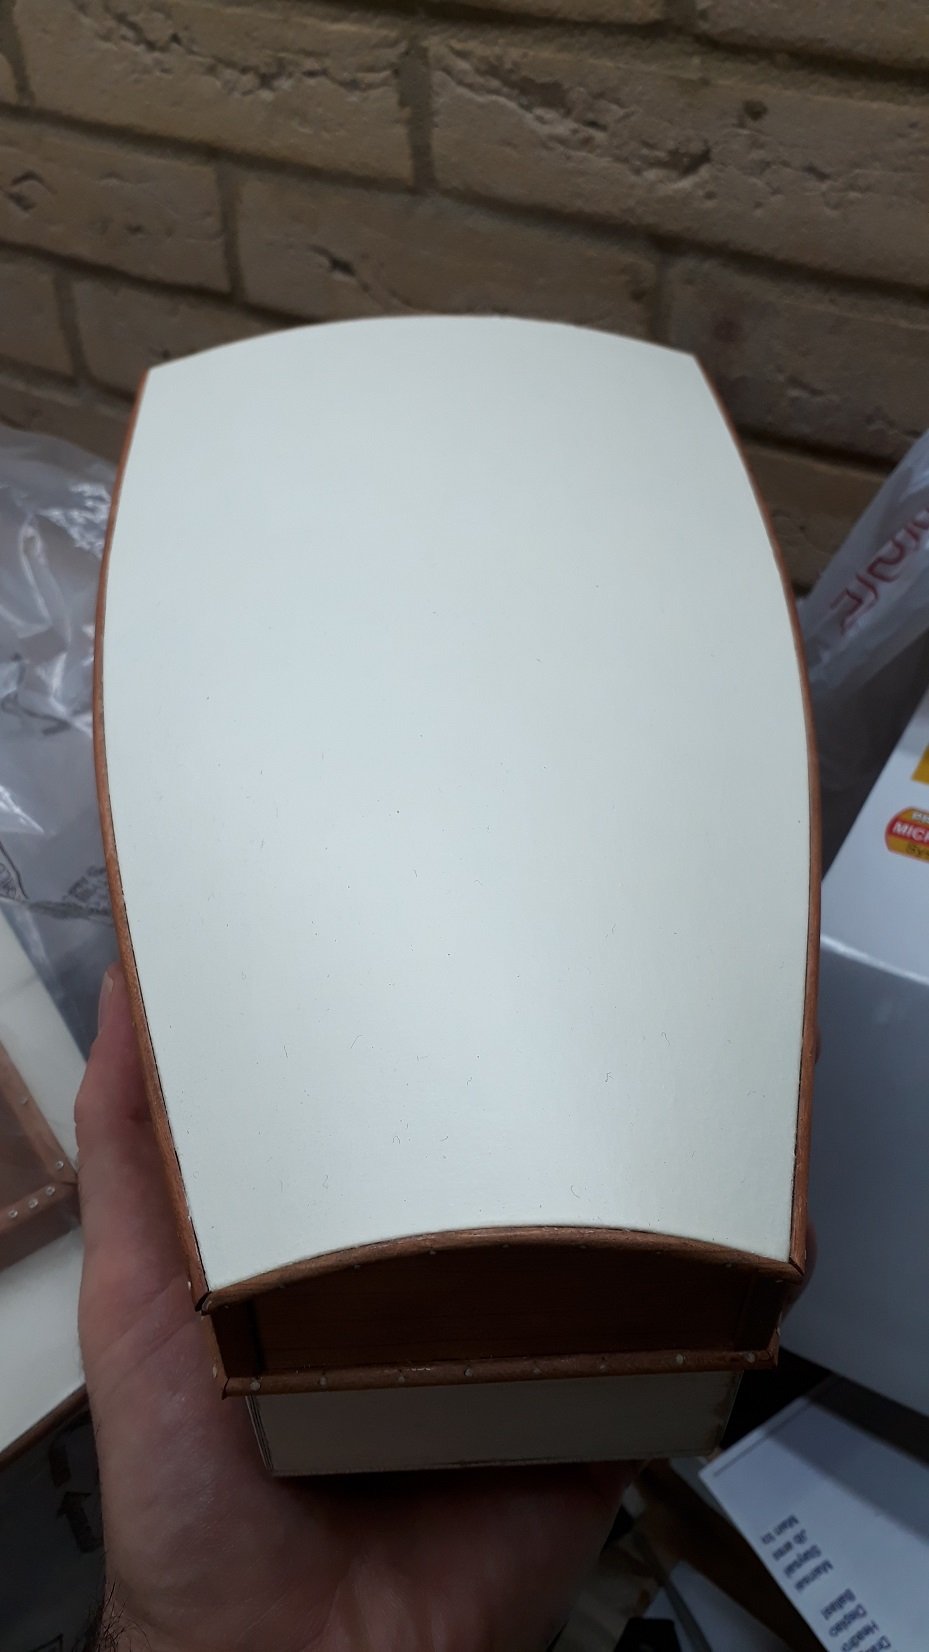
The tabernacle is ready, I cleaned the scale and the copper deposits and is ready to be primed, painted and installed. However, I feel that it is a bit out of scale, on the cabin roof it looks massive. I might need to re make it.


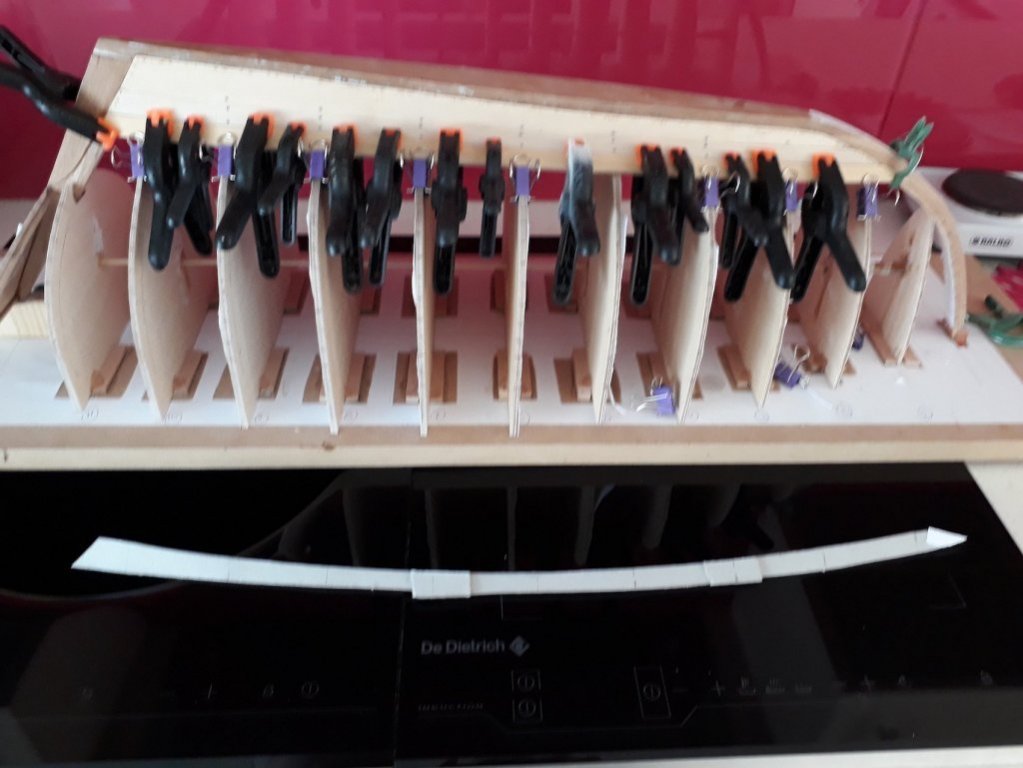
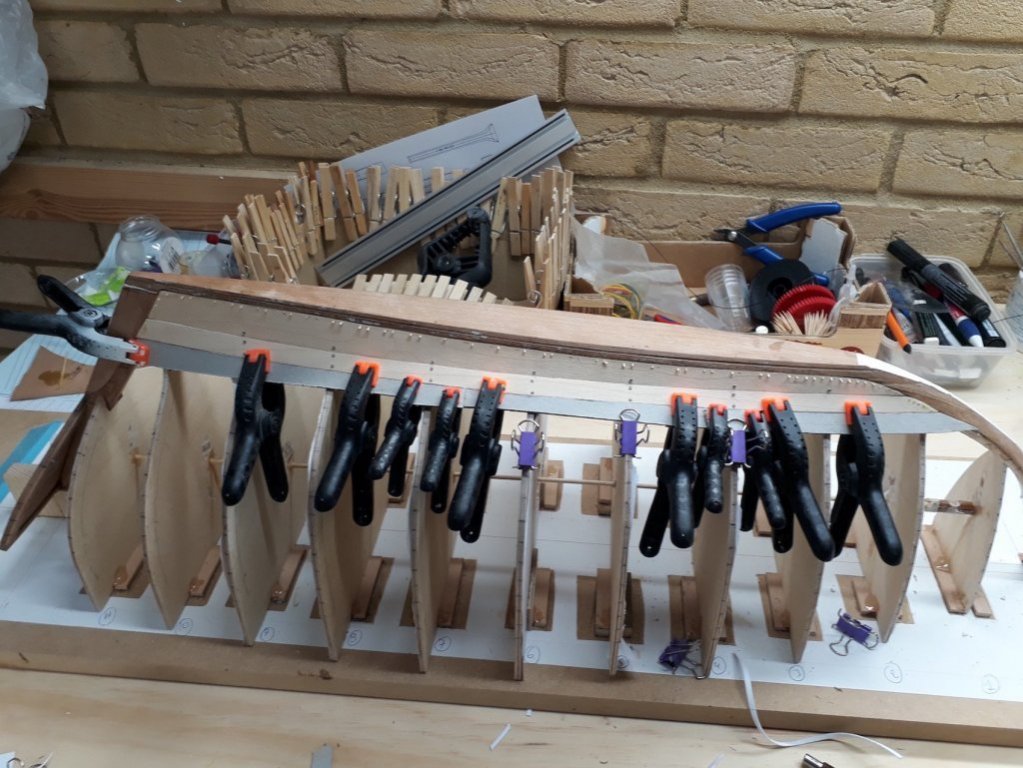
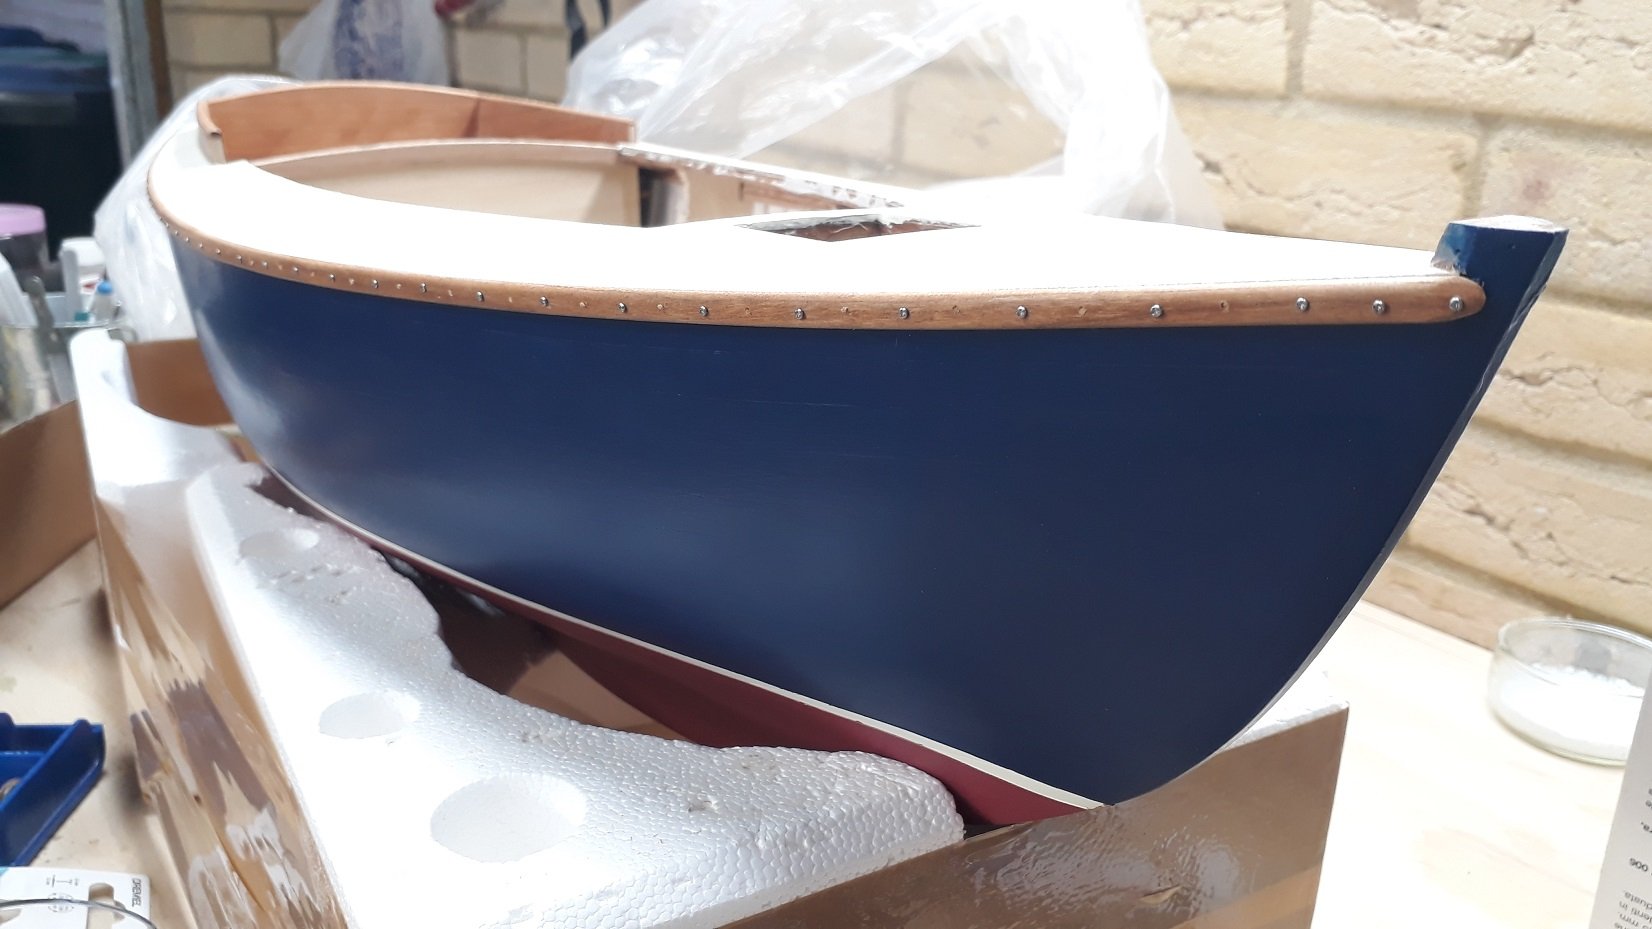
I installed the rubrails, they are under a bit of tension following the sheer so I used screws (to be replaced by wood nails) every 1 cm. About 150 in total. As I had carved hollow the back of the rubrails, they sat nicely over the edge of the canvas.


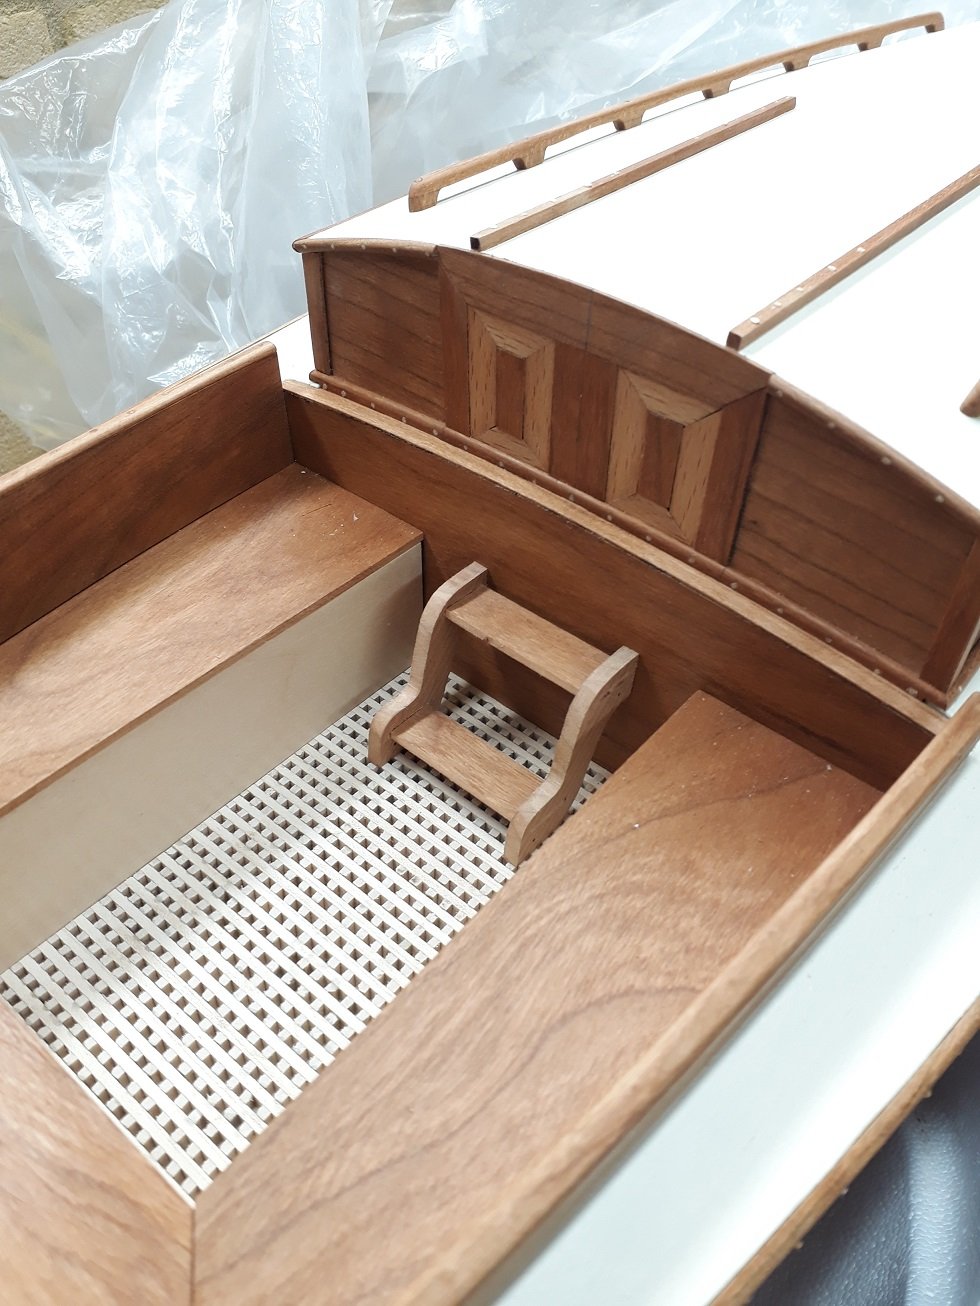
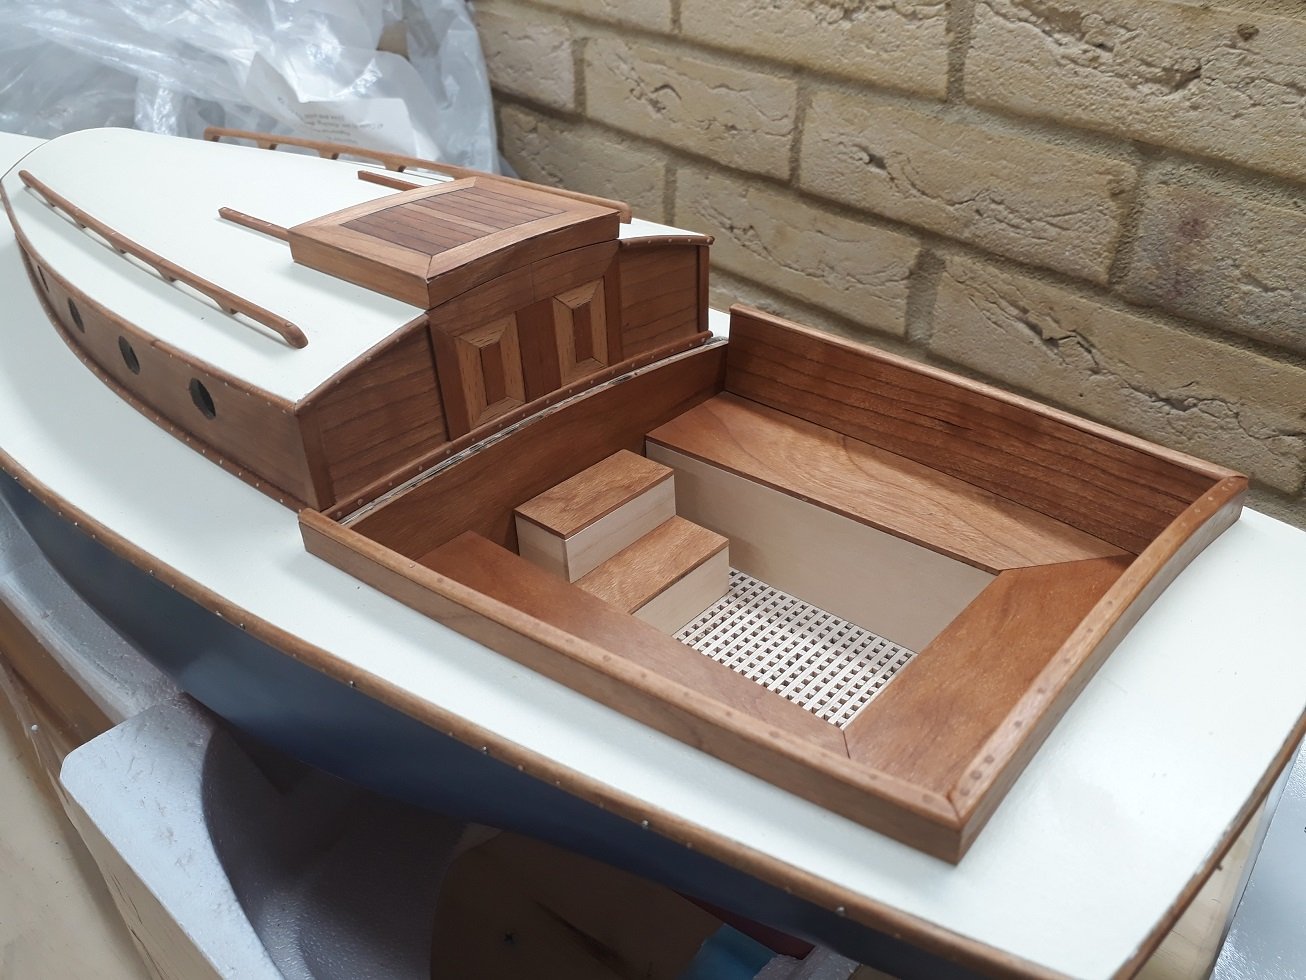
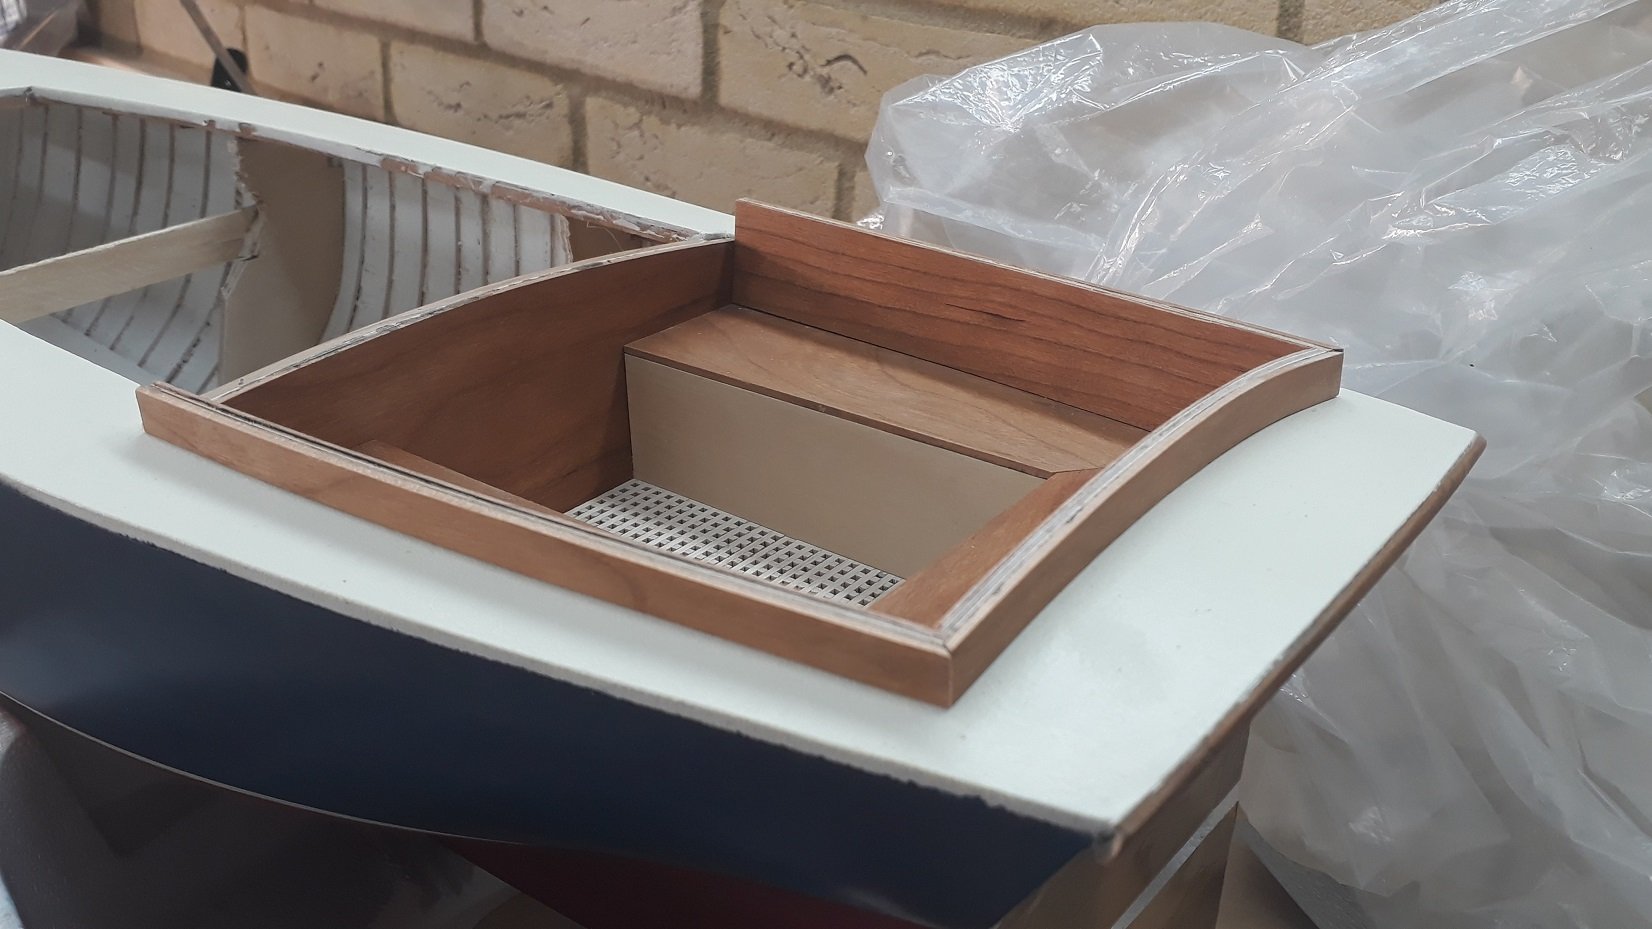
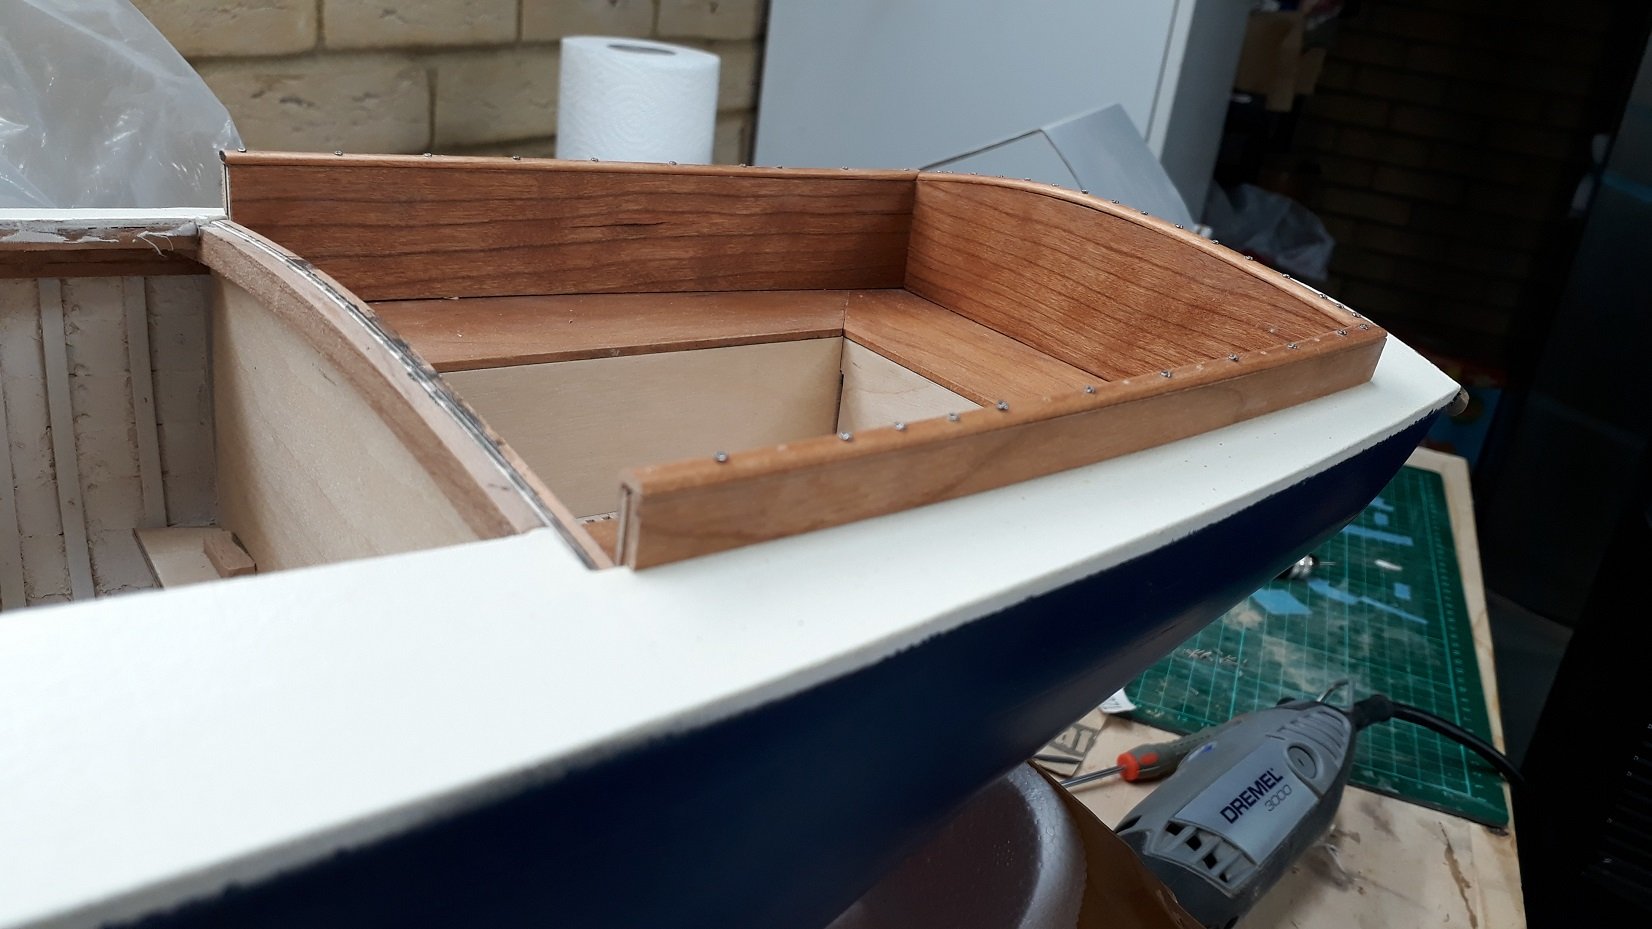
The cockpit is almost ready, I am not sure of the steps as they don't look very "nautical" but there is quite a climb to the cabin and this looked like a good solution. I am not very convinced though.
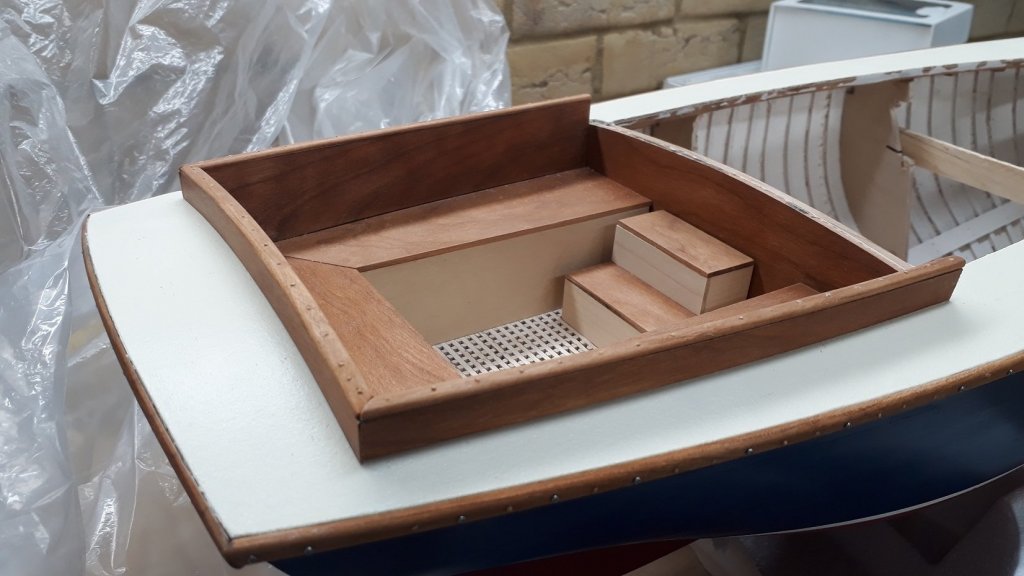
I also installed the tracks for the companionway hatch. With all hatches temporarily in place, the boat is looking almost elegant! I filled the counter holes on the hand rails with 1.8 mm tree nails, sanded and re applied Tung oil.


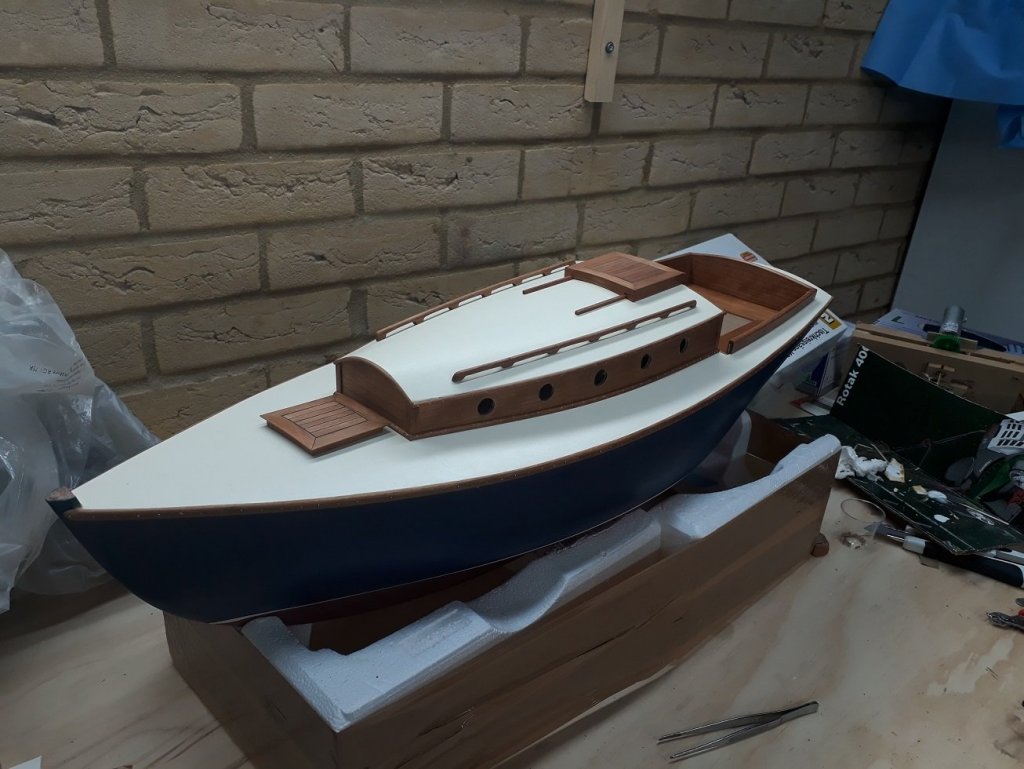
I think the boat will need some metal hand rails, I thought I could do without but again I think they would look good and actually would be necessary in a bot like this. Another challenge....
- GrantGoodale, mtaylor, G.L. and 2 others
-
5
-
-
-
This is indeed cool. A bit illegal this side of the pond but I can imagine a Victory with a hundred odd of these firing broadsides.
- lmagna, CaptainSteve, Baker and 1 other
-
4
-
-
Your work is inspiring Mark, you keep things simple and produce very elegant results. The boat is coming out mighty nice! The cockpit sole looks great.
Following your build I ve been encouraged to try on some metalwork myself. (Not as easy as you make it look)
Vaddoc
- Omega1234, mtaylor and Mark Pearse
-
3
-
Many thanks to all for your comments! I did not mention that all my tests using the Fearsome Step Drill ended up with the destruction of the test piece. But I thought I had enough training and took a leap of faith. Well, end's well, all well!
I made some more progress and interesting things happened.
I had taped off the edges of the cabin roof and the tape has been there for some time. I did not consider that masking tape gets stronger the more it is left. When I removed it, it lifted the polyurethane varnish! These areas had a rugged edge and also a much paler colour as the Valejo polyurethane varnish seems to have a tint. However, this was sorted very easily, to the credit of Valejo which really is a top company. I sanded the raised edges of the varnish layer with 600 grit and simply applied two more coats of varnish. The cabin top now looks like this incident never took place!

I continued work on the cockpit, I glued the external panels and then shaped and fitted the top covers. These are screwed and I will replace the screws with tree nails.


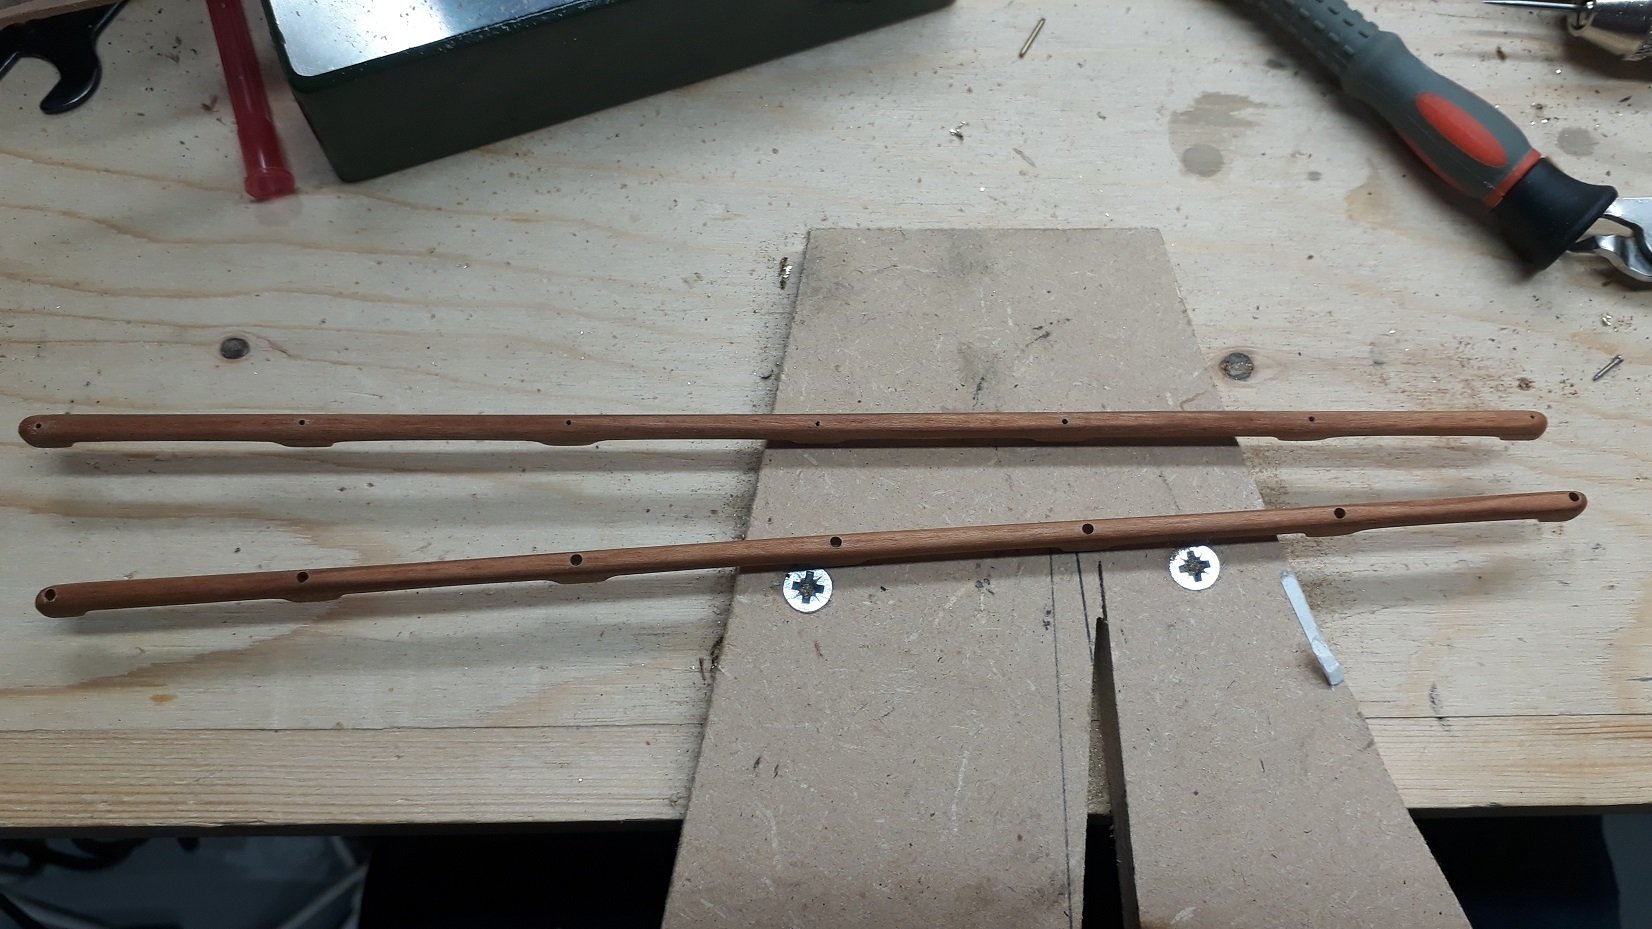
I also did some work with the rigging. I am thinking of using two large solid pieces of timber (not sure how they are called) to offset the chainplates. They actually came out fine and I will install them after the mast goes on.
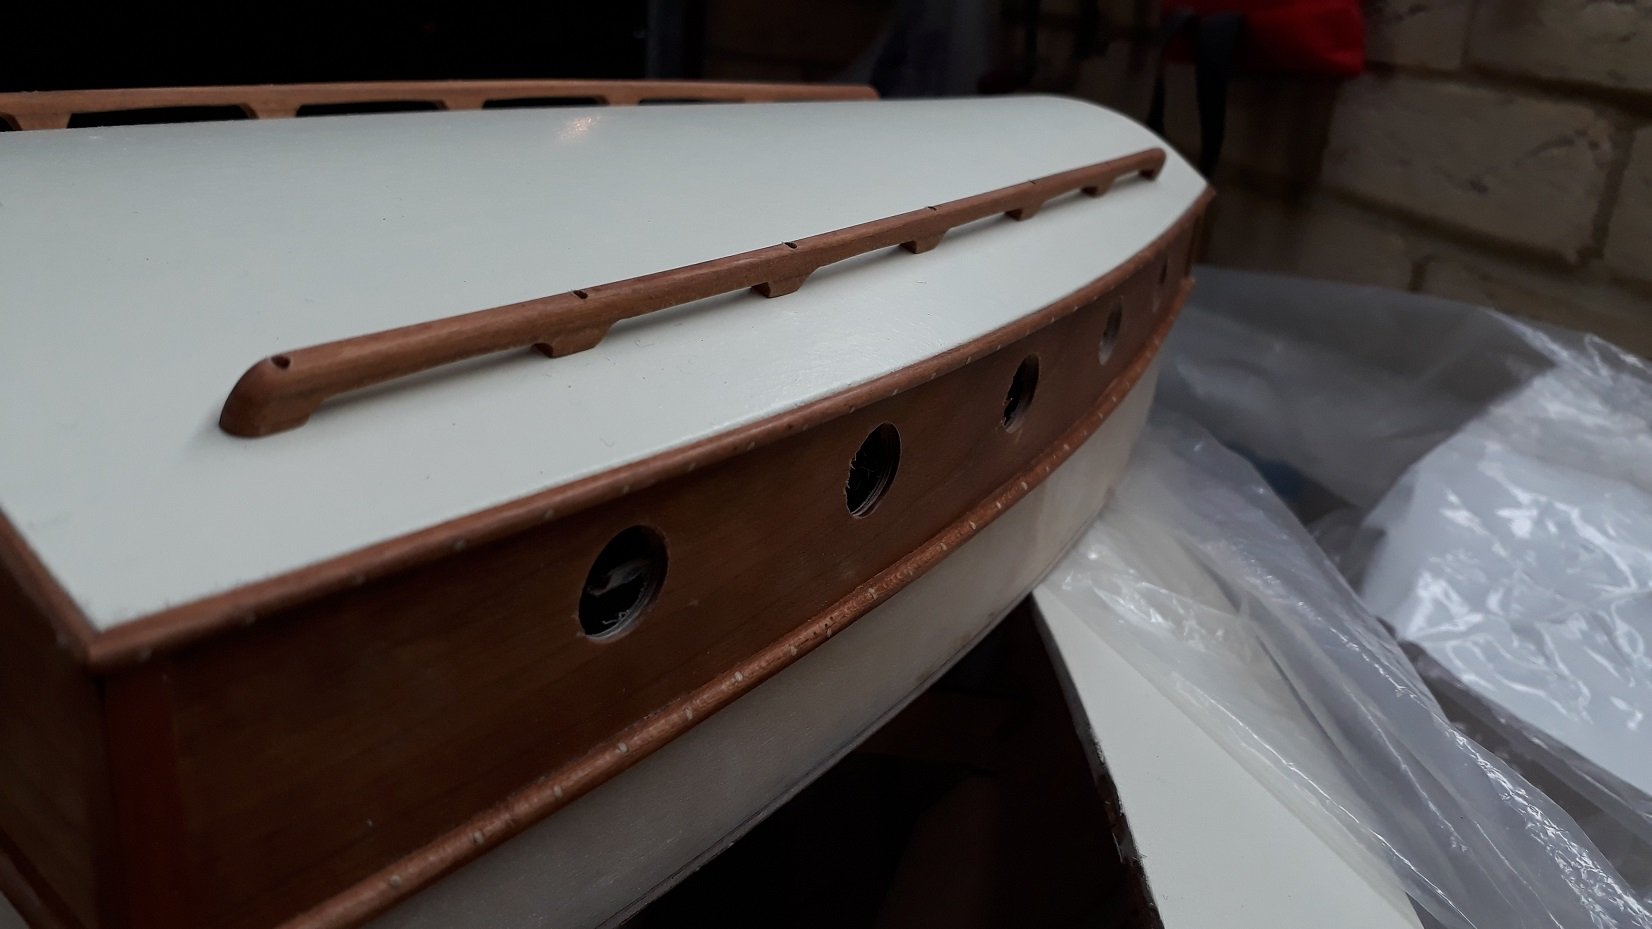
I also finished the hand rails. My main problem was how to secure them on the cabin top, and I wanted to also have a slight curve which would apply some pressure as they are two rather stiff pieces of timber. I do not have tree nails long or strong enough. I thought of using brass wire and CA glue but I am concerned it would come off with the extreme variations in temperature. Finishing would also be a problem. I thought of using 1 mm screws and countersinking the head but the screws I have are mild steel and easily deform. This would happen for sure and with the countersinking it would be impossible to remove the bad screws. The solution was to get stainless steel screws which are much stronger. They seem indeed to be stainless steel as they are non-magnetic whereas the normal ones are. So here it goes:
Holes drilled and then countersinking
Then screwed on the cabin top with the help of the Admiral. Looks good I think! I still need to plug the holes and apply two coats of enamel varnish but I am happy.


-
16 hours ago, Bob Blarney said:
Tools can be acquired as needed, but don't pass up a good deal when you see it > but only if it's on your list <.
One tool that I consider essential, and that hasn't been mentioned above, is a stable work surface (or table/bench) that is equipped with a vise, an articulated lamp (architect or gooseneck), and maybe a birdsmouth and a bench hook. It could be a piece of 3/4" MDF or plywood about 20"x20" with these items attached, and be stowed away somewhere if you don't have a dedicated workspace.
Spot on Bob
Boat building needs a lot of space, a surface that ts ok if it gets ruined (it will) and a lot of light.
-
PVA glue will be the main glue you ll use. Aliphatic has quick set and dries yellow, normal PVA has more opening time and dries more clear. Epoxy can be useful for laminating and gap filling or for gluing dissimilar material, is messy and temperamental and has somewhat of a learning curve. I use it a lot though, usually thickened with talk powder as it is brittle on its own. CA glue for specific tasks. My personal opinion, all PVA glues are created more or less equal, epoxy and CA most definitely are not. For scratch building, glue sticks (pratt etc) are useful for gluing paper patterns to wood.
There are various other glues but are rarely used.
-
-
The "good to have" tools are more than the stars in the sky. But the absolutely necessary ones are few. I would agree on the ability to drill holes, I love my (vast) collection of drills!
In regards to planes and chisels, you ll need diamond stones, straps etc to keep sharp and they are really in the "good to have" list. All in good time...
-
Your wood is fuzzy and has this yellow tint, It looks a bit like lime wood.
-
-
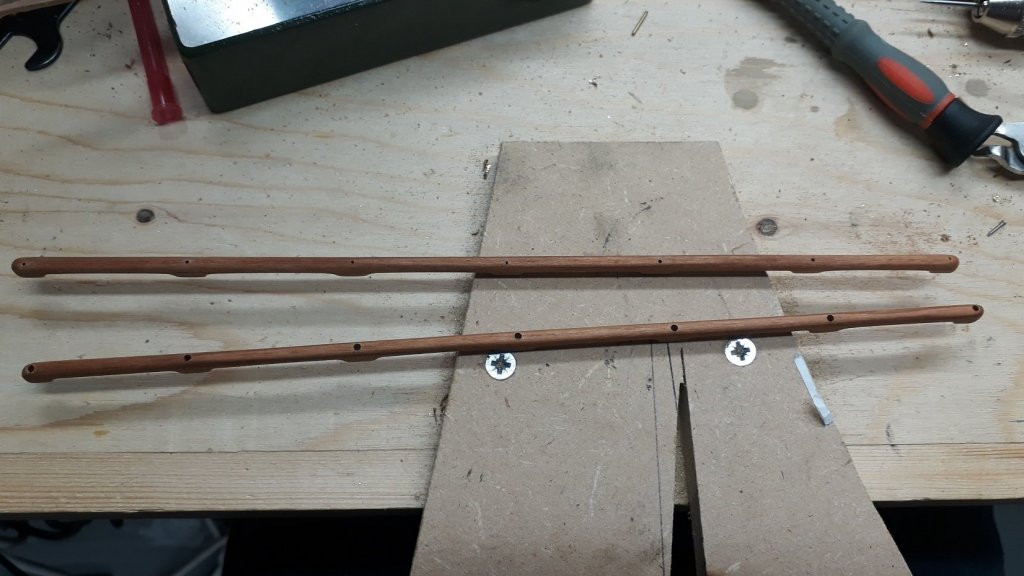
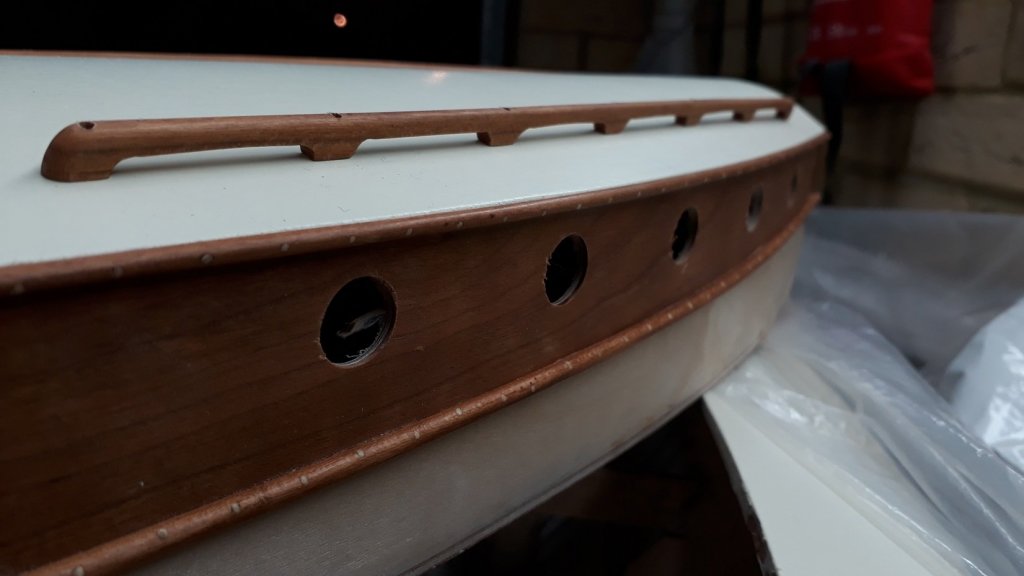
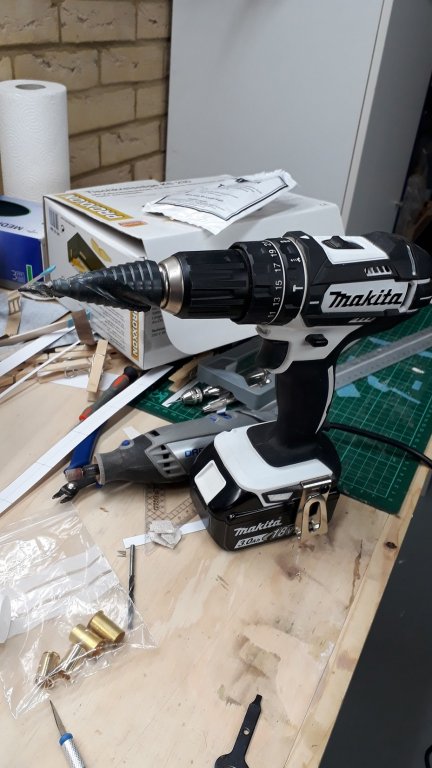
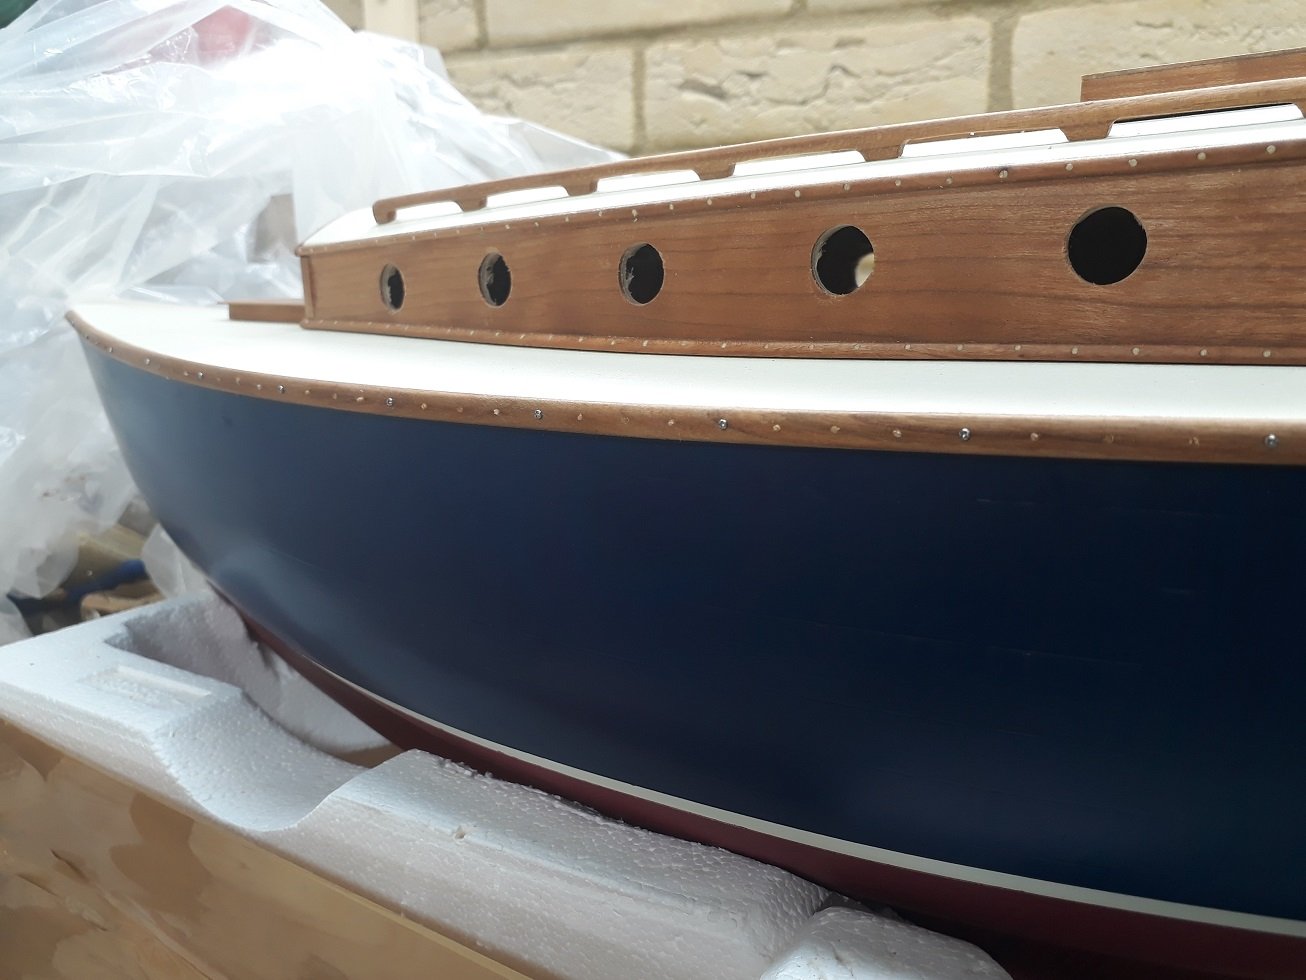
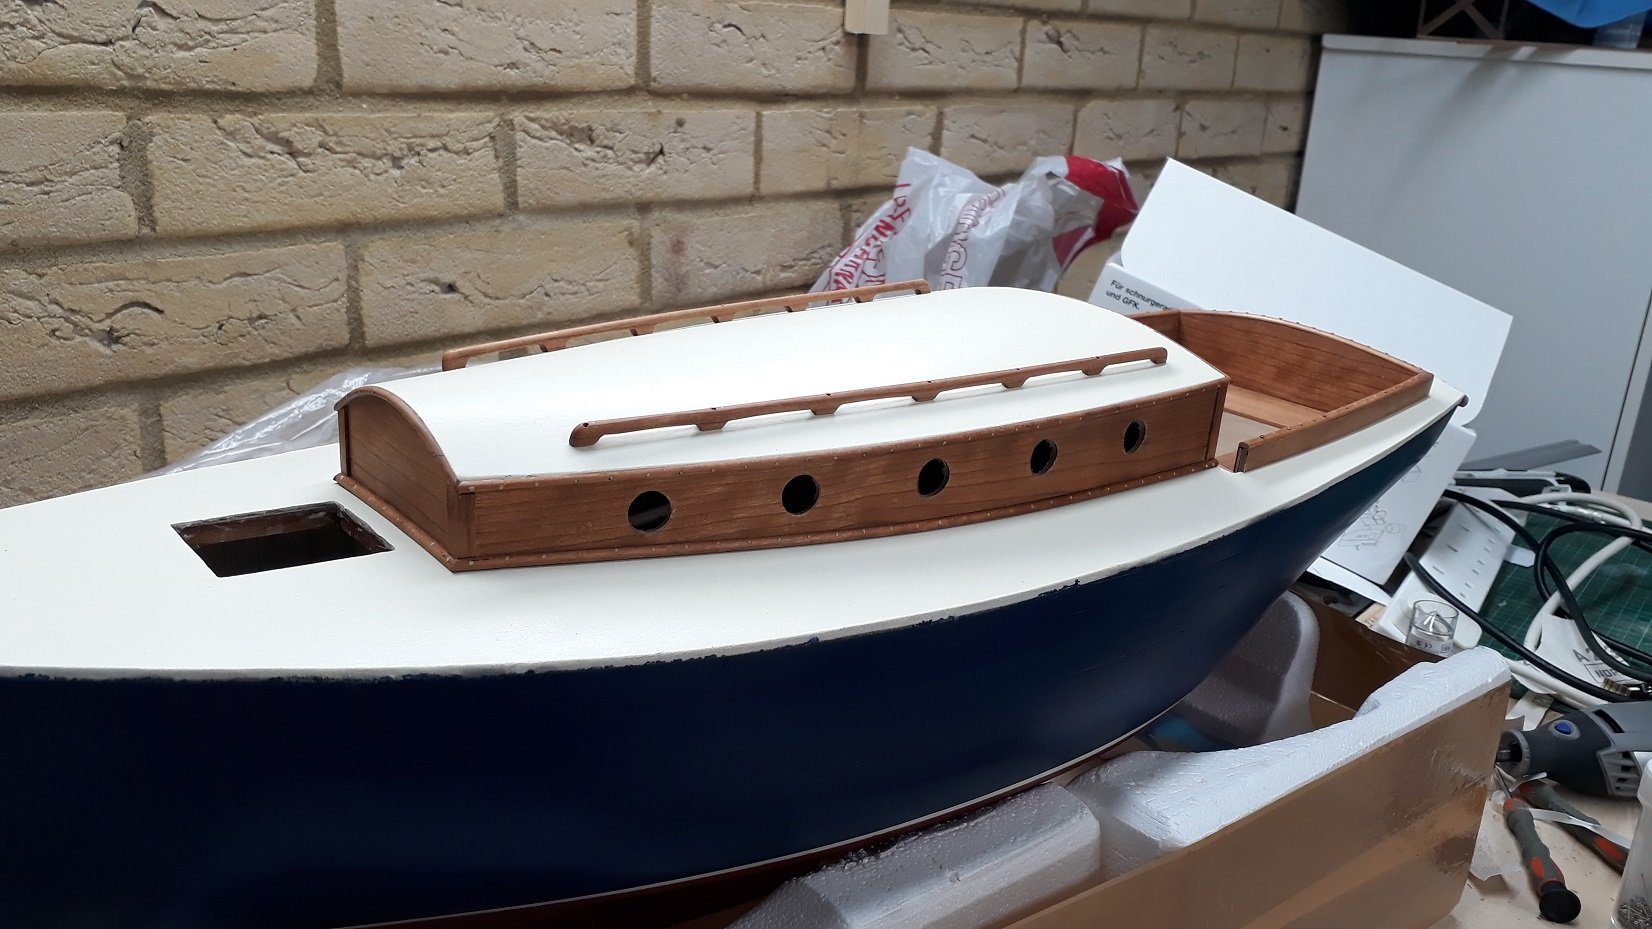
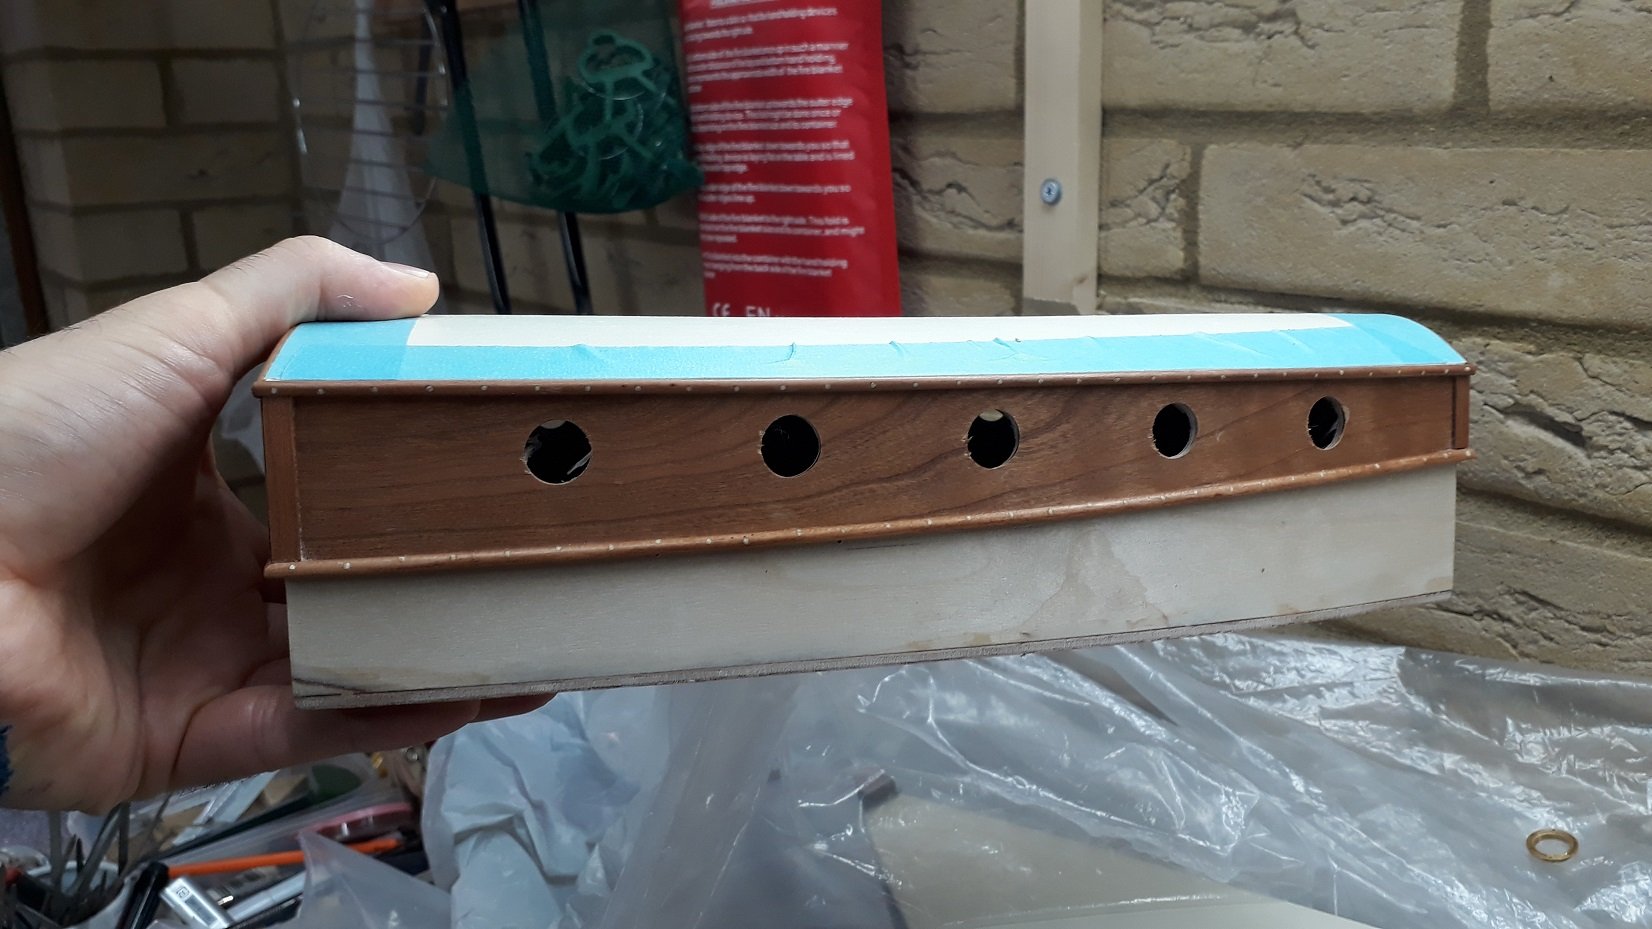
A quick addition, I drilled all the holes, initially with the fearsome step drill and then finished to size with the Dremel.

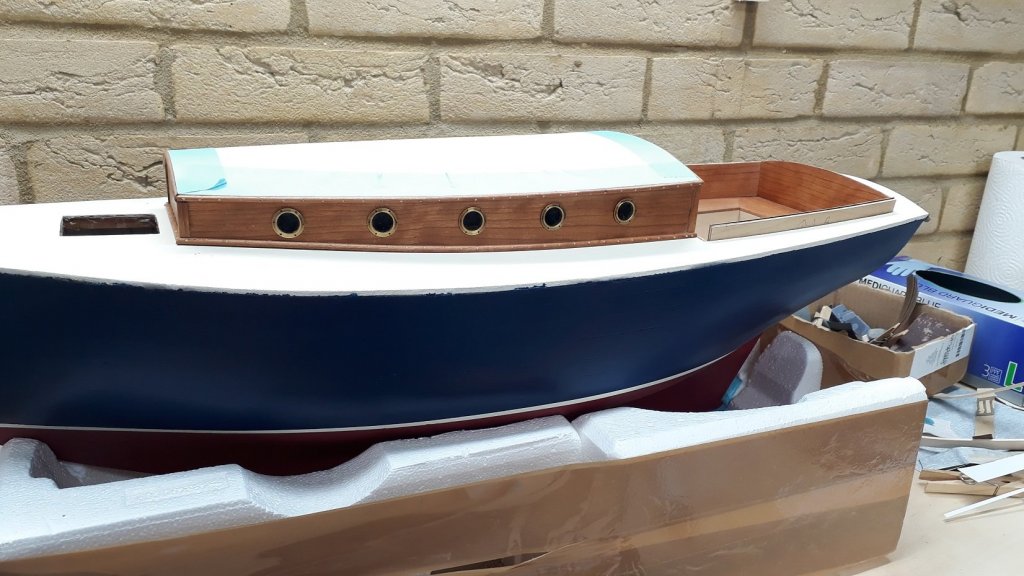
I dry fitted the portholes and they look good!

- Mark Pearse, G.L., michael mott and 6 others
-
9


Deben 5-tonner by vaddoc - FINISHED - Scale 1:10 - a Whisstock yard design
in - Build logs for subjects built 1901 - Present Day
Posted
Mark, this is exactly what I am searching (guessing is a more appropriate word). I think 2 mm for shrouds, 14 mm and 10 mm for bowsprit, up to 12 mm for all other ropes. No idea if this is correct for this boat in 1:10 scale!
I ll put three pairs of shrouds and spreaders. A bit of an overkill but I just want lots of ropes!
Vaddoc