

.jpg.f26acc9a74319261612561bfa7da1303.jpg)
vaddoc
-
Posts
1,528 -
Joined
-
Last visited
Content Type
Profiles
Forums
Gallery
Events
Posts posted by vaddoc
-
-
On 1/7/2019 at 12:47 AM, michael mott said:
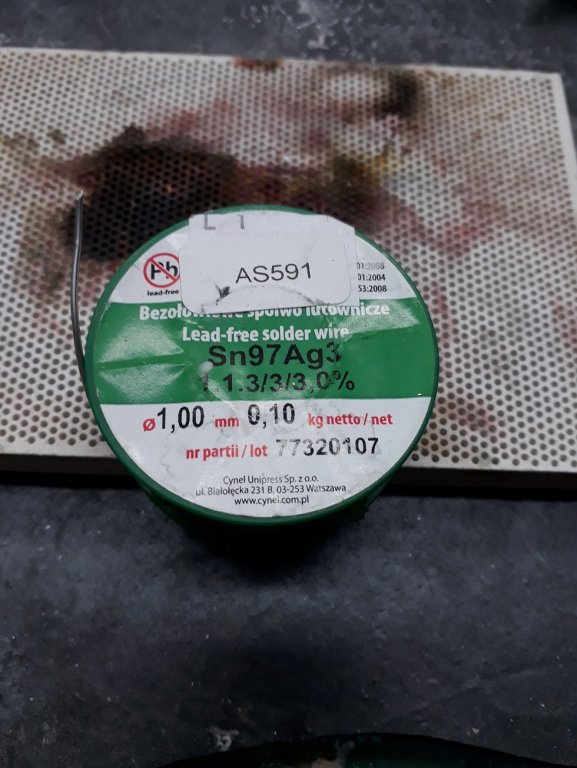
Vaddoc What is the green spool of material in the first picture?
Michael
It is a type of lead free soft solder with a bit of silver. It was recommended I think by Kurt so I got some to try. My limited experience is that it is easy to work and very strong. Still, I think I prefer silver solder.
-
Thanks Mike and Druxey.
Frankie, solder is really very soft.
Michael, I think you are right, copper would be softer and easier to work, yer stiff enough to hold its shape. It should blacken easier than brass and if left, the patina would resemble phosphorus bronze.
Too bad I have a lot of brass!😀
I made a few more today, indeed they fast become much more consistent. Not one broke.
Vaddoc
- thibaultron and mtaylor
-
 2
2
-
Today's quick update is about silver soldering. I think I 've cracked it!
Due to rare circumstances I have time to work on the boat. It is time to make the brass hardware for the rigging but this was a major headache as my metal work is very basic. So far my joints have been very inconsistent, a product of luck rather than skill. Also, I knew my flux was wrong, as it could not cope with the high heat.
So I got some borax and some soldering paste and for 2 days now I 've been experimenting.
The paste is ok but can be unpredictable. Borax is just fantastic! Initially it was pure frustration, as it bubbles it pushes the pieces apart. I learned however to trust the flux, it really copes with very high heat, gives plenty of time to re-position the pieces and add the solder. Worked like magic.
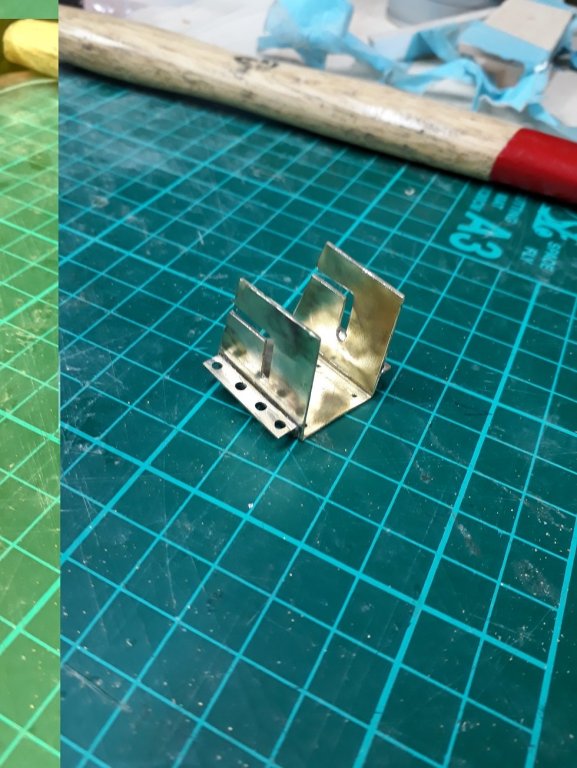
The next photo shows a test piece that took an awful lot of tries to make. I tried so many times that the brass tube was almost completely sanded away.

This one however, I soldered each piece with the first attempt, in a very controlled and standardised way. The joints came out great. I didn't even had to bring out the big boy, the little proxon torch managed to heat everything up.
I am happy, I now am confident I can reliably silver solder stuff.
Vaddoc
- G.L., mtaylor, Mark Pearse and 5 others
-
8
-
-
Dear all
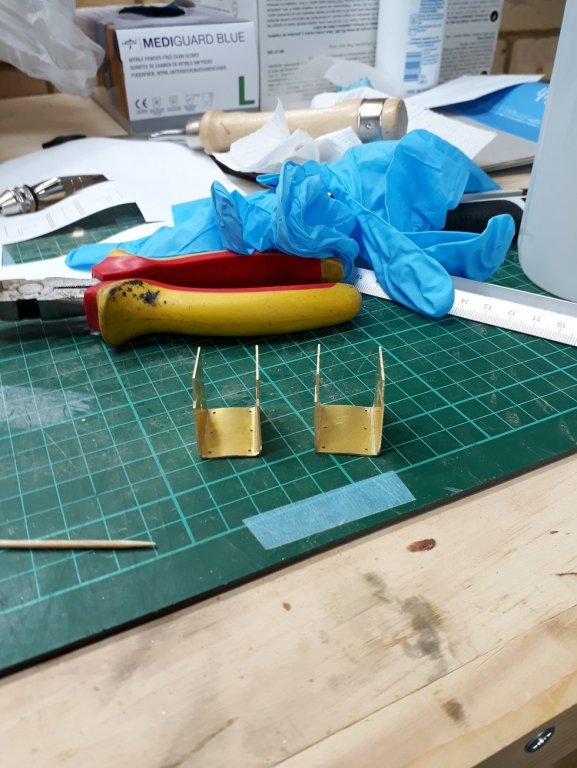
I will need many shackles for my 1:10 boat but at £1.5 each, they are incredibly expensive. I would very much like to make them myself.
Michael Mott has posted a very elegant way of making shackles in this scale. Today I experimented in my garage and tried to standardised a much simpler version, using tools that I (and probably most modellers) own. So here it goes.
Very very important: There will be clouds of flying debris and brass dust so do not attempt unless you have goggles that completely seal the eyes (they cost £1). A few more tools will be needed.
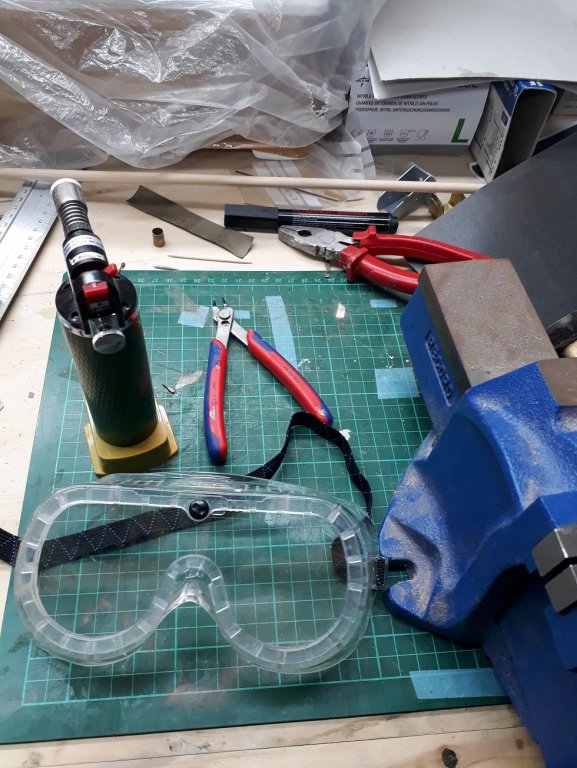
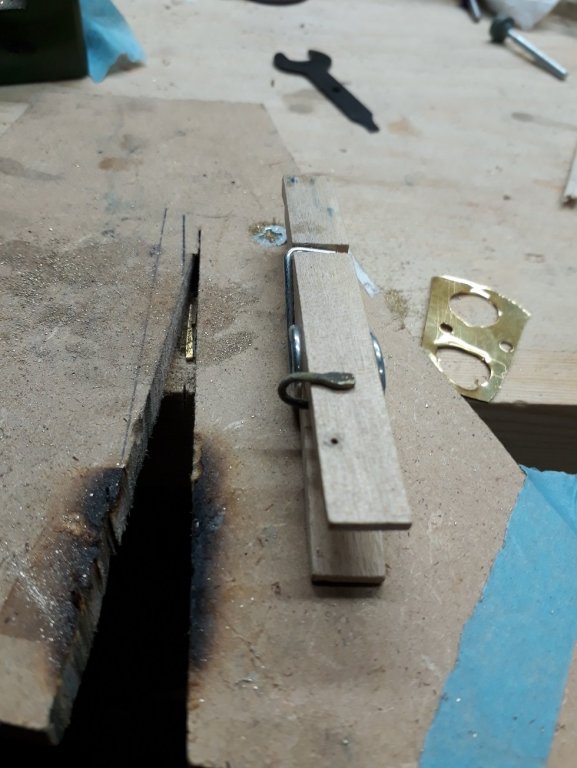
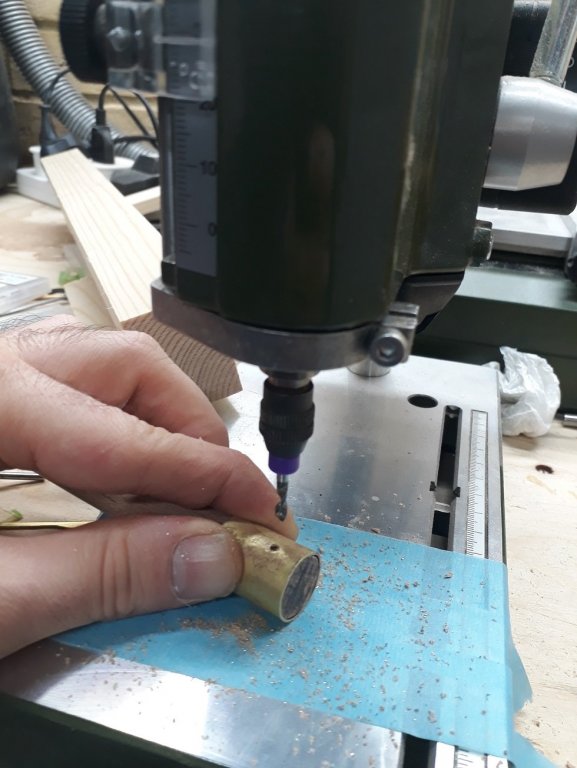
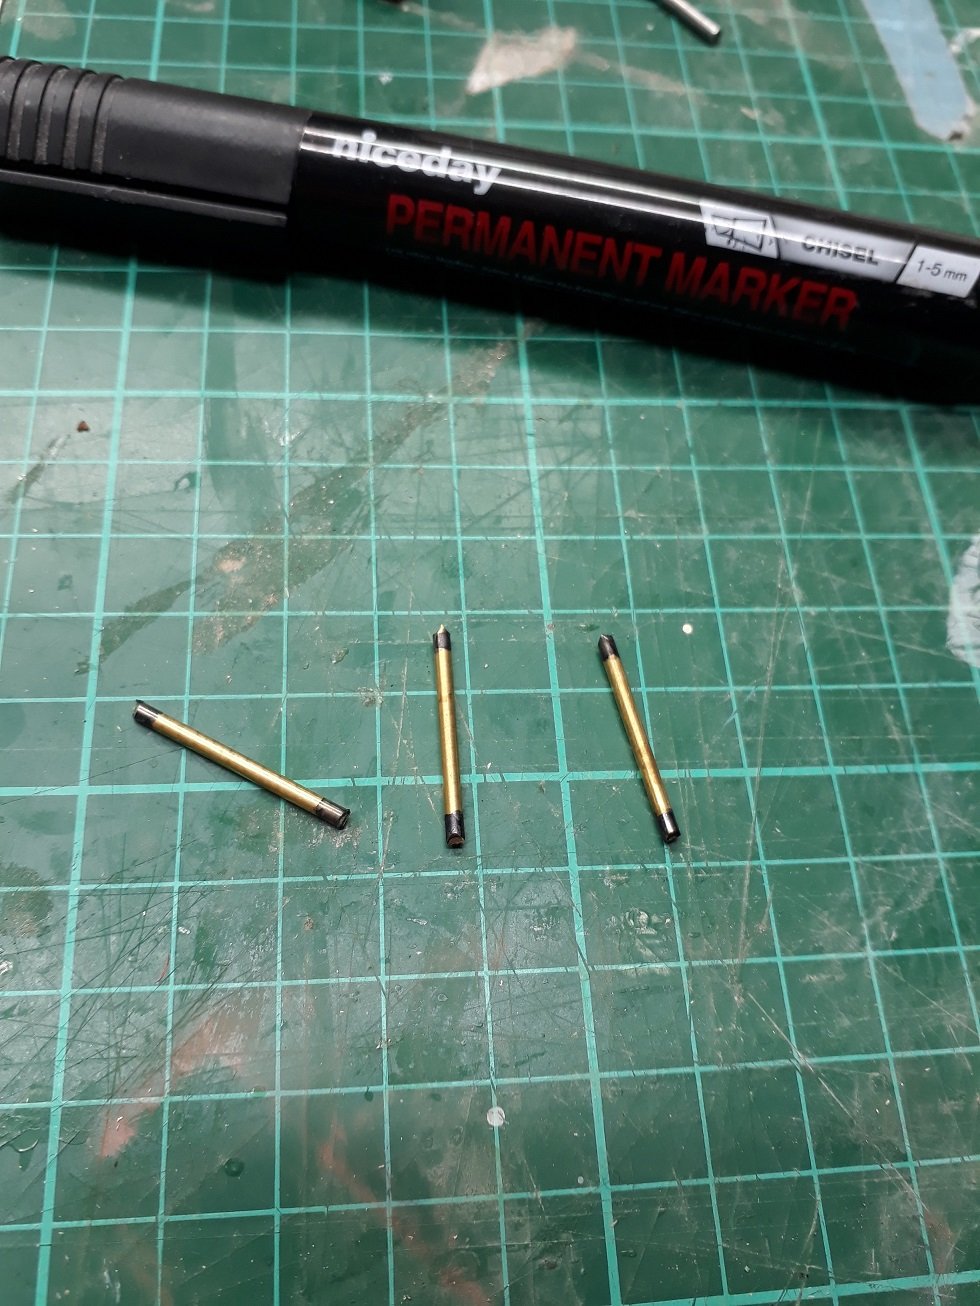
Start with 2 mm brass rod, cut to lengths a bit over 2 cm.
Mark the edges that will later be hammered flat with permanent marker.
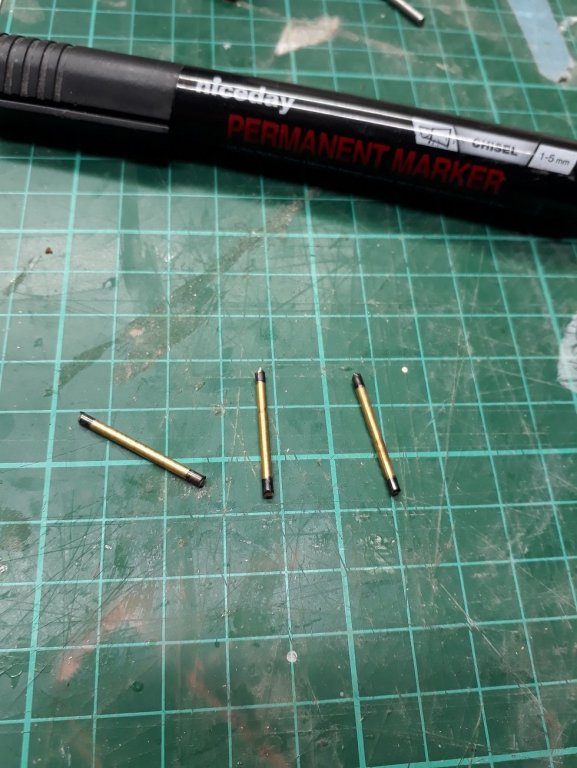
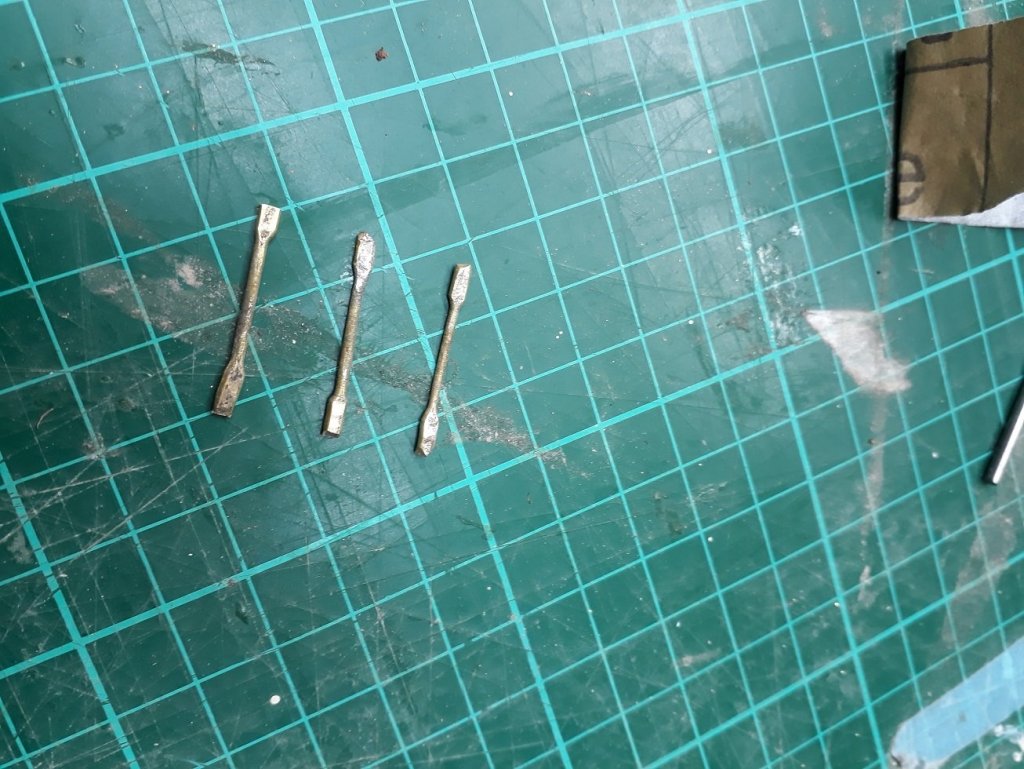
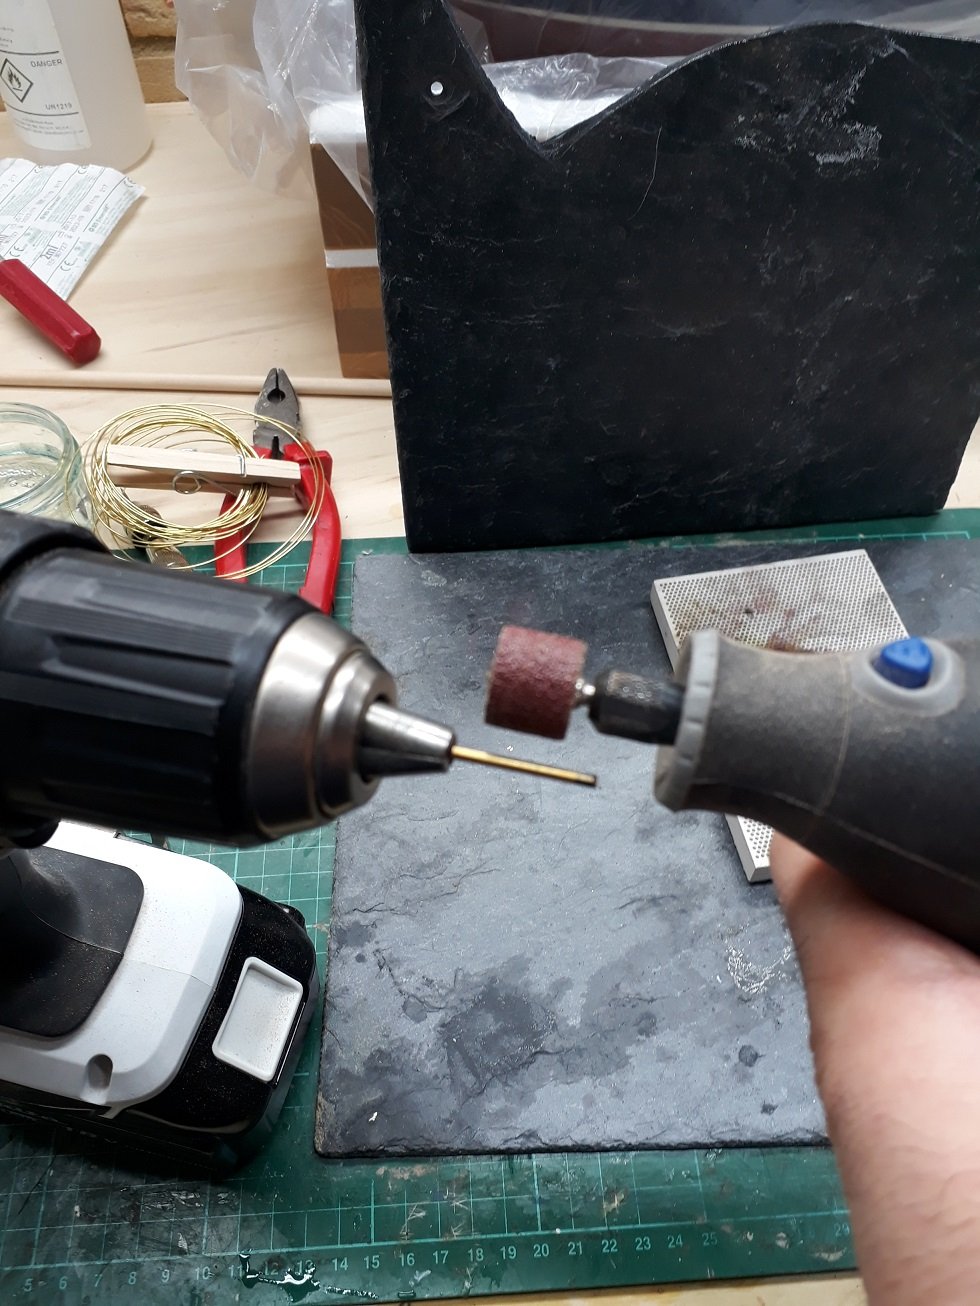
Then, secure the rods to a drill, just at the marked edge. Do not worry, it will be adequately rigid and secure. Set both the drill and the dremel spinning and with a high grit sanding drum, thin the middle of the rod. Then use 240 grit sanding paper to smooth the marks left on the rod.

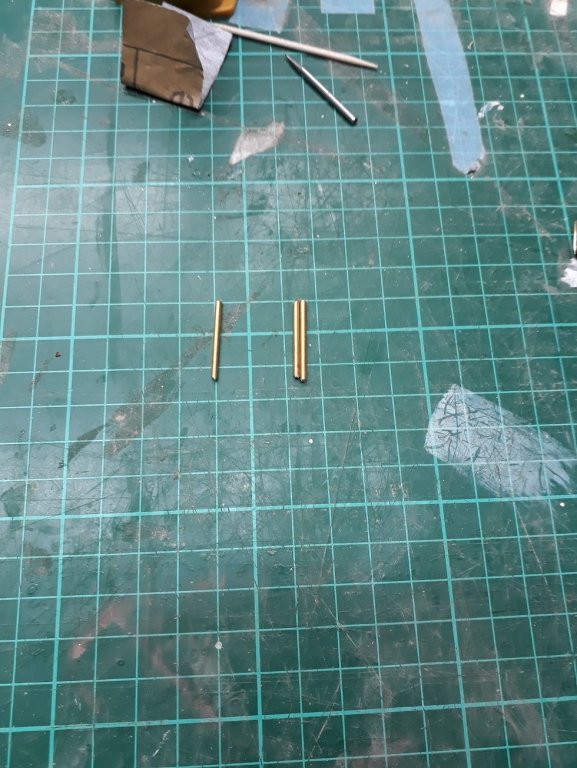
It should now look something like this.
Now anneal the metal. This needs to be done regularly otherwise the rod will break.
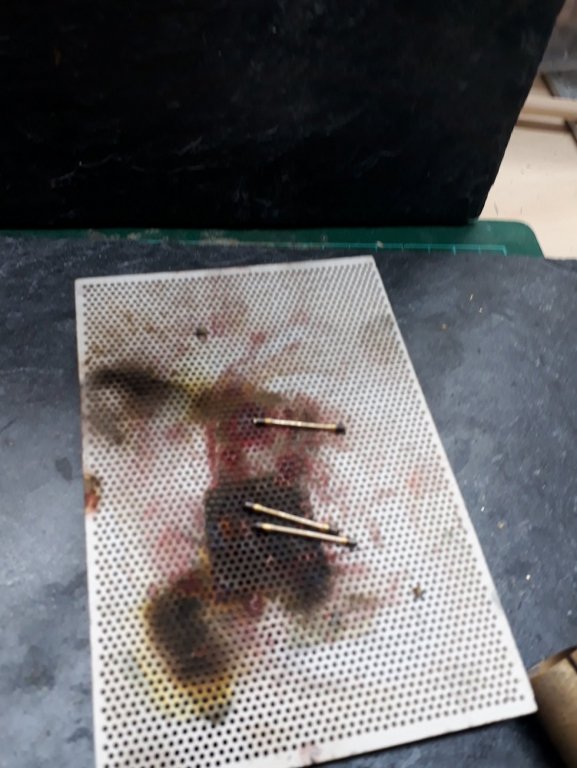
On a flat surface, hammer the edges.
Anneal and hammer again. Use a sanding disk or files to shape and round the flat edges of the rods.
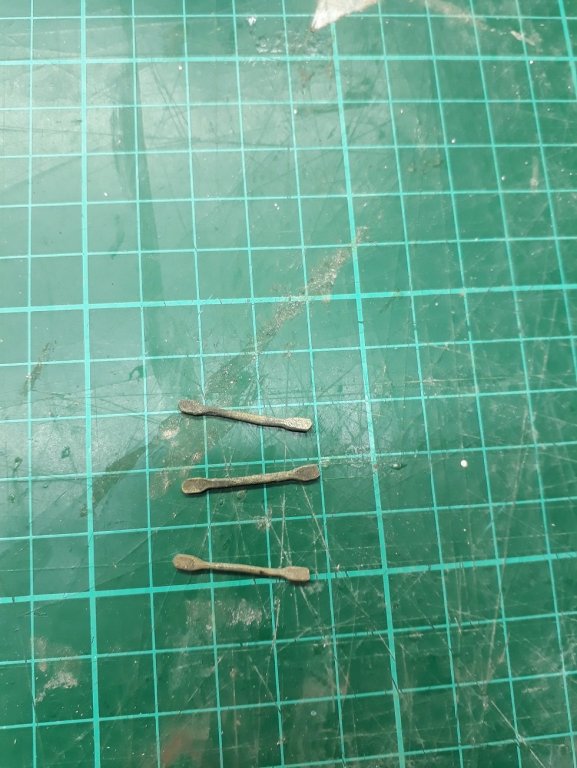
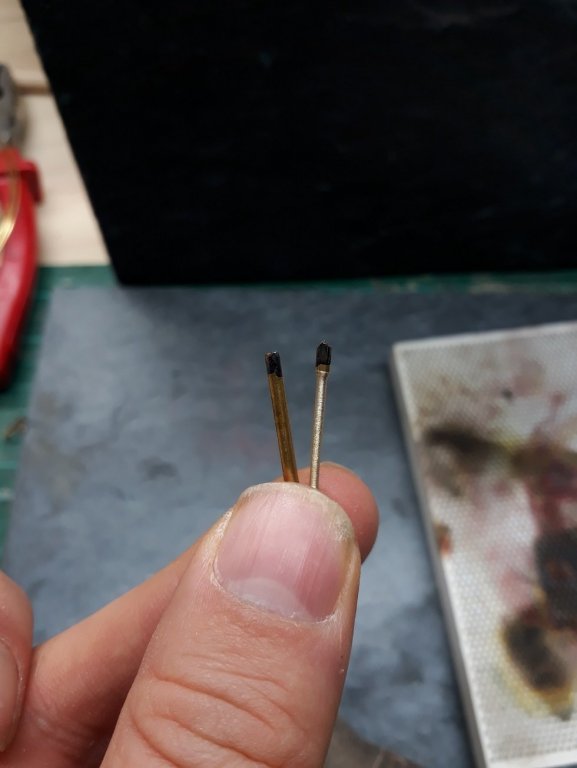
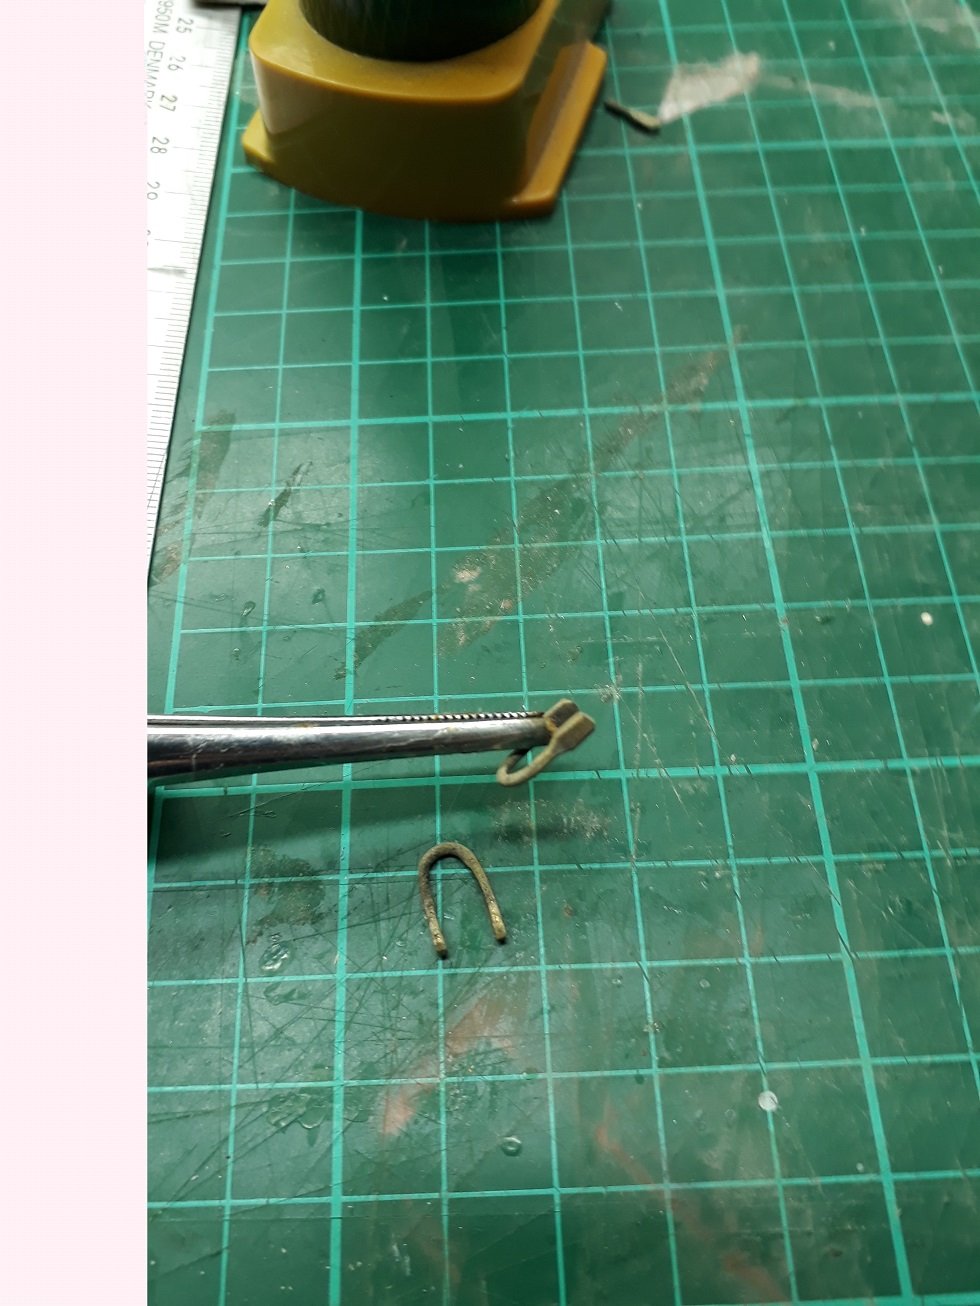
Then bend around an appropriate steel rod/pin secured in a vice, carefully so that this is done symmetrically. (One rod broke in the middle). Half bend initially, anneal and then bend all the way, otherwise the rod will break. Do not do any minor adjustments without annealing again, the rods will break very easily, bending puts huge stress on the metal. It should now look like this:
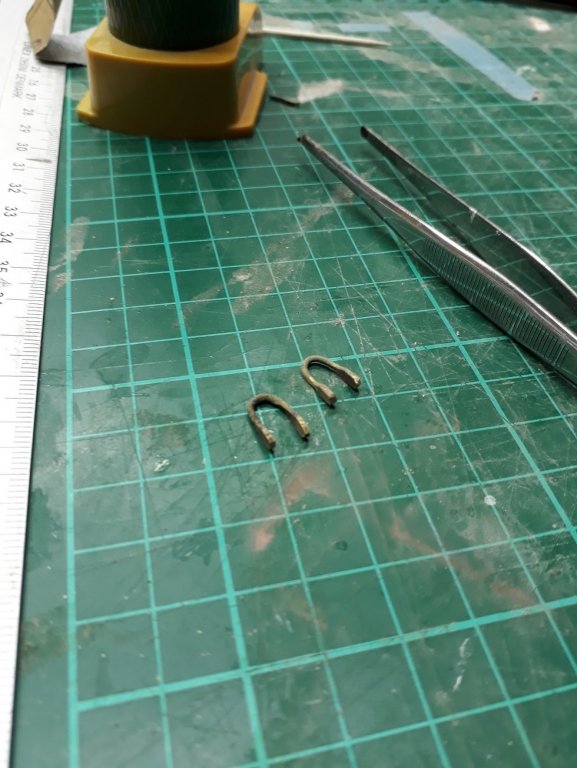

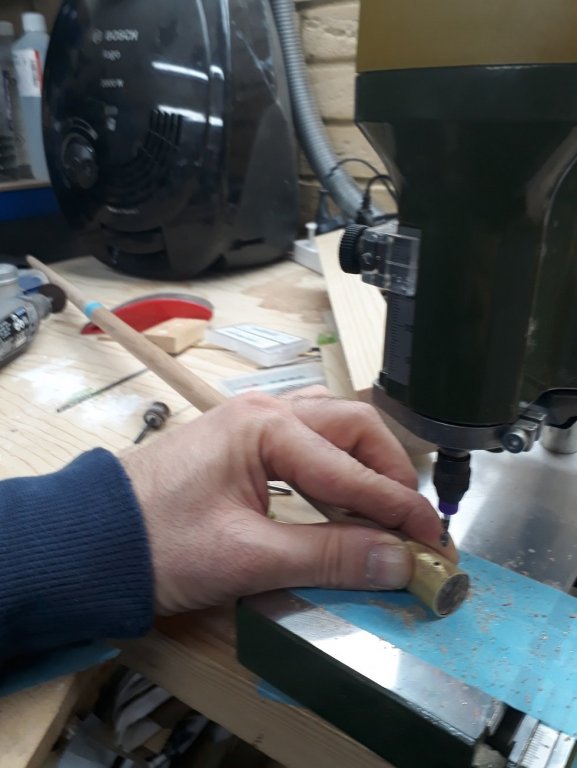
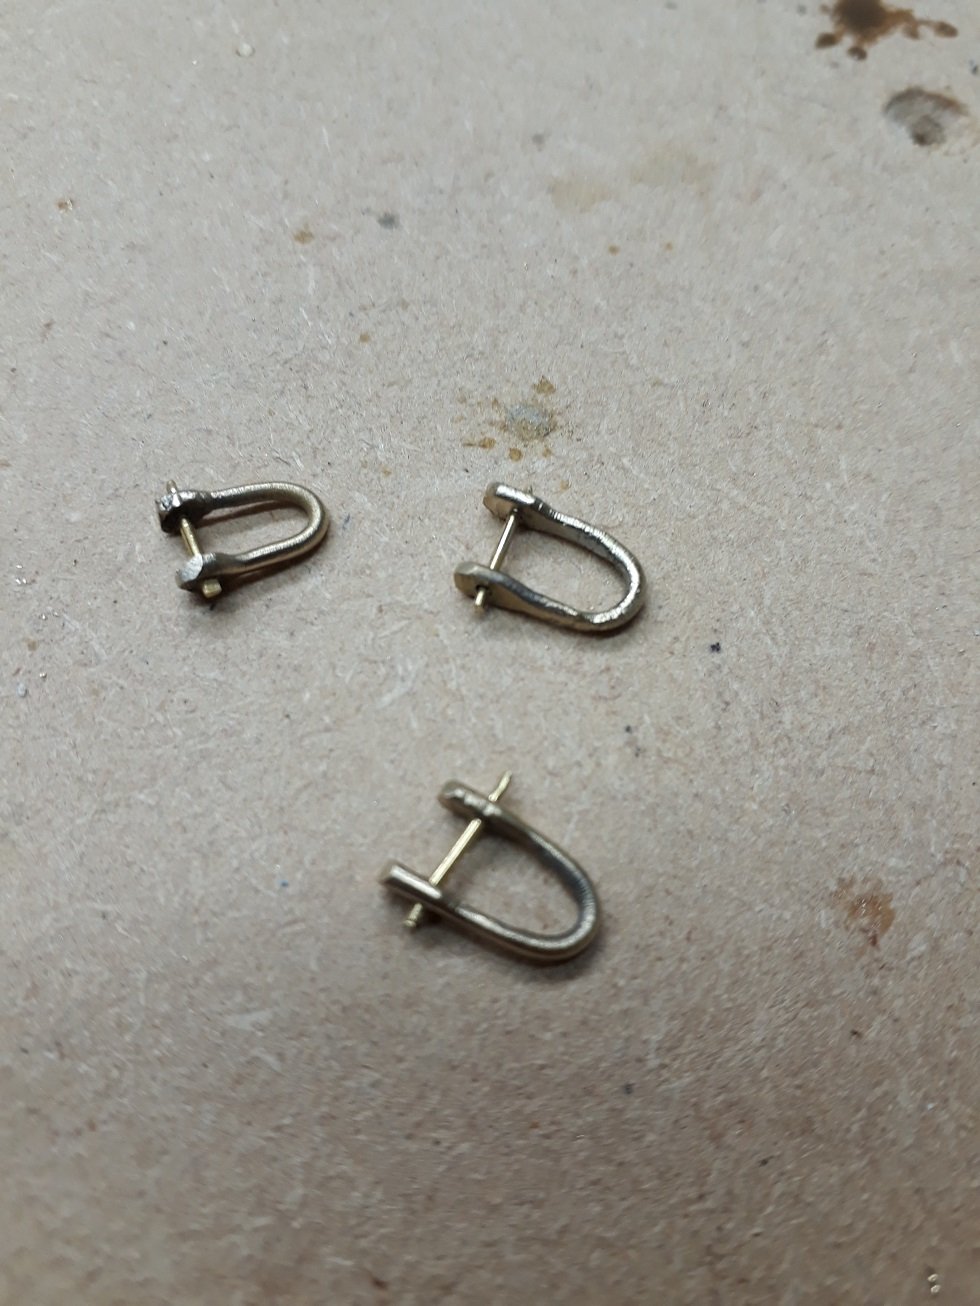
Drill the flat parts, no need to align the holes.
Then take a length of 0.8 mm brass wire, pass through the holes, then with pliers crush the ends flat and trim the excess. Polish with a steel wire brush. Shackles are ready.
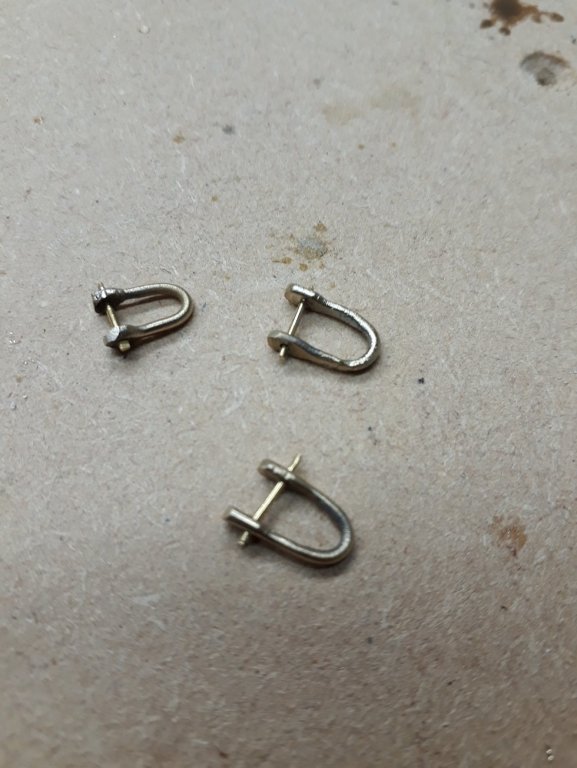
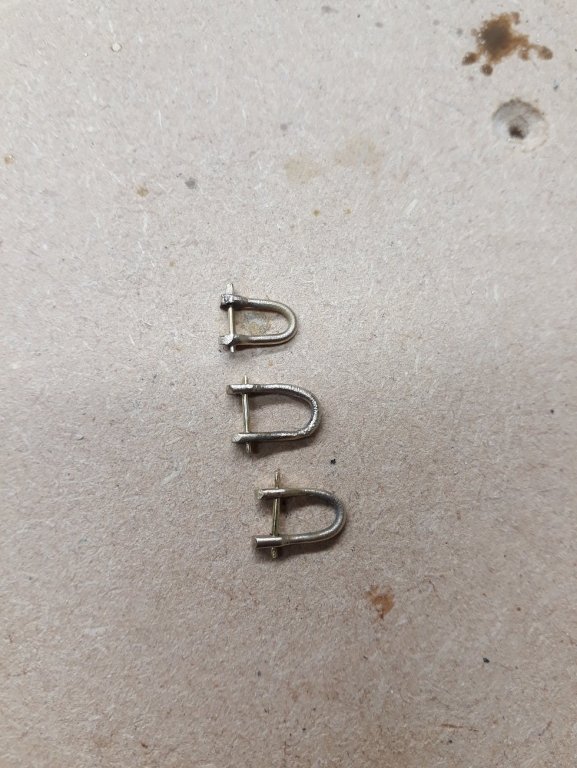
They can actually be made reasonably fast, best to do many at a time. They are not very uniform but I think with practice they should improve.
Vaddoc
- Sgt Mike, aviaamator, druxey and 24 others
-
27
-
Oh dear Patrick! Me and the camera are not best friends!
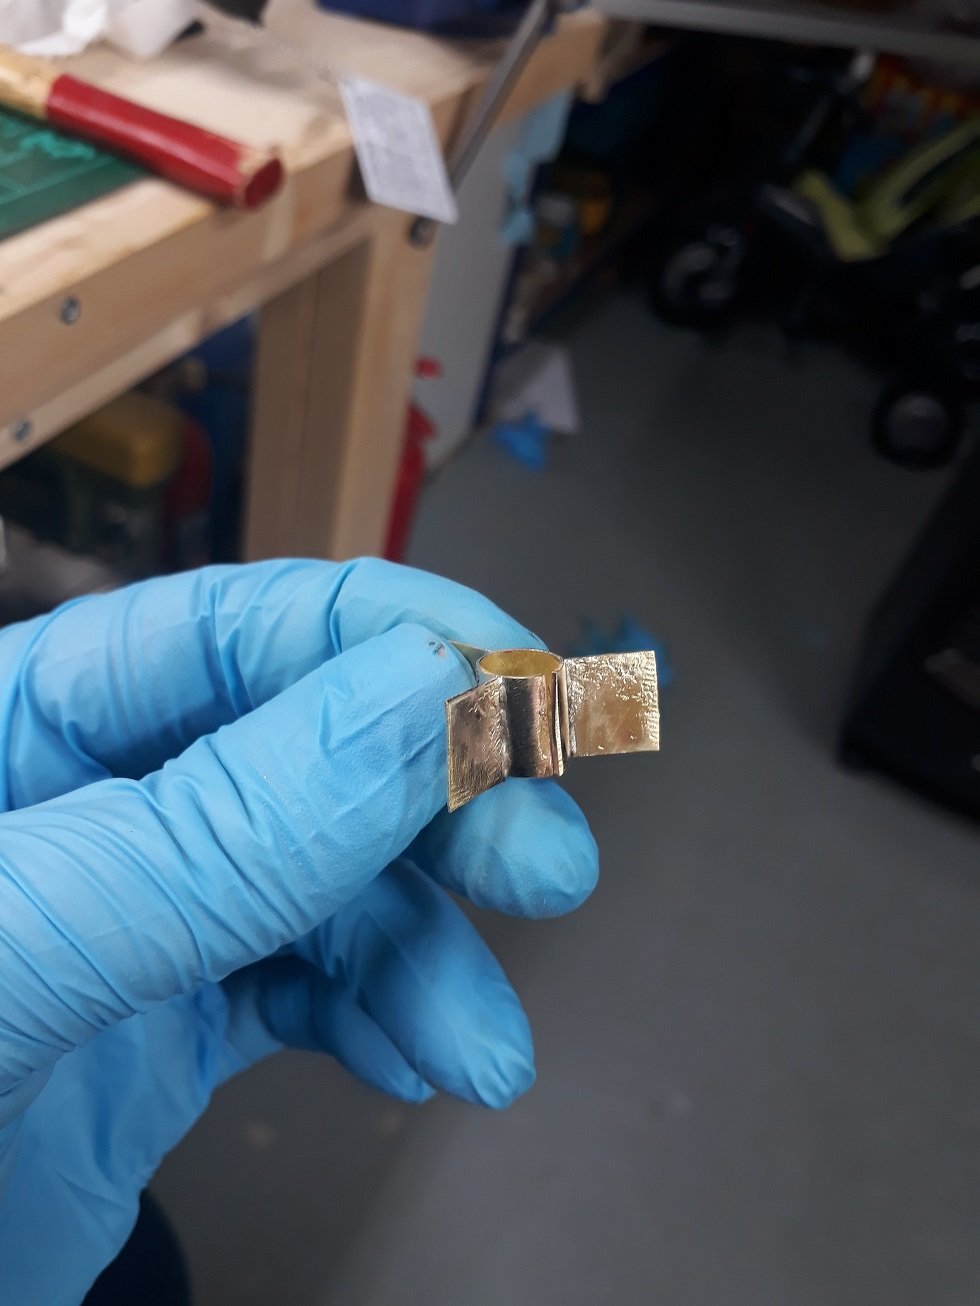
I do not yet have a clear understanding how the rigging will work but I think I will need some points at the tabernacle to attach sheaves. I used 0.7 brass sheet and silver soldered with solder paste. It worked well and came out fine!

I run out of Humbrol primer and I used an automotive one, which I do not like but did the job. The mast sheath will be next. I will paint everything with the same off white as the deck.
I experimented with a variety of lead free soft solder that has 3% silver. It produced very strong joints to the degree that silver solder might not be necessary for most parts. I used my mini torch but still the heat was too strong, I think it needs the heat iron.
Also I ordered some Borax which is supposed to tolerate high heat, I realised that my flux burns out before the silver solder melts. I use a large butane torch that heats things very quickly but is rough on the flux.
- druxey, paulsutcliffe, Omega1234 and 3 others
-
6
-
Wefalck, have you located an online supplier?. I would really like to try this thread.
Vaddoc
- mtaylor and thibaultron
-
2
-
Really good to hear these good news John! My best wished for a great new year!
Regards
Vaddoc
-
-
-
Just manage to catch up, very nice Patrick, full of your usual good vibes! Lovely details, the sculpture, the lump, the computers, also I would not mind having some of these rugs at my place...
I wish you a wonderful, creative and healthy 2019!
Vaddoc
-
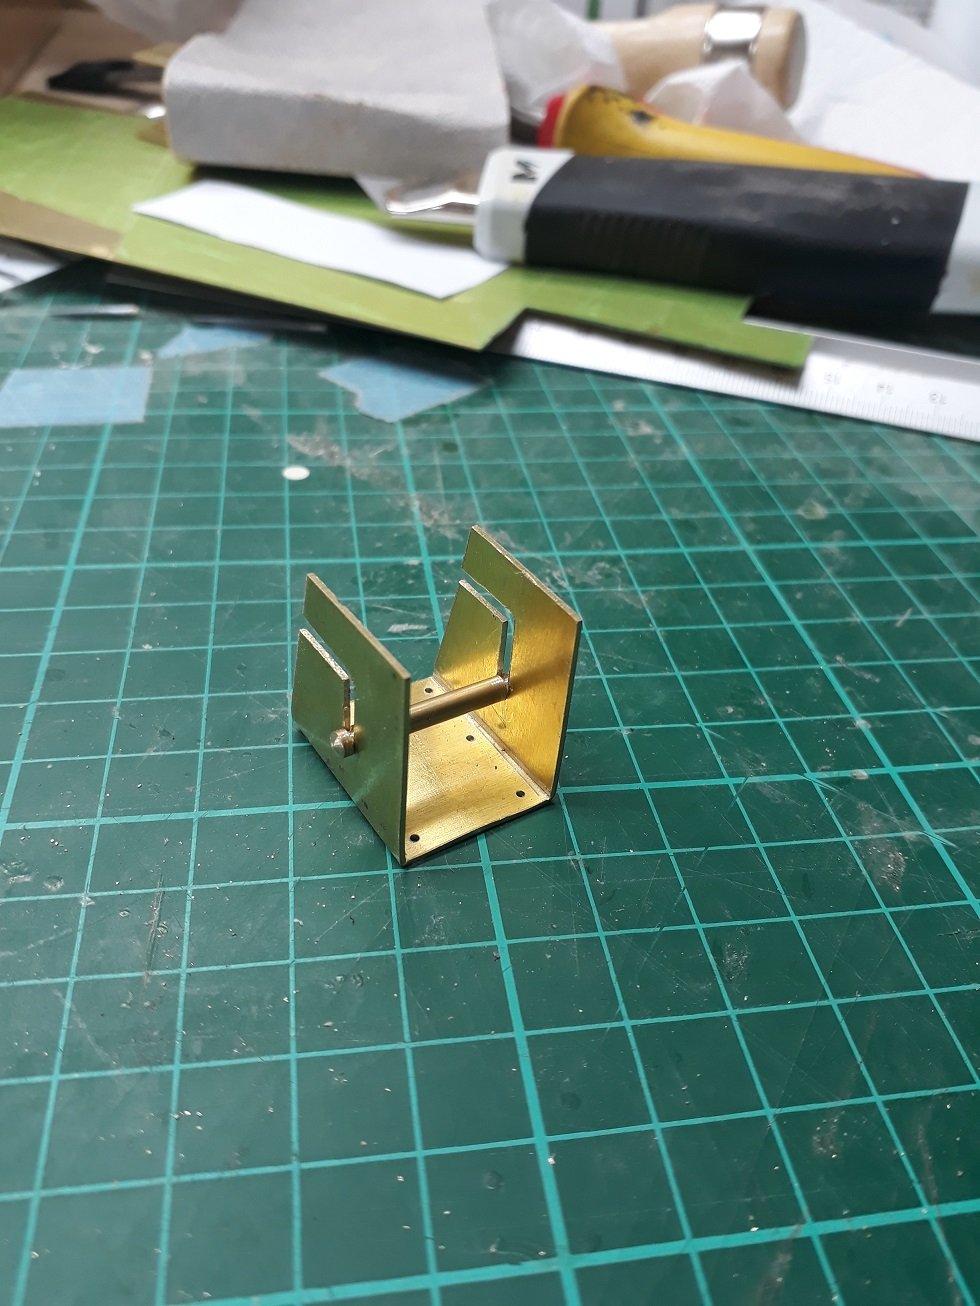
Finally, a proper update!
I was able to spent some time in the garage, I heated up the place and did a bit of work.
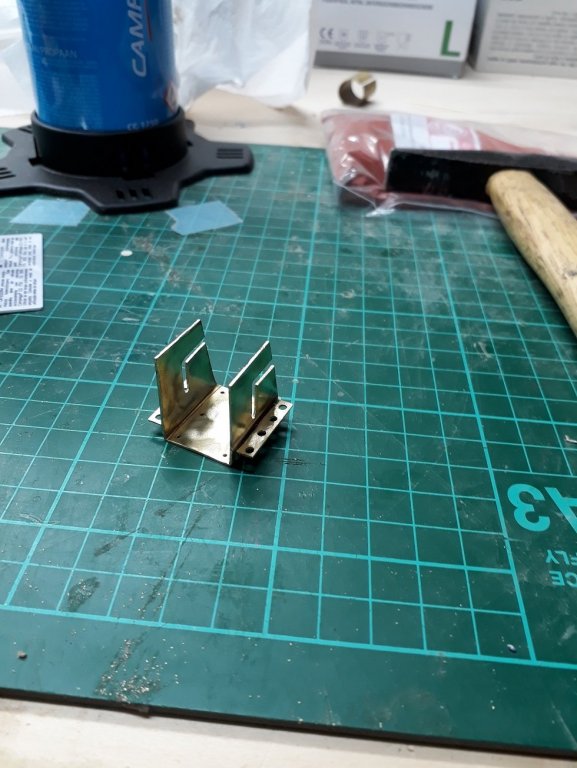
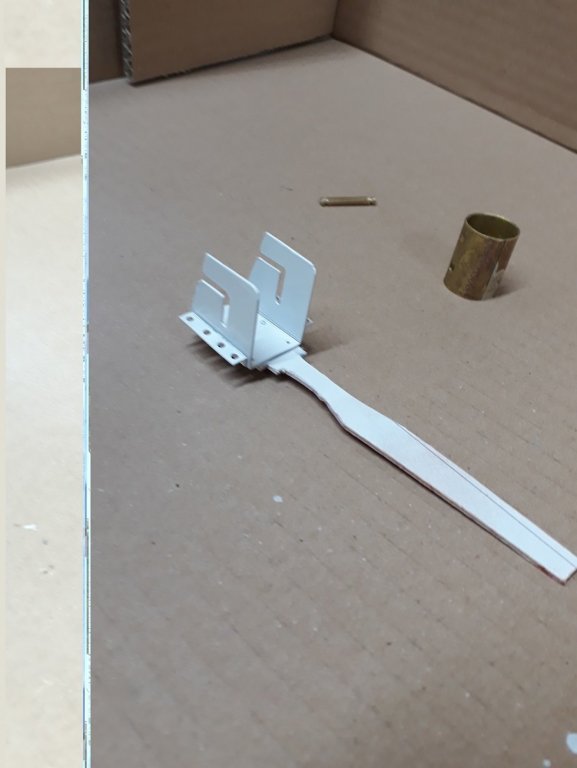
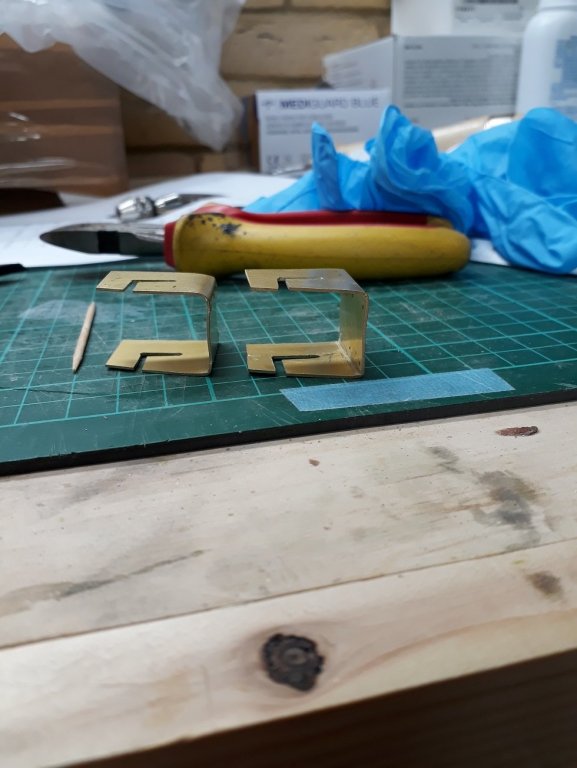
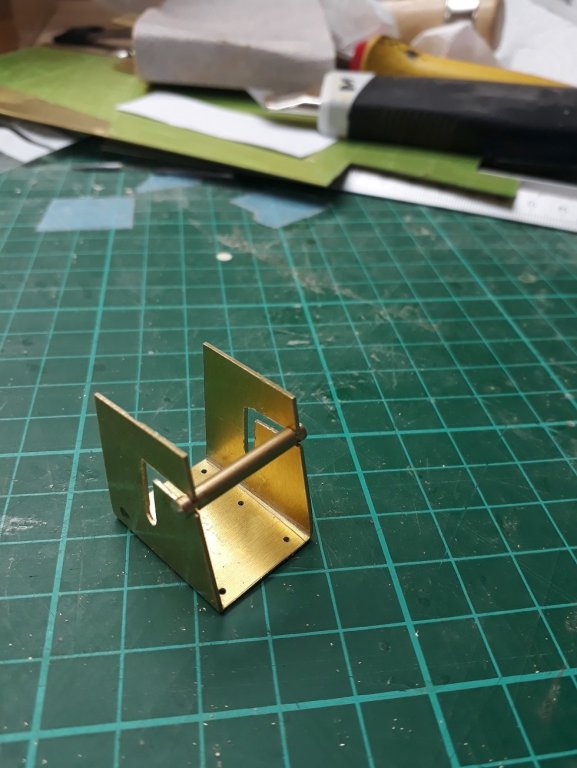
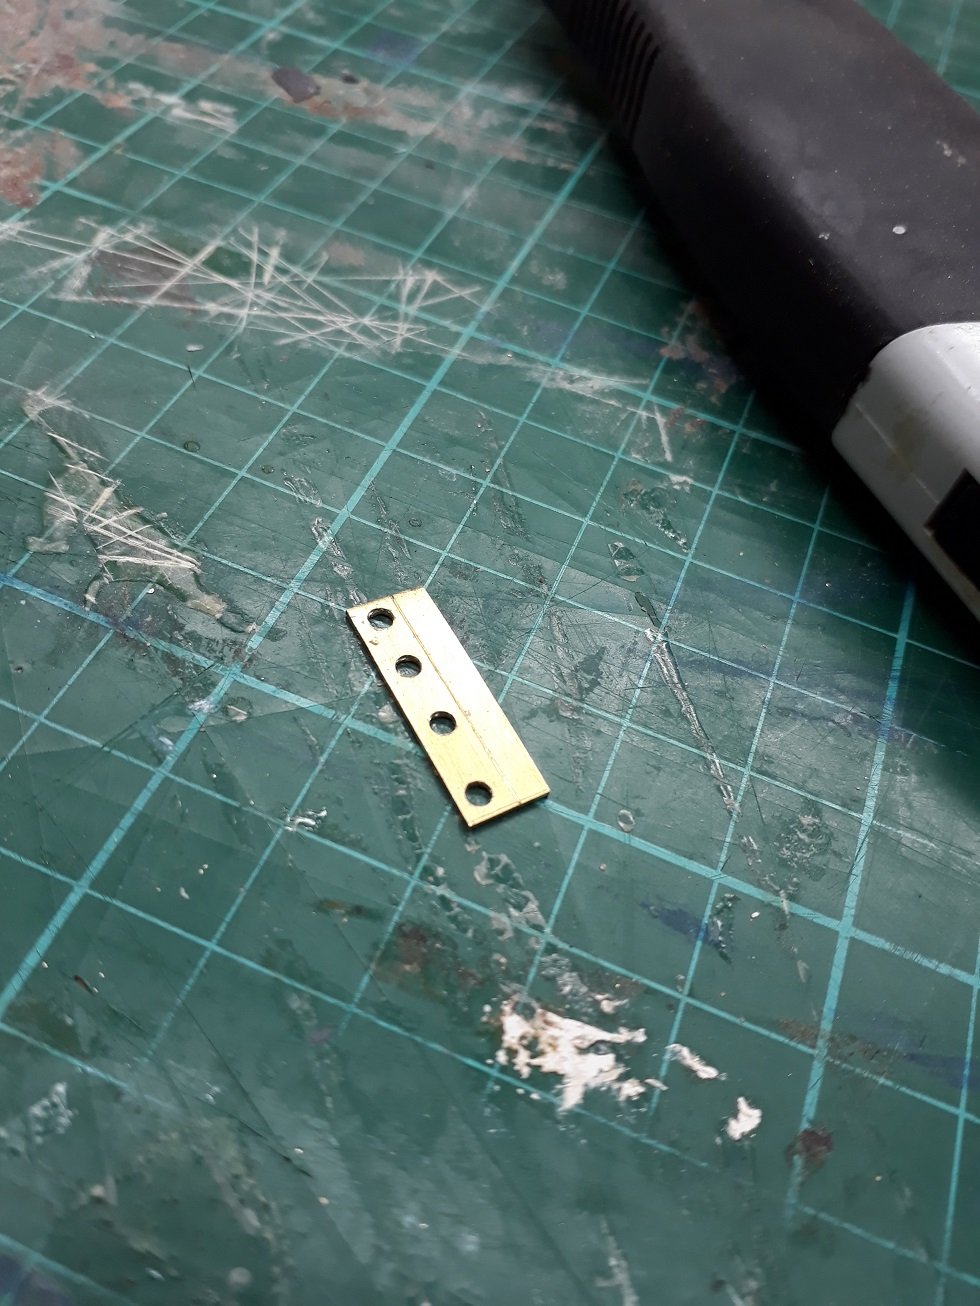
First the pattern for the new tabernacle was transferred to 0.7 mm brass.
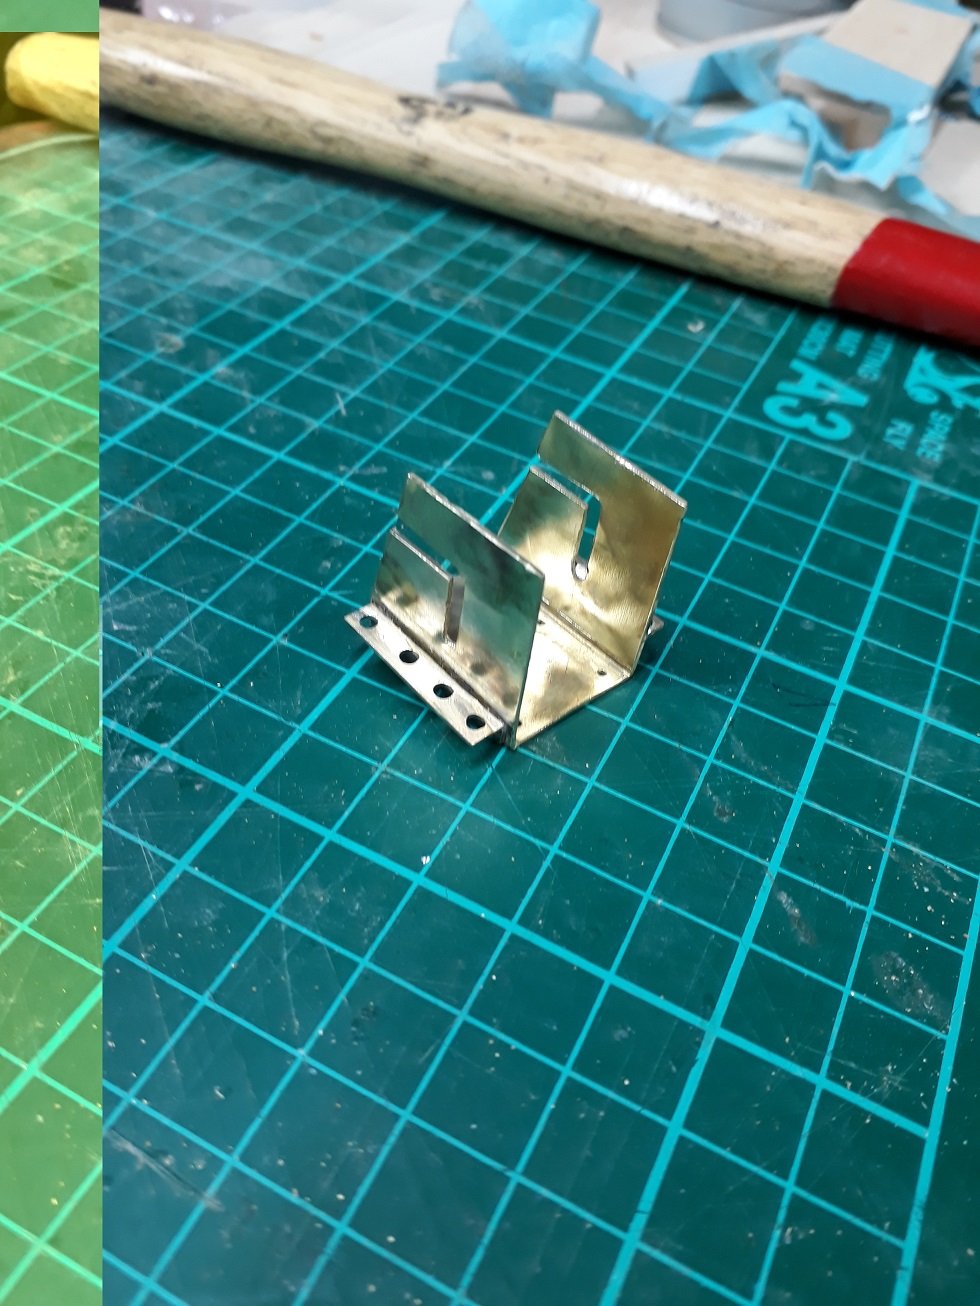
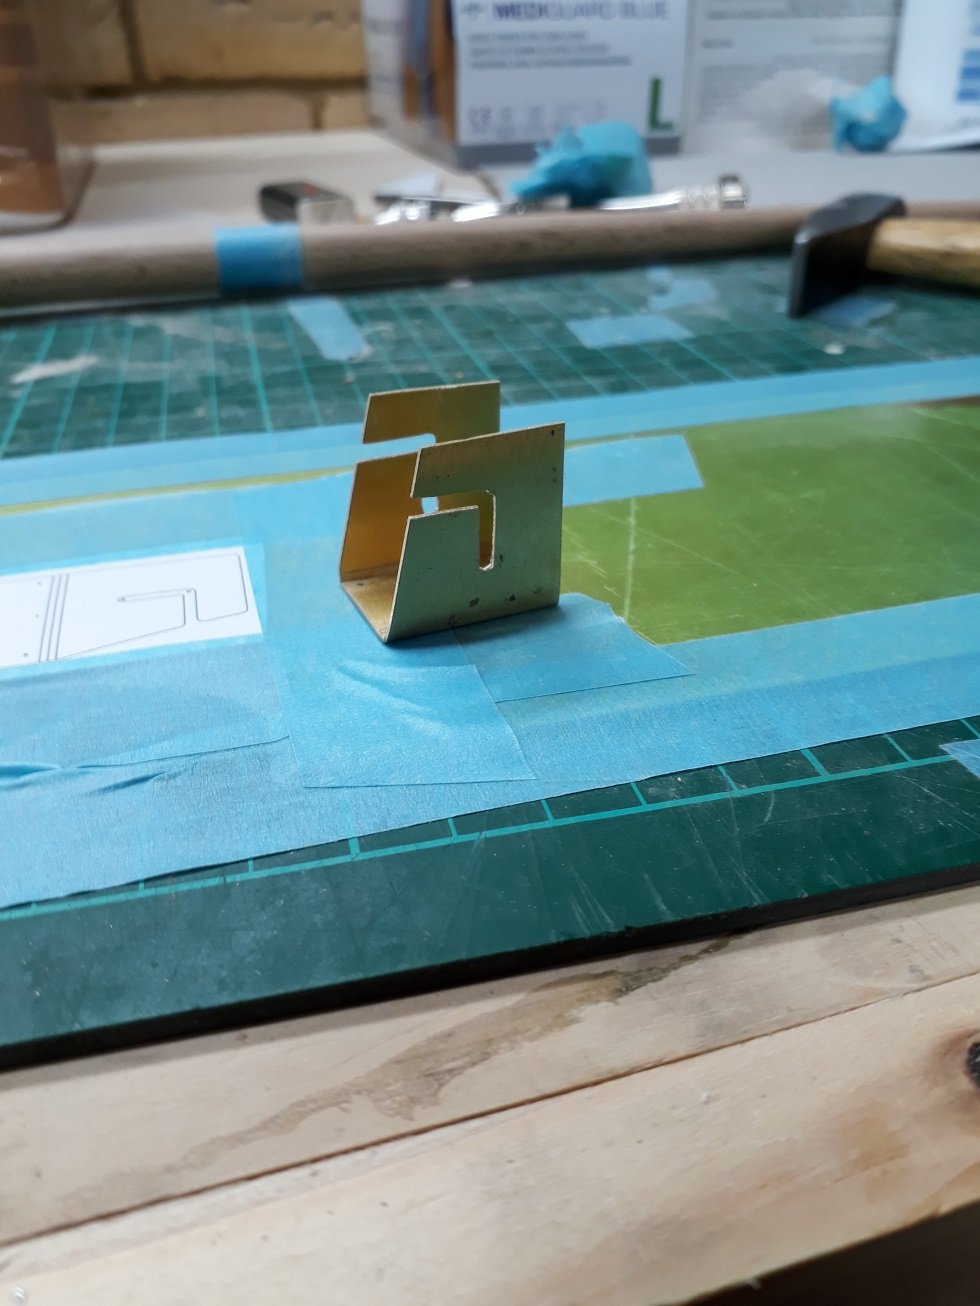
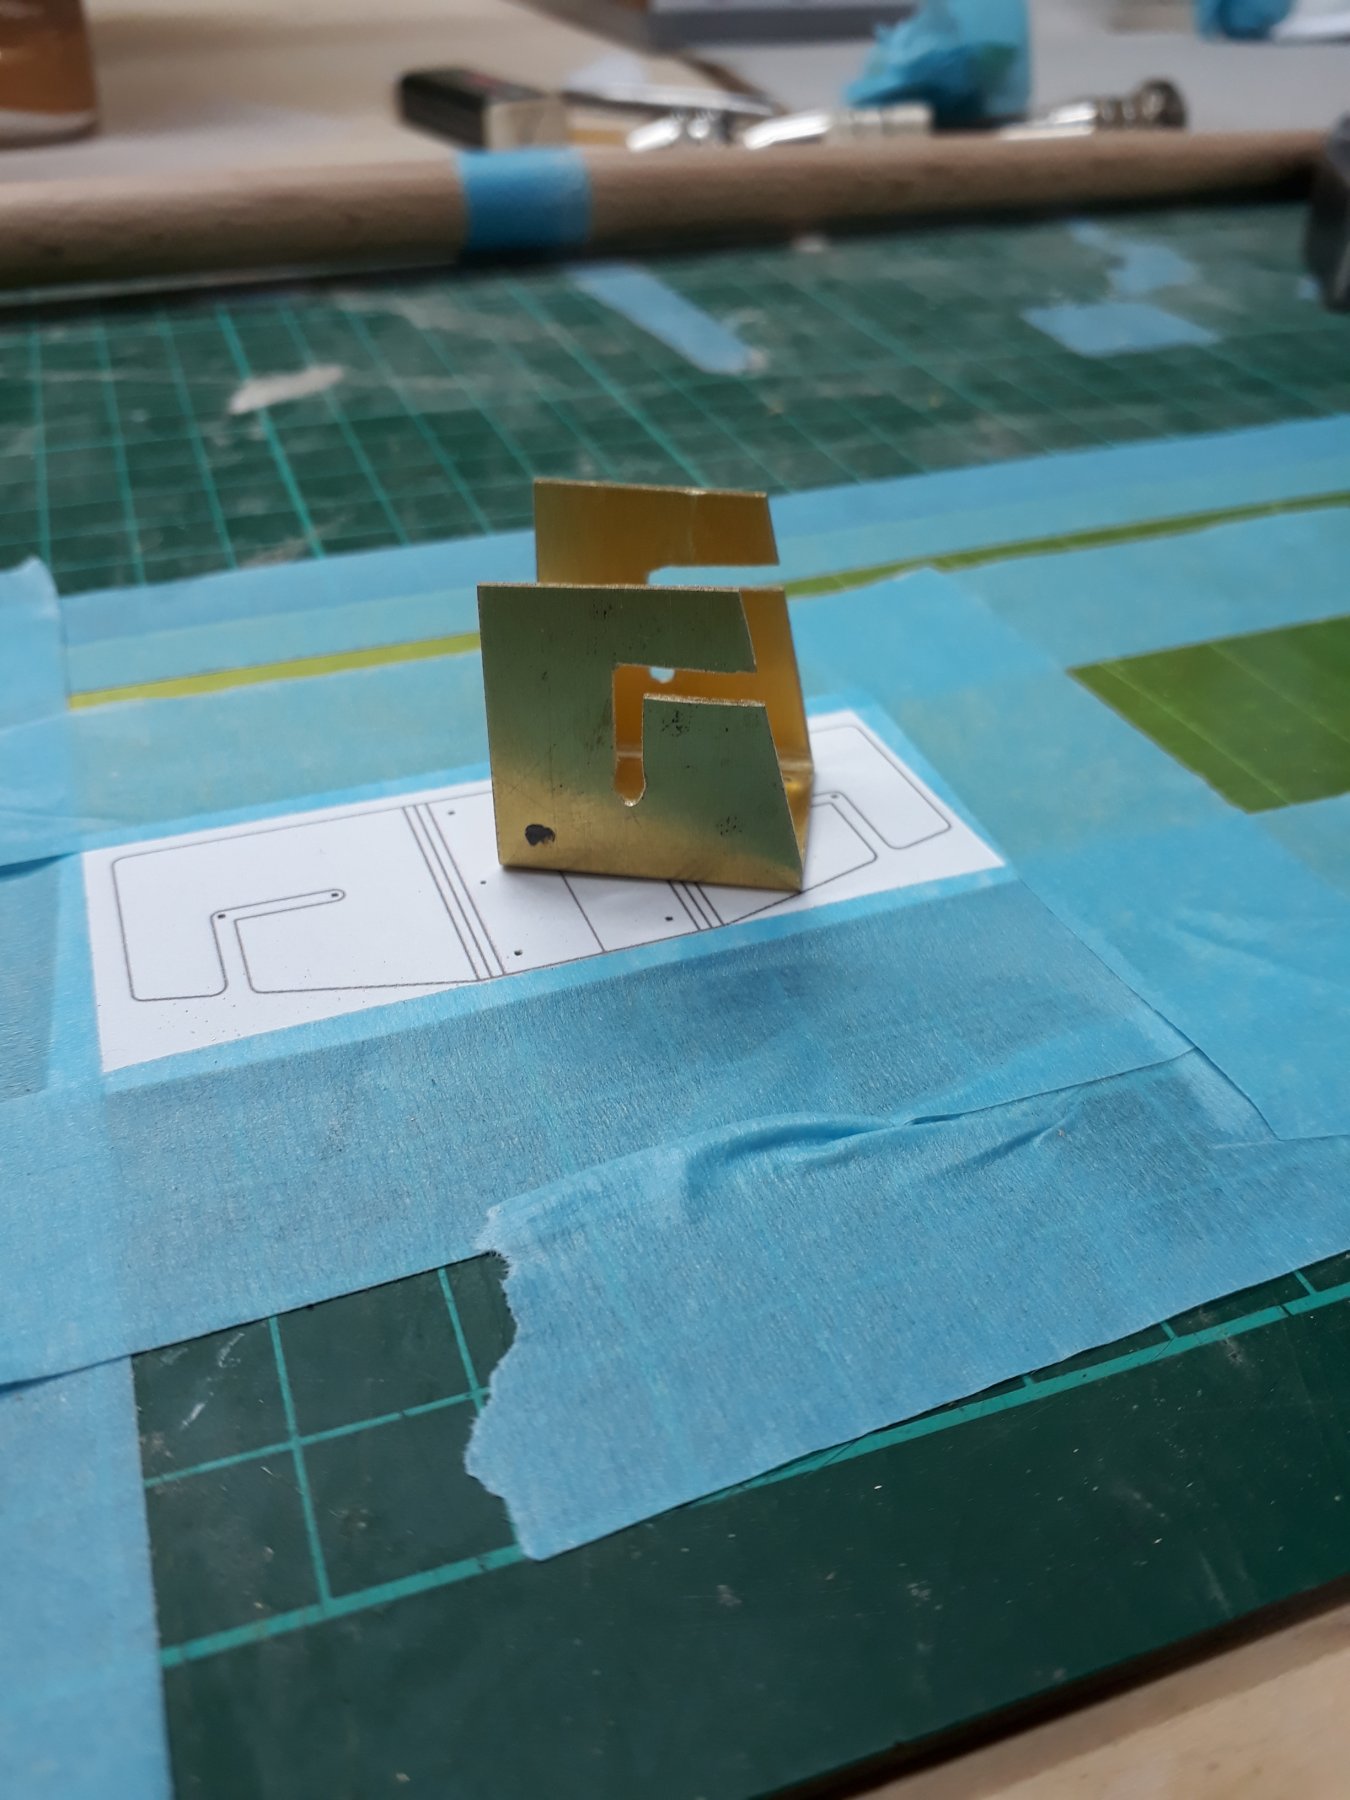
I drilled and cut the piece an then filed across the lines and bent the piece to shape. It came out fine but just a bit wide.


I think the scale is more appropriate compared to the previous tabernacle

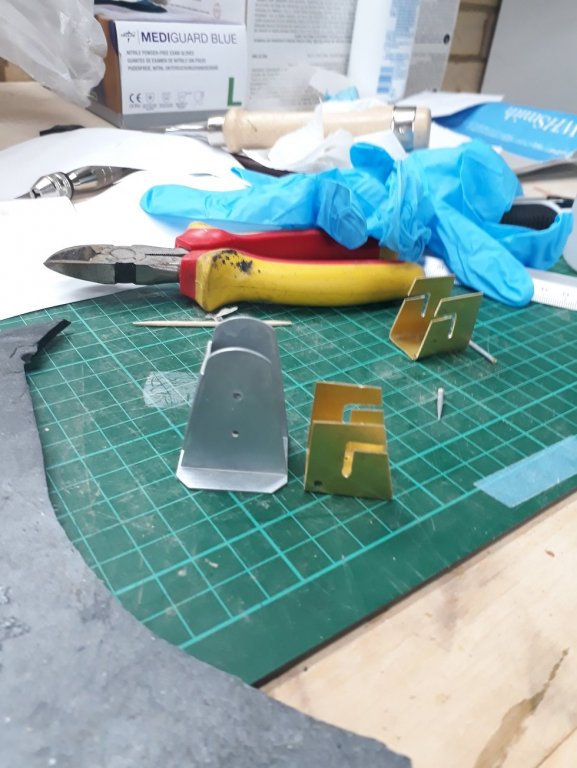
I actually made a second one, about 1 mm more narrow. I did not file deep enough though so it did not bend as well. I decided to use the first one.
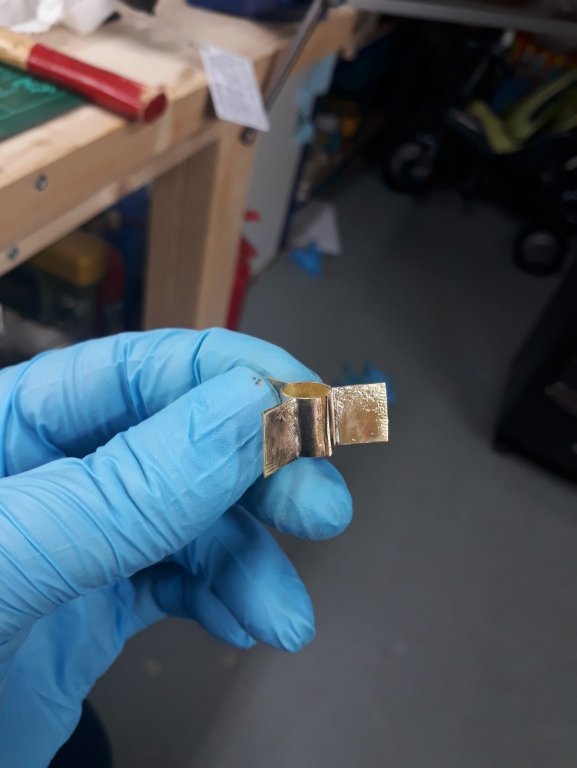
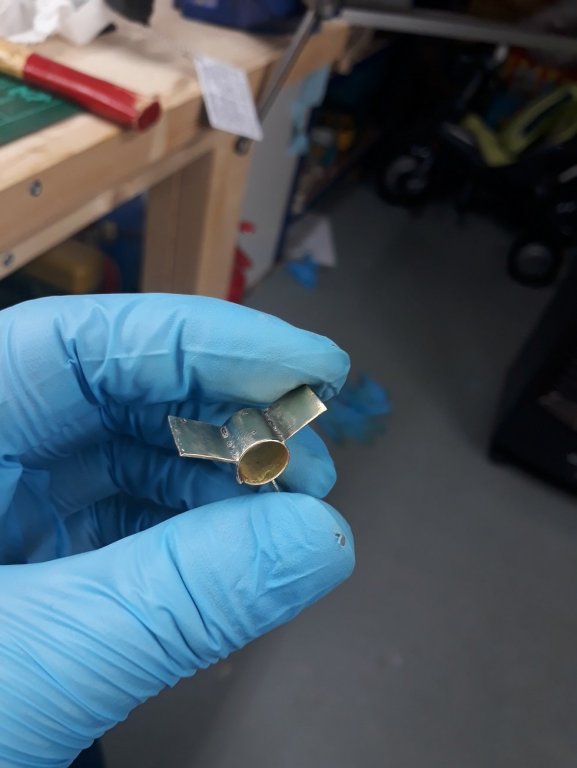
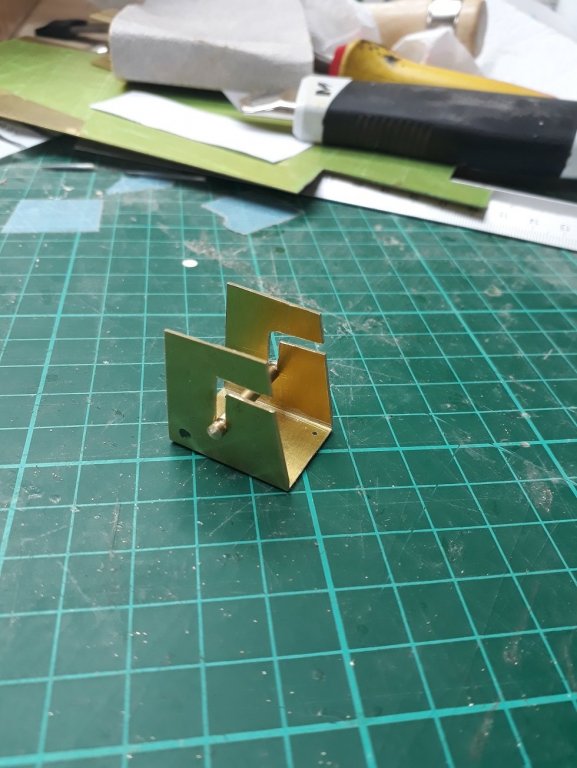
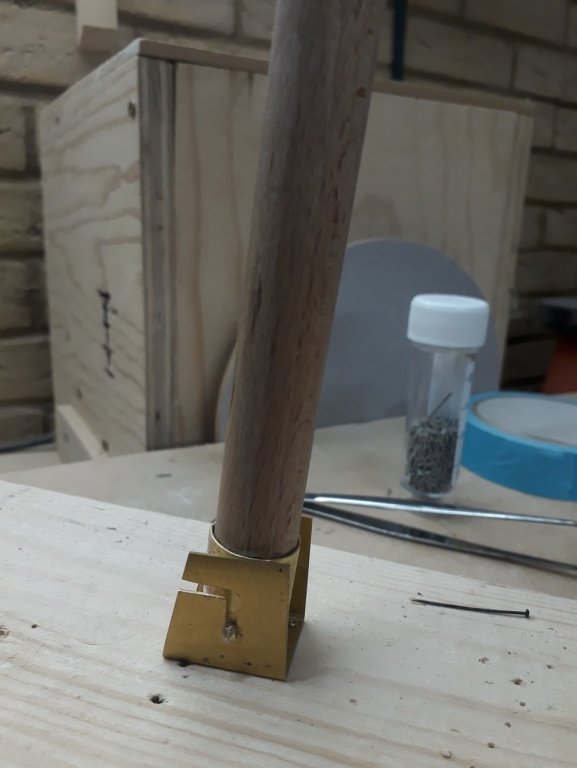
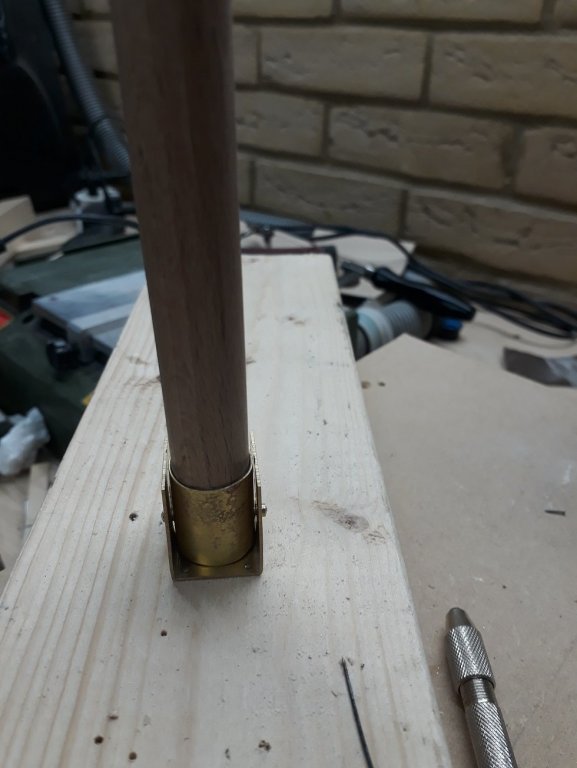
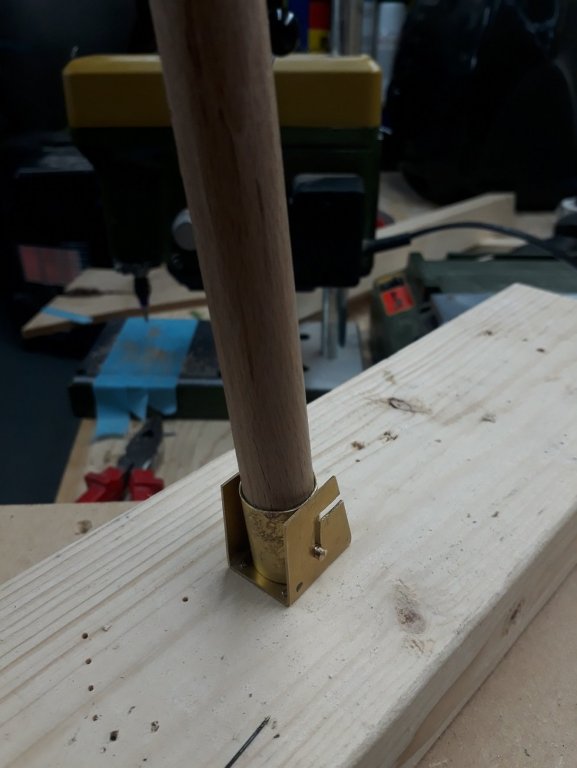
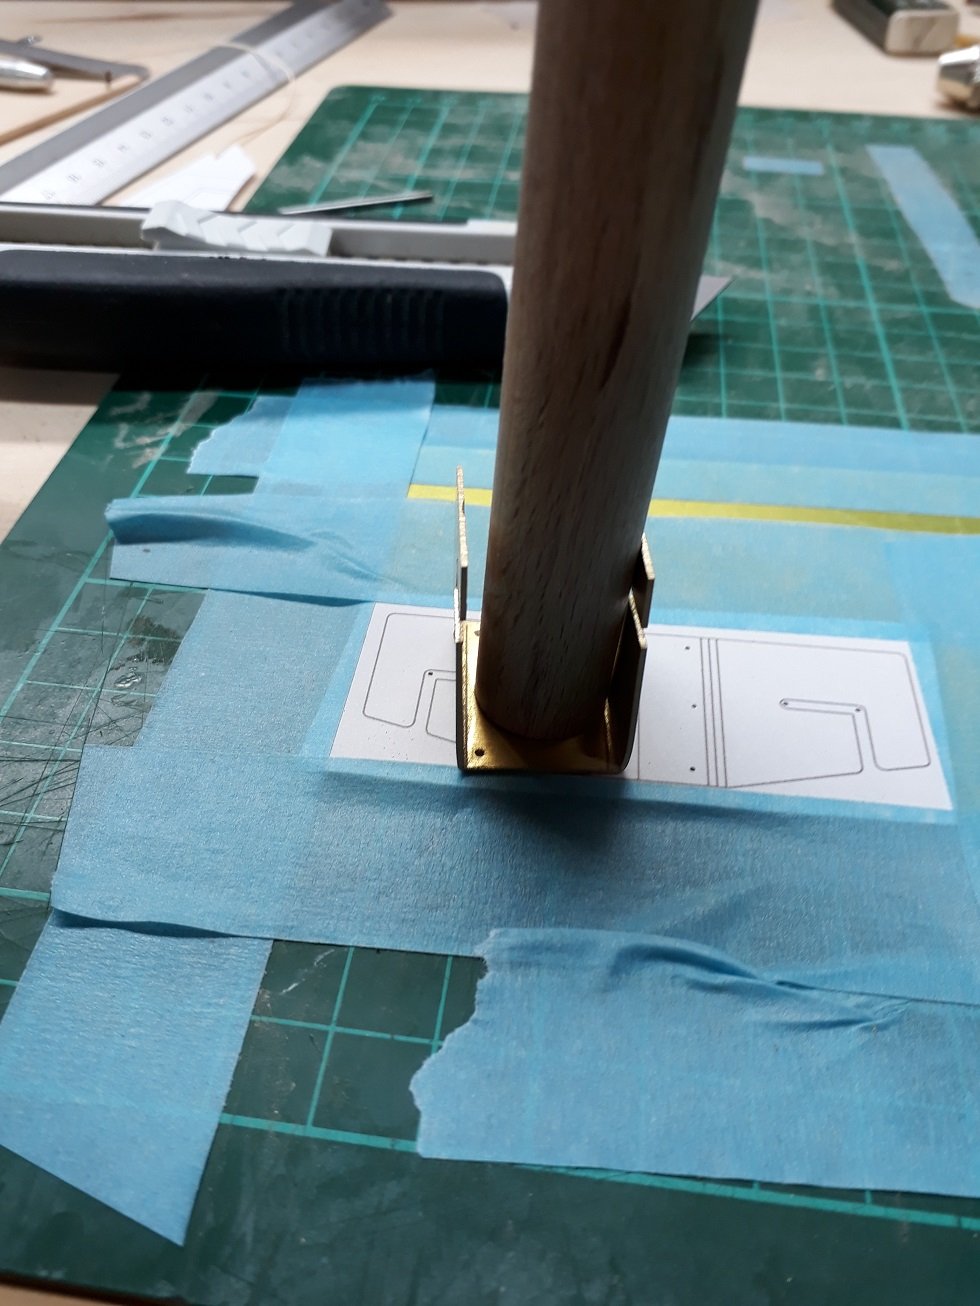
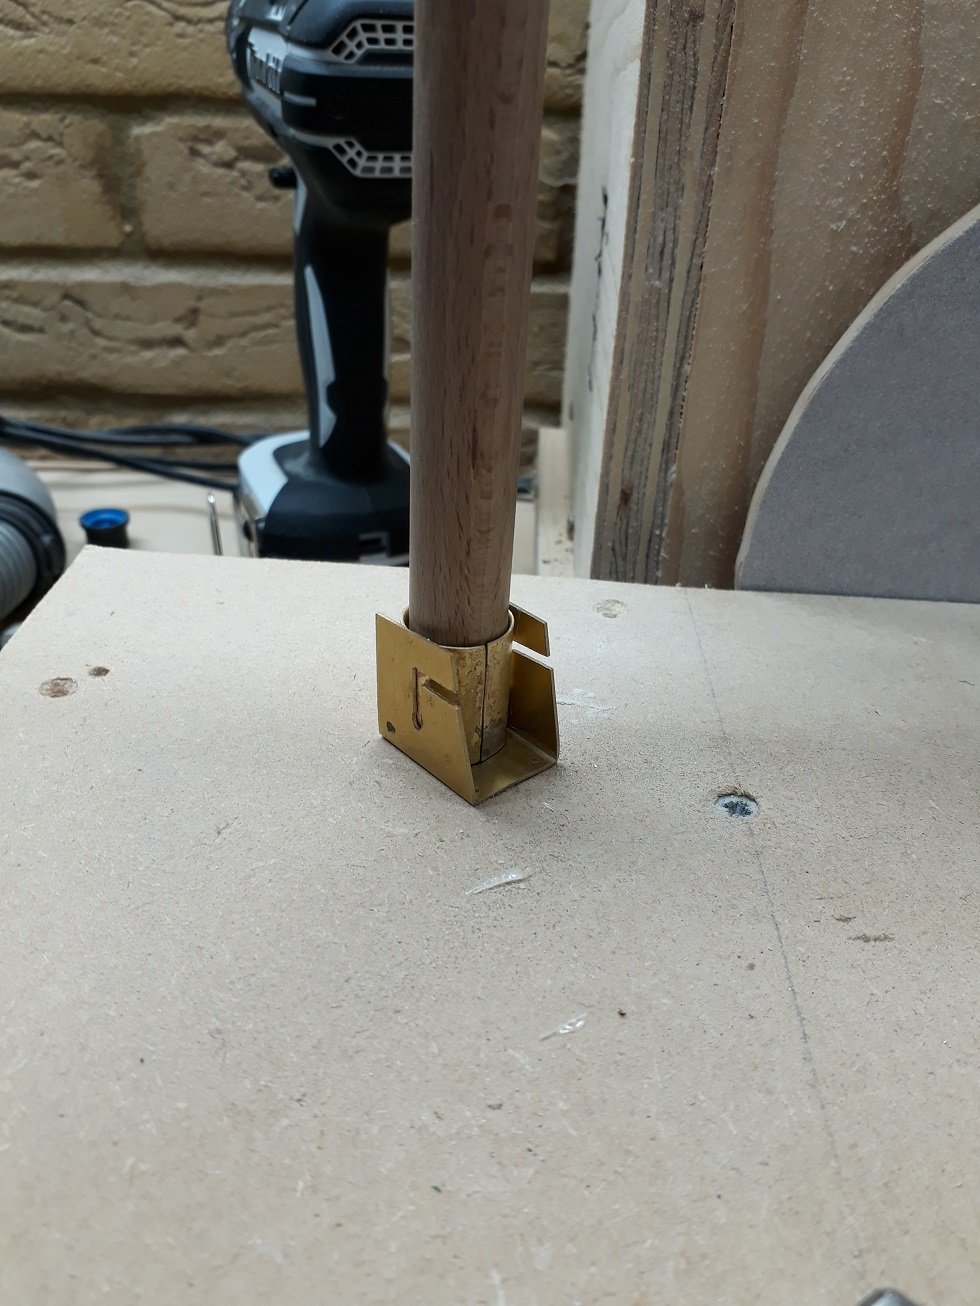
I am not sure how it would work in the real boat, however I am thinking that having the base of the mast supported by just a through bolt might not be a long lasting solution. A metal sheath would transfer forces to the base of the mast much better. So I made one, again from 0.7 mm brass. I silver soldered it but poorly, as the edged did not touch well.
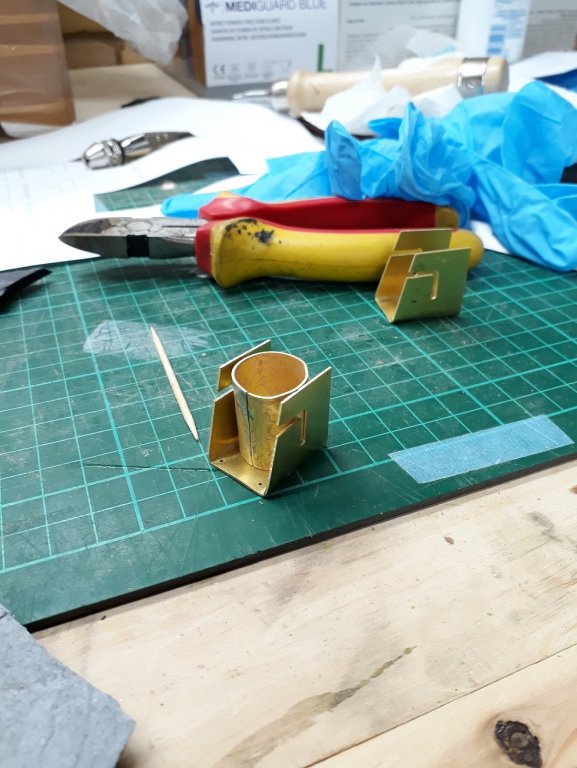

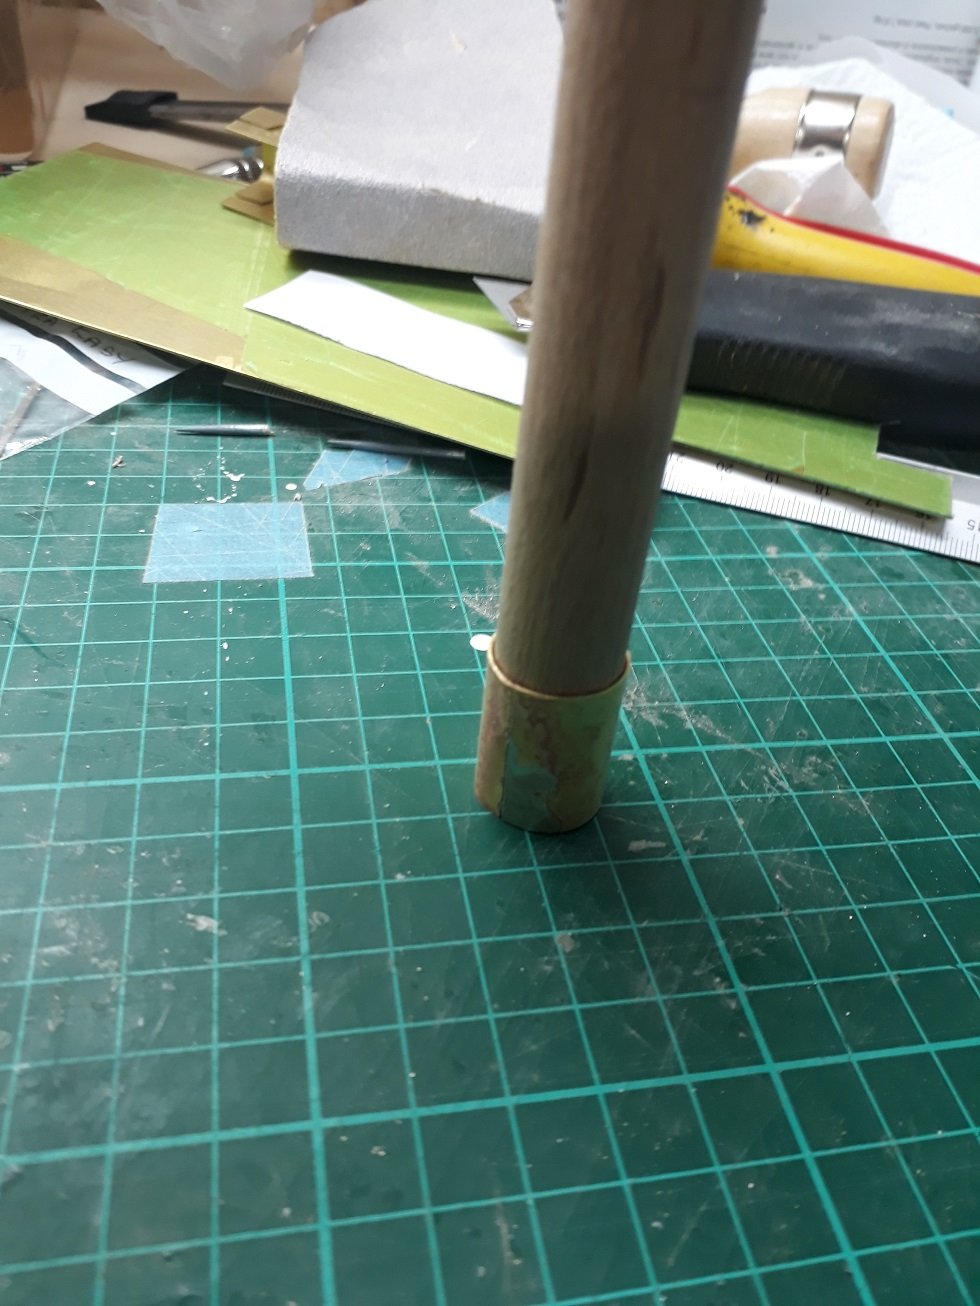
I like this set up but the metal sleeve was not a very good fit. I cut the joint, sanded the edges and silver soldered it again. I had to lightly sand the base of the mast but overall a much better soldering job and a much better fit.

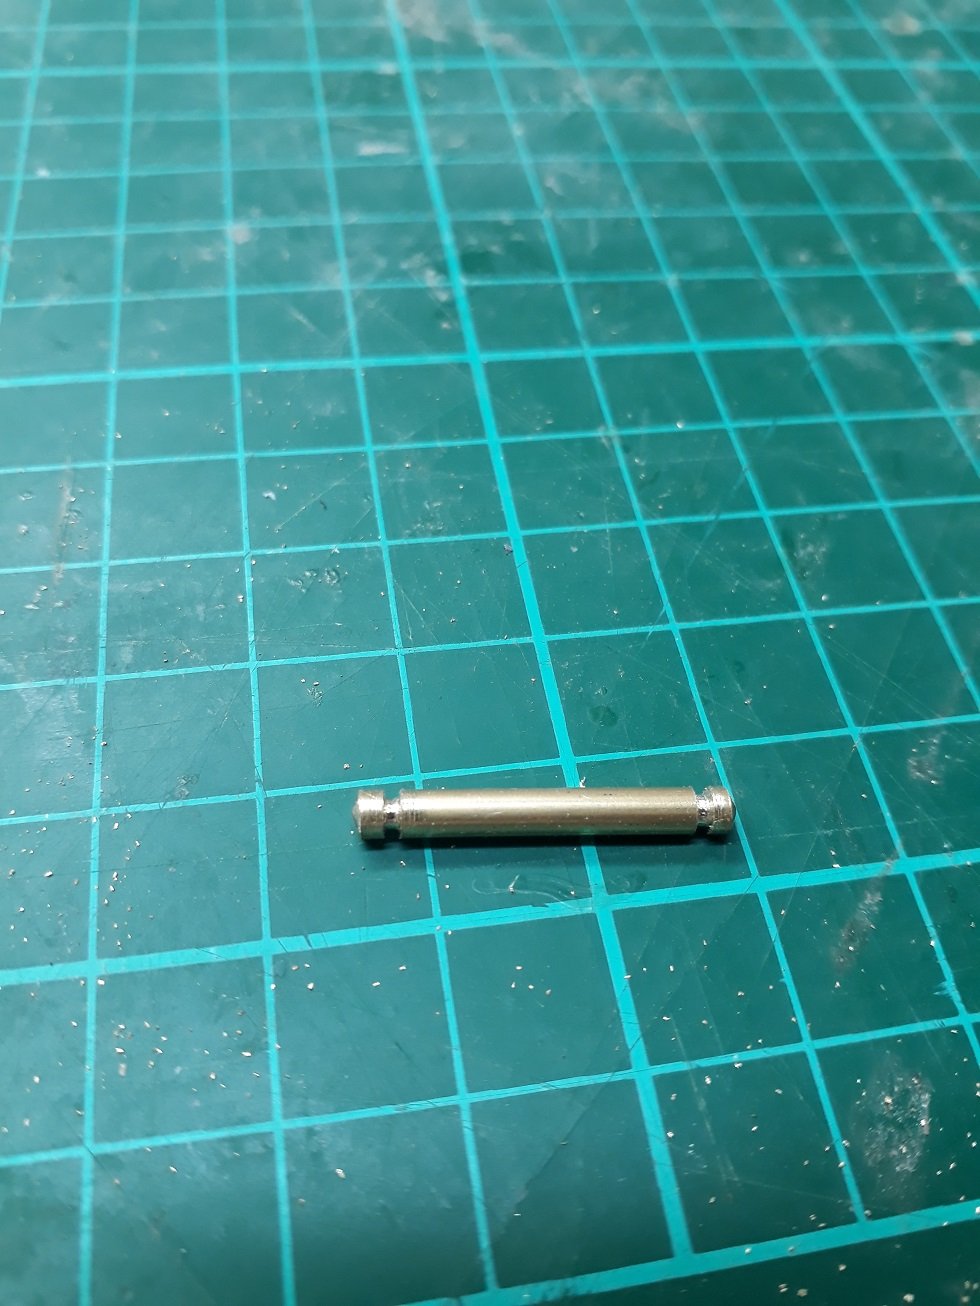
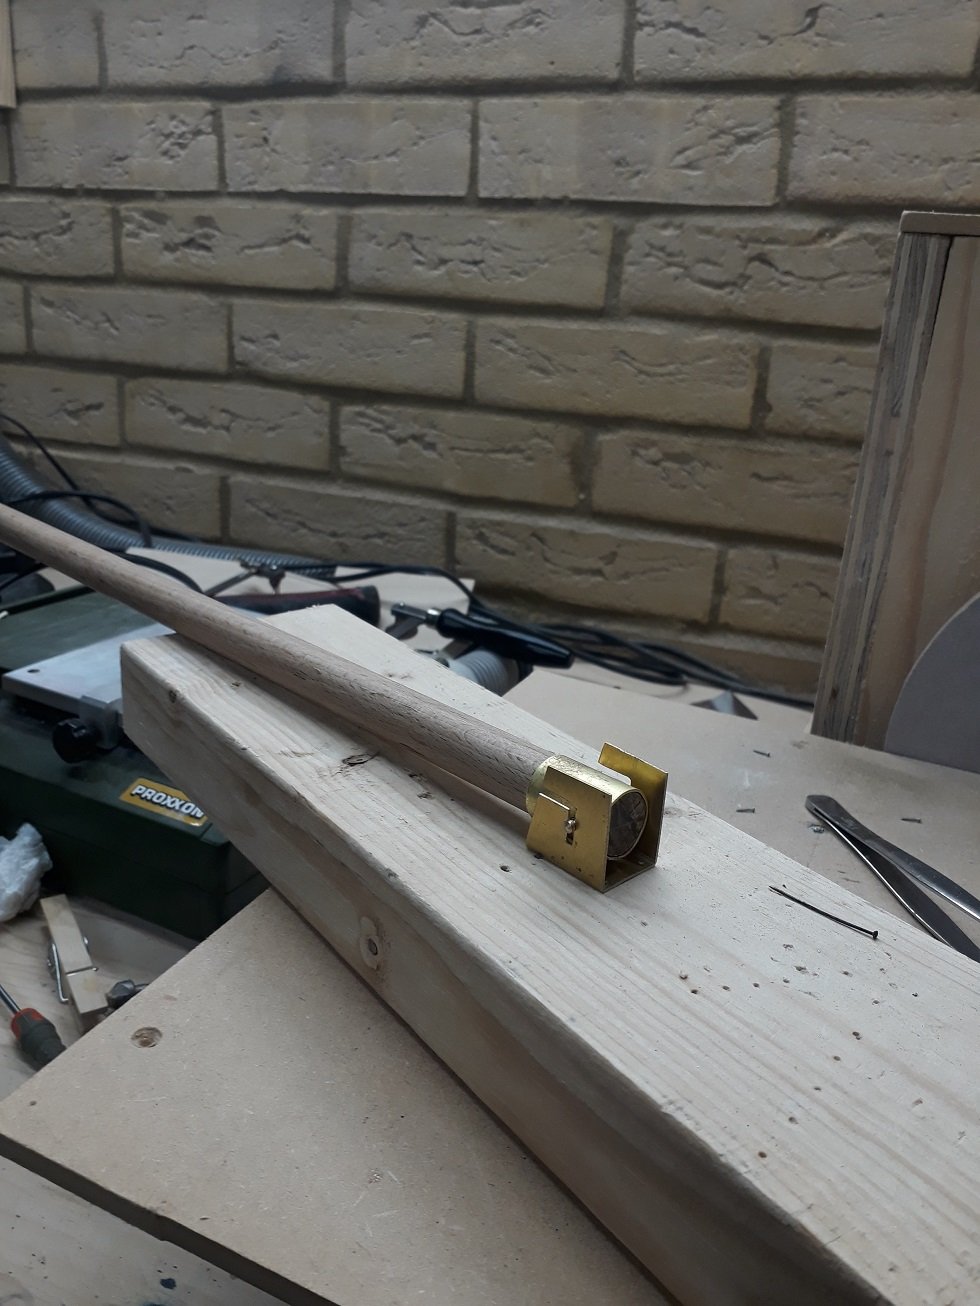
I made the axle, 3 mm brass rod secured to a drill and 2 groves filed down to 2 mm. I finished the edges on the disc sander. It fits like a glove!


Next, I drilled a 3 mm hole through the mast and the metal sleeve. A pilot hole was first drilled and then I used a massive 3 mm tungsten carbide drill. The little Proxxon drill did very well!
I test fitted the whole assembly with the tabernacle screwed on a piece of timber. Everything came together perfectly! And not only that, the tabernacle actually works and the mast very easily comes down! It is also very stable laterally despite the huge leverage from the tall mast.

I could not resist taking a short video!
Now I need to clean, acid etch, prime and paint everything and then put on the boat. I might also solder a bar on each side of the tabernacle to provide points to attach cleats.
It felt good working on the boat again!
Best wishes for a Happy New Year!
Vaddoc
-
-
Thank you all! Your support is much appreciated.
In between, fevers, teething, Christmas preparations and tons of work, I have not visited the shipyard. The boat, tools, timbers, all are frozen and dark with spider webs building!
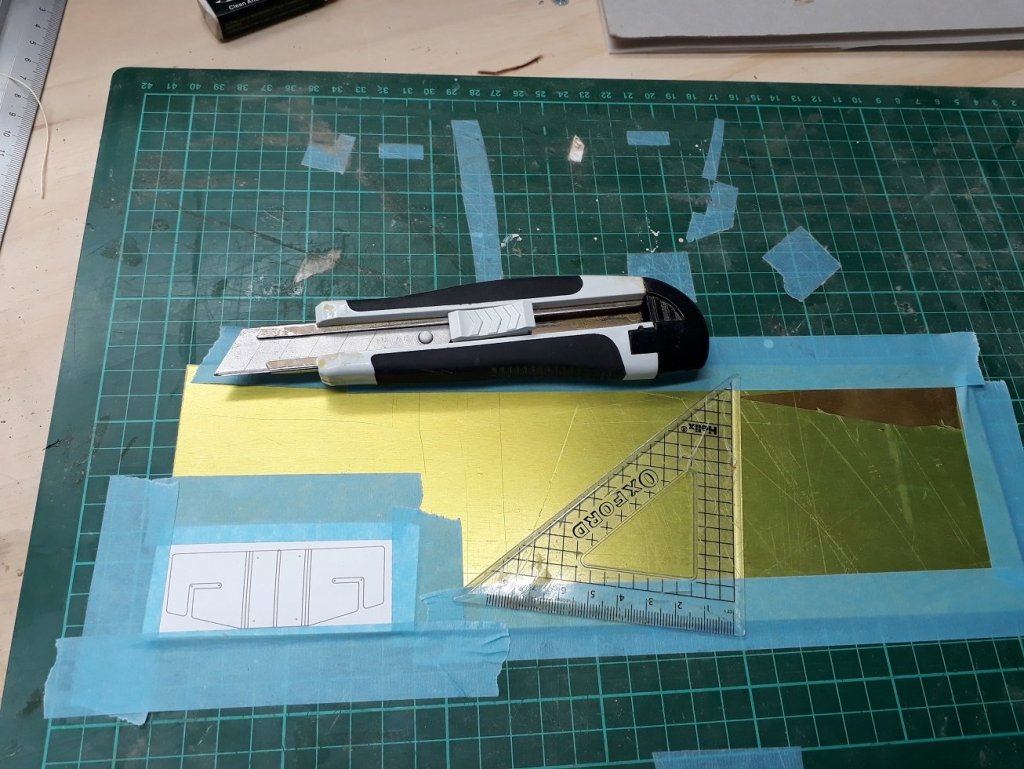
Still, I decided to make another tabernacle. It will be a different design, much smaller with fewer welds and I intend to paint it off white, the same colour as the deck.
I stole an hour to design it on Rhino. I made two versions as due to the curved cabin top, some extra width may be needed. I also thought of a kind of through axle, grooved at both ends, to be used instead of a bolt.
.thumb.png.dfca2a20cb138c493a0f4759310fb829.png)
.thumb.png.6ec656fc712a6c4f2185590f0d6e8b1f.png)
.thumb.png.2fb6fd3760b41ed42f9656fa14d2fbc9.png)
I may find some time in January to work on the boat and see how this design will materialise
Regards
Vaddoc
-
-
A couple of issues to consider
1. There can be a massive difference between cheap and expensive in how the chisels are constructed, as microchisels have complex shapes (V, U) eg uneven thicknesses etc
2. They are much more difficult to sharpen than plain chisels and more easy to ruin
My very cheap (non micro) chisels perform as well as my Narex one, but I can sharpen to a reasonable degree. I would invest more to the sharpening than to the chisel itself (although the chisel should be made of some reasonable steel)
There is also that Russian chap that makes those wonderful microchisels, very reasonably priced. There are discussions with info somewhere in the Forum
Regards
Vaddoc
-
I have had excellent results with system 3 brushes
https://www.amazon.co.uk/Daler-Rowney-System-Brush-Case/dp/B001DJ8EPA/ref=sr_1_1/261-5851405-9161227?ie=UTF8&qid=1545252558&sr=8-1&keywords=system+3+brushes
or pro arte prolene plus.
System 3 and Valejo (thinned with the hand bush media + retarder) produce great results, no brush strokes.
- Canute, paulsutcliffe, mtaylor and 1 other
-
4
-
Thanks for the tip Roger, request sent to Santa along with reassurances I 've been a good boy!😁
- Roger Pellett, druxey, mtaylor and 1 other
-
4
-
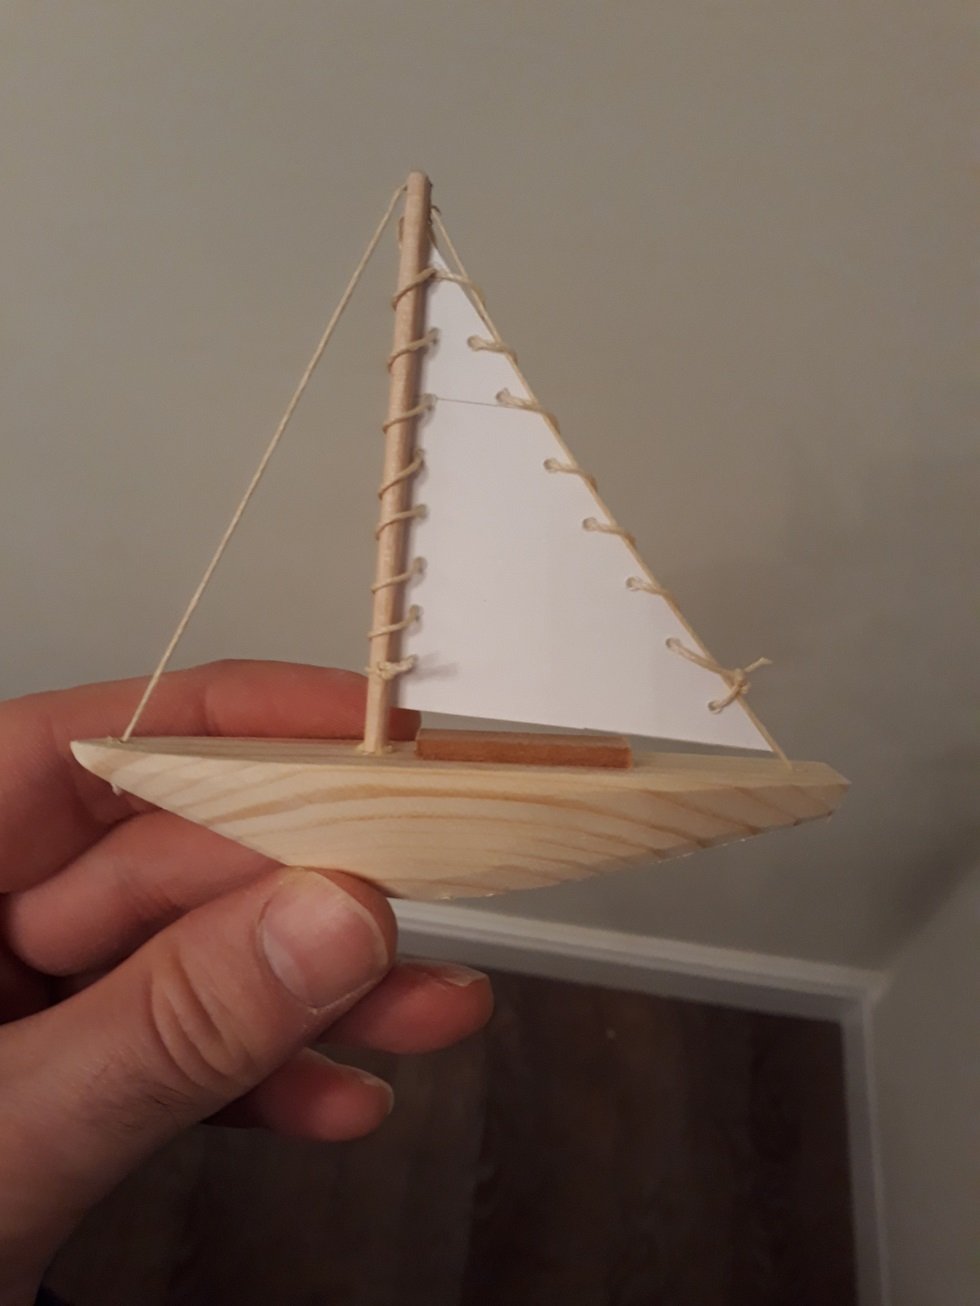
Following lots of testing I think I ll be alright for ropes. However life got so busy that I have not really been able to work on the boat almost at all. This is likely to continue for the foreseeable future. Very minimal progress in 6 weeks!
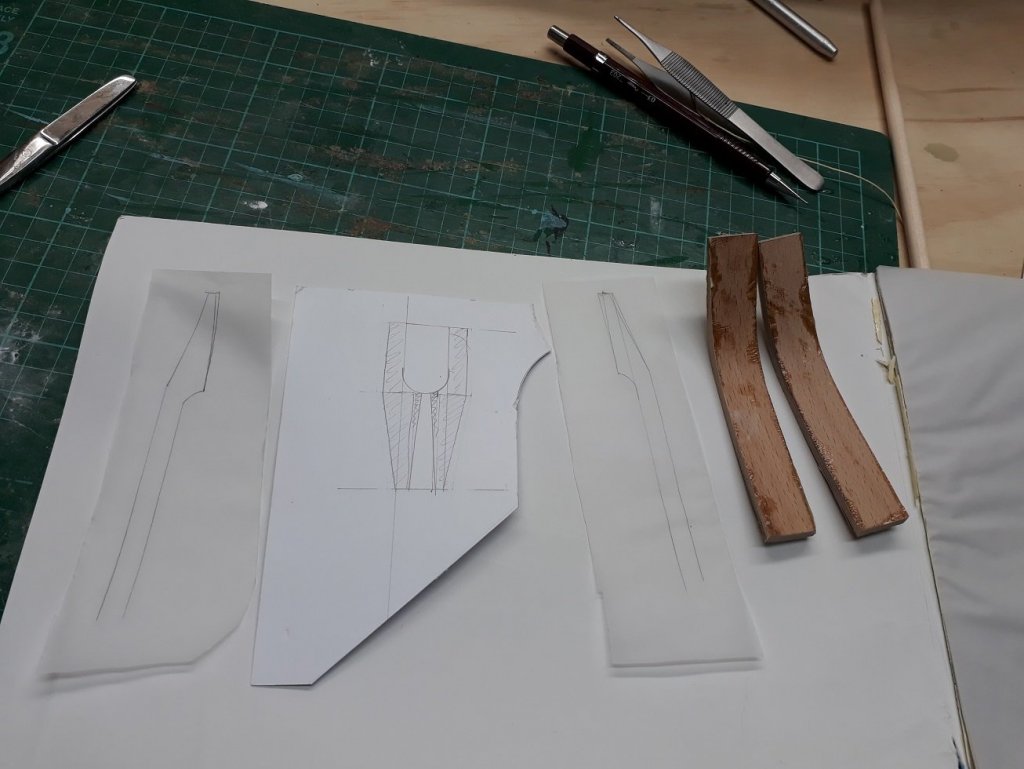
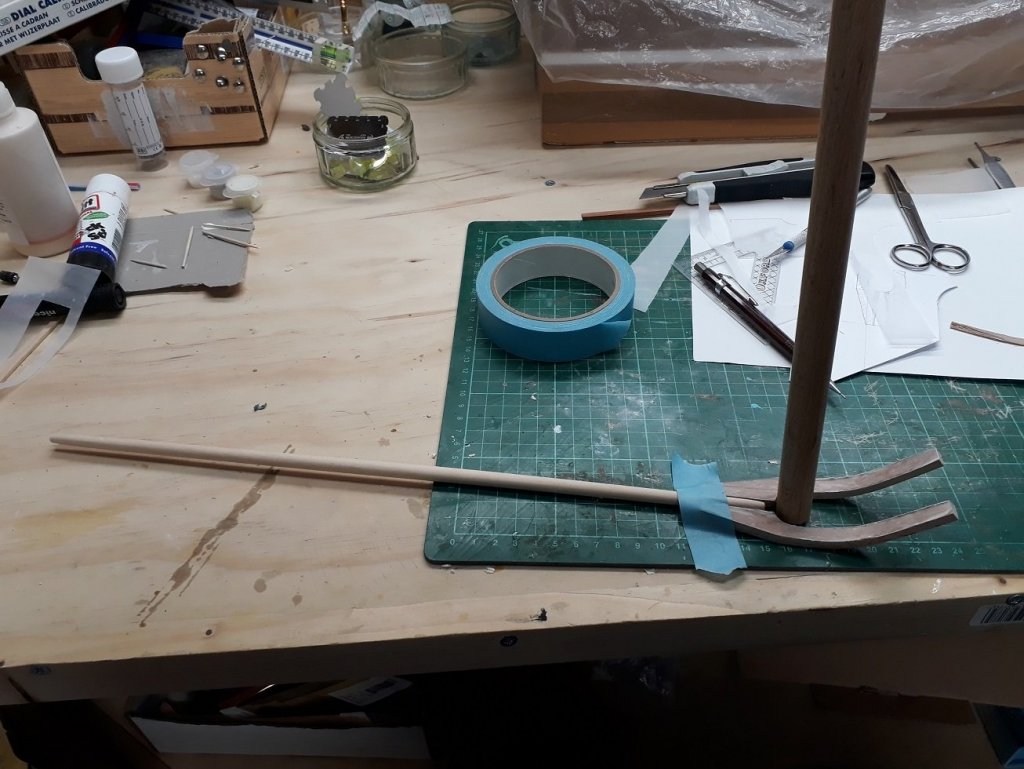
The laminates for the gaff jaws came out fine.
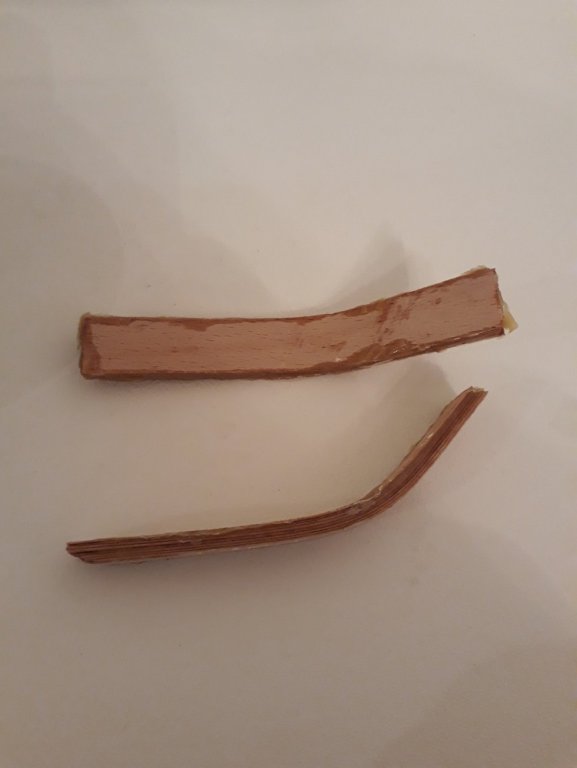
My 4 year old saw a piece of the jig I used for the laminates and told me it looks like a boat. Her face lit up when she saw this!
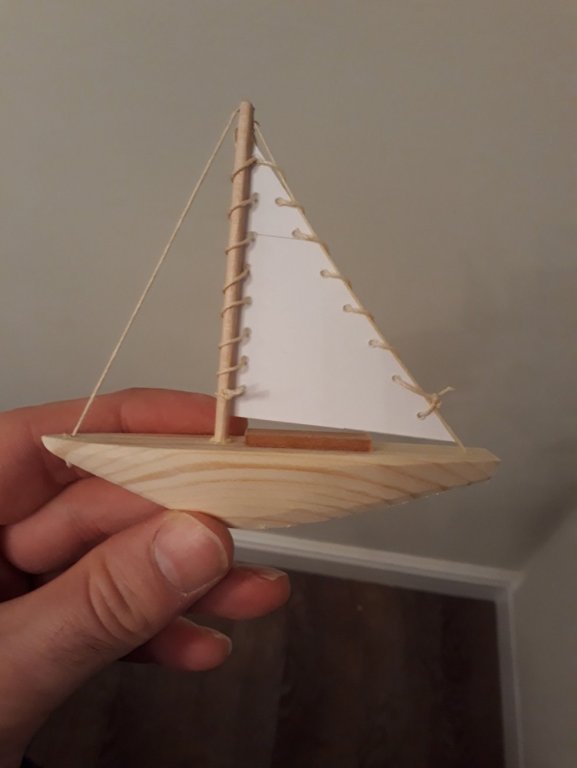
The gaff jaws need a bit of wok but they are coming out better than I expected. Still need a lot of work and clearly are way oversized but I think they look promising.
Best wishes to all
Vaddoc
- mtaylor, cog, Mark Pearse and 4 others
-
7
-
11 hours ago, wefalck said:
Another important point is to not be afraid and tighten up the strands to near the breaking point, only then you will get a good tight rope.
I think this is really important. This leads to a tighter rope at the small cost of few failures.
Isn't rope making great fun?
- Chuck, mtaylor and paulsutcliffe
-
3
-
Thanks both
I am overtwisting the rope but not setting it. I will try though to wet it and then stretch it in segments, I assume without distorting it.
I think though that the problem is with the structure of the cotton fibres. They are straight and they can slide on each other, so the rope will always stretch more. Wool on the other side, has curled fibres that catch and do not slide, this is why a wool cloth that has been washed and shrank will never come back while a cotton t-shirt can stretch and stretch. Man made fibres have very long fibres that may be elastic but will not stretch permanently. I do not know about hemp and the other traditional fibres used in ropes but probably had very different fibre properties to cotton.
- mtaylor, Nirvana and paulsutcliffe
-
3
-
Maybe it would be useful to others to also post my results with rope making. I ve been using my home made ropewalk and have made lots of rope with DMC cotton. The biggest problem is that it stretches and the rigging loosens up and sags. I am not sure what to do to prevent this. So here it goes:
When using 1 thread per strand, the twist of the thread is importand. When using multiple threads, it does not matter.
Generally linen is fuzzy, maybe it can be burned with alcohol flame, maybe worth it if t does not stretch.
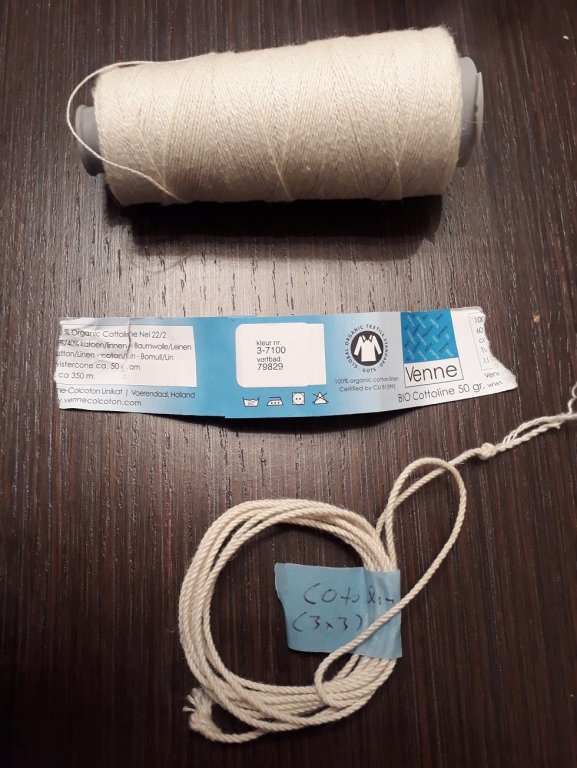
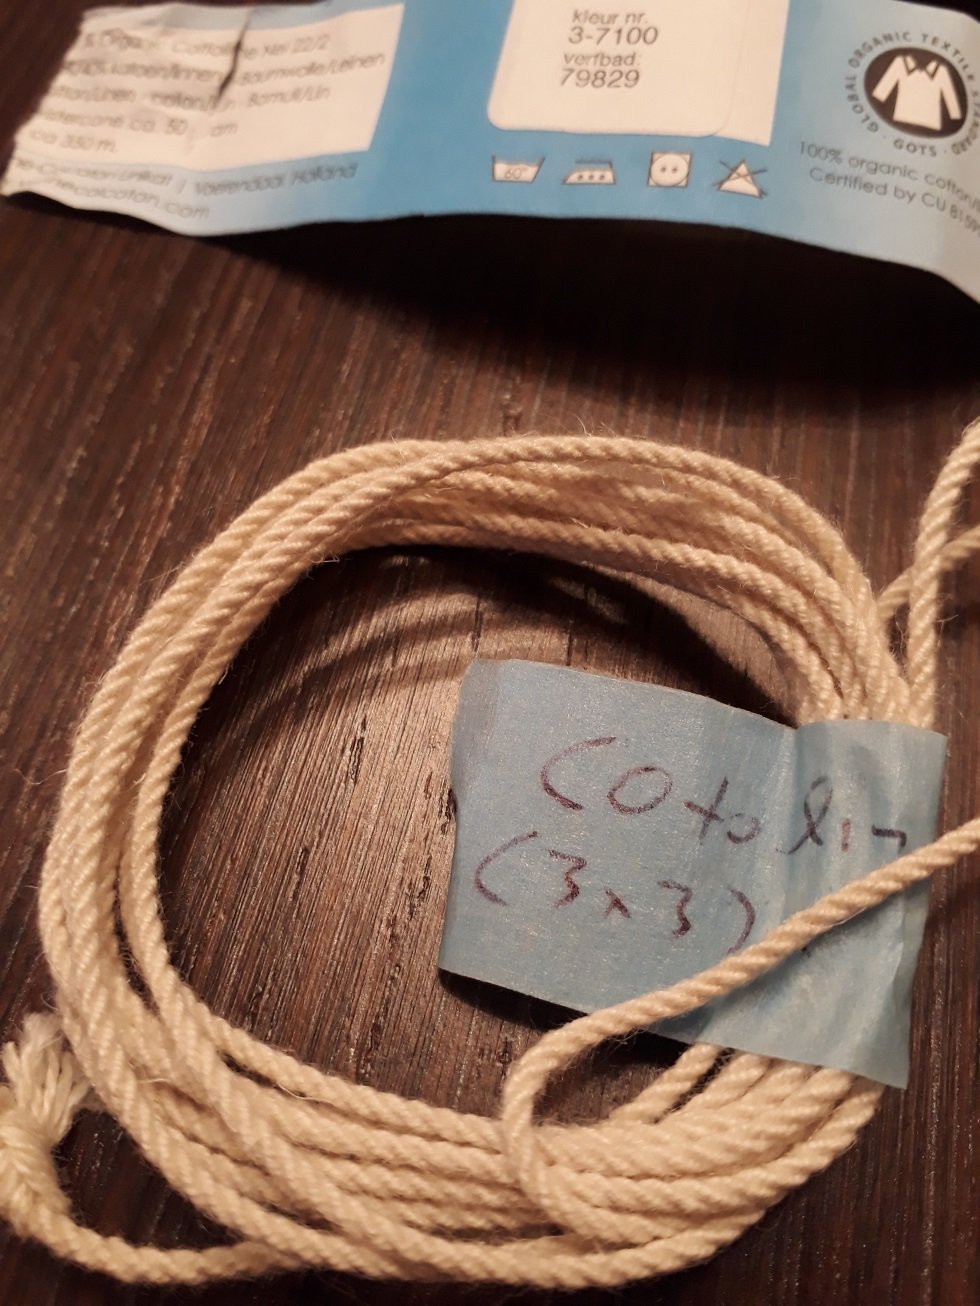
1. Cotolin, 60% cotton, 40% linen, 22/2, left twist. Very nice, supple, much less knots than the usual linen. Quite fuzzy though. 3 strands, 3 threads per strand, 1.9 mm rope

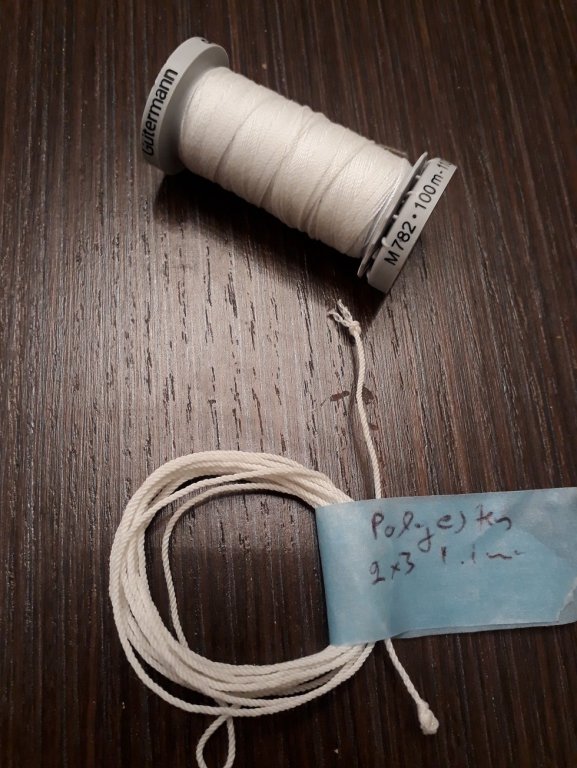
2. Gutermann extra strong 100% polyester. Right twist. Creates a rope with a very "plastic" feel, not nice. 2x3, 1.1 mm rope

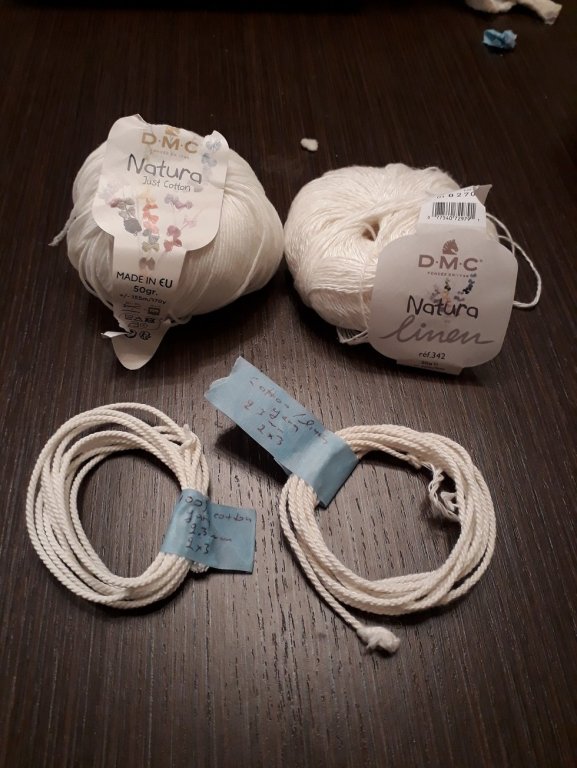
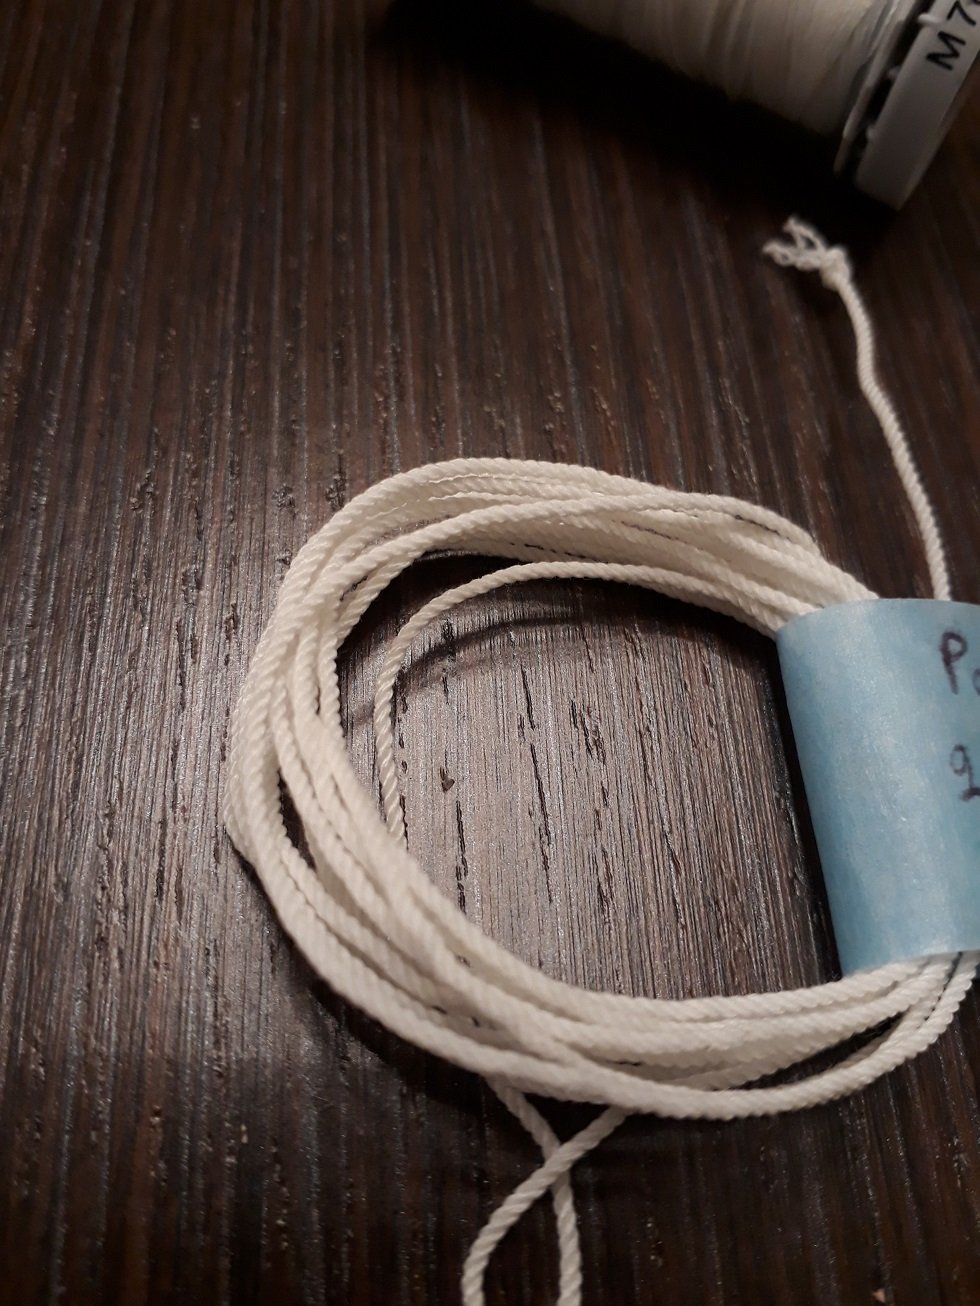
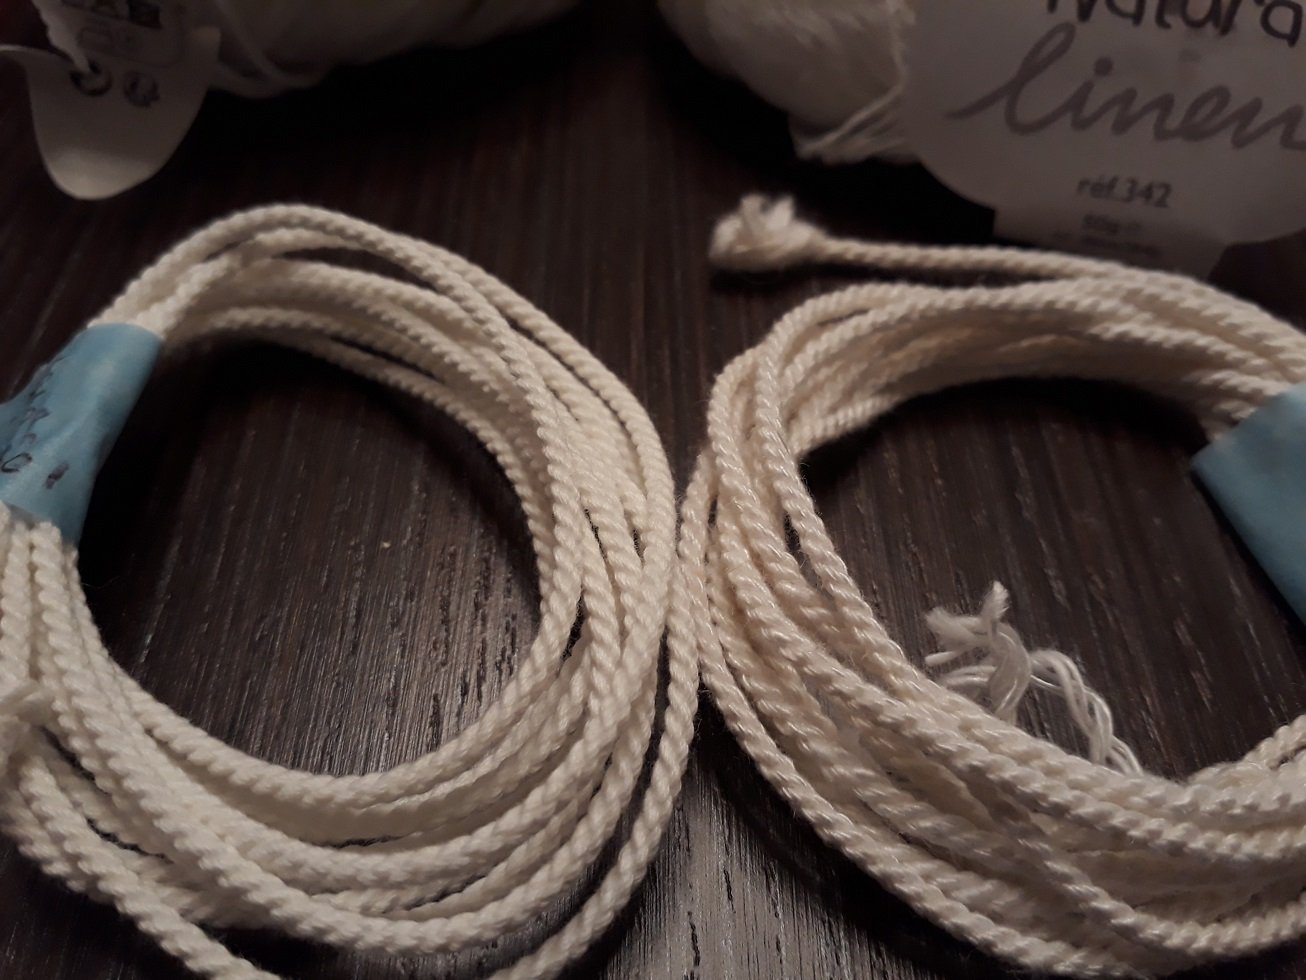
3. DMC yarn
Left: 100% cotton, No twist, very nice thread and very nice rope, 2x3, 2.3 mm rope
Right, 50% linen, 50% cotton, not as sharp as it is fuzzy, no twist, 2x2, 2.3 mm rope

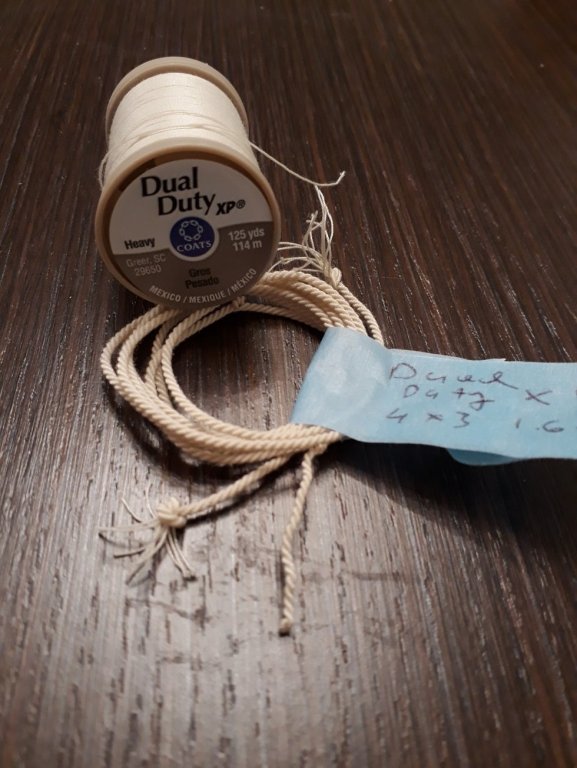
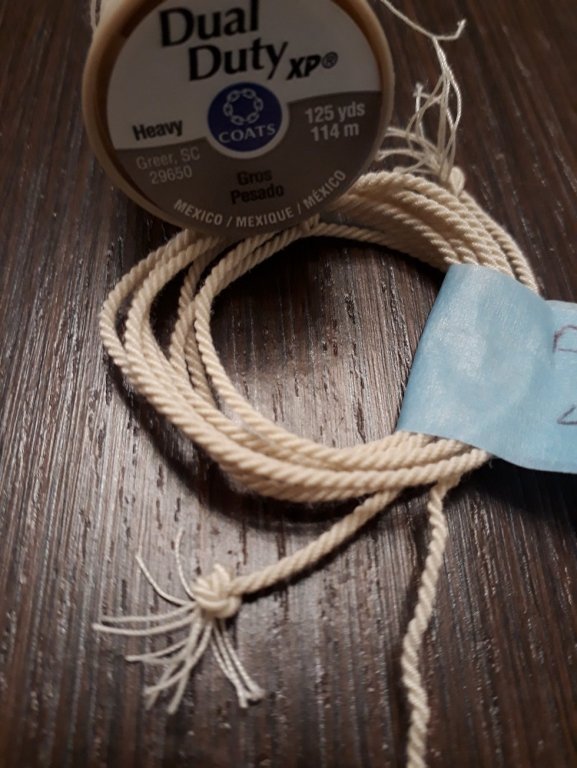
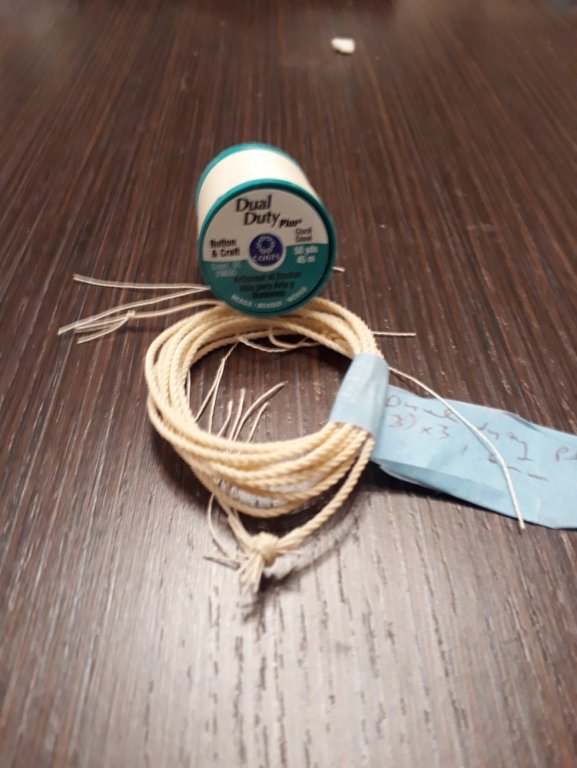
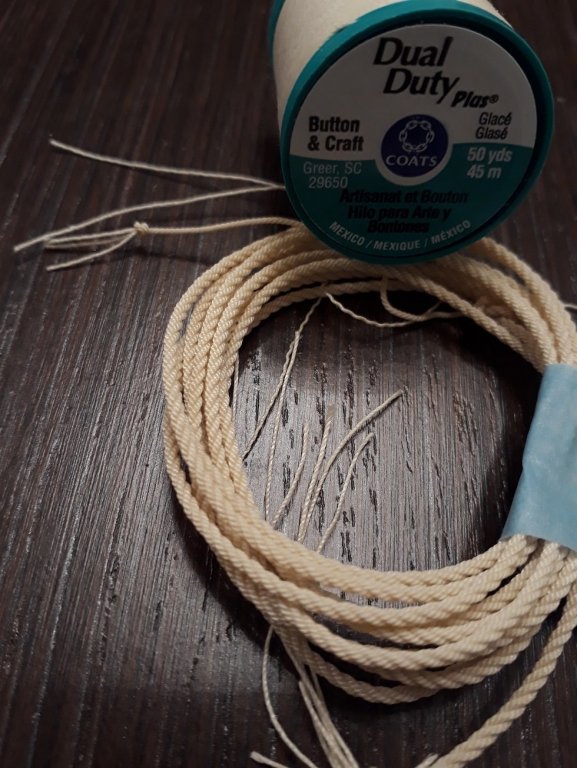
4. Coats Dual Duty XP, 100% polyester, right twist. Despite being polyester, it made an acceptable rope which probably will not stretch. Just a touch fuzzy, barely noticeable. 4x3, 1.6 mm rope.
5. Coats Dual Duty Plus. 75% polyester, 25% cotton, right twist. I had high hopes for this thread but it produced a rope with a plastic feel, not very nice. Left twist. (1x3)x3, 1.6 mm.
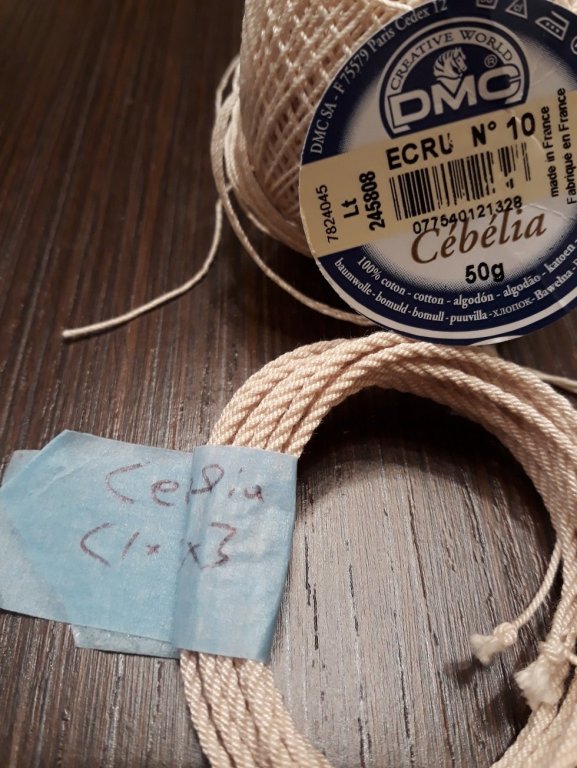
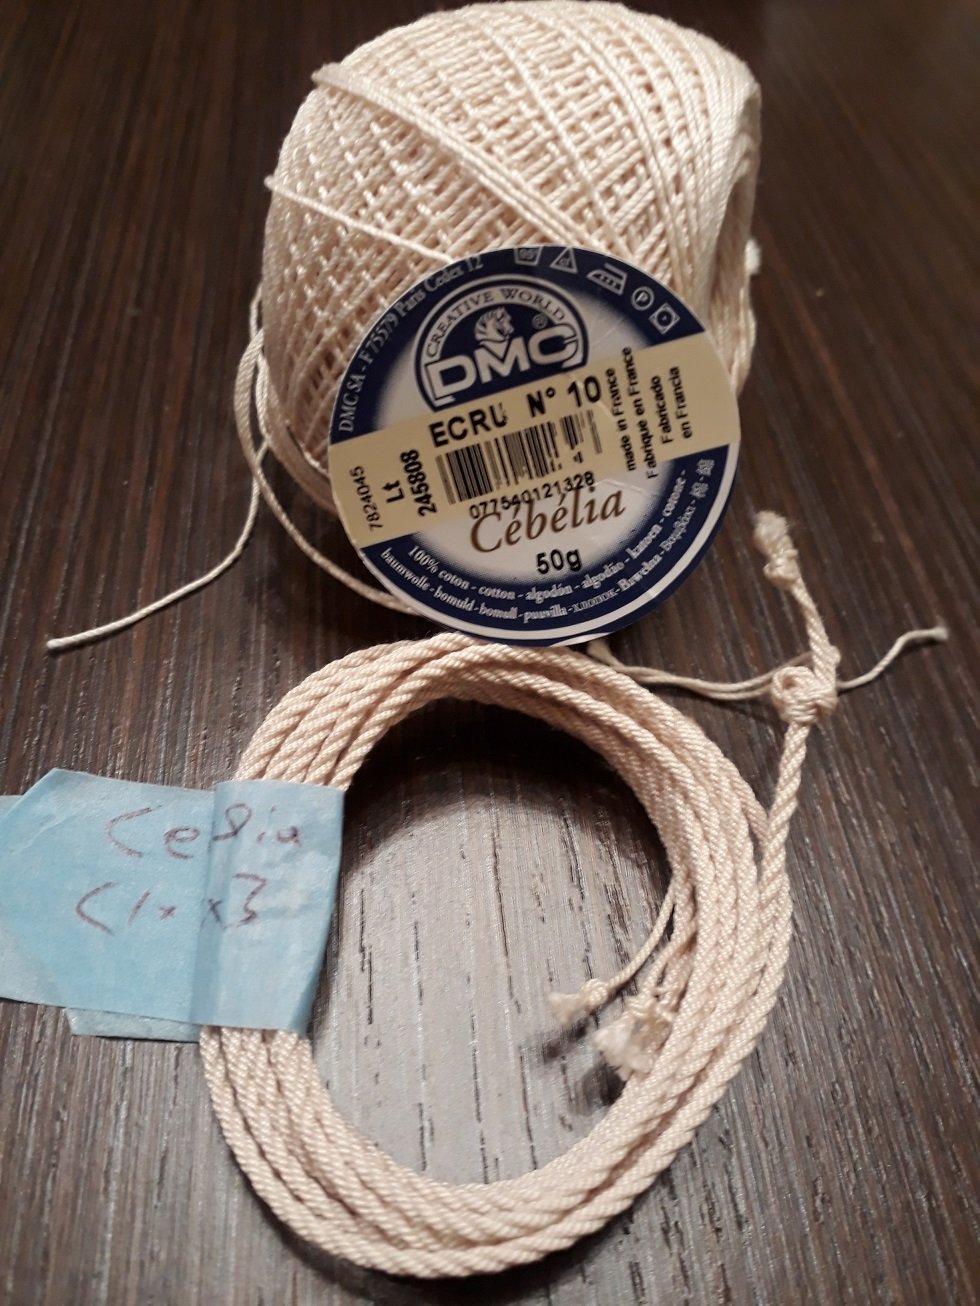
6. DMC Cebelia, 100% cotton, right twist. Wonderful like all DMC threads, excellent rope but the other DMC threads probably more useful sizes. Available in 10 weight that Cordonet is not. (1x3)x3, 2 mm rope.

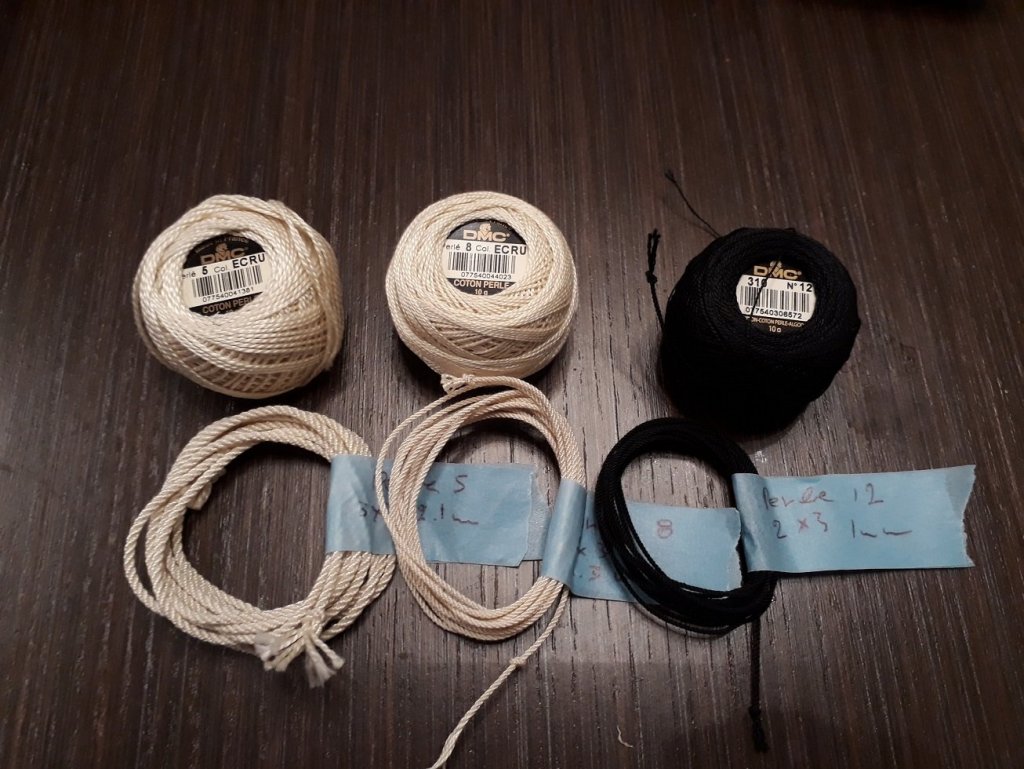
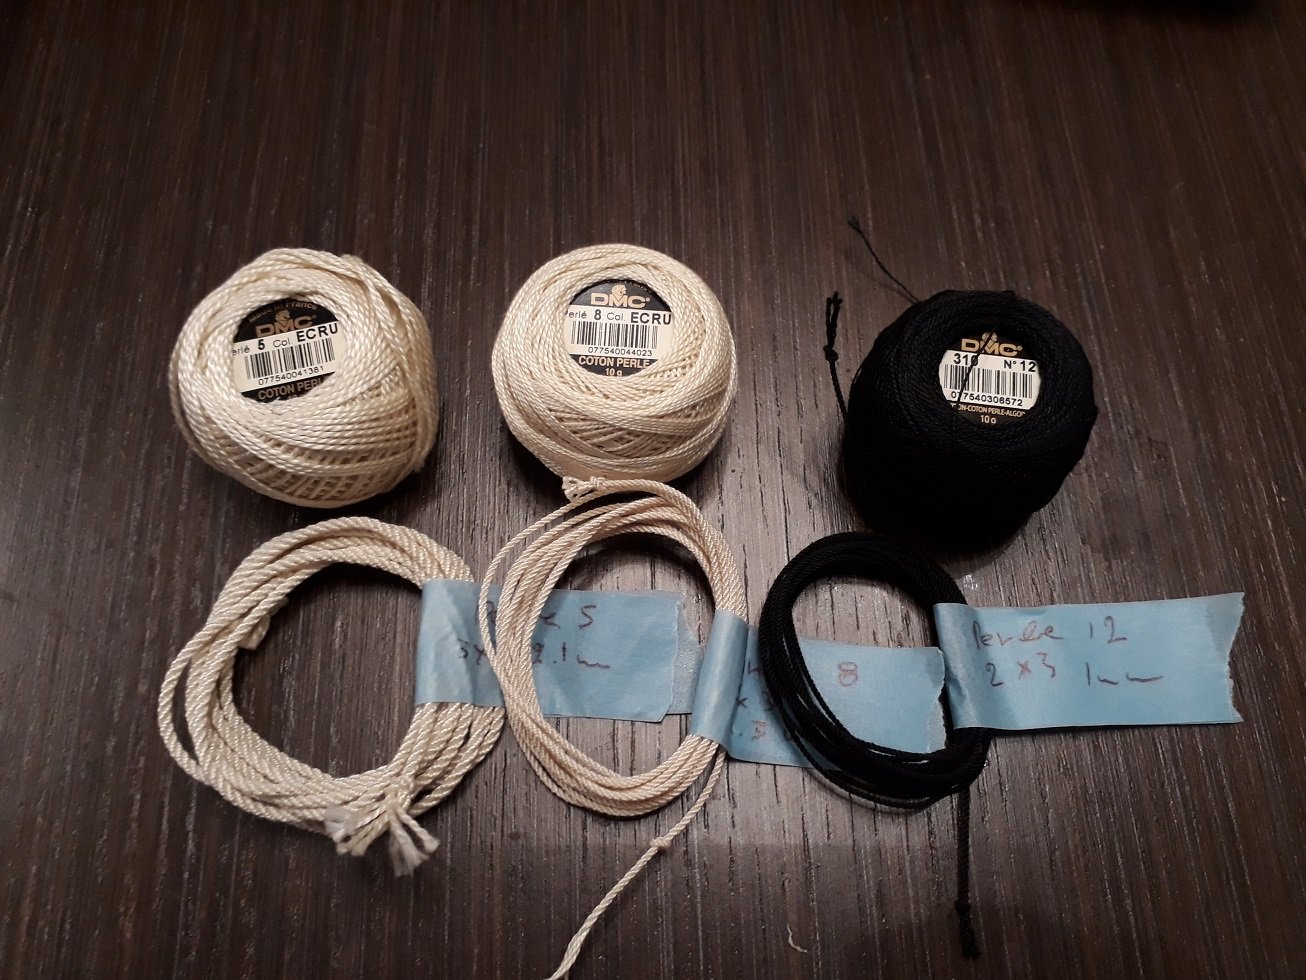
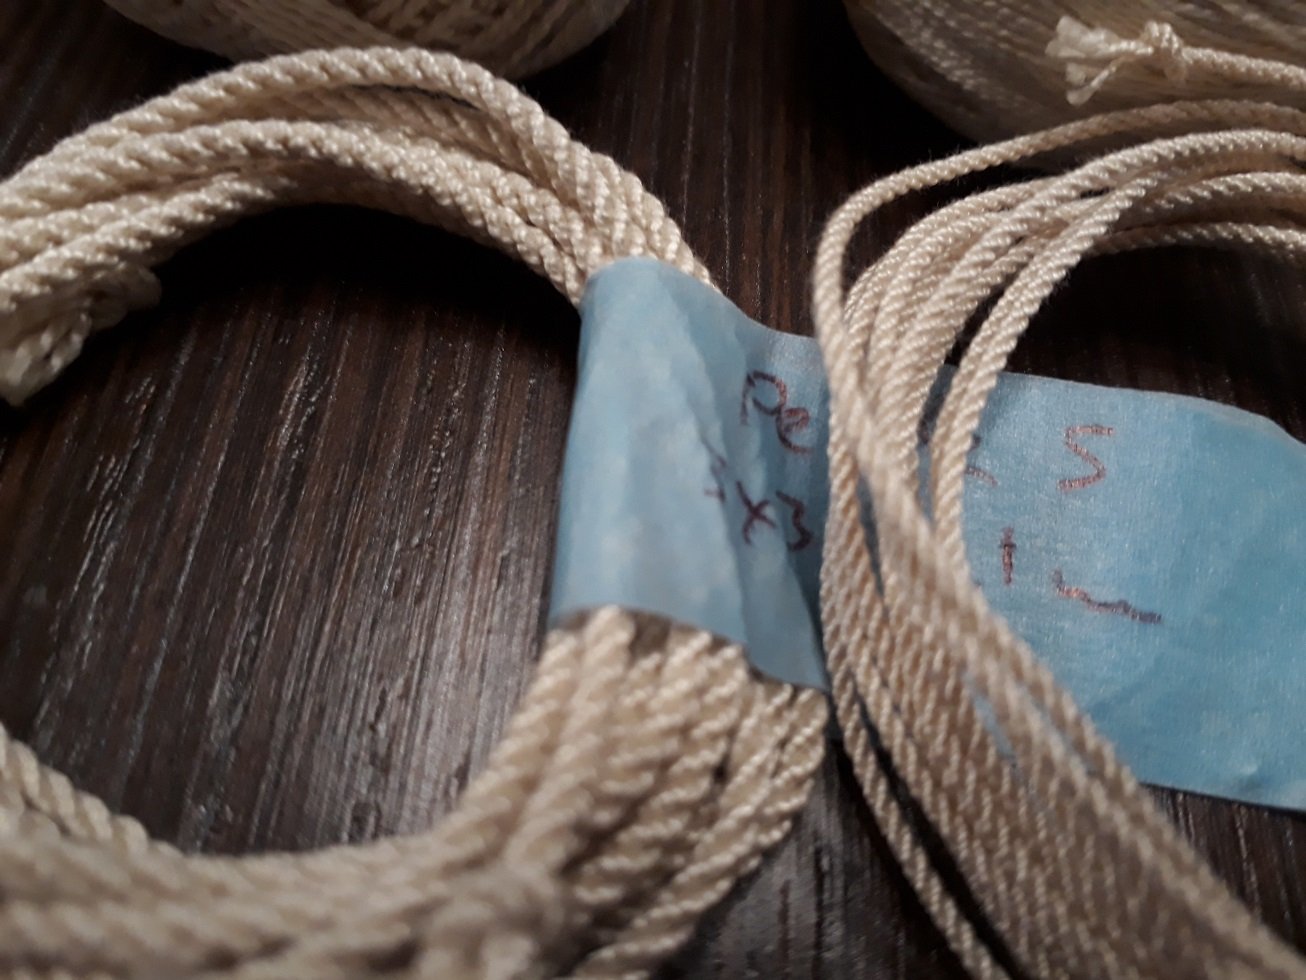
7. DMC Perle. 100% cotton, beautiful thread, no fuzz, left twist. Sizes 3 to 12, lots of colours. Excellent rope. This is my favourite thread for the scale I work (1:10).
Perle 5, 3x3, 2.1 mm
Perle 8, 3x3, 1.3 mm
Perle 12, 3x3, 1mm

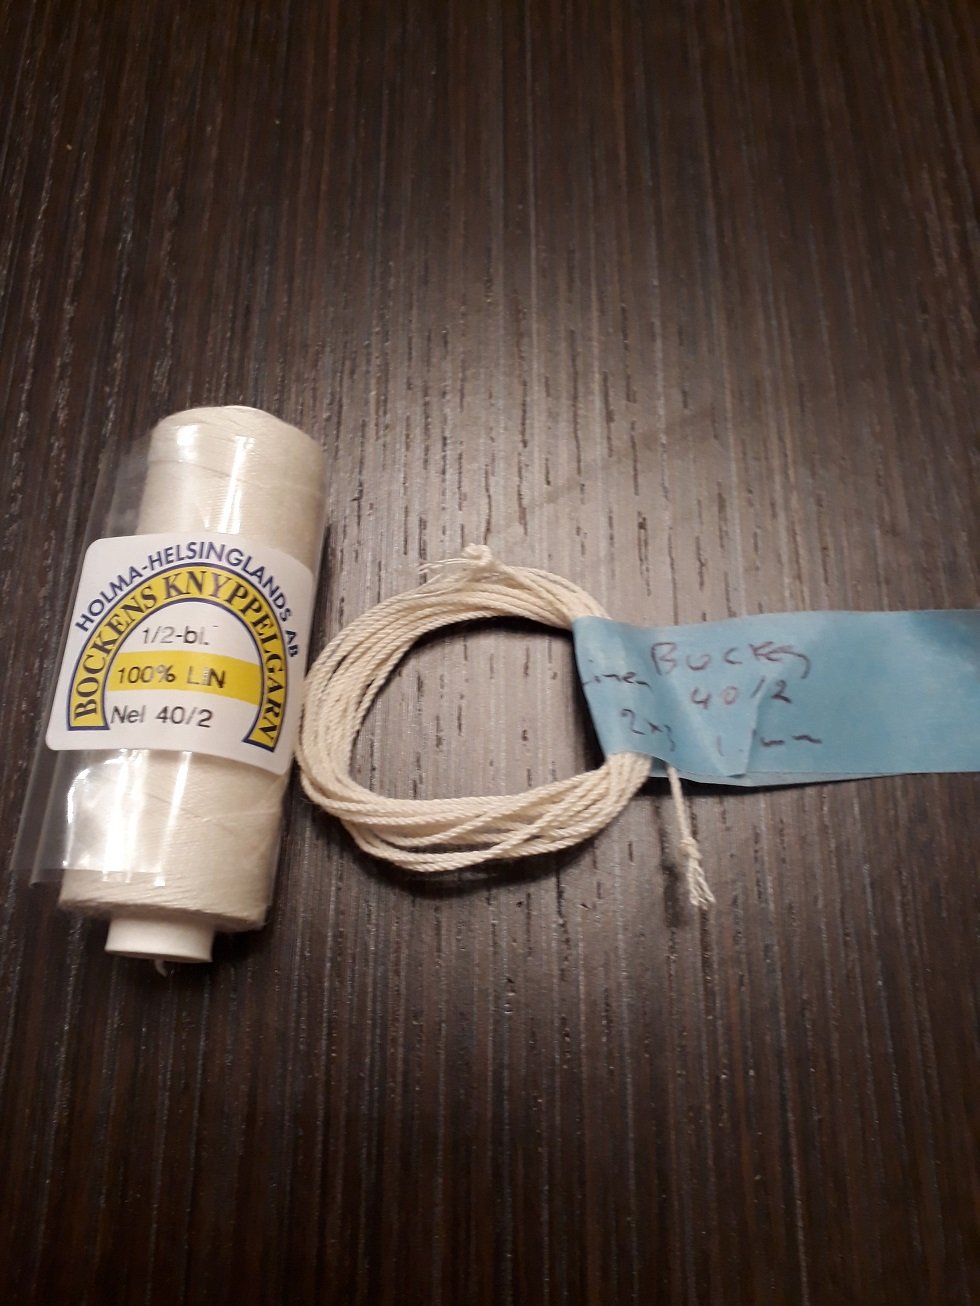
8. Bockens 40/2, 100% linen. Left twist. Fuzzy like all linen threads, also quite a few knots. Not as good as cotton but maybe it does not stretch. 2x3, 1.1 mm rope
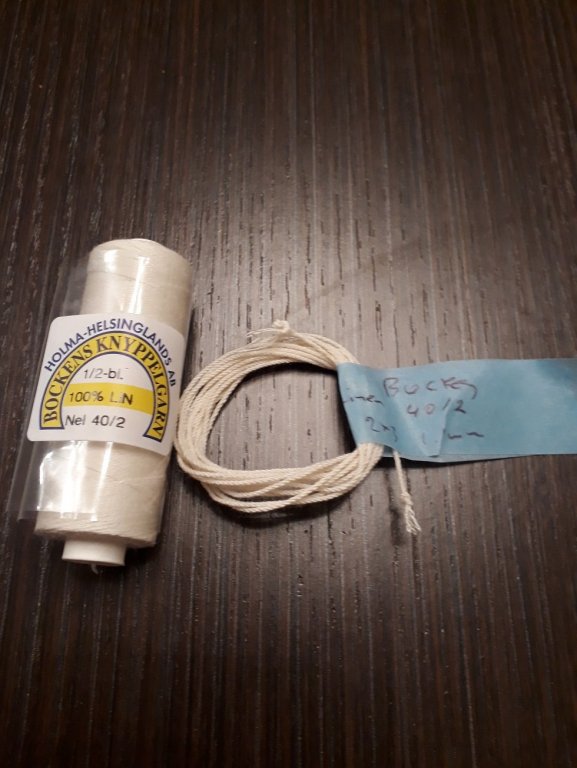
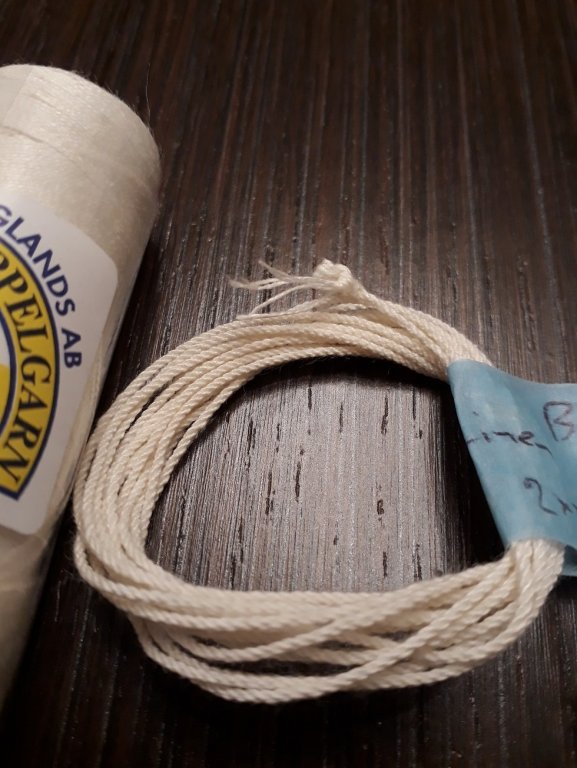
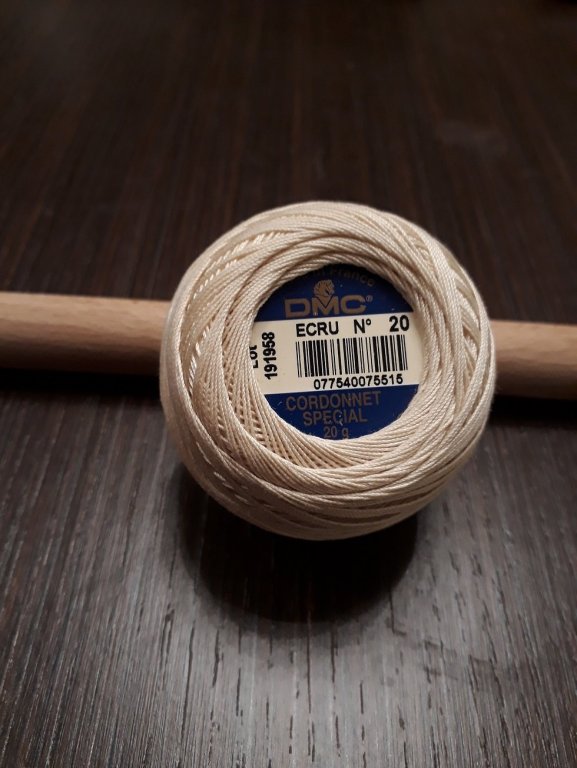
9. DMC Cordonet. 100% cotton, wonderful thread. Right twist, sizes from 100 weight to 20 weight. The 10 weight size has been dropped. Excellent for small ropes and small scale work. I could not find a rope in my stash but it is excellent.
I suspect that the best thread may actually be some synthetic high tech one but these are usually available only commercially and in in huge quantities so unlikely we will be able to find out, test and obtain.
If someone has a tip on how to avoid the stretching of cotton ropes I would be very interested.
Regards
Vaddoc
-
Many thanks Mark, I cannot find any info on rope sizes so your advise/experience is valuable.
Druxey, spot on! I deepened the grooves and there was a massive difference. I still have problems with the bearing at the weight end of the ropewalk, it does not spin freely. I need to work on this.

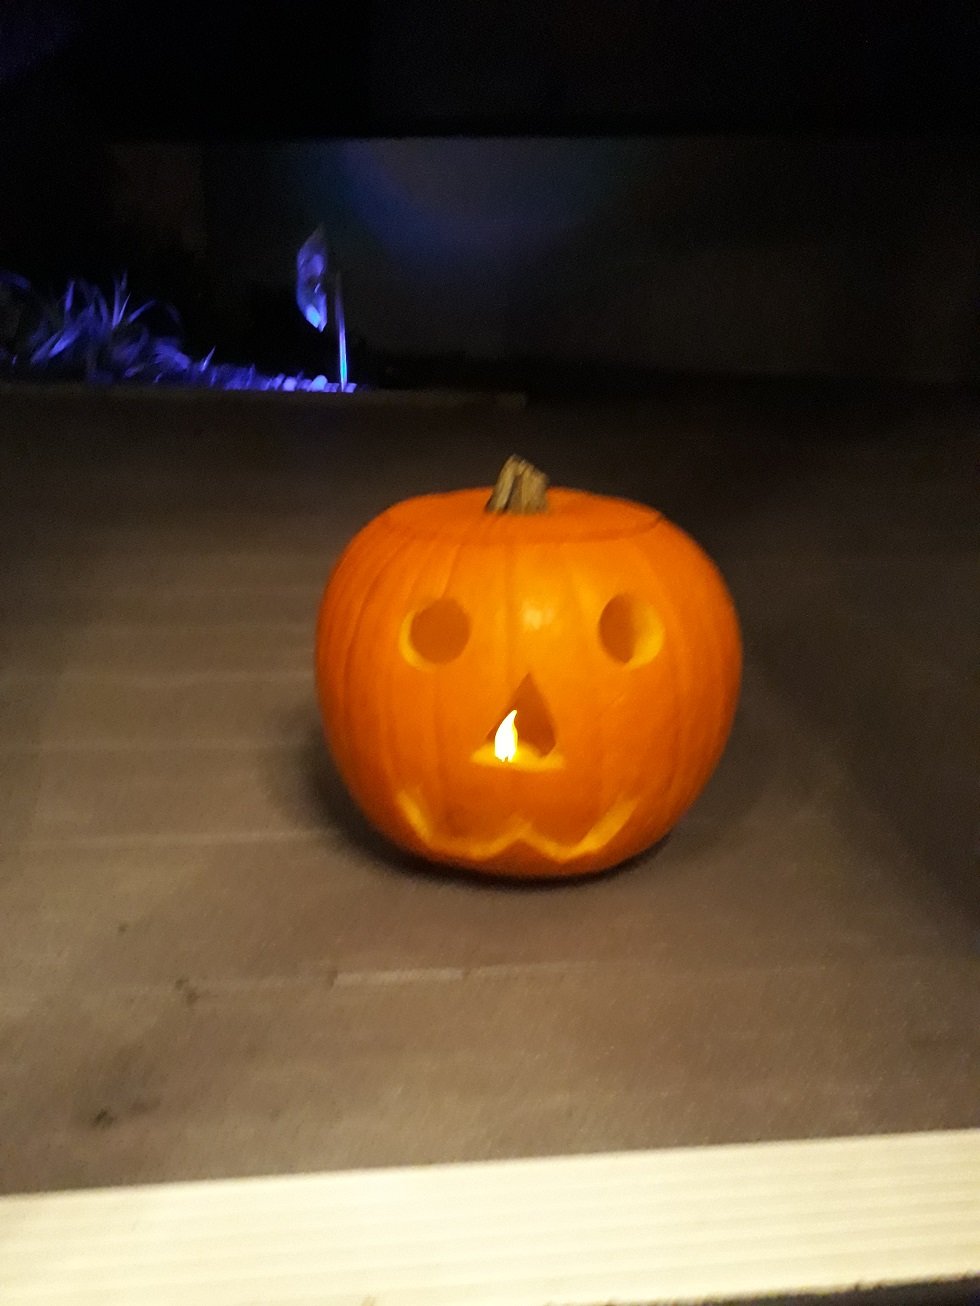
I have been making ropes for a few days now testing threads and sizes and I will post the results in a separate thread. I wrapped it up for today though, as I made a Halloween pumpkin with my daughters!


I have ordered a few more threads and I will make a few more test ropes this week.
- cog, mtaylor, Mark Pearse and 2 others
-
5
-
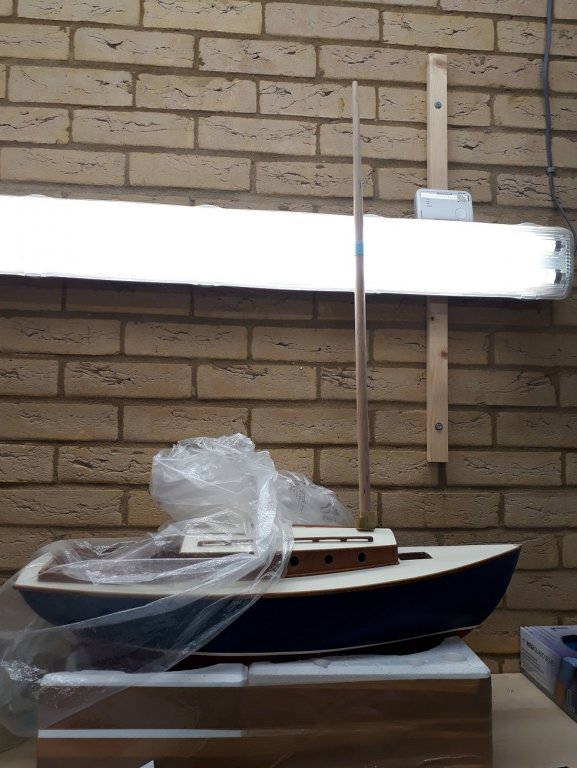
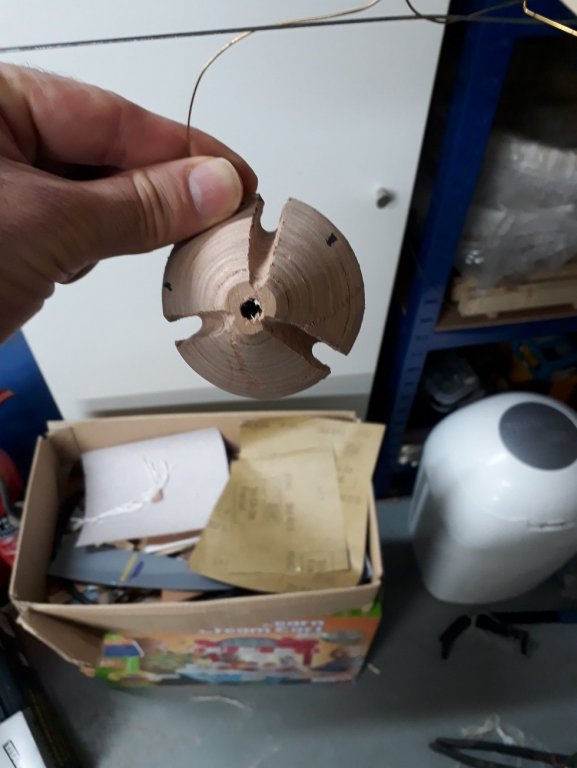
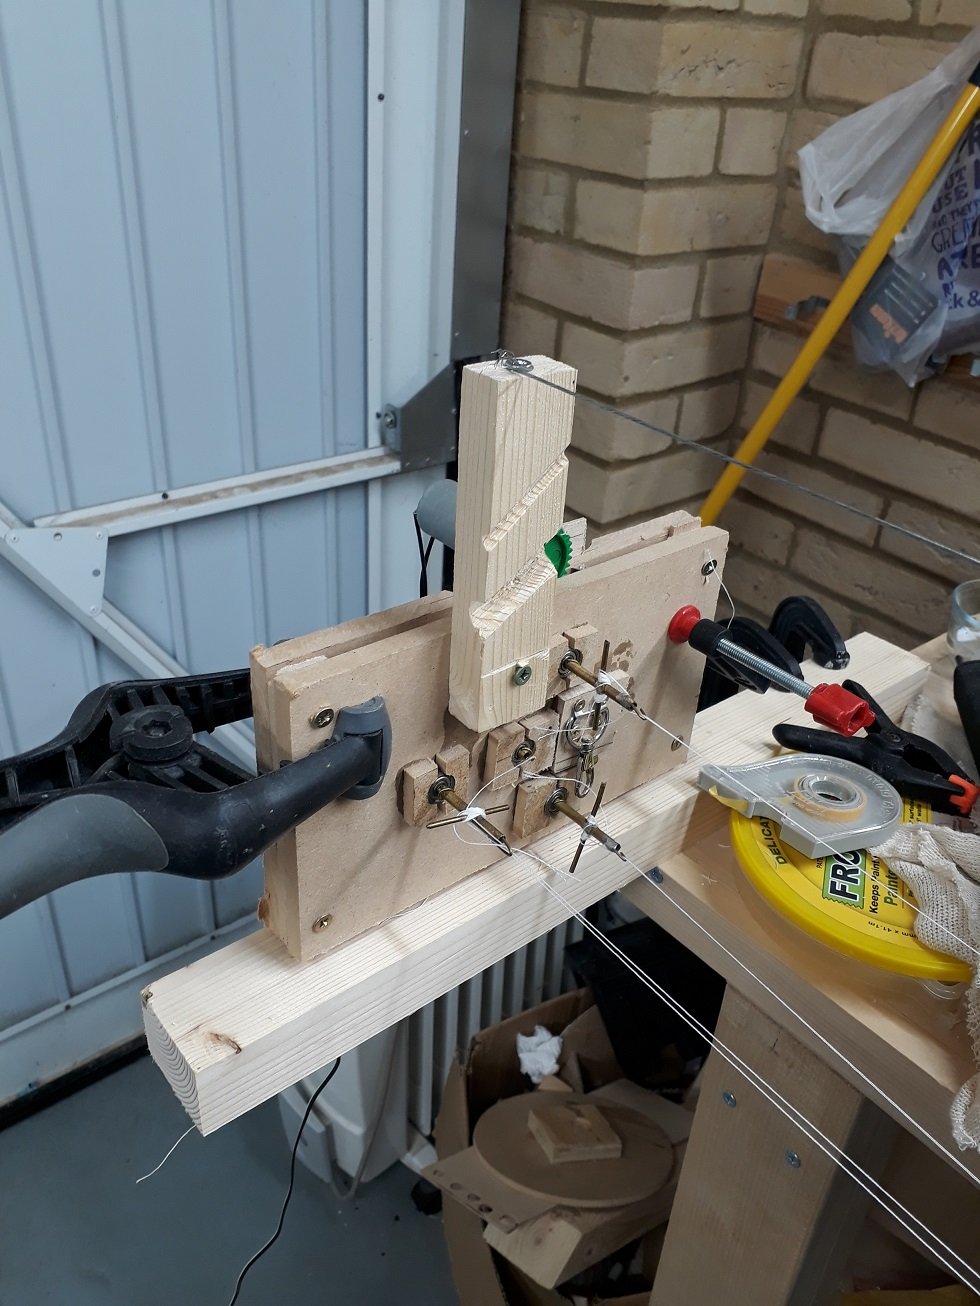
It is very easy and very cheap to make a rope walk by using whatever left over materials that are lying about and a few bits from ebay, like cogs and a motor. But it does need a fair bit of space, the rope machines available commercially are much more compact.
My set up is in the photos bellow, theoretically I can make rope of any length but I am limited by the length of my garage so I get lengths of about 2 meters. Not elegant but very robust, it still goes strong after 5 years. It cost me something like £10 but many hours of work: rope making is very satisfying but time consuming. I think it produces good rope and I can make adjustments to improve the quality.

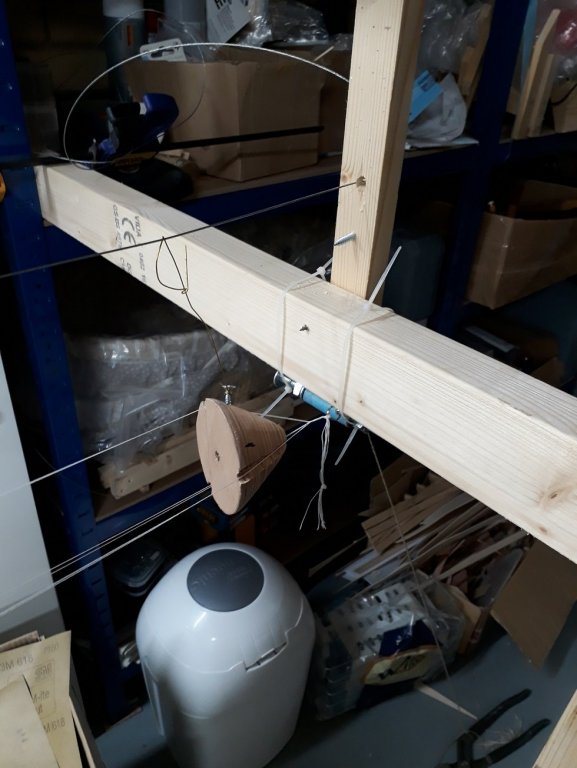

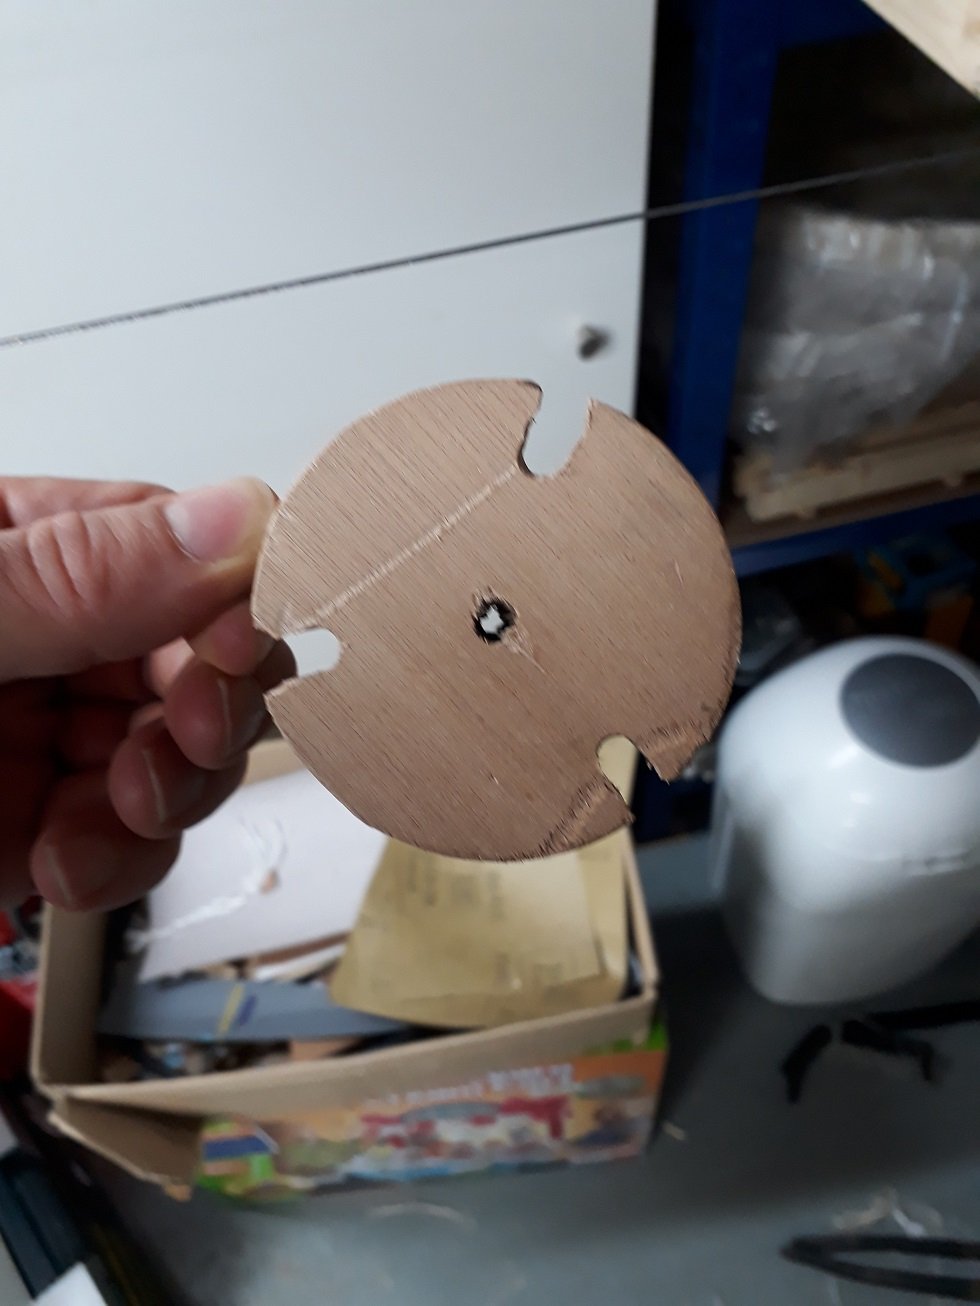
This is an old video, I've since changed the cog for a proper cone.
I will need lots of rope soon so I set it up last week to play a bit. It is probably more time and even cost efficient to buy Chuck's wonderful rope but I really like rope making, it is a bit of an art!


.png.53c1c650367426599dcd09c6b1ea5f39.png)
.png.48df6f10ea4547bb853c86494dcc0dd7.png)
.png.903eb545610c125677f90115706dd222.png)


Deben 5-tonner by vaddoc - FINISHED - Scale 1:10 - a Whisstock yard design
in - Build logs for subjects built 1901 - Present Day
Posted
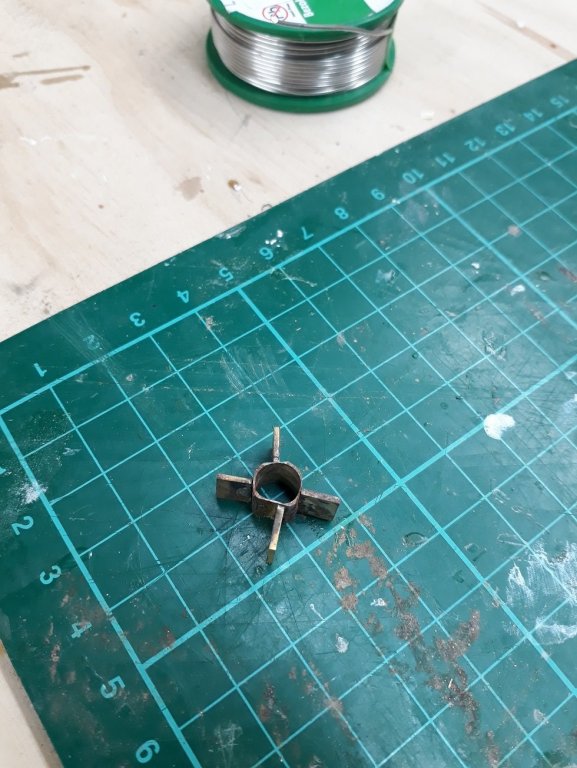
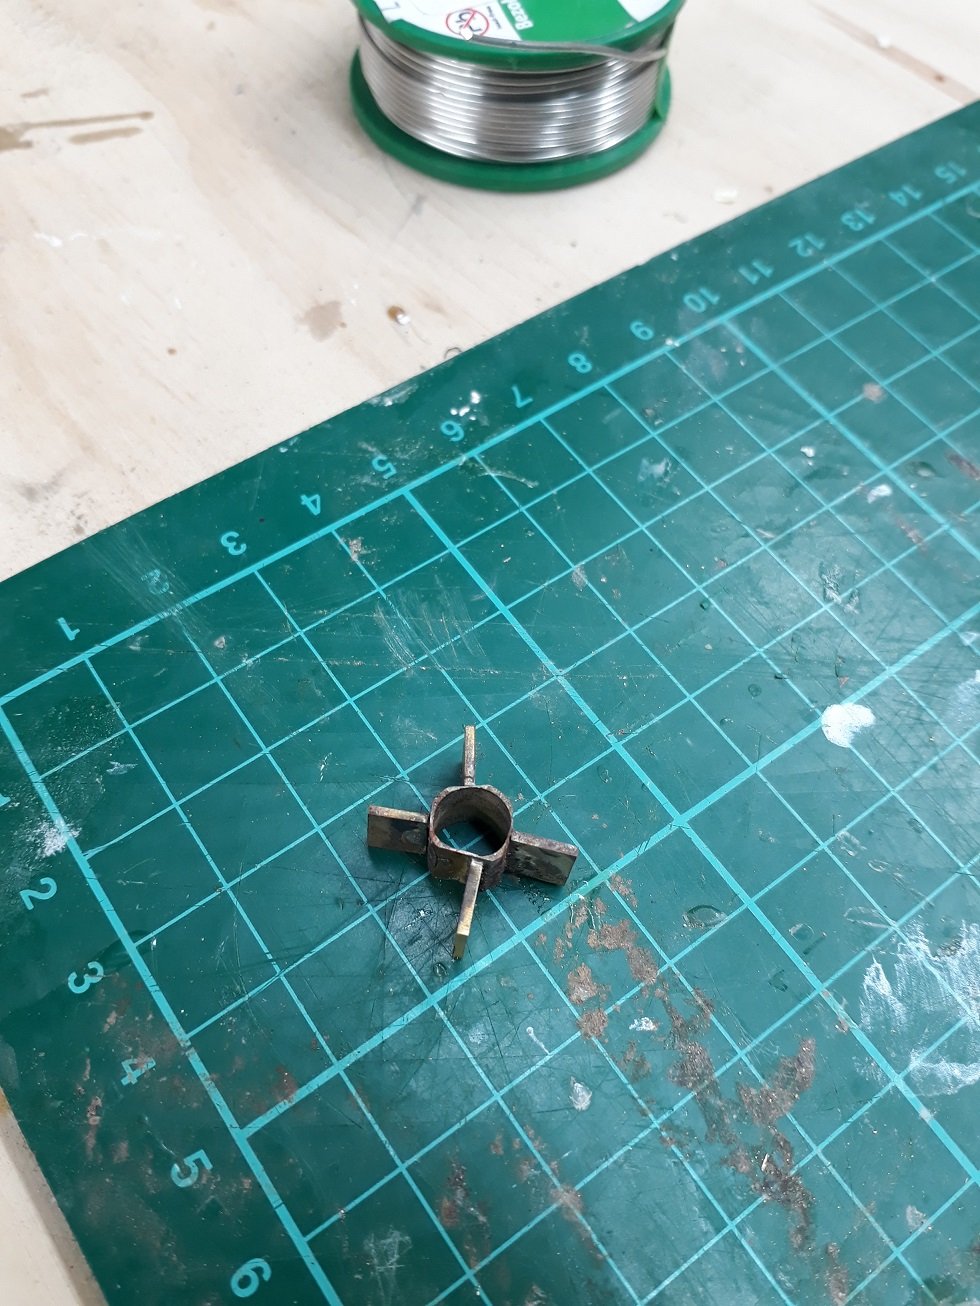
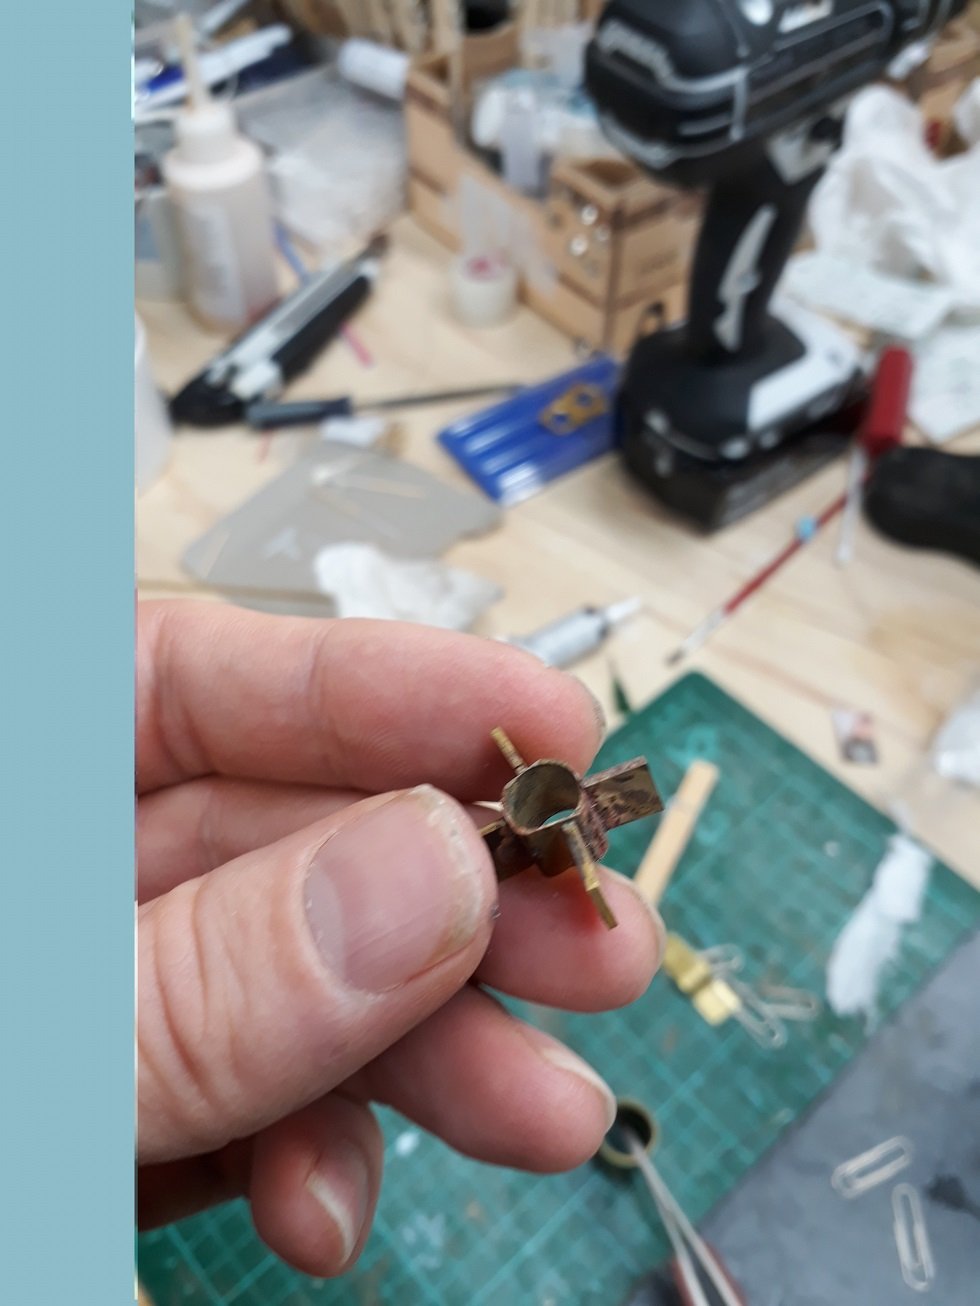
Today I put my newly acquired soldering skills to work and made the cranse iron. I bought some flat nose pliers and really they are essential for metalwork. I am now able to make tubes which is great. I tried the soldering paste but it is messy. Solder strips and borax are much more controllable. The next pic is using paste, the solder splashed all around
The cranse iron came out reasonable, considering this is actually the first item I have ever made. The solder did splash a bit but does not show, I think that the steel brush I used carried over brass so the whole piece is shiny brass colour. I messed up a bit with the holes and also it is not very symmetrical but with the rigging on, it will not be visible (I hope)
I also made some shackles, I think I need to reduce their length and maybe increase the width.
It is freezing cold in the garage even with the gas stove full on, so no more work today.
Vaddoc