

catopower
-
Posts
1,779 -
Joined
-
Last visited
Content Type
Profiles
Forums
Gallery
Events
Posts posted by catopower
-
-
Hi All,
Hope you had a Happy Thanksgiving. Latest status update is that the USS Saginaw project still lives!
I actually finished coppering and painting the rudder a couple days ago and spent much of my free ship modeling time yesterday reviewing what needed to be done.
Today, I actually started working on the paddewheels again and resolved how I will be making the hubs and axels and just finished making notes on the steps to finish their assembly. I think I've got a handle on it finally.
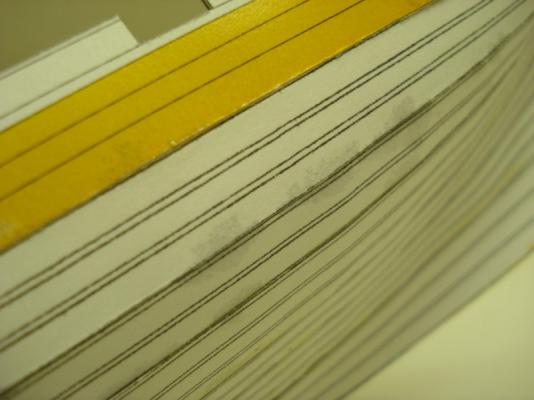
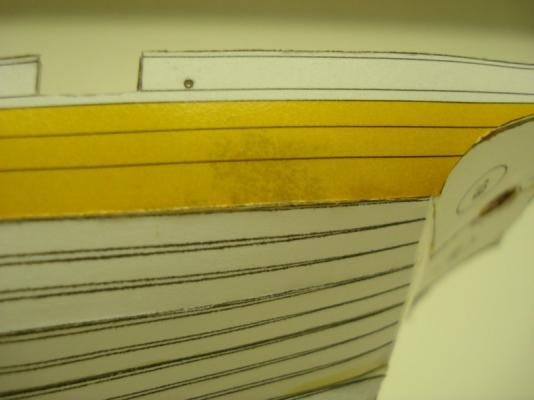
As it turns out, as much as I needed to try out the laser cutting, the design I did is off a bit. Looking back at the rims I made from copper, I've had a chance to step back and appreciate them a lot more. I think these will work though they are slightly out of round in spots. With half of the covered by the wheel houses, I don't think the issue will be noticeable, so I started moving forward again.
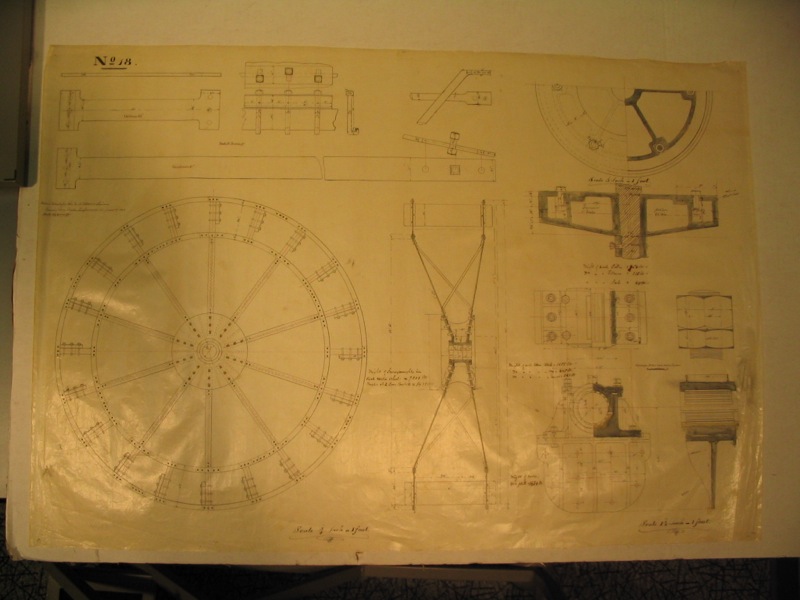
I finally learned how to correctly use the parting tool with turned brass on my Sherline lathe and I was able to quickly fashion the hubs for the paddle wheels. These aren't perfect. I'm going to end up centering the hubs on the axels, where on the actual saginaw, the hubs are actually slightly shifted on the axels. This makes the hubs slightly different in shape, but I wasn't able to work that out, so I'm simplifying here. See the edge view drawing in the center of the following attachment.
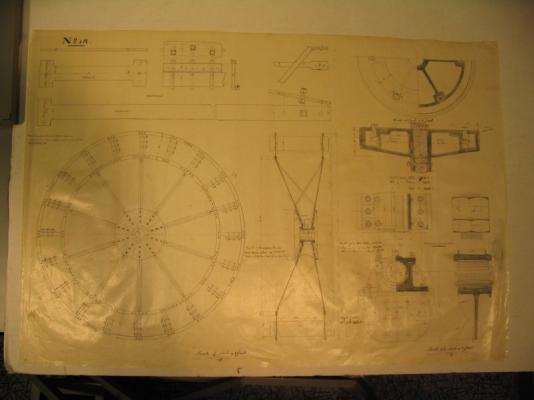
I'm ready to move forward, but just need a length on #129 K&S 3/16" brass tube. Tomorrow, I'll hit the hardware store for some and hope they've got it in stock.
Meanwhile, I'm laying out the steps I'll be taking to mount the rudder and start working on the gun ports. On the latter, I've identified a few reference photos that I'm using, but just need to find more detail on the drop-down ports used by the U.S. Navy around the time of the Civil War.
I also went back over some photos that are making me feel more confident on my ideas for the way the bridge area between the wheelhouses was made. It's not shown in any detail in the National Archives plans I'm working from.
More soon...
Clare
-
If you're got a Byrnes table saw, get the .030" blade he sells for it. Rip your planking from sheet stock, but to get uniform strips, cut them edge-wise from a sheet. So, if you want 1/8" wide planks, get 1/8" thick sheets. Cut strips 1/32" thick (or whatever suits you) and all the planks will be perfectly uniform width. If you get a little variation in thickness, a little sanding of the deck will deal with that.
I agree with Jaager about buying more than you think you'll need – double sounds nice and safe. Figure 1/32" thickness and add the blade kerf. Divide the width of the sheet you want by that number and that will tell you about how many strips you'll get out of it.
For the hull planking, you can take the same idea or follow what Jaager is saying if you intend to spile.
Clare
-
Mike on the Nautical Research Guild's web site two of the models I mentioned Polyphemus and Resolution feature in the member gallery. For Comet colour pics feature in David's book. It is worth buying for the pics alone.
Alan
Actually, the NRG directors apparently decided to eliminate the gallery. The MSW gallery is now the only way the NRG specific stuff is being shown. I'm not too thrilled about the call myself.
But on the upside, I just got my copy of this wonderful book. Well written and beautiful photos of an exquisite looking model. The plans are in a separate folder that comes with the book. I'll probably never get around to building something as beautiful as the author's model. I just look at the book and drool mostly...
Clare
-
National Balsa is great.
I've order from them on at least two or three occasions. I've bought mostly sheet basswood from them in 1/4", 3/8" boards and other wood as well. As doghomer points out, they deal with a lot more than just basswood. Very professional service, good turnaround and I've always been satisfied with my orders.
And, given that the topic is Timber source and not National Balsa, I'll also point out another fine source of basic lumber in basswood, cherry and mahogny is Norteastern Scale Lumber. I've found them to be a great source for strip woods and sheet wood. I've bought a lot of cherry strips from them mostly as well as birch plywood. They're service has been great and they're communication very good as well.
Clare
-
Hi Erin,
I've built a few Artesania Latina kits and based on those and what you show in your photos, it looks like all that probably happened was that you ran the planks past the bow instead of of simply up to the edge of the bow, as Jason pointed out.
Assuming the framing is okay, you should be able to just trim/sand the excess planking off. As you do, you'll start to see the edge of that internal keel piece show through. By the time you uncover the whole edge and trim/sand the planking back, you should find that the curve of the bow will match that keel piece your holding in the photos.
The kit probably includes thin strips of mahogany veneer for the second layer of planking, so you don't have to worry too much about how the planking looks, but you do want it to be smooth.
Good luck on your build. It's your first, so I wouldn't sweat it too much. Just do what you can and learn from it and, most importantly, enjoy the build!
Clare
-
-
Hi Chris,
Funny you should mention David Okamura's models. Two modeler's I know both bought card models at the SMA's Queen Mary event way back after seeing his models on display. I've never seen his models myself, but I understand they are really nicely done.
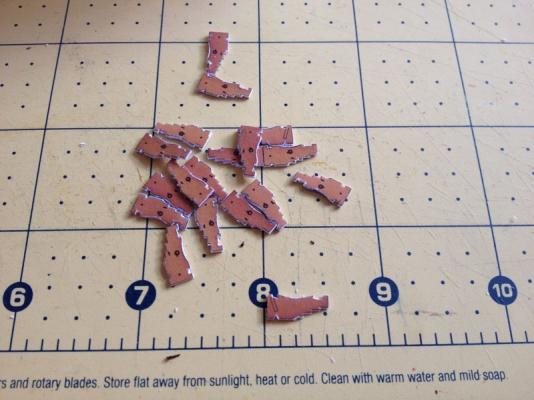
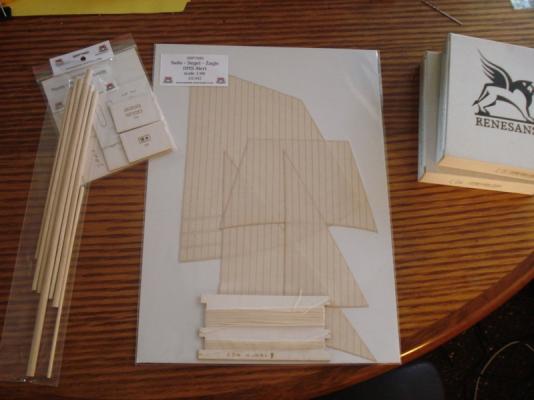
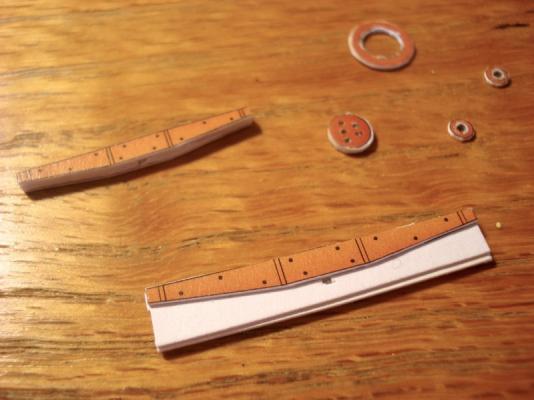
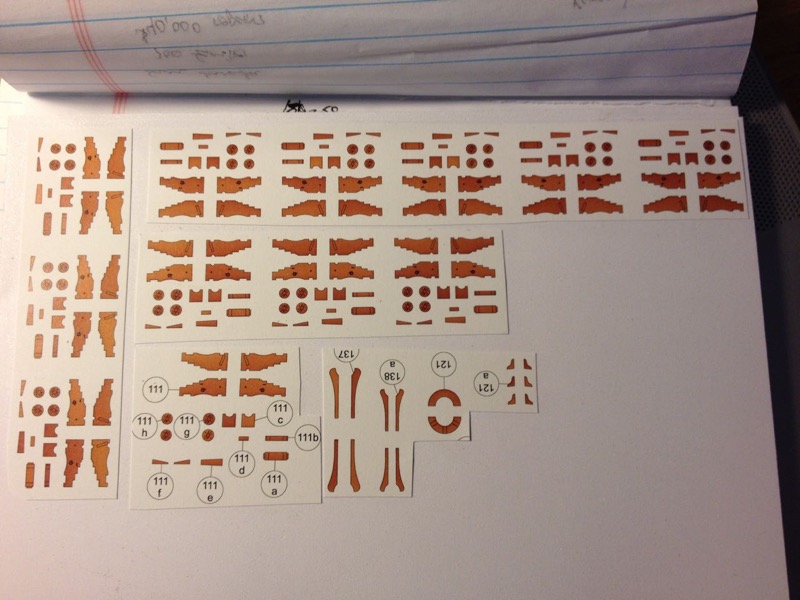
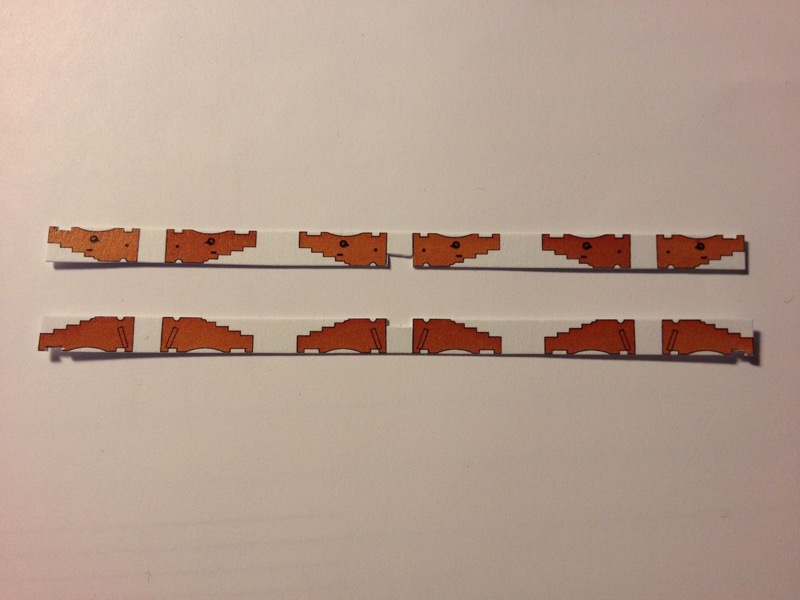
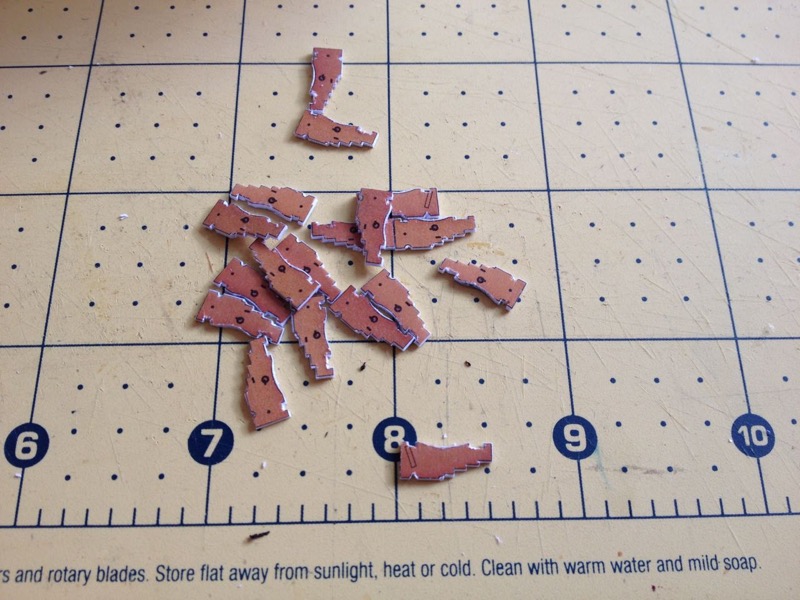
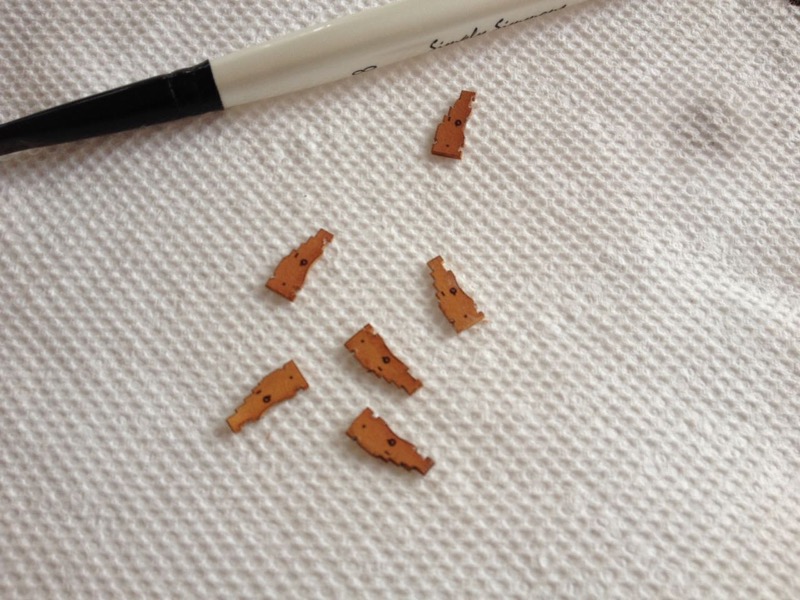
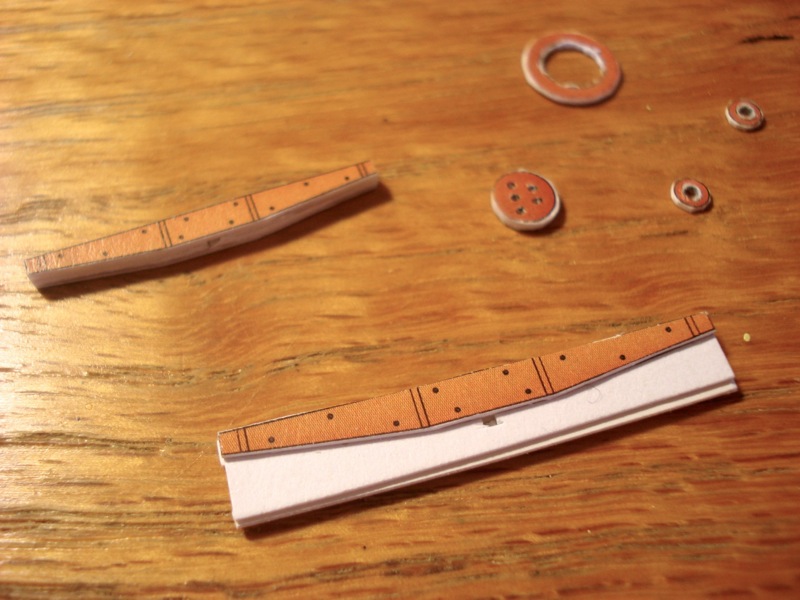
Well, on the Alert, things slow down a bit as I work more on cutting small parts. The cheeks of the gun carriages take a lot of cuts to make. There are only 12 guns on this model – not so bad. I also cut the timberheads. These are really small, but I think I shaped them okay.
All these parts are listed as 1mm thick. I've found that I don't really like using 0.5mm or 1mm cardboard as it's kind of soft, so I like to use 3M spray adhesive to laminate sheets of printer paper. This seems to cut cleaner than cardboard. The paper I use is pretty thick, so two sheets of printer paper, plus the kit part sheet comes out to 0.5mm.

The kit parts for the gun carriage cheeks are lined up on the kit sheets very nicely, allowing me to glue up several parts at one time.

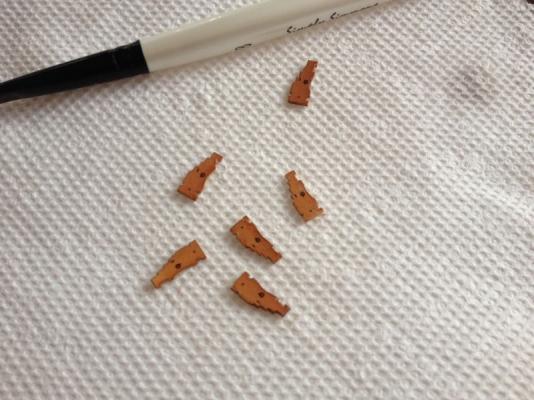
The parts show cut, yet to be cleaned up.
The cleaned up, painted parts.
Clare
-
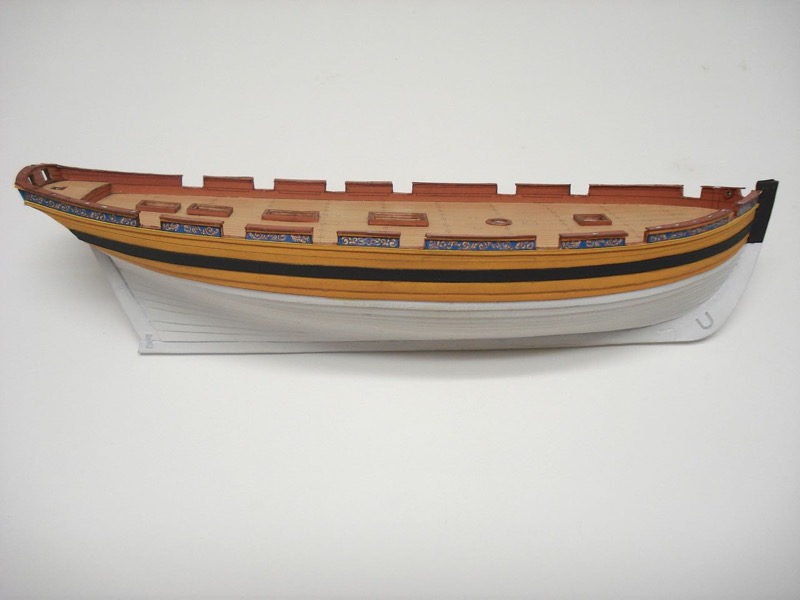
So, I was at the NRG Conference last week, and as an NRG member, I really wanted to bring a model, but couldn't see how to safely transport one to the conference. At the last minute, I decided to bring my little HMS Alert model-in-progress so people could get a better idea of what a card model looks like, even if it's not complete.
Boy, did it get a lot of attention... I don't think a single person passed by the vendor table (I went to represent Ages of Sail) without stopping to look closely at the model. I can't tell you how many times I answered "no, it's all paper" and heard the comment "I never thought a paper model would feel this sturdy". Interesting to learn how many people really like the idea of paper models. Sold two of the HMS Alert 1/96 scale kits and a 1/72 Laser Cardboard version. I suspect more people will be building one shortly.
I didn't intend to be an advocate of card models, but I just kind of ended up as one. I was even teased about turning the NRG's wooden ship modelers into card modelers.
Anyway, I've been working on HMS Alert a bit. First off, it got handled a lot at the conference, so I gave it another coat of paint on the hull.
At this point, with the hull basically complete, I've moved to the task of making the detail parts.
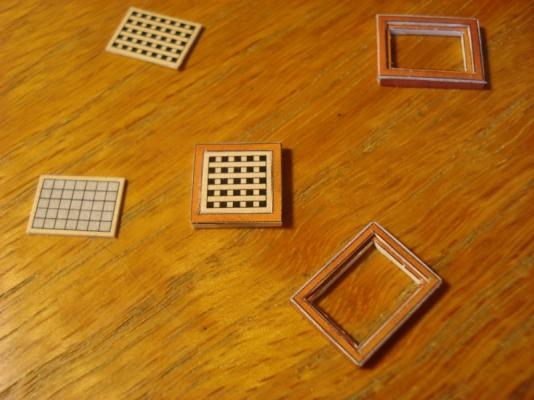
Below are the taffrails at left, the parts for the anchors in the middle, and the parts for the windlass bits on the right.

The transom planking didn't cover the transom completely, so I printed some parallel lines at 3/32" intervals off my laser printer and painted the paper and cut it to the proper shape. They're not perfect, but they're on the model now.

In addition, I made the catheads and mounted them. They need to be cleaned up a little, but they're on the model.
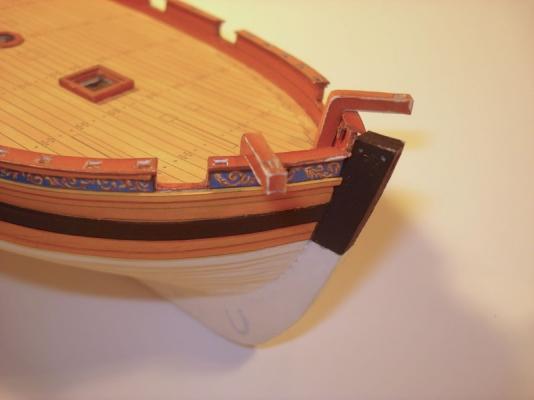
Finally, the side view showing the placement of the hatch coamings and mast coat. I went ahead and started shaping the mast. I initially used the dowel that came in the masting kit, but I was lazy and found a dowel I had on-hand that didn't need as much sanding down, so I'm using that instead.

I'm now getting to the point where I'm going to have to start thinking about how I'm going to mount and display the model. My initial thought is to just use brass posts like I did with my Mary Taylor model and English Longboat. This model is small enough to where that should work very well. I have a lot of Cherry wood on-hand and it's easy to obtain, so I'll probably make the base out of that.
Clare
- hexnut, Mirabell61, Dan Vadas and 6 others
-
 9
9
-
CaptGino, good luck on the Pinta model, it's a good looking kit. I hope you start a build log.
Rick, thanks for the kind words. I'm plugging away at it. Hey, before you go wishing for an HMS Victory in what ShipYard calls their Laser Cardboard Series (boxed), have you seen HMS Mercury? The box is the same size as all the others, but it's packed. I took one to the NRG Conference and it definitely got some attention. Kind of pricey in relation to the other kits, but it's a fully laser cut kit in 1/72 scale and nearly a meter long.
But, yeah, a 1/72-scale Shipyard HMS Victory model would rival Caldercraft's kit. That would be something to see.
Clare
-
Kurt, I never really considered that I could bring a small model in carry on. At minimum, since I'll be in the vendor room anyway and it's probably good advertising, maybe I'll bring my HMS Alert card model in progress. I think it'll be pretty safe.
Jack, Druxey, I will be setting up in the Vendor room in the afternoon (it's a working conference for me). I have to check and see exactly when I get in, but the Vendor room set up closes at 6pm. So, should we meet up after that for a drink like Kurt suggested and see about who's up for going to dinner? Maybe 6:30?
Clare
-
Hi captgino, thanks for the kind words.
I have been working on this for just about 2 months now, just kind of on the side though. So, I guess it has moved along pretty quickly. I'm finishing up the hull details and started on the deck furniture, so it's visually a little slower now, but still moving along faster than my wooden ship projects.
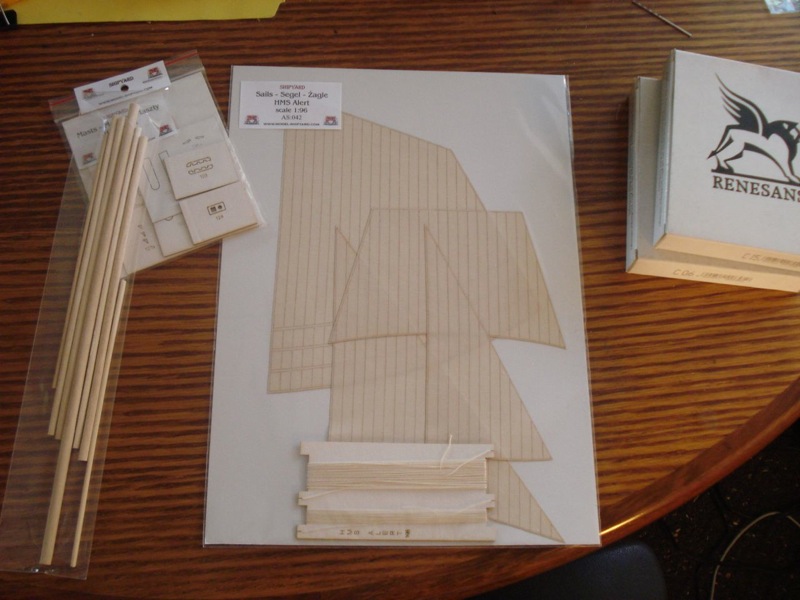
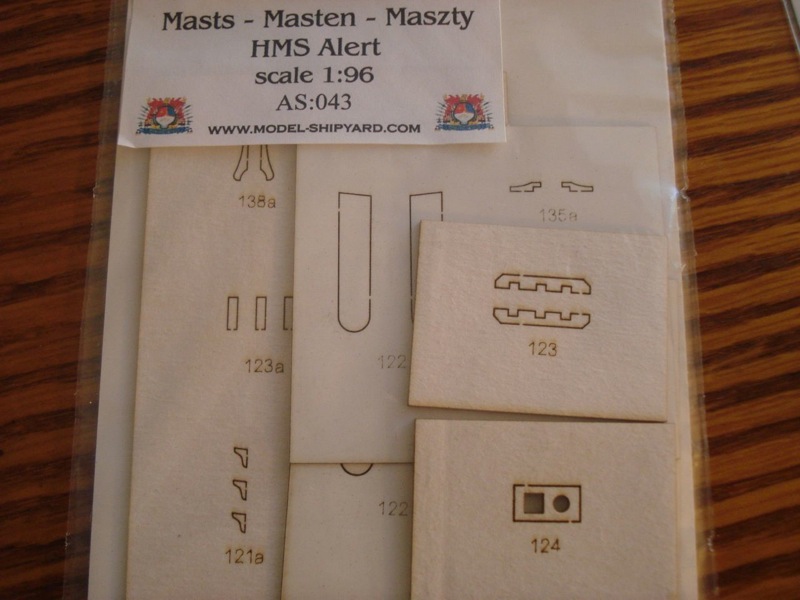
You asked if the mats are included. If you meant masts, they are not included in this kit, but dowels can be obtained easily enough. There is actually a separate masting set available, as well as a sail kit and a blocks and deadeyes set, but all the needed parts are printed in the kit anyway.
I went ahead and ordered the masting and the sails sets to check them out. The sails actually look pretty good, but I may just make my own using the kit plans as a guide. A good set of drawings of the sails is included – much better, I might add, than the sail plans in most wood ship kits I've seen. However, after making many parts now, and with plenty left to go, I decided to go ahead and order the blocks and deadeyes set. One could easily use wooden ones, like those sold by Chuck Passaro, but it's kind of cool keeping as much in paper as I can. The blocks set still saves me from all the cutting and much of the laminating. You just have to glue up the parts and paint them.
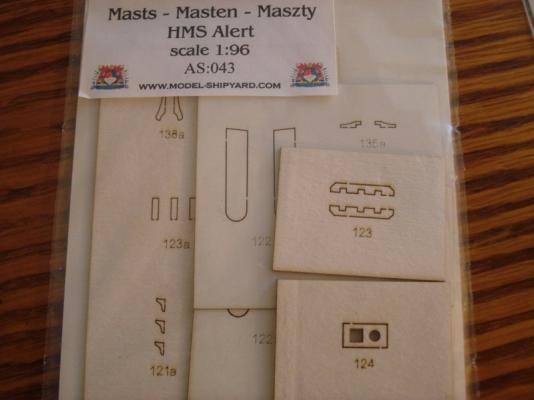
The masting set and the sail set. Some boxes of paints I ordered from ShipYard are on the right.
Close up detail of the sails set.
Close up detail of laser cut parts in the masting set.
Ordering direct from ShipYard, the cost for each set is pretty low. It is after all a 1/96-scale cutter, so not a lot to these. The prices are listed in Polish currency, but in dollars works out roughly as follows:
HMS Alert Masting set $6.50
HMS Alert Sails set $6.50
HMS Alert Blocks and Deadeyes set $20.00
Shipping, of course, is extra, and adds a lot if you order things separately. But shipping small packages from ShipYard takes about 10-14 days to get and doesn't cost too much unless you start ordering multiple ship model kits or the boxed kits.
Of course, if you get the larger 1/72-scale boxed edition, you get all this stuff included, plus brass cannons, paints, glue, and all the parts are laser cut. But you can get this 1/96-scale paper model kit, which includes laser cut frames, for less than $30, so it's very easy to get started.
FYI, Ages of Sail, whom I've been helping out a bit, recently got in a big shipment of ShipYard kits. They don't carry the add-on sets, but have just about all the ship and lighthouse kits including all the boxed kits.
Clare
- robin b and Captain Slog
-
2
-
I did it. I started a build log on this model. It's just too cool to put aside and I spent the past couple nights adding gunport linings, hatch coamings and event starting shaping the mast.
So, here's the build log: Naval Cutter HMS Alert, 1777 – 1/96 scale ShipYard Card Model - Kit Build Logs in Progress - Model Ship World
Clare
-
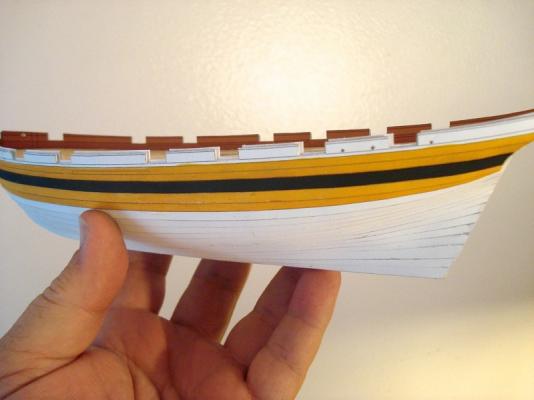
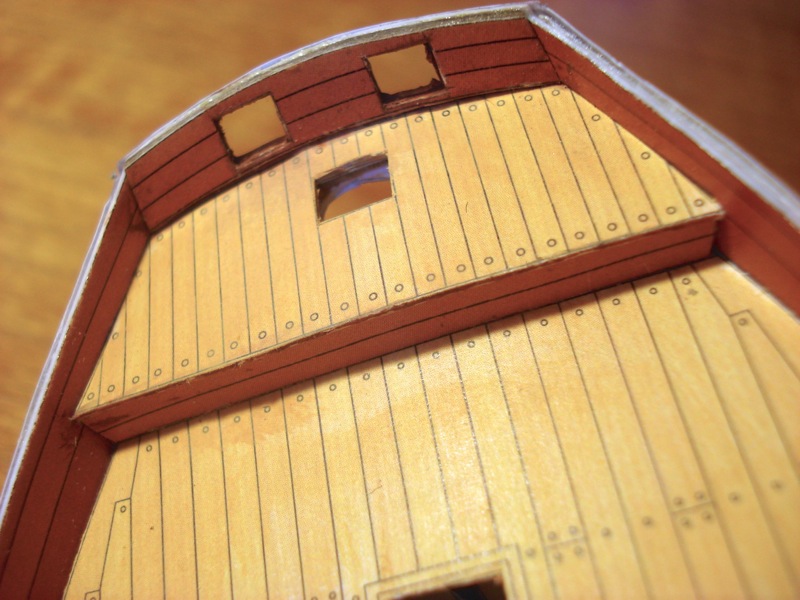
So, here's the model as it looks, planked, but no keel, stem or sternpost. The inner bulwarks is only test fit and not glued into place yet.
I've just installed the shear molding under the gunports, laminated many of the parts to give them thickness. I also made the mast coat, hawse pipes, prepped some of the mast top hardware, began shaping the wooden dowel mast, and glued up the anchor stocks, but haven't been added yet.
Parts are in the process of construction, so still look rough, particularly the round ones.
Some deck hatches. The only thing I'm not super happy with is the gratings since they're only printed. I know I could just make scratch gratings from wood, but it would be nice to see how the final ship looks as built from the kit.
View of the quarterdeck. I had a bit of a white gap at the bottom of the bulwarks and tried to even out the look with paint, but I got a little on the printed deck. After cleaning, I had to give the deck a wash of paint to even out the look.

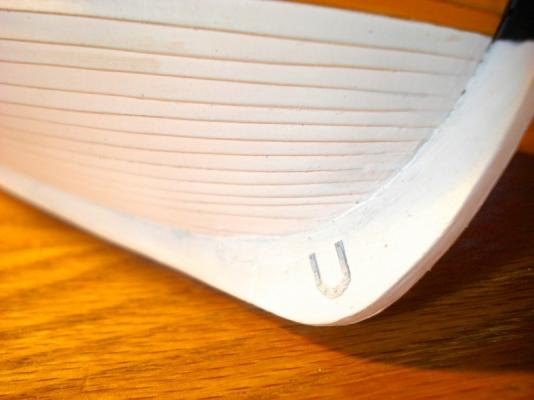
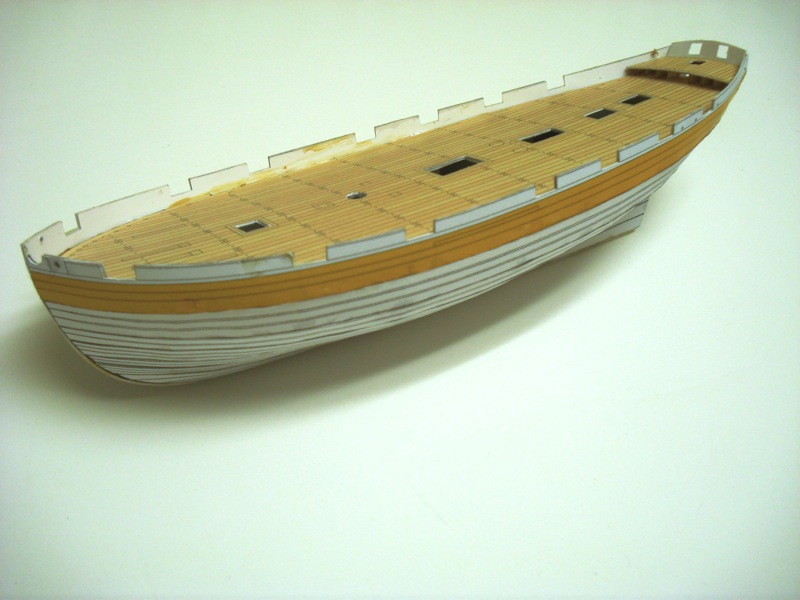
A view of the bow showing the friezes, wales, stem and bow planking. Note the horseshoe. The one on the other side tore when I cut it and it doesn't look as sharp.
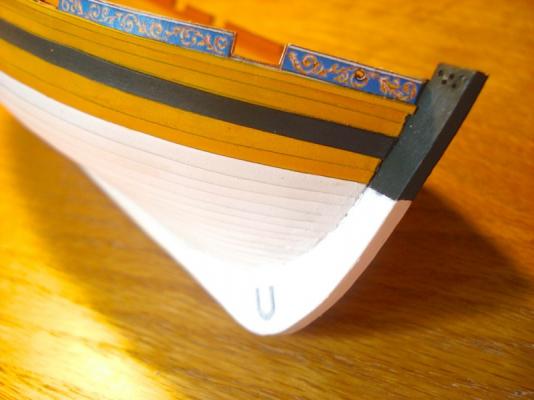
Close up of the bow planking.
Everyone who’s seen this model is amazed at how sturdy a card hull can be, including me. The lapstraked planking really makes this model solid. I also get a lot of people asking me what kind of wood was used for the deck planking, right before they say “this is paper?”
This being my first card model, I’ve learned to cut carefully and to soak parts with CA to make them stiffer and to make it easier to shape them and so that the edges don’t “fuzz up”. Plus, it makes it easier to cut very delicate pieces without them tearing up. I’ve also learned to cut out the hollow portions of parts before cutting the parts from the sheet.
Clare -
Well, I’ve done it. I started messing around with a card model from Shipyard because I was really curious about them. I didn’t mean to turn this into a real project, but I can’t help it, this thing is so frikkin’ cool!
I’ve already described the kit in detail in the topic I started: here, so no point in rehashing that. I’ll just say that I’ve been distracted by this model more and more and now I might as well just get it over with and make a regular project out of it. Luckily, this card model seems to be progressing a lot faster than my wooden model projects. I think it’s because all the parts are already defined. I don’t have to figure out anything, I just have to build.
So, I started tinkering with this kit back in August and picked it up every now and again to add some more to it. Now, I’m at the point where I’m spending multiple evenings in a row on it. At this rate, I don’t think it’s going to take all that long. I'd better really get working on this or I'll never get back to my other projects!
Here’s where it all started...
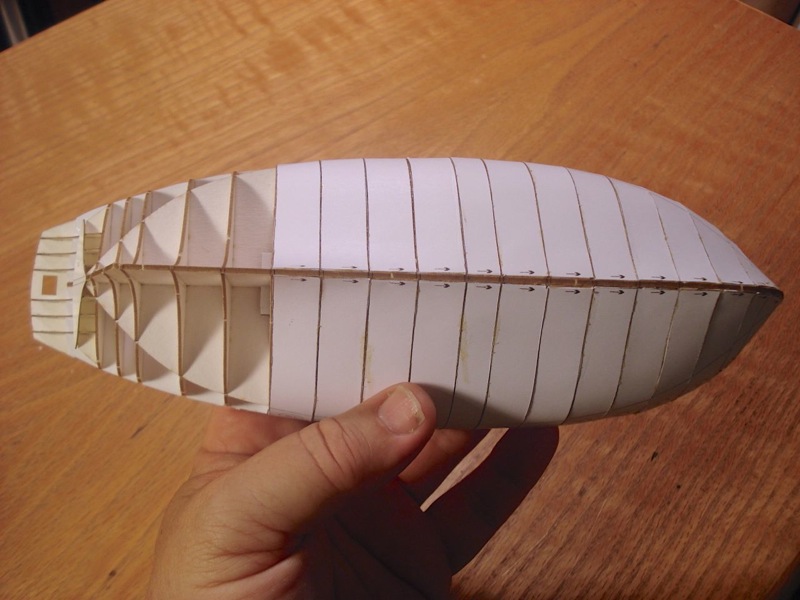
Framing was easy using the laser cut parts included in the kit. Note that not all of the shipyard paper models include laser cut framing. Instead, they give you the parts printed on standard paper and you are required to laminate that paper onto layers of card stock or plain paper in order to build the part up to the proper thickness.
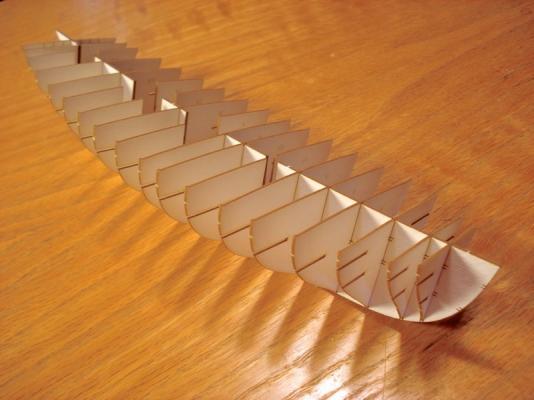
On a model this size, the frame density and the stiffeners seem to make the hull enough to work with
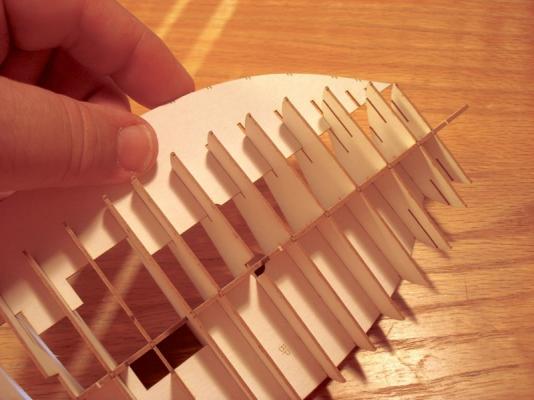
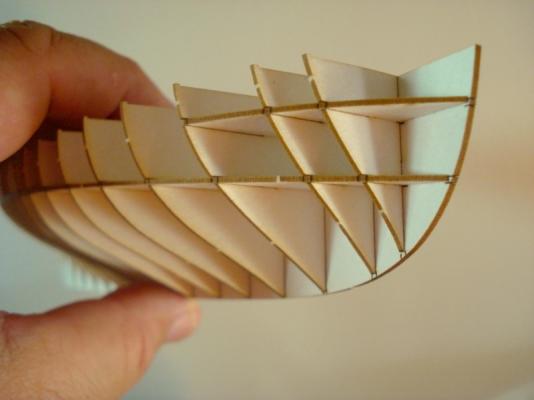
The first layer of the hull covering is made up of thin pieces that fit nicely across the bulkheads. It's hard to avoid a little overlap, but I found it important to try, otherwise it creates a wavy surface for the planking.

With the layer of stiffners in place, the first layer of hull planking is laid. There are two layers of planking, so I guess you can consider this a double-planked hull.

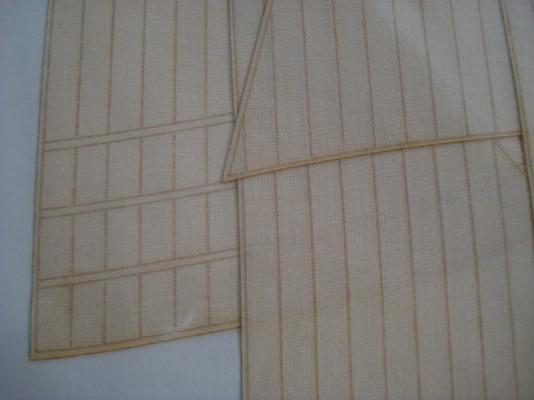
The first layer consist of belts of planks. It's nice that these are printed with properly shaped planks. This makes this model more accurate than 90% of the wooden ship models kits out there, at least in terms of hull planking.

The first problem I ran into was the in determining the proper positioning of the bulwarks piece. But, that looks like it will work itself out okay. The second problem is shown here with the laying down of the planking belts. This is a 2-D object laying down on a 3-D surface. The belts are relatively narrow, but not narrow enough to avoid creating a wavy surface along the edges. Fortunately, there is another layer of planking to go over this, so maybe I was worrying about it too much. But, what I found was that after the glue set, I could wick a tiny amount of CA into the edge and then push down on the bumps to flatten them out a bit.
That has it's own hazzards as you can see here the glue fingerprints that I haven't seen since my early days of plastic model building. This is the point where I decided to try painting the surface of the hull using paints sold by ShipYard.
Clare
-
That sounds great Kurt. I really hope to meet some MSW people there and hope more MSW members will take advantage of this opportunity to meet and learn. I only wish there were a way for me to bring a model. Flying in, I don't see how to do it. Although having a vendor table, I suppose it would be easy enough to bring a small work in progress as a "sample".
If anyone wants to meet up for a drink on Thursday evening, I'd certainly be up for that.
Druxey, good point! Also, it didn't really occur to me that I'll probably know people more by their screen names than by their real names. It's like we all have our combat-pilot call signs.
Clare
-
Hey, so I'm going to be at the conference this year, but who all is going?
Any thoughts on the MSW contingent getting together on one of the evenings or something for a short get-together?
I'm looking forward to meeting all my fellow NRG members, but it might be nice to just touch base with ones I see here online for once, gather for a group photo, and to meet and pay homage to our hard-working mods and admins.
Clare
-
Glad to help, Alaska.
You know, I've been so fortunate to stumble across a couple really great buys here on MSW a moments after Chuck posted them. That's even how I got my copy of Le Gros Ventre. So, I feel like I have this big debt to pay and I'm happy to help where I can.
Now, gotta get back to admiring Cpt Tom's build!
Clare
-
Hey Guy's I was wondering if you could tell me where to purchase the book the La Gros Ventre besides Acnre fr. I need to aquire this to start this new project. Any help would be much appreciated!
Thanks!
Alaska
Hi Alaska,
I think you're in luck. There are three new copies listed on Amazon for $50 - $55 plus shipping.
Clare
-
Wow, what a beautiful looking model and ship!
But I have to admit to not understanding the whole reasoning behind building such a beautiful vessel, just so you can set fire to her.
I would think you'd just find some old merchant ship and send her off to her doom (and the enemy's too, hopefully). Or was it considered so great a duty that the ship would be bestowed great honors before going to its death. I guess I'm going to have to buy the book to find out!
Thanks Bob for releasing what looks like another fascinating title!
Clare
-
Hi Mitchell,
I'm looking forward to your starting up on your Enterprise again. One question – I've seen the Shipyard kit and it doesn't come with pre-cut frames. You're model looks like it has laser cut frames. Did your kit come from GPM by any chance? I see they sell a separate frames and detail parts set for the Shipyard Enterprize kit, as well as ones for some other kits. Just curious if that's what you got?
Clare
- jms777, Capt.Rick and justsayrow
-
3
-
Hi Mercator,
Mark's right about Ages of Sail. The triangular deadeyes are walnut, but only come in 5mm and 7mm sizes.
If you're willing to go with britannia metal ones, Bluejacket has them in 1/8", which is just over 3mm.
Clare
-
Hi Slog,
Thanks for the kind words. I agree that GPM is a good provider of Shipyard and other items. I did notice though that they don't carry a large number of Shipyard kits. But, they seem to carry what look to be older Shipyard kits that aren't available direct from Shipyard anymore like La Belle Poule, HMS Cleopatra and a few others too.
But, what I really like is that they make laser cut frame and detail sets for several Shipyard models that don't already come with them. I wasn't sure how accurately these would fit the Shipyard kits until I noticed the GPM markings on some laser cut stuff I bought from Shipyard, and the GPM ads in the Shipyard kits.
I ended up getting a super detail set from GPM for the Shipyard 1/72 scale Santa Leocadia model – actually for the Super Modellar Plan set which includes laser cut frames.
Anyway, I agree, GPM has great stuff.
Hi Mitchel,
"Scratch that itch!" I'm looking forward to seeing more posts from you on your model. Card models are really fun, but they certainly aren't easy, are they? My models small size might make it easier to handle without damage than a larger model. I've been careful with it, but also very lucky.
Clare
-
Hi Slog,
I'm sure you'll find a way around that panel 8 issue. Your build looks great. I've been working on my little cutter model and never before considered modeling a 20th century steel hull ship. I may have to consider it now, seeing your build. I really like your model a lot and I'll be watching for your updates.
Clare
- Captain Slog and WackoWolf
-
2
-
Thanks, David.
A contact number for Poland? There should be something on the back of the kit cover...
Here's what's I found:
URL: www.model-shipyard.com
email: vessel@model-vessel.com
tel. (0-61) 88 34 275
tel. kom +48 508 539 646
I don't know what the different "tel." numbers are, but that's what's on the cover.
Clare


USS Saginaw 1859 by catopower - FINISHED - 1/8" scale - paddlewheel gunboat - first ship built at Mare Island
in - Build logs for subjects built 1851 - 1900
Posted · Edited by catopower
Hi Popeye, I'll try to keep making progress. You know, something beyond dusting it off, which I had to do today and boy was there a lot!
Mark, thanks for the tip. I had a nice email exchange with Jerry Todd today on the subject. Got some ideas, but still plenty of questions. I guess I can come up with something now though. Still don't know about those fittings for the train tackles, but they look straight forward enough.
In the meantime, I got the brass tubing I needed at the hardware store. I'll finish my construction jig for making the paddlewheels and see where that all leads.
My car has been in the shop for a few days and it's ready today, but I decided to leave it there until Monday. That will keep me from going anywhere and I can stick around and get some work done here. And today I actually did a healthy thing and walked 20 minutes to the hardware store (and another 20 back). I even managed to find more than one item I was looking for.
Tomorrow, it's supposed to start raining for a week, so I'll just have to stay in and work on ship modeling!
Clare