HOLIDAY DONATION DRIVE - SUPPORT MSW - DO YOUR PART TO KEEP THIS GREAT FORUM GOING! (Only 20 donations so far - C'mon guys!)
×


Dziadeczek
-
Posts
645 -
Joined
-
Last visited
Content Type
Profiles
Forums
Gallery
Events
Everything posted by Dziadeczek
-
 ALL ropes look fantastic to me!
 -
YA-1 Yamaha Motorcycle by Dan Vadas - FINISHED - CARD
Dziadeczek replied to Dan Vadas's topic in Non-ship/categorised builds
THANKS!!! -
YA-1 Yamaha Motorcycle by Dan Vadas - FINISHED - CARD
Dziadeczek replied to Dan Vadas's topic in Non-ship/categorised builds
Dan, May I ask what type of paper do you use for printing the designs? Regular, extra thick, matte, glossy photo paper...? -
Anyone using electric plank bender?
Dziadeczek replied to MESSIS's topic in Modeling tools and Workshop Equipment
Many years ago, when the SIS magazine was still owned by Clay Feldman, there was an article there about wood bending method by a German modeler Gebhard Kammerlander. He used a special gun with a crescent shaped head (he used to sell it). He would first soak the strips of wood in LUKE WARM water for a few minutes and with a medium heat applied, he would bend it like a pretzel. No need for a hot kettle, a curling iron, a hot lightbulb and such... Everything was easy and quick. You could add more to your bending or lessen it by bending in reverse direction. See the video here: Rather than buying this device from Gebhard, I modified my old soldering gun (80 W, 110 Volt Weller) by replacing its tip with a home made head - see pic. That way, I ended up with two tools - a wood bending tool and a soldering iron. The only thing I had to fashion, was a heat controlling device, since the heat for wood bending is about 1/3 less than for soldering, otherwise you will burn your wood. I made it (following the advice from a stain glass class I once took) from an ordinary, cheap household dimmer available from house building centers and/or electrical supplies stores. I wholeheartedly recommend trying this method! See if it works for you.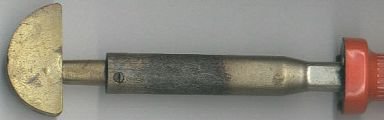
-
Aren't you supposed to allow one end of yout ropewalk to slide on the table (perhaps weighted with a ballast?) to allow your rope to shrink somewhat? Twisted rope is typically shorter than individual strands for about 25%. Perhaps that's the reason you broke your first rope...
-
J. Boudriot in his "74 gun ship" details the cabins there, including the captain's cabin. Drawings and descriptions are given.
-
New member with a question about shipping models
Dziadeczek replied to CJ2S's topic in New member Introductions
If however you'd have decided to do it yourself and your models are in display cases, here is what I once did with my Billing's "Norske Loeve" (this was recommended once by someone from the old "Seaways" list). I obtained a large bag od styrofoam "popcorns" and simply gently filled out an entire case with them (built with plastic sheets, not glass, BTW. Lexan, to be precise) WITH the model inside, , making sure styrofoam fell into all crannies and corners in between the model and the case. Then, I carefully taped the case with a blue painters tape and placed everything in the trunk of my car (station wagon), laying it flat on soft blankets, and drove it to the new place. It was however not nearly as far as yours, just a few miles, but, to my astonishement, absolutely nothing happened to the model, after complete removal of the 'popcorns'. And the roads were not as smooth as one could imagine! You can obtain these styrofoam 'popcorns' in large bags from places like post offices or office supplies stores, like Staples or Office Depot. Something to consider, besides professionals... -
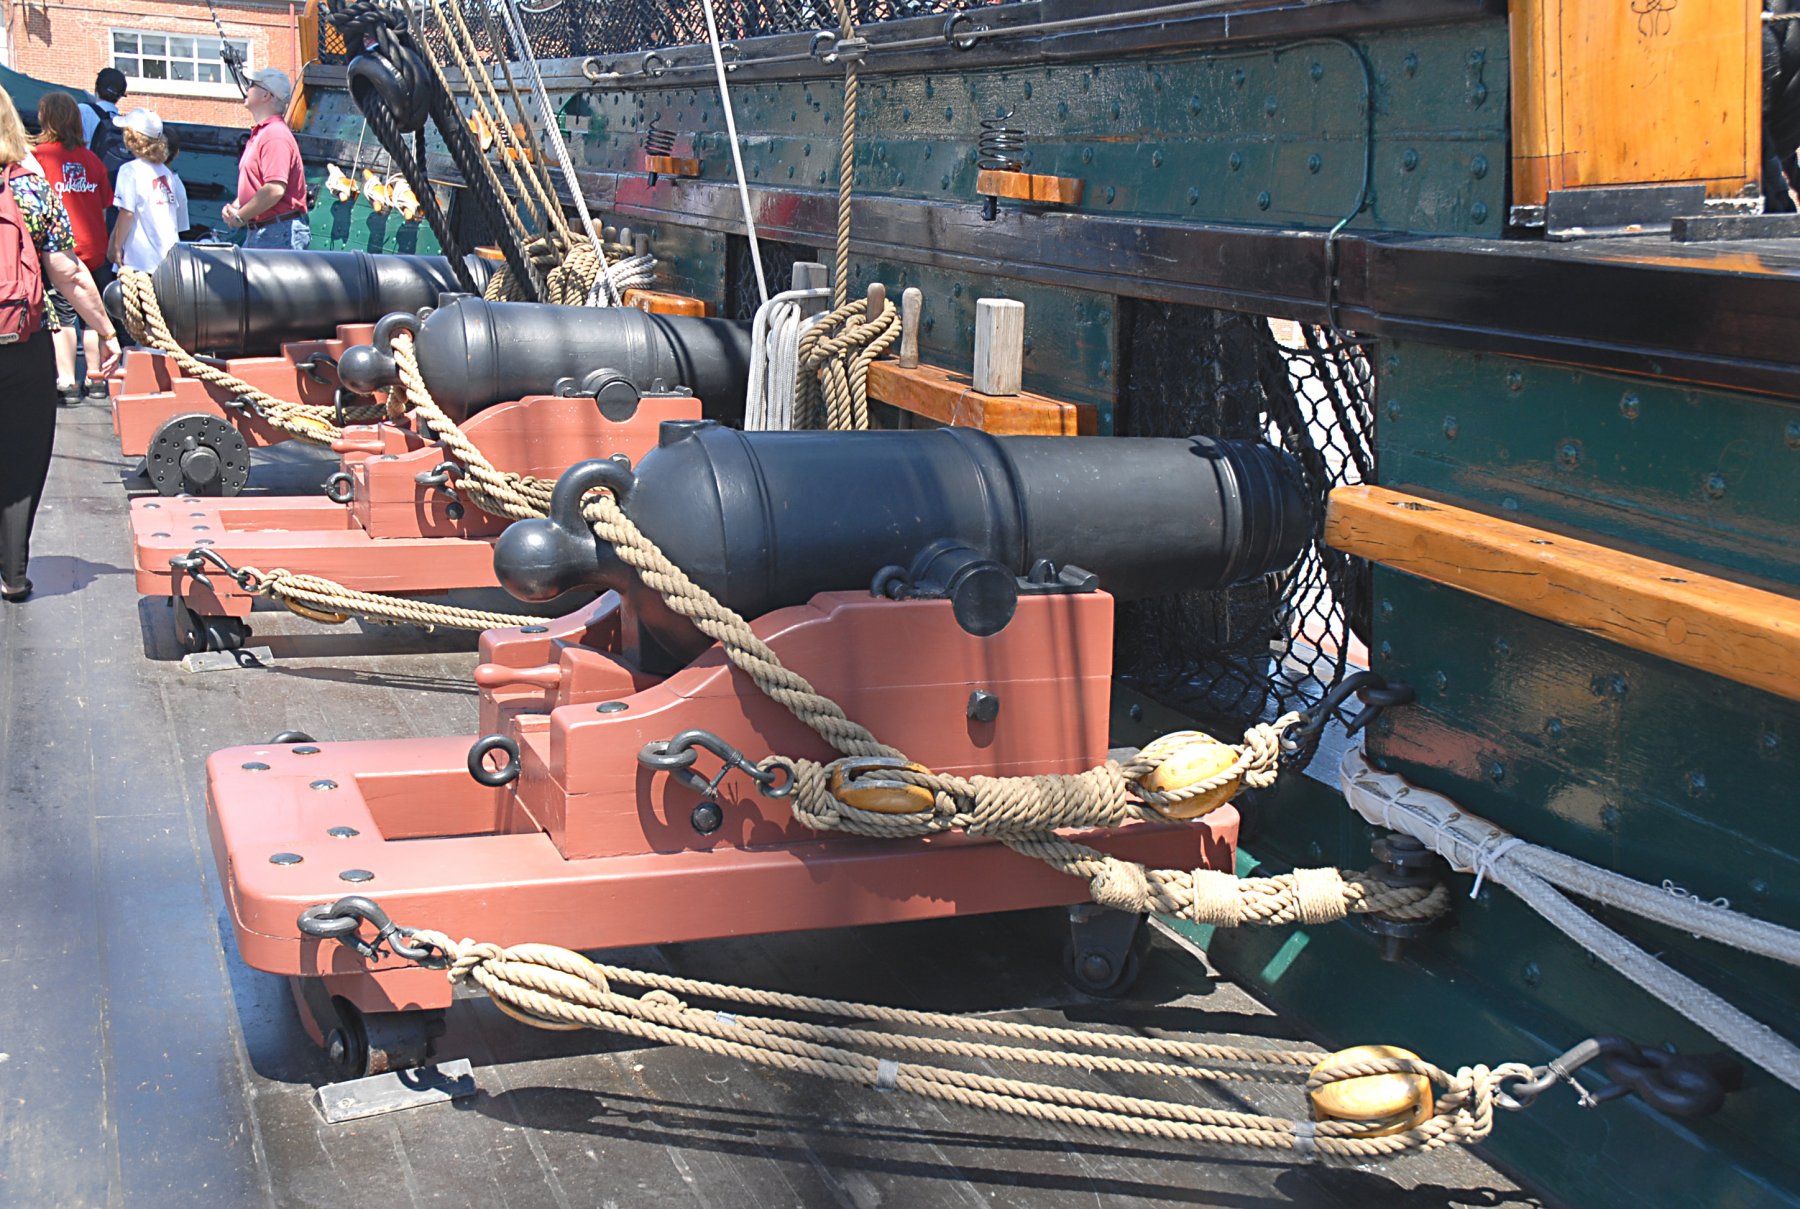
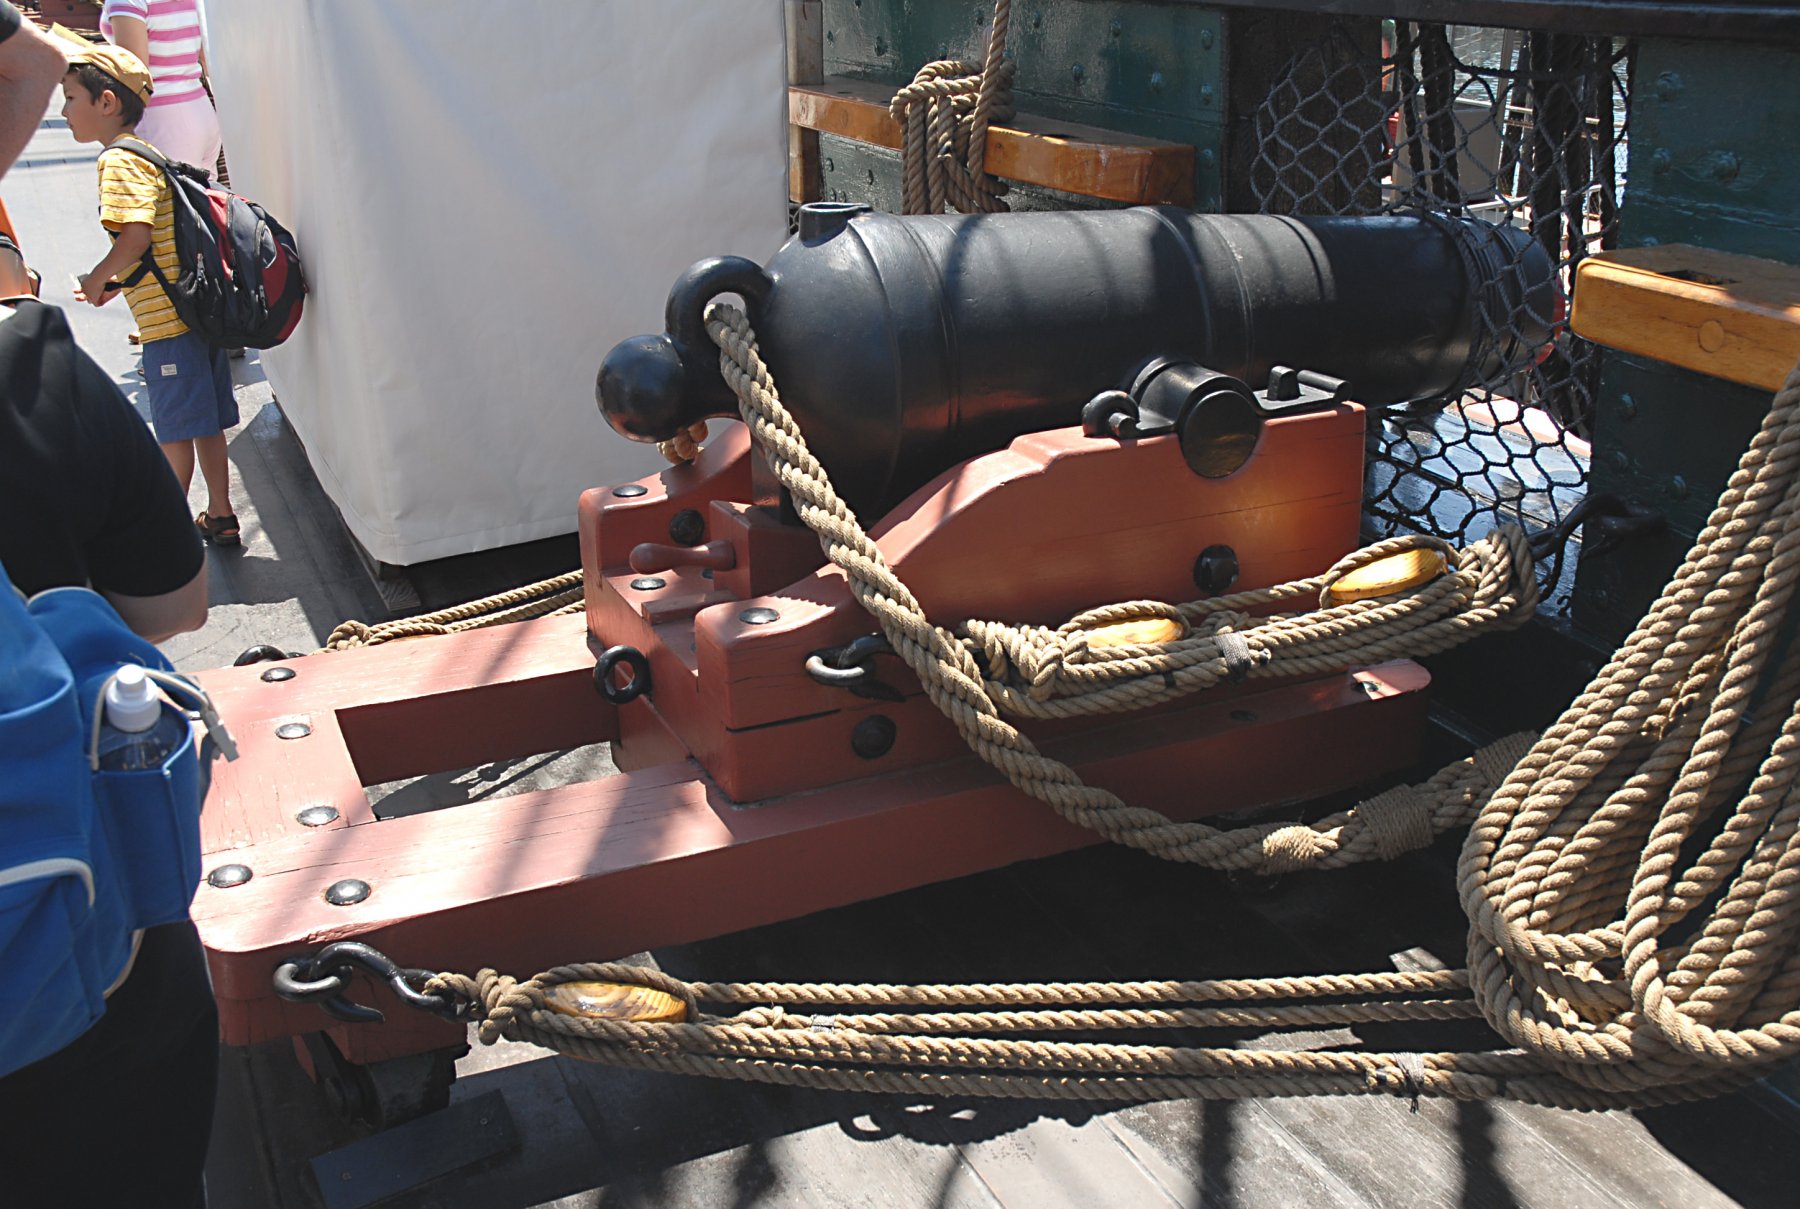
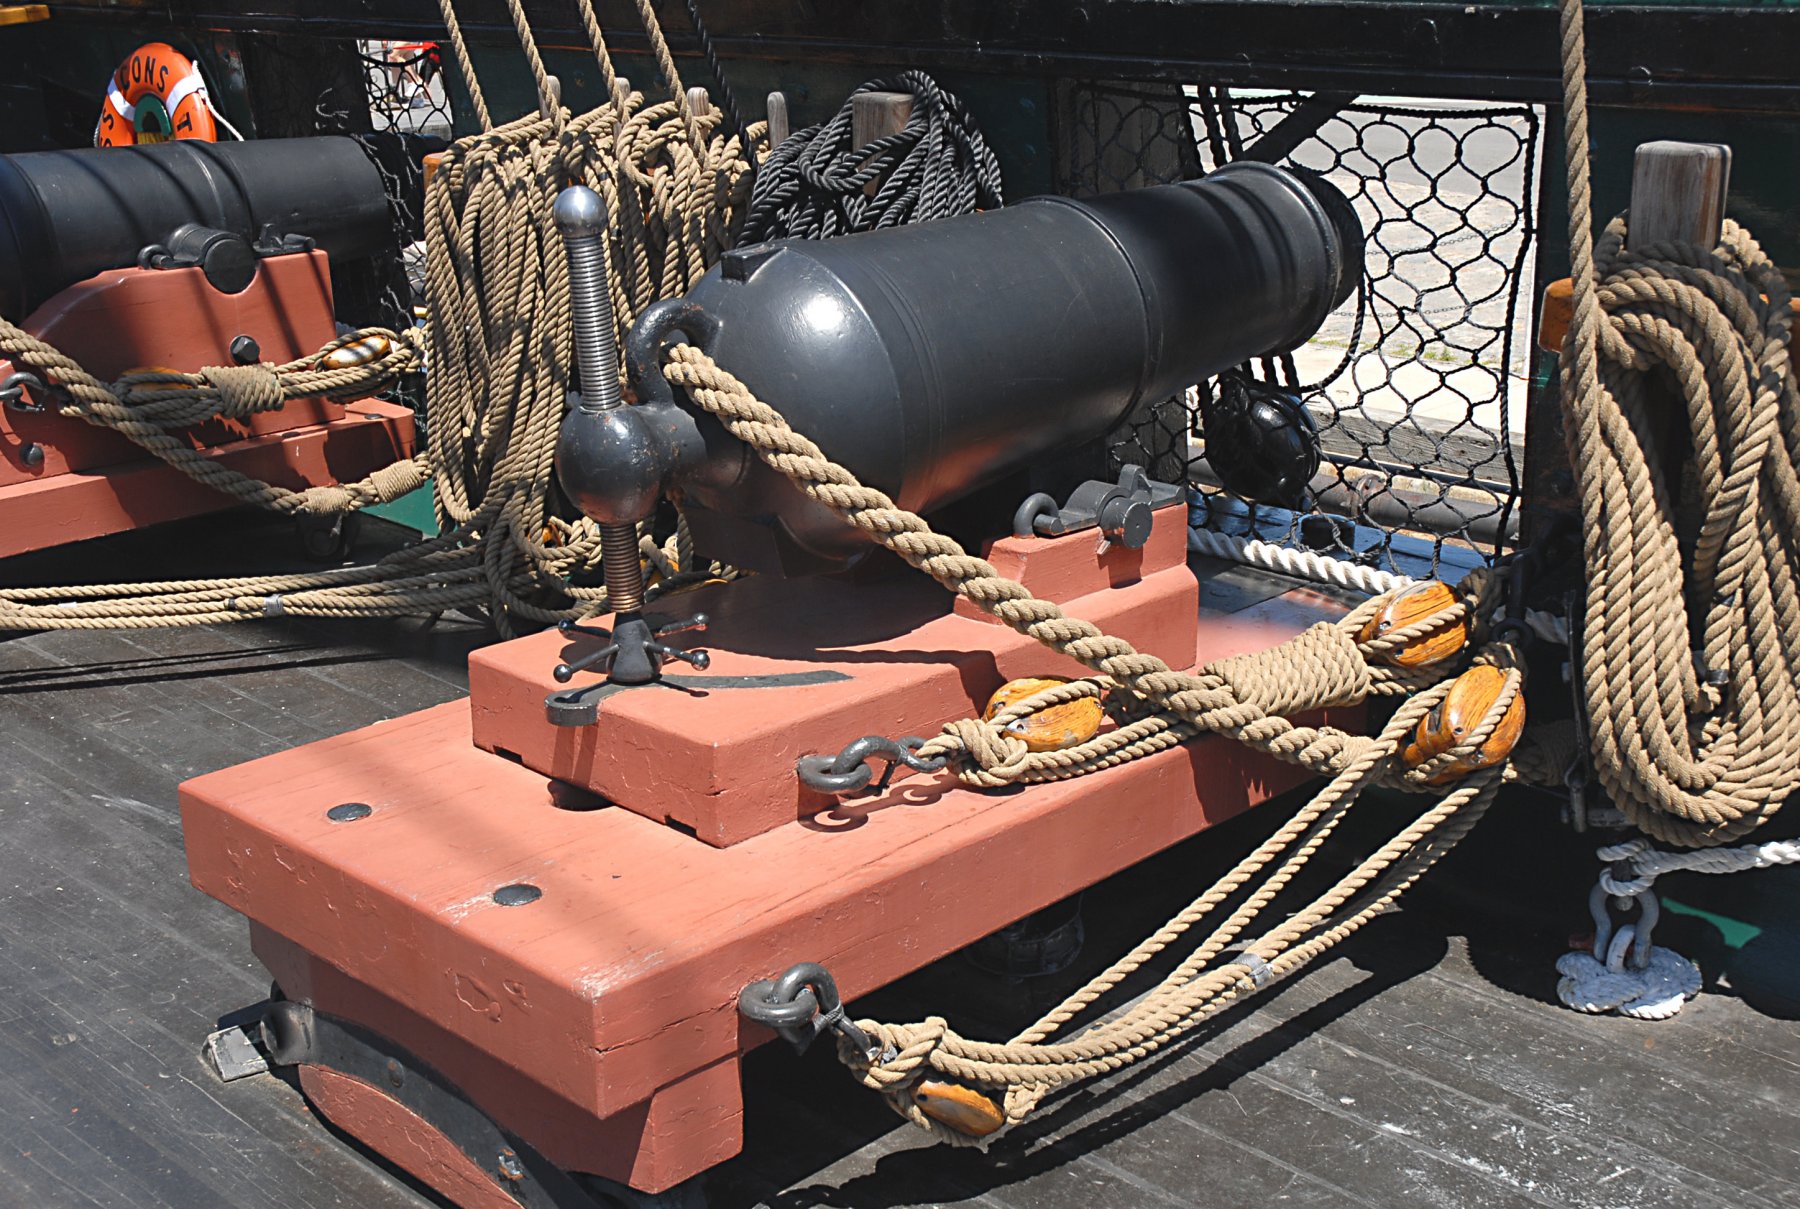
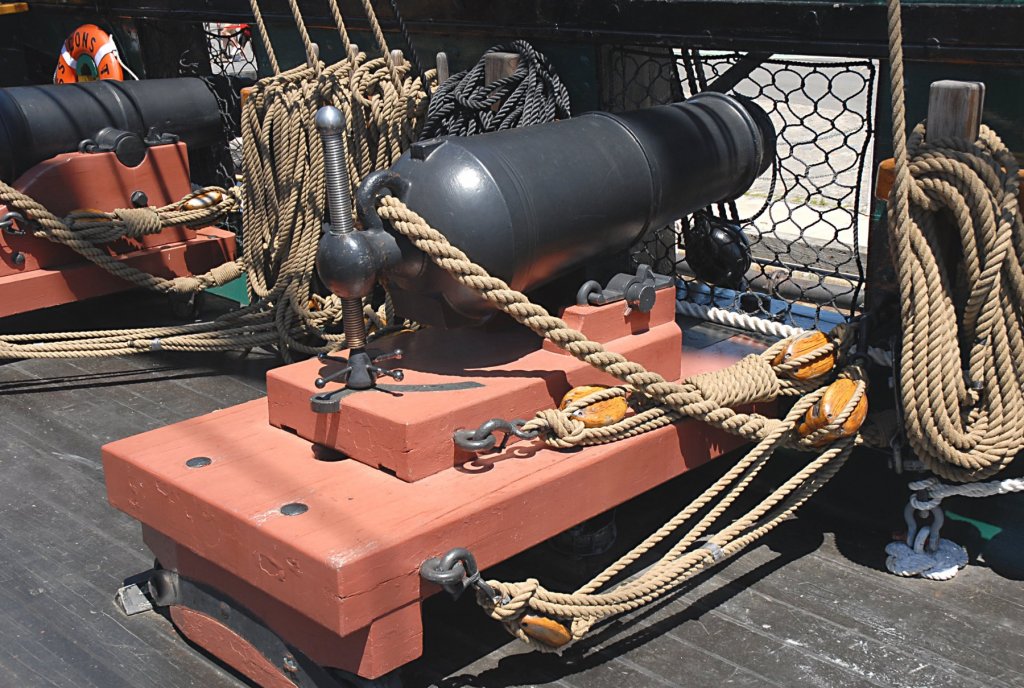
I have a handful of pics of the Constitution's carronades. Maybe they'll help?


-
Mc Kay gives 18 inches for both lower deadeyes, and Longridge says 3/8 inch (0.95 cm) in your scale (1:48), which is about right.
-
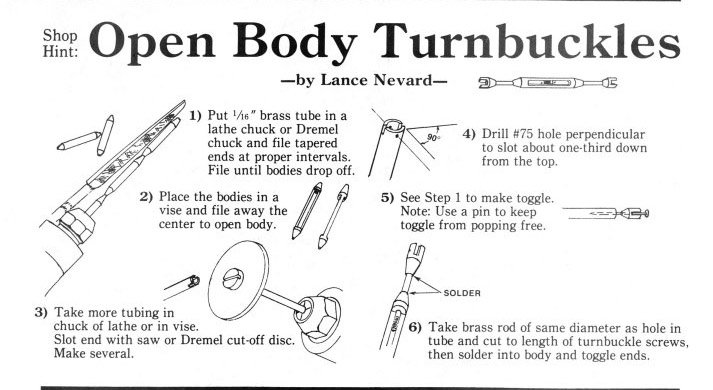
I have this illustration:
-
Ed, Are you going to blacken the copper parts? And if so, how, without bleeding the blackening agent into the wood?
- 3,618 replies
-
- 2
-

-
- young america
- clipper
- (and 1 more)
-
Fore and aft rigging questions
Dziadeczek replied to SardonicMeow's topic in Masting, rigging and sails
Perhaps L. Petersson "Rigging fore and aft craft" would be helpful? -
might this be converted to a ropewalk?
Dziadeczek replied to AON's topic in Modeling tools and Workshop Equipment
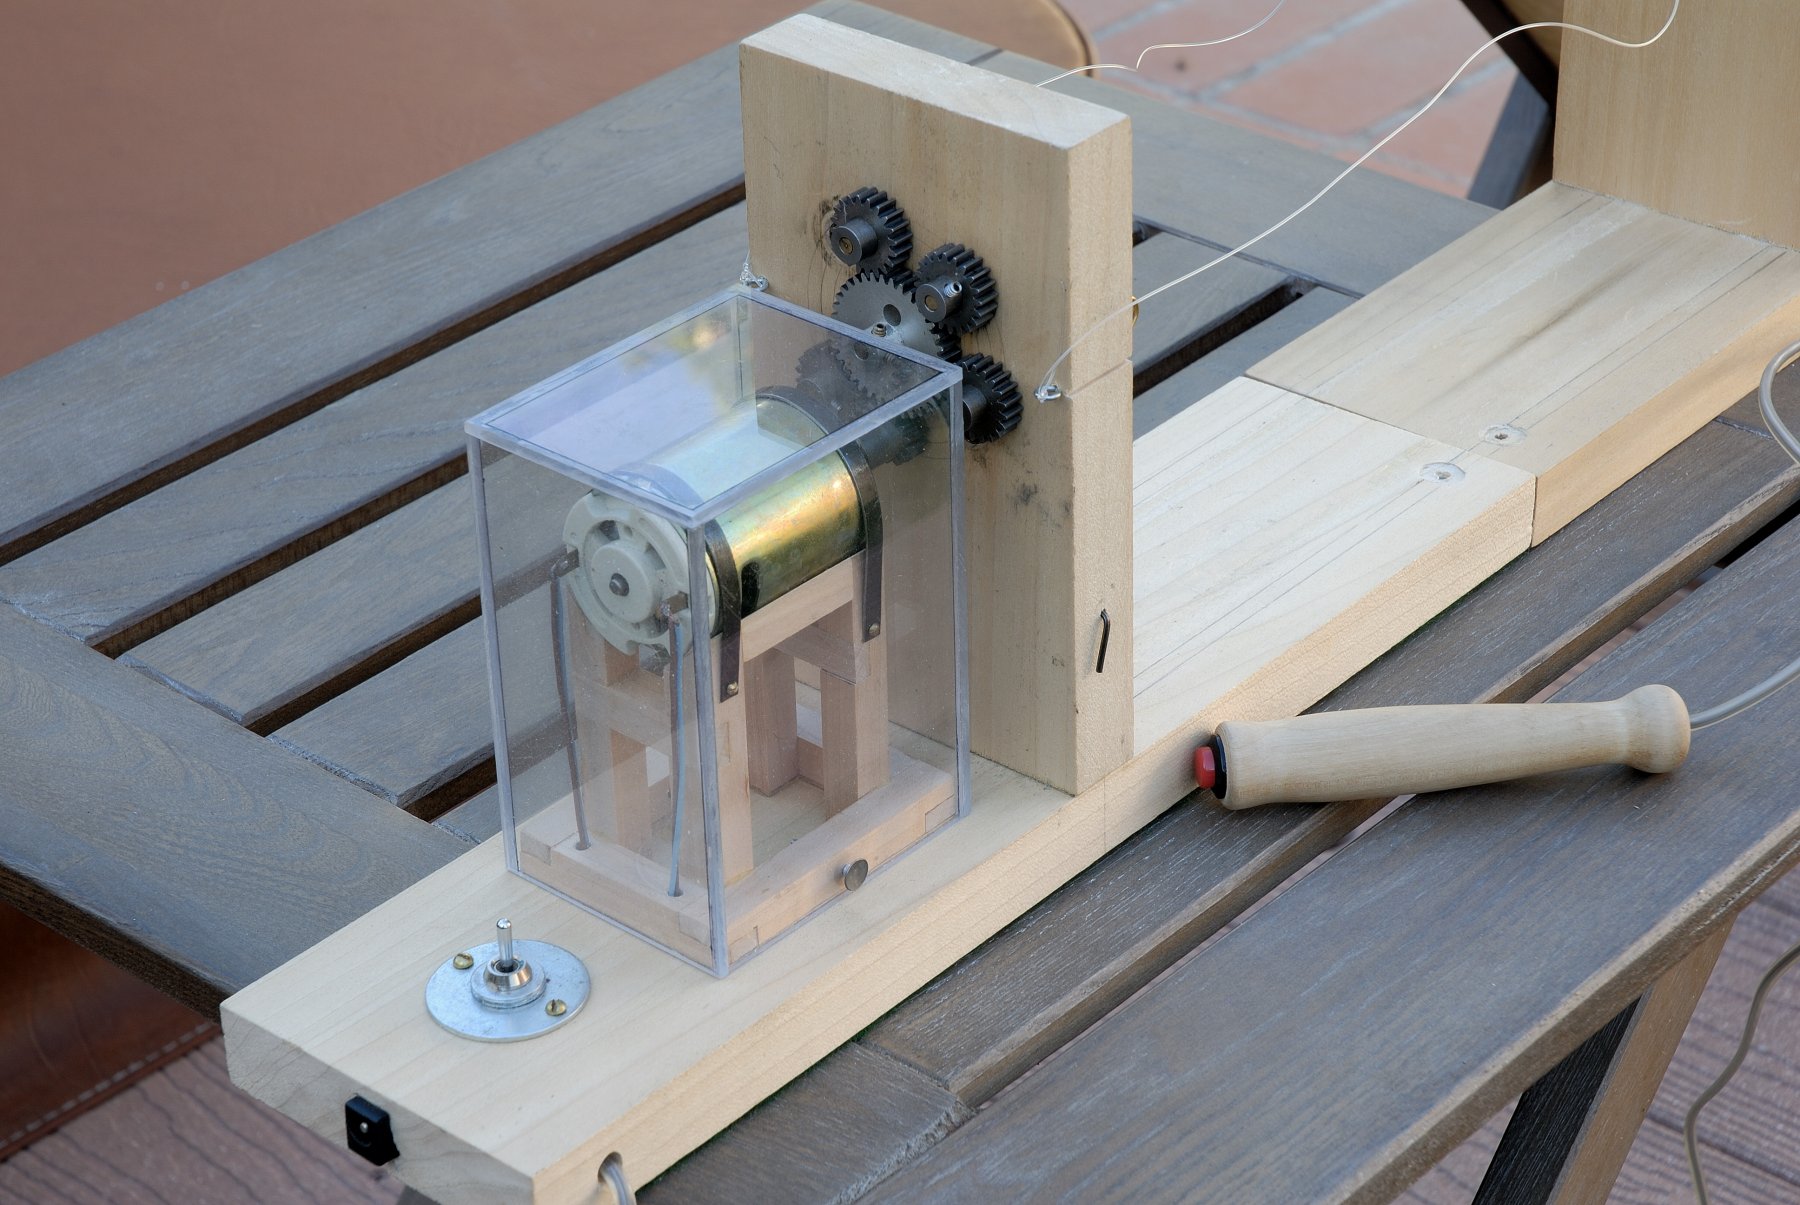
It probabaly would be easier to build a ropewalk from scratch, rather than modify a pencil sharpener, I think. You need a central axis with a bigger gear (either hand cranked or motorized, and on the periphery of this larger gear you need to mount three (or four) smaller gears which engage the "teeth" of the larger gear. So that everything rotates together and in the same direction when you start spinning this central axis. I suggest, you pay a visit to a local junk (scrap metal) store where they have bits and pieces of old machinery, and start looking for appropriate gears. This is the most difficult task (to find those gears) because buying them new online may be quite expensive, after that everyting is much easier. It is then just a matter of finding some time to assemble everything. I built my ropewalk many years ago and it still serves me well. Here is one pic of this gadget. Regards, Thomas
-
I took a liberty of translating these Polish instructions for you (page 1 of your scans). Hopefully, this will be of help for you in building your model. Regards, Thomas SMS „Helgoland” entered the service in Autumn 1914, stationed in the Sebenico base. Her active duty ensued with the bombardment of Italian Coast and continued throughout the entire war time; till its end she was conducting very intensive activities, having both, successes (e.g. sinking an Italian destroyer “Turbine”, raming a French submarine “Monge”, sinking five and damaging three luggers in the Otranto narrows, participating in sinking several other warships and civilian ships. She also had suffered from enemy artillery and airplane bombs but overall she was rather a lucky ship and had survived till the end of the war in a pretty good shape. In between 1st through 3rd of February 1918 the crew rebelled and together with crews from other ships anchored in the Cattaro Bay, tried to begin an uprising. The control on the “Helgoland” was eventually regained, and the leaders of the mutiny were shot. After the war, according to the peace treaty, the ship was acquired by the Italians. After a major rebuild and rearming, she became an auxillary ship. During the Abyssinian conflict, she was securing the Adriatic Sea from the Yugoslavian fleet joining the war efforts on the British side. In March 1937 she was struck from the fleet list and soon after, scrapped. Technical/tactical Data: Length: 130.6 m Width: 12.77 m Draught: 4.55 m Displacement: 3500 t Engines: 29.000 KM Speed: 27 knots Armor: 60 mm bulwarks; 20 mm decks Armament: 9x100 mm; 1x70 mm; 3x2 torpedo tubes Crew: 340 General notes: The model is easy to build and is suitable for medium advanced modelers. They can do away with rails and simplify masting and rigging, if desired. In the model instructions additional symbols were utilized: *-glue onto a 0.5 mm cardboard ** - glue onto a 1 mm cardboard W – cut (scissors symbol) – cut through L; P – left part, right part Descriptions of the construction Following the pic. (rys.1), assemble and glue the hull skeleton with decks. As indicated by the symbols, all parts of the skeleton and decks have to be thickened by gluing them earlier onto 1 mm cardboard. Before cutting them out, pierce or drill holes for the stanchions of the railings, cranes, masts, flagstaffs, and so on. Finished skeleton should be then covered with bottom planking, using joining strips – parts 1 thru 9. Glue elements W4a and D3a in the indicated places. Now glue bulwark strips: first at the bow and stern, later on the middle one, which is deliberately longer (reserve). From the inner side, glue part 12a. Thicken and glue bulwark armors, parts 13 and 13a. I advise to retouch edges with water paints before gluing them. Along the hatched lines glue to the keel antiheeling (?) elements K. Due to the risk of damaging the rudder and drive shafts at this time, I advise to postpone their assembly until later. The hull is now completed, it is time to begin assembly of deck equipment. Begin with smokestack bases, parts 14-17 Glue stacks, following drawing (Rys.) 2, from parts 18 and 19 + wire I. Next to the last smokestack glue two columns with gangplanks and stairs, part 20 (see drawing 3). Complete with elements 21a, 21b the superstructures of boilerhouse ventilation 21 and glue them onto the deck. Glue in the indicated place on the fore deck ventilation shaft 22. Following drawing 4 glue deckhouse with ventilation shaft, part 23, and acc. to drawing 5 deckhouse with skylights p. 24-25. Notice: glue deck 24a 3 mm below the edge of the wall and paint over visible inner surface of the wall. Skylights, p. 26, 27, 29, 30, 35 and 37 glue onto the deck in the indicated places. Glue two stern lifts with p. 28 (drawing 6) and attach (glue) them on the deck. Details p. 31 and 36 glue in the indicated places, part 32 acc. to drawing 5. Assemble and glue stern deckhouse p. 38. In the decks make an opening for a mast. On the deck there is an indicated (with a line) place to attach stairs. Acc. to drawing 7, assemble a main (commander’s) deckhouse from parts 39-42 and mount it on the deck. Support the gangways with columns made from wire. Glue in the indicated places parts 43, 44, 46 breakwater p. 45. From p. 47 make and mount two anchor hoists, similar with part 48. Part 49 (pic.8) glue on the bow. Acc. to pic 9 assemble the barrels of main artillery cannons cal. 100mm and place them on the deck. Glue 3 double torpedo tubes with or without torpedoes from parts 51 and place them on the deck (pic. 10) Following pic. 11 assemble from part 52 and a pin, a gun cal. 70 mm and glue it on the stern. Acc. to pic. 13 assemble three reflectors from part 53 and glue them in shown places. From part 54 assemble two drums for firehoses and glue them to the smokestacks bases, p. 14 and 15. Subsequently assemble and glue the following: from p. 55 ventilators (to the deck); from p. 56 drums (to the deckhouse 24 – see pic 5 and to the wall W4a. Details 57 and 58 glue onto the main deck and deckhouses’ decks – see pic. 7 and a general pic. Glue into them pins with grey heads. In indicated places glue on the deck subsequent elements: 59, 60 and 61. Gangplanks 62 glue acc. to general pic, suspending them by a thread on wire zurawiki. IV. Assemble and glue from p. 63 davitts for lifeboats wrapped around a wire II and III (Smaller for hanging boats). From parts 64-70 assemble 8 lifeboats and motorboats acc. to pic. 12, 13 and 14 (assembled together in similar fashion) and glue them on their bases or suspend them by a thread on the davitts (see general pic) Anchors p. 71 and 72 glue to the bulwarks. Now from p. 73, 74 and 75 and wire or wooden dowel assemble and glue a rudder (pattern VI) and two propulsion shafts with propellers. What remains now is gluing stairs leading from the foredeck onto the maindeck p. 76 and modeling the masting/rigging. A flag p.77 should be glued to the flagstaff V on the bow. Acc. to the drawings, make a mainmast and mizenmast from wire or dowels and mount them acc. to the general drawing. Glue a gangplank 78, a top 80 and flags 79 and 80. Make remaining elements from dowels, wire and threads, specifically rigging, rails, suports for propellers (pattern VII) an arm of a crane (pattern VIII). Lastly make liferings p. 82 and mount them on the rails acc. to general pic. The entire model finally should be carefully retouched with water paints.
-
I have identical set of files for many years already and they serve me excellently!
-
This thread is shaping to be very exciting and educational! I am placing myself deeper in my computer armchair and anxiously awaiting the continuation of Alexander's blog.
-
Would you, Korablik, show and explain the process of the carving of your small wonders, rather than showing the end products? I have a hard time imagining how you do it! What is the scale of the last figurehead? Regards, Thomas
-
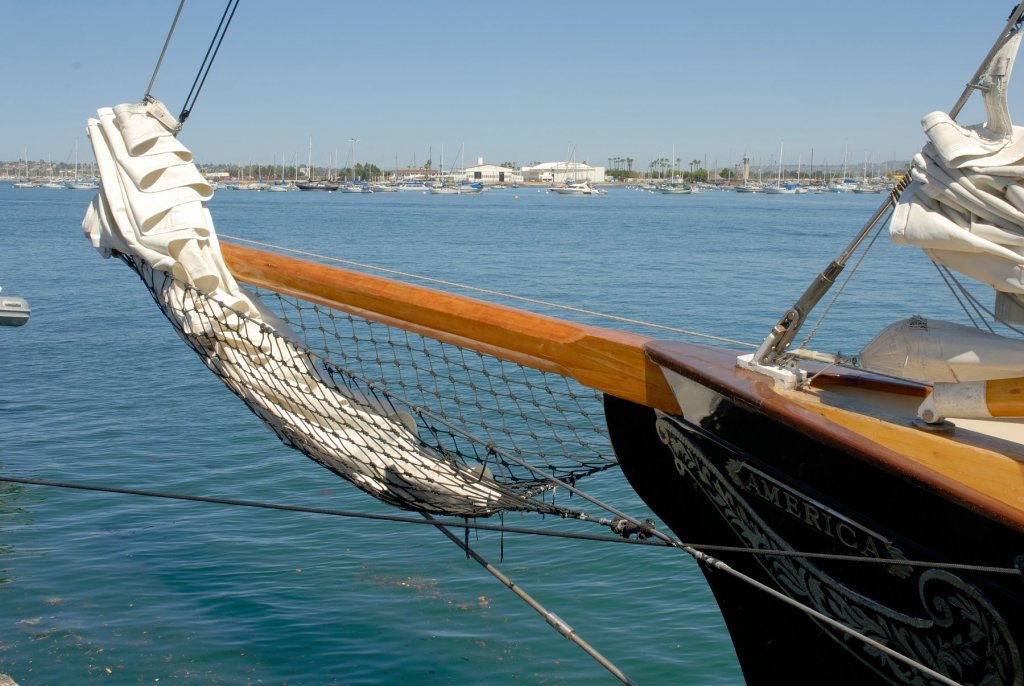
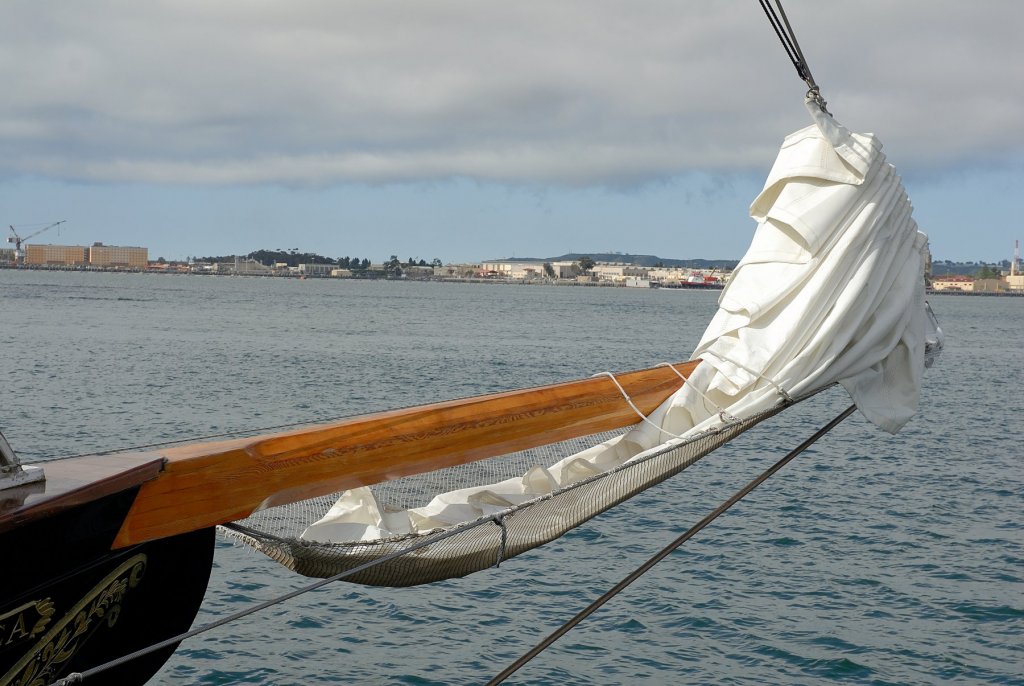
I have these two pics of the schooner America in San Diego
-
Why don't you scan the Polish instructions, indicate parts you don't understand and attach this here and I will try to help you. I do speak Polish, so I might be able to help.
-
May I ask you, what kind of glue do you use for your model? Regards, Thomas
- 295 replies
-
- 2
-
-
- amatsukaze
- halinski
- (and 2 more)
-
Thanks Tiziano for the picture of your milling bit. I think I understand the principle of it, but still have some doubt how it woul actually work on a piece of boxwood (I think ) in practice, and not ruin the piece of wood. There must be also another cutter shaping the opposite side of this intricate ballusters, am I right? (But, I don't want to force you to run too much ahead of yourself with your photo blog on this forum. I just study your pics from the French forum, where you are much further ahead with your built. I think I just photo etch in brass this particular details for my model, even though I would much prefer to do it from wood, like you did it). In any case, I have lots of admiration for your skills with wood and such excellent understanding of ship's anatomy! Hats off! Thomas
-
Thanks Tiziano for the answer. Would it be too much to ask you to post a photo, showing these milling tools made for this purpose? My milling tools are WAY too big to cut such intricate shape. Did you make yours by yourself? Thomas
-
Hi Tiziano, Could you please elaborate on, how did you obtain such a shape from wood? How did you machine this profile? Kind regards, Thomas

-
Hi Tiziano, I too am building the same model, but in a different scale, 1:48. I am not as experienced a modeler as you are, my workshop is also leaner, and this is my first such a big and complexed model (all my previous models were from kits). I am struggling along as I go, using your photos you posted on the French forum, as references (and they are a great help!). I started this build many years ago and about four years ago I returned to this project. I am somewhat behind your model, so your pictures come handy. Thanks a lot for that blog on the Marine & Modelisme Arsenal website! I am keeping my fingers crossed for you, as well as for myself! I hope to see your pics here as well! Regards, Thomas